الوسم: Triple-A Games

  • Guide to the Demon’s Bargain in Dragon Age: The Veilguard

    Guide to the Demon’s Bargain in Dragon Age: The Veilguard

    The Demon’s Bargain: A Bellara Quest in Dragon Age: The Veilguard

    "The Demon’s Bargain" is a quest in Dragon Age: The Veilguard that delves into Bellara’s backstory. This quest is crucial not only for understanding Bellara but also for uncovering the lore of the elves and the mysterious Arlathan Forest, making it particularly enriching if you’re playing as an elf.

    Throughout the quest, players will navigate through Fade rifts, battling various foes including Shades, Demons, and Constructs. We recommend bringing Neve along to utilize their Cold damage, paired with Bellara, who is essential for this challenge. The combination of these two characters provides excellent crowd control, so be sure to take advantage of that.

    Find The Missing Veil Jumpers

    To kick off the quest, enter the building and pass through the Fade tear. This will transport you to another location where you’ll encounter Greater Sentinels and a Voltaic Shade. While Greater Sentinels are vulnerable to electricity but resistant to cold attacks (making them Bellara’s responsibility), the Voltaic Shade is vulnerable to cold, which is where Neve shines.

    The Sentinels will chase you, so it’s wise to retreat down the steps to isolate them, allowing you to launch attacks without fearing the Shade’s ranged assaults. After dealing with the Sentinels, return upstairs and eliminate the Shade using a ranged attack to break its Barrier.

    When you defeat the Shade, a Greater Pride Demon will invade the scene. This creature is resistant to electricity, so while Bellara’s utilities are less effective, utilize heavy attacks on its armor and evade its sweeping purple beams. Once the demon is vanquished, instruct Bellara to repair the door and progress forward.

    Survive The Assault

    Once you exit the building, traverse the bridge using a fallen branch and slide down the ramp. Here, you’ll face more Greater Sentinels and Spellwights. Although Neve’s abilities are less effective against these foes, using Blizzard can provide you with much-needed breathing room. Focus on taking out the Spellwights first with ranged attacks and then focus your heavy strikes on the Sentinels’ armor.

    Before you cross the branch, consider grabbing the Power Crystal from the initial room, which will enable you to create a side bridge leading to extra loot, including 21 gold and two pieces of Imperial Weave.

    Proceed into the ruins, commanding Bellara to fix the mechanism while you transport the nearby Power Crystal to cross the bridge. This leads you to a clearing where you’ll face a single Frenzied Shade. Use cold attacks for effectiveness, but rapid melee strikes will also dispatch this enemy quickly. Once defeated, Bellara will identify the satchel as Mihlora’s.

    What Lies Ahead?

    After Bellara repairs the barrier, remove the Power Crystal and place it into the socket on the left to reveal a new area featuring a Death Mask cosmetic. As you continue, Bellara discovers that her brother Cyrian is now an ally of the demon Anaris, but their conversation is interrupted before she can learn more.

    To free Yenarel and Hamuel, you’ll engage in three waves of enemies. The first wave consists of two Greater Shades and two Voltaic Shades. Eliminate the Voltaic Shades first with headshots before they unleash their full attacks, then use Neve’s cold attacks on the Greater Shades as they approach.

    The Difficulty Increases

    After the first phase, interact with either crystal to begin the second phase, which mirrors the first. Ensure you start in the center to get a clear shot at the Voltaic Shades. Collect health potions in the corners if needed before assigning Bellara to work on the crystal.

    Next, Bellara will address the second crystal, and the final phase will commence. This phase is more challenging and introduces a Devouring Shade, a Shade Rejuvenator, and a Toxic Yearning. While both the Devouring Shade and Shade Rejuvenator are vulnerable to cold, the Toxic Yearning is best handled by Bellara due to its electricity weakness.

    Focus on one enemy at a time, as the smaller foes regenerate barriers throughout the fight. Target one, eliminate it, then shift your attention to the next while avoiding any distractions.

    Rewards For Completing The Quest

    After defeating the Toxic Yearning and its minions, a chest will appear, granting you an upgrade for Bellara’s The Ready Explorer armor, along with 277 gold, in addition to the 88 gold and the 100 Veil Jumper strength awarded for completing the quest.

    This quest provides a blend of combat, lore exploration, and character development, making it a significant chapter in Bellara’s journey within the world of Dragon Age: The Veilguard.

  • Dragon Age: The Veilguard – Cauldron Walkthrough Guide

    Dragon Age: The Veilguard – Cauldron Walkthrough Guide

    The Cauldron presents a captivating challenge in Dragon Age: The Veilguard. Interestingly, the quest begins in a state of limbo. When you arrive and talk to Davrin, you witness a brief cutscene that reveals the entrance is blocked, setting the stage for your next move.
    Your journey involves facing the Gloom Howler, but the main obstacle is the daunting Darkspawn Horde. Once you get inside, navigating most of the Cauldron is fairly straightforward—however, surviving until the end poses a significant challenge.

    For this reason, we recommend bringing a character who can prime Davrin’s detonations, but avoid using Emmrich since the Darkspawn resist necrotic damage. Our suggestions would be Bellara or Neve for controlling the crowd or Taash to boost your fire damage.

    How to Enter The Cauldron

    After the cutscene, proceed up the ramp and use R1/RB to summon Assan. Climb onto the lowered platform and ascend the ladder. Inside, take out the three Blight Boils from a distance, then dispose of the Darkspawn. There aren’t many, so it should be manageable. Focus on utilizing fire and heavy attacks to strip away the armor of the Greater Hurlocks to finish quickly.

    This will unveil four Blight Boils that you must eliminate to gain access to the Cauldron. Move through the archway on your left and defeat the Ghouls and a single Greater Hurlock as you did earlier. Another Blight Boil will fall; be sure to take it out before enemies appear. Then follow the path all the way to the left and up the ramp that loops back.

    Continue along this path until you find a ballista. Use it to target the Blight Boil on the wall; this is another step towards your goal. After that, move past the ballista and cross the wooden gap, where two smaller boils will drop. Destroy them before they spawn enemies, or fight them quickly if they appear. They produce Javinleers, so engaging them in melee will diminish their impact. After this, climb the steps at the back to reach the second Blight Boil. You’re halfway there.

    Return to the central courtyard and ascend the stairs on the right. Keep climbing and go up the wooden steps. This time, ignore the ballista and enter the castle, where you’ll find one Blight Boil on the right. Be prepared for two Frenzied Berserks appearing here, but with a detonation attack and heavy hits on their armor, you should be able to overcome them.

    Next, go up the left stairs on the back wall, where you’ll spot the last Blight Boil. Attack it, and then make your way back to the courtyard.

    Finding the Gloom Howler

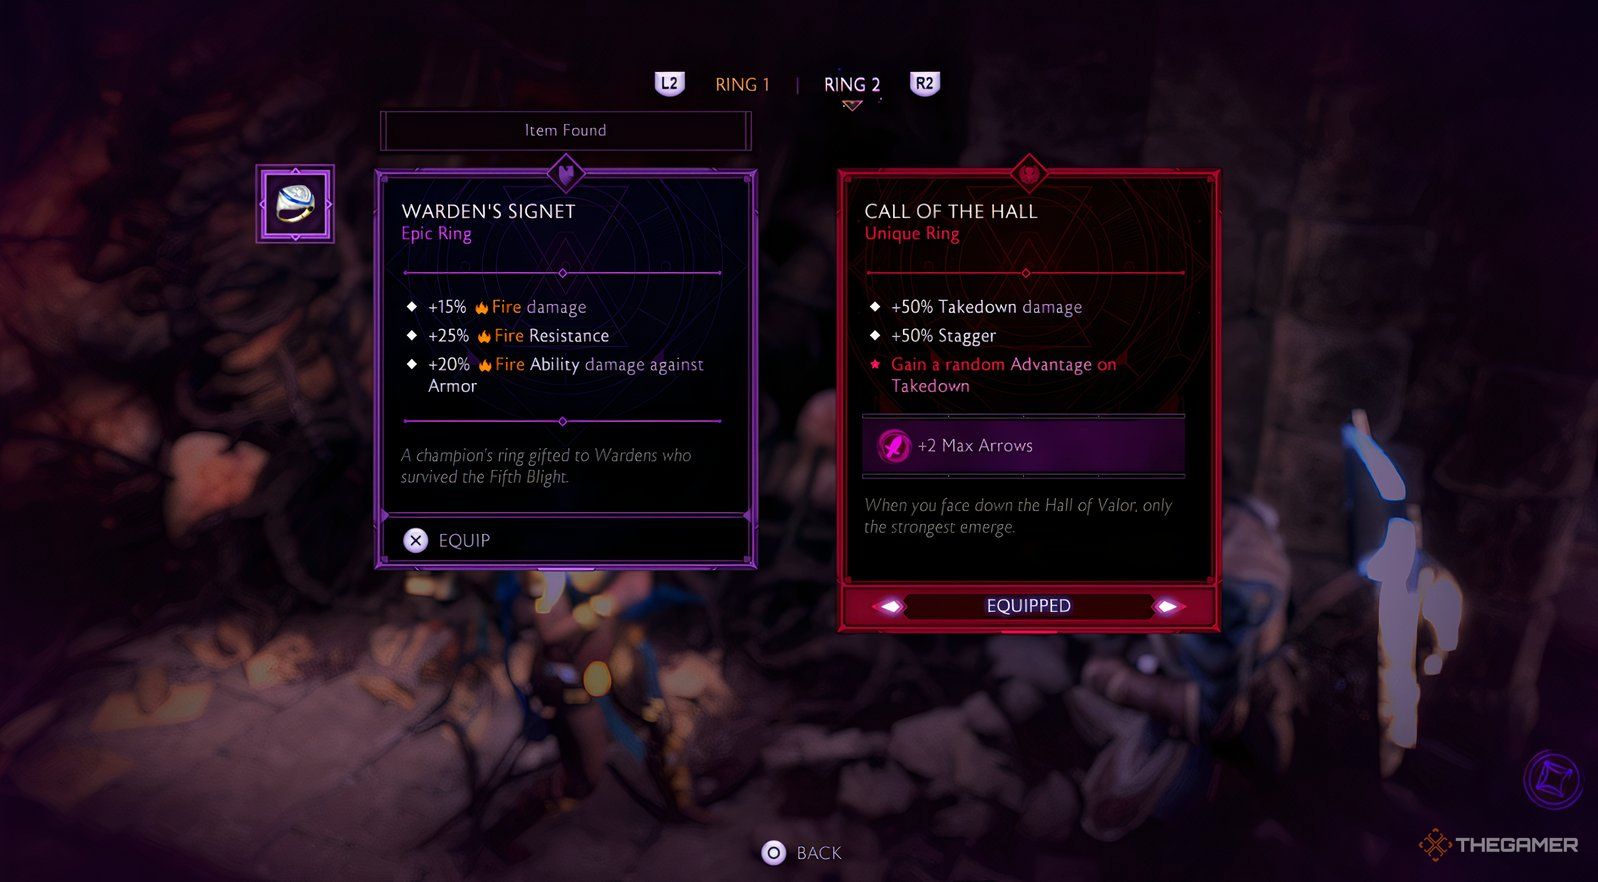
    Warden's Signet in Dragon Age: The Veilguard

    Progressing through The Cauldron is quite manageable. It features mostly linear exploration, and dialogues from Davrin or Rook, along with lore within the area, enhance the story. However, upon reaching the twin statues, check the alcove to the left for a Warden’s Signet.

    Continue until you discover a room containing a Blight Boil. Once you destroy it and pass through the opening it creates, you will enter the Gloom Howler’s Lair, where you’ll face numerous Darkspawn—this serves as good practice for what’s ahead. Your main focus here should be on the Blight Boils. You must first take out the two located furthest to the left (up a ledge) and the one furthest to the right (around the corner), followed by the one in the center.

    This will allow you to attack the Boil inside the left archway. Inside, destroy the Boil directly in front then continue around to the final one on the ledge. The battle concludes when you destroy this last Boil, so focus on evading enemies rather than engaging in combat as you make your way to the edge.

    Defeat the Darkspawn Horde

    Greater Ghouls in the Cauldron in Dragon Age The Veilguard

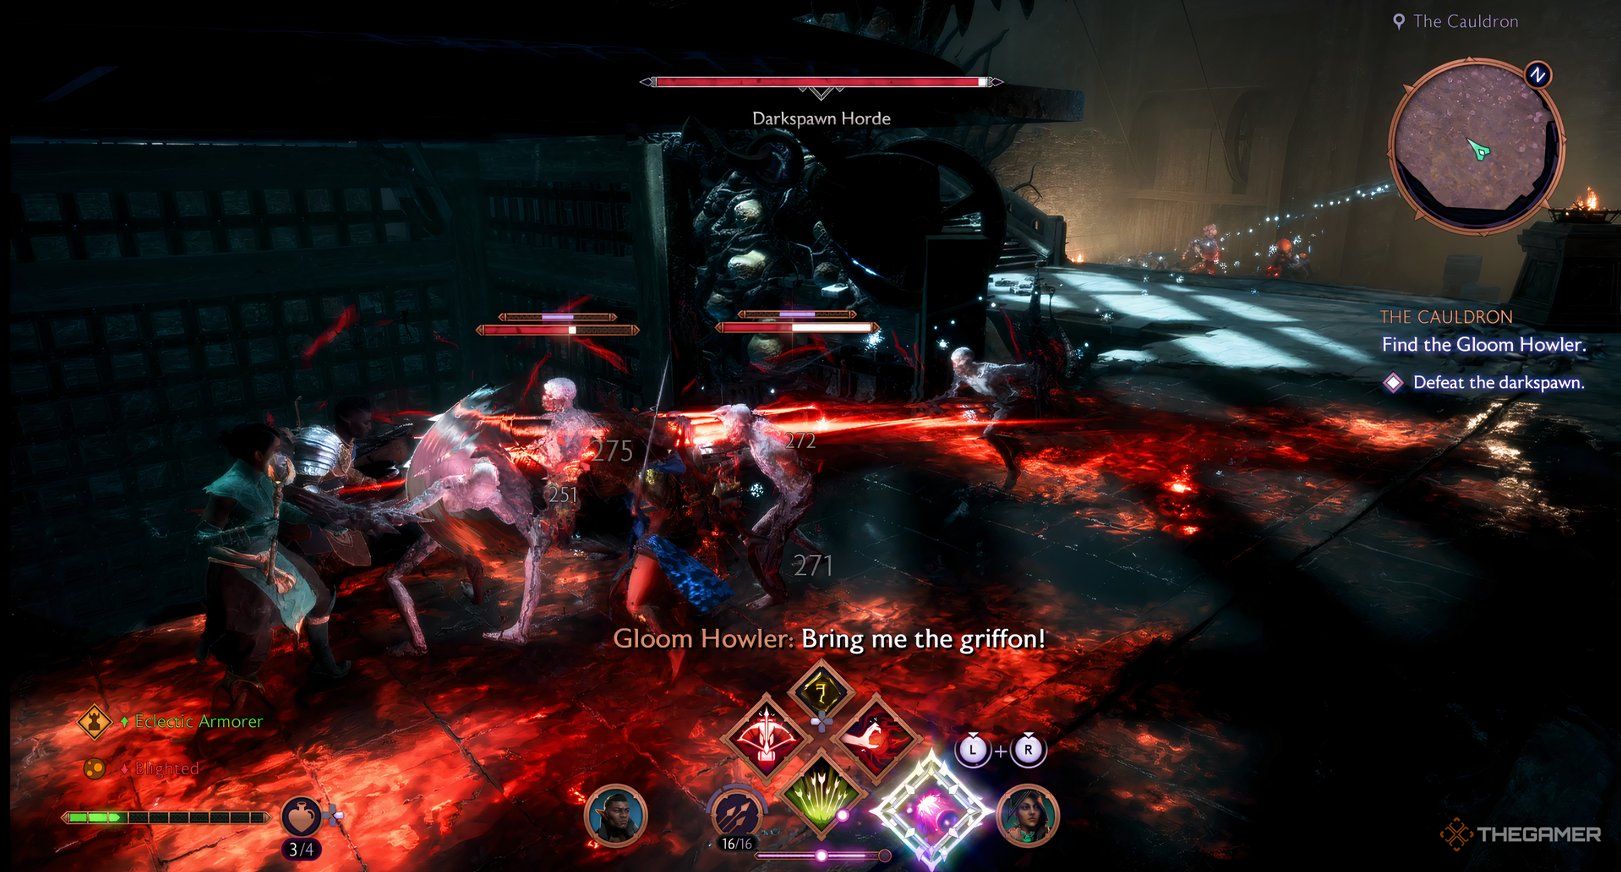
    This challenge mirrors typical ‘defeat all enemies’ missions, but there are a lot more foes to manage. Their overall numbers are shown by a health bar, which doesn’t impact the fight’s dynamics. Davrin’s support can be very helpful, and if you choose Taash, direct them to target the larger enemies, such as the Greater Hurlock Blighters or the Greater Ogre. On the other hand, if you opt for Bellara or Neve, they offer crowd control abilities like Galvanized Tear or Blizzard for thinning the weaker enemies.

    You’ll quickly find yourself encircled by smaller Ghouls, making area abilities useful for taking them out swiftly. Just after you drop from the top platform, you’ll see Greater Hurlock Blighters spawning on the right. As these cause significant damage from afar, it’s crucial to take them down before larger foes can trap you.

    Aiming at Blighted Hurlocks in the Cauldron in Dragon Age The Veilguard

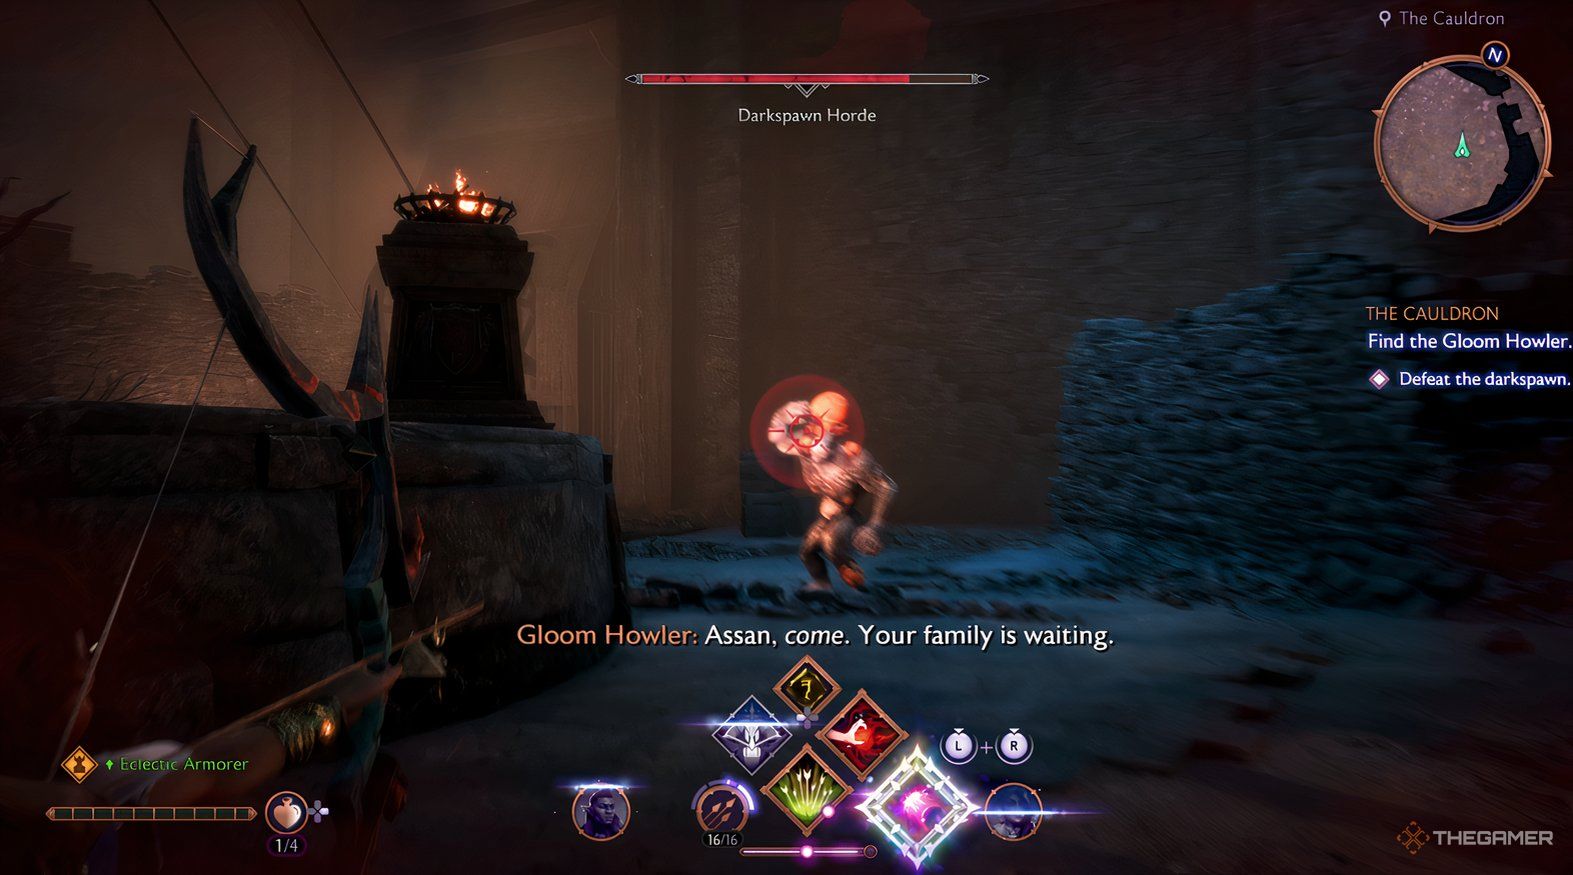
    Keep moving and aim for the Greater Hurlock Blighters since they will follow you, allowing you to lead them into area abilities. The most significant threat will be the Greater Ogre. It’s slow, so focus on clearing out as many smaller enemies as possible before confronting it, using ranged abilities against it as you go. Once you’ve dealt with all enemies, you’ll trigger a cutscene that concludes the quest, transitioning you to challenge the Gloom Howler herself.

  • Guide to The Waiting Stone in Dragon Age: The Veilguard

    Guide to The Waiting Stone in Dragon Age: The Veilguard

    The Waiting Stone Quest Overview

    "The Waiting Stone" is an important mission in Harding’s personal storyline within Dragon Age: The Veilguard. It’s unique because it offers one of the few glimpses into the Deep Roads, a significant location in the game. Since Harding accompanies you from the very beginning, this quest will likely be one of your earliest personal adventures.

    As expected, the quest revolves around Harding and the intriguing setting of the Deep Roads, which is exclusive to this mission and similar quests in the storyline. It’s worth noting that the final boss in this encounter is susceptible to necrotic damage but resistant to electrical attacks. Therefore, bringing along Lucanis or Emmrich can be beneficial for this journey of self-discovery.

    Once you arrive, you will need to navigate deeper into the Deep Roads. Expect to confront Deepstalkers, which, although resistant to necrotic attacks from your allies, are relatively weak and serve more to delay your progress than to cause significant harm. Fire abilities are effective against them, but even basic light and heavy attacks will do the trick. Be cautious of regular rock explosions—dodge when the ground turns red!

    Your path will lead you to an elevator. Pull the lever and cross the stone area, fighting off a few Deepstalkers along the way. Soon after, you will encounter Stalgard during a cutscene. Follow him through the settlement until Darkspawn appear.

    When you reach the elevated section, focus on eliminating the Blighted Boils to prevent more Darkspawn from coming. Stay vigilant and prioritize the orange pustule on the Hurlock Blighter. If Ghouls rush at you, use your abilities against the Hurlock Blighter first, then you can easily take down the Ghouls afterward. Keep following Stalgard until the Blight obstructs your advance.

    Find the Root of the Blight

    Follow the stairs on your left and navigate towards the elevator. If you take a brief detour using Harding’s Stone Song, you can secure a Traveler’s Kit +5 Armor for Harding. Before jumping into the elevator, make sure to use the Stone Song on the rock that’s blocking the shaft, then you can get in and pull the lever.

    After exiting the elevator at the back, follow the Blighted vein into a corridor. Here, you will have to choose between going left or right. You’ll need to explore both paths, but let’s start with the left.

    Immediately take out the Blighted Boil on your right as you enter and deal with the Ghouls. Use Harding’s Stone Song on the rock near the first Boil to climb up, and push that rock into the wall to clear a path to the second Blighted Boil. Once that’s destroyed, move the wall rock back to jump across to the ledge and take out the third Blighted Boil.

    Activate Stone Song to reveal the next rock and jump across the wooden platforms and chutes to a new area filled with more Darkspawn. This section is narrow and winding, so be sure to avoid the explosive Darkspawn, using area abilities to damage as many as possible. Focus especially on the Hurlock Blighters’ orange pustles.

    Once the Darkspawn are dealt with, you’ll spot a central column featuring three veins leading off. The Blighted Boils you need to destroy are indicated here: the one on the right is against a large wall, the left one is on a wooden tower, and the last one, which you should tackle last, is atop the column, leading to your exit.

    Now, head back to the passage and take the right path. Defeat several Ghouls, then destroy two Blighted Boils hiding behind breakable wood barriers on the left and right. You’ll find another one right near the entrance, allowing you to reveal a climbable rock after using Stone Song.

    After climbing up, traverse the wooden beams and leap to the hanging platform for Mayhem in Gold +5 for Harding. Continue down the corridor until you encounter a Frenzied Ogre.

    Defeating the Frenzied Ogre

    The Frenzied Ogre is resistant to necrotic damage but vulnerable to fire. It has armor, so prioritize ranged attacks to lower its defenses. Although it’s a large creature that hits hard, it’s also slow and has no allies to assist it. Watch for a glow red attack cue, which indicates you should dodge to maintain a safe distance and aim for its head. Avoid getting too close to simplify the fight.

    Once you bring down the Ogre, strike the Blighted Boils on the rock wall, the ceiling of the stone building, and the final one on the large column to reveal an exit. Leave this area and take the elevator back to Stalgard. Destroy the three Boils on the door to proceed inside and follow Harding up the stairs.

    Confronting the Iron Construct

    The Iron Construct is a tough enemy equipped with armor, making ranged attacks essential to break it down. Be ready for its rush attacks that can disrupt your range. Protect yourself using area abilities and Harding’s Seismic Shot to stagger it while dodging away.

    The Iron Construct employs three primary attacks:

    1. Launching rocks: Keep an eye out for red circles on the ground to dodge quickly.
    2. Hammer swings: Move away when you see it glowing red.
    3. Hammer slams: Sidestep when it pulls back its hammer in a red cone shape.

    It can also damage you by tunneling beneath the ground; you’ll know when this is about to happen if you see a larger red circle. If you’re close when it emerges, you could take substantial damage.

    Utilize the entire arena to your advantage. Move up the steps for close combat when necessary, and evade around the stone pit to maintain distance when required. Once the Iron Construct’s armor is down, it will summon Greater Deepstalkers. While these foes are relatively weak, their numbers can become a hassle. Use Harding to target them while having Rook focus on the Construct. When the Deepstalkers swarm, shift your regular attacks to break up their ranks.

    Rewards for Completing The Waiting Stone

    Completing "The Waiting Stone" not only advances Harding’s story but also earns you Scout’s Compassion +5 for Harding, as well as two Dragonfire Catalysts and 2,500 XP. Back at the Lighthouse, you can guide Harding on how to perceive her magic—either as a gift or something to be cautious about. This choice will affect her character development moving forward, influencing how she utilizes her magic, although it won’t impact her combat abilities.

  • Mastering Restless Spirits in Dragon Age: The Veilguard

    Mastering Restless Spirits in Dragon Age: The Veilguard

    Restless Spirits is one of the first missions you take on in Dragon Age: The Veilguard’s Necropolis after bringing Emmrich on board. This quest serves two main purposes: it lets you roam more freely in the haunted palace and introduces the various gameplay mechanics that make this eerie location captivating.

    The quest primarily revolves around chasing Wisps and involves minimal combat until the very end. Although this quest seems well-suited for Emmrich, the narrative is rather light, and you’ll face foes that resist Necrotic damage. Therefore, it’s advisable to leave Emmrich (and Lucanis) at the Lighthouse. Since some enemies are vulnerable to Electricity, while others are weak against Cold, it’s a smart choice to bring Bellara and Neve along for the journey.

    Gather All the Wisps In the Belfry

    You need to collect a total of four Wisps at the start of this quest. For the first Wisp, head to the northwest corner and interact with both torches at the location marked on your map. When they glow green, the Wisp appears in the center. Use R1/RB to capture it, then proceed to the nearby gate.

    The second Wisp can be found in the southwest corner behind a metal door illuminated by a purple gem. Enter and locate the Venatori wall. For now, ignore the shielded crystals and pull the lever on the back wall.

    This action opens the next room; exit and go around to find the unshielded crystal, which you can destroy. Before you leave, be sure to fire a ranged attack at the crystal visible through the broken fence on the left as you enter.

    Next, return to the first room and destroy the now unshielded crystal, then attack the crystal in the wall to release the Wisp. Bring it back to the gate where you took the first Wisp.

    For the third Wisp, find the door in the northeast part of the belfry. Inside, you’ll collect +3 Ethric Remnant and see several unlit candles. To light them up, you need to:

    1. Interact with the shield next to the candles.
    2. Interact with the shield on the floor to its left.
    3. Interact with the three shields on the wall, two of which are behind boxes.

    Once all the candles are lit, the Wisp will materialize. Take this Wisp back to the same gate. The last Wisp awaits you in the southwest. Go to the door that you can open, which is to the right of the one that’s locked.

    Inside, smash the boxes to uncover a lever. Pull the lever to open the other door, enter, and… the last Wisp will fly away. Unfortunately, you’ll need to head back outside, where a glowing purple rift will appear. Interact with it using R1/RB, and a skeletal hand will emerge. Climb it to capture the Wisp.

    Take it to the gate, and you can finally open it.

    Defeat The Demons

    Once you enter the gate, you’ll face several Shades. You’ll want Bellara to manage area control with the regular Shades, as they are vulnerable to Electric damage. Meanwhile, Neve should focus on the Orbiting Envy Demon, which is vulnerable to Cold damage. This demon is beefier and comes with a Barrier, making ranged attacks from Rook essential.

    The arena for this battle is narrow and lengthy, so be ready to dodge back if you’re surrounded. Watch out for the flaming spheres that will shoot fire at you. These spheres can only be destroyed when the Envy Demon is defeated, so avoid them and maintain a safe distance. Additionally, the Envy Demon has a zoning attack with spirit missiles that you’ll need to evade.

    While we mentioned that the quest has basic functions, it also has a more intriguing aspect. At the end, you’ll find yourself in front of a foreboding door in the Chamber of the Unforged, where a yellow side quest marker will appear. This marks the beginning of Pinnacle of its Kind, a quest requiring you to defeat high-level demons throughout the realm before returning to unlock it.

    Keep in mind that this quest might be excessively challenging at this point since its purpose is to gradually advance through the game. However, when you’re ready for it, you can check out our guide for Pinnacle of its Kind for further details.

  • Assisting Taash’s Non-Binary Journey in Dragon Age: The Veilguard

    Assisting Taash’s Non-Binary Journey in Dragon Age: The Veilguard

    When you first encounter Taash in Dragon Age: The Veilguard, you may find yourself in the position of knowing something the characters do not. Specifically, you might be aware that Taash identifies as non-binary, marking a series first for the franchise. However, it may be confusing to note that everyone refers to them as ‘she.’

    Taash appears somewhat accepting of this misconception. They have a bit of a grumpy demeanor due to their overprotective mother who insists they suppress their abilities and join Rook’s team. Nevertheless, gender is not a major topic for them at that moment. When you meet Taash, they are just beginning their journey of self-discovery regarding their gender identity. So, how do you help them come into their own?

    Recruiting Taash

    Before you can support Taash on their journey, you’ll first need to recruit them. Alongside Emmrich, Taash is one of the last characters you can add to your party, and their recruitment is locked until after you choose to defend Treviso or Minrathous. After completing this quest, you’ll realize that you need both a necromancer and a dragon hunter to round out your team, with Taash filling the latter role. Select the quest "The Dragon Slayer" to recruit Taash as soon as possible.

    Upon completing this quest, you’ll find yourself in conversation with Taash and their mother. You’ll witness the love they share despite the tensions between them, revealing that Taash feels somewhat trapped. As a person from a small town, they need to explore the larger world to truly understand their identity. Return to the Lighthouse and keep progressing through the quests, coming back after each one.

    Discussing Gender with Taash

    Not long after bringing Taash on board, you’ll find them in the kitchen with Neve, engaged in a heated discussion. Taash challenges Neve’s choice of feminine clothing, questioning whom Neve is trying to impress, especially since no woman truly enjoys being a woman. In this moment, Taash starts to grapple with their own identity, echoing sentiments from their mother about them acting more like a man than a woman. A good choice here would be to say, "Talk to us, Taash" or "Your mother said something…"

    From that point on, all dialogue options will continue the discussion, with "It’s not about the dress" being the most empathetic response.

    If your Rook is transgender (as determined by an earlier conversation with a mirror in your quarters), they can relate to Taash’s experiences firsthand and affirm that they’ve felt similarly. If your Rook is a woman, you can say "Being a woman shouldn’t hurt." Otherwise, opt for "You’re getting there" or "We’re here to help" to set Taash on a positive path.

    A few quests later, you’ll have the opportunity to talk to Taash in their quarters, where they reveal they’ve done more soul searching and had a conversation with a non-binary friend of Neve. This leads into A Little Dragon Hatches, a quest centered around Taash embracing their non-binary identity. When Taash expresses feelings of inadequacy, stating "I can’t even be a woman right," all dialogue options continue the quest. The decision on whether Taash should embrace Qunari or Rivain traditions does not affect their identity and can be skipped if you’re romantically involved with Taash.

    For those trying to romance Taash, you can confirm your feelings in Taash’s quarters during A Little Dragon Hatches.

    How Do Other Companions Feel About Taash Being Non-Binary?

    The companions in The Veilguard are generally supportive of Taash’s non-binary identity. Characters like Bellara and Harding openly discuss it in the field, while Davrin visits Taash’s quarters to offer congratulations and learn more. Throughout the game, Taash is referred to exclusively with they/them pronouns, and your character’s potential romance with Taash is also encouraged.

    That said, navigating this transition isn’t always straightforward. In the quest Secret of the Qunari (which you can initiate by speaking with Taash), they intend to tell their mother about their identity but ultimately hold back due to their mother’s bad mood. Their hesitation hints at a deeper fear of rejection. You won’t be able to move forward with this storyline until you complete the Slaying The Fangscorcher quest given by Taash.

    After finishing that quest, speaking with Taash in the kitchen will trigger a cutscene involving a meal with their mother, during which Taash comes out. Unfortunately, their mother’s reaction is one of disapproval—not necessarily of Taash’s non-binary identity, but more about their decision to reject Qunari traditions. This complication makes the situation even more difficult.

    To add to the drama, if you are romantically involved with Taash, their mother will privately confront you during this quest, expressing her belief that you are not suitable for her child.

    Taash’s journey continues through The Lair of the Dragon King, but this segment does contain significant spoilers, so proceed with caution.

    Spoilers ahead for the Lair of the Dragon King quest.

    Shortly after the confrontation with Taash’s mother, the quest Lair of the Dragon King unfolds. In a twist tied to the quest’s theme, Taash’s mother is kidnapped and taken to the lair of the Dragon King. In a moment of acceptance, she ultimately sacrifices herself for Taash, though it is a difficult and not entirely uplifting resolution. In the end, Taash can choose to embrace their Rivain culture or Qunari heritage, though this choice doesn’t impact their gender identity, only unlocking new attire.

  • Unlocking the Truth Is Out There Trophy in Romancing Saga 2

    Unlocking the Truth Is Out There Trophy in Romancing Saga 2

    One of the most captivating aspects of Romancing Saga 2: The Revenge of the Seven is that the main villains were once heroes themselves. In the original game, their adventures weren’t fully fleshed out, but this remake changes that. As you make your way through the game, you’ll discover shimmering pathways that beckon to you.

    Following these paths will guide you to a mystical podium. When you interact with it, you’ll be shown memories of the seven heroes. While uncovering all fifteen memories doesn’t reward you in any tangible way, you’ll earn a trophy for achieving this feat. Most of these memories are fairly easy to find; however, if you happen to miss one, it can be quite the challenge to track it down, as I learned while compiling this guide. Let me help you skip the hassle.

    1. Memories Of The Seven Heroes – Kzinssie’s Mansion

    The first memory is situated on the first floor of Kzinssie’s Mansion in Somon. Since this is part of the main quest, it’s nearly impossible to overlook. Just follow the glowing trail, and you should be good to go.

    2. Memories Of The Seven Heroes – Fiend’s Cloister

    The second memory can be found in the Fiend’s Cloister, which you’ll enter after defeating the Gel Matter. It will be on your left, so just follow that familiar glowing trail straight to the podium.

    3. Memories Of The Seven Heroes – Gemstone Mine

    You will find the third memory in the Gemstone Mine. After you enter through the elevator, head down the central path and look for it at the end of a shaft on the east side of the map—it will be your second right turn.

    4. Memories Of The Seven Heroes – Eastern Subterrane

    The fourth memory is located in the Eastern Subterrane. Head to the northeast corner of the map, and you should spot the glowing path as you near the stage’s end. You’ll need to climb a nearby rock formation to access it.

    5. Memories Of The Seven Heroes – Castle Douglas

    The fifth memory can be found in Castle Douglas. Upon entering the castle, take a left, and you’ll see the glowing trail leading you to the memory.

    6. Memories Of The Seven Heroes – The Steppe

    The sixth memory is found in The Steppe, slightly west of the save point. Follow the glowing trail downward and into a cave located beneath.

    7. Memories Of The Seven Heroes – Seer’s Citadel

    For the seventh memory, head to the Seer’s Citadel. Instead of going inside, walk around to the right side, and you’ll find the memory tucked away behind the building.

    8. Memories Of The Seven Heroes – Witch’s Sanctum

    The eighth memory is situated in the Witch’s Sanctum at the east end of the map. As part of the Mermaid quest, you’ll need to visit the witch here, and the memory can be found just a bit north of her dwelling.

    9. Memories Of The Seven Heroes – Termite Den

    The ninth memory lies in the northeast corner of the Termite Den. Look for it after the section where the path spirals down. This memory is positioned near the entrance to the Mole Den.

    10. Memories Of The Seven Heroes – Teretuva Tower

    The tenth memory is located in the southern Teretuva Tower. Specifically, it’s in the northeast corner of the third floor. If you’re currently with Mr. S, you are in the wrong tower.

    11. Memories Of The Seven Heroes – Salamat

    You will discover the eleventh memory in Salamat, on the northeast path leading to Mowlie.

    12. Memories Of The Seven Heroes – Eirunup Tower

    The twelfth memory can be found in Eirunup Tower, on the second floor’s east side (behind a tree). You can easily drop down one of the holes from the third floor to reach it.

    13. Memories Of The Seven Heroes – Castle Chonto

    In Castle Chonto, the thirteenth memory is located on the Secondary Outworks 3F. You should spot the glowing path leading straight up the stairs from the Secondary Outworks 2F.

    14. Memories Of The Seven Heroes – Forgotten Town

    The fourteenth memory is hidden in the Forgotten Town. To reach it, traverse through Iris Village via Mt. Chikapa, and you’ll find the memory behind the house where Orieve lives (in the center of the map).

    15. Memories Of The Seven Heroes – Snowdrifts

    Finally, the last memory is hidden within the Snowdrifts. You’ll find it as you progress through the stage, shortly before entering the Den of Umbrage. It’s quite conspicuous, as the glowing path is out in the open.

    In order to unlock the Snowdrifts, you must defeat six of the seven heroes.

  • Duration of Completing A Quiet Place: The Road Ahead?

    Duration of Completing A Quiet Place: The Road Ahead?

    A Quiet Place: The Road Ahead focuses on the arrival of monsters that possess heightened hearing and strength, similar to the films. This scenario compels individuals to maintain absolute silence, as even the slightest sound could result in peril.

    In the game, you take on the role of Alex, the protagonist. While the overall gameplay isn’t extensive, it is filled with tension, and the necessity to move cautiously may create a perception that time is stretching. The characters must suppress their emotions, as making any noise is a grave mistake. So, how long can you expect to invest in this chilling adventure?

    How Long Does It Take To Beat A Quiet Place: The Road Ahead?


    A Quiet Place: The Road Ahead isn’t particularly lengthy. As you sneak around, you’ll need to dodge the monster and tackle various challenges. On average, the game takes about five to eight hours to finish, although your actual time may differ depending on how carefully you navigate without causing noise.

    There are 11 levels in total. Some chapters unfold on the first day of the monsters’ arrival, while others take place on Days 119 and 120. Below is a list of all the levels:

    Level Name

    Day

    Prologue

    Day 1

    Ranch

    Day 105

    Hospital

    Day 119

    Forest

    Day 119

    Lake House

    Day 1

    The Campsite

    Day 119

    The Trainwreck

    Day 120

    The Chase

    Day 1

    Pump Station

    Day 120

    Harbor

    Day 120

    Fire Station

    Day 120

    How Long Does It Take To 100%?


    Dad enters Alex's room and warns her about the safety of the hospital in Martin hears a noise and plans to investigate it in A Quiet Place: The Road Ahead.

    If your goal extends beyond just finishing the game, and you aim to achieve 100%, you’ll need to collect all achievements and items, including notes, mixtapes, and toys. Completing everything may take about nine to 12 hours.

    Note that to unlock all achievements in one playthrough, you’ll need to play on Hard difficulty. If you wish to complete the game on easier levels, that would require you to play through all three difficulties separately.

  • Defeating Rollo and Lila in Ys X: Nordics攻略

    Defeating Rollo and Lila in Ys X: Nordics攻略

    Throughout your adventure in Ys X: Nordics, you’ll frequently come across the name Rollo, hinting at his role as the final boss. However, his true form and the unexpected ally who joins him for the showdown against Adol and Karja may take you by surprise.

    This encounter will not be your first time facing two bosses simultaneously, but it promises to be more challenging. To stand a chance at victory, you’ll want to be well-prepared.

    Rollo and Lila: First Phase Strategy

    In this phase, you won’t see a durability bar at the start, and it continues until you reduce their combined health to 20%. The shared health bar for Rollo and Lila is displayed at the top of the screen, and attacking either foe decreases their HP.

    During this phase, expect the following attacks:

    Attack Name Enemy Description
    Speed Attacks Lila Lila will remain at the edges of the battlefield, launching quick attacks, including spike-like projectiles and an arc-shaped wave. Keep moving to dodge these and counterattack for significant damage.
    Slash Attacks Rollo Rollo will start by swinging his axe, allowing for easy parries. After two swings, he will leap and slam his hammer into the ground.
    Red Attack Rollo Rollo will jump high and slam down, creating a larger area of effect (AoE) damage compared to his normal attacks.
    Wind Attack Rollo He will rise into the air, glowing with a green aura, and then charge downward while swinging his axe.
    Spin Attack Rollo If you’re too far away, he will charge up and come at you while spinning his axe.

    A pro tip: Frostbite is your ally during this fight as it significantly boosts your damage output.

    The first phase will keep you on your toes with its relentless attacks. Focus on building your revenge gauge and minimizing damage taken rather than constantly attacking, as this strategy will prove beneficial against Rollo and Lila.

    Rollo and Lila: Second Phase Strategy

    Once you lower their combined health to about 20%, a cutscene will show Rollo donning a mask while Lila gains shields, complicating your ability to target her. This transition introduces new attacks and enhances existing ones.

    Attack Name Enemy Description
    Blue Orb Lila Lila can create a large blue orb that will chase your active character. You can parry it for some revenge gauge.
    Constant Attacks Lila Lila will create airborne entities that launch projectiles at you, acting as an additional foe.
    Enhanced Red Attack Rollo After a normal red attack, he will follow up with a quick flurry of blue waves. Dodging this grants a cutscene that deals massive damage to him.
    Rollo’s Ship Rollo He can summon a ship that will move toward you after a brief delay. The best way to avoid this is to simply move out of the way.
    Grab Attack Rollo His arm may glow green before he dashes to grab you. If successful, he will lift you and perform a damaging slash.

    This phase serves as an introduction to the further challenges you will face, and it culminates once you remove their durability bar. Be vigilant, as this phase will throw frequent attacks your way.

    Rollo and Lila: Third Phase Strategy

    Once you deplete Rollo and Lila’s first durability bar, another cutscene will commence. They’ll regain their health and durability, marking the real battle’s beginning. Now, not only will the attacks get faster, but you will also encounter new moves:

    Attack Name Enemy Description
    Clone Attack Rollo Rollo summons up to four clones that will attack you one by one. It’s advisable to parry the first and dodge the rest as he may attack from his end.
    Lightning Strikes Lila While Rollo is preoccupied, Lila will place circles on the ground that can summon lightning strikes.
    Dual Attack Rollo and Lila After you remove their durability bar, they’ll prepare a giant orb that launches across the arena, causing lightning strikes to follow. Avoiding these is crucial for survival.
    Ground Wave Rollo Rollo will punch the ground, causing damage in a large triangular area in front of him.
    Whirlpool Attack Lila Lila generates a whirlpool that pulls you in, making you a target for their attacks.

    This is the longest and toughest phase as both bosses can execute multiple attacks simultaneously. The key here is to dodge as many attacks as possible while maximizing your damage to the main target. Stock up on healing and paralysis-removal items to enhance your chances in this demanding battle.

  • Locating Moses’ Gingerbread House Chimney in Life Is Strange: Double Exposure

    Locating Moses’ Gingerbread House Chimney in Life Is Strange: Double Exposure

    Quick Links

    In Chapter 4 of Life Is Strange: Double Exposure, the character Dead World Moses is attempting to construct a gingerbread house, a tradition he used to share with Safi every holiday season. Unfortunately, this year he finds himself alone following Safi’s tragic death.

    While interacting with Moses, the chimney of his gingerbread house breaks. He expresses his disappointment because this was the last gingerbread house kit Amanda had. Max reassures him that she will return, and this sets up the secondary objective of finding a new chimney for Moses. If you’re feeling lost, we’re here to guide you on how to help lift Moses’ spirits.

    How to Find a Chimney for Moses

    To trigger the moment when Moses’ chimney breaks, make sure you have successfully set up Living World Moses to run the projector for you.

    Earlier in the Krampus Party scene, Living World Safi was seen assembling a gingerbread house while chatting with Max. After the incident with Dead World Moses’ chimney, switch back to Living World. You’ll be able to interact with Safi’s gingerbread house, but you must talk to her first before you can take the chimney.

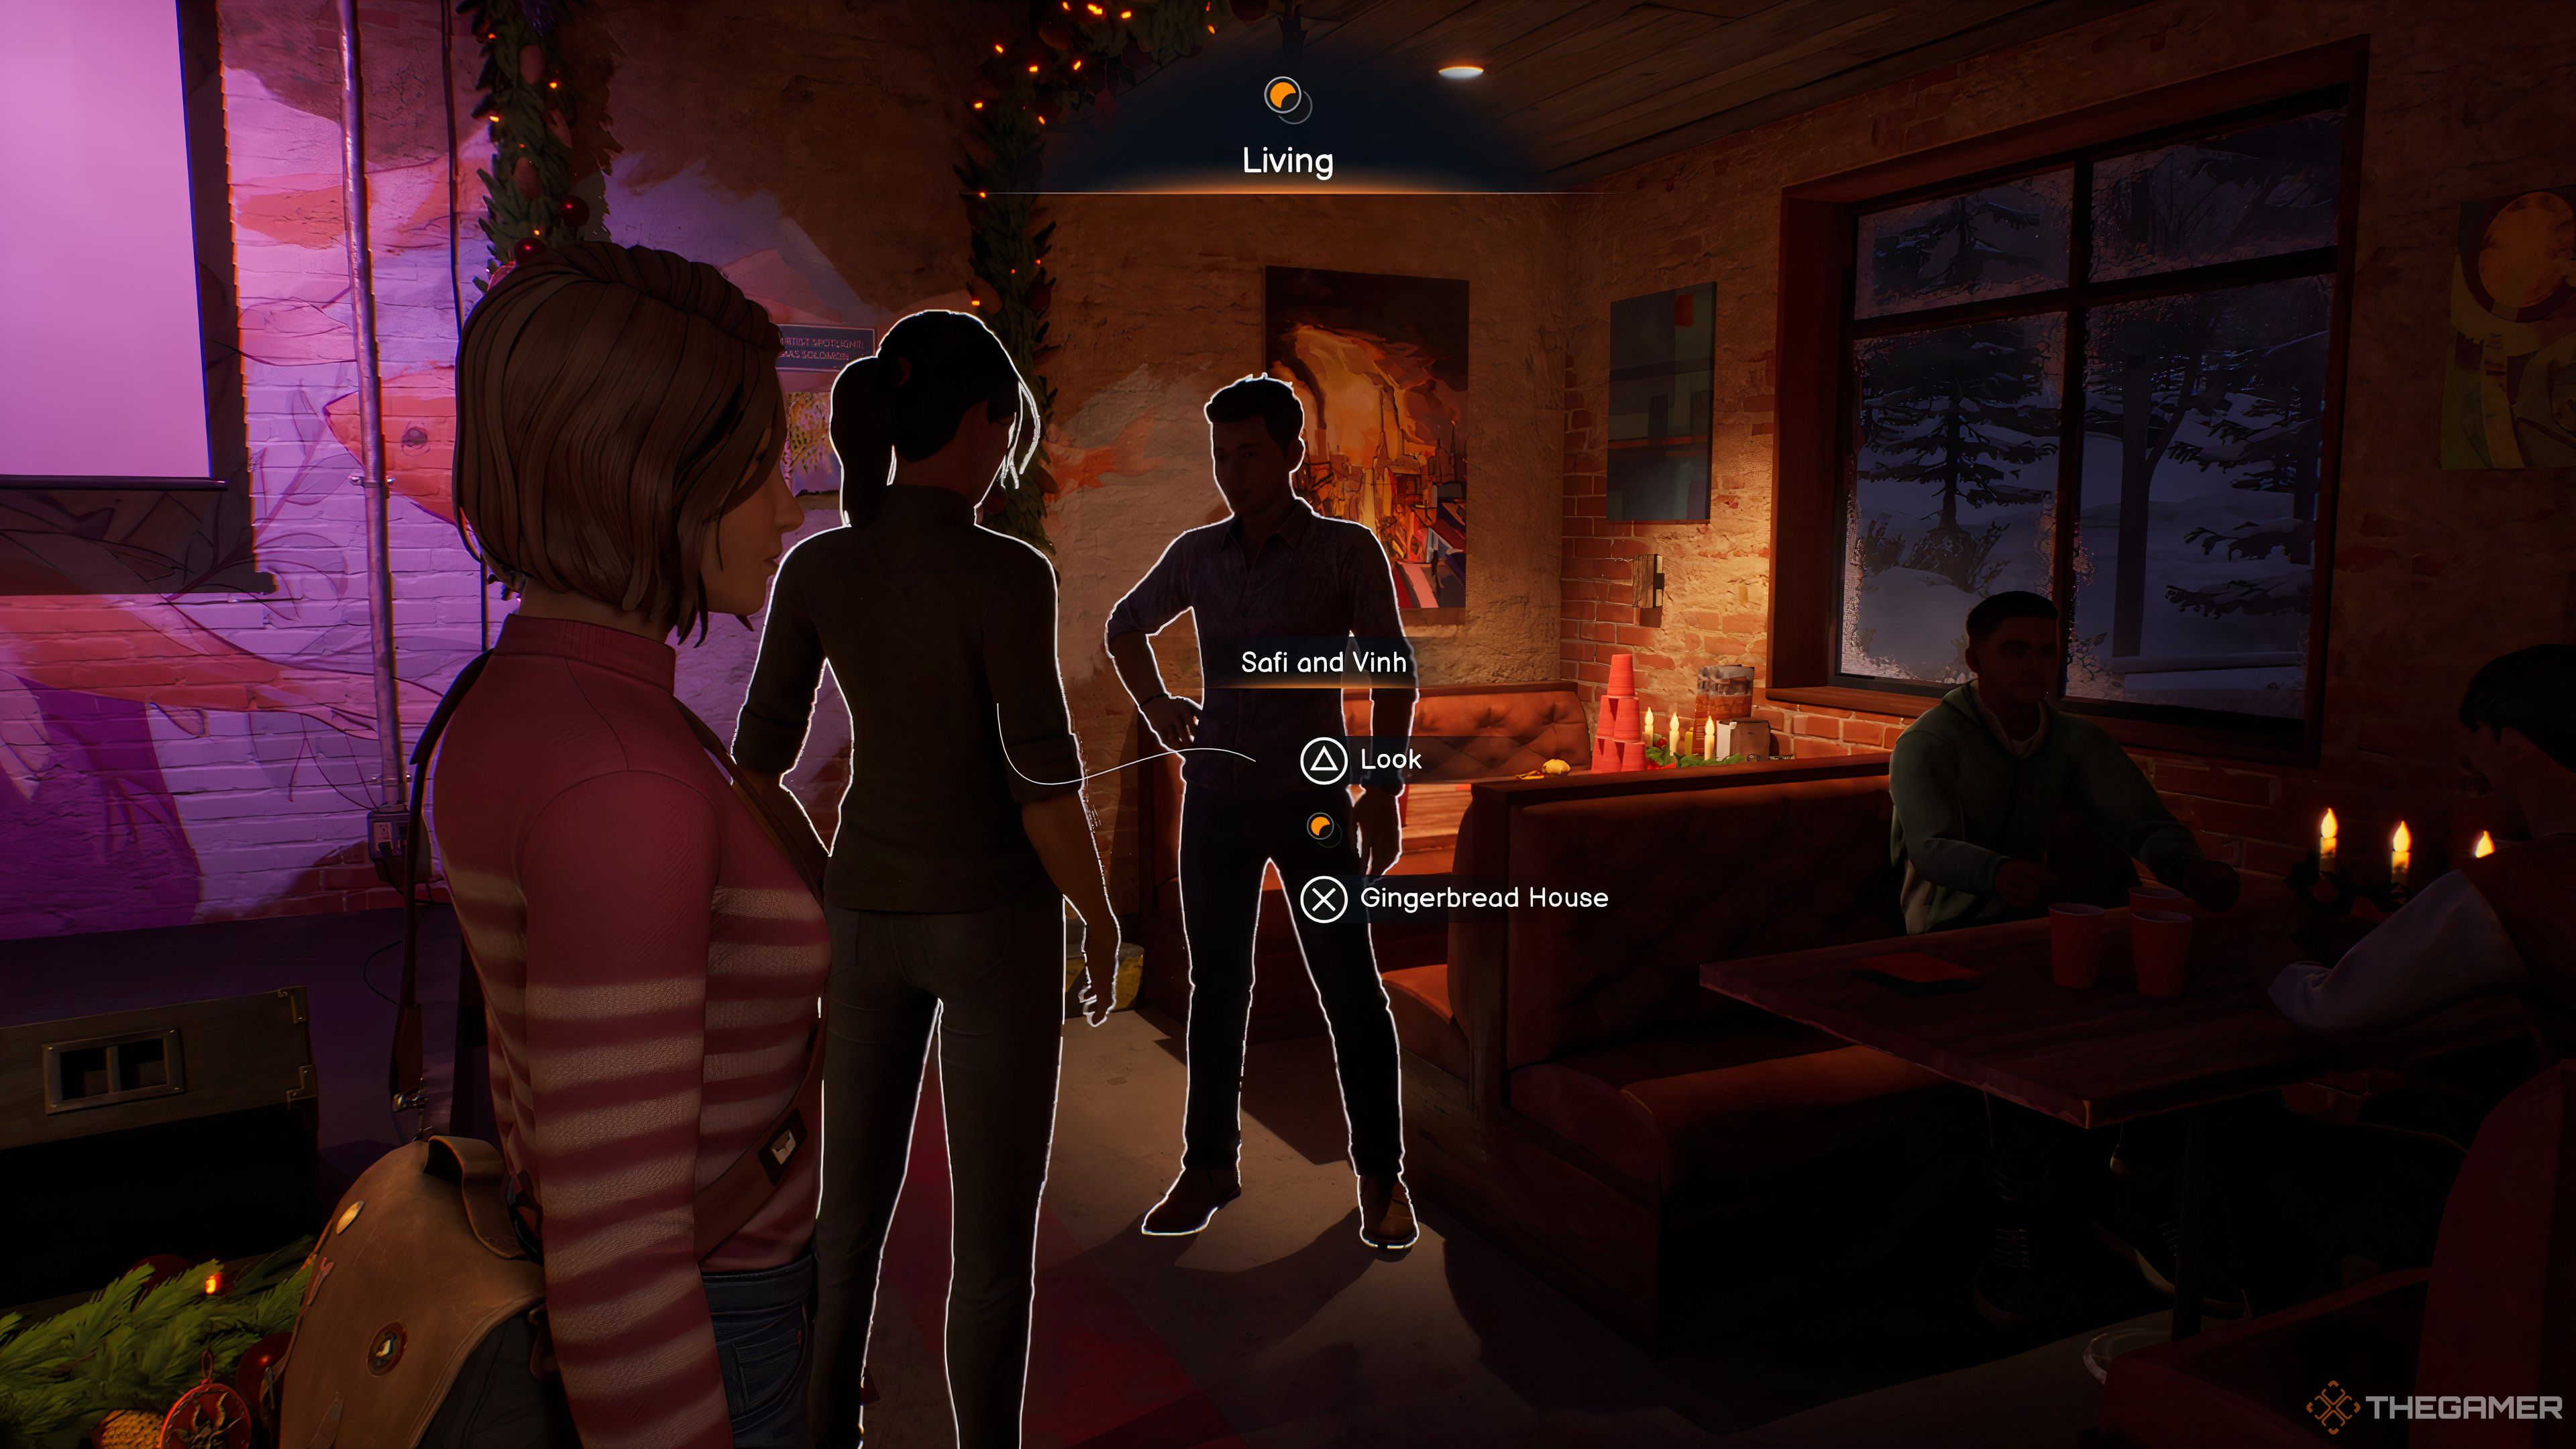
    Safi and Vinh with Prompt

    Find Safi by the stage with Vinh. Approach her, and a prompt will allow you to ask about the gingerbread house. Select it, and Max will pull Safi aside for a private conversation.

    Max explains Moses’ predicament and asks if she can borrow the chimney from her gingerbread house. Safi is not only agreeable but also adds her own personal touch to it.

    Max Asking Safi

    Once you have Safi’s chimney, return to Dead World and present it to Moses. Watch as he joyfully places the chimney on top of his gingerbread house, completing the project that holds so much meaning for him. This small act of kindness makes a big difference in his day.

  • A Guide to Helping Phone Guy Succeed in Life Is Strange: Double Exposure

    A Guide to Helping Phone Guy Succeed in Life Is Strange: Double Exposure

    Life Is Strange: Double Exposure includes various side tasks that don’t alter the main storyline but can brighten the day of certain NPCs. Who wouldn’t want a time-traveling friend to boost their failing grade to an A?

    In Chapter 3, you discover that a student named Martin Hart is having a hard time in Professor Darren Carlsen’s class, where Safi served as a Teacher’s Assistant. In the Living World, Safi ensured Martin passed with an A. However, in the Dead World, without Safi’s help, he finds himself with a failing grade. Continue reading to find out how to help Martin improve his grade.

    How to Change Martin Hart’s Grade


    In the game, Martin is sometimes called “phone guy.” As you explore the FAB during Chapter 3 in the Dead World, you might overhear him discussing how his professor seems to be targeting him. However, you don’t need to hear this to start the task.


    Checking Martin Hart's Grade In Life Is Strange: Double Exposure.

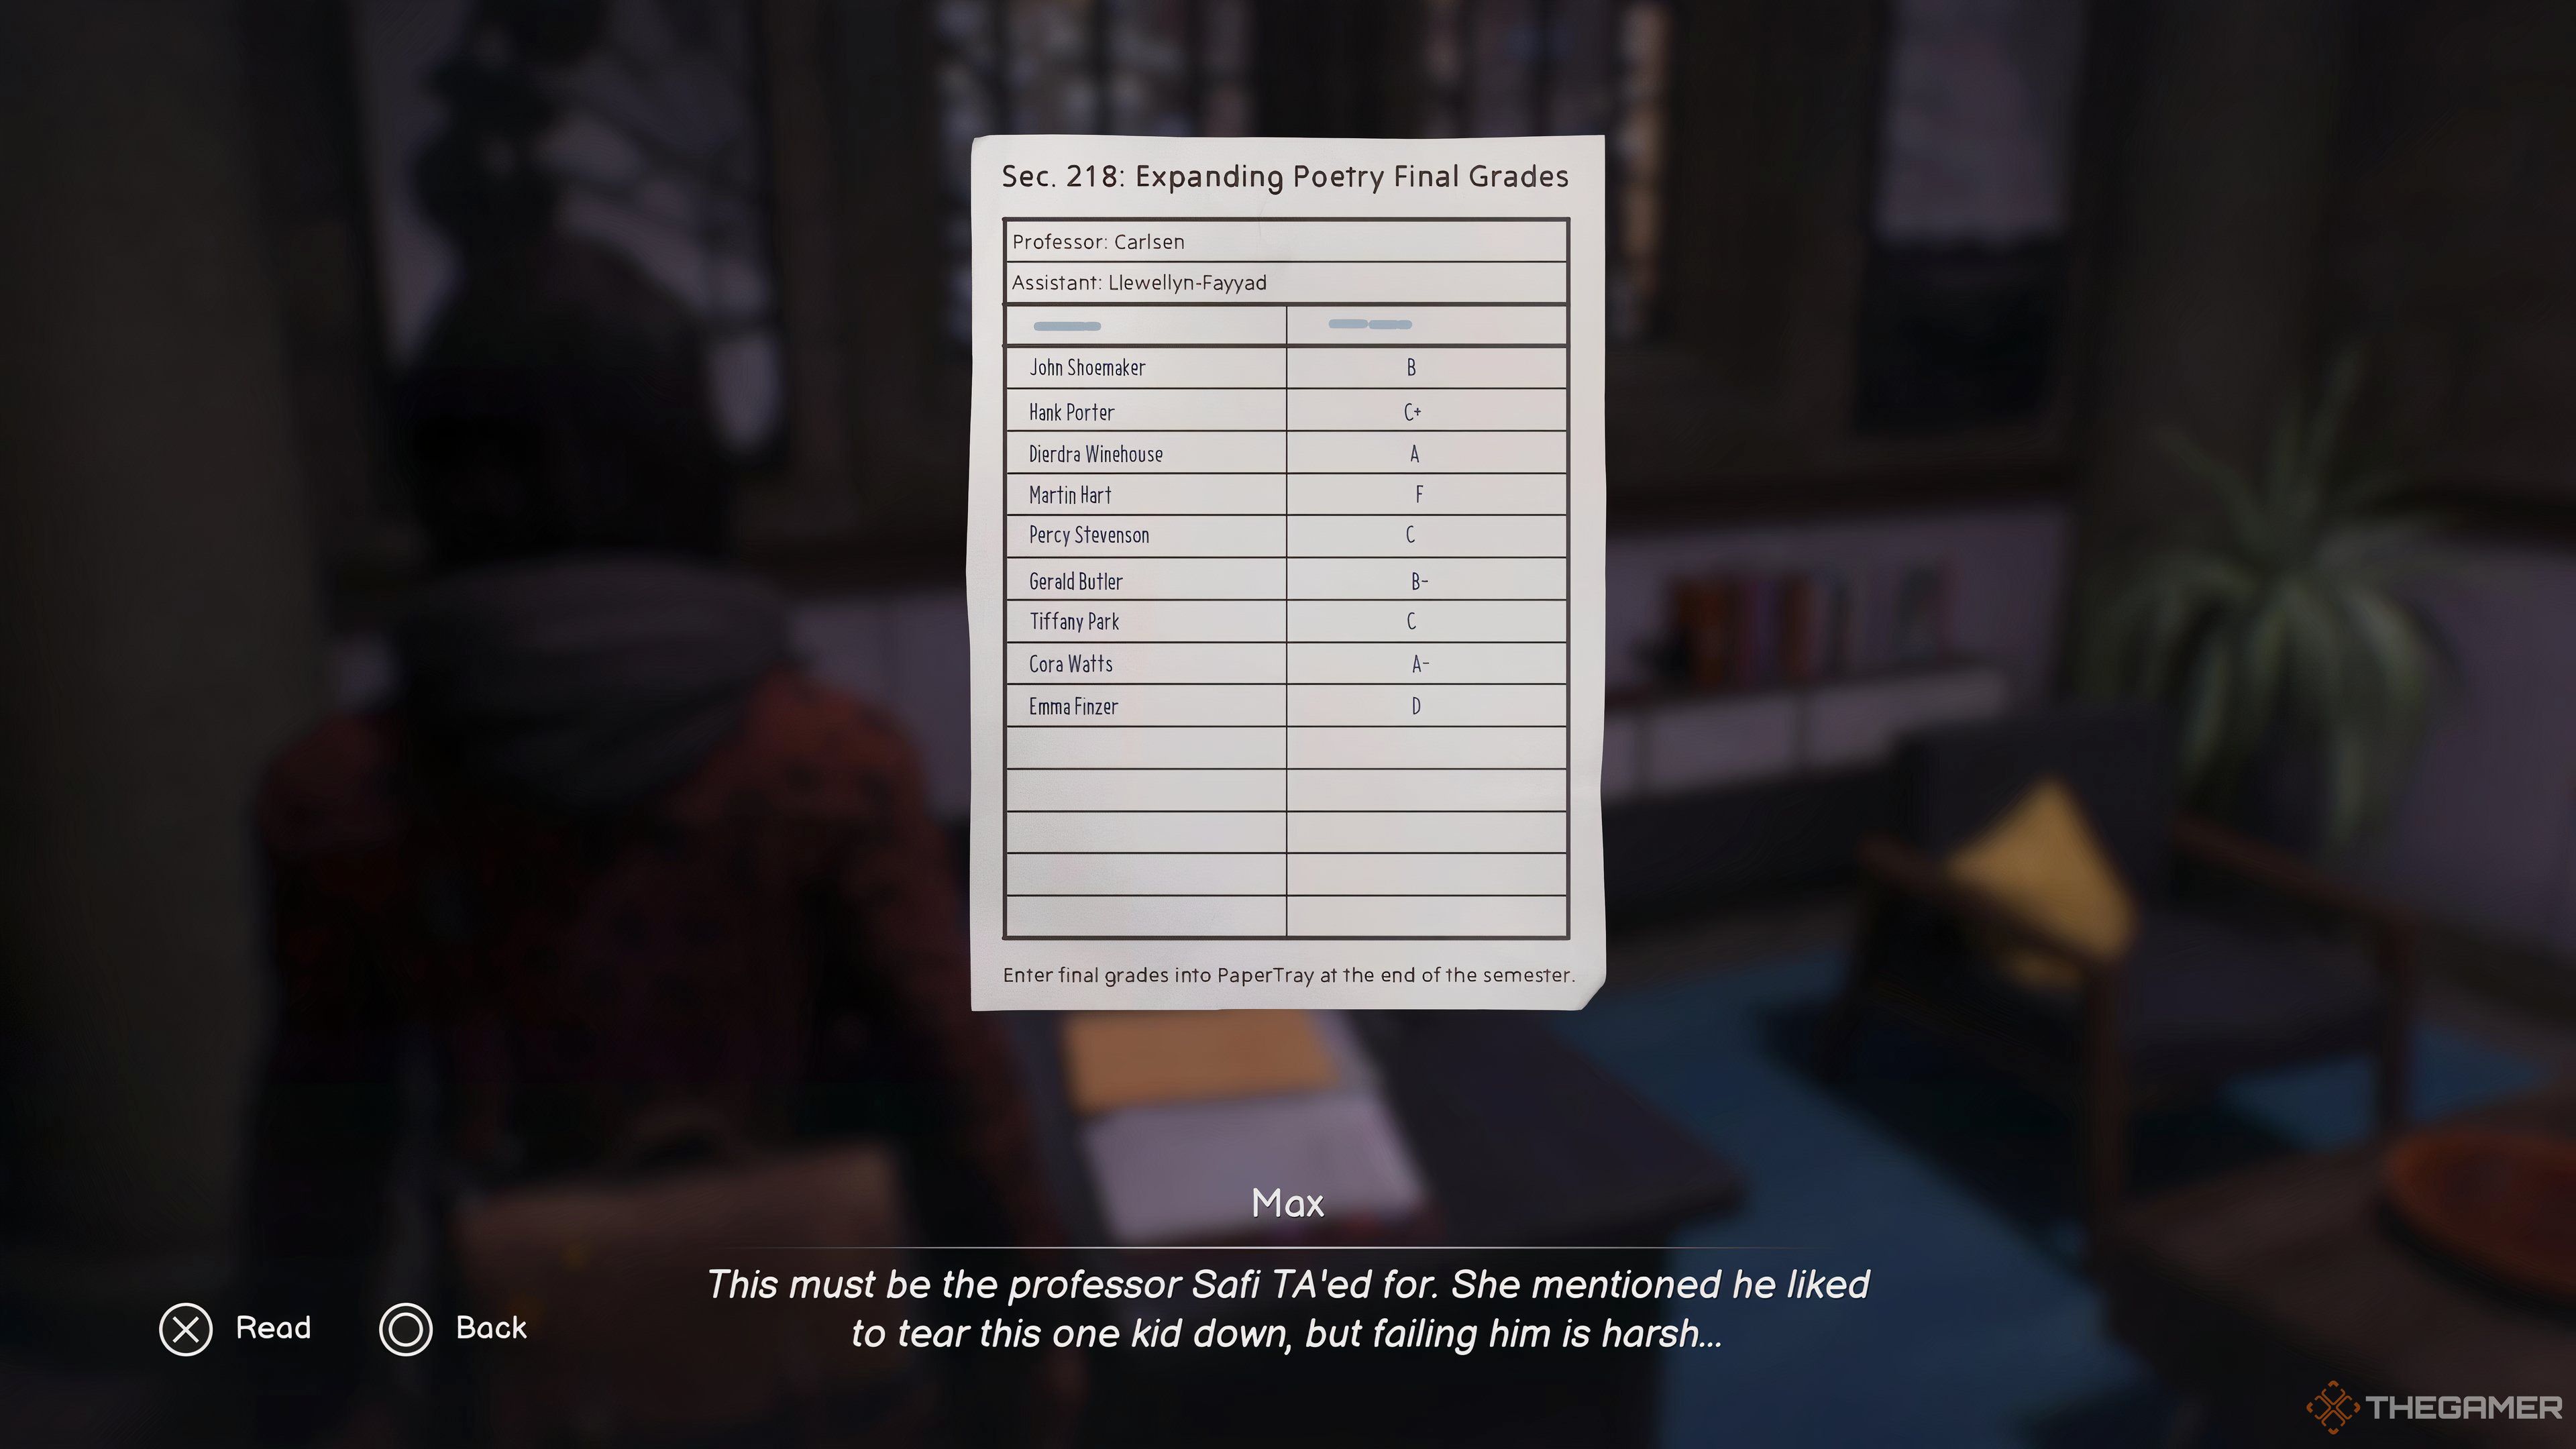
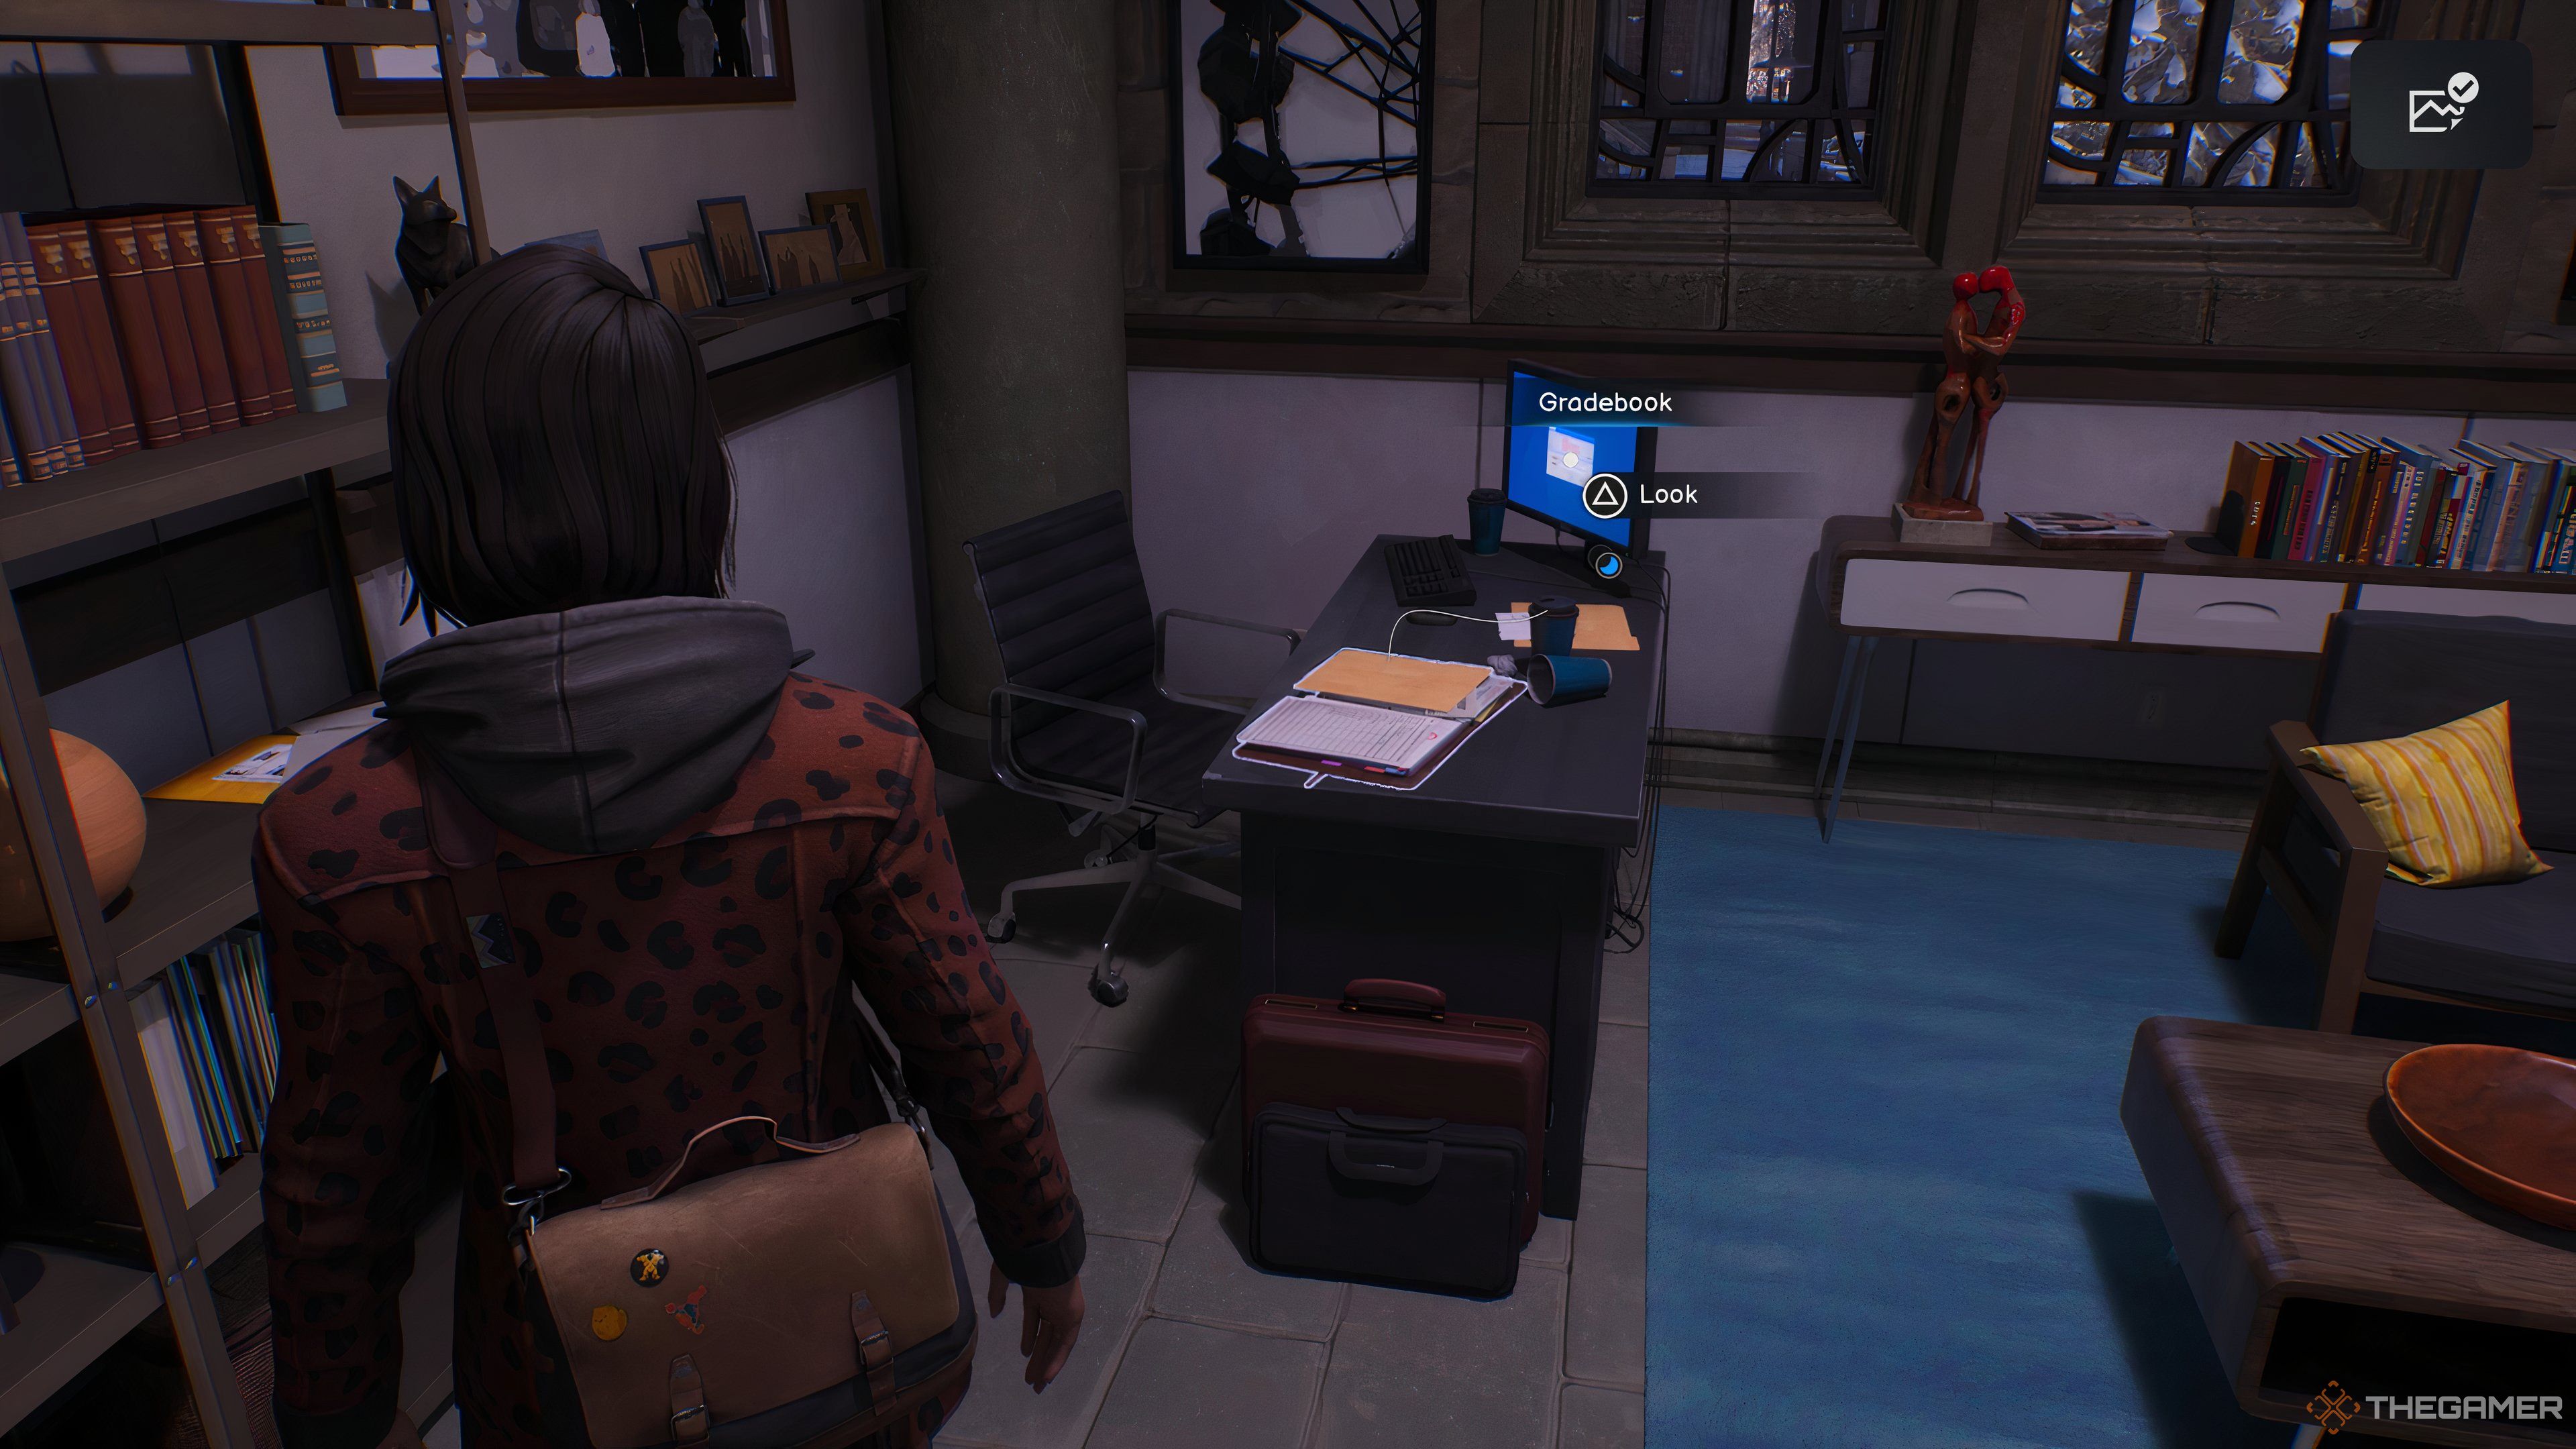
    The office next to Lucas’ belongs to Professor Carlsen. You can go inside and check the grades on his desk. Max recalls Safi mentioning that the professor had a bias against this one student, but failing him seems quite unjust.

    If you attempt to interact with the computer to modify the grade, Max notes that she needs a password first, which you can find in the Living World.


    Living World Martin Hart's Grade In Life Is Strange: Double Exposure.

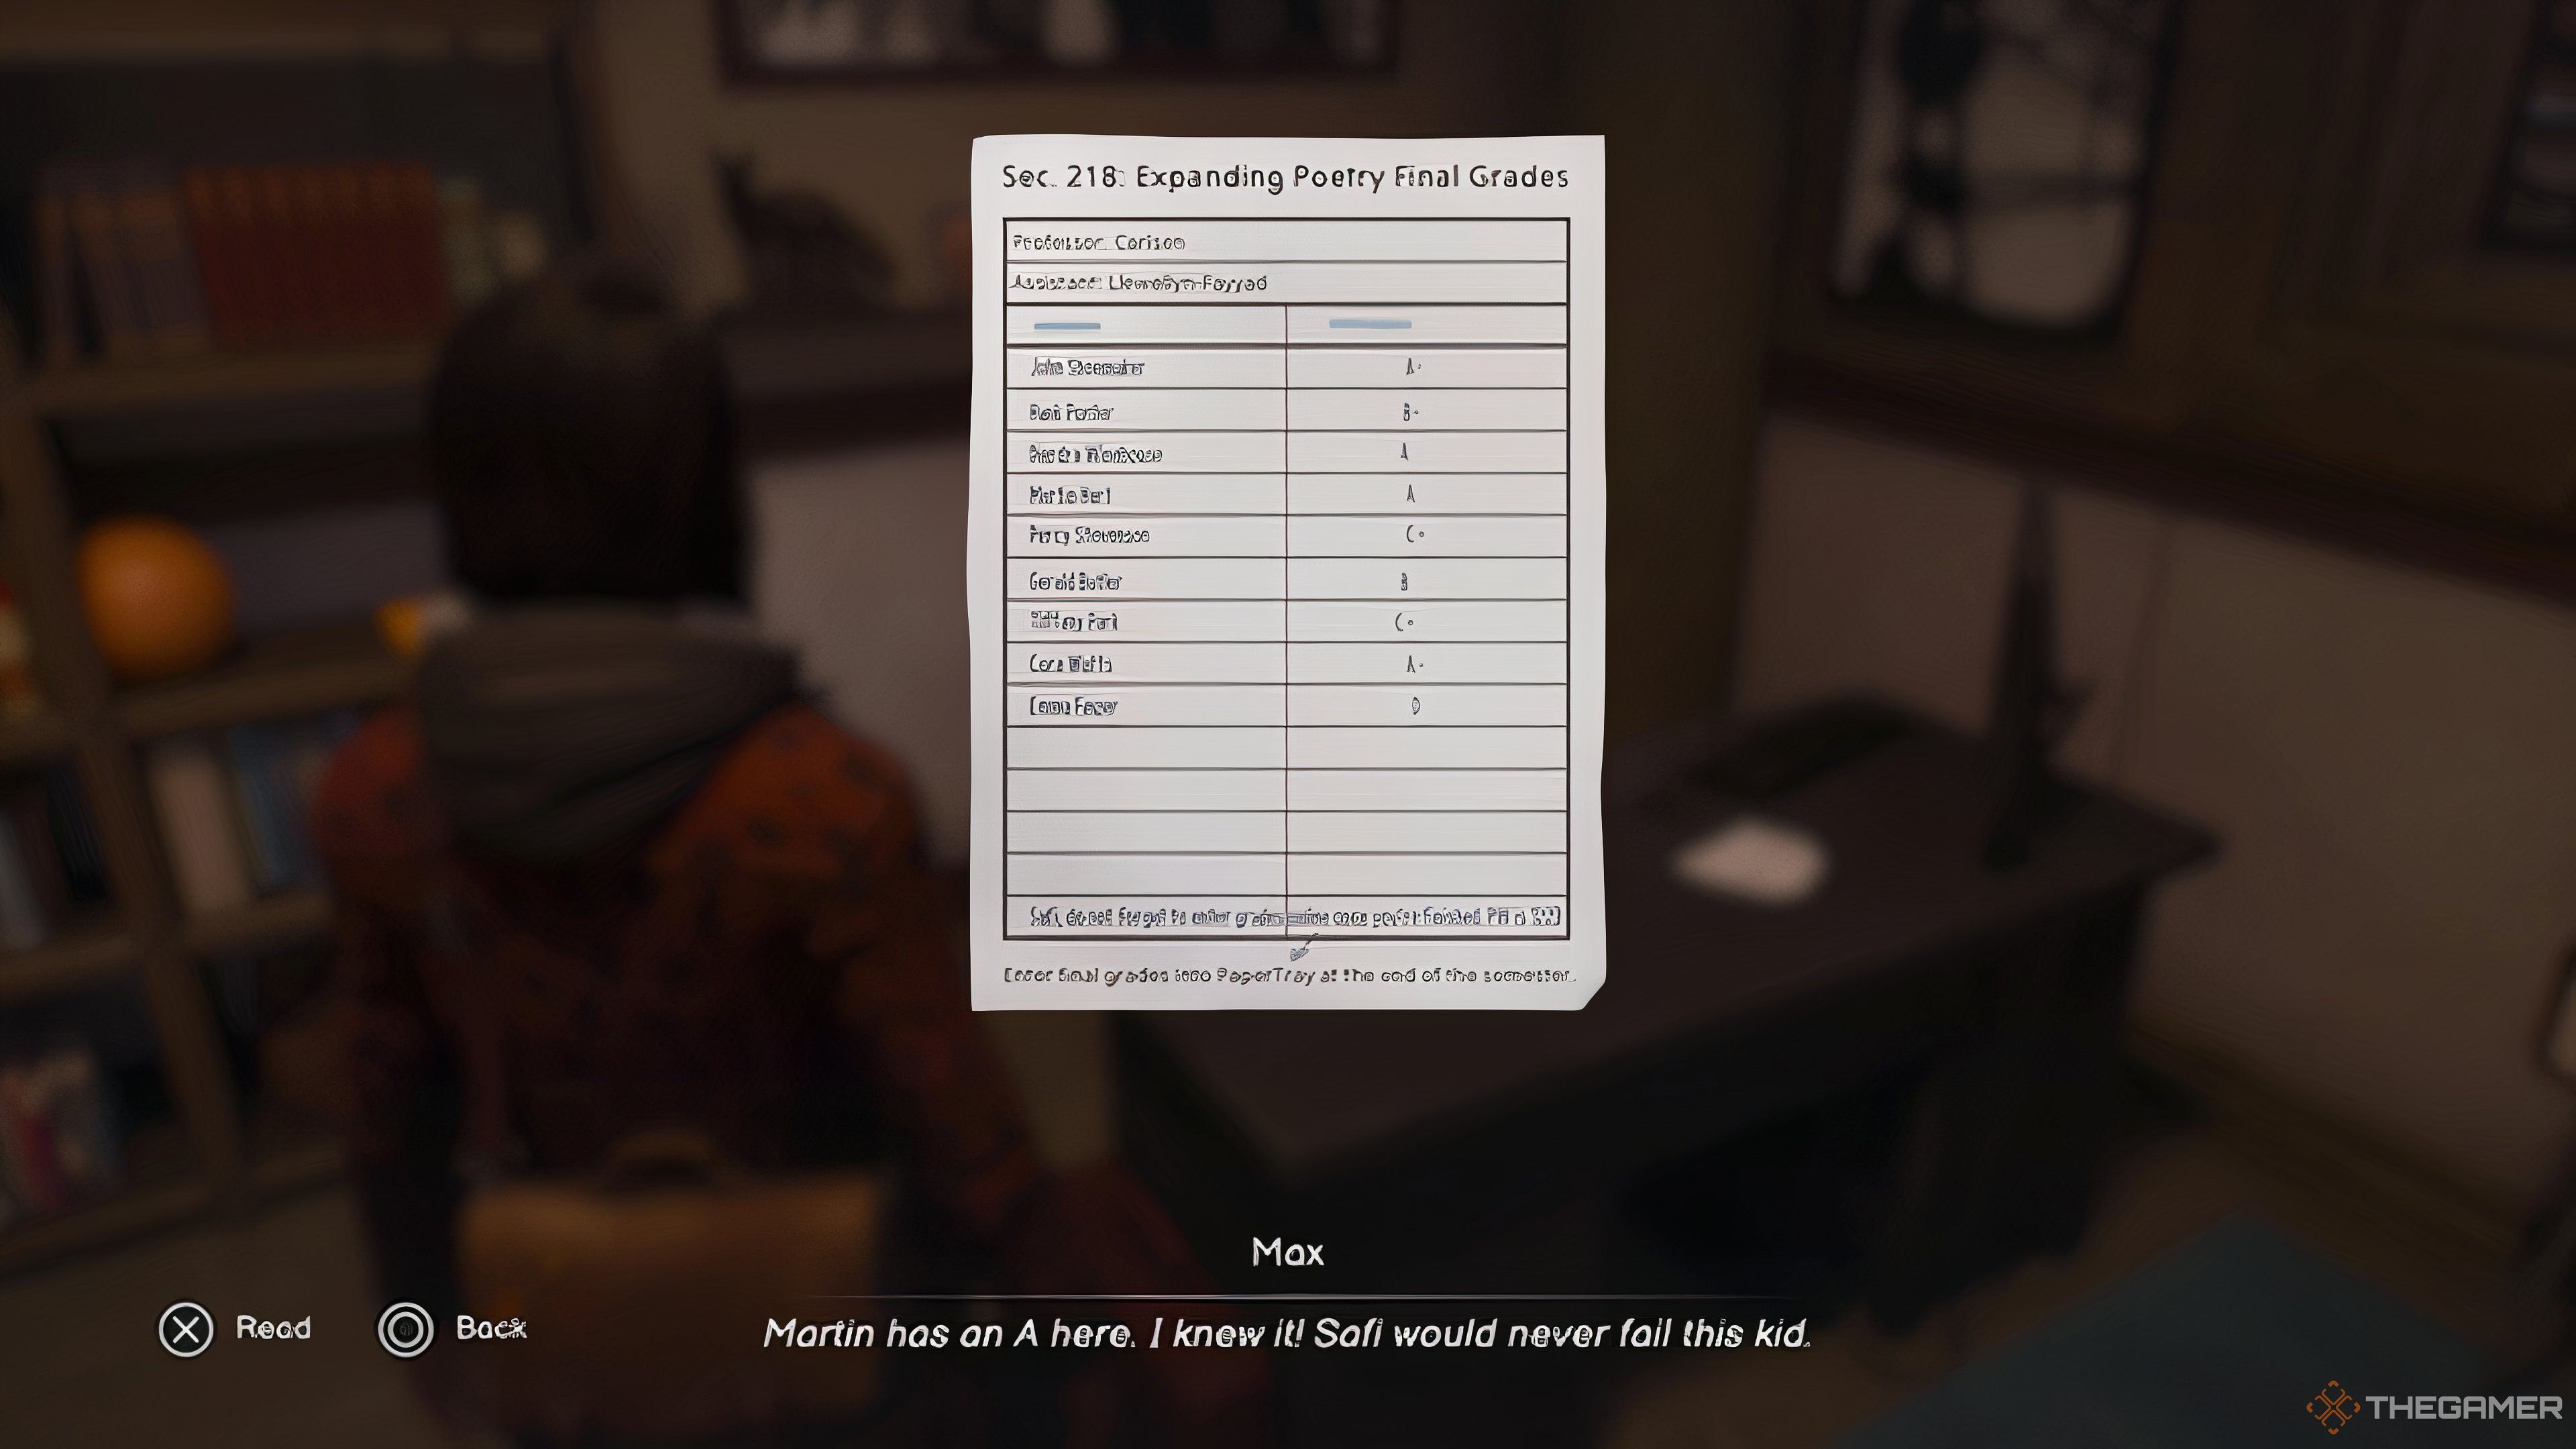
    To obtain the password, use the shift point located by the FAB cafe to switch to the Living World, and then check the same grade sheet. In this instance, Martin has an A, and the password is noted at the bottom.


    Professor Carlsen's Desk And Computer In Life Is Strange: Double Exposure.

    Finally, return to the Dead World and interact with the professor’s computer to update Martin’s grade.

    When you use the Dual Tone Phone Booth in the Living World, the first message you’ll hear from the past is from Phone Guy.

  • The Impact of Answering Loretta in Life Is Strange: Double Exposure

    The Impact of Answering Loretta in Life Is Strange: Double Exposure

    In classic *Life Is Strange* style, Life Is Strange: Double Exposure is packed with critical choices that shape the narrative. One of the first significant choices comes toward the end of Chapter 1, just a few days after Safi’s tragic passing.

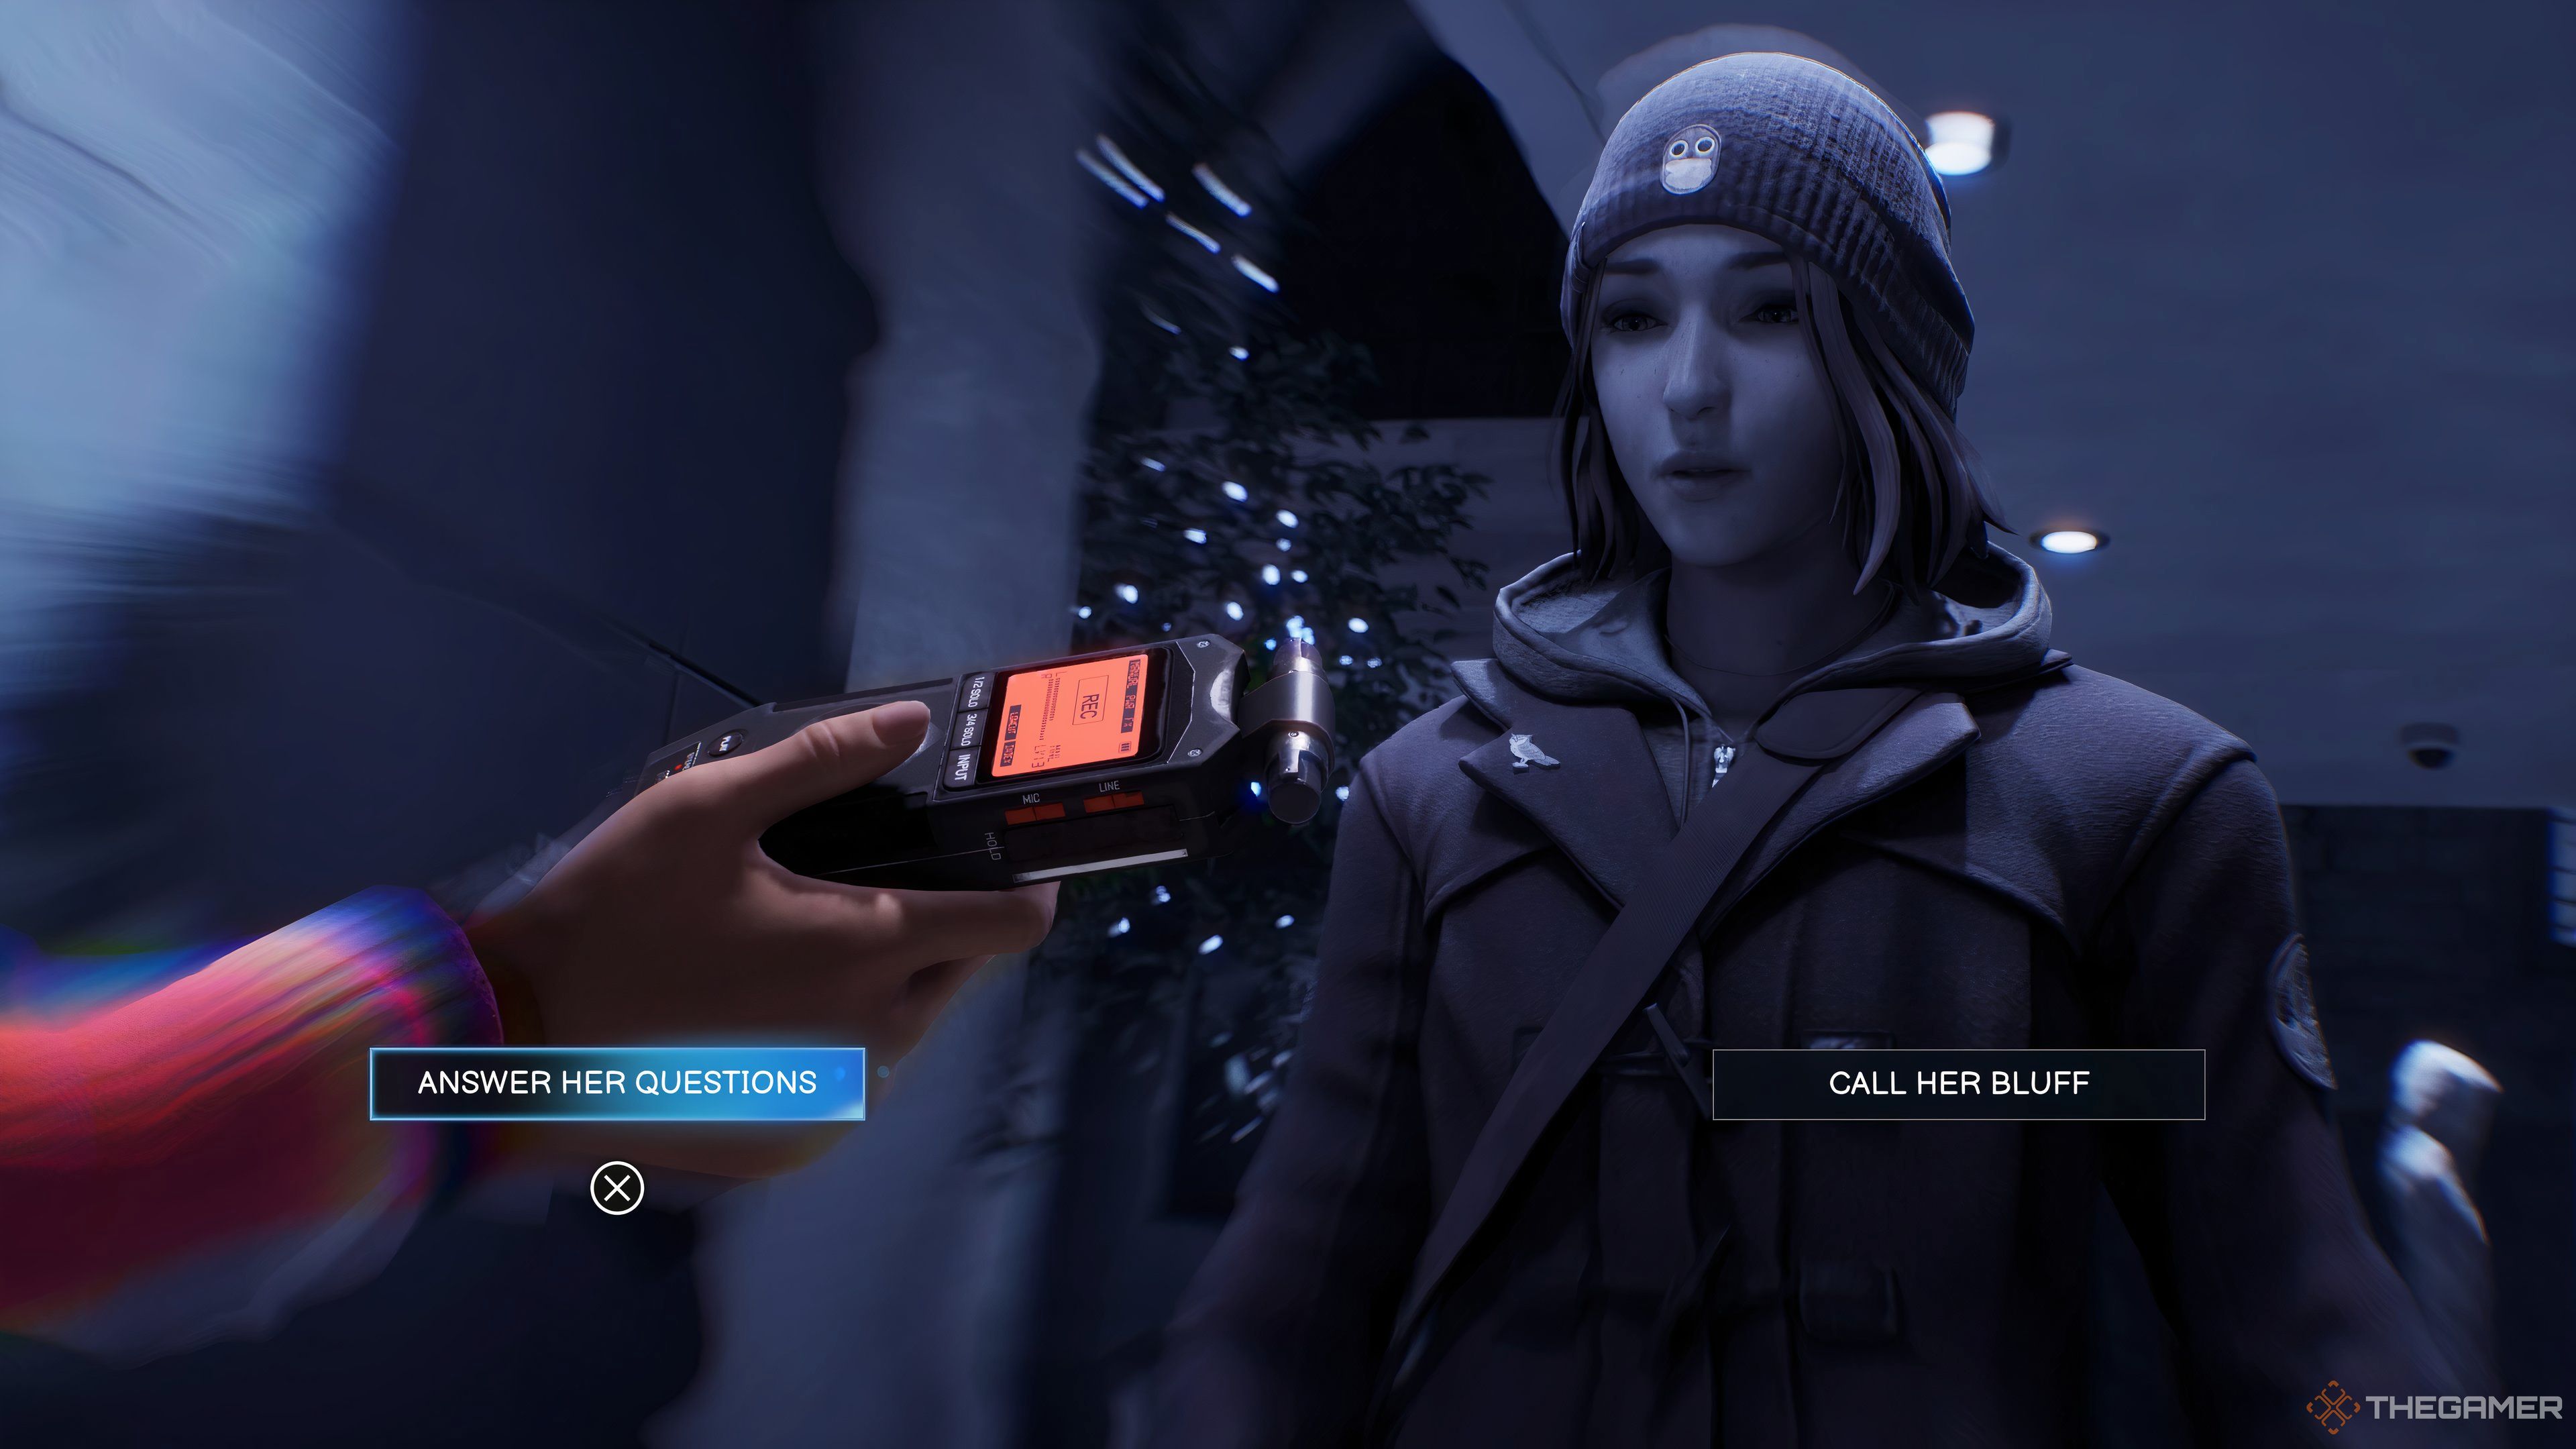
    When you first enter the Fine Arts Building following your conversation with Yasmin, Safi’s mother, Max overhears a phone call from Gwen Hunter. Loretta, the local true crime podcaster, discovers you eavesdropping. You face a choice: do you respond to her questions or call her bluff, letting her inform Gwen about your snooping?

    This choice only arises due to Safi’s death and will solely influence your interactions with Dead World Gwen.

    What Happens If You Call Loretta’s Bluff?

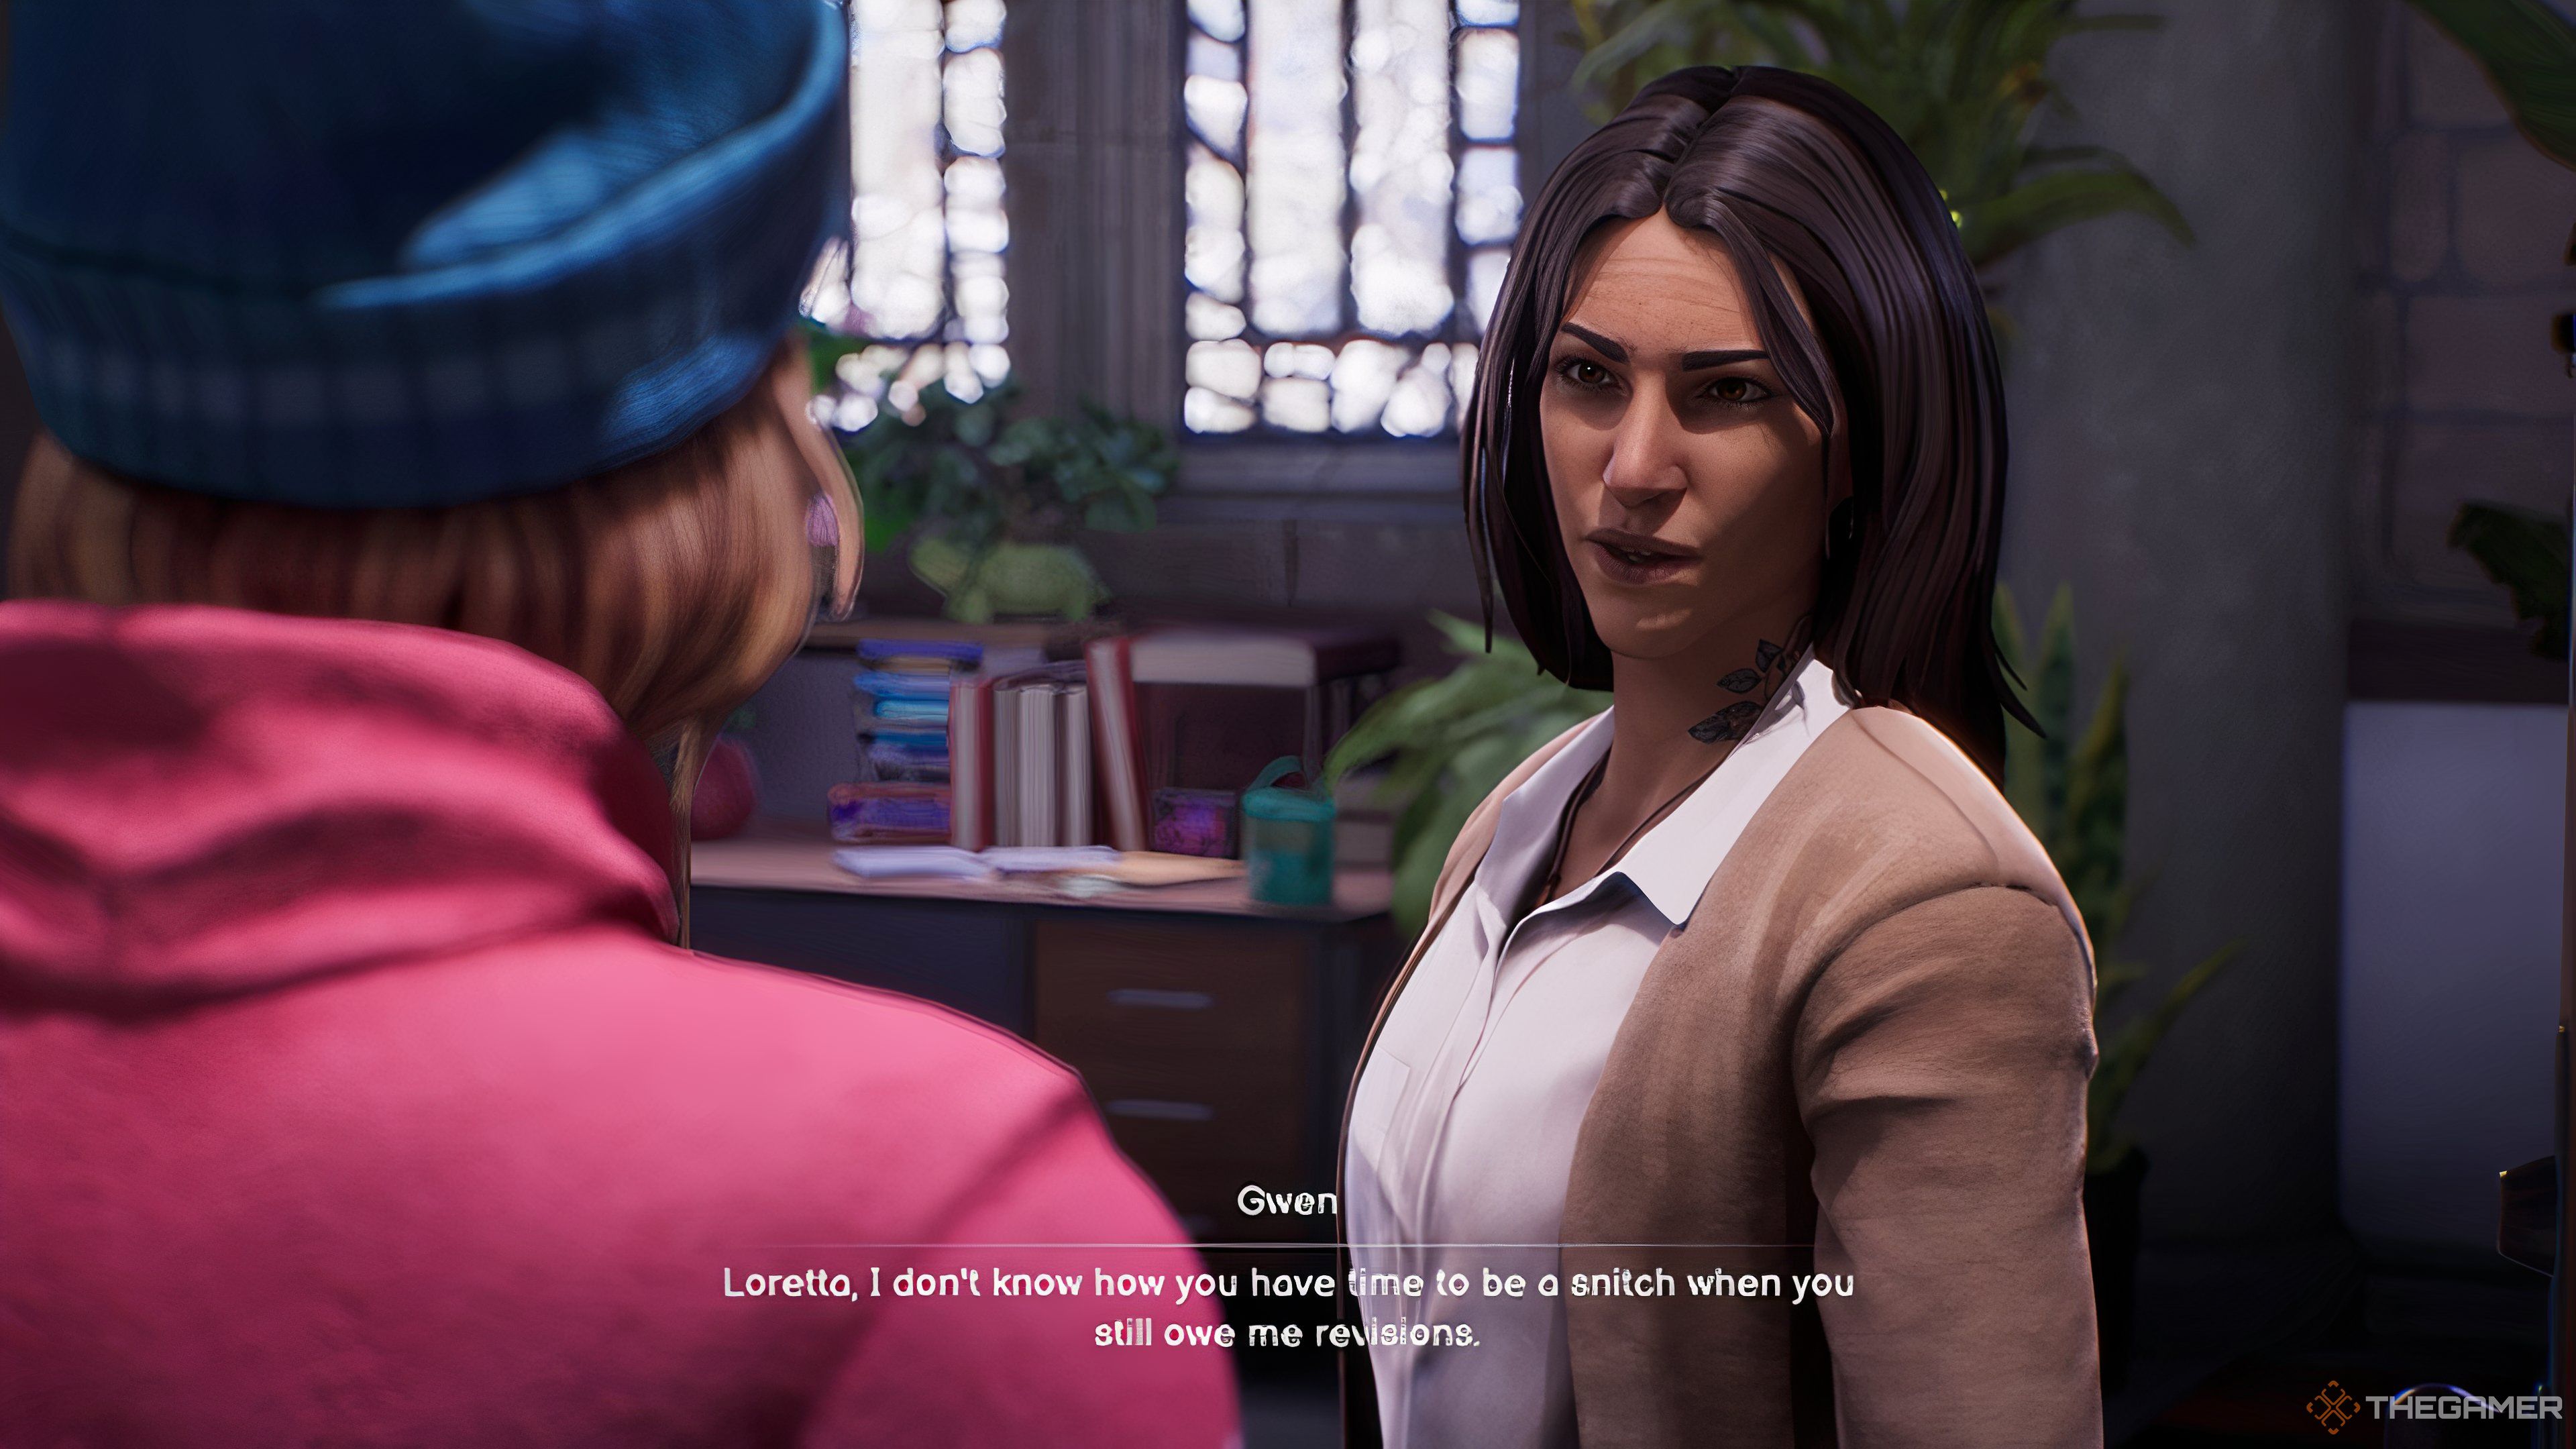
    If you choose to call Loretta’s bluff, she hurries to Gwen’s office and reveals that you were eavesdropping. Gwen quickly dismisses Loretta’s claim, yet once Loretta steps out, she questions you about your eavesdropping. Regardless of your response, she will express disappointment and ask you to keep your distance from her.

    Gwen Shooting Loretta Down In Life Is Strange: Double Exposure.

    <p_Later, in Chapter 3, when you arrive at Gwen’s office, she greets you with, “No conversations for you to conveniently overhear this time” and reluctantly agrees to discuss Safi’s book and Maya Okada with you. However, she will not let you read Safi’s manuscript when asked.

    To access Safi’s manuscript from Gwen, you’ll need to shift into Living World Gwen’s office, which is empty, and retrieve the manuscript from the drawer you saw Dead World Gwen use.

    While exploring Gwen’s office, you can snap a photo of her vintage record player and share it on your Crosstalk page. If you previously called Loretta’s bluff and Gwen knows about your eavesdropping, she’ll comment on your post, noting that she didn’t give you permission to rummage through her belongings.

    What Happens If You Answer Loretta’s Questions?

    Choosing Answer Loretta's Questions In Life Is Strange: Double Exposure.

    If you decide to engage and answer Loretta’s questions, you might tell her that you really don’t know much and suggest she speak to someone who has known Safi longer than six months.

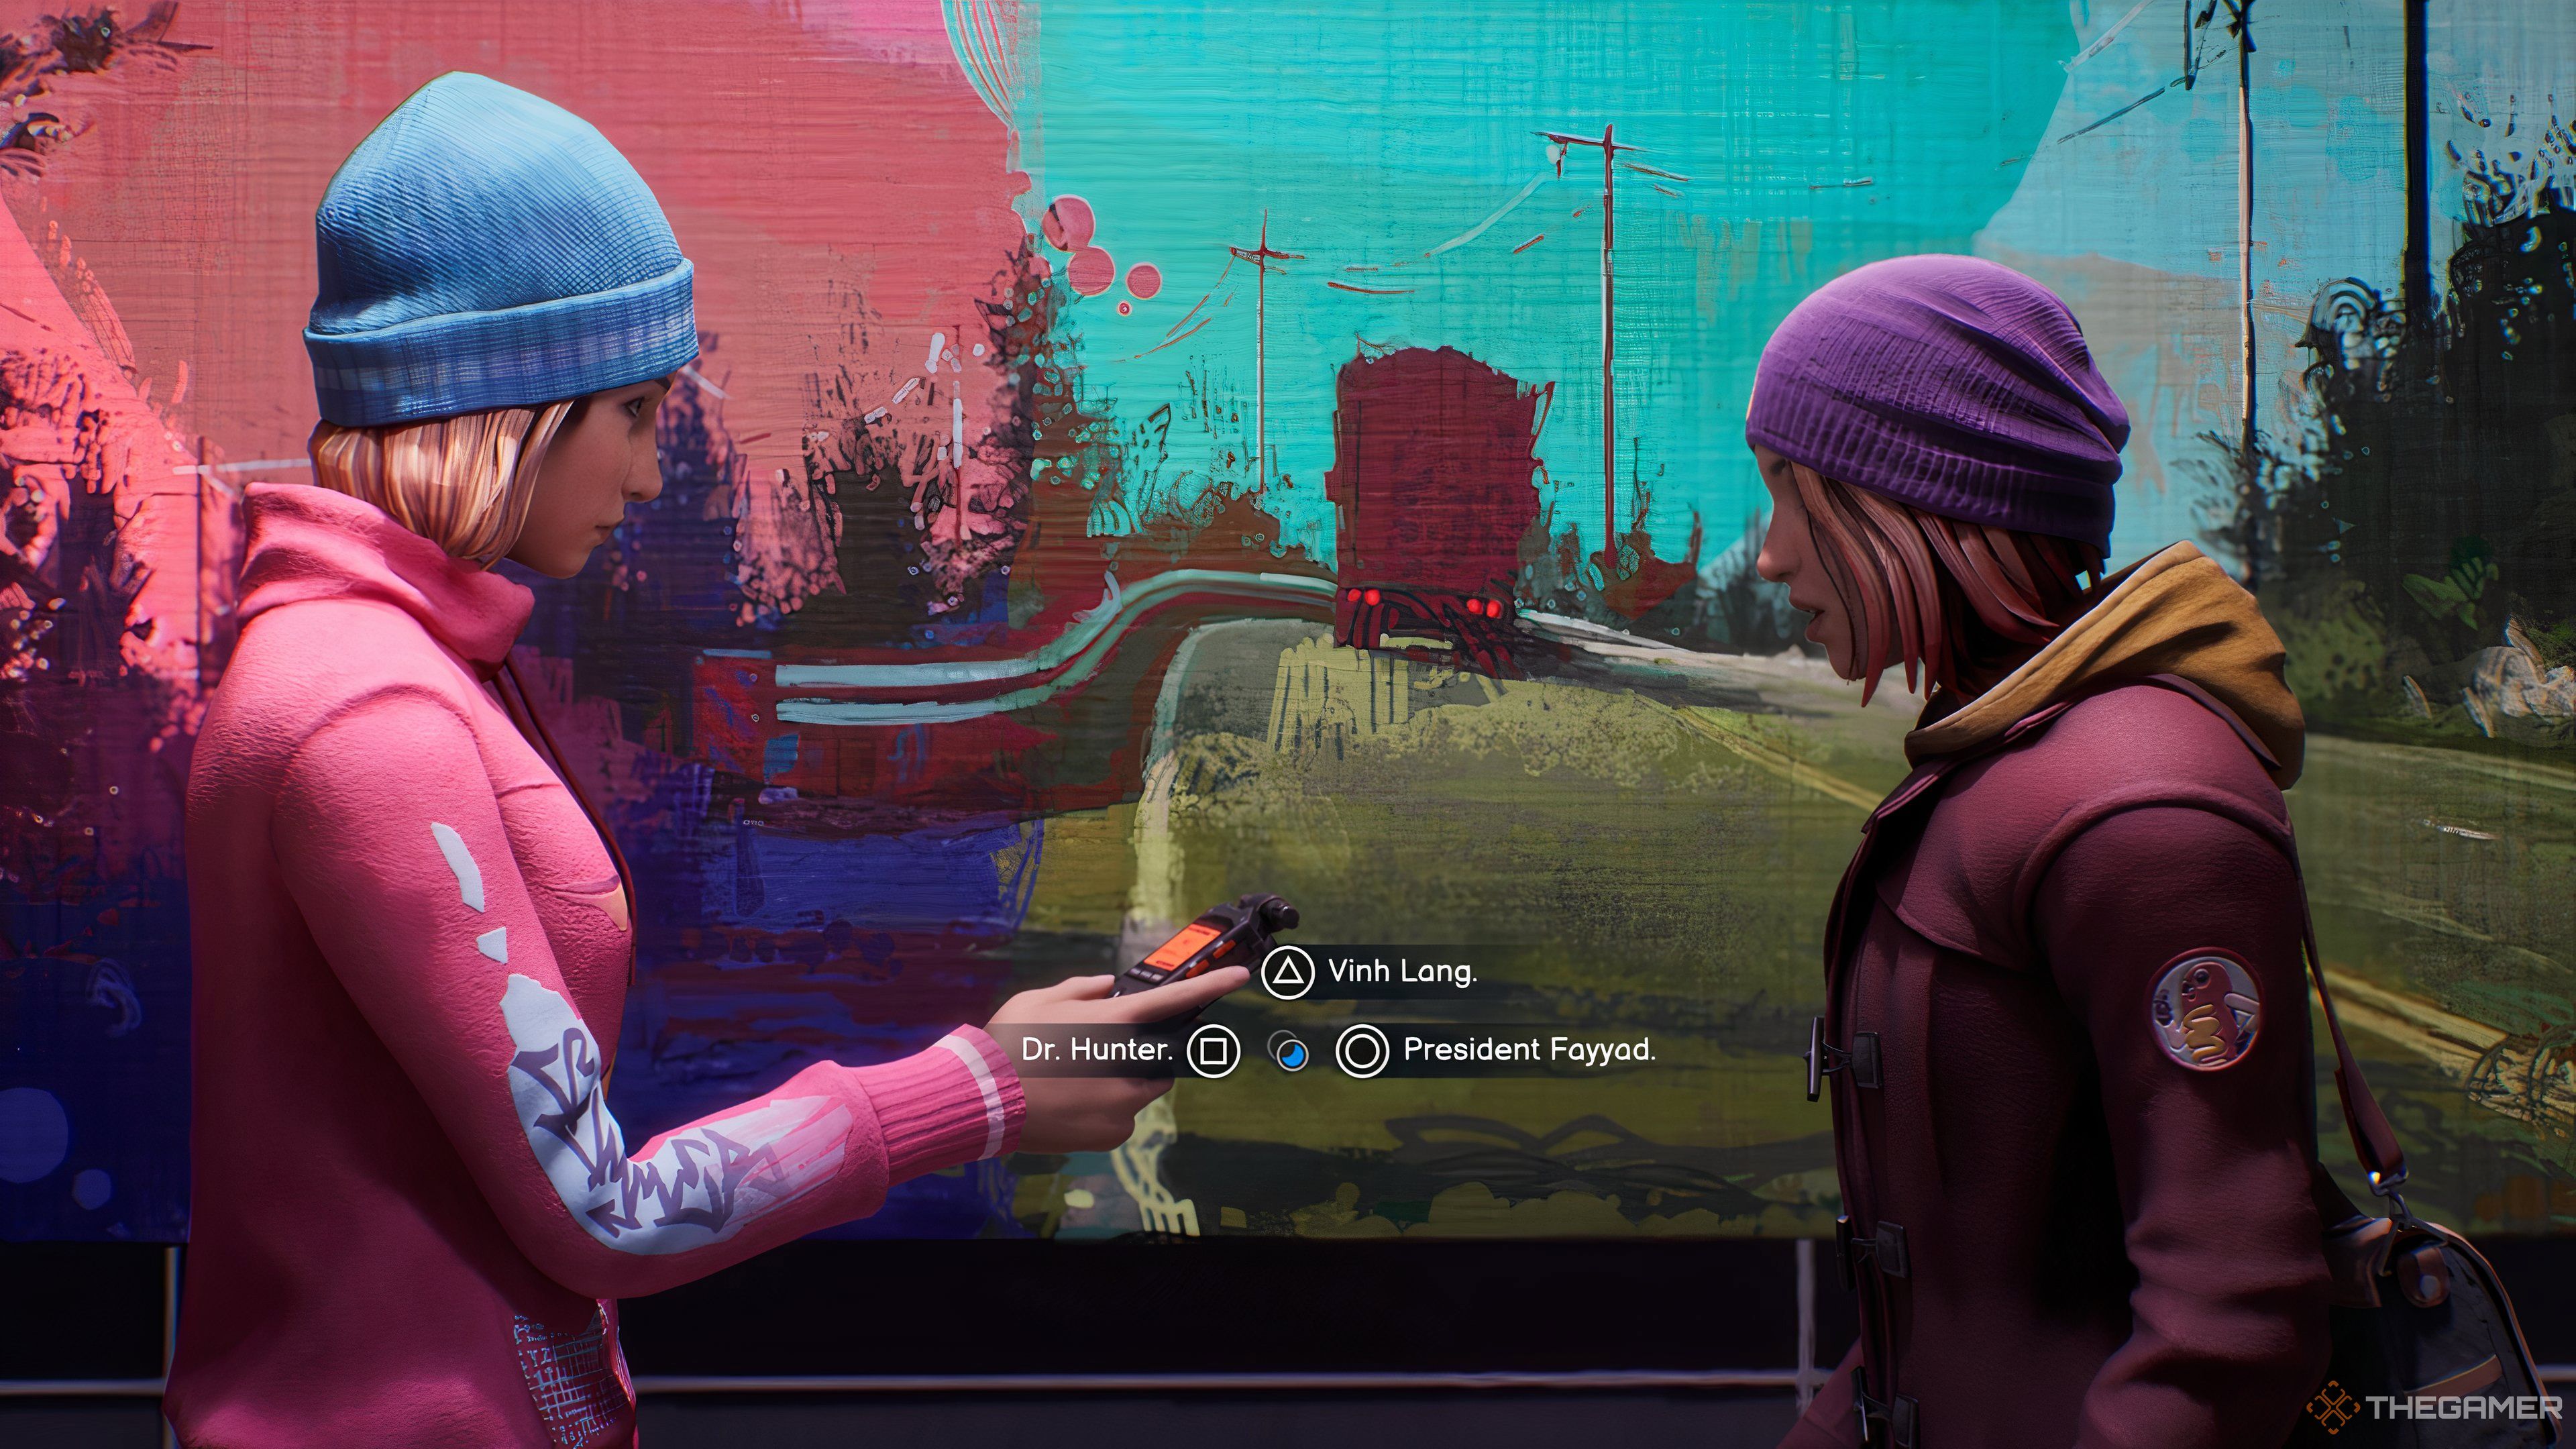
    Choosing What Name To Give To Loretta In Life Is Strange: Double Exposure.

    Loretta will then request a lead on who else to interview, with options including Gwen, Safi’s mother, or Vinh. No matter which name you provide, Loretta will express gratitude and leave.

    Gwen Letting You Read Safi's Manuscript In Life Is Strange: Double Exposure.

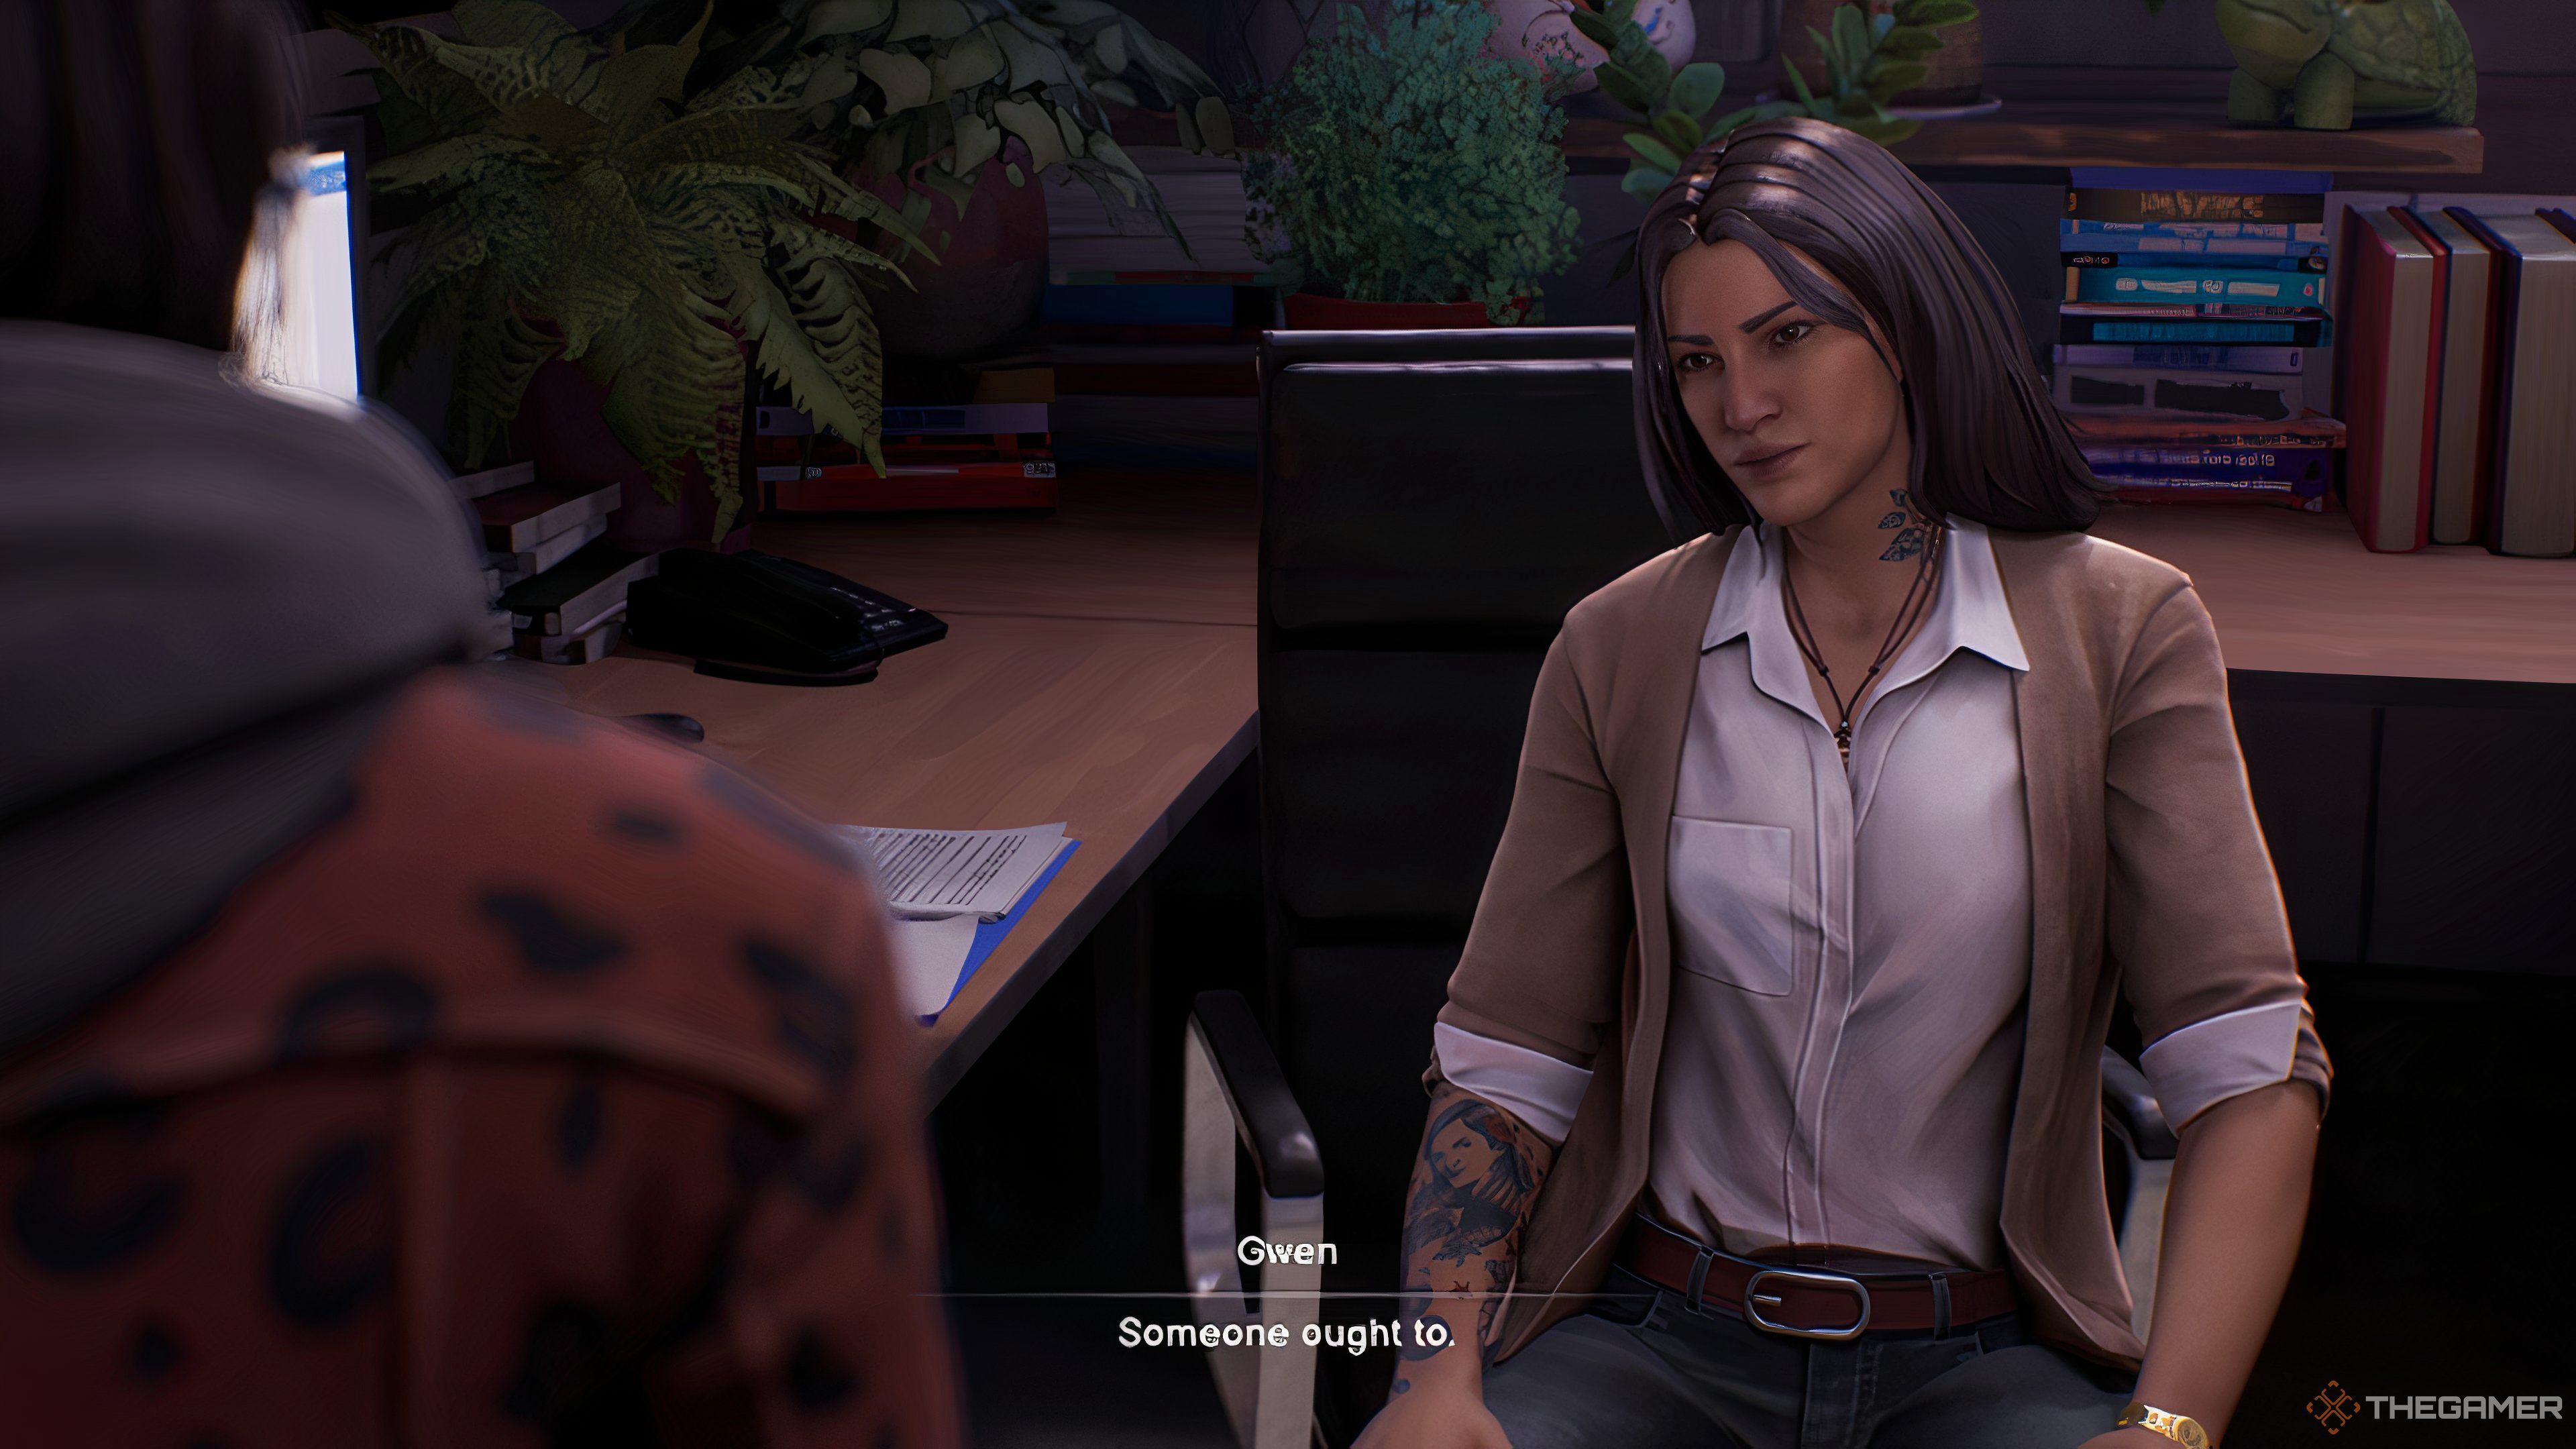
    Later in Chapter 3, Dead World Gwen will surprisingly welcome your arrival when you inquire about Safi’s work and Maya. She’ll permit you to read Safi’s manuscript, stating that “Someone ought to.”

    If you choose to post a snapshot of her vintage record player in this instance, she’ll leave a positive comment for you.

  • Discovering Maya’s Clues in Lucas’ Office – Life Is Strange: Double Exposure

    Discovering Maya’s Clues in Lucas’ Office – Life Is Strange: Double Exposure

    In Chapter Three of Life is Strange: Double Exposure, Max takes on a detective role to uncover the link between Safi and a former student from Caledon University named Maya Okada. According to Vinh, Lucas Colmenero holds the key to understanding what happened to Maya, so it’s time to pay a visit to our favorite self-important literature professor.

    You’ll find Lucas in the Fine Arts Building, sitting in his office in the Living World. You can talk to him here, but his evasive responses won’t reveal much. When you switch to the Dead timeline, however, you can start uncovering the truth.

    Investigation of Lucas’ Office in the Dead World


    To access Lucas’ office, simply switch to the Dead World and open the door. Once you’re inside, it’s time to uncover his secrets.

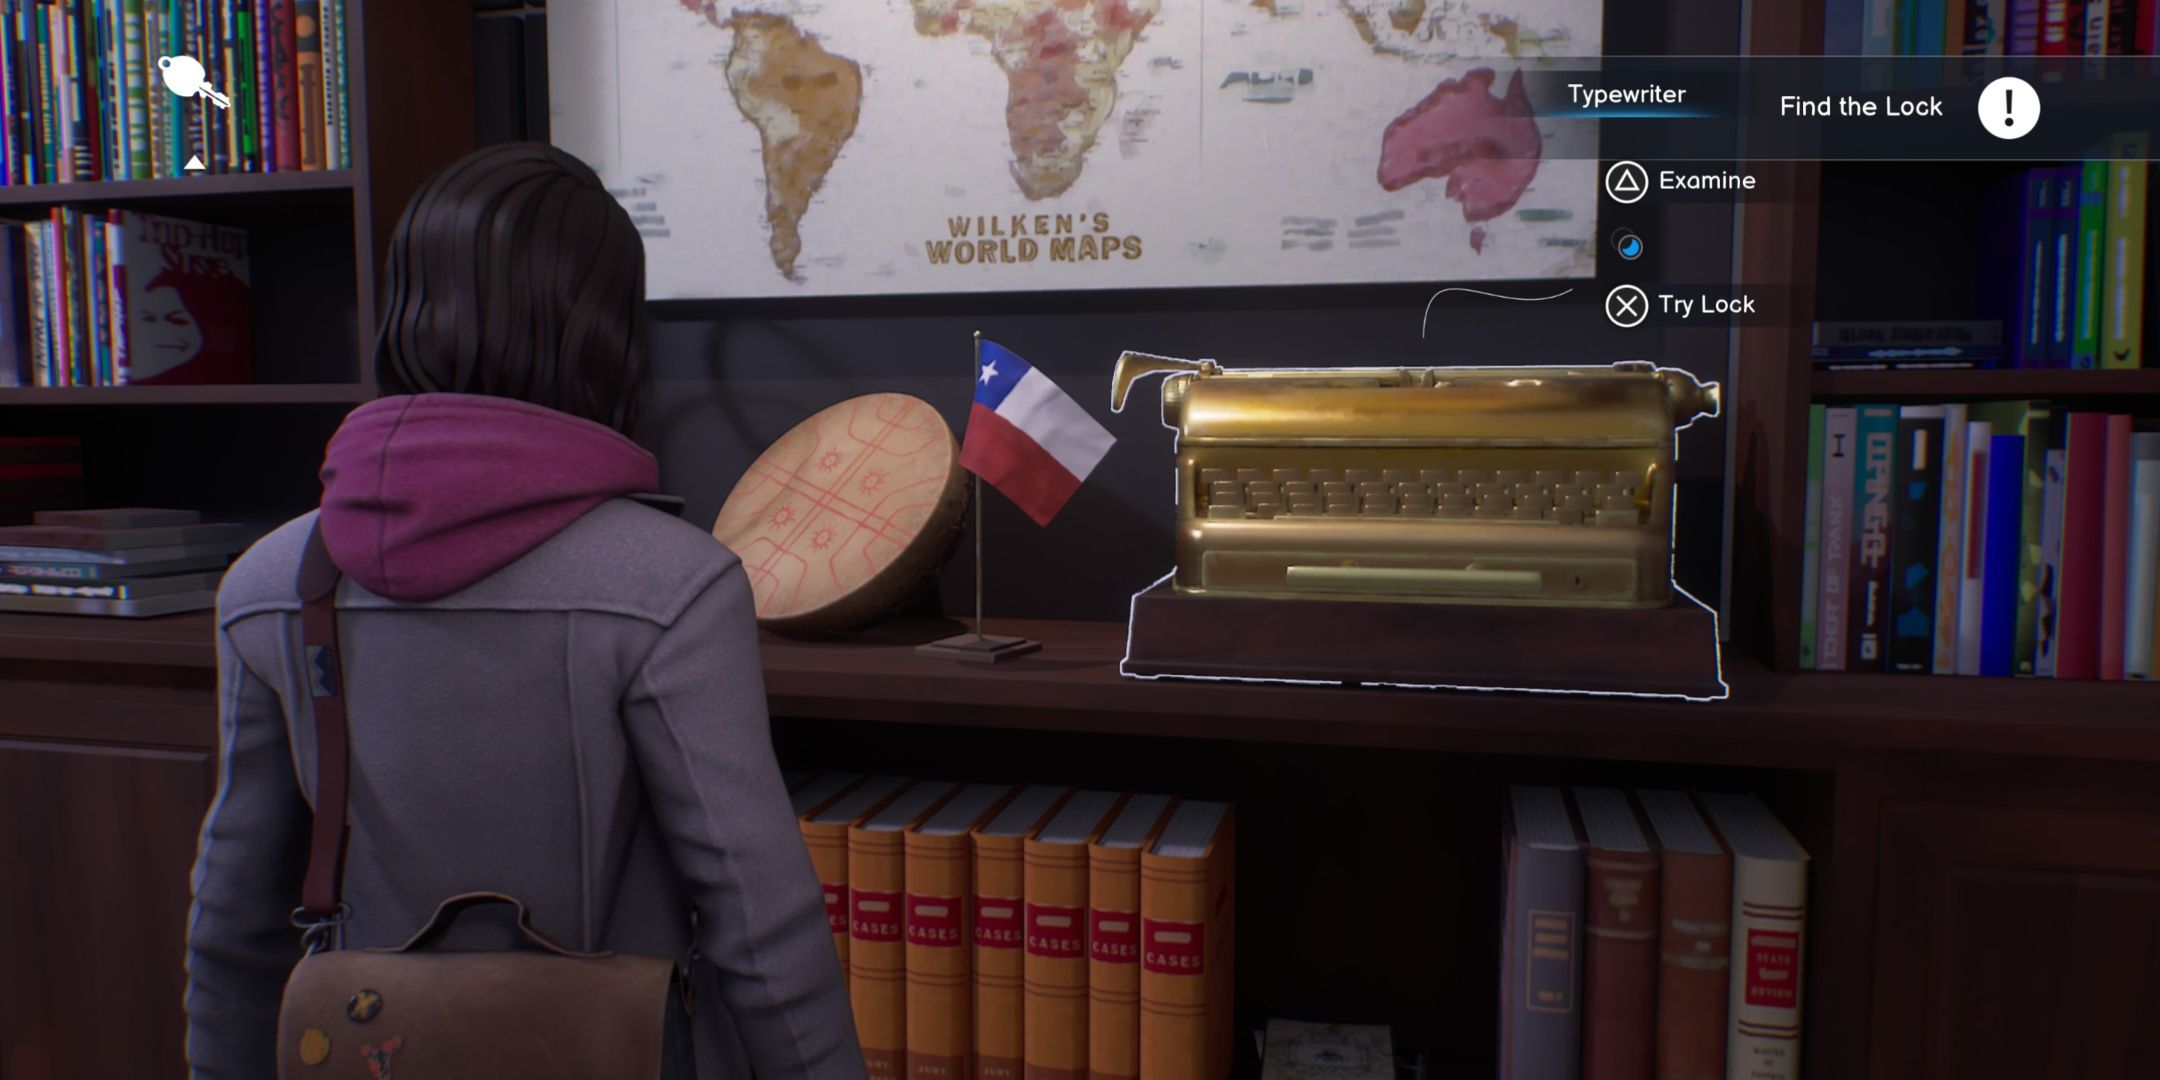
    The large golden typewriter might catch your attention, but you can’t interact with it just yet. Instead, check the bottom drawer of the filing cabinet near the entrance. Doing so will lead Max to collect several documents and lay them out on Lucas’ desk. These papers will confirm Maya was a student in Lucas’ class, regularly meeting him for writing mentorship.

    The crucial detail to crack the case lies on Lucas’ desk. Examine the family photo positioned there. You may not realize at first that you can rotate the photo, but you can—so do it. You’ll find a key taped to the bottom.

    During the pre-release phase, many players encountered a glitch in this section. While this issue may have been resolved by the time you play, if you’re experiencing audio cuts or notice the “Talk to Lucas” task reappearing after you’ve completed it, finding the key should help address these problems.

    Take the key, but strangely, it doesn’t unlock any drawers in the room. It’s time to check out the golden typewriter again.


    Max looking at Lucas' golden typewriter in Life is Strange Double Exposure.

    Open the typewriter, and you’ll uncover all the evidence you need. Just a heads up: you might not feel very fond of Lucas after this.

  • Unlocking the Thinking Outside the Box Trophy in Life is Strange: Double Exposure

    Unlocking the Thinking Outside the Box Trophy in Life is Strange: Double Exposure

    At Caledon University, there’s a mysterious group called Abraxas in Life Is Strange: Double Exposure. While the full details of their activities are still vague, it appears that most of their members are students in the arts. Those involved with Abraxas often have over-the-top personalities, engaging in everything from pranks to intricate puzzles.

    One of these intriguing puzzles can be encountered in the final scene of Chapter 1, and you’ll have the chance to crack it. If you’re interested in discovering how to locate and solve this engaging puzzle box to uncover its hidden treasures, keep reading. Don’t worry; we won’t overwhelm you with more riddles from Abraxas!

    Locating the Abraxas Puzzle Box

    In the concluding scene of Chapter 1, Max heads to Caledon’s campus to chat with Yasmin, Safi’s mother. You’ll begin in the North Quad, and by walking past the Pergola on your left, you’ll trigger a cutscene featuring Reggie.

    During the cutscene, you’ll see him frustrated with a puzzle box that he throws onto the ground. After the scene ends, pick up the puzzle box and ask Reggie about it. He explains that it’s an Abraxas Puzzle Box designed to test a crucial principle of Abraxas, known as “The Eye for Detail”.

    You’ll then enter examination mode, where you can rotate and interact with the box. You can choose to attempt solving it or walk away.

    Solving the First Layer of the Abraxas Puzzle Box

    The initial layer of the puzzle box is quite straightforward if you pay attention to Max’s dialogue hints.

    As you turn the box, you can interact with three visible sides:

    • The eye
    • Thomas Caledon
    • The crow

    The eye doesn’t trigger anything significant, but clicking on the Thomas Caledon side leads to a conversation between Max and Reggie about how he’s missing a bird, since the statue has two birds perched on his shoulders.

    Next, turn the box to the side with the crow and click on it. Max will notice wax around the crow, prompting a cutscene where Reggie melts the wax with a lighter.

    When the crow medallion drops into Max’s hand, you’ll switch back to examine mode. Turn the box back to Thomas Caledon and interact with it to position the bird on his vacant shoulder.

    This action causes the box to open, revealing another smaller box, the second layer of the puzzle. Reggie tells you to keep it, and Max adds the box to her bag.

    Solving the Second Layer of the Abraxas Puzzle Box

    You won’t get another chance to check the puzzle box until the end of Chapter 2, during a scene where Moses waits for you in the dark room. Before you go downstairs, head to the kitchen where the box is on the counter near the sink.

    The second layer of the Abraxas puzzle box is a bit more challenging than the first. You can interact with several faces of the box, but only the constellation face and the Abraxas logo face are needed.

    Initially, the dial won’t be usable, so turn the box to the constellations and click on it to get a close-up where you can manipulate the pegs.

    Your goal here is to use the pegs to form points of a constellation.

    To solve the constellation face:

    • Move the first peg down two notches.
    • Move the second peg down two notches.
    • Position the third peg down one notch.
    • Move the fourth peg down two notches.

    A panel on the Sense of Justice face will open and a dial will emerge. Take the dial and switch the view back to the Abraxas Logo face, then attach the dial to it. You can now examine this face and adjust the dials.

    You can pick either dial and rotate them left or right, but the solution is easier than it seems. Leave the outer dial untouched, and focus on the inner dial you just affixed to the face. Then, turn the inner dial to the right twice.

    A new panel will open. Turn the box to the opened panel and remove the lid to reveal a pin associated with the Abraxas Society.

    Completing the Abraxas puzzle box will unlock the “Thinking Outside The Box” achievement.

    What Happens After Solving the Abraxas Puzzle Box?

    Unfortunately, the outcome of solving the puzzle box is somewhat anticlimactic. Max will add the pin to her bag, and while speaking to Vinh and Diamond in Admin during the third scene of Chapter 3, she’ll receive a text from an unknown number in Dead World, commending her on solving the puzzle box and welcoming her into Abraxas.

    Max doesn’t seem particularly excited about this, and the topic only reappears at the Krampus party in Chapter 4. After collaborating with Safi, as you walk past two kids by the pirate mural, one will shout, “ONE OF US!”

  • Should You Hand Vinh His Package in Life Is Strange: Double Exposure?

    Should You Hand Vinh His Package in Life Is Strange: Double Exposure?

    In Chapter 1 of Life Is Strange: Double Exposure, Yasmin, Safi’s mother, requests a meeting with you in her office. Upon arrival, Vinh Lang, Yasmin’s assistant, informs you that she is currently occupied. He mentions he’s expecting a package and suggests you retrieve it while you wait.

    This task is optional and not necessary for completing the main story, but fulfilling it could offer some advantages later in the game. Whether or not to take Vinh’s request is your choice, but we’ve got you covered with all the details to help you decide.

    How to Find Vinh’s Package


    Finding Vinh’s package is a straightforward task. Head to the mailroom located down the hall from Yasmin’s lobby in the Admin area. Check one of the mail bins, and Max will comment that it looks like the package Vinh is waiting for.

    You can pick it up and add it to your inventory.

    You have two opportunities to deliver the package to Vinh: once before assisting Gwen in the library, and again after speaking with Yasmin. If you leave the Admin building without completing this, you’ll miss your chance.

    Should You Give Vinh His Package or Not?


    Vinh's Package On His Desk In Life Is Strange: Double Exposure.

    So, the main question is: should you assist Vinh or not?

    Give Vinh His Package

    If you choose to help Vinh by delivering his package, he will ask what you would like in return. Max will simply state that he now owes her a favor.

    You will have two opportunities to call in this favor from Vinh:

    • Chapter 2 – Scene 2: When you need access to Vinh’s phone, you can ask for your favor, and he will provide you with the passcode. If you skip this, you’ll need to hunt for the code elsewhere.
    • Chapter 3 – Scene 3: While gathering information about Maya Okada, you’ll converse with Vinh again. Toward the end, he will mention that he’s stopped giving out free secrets. You’ll then have the option to share one of three secrets with him, or if you haven’t asked for the favor yet, you can do so at this moment.

    Don’t Give Vinh His Package

    If you decide not to help Vinh and let him retrieve his package on his own, nothing significant occurs. He simply won’t owe you a favor, and this choice won’t impact your relationship with him.

  • Catching the Intruder in Life Is Strange: Double Exposure Tips

    Catching the Intruder in Life Is Strange: Double Exposure Tips

    Something strange is definitely happening at Caledon University. Max is caught in a twist of two timelines, and there’s the unsettling image of her pointing a gun at Safi. However, things get even weirder at the end of chapter three of Life is Strange: Double Exposure.

    As the episode nears its end, Max comes home only to discover that someone has broken into her house. The floor is scattered with glass, and her Arcadia Bay memorabilia and furniture have been destroyed. When she makes her way to her dark room, hoping to confront the intruder, she finds out that the culprit is someone she knows.

    Tracking Down Max’s Doppelganger


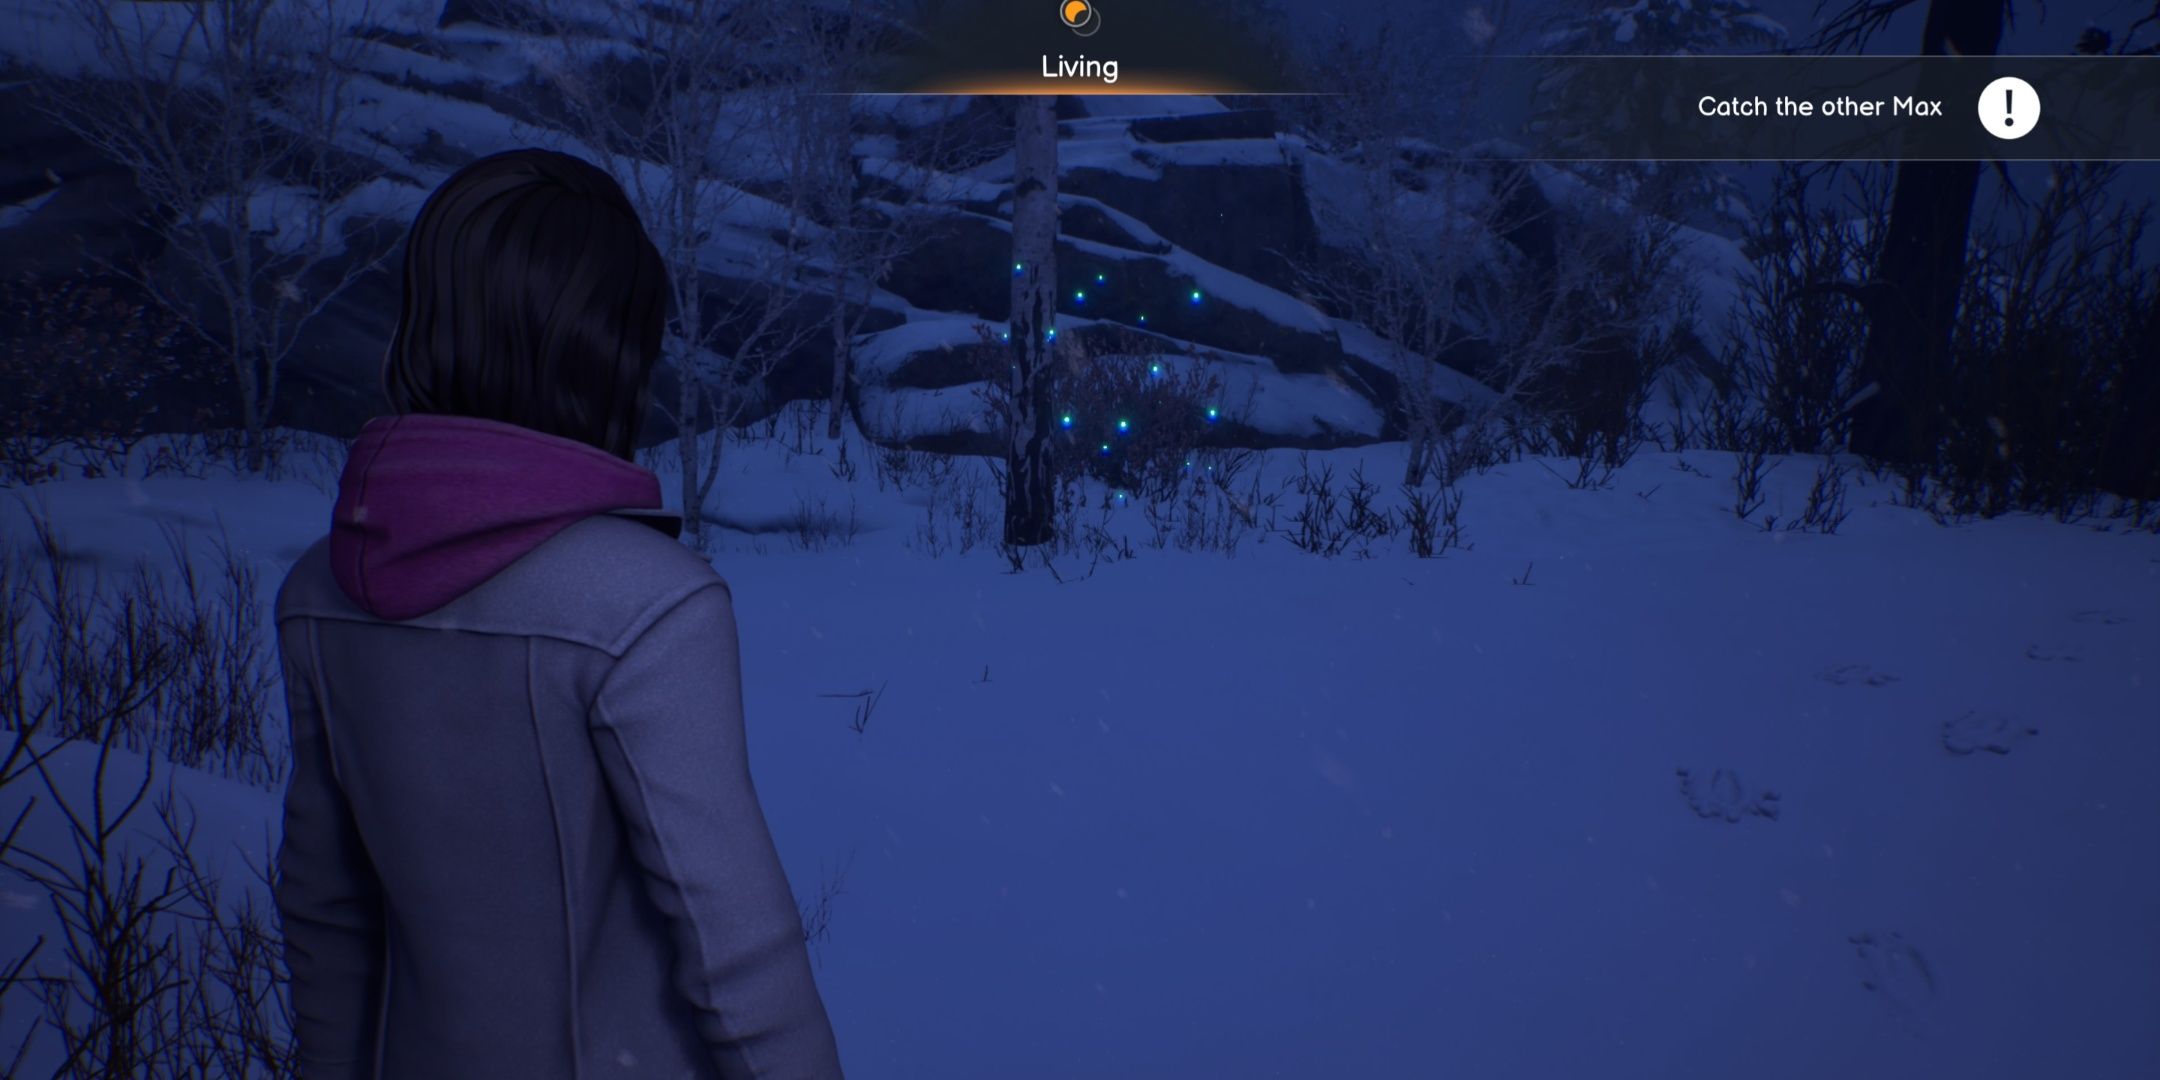
    After the Other Max escapes her home, she leads you on a snowy chase. The first challenge arises when she reaches a tree bridge, which collapses into a ravine as she crosses.


    Max looking at a portal to the Dead World in Life is Strange Double Exposure

    Fortunately, there’s another tree bridge you can access across a different ravine. Turn around and you’ll notice blue sparkles indicating a swap point to the Dead World right behind you. Switch over and then cross the now-stable bridge.


    Max pulsing to see Living World footprints in Life is Strange Double Exposure

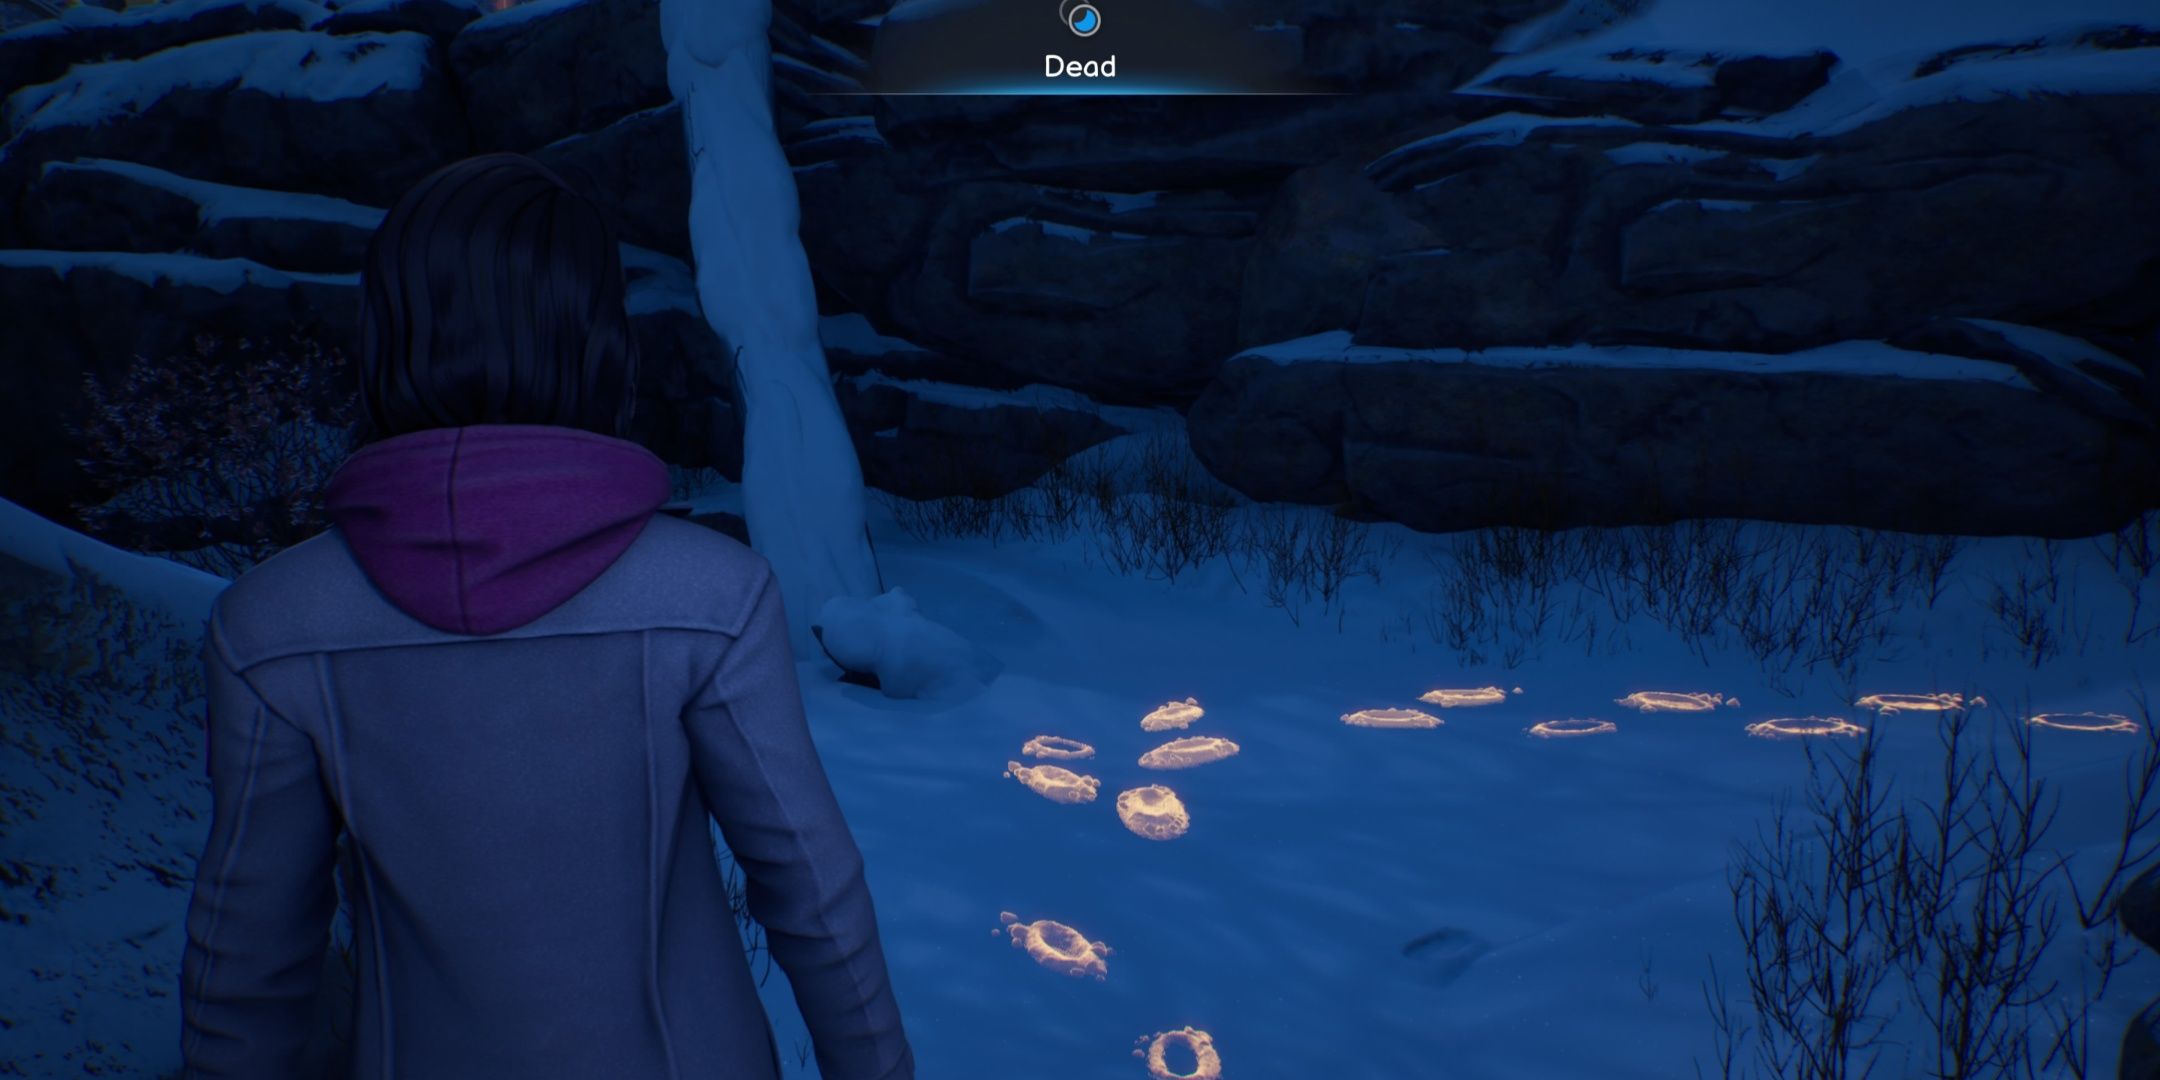
    There’s no visible path to the Living World next to the log. Instead, use Max’s Pulse ability to reveal the doppelgänger’s footprints in the snow. Keep following them, pulsing occasionally to make sure you stay on track.

    When Max asks, “How do I know which way?” pulsing will reveal the answer: go right.

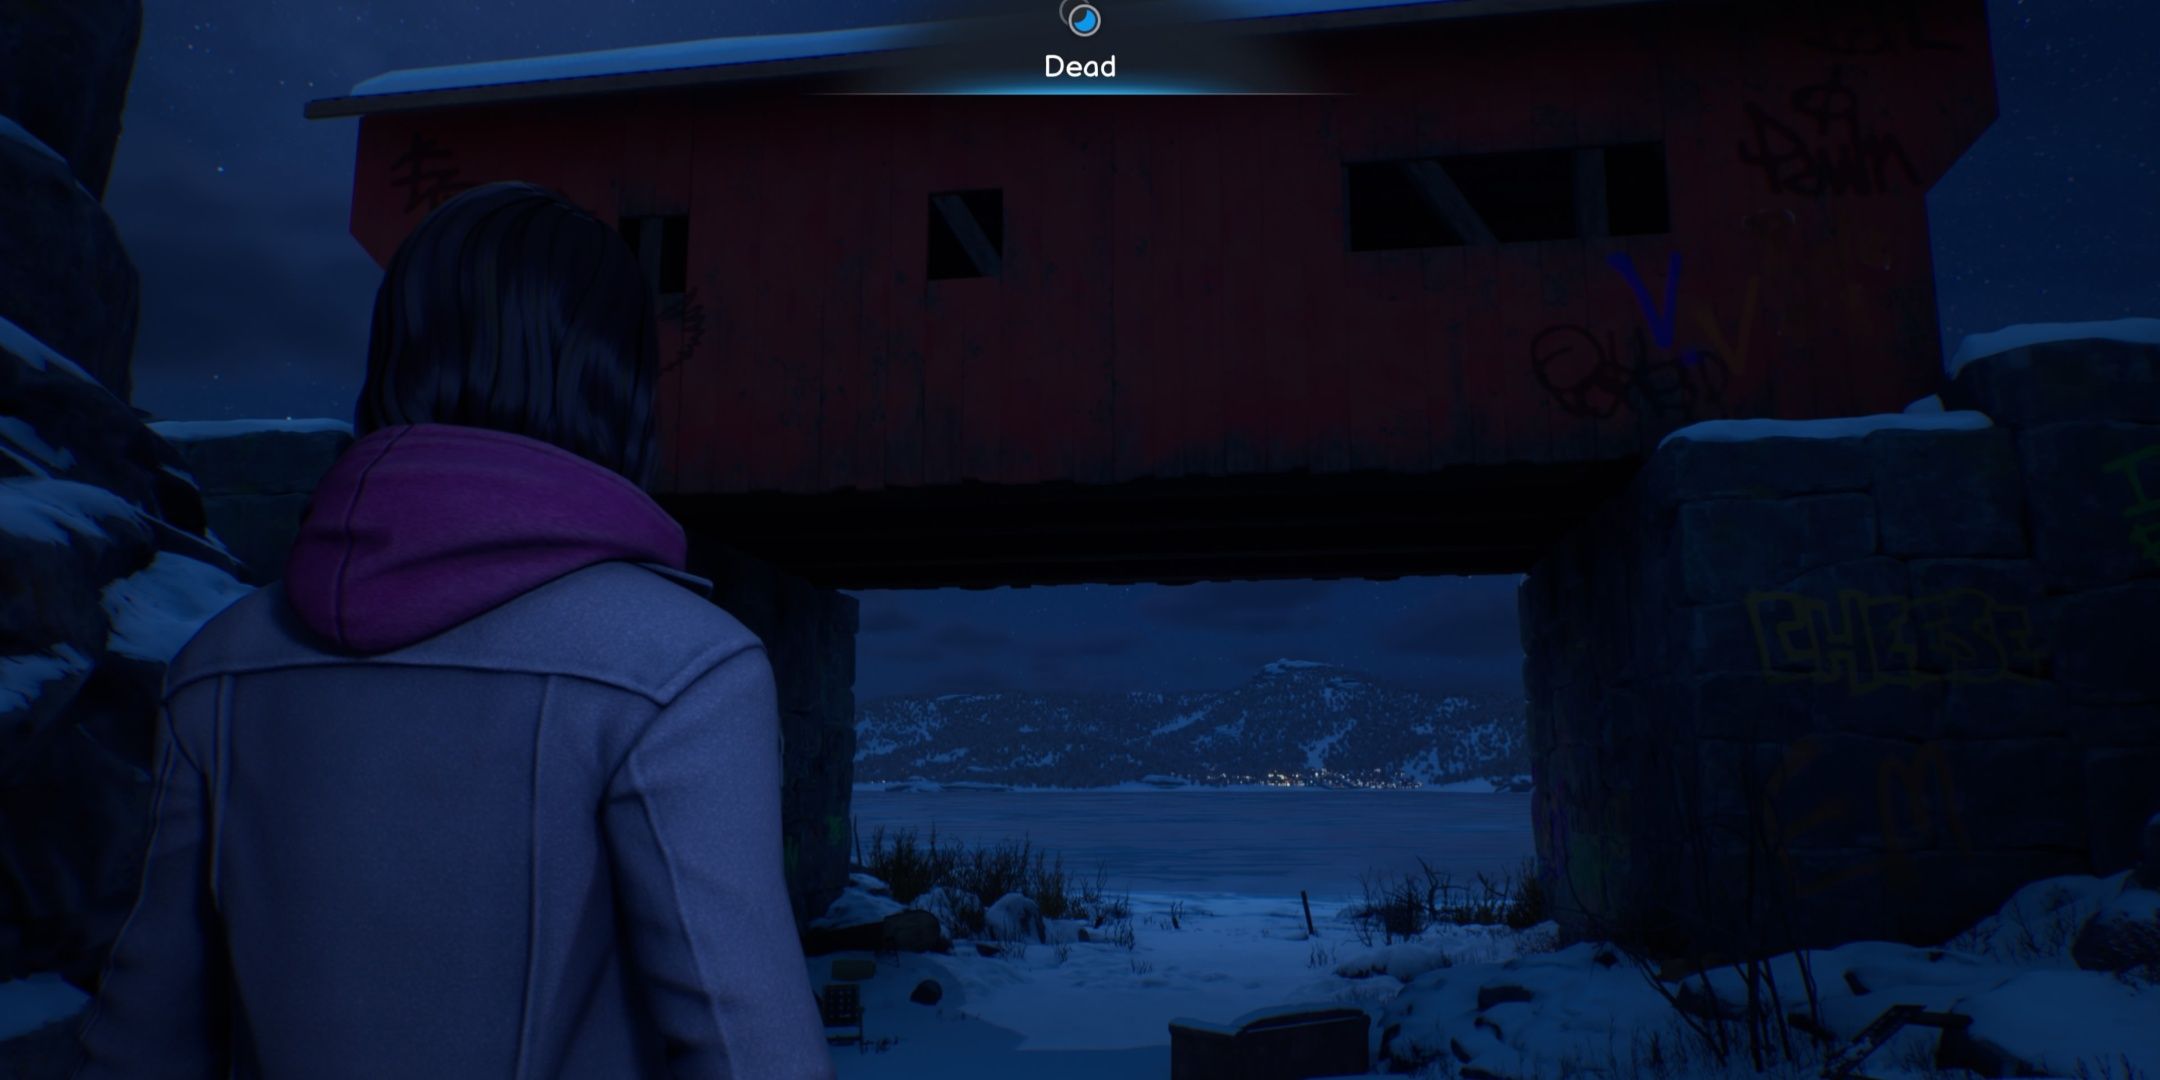
    Continue pulsing and following the footprints until you reach a crack in a wall. Approach it to trigger a cutscene as Max squeezes through. Once you’re on the other side, you’ll spot this bridge:


    Max looking at a covered bridge in the Dead World in Life is Strange Double Exposure

    To the right, you’ll see a portal back to the Living World. Use it, and once you cross to the other side, you’ll be set to confront your doppelgänger underneath the bridge.

  • Support Gwen’s Footage Dilemma or Encourage Her to Stand Strong?

    Support Gwen’s Footage Dilemma or Encourage Her to Stand Strong?

    In the universe of Life Is Strange: Double Exposure, Dr. Gwen Hunter faces serious allegations of selling drugs to students on campus. Consequently, she’s been suspended from school while awaiting a hearing with the campus review board.

    During your exploration of the Observatory in Chapter 2, you encounter Living World Gwen. She reveals a thumb drive containing footage of her alleged activities before tossing it into the trash with a lighter. You can either choose to save the footage or stand by Gwen as you watch it burn.

    If you decide to save the footage, Gwen reacts angrily, feeling unsupported. If you mention her ruining Safi’s book deal afterwards, she questions if you have been snooping through her belongings before storming off.

    Security Footage Of Gwen Dealing To Students In Life Is Strange: Double Exposure.

    At the start of Chapter 3, you have the opportunity to finally view the footage in the darkroom. Max notes that it’s strange how Gwen is looking directly at the camera, seemingly aware of the surveillance and the potential fallout.

    You later discover that it was actually Safi impersonating Gwen to seek revenge for what Gwen did to her book deal.

    Your next interaction with Living World Gwen occurs in Chapter 3 Scene 4: Nobody Wants to Drink Alone when you find her sitting by herself in a booth at The Snapping Turtle. Max returns the thumb drive to her, suggesting that it’s abnormal and encouraging her to examine the footage and challenge the accusations.

    Gwen Telling Max She Showed The Footage To The Board In Life Is Strange: Double Exposure.

    Later in Chapter 4, during the Krampus Party, Gwen mentions that despite everything being odd, she was still let go by the board. In response, she decides to help you and Safi confront Lucas.

    Gwen Telling Max She's Going To Try To Get Her Job Back In Life Is Strange: Double Exposure.

    Eventually, after the events of Chapter 5, Gwen returns to The Snapping Turtle and shares her plans of attempting to regain her previous job.

    If you decide not to give Gwen the thumb drive and suggest she fight back against the accusations in Chapter 3, the consequences for Gwen will mimic those of destroying the footage.

    What Happens If You Stand With Gwen

    Gwen And Max Watching The Footage Burn In Life Is Strange: Double Exposure.

    If you choose to support Gwen, the two of you will witness the thumb drive burning together. She expresses gratitude for your understanding and solidarity.

    Regardless of whether you interact with her at The Snapping Turtle in Chapter 3, she eventually gets fired by the board. This decision means she won’t participate with you and Safi in confronting Lucas during Chapter 4, and she will be absent in Chapter 5’s conclusion.

    Ultimately, the choice lies with you. However, we found that preserving the footage and later encouraging Gwen to fight back yielded a preferable outcome. By the end of Chapter 5, when she expresses her intent to regain her position, she says, “I failed Safi, but there are other students I can still support. I won’t just give up.”

  • Ultimate Pre-Order Guide for Xenoblade Chronicles X: Definitive

    Ultimate Pre-Order Guide for Xenoblade Chronicles X: Definitive

    It’s official: Xenoblade Chronicles X is making its way to the Nintendo Switch. This won’t simply be a rehash of the game that debuted on the Wii U; we can expect a Definitive Edition packed with enhanced visuals, additional story content, and other surprises that Nintendo hasn’t shared yet. True to their style, Nintendo unveiled this exciting news unexpectedly one Tuesday afternoon.

    Alongside the announcement, Nintendo released a trailer showcasing the upgraded version and immediately opened pre-orders. This news is even more thrilling for fans who have been eager for this title to arrive on the Switch for years. Both physical and digital versions of the Definitive Edition are available for pre-order as the game is set for release on March 20, 2025.

    Comparing the Digital and Physical Editions of Xenoblade Chronicles: Definitive Edition


    Physical Edition

    Digital Edition

    Physical Copy Of The Game

    ✓

    ✘

    14-Day NSO Free Trial

    ✘

    ✓

    The most noticeable distinction between the physical and digital versions of Xenoblade Chronicles X is the format: the physical version comes on a game card, while the digital version is accessed via the eShop. Additionally, opting for the digital version grants you a 14-day free trial for Nintendo Switch Online. Since the original game for Wii U included online features, a subscription is likely required to access the same elements in the Definitive Edition.

    Xenoblade Chronicles X: Definitive Edition

    Xenoblade Chronicles X: Definitive Edition is not just a remastered version of the original Wii U game; it includes improved graphics and additional story elements.

    Could This Link to Nintendo’s Next Console?

    shirtless character lying on the ground in xenoblade chronicles x: definitive edition

    Nintendo has yet to disclose whether Xenoblade Chronicles X will launch on its upcoming console, mainly because they haven’t provided details about it yet. However, the release date for the remastered game hints it could serve as a title for both the Switch and its successor. The Definitive Edition is set to debut solely on Nintendo Switch on March 20, 2025. By the end of this fiscal year, which ends shortly after the game’s launch, Nintendo has promised to share more information regarding its next console.

    Even without updates about a new console, Nintendo’s 2025 lineup is taking shape. Xenoblade Chronicles X: Definitive Edition is the third exclusive title already confirmed for next year, joining Donkey Kong Country Returns HD in January, and Metroid Prime 4 Beyond, which has a release window for 2025 but no confirmed date yet.

    FAQ

    Do I Need to Play Xenoblade Chronicles X Before I Play Xenoblade Chronicles 3?

    Before Xenoblade Chronicles 3 was released, Nintendo stated that playing previous titles was not necessary to understand the new game. With the announcement of the Definitive Edition, it will be interesting to see if that position changes.

    Is Xenoblade Chronicles 3 Bigger Than Xenoblade Chronicles X?

    So far, Xenoblade Chronicles 3 is the largest game in the franchise. However, with new content being added to the Definitive Edition of Xenoblade Chronicles X, this could soon change.