الوسم: Triple-A Games

  • Unveiling Riches and Rivals in the Forsaken Relics of Metaphor: ReFantazio

    Unveiling Riches and Rivals in the Forsaken Relics of Metaphor: ReFantazio

    Quick Links

    One of the final optional areas you’ll discover in Metaphor: ReFantazio is the Disgraced Ruins. This location becomes available after you take on the ‘The Apostles of the Apocalypse’ bounty. Being one of the extra challenges before the grand climax, it’s a fantastic opportunity to pass the time and enhance your Archetypes.

    Related

    Metaphor: ReFantazio – Nord Mines Walkthrough

    Get ready for an exciting journey through Nord Mine in Metaphor: ReFantazio.

    This region is filled with valuable treasures and, of course, plenty of adversaries to face. We have compiled all the essential information about the Disgraced Ruins for you.

    Navigating the Disgraced Ruins

    The Disgraced Ruins have many optional spots to explore. If your goal is to head straight for the bounty, just follow the main path down each map, and you’ll eventually arrive. However, for those determined to experience everything this area has to offer, we have it thoroughly detailed below.

    When you first enter, take the path on your left that leads to a dead end where you can pick up a Gold Beetle. After that, return and take the other path, as the northern route is blocked. You must navigate down a level on the eastern side of the map.

    On the second floor, the first left you can take leads you back to the first floor (where you can use the device to remove the blockage at the entrance). Next, drop down along the northern wall to go back to the second floor and head left, toward the west.

    On the third floor, you can take the first left, leading back up to the area with two ladders:

    • The ladder going down leads to the third floor, but you won’t be able to proceed further at this time, so it’s advisable to skip it for now.
    • The ladder that goes up takes you to the first floor, where you can remove the last block by interacting with the moving device. Additionally, you can find two treasure chests here.

    Returning to the third floor, follow the southern path to descend to the fourth floor.

    On the fourth floor, the westward path takes you back to the third floor, where you can collect two chests and interact with a device to clear a blockage.

    One of the treasure chests here contains a Bloodcoin Imitec, but it offers a Talisman of the Night if you’re interested.

    Next, jump down the wall north of the device to continue on the fourth floor. Take the northern path down to the fifth level, which leads west, to the sixth floor.

    On the sixth floor, head south, and soon on your right, you’ll notice a crawl space. Go through it, collect the treasure chest, and then climb the ladder to the next level.

    You’ll be back on the fifth level where you can retrieve a couple of treasure chests from the southernmost room.

    You can climb yet another ladder to return to the fourth floor, where you can clear the final block with the device, but it might not be worth the trouble.

    Head back to the sixth floor and take the eastern path to descend to the seventh floor, which leads directly to the eighth floor. On the first left, you’ll find a room with a treasure chest.

    The second left leads to a ladder going up a level. Move straight across to the next ladder and go up again, returning to the sixth level where you can use the last device to remove a blockage if you wish. However, it’s largely unnecessary, so it’s better to skip.

    On the eighth floor, just go to the northernmost room to face the bounty boss.

    Key Locations in the Disgraced Ruins
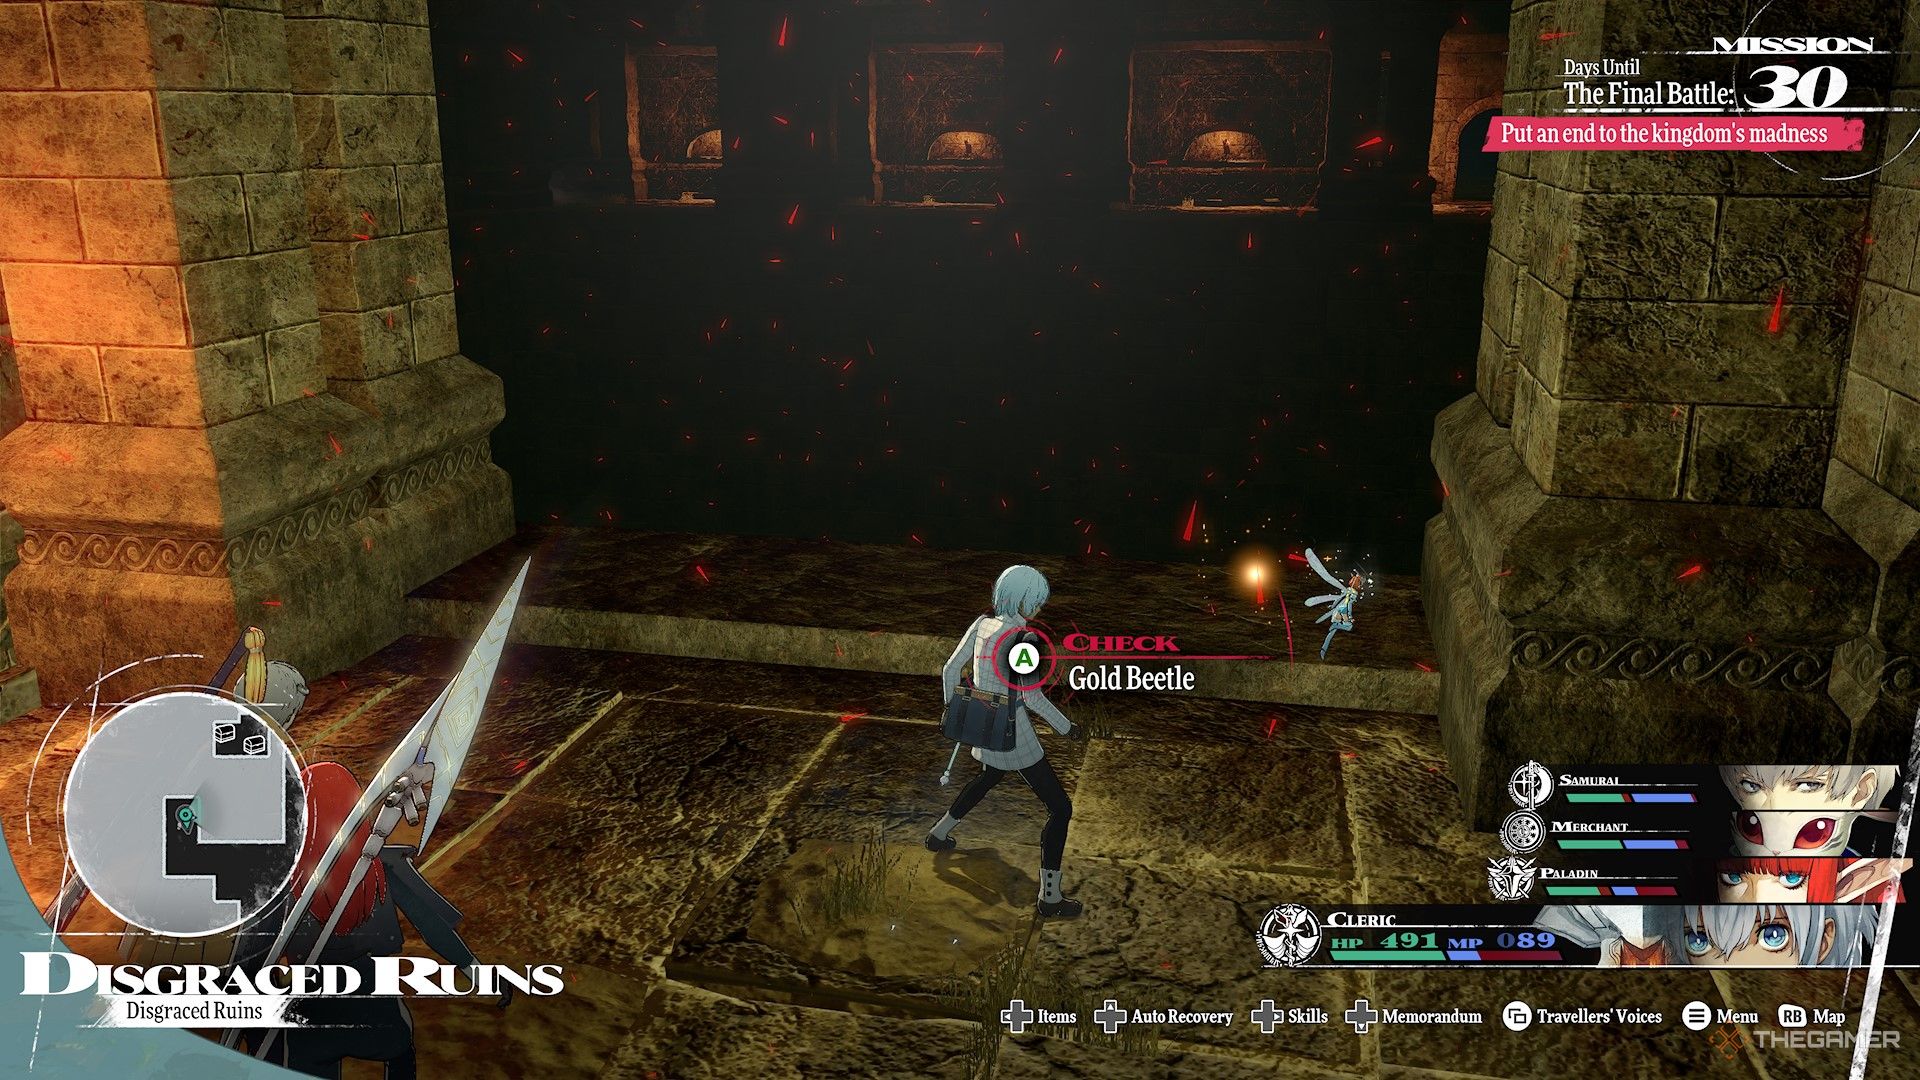
    Gold Beetle in the Disgraced Ruins in Metaphor ReFantazio.

    You can view a comprehensive breakdown of each floor and the locations of the items listed below in the preceding section.

    Items

    Item

    Location

    First Floor

    Gold Beetle

    At a dead end on the west side of the map.

    Tektite Monocle

    One of the treasure chests in the northern section contains a Bloodcoin Imitec, which drops this loot.

    Pure White Shoes

    Located in another treasure chest in the northern area.

    Third Floor

    Sancturion Gloves

    Found in one of the chests on the eastern side of the floor.

    Talisman of the Night

    Available in a treasure chest located on the eastern side, also containing a Bloodcoin Imitec.

    Fifth Floor

    Shingen’s Sign

    Contained in the treasure chest in the southernmost room.

    Bishamonten’s Sign

    Also found in a treasure chest in the southernmost chamber.

    Sixth Floor

    Sumptuous Magla Feast

    Directly ahead of the crawl space you encounter on the right while moving through this floor.

    Eighth Floor

    Great Sage’s Thawb

    Found in a small room on the western side of the floor.

    Miscellaneous

    Point Of Interest

    Location

    Plateau Mirage

    Located in front of the northernmost room on the eighth floor.

    Enemies in the Disgraced Ruins

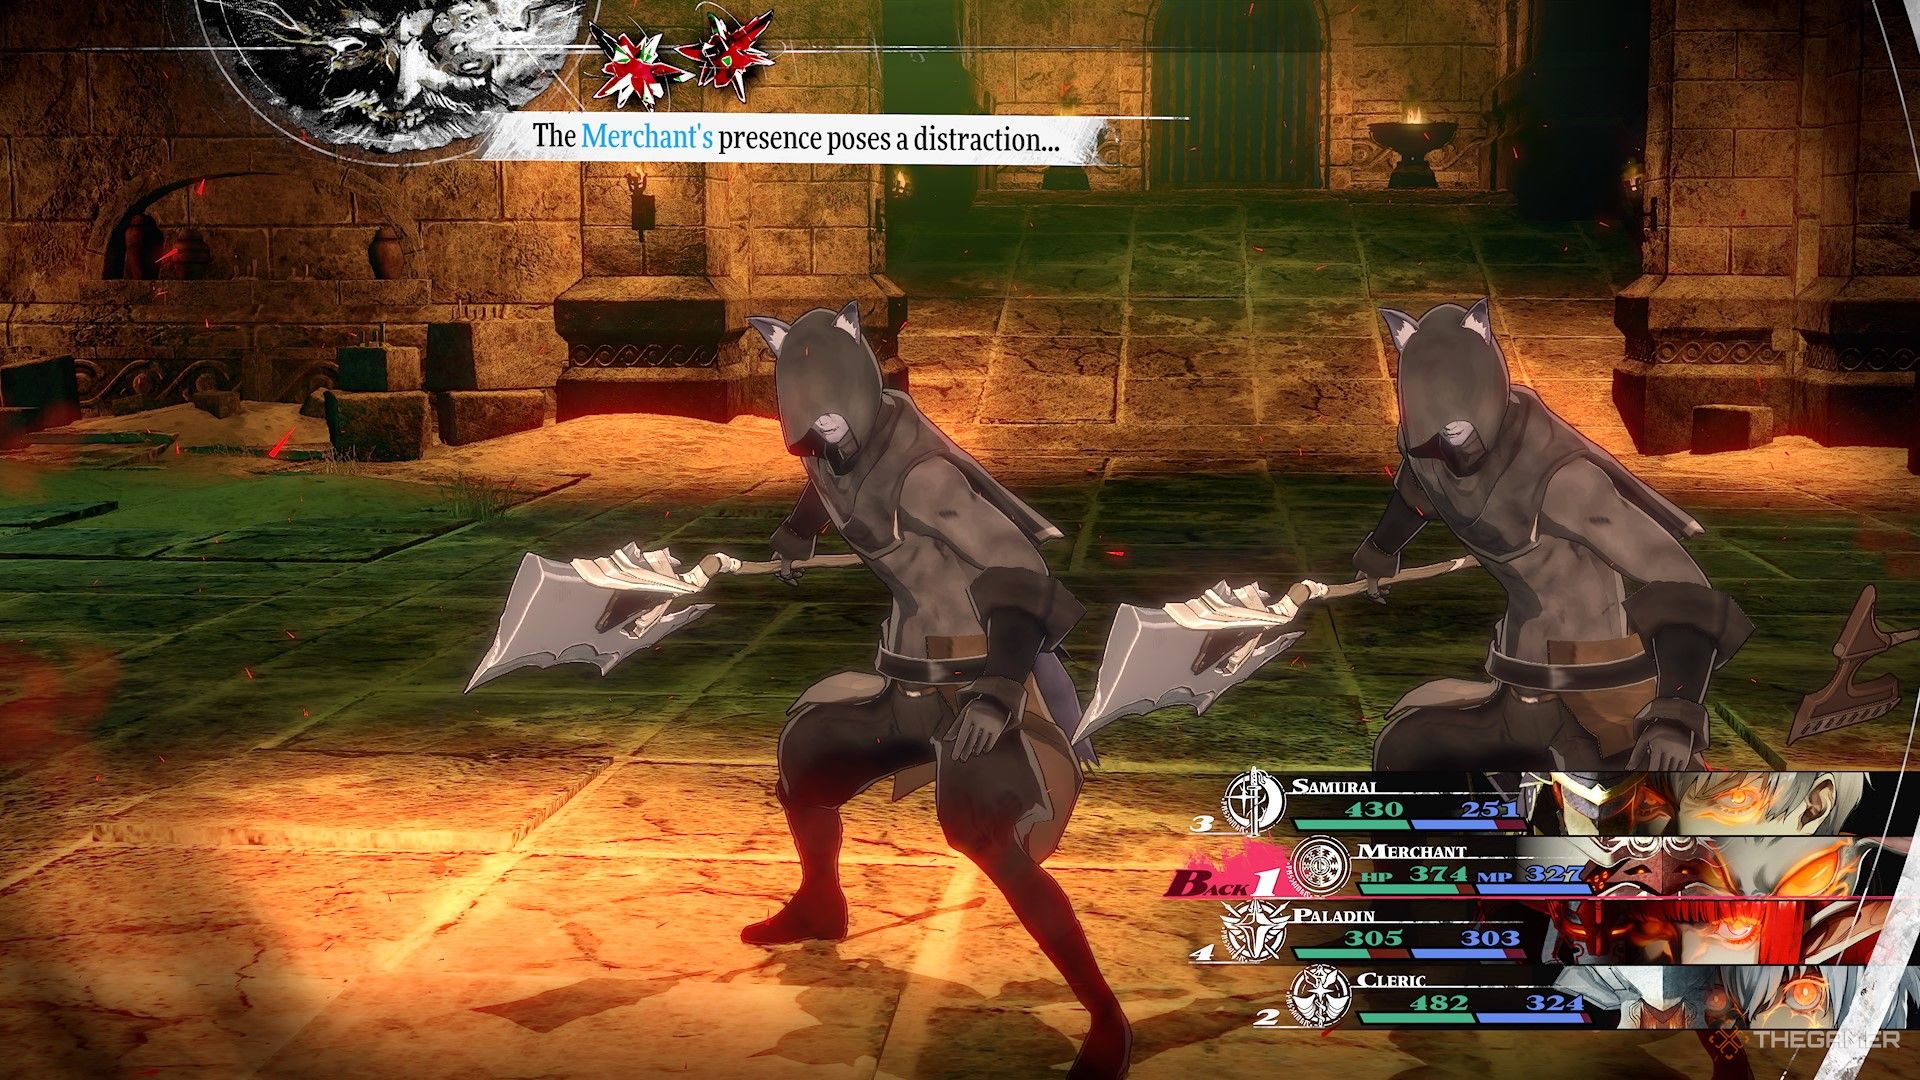
    The Merchant distracting a Bandit in Metaphor ReFantazio.

    Bandits can be distracted through the presence of a Merchant in your team or by using skills that cost Reeve.

    Enemy

    Notes

    Bandit (Hooded)

    Vulnerable to Pierce and Strike. Resistant to Electric, Wind, and Dark. Can be distracted by having a Merchant and abilities that cost Reeve.

    Bandit

    Weak to Fire and Ice. Resistant to Slash, Pierce, Strike, and Dark. Also distractible by a Merchant and skills costing Reeve.

    Sword General Malmorta

    Weak to Strike and Light, but resistant to Slash, Pierce, and Dark. It blocks Electric attacks.

    Dark Elmenta

    Weak to Light and resistant to Dark.

    Bloodcoin Imitec

    Weak to Light and resistant to Dark. It can be distracted using skills requiring Reeve.

    Bandit Chief Cistu (Bounty Only)

    Weak to Light and resistant to Dark. Also distractible by having a Merchant and skills that cost Reeve.

    Homo Sondro (Bounty Only)

    Weak to Strike, repels Slash, Pierce, and Electric, and is resistant to Light.

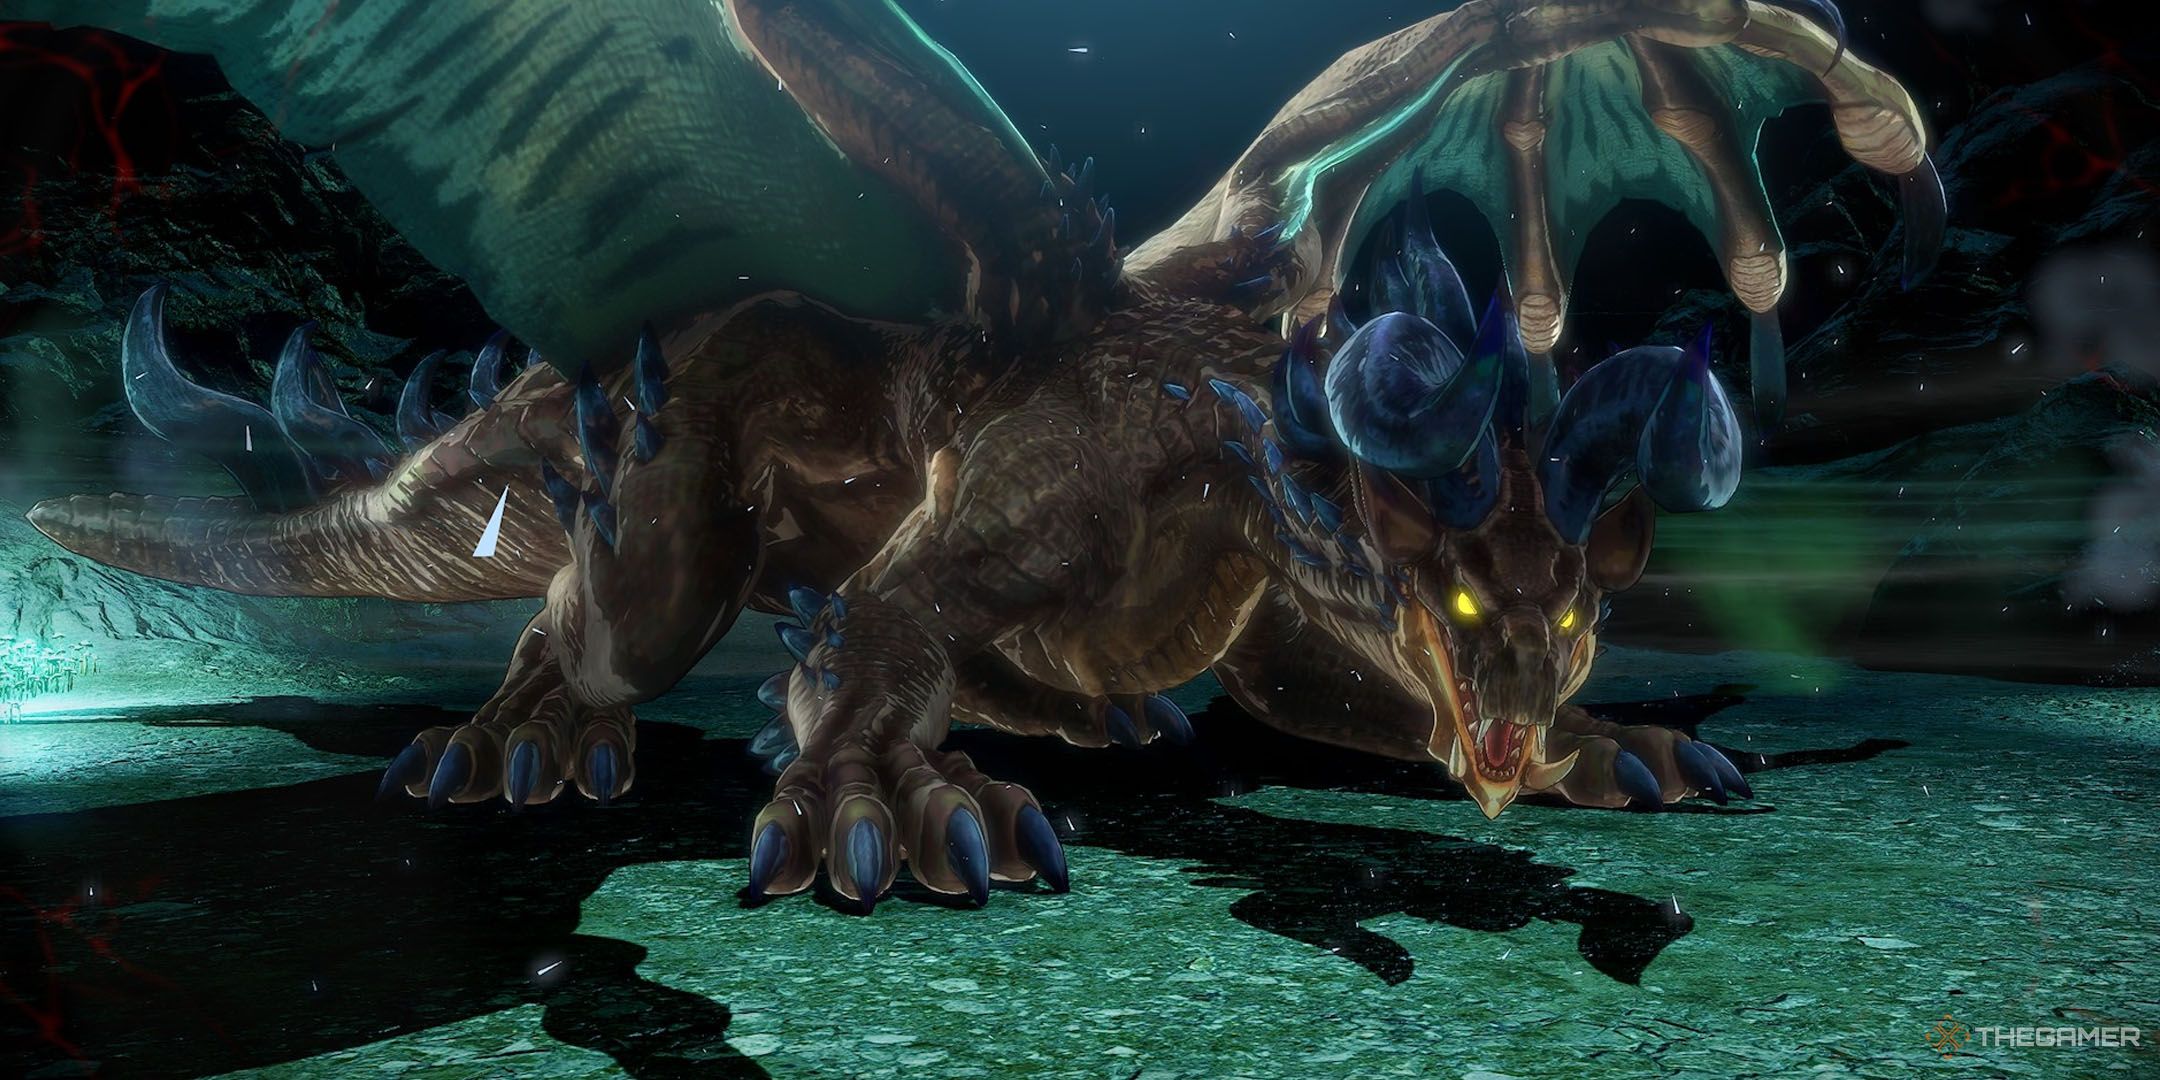
    Fire Dragon Mauna in Metaphor ReFantazio.

    Next

    Metaphor: ReFantazio – Fire Dragon Mauna Boss Battle Guide

    Learn how to defeat the Fire Dragon Mauna in the Nord Mines in Metaphor: ReFantazio.
  • The Evolution of Prince of Persia: A Chronological Journey Through the Games

    The Evolution of Prince of Persia: A Chronological Journey Through the Games

    Understanding the Prince of Persia Series

    The Prince of Persia franchise is a cherished series developed by Ubisoft that eventually paved the way for the Assassin’s Creed series. While both series feature thrilling parkour mechanics and dynamic combat, Prince of Persia is centered around a more defined setting, as opposed to the open-world exploration characteristic of Assassin’s Creed. However, the timeline of the Prince of Persia games can be a bit perplexing, as it includes original titles, spin-offs, and portable versions on devices like the Nintendo DS.

    A Complex Timeline

    Throughout its history, Prince of Persia has traversed through three distinct historical eras, each spotlighting different protagonists. Navigating the series’ chronology can be tricky, particularly with various remakes and adaptations adding to the complexity. After completing its initial trilogy, Ubisoft rejuvenated the franchise, marking the beginning of a new chapter.

    Most remakes and ports don’t significantly affect the overarching timeline, allowing players to focus on the primary narratives without getting lost in the details.

    The Games’ Historical Context

    Updated in October 2024, this overview of Prince of Persia reveals its popularity and the significant revival the series has enjoyed in recent years. It’s essential to understand when each game takes place within the franchise.

    Is There a Single Timeline?

    In short, no. Although all the games are set in an imagined version of Persia, they cover vastly different periods, particularly when looking at the various sub-series.

    While each game is placed in different contexts—ranging from ancient to medieval times—they don’t follow a strict chronological order. Given that time manipulation is a central theme within the games, this ambiguity is further pronounced.

    Game Release Date Historical Setting
    Prince Of Persia (2008) 2008 Ancient Persia
    The Fallen King 2008
    The Lost Crown 2024
    The Rogue Prince of Persia 2024
    The Sands Of Time 2003 Medieval Persia
    The Forgotten Sands 2010
    Battles Of Prince Of Persia 2005
    Warrior Within 2004
    The Two Thrones 2005
    Prince Of Persia (1989) 1989
    Prince Of Persia 2: The Shadow And The Flame 1993
    Prince Of Persia 3D 1999

    The majority of the installments take place during the medieval period, but apart from the Sands of Time trilogy, they exist as largely standalone stories. This independence allows players to delve into individual games without needing to follow a convoluted narrative.

    The Ubisoft Era

    In 2001, Ubisoft acquired the rights to the Prince of Persia series from Jordan Mechner, becoming the main developer for future titles. The majority of their releases, even those with different names, maintain connections to or are remakes of the Sands of Time series.

    With the launch of The Lost Crown, Ubisoft has explored fresh narratives within the franchise. Notably, the 2008 reboot provided a new interpretation of the series, spotlighting the versatility of its storytelling style.

    Highlights of the Series

    • Prince of Persia (2008): This soft reboot takes place in an independent timeline from the Sands of Time games, focusing on a nameless adventurer known as the Prince. He encounters a princess while trying to save his donkey and must combat Ahriman, the god of darkness.

    • The Fallen King: This game carries the narrative forward, featuring the Prince and Elika as they fight against Ahriman’s forces and teamwork to restore balance.

    • The Sands of Time: This original Ubisoft title marked a revolutionary shift in gaming with its time manipulation mechanics. The Prince must harness the Dagger of Time to correct the chaotic disruptions caused by greed.

    • The Forgotten Sands: Set between Sands of Time and Warrior Within, this game is about the Prince attempting to contain a resurrected mythological army.

    • The Two Thrones: This installment resolves plot threads from previous games while presenting new and advanced gameplay mechanics.

    • Prince of Persia: The Lost Crown: This latest entry introduces a new protagonist, Sargon, marking a significant departure by not centering around the original Prince.

    • The Rogue Prince of Persia: Featuring gameplay similar to Dead Cells, this spin-off delivers a fresh, side-scrolling experience.

    The Original Games

    The earlier titles, while differing from the modern renditions, form a vital part of the franchise’s legacy. The first Prince of Persia released in 1989 was a 2D platformer where players navigated perilous environments to rescue the Sultan’s daughter from a tyrant.

    The sequel, Prince of Persia 2: The Shadow And The Flame, continued the story just days after the first game, emphasizing combat and gameplay. However, Prince of Persia 3D ventured off with an unrelated narrative, set in a 3D environment and exploring different gameplay mechanics.

    Conclusion

    The Prince of Persia series has played a significant role in shaping video game history. Despite its complex timeline and varied gameplay mechanics, the franchise continues to captivate players with its rich storytelling and engaging gameplay. Whether revisiting the original classics or diving into the latest releases, there’s always a unique experience waiting to be discovered in this iconic series.

  • Who Should You Connect With on August 16th in the World of Metaphor: ReFantazio?

    Who Should You Connect With on August 16th in the World of Metaphor: ReFantazio?

    You’ll find yourself deeply engaged in Metaphor: ReFantazio before a limited-time event crops up. On August 6, while traveling aboard the Gauntlet Runner to an island, the main character is urged to spend some quality time with one of several companions. The catch? You can choose only one option, leaving the others off the table.

    For each choice you make, there are two rewards waiting for you: a distinct accessory and exclusive insights about one of your companions. We’ve explored all the options, so we’re here to give you a quick overview of what you might miss out on if you don’t connect with the right character.

    A quick note: each unique accessory gives a consistent bonus of +5 to all stats. This will change in a future event where unique weapons will be available, but for this first event on August 6, each accessory is distinct in its own way.

    Strohl

    Strohl is feeling the pressure to come up with strategies against Louis. The protagonist can provide some encouragement, assuring him that a solution will present itself, prompting Strohl to reflect on how easily ideas seem to flow to him.

    As they reminisce about their friendship, Strohl expresses that he recognized a bond with the protagonist early on, ultimately seeing them as a younger sibling. It’s a heartfelt moment!

    Reward Description
    Nacre Bracelet Crafted from a blue seashell, it’s said to protect against sea disasters since seashells endure the depths and wash ashore.

    Hulkenberg

    Hulkenberg praises Neuras for enhancing the Gauntlet Runner’s seaworthiness. She thanks him for the more tranquil sea conditions compared to the chaos from the previous night. A humorous imitation of Strohl’s seasickness lightens the mood.

    However, a more serious tone emerges when Hulkenberg recounts an incident from her past when she faced ridicule for caring for a comatose prince. You have the opportunity to console her as she reflects on her own struggles.

    Reward Description
    Narwhal’s Horn Given to Hulkenberg by a fortune teller, it’s believed to shield against sea threats. She once dismissed it as nonsense, only to become ill the next day when she missed a boat that later went missing.

    Heismay

    Heismay invites the protagonist to the watchtower, highlighting the tranquility of the setting while noting the fish have been unsettled due to recent turmoil with a sea creature.

    Their conversation takes a poignant turn when Heismay recalls a fishing trip with his son, where his child was incredulous that a fish might be caught by someone like him.

    Reward Description
    Falcon Anklet An amulet inspired by "a bird that glides through the sky like a shooting star."

    Junah

    Junah expresses gratitude for the protagonist’s role in saving Fidelio’s life and addresses the arrival of the Magnus brothers, recalling they aren’t inherently bad people but advising caution with them.

    The mood shifts when Junah requests a lullaby. Don’t hesitate to give her one!

    Reward Description
    Aeon Pearl Ring A pearl originating from oysters; Junah explains that as pearls take time to form, they symbolize growth and prosperity.

    Fidelio

    Fidelio harbors distrust towards the group, which is understandable given the circumstances. However, engaging with him allows for a glimpse of his softer side. He warns the protagonist to keep an eye on Junah but ultimately shows gratitude for his rescue.

    Reward Description
    Handmade Flute Created by a Brilehaven merchant, this flute is rumored to repel evil spirits.

    Basilio

    Basilio starts off by downplaying the conversation since his brother has advised him against speaking with outsiders. His fears of a "portal to hell" lurking in the depths eventually lead to an entertaining exchange.

    He expresses gratitude for saving his brother and admits his brother’s words don’t always resonate with him, revealing a caring nature beneath his bravado.

    Reward Description
    White Sand Rose A charm thought to bring good luck, though Basilio humorously admits it’s not a genuine one.

    In each interaction, you’ll find layers of character development and intriguing rewards, enhancing your experience in Metaphor: ReFantazio.

  • Mastering the Challenge: Your Ultimate Guide to the Leogron Boss Battle in ReFantazio

    Mastering the Challenge: Your Ultimate Guide to the Leogron Boss Battle in ReFantazio

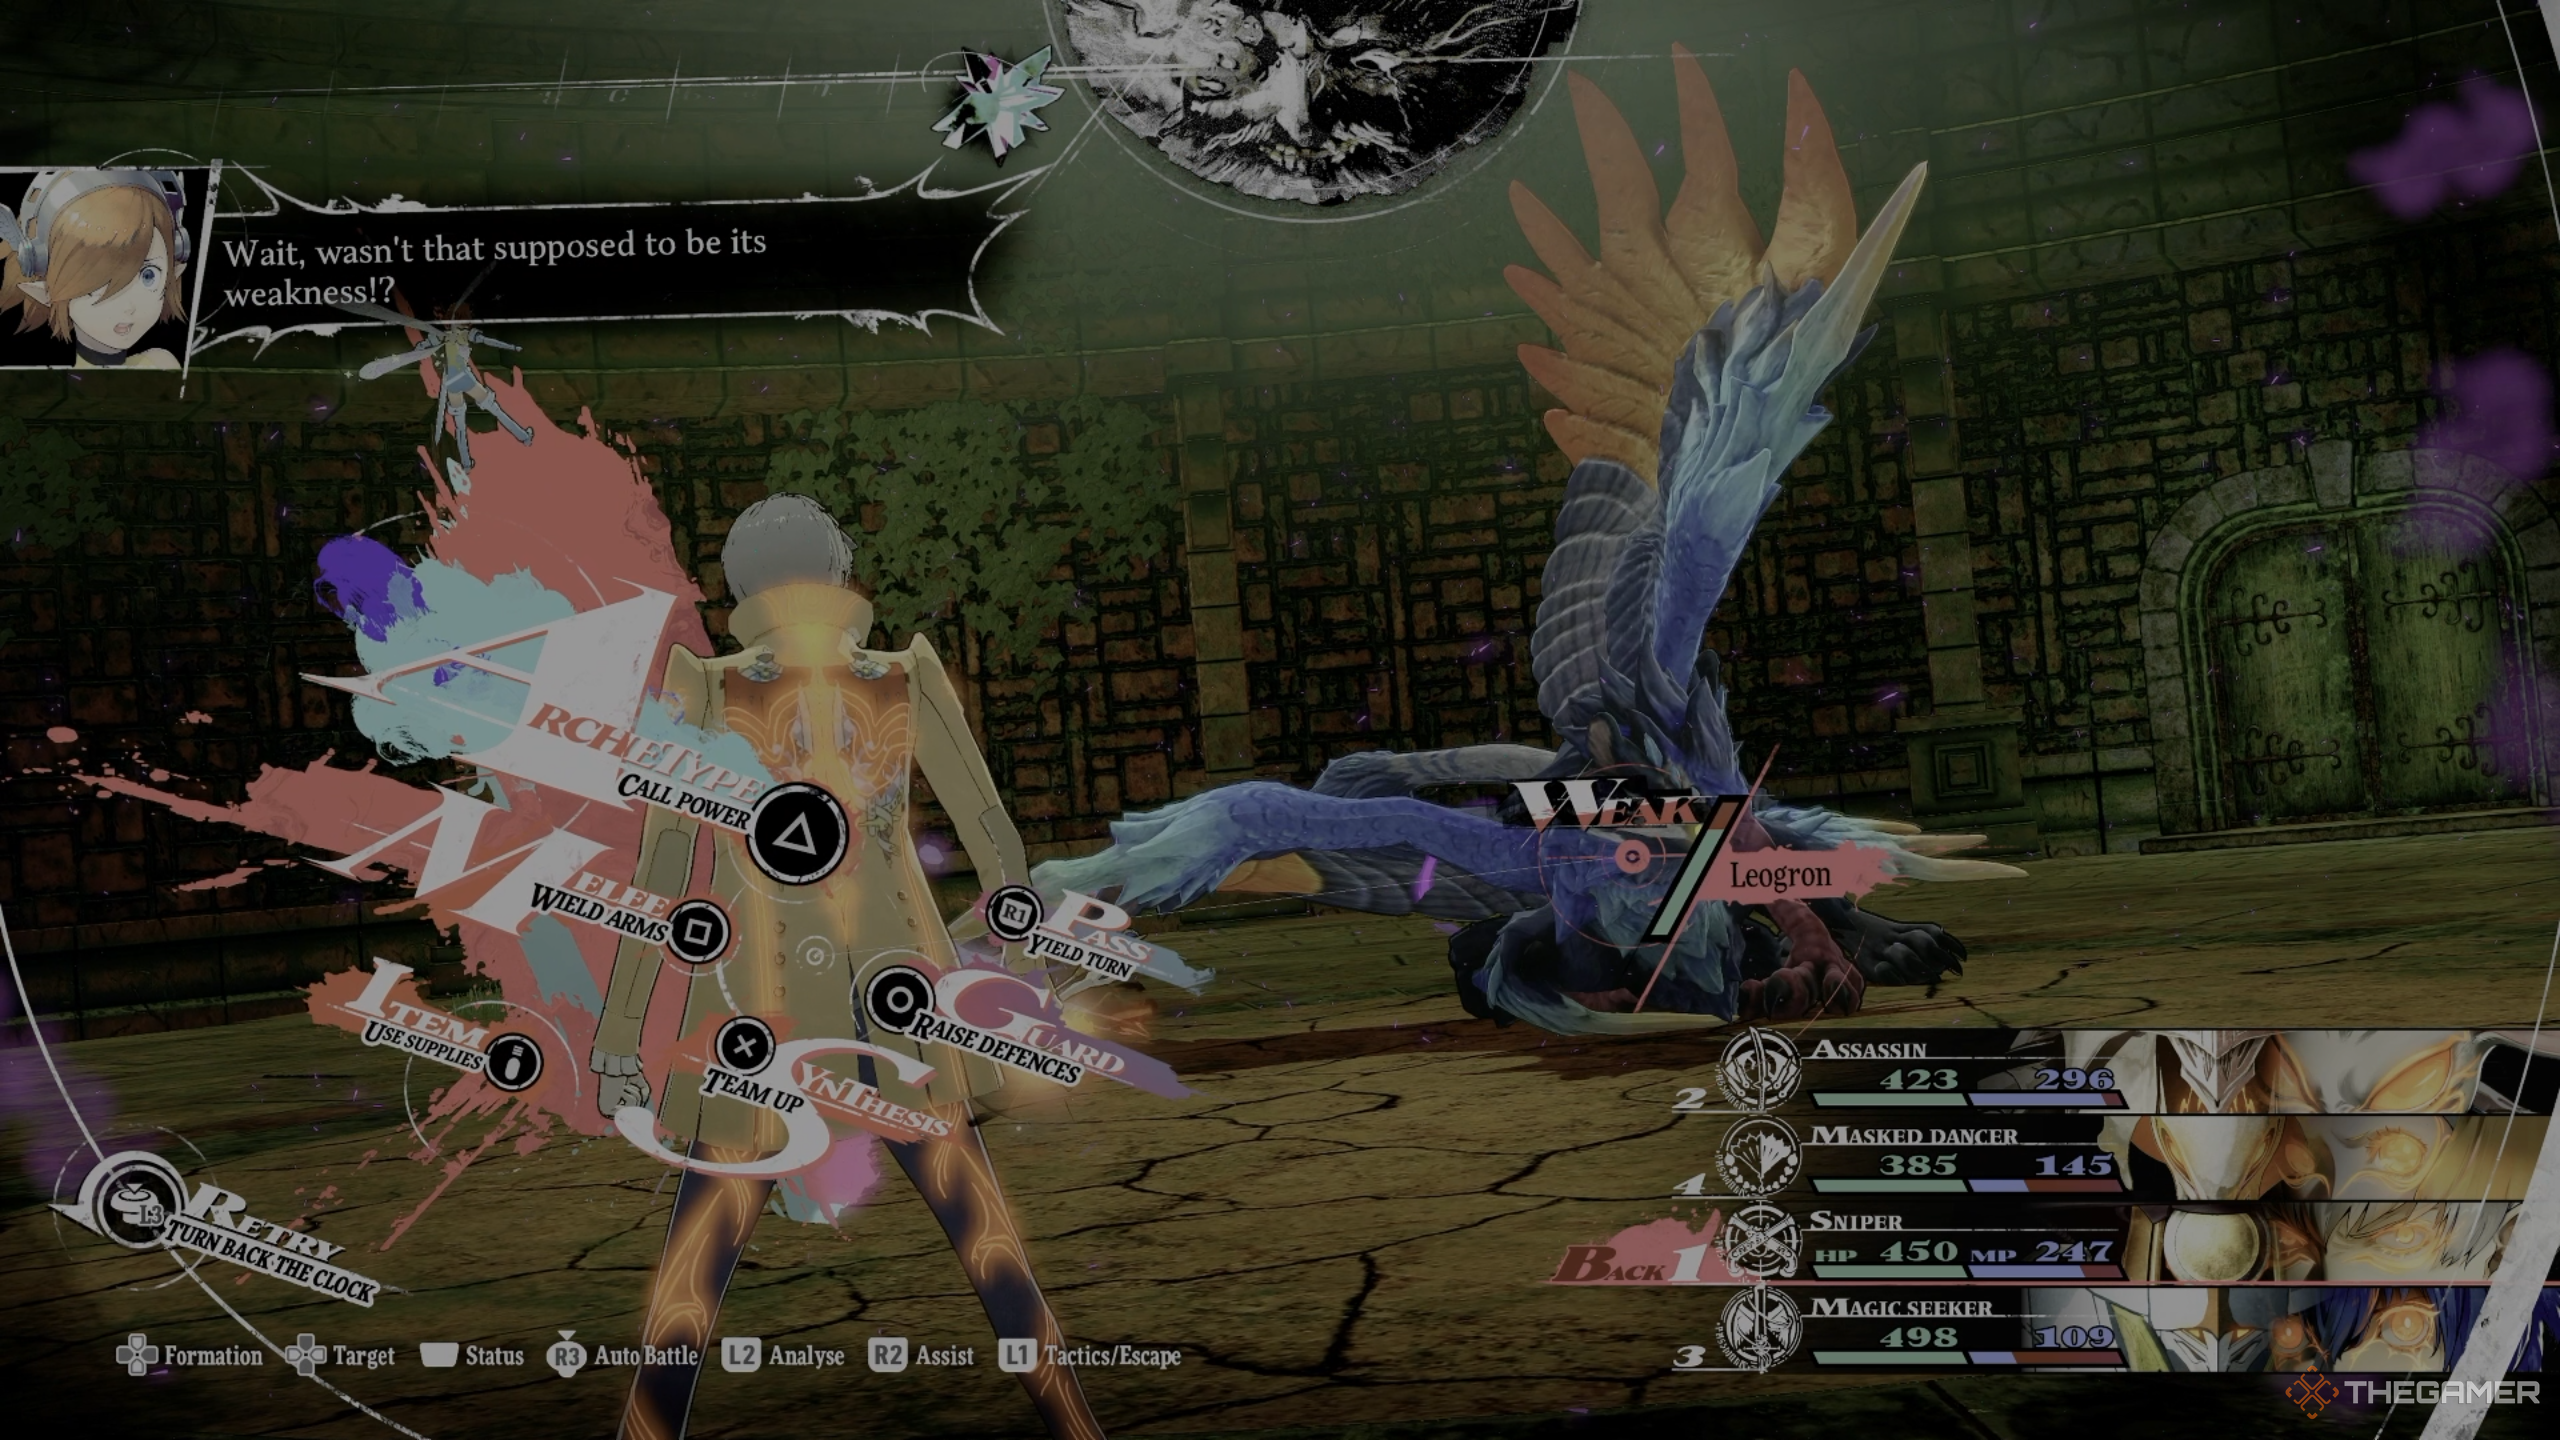
    You’ve made it to the top of the Spire of Blind Faith, and now you’re ready to face off against the boss of this Metaphor: ReFantazio dungeon, Leogron. This battle can be quite challenging, but with the right preparation, it can actually be simpler than some of the “standard” enemies lurking on the floors below.

    We suspect you would prefer the easier route, so we’ve compiled our strategies from when we took down Leogron and reclaimed its Monster Notebook to complete the “Peak Curiosity” quest. Our guide details Leogron’s abilities, its weaknesses, our party composition, and how we managed to defeat it in a streamlined manner over three rounds with minimal hassle.

    Party Composition

    Character

    Archetype

    Formation

    Strategy

    Protagonist

    Magic Seeker or Cleric

    Back

    The protagonist will focus on healing. (If you have a stronger option, use that instead.)

    Junah

    Masked Dancer

    Back

    Junah will unleash Crimson Flame to deal significant Fire damage.

    Strohl

    Sniper

    Back

    Strohl should utilize the synthesis skill Mania Bullet.

    Heismay

    Assassin or Sniper

    Back

    If playing as an Assassin, Heismay can use Illusive Dream, which will exploit weaknesses with Mania Bullet. Consider stealing a Crystal Ice Gunbai as well. If in Sniper mode, pair with Strohl using Mania Bullet.

    Abilities and Weaknesses

    Kakasados boss in Metaphor ReFantazio

    Weaknesses

    Slash

    —

    Pierce

    Weak

    Strike

    —

    Fire

    Weak

    Ice

    Absorb

    Electric

    —

    Wind

    Repel

    Light

    Resist

    Dark

    —

    Abilities

    Attack

    Description

    Chimera’s Wing

    Single-target high Wind damage.

    Chimera King’s Wing

    Massive Wind damage to the entire party.

    Deadeye Stance

    Guarantees a 100% hit rate.

    Ice Claw

    Ice-based physical attack on a single target with a chance to inflict Frostbite.

    Heat Riser

    Boosts all stats by one level.

    Blizzaton

    Heavy Ice damage to a single target.

    Boneclaw Slash

    Single-target Slash attack.

    Strategy for the Battle

    Junah attacks the Leogron with Flame Vortex in Metaphor: ReFantazio.

    This battle revolves around exploiting Leogron’s dual vulnerabilities to Fire and Pierce attacks. While it poses a significant threat, you can bring it down quickly as long as you keep a healer available to continuously cast powerful spells and keep your party in good health.

    If you have Junah with you, her Flame Vortex spell is particularly effective at this point in the game. With her high Magic stat combined with its strong Fire damage, it will deal substantial hurt to Leogron. Though it requires 42 MP, which is a fair bit, this is your primary foe in the dungeon.

    Strohl should concentrate on using the Sniper’s Mania Bullet, which will inflict significant Pierce damage while also granting a temporary weakness to Pierce (though that won’t matter much here), as well as Slash and Strike attributes.

    The Slash attribute is critical—having an Assassin enables Illusive Dream to land multiple hits of Slash damage. With Heismay’s high Agility, alongside the Assassin’s natural agility, you will be able to attack frequently.

    Don’t forget to steal the Crystal Ice Gunbai, a weapon suitable for the Commander Archetype, if you have the Assassin on your team (or if you’ve learned Steal).

    Consider lowering Leogron’s boosted Hit and Evasion if it uses Heat Riser, since you want to avoid wasting turns due to misses. If you miss several times, your party can quickly accumulate significant damage.

    As long as no one in your group is weak to Wind, even Chimera King’s Wing shouldn’t cause serious issues that lead to frequent knockouts.

    After you bring down Leogron, it drops a substantial amount of EXP. We were already at a high level—the protagonist was level 47—and afterward, they jumped to 49!

    Next

    Metaphor: ReFantazio – Homo Fulquilo Boss Battle Guide

    Here’s how to defeat Homo Fulquilo in the Nord Mines in Metaphor: ReFantazio.
  • Unlocking the Secrets of the Monster’s Notebook in Metaphor: ReFantazio

    Unlocking the Secrets of the Monster’s Notebook in Metaphor: ReFantazio

    The Spire of Blind Faith in Metaphor: ReFantazIo is essentially an upgraded version of the Forsaken Tower, another optional dungeon you encounter earlier in the game. Both dungeons are brief and straightforward but packed with tough enemies that can catch you off guard if you’re unprepared.

    This is where the guide comes into play. While you probably won’t need much help moving between levels, we’ve included detailed information about the fierce monsters you’ll face and the treasures you can collect along the way. Additionally, you’ll find a link to our comprehensive guide on the dungeon’s boss, the formidable Leogron.

    Preparing for the Quest

    As you enter, an NPC known as the Confident Woman will advise you to fight from a distance, especially against the boss, Leogron. This is wise advice; you’ll want to keep your party members as far back as possible.

    Our preferred party consists of the protagonist as a Magic Seeker, Strohl as a Sniper, Junah as a Masked Dancer, and Eupha as a Summoner.

    Tip: If you haven’t obtained Eupha yet, consider waiting until she joins your party (it’s worth it), or alternatively, use either Hulkenberg or Heismay in a back-row position.

    Make sure to bring plenty of Ailment Absolutions to combat Poison. Having someone who can use Patra would also be beneficial.

    Floors One Through Three

    The initial floor is a simple climb upward. The second floor hosts two Kokasados, fierce bird-like enemies you should be well-acquainted with by now. However, they can still pose a significant threat at this stage, so play it safe and try to stun them.

    On this floor, you’ll also encounter a single Gold Elmento (which is weak to Wind) and a valuable Heavenly Water. That’s all there is on the second floor, so move on to the next level.

    The third floor is more challenging. You’ll face nearly a dozen weaker bird enemies that will try to overwhelm you while a Leogryph casts area-of-effect spells. Focus on clearing the birds, then move behind the Leogryph and take it down using Pierce attacks. Watch out for its strong Wind attacks.

    Enemy Name Notes
    Kokasados Their Peck of Death can easily knockout characters unless you have a Defense buff. They can also inflict a party-wide poison with Poison Breath. Be cautious! Weak to Pierce.
    Leogryph Casts area-of-effect spells that can deal heavy Wind damage and debuffs. Also, it has single-target attacks. Weak to Pierce.
    Faithwight Magileto Deals heavy Light damage with spells like Hamadyne. Resists all physical attack types but is weak to Strike.
    Summon Knight Skeleto Summoned by Faithwight Magileto, uses Tetrakarn to repel physical attacks. Weak to Light.

    The elevation begins with a straightforward ascent, but be cautious, as there are trickier enemies ahead.

    Floors Four Through Six

    On the fourth floor, you’ll find a Magla Flower, which creates bee-like enemies until it’s destroyed. Be ready for unexpected encounters, as a Kokasados could close in quickly after defeating the flower.

    Another Magla Flower further in spawns bird enemies that charge at you quickly. There’s also a chest containing the Tidal Trident, which boasts 336 ATK and converts standard attacks into Wind damage.

    This floor can be difficult, featuring two Kokasados and a Faithwight Magileto. To manage this correctly, lure the first Kokasados to the doorway, chip away at it, and then repeat with the second.

    Important Notes

    Always be aware of the Faithwight Magileto’s capabilities.

    After defeating enemies, grab the Gold Beetle you find, then head up to the sixth floor. You’ll encounter approximately 20 Level 25 Sword Noble and Spear Noble Magiletos on this level. Don’t underestimate their ability to hit hard when they swarm!

    In the back, there’s a solitary Faithwight Magileto. Use Fae Sight if you want to identify it before it unleashes area damage on you. This floor also contains a Trove Imitec and a Graced Water item.

    Unlocking Treasures

    Among the loot on this floor, you’ll find Nasu’s Longbow, which enhances skills that strike multiple times to guarantee maximum hits!

    Floor Seven

    At last, the seventh and final floor brings you face-to-face with the boss of the Spire of Blind Faith, Leogron. For complete strategies and insights into this battle, be sure to check out our detailed guide on this formidable foe.


  • Metaphor: ReFantazio – Ultimate Guide to Conquering the Homo Sabara Boss Battle

    Metaphor: ReFantazio – Ultimate Guide to Conquering the Homo Sabara Boss Battle

    Quick Links

    Before the heroes and heroines of Metaphor: ReFantazio arrive on the shores of Virga Island, they encounter a fearsome deep-sea creature. This antagonist is a human, and as we’ve seen, humans spell trouble in this game. Homo Sabara, with its enormous tentacles, launches an attack on the gauntlet runner, leaving it up to the party to stop its destruction.

    Check out our guide on how to defeat Homo Sabara. We’ll detail our party composition, the skills we utilized, the timing for our attacks, and everything else we faced in this battle.

    Pre-Battle Preparation

    Even though the narrative thrusts you into a shocking confrontation with Homo Sabara, you can spend as much time as you need planning aboard the Gauntlet Runner before confronting the enemy.

    With Junah joining the party, remember that only four characters can fight at once, meaning someone must sit out. However, the game tutorial reminds us that we can easily swap party members using a turn icon.

    To set up effectively for this battle, you mainly need a character with Medica and either Recarm or a stash of Revival Balms in case they are necessary. While we usually dive into extensive details regarding setups, following our suggested party configuration should suffice.

    Recommended Party Setup

    Character Details

    Character Archetype Formation Strategy
    Protagonist Magic Seeker Front Use Kande for its Electric damage, as Homo Sabara is weak to it. Prioritize using Medica regularly and allow synthesis with Strohl.
    Strohl Pugilist Front Use Crushing Fist if synthesis isn’t an option. When able, unleash Super Energy Ray for powerful damage.
    Hulkenberg General Front Cast Matarukaja to enhance the party’s Attack. Use multi-target skills like Flaming Vanguard to eliminate tentacles.
    Junah Masked Dancer Back Utilize Kande and help Hulkenberg with her Blusterblast Maneuver synthesis for massive Fire damage while reducing enemy accuracy.

    Homo Sabara Moveset and Affinities

    Homo Sabara Moveset:

    Move Description
    Slam Strike Deals single-target damage.
    Random Strike Hits all party members. The damage increases based on how many legs remain.
    Ink Spew Attempts to inflict various status effects.
    Soul Scream Activated when HP is low, granting four turn icons.

    Battle Strategy

    In combat scenarios where additional, weaker foes accompany the boss, the tactic often suggests focusing on the main enemy. For Homo Sabara, this is nearly the case, but it’s essential to deal adequate damage to eliminate its legs swiftly.

    The Random Strike move becomes more dangerous with each active leg. Thus, while Slam Strike poses minimal risk, the potential surge in damage from Random Strike must be managed by targeting those legs quickly.

    However, focus mainly on single-target attacks aimed at defeating Homo Sabara, although you can have Hulkenberg use multi-target abilities while casting Matarukaja to boost party stats.

    Strohl should utilize Crushing Fist for decent damage, especially if his Health is high, while the protagonist frequently casts Medica to keep Strohl in top condition. If he has at least two turn icons available, switch to the synthesis skill Super Energy Ray for maximum impact.

    Using attacks like Kande (or Kandera if available) is beneficial as Homo Sabara is weak to Electric damage. This will not only deal notable damage but also increase your turn icons, which is why we recommend Junah to do the same.

    Once Homo Sabara’s HP drops to about a third, ensure that your next turn is dedicated to finishing it off before it can retaliate. At critical HP levels, it will use Soul Scream, gaining additional turn icons and unleashing powerful assaults with Random Strike.

    Avoid letting the battle prolong too much; if things get tough, employ Medica and revive fallen allies as necessary, ensuring your victory against Homo Sabara.

  • Exploring the Gracia Forest: A Journey Through Metaphor: ReFantazio

    Exploring the Gracia Forest: A Journey Through Metaphor: ReFantazio

    Are you ready to assist a weary woman in Metaphor: ReFantazio? You definitely should! She’s been through quite a lot. All she needs are seven Dragonthistle Berries to complete the “Soldier’s Solace” side quest for her, located in Brilehaven. It sounds straightforward, but there’s an optional dungeon waiting for you: Gracia Forest.

    This guide will walk you through Gracia Forest from start to finish. It’s not the longest area in Metaphor: ReFantazio, but we’ve highlighted the important enemies and treasure. We’ll also cover the boss encounter with Kokasados, so you can wrap up “Soldier’s Solace” quickly.

    How to Start “Soldier’s Solace”


    As you exit the Spider’s Den in Brilehaven the morning after the tournament events, keep an eye out for a woman with a quest icon above her head, just a short distance away.

    She’ll reveal her troubles and request your help in gathering seven Dragonthistle Berries from Gracia Forest, which will be marked on your map. Let’s get moving – it’s that simple!

    Before you leave, we suggest you
    take on any additional dungeon-related side quests, to save yourself travel time later. Completing them all in one trip is more efficient.

    Gracia Forest: Before the Plateau

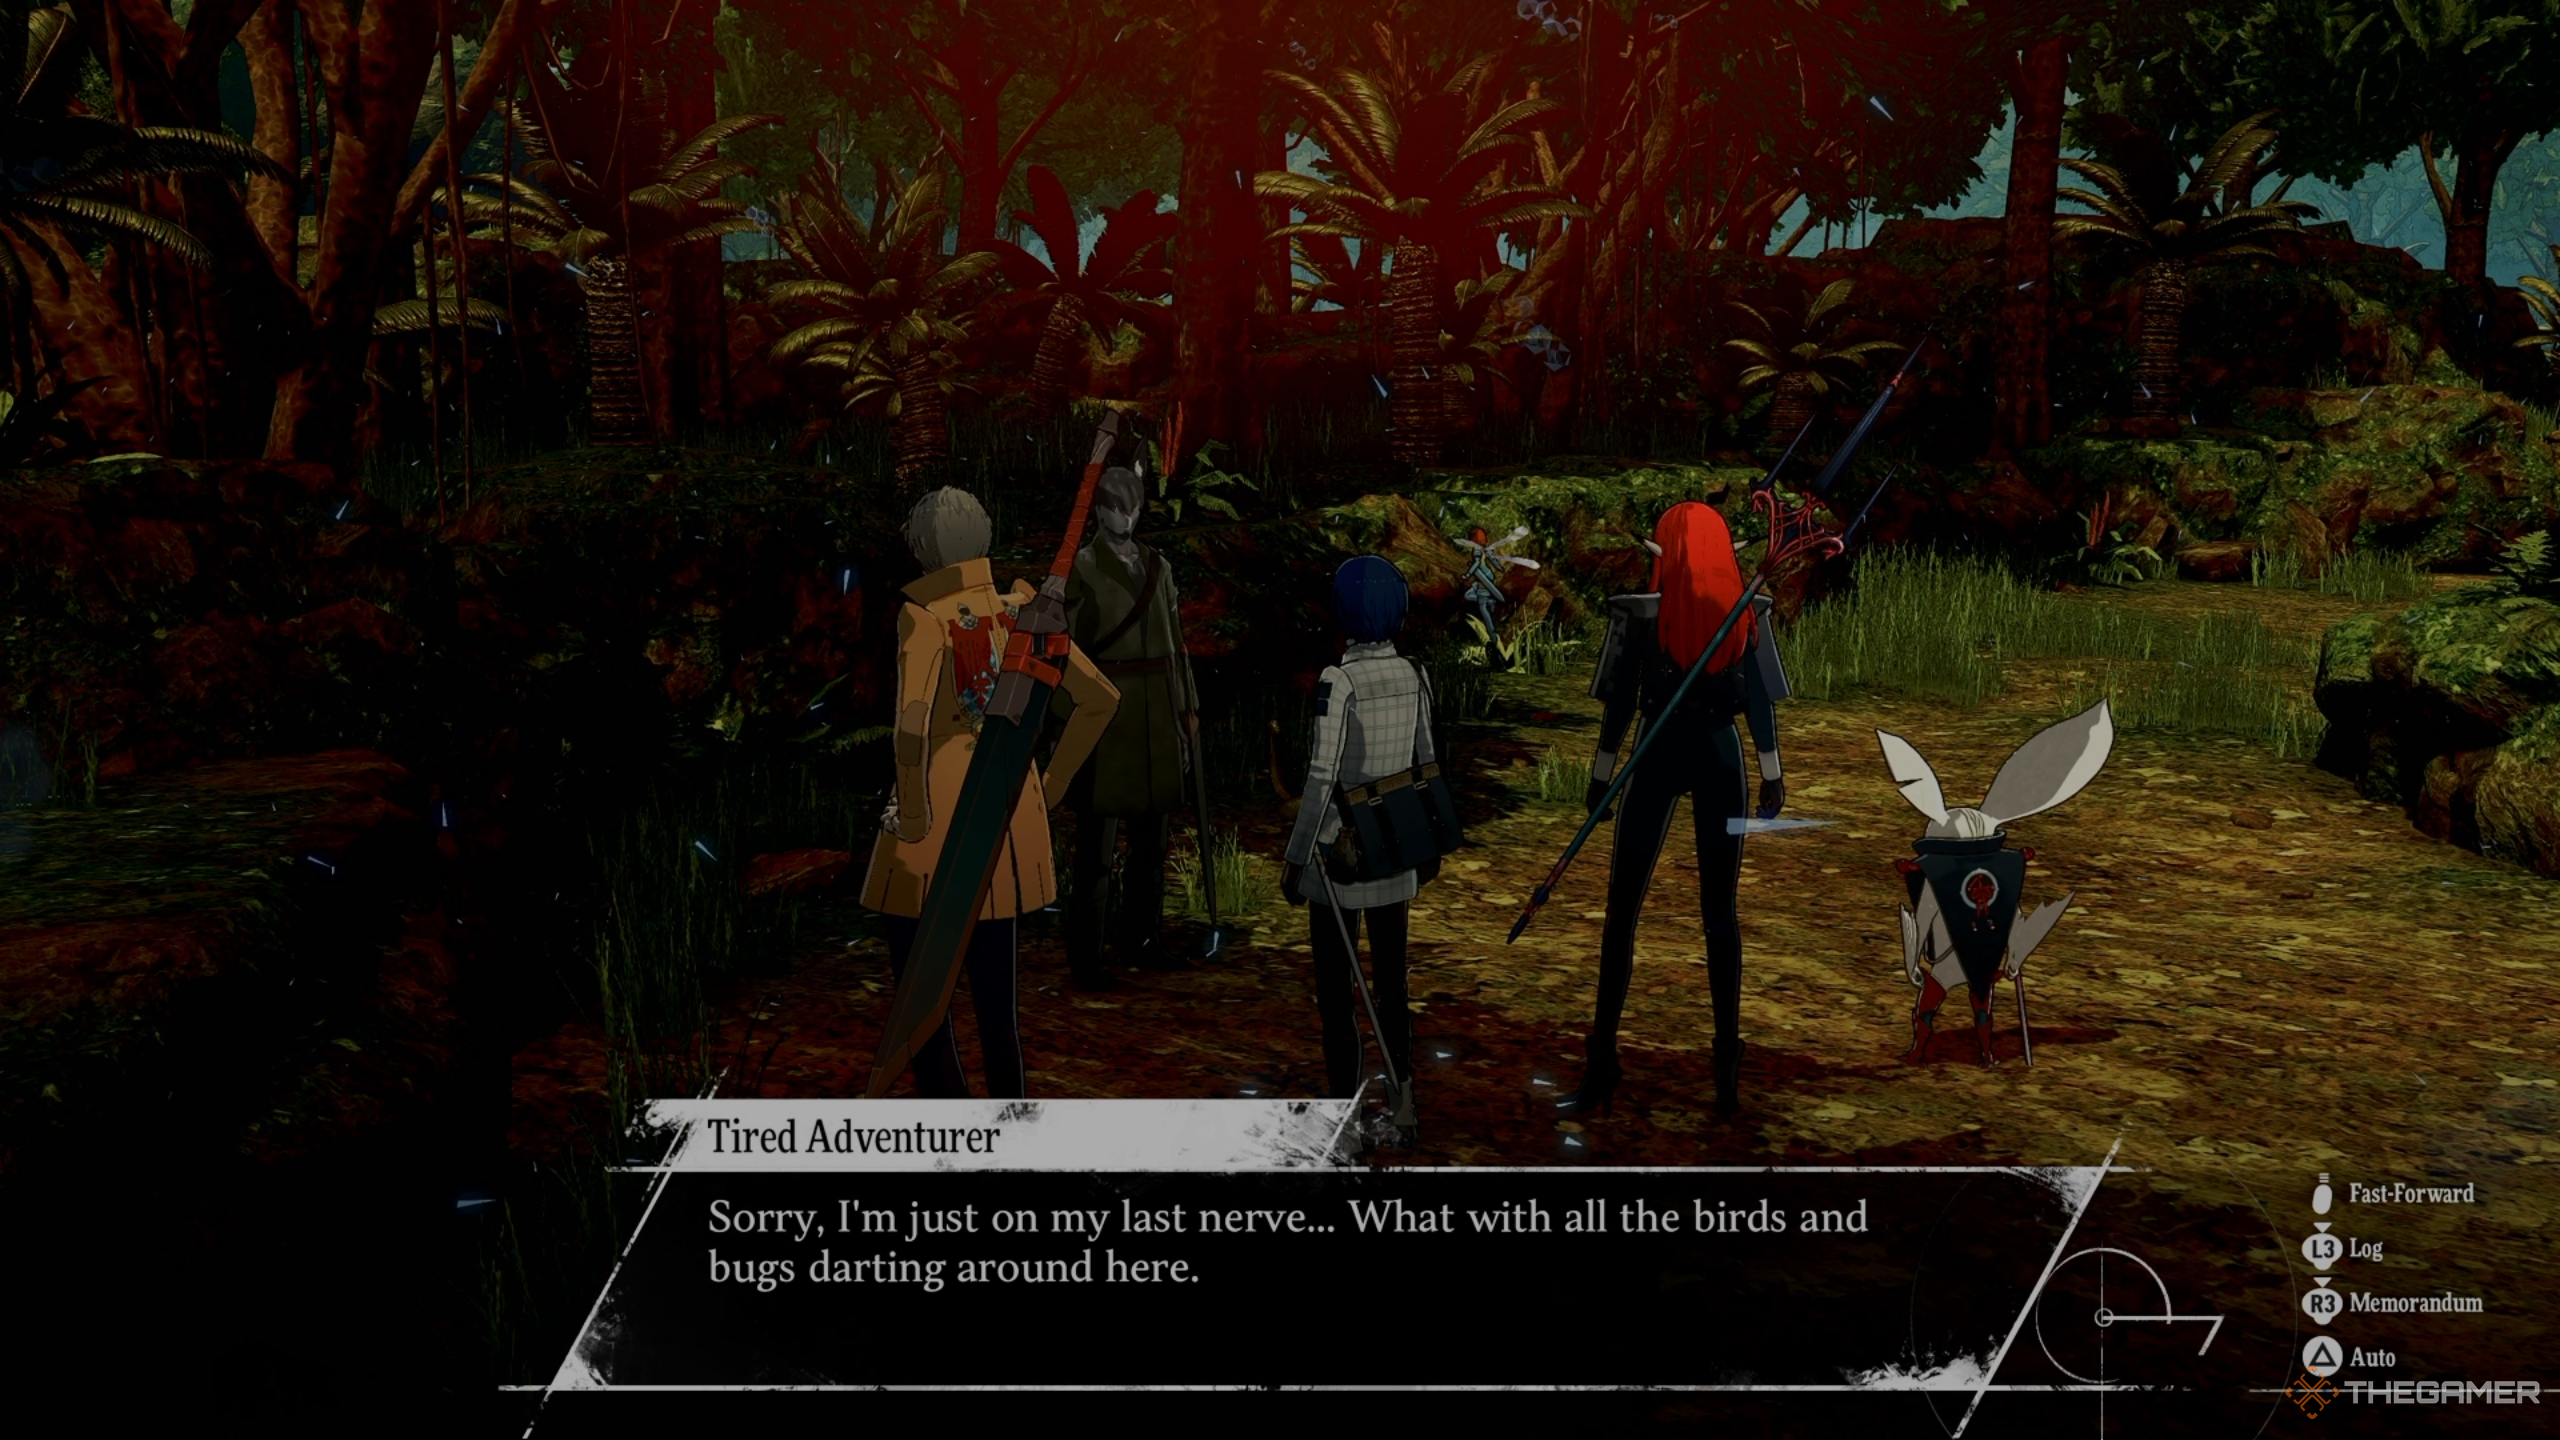
    The tired adventurer, on his last nerve, in Metaphor: ReFantazio.

    Enemy

    Notes

    Canibaflo

    This enemy uses Pollen Attack to deal light Almighty damage to all members of your party, lowering their Hit and Evasion. It can also use Numbing Pollen which may inflict Paralysis. It attacks using Cyclo and Gacyclo for single-target and area Wind damage. Resistant to Electric but weak to Fire.

    Raptor Corvo

    This enemy strikes with Rush and Heavy Rush for light physical damage. Its spells, Kandera, are available for both single target and multiple enemies. Weak against Pierce.

    Manjula

    The Manjula uses Stinger Frenzy for medium Pierce damage. Its Poison Needle and Numbing Needle attacks are weak Pierce with chances of inflicting Poison or Paralysis. It can also enhance its Attack and Defense with War Cry and inflict party-wide medium Fire damage with Fire Breath. It is weak to Ice.

    Spear Noble Malmorta

    This enemy resists Slash and Pierce. However, it has a weakness to Dark. Using synthesis Mamudo against three or more of these enemies is beneficial.

    Kadablich

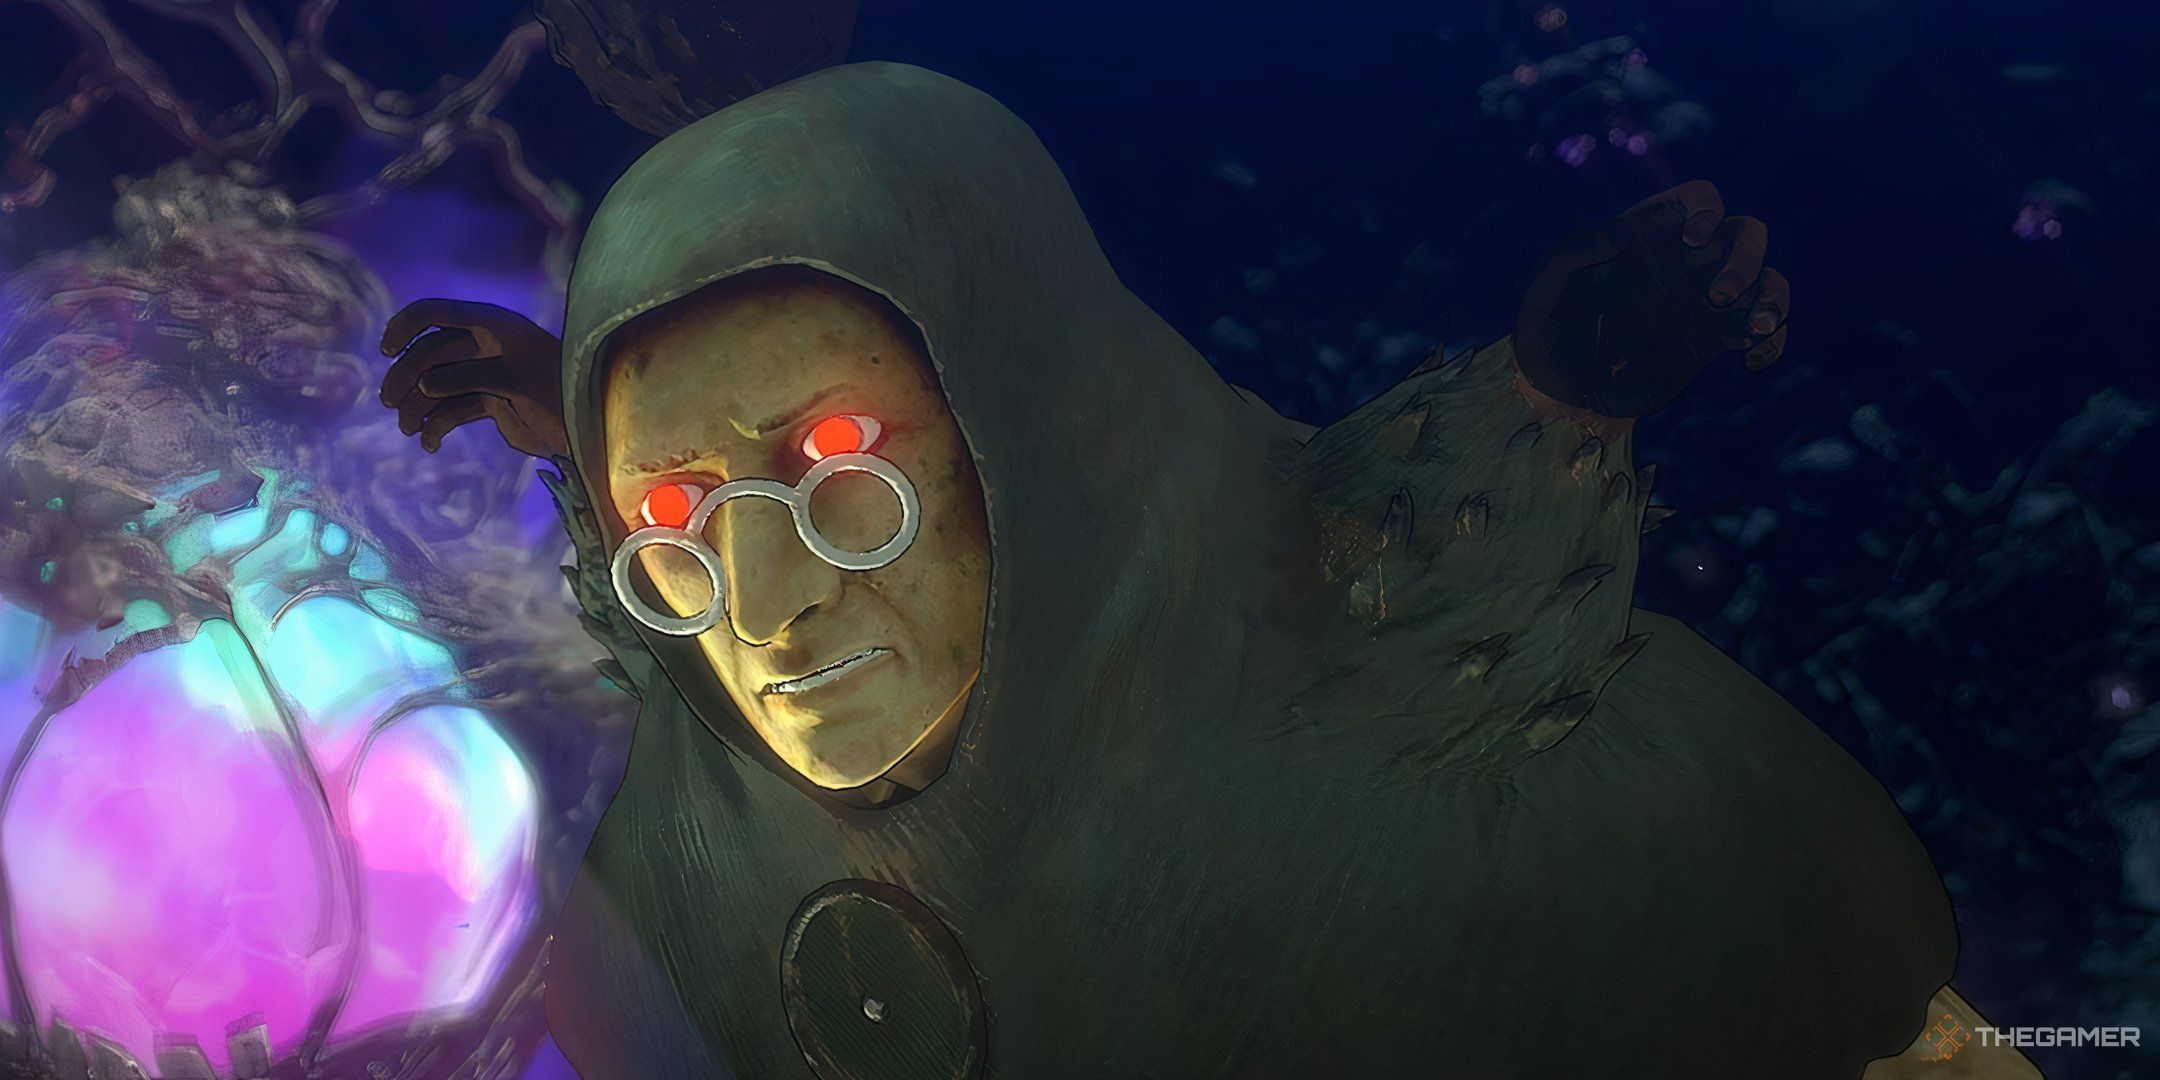
    Kadablich repels Pierce attacks and is weak to Light. It can steal Sanctor’s Vigour and utilizes Life Steal to recover some HP. The Curse Chant can inflict a party-wide Hex ailment, and its Mudoon spell might instakill.

    Chat with the Tired Adventurer as you enter the forest. He’ll remind you to make sure you have weapons and skills that can hit from a distance.

    Start by taking the west path at the fork to gain some EXP from the
    Raptor Corvos, as there’s nothing else to fight here.

    Next, head east. Your first encounter will be with a Canibaflo. It can be tough if you’re not well-prepared; having strong Fire magic and a way to recover team debuffs will make this battle easier.

    Collect the first Dragonthistle Berry nearby, and continue on. You’ll meet Loveless next. Eliminate the weak birds you find in the area, and you’ll get the second Dragonthistle Berry as a reward. Defeat another Canibaflo and… wait, are we already at the Plateau?

    Watch out for the Manjula, a chimera-type enemy, that may ambush you here. To the south from the Plateau, there are three paths to the east. The middle path leads only to Talkative Tooth, so choose the lowest path.

    Try to steal a Chimera Armor from the Manjula, which has DEF 220 and provides Endurance +5. It’s quite valuable!

    Follow the path down to find a Ruby, then head north.

    Gracia Forest: After the Plateau

    The protagonist of Metaphor: ReFantazio attacks a Manjula.

    Your third Dragonthistle Berry is situated up the path toward a dead end on the right. Watch for birds that might ambush you before you can strike them down. Proceed north.

    Continue moving north to reach a dead end where you will find a Gold Beetle!

    At the junction, turn west to bypass a swarm of hornets and take the south path to find your fourth Dragonthistle Berry at the end. Keep going north to discover the fifth Dragonthistle Berry located at a south dead end in the next wider area.

    Again, move north; a duo of Canibaflos will charge at you, so be ready to take them out swiftly. You’ll find the sixth Dragonthistle Berry by following this path all the way to its west end. Once you collect it, turn around and head south into another expansive area.

    Beware of multiple Canibaflos that tend to cluster here, accompanied by weaker enemies. If you can stun them near the less challenging foes, it might lead to a battle that yields useful Magla Pills.

    Keep moving forward while watching out for another Manjula. Make sure to heal and use MP-restoring items if necessary, as you’re about to confront the formidable Kokasados!

    Boss: Kokasados

    Kokasados in Metaphor: ReFantazio.

    Character

    Archetype

    Formation

    Strategy

    Protagonist

    Magic Seeker

    Front

    Heal as necessary, and when available, use the synthesis Fireblade Rider to maximize damage. Otherwise, rely on powerful spells.

    Strohl

    Gunner

    Back

    Employ Hex Shot and other Shot skills for Pierce damage. Use Heismay’s support when possible for Mania Bullet.

    Hulkenberg

    Commander

    Front

    Maintain a consistent Marakukaja to enhance the team’s Defense, preventing Kokasados’ one-hit KO attacks. Aid the protagonist with Fireblade Rider, and frequently utilize Pierce attacks.

    Heismay

    Thief

    Front

    Cast Tarunda several times to reduce Kokasados’ Attack. Support Strohl in crafting the Mania Bullet.

    This battle isn’t as challenging if you’re adequately prepared. The key is having Rakukaja or a similar skill handy to enhance your team’s Defense.

    In ordinary situations, that’s a typical necessity; however, against Kokasados, Defense-boosting buffs are critical. When the game alerts you that Kokasados is targeting a character without Rakukaja, and then it freezes in place, that character is likely about to face a devastating blow.

    Assign Hulkenberg as Commander (or General) to cast Marakukaja, and you will be well protected. This spell raises defenses for the entire party.

    Kokasados’ other attacks are primarily physical slash-based or Wind-based. Expect its Gacyclo to deal medium Wind damage across the party, while the Powerful Pulverizer strikes a single target with heavy physical damage.

    Utilizing Pierce attacks is crucial. Ensure your Gunner fires off skills like Hex Shot every turn, or synergize with a Thief/Assassin—like Heismay—for Mania Bullet, which delivers substantial Pierce damage.

    The protagonist, acting as your Magic Seeker, should unleash your strongest spells, and employ Fireblade Rider with Hulkenberg whenever it is available. The protagonist may only need to heal once using an inherited Medica, a spell targeting the entire party for medium HP recovery.

    Completing the Quest

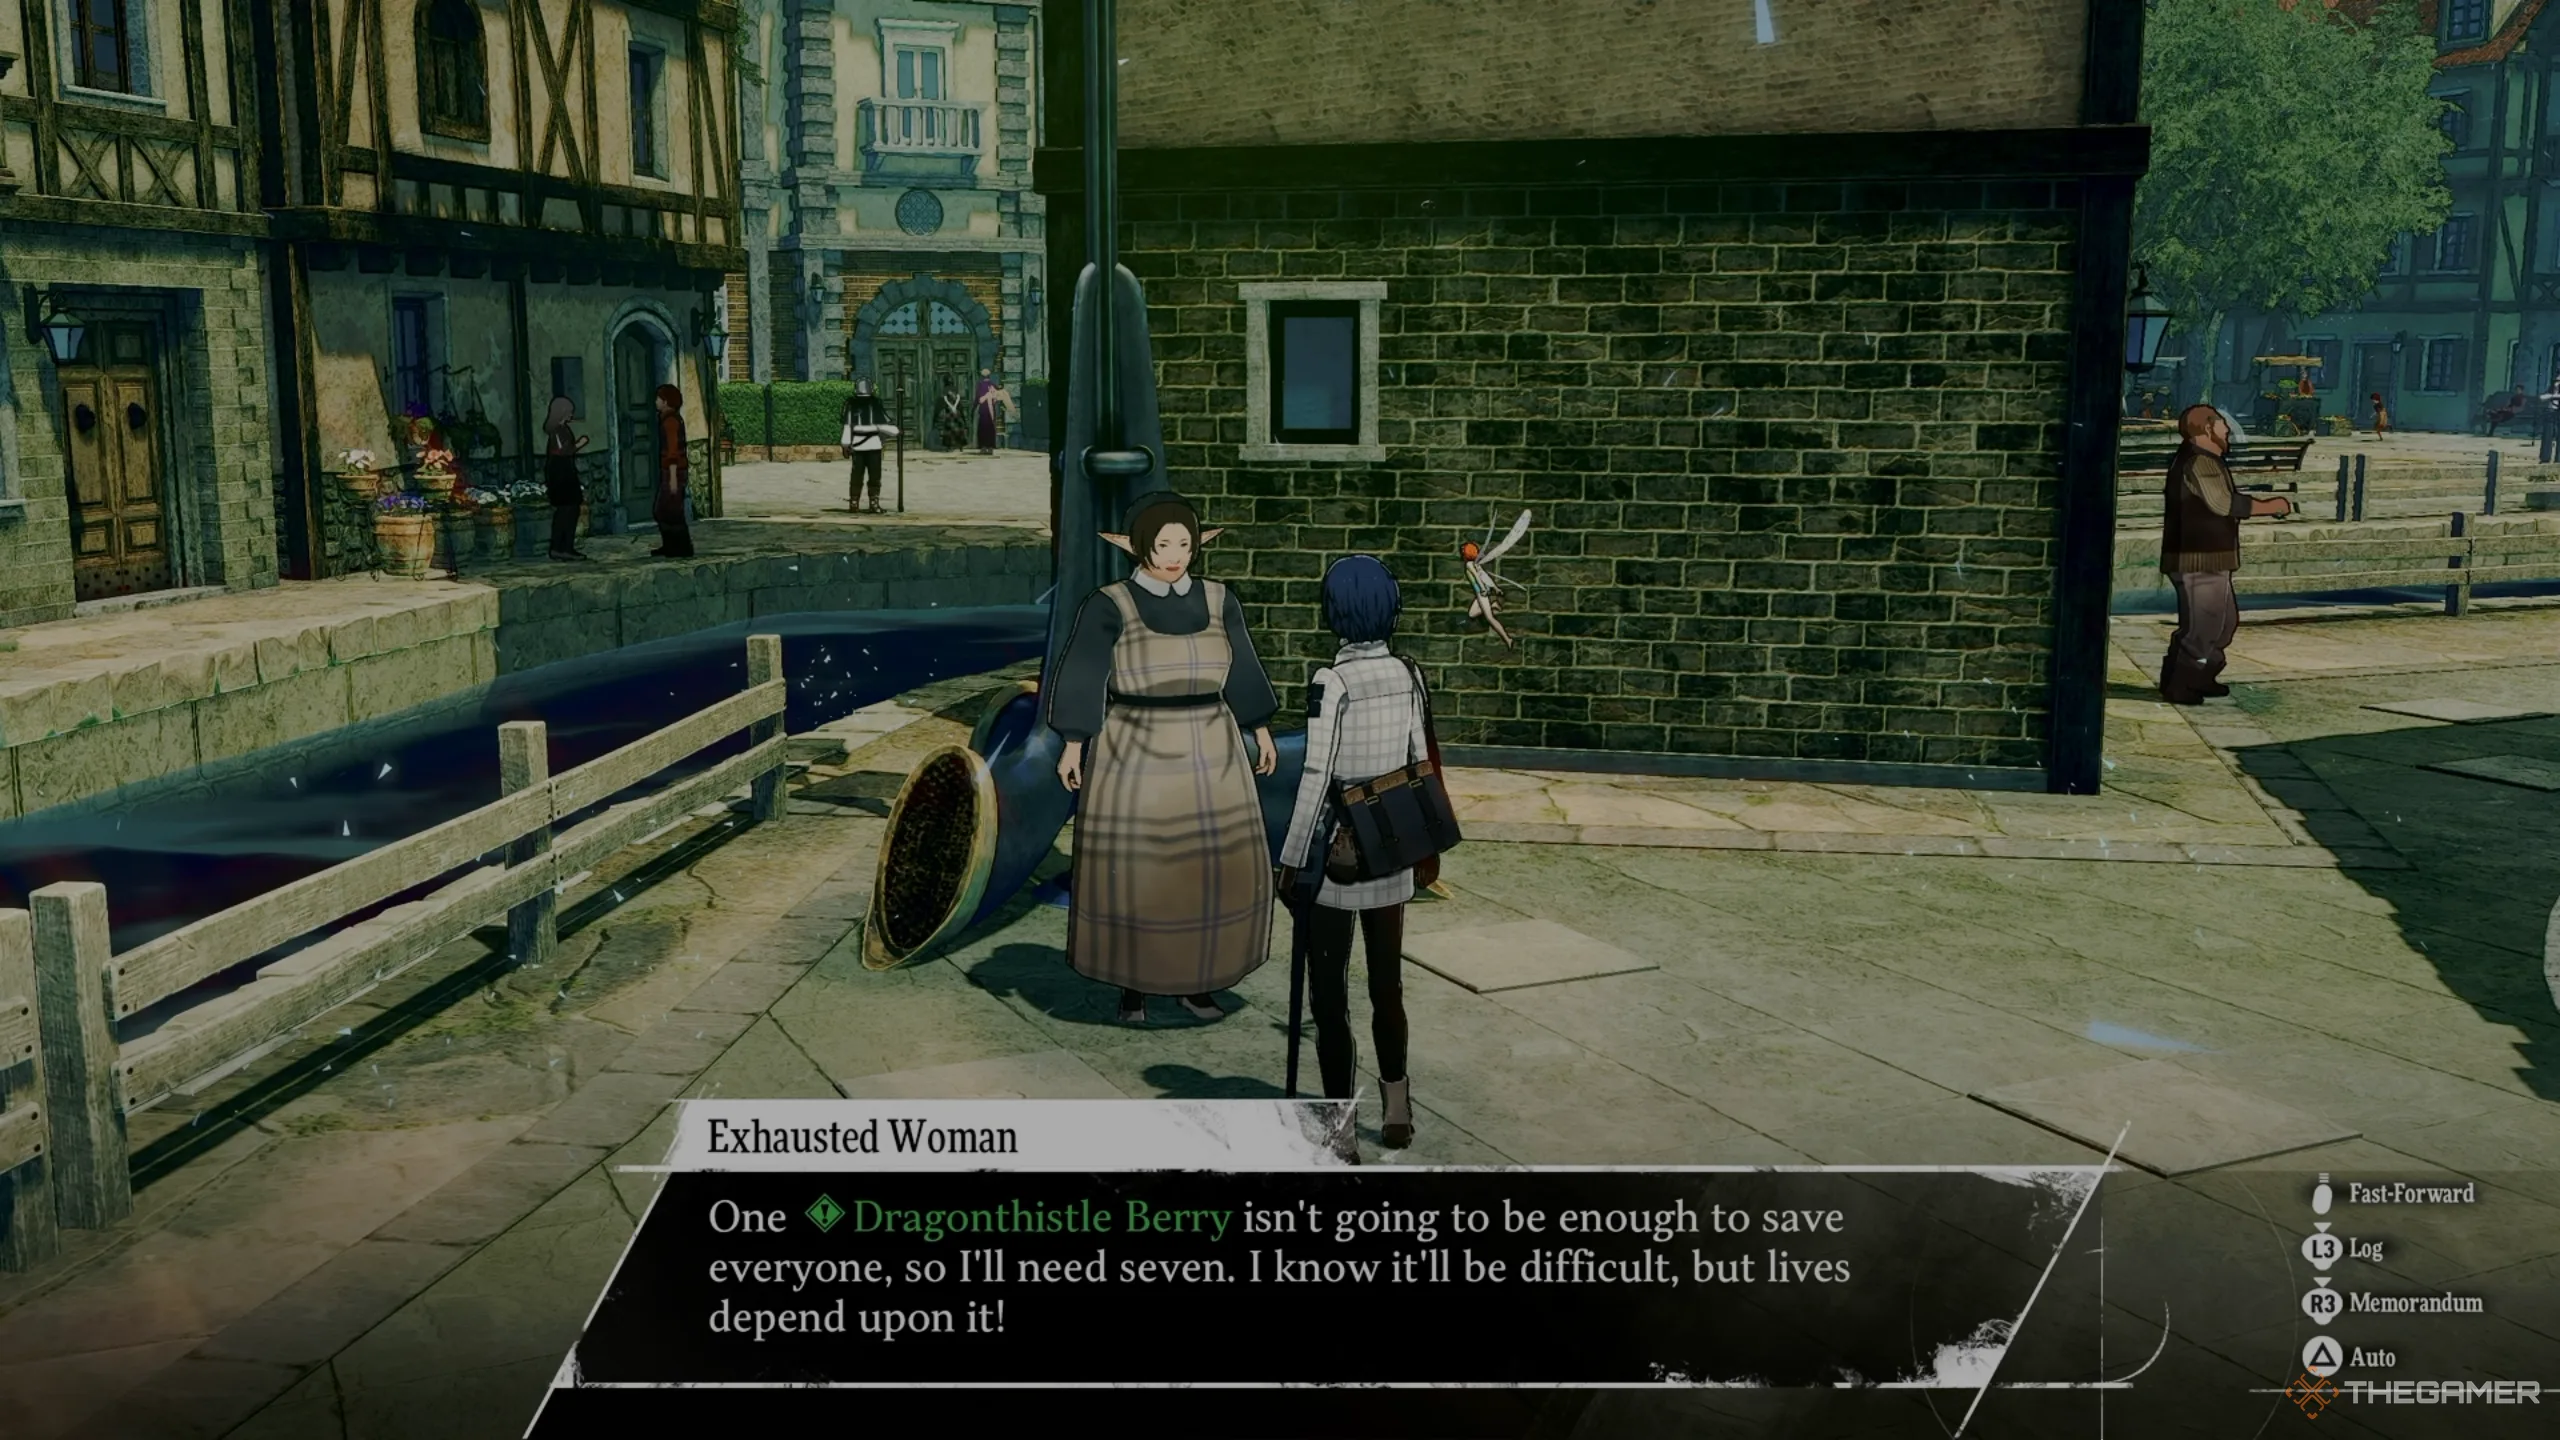
    The exhausted woman in Metaphor: ReFantazio.

    Returning the Dragonthistle Berries won’t revive the woman’s son, but they will aid others in need. Speak to her where you initially found her in Brilehaven, and she will reward you with 30,000 reeve and a Dragonblood Sap, which completely restores the HP and MP of one ally.

    And that concludes your adventure in the “Soldier’s Solace” quest in Metaphor: ReFantazio! Keep up the fantastic work, adventurer.

  • Conquering the Goborn Monarch: A Guide to Triumph in Metaphor: ReFantazio

    Conquering the Goborn Monarch: A Guide to Triumph in Metaphor: ReFantazio

    As you journey through the United Kingdom of Euchronia in Metaphor: ReFantazio, one of the fascinating stops is Martira, the Old Castle Town. This location is packed with opportunities, including various bounties just waiting for you to tackle. One of the first challenges you can take on here is called ‘The New King of the Imps’.

    This bounty leads you to the Imp’s Den, also referred to as Goblin’s Nest, filled with a variety of foes and collectible items. Here’s all you need to know about this particular task.

    Unlocking the ‘The New King Of The Imps’ Bounty

    You can pick this quest from any Recruitment Centre, but you’re likely to notice it while exploring Martira. It becomes available in late June (I accepted it on June 30), and there’s no rush to finish it.

    Keep in mind that visiting the Imp’s Den will consume a day of your time, so plan accordingly.

    Quest Preparation

    You can swing by Vica Alba Tavern and talk to the Informant for intel on the King of Imp’s Den, available for 1,000 reeve. He’ll provide tips on summoning the King Goborn, but you can find all the info you need right here.

    The Informant will highlight that the Goborns you’ll be dealing with have no specific weaknesses. While the lesser ones can be affected by Poison and Paralysis, you should find them manageable in the open world. However, the larger Goborns are a different story; they can be put to sleep, which is a tactic you’ll want to utilize.

    Make sure to visit MesmerEyes Apothecary in Martira to stock up on healing items. It’s a smart move to grab some Slumberthorn (costing 90 reeve each) to inflict Sleep on the Goborns to simplify your fight.

    You might also consider purchasing other restorative items like the Notebook of Remembrance to cure Forget (275 reeve each) and Robust Remedy to cure Poison (100 reeve each). If you have Patra, it’s a better option to use that.

    When forming your party, avoid using any Archetypes equipped with Staves or Maces; this can provoke the Goborns into using Frenzy against you. Here’s a recommended setup based on our experience.

    Character Archetype Formation Strategy
    Protagonist Seeker Back The Protagonist should focus on healing the party, especially when facing multiple Goborn or if you’re fighting the King solo. Make sure to inherit Medi from the Healer class for better HP management.
    Strohl Warrior/Swordsman/Any Front Strohl excels as a Warrior or Swordsman in this configuration, though any non-staff/mace Archetype will work.
    Hulkenberg Knight/Mystic Knight/Any Front Hulkenberg is best utilized as a Knight or Mystic Knight for this battle, as her skills can efficiently deal with Vesps and Papyros around.

    How To Summon the Goborn King

    Upon entering the Imp’s Den, you’ll encounter the Hexer Goborn Esto (the mage Goborns in black robes), which are marked on your map. There’s no necessity to defeat all of them; just take out four to trigger the appearance of the Goborn King. Defeating the fourth Hexer will automatically launch you into a battle with the Goborn King following a brief cutscene.

    Expect a mix of weaker and more formidable Goborn types to accompany the King during the fight. You can dispatch the weaker ones without activating any Squad Battle.

    If Strohl is in your line-up as a Swordsman, his Round Slash is effective for targeting multiple enemies altogether.

    Movesets and Affinities

    Affinities and Weaknesses

    Slash —
    Pierce —
    Strike —
    Fire —
    Ice —
    Electric —
    Wind —
    Light —
    Dark —

    As noted earlier, the Goborn King has zero weaknesses.

    Moveset

    Charge Powers up Goborn King’s next attack.
    Round Slash Deals physical damage to all party members.
    Matarukaja Boosts attack for all enemies.
    Dark Sword Damages one party member, with a chance to inflict Forget.
    Critical Strike Delivers critical damage to a single party member.
    Attack Normal attack on one party member.
    Unwavering Blade Used only if all adds are defeated. Increases hit rate and evasion significantly.
    Giant Slice Damages one party member.

    Goborn Adds Affinities and Weaknesses

    Slash —
    Pierce —
    Strike —
    Fire —
    Ice —
    Electric —
    Wind —
    Light —
    Dark —

    Hexer Goborn Esto Moveset

    Megidola Causes Almighty damage to all party members.
    Gabot Deals Fire damage to all party members.

    Archer Goborn Esto Moveset

    Attack Physically damages one party member.
    Smashing Salvo Damages one party member with a chance to lower their defense.
    Myriad Shots Deals physical damage to the entire party.

    Manhunter Goborn Esto Moveset

    Attack Physical damage to one party member.
    Filthy Strike Physical damage to a single party member.
    Powerful Pulveriser Inflicts physical damage to one party member.
    Giant Slice Deals physical damage to one party member.
    Poison Strike Physical damage to one party member, chance of inflicting Poison.

    All Goborns can use Frenzy if there’s an Archetype with a staff or mace in your party, which hits all members.

    Battle Strategy

    If you’ve talked to the Tired Soldier at the entrance of the Imp’s Den, you’d know that the Goblin King should not be the last one alive.

    If you eliminate all of his allies, the Goborn King will use Unwavering Blade to boost his hit rate and evasion. I recommend taking out the Goborn Hexer Esto first while leaving at least one other Goborn alive to avoid giving the King this advantage.

    The Goborn King and his minions primarily deal physical damage, so ensure to target the Hexer right away. Some of their strikes can inflict serious damage, making consistent healing paramount, especially against attacks that can cause status ailments like Forget or Poison.

    Maintain steady attacks while focusing on keeping your party’s HP high, and dispatching the Goborn King along with his crew shouldn’t pose much of a challenge.

    Once you defeat the Goborn King, don’t forget to take out the remaining minions.

    Rewards for Defeating the Goborn King

    In defeating the Goborn King, you’ll receive 16,000 reeve along with four Courage points once you complete the bounty.

    You will also earn a Stunning Arrow and a Scrapmetal Slab in addition to an Imp’s Loincloth to turn in at the Recruitment Centre.

  • Ultimate Combat Strategies for Metaphor: ReFantazio Unleashed

    Ultimate Combat Strategies for Metaphor: ReFantazio Unleashed

    The battles in Metaphor: ReFantazio can initially be quite overwhelming. Strong foes capable of dealing serious damage start appearing just a few dungeons in. Nevertheless, there are plenty of tactics to gain the upper hand if you have a solid understanding of the game’s mechanics.

    As you progress, you’ll discover that the mechanics can greatly evolve by unlocking more Archetypes and advancing your followers’ storylines. However, during those early hours, knowing the basics of combat in Metaphor: ReFantazio can be the key to your success, and this guide aims to help bring you up to speed.

    Understand the Importance of Buffs and Debuffs

    In some games, magic that buffs allies or debuffs enemies might not seem essential. Yet, in Metaphor: ReFantazio, challenging battles can quickly turn in your favor thanks to these crucial spells.

    One spell that stands out is Tarunda, which you can gain access to via the Faker Archetype by speaking with the blue-haired character, Alonzo, in Martira. Tarunda reduces your opponent’s Attack to its minimum level for three turns.

    The great part is that if you recast it on the third turn, it will continue for an additional three turns, and so on. The game’s battle interface will even highlight stat changes when a buff or debuff is about to wear off, so you’ll always know when to act.

    Minimizing a formidable enemy’s attack means less time spent on defense and more time launching your own offensive. Similarly, this concept of hindering your enemies applies to using buffs when defense is critical.

    Strategize Your Protagonist’s Development

    Unlike your companions, who automatically improve with each level, the protagonist’s growth is partly automated. Whenever he levels up, you will also have points to allocate as you see fit.

    While it may not be incredibly crucial to plan every point allocation, it can be beneficial to consider which Archetypes you want him to excel in. Whether you’re aiming for a durable tank, a magical powerhouse, or something in between, there are various paths to choose from.

    For instance, I decided to focus on my protagonist as more of a magic user, balancing offensive and healing spells. This is due to the initial party members having a differing approach to magic.

    In the early part of the game, I assigned about half of the points to the Magic stat to enhance his spellcasting abilities.

    However, don’t completely overlook your other stats. Investing a few points into Endurance will be beneficial no matter what direction you take.

    Always Remember the Retry Option

    Sometimes, you may find yourself in a dire situation—it could be low HP, low MP, or a shortage of helpful items. It’s part of the challenge, especially on harder difficulties.

    Don’t let pride blind you to the reality of the situation. If the odds are against you, it’s wise to hit that reset button for the battle instead of relying on a checkpoint or saved game.

    Of course, if your battle strategy is completely flawed, resetting might not yield better results. More often than not, it’s about gradually applying what you’ve learned from previous encounters until you’ve honed your strategy.

    Diversity in Your Attack Types is Crucial

    Nothing is worse than heading into combat with only a handful of attack options such as Fire, Ice, Slash, or Strike, only to discover that the enemy has high resistance against all of them.

    When entering a dungeon, it’s beneficial to carry as wide an array of attack types as possible.

    As you become more familiar with enemy types in a given area, you may refine your approach based on their weaknesses.

    Utilize Knight’s Proclamation Wisely

    Once Hulkenberg joins your party, you’ll gain access to the powerful Knight Archetype. With this, you’ll have the amazing Knight’s Proclamation at your disposal.

    Hulkenberg or whoever has taken on the Knight role should frequently use Knight’s Proclamation. If your enemies lean toward single-target attacks, they will likely redirect their focus to the Knight character. This serves a distinct provoke function.

    Knights possess significant Endurance, enabling them to soak up damage better than most Archetypes. Thus, you’ll want to keep enemy attention on a character equipped to handle such hits.

    Don’t Hesitate to Pass Your Turn

    This might come naturally to you soon, but if you’re still new to the game, you may overlook how the ‘Pass Turn’ action can be beneficial.

    Fans of Shin Megami Tensei will recognize the concept of a “Press Turn” system, which tracks how many actions you have used and limits available actions if you miss or fail to take a turn.

    When you pass your turn, it only consumes a half of your action. Consequently, you can end up with 1.5 or 2.5 actions remaining, which can be strategically advantageous.

    This can often mean the difference between effectively using a synthesis skill or missing out, or simply gaining an extra turn when it’s essential.

    If a party member doesn’t have a valuable action available, feel free to pass.

    Beware of Equipment Optimization

    Whenever you change Archetypes, the game suggests the “best” equipment for that character. While this can be useful, it can also cause issues.

    The system generally prioritizes raw attack or defense, which may lead to overlooking the important stat boosts that could be particularly beneficial for that Archetype.

    For instance, if you’ve swapped Hulkenberg back to her Knight Archetype, and you have an accessory that grants an incredible +6 Endurance, she might get a lesser item simply based on its higher Defense value.

    While it might be an inconvenience, always double-check the gear you’re equipping if you’re not completely familiar with it.

    Be Mindful of Your Formation

    It goes without saying that more fragile classes should typically stay in the back row. However, it can be easy to forget to position a character properly when swapping Archetypes, so be cautious.

    During combat, there will be times when you need to adjust a character’s position. You may face a formidable foe that targets the front row with an imminent attack.

    You could defend or, when it makes more sense, slide to the back row. As you progress through the game, you’ll find even more reasons to consider mid-battle adjustments.

    Consistently Restock Status Cure Items

    While it can be challenging to maintain finances, make it a point to restock at least five of every status ailment cure during your visits to shops.

    You may not always be prepared for what you’ll encounter. Yes, our guides can help, but you might find yourself deep in a dungeon when an enemy suddenly hits you with a sleep or poison effect.

    Bosses have a knack for being particularly ruthless in this regard. Always keep status cures like Malady and Hex handy. Even if you have spells like Patra available, you may need to use your caster for something else instead.

    Preserve MP by Switching Archetypes

    The sooner you grasp the importance of keeping your MP during dungeons for critical battles, the better. Keeping elemental attack items handy can help greatly.

    However, you can do even better during your explorations: don’t assume that if a character is a Healer or Mage, they can’t temporarily shift to a less MP-consuming class.

    For example, if the protagonist is primarily acting as a Healer during your exploration, but MP is starting to dwindle, consider switching to a more physical-focused class that uses less MP until you’re close to facing bosses or sub-bosses.

    Next

    Metaphor Launching In The Shadow Of Persona Is Both A Blessing And A Curse

    Metaphor: ReFantazio is easily compared to Persona, but it’s also a fresh new entry for Atlus that shouldn’t be seen as just another Persona-like.