الوسم: Triple-A Games

  • All Snow Globes and Landmarks in Starfield Explained

    All Snow Globes and Landmarks in Starfield Explained

    Starfield is filled with collectibles, but none are as unique and extensive as the snow globes you can find. The thrill of hunting them down is part of the experience. These globes serve as a physical reminder of your adventures to various landmarks scattered across the remnants of Earth and a few nearby locations.

    When we began mapping out the locations of the snow globes, we were surprised to discover the sheer number Bethesda Game Studios included. They remind us of the Dragon Priest Masks from Skyrim, but instead of facing fierce adversaries, you simply admire remarkable real-world architecture. Here’s a guide to each one you’ll encounter.

    Complete List of Snow Globe Locations in Starfield

    Below, we’ve tracked each snow globe we’ve located, along with brief notes on how to obtain them. These tips should be enough to get you started, but we’ll also provide links to our detailed guides for more complex locations should you need extra help. It’s up to you, explorer!

    To access landmarks crucial for finding most of the snow globes, you need to read a specific book. These books are scattered throughout the Settled Systems, and we’re enthusiastically seeking them out.

    The Leaning Tower of Pisa Snow Globe

    There’s no in-game hint to find the Leaning Tower of Pisa, so you’ll need to land precisely.

    If you’re on PC, it’s much easier: you can use the console command icow 0018E4B4 0 0.

    What about Xbox players? While it’s a bit challenging, it’s still possible. Make sure you have the London map marker, as this will serve as our starting point for the search.

    You’ll want to head southeast from the London Landmark, specifically just northwest of the mostly vertical landform in that area.

    What Do You Get For Collecting Snow Globes?

    Zamka in Starfield

    For the most part, it’s just about collecting for the joy of it. You can display these snow globes in your home, on your ship, or anywhere you choose. That’s the essence of it – to admire your collection and reflect on your journeys.

    However, there’s a small reward. If you manage to collect at least 13 snow globes, you’ll receive the stylish Old Earth Space Suit. This reward, along with the Old Earth Helmet and Old Earth Pack, will be available to you upon finding your thirteenth globe.

  • Ultimate Guide to Black Myth: Wukong – Tips & Walkthrough

    Black Myth: Wukong – Comprehensive Guide and Walkthrough

    Introduction to Black Myth: Wukong

    "Black Myth: Wukong," an action-adventure game inspired by classic Chinese mythology, especially the tale of the Monkey King from "Journey to the West," offers players a rich and immersive experience. This guide will help you navigate the game’s landscapes, master its mechanics, and overcome its challenges.

    Getting Started

    Before diving into the game, familiarize yourself with the basic controls and settings. Tailor the control layout to your comfort for a smoother gameplay experience.

    Gameplay Mechanics

    • Combat System: Wukong excels in combat, utilizing a mix of melee and magical attacks. Mastering these will be key to defeating enemies.
    • Movement: Use a combination of jumps, dashes, and rolls to dodge attacks and navigate the environment effectively.
    • Abilities: Wukong has unique abilities that you can unlock and upgrade throughout the game. Focus on leveling these up to gain an edge in battles.

    Exploring the World

    The game world is vast and filled with secrets. Make sure to explore every nook and cranny. Look out for hidden items, challenges, and lore that will enhance your understanding of the story.

    Enemies and Bosses

    You’ll encounter various enemies, each with its own strengths and weaknesses. Learning their attack patterns is crucial for survival. Save your powerful abilities for tougher foes, especially bosses, which often require strategy and timing to defeat.

    Tips and Strategies

    1. Upgrade Wisely: Focus on upgrading key abilities that match your play style—whether that’s a focus on offense, defense, or support.
    2. Save Often: Take advantage of save points to avoid losing progress, especially before tackling difficult sections.
    3. Practice: Spend time familiarizing yourself with enemy attacks and movement. Practice makes perfect!

    Conclusion

    "Black Myth: Wukong" promises an exciting adventure filled with mythology and action. By following this guide, you’ll be better prepared to handle the challenges that await you. Enjoy your journey as Wukong and immerse yourself in this stunning world!

  • Unveiling Rudolf Lane’s Fate in Alan Wake 2: Lake House DLC

    Unveiling Rudolf Lane’s Fate in Alan Wake 2: Lake House DLC

    Alan Wake 2: The Lake House DLC introduces several additional achievements and trophies for players to earn. Most of these can be unlocked through regular gameplay, but a few may require extra effort. One notable achievement is the ‘Shape of a Man’, which necessitates uncovering the fate of Rudolf Lane within this DLC.

    Here’s what you need to know about what happened to Rudolf Lane in the DLC.

    Alan Wake 2: The Lake House – Shape of a Man

    Like the Murderer and Victim achievements, getting this one also requires you to obtain the Security Clearance 03 Keycard. To find it, visit the Painting Production floor. It will be located in the Inventory Management room on the left side of that area.

    If you can’t access the room, make sure to turn on the switch in the Panel Control Room, which is right next to the Break Room on the same floor.

    Once you have the Security Clearance 03 Keycard, proceed to the Holding & Observation area. Go down the small staircase in the center of the room and stick to the right side. You will need to inspect a few items here:

    1. The document on the floor near the bloodstain.
    2. The documents on the desk.
    3. The tape recorder next to the documents on the same table.
    4. The document on a container just outside the area.

    After you’ve examined these, enter the room labeled Subject Observation on the right, which requires the Security Clearance 03 Keycard you found earlier.

    Make sure you stay in the room until the projector finishes playing the recording. When it’s complete, a Painted enemy will emerge from the back wall. To take this enemy down, you must use the Black Rock Launcher, as it can’t be damaged by regular weapons. Defeating it will unlock the ‘Shape of a Man’ achievement/trophy.

    If you encounter issues unlocking this achievement, try limiting your FPS to 30 if you’re on a PC. For console players, switching to Quality Mode in the Graphics Menu may also resolve the problem.

  • Claiming the Deed from the Arrogant Noble in Metaphor: ReFantazio

    Claiming the Deed from the Arrogant Noble in Metaphor: ReFantazio

    Your adventures in Martira have truly paid off in Metaphor: ReFantazio. After showcasing the actual kidnapper’s head on exhibition day in the bustling port city of Brilehaven, you’ve garnered a lot of admiration. With your growing reputation, you can expect additional side quests to arrive. One of these tasks is Deeds and Diversions.

    Securing the Deed from the arrogant Ishkia noble might look like an easy task, but, as is often the case, it’s not straightforward. You will need to engage in some negotiations and dive deep into the Forsaken Tower to rectify the situation.

    How to Begin Deeds and Diversions


    On July 23rd, the day after the Exhibition of the Brave, you will be free to explore Brilehaven at your leisure, where you will find several NPCs offering quests. The Overfamiliar Man outside Nightprowler will present you with the Deeds and Diversions quest, requesting your assistance in reclaiming his Deed from an Ishkia noble.

    How to Obtain the Deed


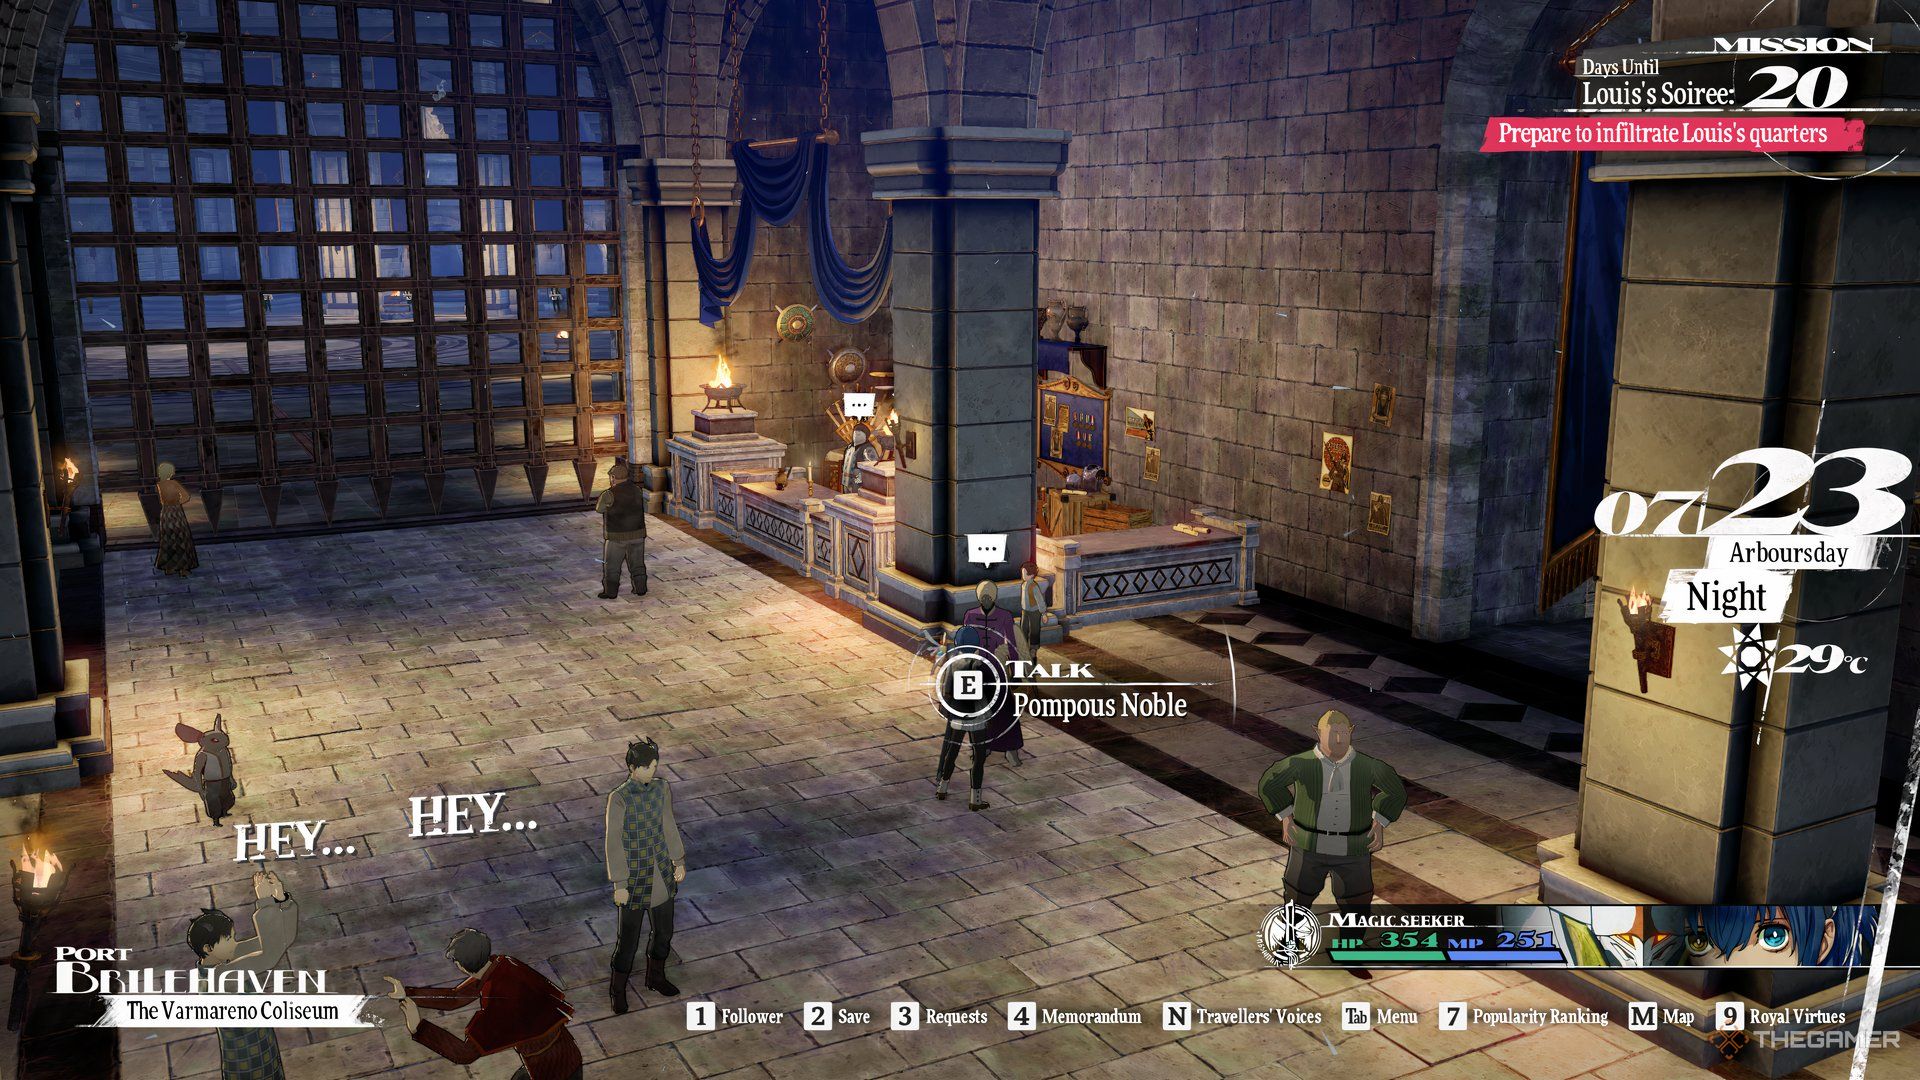
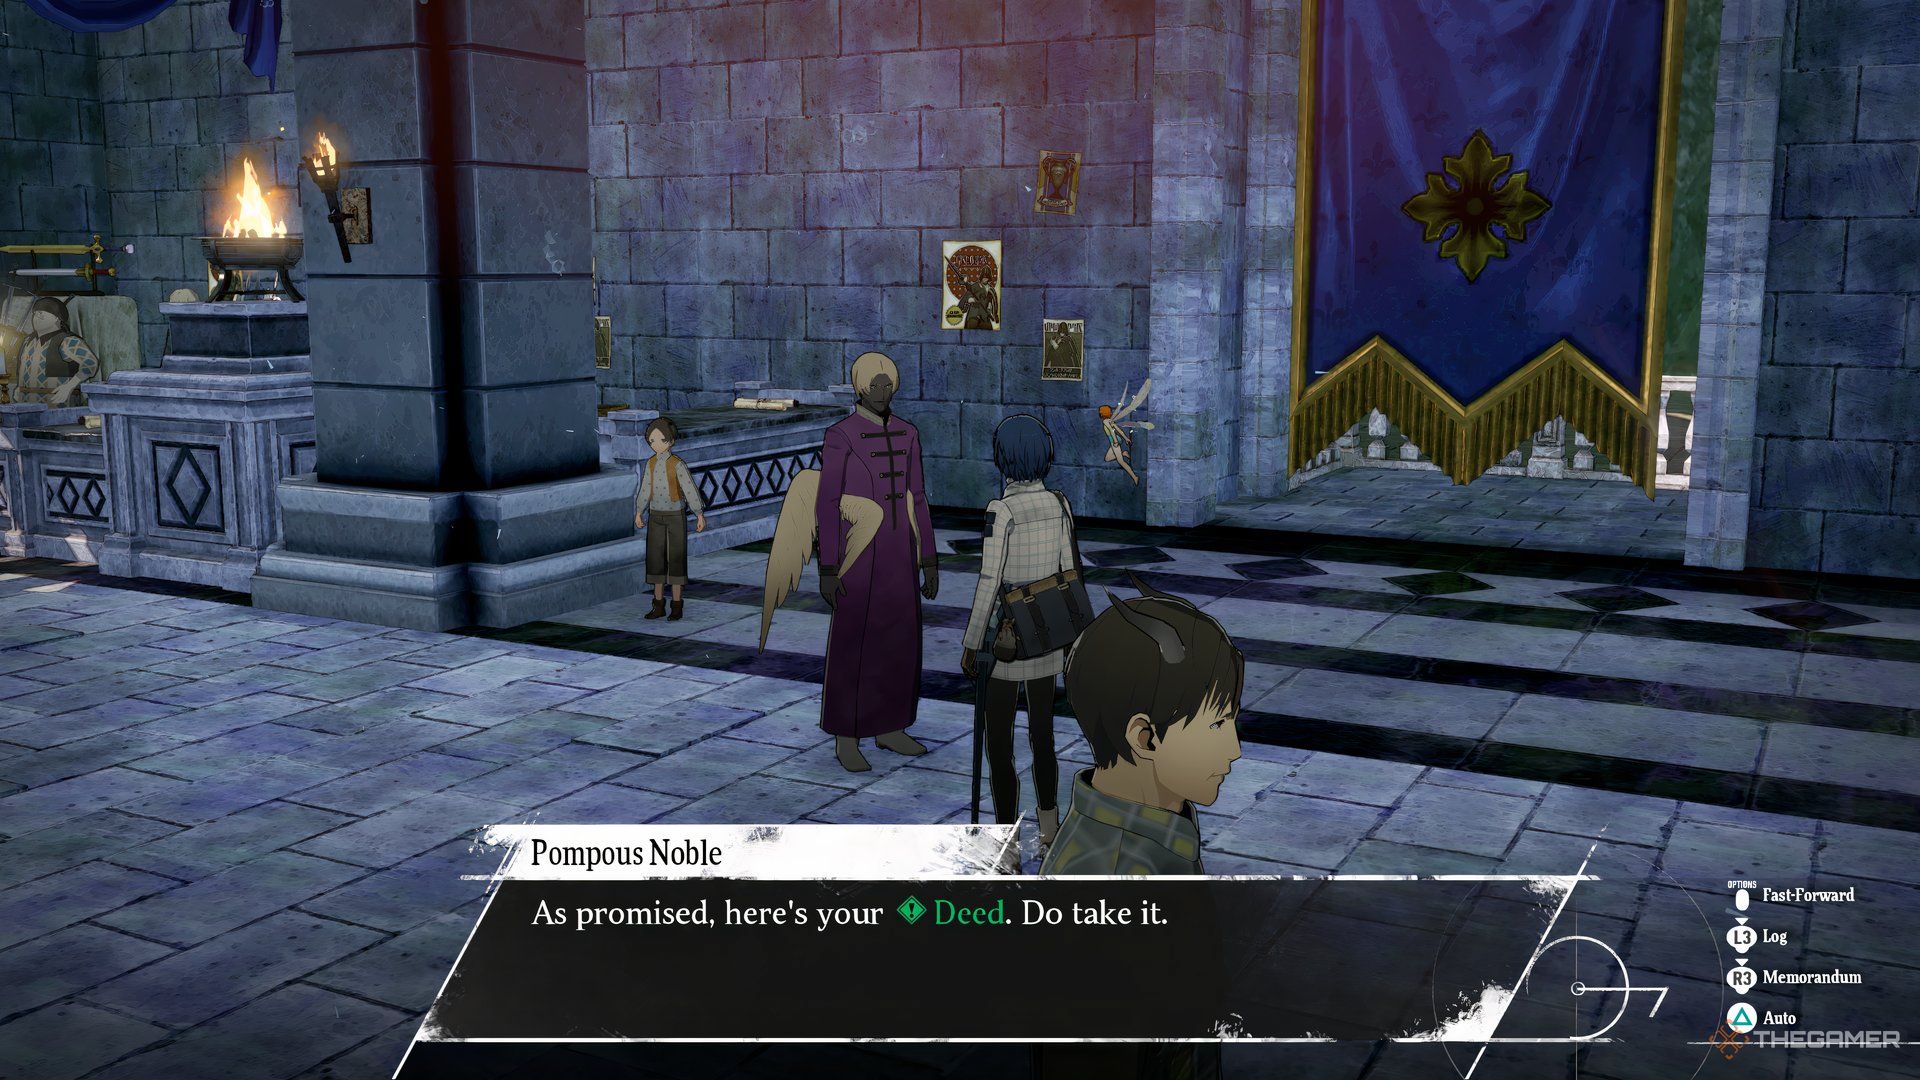
    The Metaphor: ReFantazio protagonist before a Pompous Noble in the Varmareno Coliseum.

    The noble you seek is notorious for his passion for bloodsports, as the quest-giver suggested. You’ll typically find him near the Varmareno Coliseum in Arenafront Wharf, dressed in purple.

    When you approach him, avoid being blunt about the Deed. Instead, choose your dialogue wisely to gently steer the conversation toward the Deed.


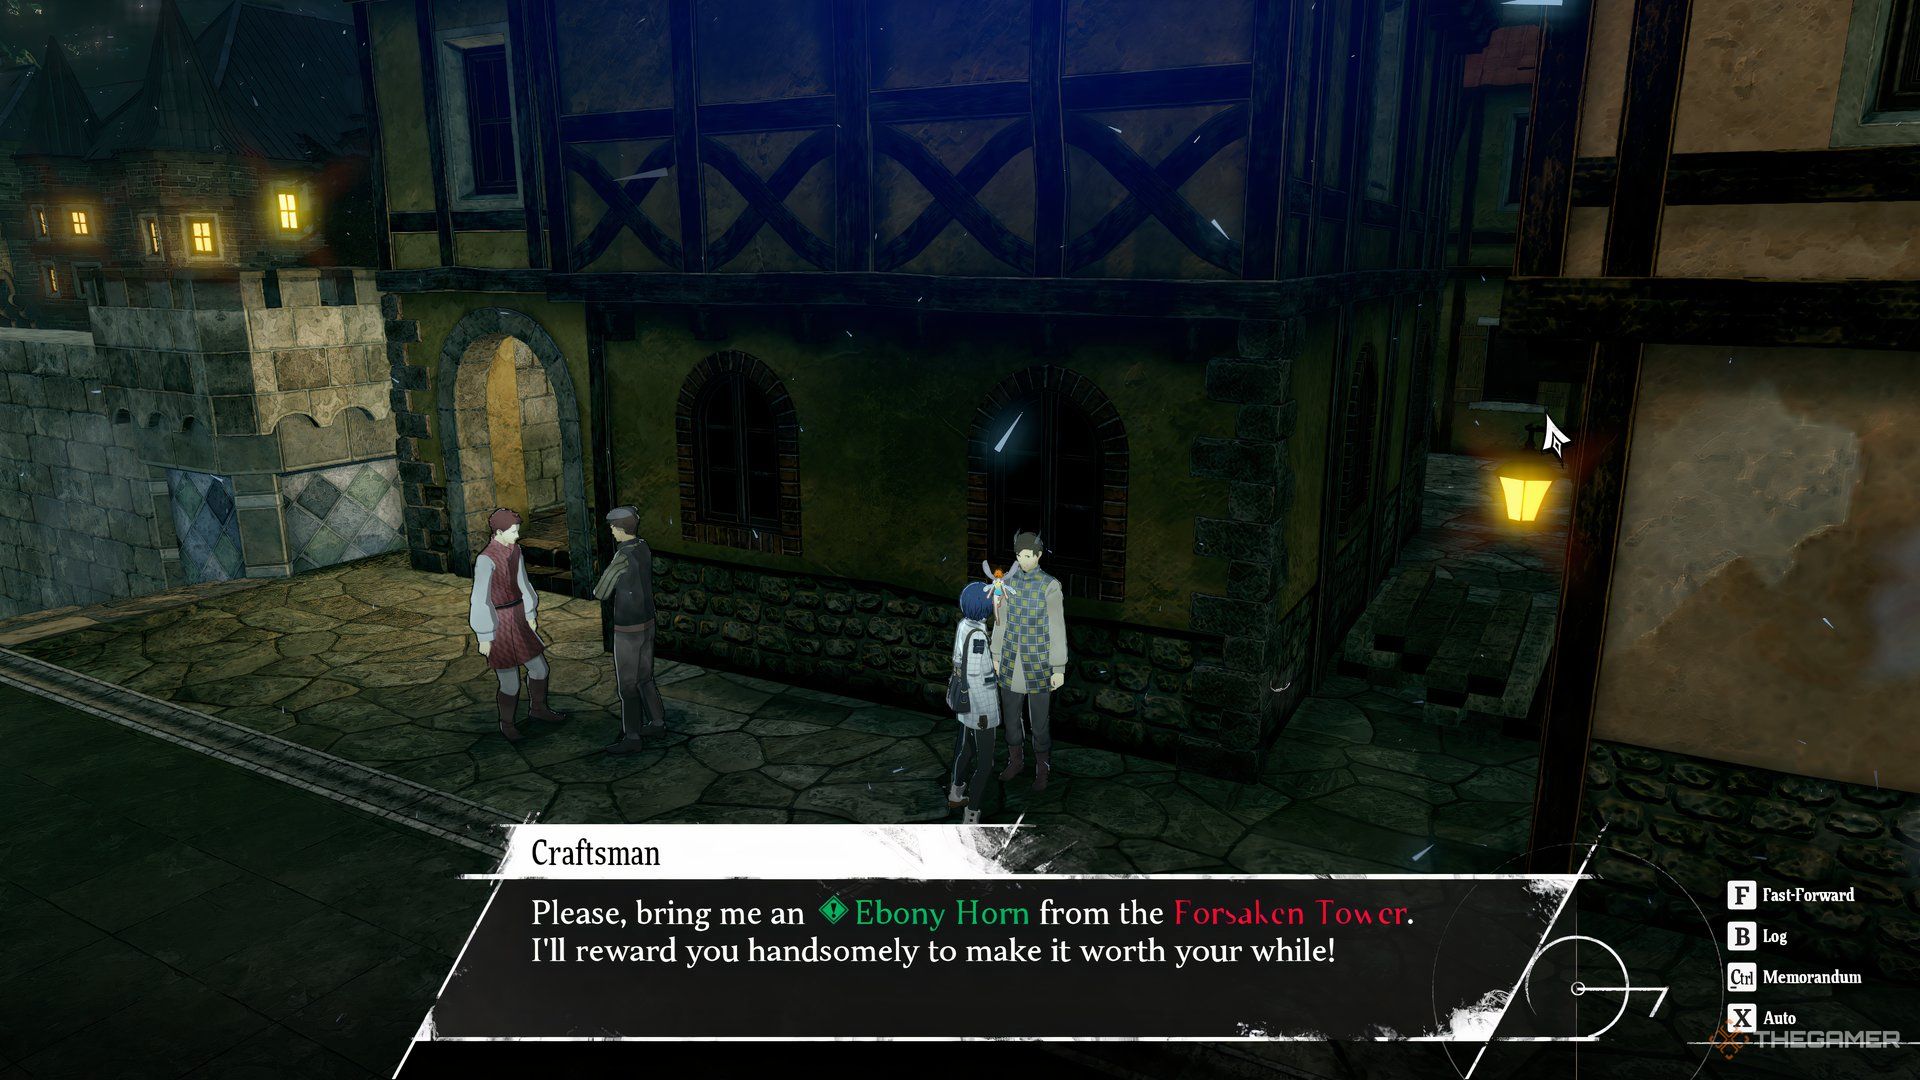
    An NPC asking the Metaphor: ReFantazio protagonist to bring him an Ebony Horn.

    Regrettably, you’ll encounter a problematic conversation unless you have already defeated the Orgas in the Forsaken Tower. This boss fight is also linked to the Superior Scrimshaw quest from the Craftsman in the Merchant Bazaar, where you’ll need to obtain an Ebony Horn by defeating the Orgas.

    Defeat Orgas in the Forsaken Tower


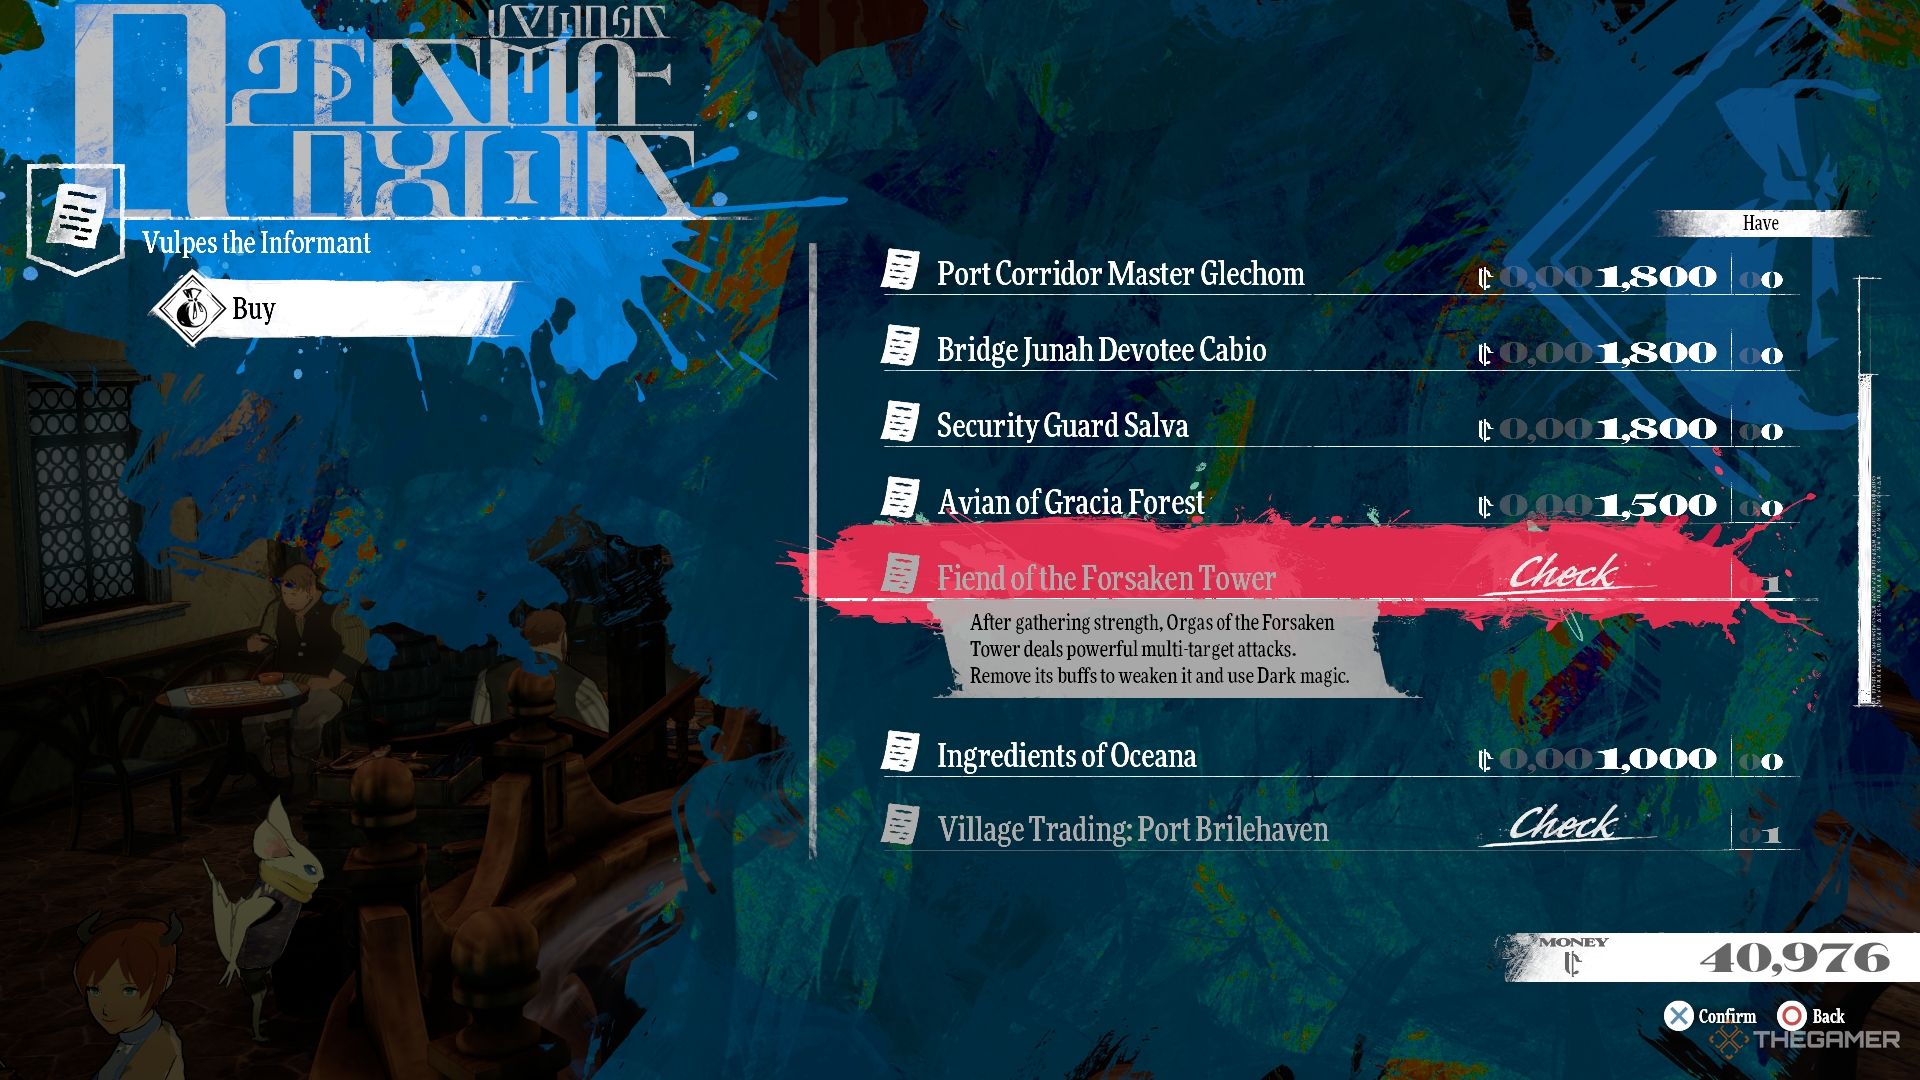
    The Metaphor: ReFantazio protagonist purchasing the Fiends of the Forsaken Tower information.

    To gain access to the Forsaken Tower, talk to the Seasoned Man in the Greatest Catch Tavern and spend 1,800 Reeve to acquire the Fiend of the Forsaken Tower information. This will grant you the ability to travel to the tower using your Gauntlet Runner – a three-day journey filled with challenges from competing Gauntlet Runners, along with a stop at Gracia Forest.

    While in Garia Forest, consider completing the Soldier’s Solace quest given by the Exhausted Woman in Angler’s Inn Square. It’s a great opportunity to accomplish more during your trip.


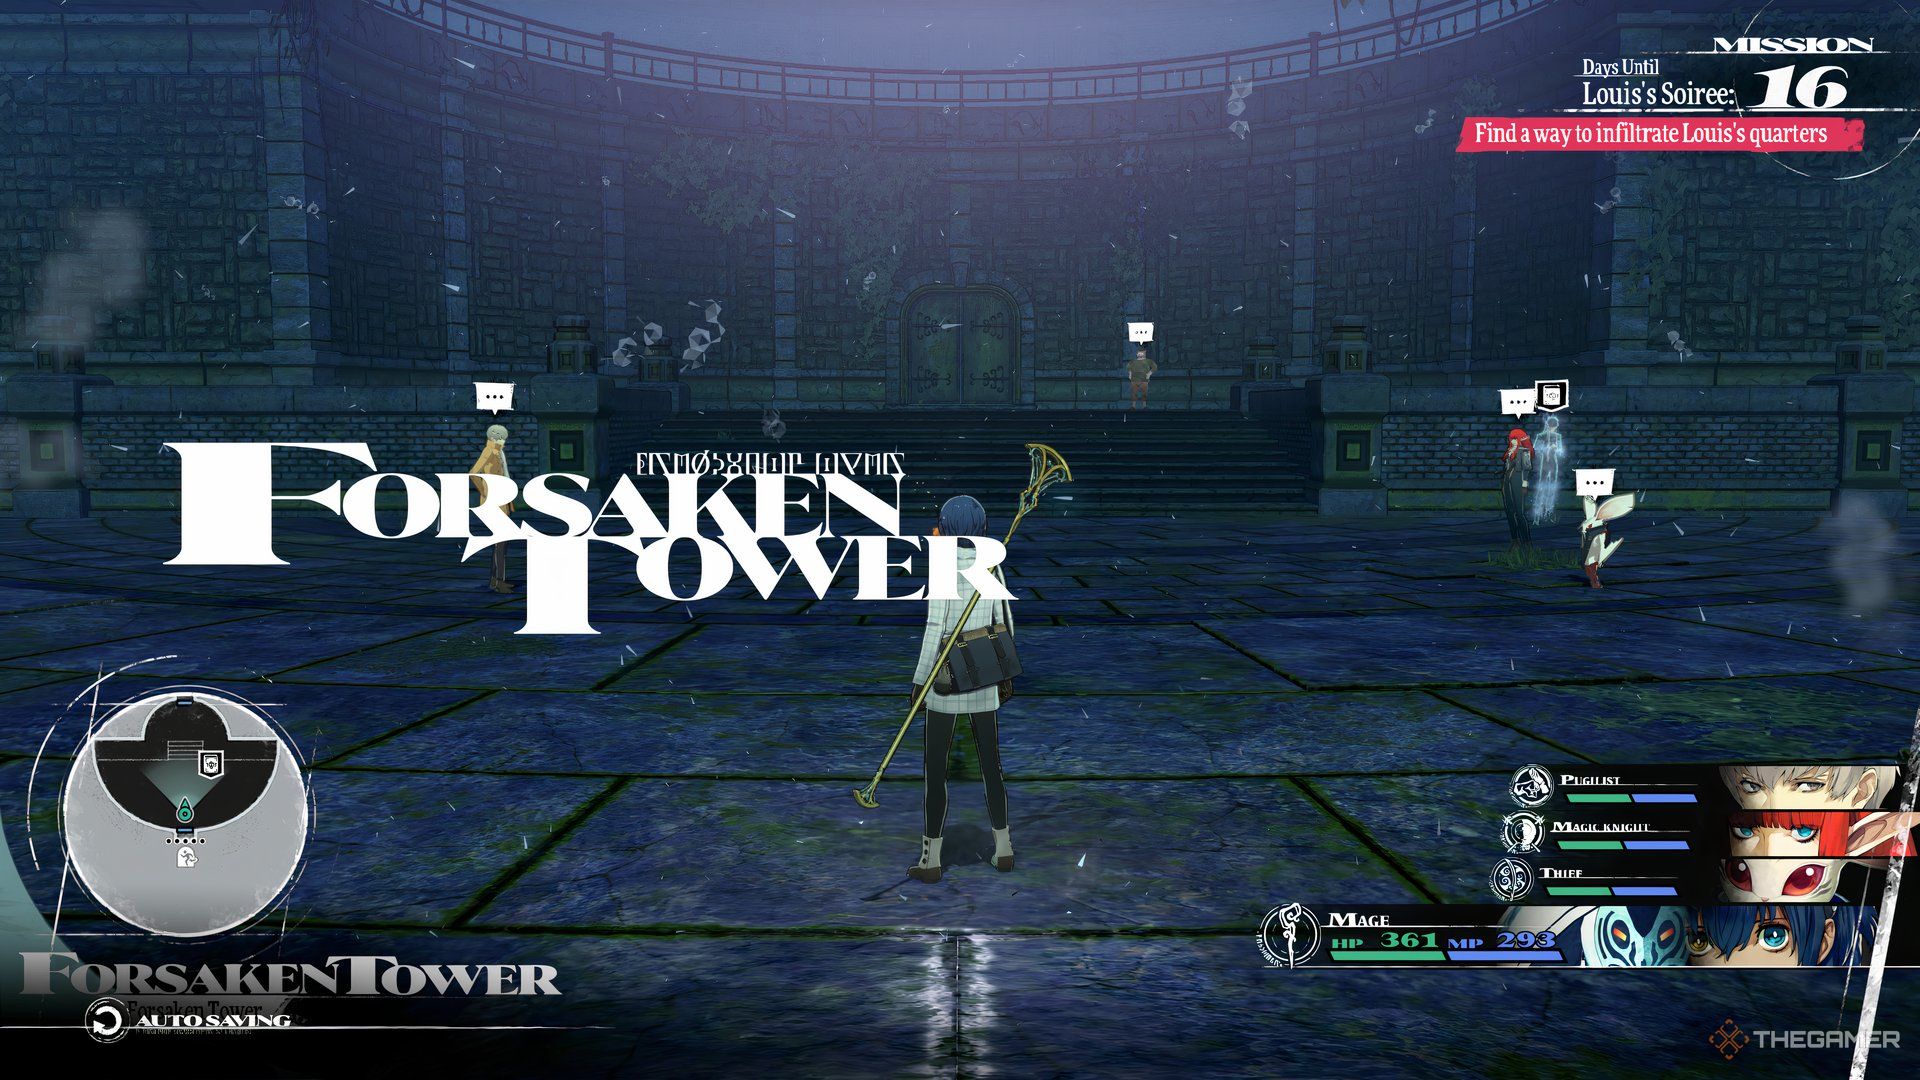
    The Metaphor: ReFantazio protagonist and their gang arriving at the Forsaken Tower.

    The Forsaken Tower has a straightforward layout, but the creatures inside are definitely challenging. Once you reach the top, you’ll confront Orgas, an incredibly tough boss. To give yourself the best shot at victory, having the Healer, Thief, and Faker archetypes is highly recommended.

    Effective Dialogues for the Pompous Noble


    The Metaphor: ReFantazio protagonist before The Pompous Noble who is returning the Deed.

    After conquering Orgas and securing the Ebony Horn, you can return to the port city the next day to complete the craftsman’s request. Afterward, head back to the noble and use these dialogue options to keep the conversation on track towards the Deed:

    1. You know me, I trust? (3rd Option)
    2. Such a tawdry arena. (2nd Option)
    3. Any option.
    4. You know the forsaken tower? (3rd Option)
    5. I’d like the Deed. (5th Option)

    Rewards for Deeds and Diversions


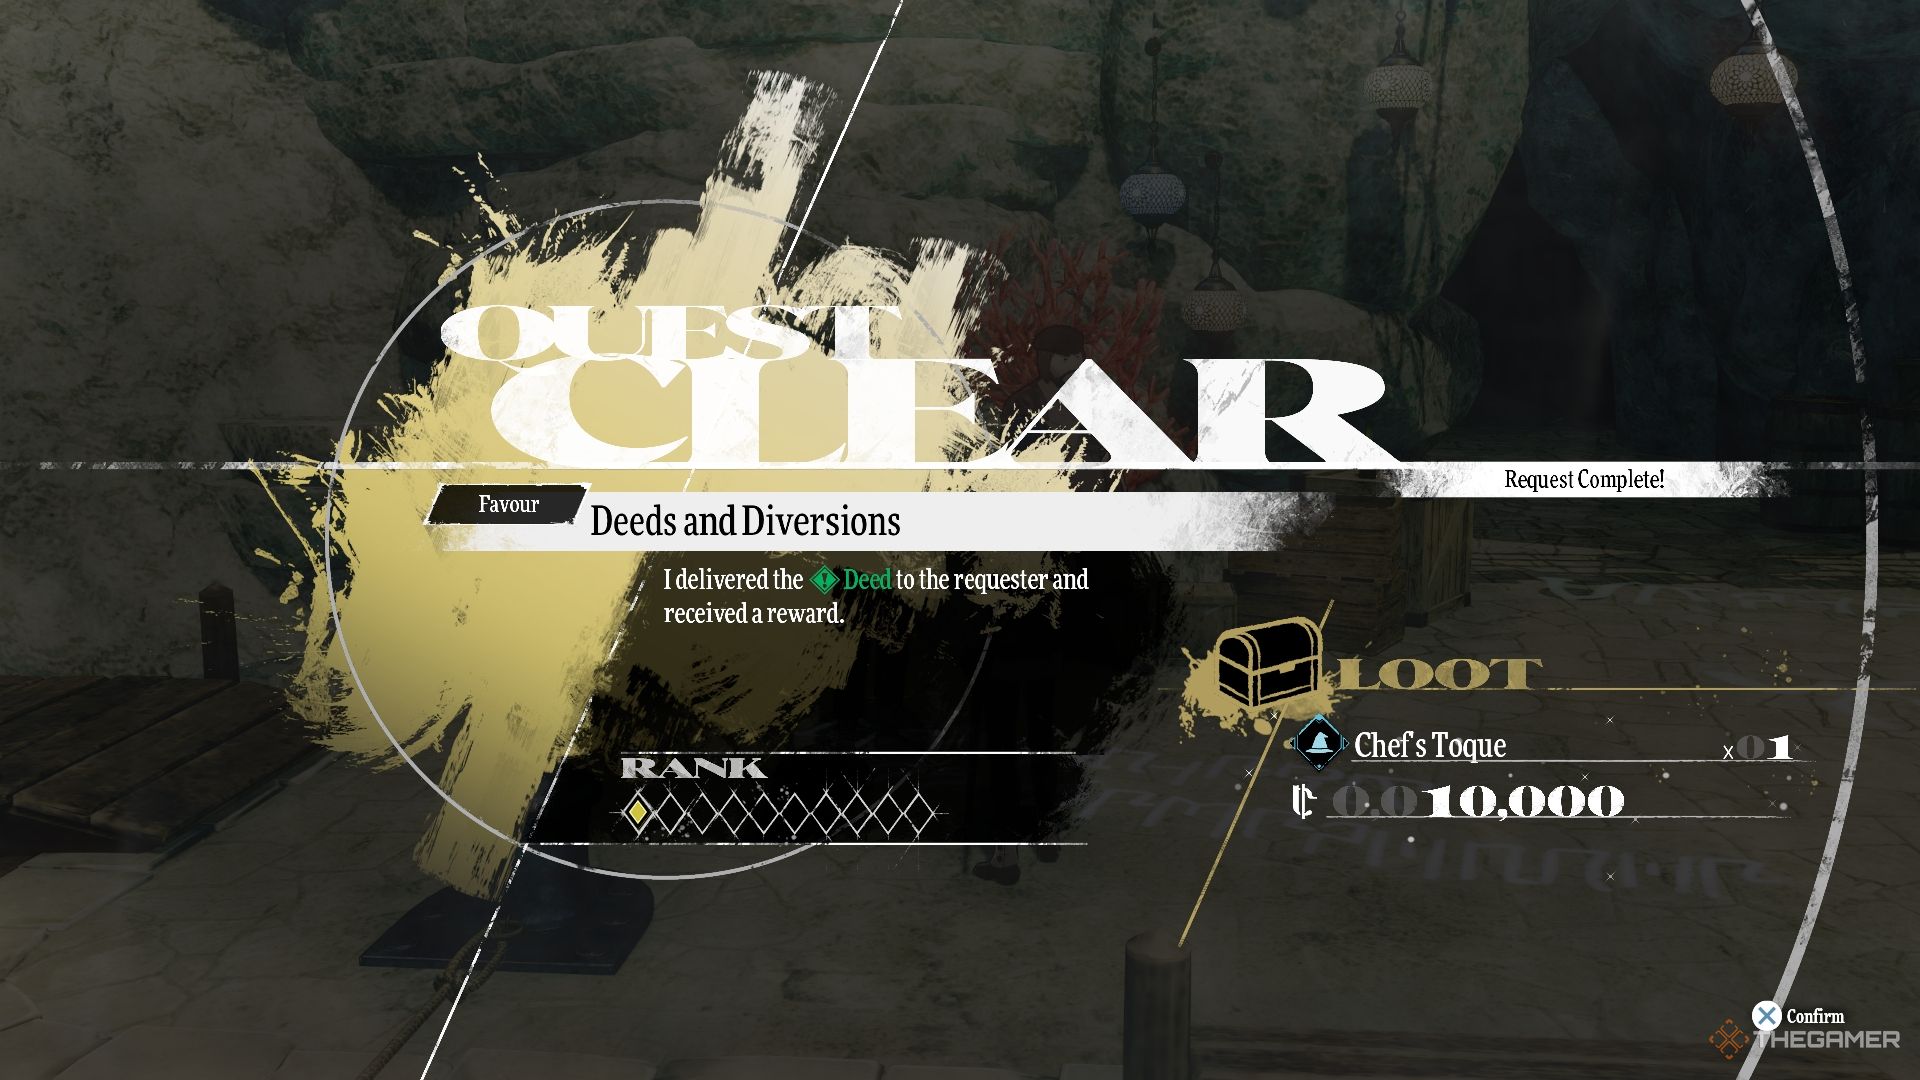
    Quest rewards for completing Deeds and Diversions in Metaphor: ReFantazio.

    After the conversation, the noble will finally hand over the Deed, allowing you to return it to the Overfamiliar Man to finish the Deeds and Diversions quest. He will reward you with a Chef’s Toque and 10,000 Reeve as promised.

  • Mastering Black Rock: Defeating Every Enemy in Alan Wake 2’s DLC

    Mastering Black Rock: Defeating Every Enemy in Alan Wake 2’s DLC

    The “Less Carrot, More Stick” is a missable achievement/trophy found in the Alan Wake 2: The Lake House DLC. To unlock it, you need to obtain the Black Rock Launcher within the facility and use it to take down every enemy type featured in the DLC.

    Although it may sound straightforward, this task can be challenging due to the limited ammo for the Black Rock Launcher. Additionally, the launcher requires proper charging before firing, which adds to the difficulty of timing your shots accurately.

    Alan Wake 2: The Lake House – Less Carrot, More Stick Achievement/Trophy


    The first step is to get the Black Rock Launcher; you will naturally unlock it as you progress through the game, making it fairly easy to obtain. After acquiring it, head to the Research Archives.

    Keep in mind that finding enough ammo for the Black Rock Launcher can be quite difficult. If you’re running low, consider enabling Infinite Ammo in the ‘Options’ for a brief time.

    There are four types of enemies you need to defeat using the Black Rock Launcher to earn the trophy/achievement. These include:

    1. Painted: These enemies emerge from walls and can only be damaged with the Black Rock Launcher. There’s also an achievement for defeating one as it comes out of a wall, which you may want to attempt at the same time.
    2. Normal: This enemy, wearing a white coat, can be taken down with a single shot.
    3. Teleporter: These enemies move around frequently. It’s best to learn their paths before making your shot, especially if you’re running low on ammo.
    4. Brute: Look for enemies marked with a red spot on their chest. Although they may be tough, they’re manageable similar to normal enemies.

    Once you successfully eliminate all four enemy types with the Black Rock Launcher, you’ll unlock the ‘Less Carrot, More Stick‘ achievement/trophy.

  • Conquer Jiren in Dragon Ball’s Sparking Zero Episode Battle

    Conquer Jiren in Dragon Ball’s Sparking Zero Episode Battle

    Quick Links

    Dragon Ball: Sparking Zero includes numerous tough battles in the Episode Battle section. In this part of the game, you select a character and follow through with their story. Your choices in handling these battles can affect how the story unfolds and may lead to different outcomes. Sometimes, these alternate routes can even end the story altogether.

    As you navigate through the main storyline, you’ll face Jiren as the final opponent in Goku’s Character Episode. Defeating Jiren is essential to moving forward, but it won’t be easy.

    How to Start the Battle Against Jiren

    You’ll get to fight Jiren at the climax of the Tournament of Power during the Universe Survival Arc. The lead-up to this battle is filled with tough adversaries. Fortunately, you’ll be playing as Ultra Instinct Goku, which adds a thrilling twist. Even so, Jiren is a formidable foe, so don’t underestimate him. It’s advisable to stick to the main storyline for the most exciting conclusion and to unlock Jiren’s Character Episode.

    How to Defeat Jiren

    Jiren is incredibly powerful, but so is Goku in his Ultra Instinct form. Initially, you’ll start the fight in an incomplete version of this form, and Jiren will also be holding back his full strength.

    As the battle unfolds, Goku will eventually harness the full power of Autonomous Ultra Instinct, making the fight more challenging for Jiren. Your strategy should focus on keeping distance and charging your Ki to enter Sparking Mode. Once you enter Sparking Mode, get close to Jiren and initiate a melee combo.

    Tip: To maintain your combo without letting Jiren escape, consider breaking it early by hitting the Ki Blast button during your Rush Combo. This helps you stay in control and deal optimal damage.

    As you deal damage, Jiren will be knocked back, which is your cue to unleash your Ultimate Blast and then recharge your Ki. Keep repeating this cycle until his health is fully depleted. At a certain point, Jiren will unleash his true power and start fighting as if the gloves are off.

    If Jiren is relentless and doesn’t give you space for a Rush Combo, you can use Super Perception or High-Speed Evasion to counter his attacks and regain control. If charging your Ki becomes too difficult, you can either knock Jiren away and recharge or use your Ultimate Blast immediately if you’re already in Sparking Mode.

    Tip: If you find Jiren constantly on the offensive, look for a chance to use Goku’s No Backing Down skill. Though it consumes three Skill Points, this move instantly puts you in Sparking Mode and gives you valuable buffs.

    Always keep a safe distance from Jiren while he’s in Sparking Mode—his Ultimate Blast cannot be blocked and has a large area of effect (AOE). It’s best to wait until his Sparking Mode ends before engaging again.

    If you manage to defeat Jiren in a short time, you’ll unlock an alternate ending where Goku wins the Tournament of Power solo, although you may miss out on some major rewards tied to the primary ending.

    How to Unlock the Dragon Ball Super Ending by Defeating Jiren

    To access the main ending, you’ll need to extend your battle with Jiren until all characters finish their dialogue. As the dialogue wraps up, you’ll hear Vegeta proclaim that it’s time for Goku to take down Jiren.

    Note: If you defeat Jiren before the dialogue is over, you’ll trigger the alternate ending.

    Once the conversations reach their conclusion, you can defeat Jiren, leading to another fight where Goku will revert to his base form. In this battle, Frieza and Android 17 will also be playable.

    Despite Goku’s change to his base form, you can still use the same strategy you did in Ultra Instinct. If Goku’s health is low, feel free to switch to Frieza or Android 17 to keep the fight going.

    After defeating Jiren in this final encounter, you will unlock the ending cutscene featuring Jiren from the main storyline. Additionally, you’ll earn seven Super Shenron Balls. Completing Goku’s main route will also unlock Jiren’s Character Episode.

  • Getting Started with Dragon Ball: Sparking Zero Online Basics

    Getting Started with Dragon Ball: Sparking Zero Online Basics

    Are you excited to dive into the online battles of Dragon Ball: Sparking Zero? There are plenty of ways to compete, from laid-back tournaments to ranked matches. And unlike the infamous “Tournament of Power,” the fate of the universe is definitely not at risk here—though you probably didn’t worry about that to begin with.

    That being said, we know you have some questions: Does the game have rollback netcode? Is cross-play available? And how can you create lobbies to play with your friends? Let’s clarify these points and more!

    Is There Rollback Netcode in Dragonball: Sparking Zero?


    Dragonball: Sparking Zero does not include rollback netcode. The game’s lead producer, Jun Furutani, confirmed this before its release in June 2024.

    Because rollback netcode is designed to minimize lag by predicting how an opponent will act, it may not work well with Sparking Zero’s open-ended 3D arena combat, which differs from traditional 2D fighting games like Dragon Ball FighterZ.

    Is Cross-Play Supported in Dragonball: Sparking Zero?


    Goku unleashes a Kiaoken 20x Kamehameha attack on Guldo in Dragon Ball: Sparking Zero.

    Dragonball: Sparking Zero does not offer cross-play. Jun Furutani shared in a September 2024 interview with IGN that technical complexities hindered the implementation of online cross-play.

    Given these details, the chances of cross-play being introduced in a future update appear low, but we will keep you in the loop if anything changes.

    What Online Modes Are Available in Dragon Ball: Sparking Zero?

    Dragon Ball: Sparking Zero features multiple online modes catering to both casual and competitive players. You can find these options in the “Episode And Custom” and “Battle And Training” sections of the main menu.

    Player Match

    Player Match serves as the casual matchmaking option. You can either join or create a room, or go for a quick match.

    Ranked Match

    Ranked Match is the game’s competitive matchmaking mode. It includes five ranking tiers (D, C, B, A, and S), each divided into five sub-tiers (1-5).

    Experienced players can aim for the Z-Rank, a designation for the top players in Sparking Zero.

    Rankings

    In Rankings mode, players can monitor their competitive rank, check their opponents’ ranks, and view the top 100 players in Sparking Zero. There’s also a filter for viewing the top 100 Z-Rank players.

    Additionally, players can explore Character Frequency Rankings and Character Rankings for each character in Ranked Matches.

    World Tournament

    World Tournament is a casual matchmaking mode that allows you to host or join fighting tournaments using pre-established rules or you can set up your own.

    World Library

    In the World Library, you can engage in Custom Battles created by players around the world. You can also upload your own Custom Battles for others to enjoy. Earn player titles when other online players appreciate your custom battles.

    How to Play Online with Friends

    To play online with friends, simply create a custom room in either Player Match or World Tournament mode. After selecting your desired mode, follow these steps:

    1. Choose “Create Room” to access the Room Settings menu.
    2. Adjust your Room Settings by selecting from the following options:

      1. Select Tournament Rules (World Tournament only): Pick the ruleset you want to use.
      2. Rank: This option determines who can enter your room based on their online rank.
      3. Battle Rules (Player Match only): Choose rules for Destruction Point, Team, or Single Battle in your room.
      4. Time (Player Match only): Set a time limit for each battle in your room.
      5. Language: Indicate if you prefer to play with gamers who speak the same language.
      6. Participants (Player Match only): Decide how many players can join your room.
      7. Private Slots: Set aside specific slots for private invitations.
      8. Connection Quality: Specify internet connection requirements for players wanting to join.
      9. Reflect Ability Items (Player Match only): Turn ability item effects on or off.
      10. Battle Order (World Tournament only): Decide if tournament matches occur simultaneously or in succession.
    3. Once you finalize your settings, select “Confirm” to create your room.
    4. You can invite friends to your room using one of these methods:

      1. Press Triangle (△) / Y to open the Sub-Menu and select “Invite a Friend” to send an invitation through your system’s online service.
      2. Share your Room ID with friends, who can enter it to join your room—Press L1 / LB to show your Room ID.
  • Master the Sonic Sway Technique in Dragon Ball: Sparking Zero

    Dragon Ball: Sparking Zero is an action-packed fighting game filled with a wide range of characters, each possessing unique moves and combos. One aspect that players often overlook is mastering defense. A great way to up your game defensively is to learn the challenging technique known as the Sonic Sway.

    The Sonic Sway is one of the few defensive moves that can help players evade damage. Although it can be tricky to master, successfully executing it feels incredibly rewarding and adds a stylish flair to your gameplay. In this guide, you’ll find out how to perform the Sonic Sway effectively and understand its advantages.

    How To Execute A Sonic Sway

    To perform the Sonic Sway, you need to hit the Perception button just before an enemy’s attack connects. This may seem straightforward, but the key challenge lies in timing. Different characters have varying attack animations, which can make it tricky to execute the Sonic Sway at the right moment. Mistiming it could leave you vulnerable to an attack or just trigger a standard counter instead.

    The Sonic Sway does not work against Ki-based attacks.

    One helpful tip is to rely on sound cues. As you defend against an enemy’s assaults, listen closely to the sounds made when their hits strike your guard. If timed right, your character will execute several dodges and deplete one full Ki Gauge from your opponent before sending them flying to a mid-range distance.

    You cannot perform the Sonic Sway while caught in a combo or stunlock by the opponent. Always remember to hold the guard button when trying to initiate a Sonic Sway.

    Where To Practice Sonic Sway

    To practice the Sonic Sway effectively, just enter Training Mode from the Main Menu and set the opponent’s behavior to Rush Chains. This option will make the AI use only melee attacks with brief pauses. It’s advisable to practice against each character to familiarize yourself with their specific timing patterns.

    The Sonic Sway is ineffective against large enemies like Great Ape Vegeta or Janemba.

  • A Guide to Locating Every Puppet in Ys X: Nordics

    A Guide to Locating Every Puppet in Ys X: Nordics

    From the moment Adol arrives on Carnac in Ys X: Nordics, he hardly has a chance to catch his breath. As one of only two people capable of combating the relentless Griegr attacks, he quickly finds himself embroiled in chaos. Just when he tries to take a breather with his new friends, Carnac faces a raid, resulting in the disappearance of all the villagers.

    As you progress through the game, you discover that Jord has transformed every villager into a puppet, scattering them across the Obelia Gulf. Throughout your journey, you’ll encounter these villagers in various locations, and here’s how you can rescue them all.

    Finding All Villagers

    While exploring Carnac, you’ll have the chance to talk to each villager and understand their challenges. Once they’re kidnapped, it becomes your duty to save them—mostly one at a time. Below is a list of all the locations you’ll need to visit:

    Villager Name

    Location

    How To Free

    Dogi

    Lecto Island

    Dogi is the first villager you’ll automatically rescue during the main story after defeating the Ioi boss.

    Joel

    Fishscale Island

    The plot leads you here right after the trial on Lecto Island, where you’ll find Joel hiding away.

    Cruz

    Termina Island

    The third villager you’ll liberate occurs during the main storyline at the end of Termina Island, right after the Magna Diga boss fight.

    Mirabel

    Carnac

    After conquering Termina Island, head to Carnac, where you can rescue Mirabel after an intense battle.

    Momina

    Balta Island

    During your journey to Balta Island in response to the Griegr attack, you can save Momina near the end of the level.

    Ashley

    Ozmid Expanse – Occupied Island

    You’ll learn about recapturing islands once you reach Ozmid Expanse, and Ashley will be saved once you complete your first mission.

    Romes

    Anchor Island

    Another character tied to the main story, you’ll find Romes while exploring the outskirts of Anchor Island.

    Cohen

    Ozmid Expanse

    Located on a small boat near a blue question mark in this area, you can find Cohen.

    Father Cuthbert

    Breezy Isle

    To find this NPC, you’ll first need to reach another blue question mark in the Ozmid Expanse, which will trigger a side quest leading you to Breezy Isle.

    Rosa

    Haze Island

    You’ll arrive at this island during the main storyline and save Rosa at the end of the La Belladona boss encounter.

    Dr. Flair and Rafe

    Kalon Island

    Connected to the main storyline, you’ll find both NPCs battling the Griegr themselves.

    Rene

    Falun Island

    You’ll encounter Rene while liberating Ilmer Village.

    Mayor Clement and Dawson

    Raufos Island

    You’ll save them during your assault on Jord’s stronghold.

    Einar

    Outcast Isle

    Look for a green side quest marker when you arrive on this island; you’ll find Einar in a small cave there.

    Millette

    Sonnelia Basin – Southern Ruins

    Millette, a Griegr puppet, is located in the final room you’ll clear while reclaiming this island.

    Mandy

    Specular Bay

    While navigating the bay, you’ll spot a Griegr ship. Defeat the Griegr on board to save Mandy.

    Corinne

    Specular Bay – Northern Citadel

    Find the Griegr puppet in the last room during this island’s recovery mission.

    Fortune Teller Guila

    Eversummer Isle

    You can find her at the green marker right after landing on the island. Defeating the Griegr will allow her to join you on your ship.

    All Other Villagers

    Grotto Isle

    A side quest near Grotto Isle from Hugill culminates in a battle against several Griegr puppets. Defeating them will rescue all remaining villagers.

    Defeating Griegr Puppets

    Griegr puppets serve as unique enemies in Ys X: Nordics. While they aren’t classified as bosses, they’re formidable due to their high health and multiple durability levels. Once you deplete the initial durability bar and reduce their health by half, they will scream and regenerate a new durability bar to conquer.

    The most effective strategy to defeat these enemies is to use your Break abilities repeatedly, followed by quickly finishing them off. You can also dodge their attacks to increase your revenge gauge, which enhances your break and health damage. Be aware that the Griegr puppets encountered in the last quest on Grotto Isle are significantly tougher than the previous ones.

    The Importance of Saving Carnac Villagers

    Most villagers in Carnac can be saved through the main storyline, but a few require extra effort. Fortunately, saving these villagers isn’t purely for altruistic reasons. Each villager you rescue unlocks new features on your ship, including:

    • The ability to report Runestones to Father Cuthbert, earning you various rewards like Blessed Paper Scraps.
    • Unlocking a special area with the fortune teller, allowing you to use Crystal Shards to create random mana seeds, which can be more effective than regular crafting.
    • Saving Cohen enables you to convert excess fish into Basic Ingredients, facilitating trades with merchants.
    • Mandy opens a shop on your ship where you can upgrade your accessories freely.

    In addition to these benefits, every villager you rescue enhances one or more stats of your ship and provides you with an extra Recapture Skill.

  • Conquering Naglfar Nucleus in Ys X: Nordics – A Guide

    Conquering Naglfar Nucleus in Ys X: Nordics – A Guide

    As you dive into the story of Ys X: Nordics, you’ll encounter the three main antagonists early on, with Odr being the clear leader. He’ll challenge you to a duel at the beginning to demonstrate his strength and set you on a journey to enhance your own abilities to confront this formidable foe.

    Your chance to defeat him arrives after you board the Griegr warship and enter the primary generator room. Be prepared, as you won’t only be facing him; this encounter will be the toughest challenge you’ve faced so far in the game.

    Naglfar Nucleus Overview and Attack Patterns


    HP

    96,582

    STR

    446

    DEF

    488

    Looking at the stats, you can see how tough this encounter will be. This fight marks your first real boss battle after Logr, who had significantly less health. Along with its impressive stats, the Naglfar Nucleus fight involves two attackers: Odr and the Nucleus itself.

    Here’s what you need to anticipate during this battle:

    Attack Name

    Description

    Normal Slashes

    Odr will perform quick slash attacks after charging his hand briefly, delivering one or two swift slashes.

    Ground Stomps

    Odr has two types of stomps in this battle. One involves him raising his leg and then slamming it down. The other triggers at a distance, having a broader AoE and greater damage.

    Red Attack

    Odr will glow red while charging a giant orb above his head to throw at you. This is fairly easy to counter, making it excellent for raising your revenge gauge. He can also fly up and smash down after charging his hook.

    Speed Attack

    The Nucleus will charge up with a blue aura before unleashing a wide laser attack.

    Dark Orb

    If Odr begins charging a dark orb, it’s best to get away quickly, as he can attempt to grab your active character and inflict heavy damage.

    In addition to these attacks, the Nucleus can also perform close-range strikes while you attack it.

    How to Beat the Naglfar Nucleus

    This confrontation with the Naglfar Nucleus requires a solid strategy. Remember that while the Nucleus can reposition itself, it lacks mobility and tends to stay on one side of the battlefield. In contrast, Odr will be continually moving around to engage you.

    Your main objective is to deplete Odr’s durability bar, which will immobilize him briefly. Then, focus your attacks on the Nucleus until he recovers. Fortunately, the Nucleus doesn’t regenerate its health or durability at any point during the fight.

    You cannot eliminate Odr in this battle permanently; your only strategy is to keep immobilizing him.

    A quick strategy is to remain close to the Nucleus since Odr will pursue you, allowing you to utilize AoE attacks on both. However, you’ll need to be adept at dodging and countering, as the attacks from both foes can come at you relentlessly.

    Alternatively, you can maintain distance from the Nucleus and concentrate on defeating Odr first before shifting your focus to it. Whichever approach you take, ensure that you have abilities that deal significant Break damage as they are crucial for success in this battle.

  • Quick Guide to Efficiently Farm Magla in Metaphor: ReFantazio

    Quick Guide to Efficiently Farm Magla in Metaphor: ReFantazio

    In Metaphor: ReFantazio, you need to collect various currencies to advance in the game. Much like Reeves, Magla has its own purposes. If you aim to enhance your Archetypes, gathering plenty of Magla is essential. You can engage with Archetypes for your allies and inherit valuable skills to make them stronger.

    Here are some simple methods to quickly stock up on Magla. Facing tough enemies in Dungeons is always a reliable way to earn it. Additionally, you can optimize your resources by joining bond events and gathering Magla from the King’s Rock.

    Exploring Dungeons


    The quickest way to earn Magla is by exploring Dungeons where you encounter various enemies. Focus on achieving as many Unscathed Triumphs as possible for extra rewards, so ensure you’re strong enough to defeat opponents before they strike.

    If you find Trance Crystals, take advantage of them to farm Magla by defeating the enemies that spawn. You may also encounter Elmenta, which you’ll need to defeat in one turn for substantial rewards.

    It’s wise to tackle weaker foes around the Trance Crystals using your melee weapon, avoiding starting a Squad Battle.

    Connecting with Followers


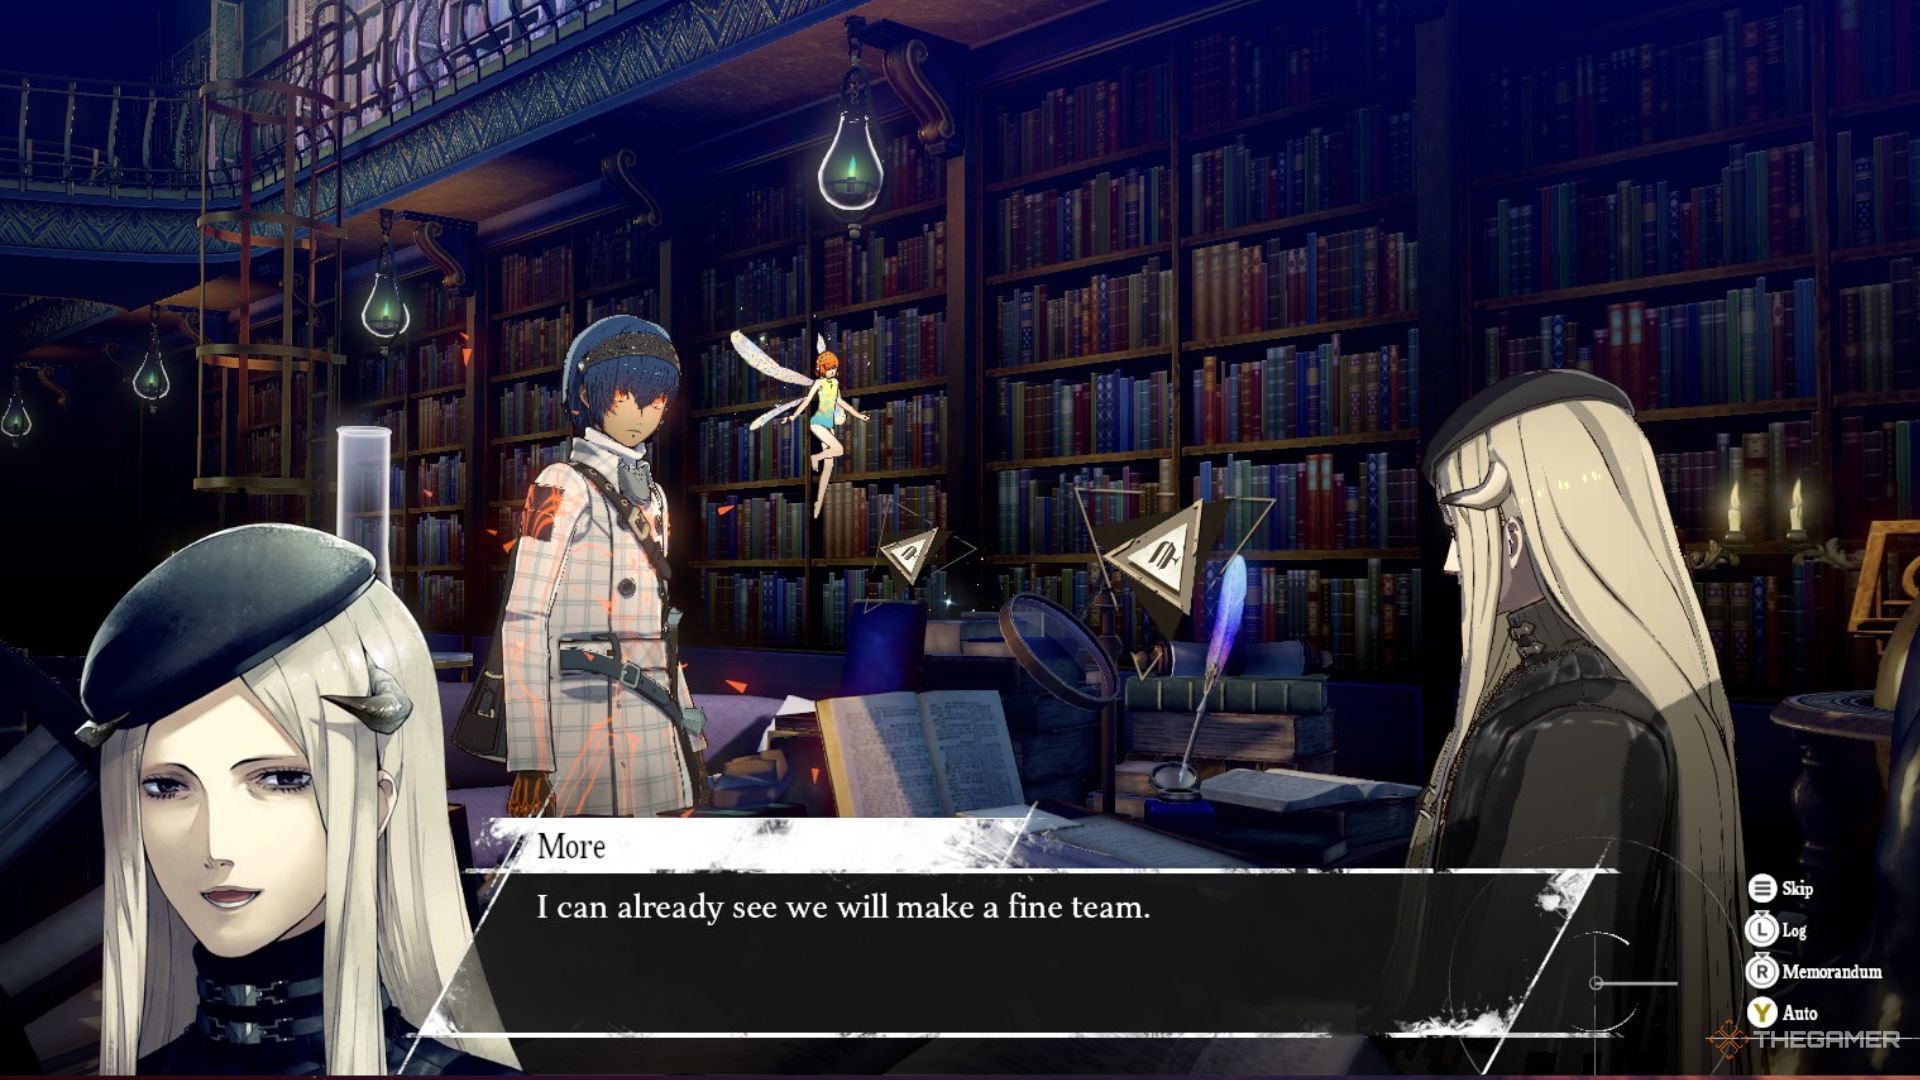
    Extra Magla is obtained during a bond event with More in Metaphor: ReFantazio.

    When participating in Bond events with Followers, you can earn extra Magla by selecting the most appropriate responses. Aim to impress them during discussions.

    Once you unlock the Gauntlet Runner, you can spend quality time with your companions to enhance your Kingly Virtues. They will engage you in conversation, and if you choose the right replies, you’ll earn additional Magla.

    Gathering Magla at King’s Rocks


    The protagonist is standing in front of the King's Rock in Metaphor: ReFantazio.

    Each town features a King’s Rock displaying popular candidates for kingship. Although your name might not be on the rock, you can earn Magla by increasing your popularity among local residents.

    You can boost your popularity through various activities, such as completing quests and bounties, which will endear the townsfolk to you for your help.

  • Defeating Wagnas in Romancing Saga 2: Seven’s Revenge Guide

    Defeating Wagnas in Romancing Saga 2: Seven’s Revenge Guide

    Wagnas is the main villain in Romancing Saga 2: Revenge of the Seven. Despite being the central antagonist, you don’t have to wait until the end to face him—it’s possible to challenge Wagnas relatively early in the game, although it may take some travel. One key point to remember: if you enter this battle without adequate preparation, you’re likely going to regret it.

    Wagnas is not just any foe; he’s a powerful magician equipped with devastating magical abilities. His spells include an all-encompassing fire attack that affects your entire party, as well as a strong light magic spell that can deal significant damage to multiple characters. If you go in ill-equipped, you’re bound to have a tough time. This guide will provide you with crucial strategies for reaching Wagnas and handling the battle effectively.

    The Battle of Castle Hakuro

    When Castle Hakuro becomes available, you’re all set to confront Wagnas, the leader of the seven. You can access this quest after completing Sekishusai, the Loyal Retainer. After a time shift, you’ll unlock "The Battle of Castle Hakuro."

    Upon entering Castle Hakuro, take a left, go through the gate, and climb the stairs. Turn right out the door and follow the path until you find a door leading to a battlement. Enter the doorway; there will be a large room on the other side. Navigate around the guards positioned on either side of this door.

    Next, go down the nearby staircase and head straight to the next door. Proceed down the stairs, and you’ll find a save point, just about ready to face the boss of this dungeon: the Black Legion.

    Black Legion Boss Fight

    In this encounter, you’ll battle the Black Legion alongside two Mystics. The Rapier’s Marionette technique proves to be highly effective against them. While the Black Legion is mostly resistant to attacks, it can be disrupted by the Paralyze status.

    Be cautious of the Mystics, as they can unleash very powerful martial arts attacks, especially after the Black Legion is defeated. Thus, it’s advisable to eliminate them first. If you consistently utilize the Marionette technique, this battle should be manageable.

    Upon defeating the Black Legion, Wagnas will reveal himself and then quickly escape to his floating castle, prompting you to find a way to reach him.

    Reaching the Flying Castle

    To pursue Wagnas, you need to reach his Floating Castle. There are two options: use Hiraga’s flying machine or get an Iris to take you there. The Iris route is lengthy and could be complicated if you haven’t completed its quest yet. Therefore, let’s focus on the Hiraga method. Start by going to Liangshan and Yuyan and chatting with the locals marked with a quest symbol.

    Afterward, head to Somon to find Hiraga. He’ll have a new invention ready for you. Just go to Castle Chonto, where you can utilize the Windwaker to reach the Floating Castle above. But ensure your party is properly configured because you won’t be able to leave once you arrive.

    Note: If you haven’t paid Hiraga to build the Leon Bridge, be prepared to spend 1,000,000 Crowns.

    Preparing Your Party for Wagnas

    The Fire Wall spell is essential for fighting Wagnas, as it counters his Firestorm attack. Make sure your fastest character knows this spell. To obtain Fire Wall, find the Book of Fire & Earth I in the Steppe area, located near the center near two ladders. You’ll need to research the spell, so be prepared to spend some time acquiring it.

    It’s crucial to bring as many water-element attacks as possible, as Wagnas will create a fire leyline during the fight. While your character using Fire Wall won’t have water magic equipped, they can still utilize water-elemental techniques. Great swords often have such techniques. Additionally, fire-immune characters, like a Salamander, and a Fire Ring can be major assets. Equip characters proficient in swords, spears, axes, and bows.

    If your group includes a character with a bow, equip the Falling Phoenix technique, particularly effective since Wagnas is airborne. Multi-hit attacks are beneficial, especially against the Animas in the battle’s second phase, and Barrage is an excellent choice for taking out multiple enemies.

    Battle of the Floating Castle

    Once inside the Floating Castle, head straight and up the stairs, avoiding the living jelly creatures. Continue outside, dodge the dragons, and head through the door at the other end. Move along the hallway, staying clear of slimes.

    You’ll find a chest on the right containing a Vorpal Sword, but beware of a mimic guarding it. Continue down the hallway, up some stairs, and exit through the next door to find yourself outside again. To your right, you’ll find a staircase. If you follow the left path outside, you can discover another chest containing Gold Ore.

    Return through the doors into an expansive hall, then enter the main room and take a left to climb the spiral staircase.

    When you reach the second floor, head through the doors and step outside once more. A large dragon will be waiting out there, which you can choose to engage or avoid. If you decide to fight, they can also be stunned, allowing you to take advantage of their turn. If you have the Fire Wall spell ready for Wagnas, it will negate the dragon’s powerful attacks.

    After battling your way through, head back through the doors and up the stairs to find Wagnas waiting for you.

    Warning: Before facing Wagnas, ensure your gear is suited for the fight. He relies exclusively on magic, meaning you should prioritize magic defense over physical armor.

    The Wagnas Boss Battle

    The confrontation with Wagnas unfolds in three phases:

    1. In the first phase, you’ll deal with Wagnas’s magical assaults.
    2. The second phase introduces his formidable Firestorm attack, along with Blue and Red Animas that will join the fray.
    3. In the third phase, Wagnas employs a potent light magic spell known as Sunray.

    During the battle, focus on dealing damage to Wagnas. When he transitions into the second phase, use your Fire Wall spell to counter his Firestorm attacks. Always cast water spells while the fire leyline is active to prevent him from healing significantly at the end of the round.

    Make sure to keep an eye on the turn order, as the Firewall spell expires at the end of the round when cast by your last acting character. In the later phases of the fight, Wagnas will summon Animas to assist him. Pay close attention to their sacrificial attacks, as the Red Anima will target one ally, while the Blue Anima will attack multiple characters.

    Using a Unite Attack when the Animas are summoned can be highly effective, especially if you have strong multi-target attacks prepared. As the final phase progresses, Wagnas will continue using his previous strategies while introducing the Sunray spell. Prepare for this by equipping light magic defenses, like the Light Wall spell if available.

    Despite the challenges, if you stay focused and apply these strategies, you’ll confirm victory against Wagnas. If you find yourself struggling with party composition, you can opt for a non-confrontational approach by telling Wagnas you were "just leaving" during the initial interaction, allowing you to regroup.


  • Crafting Unique Battles in Dragon Ball: Sparking Zero

    Crafting Unique Battles in Dragon Ball: Sparking Zero

    Quick Links

    Dragon Ball: Sparking Zero allows players to design their own thrilling battles with its Custom Battle feature. You can choose your favorite characters and create unique matchups, customizing the rules and settings to enhance your gameplay experience.

    In this guide, we will explain how to set up and excel in Custom Battles, detailing adjustments to battle parameters and effective team strategies. Additionally, we’ll provide an example of a Custom Battle that you can replicate.

    How To Get Started

    When you first enter Custom Battle Mode, you will encounter a tutorial that provides an overview, but it may not cover all the specifics needed for more complex scenarios. While the game suggests starting with Simple Edit mode, which can feel limiting, we’ll focus on the more versatile Normal Edit Mode.

    The Simple Edit mode offers a helpful tutorial for its basic features, so we won’t delve into that here.

    To begin, access the Custom Battle Mode, select Create New, and choose Normal Edit. The game will automatically present a predefined matchup between Goku and Frieza on Namek, but we’ll modify it according to our preferences.

    For our example, we’ll create a scenario where:

    • Goku and Vegeta fuse during the Tournament of Power.
    • They effortlessly defeat Jiren in the process. (You can adjust the challenge level to your liking.)

    Characters

    You can select participants for the battle from the character roster. Although it’s quick to choose characters from the side menu, it’s more advantageous to hit the Character Details button at the bottom of the screen for deeper customization options.

    Here, you can modify aspects of each character, including their outfits and available techniques.

    For our example, we’ve chosen:

    • Player’s Team: Goku and Vegeta, with Vegeta equipped with numerous power-up items for a robust fusion.
    • CPU Team: Jiren, set on default settings since the enhancements we’ve given to Vegeta will make the battle manageable.

    Battle Environment

    In the Battle Environment settings, you can select the stage, music, and the overall rules of the encounter. We’ll choose the Tournament of Power Arena and set the music to the anime’s opening theme for a fun twist.

    It’s essential to check the Rule Settings tab, where you can enable or disable elements like transformations or team switching. For this combat, we will deactivate flying for everyone, and if you want only one character grounded, assign them a special item during character customization. As we’re using the Tournament of Power Arena, we’ll also set the rules for Out-of-Bounds.

    While we’ll turn off the CPU transformation feature, allowing Jiren to remain in his base form during the match, you have the option to trigger his transformation later through effects.

    Effect Settings

    This section allows you to create dynamic elements during the fight. One notable action we want to initiate is the fusion of Goku and Vegeta at the battle’s start. We’ll configure this by setting a No Condition trigger, which will automatically initiate the fusion.

    You can also designate various effects depending on the circumstances, such as remaining health or moves used. In our case, we’ll select Force Fusion, transforming Goku into Gogeta as soon as the battle begins.

    Next, we’ll add a separate condition for Jiren, triggering his transformation when his health is significantly low, followed by a health regeneration effect to maintain an exciting flow during the battle.

    Scene Settings

    In this area, you can manage the scenes for both the opening and closing of the battle. You can also inject mid-fight scenes through the Effect Settings menu.

    Let’s create an introductory scene by selecting an appropriate cut, which will involve crafting individual narrative elements. Initially, we’ll opt for a 2D cut due to the ease of use, although it lacks the interactivity found in 3D cuts.

    We can further personalize the scene with dialogue options, though this may require navigating a vast database of pre-written text. Filters can simplify this process, letting you find specific lines quicker.

    After selecting a thumbnail image for your scene, you can finalize it and add any necessary scenes for the battle end. For the closing segment, we’ll incorporate dynamic 3D elements for a more thrilling experience.

    How To Finish The Custom Battle

    You’ll need a title screen that includes a thumbnail image and descriptive text. The text, like before, can be filtered, but the thumbnail doesn’t have to relate directly to any of the scenes created.

    Once the thumbnail and title are finalized, set tags that best describe the battle, making it easy for players to locate. We’ll use tags like Easy and Tournament of Power for clarity.

    Once satisfied with your setup, you must play and win your battle before uploading it. A green joystick icon indicates that it’s ready for submission.

    You can edit or remove the battle via a submenu, and once everything aligns with your vision, post it. Your battle will then be accessible in the World Library under My Page, displaying its ID beneath your username.

    If you wish to check how our example battle looks in-game, it’s assigned ID 2-632-619-740.

  • Discover All Pikkard Locations in Ys X: Nordics

    Discover All Pikkard Locations in Ys X: Nordics

    If you’ve been enjoying Ys X: Nordics for a bit, you’re probably encountering a variety of collectibles scattered throughout the game. While main and side quests guide you to complete specific tasks, these collectibles encourage you to explore the game world instead.

    One such collectible is the Pikkard, which you’ll unlock a few hours into your journey. There are only six Pikkards to discover, but finding them early on can yield significant rewards.

    First Pikkard Location


    To start gathering Pikkards, you’ll need to advance in the story until you form a partnership with Karja and rescue the trapped villager on Termina Island. After completing this, feel free to roam the Carnac Waters and head towards the Inlet Isle, located in the lower right area of the map.

    When you reach the end of the Isle, you will encounter two more Carnac villagers, Lux and Sache. They will ask you to help save the Pikkard, leading Karja to set up a dedicated space for it on the ship. This initiates the Pikkard Adoption quest.

    Once you’ve acquired a Pikkard, you can interact with it after completing each part of the story for additional rewards.

    You can also access the basket in the cabin area to collect some Basic Ingredients.

    Silver Pikkard Location


    Ys X Nordics green mark in swampy water for Silver Pikkard in Termina Island.

    Once you embark on the Pikkard Adoption quest, your second Pikkard can be found in Carnac Waters. Check your sea map and head towards Termina Island, the same location where you obtained your Gullinboard and faced the Magna Diga boss.

    After arriving on Termina Island, navigate to the swampy waters that you couldn’t initially cross without your Gullinboard. Look for a green mark in the center of the water; approaching this mark will reveal the Silver Pikkard for you to collect.

    Speedy And Scaredy Pikkard Location


    Ys X Nordics speedy Pikkard locations on Hidden Isle.

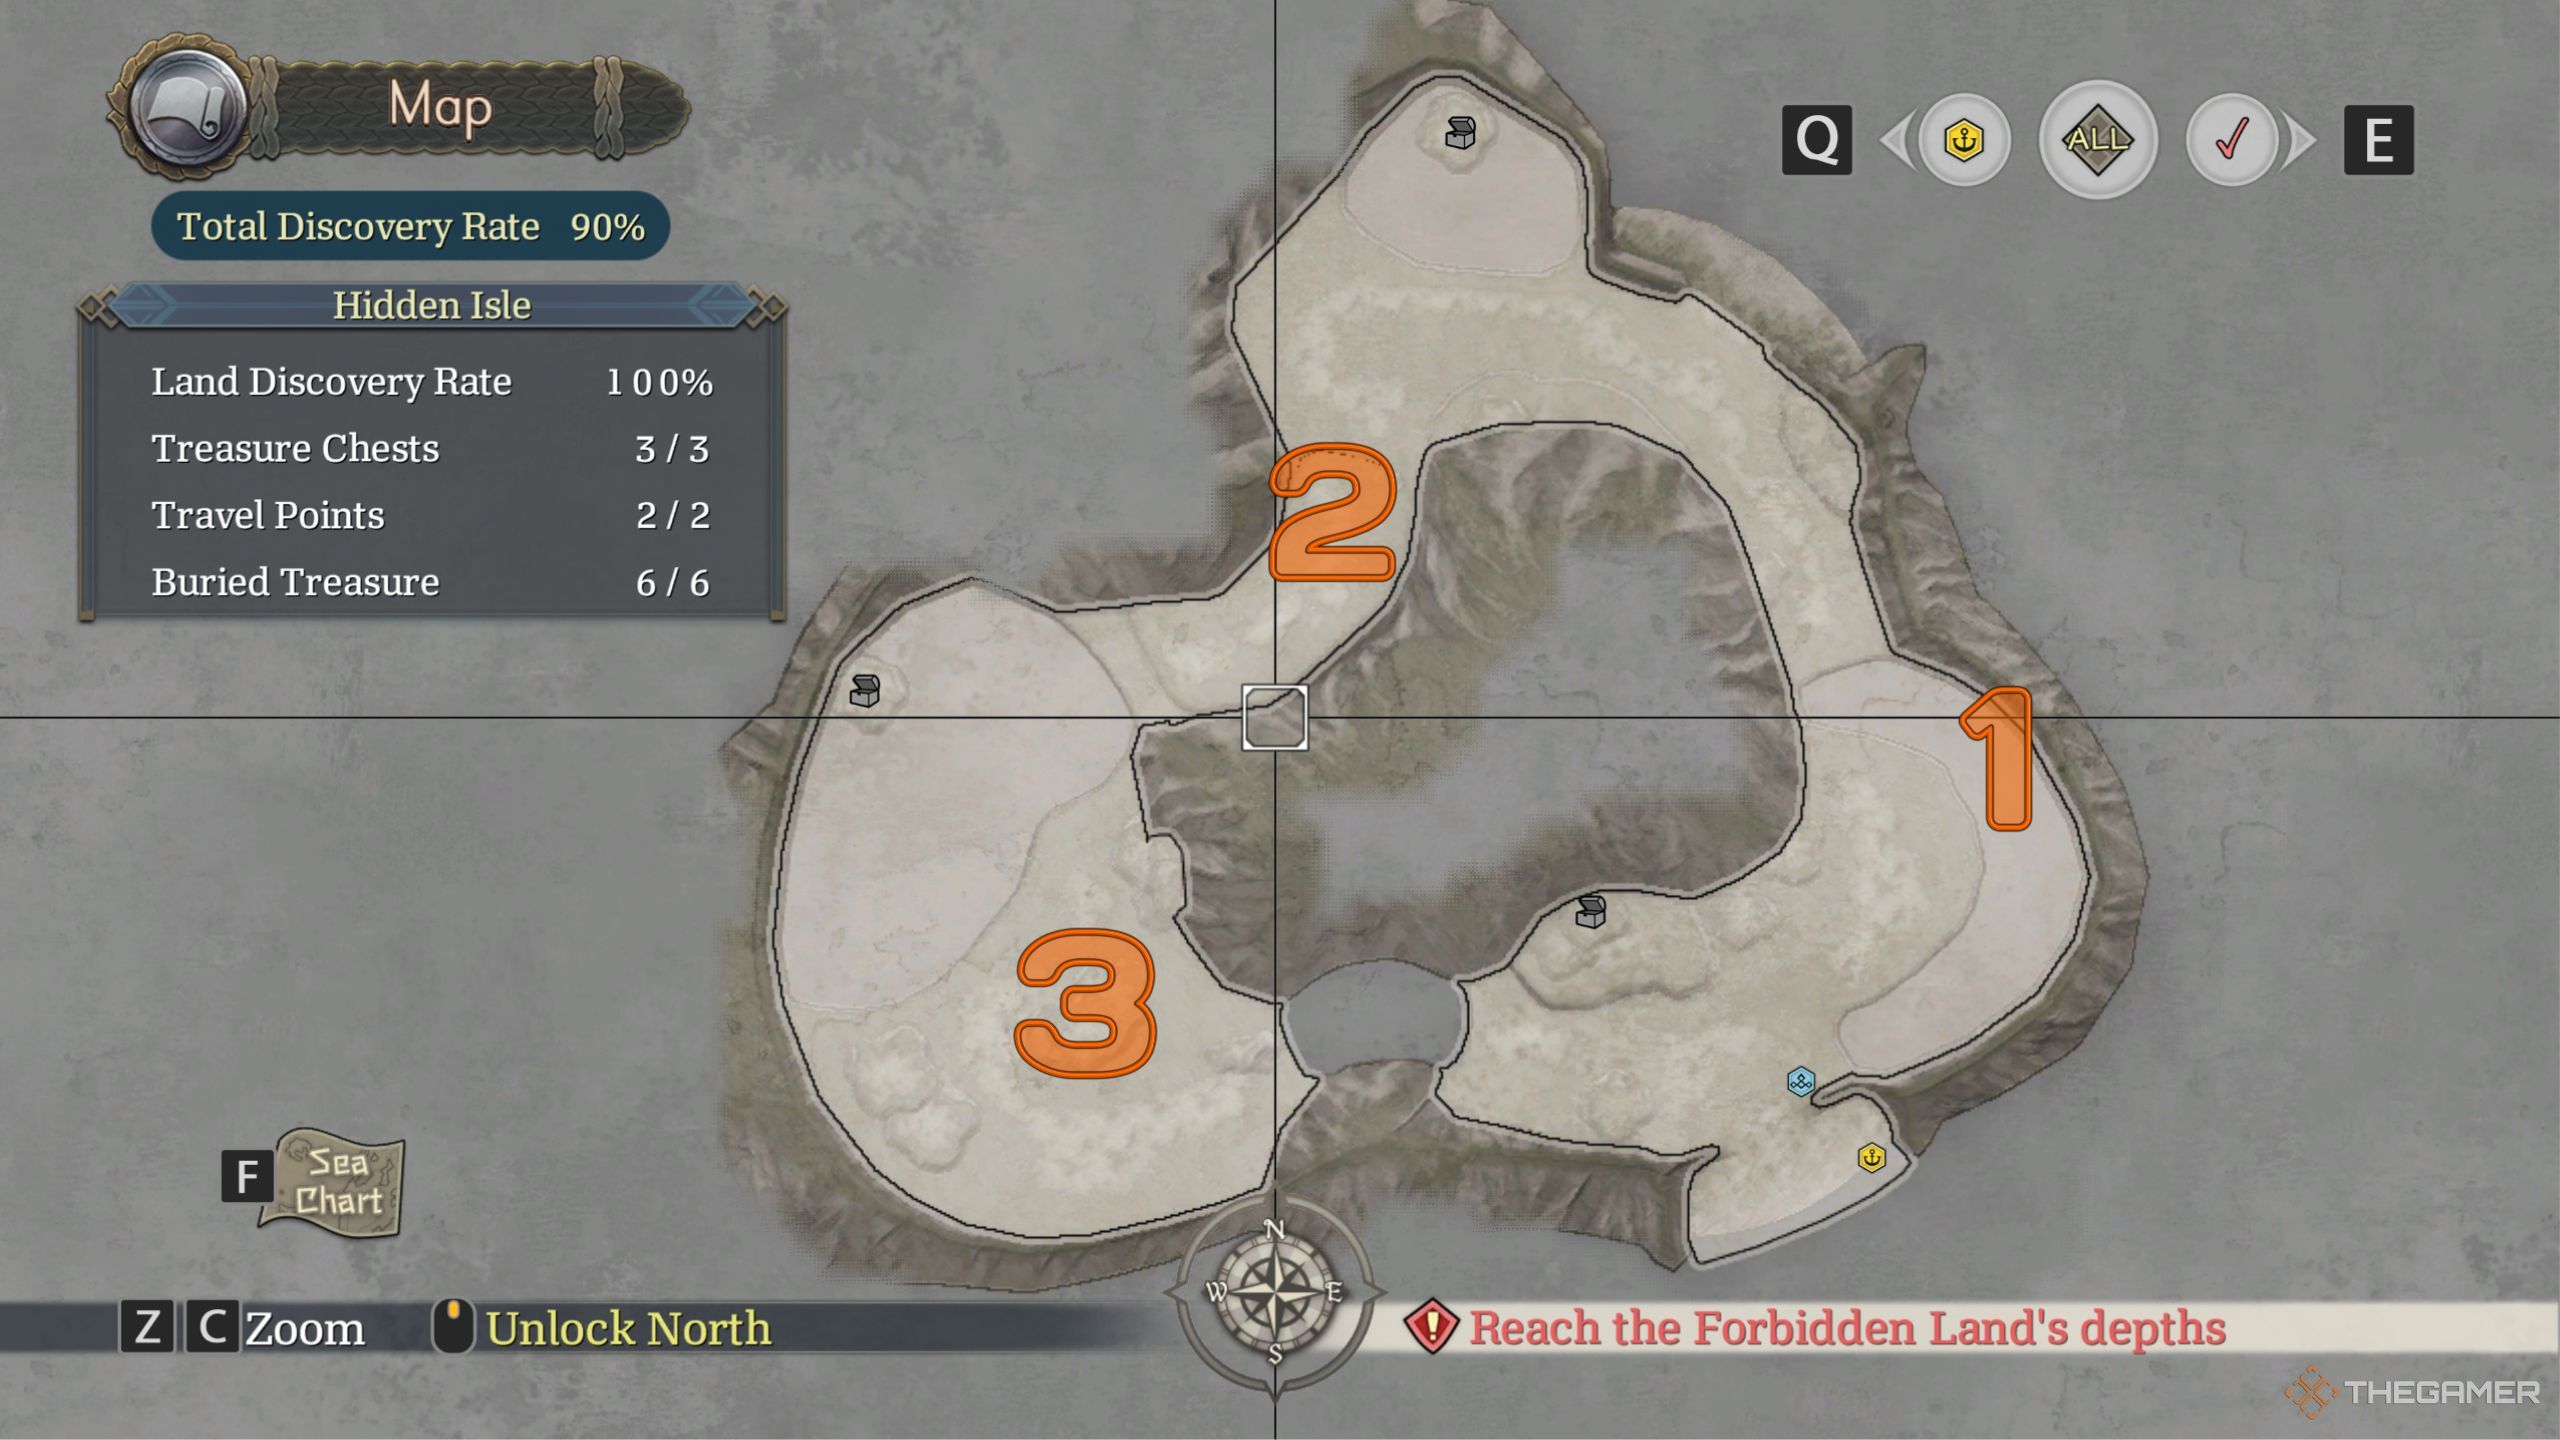
    To find the next two Pikkards, keep progressing through the main storyline until you reach the Sonnelia Basin area. At this point, you’ll unlock the Mana Barrier ability, essential for accessing the Hidden Isle located in the southeast corner of the Ozmid Expanse.

    Upon entering the Isle, you’ll notice the Pikkard will try to escape. You need to catch it in three locations:

    1. On a boulder to your right after you cross a small river on the Isle.
    2. As you continue forward, it will be hiding in a flock of sheep.
    3. On top of a rock formation towards the end of the island.

    After finding it in these three spots, head back to the starting point of the Isle to locate it one last time before bringing it back to your ship.


    Ys X Nordics Scaredy Pikkard location on Sonnelia Basin's map.

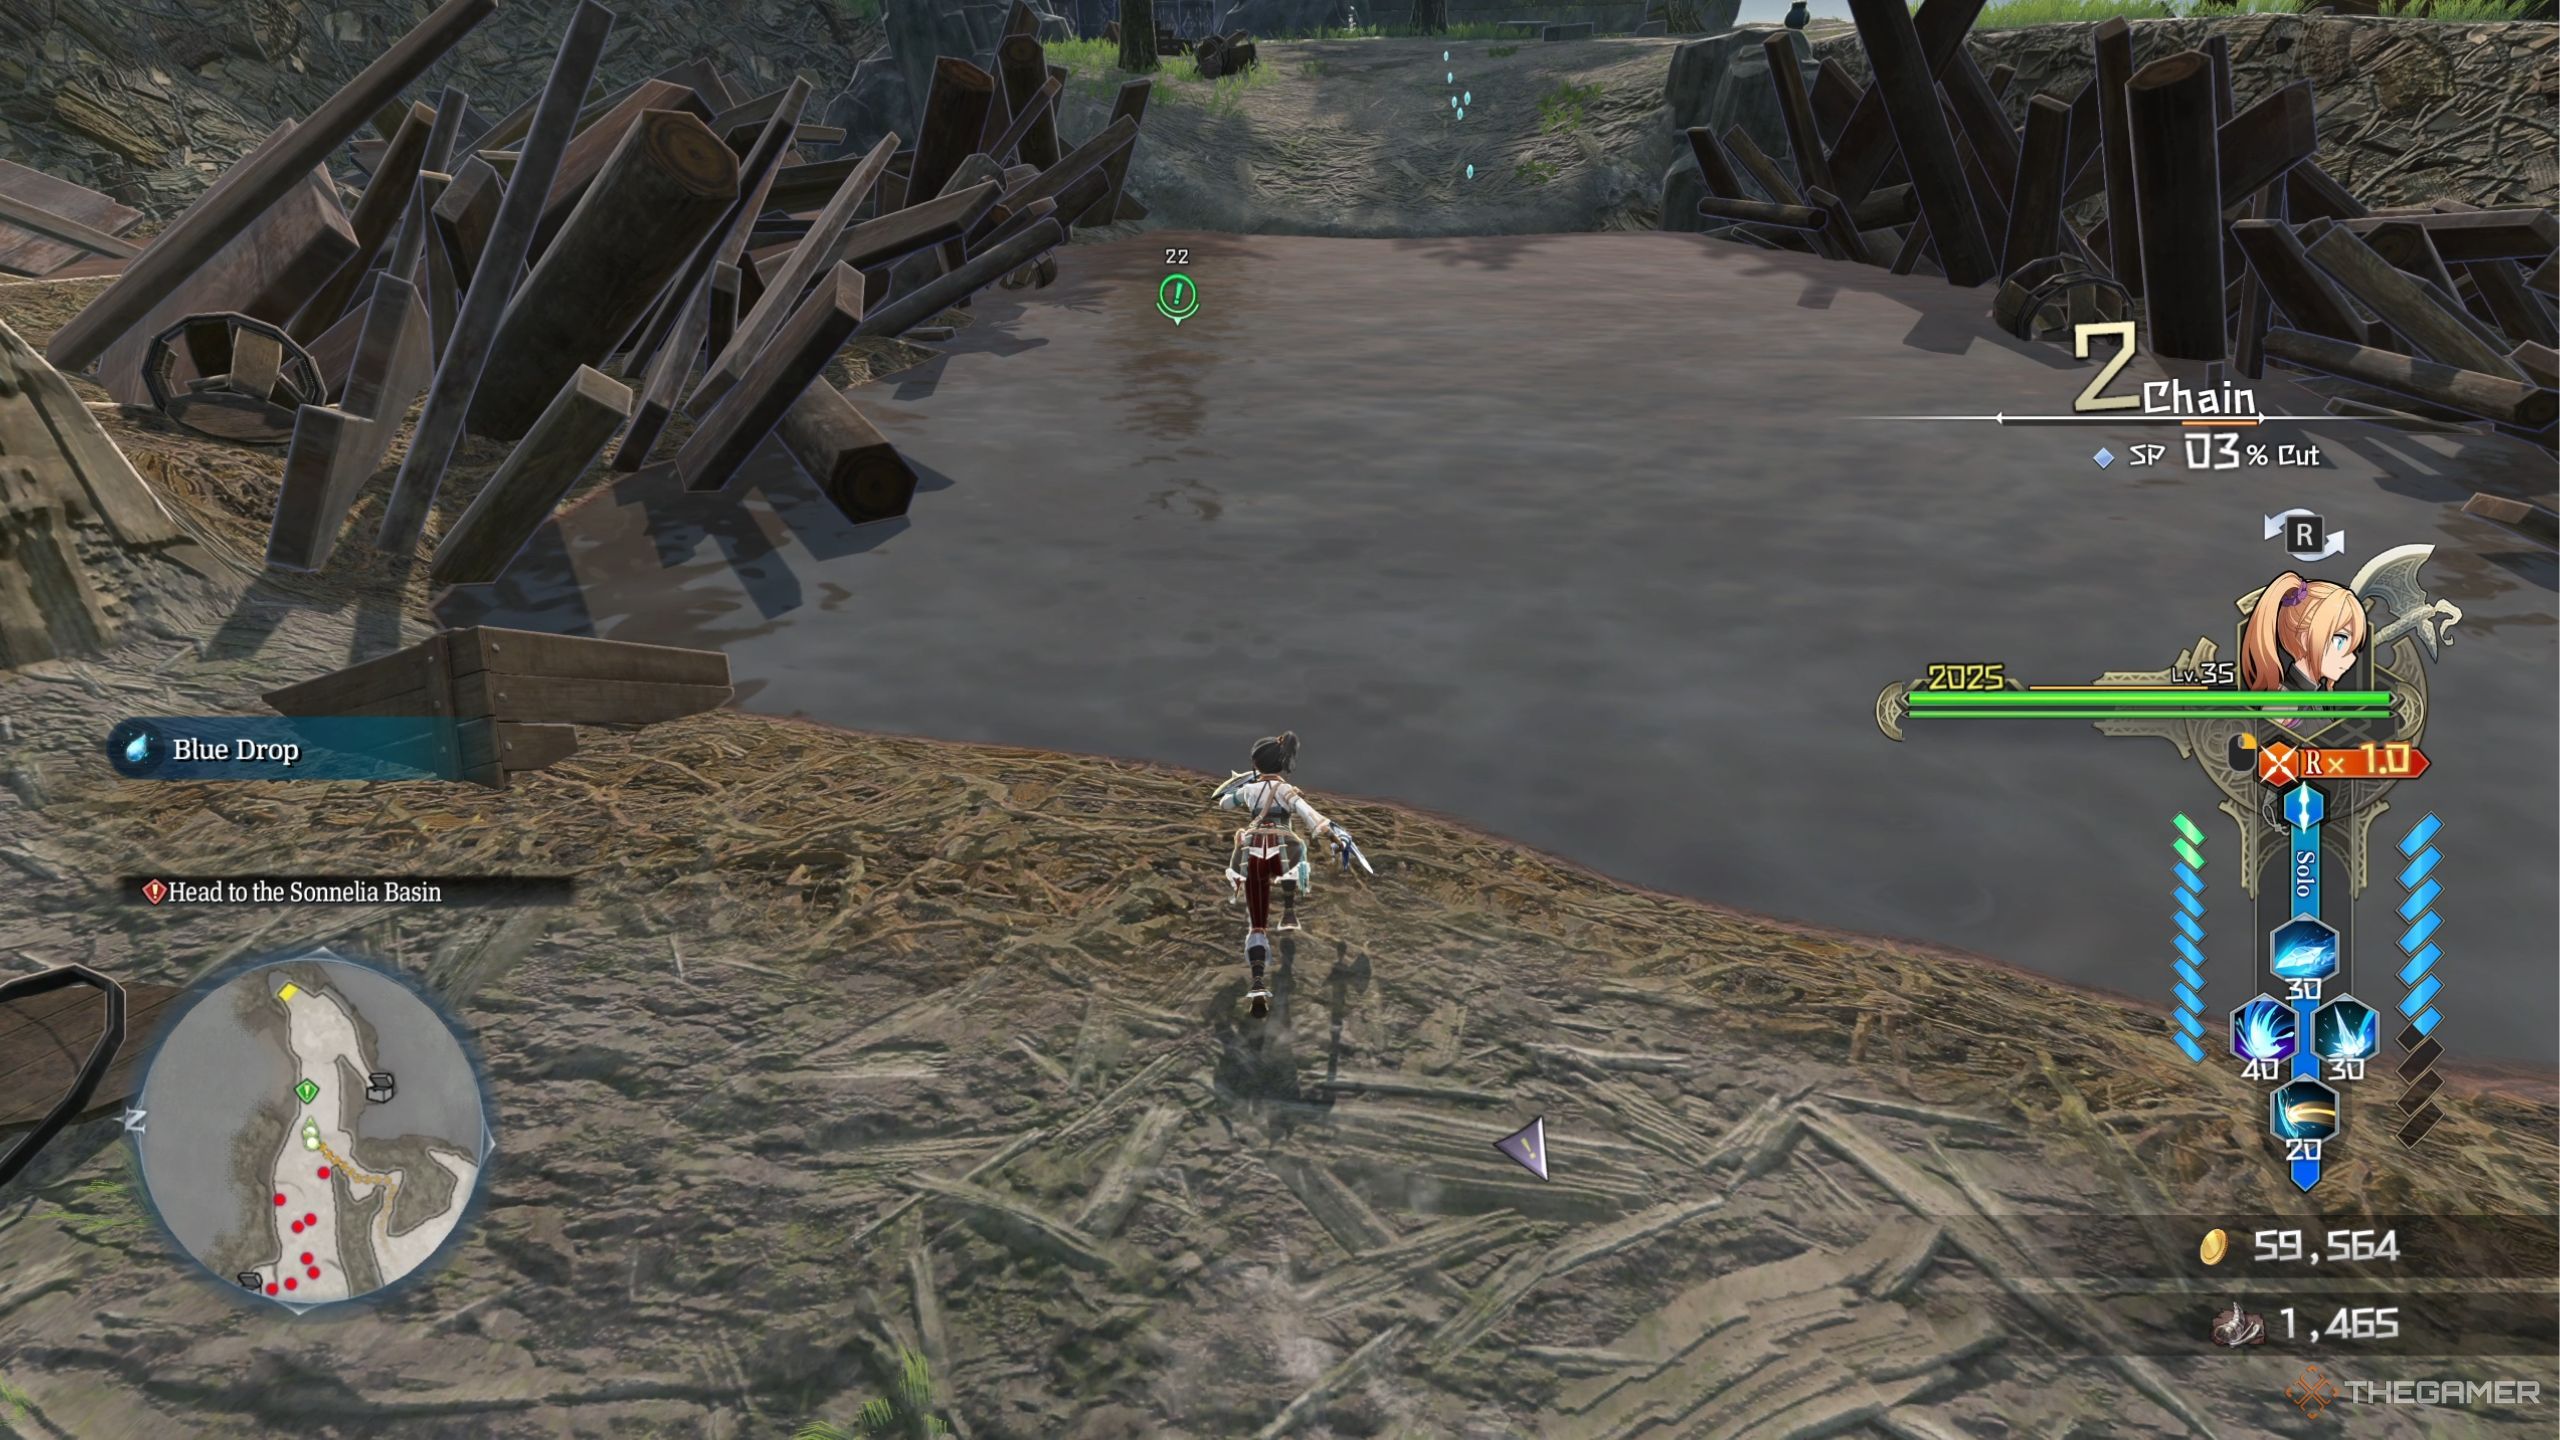
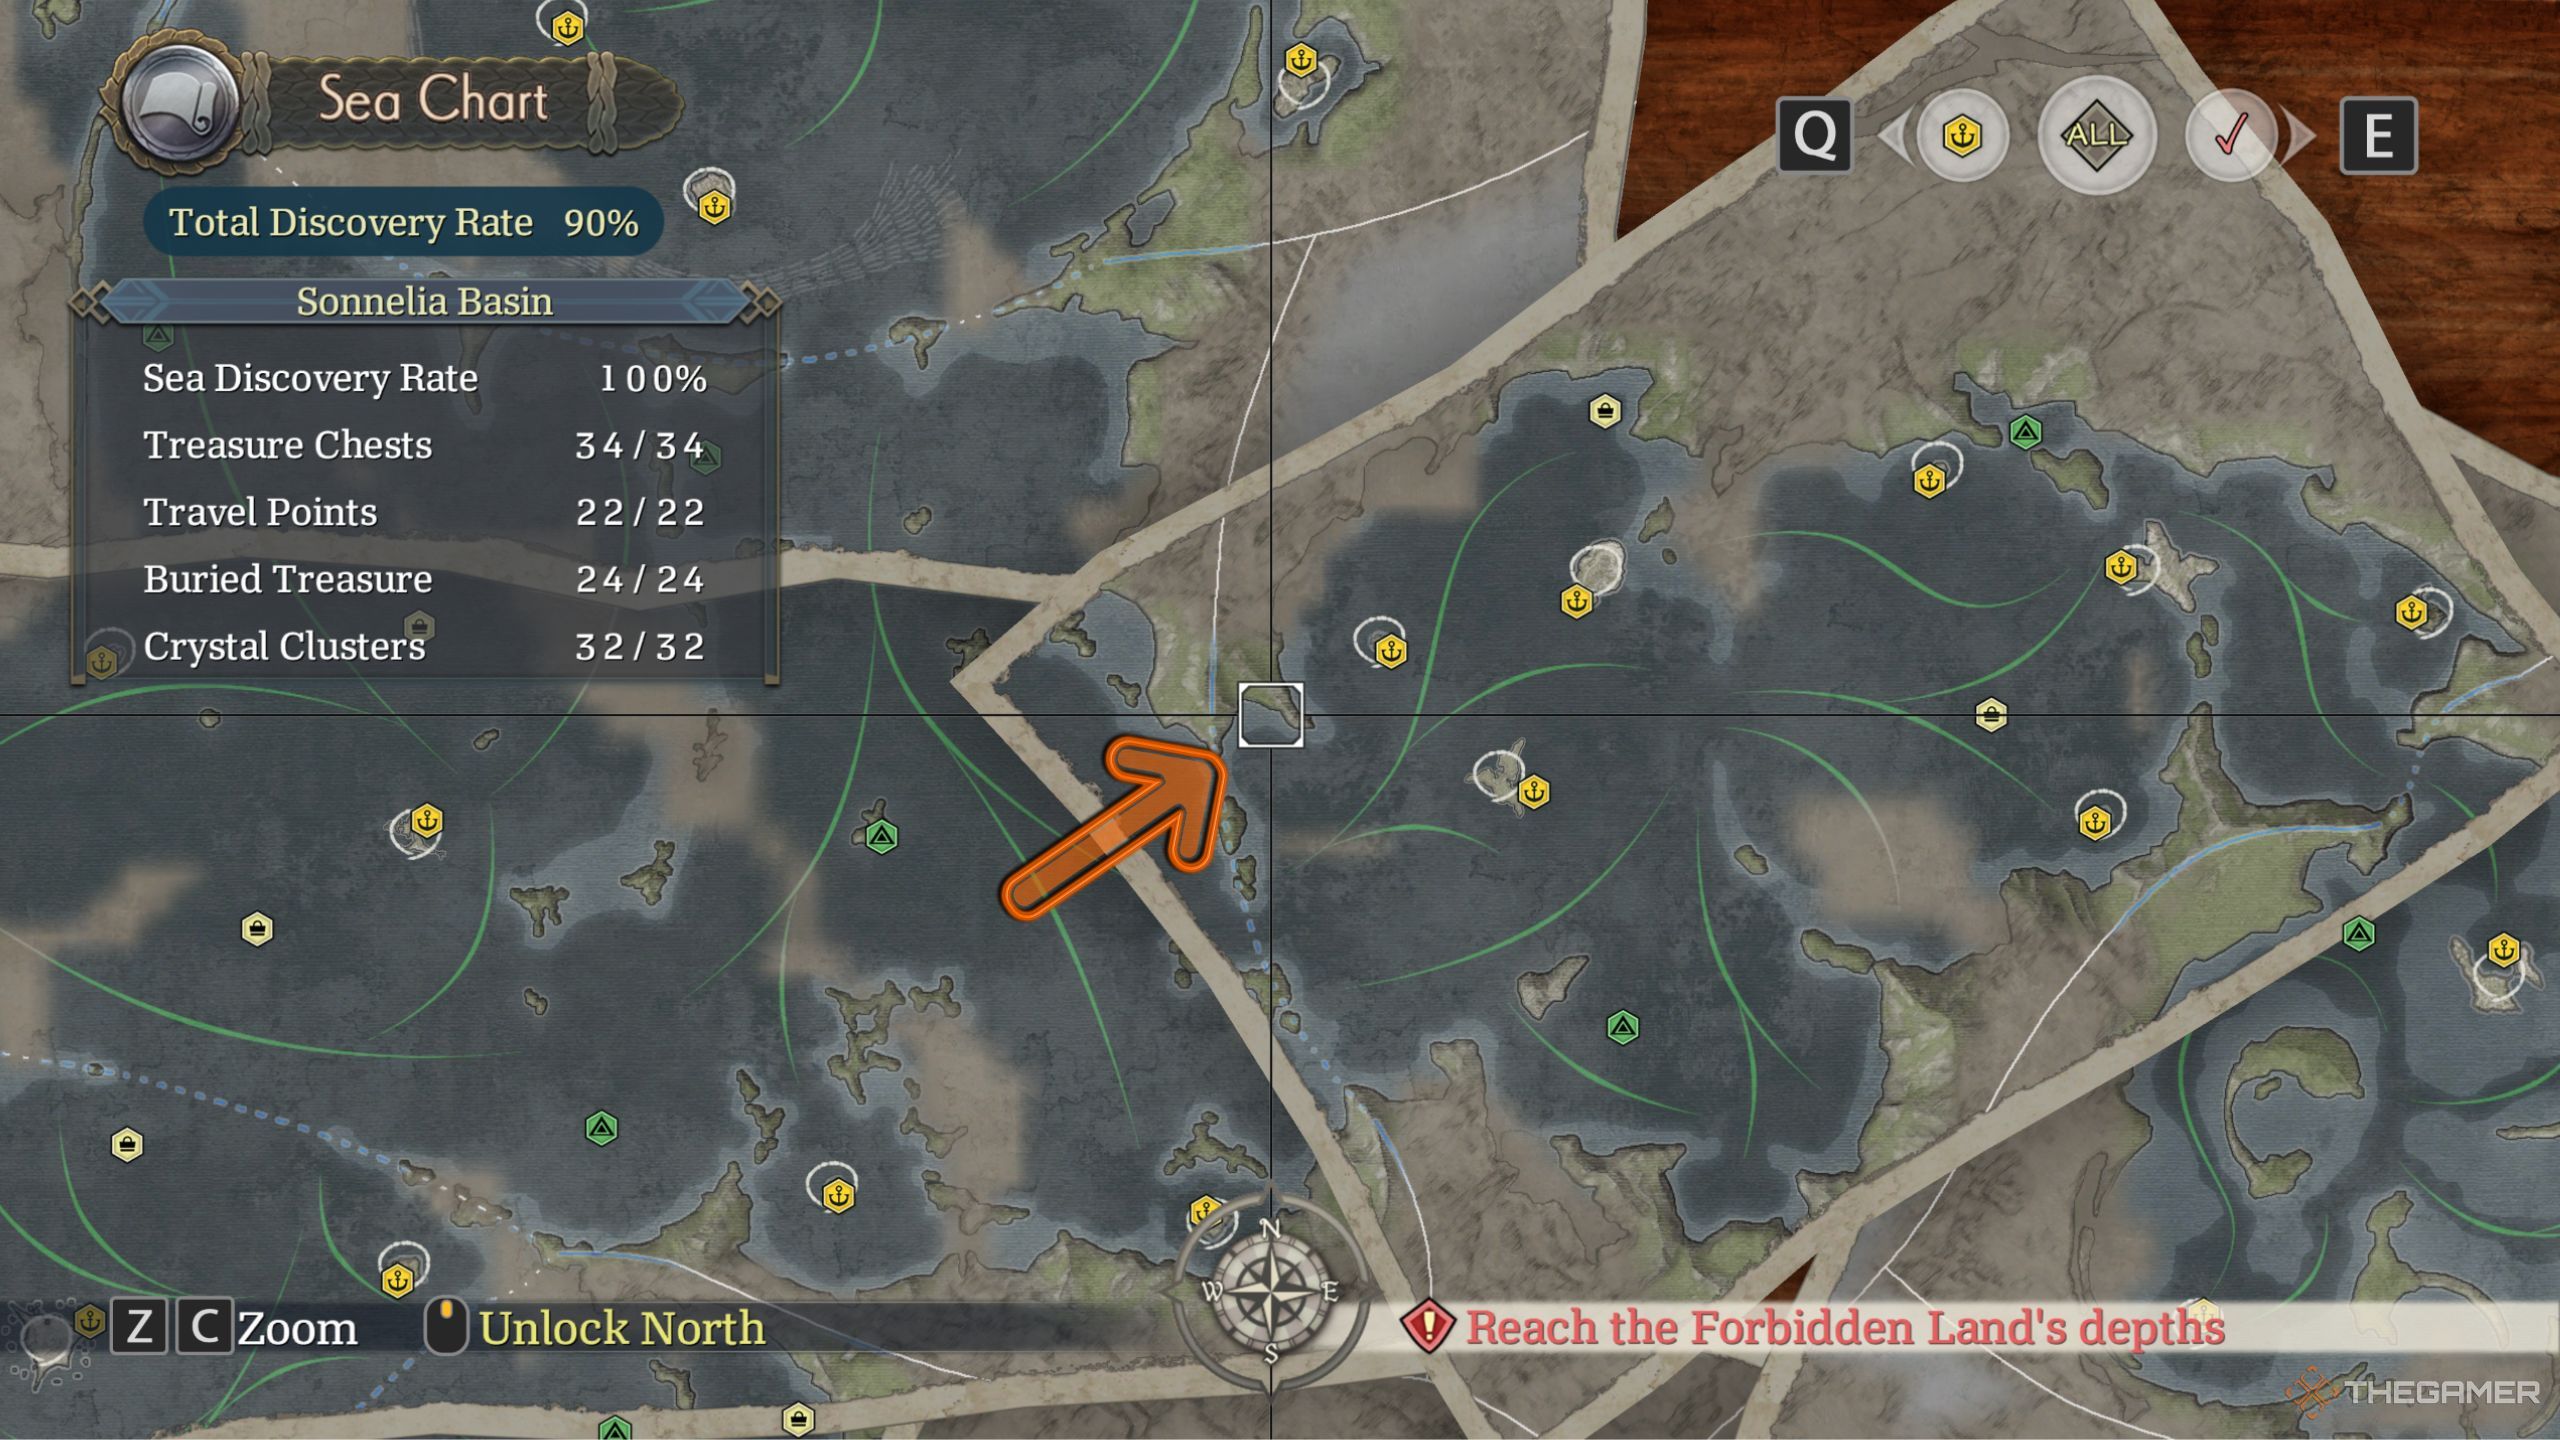
    After capturing the Speedy Pikkard, you can access the Sonnelia Basin through the Ozmid Expanse and head to the left edge of the area to find the Scaredy Pikkard stationed on a damaged ship.

    Scrappy And Septicolor Pikkard Location

    For your final two Pikkards, you will need to progress further in the story. You can find the Scrappy Pikkard during your journey through the Flumen Strait area, but you may need to come back later after making more progress.

    It’s located after you exit the Dvergr Coast island and travel through a narrow path. The Septicolor Pikkard can be discovered in the central region of the last area of Ys X: Nordics, known as Cicatrix.

  • All White Pikkard Spots on Sprout Atoll in Ys X: Nordics

    All White Pikkard Spots on Sprout Atoll in Ys X: Nordics

    In the game Ys X: Nordics, you’ll encounter various side quests as you explore, each with its own unique deadlines. These quests can involve tasks like gathering ingredients from specific areas or battling enemies. One such quest, called Pikkard Corral, becomes available after you visit a particular island.

    For this quest, you’ll need to locate five white Pikkards on the island to earn a special accessory. While the locations of these Pikkards are marked on your screen, some may pose a bit of a challenge to reach.

    Where to Find the Pikkard Corral Quest


    The Pikkard Corral quest is available later in the game, once you have access to the Specular Bay area. After completing the initial story island in this region, you can venture out to find Sprout Atoll, located on the lower left side of your map.

    To start the quest, approach this island and step onto it. There is a generous deadline for this task, allowing you to complete it at your convenience before finishing the game.

    Locations of All White Pikkards


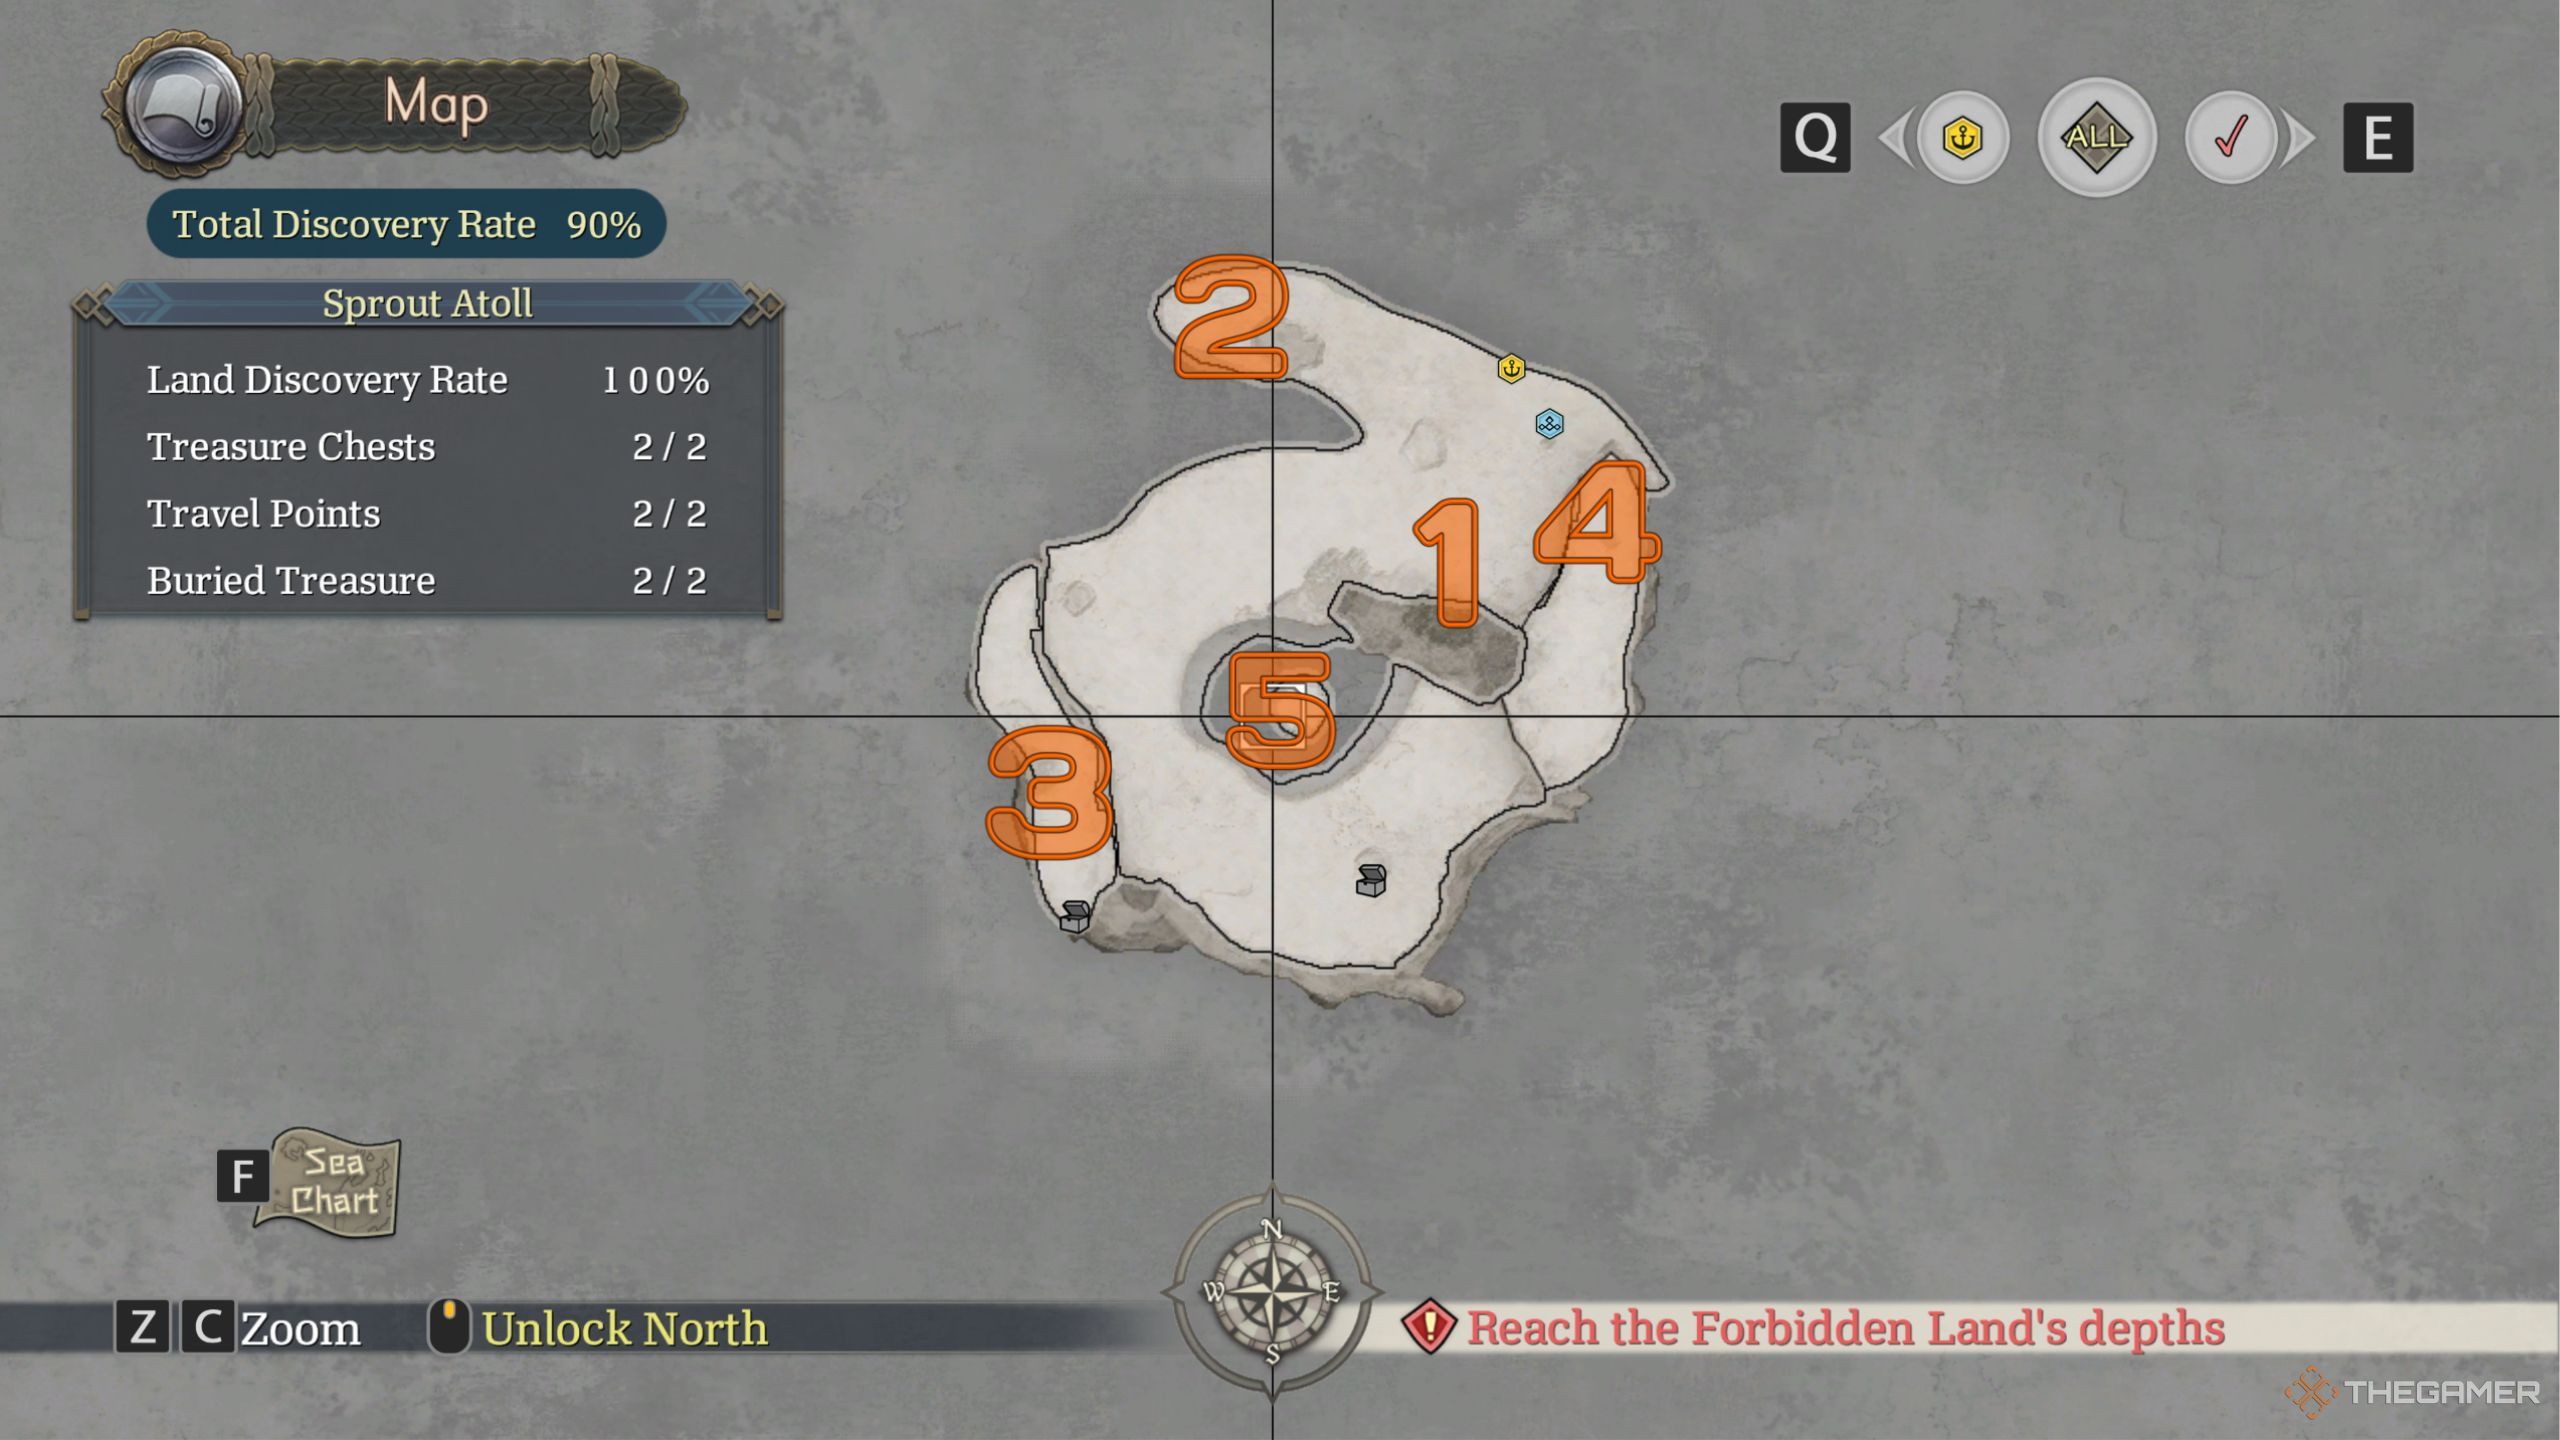
    Ys X Nordics All white pikkard locations on Sprout Atoll.

    To complete this quest, your goal is to find and collect five Pikkards, which will be shown on both your minimap and main screen. Here’s how to locate them:

    1

    The first Pikkard is directly in front of you after you finish your initial dialogue on the island. You can simply approach it and interact to collect the first one.

    2

    The second Pikkard is located in a hidden area on your right (top left on the island’s map). It’s nestled behind some rocks.

    3

    For the third Pikkard, you need to make your way to the upper left part of the island, using your mana string on a sword stuck in the ground to reach this area.

    4

    You can access the fourth Pikkard from the same part of land as the previous one, simply by using a boost.

    5

    The last Pikkard is found in the middle of the island. Head slightly upwards from a small platform with a little being. From this position, use your Gullinboard to leap at the right moment to land right on the Pikkard.

    Once you have collected all the Pikkards, the quest will conclude, and you will receive the Pikkaback Pikkard (White) accessory as a reward.

  • Defeating the Narwhal in Romancing Saga 2: Seven’s Revenge Guide

    Defeating the Narwhal in Romancing Saga 2: Seven’s Revenge Guide

    As you broaden your influence in Romancing Saga 2: Revenge of the Seven, you’ll come across an opportunity to invest in the construction of a bridge. It sounds simple: you put down some crowns initially, and after the bridge is completed, your Imperial Revenue will increase, allowing you to recover your investment as you conquer foes. What could possibly go wrong?

    Unfortunately, building the Leon Bridge draws the ire of the Narwhal, a gigantic creature worshipped as a sea deity. Until you defeat this monster, the bridge won’t be built, and your investment will remain in limbo.

    How to Build the Leon Bridge

    As you advance in the game, make sure to check in with the inventor Hiraga in Somon from time to time. His home is the first on the right as you enter town. When you see the objective Constructing The Leon Bridge appear, talk to Hiraga. He’ll offer to construct the bridge for one million crowns.

    Like other building projects in the game, you’ll need to wait until the bridge is finished, either by winning battles or using a time skip. Once it’s complete, you can visit the newly constructed Leon Bridge in Miramar.

    After the bridge is finished, return to the construction site and speak to Hiraga. He will showcase the bridge’s design and you’ll also gain the Wizened One ability, which allows your equipped character to occasionally identify an enemy’s weakness during battles.

    How to Find the Narwhal

    Once you skip ahead after completing the bridge, you’ll learn that the Leon Bridge has been destroyed. Head back to Miramar and ask the locals what went wrong.

    Since the bridge is down, you need to speak with the ferryman at the docks on the right to cross the canal and talk to the villagers on the opposite side.

    Following your inquiries, talk to Hiraga again. He will inform you that until the Narwhal is defeated, they cannot rebuild the bridge, or else it will just be knocked down again.

    Next, travel to the newly discovered location, Lake Wyringa, in search of the Narwhal’s lair. Once you arrive, sail past the rocks to your left, then turn left again. You should see a cave along the shore where the Narwhal resides.

    Beware of the yellow-scaled Albions while navigating the lake. Their lightning attacks can inflict significant damage on your entire party.

    Upon entering the cave, you’ll have the option to either threaten the Narwhal or leave it alone. If you choose to threaten it, be prepared for a boss battle; otherwise, you’ll exit the cave without confrontation.

    How to Beat the Narwhal

    The Narwhal deals heavy damage and has a substantial amount of HP. The battle can be easier if you return in a later generation with a more experienced team. That said, once your stats match those of the boss, the fight should be relatively straightforward.

    Expect a combination of physical and magical attacks, so equip your party accordingly. Specifically, watch out for the Narwhal’s Cyclone Squeeze attack, which hits with both Water and Wind damage while possibly stunning your character. Its most dangerous move, Headbutt, is reminiscent of Dantarg’s attacks. Solutions like Gilden Shield or Light Wall offer good protection against this, as it can hurt every member of your team.

    The Narwhal’s Weaknesses

    The Narwhal is particularly susceptible to the following types of damage:

    • Swords
    • Spears
    • Bows
    • Fire spells (Pyrology)

    Using attacks that target the boss’s weaknesses is crucial, especially since midway through the battle, the Narwhal will cast Elemental Coating. This ability makes it immune to all damage types except those it is weak against until its horn is destroyed. Be prepared with the appropriate gear and spells, or you may find yourself at a disadvantage.

    Remember, you do not necessarily need to destroy the horn. If you find you must, Greatswords and Earth damage are effective against it.

    A key strategy during this battle is to heal using Earth or Light spells instead of Water. The Narwhal can recover around 4500 HP each turn from the Water leyline on the battlefield, so using spells like Water of Life can accidentally help it. Focus on using powerful Fire attacks like Flame Whip, Charge, and Prominence to nullify the leyline’s effects and hinder the Narwhal’s healing ability.

    After you conquer the Narwhal, return to Hiraga in Somon. He’ll promptly rebuild the bridge, restoring the additional income it provides to your Imperial Revenue.

  • Complete Guide to Ability Items and Effects in Dragon Ball: Sparking Zero

    Complete Guide to Ability Items and Effects in Dragon Ball: Sparking Zero

    Quick Links

    Dragon Ball: Sparking Zero is an incredible game that delivers a challenging experience. The character lineup can feel uneven, the AI bosses are relentless, and the numerous intricate mechanics may leave you scratching your head. Fortunately, Ability Items in Sparking Zero help to balance things out and ease the learning curve for players.

    If you’re not a seasoned Budokai Tenkaichi player, you’ll likely rely on Ability Items to overcome some of the game’s toughest challenges. So, what exactly are these Ability Items, and how can you obtain them? Let’s dive into a quick guide that provides all the essential details.

    What Are Ability Items?

    Ability Items are special power-ups that you can equip to each character in Dragon Ball: Sparking Zero. Each item offers unique advantages and effects, with some being more impactful than others.

    In total, there are 93 Ability Items arranged into seven categories:

    • Red Items: These boost your health.
    • Green Items: These enhance combos and Rush Attacks.
    • Orange Items: These improve melee attack capabilities.
    • Yellow Items: These affect Ki Blasts and your Ki Gauge.
    • Blue Items: These enhance Super and Ultimate Blasts.
    • Purple Items: These contribute to a variety of special skills.
    • Rainbow Items: These provide perks across multiple areas.

    How to Acquire Ability Items

    You can obtain Ability Items through three primary methods:

    1. Completing Bonus Battles.
    2. Finishing Episode Battle Arcs.
    3. Purchasing them from the Shop.

    Special Note

    One unique item, Broly’s Ring, isn’t available through the methods mentioned above. Instead, you need to request it from Special Shenron using the "Come Forth" menu.

    Overview of Ability Items and Their Effects in Dragon Ball: Sparking Zero

    Now let’s take a closer look at all the Ability Items available in Dragon Ball: Sparking Zero, categorized by their specific effects.

    Health Abilities (Red)

    There are six Health Abilities in the game, some of which enhance your maximum health while others focus on health recovery.

    Ability Name Ability Number Star Ranking Effect(s)
    Master Roshi Training 001 ⭐(1) Slightly boosts maximum health
    King Kai Training 002 ⭐⭐(2)
    God of Destruction Training 003 ⭐⭐⭐(3) Greatly increases maximum health
    Dende’s Healing Ability 037 ⭐⭐(2) Gradually recovers health during battle over time
    Warming Up 041 ⭐⭐(2) Increases health recovery while on standby in Team Battles
    Latent Power! 071 ⭐⭐⭐(3) Boosts defense the lower your health gets

    Rush Attack Abilities (Green)

    There are eight Rush Attack Abilities. While some heighten Rush Attack power, others help with combo damage, and one is specific to Sparking Mode.

    Ability Name Ability Number Star Ranking Effect(s)
    Rush Attack Boost 1 004 ⭐(1) Slightly increases Rush Attack power
    Rush Attack Boost 2 005 ⭐⭐(2) Increases Rush Attack power
    Rush Attack Boost 3 006 ⭐⭐⭐(3) Greatly boosts Rush Attack power
    Power Unleashed 027 ⭐⭐(2) Boosts Burst Rush attack power
    Super Warrior 033 ⭐⭐(2) Enhances Rush Attack power during Sparking Mode
    Combo Master 034 ⭐(1) Slightly increases damage from consecutive combos
    Combo King 035 ⭐⭐(2) Boosts damage from consecutive combos
    Dragon Rush 062 ⭐⭐(2) Improves the ability to stun enemies using Rush Attacks

    Melee Abilities (Orange)

    There are nine Melee Abilities focusing on Smash Attacks and Rush Chains, as well as skills for throws and stuns.

    Ability Name Ability Number Star Ranking Effect(s)
    Melee Charge 1 007 ⭐(1) Slightly reduces charging time for Smash Attacks
    Melee Charge 2 008 ⭐⭐(2) Reduces charging time for Smash Attacks
    Melee Charge 3 009 ⭐⭐⭐(3) Greatly reduces charging time for Smash Attacks
    Smash Attack Boost 1 010 ⭐(1) Slightly boosts Smash Attack power
    Smash Attack Boost 2 011 ⭐⭐(2) Increases Smash Attack power
    Smash Attack Boost 3 012 ⭐⭐⭐(3) Greatly boosts Smash Attack power
    Finishing Blow 028 ⭐⭐(2) Increases Burst Meteor attack power
    Draconic Aura 059 ⭐⭐⭐(3) Enhances ability to stun opponents
    Master Throw 088 ⭐⭐(2) Boosts attack power of Throw moves

    Ki Gauge and Ki Blast Abilities (Yellow)

    There are 25 Ki Abilities that pertain to ki consumption mechanics, particularly Ki Blasts and the Ki Gauge.

    Ability Name Ability Number Star Ranking Effect(s)
    Ki Blast Attack Boost 1 013 ⭐(1) Slightly increases power of Rush Ki Blasts
    Ki Blast Attack Boost 2 014 ⭐⭐(2) Boosts Rush Ki Blast attack power
    Ki Blast Attack Boost 3 015 ⭐⭐⭐(3) Greatly enhances Rush Ki Blast attack power
    Energy Saver 1 016 ⭐(1) Slightly lowers ki cost for Rush Ki Blasts
    Energy Saver 2 017 ⭐⭐(2) Reduces ki cost for Rush Ki Blasts
    Energy Saver 3 018 ⭐⭐⭐(3) Greatly reduces ki cost for Rush Ki Blasts
    Ki Blast Charge 1 019 ⭐(1) Slightly cuts charging time for Smash Ki Blasts
    Ki Blast Charge 2 020 ⭐⭐(2) Reduces charging time for Smash Ki Blasts
    Ki Blast Charge 3 021 ⭐⭐⭐(3) Greatly reduces charging time for Smash Ki Blasts

    Super and Ultimate Blast Abilities (Blue)

    There are nine Blast Abilities that enhance Super and Ultimate attacks and their required ki.

    Ability Name Ability Number Star Ranking Effect(s)
    Blast Attack Boost 1 022 ⭐(1) Slightly increases power of Blast and Ultimate Blasts
    Blast Attack Boost 2 023 ⭐⭐(2) Boosts Blast and Ultimate Blast attack power
    Blast Attack Boost 3 024 ⭐⭐⭐(3) Greatly increases power of Blast and Ultimate Blasts
    Blast Burst 030 ⭐⭐(2) Increases ki needed for Blasts and enhances their power
    Ultimate Burst 031 ⭐⭐(2) Increases ki needed for Ultimate Blasts and boosts their power
    Divine Blow 032 ⭐⭐(2) Enhances Ultimate Blast attack power
    Performer 036 ⭐(1) Boosts Blast attack power after using an emote
    Fury! 069 ⭐⭐(2) Enhances Blast attack power as health decreases
    Fighting Spirit 070 ⭐⭐⭐(3) Increases Ultimate Blast power as health decreases

    Miscellaneous Abilities (Purple)

    Miscellaneous Abilities cover skill gauge mechanics along with many other aspects, totaling 30 items in this category.

    Ability Name Ability Number Star Ranking Effect(s)
    Dragon Spirit 043 ⭐⭐(2) Boosts skill gauge recovery
    Battle Control 044 ⭐⭐(2) Reduces recovery time of Switch gauge during Team Battles
    The Secret to Counters 047 ⭐⭐⭐(3) Lowers Skill Count needed for Super Z-Counters by 1
    Super Transformation 053 ⭐(1) Reduces Skill Count needed for Fusions and Transformations by 1
    High-Speed Movement Master 054 ⭐(1) Lessens Spark gauge used by High-Speed Movements
    The Secret to High-Speed Movements 055 ⭐⭐⭐(3) Reduces Spark gauge used by High-Speed Movements
    Super Movement Master 056 ⭐(1) Slightly reduces Spark gauge used by Super Movements
    The Secret to Super Movements 057 ⭐⭐⭐(3) Reduces Spark gauge used by Super Movements
    Light Body 060 ⭐⭐⭐(3) Lowers chance of being stunned by Ki Blasts
    Power Body 061 ⭐⭐⭐(3) Reduces chance of being stunned by melee attacks

    Z Abilities (Rainbow)

    There are six Z Abilities, known for being the rarest in the game. They provide specialized buffs that may affect multiple stats at once.

    Ability Name Ability Number Star Ranking Effect(s)
    Active Heart 039 ⭐(1) Slightly increases ki recovered after Rush Attack
    Indomitable Fighting Spirit 040 ⭐⭐(2) Increases ki recovered after Rush Attack
    Water’s Blessing 045 ⭐(1) Gradual recovery of health and ki while in water
    God Ki 052 ⭐⭐⭐(3) Cuts ki needed for Blasts by half
    Master Strike 086 ⭐⭐(2) Boosts Rush Attack and Smash Attack power, reduces max health
    Almighty Boost 093 ⭐⭐⭐(3) Slightly enhances multiple attack types

    This comprehensive overview should provide you with all the information you need regarding Ability Items in Dragon Ball: Sparking Zero. Happy gaming!