الوسم: Triple-A Games

  • Unlocking Fairy Skills in Farmagia: A Complete Guide

    Unlocking Fairy Skills in Farmagia: A Complete Guide

    Fighting in Farmagia can be tough without the right resources. To help you tackle the Mazes more effectively, it’s essential to gather as many Fairy Skills as possible. These skills provide valuable buffs that can significantly improve your performance, especially in boss encounters and Monster Nests.

    To fully benefit from Fairy Skills, consider the Fairy Families for extra bonuses. You can find Fairies in Fairy Dens or at Charlotte’s Purchase Portal. By pairing them smartly, you can take advantage of your enemies’ weaknesses and enhance your chances in battle.

    What Are Fairy Skills?


    Fairy Skills provide additional benefits that last until you finish the maze. Fairies come in different colors and ages, each offering various effects. By matching colored Fairies, you can form Fairy Families, which unlock sub-skills or remove negative ones. You can unlock three types of fairies: Young, Adult, and Old.

    You can only equip eight Fairy Skills in the early stages of the game.

    The team you have for battle might not be powerful enough to defeat a boss. Instead of grinding to boost your strength, you can explore Fairy Dens within mazes. This allows you to acquire Fairy Skills that can be equipped on your Farmagia or your Buddies.

    Select Fairies that enhance your Battle Buddies’ strengths against specific Bosses. For instance, if a boss is vulnerable to Arkies, focus on boosting overall attack and critical rates. Conversely, abilities that enhance Fusion and Unite Blitz are ideal for your Farmagia.

    The Black Fairy can only be used once, providing a one-time benefit like healing your HP or summoning extra buddies from your ranch.

    Fairy

    Description

    Young

    These Fairies appear often and grant a single power-up when equipped. You can swap them for Adult and Old Fairies as you progress.

    Adult

    These are the most effective Fairies to equip. Always replace Young Fairies with Adults when they become available. Matching the color family can unlock their sub-skills.

    Old

    Experienced Fairies with powerful skills but also possess one detrimental skill, which can be a drawback in battles. You can replace these Fairies or negate the negative skills by collecting more Old Fairies from the same family.

    How To Get Fairy Skills


    Two Fairy Dens with glowing red orbs are shown in Sun-Dappled Forest in Farmagia.

    One of the most effective ways to obtain Fairy Skills is by visiting Fairy Dens while exploring a Maze. You can spot these locations by the round, glowing orbs on plants.

    You can either select a Fairy Den area along The Neural Road or engage in battles in Monster Nests. If you’re still looking to enhance your collection, check out what Charlotte has to offer.

    • The Neural Road
    • Clearing Monster Nests
    • Charlotte’s Purchase Portals

    The Neural Road

    Once you defeat all monsters on a floor, The Neural Road will open, allowing you to access a Fairy Den after clearing all monsters in that area.

    After entering the Fairy Skill selection screen, you must pick a Fairy as the Fairy Den will vanish if you attempt to exit.

    Monster Nests

    Completing Monster Nests can be challenging since you will face multiple powerful enemies consecutively. However, once you finish, new Fairy Dens will appear, increasing your chances of finding valuable Adult and Old Fairies. Utilizing Fusion or Unite Blitz techniques can help you navigate these challenges more easily.

    Charlotte’s Purchase Portals

    If you’re looking for stronger Fairies, you can purchase some Fairy Skills at Charlotte’s Purchase Portals located before boss battles. This option can be costly and consumes a lot of Magia, so it’s advisable to consider this carefully. Nonetheless, you may find some rare Fairies in her inventory.

  • Conquering George’s Beast Form in Shadows of the Damned: Hella Remastered

    George is making a comeback! The first boss from Shadow of the Damned: Hella Remastered is back for round two, and he’s not happy about your last encounter. This time, he has some new tricks that will make this battle even harder.

    George emerges from a portal overhead, dramatically tearing out and consuming his own heart, transforming into a massive, hairy creature. He then conjures a horse in the center of the arena, rides it, and readies two spears for the fight. To progress, you’ve got to take George down for good.

    How to Beat George (Beast Form) – Phase One

    The battle begins in a round courtyard with a fountain in the center. George rides his horse in circles, trying to stab you with his spear, but you can easily dodge his attacks. You might notice a blue spot on George’s back; this is a weak point that you can take advantage of when it’s dark.

    Fortunately, his horse has a bit of a problem. It will let out clouds of darkness in certain areas, which you can use to take aim at George’s target.

    When the darkness appears, stand in front of it to draw George in for a charge. This exposes his weak spot, making it your chance to shoot.

    Hitting George’s back will knock him down, revealing another weak spot on the horse’s belly. Focus your shots there, and they’ll both jump onto the fountain in the middle of the area.

    Once up there, George will start throwing spears at you, but this will again expose his horse’s vulnerable underbelly. Use your roll to avoid his attacks and aim at the target once more.

    After a few hits, George will come back down and create another cloud of darkness. You’ll repeat this process a couple of times before moving on to the second phase.

    How to Beat George (Beast Form) – Phase Two

    Once you’ve dealt enough damage, a cutscene will play where George rips out the heart of his horse and eats it, causing him to grow significantly larger. He now looms over you, looking like a towering structure. Surprisingly, this part of the fight is actually easier.

    George will have multiple targets on his body that you can shoot without needing darkness to hit them. There’s one on each arm, two on his ankles, and three on his back. While he may try to crush you, his slow movements make him less of a threat.

    When you break the targets on his ankles, he will fall over, which will make it easier for you to hit his arms.

    After successfully hitting all his weak spots, George will make a final desperate attempt by unleashing a stream of darkness into the fountain, engulfing the arena. At this point, his intestines will emerge from his body, and your goal is to shoot them before the darkness consumes you. Once you manage that, George will be defeated for good.

    After the battle, George will drop a blue gem that upgrades the Monocussioner shotgun to the Skullcussioner.

  • Exploring Dragon Age: A Scholarly Guide

    Dragon Age: An In-Depth Academic Guide

    Introduction to Dragon Age

    "Dragon Age" is a fantasy role-playing game series developed by BioWare. Known for its rich storytelling, character development, and immersive world, it has sparked considerable interest among gamers and scholars alike. This guide aims to explore the academic aspects of the franchise, providing insights for students and enthusiasts interested in the themes, narratives, and cultural significance of the series.

    Historical Context

    The Dragon Age series debuted in 2009 with "Dragon Age: Origins." Set in the fictional continent of Thedas, the game draws on a variety of medieval and mythological influences. Its history is detailed through lore books, character backgrounds, and in-game decisions that affect the storyline, making it a prime example for studying narrative structure and world-building in interactive media.

    Themes and Narratives

    One of the key academic interests in Dragon Age lies in its exploration of themes such as power, morality, and identity. Characters face complex dilemmas that challenge their beliefs and values, allowing players to engage deeply with the moral implications of their choices. The series also addresses social issues such as class discrimination, racism, and political intrigue, creating a rich tapestry for analysis.

    Character Development

    Characters in Dragon Age are meticulously crafted, each with unique backgrounds, personalities, and arcs. The interplay between these characters adds depth to the narrative, fueling discussions about character motivation, growth, and relationships. The choices players make can lead to a variety of outcomes, highlighting the importance of player agency in storytelling.

    Cultural Impact

    The impact of Dragon Age extends beyond gaming. It has influenced discussions around representation in media, particularly concerning LGBTQ+ characters. The series is celebrated for its inclusive approach, encouraging analysis of how video games can reflect and challenge societal norms.

    Conclusion

    Dragon Age serves as a compelling subject for academic exploration, blending storytelling, character dynamics, and cultural commentary. Whether analyzing its narratives or understanding its social implications, the series offers a wealth of material for those interested in the intersection of gaming and scholarly study. Through its intricate design and thought-provoking themes, Dragon Age invites players and academics to delve into its expansive world and meaningful content.

  • Assisting Grey Wardens: Defend Lavendel in Dragon Age: The Veilguard

    Assisting Grey Wardens: Defend Lavendel in Dragon Age: The Veilguard

    Dragon Age: The Veilguard takes you on an adventure to locate two escaped Elven gods, but you’ll also lend a hand to defend villages from Darkspawn along the way. The “Something Wicked” quest provides clear guidance on how to assist the Grey Wardens and the residents of Lavendel.

    Your main contacts for this mission are Evka and Antoine. They will ask you to prepare for an impending attack and support the effort against the Darkspawn. During this quest, you’ll face two major battles. Fortunately, you only need to fully engage in one of them, while the other requires you to survive a set amount of time before moving on.

    How to Support the Grey Wardens in Lavendel During Something Wicked

    Your task begins with a straightforward instruction: check in with the Grey Wardens Evka and Antoine. After a brief conversation, your quest log will update, prompting you to consult the three Grey Warden sentries.

    Exit the Grey Hold and follow your quest marker, turning left to find the large door leading to the Lavendel Barricade.

    Speak with Warden Jaynie to make sure they’re ready for the approaching threat.

    Next, return to the center of Lavendel and head southeast to meet Warden Greta, who is eager to confront the Darkspawn.

    After talking to Warden Greta, follow the marker to the west where you’ll encounter Warden Augustine, who assures you he’s prepared for battle.

    With all three Wardens briefed, head back to Evka and Antoine in front of the Grey Hold.

    Once you report that everyone is ready, your next task is to engage the Darkspawn at Sheltered Glade.

    You’ll encounter several types of enemies, including Greater Hurlocks (vulnerable to Fire, resist Necrotic), Ghouls, and Emissaries. All these foes share similar weaknesses.

    Defeating the weaker enemies will lead to more challenging ones appearing in subsequent waves.

    You’ll know you’ve cleared a wave when you receive 300 XP.

    At this point, you’ll have two new objectives:

    • Defeat Darkspawn at the gates
    • Check on the Wardens

    First, head to the eastern marker to check on the Wardens; as expected, they’re all set for more action.

    Then, make your way north to enter a large battle with the Darkspawn at Lavendel’s gates.


    Be prepared to face Greater Hurlocks and other formidable foes, and do not forget to take advantage of their Fire weakness.

    After enduring the relentless assault for some time, you’ll trigger a cutscene featuring Evka and Antoine in a fight, which marks the end of this battle.

    What Rewards Can You Earn from Something Wicked?


    Rook receives rewards for completing Something Wicked in Dragon Age: The Veilguard.

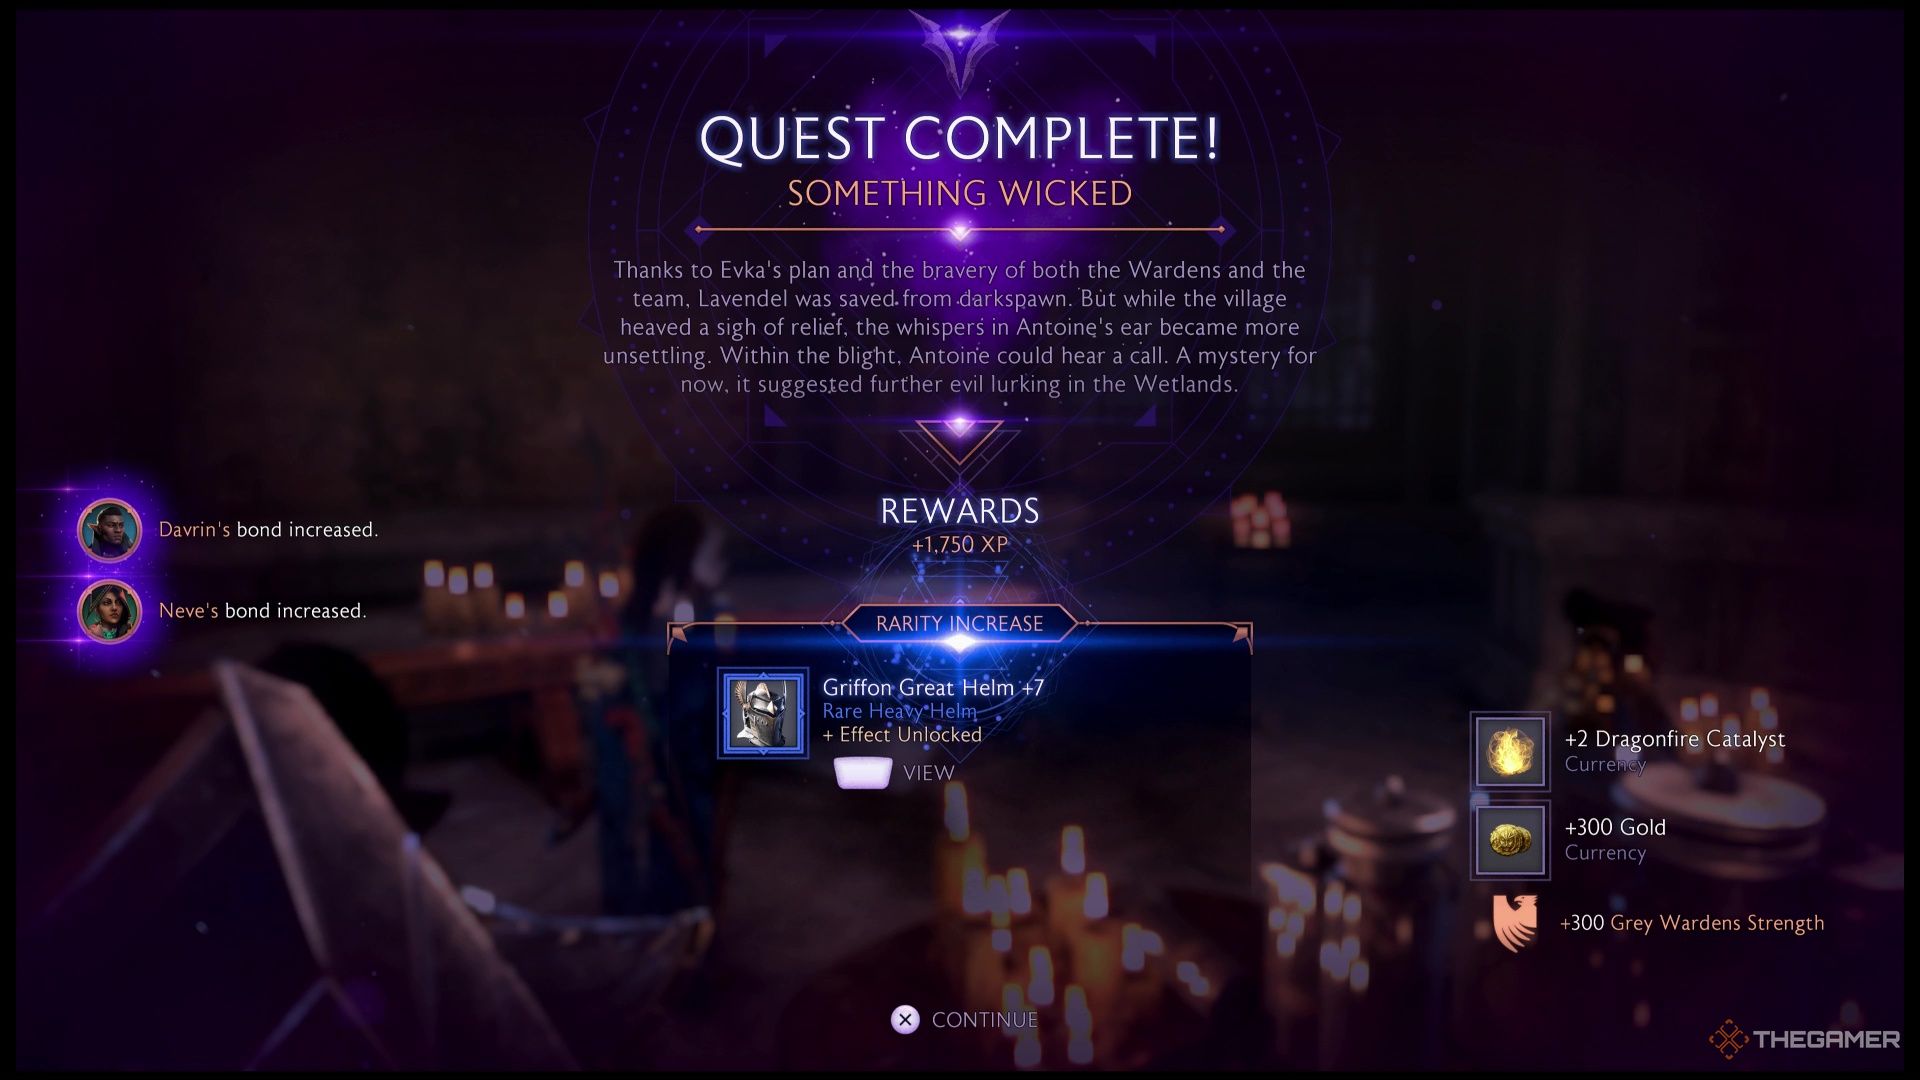
    As the cutscene concludes, you will receive the following rewards for completing Something Wicked:

    • 1,750 XP
    • Increased bond with your companions
    • Dragonfire Crystals
    • Gold
    • 300 Grey Wardens Strength

    Given the short duration of this quest, the rewards are certainly worthwhile.

  • Stopping the Venatori Ritual in Dragon Age: The Veilguard’s Last Rites

    Stopping the Venatori Ritual in Dragon Age: The Veilguard’s Last Rites

    Dragon Age: The Veilguard challenges players with eight primary enemy factions, and among these, the Venatori consistently emerge as a persistent annoyance for Rook throughout your journey. Your mission this time? Shatter the Venatori crystals and put a stop to a treacherous ritual that poses a threat to everyone.

    While the Venatori aren’t particularly inventive with their locking systems, there’s one key detail about the glowing red crystals scattered throughout this mission: they must be destroyed in a specific sequence. The trick is to follow the red beams that lead to their source until you find an unprotected crystal. Start by taking out this first crystal, and then you can proceed to the others that were previously shielded.

    How to Locate the Venatori Ritual Site

    The Last Rites mission kicks off in the Wharf Crossing North area, where you need to find and demolish red crystals at a Venatori ritual site. You’ll spot a crystal behind a red shield, concealed by some large pillars on the ground.

    If you wait a moment, you should see a red beam illuminating this crystal from above, tracing back to another red crystal hovering in the air.

    Begin by destroying the unshielded floating crystal, as this will disable the shield on the first crystal near the pillars. Once that’s taken care of, direct your attention toward the large red barrier to identify a third crystal that you can destroy.

    Finally, smash the red crystal on the door itself to deactivate the barrier and proceed through. Investigate the note in front of the now-accessible double doors, and your quest will update to help the person in need. Follow the marker down the nearby staircase to reach the Parthenius Main Docks.

    Here, you’ll face a group of Venatori, including a Blood Forge (vulnerable to Cold damage and resistant to Fire) that has an armor bar above its standard health.

    Utilizing area of effect (AoE) skills can be highly effective in this encounter, especially if you manage to group the Venatori close to the Blood Forge, as you can deliver significant damage to multiple foes simultaneously.

    Once you take down the Venatori forces, you’ll find a civilian trapped within a red force field, sustained by two shielded red crystals powering their main shield.

    How to Save the Trapped Civilian

    To begin rescuing the civilian, look up to the right of the boat beside them. You’ll notice an object hanging high that you can interact with. Engage with it to reveal the first unshielded crystal. Destroy this crystal, then take out the second crystal located on the boat, followed by the third one next to the civilian.

    Next, look to the north to find the source of another crystal series inside a nearby building along the dock. Destroy the first crystal inside that building. To find the second, turn around from that door and smash the crystal behind you. Lastly, destroy the third crystal by the civilian to free them from their red-shielded confinement.

    What Rewards Do You Get from Last Rites?

    After speaking with the rescued civilian, you will effectively complete Last Rites, earning the following rewards:

    • 500 XP
    • Increased bond with your companions
    • Improved faction strength

    As you continue your adventure, there will be many more Venatori to confront, so this isn’t the last time you’ll encounter those pesky red crystal challenges.

  • Cracking the In Memoriam Murders in Dragon Age: The Veilguard

    Cracking the In Memoriam Murders in Dragon Age: The Veilguard

    In Dragon Age: The Veilguard, you have many chances to interact with the undead, whether through combat or other encounters. One particularly intriguing quest is In Memoriam, which presents an elaborate murder mystery with the assistance of a friendly spirit named Compassion. This quest can sneak up on you; you might not even realize you’re in the middle of it until you’ve gone too far to backtrack.

    The quest unfolds smoothly, drawing you into its unique story through a series of notes. Whether you’ve stumbled upon the starting point or are seeking guidance on how to begin, we have everything you need to successfully navigate In Memoriam.

    How to Start In Memoriam

    To kick off In Memoriam, travel to Razikale Walk, where you will spot a corpse with a sword protruding from it, marked by a yellow exclamation point, which indicates a quest.

    Investigate the body, provoking the appearance of a creature known as Despondence alongside Superior Shades.

    Both Despondence and the Shades are vulnerable to Fire attacks while resisting Cold damage.

    Despondence is a tough opponent, equipped with the Glass Cannon and Exploding abilities, and it can unleash an attack that darkens the area, effectively blinding you for most of the fight.

    Stay close to Despondence and continuously deal damage to bring the battle to a swift conclusion, or risk being dragged across the map as it escapes while calling in more enemies to slow you down.

    Once you manage to defeat this challenging foe, examine the sword from earlier to summon the spirit, which will officially commence In Memoriam.

    How to Solve the Murders and Find the Victims

    The silver lining is, as soon as you receive the quest notification, you’ve already made some progress, and your current objectives will be partially complete.

    Head to the closer marker to find a clue related to the bridge murder by examining a small shed where you’ll discover Hortensia’s Garden Journal.

    Reading this journal will trigger the spirit to appear once more, asking for information about the other victims.

    This action will fulfill the objective, “Solve the bridge murder.”

    Next, follow your marker eastward along Razikale’s Walk to the Urthemiel Venue, unlocking a fast-travel point as you go.

    Ascend the ladders near the marker, jumping across gaps to reach Spare Coin Way.

    Push forward through the Temple Of Andraste into Andraste’s Watch, where you will encounter a second victim pinned down by a sword.

    Defeat the Shades that appear, including another formidable foe: Remorse, which is vulnerable to Fire and resistant to Cold.

    This enemy possesses the Devouring and Juggernaut modifiers, making it exceptionally durable and hard to defeat if it manages to hit you multiple times, draining your health.

    Remorse will use a similar blinding attack that darkens the world around you and casts Cold magic in the shadows.

    Chase Remorse as it tries to escape throughout Andraste’s Watch until you finally bring it down.

    After the battle, Compassion will reappear and urge you to uncover more about the murder victim, updating your objective to two of three, while introducing a new goal: solve the temple murder, at one of two.

    From here, head south to Spare Coin Way, where you will find another victim slightly off to the right of where you climbed the ladders earlier.

    A demon named Isolation will confront you. This enemy comes with Colossal, Sadistic, and Knockback modifiers, posing a significant challenge, although it is vulnerable to Fire and resists Cold damage.

    This enemy is just as tough as the previous two demons and will require substantial effort and patience to defeat. Keep up the pursuit, and it won’t be too bad.

    After emerging victorious, approach the third victim’s body to provoke Compassion’s appearance again.

    This will complete your task of locating more victims, leaving you with one of two remaining tasks for two objectives:

    • Resolve the temple murders
    • Resolve the market murders

    Next, follow the marker to the Temple Courtyard and take down the Venatori you encounter in that area, then make your way to the northern section of Andraste’s Watch where you’ll find a note labeled Property Of Marcus, Scholar.

    Compassion will appear and speak, fulfilling your goal to solve the temple murder.

    This will leave you with just the market murder to investigate, so return to the Urthemiel Venue and look for the ladder in the general vicinity of the fast-travel beacon.

    Climb the ladder to reach the top, where you’ll find some notes; the one you need is Charcoal Drawing Of A Rooftop.

    Review this note, and Compassion will appear for the last time, disclosing the truth behind the murders.

    What Rewards Do You Get from In Memoriam?


    Once Compassion finishes their story, you will complete In Memoriam and receive the following rewards:

    • 500 XP
    • Increased Bond with Companions
    • Gold
    • Fade-Touched Crystals

    While the rewards may not seem exceptional, you can gain additional XP and loot as you progress through each objective, which balances things out nicely.

  • Dragon Age: Veilguard Guide – Journey Through the Hall of Valor

    Dragon Age: The Veilguard – Hall of Valor Guide

    In this guide, we’ll take you through the Hall of Valor in Dragon Age: The Veilguard, helping you navigate challenges and uncover secrets.

    Getting Started

    Upon entering the Hall of Valor, you’ll be greeted by stunning visuals and a sense of history. Take a moment to soak in the atmosphere before moving forward. Keep an eye out for any interactive objects or characters that may provide hints.

    Exploring the Area

    As you move through the hall, explore every corner. There might be hidden treasures or lore that can enhance your understanding of the game. Be cautious of any enemies that may lurk in the shadows.

    Puzzles and Challenges

    The Hall of Valor features several puzzles that need solving. Pay close attention to your surroundings, as clues are often hidden in the environment. Working through these challenges not only progresses the story but can also reward you with valuable items.

    Combat Tips

    If you encounter enemies, remember to use your character’s strengths wisely. Coordinate with your team to take down tougher foes. Utilizing the environment to your advantage can often turn the tide in battle.

    Conclusion

    Navigating the Hall of Valor can be an exciting journey filled with discovery and challenges. Take your time, explore thoroughly, and work together with your team to overcome obstacles. Enjoy your adventure in Dragon Age: The Veilguard!

  • Should Safi Confront Lucas as Herself or Vinh in Life is Strange?

    Should Safi Confront Lucas as Herself or Vinh in Life is Strange?

    Quick Links

    It’s time to call out Lucas Colmenero for the cheating scammer he really is! In Life is Strange: Double Exposure, during the Krampus on Campus event, Safi prepares a slideshow to make her case against Lucas. He indeed copied Maya Okada’s work and played a role, at least in part, in her tragic death.

    However, just presenting the facts at the Snapping Turtle won’t be enough to sway the crowd. Lucas has already come this far and won’t let the upcoming movie Wilder Beasts Than These slip away without a confrontation. He even manages to persuade Vinh to back down. Safi is determined to deliver a powerful closing statement, but Max must help her figure out whether she can make a stronger argument as herself or as Vinh.

    What Happens If You Confront Lucas As Vinh?

    If you advise Safi to confront Lucas as Vinh, she takes the stage and boldly challenges him. This approach works well; Safi channels Vinh’s charisma as the Master of Ceremonies. Lucas, angered, inadvertently admits to plagiarizing Maya’s work, claiming they intended to collaborate.

    What Happens If You Confront Lucas As Safi?

    On the other hand, if you convince Safi to go up as herself, she feels apprehensive, admitting that honesty isn’t her forte. Nonetheless, she takes the plunge and accuses Lucas of causing Maya’s death. By presenting herself authentically instead of as Vinh, Safi opens herself up to new vulnerabilities. Lucas counters her claim by questioning why she didn’t speak out sooner if she felt so strongly about it.

    Safi remains resolute and sways the crowd to turn against Lucas. Instead of his usual excuses, Lucas attributes his actions to his divorce and obligations as a father. Despite his attempts to justify himself, he gets booed off the stage. This moment showcases that Safi can outshine Lucas without relying on any powers; she stands her ground as herself.

    Regardless of the outcome, as Safi enjoys her triumph with Max, Lucas makes his way over, asking for a private conversation. This could spell trouble ahead.

  • Dragon Age: The Veilguard – Ultimate Guide to The Last Gambit

    Dragon Age: The Veilguard – Ultimate Guide to The Last Gambit

    The Last Gambit is a pivotal quest in Dragon Age: The Veilguard, and it could prove dangerous for your companions. In contrast to the last mission, where you faced a mandatory choice, the decisions you make this time can lead to positive outcomes if you choose wisely and have the necessary strength to support those choices.

    But it’s not solely about the decisions you make. There’s also a particularly challenging boss fight waiting for you at the end of this quest, and your allies may be limited in this encounter. We’re here to guide you so you can earn the "The Ones That Last" Trophy/Achievement for ensuring everyone’s survival.

    Who Should Support the Factions?

    Like the choices you faced in The Isle of Gods, we’ll provide a comprehensive overview of the decisions that influence the outcomes of these endgame quests. For now, let’s focus on the three (or actually four) key choices made at the start of The Last Gambit, including selecting your companions for the upcoming battle.

    Ideally, you want each faction to be at three stars, except for the Shadow Dragons or Antivan Crows—which should remain at two stars, depending on whether you saved Minrathous or Treviso. Furthermore, every character should be a Hero of the Veilguard.

    If you’re in this fortunate position, congratulations—keeping everyone alive will be quite straightforward. However, if everyone is at two stars or you lack Heroes of the Veilguard, the situation becomes more challenging. After playing through this quest multiple times, we found that while death isn’t guaranteed in such scenarios, poor choices can significantly increase the risk.

    The Right Choices for Victory

    The right choices are essential for success. For taking down the magic wards, opt for Emmrich, Neve, or Bellara. Since one of Neve or Bellara is likely captured, your choice is limited. This will also influence your subsequent decisions.

    When it comes to eliminating the Venatori leader, choose either Neve or Lucanis, and for disabling the Juggernaut, select either Taash or Bellara. This situation means you’ll end up with either Harding or Davrin in your party for this quest. Given that Elgar’nan’s Wrath is Vulnerable to Necrotic and Resistant to Lightning, your ideal team would include either Emmrich or Lucanis, alongside Harding or Davrin.

    If Neve is captured, your sequence should be: Bellara for wards, Lucanis for Venatori, and Taash for Juggernaut. If Bellara is the one captured, you should go with Neve or Emmrich for wards, Neve or Lucanis for Venatori, and Taash for Juggernaut. Ensure that one of these choices is Neve.

    If your Rook is a Death Caller Mage or a Duelist Rogue with Necrotic Abilities, it’s wise to send Emmrich and Lucanis while keeping Neve, as she will be beneficial for area control and combating the Venatori.

    Following this, you’ll encounter a lengthy cutscene revealing your companions’ fates, and with these choices, you should be in a good position. The combat section echoes the linear challenge found in The Isle of Gods, where you’ll face Darkspawn and Venatori. A team of Neve, Davrin, and yourself as the Necrotic fighter is ideal, though it’s no harder than previous confrontations.

    Remember to prioritize eliminating ranged attackers, utilizing heavy attacks on armor and weak point attacks on barriers. If your allies have healing abilities, use these over potions, unless you can sustain yourself by finding additional potions along the way.

    How to Defeat Elgar’nan’s Wrath

    Elgar’nan’s Wrath is a Blood Prime, which you’ve likely faced in Blood of Arlathan. In this encounter, be aware of several significant attacks:

    • Fire breath (dodge timing is crucial)
    • Mace swings (move sideways immediately to evade)
    • Stomp (retreat when the ground glows red)
    • Earthquake (a more powerful version of the stomp)
    • Melee attacks (dodge or parry)

    The best strategy against Elgar’nan’s Wrath is to immobilize it using an ability like Neve’s Blizzard while dealing heavy damage to its armor. Afterward, keep your distance and utilize Necrotic Abilities. When it breathes fire, you have two prime opportunities to inflict damage.

    First, rush to the side since it won’t attack until the fire breath concludes, allowing solid hits while it’s defenseless. Second, aim for its open mouth during the fire attack—this is when it becomes vulnerable.

    Save your Ultimate for these moments or use it to eliminate the smaller threats. While you can parry its circular mace swing, it’s generally not advisable due to the risk of getting stuck in a damaging cycle.

    As you fight, several Venatori and Darkspawn will also engage you. While it’s important to thin their numbers, remember that the primary goal is to defeat Elgar’nan’s Wrath. Focus the Necrotic companion (or yourself) on the Blood Prime and use the rest of your party to set up detonation attacks or utilize area abilities to tackle multiple enemies at once.

    The weaker enemies can still deal substantial damage, especially if you become overwhelmed by Elgar’nan’s Wrath. Once you defeat him, you can look forward to a cutscene with Solas, gearing up for the final confrontation ahead.

  • Creating a Will in The Sims 4: Navigating Life and Death

    Creating a Will in The Sims 4: Navigating Life and Death

    When dealing with the loss of a loved one, it’s easy to overlook what will happen to their possessions. Fortunately, the The Sims 4: Life & Death expansion gives players the chance to plan ahead by letting their Sims create a will before they pass away.

    In a Sim’s will, they can specify their wishes for after their demise. This includes planning their memorial service, deciding who gets their belongings, and splitting up any assets and heirlooms. It’s essential for your Sim to draft a will in time!

    How to Create and Use Wills


    Creating a Will from Your Inventory

    If you’re prepared to sort out your Sim’s end-of-life plans in The Sims 4: Life & Death, there are a few ways to start drafting a will:

    • Access the Household tab on your computer to begin writing a will from home.
    • Consult with an Inheritance Lawyer by:
    • Arranging a call through the Hire Services option in the Household tab.
    • Stopping by the pop-up setup at the Ravenwood Family Day event in the Mourningwood neighborhood, which occurs regularly.
  • Visit the Town Hall in the Mourningwood neighborhood, part of the new pack. Although it’s a hidden lot, your Sim can go to a nearby location and then head into the Town Hall to obtain their will.

After starting the will, your Sim will find a will document in their personal inventory. You can further customize it by interacting with the will and selecting the “Update Will” option. You can also read the will to review your current choices.

Even though the will is stored in your Sim’s inventory, it might be wise to move it to a more secure location, like the family inventory in build/buy mode, in case something happens and family members need access to it.


Making a will on a computer in The Sims 4 Life and Death with the new wallpaper and chair in the background.

If you ever wish to delete your will, simply choose the “Destroy Will” option from the menu accessible in your inventory. This will permanently remove the will, and you’ll need to start a new one if you decide to leave any instructions later.

What Can Be Included in a Will?

By preparing a will while your Sim is still living, they can make important choices to ease the decision-making process when Grim comes for them, such as:

  • Choosing various funeral activities that guests can participate in during their memorial, effectively allowing them to plan their own farewell.
  • Deciding what happens to their body, with options for burial (headstone) or cremation (urn). Your Sim can determine which option they prefer.
  • Specifying to whom their personal heirlooms will be transferred upon their passing.
  • Adding a personal note in the will that provides a moodlet for readers when it’s opened after their death.

Additionally, broader provisions now empower your Sim to decide what happens when the last member of the family dies. Rather than leaving things uncertain, your Sim can now clarify:

  • Where the household funds will go, whether to another family member or a charitable organization (which is great for passing on wealth).
  • What will happen to dependents, like children or pets, that may require care after the Sim is no longer around.

If your Sim wants to create a will but is indifferent to the choices made, they can opt for a premade will from the Mysterious Merchant. Keep in mind that all decisions made within that will are completely out of the Sim’s hands, but it can add an interesting twist to the storyline after their passing if they are not concerned with the specifics of their affairs.

  • Locating Brona’s Bloom in Dragon Age: The Veilguard Guide

    Locating Brona’s Bloom in Dragon Age: The Veilguard Guide

    Certain quests can be misleading, often filled with deception and unexpected turns. However, Dragon Age: The Veilguard provides some quest names that give a clear indication of what lies ahead. You might wonder if the cabin is situated in the Blight, or if the Blight envelops the cabin, but at least you’ll know what you’re getting into with the “Cabin In The Blight” quest.

    Despite the eerie title reminiscent of a horror film, this quest revolves around searching for lost supplies rather than enduring a terrifying cabin experience. Your task is to assist the physician’s apprentice, Flynn, in locating some misplaced medical supplies by venturing into the Lavendel area to find the missing physician, Oskar.

    How To Find The Physician’s Cabin

    Your adventure begins in the village of Lavendel. Speak with Flynn, the physician’s apprentice, who will brief you on the situation.

    Following your discussion, you’ll need to search for the lost medical supplies as requested by Flynn. This journey will take you through the Blighted Tunnel, Old Crossroads, and into the Blighted Grove.

    Along your route, you’ll need to take down any Darkspawn you encounter. Continue along the path until you reach the southeast section of the Hossberg Wetlands.

    Ascend the stairs, and you will arrive at the physician’s cabin, which unfortunately is completely infested by the Blight.

    Before you can proceed, you’ll need to eliminate the Darkspawn present in the area.

    Destroy The Blight Boils

    Next, focus on the three Blight Boils.

    The first Blight Boil is located to the southwest, perched on the edge of a cliff. Strike this one, then follow the burning trail to the back of the Blighted Cabin.

    Destroy the second Blight Boil found behind the cabin. Afterward, return to the front and eliminate the third Blight Boil to eradicate the Blight.

    Once that’s done, enter the cabin and examine a note left on a table. This will update your quest, directing you to find the missing physician.

    Search For The Physician

    Follow the marker to a nearby ladder and explore the area to discover a physician’s book along with some additional loot.

    Next, head east to investigate a marker pointing to a snowy patch of ground. Here, you’ll find more supplies that have already been scavenged.

    Finally, continue along the Swamp Road to reach the third location, where more Darkspawn will appear.

    Once they are defeated, inspect the marker to find the body of Oskar, the missing physician, along with his satchel.

    Return the medical supplies and news of Oskar’s fate back to Flynn.

    What Rewards Do You Get From Cabin In The Blight?

    After finishing your discussion with Flynn, you will complete the “Cabin In The Blight” quest and receive the following rewards:

    • 1,750 XP
    • An Uncommon Item (specific to your class)

    This amount of XP should significantly boost your progress, especially considering how quickly the quest can be completed.

  • Locating the Rogue Necromancer in Dragon Age: The Veilguard

    Locating the Rogue Necromancer in Dragon Age: The Veilguard

    If you’re in the mood for something eerie, Dragon Age: The Veilguard offers a variety of chilling quests, including the House of the Dead. Emmrich and his skeletal assistant, Manfred, are on a mission to locate a rogue necromancer hidden inside a vast haunted mansion, and they’ll need your assistance to confront the dangers lurking there.

    Venture into the haunted estate and enter the mansion to begin your quest, but don’t hesitate to explore outdoors first. There’s an optional boss you can face in a nearby mausoleum before heading inside. Just be prepared — once inside, you’ll encounter numerous spine-tingling skeletons waiting to give you a scare.

    Emmrich is a necessary companion for this quest, so you’ll have an open slot for another companion of your choice.

    How to Find the Rogue Necromancer

    For those eager to spend more time with Emmrich, the House of the Dead presents the perfect opportunity to enjoy a thrilling journey through a haunted mansion.

    Although this quest doesn’t focus on romance, you’ll get plenty of chances to appreciate Emmrich’s company as you both work to liberate trapped spirits while gearing up for an intense confrontation.

    Your adventure kicks off at Blackthorne Manor after a brief cutscene with Emmrich, as you step into the courtyard.

    Move toward and enter the mansion through the front door, then follow your marker to the Grand Foyer and head up the stairs on your right.


    Continue following your marker down the hallway to the Blackthorne Library, where your objective will update, indicating you need to look for signs of necromancer activity.

    Drop down and approach the door adorned with glowing green seals on either side.

    How to Open the Blackthorne Library Door

    Emmrich will suggest that you head southwest and northeast based on the direction the Hand of Glory points.

    From the door, take a left into the Abandoned Study.

    Follow the stairs up to the Northeast Wing until you reach the Master Bedroom, where you’ll encounter a tortured green skeleton.

    After some dialogue, you’ll face several Frenzied Shades (weak to Cold, resistant to Necrotic damage).

    Once you defeat them, Emmrich will release the trapped spirit in the room and urge you to find the others.

    Return to the Blackthorne Library and backtrack to the other side of the Grand Foyer to enter the doorway leading to the Upper Halls.

    Pass the Ruined Balcony and step into the Guest Room, where you’ll find a second tortured spirit for Emmrich to liberate.

    This time, you must defeat a gathering of Devouring Shades to assist Emmrich in freeing this spirit.

    Once this spirit is freed, head back to the Blackthorne Library, where you can unlock the previously sealed door to reveal a portal to The Fade.

    Inside The Fade, you will find a door that requires you to deliver a wisp to the receptacle next to the door to open it.

    Follow the concealed path on the right to the wisp, then place it in the receptacle to unlock the door.

    Proceed along the path and eliminate any Darkspawn you encounter, following your marker down a slope and up a ledge until you trigger a cutscene.

    At this point, you’ll meet Johanna Hezenkoss, the rogue necromancer and an acquaintance of Emmrich.

    Johanna will taunt you before vanishing, leaving you to deal with a swarm of enemies, including Despair Demons (weak to Fire and resistant to Cold damage).

    After defeating the enemies, try to free the final spirit with Emmrich.

    Unfortunately, Johanna has captured the spirit’s essence in a lantern before escaping, so you must leave The Fade and pursue Johanna Hezenkoss.

    How to Escape The Fade

    Follow the marker until you discover a candle nearby. Emmrich will comment on it and ask you to collect more candles to aid in escaping The Fade.

    Find a second candle held by a statue in the eastern part of the area, grab it, and take both candles to the marked pedestals.

    Emmrich will construct a bridge allowing you to reach the portal and escape The Fade.

    Confront Johanna

    Upon returning to the mansion, you’ll hear Johanna’s voice, yet she won’t be visible.

    Head straight to the Main Hall, following your marker, and enjoy the ensuing cutscene.

    After Johanna’s speech and her subsequent escape, you’ll have to fight Rampant Ego, a modified Pride Demon accompanied by a group of Lesser Pride Demons.

    Pride Demons and Rampant Ego are both weak to Necrotic damage and resistant to Electric damage.

    Be cautious not to get cornered, and prioritize targeting your enemies’ weaknesses to keep them at bay.

    Concentrate on Rampant Ego’s shield and prevent it from fully recharging.

    As soon as all the enemies are defeated, you’ll have time to explore the area and can chat with Emmrich when you’re ready.

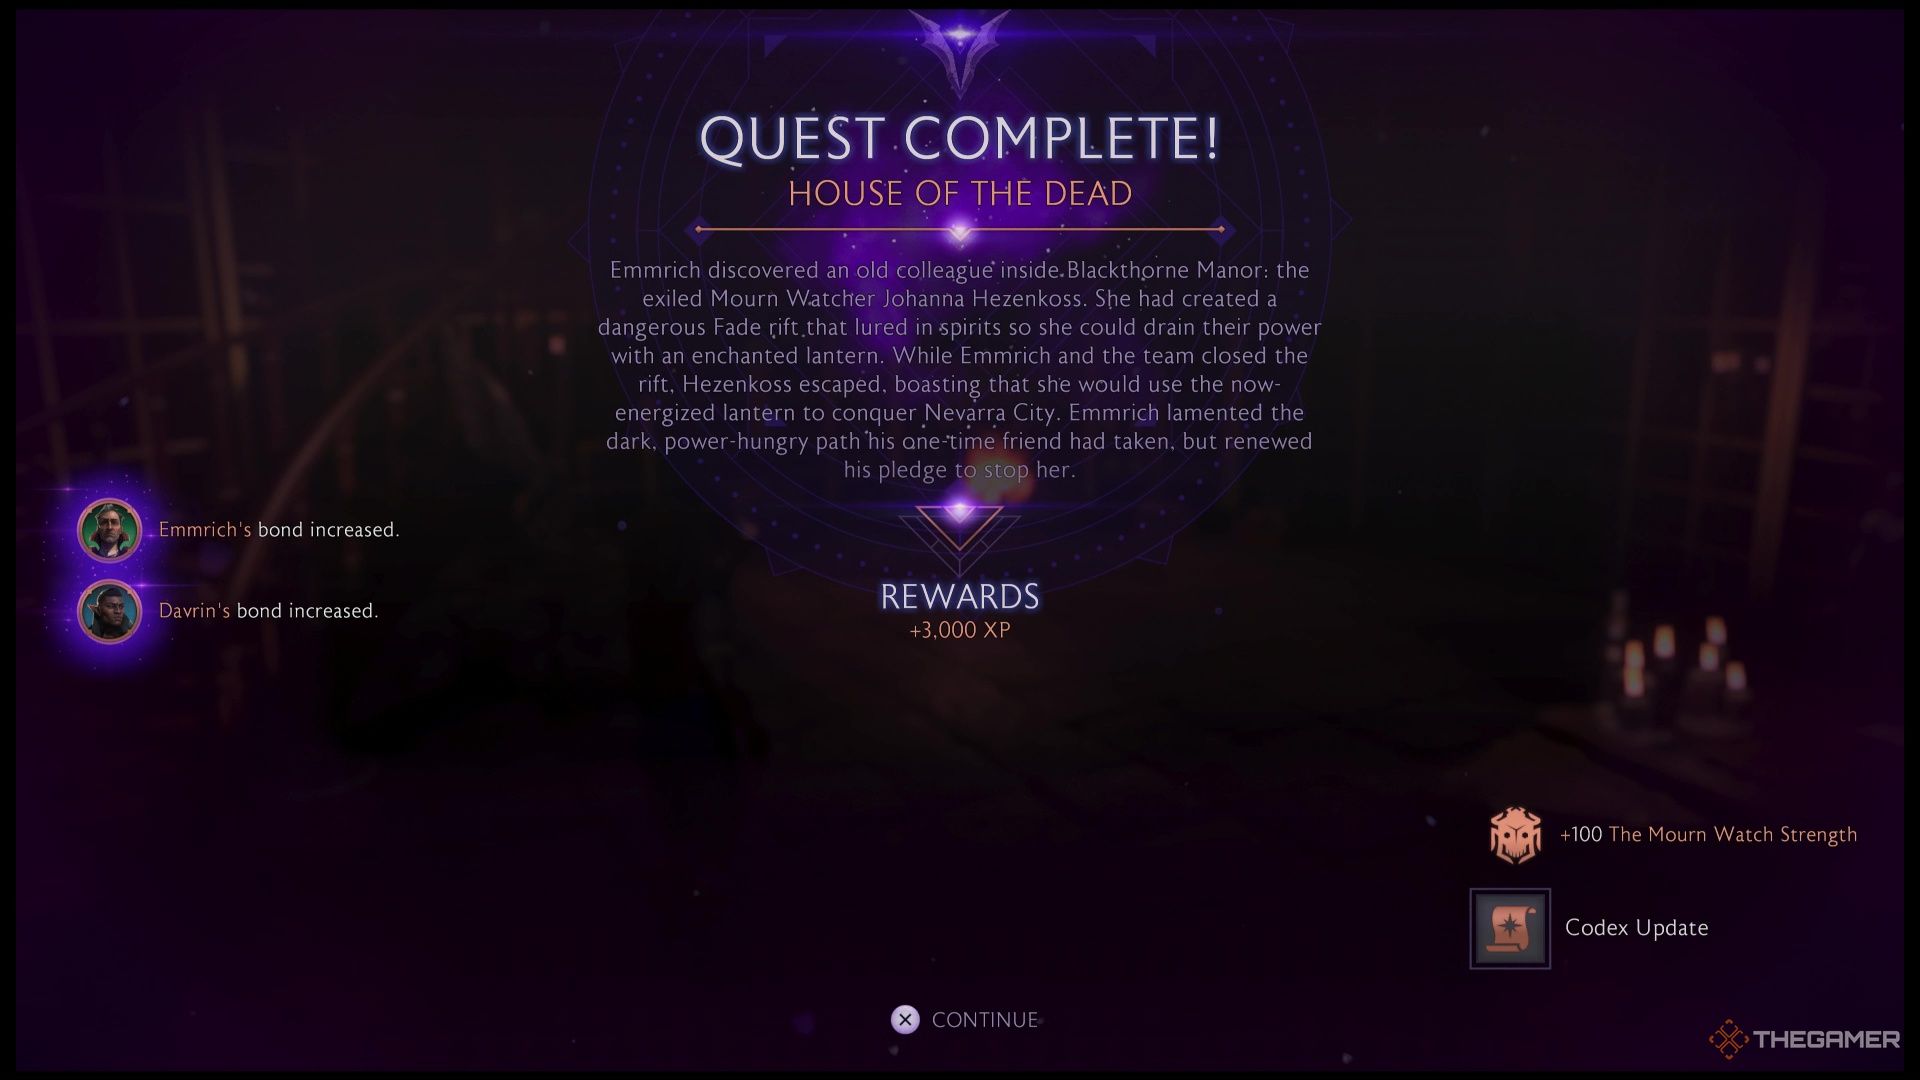
    What Rewards Do You Get from House of the Dead?


    The House Of The Dead Rewards In Dragon Age: The Veilguard.

    Once you’ve wrapped up your conversation with Emmrich, you will complete the House of the Dead quest and receive the following rewards:

    • 3,000 XP
    • Increased bonds with both companions who accompany you

    Use this quest to strengthen your relationship with your favorite companions alongside Emmrich, enhancing your connections in the game.

  • Conquering Amarell The Unwoven in Dragon Age: The Veilguard

    Conquering Amarell The Unwoven in Dragon Age: The Veilguard

    If you’re ready for some monster hunting, Dragon Age: The Veilguard has a variety of quests that will keep you entertained, especially the “Gate” quests. In the Gate of Pale Reflections, you’ll journey to Solitude’s Edge in the Hossberg Wetlands, where you’ll encounter numerous creatures and challenging quests.

    This quest conveniently follows the route of the Pinnacle of Its Kind quest, which also leads you to Solitude’s Edge to face another foe. The best approach is to complete Pinnacle of Its Kind first and then go to Solitude’s Edge. It’s wise to level up sufficiently before attempting both quests, as the boss encounters are very close to each other.

    How to Defeat Amarell the Unwoven

    The simplest way to access Solitude’s Edge in the Hossberg Wetlands is by completing the Pinnacle of Its Kind quest, which is also necessary for unlocking the Unbound Trophy/Achievement.

    You can also fast-travel to the nearest beacon if you’ve already completed that quest.

    In the southwest part of Solitude’s Edge, look for a large Blight Cyst sticking out of a ruined structure, as this is where our champion resides.

    Destroy the Blight Cyst to awaken Amarell the Unwoven from its slumber.

    Amarell is a level 35 champion with both Necrotic Imbued and Exploding abilities. It has a weakness to Fire and resists Necrotic damage.

    Inflicting a burning effect is a great strategy to help take Amarell down quickly.

    A solid tactic for defeating Amarell quickly is to keep it pinned in the small, ruined building where it emerges from the Blight Cyst. This will make it easier to stagger Amarell, leaving it open to a series of follow-up attacks. If you time the stagger with applying fire damage, Amarell’s health will drop rapidly, leading to a swift victory.

    Be sure to collect the Champion Essence after the battle!

    What Rewards Do You Get from the Gate of Pale Reflections?


    Once you defeat Amarell, you will receive the following rewards:

    • 350 XP
    • Etheric Remnants
    • +50 Grey Wardens Strength

    Near where Amarell appeared, there is also a large chest that will contain a unique weapon specific to your class. For example, as a rogue, I received the Optimist’s Span, which features the following effects:

    • Increases damage by 100 percent when attacking from the air
    • Decreases damage by 30 percent when attacking from the ground

    Enjoy your rewards and keep completing more quests to gain additional Grey Wardens Strength and unique items.

  • Dragon Age: The Veilguard – Isle of Gods Guide

    Dragon Age: The Veilguard – Isle of Gods Guide

    The Isle of the Gods marks a pivotal moment in Dragon Age: The Veilguard, setting the stage for an intense showdown against the forces of tyranny, the Blight, and the Veil. Here, you’ll face a range of foes including Darkspawn, Antaam, Venatori, and mercenaries, leading up to an encounter with Ghilan’nain herself.

    With so many enemies around, it doesn’t heavily matter who you bring along, as you can always find someone to target their weaknesses. We recommend selecting a companion with healing skills, as well as pairings that can effectively work together (like one character who can cause explosions). Everything kicks off with a crucial decision.

    Davrin or Harding for the Second Team

    As you progress, you will frequently face crucial choices, and we have a detailed analysis of every option along with the best companions to select. But first, you must choose between Davrin and Harding. Just a warning: this choice will affect the rest of the game, with the character you select being unavailable moving forward, so pick someone you’re okay with missing out on.

    Davrin deals fire damage, which is advantageous but can be overshadowed by Taash. On the other hand, Harding is a versatile option, making her a reliable choice, yet not necessarily the best for your lineup. In this instance, neither is essential, complicating your decision even more.

    Spoiler Alert: Major Impacts Ahead

    Proceed only if you’re ready for significant spoilers.

    At the conclusion of this mission, depending on your choice, one companion will make the ultimate sacrifice to protect the group, meaning there’s no way to complete the mission without one of either Harding or Davrin (plus Assan, who goes down with them).

    After this choosing moment, you’ll find yourself in combat along the beach. This section is generally straightforward, so ensure you have your companion to provide healing, and it shouldn’t pose much of a challenge.

    Bellara or Neve to Take Down the Magic Wards

    Similar to the previous decision, you will encounter choices that can lead to potential spoilers. We’ll keep it straightforward: whoever you pick here will also be off-limits until the end of the game. If Neve has been Hardened, she’s the better choice since she won’t possess her healing abilities. If not, the decision is up to you. Both options come equipped with healing and control skills, so it boils down to personal preference.

    However, be aware that if you opt for Neve, you’ll end up losing one of either Emmrich or Lucanis, while choosing Bellara will result in losing Emmrich or Taash instead.

    Spoiler Alert: Significant Consequences Ahead

    Only read if you’re okay with encountering major spoilers.

    Either way, the stakes are less critical here. The companion you select will be captured and will need rescuing later, and you won’t be able to add them back to your party, so choose carefully.

    Following this, combat gets progressively tougher. You’ll want to focus on the Boils first when battling Darkspawn and prioritize taking out the Emissaries to avoid hazardous traps across the battlefield.

    How to Defeat Ghilan’nain

    When you confront Ghilan’nain, you’ll start off alone, facing waves of Darkspawn that just keep coming. It’s vital to defend yourself against being overwhelmed, but your main priority should be tackling the Blight. The only exceptions are Javelineers and Hurlock Blighters, as they cause significant area damage, complicating your movements. While it’s important to combat any threats, your key goal here is survival and eliminating the Blight.

    Importantly, you do not have to battle Ghilan’nain directly. Once you deplete her Blight Shield, a cutscene will trigger, concluding the quest, so be liberal with your health potions—don’t save them for later.

    When the battle commences, start by attacking the first Boil immediately to your left. Then, proceed up the steps next to it for your next Boil. The third is found at the bottom of those same steps. Afterward, focus on the Blight surrounding Ghilan’nain to free your first companion.

    Assign your ally to tackle the toughest Darkspawn as you clear the area. Move to the opposite end of the arena, targeting the Blight there. Another Boil is positioned at the foot of the steps, so be sure to eliminate it as well.

    After you’ve dealt with the Blight near Ghilan’nain, your second companion will be freed.

    Next, head to the center back of the arena for another Blight Boil. Ascend the central stairs, where you’ll find the second Boil on an arch and the third at the bottom. Attack the Blight on the island near Ghilan’nain and then target the opposite side of the steps below.

    With that completed, move to eliminate the Blight around Ghilan’nain again, freeing Harding or Davrin, depending on who you selected earlier. They won’t fight alongside you but will be essential for the next phase.

    Head back to the area of the first Boil, where a new one will have become visible. Step back slightly and aim at the right of the arch on the stairs. This will destroy the Blight, causing another Boil to activate next to the first. Clear that one out too, followed by tackling the Boil located on the opposite side of the stairs.

    Now, you can attack the Blight surrounding Ghilan’nain to wrap up the quest. Enjoy the cutscene, and perhaps reflect on whether or not you checked those spoiler warnings earlier.

  • Dragon Age: A 15-Minute Dive into Character Creation

    Dragon Age: A Quick Look at the Character Creation Menu

    In the world of Dragon Age, the character creation menu is an essential step that sets the stage for your adventure. As you dive into this process, you have the opportunity to shape not just your character’s appearance, but also their background and abilities.

    You’ll start by choosing your character’s race, which influences their skills and the way they interact with the game world. From humans and elves to dwarves, each race has unique traits that can affect your path in the game.

    Next, you can pick a class that aligns with your desired play style. Whether you prefer the brute strength of a warrior, the stealth of a rogue, or the magic of a mage, your choice will determine your combat abilities and how you approach challenges.

    The character customization options are extensive. You can tweak facial features, skin tone, hair style, and even tattoos, allowing you to create a truly unique character that reflects your personal style.

    Moreover, as you finalize your character, you’ll make decisions about their backstory, which adds depth to your gameplay experience. These choices not only shape who your character is but also influence how other characters in the game perceive you.

    Overall, the character creation menu in Dragon Age is more than just a formality; it’s an immersive experience that tailors the game’s narrative to your personal preferences. Embrace the opportunity to craft your hero and embark on a journey filled with rich storytelling and engaging gameplay.

  • Unlocking Bellara’s Power Crystal in Dragon Age: The Veilguard

    Unlocking Bellara’s Power Crystal in Dragon Age: The Veilguard

    Quick Links

    Here are some quick links to topics related to the game:


    Dragon Age: The Veilguard reintroduces familiar characters along with new allies like Bellara. In the quest titled "In Entropy’s Grasp," you’ll meet Bellara Lutare and assist her in locating a missing power crystal. Your adventure will take you to the Veil Bubble, where you’ll face minor obstacles before meeting her.

    When you finally join forces with Bellara, you will encounter significant challenges. During your mission, you’ll battle against various foes, including Darkspawn, Shades, and Sentinels, as you journey to the Floating Archive Temple.

    How To Help Bellara Reach The Floating Archive Temple In Entropy’s Grasp

    After defeating the first Sentinel in the Veil Bubble forest, you’ll have a short chat with Bellara, who will request your assistance in finding her Power Crystal. With her on your side, you’re ready to continue the quest.

    Advance along the trail and defeat the enemies you encounter along The Forest Path until you reach the Elven Temple. Once there, take a left down the hallway and keep going.

    Tip: Don’t forget to check the chest for valuable items, armor, and gold!

    Once you’re finished inside the temple, exit through the large door and navigate through the Forest Path until you arrive at the Ruins Approach. Here, you’ll find a peculiar triangular artifact that Bellara will note. Pick it up and place it in the designated receptacle.

    With the artifact in place, a bridge will form, leading you to the Mountain Path. To your left, at the top of the slope, you’ll notice another Elven device to interact with.

    This time, use Bellara’s Tinker ability to disable the device. Once you do, you’ll have to fight off Shades before continuing.

    Keep following the path along the Mountain Path and pass under an archway into the Cliff Wolf Temple area. There, defeat constructs guarding two doors, both of which are also equipped with Elven artifact receptacles.

    After clearing the rooms, take the artifact from the left door and move it to the receptacle next to the right door to gain access.

    Be sure to check the nearby chest for more treasures before advancing through the two doors. Follow the quest marker, and you’ll eventually reach an area filled with Darkspawn feasting on a dead animal. At this point, you’ll need to deal with them.

    Afterward, you’ll find another resonance amplifier that Bellara can help deactivate. Once that’s done, more Darkspawn will appear, and you’ll need to defeat them to proceed.

    Continuing along the path, you’ll come across a massive ballista. Use it to break through the wall in front of you, and defeat the Darkspawn minions that flood in once the wall has been destroyed.

    Next, head to the Abandoned Camp, where you’ll find another resonance amplifier. As before, Bellara can assist you in shutting it down. Once you’ve deactivated it, prepare for another group of Sentinels to attack.

    After defeating them, continue to follow the quest marker into the Broken Stairway and ascend the winding path. At the top, you’ll face a Frenzied Sentinel guarding two doors.

    Eliminate any Darkspawn that appear, as they can easily overwhelm you during this fight.

    After dealing with the Frenzied Sentinel, you’ll find another locked door requiring a triangular artifact to open it. To the left of this door, you’ll spot a second Elven artifact locked behind a gate.

    Take the first artifact out to the area where you fought the Frenzied Sentinel. You’ll spot another door there, where you can place the artifact in its receptacle.

    Proceed up the stairs until you encounter a ballista that is blocked by a Blight Boil. Destroy the Blight Boil and use the ballista to break through a wall ahead, giving you access to the other Elven artifact.

    After collecting it, make your way back to the door with two receptacles, then return the first artifact to its original spot to open the door to the Floating Archive Temple.

    Once inside, gather any remaining treasures from the chest in the room, then proceed towards the marker to trigger a cutscene.

    How To Get Bellara’s Power Crystal

    Following the cutscene, you’ll find yourself face to face with a giant Ogre that you’ll need to defeat. The Ogre is especially vulnerable to fire, so prepare your fire skills for this encounter.

    Caution is key; this battle can be unforgiving if you’re not careful. The Ogre’s club will glow bright red when it’s about to unleash a powerful unblockable attack. Make sure to roll away from these strikes, as they can significantly reduce your health.

    Use any staggering abilities you have, as they will allow you to chain multiple attacks and inflict high damage in a short amount of time.

    Upon vanquishing the Ogre, a cutscene will play featuring Nadas Dirthalen, and you’ll receive experience points for returning Bellara’s Power Crystal, thus completing this section of the quest. Make sure to speak with Bellara to wrap things up!

  • Quickly Boost Your Caretaker Reputation in Dragon Age: The Veilguard

    Quickly Boost Your Caretaker Reputation in Dragon Age: The Veilguard

    Across the world of Dragon Age: The Veilguard, you’ll discover various shops where you can buy items for your companions, gear for yourself, and upgrades for your existing equipment. One shop you’ll visit frequently is the Caretaker’s store, located in the courtyard of The Lighthouse, which serves as the main hub of the game.

    The Caretaker is there to help you enhance your gear and that of your companions. However, to unlock the more powerful upgrades necessary for tougher battles later in the game, you’ll need to improve your relationship with him. This is achieved by collecting Caretaker Reputation Points, which can be quite a challenge to accumulate.

    How to Earn Caretaker Reputation Points


    You can earn Caretaker Reputation Points primarily through exploration. While wandering the world of Dragon Age, you will come across Mementos, which are collectibles scattered throughout. For every Memento you pick up, you receive 50 Caretaker Reputation Points.

    Completing specific story quests will also net you some points, often in the hundreds. However, this shouldn’t be your main strategy for leveling up the shop, so treat those moments as pleasant bonuses when they occur.

    Where to Find Mementos


    A Memento available from the Veil Jumpers in Dragon Age: The Veilguard.

    Mementos can be found in various locations. Look on tables in faction headquarters, breakable boxes scattered throughout cities, or even from faction vendors.

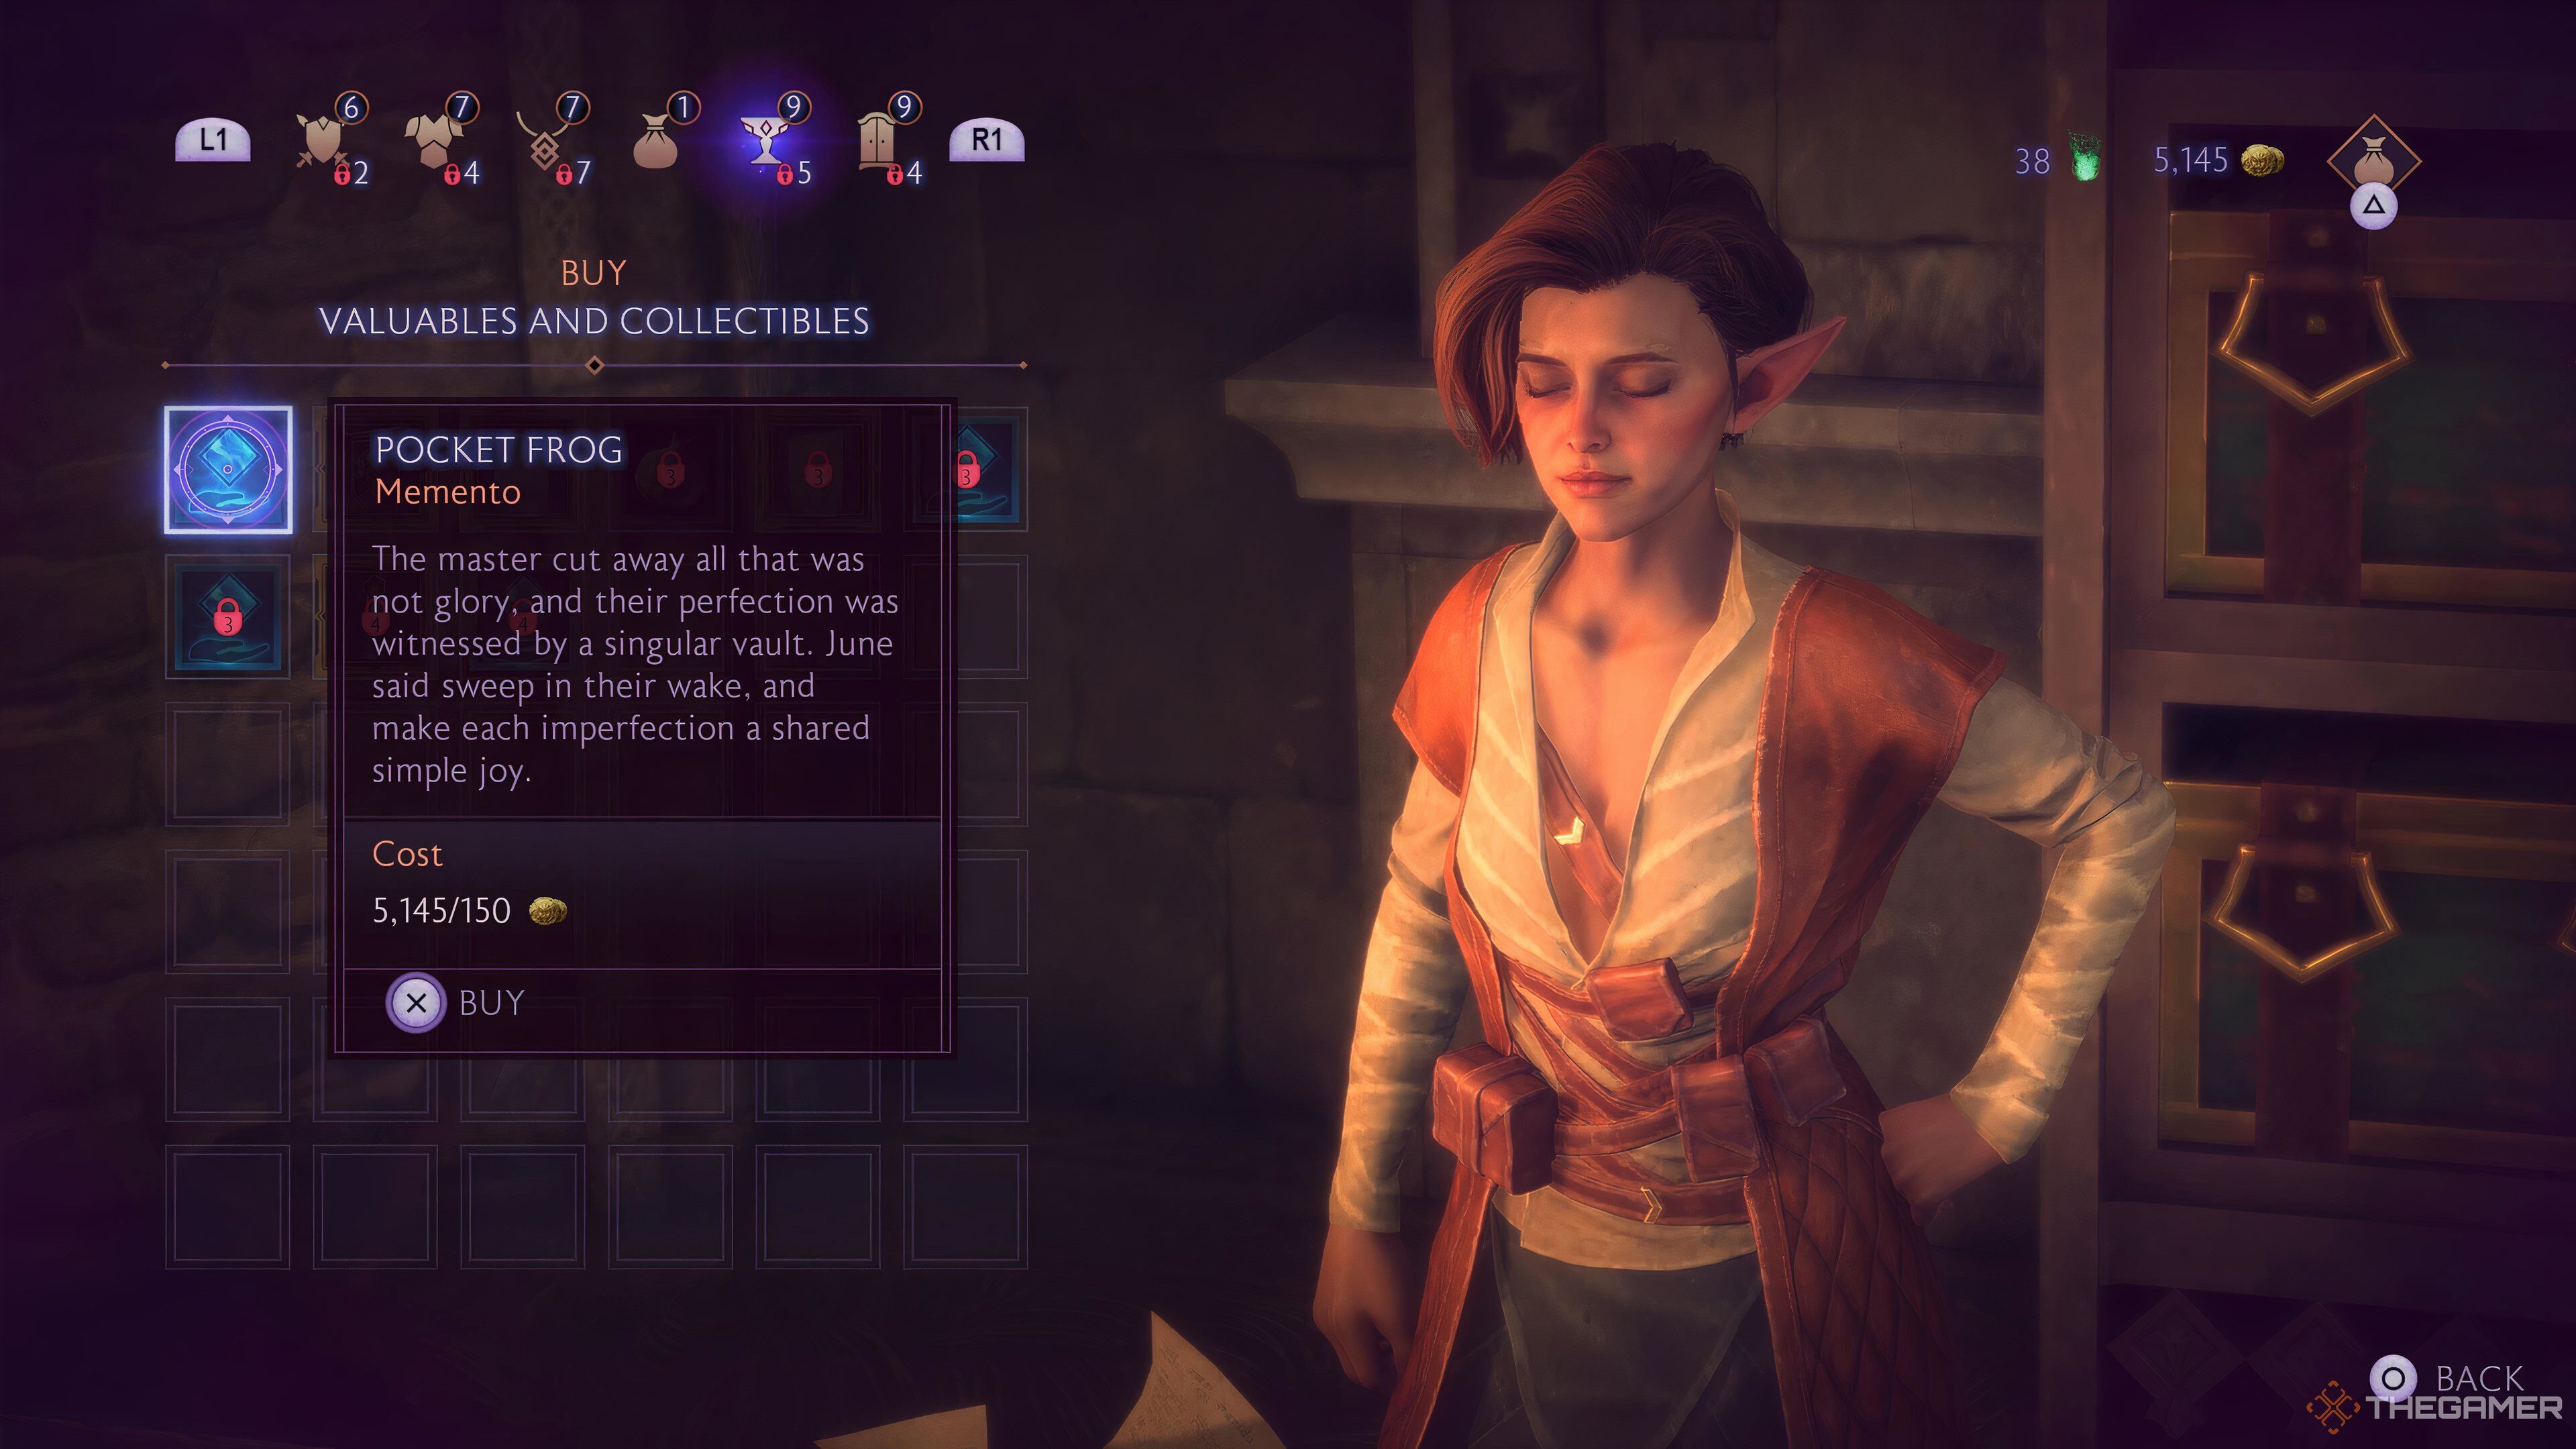
    You can buy Mementos for about 150 gold. They function just like any regular Memento, being added to your Library and granting 50 Caretaker Reputation Points.

    To upgrade the Caretaker’s shop, you’ll need to find a substantial number of Mementos. For example, to reach the second rank, you need 750 Reputation Points. Therefore, stay alert during your explorations and while completing quests. Fortunately, after finishing the initial story quests, there are many opportunities to discover Mementos regularly.