Select Language:
If you’re trying to get your HP Color LaserJet Pro MFP 3301-3304 3388 Printer Series to correctly send scans directly to your computer, here’s a simple guide to help you set it up.
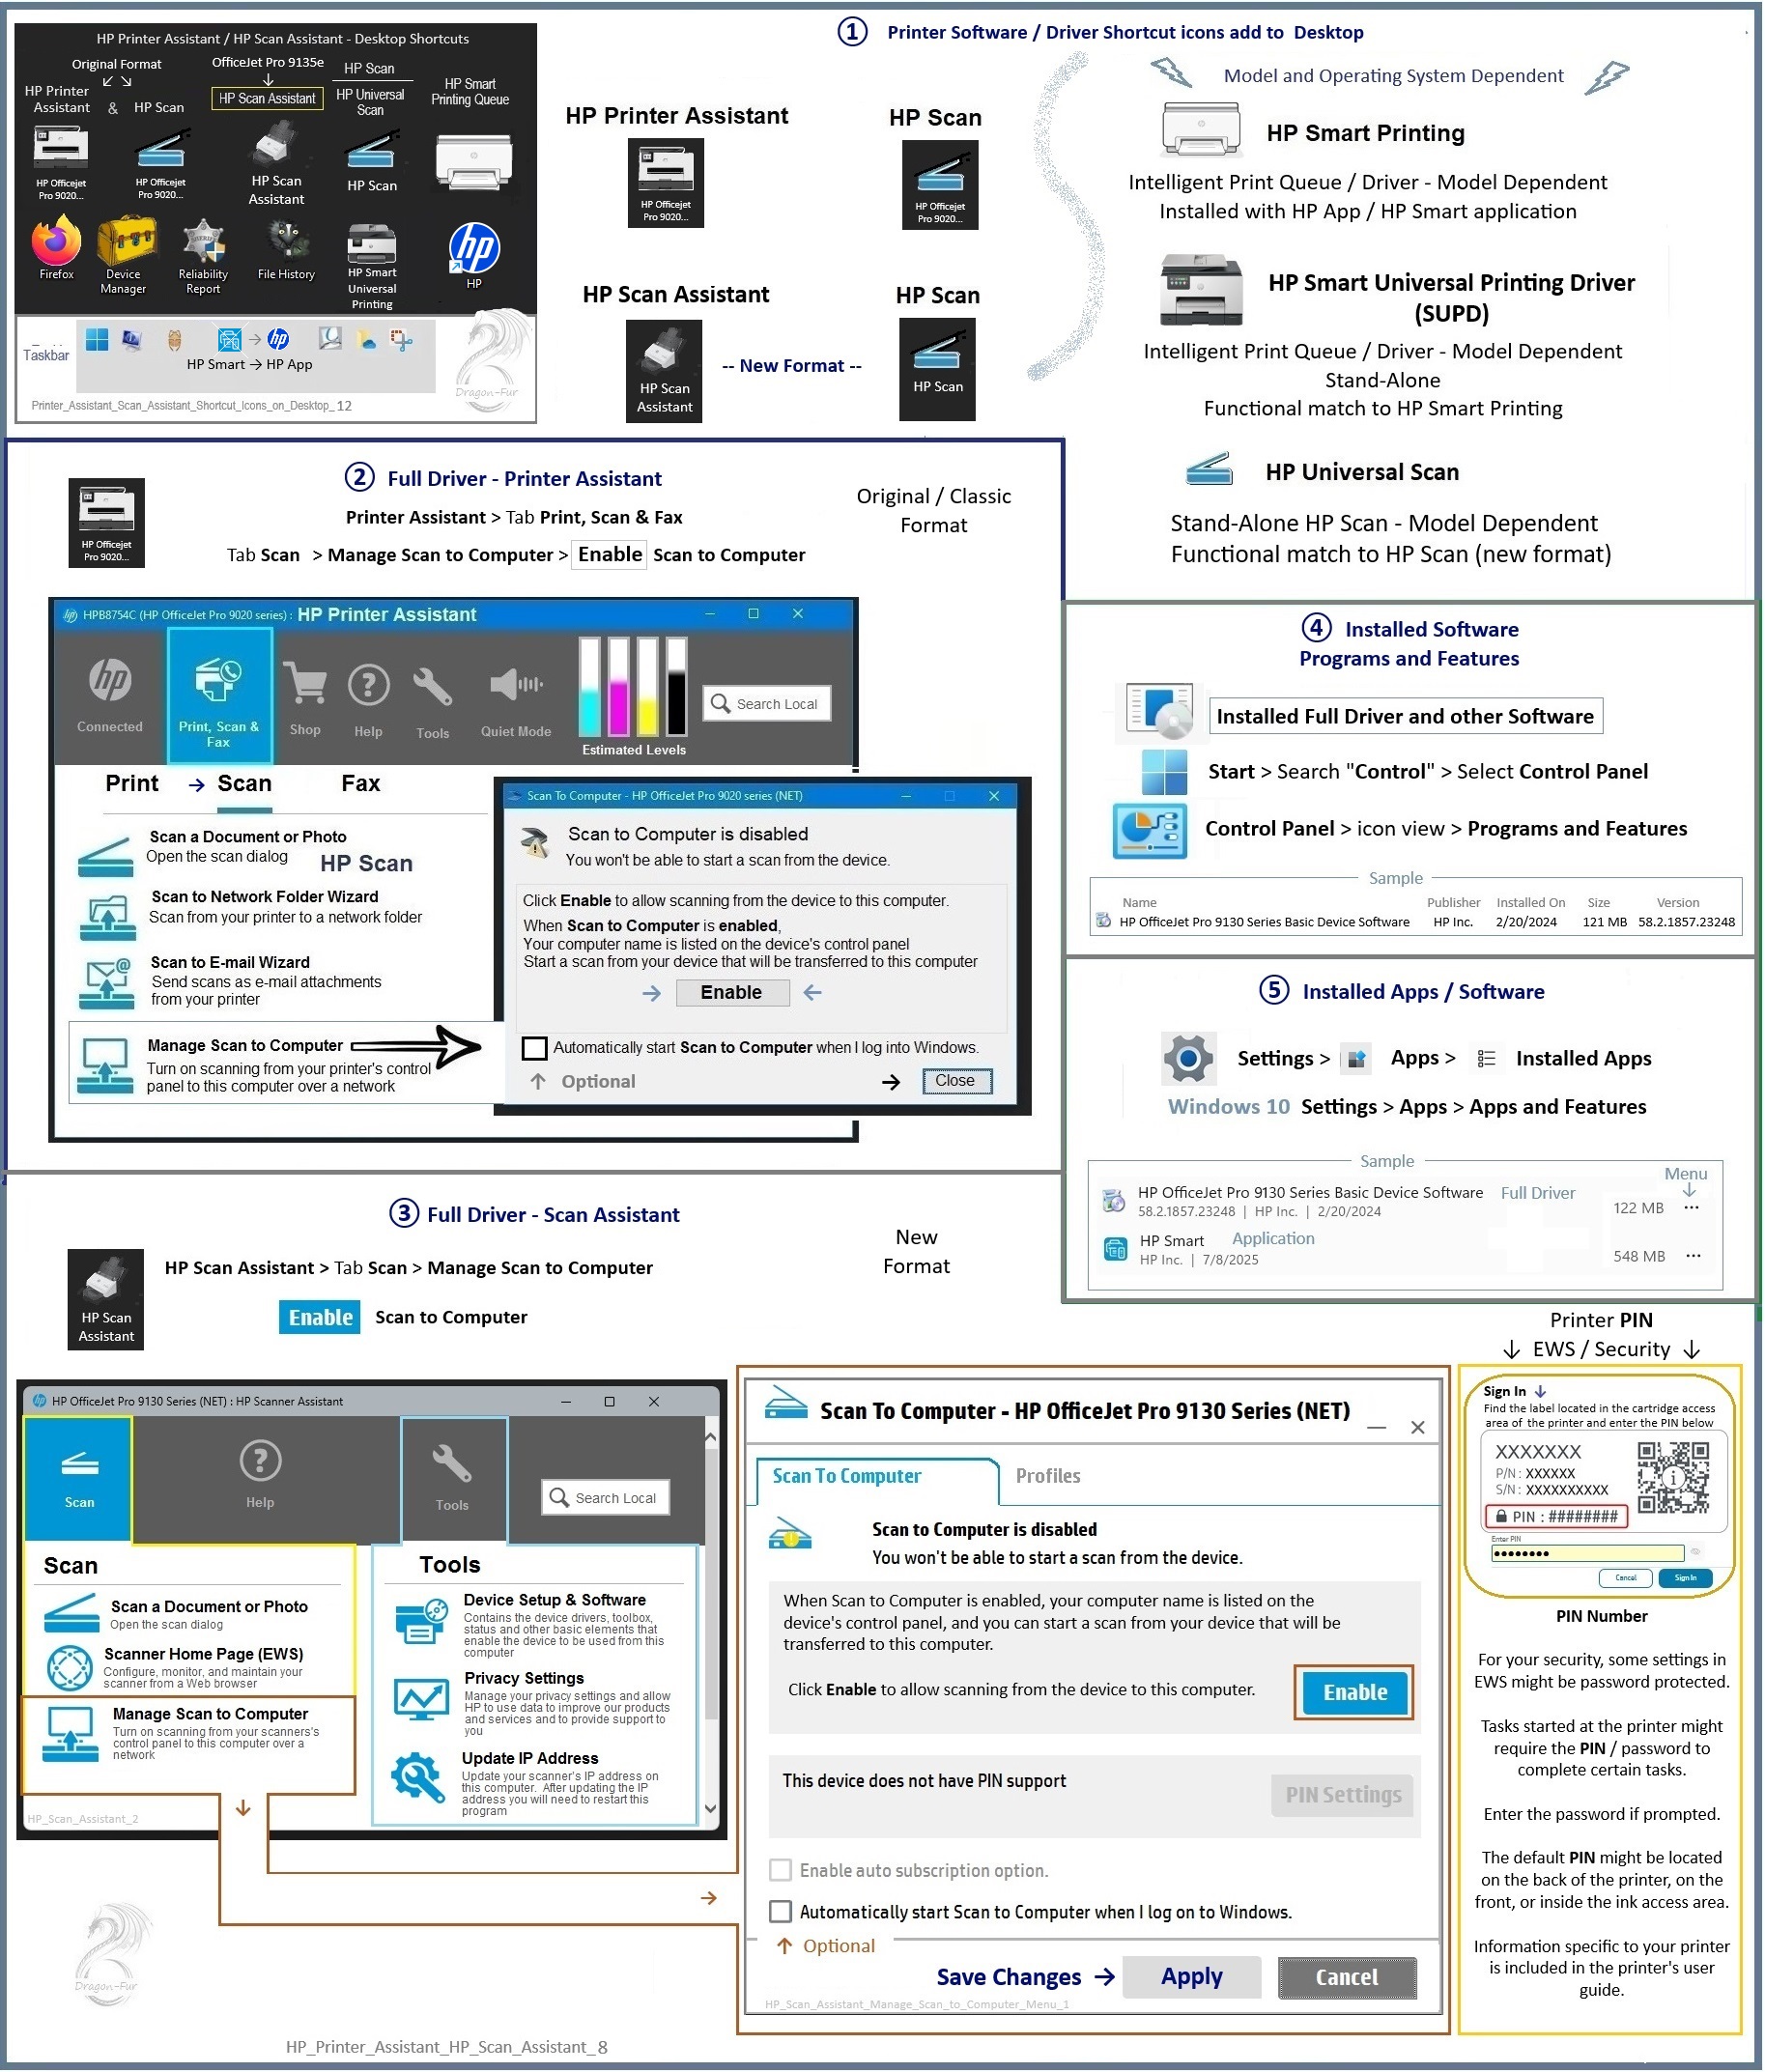
First, make sure you’ve installed the full printer driver software compatible with your Windows operating system. This software provides all the features you’ll need not only for printing but also for scanning from your computer. After installing, restart your PC and sign back in.
Next, open the HP Scan Assistant. You can usually find this program in your Start menu or the list of installed programs. Once open, look for the ‘Tools’ option. Within Tools, you’ll find ‘Manage Scan to Computer’ — click on it, and then turn on or enable this feature. This step allows your computer to receive scans directly from the printer.
The full driver software isn’t just about basic printing; it also unlocks advanced printing preferences, printer properties, and scanning options that may be hidden if only the basic driver is installed. Be sure to direct your printer properties to use the HP driver rather than generic Microsoft drivers. This ensures full functionality and better compatibility.
If you’ve previously installed the software and it’s not working right, try reinstalling the full driver. Before doing this, it’s a good idea to check for any pending Windows updates. Install those updates, restart your computer, and then uninstall the existing printer software via your ‘Programs and Features’ menu, including any help or support tools related to the printer. After that, disconnect any USB cable connecting your printer to the computer.
Now, download the latest full driver from HP’s official support website. For a more streamlined installation, you can use the web-based setup, called Web Pack Installation. Follow the instructions to download, save, and run the installation file. If the web installer prompts you to use the internet, it’s best to open the browser (using Microsoft Edge works well) and attempt the download again. When prompted, connect your printer to your computer with the USB cable near the end of installation.
Once everything is set up and installed, restart your computer. Now, your printer should be fully configured to send scans directly to your computer. You can then access scanning options via the HP Scan Assistant or your printer’s control panel.
For more help, HP offers video guides and community support that walk you through troubleshooting and advanced setups. Simply visit HP’s official support pages or their YouTube channel for step-by-step videos.
Remember, regularly checking for Windows and printer software updates can prevent many issues and keep your device running smoothly. Following these steps ensures you get the most out of your printer’s full capabilities, including Scan to Computer.