الوسم: Triple-A Games

  • Complete Guide to Locating Every Key in Sonic X Shadow’s Space Ark

    Complete Guide to Locating Every Key in Sonic X Shadow’s Space Ark

    As with any Sonic title, Sonic X Shadow Generations focuses on reaching the finish line as swiftly and stylishly as possible. However, speed isn’t everything. You need to be strategic about your routes, stay alert for enemies, and maintain a healthy collection of rings.

    And what’s a Sonic game without collectibles? The journey begins in the Space Ark Colony, where you’ll be immersed in the action right away. For those aiming for an S Rank in both Acts and on the lookout for hidden keys, this guide is here to help.

    How to Achieve an S Rank in Space Ark Colony

    Attaining an S Rank is a significant goal in any Sonic game, and Shadow boasts a more precise control scheme compared to Modern Sonic in the primary game, which makes mastering his levels all the more enjoyable.

    S Rank for Space Ark Colony Act 1

    The first act of Space Ark Colony is among the longest in Shadow’s adventure, serving as an introduction to crucial mechanics and the antagonist Black Doom. Fortunately, the requirements for achieving an S Rank in Act 1 are relatively forgiving, although the length means mistakes can be costly.

    Any keys you gather during the level are retained upon completion, allowing you to concentrate solely on securing an S Rank.

    The key to mastering this level is to control your speed. If you push too hard, you may miss jumps that could help you reach the finish line more quickly. Shadow’s Homing Attack is also vital, as it enables him to move past laser barriers by attacking the Artificial Chaos enemies behind them.

    The Radical Highway sections can be quite perilous; a single misstep can lead to instant failure. If you’re hesitant about a jump, it’s wiser to choose a safer route. It’s often better to play it safe than face an untimely demise and have to start over at the last checkpoint.

    Utilizing Chaos Control can pause time, which is crucial for navigating through rocket fields safely. Getting hit by rockets can waste precious seconds, especially when they fire unpredictably, so don’t hesitate to activate Chaos Control.

    Additionally,
    using Chaos Control also stops the in-game timer
    , providing extra time each time you apply it.

    Achieving a time of under five minutes with approximately 40,000 points will assure you an A Rank. To elevate that to an S Rank, aim for a Perfect Clear by completing the level without any deaths.

    S Rank for Space Ark Colony Act 2

    Act 2 of Sonic X Shadow Generations is considerably shorter than Act 1 and lacks any Radical Highway sections. Instead, it maintains a distinct Space Ark Colony vibe while introducing its own exciting elements.

    This act requires caution regarding your movements; careless boosting could result in missing critical grind rails, or an improperly timed Homing Attack might drop you to lower levels. Pay special attention during the side-scrolling segments.

    The Gravity Poles serve as a significant challenge here. They primarily show in the side-scrolling parts and can complicate your jumps. Although falling from them won’t always lead to death, you might still lose valuable time trying to navigate them. To save time, boost off when you can reach higher paths.

    As you near the level’s end, sections will demand the use of Doom Wings. While not essential for achieving an S Rank, they can be beneficial if you’ve made mistakes earlier on.

    Doom Wings only
    automatically activate if you’re playing with them disabled
    . If you have the ability, you have to activate them manually, which can be a bit confusing.

    Watch out for the Doom Spear switches since failing to activate them quickly could result in crashing into walls. By holding down the Doom Spear button, you can lock onto them automatically when they appear.

    Remember that during Chaos Control, the Doom Spears won’t move, so position yourself closer to activate them.

    To achieve an A Rank, complete the act in under three minutes and score at least 40,000 points. A Perfect Clear will push your score to an S Rank.

    Locating Every Collection Box Key in Space Ark Colony

    In each Act of Shadow Generations, whether main or challenge, you’ll discover three keys that unlock various Collection Boxes located throughout White Space. Although called keys, they resemble medals.

    Both acts of Space Ark Colony contain two of each type of key, ensuring a variety of chests for you to open. Here’s where you can find them all.

    Space Ark Colony Act 1 Collection Box Keys

    Shadow falling through the air as rockets fire below him in space ark colony in sonic x shadow generations.

    In Space Ark Colony Act 1, the three keys can be found before entering the Radical Highway section, allowing you to race through there without concern. Here are their approximate locations:

    • The first Shadow’s History Key can be found right before your initial anti-gravity wall. Instead of heading straight for it, bounce off the pad and use your Homing Attack on nearby asteroids to reach a grind rail. Jump at the end to land on the roof where the key is hidden.
    • The second Music key is situated just prior to the segment where you need to use Chaos Control to take out a rocket. As you fall, activate Chaos Control when the rockets align to form a pathway, and the key is at the end.
    • The third Artwork key is located inside the grind rail section. To access it, use your Homing Attack on flying robots to reach a Dash Ring that will elevate you to a higher grind rail, automatically collecting the key at the end.

    Make sure to complete the Act after collecting all three keys to secure them.

    If you die before reaching a checkpoint, you will have to
    recollect any keys you acquired
    .

    Space Ark Colony Act 2 Collection Box Keys
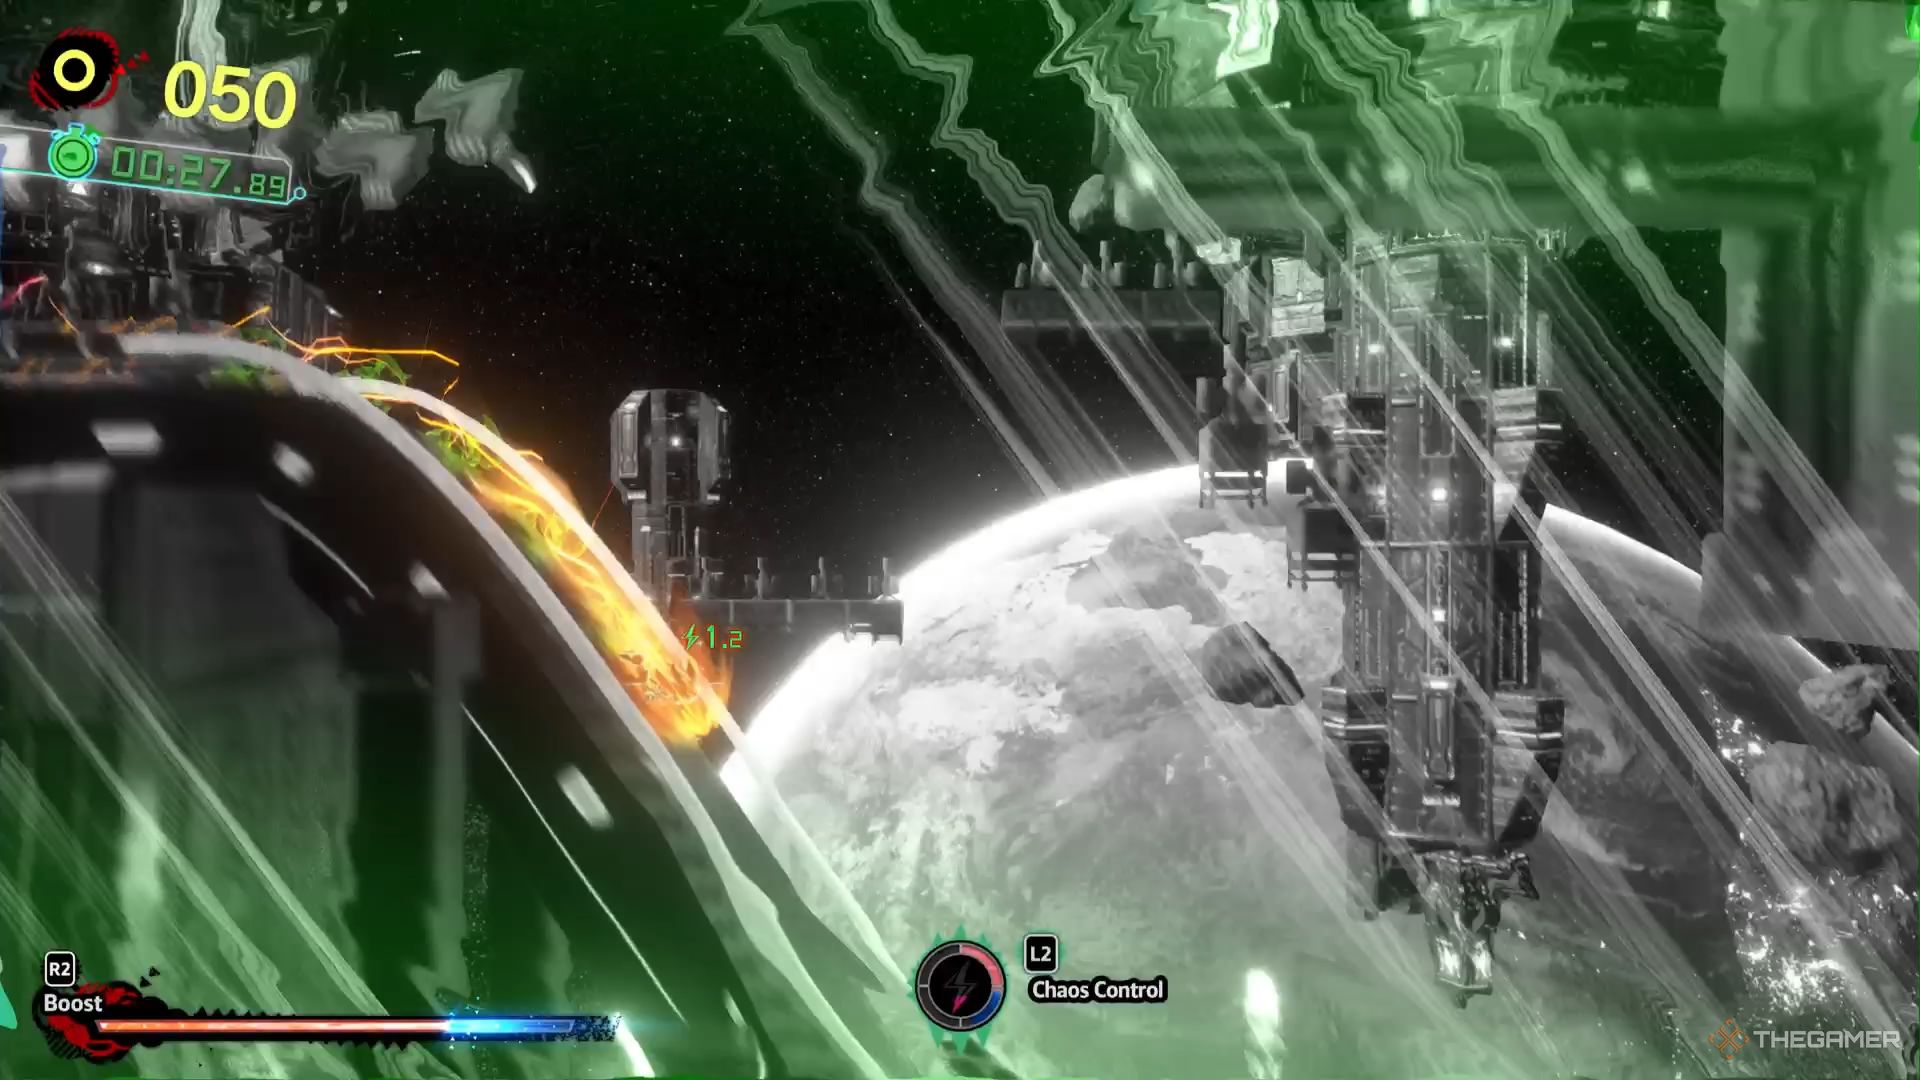
    Shadow dashing down a path while Chaos Control is active in Sonic x Shadow Generations.

    In Act 2 of Space Ark Colony, the three keys are more widely dispersed than in Act 1, with the last key appearing close to the Act’s conclusion.

    • The first Music key can be found near the start. After passing a checkpoint, you’ll zip down a hill. Stop and jump to grab a raised area instead. Pull the handle up, and you’ll find the key waiting.
    • The second Artwork key is located later on, near the Gravity Poles. This key sits atop the first Gravity Pole with a top. You’ll need to jump to it from the second Gravity Pole, avoiding any Dash Ring interference.
    • The third Shadow’s History Key is positioned in the following side-scrolling section with Gravity Poles after you’ve outrun some rockets. Boost up the first Gravity Pole to find flying robots. Utilize your Homing Attack to land on a rail and keep using it to reach the next rail, where the key awaits.

    With that, you’ve successfully located all the keys in the Space Ark Colony. We hope you’ve secured your S ranks along the way! Congratulations! Now, enjoy the rest of the game.

  • Complete Guide to All Chests in Sonic X Shadow Generations

    Complete Guide to All Chests in Sonic X Shadow Generations

    In the original Sonic Generations, players could gather numerous collectibles, including concept art, music, and details about earlier Sonic titles by exploring levels and completing special challenge acts. With the introduction of Shadow’s own adventure in Sonic X Shadow Generations, a treasure trove of artwork and collectibles becomes available for players to discover.

    For Shadow, the mechanics are a bit different. Many collectibles are nestled within various levels, while additional music and artwork pieces can be found scattered around the expansive hub known as White Space. There’s a vast amount to uncover, so let’s dive into where you can find all the Collection Boxes.

    How To Unlock Collection Boxes

    When you stumble upon a Collection Box, your first instinct might be to simply dash over and open it. After all, finding one is quite an achievement! However, Sonic X Shadow Generations challenges you to put in a bit more effort. Each box type requires a specific key, which can be located throughout both Main Acts and Challenge Acts.

    • Green Collection Boxes reveal parts of Shadow’s History—there are 10 in total.
    • Yellow Collection Boxes unlock Music that can be set to any Act, totaling 22 hidden boxes.
    • Blue Collection Boxes grant you access to Artwork to appreciate in the Collection Room, with 54 hidden inside Collection Boxes.

    This adds up to 96 Collection Boxes to discover, meaning you’ll need to locate every key in each act to unlock them all—there are no extras to be found.

    Keep in mind that not all Music and Artwork come solely from Collection Boxes; you’ll also earn some by completing Challenge Acts. However, all of Shadow’s History is exclusively found in Collection Boxes.

    Where To Find Every Collection Box

    Of the 96 Collection Boxes, every single one can be found in White Space, and none are permanently missable. This allows you to explore at your leisure. If you find a Collection Box but lack the corresponding key, it will be marked in red on your map, ensuring you remember where to return once you’ve acquired it.

    Tips for Finding Collection Boxes:

    1. Break every wooden box you encounter, as they often hide a Collection Box or may even contain one.
    2. Check unexpected areas—Collection Boxes can be tucked away in corners and less obvious spots.
    3. Use Doom Wings once they’re unlocked. This ability to hover can help you reach some of the more cleverly positioned Collection Boxes.

    Be aware of the game’s draw distance. Sometimes Collection Boxes might not appear until you get close, so feel free to scrutinize your surroundings thoroughly.

    Special Locations

    After unlocking Radical Highway, a path will appear leading to a giant sphere in the sky,but this disappears once you finish the game. Keep an eye out for two Collection Boxes hidden up there; you can restore access by activating the new Doom Sphere in White Space.

    Another notable area is the underground section accessible via a well near the center of the map, later reachable through a cave in Chaos Island. This area has multiple hidden Collection Boxes, most of which require Doom Morph to access.

    Finally, you can find tricky Collection Boxes in the upper part of the Citadel located in Rail Canyon. Reach them using the Doom Blast ability on the enemies near the Biolizard boss fight, aiming slightly higher than usual, as there won’t be a lock-on point here; just follow the edges to discover the two additional Collection Boxes.

    For any boxes you’re struggling to locate, we’ve included images highlighting the exact spots for all 96 Collection Boxes.

    Is There a Reward for Opening Every Collection Box?

    Each Collection Box offers a reward, but the quest to find all of them is massive and doesn’t come with an additional reward. What you get from each box is all there is, even after opening all 96. The only consolation prize is the All Collection Boxes Opened trophy, but beyond that, there isn’t much else to earn.

    Now, get ready to dive into Sonic X Shadow Generations and uncover the riches hidden in its levels! Happy collecting!

  • Catch Morpeko During the 2024 Halloween Event in Pokémon GO!

    Catch Morpeko During the 2024 Halloween Event in Pokémon GO!

    The 2024 Pokemon Go Halloween Event is set to be the most exciting one yet, offering players new bonuses and making substantial changes to the gameplay experience. This event will transform Pokemon Go with a spooky “makeover,” enhancing both the visuals and sounds to create a fitting atmosphere.

    Related

    Pokemon Go: October Raid Guide

    Check out what’s in store for this month’s Raids in Pokemon Go.

    The first part of the Pokemon Go Halloween event runs from Tuesday, October 22, 2024, at 10 a.m. local time until Monday, October 28, 2024, at 10 a.m. local time. This will introduce both exciting new content and returning features, which we’ve updated in this guide for your convenience.

    Updated on October 21, 2024, by Christian Pellegrino: As noted earlier, this year’s Halloween Event will incorporate numerous features and improvements. This guide has been updated to reflect the first part of the event and will be revised again next week for the second part.

    Debuting in Pokemon Go

    Morpeko in two forms, Fully Belly and Hangry, with a decorative frame.

    Morpeko makes its debut in Pokemon Go during this Halloween Event! Players can catch Morpeko as a research reward from both free and paid Timed Research tasks throughout the event.

    Moreover, Morpeko will also be available as a reward in the current Go Battle League. During the event, players have increased chances of encountering Morpeko from the Premium Track rewards.

    After the event wraps up, Morpeko can still be encountered in the Go Battle League from Rank 16 and up.

    These encounters will occur in both Standard and Premium Tracks but will be more frequent in the Premium Track.

    Unique to Pokemon Go, Morpeko can shift between two forms during battles: Full Belly Mode and Hangry Mode.

    In either form, Morpeko can use a special Charged Attack called Aura Wheel, functioning as an Electric-type attack in Full Belly Mode and a Dark-type attack in Hangry Mode.

    Below are the stats for Aura Wheel:

    Aura Wheel Stats

    PvP (Trainer Battles)

    100 Power


    Increases user’s Attack stat by one stage

    The second part of this year’s Halloween Event will introduce two new costumed Pokemon: Froakie and Rowlet, dressed in Halloween outfits.

    Even during the initial phase of this year’s Halloween Event, players can encounter and catch these newly costumed Pokemon through Paid Timed Research.

    Event Bonuses

    Candy XL from Pokémon Go on grass with the Pokémon Go logo above.

    Players can enjoy two Candy-themed bonuses during the Halloween 2024 Event. Don’t miss out on these in-game bonuses, which will help you accumulate lots of Pokemon Candy, a crucial resource in the game.

    Additionally, this event offers a higher chance to encounter Shiny Umbreon and Shiny Zorua. Umbreon will appear in Raid Battles, while Zorua will be found in the wild.

    Event Research

    Professor Willow with Pikachu, Mew, and the Pokémon Go logo.

    Free Timed Research

    During the Pokemon Go Halloween 2024 Event, players can access free event-themed Timed Research tasks.

    This Timed Research focuses on Spiritomb and will require players to complete various in-game tasks before the event ends. Rewards for completing these tasks include encounters with Morpeko and other Halloween-themed Pokemon.

    Tasks must be completed and rewards claimed by November 3, 2024, at 8 PM local time.

    There will be two Paid Timed Research tasks available during the Halloween 2024 Event. Players can purchase these tasks from the Pokemon Go in-game shop to unlock various rewards.

    The first task will include branching paths and costs $5.00 USD. Purchasing this research unlocks a triple catch Candy bonus throughout the event along with a series of tasks.

    Completing tasks in this Paid Timed Research will result in:

    • Encounters with Halloween-themed costumed Pokemon.
    • Encounters with Spiritomb and Morpeko.
    • Morpeko Onesie Avatar item (available in both Full Belly Mode and Hangry Mode).

    The second Paid Timed Research will be slightly less expensive at $2.00 USD. Completing tasks for this will provide specific Pokemon encounters, including the costumed versions of the following:

    • Pikachu (Witch Hat)
    • Gengar (Spooking Festival Costume)
    • Vulpix (Spooky Festival Costume)
    • Piplup (Halloween Mischief Costume)
    • Drifblim (Halloween Mischief Costume)
    • Pumpkaboo (Spooky Festival Costume)
    • Froakie (Pokemon Halloween Costume)
    • Rowlet (Pokemon Halloween Costume)

    Similar to the Free Timed Research, complete any tasks and claim rewards from either Paid Timed Research prior to 8 PM local time on November 2, 2024.

    Field Research

    During the event, you can take on Field Research Tasks specific to Halloween, which can be obtained by spinning PokeStop Photo Discs.

    These event-themed tasks will reward players with encounters featuring specific Halloween Pokemon. You might catch one of these eight Pokemon:

    • Sableye
    • Golett
    • Scraggy
    • Sandygast
    • Nymble
    • Morpeko
    • Greavard
    • Spiritomb

    Some of these tasks will also reward Mega Energy for specific Pokemon, required for their Mega Evolutions. This includes Mega Energy for Gengar, Houndoom, Sableye, Banette, or Absol.

    Max Battles During the Event

    Various Pokemon including Sobble, Scorbunny, and Grookey against Dynamaxed Pokemon.

    This Halloween event will feature Max Battles, including the debut of Dynamax Gastly in Pokemon Go. Below is the list of Dynamax Pokemon and their respective Max Battle Tier:

    Dynamax Pokemon

    Max Battle Tier

    Gastly

    One-Star

    Scorbunny

    One-Star

    Grookey

    One-Star

    Sobble

    One-Star

    Falinks

    Three-Star

    Event Raids

    Pokemon Go raids around a city.

    During the event, players can expect to encounter Halloween-themed Pokemon in Raids, each varying in difficulty based on their Raid Tier. The updated list of Pokemon in Raids for this event is provided below:

    Raid Pokemon

    Raid Tier

    Sneasel

    One-Star

    Sableye

    One-Star

    Yamask

    One-Star

    Galarian Yamask

    One-Star

    Hisuian Typhlosion

    Three-Star

    Umbreon

    Three-Star

    Bombirdier

    Three-Star

    Wild Encounter Pokemon

    A lineup of Pokemon in Halloween costumes, including Vulpix and Gengar.

    During the event, several Halloween-themed Pokemon will spawn more frequently as wild encounters. The following Pokemon will be available during the first part of the event:

    Event Wild Encounter Pokemon

    Zubat

    Greavard

    Spinarak

    Shuppet

    Murkrow

    Drifloon

    Zorua

    Frillish (F)

    Litwick

    Sableye

    Purrloin

    Absol

    Misdreavus

    Pokemon Showcases

    Multiple phone screens showcasing a Squirtle in a Pokemon Showcase.

    During the Halloween Event Part One, specific Halloween-themed Pokemon from the event will be featured in Pokemon Showcases. Be sure to keep hold of any notably large or small Pokemon, as they will yield the highest points and best rewards in these competitions.

    Avatar Items and Stickers

    Three Pokemon Go avatars dressed in Halloween-themed outfits.

    New Halloween-themed Avatar items will be available for purchase in the in-game shop during and even after the event. The new items include:

    • Halloween Finery
    • Woobat Top Hat
    • Morpeko Onesie (Full Belly Mode)
    • Morpeko Onesie (Hangry Mode)

    Additionally, there will be new event-themed Stickers available throughout the Halloween 2024 Event. These can be obtained from PokeStops, Gifts, and purchases in the in-game shop.

  • Exploring the Observatory in Life Is Strange: Double Exposure Guide

    Exploring the Observatory in Life Is Strange: Double Exposure Guide

    In Life is Strange: Double Exposure, Safi meets her demise on a picturesque hilltop known as "The Observatory," a favorite spot for students and faculty at Caledon University. When Reggie, overwhelmed with anxiety, reveals to Max that he has seen himself at this lookout, she takes it upon herself to investigate the situation further.

    Upon reaching the base of the hill, Max encounters a police officer who is obstructing her way. To unravel the mystery of what happened to Safi, Max must find a way to reach the summit. Keep reading for tips on how to get past the cop and make your way to the top.

    How to Circumvent the Police Officer

    To progress in the game, you’ll need to discover a time-swapping point. Start by moving towards the bench on the right side of the path. When you get close, you’ll hear the familiar buzzing sound and see shimmering particles in the air. Switch to the Living timeline, and this will make the officer vanish from view.

    Next, go through the gate and climb the hill until you come across an Art Project that’s in the way. Stand back about six feet from it to trigger the buzzing sound that indicates you can swap timelines again. Once you do this, continue moving up the path.

    At the hilltop, you’ll find a police barricade. Max notes that attempting to tamper with it would alert the officers, meaning you can’t proceed this way.

    Turn back down the snowy path until the sound of a cell phone buzzing catches your attention. Along with this, you’ll notice the timeline swap sound and see yellow particles. Switch back to the Living World to continue your ascent to the top.

    Once you reach the peak, you’ll have to navigate around the barricade to complete your investigation into Safi’s circumstances.

  • Ultimate Silent Hill 2: Your Complete Walkthrough Guide

    Silent Hill 2: Comprehensive Guide and Walkthrough

    Welcome to your complete guide for Silent Hill 2. This walkthrough is designed to help you navigate the chilling atmosphere of the game, providing tips and strategies to overcome obstacles and unravel the mysterious story. Whether you’re a newcomer or a seasoned player, this guide will enhance your experience and ensure you don’t miss any important details.

    Getting Started

    Before diving in, make sure you familiarize yourself with the game’s controls and mechanics. Understanding how to move, interact, and manage your inventory is crucial for your survival in the eerie town of Silent Hill.

    Chapter Summaries

    1. The Arrival: Begin your journey as James Sunderland, who has arrived in Silent Hill after receiving a letter from his deceased wife. Explore the initial area to gather crucial items and clues that will set the stage for your adventure.

    2. Exploring the Town: As you wander the fog-laden streets, pay close attention to your surroundings. Many locations hide secrets and important items that will help you along the way.

    3. The Puzzle Challenges: Expect to encounter various puzzles throughout your journey. Solving these is key to progressing the story. Don’t hesitate to revisit previous locations for hints if you find yourself stuck.

    4. Confronting Nightmares: As you explore, you’ll encounter terrifying creatures that reflect James’s inner struggles. Use your weaponry wisely and learn to evade attacks when necessary.

    5. Unraveling the Mystery: Each step brings you closer to understanding the truth behind your wife’s letter. Stay observant and gather as much information as you can to piece together the events that led you to Silent Hill.

    Tips for Overcoming Obstacles

    • Save Often: Find save points regularly to avoid losing progress. This is crucial for managing your time and resources.
    • Inventory Management: Keep track of your items. Some can be combined or used in unexpected ways.
    • Stay Calm: The atmosphere can be intense, but staying composed will help you make better decisions in high-pressure situations.

    Conclusion

    Silent Hill 2 is a haunting journey filled with psychological depth and intense gameplay. This guide aims to provide you with the insights needed to navigate its challenges successfully. Embrace the experience, and remember that every encounter is a step closer to uncovering the truth. Happy gaming!

  • Conquering Sonic X Shadow Generations’ Ultimate Boss Fight

    Conquering Sonic X Shadow Generations’ Ultimate Boss Fight

    The Time Eater serves as the ultimate adversary in Sonic’s segment of Sonic Generations. Similar to the original game, figuring out how to confront this final boss can be challenging—even with your character allies offering constant advice.

    10 Characters We Hope to See in the Sonic the Hedgehog x DC Collaboration

    We need these characters in the Sonic the Hedgehog x DC crossover.

    This guide will walk you through the steps to defeat Time Eater and explain how to unlock this boss encounter in the first place.

    How to Unlock the Final Boss in Sonic Generations

    A player in Sonic Generations making their way to the final boss.

    Your first objective is to complete all nine main levels and defeat the three bosses blocking your path: Death Egg Robot, Perfect Chaos, and Egg Dragoon.

    After taking down Egg Dragoon, the path to the final area on the right side of the map will open up. This area resembles a collection of gears and machinery, which you will be able to activate using the Chaos Emeralds you’ve gathered on your journey.

    This means you must collect all seven Chaos Emeralds to engage Time Eater. You’ll find four throughout the main story while the remaining three come from rival battles with Metal Sonic, Shadow, and Silver. Yes, those fights are mandatory.

    With all the Chaos Emeralds collected, return to the final area. Jumping near the center of each gear will automatically slot each emerald into place.

    How to Beat Time Eater

    After a cutscene reveals that Time Eater is under Eggman’s control—yes, multiple Eggmans—you’ll have to maneuver both modern and classic Sonic against this boss.

    Your job is straightforward: get close enough to Time Eater to strike. You need to land four successful hits to win the battle.

    Both Sonics will be in Super Sonic mode, causing you to gradually lose rings throughout the fight. Collect as many rings as you can, as reaching zero will force a restart of the battle.

    The battle primarily revolves around maintaining your boost. Hold down the boost button continuously until you reach the vulnerability point of Time Eater, which will be highlighted for you. Repeat this process until you hit the specified target three times.

    After your third hit, press both back triggers simultaneously for both Sonics to combine their energy, thus concluding the fight.

    Switching Between 2D and 3D

    The final boss in Sonic Generations.

    To switch between modern and classic Sonic, press a button (triangle on PlayStation, Y on Xbox). This will shift the gameplay to 2D when controlling classic Sonic.

    If you miss the cues from Sonic’s friends about switching, just follow Time Eater. Ensure it’s always in front of you; if it’s not, make the switch.

    Classic Sonic cannot attack Time Eater—only evade attacks and stay close. However, it’s a great chance to gather rings.

    Time Eater’s Attacks

    The final boss in Sonic Generations.

    Sonic’s friends will alert you before Time Eater attacks and suggest ways to dodge those attacks. Here’s a rundown of the various attacks Time Eater uses during the battle.

    Attack Description
    Homing Shot A series of homing missiles—Time Eater’s most frequent attack. Stay moving to avoid being hit.
    Warping Arm Attack One of Time Eater’s arms is launched through a portal. Boost away as soon as you see it.
    Crush When you get close, Time Eater will attempt to crush you with its arms. Slow down to dodge, evade, or keep attacking to temporarily stun it.
    Laser Aiming a laser beam. Move out of the way before it can lock onto you. Switching between 2D and 3D may help here.
    Slow Down Time Not much of a damaging attack, but it can be quite annoying. Towards the end, Time Eater slows down time, so just wait it out to resume your boosting.
  • Complete Guide to Locating All Spells in Black Myth: Wukong

    Complete Guide to Locating All Spells in Black Myth: Wukong

    Black Myth: Wukong offers The Destined One an extensive array of defensive options to confront formidable foes during their quest to the West and encounter the Great Sage. A key component of these options includes spells that give players a significant advantage in battles, particularly against powerful bosses. For those familiar with the game’s source material, these spells are especially resonant.

    There are multiple methods to acquire these spells. When utilized correctly against specific bosses, they can simplify your journey. The Destined One has options like petrifying foes, creating clones, or even outflanking them without making a sound.

    Immobilize Spell

    The Immobilize Spell is one of the essential spells you’ll come across while confronting the first boss early in your adventure. True to its name, it can momentarily freeze enemies, providing the perfect opportunity to heal or land a strategic attack.

    Cloud Step Spell

    The Cloud Step Spell is a powerful ability that renders The Destined One one with the wind, making them invisible to enemies while boosting movement speed. Once the effect wears off, the player can deliver a decisive strike on unsuspecting foes and create diversions.

    Unlock this spell after your initial encounter with the Black Wind King.

    Rock Solid Spell

    Though the game is categorized as a ‘soulslike,’ it notably lacks the core mechanic of parrying. However, the Rock Solid Spell compensates for this by allowing players to dodge attacks and stun enemies. You can obtain it after defeating the Tiger Vanguard boss in Chapter Two.

    If executed flawlessly, this spell can evade an incoming attack to stun the opponent, but it is ineffective against strong blows.

    A Pluck of Many Spell

    Available in Chapter Two, A Pluck of Many enables The Destined One to create clones using their hair strands. These clones are capable of dealing significant damage in combat and can distract enemies, allowing for strategic repositioning. You can unlock this spell after speaking to the Headless Minstrel NPC.

    Ring of Fire Spell

    With the Ring of Fire Spell, The Destined One can create a protective fire circle that boosts the effectiveness of consumables and overall defense, making it indispensable before major boss battles. You’ll acquire this spell during your second encounter with the Macaque Chief.

    Spell Binder Spell

    The Spell Binder Spell is an optional yet potent ability that lets The Destined One convert mana into a considerable damage boost. However, it comes with risks—it prevents the use of transformations, gourds, and other spells. To unlock it, you must defeat the Green-capped Martialist as part of the Treasure Hunter quest in The New West.

    Life-Saving Strand Spell

    The Life-Saving Strand Spell is the final mandatory spell, accessible only in New Game+ (Cycle 2). This rechargeable spell creates a clone that absorbs fatal damage, replenishing health in critical moments. You’ll find this spell after resting at the first Keeper’s Shrine in the second story cycle.

    In summary, Black Myth: Wukong presents a wealth of spells, each with unique abilities that enhance gameplay and strategy, making every encounter thrilling and interactive.

  • Metaphorical Visions: Maria’s Vista Reimagined in ReFantazio

    Metaphorical Visions: Maria’s Vista Reimagined in ReFantazio

    Every player in Metaphor: ReFantazio has their own unique strategies for consistently leveling up, but Maria’s approach is particularly engaging. Throughout the game, you often find yourself presenting her father Grius’s daughter with Vista Drawings that showcase the most stunning locations you’ve encountered during your adventures across Euchronia.

    Identifying these locations isn’t overly complicated. However, planning your route in advance to visit each picturesque spot can save you valuable time later on. We’ve explored them all and are here to guide you on how to reach these beautiful destinations efficiently.

    Finding your way to these scenic spots may involve a bit of exploration. Here’s a list of some notable locations, along with how and when you can access them:

    Location Directions Availability
    Tree of Prophecy Automatic Story-related; unmissable
    Midnight Sunsands Automatic Story-related; unmissable
    City Ruins Automatic Story-related; unmissable
    Towering Seawall Automatic Story-related; unmissable
    Colerodio Cliff Automatic Story-related; unmissable
    Monolith Automatic Story-related; unmissable
    Solstice Crossing Automatic Story-related; unmissable
    Murky Graveyard Automatic Story-related; unmissable
    Peregrine Falls En route to Tomb of Lament Opens upon accepting the ‘Grieving Ghost of the Goblet’ side quest
    Sporico Cave En route to Spire of Blind Faith Unlocked upon taking the quest to defeat Leogron
    Prismatic Sea En route to Land of Ceremony Available after accepting the ‘Trial of Malnova’ side quest, which activates Eupha’s bond
    Decaying Estate En route to Mount Vulkano Unlocks through progressing with Eupha’s bond or towards the conclusion of Basilio’s story arc
    Malibelo Slope En route to Disgraced Ruins Opens upon accepting the ‘Apostles of the Apocalypse’ side quest

    With this information in hand, you can effectively navigate Metaphor: ReFantazio and make the most of your exploration.

  • Where to Find Safi’s Camera in Life Is Strange: Double Exposure

    Where to Find Safi’s Camera in Life Is Strange: Double Exposure

    The investigation into the murder of Dead World Safi in Life Is Strange: Double Exposure ultimately brings Detective Alderman to Dead World Moses’ lab. In a moment of urgency, he sends out an S.O.S signal, prompting Max to rush to assist him.

    While Alderman is out of earshot, Moses reveals to you that he secretly took Safi’s camera from the crime scene and hid it within his lab. Just as he’s about to disclose its location, Alderman returns. Now, you must devise a plan to stealthily enter the lab and retrieve the camera before Moses faces charges for Safi’s murder.

    How to Enter Moses’ Lab

    First, you need to find a way into the lab. Since Alderman is present in Dead World, you can’t enter there just yet—this requires a shift to the Living World. Look for a shift point near the janitor’s cart around the corner.

    In the Living World, step into the lab and engage with Living World Moses, who’s busy working on a telescope. To progress the conversation, ask if he has any hidden contraband.

    Moses will mention an electric kettle he has stashed away. Suddenly, the telescope wobbles, and while he’s holding it up, he requests that you fetch an Allen wrench to stabilize it before revealing where he keeps things in his office.

    To find the Allen wrench, shift back to Dead World through the shift point in the lab’s corner, grab it from the table in the center of the room, and return to the Living World to hand it to Moses.

    Once he repairs the telescope, he will direct you to a locked cabinet near his desk where he stores his "forbidden kettle."

    As he becomes preoccupied with his computer work, take the key he left sitting on the shelf, then shift back to Dead World to unlock the cabinet.

    Sadly, when you check, the camera isn’t inside, but you do stumble upon a note reading "Under ‘Safe.’"

    While exploring Moses’ lab in either timeline, you can examine and interact with several items to gain insight into his character, including a polaroid collectible located on Carla’s desk in Dead World.

    How to Find the "Safe"

    Nearby, there’s a poster featuring an anime character that Moses admires, complete with a safe on its head. Inspect the poster, then check the box beneath it. Although the camera isn’t here, doing so prompts Max to suggest inquiry about a safe to Moses.

    Return to the Living World and ask if he possesses a safe. He’ll mention a star called Saiph (pronounced like "safe") in the Orion constellation. With this clue, shift back to Dead World and make your way to the loft.

    On a bookshelf near the railing, there’s a Star Projector. Max notes that Moses probably used it to paint the mural, meaning Saiph should be projected there.

    Align the constellations with the mural, determining where Saiph was positioned on the night he hid the camera.

    Once everything is properly aligned, head back downstairs to find Saiph situated in the lower left corner. Max will notice the camera hidden in the vent behind a cart filled with telescope components.

    How to Distract the Detective and Secure Safi’s Camera

    Before you get the chance to grab the camera, Detective Alderman arrives, gaining entry to the lab. It’s crucial to remain out of sight and create a diversion to snag Safi’s camera.

    Fortunately, you’re conveniently positioned right at a shift point. Switch to the Living World and take the loud Hawt Dawg Man ornament from the Christmas tree. Proceed upstairs to the loft and shift back to Dead World. A cutscene unfolds as Max sets the ornament down and activates it.

    Before Alderman ascends the stairs, quickly shift to Living World, descend, and then return to Dead World. When you attempt to move the telescope parts, the dolly squeaks, alerting Alderman.

    Max expresses her wish that Moses had constructed the telescope in this timeline, causing the telescope parts to illuminate. Follow the on-screen prompts, and Max will use her powers to swap the telescope parts with the actual telescope, effectively concealing you from Alderman’s sight.

    While Alderman focuses on the newly manifested telescope, you can swiftly retrieve Safi’s camera from behind the grate, then shift to the Living World, exit Moses’ office, and shift back to Dead World.

  • Complete Guide to All Minigames in Yakuza Kiwami

    Complete Guide to All Minigames in Yakuza Kiwami

    Minigames are a defining feature of the Like A Dragon (formerly known as Yakuza) series. Each installment is packed with a variety of engaging activities that come with their own set of minigames.

    This is particularly true for the remake of the original title, Yakuza Kiwami. The minigames span a diverse range of activities such as sports, gambling, karaoke, and more. Importantly, these minigames aren’t all found in one cramped location like New Serena; you need to venture into the game’s open world to discover them. To help you track them down, we’ve compiled a list of all their locations. Completing every minigame rewards you with the “What A Player” achievement or trophy.

    All Minigame Locations

    Most minigames become accessible starting from Chapter Four, which opens up the game’s vast world. However, the Gambling Hall won’t be available until Chapter Seven.

    Once you’re free to explore Kamurocho, here are all the minigame locations:

    Minigame Location Description
    Batting Center Found at the Yoshida Batting Center in the northwestern part of the map, located in the Hotel District.
    Bowling Available at Mach Bowl in Theater Square, on the western side of the map.
    Baccarat Playable at the Kyushu No. 1 Star casino in Pink Alley, located on the eastern side of the map. You can find this alongside Blackjack, Poker, and Roulette.
    Club Asia Show Located in Club Asia on Pink Street, where you can pay to enjoy a show.
    Darts Play Darts at Vincent, a bar on Park Boulevard in the Northeast corner, just south of Purgatory.
    Pool Also available at Vincent alongside Darts.
    Cee-lo Located in the Gambling Hall next to the Millennium Tower. Speak to the person at the Lottery Ticket Booth to enter.
    Cho-han Available in the Gambling Hall.
    Koi-koi Playable at the Gambling Hall.
    Oicho-kabu Also found in the Gambling Hall.
    Karaoke Visit the karaoke bar on the eastern side of the map, on Senryo Avenue.
    Mahjong Located at the Orchid Palace, situated on the southern side of Nakamichi Alley.
    MesuKing You can play this game at Club Sega on Nakamichi Street. First, find the MesuKing card outside the arcade for a special interaction.
    Photo Booth Also at Club Sega, you can find this alongside the MesuKing game and UFO Catcher.
    UFO Catcher Play this crane game at Club Sega, both at Nakamichi Street and Theater Square.
    Pocket Circuit Accessible at the Pocket Circuit Stadium, which is located at the northwest corner of the map near Children’s Park, on Shichifuku Street West.
    Shogi Play this classic strategy game at Shoten, located in the southeast corner of the map.

    Each minigame brings its unique flavor to the game, enhancing the experience beyond the main storyline. Happy gaming!

  • Unlocking the Gunner Archetype in Metaphor: ReFantazio

    Unlocking the Gunner Archetype in Metaphor: ReFantazio

    As the Tournament for the Throne begins in Metaphor: ReFantazio, you and your group are set to travel to Martira for your first challenge. During your time there, you’ll have the opportunity to gather more Followers and unlock additional Archetypes, enhancing your combat capabilities.

    Related

    Metaphor: ReFantazio – Gold Beetle Location Guide

    Wondering about those buzzing little Gold Beetles in Metaphor: ReFantazio? We’ve got the scoop on where to find them and what they’re used for.

    The Gunner Archetype is one of the new features available, and if you’ve been keeping up with More’s quests, this is a must-have. You can unlock this Archetype through the Providing a Spark quest. Unlike the Merchant and Faker Archetypes, which are more challenging to get, the Gunner is relatively straightforward to obtain but can be easily overlooked.

    How to Start the Providing a Spark Quest

    Detailed overview of the Providing a Spark Quest in Metaphor: ReFantazio.

    The Providing a Spark quest unfolds naturally as the narrative progresses. Once the Tournament for the Throne is officially declared, Nueras will assign you the quest on 6/26 while you are onboard the Gauntlet Runner heading to Martira.

    This quest will lead you to Komero Village, located about a day’s travel from Martira, where you’ll need to retrieve an artifact for the quest giver. Completing this task will add Nueras to your Followers and unlock the Gunner Archetype.

    If you’ve already finished More’s initial task and
    are required to learn about the Gunner Archetype for his next, you’ll need to
    wait until this part of the story to advance his Follower connection.

    How to Complete the Providing a Spark Quest

    The quest is automatically fulfilled once you arrive in Komero Village. On 6/29, after you’ve acquired the teleportation ability, a Gloomy Youth near the fountain in Martira’s Thoroughfare Square will offer you the Hatching a Plan quest if you engage him. This will allow you to travel to Komero, accessible from the round table on the Gauntlet Runner.

    Once you get to Komero, you’ll find that exploration is limited; you will only have a short conversation with a local. He will give you the Glass Ornament, the required relic, along with the Inventor’s Journal, which will be essential for Nueras’s forthcoming quest.

    Nueras holding a red gem with the Metaphor: ReFantazio protagonist in the background.

    These items will then be automatically transferred to Nueras, marking the completion of the Providing a Spark quest while also unlocking the Gunner Archetype. Afterward, be sure to visit More in Akademia when you have a chance to increase his follower bond, gain the Magic Seeker Archetype, and receive his next assignment.


    Purchasing the Practical Pigeon Parcel in Metaphor: ReFantazio.

    While you’re in Komero,
    don’t miss out on buying the Practical Pigeon Parcel from the Obliging Shopkeep in the Key Items tab for
    400 Revee
    to fulfill the
    Gloomy Youth’s quest before the July 11 deadline.

    Additionally, make sure to
    pick up five Magla Pills
    that are priced at 200 Revee each, as they’re rare and can be very useful in a boss fight!

    Next

    Metaphor: ReFantazio – Which Answer to Pick in Recruitment Test

    Do you need Strength, Luck, or something else?

  • Every Title in the Collection

    Every Title in the Collection

    Since the 1980s, Link has been on countless thrilling quests, often culminating in his rescue of Princess Zelda, saving the kingdom, or achieving both goals. These adventures are showcased in the The Legend of Zelda series. Over the years, this franchise has established itself as one of the most acclaimed and beloved video game series in history.

    It’s not just a handful of remarkable titles that have highlighted the series’ brilliance. A plethora of Zelda games exists, and even die-hard fans may be surprised by the extensive list. However, all the details about these games can be conveniently found right here.

    Updated October 15, 2024, by Ben Jessey: Recently, the series expanded with the release of The Legend of Zelda: Echoes of Wisdom. This new installment prompted us to refresh this article, updating the total game count and revising some content.

    There Are 21 Main Zelda Games

    The 21 primary installments in the Legend of Zelda series primarily feature action-adventure gameplay with certain RPG elements. The overarching narrative typically involves Link striving to thwart various dark forces threatening Zelda and the realm of Hyrule.

    Despite a consistent objective throughout the games, the gameplay itself varies significantly. The earlier titles were relatively compact and heavily 2D-focused. As the series evolved, open-world environments became more pronounced, along with upgrades in graphics and overall game design.

    Game Release Date Systems
    The Legend of Zelda 1986 (Japan), 1987 (North America) Famicon Disk System, Nintendo Entertainment System, GameCube, Game Boy Advance, Wii, 3DS, Wii U, Switch Online
    Zelda II: The Adventure of Link 1987 (Japan), 1988 (North America) Famicon Disk System, Nintendo Entertainment System, GameCube, Game Boy Advance, Wii, 3DS, Wii U, Switch Online
    The Legend of Zelda: A Link to the Past 1991 (Japan), 1992 (North America) Super Nintendo Entertainment System, Satellaview, Game Boy Advance, Wii, 3DS, Wii U, Switch Online
    The Legend of Zelda: Link’s Awakening 1993 Game Boy, Game Boy Color, 3DS, Nintendo Switch
    The Legend of Zelda: Ocarina of Time 1998 Nintendo 64, GameCube, Wii, 3DS, Wii U, Switch Online
    The Legend of Zelda: Majora’s Mask 2000 Nintendo 64, GameCube, Wii, 3DS, Wii U
    The Legend of Zelda: Oracle of Ages 2001 Game Boy Color, 3DS
    The Legend of Zelda: Oracle of Seasons 2001 Game Boy Color, 3DS
    The Legend of Zelda: A Link to the Past & Four Swords 2002 Game Boy Advance
    The Legend of Zelda: The Wind Waker 2002 (Japan), 2003 (North America) GameCube, Wii U
    The Legend of Zelda: Four Swords Adventures 2004 GameCube
    The Legend of Zelda: The Minish Cap 2004 (Japan), 2005 (North America) Game Boy Advance, 3DS, Wii U
    The Legend of Zelda: Twilight Princess 2006 GameCube, Wii, Wii U
    The Legend of Zelda: Phantom Hourglass 2007 Nintendo DS, Wii U
    The Legend of Zelda: Spirit Tracks 2009 Nintendo DS, Wii U
    The Legend of Zelda: Skyward Sword 2011 Nintendo Wii, Wii U, Nintendo Switch
    The Legend of Zelda: A Link Between Worlds 2013 Nintendo 3DS
    The Legend of Zelda: Tri Force Heroes 2015 Nintendo 3DS
    The Legend of Zelda: Breath of the Wild 2017 Nintendo Wii U, Nintendo Switch
    The Legend of Zelda: Tears of the Kingdom 2023 Nintendo Switch
    The Legend of Zelda: Echoes of Wisdom 2024 Nintendo Switch

    There Are 17 Zelda Spin-Offs

    The Legend of Zelda spin-offs often deviate from the main formula. Some feature different protagonists, while others explore diverse genres or even utilize unconventional platforms like wristwatches.

    Historically, Nintendo’s main consoles saw few Zelda spin-offs until more recent years. Prior to that, the franchise spread across various handheld devices and lesser-known consoles. Additionally, some spin-off titles were exclusively released in Japan, which means they never made it to American audiences. In total, there are 17 spin-offs in the Zelda lineage.

    Game Release Date Systems
    Zelda 1989 Game & Watch, Nintendo Mini Classic
    The Legend of Zelda 1989 Nelsonic Game Watch
    Zelda no Densetsu: Kamigami no Triforce 1992 (Japan only) Barcode Battler 2
    Zelda: The Wand of Gamelon 1993 CD-i
    Link: The Faces of Evil 1993 CD-i
    Zelda’s Adventure 1994 CD-i
    BS Zelda no Densetsu 1995 (Japan only) Satellaview
    BS Zelda no Densetsu Inishie no Sekiban 1997 (Japan only) Satellaview
    Freshly-Picked Tingle’s Rosy Rupeeland 2006 (Japan) Nintendo DS
    Tingle’s Balloon Fight DS 2007 (Japan only) Nintendo DS
    Link’s Crossbow Training 2007 Nintendo Wii
    Dekisugi Tingle Pack 2009 (Japan only) DSiWare
    Irozuki Tincle no Koi no Balloon Trip 2009 (Japan only) Nintendo DS
    Hyrule Warriors 2014 Nintendo Wii U, 3DS, Switch
    My Nintendo Picross: The Legend of Zelda 2016 Nintendo 3DS
    Cadence of Hyrule 2019 Nintendo Switch
    Hyrule Warriors: Age of Calamity 2020 Nintendo Switch

    There Are 9 Zelda Remakes and Re-Releases

    Nintendo has a penchant for remaking and re-releasing titles from the Legend of Zelda series. Many beloved main games have resurfaced in some form, leading to a total of nine remakes and re-releases.

    Typically, these games only receive graphical enhancements, though some undergo more significant transformations, including tweaks to controls. Overall, the changes have generally enhanced gameplay while preserving the original charm.

    Game Release Date Systems
    The Legend of Zelda: Link’s Awakening DX 1998 Game Boy Color
    The Legend of Zelda: Ocarina of Time Master Quest 2002 (Japan), 2003 (North America) Nintendo 64, GameCube
    The Legend of Zelda: Ocarina of Time 3D 2011 Nintendo 3DS
    The Legend of Zelda: Four Swords Anniversary Edition 2011 DSiWare
    The Legend of Zelda: The Wind Waker HD 2013 Nintendo Wii U
    The Legend of Zelda: Majora’s Mask 3D 2015 Nintendo 3DS
    The Legend of Zelda: Twilight Princess HD 2016 Nintendo Wii U
    The Legend of Zelda: Link’s Awakening 2019 Nintendo Switch
    The Legend of Zelda: Skyward Sword HD 2021 Nintendo Switch

    There Are 46 Zelda Games in Total

    Taking into account all the primary games, spin-offs, and remakes that have been released over the years, there have been a total of 46 Zelda games. From new entries with innovative mechanics to classic titles reimagined with updated graphics and experimental games, the Legend of Zelda franchise continues to thrive, with countless more adventures likely on the horizon.

  • Locating Every Sahin Tile in Unknown 9: Awakening

    Locating Every Sahin Tile in Unknown 9: Awakening


    Sahin Tiles Collection Guide

    Sahin Tile 1

    Location: Quinta Matos
    After defeating the Ascendants in the round chamber, head to the left side of the room near the wooden wall. Break the crates, and you’ll find the Sahin Tile lying next to a few barrels.


    Sahin Tile 2

    Location: Quinta Matos
    Cross the makeshift bridge with Luther and check behind the rock formation on your right. The second Sahin Tile is located on the ground behind that rock.

    Sahin Tile 2


    Sahin Tile 3

    Location: Quinta Matos
    Climb the wall with Luther, then crawl under the rocks to enter a small cave. The Sahin Tile is on the left side of the cave, past some broken wooden planks.

    Sahin Tile 3


    Sahin Tile 4

    Location: Quinta Matos
    Continue through the cave and climb up the wooden wall with Luther. After jumping onto the platform, check the corner; the Sahin Tile rests on top of a crate there.

    Sahin Tile 4


    Sahin Tile 5

    Location: The Morning Star III
    Once back inside the ship, descend the first flight of stairs into the control room. Solve the Light Puzzle on the left side, then return to the showcase room. You’ll find the Sahin Tile in the first display case on the left.

    Note: To solve the puzzle, flip the third switch, then the first, second, and finally the fourth.

    Sahin Tile 5


    Sahin Tile 6

    Location: The Morning Star III
    Return to Vincent’s office and interact with the display behind his desk to unlock a secret room. Head downstairs to find the Sahin Tile on the right, situated between two lights.

    Sahin Tile 6


    Sahin Tile 7

    Location: Anatolia
    Pass through the rectangular archway and follow the path through the ruins until you enter a large room with a stone slab centered in it. The Sahin Tile is located at the edge of the slab, next to some stalagmites.

    Sahin Tile 7


    Sahin Tile 8

    Location: Anatolia
    Lift the rocks with Luther to progress to the next room, then jump over the ledge at the hall’s end. Smash the rock wall on your right, and you’ll discover the Sahin Tile at the end of the tunnel next to a statue.

    Sahin Tile 8


    Sahin Tile 9

    Location: Anatolia
    Break the nearby rock wall and cross to the other side of the room on the stone beam. Move to the right, but stop before going down. Go over the cave entrance filled with stalagmites, and you’ll see the Sahin Tile on a flat rock along the left wall.

    Sahin Tile 9


    Sahin Tile 10

    Location: Anatolia
    After reaching the circular room with a balcony, head down the stairs to the right. The Sahin Tile is located on the ground behind a stone statue at the end of the hall.

    Sahin Tile 10


    Sahin Tile 11

    Location: Anatolia
    Eliminate the Ascendants blocking the door, lift the stones to pass through, and navigate the dark tunnel. When you reach the fork, take a hard left and go behind the rock pillar to find the Sahin Tile on a flat rock near the stalagmites.

    Sahin Tile 11


    Sahin Tile 12

    Location: Dasuden
    Move the rocks with Buchra to crawl under them, then enter the cave and walk past the left path. The Sahin Tile is on a flat rock in the corner, partly covered by another rock.

    Sahin Tile 12


    Sahin Tile 13

    Location: Dasuden
    After breaking open the gate with the minecart and defeating the Ascendants, unlock the gate. Before heading down, note that the Sahin Tile is sitting on a stack of crates near the broken elevator.

    Sahin Tile 13


    Sahin Tile 14

    Location: Dasuden
    Upon crossing the rotating bridge into the cave with Buchra, go down the stairs past the first platform. At the second platform, the Sahin Tile can be found on a table next to a large radio.

    Sahin Tile 14


    Sahin Tile 15

    Location: Dasuden
    Make your way to the end of the cave, cross the bridge leading outside, then head down to the end of the tracks and upstairs. The Sahin Tile is located on a table in front of the building, beside a backpack.

    Sahin Tile 15


    Sahin Tile 16

    Location: Peshanden
    After defeating the Ascendants, go through the heavy red door and descend the circular stairs. Crawl under the broken doorway at the end, and you’ll find the Sahin Tile resting on a broken stone on the left.

    Sahin Tile 16


    Sahin Tile 17

    Location: Peshanden
    After climbing down several rock walls, stop when you reach a circular doorway leading to a conduit. Walk onto the left ledge, sneak around the wall, and pass through the doorway where the Sahin Tile awaits at the cliff’s edge, beneath a statue.

    Sahin Tile 17


    Sahin Tile 18

    Location: Peshanden
    Get close to the conduit with a Tuneable memory, then take the stairs down and around the corner. Continue down another set of stairs and across a gap, then turn around. The Sahin Tile will be on the ground in front of a statue.

    Sahin Tile 18


    Sahin Tile 19

    Location: Peshanden
    After clearing all the Ascendants, drop into the central area and go through the doorway near the conduit. The Sahin Tile is on the ground at the base of some rubble.

    Sahin Tile 19


    Sahin Tile 20

    Location: Peshanden
    Follow the large staircase down into the Sahin structure surrounded by statues. Break the wall across from your entrance, head through the doorway, and the Sahin Tile will be located at the bottom of a blocked staircase.

    Sahin Tile 20


    Sahin Tile 21

    Location: Reithden
    Climb the flowering vines with Buchra after the cutscene featuring the ruins. Once you reach the top, jump over the fallen tree to your right. The Sahin Tile can be found on a yellowed stone at the path’s end.

    Sahin Tile 21


    Sahin Tile 22

    Location: Reithden
    After climbing the flowering vines, proceed to the Crushable tree and use it to create a path. Walk over the tree, then turn left to find the Sahin Tile in a small cave filled with Sahin statues.

    Sahin Tile 22


    Sahin Tile 23

    Location: Reithden
    Crush the tree across the river, then cross it and climb up the flowering vines to an open area. Take the right path, and you’ll see the Sahin Tile near the end, resting on a broken stone.

    Sahin Tile 23


    Sahin Tile 24

    Location: Reithden
    After unlocking the Sahin Door, head through it and approach the broken bridge. Use the flowering vines to scale down into a lower area, then follow the trail up the hill. Stop before the edge and turn right; the Sahin Tile rests in a crevice, surrounded by small Sahin statues.

    Sahin Tile 24


    This guide provides the locations of all 24 Sahin Tiles in “Unknown 9: Awakening.” Happy hunting!

  • Discovering Every Leap Year Coin Spot in Unknown 9: Awakening

    Discovering Every Leap Year Coin Spot in Unknown 9: Awakening

    The Leap Year Society in Unknown 9: Awakening used to have a strong presence, but it has dwindled over time. Once filled with enthusiastic members dedicated to exploring the mysteries of the arcane, the society now faces significant challenges. Many members appear to be deceased, have defected, or have simply vanished.

    Like many clandestine groups, they possess symbols to identify their members or leave hints for others. In this case, it’s the Leap Year Coins. It’s possible that every member carries one, but their exact significance remains unclear. However, picking them up certainly won’t hurt.

    Locations of Every Leap Year Society Coin

    You’ll find a total of 24 Leap Year Society Coins scattered throughout the game. Much like other collectibles, they are often tucked away in inconspicuous spots or sometimes found on long-dead skeletons.

    You’ll have better luck finding the Leap Year Society Coins in chapters that feature ruins and Sahin structures.

    Due to their small size, these coins can easily go unnoticed. To aid in your search, you should consider investing in the Umbric Resonance skill from the Stealth skill tree, as it highlights nearby collectibles with a bright glow.

  • Top Strategies for Basilio’s Rank Up Events in ReFantazio

    Top Strategies for Basilio’s Rank Up Events in ReFantazio

    In Metaphor: ReFantazio, the last character you’ll recruit is Basilio, who has undergone quite a transformation by the time he becomes part of your team. He has fought against you, joined you in battles, and learned a lot about life along the way. However, even after he becomes an ally, there’s still some effort required to fully build your connection with him.

    This guide will show you how to unlock Basilio as a follower in Metaphor: ReFantazio, along with the best responses for each scenario if you’re aiming to maximize your MAG. We’ll also explore the rewards you receive at each level of Basilio’s ranks, so keep reading for all the details.

    How to Unlock Basilio as a Follower

    Basilio joins the party after you complete the Altabury Opera House dungeon. You won’t have to wait long to recruit Basilio as a follower — he’s the last follower you can get, assuming you haven’t overlooked any optional characters along your journey.

    Starting from September 12th — when you’re still in Altabury — accept a side quest that takes you aboard the Gauntlet Runner. This will enable you to talk to Basilio in the engineering section of the ship.

    Once you agree to spend some time with him, you will finally establish a bond.

    All Basilio Follower Ranks and Rewards

    It’s essential to remember that interactions with Basilio will always reward you with the next rank. Unlike in games like Persona, where incorrect responses can lead to losing points, you’ll steadily progress with Basilio.

    Instead, you can accumulate more MAG for unlocking Archetype advancements by providing ideal responses. This system eases the pressure since you can earn MAG in various ways, so don’t stress too much. It’s always good to be kind!

    Rank Number Ideal Responses Rank Reward Additional Reward
    One N/A Unlocks the Berserker Archetype. –
    Two Berserker Enlightenment: Lowers the MAG cost of studying Berserker skills. Beast-Scent Adept: Boosts evasion against attacks from Human and Beast enemies.
    Three
    • “More, please!”
    • “That must be tough.”
    • “Let’s visit him again.”
    Scion’s Skill: Increases inheritance slots to two. Battle Aura: Boosts EXP gained for Basilio while in reserve.
    Four Berserker Veneration: Significantly decreases the MAG cost of studying the Berserker lineage. –
    Five Scion’s Merit: Raises inheritance slots to three. –
    Six (Requires Imagination Rank 5)
    • “Let’s find his target.”
    • “Keep your chin up.”
    • “Naturally.”
    • “That was Vinca’s hope, too.”
    Berserker Archetype: Elite: Unlocks the Destroyer Archetype. –
    Seven
    • “Genius!”
    • “That won’t solve anything.”
    • “What will you do?”
    Battle Hypnosis: Basilio earns standard EXP even while in reserve. –
    Eight (Requires Eloquence Rank 5)
    • “Now we fulfill your promise.”
    • “He was a good person.”
    • “We’ll make it happen.”
    Scion’s Essence: Increases inheritance slots to four. Beast’s Insight: Significantly boosts Basilio’s evasion against Humans and Beasts.

    Upon reaching Rank Eight for Basilio, he will receive the Grand Fantasy modifier. With this in addition to other followers’ abilities, he can learn the Royal Berserker class after 9/24 as long as he meets the other study requirements.

  • Top Strategies for Eupha’s Rank-Up Events in ReFantazio

    Top Strategies for Eupha’s Rank-Up Events in ReFantazio

    Eupha: A Unique Perspective in Metaphor: ReFantazio

    Eupha is a member of the often-misunderstood Mustari tribe and offers one of the most distinct and knowledgeable viewpoints in Metaphor: ReFantazio. While she shares a preference for magic-focused builds with Junah, that’s where their similarities end, particularly evident in both story segments and the conversations you have with her as a follower throughout the eight rank-ups.

    Getting Started with Eupha as a Follower

    Our guide on Eupha will help you get her started as a follower—it’s not automatic just because she joins your team! You’ll learn about the best conversation choices to maximize your MAG earnings and discover new gameplay features that unlock with each rank.


    Unlocking Eupha as a Follower

    Eupha is the last potential party member you will meet, although she becomes part of your team slightly before the final one. Your first encounter with Eupha occurs during the Virga Island arc, and her joining the party may come as a surprise.

    She joins you at the end of the Dragon Temple dungeon. To incorporate her as a follower, you need to approach her at any major settlement afterward when she has a quest marker indicating a side quest you can take on.

    Engaging with her will lead you to the side quest named “Trial of Malnova.” Completing this quest unlocks Eupha as a follower, allowing you to level her up further and delve deeper into her character as a summoner.


    Eupha’s Follower Ranks and Rewards

    It’s important to note that you do not earn rank-up points in Metaphor: ReFantazio like you do in Persona. Instead, the "best" responses to interactions with Eupha grant you extra MAG that can be spent on enhancing your Archetype.

    Here’s a summary of Eupha’s follower ranks and the corresponding rewards:

    Rank Ideal Responses Rank Reward Additional Reward
    One N/A Unlocks the Summoner Archetype
    Two – "Don’t worry about it."
    – "I can’t leave you anywhere."
    – Any response is suitable.
    Summoner Enlightenment: Reduces MAG cost for studying the Summoner lineage. Pagan Teachings: Lowers the chance of the party experiencing Anxiety.
    Three – "Teach me, too."
    – "Your beliefs are your own."
    Scion’s Skill: Increases inheritance slots to two. Battle Aura: Enhances EXP gained by Eupha while she’s on reserve.
    Four – "Let’s have a look."
    – Any response is suitable.
    Summoner Veneration: Significantly lowers MAG cost for studying the Summoner lineage. –
    Five – Any response is fine.
    – "Less thinking. More action."
    – "Then let’s help them" or "I’ll give you a hand."
    Scion’s Merit: Increases inheritance slots to three. –
    Six (Requires Imagination Rank 5) – "Let’s go see."
    – Any response is suitable.
    Summoner Archetype: Elite: Unlocks the Devil Summoner class. –
    Seven (Requires Wisdom Rank 5) Battle Hypnosis: Eupha receives full EXP from battles even while on reserve.
    Pagan Secrets: Greatly decreases the chance of the party suffering from Anxiety.
    Eight – "Request?" or "Anything for you."
    – "Sure, but…"
    – "I understand."
    – "How did you know?"
    – Any response is suitable.
    Scion’s Essence: Increases inheritance slots to four. Grand Fantasy: After 9/24, Eupha can learn the unique Royal Summoner class if she meets the study requirements.

    Eupha adds a rich layer to the gameplay of Metaphor: ReFantazio, making her a valuable addition to your team as you navigate this unique world.

  • Mastering Elementa: Strategies to Conquer in Metaphor: ReFantazio

    Mastering Elementa: Strategies to Conquer in Metaphor: ReFantazio

    While exploring in Metaphor: ReFantazio, you will come across peculiar little orb-like foes known as Elmentas. These elusive enemies are infrequently spotted, usually appearing alone in dungeons or specific areas, and they can be quite challenging to defeat for a few reasons.

    Lucky for you, we’ve gathered all the essential details you need, including where to find each Elmenta, strategies for defeating them, and reasons why you should even bother with these oddball enemies.

    What Are Elmenta?

    The protagonist chasing a Gold Elmenta in Metaphor ReFantazio.

    Elmentas are unique elemental enemies that can be found in various dungeons or encountered while on the Gauntlet Runner. These foes will attempt to evade you as soon as they spot you, requiring you to give chase.

    It’s a good strategy to land a few hits before initiating a Squad Battle, as you want the Elmenta to be stunned during its first turn. If it successfully uses its first Turn Icon, it will escape immediately. The more Turn Icons you have at your disposal, the better your chances of victory.

    Taking down Elmentas is worthwhile because defeating them offers significantly higher amounts of MAG, cash, and experience points compared to regular encounters.

    If you possess the Steal ability, you can swipe rare items from Elmentas, including valuable gems that can be sold for a good amount of gold.

    Elmenta Locations and Weaknesses

    Junah fighting against a blue Elmenta in Metaphor ReFantazio.

    Below, we’ve compiled a list of each type of Elmenta, their vulnerabilities and strengths, along with their known locations. There is a chance that they might appear in other areas that we haven’t yet discovered since Elmentas are notoriously rare and often flee quickly. We will update this guide as we learn more about them.

    Elmentas can also occasionally show up as foes during your travels on the Gauntlet Runner.