الوسم: Triple-A Games

  • Discovering Every Echo in Zelda: Echoes of Wisdom


    Echo Location Base Energy Cost
    Zol Suthorn Beach, just after departing from Hyrule Castle 1
    Ignozol Suthorn Forest Cave 2
    Hydrozol Faron Wetlands (close to the entrance waypoint) 1
    Buzz Blob Faron Wetlands 3
    Spear Moblin Suthorn Forest 2
    Sword Moblin Eastern Hyrule Field (these creatures are scattered throughout) 2
    Club Boarblin Gerudo Desert (north of the Oasis) 2
    Boomerang Boarblin Gerudo Desert (north of the Oasis) 2
    Lynel Eternal Forest (follow the hoof prints; stray off the path, and you must restart) 6
    Lizalfos Eldin Volcano (found in many locations; you need to defeat them for the main storyline) 3
    Darknut Suthorn Ruins (this is part of the main quest) 3
    Armos Faron Wetlands (in an underwater cave to the west, just above the stamp) 2
    Ball-and-Chain Trooper Hyrule Castle (part of the main quest) 4
    Gibdo Gerudo Desert (cave south of the Oasis) 3
    ReDead Southern Gerudo Desert 3
    Fire Wizzrobe Eldin Temple (this is part of the main quest)
    Also found near the lava north of Goron City.
    5
    Ice Wizzrobe Hebra Mountain (right side of the frozen lake) 5
    Electric Wizzrobe Faron Wetlands (southeast corner) 5
    Caromadillo Suthorn Forest Cave 2
    Rope Suthorn Forest 1
    Tornando Gerudo Desert (found all around; can be spotted by heading north from the Oasis) 2
    Ribbitune Hyrule Field (next to the cemetery on the right) 2
    Drippitune Faron Wetlands (quite common throughout) 3
    Torch Slug Eldin Volcano (visible while climbing toward Goron City, clinging to walls) 3
    Freeze Slug Lanayru Temple (part of the main quest) 3
    Holmill Gerudo Desert (located in the cave needed for the Ancestor’s Cave of Rest Rift main quest, in the extreme north) 3
    Wolfos Hyrule Field (south of Kakariko Village) 3
    While Wolfos Lanayru Temple (this is part of the main quest) 5
    Keese Beach Cave (these guys are quite ubiquitous) 1
    Fire Keese Encountered during the Lizalfos Borrow quest 4
    Ice Keese Hebra Mountain (this variation of Keese is common) 4
    Electric Keese Stilled Faron Wetlands 4
    Mothula Gerudo Sanctum (this is part of the main quest) 3
    Needlefly Zora River (near Zora Village) 2
    Albatrawl South of Zora Cave 2
    Crow Between Suthorn Prairie and Gerudo Desert (plentiful here) 2
    Beakon Southern Faron Wetlands (to the right of the heart-shaped lake) 3
    Guay Hyrule Field (common bird) 3
    Octorok Suthorn Prairie 1
    Fire Octo Eldin Volcano lava regions 2
    Ice Octo Hebra Mountain water areas 2
    Sea Urchin Suthorn Beach, just after leaving Hyrule Castle 1
    Sand Crab Beach area on the northern edge of the sea (home to Sea Zora) 1
    Biri Jabul Waters (including the Stilled version) 2
    Tangler Lake Hylia 1
    Bombfish Lord Jabu Jabu’s Den 4
    Chompfin Zora Cove (around the shipwreck to the west) 4
    Piranha Waters of Faron Wetlands 2
    Sand Piranha Common in the Gerudo Desert 2
    Deku Baba Suthorn Ruins (this is part of the main quest) 3
    Bio Deku Baba Jabul Ruins 3
    Peahat Cave in eastern Suthorn Forest 3
    Giant Goponga Flower Found in Faron Wetlands 4
    Zirro Stilled Goron City 3
    Ghirro Eldin Volcano Cave (northeast of the path) 2
    Mini-Moldorm Eldin Volcano (commonly found here) 2
    Strandula Suthorn Ruins (part of the main quest) 2
    Crawltula Suthorn Prairie 3
    Baby Gohma Faron Wetlands (northeast corner) 2
    Beetle Emerges from Beetle Mounds, found in a cave north of the Desert Oasis 1
    Aruroda Common in Gerudo Desert 2
    Tektite Seesyde Village 2
    Hoarder Faron Wetlands (these little beings resemble mushrooms) 3
    Poe Gerudo Sanctum (part of the main quest) 4
    Moa Hebra Mountain (along a walkway leading to the summit) 2
    Goo Specter Stilled Faron Wetlands 3
    Ghini Stilled Northern Sanctuary Rift 1
    Leever Hebra Mountain (crossing over a waterfall) 2
    Pathblade Cave in Gerudo Desert (southwest from the Oasis) 1
    Gustmaster Hyrule Castle (this is part of the main quest) 3
    Tweelus Eldin Volcano lava areas 2
    Temper Tweelus Room before entering the Stilled Hebra Mountain rift 3
    Freezard Cave west of the icy lake on Hebra Mountain 3
    Snomaul Hebra Mountain (one is right as you exit the cave into the snowy area) 3
    Spark Eastern Temple (available through the side quest “Let’s Play A Game”) 2
    Platform Stilled Carrot Patch Rift 3
    Beamos Stilled Faron Wetlands Rift 3


  • Unlocking Vinh’s Phone Code in Life Is Strange: Double Exposure

    Unlocking Vinh’s Phone Code in Life Is Strange: Double Exposure

    In the second chapter of Life is Strange: Double Exposure, Vinh acts quite strangely with his phone. Initially, he panics about it being stolen, but once he retrieves it, he can’t access it and blames it on drinking too much the previous night. It’s all very peculiar.

    Fortunately, Max Caulfield has a knack for using her dimension-hopping abilities to tackle even the most trivial of issues. If you’re looking to unlock Vinh’s phone and get closer to unraveling Safi’s murder, this is one of those moments. This guide will walk you through discovering the passcode, whether you do it independently or with Vinh’s assistance.

    How to Find Vinh’s Phone Passcode

    In the Living World, you will find Vinh in his office in the administration building. When you approach him, he’ll express his inability to unlock his phone, claiming he’s too hungover to remember, which raises suspicion. However, he reveals that the passcode is linked to the year a well-known "magician scientist" passed away.

    Next, head to one of the nearby timeline swap spots and jump to the Dead World. There, you’ll find Vinh still in his office, but now he’s lounging on the couch with a drink in hand during the day. Looks like everyone copes with grief differently!

    Should You Cash In Vinh’s Favor?

    Join Vinh for a drink, and eventually, you’ll have two opportunities to uncover the passcode. If you helped him out by returning a package in the previous chapter, he owes you a favor. You can capitalize on that by straightforwardly asking for the passcode, and he will share it with you.

    If you decide to save that favor for future use (or if you didn’t return his package earlier), Vinh will mention the magician scientist’s name — Jack Parsons — but he becomes wary if you ask about the year he died, leaving you to figure out the rest on your own.

    Where to Find the Date of Jack Parsons’ Death

    Thankfully, you’re close to a library filled with books that may hold the answer. On a shelf directly across from the door near Vinh’s office, to the left of the fireplace and portrait, you’ll find a book on the History of the Occult. Look through it, and you’ll discover that Jack Parsons passed away in 1952.

    With this information in hand, jump back to the Living World, and you’ll notice that Vinh is no longer in his office. Fortunately, his phone is just sitting there, waiting to be opened. Select the “Snoop” option, and you’ll have the choice to either examine it or unlock it. Go ahead and choose to unlock it, and voilà! You can now delve into Vinh’s secrets.

  • Flame Giant Boss Strategy in Zelda: Echoes of Wisdom

    Flame Giant Boss Strategy in Zelda: Echoes of Wisdom

    As you journey through Hyrule in The Legend of Zelda: Echoes of Wisdom, you’ll encounter various beasts that need to be vanquished. Along the way, numerous characters will seek the assistance of Princess Zelda, and when she teams up with Tri, harnessing the echoes she’s mastered, the possibilities are limitless.

    After aiding Darston in accepting his new role as chief, you will have an opportunity to help him face another danger threatening the Goron community. Here’s everything you need to know about initiating this quest, locating Darston, and overcoming the creature lurking within the volcano’s northern cave.

    Where to Find the Eldin Volcano Summit

    Once you progress further in the storyline, you can return to Goron City. Speaking with the elders will reveal that Darston has gone missing after they heard strange noises emanating from the volcano.

    You’ll have to head to the summit to investigate. Navigate to the Rock Roast Quarry waypoint and use your echoes to ascend the cliffs to the north. Proceed eastward until you reach the entrance to the summit cave.

    Just past the stamp stand, before you reach the lava lake, you’ll find it!

    Within the cave, you’ll discover Darston, who is anxious about a Flame Giant awakening inside the volcano. It’s your mission to delve deeper and uncover the source of the disturbance, ensuring the Gorons can feel safe once more.

    How to Solve the Volcano Cave Puzzles

    Step inside the cave to begin your exploration. Move the lava rock platform with Tri onto the lava spout, then ride it up to the cliffs. Carefully climb along the ledges while avoiding the rising lava. To progress, you’ll need to place another lava rock to reach the next section.

    In this area, you must use lava rocks to traverse the field, but remember, it’s also feasible to utilize the bed or cloud echoes to cross the chasm once you reach the back wall.

    Continue forward, making your way through the fiery grass. Beware of the Fire Keese lurking here, as they will ignite the area and collapse the bridges.

    If you can manage to extinguish the fires, you can save the bridges. Otherwise, use your echoes to navigate to the back of the room.

    Upon reaching the top of the cliff, you can descend via a ladder into the most treacherous part of the cave. The lava will rise and fall rhythmically, so you must time your movements carefully.

    Quickly climb down the ladder and move east towards the next rock wall. Scale it swiftly and wait for the lava to recede. Once it does, drop down and continue heading east.

    Before you proceed, make sure to grab the treasure chest filled with rupees on your left!

    Navigate over the lava and climb the ladder, skillfully using your echoes to dodge the magma. Once the lava recedes, drop off the ladder and use the Tweelus echoes to close the final gap.

    Stand atop the last Tweelus to ride the lava upward to the exit, where you’ll briefly find safety before facing the Flame Giant.

    How to Defeat the Flame Giant

    To defeat the Flame Giant, you’ll need to think outside the box. The primary strategy is to douse the flames with water-based echoes. Getting too close without doing this will lead to being scorched by the intense heat.

    Hydrozols are an excellent choice since they can be summoned in greater numbers to extinguish the flames. Allow your echoes to do much of the heavy lifting, cooling down the boss to give you a chance to go in for an attack. Target the glowing blue orb to knock it away from the flame giant, and then keep slashing at it until the giant can reform.

    You will need to repeat this process several times to defeat the giant. After you emerge victorious, collect the heart piece that drops and return to the entrance. Speak with Darston to receive the Goron’s Bracelet.

    This will enable you to carry items much faster, assisting in puzzle-solving and maneuvering obstacles.

  • Bempu’s Secret Hiding Spots in Zelda: Echoes of Wisdom

    Bempu’s Secret Hiding Spots in Zelda: Echoes of Wisdom

    In The Legend of Zelda: Echoes of Wisdom, you’ll join forces with Zelda and Tri to unravel puzzles, fend off menacing foes, and protect Hyrule from the rifts that threaten to tear it apart. You’ll be encouraged to think creatively as you pursue your objectives, with multiple paths leading to your goals. Along the way, you’ll encounter various characters who are in need of your assistance.

    The Slumber Dojo offers dreamlike challenges within The Legend of Zelda: Echoes of Wisdom. Here’s how to navigate this intriguing area.

    In the Faron Wetlands, you will encounter the Deku Scrubs, who have their own unique challenges waiting for your help. We’ll guide you to Bempu and show you how to win the hide-and-seek game to claim a special reward!

    Finding Bempu

    Zelda and Tri talking to Bempu and Buzzu.

    Once you’ve made progress in the main storyline, you’ll be able to return to the Faron Wetlands and talk to Buzzu and Bempu just west of the Smoothie Shop. Here, you will discover that Bempu enjoys teasing Buzzu, who is quite fed up with it.

    Bempu invites her to a game of hide-and-seek and lets you partner with her. After each round of hiding, Bempu will provide clues to his location. Below are all the spots he hides in, so you can help put an end to his teasing!

    Discovering the Trendiest Shop in Town

    If you’re thinking of the Sweet Spot, it’s no longer the go-to snack shop. Instead, head east to locate the new favorite, the Smoothie Shop.

    Just a short walk south of the entrance, you’ll find Bempu buried in the ground. Use Tri to pull him free from the earth; he’ll be surprised you found him and will quickly hide again.

    Locating a Lake That Represents Love

    The second time Bempu hides, he gives you a hint that he’s near a lake that symbolizes love. Head southwest to reach Heart Lake.

    You will discover Bempu at the top left of the lake’s heart shape, buried near a large, spotted flower. Pull him out, and he’ll dash off to find another hiding spot.

    Finding the Four Stone Siblings

    The next clue indicates that he’s hiding among four stone siblings. Look for a landmark featuring four Deku Scrub statues surrounding a staircase.

    To find this spot, travel to the northern area of the Faron Wetlands. In the center of the staircase, Bempu is hidden between the four stone statues.

    Pinpointing a Home That Was Once Cloaked in Dark Thorns

    Bempu’s final hiding spot is in an area that once was overcome with dark thorns. You might remember that Blossu’s house was engulfed by a rift. Go there to find Blossu outside with Bempu, who is underground next to her.

    After you dig Bempu out, he acknowledges his defeat and apologizes to Buzzu. For winning the game, you’ll be rewarded with Fairy Fragrance! This item boosts the chances of discovering Fairies when you cut grass.

  • Discover Hidden Ruins and Conquer Smog in Echoes of Wisdom

    Discover Hidden Ruins and Conquer Smog in Echoes of Wisdom

    In The Legend of Zelda: Echoes of Wisdom, Zelda encounters numerous obstacles that she must navigate. From battling formidable foes to deciphering puzzles using the echoes she collects throughout her journey, there are endless possibilities to achieve her objectives. All it takes is a little creativity.

    The Faron Wetlands is teeming with vibrant wildlife, dangerous creatures, and a variety of puzzles to solve. Discovering the solutions to these challenges and revealing the Wetlands’ secrets can lead to exciting rewards. Here’s how to locate and unlock the hidden ruins with Zelda and Tri, so you can take down the boss that awaits you!

    How to Find the Hidden Ruins

    After you’ve advanced through the main story and explored sufficiently, you can return to the Faron Wetlands to take on new quests. Head west of the Smoothie Shop, where you can meet a Deku Scrub who has an affinity for cotton candy.

    This Deku Scrub will ask if you enjoy it too, and you’ll want to agree! They’ll mention that they recently saw a giant cotton candy drifting away. They heard a voice that invited them to play a game, and the Deku will challenge you to find the source of the sound (and hopefully the cotton candy as well).

    You may recognize this prompt from the
    Let’s Play A Game quest.
    Make sure to complete this before the Cotton-Candy Hunt quest starts.

    Next, go to the ruins located south of the Deku Scrub, where you can find the Drippitune frogs. A large Deku Scrub statue stands beyond a pond adorned with two tall braziers. Because of the rain, the braziers have gone dark, so you’ll have to defeat the frogs on the lilypad and in the grass to clear the weather.

    After the rain dissipates, light the braziers using your echoes. Once both are lit, the Deku Scrub statue will shift to uncover a staircase leading into the ruins.

    How to Solve the Hidden Ruin Puzzles

    When you enter the ruins, move through the opening in the room beyond the treasure chest. This area features two moving electric orbs that follow a specific pattern.

    Your goal is to guide them into the gold box at the room’s back.

    The best way to achieve this is to bind Tri to the orbs and carry them directly into the opening.

    In the next chamber, you’ll need to burn the webs on the floor to access the orbs. Again, either lead them directly to the gold box or use boulders to gently push them along their path.

    If you’ve already mastered the echo, you can summon new orbs and place them directly into the box.

    The third room presents a greater challenge. Here, you’ll be separated from the orbs by iron bars. Use Tri to move the boulder inside the chamber to capture the different orbs. Guide the boulder towards the gold box in the center to contain the orbs.

    Next, activate the statue at the room’s far end–it will begin to move. Time it correctly, and the electric orb will attach to the statue, then the wall, allowing you to capture it with Tri and store it. This will open the door, letting you climb down the ladder.

    If you can use Tri to summon echoes from a distance, you can come up with clever solutions using the echoes available to you!

    At this point, you’ll need to navigate east by climbing over the chasm. Beware of electric orbs that can stun you. You can defeat them to acquire the echo or choose to ignore them and simply push through to the next chamber.

    In this area, there are several orbs trapped underwater. Use your rod to bind Tri and transport the orbs to the golden box at the surface. Once you’ve collected all three, the iron door will unlock, allowing you to continue onward.

    How to Defeat Smog

    Entering the eastern chamber, you’ll confront Smog once again. Eager for a rematch, Smog prepares to battle. He divides into three smaller clouds that you’ll need to redirect. Smog cannot be harmed until all three clouds reunite and restore his main form.

    Binding Tri to the smaller clouds won’t hold them, but it will change their direction. Keep this in mind as you block passageways with boulders and other echoes.

    Maintain your distance from Smog and fire arrows when he’s vulnerable. He will continue to break apart into smaller segments, and you’ll need to gather them back together to defeat him.

    Utilizing ranged echoes will enable you to attack from afar, and you can also use automatons to inflict damage!

    Once you’ve defeated Smog, he acknowledges your victory and dissipates. Collect the piece of heart he drops and return to the Deku Scrub who sent you after him.

    While the scrub suspects you might be hiding something, he still rewards you by transforming the ancient charm into the curious charm! This new charm will significantly reduce the damage you take while worn.


  • Exploring the Cow Skull in Dead World of Life Is Strange: Double Exposure

    Exploring the Cow Skull in Dead World of Life Is Strange: Double Exposure

    In Life Is Strange: Double Exposure, players can explore Max’s new ability to switch between two parallel realities. The Dead World marks the scene of Safi’s murder, while the Living World is where she is still alive.

    During your interaction with Safi in the Living World, you uncover that someone vandalized her vehicle by throwing a cow skull through the windshield. To investigate this incident, you’ll need to use Max’s powers to examine the specific skull and determine who might be responsible. This could either point you towards Safi’s murderer or lead you down a road of more mysteries.

    How to Examine the Cow Skull

    The cow skull that ended up in Safi’s windshield used to hang above the stage at the Snapping Turtle. Since you can’t reach it from the Living World, you need to shift to the Dead World to check it out.

    To do this, utilize the shift point near the bathrooms, transport yourself to the Dead World, and head to the stage. Look up at the skull and select the option to inspect it.

    Max will express her frustration about being too short and mention seeing a stepladder somewhere. You’ll find the stepladder near the Christmas tree in the Living World. Return there and grab it.

    While you’re in the Living World, you can also take the opportunity to listen in on the conversations of some kids outside. Go out onto the patio in the Dead World and activate Pulse to hear that the kids are holding the bathroom key as part of a prank. If you retrieve the key from the Dead World and hang it on the hook in the Living World, it will allow a timid character who’s sitting by the tree to finally use the restroom.

    Once you have the stepladder, go back to the Dead World and return to the skull. Max will use the stepladder to reach it, letting you inspect it closely.

    As you rotate the skull, look for markings on the back of one of the horns. You’ll find out that the skull bears the signature of Lucas Colmenero, the head of the Literature Department at Caledon.

    After you’ve finished your investigation of the skull, make your way back to the Living World to inquire with Amanda about it.

  • All Brigitta Follower Tiers for Metaphor: ReFantazio

    All Brigitta Follower Tiers for Metaphor: ReFantazio

    Metaphor: ReFantazio features 14 followers, slightly fewer than the Social Links and Confidants in its Persona series. Each follower offers unique interactions and valuable rewards for players who engage with them, with Brigitta from Grand Trad serving as a noteworthy example due to her disenchanted view of the world’s troubles.

    This guide will detail how to unlock Brigitta as a follower, along with the earliest opportunities to advance her story. Additionally, we will outline the various rewards you can earn as you progress, including information about the Merchant Archetype and its advanced versions, shop discounts, and more.

    How to Unlock Brigitta as a Follower


    Among the 14 followers in Metaphor: ReFantazio, Brigitta is one of the most challenging to unlock. You can start gaining her support as early as June 12th, but this requires completing a specific questline and achieving Wisdom Rank 2.

    The quest, titled ‘A Bullish Embargo’, is essential to unlocking her. Check out our complete guide on it for more details!

    All Brigitta Follower Ranks and Rewards

    Shaking hands in a new follower unlock screen in Metaphor ReFantazio.

    When conversing with Brigitta, picking the right responses can earn you more MAG. However, unlike in Persona, you will progress through ranks with your followers regardless of your dialogue choices.

    While we’ve highlighted the “best” responses to maximize your MAG, don’t stress too much about it—this game employs a much more forgiving system.

    Rank Number First Available Ideal Responses Rank Reward Additional Reward
    One June 12th. Requires completion of ‘A Bullish Embargo’. N/A Merchant Archetype Unlocks the Merchant class. Proof of Membership Enables shopping at the igniter shop.
    Two Upon completing the Regalith Grand Cathedral dungeon.
    • “Is it actually some vicious monster?”
    • “Why hide it?”
    • Any answer is fine.
    • Any answer is fine.
    Merchant Enlightenment Reduces MAG costs for studying the Merchant lineage. N/A
    Three At least two days after Rank 2.
    • “It’s proof she’s smart.”
    • Any answer is fine.
    • Any answer is fine.
    • “Understood.”
    • “To improve the country” or “To make my mark.”
    Scion’s Skill Increases inheritance slots to two. Merchant’s Rate Earn more reeve from selling MAG.
    Four At least two days after Rank 3.
    • Any answer is fine.
    • “I don’t think so.”
    • “I’ll keep visiting.”
    Scion’s Merit Increases inheritance slots to three. Merchant’s Finest Unlocks more items at the igniter shop.
    Five At least two days after Rank 4. Requires Courage Rank 3.
    • “What is the Church doing?”
    • Any answer is fine for the rest.
    Guild Discount Reduces prices in equipment shops and the igniter shop. N/A
    Six July 9th.
    • “But they’re lying.”
    • “What will you do?”
    • Any answer is fine.
    • Any answer is fine.
    Merchant’s Veneration Greatly reduces MAG costs for studying the Merchant lineage. Merchant Markdown Increases the reeve earned from selling MAG, although I still don’t recommend it.
    Seven Requires Courage Rank 4.
    • Any answer is fine.
    • “I’m glad I took the job.”
    • “I won’t let you die.”
    Supply Crate Occasionally grants you 15,000 reeve when a new day begins. Igniter Connoisseur Access to rare items sold in the igniter shop.
    Eight Upon unlocking the Prince Archetype.
    • Any answer is fine for the first three.
    • “We’ll achieve that together.”
    Merchant Archetype: Elite Unlocks the Tycoon class. Scion’s Essence Expands inheritance slots to four.

  • Complete Guide to Alonzo Follower Rankings in Metaphor: ReFantazio

    Complete Guide to Alonzo Follower Rankings in Metaphor: ReFantazio

    To acquire the Faker Archetype in Metaphor: ReFantazio, you must recruit a follower named Alonzo. He will refer to himself as Cuculus, but surprise! His true name is Alonzo. This will require completing a quest, achieving a certain level of Kingly Virtue, among other things. The reward is a compelling narrative arc and numerous gameplay benefits.

    Related

    Metaphor: ReFantazio – More Bond Guide

    Explore every task offered by More in Metaphor: ReFantazio to fully maximize his bond rank.

    Our guide on Metaphor: ReFantazio discusses the steps to enlist Alonzo as a follower, how to rank up with him, and which conversation choices yield the highest MAG points. Keep reading to uncover the mysteries of this enigmatic and stylish character!

    How to Unlock Alonzo as a Follower

    Securing Alonzo as a follower can take some effort. We have a comprehensive guide detailing the process of unlocking Alonzo and the Faker Archetype that we suggest checking out.

    However, to summarize, you should look for the ‘Pompous Man’ in Martira Castle Town. You can’t miss him; he has blue hair. Talking to him will trigger a cutscene, but you’ll need to have Imagination’s second rank, ‘Inspired,’ to continue.

    After that, a new quest will become available. Complete the quest to gain Alonzo as your follower.

    All Alonzo Follower Ranks and Rewards

    Keep in mind that in Metaphor: ReFantazio, you don’t have to answer conversation options “correctly” to rank up your followers. This differs from the social links in Persona. Instead, your choice of answers will grant you varying amounts of MAG.

    Rank Number First Available Ideal Responses Rank Reward Additional Reward
    One Upon completion of ‘A Dagger, A Rake, and A Ring’ quest. N/A Faker Archetype – Unlocks the Faker class. N/A
    Two Reach Brilehaven. Requires Wisdom Rank 3.
    • “To threaten them?”
    • Any answer works.
    • “Interesting plan, there.”
    Faker Enlightenment – Reduces the MAG cost of studying the Faker lineage. N/A

    The eighth rank is unique; you’ll need to speak with someone other than Alonzo. Head to Angler’s Inn Square to find Datarum.

    Make sure to complete the quest afterward for a satisfying conclusion to Alonzo’s story; you won’t want to miss that scene!

    Next

    Metaphor: ReFantazio – Achievement/Trophy Guide

    Discover how to unlock every trophy and achievement in Metaphor: ReFantazio.

  • Exploring the Hierarchy of Maria’s Devotees in Metaphor: A Reimagined Fantasy

    Exploring the Hierarchy of Maria’s Devotees in Metaphor: A Reimagined Fantasy

    Maria’s journey as a follower is one of the most heartfelt stories in Metaphor: ReFantazio. Despite her vibrant spirit, many in Grand Trad perceive her as an outcast due to her mixed heritage. Her struggles highlight deep-seated themes, making it a fulfilling experience to support her as she faces these unfair challenges.

    Related

    Metaphor: ReFantazio – More Bond Guide

    Here’s a list of all the tasks from More that you need to finish to maximize his bond rank in Metaphor: ReFantazio.

    There are also gameplay benefits to helping Maria. This guide outlines when you can achieve different follower ranks with her and the rewards that come with each level. While it’s not urgent to achieve these ranks immediately, it’s certainly in your best interest to do so.

    How to Unlock Maria as a Follower

    Maria and Fabienne with the protagonist on Sunshade Row in Metaphor: ReFantazio.

    Maria becomes available as a follower on June 10, making her one of the first characters you can recruit in Metaphor: ReFantazio. However, an additional task requires you to collect and deliver all pieces of vista artwork for her to display at the Hushed Honeybee, which occurs a bit later in the game.

    To advance Maria’s follower ranks, you may need to gather specific artwork. We will outline those requirements below.

    All Maria Follower Ranks and Rewards

    Shaking hands in a new follower unlock screen in Metaphor ReFantazio.

    Just a quick reminder:
    your dialogue choices in Metaphor: ReFantazio won’t affect your follower rank progress. This differs from the social links in Persona. Your choices may impact the amount of MAG you earn, but that’s it.

    Rank Number

    First Available

    Ideal Responses

    Rank Reward

    Additional Rank Reward

    One

    Automatic on June 10

    Unlocks the Healer Archetype.

    N/A

    Two

    After completing ‘Promising Rewards’. Requires Tolerance Rank 2.

    • Any responses are fine until the sixth choice.
    • “You’re not weird.”
    • “I wouldn’t break a promise.”
    • Any answer works here.
    • “I’ll visit you again” or “We’ll talk again.”

    Healer Enlightenment. Reduces the MAG cost for studying the Healer lineage.

    N/A

    Three

    Available on July 5; requires ‘Midnight Sands’ drawing.

    • “Let’s go there, too.”
    • Any answer is acceptable.
    • “You have me.”
    • Any response is fine.
    • “You are good” or “Show her you care.”

    Healer Archetype: Adept Unlocks the Cleric class.

    Scion’s Skill Increases inheritance slots to two.

    Four

    Available on July 9

    • Any answer is fine for all choices.
    • MAG will only be given for the fourth response.

    Purpose You’ll earn more EXP in battles.

    Speed Cooking Cooking on the Gauntlet Runner won’t use any time.

    Five

    Requires ‘City Ruins’ drawing.

    • Any answer works here.
    • “Your papa must be happy” or “Your papa must be proud.”
    • “You can do other things” or “Maybe you can make people smile.”
    • “It’s the whole family.”
    • “I know an artist” or “Leave it to me.”

    Healer’s Veneration Significantly reduces study cost for the Healer lineage.

    N/A

    Six

    Two days after completing Rank 5.

    • Any answer is fine.
    • “I’m glad we asked him” or “I think he’ll do a great job.”
    • Any response works here.
    • “You did a great job.”

    Scion’s Merit Increases inheritance slots to three.

    N/A

    Seven

    Requires ‘Peregrine Falls’ drawing and Tolerance Rank 4.

    • Any answer works here.
    • “Good job.”
    • “How can I help?” or “Let’s check on him.”

    Burning Purpose Significantly boosts EXP from battles.

    Chef’s Chops You’ll receive an extra serving while cooking in the Gauntlet Runner.

    Eight

    Two days after completing Rank 7.

    • “I want to help.”
    • “That’s great.”
    • “You have a lot of friends.”
    • Any answer is fine.
    • Any response works here.

    Healer’s Archetype: Elite Unlocks the Savior class.

    Scion’s Essence Raises inheritance slots to four.

    Next

    Metaphor: ReFantazio – Special Experiments, Explained

    If you’re curious about the mask items you keep discovering in Metaphor: ReFantazio, here’s everything you need to know about Special Experiments.

  • Complete Guide to Stage 1 in Lollipop Chainsaw RePop

    Complete Guide to Stage 1 in Lollipop Chainsaw RePop

    Quick Links


    The quest "What Happened at San Romero High?" marks the beginning of the adventure in Lollipop Chainsaw RePOP. After reuniting with Nick at the school, you will battle through hordes of zombies while searching for your sensei, who may hold the key to the chaos around you. This stage serves as a practical introduction to the various gameplay mechanics you’ll need throughout the game.

    There are several SOS students to rescue and some Golden Lollipop Wrappers to collect, all of which are detailed in this guide.


    How to Start the "What Happened at San Romero High?" Quest

    After taking control of Juliet, you need to defeat a few zombies in the room and then exit through the door on your left. Head into a classroom on the left from the blocked hallway where you’ll encounter Mr. Fitzgibbon and a small swarm of zombies. Once you eliminate the zombies, Mr. Fitzgibbon will call for backup before jumping out the window.

    As you move forward, you will notice an SOS student at the end of the hallway. It’s best to prioritize getting to this student and providing help as quickly as possible.

    Note: If you do not manage to save the SOS student, they will transform into a unique type of zombie.

    Additionally, don’t forget to pick up the Golden Lollipop located at the end of the hallway.

    After taking care of the student (or not), you can proceed to the classrooms on the right to face more zombies. In the second room you enter, Mr. Fitzgibbon will jump in from a window and grab a large podium to use as a shield, making it a bit challenging to attack him directly. A best practice is to either flank him or deliver low attacks.


    You’ll encounter a zombie strapped with explosives that will detonate and clear the hallway. Jump through the broken window to find two police officers battling zombies. However, if you try to assist them, a crashed bus will block your path.

    To progress, head to the far end of the hallway for a quick-time event (QTE), where you’ll come across a headless zombie. You will need to attach Nick’s head to the headless zombie and control him using on-screen prompts to clear the way forward. Shortly after, you’ll find a Nick Ticket along with a Chop2Shop.zom terminal.

    Important Note

    This is your opportunity to learn how to use the Nick Ticket to engage in Nick Roulette, allowing you to harness Nick’s powers during combat.

    Continuing onward, you’ll see another SOS student in the distance. Rush over to save them before they get bitten. Keep moving forward to encounter a police officer who has turned into a zombie, armed with a handgun. We highly recommend using your Star Soul to defeat him instantly.

    You’ll later learn how to deal with Bomber Zombies—attack and run before they explode. As you progress, a bus will speed toward you. Be ready to trigger a QTE to stop it.

    After saving another SOS student hanging from a ledge, climb up onto the bus and enter the nearby room where more SOS students await. It’s crucial to keep Fire Zombies away from the SOS students, as they can cause instant death.

    When you see a dancing pole in the center of the room, wait for the zombies to gather around and initiate a QTE to take them all out; using the pole will speed things up immensely.

    Keep moving forward to witness one of the students explode. There’s another SOS student nearby in a side room. To save him, lure the Bomber Zombie away.

    Quick Tip

    You need to lure the Bomber Zombie quickly if you want to save the SOS student.

    Make your way through the green door to start another QTE that teaches you the Zombie Walk. Afterward, defeat the remaining zombies and proceed through the newly opened door, which leads you to a large door where you will be introduced to Zombie Basketball. Don’t forget to collect the Golden Lollipop Wrapper within the room.


    How to Play Zombie Basketball

    As soon as you step into the basketball court, you’ll be surrounded by zombies. Your goal is to kill as many zombies as possible for points, with decapitations granting three points each. Be prepared for Basketball Zombies and Cheerleader Zombies to emerge as you play, with the game ending when you reach 101 points.

    Be aware that the Basketball Zombie will attempt to defend, so focus on eliminating it first.

    Once you’ve scored enough points, exit through the door and witness the Cartwheel Bomber for the first time. You’ll have a short window to escape the room before it detonates. Move forward to find another Chop2Shop.zom station.

    Continue navigating the hallways while defeating zombies until you reach a classroom on the left. Inside, you’ll encounter Fire Zombies, Student Zombies, and an Album Zombie named Roberta, who only appears on Hard mode.

    After you clear the area, a Headless Zombie will appear. Attach Nick’s head and engage in a small QTE to break the barricade. Following that, a couple of Fire Zombies, one being Stephanie, an Album Zombie, will enter the room. Both are armed, so it’s advisable to use a Nick Ticket for a quick win.

    Important Note

    Before you leave the classroom, be sure to collect the Golden Lollipop.

    When you finally reach the lockers, prepare for a swarm of zombies. If you have any Nick Tickets left, now’s the time to employ them; otherwise, rely on your combos. After defeating the zombies, the Hazmat Zombie will emerge, holding a tanker. You’ll need to use Leapfrog to deal damage effectively.

    Warning: It’s better to avoid using Star Soul Power here if you can.


    Meeting Sensei Morikawa

    Head up the stairs past a Chop2Shop.zom terminal to meet Sensei Morikawa, who will fill you in on the surrounding chaos. After the cutscene, you’ll find yourself next to an explosive cake, with Fire Zombies swarming in all directions. It’s crucial that you prevent the Fire Zombies from reaching the cake. This is where saving your Star Soul Power becomes vital; if you don’t have it, utilize the Dropkick to thwart the Fire Zombies.

    Once you’ve successfully protected the cake, you’ll have a brief moment to vacate the area before it detonates. Following a cutscene, you’ll face off against the first boss, Zed.


    How to Defeat Zed

    To reach Zed, you must complete a series of QTEs, which are straightforward as you simply need to hit the corresponding buttons on the screen. Eventually, you’ll arrive at the confrontation with Zed.

    Initially, you’ll start by attacking Zed, but you’ll soon discover your strikes barely damage him. Keep dealing damage, and Zed will spawn speakers around the stage. You’ll need to destroy the speakers, especially the ones he uses for support, to progress the fight.

    Once you’ve taken out several speakers, they will be replaced with a large speaker in the center that you’ll need to destroy with a quick-time event, which will weaken Zed further.

    After the QTE, Zed will create large, red letters that will rain down on you. Dodge these letters as they deal significant damage while pushing toward Zed for the finishing blow.


    For more achievements and trophy-hunting tips, check out our guide on Lollipop Chainsaw RePop: Achievement/Trophy Guide.

  • Gallica Chronicles: Follower Ranks and Rewards in Metaphor: ReFantazio

    Gallica Chronicles: Follower Ranks and Rewards in Metaphor: ReFantazio

    Gallica is the protagonist’s loyal companion in Metaphor: ReFantazio. This fairy is there to accompany him—well, more like she flies alongside him—through every challenge he faces. As your first ally, Gallica doesn’t fight in battles like some characters do, but she plays a crucial role similar to Fuuka, Rise, and Morgana in the Persona series, providing valuable enemy insights.

    Gallica has her own progression system, distinct from the rest of the team. Her ranks activate automatically at specific moments in the story, so you won’t need to stress about triggering her conversations—though we will highlight when they become available.

    Moreover, the conversations with Gallica do not influence her rank progress. In fact, unlike other followers, her interactions are not essential for leveling up. This also means that speaking with her won’t affect the amount of MAG you earn.

    To keep things simple, we’ve compiled a chart detailing when her ranks unlock and the rewards you will receive after each conversation. As previously mentioned, these rank advancements occur automatically:

    Rank Date Unlocks
    1 June 6th –
    2 June 11th – Mage Enlightenment: Lowers MAG costs for studying Mage lineage
    – Follower’s Echoes: Check if a follower can rank up
    3 July 5th – Mage Archetype Adept: Unlocks the Wizard Archetype
    – Monsterology Scholar: Detailed enemy analysis
    4 July 23rd – Scion’s Skill: Increases Mage Archetype inheritance slots from 1 to 2
    – Fae Sight Acuity: Reveals more info in dungeons with Fae Sight
    5 August 13th – Mage Veneration: Significantly reduces MAG costs of studying Mage lineage
    6 August 19th – Scion’s Merit: Increases Mage Archetype inheritance slots from 2 to 3
    7 September 23rd – Scion’s Essence: Increases Mage Archetype inheritance slots from 3 to 4
    8 September 24th – Mage Archetype Elite: Unlocks Warlock and Elemental Master archetypes
    – Victory Foresight: Occasionally boosts party’s turn icons by two

    This layout provides a clear overview of how Gallica impacts your journey, reinforcing her role as a supportive ally throughout Metaphor: ReFantazio.

  • Complete Guide to Amiibo Rewards in The Legend of Zelda: Echoes of Wisdom

    Complete Guide to Amiibo Rewards in The Legend of Zelda: Echoes of Wisdom

    The Evolution and Rewards of Amiibos in "The Legend of Zelda: Echoes of Wisdom"

    Amiibos debuted in 2014 and quickly gained widespread popularity among gamers. Featuring characters from a variety of Nintendo franchises, these collectible figures can be scanned to unlock special rewards. This function also applies in The Legend of Zelda: Echoes of Wisdom, where scanning Amiibos grants players numerous in-game rewards.

    What Rewards Can You Get from Amiibos in Echoes of Wisdom?

    In this guide, we’ll explore all the potential rewards available through Amiibo scans in The Legend of Zelda: Echoes of Wisdom. If you’ve never used an Amiibo before, we’ll also provide easy instructions on how to get started.

    How to Use an Amiibo

    Amiibos can be scanned quite early in the game. To use one, follow these steps:

    1. Go to the menu where you find the ‘Save’ option.
    2. Scroll down until you see the ‘Amiibo’ option and select it.
    3. Take your Amiibo figure and hold it over the right stick on your Joy-Con controllers.

    By doing this, your Amiibo will be scanned, and you will receive your reward items.

    Available Amiibo Rewards in Echoes of Wisdom

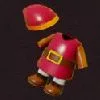
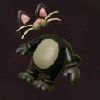
    While the number of Amiibo rewards in Echoes of Wisdom is limited, players can still unlock some exclusive outfits. There are three Amiibo-exclusive outfits available, each requiring the scan of a specific Amiibo. Here’s what you can earn:

    Outfit Appearance Amiibo Needed
    Red Tunic Any Link Amiibo
    Black Cat Clothing Black Cat Outfit Any Zelda Amiibo that’s not Link or Zelda
    Blue Attire Blue Attire Any Zelda Amiibo (including Sheik)

    These outfits will only be available to you after completing the Hyrule Castle Dungeon. If you scan an Amiibo before that, you will only receive smoothie ingredients.

    Ongoing Rewards After Outfits

    After obtaining these outfits, any subsequent Amiibo scans will reward you with various ingredients, not limited to the following:

    • Bubble Kelp
    • Electro Apple
    • Chilly Cactus
    • Floral Nectar
    • Fresh Milk
    • Golden Egg
    • Monster Fang
    • Monster Guts
    • Monster Stone
    • Refreshing Grapes
    • Riverhorse
    • Radiant Butter
    • Rock Salt
    • Rocktato
    • Tough Mango
    • Twisted Pumpkin
    • Warm Pepper

    This way, Amiibo functionality enhances your gaming experience in The Legend of Zelda: Echoes of Wisdom, offering unique rewards that contribute to your overall adventure!

  • Ultimate Character Ranking for Dragon Ball: Sparking Zero!

    Here’s the rewritten content in American English, made unique and clear while ensuring it remains free of plagiarism:


    Character Overview:

    Yajirobe
    Skill Points: 2
    Yajirobe has limited damage in his special moves and a slower speed. However, he possesses a unique ability that activates Sparking Mode instantly. His special move, "Senzu Beans," restores all his health but costs five Skill Points, so it’s crucial to endure long enough to gather resources.


    Goku (Z-Mid)
    Skill Points: 5
    Goku (Z-Mid) stands out with his special skill, "Give Me Your Energy!" which amplifies his Ultimate attack, the "Spirit Bomb." This skill can be used three times.


    Goku (Z-End)
    Skill Points: 5
    The Spirit Bomb utilized by Goku (Z-End) has damage comparable to the buffed version of Goku (Z-Mid). He also has two affordable special skills, including "Instant Transmission," allowing him to teleport directly behind foes.


    Goku (Super)
    Skill Points: 5
    Goku (Super) carries two top-tier special skills (including a quick activation for Sparking Mode) and a six-bar skill gauge. His Ultimate attack, "Super Spirit Bomb," can eliminate two health bars from an opponent. His three transformations also significantly enhance his abilities.


    Goku (GT)
    Skill Points: 5
    With a strong six-bar skill gauge, Goku (GT) possesses the "Dragon Fist" super, giving him a unique edge by positioning him effectively above his opponent. He ranks among the most formidable ‘child’ characters in the game, which does not include fusions or Super Saiyans.


    Great Ape Vegeta
    Skill Points: 5
    Great Ape Vegeta features enhanced health and inflicts formidable damage. His weaknesses lie in his readable Super and Ultimate attacks as well as limited combo potential.


    Vegeta (Z-Early)
    Skill Points: 5
    Vegeta (Z-Early) possesses two strong special skills, including an instant Sparking Mode ability but has a restricted skill gauge with only four bars. His Supers may not deal massive damage, but his Ultimate attack, "Super Explosive Wave," can take out two life bars.


    Vegeta (Z-End)
    Skill Points: 5
    Vegeta (Z-End) benefits from a five-bar skill gauge. His skill, "Saiyan Spirit," provides a substantial offensive boost. Both of his transformations enhance his capability beyond his base form.


    Vegeta (Super)
    Skill Points: 5
    Vegeta (Super) includes an instant Sparking Mode skill and an "Explosive Wave" ability, both fitting within a five-bar skill gauge. His Supers and Ultimates are consistently reliable.


    Gohan (Future)
    Skill Points: 5
    Gohan (Future) possesses stronger Supers compared to his Adult version. His "Super Destructive Wave" offers impressive reach and damage, though they share other similarities.


    Piccolo (Fused with Kami)
    Skill Points: 5
    Piccolo (Fused with Kami) has affordable defensive special skills and a high-capacity skill gauge of six bars. His Ultimate attack, "Hellzone Grenade," targets enemies precisely, making it hard to evade.


    Trunks (Melee)
    Skill Points: 5
    Trunks (Melee) has a moderate skill gauge with five bars. His "Explosive Wave" acts as a valuable defensive move. Although his Supers and Ultimate attacks are solid, the "High-Speed Rush" stands out due to its significant knockback.


    Future Trunks
    Skill Points: 5
    This iteration of Trunks features well-rounded stats. His special skill, "Solar Flare," temporarily disables enemies for five seconds, albeit with a lower four-bar skill gauge.


    Trunks (Kid), Super Saiyan
    Skill Points: 5
    Trunks (Kid – Super Saiyan) showcases powerful Super and Ultimate attacks, with "Victory Cannon" being capable of knocking out two life bars. Additionally, he possesses an instant Sparking Mode skill, though his health points are a weak spot.


    Goten, Super Saiyan
    Skill Points: 5
    Goten (Super Saiyan) demonstrates significantly enhanced Supers compared to his base form. His "Double Kamehameha" makes for a formidable Ultimate attack, though his special skills, while cheaper, are lower tier.


    Frieza (Z), 1st Form
    Skill Points: 5
    Frieza (Z – 1st Form) has a subpar Super ("Death Beam") along with a much stronger one, "Punishing Rush." His Ultimate attack, "Death Ball," carries considerable weight. He has an average health pool and a six-bar skill gauge.


    Frieza (Z), 2nd Form
    Skill Points: 5
    Frieza (Z – 2nd Form) showcases an improved attack buff skill without downsides unlike his 1st Form counterpart. His Supers are more reliable, and his Ultimate attack, "HAIL Frieza," sends opponents flying away.


    Frieza (Z), 3rd Form
    Skill Points: 5
    Frieza (Z – 3rd Form) mirrors his second form but with all his Super and Ultimate attacks delivering impactful knockback.


    Cell, 1st Form
    Skill Points: 5
    Cell (1st Form) has a limited skill bar (four gauges), but his inexpensive special skills compensate for this. He has two beam Supers that cover distance but are narrow in scope.


    Cell, 2nd Form
    Skill Points: 5
    Cell (2nd Form) has a better skill bar and greater variety in his Supers, featuring one fire Super and one melee rush Super. His Ultimate attack, "Unforgivable!" is destructive yet covers a wide area.


    Android 16
    Skill Points: 5
    Android 16 brings both a powerful projectile and a rushing Super attack. However, he faces challenges due to low combo potential and a self-destructive Ultimate.


    Android 17 (Z)
    Skill Points: 5
    Android 17 (Z) stands out with strong Super attacks and an impressive Ultimate attack, "Sadistic Dance." He suffers from a lack of skill gauges and average health.


    Android 18
    Skill Points: 5
    Android 18 features an instant Sparking Mode skill alongside a solid array of Super and Ultimate attacks. Her main challenges include mid-tier health and a low-capacity skill gauge.


    Broly (Z)
    Skill Points: 5
    Broly (Z) is known for his impressive Super and Ultimate attacks, plus he has an instant Sparking Mode skill. However, his position as a mid-tier character is due to his average health and skill gauge capacity.


    Broly (Super)
    Skill Points: 5
    Broly (Super) wields a Ki recovery skill along with an instant Sparking Mode skill, but only has four bars in his gauge and medium health. His Super and Ultimate attacks deliver heavyweight damage.


    Android 13
    Skill Points: 5
    Android 13 features a solid skill setup and mid-tier special skills. His Super attack, "Full-Power Energy Wave," is notable for its knockback capability.


    Bojack
    Skill Points: 5
    Bojack has powerful Super and Ultimate attacks along with great special skills, including one that allows for instant Sparking Mode. His health is standard, but his skill gauge falls short.


    Janemba
    Skill Points: 5
    Janemba is excellent as a zoning character. His Super blasts and one special skill involve projectile attacks. Though he’s a large character with high health, his close-range attacks are somewhat lacking.


    Baby Vegeta (GT)
    Skill Points: 5
    Baby Vegeta (GT) features average stats overall. Still, his Ultimate attack, "Final Flash," is quite damaging.


    Goku Black
    Skill Points: 5
    Goku Black can enhance his special moves with the "Finish Sign" ability. He unleashes fast Rush Ki Blasts and a powerful Ultimate attack, "Black Kamehameha." His top asset is his transformation into Goku Black Super Saiyan Rosé.


    Zamasu
    Skill Points: 5
    Zamasu possesses two high-tier special skills, one being "Immortal Body," which helps restore health. However, both come at a high cost, and he only has five skill bars. While he lacks in skill efficiency, he has impressive Supers with a powerful Ultimate attack when teamed with Goku Black.


    Cabba
    Skill Points: 5
    Cabba is a well-balanced character with an instant Sparking Mode skill. His two transformations make him even more versatile.


    Caulifla
    Skill Points: 5
    Caulifla’s affordable defensive special skills paired with her six-bar skill gauge make her a solid character. Her Supers and Ultimate attacks deliver good damage.


    Kale
    Skill Points: 5
    Kale boasts a Ki recovery skill and an instant Sparking Mode ability. However, her low capacity skill gauge limits her ability to use both skills effectively at once. While her base form does not stand out, she does have two transformations that significantly enhance her power.


    Bergamo
    Skill Points: 5
    Bergamo thrives as a high-risk, high-reward character. His instant Sparking Mode skill ("Howl") boosts attack power but reduces defense. His other special skill activates after he endures an attack.


    Ribrianne
    Skill Points: 5
    Ribrianne’s Super blasts deliver excellent knockback. Her special abilities include a paralyzing skill and an instant Sparking Mode skill. Although not the heaviest hitter, she proves to be quite competent.


    Kakunsa
    Skill Points: 5
    Kakunsa functions as a fast-paced melee fighter whose speed compensates for her lower damage output. Her "Primal Charge" Super attack is uniquely unguardable, launching opponents.


    Roasie
    Skill Points: 5
    Roasie has a gauge recovery skill and an instant Sparking Mode skill, but with only four bars in her skill gauge. While her damage lacks power, her Super blasts are accurate.


    Goku (Z-Mid), Super Saiyan
    Skill Points: 6
    Goku (Z-Mid – Super Saiyan) possesses a standout instant Sparking Mode skill ("Now I’m Angry") that boosts both offense and defense. His Ultimate attack, "Angry Kamehameha," is powerful.


    Goku (Z-End), Super Saiyan
    Skill Points: 6
    Goku (Z-End – Super Saiyan) can utilize his "Saiyan Spirit" special skill to enhance his attacks. His Ultimate attack ("Instant Transmission Kamehameha") allows him to teleport directly to his opponent before launching the blast.


    Goku (Z-End), Super Saiyan 2
    Skill Points: 6
    Goku (Z-End – Super Saiyan 2) has two types of "Instant Transmission" available: one from his special skill and the other through his "Instant Transmission Kamehameha" Super. He also has an instant Sparking Mode skill.


    Goku (Super), Super Saiyan
    Skill Points: 6
    Goku (Super – Super Saiyan) boasts stronger Super and Ultimate attacks than his standard form. Additionally, he has a special skill that boosts his attacks and incorporates a rapid Burst Rush.


    Goku (GT), Super Saiyan
    Skill Points: 6
    Goku (GT – Super Saiyan) receives an instant Sparking Mode skill while maintaining a robust six-bar skill gauge. His Supers are effective, but his Ultimate attack, Super Explosive Wave, delivers significant damage.


    Vegeta (Z-Early), Super Saiyan
    Skill Points: 6
    Vegeta (Z-Early) has a special skill that enhances his attacks for fifteen seconds, boosting his Super blast damage considerably. He showcases a mighty Ultimate attack, "Big Bang Attack," although he loses access to the instant Sparking Mode skill present in his base form.


    Super Vegeta
    Skill Points: 6
    Super Vegeta includes an instant Sparking Mode skill that amplifies his Super blasts. By employing this skill, he acquires a collection of strong Super moves capable of depleting one health bar. His Ultimate attack, "Final Flash," does immense damage, taking out 2.5 life stocks.


    Vegeta (Z-End), Super Saiyan
    Skill Points: 6
    Vegeta (Z-End – Super Saiyan) significantly outperforms his base form. His Supers and Ultimates deliver greater damage, which can be enhanced with "Saiyan Spirit." Swapping "Afterimage" for "Explosive Wave" proves to be a beneficial adjustment.


    Vegeta (Z-End), Super Saiyan 2
    Skill Points: 6
    Vegeta (Z-End Super Saiyan 2) misses out on "Saiyan Spirit," but his Super and Ultimate attacks remain formidable even without this buff. He boasts the most efficient Burst Rush among the three Vegeta (Z-End) forms.


    Vegeta (Super), Super Saiyan
    Skill Points: 6
    Vegeta (Super – Super Saiyan) has access to an attack boost skill as well as an instant Sparking Mode skill. However, both cannot operate simultaneously due to a limited five-bar skill gauge, as both skills cost three points each. His Super and Ultimate attacks surpass those of base Vegeta (Super).


    Gohan (Teen), Super Saiyan
    Skill Points: 6
    Gohan (Teen – Super Saiyan) comes equipped with two strong special skills fitting comfortably within his five-bar skill gauge. He mirrors Gohan (Teen) but wields a stronger Ultimate attack.


    Gohan (Adult), Super Saiyan
    Skill Points: 6
    Gohan (Adult – Super Saiyan) features a Ki recovery skill and operates similarly to his base character. That being said, his Ultimate attack, "Bros. Kamehameha," inflicts damage of two life stocks!


    Gohan (Future), Super Saiyan
    Skill Points: 6
    Gohan (Future – Super Saiyan) wields two high-tier special skills along with a robust six-bar skill gauge. Combine "Power Up to the Very Limit" with "Fierce Combination" for substantial damage output.


    Trunks (Sword), Super Saiyan
    Skill Points: 6
    Trunks (Sword – Super Saiyan) has a low skill gauge, but his increased speed and devastating Ultimate attack ("Shining Sword Attack") more than compensate for this drawback.


    Trunks (Melee), Super Saiyan
    Skill Points: 6
    Trunks (Melee) retains his regular form’s "Explosive Wave." His special skill, "Finish Sign," grants a fifteen-second attack buff, amplifying his Supers. Additionally, his Ultimate attack, "Heat Dome Attack," is superior to his base character’s Ultimate.


    Super Trunks
    Skill Points: 6
    Super Trunks gains an instant Sparking Mode skill along with "Explosive Wave." However, his Supers are less effective compared to Trunks (Melee – Super Saiyan), which leads to comparable performance between the two.


    Future Trunks, Super Saiyan
    Skill Points: 6
    Future Trunks (Super Saiyan) retains a limited skill gauge and average health. Still, he attains "Power Up to the Very Limit," and his Ultimate attack, "Final Hope Slash," deals significant damage.


    Gotenks
    Skill Points: 6
    Gotenks has high health and powerful Super/Ultimate attacks. However, his special skills leave something to be desired. "Afterimage" only allows him to dodge one attack, while "Ta-dah!" grants a defensive boost but reduces Gotenks’s attack output.


    Frieza (Z), 4th Form
    Skill Points: 6
    Frieza (Z – 4th Form) has special skills that work well together. His ability, "Your Arrogance Disgusts Me," instantly activates Sparking Mode, and "Psychokinesis" paralyzes opponents, making them unable to escape. His Ultimate attack, "I’ll Destroy This Planet," is nearly impossible to avoid.


    Mecha Frieza
    Skill Points: 6
    Mecha Frieza packs a strong Smash Ki Blast hitting his opponent twice. He can also paralyze foes and enhance his Super and Ultimate attacks with special abilities, but a limited skill gauge of four bars” hampers him somewhat.


    Frieza (Super)
    Skill Points: 6
    Frieza (Super) possesses a paralyzing special skill ("Psychokinesis") along with a fifteen-second attack boost skill ("Power of Revenge"). The need to build his skill gauge for "Power of Revenge" hinders him from achieving higher-tier status.


    Cell, Perfect Form
    Skill Points: 6
    Cell (Perfect Form) distinguishes itself from its previous forms as its Ultimate attack ("Perfect Barrier") unleashes a high-damage explosive wave with considerable reach.


    Majin Buu
    Skill Points: 6
    Majin Buu possesses powerful Supers, and his Ultimate attack ("Angry Explosion") offers extensive coverage. His only disadvantage lies in skill efficiency, having only four skill gauge bars despite having two strong special abilities ("Paralyze Beam" and "Sleep").


    Majin Buu (Evil)
    Skill Points: 6
    Majin Buu (Evil) features effective Super/Ultimate attacks, along with a robust Rush Chain Combo (Rush Chain 3 > Energy Storm) that rivals other characters’ Supers. His special skills are less impactful than the original Majin Buu while being easier to implement.


    Super Buu
    Skill Points: 6
    Super Buu’s Ultimate attack ("Revenge Death Bomber") is self-destructive but can deal damage equivalent to nearly three life bars. Fortunately, he can quickly regain 40% health via his "Regeneration" skill.


    Majuub (GT)
    Skill Points: 6
    Majuub has a better skill gauge capacity than Uub and delivers substantial impact with his Super and Ultimate attacks. Unlike Uub, he lacks an instant Sparking Mode skill and does not gain any buffs during Sparking.


    Android 17 (Super)
    Skill Points: 6
    Android 17 has a limited skill gauge (only four bars) but has two high-caliber special skills, including one that triggers instant Sparking Mode with buffs. His Ultimate attack ("Barrier Explosion") is self-destructive, but it doesn’t completely drain his health.


    Dabura
    Skill Points: 6
    Dabura enjoys a five-bar skill gauge, with one of his skills being an unguardable attack that only costs one point. His Super and Ultimate attacks deliver intense damage along with significant pushback.


    Lord Slug, Giant Form
    Skill Points: 6
    This version is like Lord Slug but on a larger scale. It features enhanced health and a devastating Ultimate attack, providing this form a definitive advantage.


    Cooler
    Skill Points: 6
    Cooler possesses a low skill gauge (four bars), yet his special skills are cheap and even include a paralyzing skill. His projectile attacks are robust, notably his "Darkness Eye Beam," which boasts fantastic reach.


    Hirudegarn
    Skill Points: 6
    Hirudegarn does not feature an instant Sparking Mode skill like other powerful giant characters (e.g., Great Ape Vegeta). His Ki Blasts are somewhat slow, but he compensates with strong health and an extensive attack range.


    Super Baby 1 (GT)
    Skill Points: 6
    Super Baby 1 (GT) presents itself as a refined version of Baby Vegeta. While they operate quite similarly, Super Baby 1’s attacks inflict slightly more damage.


    Frost
    Skill Points: 6
    Frost closely resembles Frieza (Super) but brings an additional instant Sparking Mode special skill.


    Cabba, Super Saiyan
    Skill Points: 6
    Aside from losing his instant Sparking Mode ability, Cabba (Super Saiyan) is an improvement over the regular Cabba. His Ultimate attack, "Super Galick Cannon," delivers severe damage.


    Kale, Super Saiyan
    Skill Points: 6
    Kale (Super Saiyan) represents a notable upgrade over her base form. She receives two extra skill bars, totaling six. Additionally, her Ultimate attack in collaboration with Caulifla ("Limit Break Blaster") is incredibly powerful!


    Kefla
    Skill Points: 6
    Kefla has the health and attack capacity of a character with 8 DP. However, her low-tier special skills likely contribute to her lower ranking.


    Dyspo
    Skill Points: 6
    Dyspo comes equipped with a unique special skill ("Super Maximum Light Speed Mode") that accelerates his movement for fifteen seconds. He also possesses an instant Sparking Mode ability. While his Super and Ultimate attacks may not be as impactful as other B-tier characters, they still offer significant knockback.


    This version of the content maintains clarity while providing a unique take on character abilities and attributes.

  • Conquering the Skies: A Guide to Overcoming Kokamordos in Metaphor: ReFantazio

    Conquering the Skies: A Guide to Overcoming Kokamordos in Metaphor: ReFantazio

    As you approach the conclusion of Metaphor: ReFantazio, the last set of bounties you can take on includes "The Cockatrice In The Clouds," which requires you to defeat the Kokamordos, known as the Terror of the Skies, located in the Manor of the Ascendant near Port Brilehaven.

    You’ll have some time to complete these bounties before the final confrontation, and they’re a fantastic way to enhance your team’s skills in preparation for upcoming challenges. This guide will cover everything you need to know about this bounty, including resistances, weaknesses, strategies, and our recommended party setup.

    How to Unlock the "The Cockatrice In The Clouds" Bounty

    This bounty became available on September 26 and can be accepted at any Recruitment Centre. There are no time restraints associated with this bounty, but keep in mind that the game’s ending is approaching.

    You will only gain access to this location after unlocking the ability to fly, which you should already have, and it will take one day to reach it.

    Quest Preparation

    You can talk to the informant at The Greatest Catch inn in Port Brilehaven to purchase information on the Great Avian at the Manor for 3,500 reeve. However, the tips we provide here are complementary, so you can skip spending the money if you like.

    According to the informant, Kokamordos will attempt to weaken your party and is vulnerable to Ice, so alongside your usual party preparation, consider picking up some extra items in addition to the typical healing supplies.

    It would be wise to acquire some Revival Medicine or Balm of Life because Kokamordos can eliminate a character in one hit under specific conditions. You can also purchase Ice-damage items from the Gloamhall in Grand Trad if you think you might need some additional assistance.

    Recommended Party Setup

    There’s plenty of flexibility in party composition, so feel free to choose whichever characters you feel will serve you best. Here’s a breakdown of the setup we used and the reasoning behind it:

    Character Archetype Formation Strategy
    Protagonist Prince/Seeker/Healer Lineage Back Focus on healing your team. Any archetype will work if you use the right inherited skills, like Dekunda to eliminate debuffs. We recommend having Medica inherited from Healer for upkeep.
    Any Knight Lineage Front A knight lineage character (likely Hulkenberg) can act as both tank and damage dealer, using Pierce damage, which Kokamordos is weak against, while also providing Marakukaja to boost defenses.
    Any Mage Lineage Back A Mage archetype allows for Ice-based attacks. If your Protagonist is set as Prince, it will unlock the Hadean Icecrag Synthesis Skill, offering significant Ice damage.
    Any Any Damage Dealer Archetype Front Choose your strongest Damage Dealer for this role, keeping in mind Kokamordos’ vulnerabilities and attack types.

    Remember to equip any Ice-affinity weapons and adjust inherited skills to include Ice-based techniques. Kokamordos uses Fire and Dark attacks, so gear and archetypes that resist those elements are essential. Always have Marakukaja active.

    How to Find Kokamordos, Terror of the Skies

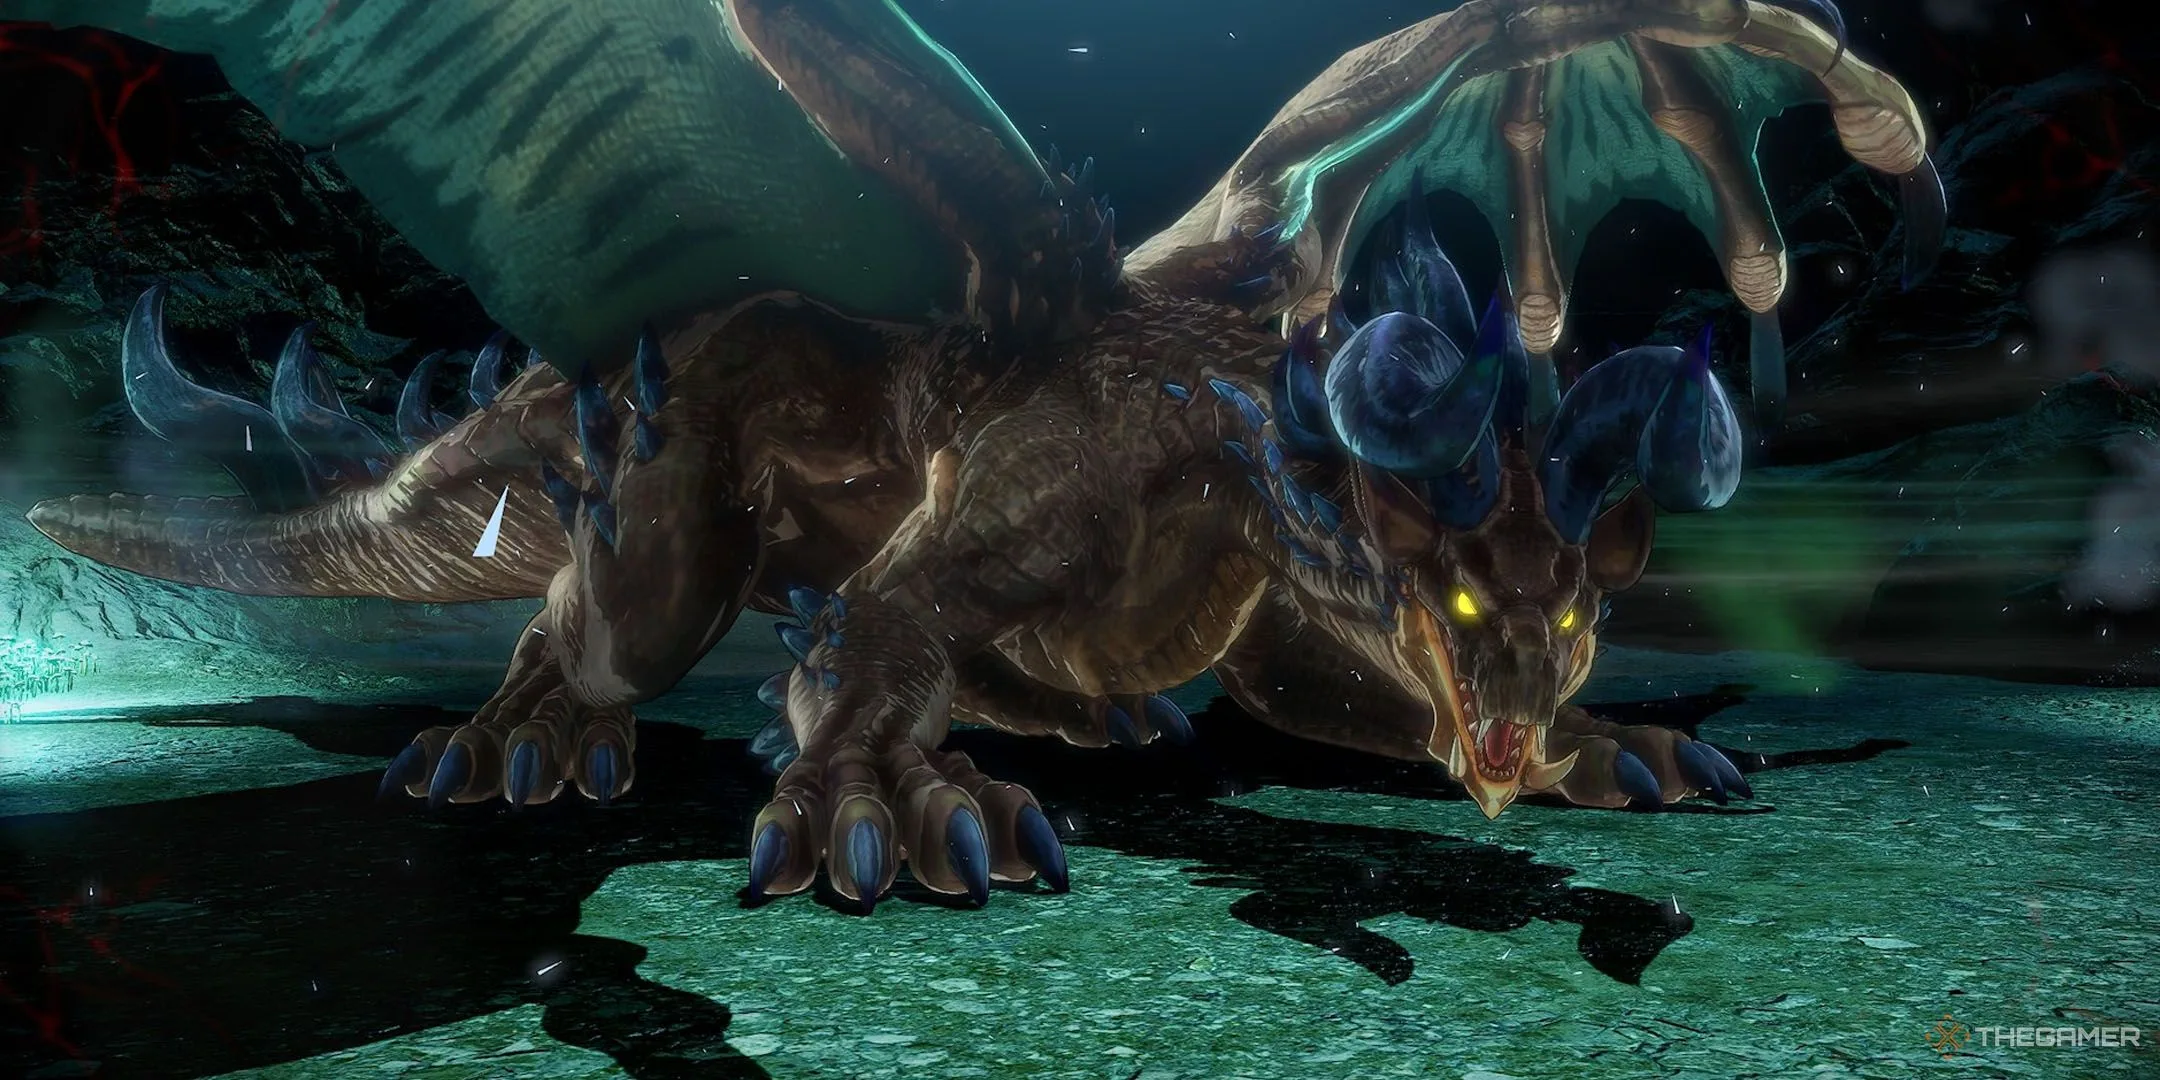
    Kokamordos Terror of the Skies is located on the fifth floor of the Manor of the Ascendant dungeon in the Principality of Oceana. Thankfully, there are no additional requirements needed for it to spawn.

    Movesets and Affinities

    Here’s a quick look at Kokamordos’ weaknesses and affinities:

    Affinity Status
    Slash —
    Pierce Weak
    Strike —
    Fire Immune (heals it)
    Ice Weak
    Electric —
    Wind —
    Light —
    Dark —

    Moveset:

    • Dark Breath: A Dark attack hitting all party members.
    • Hell Thrust: A physical attack targeting one member that reduces their defense.
    • Gabouat: Deals Fire damage to all members.
    • Vidyartha: Greatly lowers a single target’s Attack and Defense.
    • Peck of Death: Targets an ally lacking Rakukaja and can instantly eliminate them.
    • Mudodyne: A Dark magic attack on one member with a risk of instant death.

    Battle Strategy

    On your first turn, prioritize boosting your defenses with Marakukaja, then exploit Ice and Pierce weaknesses as much as possible. Kokamordos employs a mix of Fire and Dark attacks and can also debuff your party’s attack and defense. Be ready to heal and use Dekunda to remove any debuffs.

    Kokamordos tends to focus on allies without the benefit of Rakukaja—ensure that you keep this buff active.

    If you manage to maintain Marakukaja and adequately heal your team, the battle should go smoothly. Utilize your Synthesis Skills to maximize Ice and Pierce damage, and Kokamordos will soon be defeated.

    Rewards for Defeating Kokamordos Terror of the Skies

    By completing this bounty, you’ll receive 105,000 reeve and four points of Courage. Additionally, defeating Kokamordos grants you the Medic Greaves and the Cockatrice Crest, a key item needed to finalize the bounty.

    As you brave through Metaphor: ReFantazio, may your encounters be victorious!

  • Legacy of Shadows: Discovering Foes and Riches Within the Ascendant Manor in Metaphor: ReFantazio

    Legacy of Shadows: Discovering Foes and Riches Within the Ascendant Manor in Metaphor: ReFantazio

    If you’re taking on the ‘Cockatrice In The Clouds’ bounty in Metaphor: ReFantazio this September, you’re in for quite an adventure at the Manor of the Ascendant near Port Brilehaven. This dungeon is packed with various monsters, but it’s also rich in treasure hiding in corners and cracks, just waiting for you to uncover it.

    Here’s a detailed guide to this dungeon, covering all the creatures you’ll face, the loot available, and other points of interest. Let’s dive in!

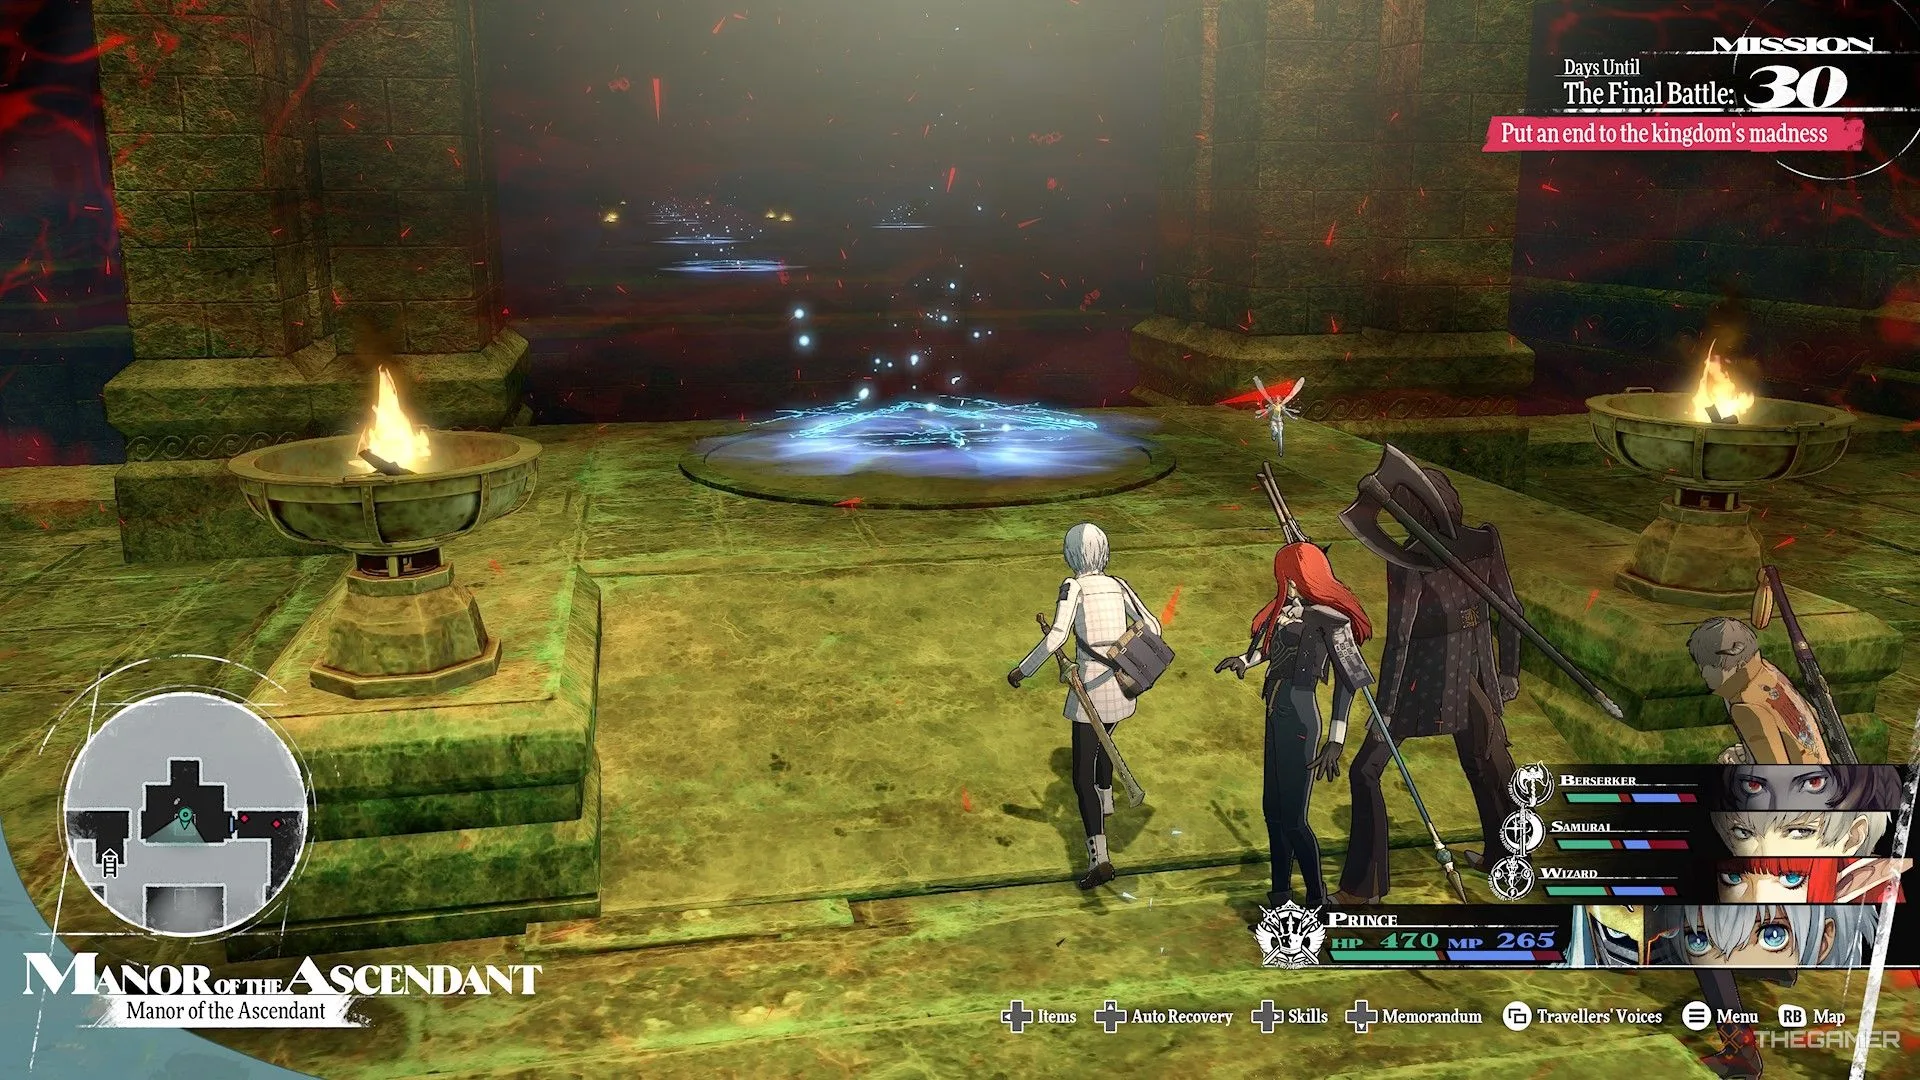
    Navigating the Manor of the Ascendant

    As you step into the first room, you’ll notice a large platform to the north, which doesn’t seem to have any function at the moment.

    Later on, these platforms will become portals once activated.

    To progress, you should turn left towards the next room where the portal pedestal is located, and then take the crawlspace on your right to move to the next area, following the map and climbing a ladder.

    In the next area, you can head directly south through a crawlspace to find another room with an item.

    On the second floor, make your way east across the narrow platforms. You’ll find a few optional items here (details below).

    In the corridor leading north, take the crawlspace to your left to access a new area with a Gold Beetle.

    You can also head north and descend the ladder to find an item on the first floor.

    To make progress, you should take the crawlspace on your right and follow it down to the southernmost ladder on the map. After descending, collect the item immediately on your right, and then follow the path north to a room with an inactive portal.

    Enter the crawlspace to the north to reach the next section and continue moving further north. Use the Move Contraption at the room’s northern end to activate all the portal platforms throughout the dungeon.

    Now that you’ve activated the portals, you can easily return to different sections. Each portal in the north, east, south, and west connects to a matching pair in the center of the map.

    Using these portals will transport you back and forth seamlessly.

    There’s one extra portal in the center, and this will take you up to the third floor.

    Make your way through the most central portal (the lower of the two northern ones) to reach the third floor. From here, you can go either right or left since both paths lead to the same room. On the fourth floor, take either of the southern paths to get to the fifth floor, but don’t forget to look for treasure chests along the way.

    On the fourth floor, enter the central chamber and take the crawlspace south to reach the room with two chests. Grab your loot before continuing your journey.

    Once you’ve taken either of the southern paths to the fifth floor, it’ll be a direct route to the room where Kokamordos — the Terror of the Skies — awaits you.

    Notable Locations in the Manor of the Ascendant

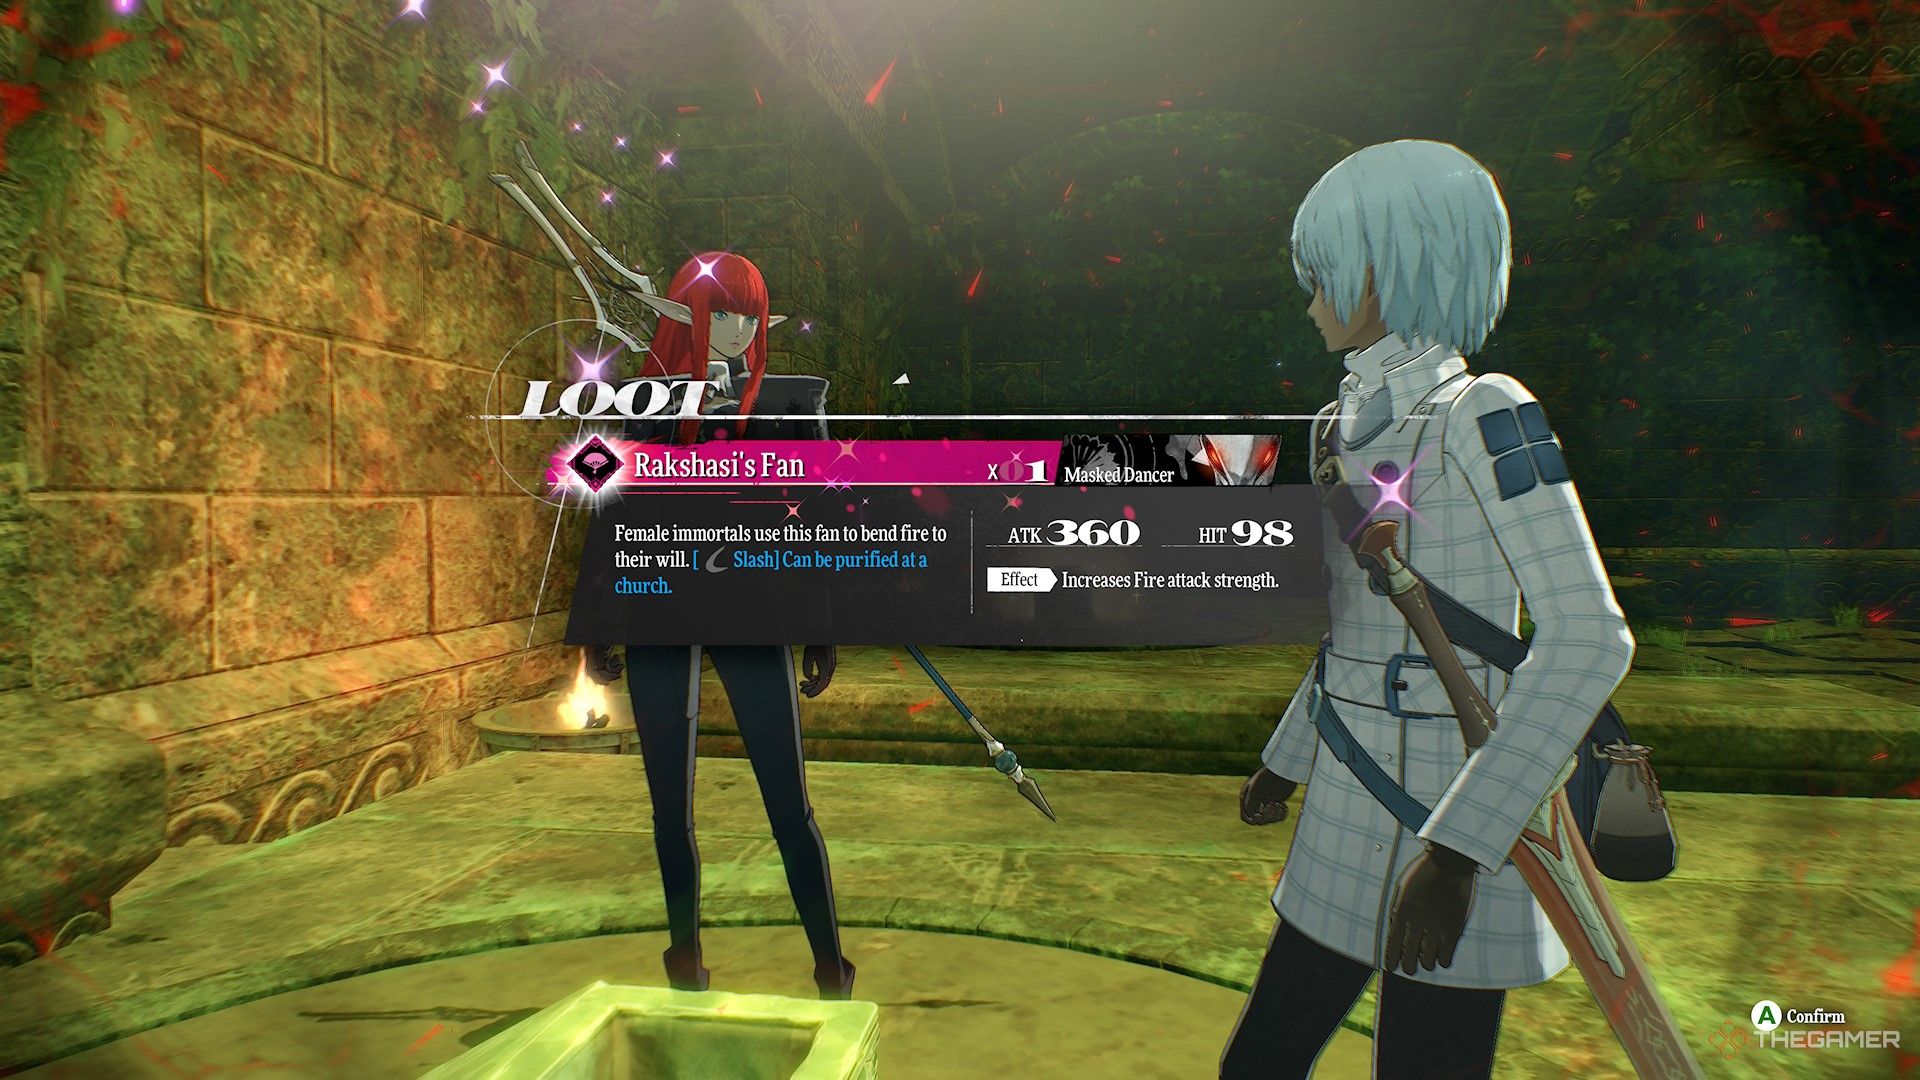
    Finding the Rakshashi's Fan treasure in Metaphor ReFantazio.

    You can refer to the earlier sections for a complete breakdown of each floor and where to find the items listed.

    This area features multiple floors and hidden paths, which is why we’ve created a detailed walkthrough at the top to assist you in navigating the manor.

    Items

    Item

    Location

    First Floor

    Tainted Polearm

    In the first chamber you enter, located to the right at the dead end.

    Magla Injection

    Found in the dead end on the western side of the map.

    Talisman of the Femme

    Located in the eastern dead end, accessible by descending from the second floor.

    Graced Water

    On the eastern side, found in the southern dead end which can be reached via a ladder.

    Second Floor

    Dragonblood Sap

    In the dead end at the southern edge of the map, accessible via a crawl space going south.

    Gold Beetle

    Located in the dead end at the northern edge, reachable through a crawl space heading west.

    Fourth Floor

    Rakshasi’s Fan

    In a treasure chest to the left after using the crawl space south.

    Heavenly Raiment

    In a treasure chest to the right after taking the crawl space south.

    Miscellaneous

    Point Of Interest

    Location

    Talkative Tooth

    Found in the corner on the southern edge after turning left upon entering the dungeon. Provides tips to boost your defense against Kokamordos.

    Move Contraption

    Located at the north of the second-floor map; activating this switch enables the portals throughout the dungeon.

    Quiet Tooth

    On the third floor, directly north of the main chamber; it offers strategies to use Ice against Kokamordos.

    Plateau Mirage

    Located on the fifth floor, just before entering the room leading to Kokamordos.

    Enemies in the Manor of the Ascendant

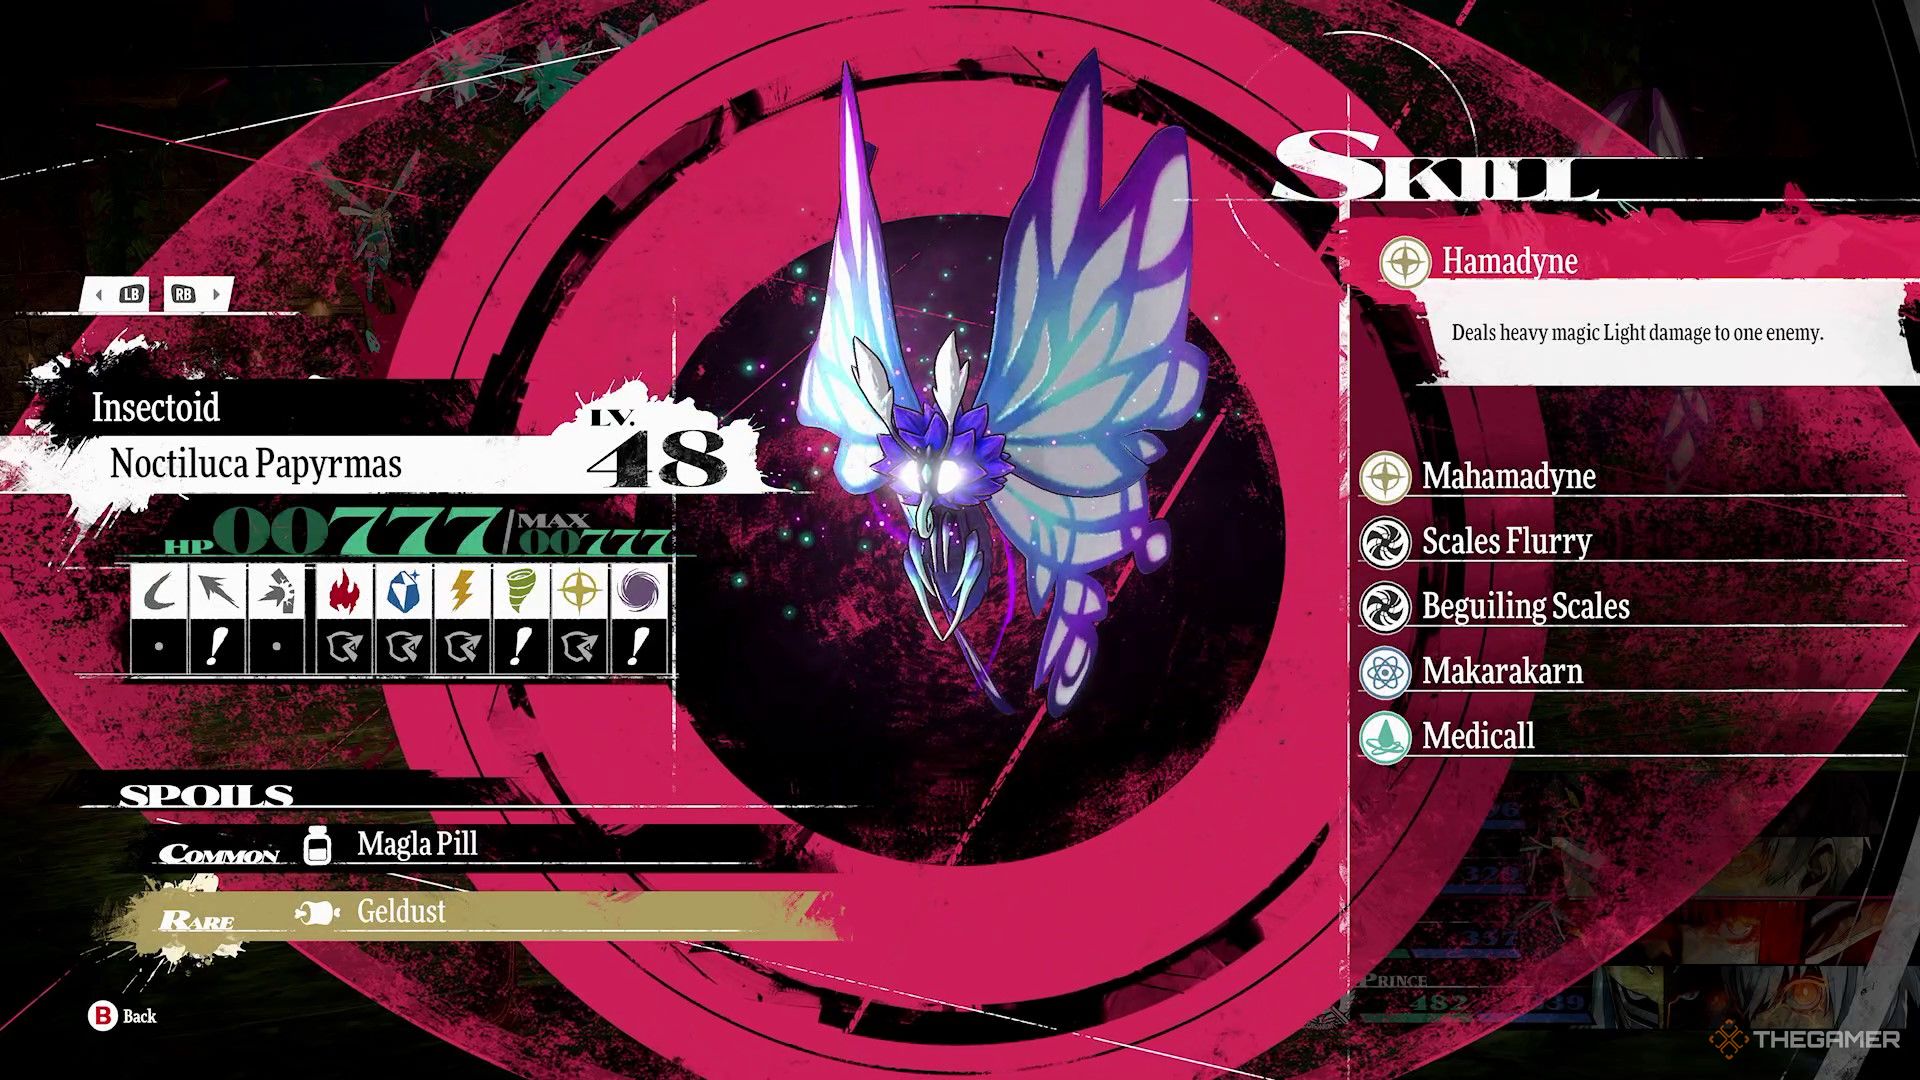
    Noctiluca Papyrmas stat screen in Metaphor Refantazio.

    Most of the enemies in this dungeon have weaknesses to Fire and Pierce, so you shouldn’t have too much trouble overall. Once you conquer Kokamordos, it won’t show up again.

    Enemy

    Notes

    Ostoflo

    Weak to Fire and Light, blocks Ice; resistant to Lightning, and takes no damage from Dark.

    Noctiluca Papyrmas

    Weak to Pierce, Wind, and Dark; repels Fire, Ice, Lightning, and Light. Can inflict Charm.

    Potolpo Bru

    Weak to Lightning; blocks Strike, resistant to Fire, and repels Ice.

    Balmy Alento

    Weak to Fire; resistant to Ice, Lightning, Wind, and Dark. Light heals it and it can cause Paralysis.

    Raging Corvosta

    Weak to Pierce; repels Wind.

    Dark Elmenta

    Weak to Light; prone to fleeing on its first turn.

    Kokasadors

    Weak to Pierce and Fire; repels Ice and Dark.

    Kokamordos (Bounty Only)

    Weak to Pierce and Ice, immune to Fire.

    Next

    Metaphor: ReFantazio – Fire Dragon Mauna Boss Battle Guide

    Here’s how to drive away the Fire Dragon Mauna in the Nord Mines in Metaphor: ReFantazio.

  • Metaphor: ReFantazio – Unveiling the Secrets of Unique Experiments

    Title: ReFantazio – Understanding Unique Experiments

    ReFantazio is all about exploring intriguing experiments that push the boundaries of creativity and imagination. This platform brings together fresh ideas and innovative approaches, transforming the way we view different concepts.

    At ReFantazio, each experiment is designed to encourage curiosity and inspire new ways of thinking. Whether it’s through interactive projects, artistic endeavors, or scientific inquiries, the goal is to create a space where imagination meets experimentation.

    By breaking down complex ideas into understandable components, ReFantazio makes it easy for anyone to get involved. Each project is explained in simple terms, allowing for greater accessibility and engagement.

    Join us in this journey of discovery as we delve into the world of ReFantazio, where every experiment opens up new possibilities and invites you to think beyond the ordinary.

  • Conquering the Bandit Leader: A Guide to Overcoming Cistus Fervent Zealot in Metaphor: ReFantazio

    Conquering the Bandit Leader: A Guide to Overcoming Cistus Fervent Zealot in Metaphor: ReFantazio

    One of the last quests you can take on in Metaphor: ReFantazio is called "The Apostles of the Apocalypse". This quest has you and your companions making your way to the Disgraced Ruins, located just north of Grand Trad. As a later-game bounty, the challenges within this dungeon may be a bit more demanding, depending on your chosen difficulty setting.

    Unlocking "The Apostles of the Apocalypse" Bounty

    "The Apostles of the Apocalypse" bounty became available on September 26 and has no deadline for acceptance. You can take it on from any Recruitment Center.

    Expect to spend a day traveling to the Disgraced Ruins, so make sure to plan accordingly.

    Quest Preparation

    As with all bounties, speaking to an informant can provide valuable insights. For this quest, you’ll find the informant at the Hushed Honeybee Inn, where you can purchase information about the Zealot of the Disgraced Ruins for 3,500 reeve. However, we’ll provide you with all the necessary details right here, saving you some cash.

    If funds are tight, don’t hesitate to sell any unneeded valuables. It’s essential to have enough reeve, especially since you’ll likely be using merchant abilities that cost reeve. Additionally, ensure you have a good supply of healing items.

    Recommended Party Setup

    Depending on your difficulty level, you may need to adjust your party strategy for the best results. Here’s a breakdown of the ideal archetypes and their roles:

    Character Archetype Position Strategy
    Protagonist Healer Lineage Back This role is crucial for healing your party, especially using Patra. Consider using Light abilities, as Bandit Chief Cistus is weak to light. Removing debuffs with Dekunda can also be beneficial.
    Any Paladin/Any Front Paladins offer great defensive skills and Light magic, making them ideal for targeting Bandit Chief Cistus’s weakness. Using Marakukaja to boost defenses is a plus.
    Any Merchant Lineage Back Merchants can distract Bandit Chief Cistus and the bandits, making them miss their turns. Having a merchant on your team is essential for this task.
    Any Berserker/Mage Lineage Front/Back A Berserker is ideal for maximizing damage against the secondary boss, while a Mage can deal different elemental damage to the bandits. It’s a good idea to switch members as needed.

    Additionally, equip gear that protects against status ailments, especially against being Enraged.

    Finding Bandit Chief Cistus Fervent Zealot

    You’ll find Bandit Chief Cistus at the deepest level of the Disgraced Ruins. Fortunately, you don’t need any special conditions to trigger him.

    Phase 1: Movesets and Weaknesses

    When facing Bandit Chief Cistus, remember he’ll have two bandit allies. You can eliminate them, but he’ll likely summon them back, so it might be wiser to handle them at the end of the encounter.

    General Tips for Phase 1:

    • At the start of the fight, use Marakukaja to boost your party’s defenses.
    • Target Cistus’s weakness to Light with your most potent abilities.
    • Make sure to use merchant skills to increase the chances that Cistus and his companions miss their turns due to distractions.

    Once you defeat Bandit Chief Cistus, you’ll then need to deal with his surviving bandit allies to finish the fight before transitioning to the next boss battle.

    Phase 2: Facing Homo Sondro

    For the second phase, switching to a Berserker is crucial as Homo Sondro repels physical and electric attacks. This enemy only has a weakness to Strike, so focus your attacks here.

    Homo Sondro Strategy:

    • Make full use of your Berserker’s Synthesis Skills.
    • Stay vigilant about health, as moves like Slam Shatter and Gakandeon can inflict considerable damage.
    • You can also look for opportunities to remove buffs from Homo Sondro; while it may recast them, it uses a turn that you can exploit.

    Rewards for Defeating the Bosses

    After defeating Bandit Chief Cistus and Homo Sondro, you’ll earn 115,000 reeve and four points of Courage upon handing in the bounty at a Recruitment Center. Additionally, you’ll receive Strength Incense and a Frostbite Axe for taking down Bandit Chief Cistus, and Golden Armor for defeating Homo Sondro. Finally, you’ll obtain the Founder’s Hatchet, which you need to turn in to the Recruitment Center.

    With this strategy and preparation, you and your party should be well-equipped to tackle this challenging bounty and come out successful!