Tag: PC Games

  • ReFantazio: Conquering Kokamordo’s Skyward Terror!

    ReFantazio: Conquering Kokamordo’s Skyward Terror!

    Kokamordos: The Sky Menace

    Kokamordos, known as the Terror of the Skies, is a formidable bounty boss encountered late in Metaphor: ReFantazio. You can access this challenge by completing The Cockatrice in the Clouds bounty. Tackling these bounties not only enhances your character’s level in preparation for the final boss but also provides valuable rewards that strengthen your party.

    Understanding Boss Battles in Metaphor: ReFantazio

    As you progress in Metaphor: ReFantazio, you’ll encounter multiple bosses, some of which may prove challenging based on your team’s configuration and the Archetypes you’ve selected. Keep in mind that certain Archetypes can exploit the weaknesses of bosses, so strategizing your party composition is essential. In this guide, we’ll provide recommendations for party setups and strategies to bring down Kokamordos efficiently.

    Unlocking The Cockatrice In The Clouds Bounty

    Recruitment Center Access

    The Cockatrice in the Clouds bounty became available on September 26 and does not have a deadline. It’s advisable to complete it before finishing the game to ensure your party is adequately prepared. You can unlock this bounty at any Recruitment Center.

    Necessary Preparations

    While there’s no specific level requirement for taking on Kokamordos, remember that this is a late-game challenge. You’ll need to have flown previously to reach the designated location, which shouldn’t be an obstacle at this advanced stage.

    Items and Archetypes

    You have a wide range of Archetypes available for this boss encounter. Given that you’ve likely faced a Cockatrice earlier in the game, you should be familiar with its movements and abilities. While you can choose the Archetypes you believe are strongest, we highly recommend fielding at least one party member with the Mage Archetype for effective ice-based damage.

    Furthermore, any ice-affinity weapons will also be critical, along with skills that provide ice damage. The Marakukaja Synthesis Skill, which requires Rakukaja, is an essential support skill to keep your party alive as you’ll see later.

    Tip: To use the Marakukaja skill, you’ll need to have the Magic Knight unlocked, along with an ally from the Seeker, Knight, or Commander lineage.

    Battle Strategy and Party Composition

    Kokamordos has abilities that can debilitate your team, so come prepared with items like Revival Medicine and Balm of Life, which can be crucial given the boss’s lethal attacks. The merchant in Gloamhall also offers ice-damage items, enhancing your chances in battle.

    Recommended Team Setup:

    • Protagonist: Use the Prince Archetype.
    • Strohl: High damage dealer; Knight lineage is suggested.
    • Magic User: Opt for characters with high magic capabilities; Mage lineage is ideal.
    • Agile Fighters: Choose characters with high agility; Faker lineage can be useful.

    These selections provide not only strong damage output but also diverse abilities. For instance, using the Hadean Icecrag Synthesis Skill alongside the Prince Archetype amplifies your ice-damage capacity. Agile characters can debuff Kokamordos effectively, shortening the overall fight duration.

    Locating Kokamordos: The Ascendant Manor

    Once the bounty is unlocked, the Manor of the Ascendant will appear on your map, or it may show as the Principality of Oceana dungeon. You can easily fly there within a day’s journey.

    In order to defeat Kokamordos, you need to reach the fifth floor of the manor. Fortunately, navigating this area is straightforward, but you must pass through two crawlspaces on the second floor. Once you reach the area with portals, take the center one to ascend to the third floor. After that, veer towards any southern paths on the fourth floor to access the fifth floor where you’ll confront Kokamordos.

    Defeating Kokamordos: Strategies and Rewards

    Kokamordos can be a challenging foe if you aren’t prepared. Here’s a quick overview of his strengths and weaknesses:

    • Strengths: Immune to Fire Damage
    • Weaknesses: Vulnerable to Piercing and Ice Damage

    Kokamordos wields a diverse set of moves, including powerful dark attacks and debuffs that can significantly hinder your progress. You can effectively manage the battle by using the Marakukaja right away to bolster your party’s defenses, followed by a tactical assault utilizing ice and piercing attacks.

    Keep your party healed and cleanse any debuffs quickly. If you keep this strategy in play, you should be able to defeat Kokamordos relatively swiftly.

    Post-Battle Rewards

    Upon successful completion of the encounter, you will be awarded 105,000 reeve and four points of Courage. To finalize the bounty, don’t forget to return to the Recruitment Center with the Cockatrice Crest obtained from defeating Kokamordos, along with a set of Medic Greaves. Completing this bounty marks a significant achievement in Metaphor: ReFantazio.

    Video Reference

    For visual learners, check out the video by YouTuber Naz talgic for a playthrough of the boss battle.

  • ReFantazio: Unlocking All Archetypes Through Metaphor

    ReFantazio: Unlocking All Archetypes Through Metaphor

    Metaphor: ReFantazio reveals over 40 unique Archetypes, beginning with 14 distinct lineages. With the game’s innovative battle mechanics, players can customize their party composition and playstyle, offering limitless possibilities for each playthrough and numerous strategies to gain an advantage in combat. To fully harness your abilities, strive to unlock every available Archetype to access exclusive skills.

    Drawing inspiration from well-known ATLUS games, Metaphor: ReFantazio mirrors the Personas found in Persona 3: Reload and its predecessors. In both titles, Archetypes enhance party members during battles by providing new skill sets that can deal damage, heal, or boost stats. As a result, these Archetypes become essential assets in battles, providing multiple options even in challenging scenarios.

    All Archetypes & Main Features

    Unlock 14 Lineages for Over 40 Archetypes

    As showcased by ATLUS West, Metaphor: ReFantazio boasts a total of 46 Archetypes, grounded in 14 foundational lineages. Each lineage is introduced by an Origin Archetype, with advanced forms known as Adept and Elite waiting to be unlocked as players progress, amplifying the basic skills of their Origin counterparts. Some Archetypes even offer multiple Adept or Elite variations for further diversification.

    Every Archetype in Metaphor: ReFantazio comes preloaded with valuable skills and strengths to aid you in battle. PushSquare has curated a list that includes the following Archetypes:

    • Seeker
    • Warrior
    • Mage
    • Knight
    • Healer
    • Merchant
    • Brawler
    • Gunner
    • Thief
    • Faker
    • Commander
    • Masked Dancer
    • Summoner
    • Berserker
    • Magic Seeker
    • Swordmaster
    • Wizard
    • Magic Knight
    • Cleric
    • Pugilist
    • Assassin
    • Sniper
    • General
    • Soul Hacker
    • Samurai
    • Elemental Master
    • Warlock
    • Paladin
    • Dark Knight
    • Saviour
    • Tycoon
    • Martial Artist
    • Dragoon
    • Ninja
    • Trickster
    • Warlord
    • Persona Master
    • Devil Summoner
    • Destroyer
    • Prince
    • Royal Warrior
    • Royal Knight
    • Royal Thief
    • Royal Masked Dancer
    • Royal Summoner
    • Royal Berserker

    In addition to the Origin, Adept, and Elite forms, players can also discover Royal Archetypes that are exclusive to selected characters in Metaphor: ReFantazio. These Royals embody the game’s most powerful Archetypes, showcasing enhanced skills and unique abilities that are not available to the standard types.

    How to Unlock Every Archetype

    Gaining Followers & Climbing the Ranks

    In Metaphor: ReFantazio, acquiring new Archetypes largely involves forging new bonds with Followers and enhancing Bond Ranks—similar to Social Links in Persona 3: Reload. Certain characters grant access to exclusive Royal Archetypes, the most potent forms in select lineages, so strategically choose which bonds to cultivate to maximize your endgame options. Here’s how to unlock all 46 Archetypes in Metaphor: ReFantazio:

    ARCHETYPE HOW TO UNLOCK
    Seeker – Unlock More as a Follower
    – 500 MAG
    Warrior – Unlock Strohl as a Follower
    – 500 MAG
    Mage – Unlock Gallica as a Follower
    – 500 MAG
    Knight – Unlock Hulkenberg as a Follower
    – 1,000 MAG
    Healer – Unlock Maria as a Follower
    – 1,000 MAG
    Merchant – Unlock Brigitta as a Follower
    – 2,000 MAG
    Brawler – Unlock Catherina as a Follower
    – 1,000 MAG
    Gunner – Unlock Neuras as a Follower
    – 1,200 MAG
    Thief – Unlock Heismay as a Follower
    – 1,200 MAG
    Faker – Unlock Alonzo as a Follower
    – 2,000 MAG
    Commander – Unlock Bardon as a Follower
    – 2,400 MAG
    Masked Dancer – Unlock Junah as a Follower
    – Reach Mage Rank 15
    – Reach Thief Rank 10
    – 9,000 MAG
    Summoner – Unlock Eupha as a Follower
    – Reach Seeker Rank 15
    – Reach Faker Rank 10
    – 9,000 MAG
    Berserker – Unlock Basilio as a Follower
    – Reach Warrior Rank 10
    – Reach Brawler Rank 10
    – Reach Knight Rank 10
    – 9,000 MAG
    Magic Seeker – Reach Bond Rank 3 with More
    – Reach Seeker Rank 20
    – 7,200 MAG
    Swordmaster – Reach Bond Rank 3 with Strohl
    – Reach Warrior Rank 20
    – 7,200 MAG
    Wizard – Reach Bond Rank 3 with Gallica
    – Reach Mage Rank 20
    – 7,200 MAG
    Magic Knight – Reach Bond Rank 3 with Hulkenberg
    – Reach Knight Rank 20
    – Reach Mage Rank 10
    – 8,100 MAG
    Cleric – Reach Bond Rank 3 with Maria
    – Reach Healer Rank 20
    – 7,200 MAG
    Pugilist – Reach Bond Rank 3 with Catherina
    – Reach Brawler Rank 20
    – 9,000 MAG
    Assassin – Reach Bond Rank 3 with Heismay
    – Reach Thief Rank 20
    – 9,000 MAG
    Sniper – Reach Bond Rank 3 with Neuras
    – Reach Gunner Rank 20
    – Reach Seeker Rank 10
    – 9,000 MAG
    General – Reach Bond Rank 3 with Bardon
    – Reach Commander Rank 20
    – 12,000 MAG
    Soul Hacker – Reach Bond Rank 7 with More
    – Reach Magic Seeker Rank 20
    – 20,000 MAG
    Samurai – Reach Bond Rank 7 with Strohl
    – Reach Swordmaster Rank 20
    – Reach General Rank 10
    – 20,000 MAG
    Elemental Master – Reach Bond Rank 8 with Gallica
    – Reach Wizard Rank 20
    – 20,000 MAG
    Warlock – Reach Bond Rank 8 with Gallica
    – Reach Wizard Rank 20
    – Reach Assassin Rank 10
    – 20,000 MAG
    Paladin – Reach Bond Rank 7 with Hulkenberg
    – Reach Magic Knight Rank 20
    – 20,000 MAG
    Dark Knight – Reach Bond Rank 7 with Hulkenberg
    – Reach Magic Knight Rank 20
    – Reach Wizard Rank 10
    – 20,000 MAG
    Saviour – Reach Bond Rank 8 with Maria
    – Reach Cleric Rank 20
    – 20,000 MAG
    Tycoon – Reach Bond Rank 8 with Brigitta
    – Reach Merchant Rank 20
    – Reach Commander Rank 10
    – 30,000 MAG
    Martial Artist – Reach Bond Rank 8 with Catherina
    – Reach Pugilist Rank 20
    – 25,000 MAG
    Dragoon – Reach Bond Rank 8 with Neuras
    – Reach Sniper Rank 20
    – Reach Magic Knight Rank 10
    – 30,000 MAG
    Ninja – Reach Bond Rank 7 with Heismay
    – Reach Assassin Rank 20
    – Reach Sniper Rank 10
    – 20,000 MAG
    Trickster – Reach Bond Rank 8 with Alonzo
    – Reach Faker Rank 20
    – 30,000 MAG
    Warlord – Reach Bond Rank 8 with Bardon
    – Reach General Rank 20
    – 30,000 MAG
    Persona Master – Reach Bond Rank 6 with Junah
    – Reach Masked Dancer Rank 20
    – Reach Faker Rank 10
    – 30,000 MAG
    Devil Summoner – Reach Bond Rank 6 with Eupha
    – Reach Summoner Rank 20
    – 30,000 MAG
    Destroyer – Reach Bond Rank 6 with Basilio
    – Reach Berserker Rank 20
    – 30,000 MAG
    Prince – Unique to the protagonist
    – Unlocked through natural story progression
    Royal Warrior – Unique to Strohl
    – Unlocked in late-game
    – Reach Bond Rank 8 with Strohl
    – Reach Samurai Rank 20
    – Reach Warlord Rank 20
    – 30,000 MAG
    Royal Knight – Unique to Hulkenberg
    – Unlocked in late-game
    – Reach Bond Rank 8 with Hulkenberg
    – Reach Paladin Rank 20
    – Reach Dark Knight Rank 15
    – Reach Elemental Master Rank 15
    – 30,000 MAG
    Royal Thief – Unique to Heismay
    – Unlocked in late-game
    – Reach Bond Rank 8 with Heismay
    – Reach Ninja Rank 20
    – Reach Dragoon Rank 15
    – Reach Tycoon Rank 15
    – 30,000 MAG
    Royal Masked Dancer – Unique to Junah
    – Unlocked in late-game
    – Reach Bond Rank 8 with Junah
    – Reach Persona Master Rank 20
    – Reach Trickster Rank 20
    – 30,000 MAG
    Royal Summoner – Unique to Eupha
    – Unlocked in late-game
    – Reach Bond Rank 8 with Eupha
    – Reach Devil Summoner Rank 20
    – Reach Soul Hacker Rank 20
    – 30,000 MAG
    Royal Berserker – Unique to Basilio
    – Unlocked in late-game
    – Reach Bond Rank 8 with Basilio
    – Reach Destroyer Rank 20
    – Reach Martial Artist Rank 20
    – 30,000 MAG

    In addition to forming connections with other characters, advancing through the Archetype ranks and spending earned MAG (Magla) is essential for unlocking new Archetypes. This in-game currency also allows access to exclusive skills, making it a crucial part of your journey in Metaphor: ReFantazio.

    Source: Robert Ramsey/PushSquare

    Video Credit: Official ATLUS West/YouTube

    Platform(s): PS4, PS5, PC, Xbox Series X, Xbox Series S
    Release Date: October 11, 2024
    Developer(s): Studio Zero
    Publisher(s): Atlus
    OpenCritic Rating: Mighty

  • Defeating Grotesque Guptauros: A ReFantazio Boss Strategy

    Defeating Grotesque Guptauros: A ReFantazio Boss Strategy

    Facing Grotesque Guptauros Early in Metaphor: ReFantazio

    In Metaphor: ReFantazio, players encounter several formidable bosses, one of which is Grotesque Guptauros. This tough opponent appears early in the game, specifically within the bustling city of Grand Trad, the main hub of Euchronia. To confront Grotesque Guptauros, players can embark on a side quest titled A Bullish Embargo, available from Brigitta, the owner of the Igniter Shop. Completing this quest will guide you to the dungeon where the boss battle awaits, but be warned – it’s not a straightforward fight without proper preparation.

    Tailoring Your Party for Success

    The difficulty of boss encounters in Metaphor: ReFantazio largely hinges on your party setup. Players have the freedom to mix different archetypes and level them up, which adds a unique strategy aspect. However, this flexibility can also pose challenges if you approach the battle without a solid plan.

    Preparing for the Battle against Grotesque Guptauros

    Key Archetypes and Moves

    To effectively prepare for the showdown with Grotesque Guptauros, consider unlocking the Brawler archetype to utilize the Synthesis move Hammer of Justice. If you haven’t acquired it yet, the Warrior archetype can serve as a replacement; you can opt for the Jump Thrust move instead.

    Your optimal setup would involve either two Knights and a Brawler or two Knights and a Warrior. This configuration helps manage Grotesque Guptauros’ anger during the fight. Ensure your Brawler or Warrior possesses the inherited trait Medi, as it’s crucial for maintaining your party’s health. On the Knights, equipping the Heat Up inherited trait will boost your physical attack abilities.

    Building Your Knights for Battle

    Consider configuring your two Knights with distinct roles. One should focus on dealing damage while the other takes on a support role. For the damage dealer, gear up with as much strength as possible, while the support Knight should prioritize agility. This arrangement allows the support Knight to act first, enabling them to apply valuable bonuses and buffs for the damage dealer to exploit effectively.

    Avoiding Dangerous Archetypes

    Choose the Brawler or Warrior archetype over a Mage or Healer for this fight. The latter archetypes tend to provoke the boss and trigger more intense attacks, making the encounter significantly tougher.

    Additionally, prioritize boosting the magic of your Brawler or Warrior so you can use Medi frequently and keep your party intact, compensating for the lack of a traditional healer. While there are various archetypes available that could work, this particular strategy is highly recommended.

    Best Party Composition Against Grotesque Guptauros

    Initially, your options for playable characters in Metaphor: ReFantazio may be limited. In this strategy, make your main character a Brawler or Warrior, and assign Strohl and Hulkenberg as the Knights, with Strohl serving primarily as your damage dealer and Hulkenberg as your support Knight.

    Exploiting the Boss’s Weaknesses

    Grotesque Guptauros has specific weaknesses you can exploit, which will help in choosing your moves wisely. Notably, he’s weak to Pierce and Ice attacks while resistant to Fire.

    Boss Attacks to Anticipate

    Grotesque Guptauros comes with a variety of powerful moves:

    • Charge: Strengthens his next attack
    • Attack: Inflicts physical damage on a party member
    • Powerful Pulverizer: Deals significant damage to one party member
    • Slam Shatter: Attacks all party members
    • Heavy Rush: Another strong attack directed at one party member
    • Frenzy: Inflicts substantial damage to the entire party
    • Reckless Charge: Buffs that Grotesque Guptauros has will fade (only in easy mode)

    It’s crucial to note that using a Mage or Healer archetype will prompt the boss to unleash his strongest attacks more frequently.

    Winning Strategies Against Grotesque Guptauros

    Start the battle by maximizing your party’s healing capabilities. The boss’s heavy-hitting attacks can quickly eliminate members of your team if you’re not vigilant, especially after he uses his Charge move, which is typically followed by a devastating Frenzy attack. Always activate Guard after seeing Charge to protect your team.

    If you’re playing the main character as a Brawler or Warrior, focus primarily on healing with moves like Medi. The support Knight should also be ready to use healing items as necessary. Your Brawler can employ Hammer of Justice to deal significant Piercing Damage to Grotesque Guptauros, or keep using Jump Thrust whenever possible.

    Incorporating Ice-based attacks like Blizz will also exploit one of the boss’s weaknesses. As you engage Grotesque Guptauros, continue applying Jump Thrust, Hammer of Justice, and healing as needed. This strategy keeps the boss weakened while allowing your team to endure his heavy hits.

    Post-Battle Rewards

    After you successfully defeat Grotesque Guptauros in Metaphor: ReFantazio, you will earn a Falchion weapon and a Brute’s Horn, which are essential for completing side quests and advancing in your journey.

    Source: YouTube/Naz talgic

  • Unlocking Angelbreath in Diablo 4: A Complete Guide

    Unlocking Angelbreath in Diablo 4: A Complete Guide

    Angelbreath has gained significant importance with the introduction of the Vessel of Hatred DLC in Diablo 4. This resource is essential for crafting powerful elixirs that can give you an edge when facing difficult foes. Elixirs are consumable items that temporarily enhance your damage or resistance during battles, so you’ll need to gather a good amount of Angelbreath to keep your stock plentiful.

    The release of the Vessel of Hatred DLC has opened up new uses for this herb. While other crafting materials, like Ingolith, are reserved for Masterworking weapons and armor in Diablo 4, Angelbreath serves two primary purposes. It is a critical component in creating elixirs and is also necessary for rerolling affixes on your equipment. While players could gather enough of this herb in the main game, the new content demands much more of it.

    How to Acquire Angelbreath in Diablo 4

    Earn Over 300 Per Hour

    There are several ways to collect Angelbreath, with Helltides, bosses, mystery chests, and dungeons standing out as the most effective methods. According to Dalkora on YouTube, participating in Helltide events is the best approach. He has analyzed the various activities and confirmed that this method yields about 300 to 500 Angelbreath each hour from Helltides.

    Avoid fighting the Blood Maiden, as this can consume too much time. Instead, focus on rotating between public events and eliminate enemies along your path. You can collect cinders from defeated foes to unlock chests, and look out for Harbingers, which will appear as a skull icon on the mini-map. Taking these tough enemies down can also reward you with Angelbreath.

    What Is Angelbreath Used For?

    Reset Stats in the DLC

    As previously mentioned, Angelbreath is crucial for crafting elixirs and rerolling gear affixes. You can create elixirs at The Alchemist, while adjustments to gear are handled at The Occultist. Players who have been involved with the game from the start may have a good stash of Angelbreath, but it’s essential to remember that stock will deplete quickly. Gathering this herb can be time-consuming, but it’s necessary for optimizing your equipment. The game revolves around obtaining the best loot and tackling ever-increasing challenges, a tradition that Diablo 4 continues to uphold.

    Source: Dalkora

  • Silent Hill 2 Remake: Complete Guide to Gallows Puzzle Solutions

    Silent Hill 2 Remake: Complete Guide to Gallows Puzzle Solutions

    In the Silent Hill 2 Remake, players encounter various puzzles necessary for advancing the storyline, one of which takes place at the gallows. James Sunderland’s journey starts at Brookhaven Hospital, but soon he ventures to various other locations, including Toluca Prison.

    As players progress through the game, James eventually arrives at Toluca Prison, a location rich with challenges and items. After completing a puzzle that involves balancing weights, James must head back to the Yard for the next challenge, which involves solving riddles.

    Gallows Puzzle Poems and Answers

    Match Riddles and Uncover the Innocent

    After completing the Weights and Scales puzzle in Silent Hill 2 Remake, James will receive an Execution Lever. This lever is crucial for unlocking the next puzzle based on riddles at the Gallows. By using the Execution Lever on the Gallows, you will activate the mural in front of you.

    Interact with the plaques to read the couplets. This puzzle involves matching verses and solving the riddle. Like other challenges in Silent Hill 2 Remake, the Gallows Puzzle varies by difficulty level, resulting in one or two answers available. The poems also change with the difficulty, providing different answers for Standard and Hard modes.

    You will find a set of six poems, each linked to an illustrated prisoner on trial for murder; however, one of them acted in self-defense and is innocent. After matching the lines of the poems, your task is to identify the innocent prisoner.

    The six prisoners include an arsonist, a thief, a man who kidnapped and killed his daughter’s kidnapper, a vandal, a murderer, and a prisoner who killed their own mother.

    The poems present riddles. Solving them will reveal which prisoner is innocent. Below are the poems and potential answers for each difficulty level.

    Difficulty Mode: Light

    In Light difficulty, unlike the Standard and Hard modes in Silent Hill 2 Remake, there is only one possible answer for each poem. This makes it easier to deduce who the innocent prisoner is. Here are the poems and their corresponding answers.

    Gallows Poem #1

    Hallowed was the place, this one set ablaze.

    Possible Answer #1

    T’was the home of evil, it had to be razed.

    Gallows Poem #2

    This one took from others, T’was a sinful deed.

    Possible Answer #1

    Stealing not to eat, but to feed his own greed.

    Gallows Poem #3

    This one, he did kidnap, his beloved daughter.

    Possible Answer #1

    In a fit of anger, bloody end he brought her.

    Gallows Poem #4

    This one broke the lock, to steal, I’ll tell you plain.

    Possible Answer #1

    One more place to plunder, one more wrongful gain.

    Gallows Poem #5

    This one dared to take his own mother’s life.

    Possible Answer #1

    Did it just for pleasure, not over a strife.

    Gallows Poem #6

    This one clenched his fist, and has pulled no punch.

    Possible Answer #1

    Turned against his bully, turned his brain to mulch.

    Difficulty Mode: Standard

    In Standard difficulty of the Silent Hill 2 Remake, you will find two possible answers for each poem, which differ from the Light difficulty. Below are the new poems and possible answers.

    Gallows Poem #1

    For your grace I do not plead, For the flames I did set free, Sisters shrieked, and children cried, No one made it out alive.

    Possible Answer #1

    Though the young ones’ deaths I mourn, Their tormentors are no more, On young souls the nuns did prey, Took their innocence away.

    Possible Answer #2

    I watched them burn, I heard them cry, I felt a soothing warmth inside, It felt so good, I cannot lie, And for my bliss, they had to die.

    Gallows Poem #2

    The wealth of others I did take, The seventh statute I did break, And yet my deeds I don’t regret, I had my reasons, that is that.

    Possible Answer #1

    The reason, if I have to say, Was to survive another day, To them, it was a loaf of bread, To me, a cherished step ahead.

    Possible Answer #2

    What were those reasons you might ask, The truth allow me to unmask, I see. I crave, I need, I take, ‘Tis all the sense it needs to make.

    Gallows Poem #3

    I took the child you are quite right, Carried her off into the night, She did not scream, she did not bawl, I was her father, after all.

    Possible Answer #1

    Forgive me, child, for I have failed, To save you from her wretched ways, She whom I loved, who gave you life, A monster hiding in plain sight.

    Possible Answer #2

    My only daughter, joy of days, They wanted to take you away, Hush, little baby, and be still, If I can’t have you, no one will.

    Gallows Poem #4

    Once the sun had ceased its reign, I cut through the rusty chain, Pushed the door open, snuck within, and Filled my pockets to the brim.

    Possible Answer #1

    So my guilt is plain to see, I had robbed the pharmacy, Yet, I did so not for gain, But so I could ease the pain.

    Possible Answer #2

    I departed with great haste, Leaving not a single trace, Ever faithful to my creed, All is right, which feeds my greed.

    Gallows Poem #5

    Mommy dearest, mommy sweet, Your love for me was so deep, “Why, oh, why?”, you shouted out, When my knife pierced through your heart.

    Possible Answer #1

    You broke my legs, I couldn’t walk, You pulled my teeth, I couldn’t talk, You fed me pills to slow my mind, I took your life ‘fore you took mine.

    Possible Answer #2

    You were, oh, so kind to me, Filled my heart with joy and glee, In the end, it was for naught, “Why, oh, why?”, you ask. Why not?

    Gallows Poem #6

    I waited long, I bid my time, I waited to commit my crime, The man appeared, he saw me not, A bloody end is what he got.

    Possible Answer #1

    In truth, he was less man than beast, And on my flesh and soul he’d feast, My will to live he’d try to break, There is so much a man can take.

    Possible Answer #2

    In truth, I did not hesitate, As my blade sealed the poor man’s fate, He knew the rules, they are quite clear, Go against me, your end is near.

    Difficulty Mode: Hard

    The Hard difficulty features mostly poems with two possible answers, but one poem has three answers. The poems differ from earlier modes. Fortunately, regardless of the difficulty you select, the correct choice is always the Possible Answer #1.

    Gallows Poem #1

    Under the veil of nightfall, in the ink of dusk, A blazing inferno engulfs the wooden husk. Screams of the innocent fill the night sky, He, who hell let loose, now watches them die.

    Possible Answer #1

    Death of the blameless, a damnable sin, Wracked with guilt, his soul withers from within, Yet among the pure, the vile also would dwell. Demons dressed in piety, they perished as well.

    Possible Answer #2

    A contorted chill dances on his spine, As their souls fly forth on Thanathos’ sigh. No sign of regret, not a tinge of guilt, But a fiery urge to destroy what God built.

    Gallows Poem #2

    In twilight’s grasp, a thief emerges sly, Through the veils of night, his purpose veiled, awry. His nimble fingers, like whispers they glide, In the goods of others, his needs doth reside.

    Possible Answer #1

    With hands atremble, he seizes what he must, A wretched dance, fueled by hunger’s thrust. Poverty’s embrace fuels his misdeeds, Thieving to survive, the barest of needs.

    Possible Answer #2

    His avarice driving every cunning theft, No conscience stirs, no remorse is left. Not a hunger’s pang, nor a desperate need, but a heart consumed with relentless greed.

    Gallows Poem #3

    In shroud of twilight, a tale doth unfold, Where the shadows dance, their secrets are told. A shadowy figure, his motives unclear, Steals his own kin, one he should hold dear.

    Possible Answer #1

    Amidst the moon’s glow, a desperate truth, The man’s life of pain and in peril, forsooth. Sealed within these walls, his salvation lies, Steal and live on, the ultimate prize.

    Possible Answer #2

    A tragic fruition, a mother’s despair, Her heiress undone by the one she once loved. Forsooth, it was not love that guided his clasp, But a spiteful avarice one struggles to grasp.

    Gallows Poem #4

    In clandestine steps, darkness as his guide, The man ventures deeper, where riches doth hide. An unseen intruder with motives untold, His hands eager to touch, to grab and to hold.

    Possible Answer #1

    Amidst the moon’s glow, a desperate truth, The man’s life of pain and in peril, forsooth. Sealed within these walls, his salvation lies, Steal and live on, the ultimate prize.

    Possible Answer #2

    Beneath moonlit guise, a villain’s design, He trespasses where treasures brightly shine. With a selfish hand, with greed as his creed, Claims the spoils, indulging every single need.

    Possible Answer #3

    A contorted chill dances on his spine, As their souls fly forth on Thanathos’ sigh. No sign of regret, not a tinge of guilt, But a fiery urge to destroy what God built.

    Gallows Poem #5

    With her senses falling, she looks, mouth agape, At the one who forced her spirit to escape. Cold steel pierces vein, a sanguine flood, Gazing back at her, her own flesh and blood.

    Possible Answer #1

    ‘Twas a twisted fate that forced the man’s hand, A son at mother’s mercy, his life in hell he’d spend. Forsooth, not all killings are ones of ill will, For the choice was clear, ’twas either her, or him.

    Possible Answer #2

    Desperation’s grip suffocates the air, The attacker’s past, a tale of despair. A victim turned assailant, a tragic decree, On this night of judgment, pain sets both men free.

    Gallows Poem #6

    In shadows cast, the hunter lies in wait, His violent intent cloaked in a veil of fate. An enigma unfolds, motives undefined, As the prey approaches, their fates intertwine.

    Possible Answer #1

    As the spark of life from her eyes did flee, The man held his gaze with wicked glee. An unfeeling sigh escapes the man’s lips, A thirst for more bloodshed begins to take shape.

    Possible Answer #2

    The victim’s eyes wide with terror and fright, The attacker’s nature now comes into light. Vicious is his cause and marred with dark pride, A show of brute strength, for all to abide.

    How to Solve the Gallows Puzzle

    Select the Correct Noose to Progress

    James from Silent Hill 2 Remake Standing in Front of a Noose

    After piecing together the poems and corresponding answers in the Silent Hill 2 Remake, you will need to identify which prisoner is innocent. Look for the nooses labeled with Roman numerals I, II, III, IV, V, and VI, corresponding to numbers one through six. Your goal is to stand beneath the number that indicates the innocent prisoner.

    The identity of the innocent prisoner varies with each playthrough. Given that answers can change, pinpointing the correct one will require careful reading of the poems and logical reasoning. Once you feel confident about your answer, pull the designated noose.

    Pulling the right noose prompts James to awaken in a morgue, while pulling the wrong one sends him into a dark pit filled with enemies. Fortunately, this does not result in game over; players can quickly escape by heading to the ladder at the back and return to the Yard to tackle the Silent Hill 2 Remake Gallows puzzle again.

  • ReFantazio: Elevate Your Eloquence with Metaphors

    ReFantazio: Elevate Your Eloquence with Metaphors

    Eloquence stands as one of the five Royal Virtues in Metaphor: ReFantazio, defining a character’s skill in effective communication and persuasion. Elevating this virtue is essential for unlocking various dialogue options, enhancing relationships with followers, and accessing specific quests. Its impact is akin to the charisma attribute found in many games, making it a key stat to continually improve. The higher your Eloquence, the more likely NPCs will listen to you and be persuaded by your requests.

    Although it may be one of the harder virtues to develop, boosting your Eloquence offers numerous advantages, regardless of your character type. It facilitates smoother interactions with NPCs, leads to critical quest opportunities, and helps you forge deeper connections with your followers. Throughout your gameplay, you’ll encounter several chances to enhance this skill, although you might need to approach it actively, as Metaphor: ReFantazio does not provide many automatic opportunities for growth in this area.

    In Metaphor: ReFantazio, raising your Eloquence is pivotal for unlocking dialogue choices similar to Social Stats in Persona 5, advancing follower relationships, and attaining the Heroic Embodiment ability for your team members. Although leveling up this virtue can seem daunting, effective ways to improve include reading books, engaging in debates, learning from friends, and attending performances. These methods may require some effort, but they pay off significantly.

    Related

    Metaphor: ReFantazio Mirrors a Classic Persona Flaw

    Metaphor: ReFantazio takes inspiration from Persona with its combat and Social Links, but also inherits its biggest shortcomings. Here’s what it should have done differently.

    To improve your Eloquence effectively, ensure you read every book available and take part in debates once the King’s Contest starts. Spending time with your party members is also crucial; otherwise, you risk missing out on easy Eloquence points. While attending shows might not sound appealing, it can rapidly and easily increase your Eloquence. The four ranks of Eloquence, from lowest to highest, are Tongue-Tied, Articulate, Urbane, Influential, and Rhetorician. Consider completing the Wayward Shepherd and The Queen of Cuisine: Soul quests for quick boosts.

    Read Books

    Reading books in Metaphor: ReFantazio is an accessible way to enhance your skills. Books like “Pride and Persuasion”, found on the Gauntlet Runner’s bookshelf, are effective for increasing your Eloquence. Throughout your adventure, new books will become available, giving you more chances to boost your stat. Although these opportunities may not arise as frequently as you’d like, it’s always wise to seek out your bookshelf whenever a new book shows up.

    You will acquire books as you advance in Metaphor: ReFantazio. Stay tuned for notifications and gifts that others might give you. While not every book will raise your Eloquence, many offer valuable rewards. “Pride and Persuasion” is particularly impactful, but other books may also contribute to your Eloquence growth, so always watch for new titles.

    Practice Debating

    Engaging in debates is one of the quickest ways to develop your Eloquence in Metaphor: ReFantazio. You gain significant enhancements with each successful debate. Opportunities to practice can be found at the Grand Trad Podium, Maritra Podium, Brilehaven Podium, Virga Island Podium, and Altabury Podium. Ensure you’re well-prepared before entering a debate, and aim to raise your Eloquence as high as possible before you compete.

    Take debates seriously; winning can lead to substantial rewards.

    Debating also boosts your Imagination stat, which is vital for accessing certain abilities and crafting magical items. Each debate victory yields 5,000 reeve, a crucial currency for purchasing items and services. Debates play a significant role in the game; although they may take longer due to the need for strategic choices, the benefits gained make the effort worthwhile. After completing a debate successfully, you’ll receive a reward for your Eloquence. Debates are probably the best method to enhance your Eloquence.

    Learn From Friends

    Engaging in the Learn From Friends activity in Metaphor: ReFantazio is one of the most effective ways to improve your Eloquence. This also enhances your relationships with your comrades. Spend time with Junah and interact with the Activist Woman in Sunshade Row, Grand Trad, during the day. These activities will help you steadily increase your Eloquence. You can find Junah at the Gauntlet Runner, where a bookshelf is also located. It’s a great idea to read and spend time with Junah while you’re there.

    No other followers provide the same increase in your stats as these two, so focus on them. Unlike reading books that require multiple sessions, Learn From Friends facilitates continuous growth during your journey. This activity becomes available after leaving Brilehaven and introduces a new party member with a high Eloquence stat. Spending time with them on the deck of the Gauntlet Runner allows you to accumulate Eloquence points effortlessly.

    See a Show

    Watching shows in Metaphor: ReFantazio offers a distinct experience that extends beyond mere entertainment. The performances are engaging, but the main advantage lies in the chance to enhance your Royal Virtues. From the end of September onwards, shows hosted by Altabury’s Opera House highlight different virtues, allowing you to passively gain points just by watching. To focus on improving your Eloquence, attend “The Stripling and His Stewards,” which tells the tale of a clever boy handling complex negotiations.

    Make an effort to watch every show you encounter. While not all provide the same level of stat boosts, they’re definitely worth a shot. By figuring out which show contributes to each stat, you can plan accordingly. Each show costs 1,500 reeve to watch, which can be quite a bit at the start of the game. However, a performance like “The Stripling and His Stewards” can elevate your Eloquence by seven skill points.

    Increasing your Eloquence unlocks numerous advantages in Metaphor: ReFantazio, affecting how your character interacts with others and how your party progresses. Although the initial benefits may seem modest, the cumulative impact of higher Eloquence is significant. Basic levels allow access to more dialogue options with specific characters, which was evident during the demo. This helps you glean hidden information by fostering deeper relationships. As your Eloquence improves, you can influence your followers more effectively, unlocking not just new dialogue options but also higher bond levels with certain characters.

    Achieving the top levels of Eloquence allows you to unlock the Heroic Embodiment for your companions in Metaphor: ReFantazio. This potent bonus enhances their abilities and reveals unique potential. However, this perk requires maxing out your Eloquence and obtaining Friendship Rank 8 with each companion while also unlocking their specific Archetypes. Much like the Charisma stat in various games, it’s easy to recognize the benefits of becoming more personable in your gameplay. If you’d prefer a less direct approach to leveling this stat, it will naturally grow over time, and it is essential.

  • Unlocking the Witch Broom in Fortnite: A Complete Guide

    Unlocking the Witch Broom in Fortnite: A Complete Guide

    As Halloween draws near, Fortnitemares 2024 has kicked off in Fortnite as a part of the Halloween festivities for Chapter 5 Season 4. This year’s event welcomes back some iconic items, including the Witch Broom. Although it’s not brand new, the Witch Broom is available only for a limited time, so players eager to get their hands on it should act quickly.

    Fortnitemares 2024 officially started on October 12, and all event-related items will be up for grabs until Chapter 5 Season 4 comes to a close. In addition to the Witch Broom, players can also find the Wood Stake Shotgun and the Pumpkin Launcher. To unlock these items, you’ll first need to complete some spooky tasks.

    How to Obtain the Witch Broom

    Complete Jigsaw’s Challenge

    The Witch Broom is a limited-time item exclusive to the Fortnitemares 2024 event. If you’re interested, make sure to grab one soon, or you may have to wait until next year’s Halloween to see it again.

    While the Wood Stake Shotgun and Pumpkin Launcher can be claimed as rewards for defeating Ultima Carver at Brawler’s Patch, the Witch Broom has its own unique requirements. You can find the Witch Broom on the ground, in Chests, and on Loot Island. For a guaranteed way to obtain one, complete Jigsaw’s Challenge.

    If Jigsaw’s Challenge isn’t your thing, check out NPCs selling the Witch Broom, such as Peely Bone at Restored Reels or Edward Scissorhands at Grand Glacier. Keep in mind that each NPC only has one for sale, so you’ll want to land quickly, make your purchase, and escape.

    The Challenge

    In Jigsaw’s Challenge, you’ll need to find the infamous horror icon, Jigsaw, who appears on monitors scattered across the map. By accepting his challenge, you’ll enter a duel with another player who has also accepted from a different screen. Once you both accept, you’ll be equipped with explosive Billy-inspired masks.

    Your goal is straightforward: eliminate your opponent before time runs out. If you’re unable to do so quickly, your mask will explode, knocking you out instead. However, if you succeed in taking out your opponent, you’ll receive the Witch Broom, a Boom Billy, and some extra loot.

    How to Use the Witch Broom

    Using the Witch Broom effectively can be a game-changer. One of the quests for this year’s event requires players to travel a certain distance while airborne on the Witch Broom, making it essential if you want to complete that mission. Once you have it, you can soar into the skies, allowing you to swiftly escape sticky situations.

    The Witch Broom acts like a glider; however, after each use, it has a cooldown of 20 seconds. So, it’s wise to avoid landing in dangerous areas where you might lose your Witch Broom to enemies, forcing you to hunt for another one.

  • ReFantazio: Unleash Your Max Follower Connections Guide

    ReFantazio: Unleash Your Max Follower Connections Guide

    Follower Bonds in Metaphor: ReFantazio

    Follower Bonds serve as the equivalent of Social Links in Metaphor: ReFantazio. These event cutscenes provide opportunities for the main character, Will, to connect with his teammates and allies without hastening the overall storyline. This feature not only enriches character development but also unlocks new combat abilities, helps gather additional items, and reduces shop expenses. While bonding is not essential for completing the game, it certainly alleviates a good amount of tension.

    In comparison to Social Links in Persona 3 Reload, the Bonds system in Metaphor: ReFantazio offers more leniency. Many of the bonding events occur automatically during the main narrative, featuring fewer time-sensitive engagements. Additionally, the player’s responses do not influence the Bond rank, so failure isn’t an option. Instead, providing the right answers rewards players with Magla (MAG), a resource that can enhance characters or be sold for cash. This incentivizes players to choose their responses wisely to minimize future grinding.

    Engaging with Teammates

    Once you complete the Regalith Grand Cathedral, the Follower Menu opens the door for conversations with party members and NPCs. A red handshake symbol indicates a character can level up their bond with you. If you see a grey handshake but have reached the designated date, you’ll need to visit a town and speak to the character in question. For assistance in locating characters, consult Gallica, who can provide hints on those available on your free days. If no handshake symbol appears, you must progress the main storyline before you can upgrade that bond.

    Raising Follower Bonds

    The six primary party members represent the most direct Followers to interact with. They are frequently accessible in towns and provide insights into their Archetypes while fighting, clarifying how they can grow through ranking up.

    Maximizing Relationships with Key Characters

    • Strohl: On 6/6, players can engage with Strohl, one of the initial Followers. Maximizing this bond allows access to abilities as a Warrior and facilitates the advancement of the Swordmaster and Samurai Archetypes.

    • Hulkenberg: Hulkenberg joins on 6/11 after defeating Grius. This provides a chance to cultivate bonds, as he represents the Knight Archetype, supporting further rankings up to the Paladin, Dark Knight, and Magic Knight.

    • Heismay: Heismay, who enters the team on 7/4, is a stealth expert whose ability to sneak and ambush makes him a standout character. He belongs to the Thief archetype but can also evolve into an Assassin or Ninja.

    • Junah & Eupha: Following the Dragon Temple Dungeon, engage with Junah through the side quest Save the Mourning Snakes to avoid missing out on her bond opportunities. Similarly, Eupha’s bond can be unlocked during interactions on Virga Island, but it requires attention to her The Trial of Malnova quest.

    Interactions with Non-Playable Characters (NPCs)

    Aside from the playable characters, various NPCs can become non-combat Followers by completing specific side quests throughout various cities. Some are obtained simply by navigating through the main story.

    A character of note is Gallica, who automatically gains bond ranks during the storyline. By 9/24, she should achieve the maximum rank of 8, as she embodies the Mage Archetype.

    NPCs typically need higher Virtues to improve their bonds. While some require multiple Virtues, they tend to remain in fixed locations, making them easier to approach in settlements.

    Additional Tips for Maximizing Bonds

    • Different characters may require a minimum level of specific Virtues to progress their bonds, indicating the importance of character development.

    • In general, maintaining a balance between engaging in storyline progression and exploring side quests will ensure all potential bonds can be cultivated effectively.

    Each character reflects a distinct class archetype, and enhancing their bond rank raises their abilities. While it’s possible to play the game focusing on a limited number of archetypes, forging these bonds can deepen character interactions and lead to more immersive storytelling within Metaphor: ReFantazio*.

  • ReFantazio: A Guide to Weapon Purification Techniques

    ReFantazio: A Guide to Weapon Purification Techniques

    As you progress through your Metaphor: ReFantazio adventure, you will come across weapons and pieces of armor that can be purified. This upgrade is indicated in the description of the item. However, you’ll need to advance a bit in the game before you unlock the purification feature for your items.

    Purifying these weapons and armor will significantly boost their stats and abilities and may occasionally unlock unique hidden effects. This is a crucial strategy early in the game, as enhancing your gear right away ensures that all members of your Metaphor: ReFantazio team are equipped with the best possible weapons.

    Enhancing Wisdom & Unlocking Purification at the Church

    You can purify weapons and armor at a church in Metaphor: ReFantazio. The St. Fermis Church located in Grand Trad serves as the primary spot for this purification process. Purifying your gear at this location will further amplify the capabilities of these already powerful items.

    Access to St. Fermis Church will be granted after you finish the prologue in Metaphor: ReFantazio, making it an excellent early-game option for purification.

    In addition to finding the church, there are a few further requirements you must meet before you can unlock the ability to purify your equipment. According to Gamers Heroes on YouTube, these include:

    • Raising your Wisdom to Informed
    • Gathering Blessed Water

    You won’t be able to purify any impure weapons or armor at the church until you meet these conditions.

    How to Increase Wisdom

    First, you need to elevate your Wisdom to Rank 2, or Informed. Through your Royal Virtues, there are several ways to boost your Wisdom, but one of the most effective is completing quests that focus on this aspect.

    According to Gamers Heroes, enjoying the view of the Royal Capital from a bench in the heart of Grand Trad is another straightforward method for easily increasing this Royal Virtue without veering off course.

    How to Acquire Blessed Water

    Once you reach Wisdom Rank 2, you’ll need to collect some Blessed Water. As stated by TheGamer, Blessed Water is necessary for each purification, and obtaining it isn’t too difficult. Dungeons are great locations to gather Blessed Water, but you’re also likely to acquire some through natural story progression.

    If you are using the Thief Archetype in Metaphor: ReFantazio, you can steal Blessed Water from Trove enemies found in dungeons. Utilize this Archetype or any other with a Steal ability for efficient collection.

    Once you have met the necessary requirements, you can purify your impure weapons and armor at any local church in Metaphor: ReFantazio. Make sure to bring all the affected items with you for your next visit and select the Purify option when talking to the priest inside. Regular trips to the church will help you unlock the full potential of your gear. Keep in mind that purification comes with a cost, and it can add up quickly if you allow your equipment to accumulate.

    Source: Quinton O’Connor/TheGamer

    Video Credit: Gamers Heroes/YouTube

  • Unlocking Timon and Pumbaa: A Step-by-Step Guide

    Unlocking Timon and Pumbaa: A Step-by-Step Guide

    To unlock the newly introduced characters, Timon and Pumbaa, in Disney Dreamlight Valley, players need to complete several steps. These characters were added in the Jungle Getaway update and can be found in the Lion King Realm. If you’ve previously explored this realm, you might already be familiar with it, as Simba and Nala are also part of this area. To add Timon and Pumbaa to your Valley, you must return to the Lion King Realm.

    If you’ve been playing Disney Dreamlight Valley, you know that unlocking characters requires time and effort. Timon and Pumbaa are no different; there’s an additional step involved beyond typical friendship tasks. Specifically, you must first unlock the Lion King—Simba—before you can interact with Timon and Pumbaa.

    How to Unlock Timon and Pumbaa

    Prerequisite: Simba’s Friendship Level

    Before you can bring Timon and Pumbaa into the Valley, you need to unlock Simba and increase your friendship level with him. If you don’t strengthen your bond, you won’t receive the quest to access Timon and Pumbaa.

    To begin the quest, you need to help Simba reach at least a Level 10 friendship. This involves completing specific quests, including:

    • Stars to Guide Us
    • Hakuna Matata
    • The Great Gathering
    • Seed of Memories
    • The Dreamlight Grove

    After completing those quests and achieving a Level 10 friendship with Simba, speak with him again. This will activate the Finding Old Friends quest, where you’ll revisit the Lion King Realm to find Timon and Pumbaa. However, they’ll require you to deepen your understanding of Hakuna Matata before they agree to come back with you.

    Completing the Finding Old Friends Quest

    When you return to the Lion King Realm, start by talking to Timon. He’ll ask you to dress as a lion and send you off to craft a Lion’s Mane. You can craft a table yourself or bring Timon 4 Jungle Stones and 4 Jungle Wood, and he’ll handle the crafting for you.

    Jungle Stones and Wood are found near where you are. For additional help, you can check out Quick Tips on YouTube for more location details.

    After crafting your Lion’s Mane, talk to Timon again. He’ll task you with letting go of your worries. Follow him deeper into the jungle to listen to a conversation about finding and destroying an Old Crown. Search for golden bubbles in the river to fish up the crown, then bring it back to Timon and destroy it using a Pickaxe.

    Next, craft an Empty Vial from 3 Glass Pieces, which you can create from 5 Sand and 1 Coal. Then follow Timon to the river, shout into the vial (your choice of dialogue), and interact with a shiny spot on the ground to release your worries.

    Finally, return to Timon and Pumbaa and create three comfy beds for the three of you. Once you’re done, listen to their chat before going to bed, which will conclude the Finding Old Friends quest and lead you to the next stage.

    Complete the Relax! Quest

    Following your rest, Pumbaa will ask you to make a hammock. You can use the same crafting station to create it with the following materials:

    • 6 Jungle Vines
    • 2 Bottles of Palm Tree Sap

    Gather these by digging them up and interacting with the correct trees to obtain Palm Tree Sap.

    After using the hammock, test out Pumbaa’s favorite nap spots by finding large leaf piles and interacting with them. Once you’ve tested them all, sleep in one while Pumbaa prepares the final spot. You’ll then splash around in the mud at Pumbaa’s direction and return to camp for a discussion about catching jungle fireflies.

    Catch three fireflies, mix them in the cooking pot, and deliver them to Pumbaa. After taking a photo with him, you can rest again and wrap up this quest.

    The Final Step to Unlock Timon and Pumbaa

    The last quest to unlock Timon and Pumbaa is called “Where’s Pumbaa?” This will begin on the final morning. When you wake up, Pumbaa will be missing—trapped in a log near the Valley portal. You’ll need to take a picture of him before creating a new recipe to free him.

    Head to the river and break four rocks with your pickaxe to find:

    • 2 Yellow Oily Bugs
    • 1 Red Oily Bug
    • 1 Blue Oily Bug

    Use these bugs to prepare two specific recipes: Orange Bug Oil and Green Bug Oil. After combining both oils, you’ll create Super Slippery Bug Oil. Return to Timon, who will pour the oil into your watering can. However, it won’t work on Pumbaa just yet; we still need to tackle a few more things in the Valley.

    Talk to Goofy in the Valley for suggestions and acquire his Old Plunger. You’ll need to gather additional ingredients to enhance the Plunger’s functionality, listed below.

    Once you’ve got everything, return to Pumbaa to free him from the log. With both characters ready, invite them back to the Dreamlight Valley, and upon their arrival, take a photo with each to successfully complete the quest and fully unlock Timon and Pumbaa.

    Timon & Pumbaa Friendship Quests

    After gaining Timon and Pumbaa as buddies, you can further develop your relationships by completing several new quests for them. For Pumbaa, you will need to finish:

    • Something’s Off (Level 2)
    • Fine Arts for Warthogs (Level 4)
    • Down to Earth (Level 7)
    • The Infestation Part 2 (Level 10)

    To max out your friendship with Timon, do the following quests:

    • Old Enemies (Level 2)
    • Curious About Critters (Level 4)
    • The Timon Talk (Level 7)
    • The Infestation Part 1 (Level 9)
    • The Infestation Part 3 (Level 10)

    By nurturing these relationships and completing quests, you’ll solidify your bonds with Timon and Pumbaa, expanding the vibrant world of Disney Dreamlight Valley.

  • Farming Salt: Techniques and Its Various Uses

    Farming Salt: Techniques and Its Various Uses

    In the popular free-to-play MMORPG Throne and Liberty, salt is a crucial resource for players aiming to enhance their cooking abilities. Cooking is a key life skill in the game, as it allows you to create meals that provide valuable buffs while you navigate the world of Solisium. While many recipes call for salt, this essential ingredient can be tricky to locate.

    Investing time in developing your culinary skills and gathering necessary ingredients can truly pay off. The bonuses you receive from your crafted meals can significantly aid you in challenging boss fights, PvP battles, or while exploring Solisium. You can find all the necessary ingredients through various methods: gathering, fishing, defeating specific monsters, purchasing from Sundries Merchants, sending your Amitoi on Expeditions, or receiving them as quest rewards. Remember to keep an eye out for other essential ingredients to help prepare your next dish.

    Where To Find And Farm Salt

    Send Amitoi On Expeditions

    Custom image by Paul Vanasse

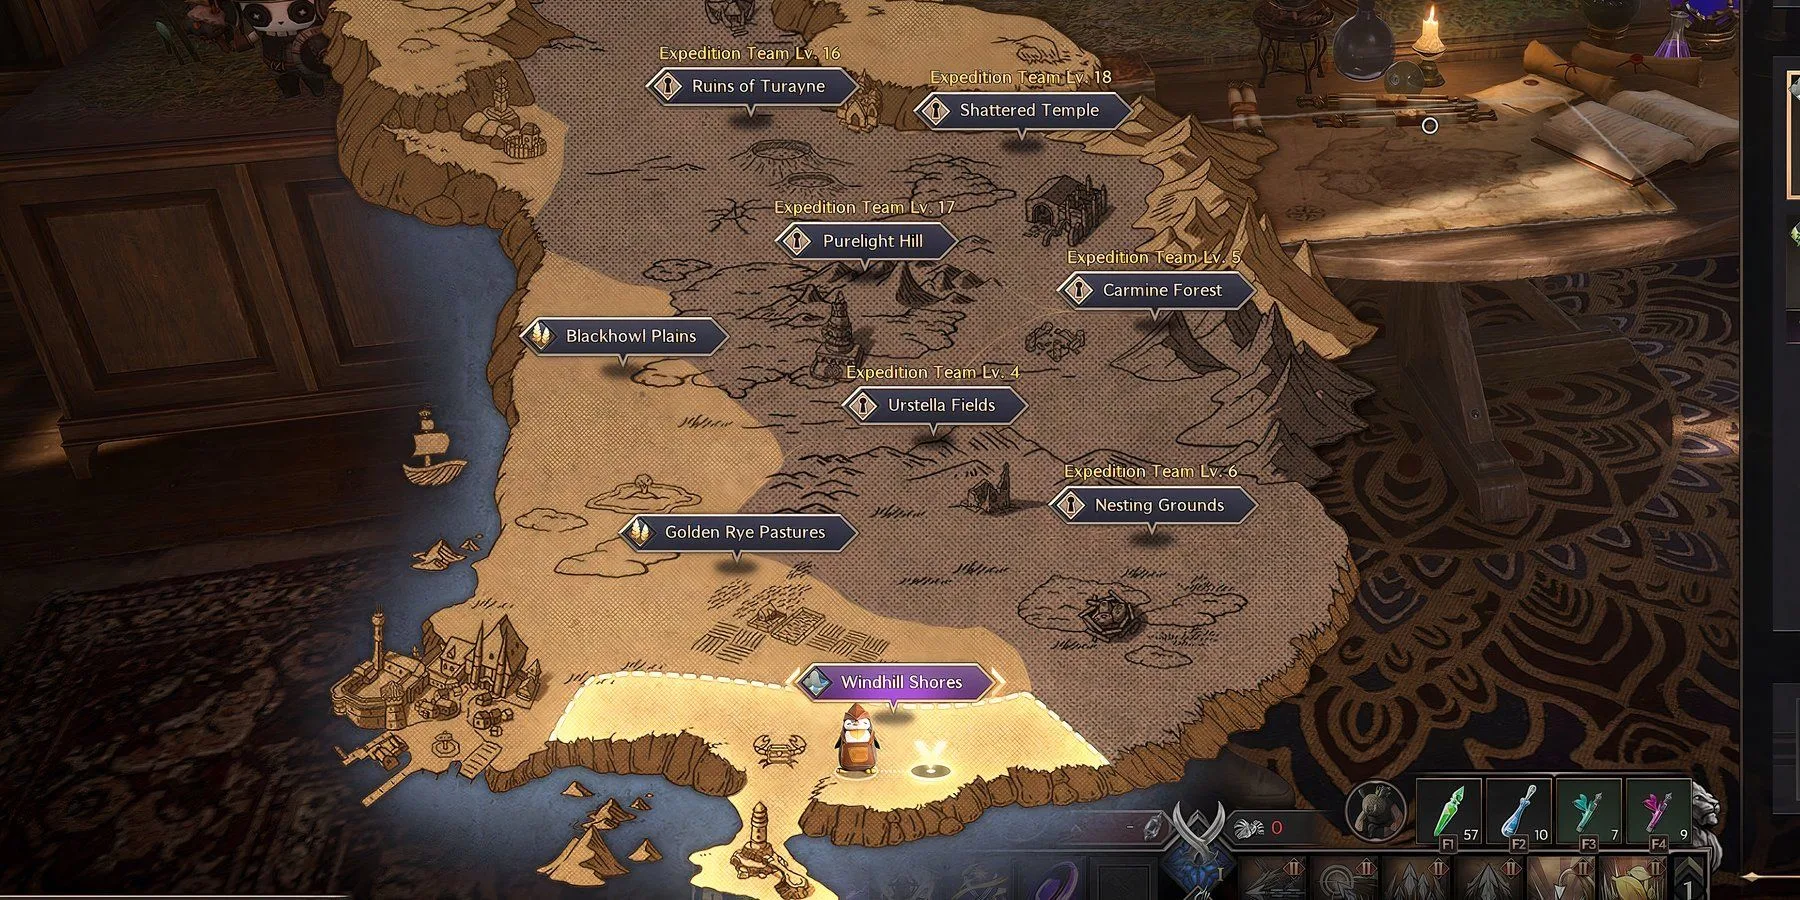
    There are several ways to locate and gather salt. One method is to defeat monsters in Windhill Shores, as they occasionally drop salt upon defeat. Use the Windhill Shores Waypoint to fast-travel and start targeting Chestaceans, Hermit Lobsters, Large Stone Crabs, and Megalobsters; any of these creatures could drop salt. You may also find salt by defeating Sea Crabs, Hermit Crabs, Starlight Fireflies, and Iron Chestaceans at Daybreak Shore in Stonegard at higher levels.

    You can also purchase salt in Zenus’s Star Shop using Star Crystals. Salt (x10) costs five Star Crystals. However, be cautious about spending too many Star Crystals on salt, as it may prevent you from acquiring more valuable items from the shop.

    A more effective method for gathering salt is through Amitoi Expeditions. As you progress in Throne and Liberty, you’ll gain access to the Amitoi House and can assign Amitoi to undertake timed missions to gather valuable resources. Assign boosted Amitoi (indicated by an arrow next to them during selection) to expeditions that yield salt as soon as you are able.

    Amitoi Expeditions Rewarding Salt

    Name

    Expedition Team Level

    Type

    Windhill Shores (Laslan)

    3

    Shore

    Ustella Fields (Laslan)

    4

    Plains

    Monolith Wastelands (Stonegard)

    7

    Desert

    Abandoned Stonemason Town (Stonegard)

    8

    Desert

    Moonlight Desert (Stonegard)

    9

    Desert

    Sandworm Lair (Stonegard)

    10

    Desert

    Always have an Amitoi Expedition in progress to maximize your salt collection while also leveling up your Amitoi.

    The quickest way to farm salt is to defeat monsters at Windhill Shores while your Amitoi Expeditions complete. A great time-saving tip is to aggro multiple enemies at once and eliminate them all using an area-of-effect attack.

    What Is Salt Used For?

    Use Salt To Cook Helpful Items

    Once you have gathered enough salt along with other ingredients, you can start cooking meals and progressing your cooking skills. To prepare a dish, find and interact with a Bonfire in the wild or a Cooking Oven in towns (there’s one in Kastleton near the crafting NPCs).

    To cook, make sure you have the recipe ingredients, then interact with the oven, select your meal, and begin cooking. Here is a list of recipes that require salt, with each using one salt per dish:

    Meal

    Cooking Level

    Effect

    Meat and Onion Soup

    1

    All Defense +150, Duration: 15-30 min.

    Vegetable Stir-Fry

    1

    Max Health +300, Health Regen +20, Duration: 15-30 min.

    Rye Bread

    1

    Fishing Mastery Bonus +15%, Duration: 15-30 min.

    Mushroom Stir-Fry

    2

    Max Mana +300, Mana Regen +20, Duration: 15-60 min.

    Kastler Salad

    3

    EXP Bonus +50%, Duration: 15-60 min.

    Wild Game Steak

    4

    All Hit Chance +60, All Heavy Attack Chance +60, Duration: 15-30 min.

    Laslan-Style Braised Meat

    9

    All Evasion +50, Skill Damage Resist. +60, Duration: 15-60 min.

    Crab Meat Pie

    9

    Sollant Bonus +50%, Abyssal Contract Token Efficiency +10%, Duration: 15-60 min.

    Grilled Crown Fish

    13

    Bonus Damage +7, Skill Damage Boost +50, Duration: 15-60 min.

    Vienta-Style Seafood

    15

    Incoming Heal +2.5%, Amitoi Heal +50%, Duration: 15-60 min.

    Scorpion Tail Fritters

    17

    Movement Speed +3.5%, Attack Speed +3%, Duration: 15-60 min.

    Always be on the lookout for extra ingredients while you explore; complex recipes will require more components. Improving your cooking and preparing meals for yourself or your guild will make you a valuable asset to any team, so don’t overlook the importance of spending time by the oven as you journey through the world of Throne and Liberty.

  • Switching Servers in Throne and Liberty: A Quick Guide

    Switching Servers in Throne and Liberty: A Quick Guide

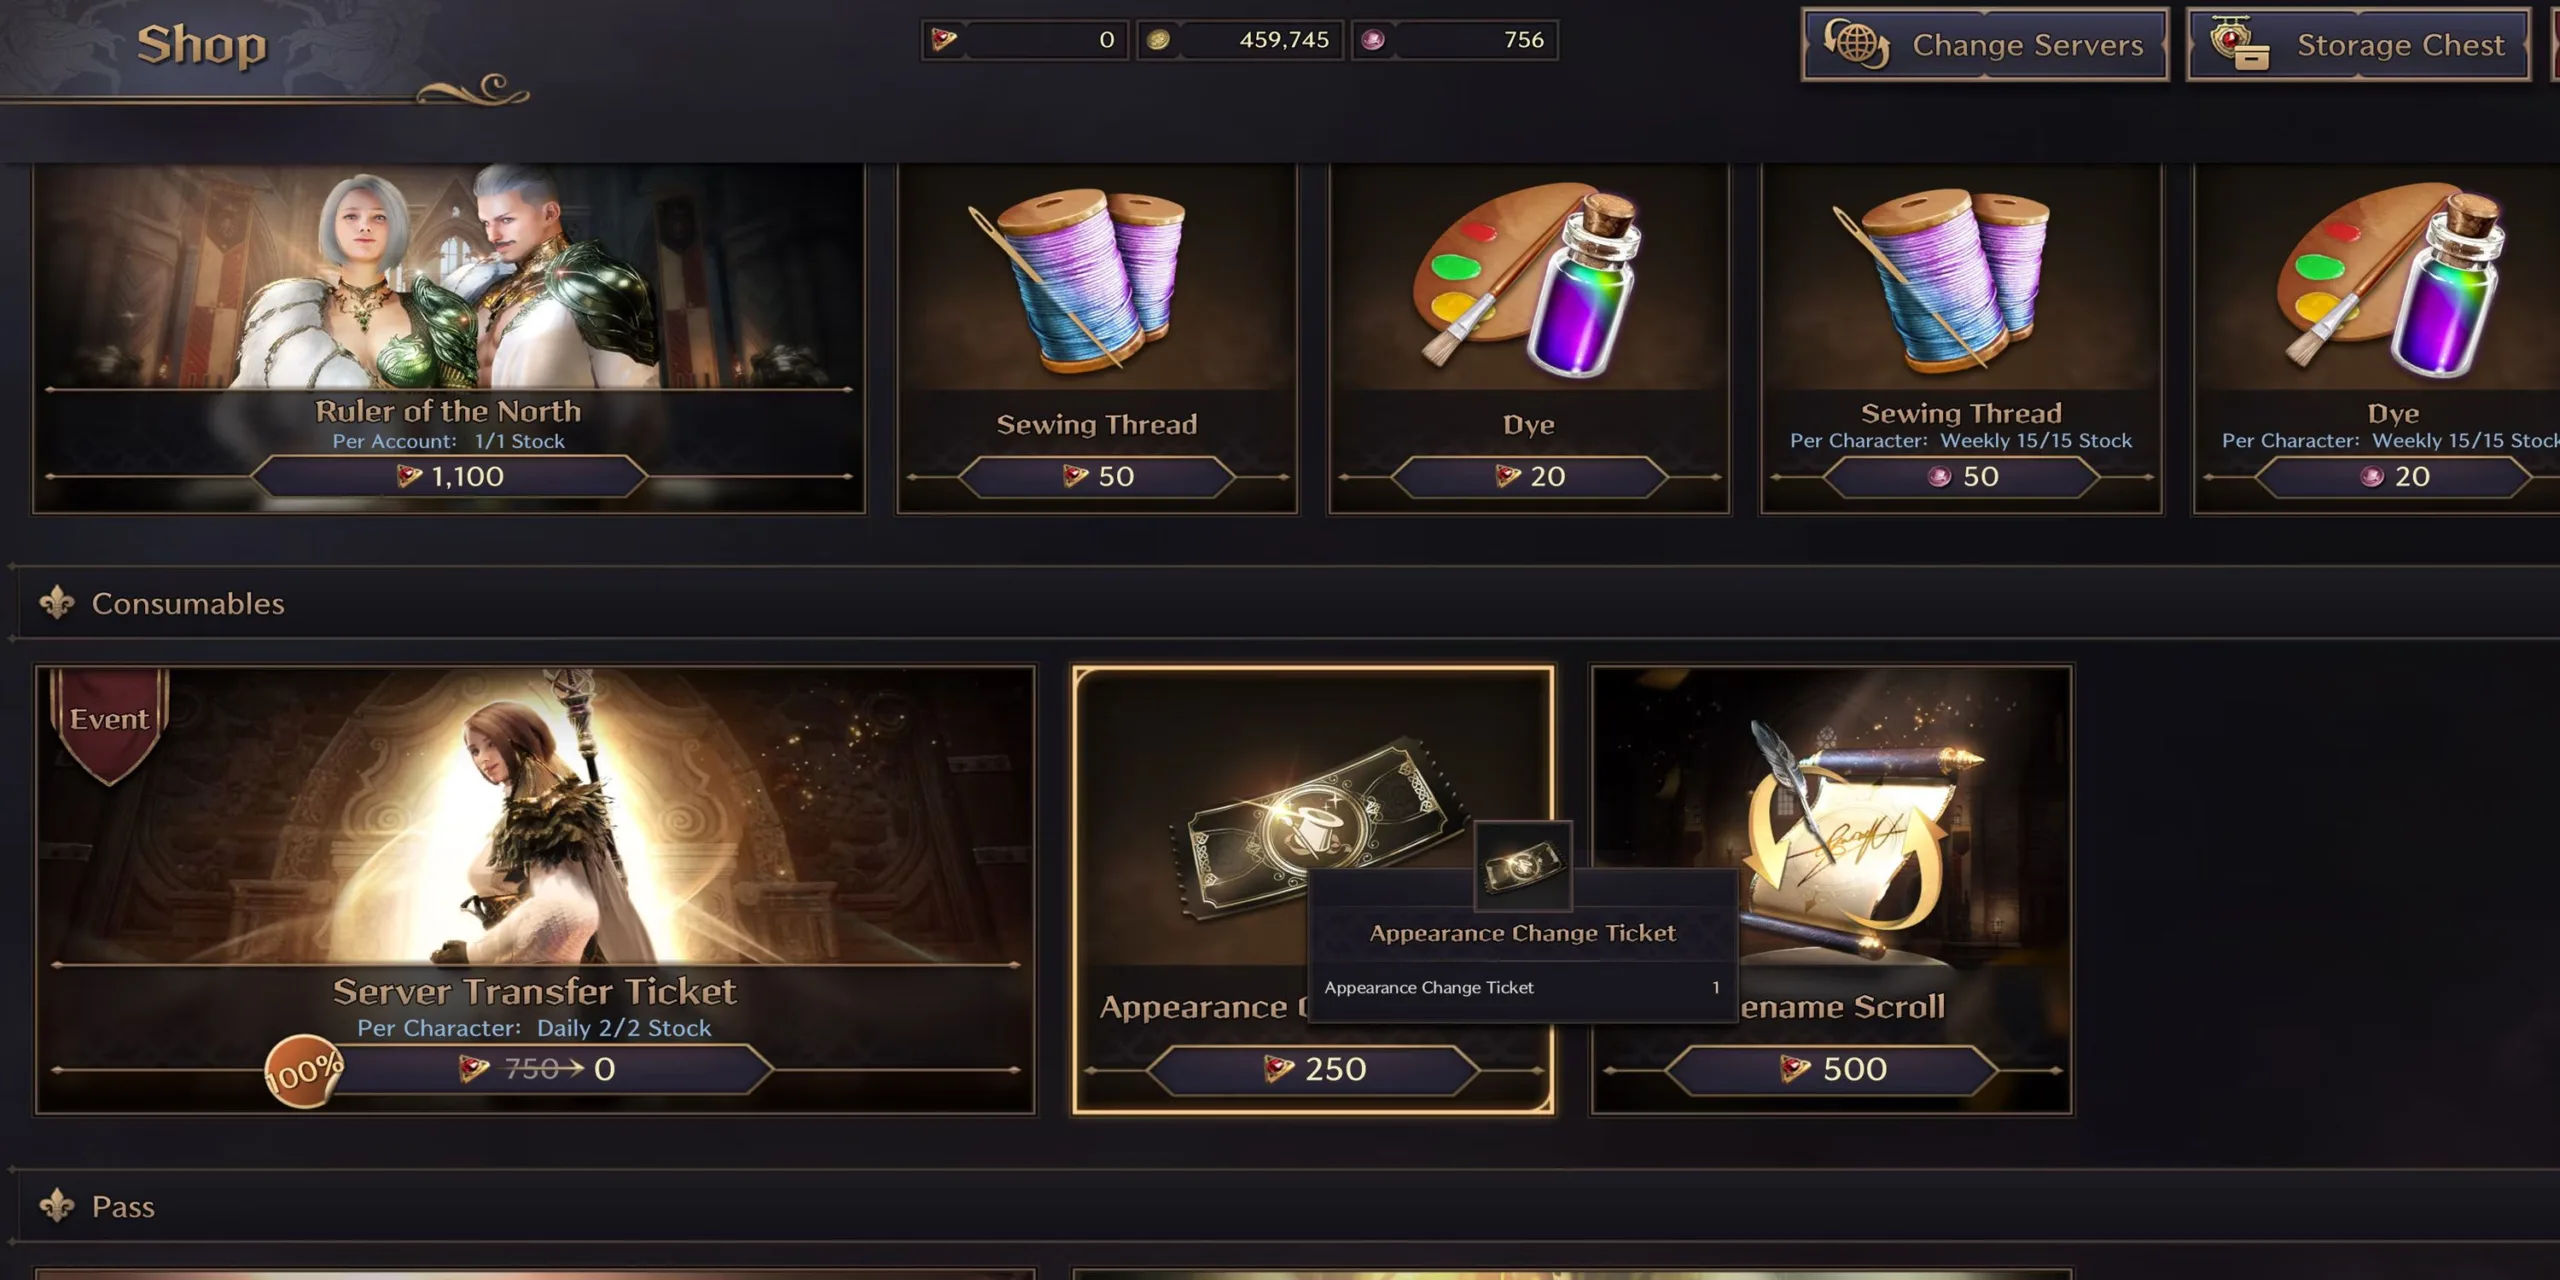
    Throne of Liberty allows players the option to switch the server they are currently on. While this feature is available for free during the game’s early period, it will be priced at 750 Lucent, equivalent to approximately $7 USD, by 2024. Once purchased, the server transfer ticket is active for 24 hours, so you’ll need to use it within that timeframe. If timed correctly, it’s possible to use the ticket even after the campaign concludes.

    Server transfers are key for playing with friends if you find yourselves on different servers in Throne of Liberty. The game boasts nearly 90 servers located in various regions around the world. Coordinating where to start your journey can be challenging, especially since the game just entered Early Access in late September. Most servers have not yet developed their own unique identities, cultures, languages, or economies.

    How to Change Servers in Throne and Liberty

    Temporary Free Offer

    The Server Transfer Ticket can be found in the cash shop of Throne and Liberty. To access it, open the main menu and click on the store icon in the top right corner. From there, scroll down to the “Consumables” tab to find the ticket. As you browse, you may also notice options for paid transformations, although you can utilize standard morph options as part of regular gameplay.

    Each ticket is designated for an individual character. If you wish to switch servers with multiple characters, you will need to buy and apply a ticket for each one. This gives you the flexibility to send each character to a different server.

    A YouTuber, Quick Tips, successfully acquired a Server Transfer Ticket while playing. However, they could not redeem it immediately as they were not in a safe area. Other restrictions also apply, including not being in a guild and having all items claimed from the Auction House.

    Choosing a Server Destination and Requirements

    Once you have at least one Server Transfer Ticket, a “Change Server” button will appear in the Throne and Liberty cash shop. Click this to access a new menu where you can select a server region. The options available include Western Americas, Eastern Americas, South America, Europe, and Japan/Oceania. A list of servers will display, allowing you to filter out those that are full or experiencing congestion.

    Within the selection menu, you will see nine requirements that must be met to proceed with the transfer. Most of these requirements ensure that you are not in a guild or selling items. Make sure to resolve any such obligations before attempting to transfer.

    1. Be at least Level 1.
    2. You must be in a Safe Zone.
    3. Ensure you are not in a party.
    4. You should not be a member of any guild.
    5. There should be no pending guild applications.
    6. All auction house items must be collected.
    7. All incoming mail should be claimed.
    8. All rewards from the Shop Chests must be collected.
    9. No remaining Gate of Infinity rewards.

    If you meet these conditions, click the purchase button in the lower right to finalize the transfer. Depending on server load, the process may take a few minutes, and you’ll soon be connected to a new server in Throne and Liberty.

    Source: Quick Tips/YouTube

  • Discovering and Capturing Alpha Chillet in Palworld

    Discovering and Capturing Alpha Chillet in Palworld

    In Palworld, there’s a wide variety of Pals to discover, and one of the standout ones is Alpha Chillet. This character, with both Ice and Dragon abilities, offers interesting challenges. Once caught, it becomes a potent Pal that enhances your travel options, making it one of the top Dragon-type Pals in the game.

    Alpha Pals are categorized as boss characters that you’ll encounter while exploring Palpagos Island. Each Alpha is marked on your map, including Alpha Chillet. Generally, Alpha Pals are stronger than their regular counterparts. However, Alpha Chillet is among the first Alpha Pals you’re likely to meet, and it won’t pose much of a challenge when you face it.

    Finding Alpha Chillet in Palworld

    First Alpha Boss Encounter

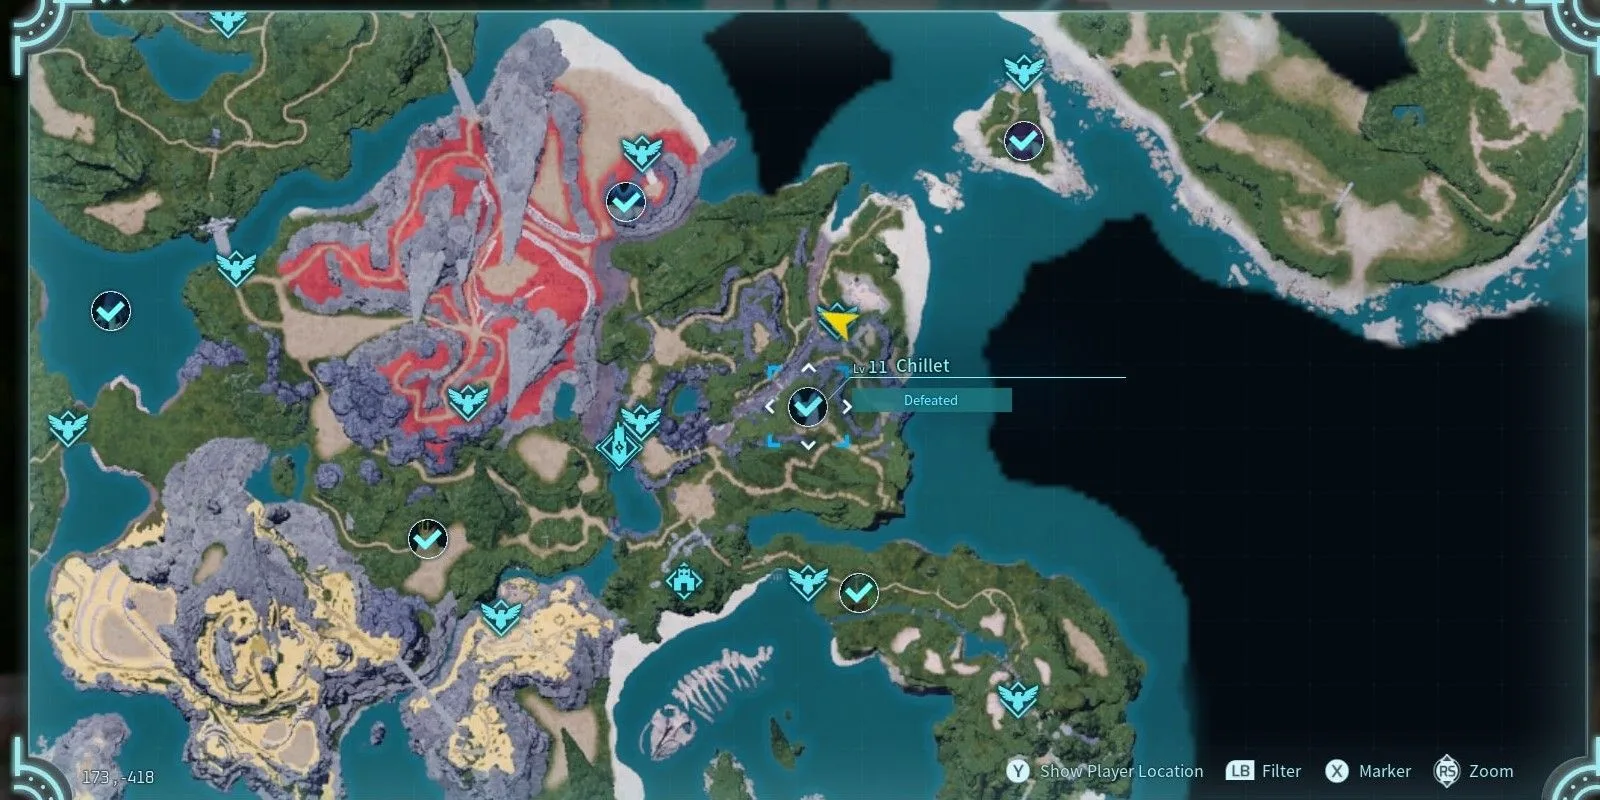
    Chillet is one of the lower-level Alphas in Palworld, starting at level 11, making it an ideal target as you embark on your adventure. It’s located near the initial starting area, known as the Plateau of Beginnings. You’ll always find its location marked on the map, specifically Southwest of the Fort Ruins Great Eagle Statue.

    If you haven’t ventured to the Fort Ruins area yet, the closest fast travel point is the Grassy Behemoth Hills. When you arrive, you’ll easily spot Alpha Chillet, as it moves around an open field and has a distinct light blue color.

    Tips to Capture Alpha Chillet

    Exploiting Weaknesses

    In Palworld, Alpha Chillet consistently remains at level 11. If you’re around level 9 or 10, you should find it straightforward to catch this creature. Being an Alpha, Chillet has notable health, but you can counter this by targeting its weaknesses. Using Fire or Ice Pals will inflict bonus damage, making it simpler to wear down Alpha Chillet. You can also use a Mega Sphere since it can capture Pals up to level 14.

    As of Early Access version 0.2.4.0, the stats and health of Alpha Pals have been updated. Previously, they did not exceed the stats of standard versions, but now they boast significantly increased HP.

    Alpha Chillet at level 11 possesses three abilities: Ice Missile, Dragon Cannon, and Rocket Slam, the latter being unique to Chillet. Take these moves into account during your battle, as they can pose challenges if you’re unprepared. Be cautious not to defeat Chillet too quickly. It’s advisable to unsummon any Pals accompanying you once Chillet’s health drops significantly.

    Catching it becomes even more manageable if you’re with friends, but it can still be handled solo. If you don’t succeed in capturing it right away, don’t worry. The Alpha Chillet will respawn every hour, allowing you to try again for experience or breeding purposes in Palworld. You can find an example of the battle in Ultima Kira‘s video.

    Alpha Chillet Stats
    HP 108
    Base Attack 80
    Defense 80
    Support 100
    Craft Speed 100
    Max Full Stomach 225
    Food Amount 3

    10 times the XP compared to taking down an ordinary Chillet of equivalent level—but you’ll also notice that it takes longer to defeat due to its substantial health. Furthermore, its drops differ from those of regular Pals; you can expect to receive the following items:

    • Ancient Civilization Parts
    • Leather
    • Precious Pelt
    • Cloth Outfit Schematic 4

    Once you’ve secured the Alpha Chillet, consider breeding it for more advantages, or use it as a reliable mount. While mounted, your attacks benefit from dragon damage, enhancing your exploration experience.

    Video Credit: YouTube/Ultima Kira

  • Unlocking the Painted Realm in Black Myth: Wukong Explained

    Unlocking the Painted Realm in Black Myth: Wukong Explained

    The Painted Realm is a special area that players can unlock in Chapter 3 of Black Myth: Wukong. To gain access to this secret domain, you need to acquire the Ruyi Scroll, a powerful item that will take you to the Zodiac Village found within the Painted Realm. Once you open the area, you’ll find key characters like the Zodiac Deities, Xu Dog, and Shen Monkey, making this village an essential hub for enhancing your gear, crafting potions, and collecting ingredients.

    Along with Xu Dog and Shen Monkey, two additional NPCs will appear in the village. The first is Chen Loong, an old dragon who can plant seeds you’ve gathered during your journey, allowing for regular harvesting of ingredients. The second is Yin Tiger, the blacksmith, who can forge new weapons and upgrade any armor you’ve created. To acquire the Ruyi Scroll and unlock all the advantages of the Painted Realm, players must first overcome certain challenges.

    Yin Tiger is a formidable fighter and can be challenged. If you defeat him, he will reward you with a new Transformation and an additional Curio Slot.

    Unlocking The Painted Realm

    Defeat a Boss First

    Black Myth Wukong Chen Loong handing Destined One Ruyi Scroll for Chapter 3 secret area

    To begin unlocking the Painted Realm, you need to locate and defeat Chen Loong, a boss near the North Shore of the Bitter Lake Keeper’s Shrine. Start at the Shrine, turn to face the lake, and head right along the shore. You’ll find Chen Loong in a shallow pool. After defeating him, speak with him, and he will claim that only one of Xu Dog’s Resurrection Pills can save him.

    Related

    Black Myth: Wukong – How To Find & Beat Cyan Loong (Secret Boss)

    In Black Myth: Wukong, defeat Cyan Loong on Turtle Island to collect rewards for crafting legendary weapons. Gather a third Loong Pearl.

    After your encounter, Chen Loong will move to a hut nearby along the lake shore. To proceed with your quest for the Painted Realm, you have to visit the Zodiac Deity Xu Dog located in the Yellow Wind Ridge area from Chapter 2 and complete his tasks. Once you accomplish this, he will create the pills that Chen Loong needs. Deliver these pills back to Chen Loong, and he will present you with the Ruyi Scroll, granting you access to the Painted Realm.

    How To Unlock Xu Dog’s Celestial Medicines

    Gather The Ingredients

    Black Myth: Wukong Xu Dog NPC giving a Celestial Medicine to Sun Wukong

    You can find Xu Dog close to the Village Entrance Keeper’s Shrine, near Sandgate Village. Head to the Shrine, then move towards the village. When you reach the wooden bridge, jump off to the right and proceed directly into the caverns where Xu Dog resides. He’ll ask you to retrieve his forgotten medicinal formulas that the giant frog, Lang-Li-Guhh-Baw, swallowed.

    Keep going straight from Xu Dog’s location, and you’ll find the frog in a pond outside the cave. Defeat Lang-Li-Guhh-Baw and return the formulas to Xu Dog; he will now be able to craft medicines for you.

    After that, Xu Dog will begin searching for his furnace to create even better medicines. Once you defeat the Tiger Vanguard in Crouching Tiger Temple, you’ll find Xu Dog again near the Cellar Keeper’s Shrine located below the Temple.

    With his furnace found, Xu Dog will be able to craft Celestial Medicines. He can also create a special medicine for Chen Loong. After delivering it to Chen Loong, he will reward you with the Ruyi Scroll, which, when activated, opens a mystical portal to the Painted Realm.

    How To Use the Painted Realm

    Harvest Seeds For Ingredients

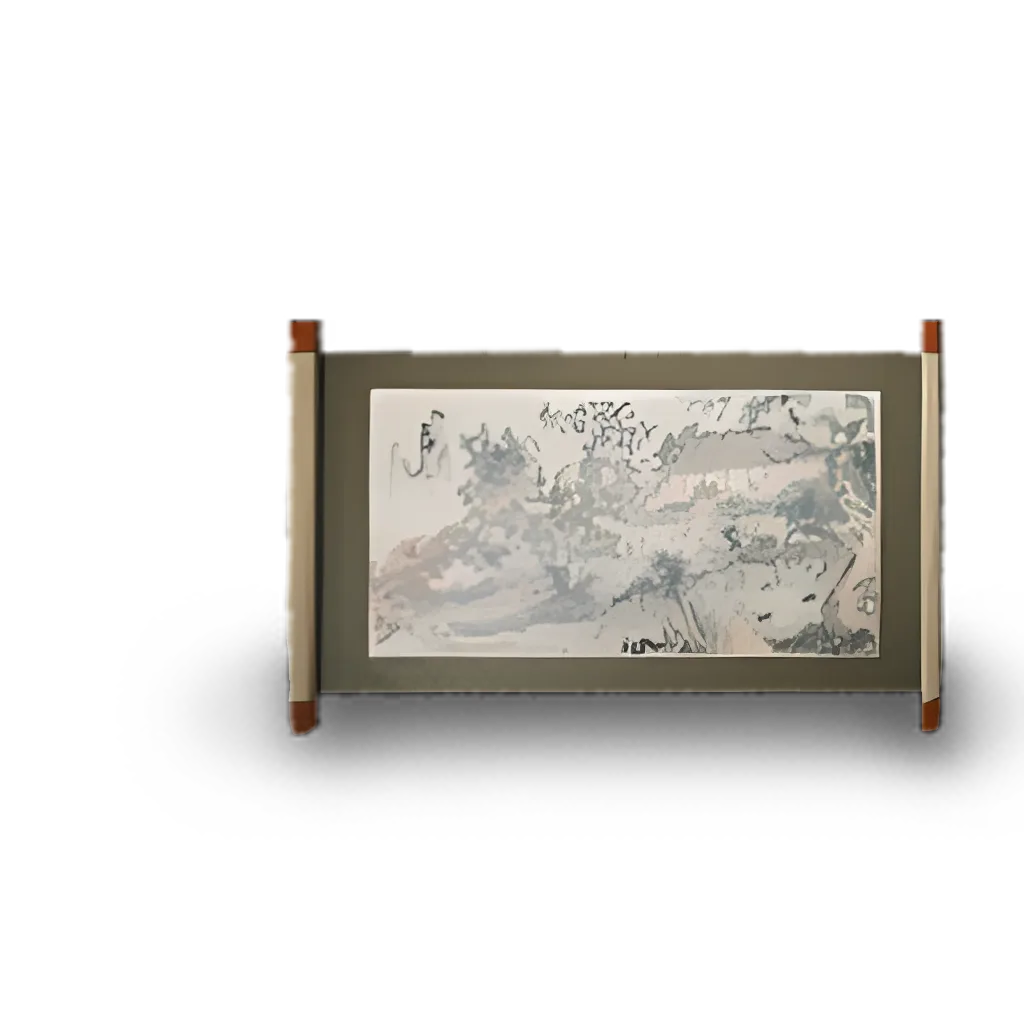
    The Ruyi Scroll depicts the Pained Realm and the Zodiac Village in Black Myth: Wukong.
    Custom image by Paul Vanasse.

    You can access the Painted Realm anytime with the Ruyi Scroll. When you first enter, you’ll notice that Shen Monkey, Xu Dog, and Chen Loong have settled in Zodiac Village. Chat with Chen Loong located up the stairs from the Shrine, and discover he has a green thumb. He will plant any seeds you collect, taking care of the plants until they’re ready for harvesting ingredients, which you can then bring to Xu Dog nearby to create medicines.

    Additionally, you’ll be able to request medicines from Xu Dog periodically. Keep exploring, and eventually, you’ll meet the blacksmith, Yin Tiger, in a large open area. With his forge, he’ll be able to enhance any armor pieces you own, provided you have the necessary materials. This means you can upgrade your favorite armor sets, boosting their defense and allowing you to equip pieces with unique abilities to strengthen your character.

    If you decide to take on Yin Tiger in a duel, be prepared for a tough challenge. You might need a few attempts to understand his attack patterns and master your dodging techniques. However, if you succeed, you’ll earn a powerful new Transformation, Ebon Flow, and unlock a third Curio Slot. These rewards will significantly boost your combat prowess, helping you tackle tougher opponents with ease.

    Be sure to use the Ruyi Scroll to return to Zodiac Village frequently to enhance the Destined One’s skills and gear. NPCs in the village will have new items available for sale as you progress, so don’t forget to check in with them often. As you journey further in Black Myth: Wukong in search of the Great Sage’s treasures, the Painted Realm will serve as a sanctuary where you can grow stronger and prepare for the many challenges ahead.

    Credit: Wilstorm Gaming/YouTube

  • Mastering the Art of Killing Every Character in Until Dawn Remake

    Mastering the Art of Killing Every Character in Until Dawn Remake

    In the Until Dawn Remake, every survivor is at risk of dying. In fact, one of the Trophies for PlayStation 5, titled “This is THE End.” requires you to eliminate all characters. The way characters meet their end can significantly influence the narrative and gameplay. It can determine who takes on the role of the next protagonist, shift key scenes, or even skip over certain parts of the story altogether. The remaining characters may react to these losses with trauma, a sense of relief over a rival’s death, or attempts to comfort others, making the experience of witnessing different deaths through various playthroughs quite intriguing.

    The remake enhances the graphics, making the death sequences more intense and impactful than in the original PlayStation 4 version of Until Dawn. Many of the original actors, including Hayden Panettiere and Rami Malek, returned to reprise their roles through motion capture and voice recordings. If you want to spare your favorite character from a gruesome fate, it’s wise to choose less extreme options for their demise. However, if your aim is to kill off all characters, some choices might be off the table.

    Early Demises – How to Kill Jessica and Matt

    Their Fates Can Be Sealed Quickly

    Both Jessica and Matt are in danger early in Until Dawn. Jessica’s fate primarily hinges on the decisions made by others, while Matt can seal his fate with a single poor choice.

    Ways to Get Jessica Killed

    In the initial chapters, Jessica makes a number of poor decisions that can endanger her life. Among the characters, she stands out as the least sensible. In fact, she can only play a role if Matt hasn’t made worse mistakes beforehand.

    Death

    Chapter

    Actions

    Abducted and Ripped Jaw

    Four

    As Mike, fail all the Quick Time Events (QTEs) while pursuing Jessica and the mysterious figure.

    Matt Leaves Jessica to Die

    Six

    As Matt, allow the elk to pass without intervening. If you choose to provoke them, succeed in climbing back up the mountain by completing all the QTEs. Later, when Emily falls from the tower, choose not to save her.

    Nine

    As Matt, decide to run ahead of injured Jessica or leave her behind entirely. The Wendigo will find and kill her.

    Wendigo Catches Matt and Jessica Together

    Nine

    As Matt, fail any QTE or allow a decision timer to run out.

    Choked by Wendigo

    Six

    As Matt, provoke the elk so they push you over the edge of a cliff, then fail the QTEs to climb back up. Additionally, when Emily falls, she attempts to save her twice but does not use the flare gun.

    Nine

    As Jessica, choose any option to run instead of hiding. The Wendigo will inevitably catch up to her due to her injuries.

    Stabbed by Wendigo

    Nine

    As Jessica, fail any standstill prompt or allow a decision timer to run out.

    Ways to Get Matt Killed

    Matt’s deaths can often come across as somewhat humorous. His encounter with the wild elk herd feels oddly placed in the overall horror tone of Until Dawn. Usually, multiple mistakes will need to be made to meet his end.

    Death

    Chapter

    Actions

    Pushed Off The Mountain

    Six

    As Matt, provoke the elk so they push you off the cliff. Fail the QTEs to get back up.

    Hooked by Wendigo

    Five

    As Matt, agree with Emily to go to the Radio Tower.

    Six

    As Emily, keep the flare gun for yourself or give it to Matt. If he agreed to the tower’s visit, he will automatically fire it. As Matt, he will also save Emily twice when she falls.

    Wendigo Catches Matt and Jessica Together

    Four

    As Mike, pass all QTEs when chasing after Jessica and the unknown figure.

    Nine

    As Matt, fail any QTE or let a decision timer expire.

    Bashed In Face

    Nine

    Kill Jessica by missing all of Mike’s chase QTEs or by abandoning her as Matt. Then, fail any QTEs or allow a decision timer to run out.

    Multiple Ways to Die – How to Kill Chris, Ashley, and Emily

    Risks at Every Turn

    Chris and Ashley escape in Until Dawn

    Among the survivors, Chris, Ashley, and Emily have the highest number of potential deaths in Until Dawn. It’s fascinating to think about which scenes will make it to the film adaptation, although it’s unlikely that all three characters will make it through alive.

    Ways to Get Chris Killed

    Chris’s survival hinges not just on his own choices but heavily on how Ashley fares. YouTuber GoGa No Commentary faced a decision on whether to shoot Chris or Ashley and went with Chris, which surprisingly offered him a new chance at life.

    Your last opportunity to eliminate Chris comes in the ninth chapter. If he survives up to the final confrontation, he will automatically escape. However, making several mistakes, like with Sam, can leave Chris as the last one standing.

    Death

    Chapter

    Actions

    Ambushed by Wendigo

    Eight

    While hunting Wendigo with the Stranger, fail any shooting segment QTEs.

    Ashley Strands Chris

    Six

    When captured by the Psycho, choose to shoot Ashley.

    Eight

    While out with the Stranger, successfully complete all shooting QTEs. Ashley will still harbor resentment and allow Chris to perish.

    Wendigo “Jessica” Trap

    Nine

    As Ashley, avoid trying to meet Chris. As Chris, follow Jessica’s voice and open the latch. Note: If Ashley is dead, Chris will automatically check and meet his demise.

    Ways to Get Ashley Killed

    A significant number of Ashley’s potential deaths are linked to Emily. The better Emily performs in her segments, the less likely it becomes that Ashley will be involved in a subsequent altercation. This could result in Matt facing greater dangers, depending on your strategy.

    Death

    Chapter

    Actions

    Wendigo “Jessica” Trap

    Nine

    As Ashley, do not attempt to find Chris, then follow Jessica’s voice and open the latch.

    Caught in Lodge Explosion

    Ten

    As Sam, hurry to the light switch before Ashley can escape.

    Gouged Eyes

    Six

    As Emily, give the flare gun to Matt or discharge it now.

    Eight

    As Emily, inflict some damage while escaping the Wendigo. As Ashley, point out Emily’s bite mark, but when it’s Mike’s turn, refuse to shoot Emily.

    Ten

    If Ashley has called Emily out, Emily will quickly exit the lodge. As Sam, neglect to assist Ashley against the Wendigo.

    Ways to Get Emily Killed

    Emily faces some of the most brutal deaths in Until Dawn. Given the game’s chaotic nature, you might miss a few even after multiple playthroughs. To experience certain deaths, you need to be strategic.

    Death

    Chapter

    Actions

    Crushed in Eyes

    Eight

    While being chased by the Wendigo, fail too many QTEs or neglect to start the elevator.

    Fall into Rock Grinder

    Eight

    Take the right-hand path. Remain on the conveyor belt and fail two QTEs.

    Shot by Mike

    Six

    As Emily, give the flare gun to Matt.

    Eight

    During the Wendigo pursuit, take damage and sustain a bite. Then as Mike, shoot at “possibly infected” Emily.

    Caught in Lodge Explosion

    Ten

    As Sam, hurry to the light switch before Emily can escape.

    Gouged Eyes

    Five

    As Matt, disagree with Emily about going to the Radio Tower.

    Six

    As Emily, keep the flare gun to yourself.

    Eight

    In the Wendigo chase, opt for the left route and complete all QTEs. Shoot the Wendigo with the flare to avoid being bitten.

    Ten

    If there hasn’t been a confrontation over a bite, Emily will allow Ashley to leave first. As Sam, simply ignore Emily’s need for help.

    Last Minute Deaths – How to Kill Mike, Sam, and Josh

    They Will Usually Survive

    Sam stares aimlessly in Until Dawn

    Mike and Sam serve as central figures in the plot of Until Dawn and have a limited number of ways to meet their end. Throughout the game, even situations that should have been fatal for them typically result only in injuries or fear, giving them the impression of being nearly invulnerable.

    Additionally, Josh dies by default. You don’t need to take special measures to make sure he perishes. However, if you manage to collect all the hidden items, particularly the Scrawled Journal, he can recover and survive.

    Ways to Get Mike Killed

    Mike’s demise can only happen in the final chapter of Until Dawn. Most of this act is played from Sam’s perspective. If you don’t mind letting Sam survive, you can kill off Mike, Ashley, and Emily with one action: detonating the lodge.

    Death

    Chapter

    Actions

    Burned by Sam

    Ten

    As Sam, get to the light switch quickly, allowing all other survivors to die.

    Self-Immolation

    Ten

    As Sam, fail the first standstill prompt, injuring Mike but not killing him. Then, allow her to be seen by the Wendigo, leading Mike to blow up the lodge with his lighter.

    Ways to Get Sam Killed

    Sam has only one definitive way to die in Until Dawn. If timed correctly, you can allow Sam to die while letting Mike survive; you must pass the first standstill prompt and then fail the second. However, in the remake, allowing her to survive can unlock a new ending.

    Death

    Chapter

    Actions

    Stabbed by Wendigo

    Ten

    Fail the second standstill prompt while helping Mike. Note: If Mike has already exited the lodge, Sam can no longer be killed.

    Source: GoGa No Commentary/YouTube

  • Diablo 4: The Vessel of Vengeance

    Diablo 4: The Vessel of Vengeance

    The Kurast Undercity in Diablo 4: Vessel of Hatred presents an exhilarating dungeon filled with monsters and a distinct Tribute-based reward system. Although navigating through its challenging levels can be tough, the rewards you receive at the base are not particularly generous. To truly maximize your gains, you’ll need to collect Tributes and enhance your loot using Bargains.

    Vessel of Hatred’s Kurast Undercity isn’t new to the Diablo series—players may remember it from Diablo 2—but it has undergone significant enhancements since its return. With floors teeming with foes and a powerful boss awaiting you, it closely resembles the best Nightmare Dungeons in Diablo 4. Nevertheless, the reward system here stands out, relying heavily on Tribute consumables, which can significantly impact the farming potential in the dungeon.

    How to Unlock the Kurast Undercity

    Beyond the Diablo 4 Campaign


    To unlock the Kurast Undercity in the Diablo 4: Vessel of Hatred expansion, you must complete the campaign and reach Level 15. This new dungeon will become available during the “Deeds of a Champion” storyline, which spans the game’s endgame content. According to TheGamer, this quest requires defeating the Terror of Five Hills dungeon boss. Once you complete this task, you’ll gain access to both the Kurast Undercity and its rewards.

    Kurast Undercity Walkthrough

    Rush the Timed Three-Tier Dungeon

    Player enters the first floor of the Kurast Undercity in Diablo 4: Vessel of Hatred

    The Kurast Undercity consists of three distinct levels. The first two levels are timed, whereas the boss fight on the final level is not. As you navigate, it’s important to note enemy locations to optimize your limited time. Completing optional events and defeating enemies will grant you extra time and Attunement. Elite monsters provide the most significant time extension, but all victories are beneficial. Use your map to track icons to plan your route effectively.

    Every completed activity in the Undercity boosts your Attunement level, which in turn yields bonus loot from the boss’s chest. To achieve Rank IV, you must clear the majority of the activities within the dungeon.

    As you progress, activating Beacons will be crucial for maintaining momentum. Once lit in the Undercity, they summon waves of enemies, granting you more time and a significant cooldown reduction. This lets you advance more swiftly through the first two levels.

    Upon reaching the third level, you’ll encounter the boss arena. Remember that these battles are not timed, which somewhat relieves the pressure, but also indicates the difficulty you’re likely to face. Avoid area-of-effect (AoE) attacks and health replenishment when necessary. After defeating the boss, you can access the boss’s loot chest, but keep in mind that Tributes and Bargains play a crucial role in determining your rewards.

    Kurast Undercity Rewards

    Tributes & Bargains

    The Spirit Brazier located outside the Undercity is where you’ll make your Tributes and Bargains. While these are optional, they significantly enhance the rewards for clearing all three levels of the dungeon. Rob2628 illustrates how you can specifically target items that you wish to collect from the boss’s chest, making the Kurast Undercity a prime location for farming during the Diablo 4 endgame. The focus on Tributes is vital for maximizing your earnings, while Bargains influence the quality of drops. Below is a clear differentiation of these systems.

    Tributes

    Ancestral Loot Drops in Diablo 4: Vessel of Hatred's Kurast Undercity

    According to GameRant, Tributes act as keys to the dungeon, though you don’t actually need them to enter the Undercity. Their main purpose is to influence the type of loot you’ll receive from the boss’s chest. Naturally, common Tributes deliver less valuable rewards, while rarer Tributes promise much better loot. Along with allowing you to craft Mythic Uniques in Season 5, this serves as a game-changer for anyone on the hunt for rare gear in Diablo 4.

    The catch is that Tributes often come with specific requirements, and you’ll need to complete the Undercity and finish relevant quests to acquire them. The final quest will provide you with some initial Tributes, but you can earn more through dungeons, public events, and further Undercity runs. Some known types include:

    Tribute of Growth

    Grants additional Experience points.

    Tribute of Harmony

    Ensures Rune drops.

    Tribute of Radiance

    Ensures drops of Legendary Ancestral items.

    Tribute of Ascendance

    Boosts the chance of Mythic Uniques.

    Bargains

    Bargains modify the loot linked to your Tribute and require currency, crafting resources, or a mix of both. You can apply additional Bargains as you progress through different difficulty levels. Keep in mind that you can only have one Bargain active per run.

    Using Bargains is an excellent strategy for securing items with Skill Ranks or Mythic Uniques. However, like Tributes, there is a downside to crafting Bargains. The more you use them, the higher the costs become, so it’s vital to focus on other aspects of the Diablo 4: Vessel of Hatred expansion, such as unlocking new DLC mercenaries.

    Source: Charles Burgar/TheGamer, Marc Santos/GameRant

    Video Credit: Rob2628/YouTube

  • Optimal Playstyles for Each Position in the Game

    Optimal Playstyles for Each Position in the Game

    Since the introduction of Playstyles in the series, they’ve made a significant impact, and this trend continues with EA Sports FC 25. Each player in the game is assigned stats that reflect all areas of football, rated from 0 to 99. However, the top players come with unique abilities and Playstyles that enhance their main attributes even further. Your choice of Playstyles will largely depend on your personal play style, especially when it comes to certain positions like full-backs and wingers.

    In optimal formations within EA Sports FC 25, you’ll want your attacking players to utilize Playstyles that can effectively challenge defenders, while in some cases, maintaining possession takes priority. There are 34 distinct Playstyles available in EA Sports FC 25, each enhanced if your player has the Playstyle Plus attribute. These Playstyles fall into six key categories: scoring, passing, defending, ball control, physical, and goalkeeping. They apply across all game modes, like Career Mode and Ultimate Team, and are fixed for each player, meaning you cannot change them.

    Best Playstyle for Each Position

    Playstyle Recommendations by Position

    Position Best Playstyle Description
    Goalkeeper (GK) Footwork Enhances the goalkeeper’s ability to make foot saves more frequently and extends their reach.
    Fullbacks (LB/RB) Intercept Improves reach and ball retention during interceptions—critical for disrupting attacks.
    Center Backs (CB) Block Increases the effectiveness of blocking attempts, significantly reducing shot opportunities against you.
    Defensive Midfielders (CDM) Anticipate Boosts success rates for standing tackles and ball control after tackles, making it vital for CDMs.
    Central Midfielders (CM) Tika Taka Improves accuracy and speed of ground passes, crucial for ball movement in midfield.
    Attacking Midfielders (AM) Incisive Pass Enhances the accuracy and speed of through balls to strikers.
    Wide Midfielders (LM/RM) Rapid Boosts sprint speed while dribbling, minimizing the risk of losing ball control.
    Wingers (LW/RM) Technical Increases speed during controlled sprints, allowing for better maneuvering in tight spaces.
    Strikers (ST/CF) Finesse Shot Enhances the speed and curve of shots, improving conversion rates from distance.

    In a groundbreaking move, EA Sports FC 25 marks the first time Playstyles have been introduced specifically for goalkeepers, offering six options. Among these, Footwork is the standout choice, boosting the number of foot saves your goalkeeper can make—often crucial in closely contested matches.

    When choosing Playstyles for defenders and defensive midfielders, you should consider your play style. Options like Intercept, Block, and Anticipate all can be effective, influenced by your formation and preferences. Creative midfielders—both central and attacking—will thrive using Playstyles that enhance their passing, such as Incisive Pass, Tika Taka, and Pinged Pass.

    For wide midfielders and wingers, the choice is personal based on your strategic goals. I personally prefer the Technical Playstyle, particularly for skilled players, as it improves their chances of outmaneuvering defenders and advancing toward the goal. Nevertheless, you should also pay attention to physical attributes like speed, which can provide a crucial advantage when initiating attacks from wide positions.

    When it comes to strikers, you have several options within the scoring category that can enhance physicality. Among these, Finesse Shots stand out, significantly improving shot accuracy and creating more goal-scoring chances from a distance. Playstyles have quickly become essential in EA Sports FC 25, and having the right ones linked to your players can greatly enhance your team’s performance.