Tag: PC Games

  • ReFantazio: Unlocking New Game+ and What’s Carried Over

    ReFantazio: Unlocking New Game+ and What’s Carried Over

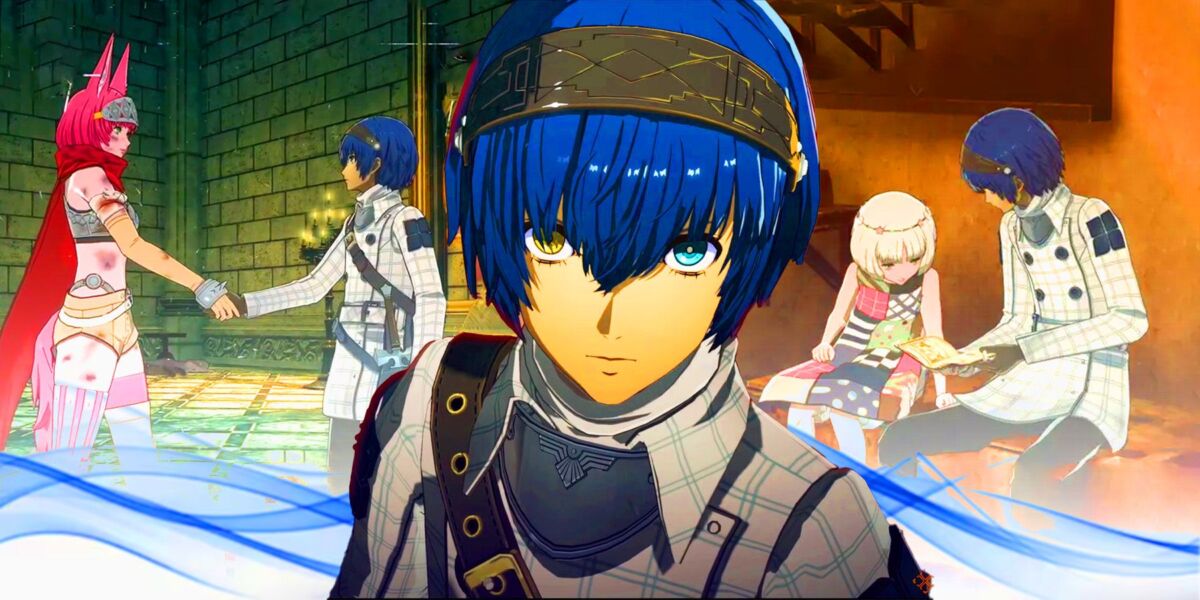
    Even after a long journey through Metaphor: ReFantazio, many gamers are excited to dive into New Game+ and explore what they can bring along. Fortunately, similar to previous Atlus titles, important gameplay features will transfer over, allowing players to manage their time in dungeons more efficiently while tackling other quests.

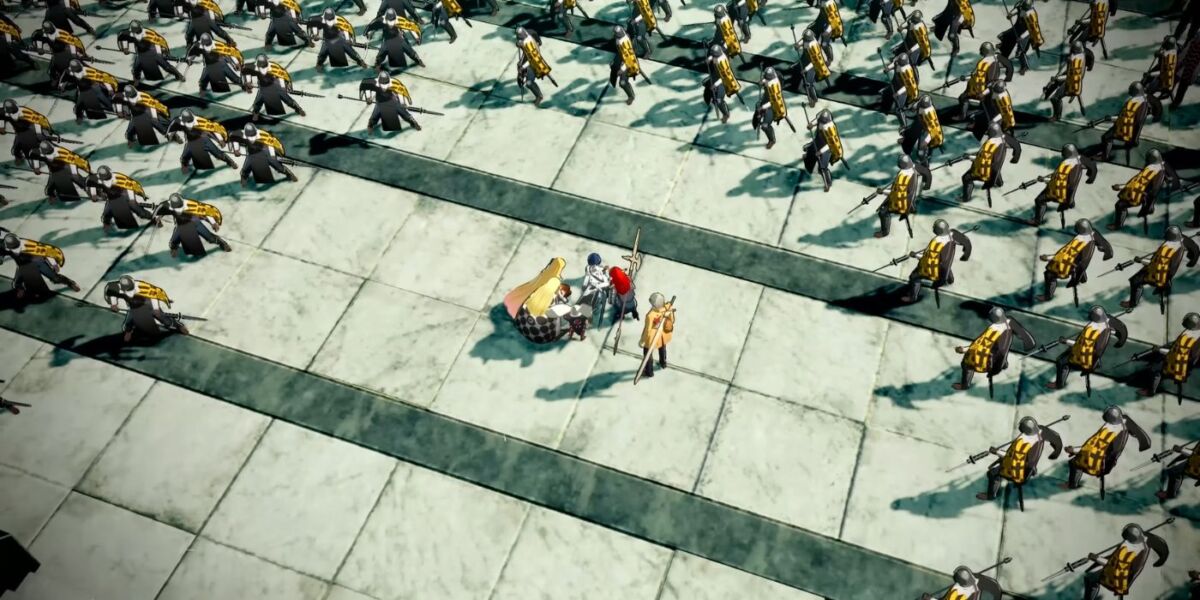
    But the excitement of New Game+ isn’t just about carryover items. Those seeking an extra challenge can face a secret boss that only appears in New Game+, known as the Redscale Apocalypse Dragon.

    How to Unlock New Game Plus

    Complete the Main Campaign of Metaphor: ReFantazio

    FazPersona

    Getting started with New Game+ is straightforward. To unlock this feature, you must first finish the main campaign and witness the true ending of Metaphor: ReFantazio, where the screen displays “Fantasy Lives On…” followed by the credits.

    If you’re confident in your advantages,
    consider challenging the Regicide difficulty
    , which is off-limits in your first playthrough.

    After the credits roll, you’ll be prompted to create a clear data file, marking the beginning of your New Game+ adventure. Your total playtime will also be carried over, similar to other Atlus games, so don’t be alarmed if the game doesn’t reset your playtime. Once you access that file, you can officially embark on your New Game+ journey.

    What Carries Over to New Game Plus

    What You Can Take with You and What Resets in New Game+

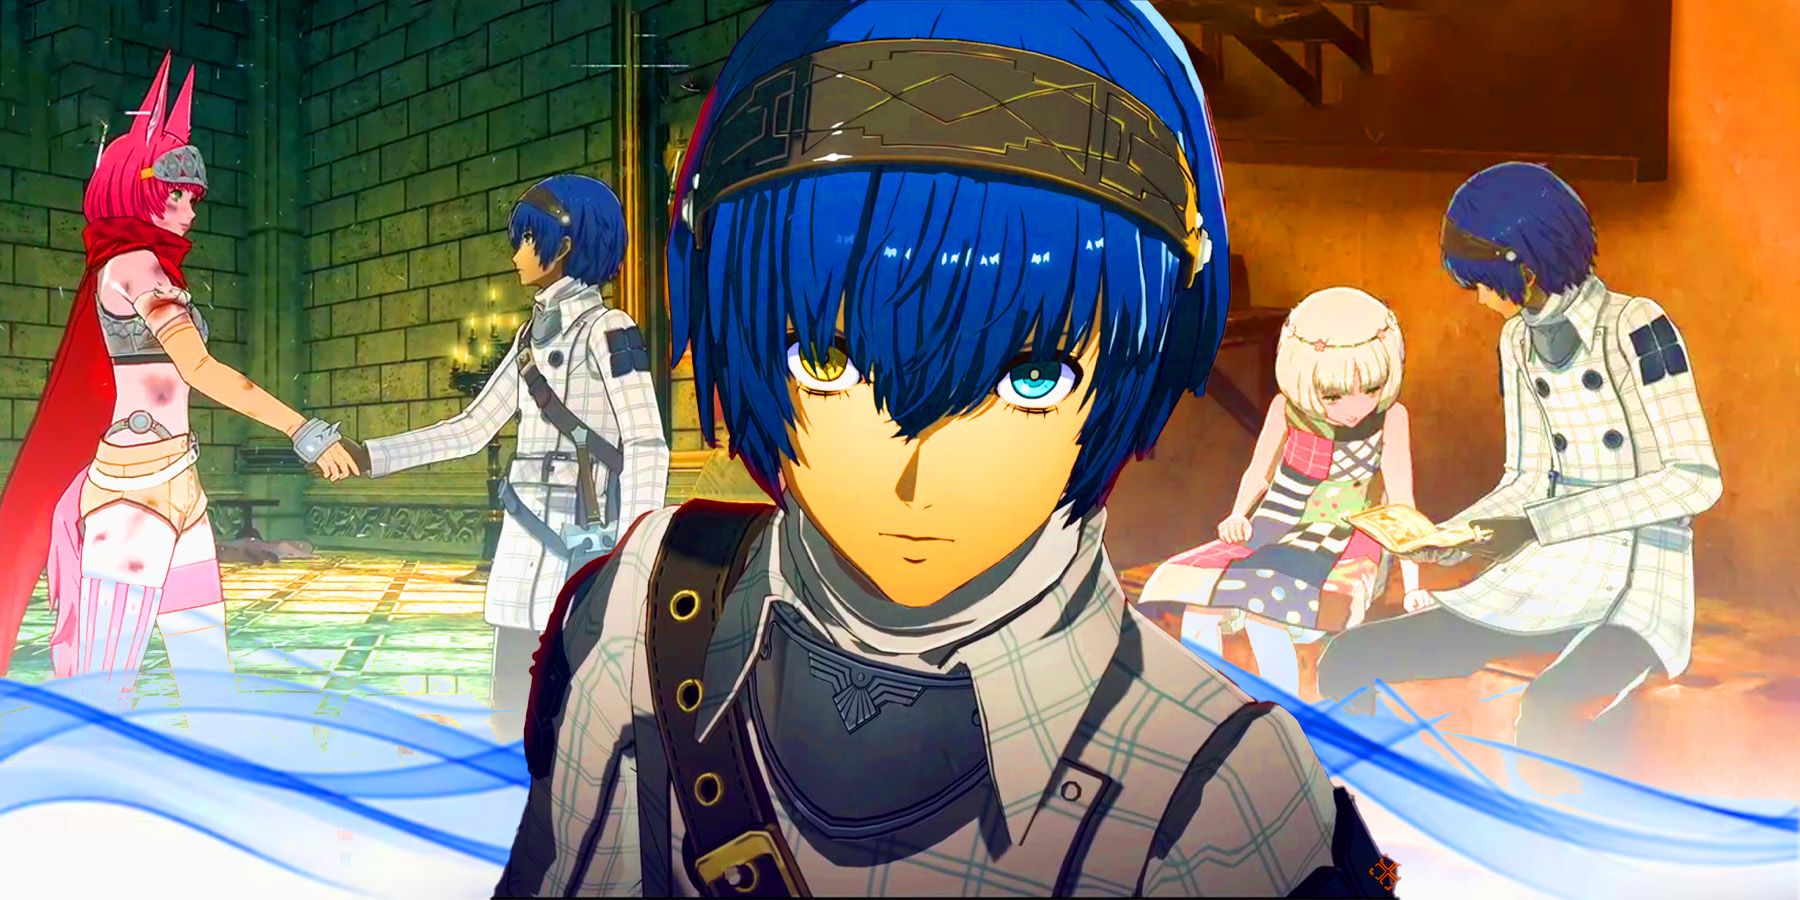
    However, not everything transfers to the New Game+ experience, as highlighted in The Game Looters’ video. If everything transferred, key plot elements would lose their impact. For instance, players can’t access all archetypes right away without first engaging with the respective Followers. Whatever does carry over is meant to enhance your replay experience and assist in obtaining achievements that may have been challenging during the first playthrough.
    Related

    Metaphor: ReFantazio – Max Follower Bonds Guide (Social Links)

    Metaphor: ReFantazio features a Bond system akin to the Social Links in Persona, extending to both party members and NPCs, totaling 14.

    Many less critical aspects of your first playthrough will carry over smoothly, such as Money, MAG, Items, Equipment, and Gold Beetles. However, essential quest items aside from rewards from bonds will not transfer. You will keep your Archetype progress, but they won’t be immediately available until you unlock them again through the story. Once you do, they’ll have all your prior progress intact.

    One of the key features that carries over is your Royal Virtues, or Social Stats. Though this may seem minor, it provides greater flexibility in managing your time before various deadlines. Since you won’t need to spend time boosting your Royal Virtues, you can focus on different activities, such as treasure hunting or leveling up in dungeons.

    If you haven’t finished your initial playthrough yet, it’s advisable to maximize your Royal Virtues. As noted in

    The Game Looters

    ‘ video above, this will save you time later, allowing you to focus on other objectives.

    While there’s plenty to retain, it may not be worth the effort to grind levels in your first playthrough if you plan to continue playing in New Game+. However, it’s beneficial to farm items and equipment, as these carry over and are crucial in the early stages of your second playthrough, helping you level up your character more efficiently.

    New Features in New Game+

    Discover the Book of Apocalypse

    Player standing next to the Book of Apocalypse in Metaphor ReFantazio

    Engaging in a second playthrough with some advantages is just one of the appealing aspects of New Game+ in Metaphor: ReFantazio. You probably encountered a mysterious book during your first run, The Book of Apocalypse, but were unable to interact with it. No matter how many times you checked it in Akademia, you couldn’t do anything with it.

    Related

    Should You Fight the Dragon in Metaphor: ReFantazio?

    Metaphor: ReFantazio’s first optional boss is a sleeping dragon guarding treasure in the Nord Mines. But is the challenge worth it?

    Fortunately, those who revisit the game in New Game+ can finally unlock the Book. Interacting with it allows you to face a secret boss, the Redscale Apocalypse Dragon, as long as you’re not on Storyteller difficulty. This fight is quite challenging, so it’s advisable to level up appropriately before diving in, even if the idea of challenging this hidden boss in Metaphor: ReFantazio sounds tempting.

    Source: YouTube/The Game Looters

  • Compete in Symbiote Cup for She-Venom Skin: A How-To Guide

    Compete in Symbiote Cup for She-Venom Skin: A How-To Guide

    As part of the upcoming Fortnitemares 2024 event in Fortnite, players will have the chance to participate in a special tournament named the Symbiote Cup. This exciting event offers players a chance to earn the She-Venom and Agony skins for free. It makes perfect sense since Venom and Carnage are already featured in the game.

    The Symbiote Cup kicks off on October 22, 2024, and will be open to players from all regions, though specific participation times will be assigned based on location. This tournament is a Battle Royale Duos format, meaning there are no rank restrictions, but there are certain criteria you must meet to compete.

    When Does The Fortnite Symbiote Cup Start?

    Everything You Need to Know Before the Event Begins


    The Symbiote Cup will feature 10 matches over a three-hour span starting on October 22, 2024. Each region will have its own specific three-hour window when players can participate, so make sure to log in and check your region’s time to avoid missing out. During this period, your goal is to earn as many Battle Royale points as possible.

    Related

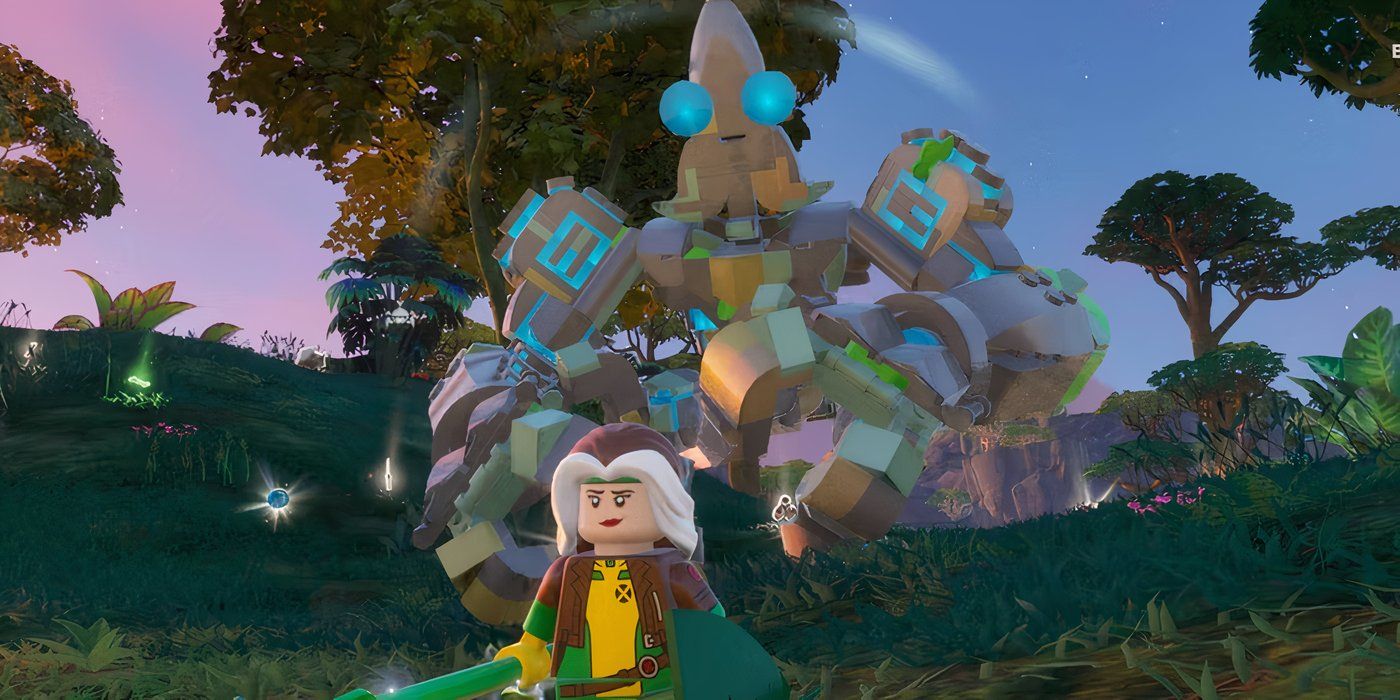
    LEGO Fortnite: How To Find & Beat Golems

    Golems are a new enemy in LEGO Fortnite, added with the Lost Isles update. Discover where to find these rocky beasts and how to defeat them.

    The scoring system for the tournament focuses on two main aspects. Players will gain more points for achieving higher ranks, with eliminations also contributing to your score. This rule aims to discourage players from hiding until the last minute, only to claim victory while relying on others to do the hard work. Therefore, if your normal strategy is to play it safe, you might want to adopt a more aggressive style for the Fortnitemares 2024 Symbiote Cup.

    For those who prefer not to take part in the Symbiote Cup, the She-Venom and Agony skins will also be available in the store starting October 24 at 8 PM ET.

    To score points, the ranking system gives only two points for 25th place, with every subsequent position earning an additional two points. For instance, 24th place earns four points while 23rd gets six, and so forth. This structure changes slightly for the top five, where the points increase significantly: fifth place gets 44, fourth earns 48, third receives 52, second gains 56, and first place gets an impressive 65 points. Besides your ranking points, you will also earn one point for each elimination you achieve during the matches.

    Participation Requirements

    Symbiote Cup point breakdown in Fortnite

    Before you can compete, you must meet certain requirements. You need to be at least 13 years old, have two-factor authentication enabled on your account, and your account level must be at least 50. You can check your level by accessing the Careers tab within the game.

    Related

    Platform(s)
    PC, iOS, Mobile, Xbox One, Android, PS5, Xbox Series X, Xbox Series S, Switch

    Released
    July 25, 2017

    Because this tournament is focused on strategic play rather than gimmicks, items like Boom Billy and Pumpkin Launchers will not be available during the matches, despite the Halloween theme of Fortnitemares. These rules ensure that everyone can compete fairly, relying primarily on skill to earn points.

    How To Get The She-Venom & Agony Skins For Free

    Unlock These Skins For Free Before They Hit The Shop

    Symbiote Cup showcasing the event details in Fortnite

    As suggested by the tournament name, the reward for the Symbiote Cup is clear. The top-performing duos from each region will be awarded the She-Venom and Agony skins free of charge, giving them access to these items before they are available for purchase in the store. This allows you not only to save money but also to show off your victory in the Symbiote Cup.

    Unfortunately, since the scoring is based on points and eliminations will factor in as well, it’s hard to determine a specific score to aim for. Achieving first place in every match doesn’t guarantee a win if another duo also comes in second consistently while getting more eliminations throughout. Focus on doing your best, and even if you don’t finish first in this Fortnite tournament, try to accumulate as many eliminations as possible.

  • Ultimate Wraith Build: Abilities, Gear, and Leveling Tips

    Ultimate Wraith Build: Abilities, Gear, and Leveling Tips

    Wraith is one of the easier characters to play in Deadlock, and many gamers fail to see her full potential through an optimized build. Skilled with weapons, she can inflict damage swiftly and reliably, and her unique skills allow for teleportation and disruption of enemy formations. To excel against other players, it’s crucial to prioritize the right leveling and itemization through various stages of the game.

    While her abilities might not be as elaborate as Pocket’s in Deadlock, Wraith offers a solid mix of versatility. Despite her straightforward kit, she has some effective surprises to reveal during battles. This simplicity could be the key to her strength when handled by a skilled player. With thorough mastery of her four abilities, along with the right items, she can easily lead a team to victory alone.

    Optimal Abilities & Items for Wraith in Deadlock

    Leveling & Itemization for Each Game Phase

    For most players, Wraith’s best build revolves around a gun setup. Given that many of her abilities benefit from Spirit scaling, we’ll also consider this aspect to create a balanced build. Content creator Metro has shared essential tips regarding useful items, making their build popular among Wraith admirers. We’ve developed similar paths for ability usage and leveling, along with item recommendations for different game phases.

    Deadlock
    is currently being tested, so some gameplay details might undergo changes. We will provide updates as Valve releases patches and new content.

    Most Effective Ability Path & Leveling for Wraith

    Like all heroes in Deadlock, Wraith possesses four unique abilities: Card Trick, Project Mind, Full Auto, and Telekinesis. Although she may seem basic compared to other characters with intricate abilities, her true potential shines once you focus on her leveling and item loadout. Here’s a detailed overview of her abilities and their enhancements at various AP levels:

    ABILITY DESCRIPTION & LEVELING
    Card Trick Summon cards that deal weapon damage. Activate to throw a card flying towards an enemy or a target point under your crosshair.

    • 1 AP: +1 Charge
    • 2 AP: +50 Damage
    • 5 AP: +50% Card Summon Rate
    Project Mind Teleport to a designated location.

    • 1 AP: +15m Cast Range
    • 2 AP: Grants a 300 Bullet Shield for 8 seconds upon Teleport. The shield scales with Spirit Power.
    • 5 AP: -30s Cooldown
    Full Auto Provides a temporary increase to your fire rate. Nearby allies gain half of the fire rate bonus.

    • 1 AP: -15s Cooldown
    • 2 AP: +5 Spirit Damage Per Bullet
    • 5 AP: +35% Bullet Lifesteal
    Telekinesis Lift an enemy hero into the air, briefly stunning them. The target incurs Telekinesis damage when the lift concludes.

    • 1 AP: -30s Cooldown
    • 2 AP: +0.5s Duration
    • 5 AP: Telekinesis targets enemies within an area around Wraith.

    With all these points in mind, the best way to unlock Wraith’s abilities is:

    1. Card Trick
    2. Full Auto
    3. Project Mind
    4. Telekinesis

    Once you’ve accessed all four abilities, shift your attention toward upgrades. Start with 1 AP for Card Trick, then proceed with Full Auto upgrades. You won’t need to max this ability out immediately; however, securing the first two enhancements for reduced Cooldown and increased Spirit Damage is vital. Afterward, repeat the pattern with Telekinesis and work on maxing out Card Trick, finishing with Project Mind.

    Best Itemization for Wraith

    Best Items for Wraith in Deadlock

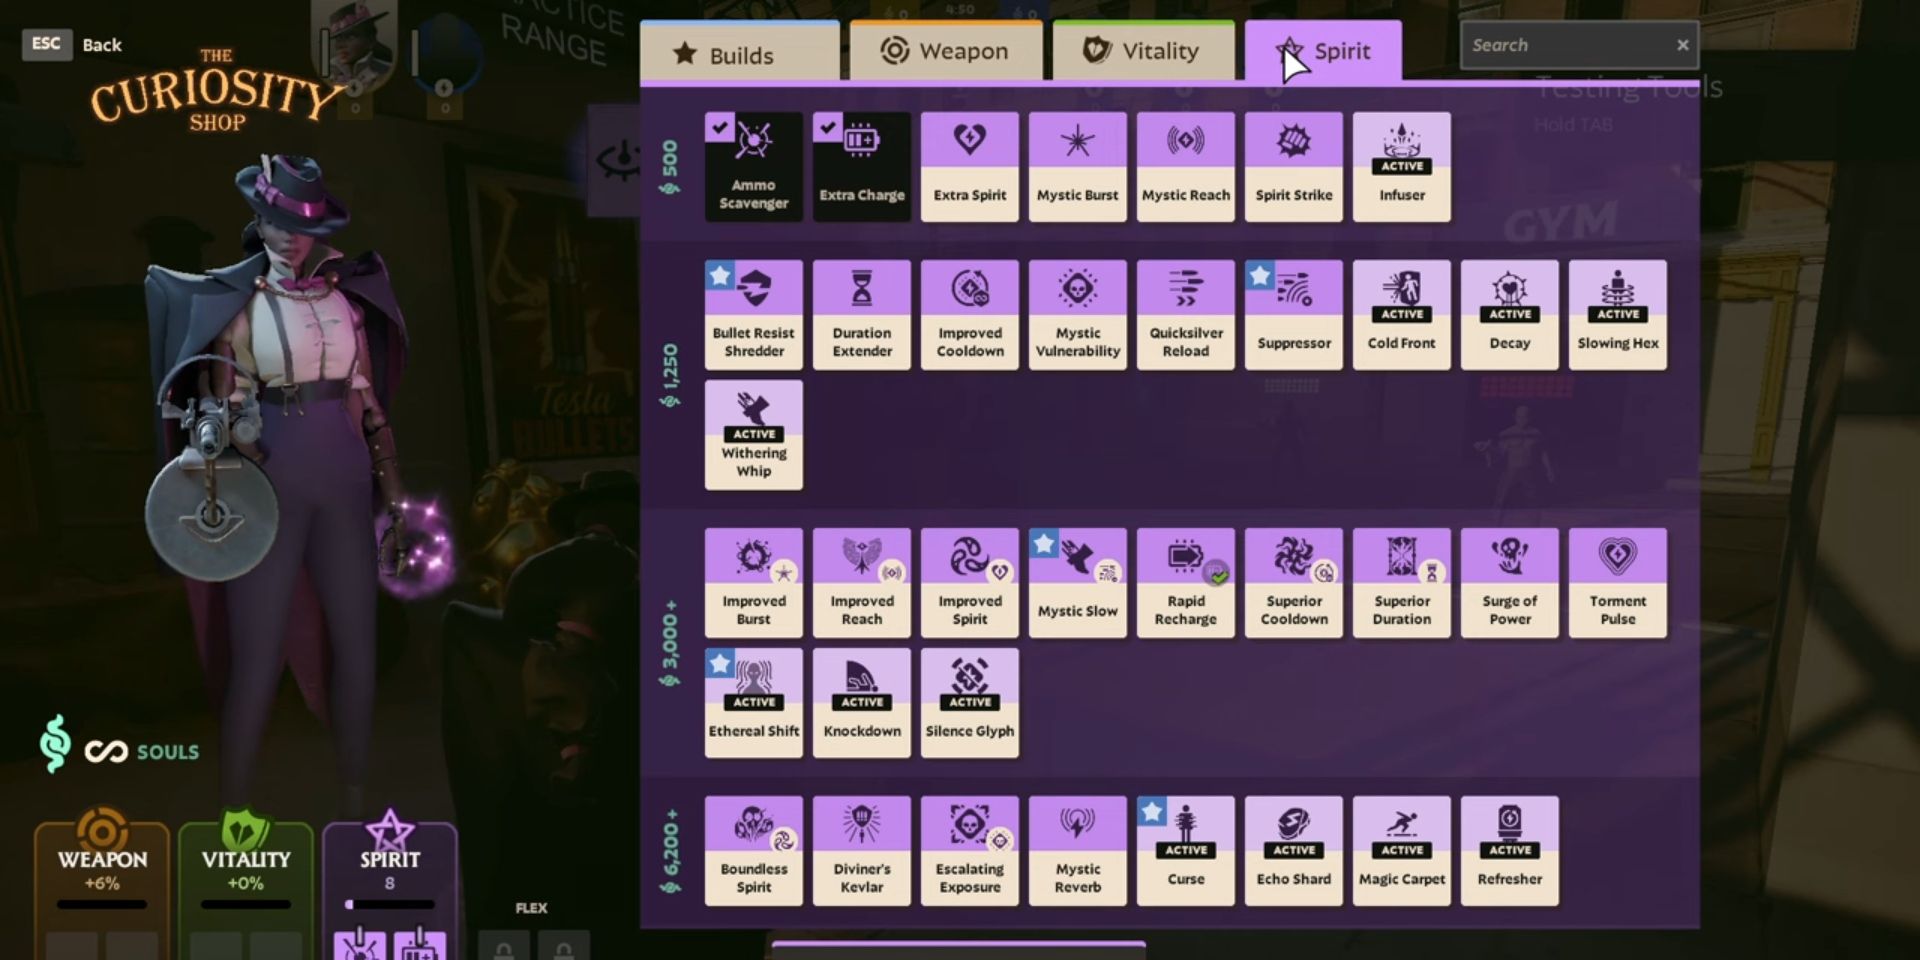
    Wraith’s optimal itemization across different game phases is somewhat like Haze’s recommended items in Deadlock. Our main focus is on Weapon Damage, with additional support for amplifying Spirit Power and effects on enemies. We’ve also included some Situational and Flexible Item suggestions to adapt to gameplay circumstances. Here’s a detailed breakdown:

    GAME PHASE BEST ITEMS SITUATIONAL & FLEX ITEMS
    Early Game (Lane)
    • Basic Magazine
    • Monster Rounds
    • Extra Regen
    • Mystic Burst
    • Extra Charge
    • Ammo Scavenger
    Mid Game
    • Slowing Bullets
    • Tesla Bullets
    • Lucky Shot
    • Combat Barrier
    • Bullet Lifesteal
    • Spirit Armor
    • Burst Fire
    • Bullet Resist Shredder
    • Quicksilver Reload
    • Fleetfoot
    Late Game
    • Ricochet
    • Titanic Magazine
    • Inhibitor
    • Toxic Bullets
    • Curse
    • Suppressor
    • Leech
    • Intensifying Magazine

    During the early game phase of Deadlock, focus on acquiring Basic Magazine, Monster Rounds, Extra Regen, and Ammo Scavenger to enhance Weapon Damage and ammo. These items will also provide health and Spirit Power boosts. Mystic Burst can also contribute to your Weapon Damage, while providing an essential Spirit Shield enhancement. Lastly, don’t forget to include Extra Charge to maximize Wraith’s Card Trick potential.

    As your game progresses into the mid-phase, focus on acquiring Slowing Bullets, Tesla Bullets, and Lucky Shot. These upgrades will significantly boost Weapon Damage, Spirit Damage, Fire Rate, and ammunition count. The Combat Barrier offers additional benefits, while Bullet Lifesteal and Spirit Armor enhance Wraith’s longevity in battles.

    Finally, in the endgame phase, prioritize three key items: Ricochet, Titanic Magazine, and Inhibitor. Together, they will maximize Weapon Damage, Fire Rate, and ammunition, while also providing some health benefits. You may switch to various Situational and Flex Items, such as Toxic Bullets and Curse, which can be particularly troublesome for your opponents.

    Video Credit: Metro/YouTube

  • Harvest Resources & Forge Mythic Items in Season 6

    Harvest Resources & Forge Mythic Items in Season 6

    Farming bosses in Diablo 4 has consistently represented the ultimate endgame experience, a trend that continues with the Vessel of Hatred expansion. While these bosses no longer yield Legendary gear, they now exclusively drop Unique items, making it much simpler to hunt for specific pieces of equipment. Additionally, with the introduction of Runewords this season, the significance of Tormented Bosses has increased immensely.

    In the prior season, you needed only four Resplendent Sparks to craft any Mythic Unique item of your choice. However, this process has been revamped to include Runes. Now, crafting Mythic Uniques demands three distinct sets of Runes, with each type varying based on the Mythic being created. To gather enough Runes for the preferred Mythic, players should focus on farming Tormented Bosses in Diablo 4.

    Top Tormented Bosses for Material Farming

    Duriel and Andariel

    Among all Tormented Bosses, Duriel and Andariel offer double the chance of dropping Mythic Unique items compared to any other bosses. Therefore, targeting these bosses for farming Mythic gear is far more efficient than hoping for drops from bosses like Grigoire, The Galvanic Saint. Keep in mind that different Tormented Bosses drop distinct loot based on your character class, though the Rogue lacks Mythic Unique gear specific to their class.

    Class

    Mythic Uniques

    Barbarian

    The Grandfather

    Druid

    Ahavarion, Spear of Lycander

    Necromancer

    The Grandfather

    Sorcerer

    Ahavarion, Spear of Lycander

    Spiritborn

    Nesekem, the Herald

    All Classes

    Doombringer, Melted Heart of Selig, Andariel’s Visage, Harlequin Crest, Ring of Starless Skies, Tyrael’s Might, Heir of Perdition, Shroud of False Death, Shattered Vow

    Tormented Bosses also frequently drop various Runes, essential for crafting Mythic Unique items at the Jeweler. Each Mythic Unique requires three different Rune sets for crafting, with six Runes needed from each set. For instance, crafting Tyrael’s Might requires six Lith Runes, six Feo Runes, six Tec Runes, and two Resplendent Sparks.

    Seething Opals, Elixirs, and Incense

    Maximize Your Efficiency Against Bosses

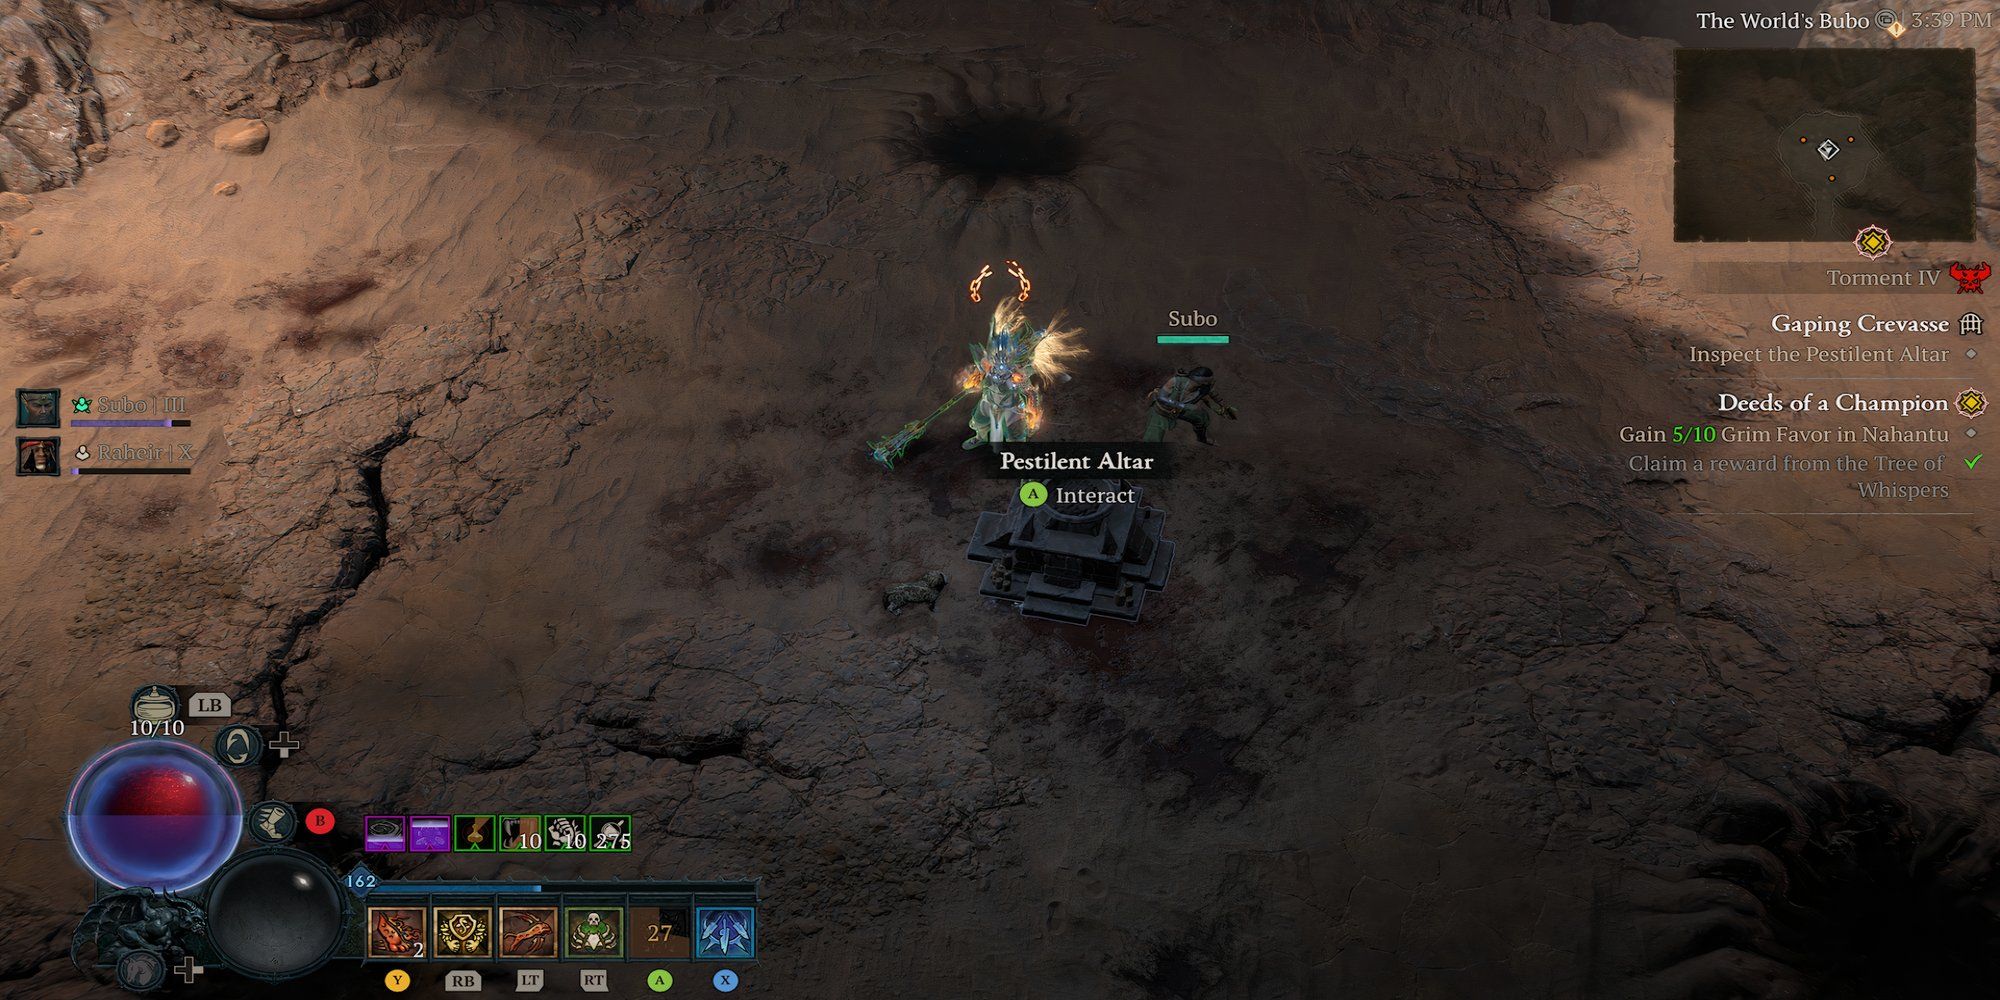
    The World's Bubo Arena featuring the Tormented Boss Duriel in Diablo 4

    To farm Tormented Bosses effectively, players should utilize Elixirs, Incense, and the seasonal item Seething Opals. These items can be combined for superior buffs to both individual players and the entire party. Defeating a Tormented Boss earns players experience and vendor reputation, which can be further enhanced with Elixirs and Seething Opals, making them some of the most valuable new additions this season.

    The Elixir of Resourcefulness is particularly beneficial for the
    Spiritborn Quill Volley build
    , as it boosts damage by increasing the Maximum Resource.

    Incenses offer party-wide buffs that enhance both survival and damage output against Tormented Bosses. The Soothing Spices and Chorus of War Incenses are excellent options to boost everyone’s elemental resistances and enhance Critical Strike and Overpower Damage. Additionally, players will notice that Tormented Bosses do not drop a full inventory of loot, eliminating the need to return to town for inventory management after each kill.

    Unique Gear Drop Rates from Duriel

    Variability in Boss Loot Tables

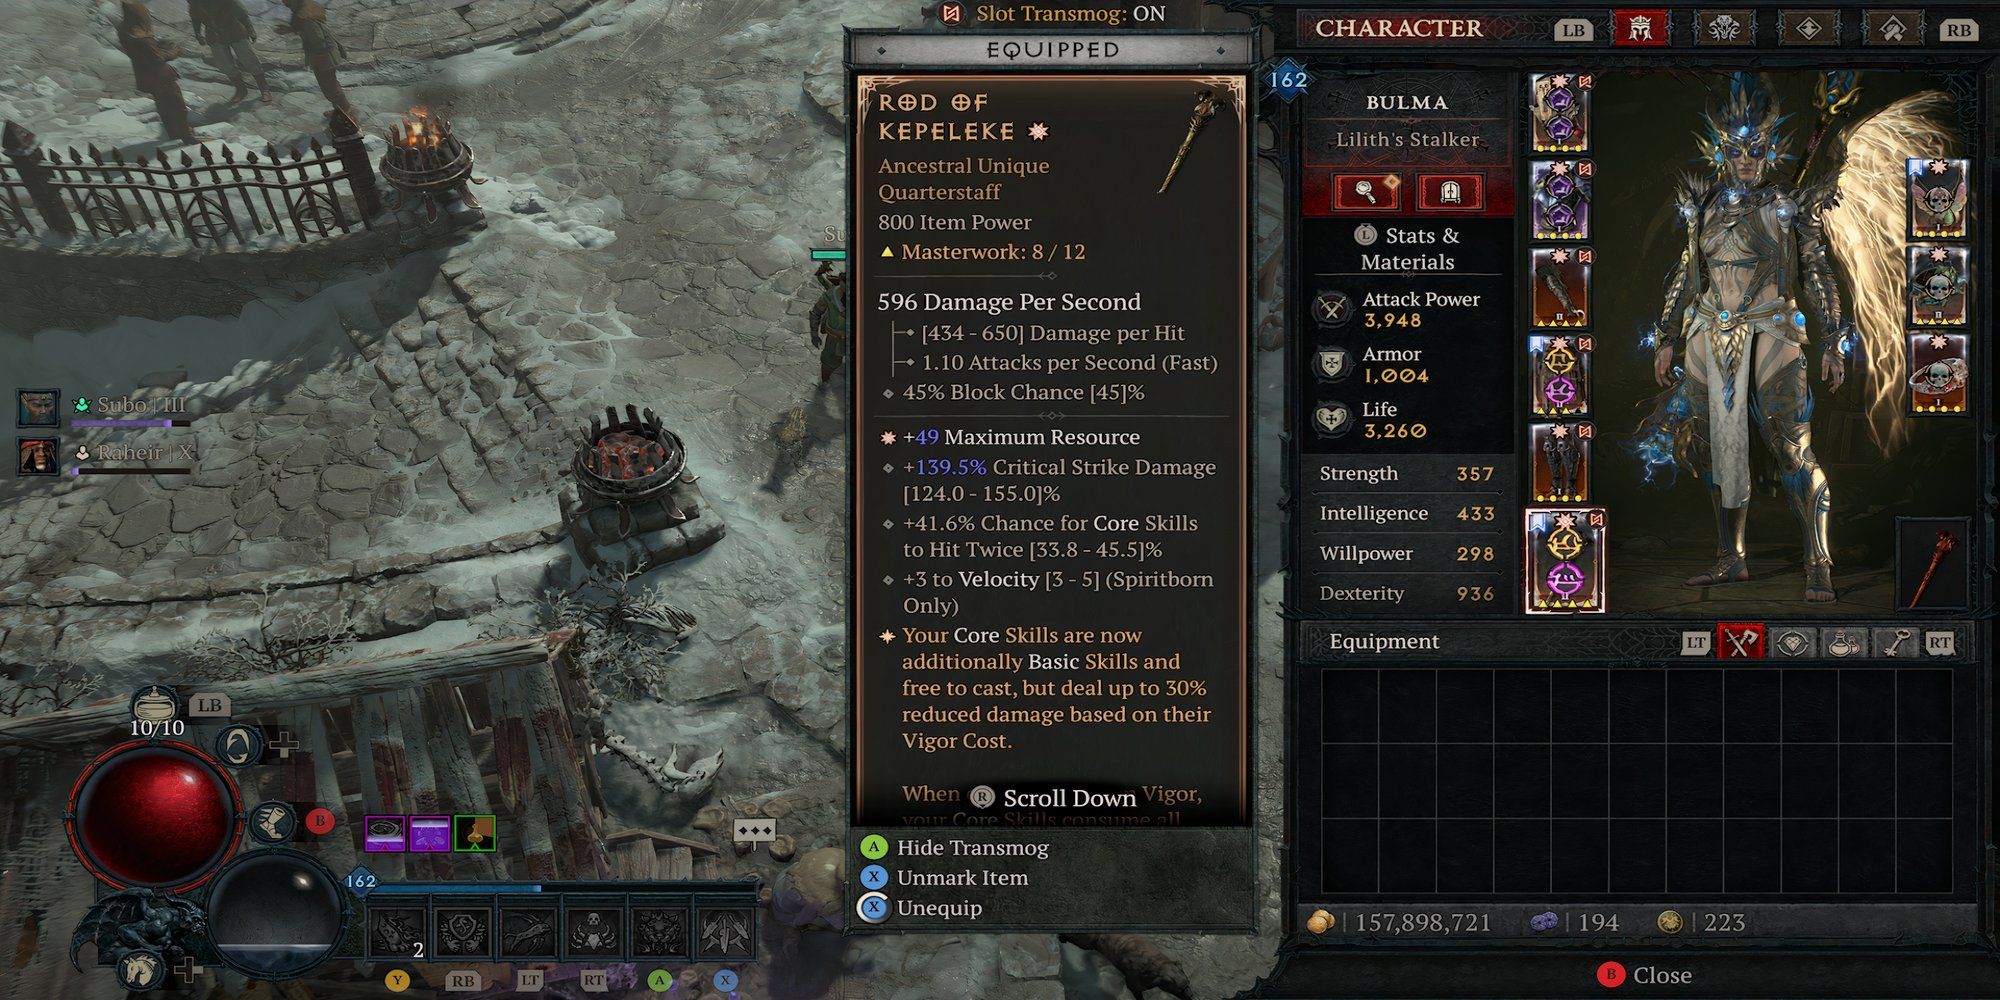
    The Rod of Kepeleke dropped by Duriel in Diablo 4

    While players farm Duriel for the needed Runes, they will also accumulate Ancestral Unique items and various crafting materials, like Rawhide. Therefore, it’s wise to aim for Unique items with specific Greater Affixes while farming. For instance, the Rod of Kepeleke with a Maximum Resource Greater Affix can be obtained from Duriel, which is essential for maximizing the Spiritborn Quill Volley build’s performance.

    Class

    Mythic Uniques

    Barbarian

    Tuskhelm of Joritz the Mighty

    Druid

    Tempest Roar Dolmen Stone

    Necromancer

    Black River Bloodmoon Breeches

    Rogue

    Cowl of the Nameless Scoundrel’s Leathers

    Sorcerer

    Flamescar Blue Rose

    Spiritborn

    Rod of Kepeleke Sepazontec

    All Classes

    Azurewrath, Godslayer Crown, Flickerstep, Tibault’s Will, X’Fal’s Corroded Signet, Soulbrand, Banished Lord’s Talisman

    As Gold is one of the most crucial resources in the game, players are encouraged to sell any duplicate Unique items to vendors rather than dismantling them at the Blacksmith. This strategy allows players to accumulate significant amounts of Gold for Masterworking their gear. However, since Tormented Bosses no longer yield Legendary gear, they may not be the optimal source for every type of endgame loot in Diablo 4.

  • ReFantazio: Cultivating Tolerance Through Metaphor

    ReFantazio: Cultivating Tolerance Through Metaphor

    Tolerance is one of the five Royal Virtues featured in Metaphor: ReFantazio. Similar to the other four virtues, you can enhance its level to boost your Follower Bond and unlock new dialogue options as well as character-specific side quests. While this enhancement doesn’t alter the conclusion of the main storyline, increasing your Tolerance and other Royal Virtues reveals new paths in Follower narratives and can even affect your dealings with NPCs throughout Euchronia.

    You can earn Tolerance points through specific quests and minor decisions, such as politely declining changes to Gallica’s Redgrass-Roasted Bidou recipe. Each Follower in Metaphor: ReFantazio can help you boost certain Royal Virtues, and Heismay is your go-to character for learning about Tolerance. You can elevate your Tolerance rank by spending time with him or taking part in other rewarding activities, like assisting Fabienne at the Hushed Honeybee Inn or immersing yourself in books during your travels.

    How to Enhance Tolerance

    Earn Points Through Quests and Activities

    Just as you can earn Wisdom points through certain challenges in Metaphor: ReFantazio, Tolerance and other Royal Virtues can be strengthened by engaging in tasks that require using these skills. According to The Game Looters on YouTube, you can identify activities and quests that will boost your points by looking for the heart-in-hands icon as you explore new areas.

    With many activities available from the outset, here’s a detailed overview of tasks that can earn you Tolerance points in Metaphor: ReFantazio, as highlighted by GameRant:

    Tolerance Activities & Quests

    Location & Requirements

    Help Fabienne

    The Hushed Honeybee Inn, Grand Trad

    Talk to the Mustari Man

    Sunshade Row, Grand Trad

    Talk to the Mustari Woman

    Thoroughfare Square, Martira

    Talk to the Cattle Owner

    By the cows on Cattleracket Road, Martira

    Talk to the Earnest Youth

    Angler’s Inn Square, Port Brilehaven (daytime)

    Talk to the Mustari Woman

    Angler’s Inn Square, Port Brilehaven (nighttime)

    Talk to the Village Cleric

    Village of Pagans, Virga Island

    Talk to the Mustari Woman

    Upper Blue Sky Bridge, Altabury Heights (daytime)

    Talk to the Mustari Man

    Lower Blue Sky Bridge, Altabury Heights (nighttime)

    Spend Time with Heismay

    Gauntlet Runner

    Read the “Bygone Days” Book

    Gauntlet Runner Bookshelf

    Read the “How to Walk Outside the Island” Book

    Gauntlet Runner Bookshelf

    Stick to the Redgrass-Roasted Bidou Recipe

    The Hushed Honeybee Inn, Grand Trad

    Complete the “Pagan’s Dilemma” Quest

    Sunshade Row, Grand Trad

    Complete the “A Noble’s Legacy” Quest

    Achieve Follower Bond Rank 5 with Strohl

    Complete the “Efflorescent Youth” Quest

    Seabreeze Street, Port Brilehaven

    Complete the “Warmth in Winter” Quest

    Dia Franco Street, Altabury Heights

    Complete the “A Brother’s Mercy” Quest

    Achieve Follower Bond Rank 7 with Basilio

    Assisting Fabienne with her relentless kitchen tasks and spending time with Heismay after a series of misunderstandings and a challenging boss fight against his clones are among the best methods to increase your Tolerance. This expansion of your perspective will help enhance your understanding and allow you to max out Follower Bonds with characters like Maria, who require a specific Tolerance rank for connection.

    All Tolerance Levels

    Understanding Each Rank

    Like other Royal Virtues in Metaphor: ReFantazio, Tolerance comprises five ranks to achieve as you accumulate points. You begin at the first rank, Inflexible, which reflects the protagonist’s capacity to demonstrate patience and consider different perspectives in various situations. With careful decision-making and some patience of your own, you can refine this skill and ascend through the ranks, which include:

    • Tolerance Rank I: Inflexible
    • Tolerance Rank II: Open-Minded
    • Tolerance Rank III: Generous
    • Tolerance Rank IV: Benevolent
    • Tolerance Rank V: Savior

    As you advance in rank, you will discover that your improved Tolerance effectively unlocks new opportunities in your Metaphor: ReFantazio gameplay. Not only does this enhance your bond with Maria, but it’s also wise to revisit quests and tasks that were previously unavailable when you held a lower rank.

    Source: Joshua Leeds/GameRant

    Video Credit: The Game Looters/YouTube

  • Unlocking ReFantazio: Defeat the Secret Boss in Apocalypse

    Unlocking ReFantazio: Defeat the Secret Boss in Apocalypse

    While journeying through Metaphor: ReFantazio, you might have come across a peculiar book titled The Book of Apocalypse in Akademia. What you may not have realized is that this book holds a hidden boss encounter. To gain access to this book and challenge the boss, you’ll first need to finish the game itself.

    During your initial playthrough of Metaphor: ReFantazio, trying to engage with the Book of Apocalypse tucked away in the back of Akademia will only yield frustration, as it remains locked. Regardless of how many times you attempt to interact with it, it won’t budge, and all you’ll receive is a warning to steer clear of its dangers.

    How To Unlock The Book Of Apocalypse

    Complete the Campaign of Metaphor: ReFantazio

    Since the book is secured throughout your first journey, you will have to wait until you finish Metaphor: ReFantazio and dive into New Game+ (NG+).

    Once you progress far enough in NG+ to return to Akademia, you’ll notice that the Book of Apocalypse is now positioned to the left of More’s desk, and it is no longer locked away.

    At this stage, simply interacting with the book will trigger a boss fight against the formidable Redscale Apocalypse Dragon. However, be aware that in NG+, your character levels will reset, leaving you somewhat unprepared for this notably challenging foe. It’s advisable to hold off on confronting the dragon until you’ve made significant progress closer to the end of your NG+ journey.

    While being in a NG+ file is one prerequisite for battling this boss, there’s another important condition: regardless of the difficulty level you played in your first run, you cannot set the game to Storyteller difficulty. To take on the Redscale Apocalypse Dragon, you must play on at least Easy difficulty or higher. This fight is intended to be tough, and playing on the Storyteller mode would undermine that challenge.

    Strategies to Defeat the Redscale Apocalypse Dragon

    Prepare Adequately with Equipment and Items

    First and foremost, to make this battle manageable, it’s crucial to reach at least level 70. While it may take extra effort, entering the fight under-leveled can lead to an unnecessarily frustrating experience. The higher your level, the smoother this encounter will be. Regardless of whether you hit the suggested minimum, you’ll still need to strategize effectively to emerge victorious against the Redscale Apocalypse Dragon, as highlighted in various Trophy Guides on YouTube.

    Regarding gear and items, prioritizing the best you can access is essential. Pay particular attention to equipment that offers fire and slash resistance, as well as items that enhance your attack power. While specific gear will vary based on what you possess and who it’s for, consider equipping the Reverent Crown and Knight’s Last Stand if possible.

    Knight’s Last Stand is a pair of boots that lets you survive a hit that would normally be fatal, allowing you to stay alive with just 1 HP. It’s compatible with any Archetype and boasts a defense rating of 165. The Reverent Crown is unique to the protagonist, granting an extra turn icon at the beginning of your turn, which becomes crucial as you need every advantage you can muster. Additionally, bring along as many Sublime Spoonfuls as you can for extra support during the fight.

    For your Archetypes, you have some room to play based on how you want to utilize skills, assuming you have previously unlocked all Archetypes when approaching this clash. Focus on enabling passive buffs for your team and attacking moves that can weaken the enemy or provide healing. At least one party member should concentrate on supporting your group.

    As you prepare, avoid bringing items that drain or repel attacks unless you’re ready to face the consequences. During the actual battle, make it a priority to buff your party and debuff the Redscale Apocalypse Dragon first. After setting yourself up with these advantages, unleash your attacks while those buffs are active.

    If you’re after the achievement or just want to complete the task without focusing on the actual battle, you can make things easier: grind for a surplus of Sublime Spoonfuls. This way, you can potentially negate any chance the Dragon has to retaliate.

    Once your buffs wear off, promptly reapply them. Keep an eye on your health, especially mid-battle, as you might find the fight escalates once you start taking damage. When your party is on the brink of defeat, begin using your Sublime Spoonfuls to maximize your turns and finally overcome the Apocalyptic Dragon. After achieving victory, you’ll earn the Closing The Book achievement and acquire the Gaius Regalia.

    The Gaius Regalia is an invaluable item that fully restores both HP and MP after each battle. This item can be equipped with any Archetype, making it one of the most beneficial items for the remaining challenges in your New Game+ playthrough of Metaphor: ReFantazio.

    Source: YouTube/Trophy Guides

  • ReFantazio: Unlocking Your Inner Courage

    ReFantazio: Unlocking Your Inner Courage

    Courage is one of the five Royal Virtues featured in Metaphor: ReFantazio, serving as a gauge of the protagonist’s bravery and readiness to confront peril. Increasing your Courage enhances dialogue options, strengthens bonds with companions, and even opens doors to exclusive quests and experiences. By prioritizing Courage, players can express thoughts and feelings that the main character might otherwise shy away from, creating a sense of true heroism in challenging moments.

    Compared to other titles developed by Atlus, Metaphor: ReFantazio provides more varied opportunities to boost your Courage. Gone are the days of relying on the occasional random act like consuming a specific food item on a designated day to gain points. Unlike Persona 5, this game offers more straightforward ways to elevate your Courage without scouring unpredictable locations. However, while it’s more direct, you’ll still need to invest time to see significant improvements.

    How to Boost Your Courage

    The Best Methods for Increasing Courage

    Similar to how you boost Wisdom, the easiest way to enhance your Courage in Metaphor: ReFantazio is to engage in various quests, partake in specific activities, and complete bounties. These can include taking on challenges, competing in the Coliseum, and spending quality time with Strohl. If you’ve already accomplished most activities, check out the Recruitment Centre for a range of quests and bounties. They can consistently offer opportunities to grow your courage and earn rewards if quick alternatives are running low.

    Related

    Metaphor: ReFantazio – How to Increase Wisdom

    Enhancing your Wisdom in Metaphor: ReFantazio aids in unlocking unique dialogue choices and resolving challenges within the game.

    Activity

    Location

    The Right to Rule Quest

    Bardon Follower Bond Rank 6 Location

    Top Secret Poetry! Do Not Read! book Activity

    Found in Gauntlet Runner bookshelf after 08/13

    The Old Castle Town Kidnapper Quest

    Found through following the main story

    Spend time with Strohl Activity

    Gauntlet Runner Location

    Superior Scrimshaw Quest

    Merchants’ Bazaar, Port Brilehaven Location

    Diving Competition (Bullish Youth) Activity

    Merchants’ Bazaar, Port Brilehaven Location in the daytime

    Proof of Power Quest

    Opera House Square, Altabury Heights Location

    Man’s Not-So Best Friend Quest

    Recruitment Centre Location

    The New King of the Imps Quest

    Recruitment Centre Location

    Grieving Ghost of the Goblet Quest

    Recruitment Centre Location

    The Greater One-Eyed Scoundrel Quest

    Recruitment Centre Location

    The Fiend in the Frozen Forest Quest

    Recruitment Centre Location

    The Cockatrice in the Clouds Quest

    Recruitment Centre Location

    The Apostles of the Apocalypse Quest

    Recruitment Centre Location

    The Incarnate in the Woods Quest

    Recruitment Centre Location

    A Bullish Embargo Quest

    Sunlumeo Street, Grand Trad Location

    A Haunted Heirloom Quest

    Sunlumeo Street, Grand Trad Location

    Gauntlet Challenge Activity

    The Varmareno Coliseum, Port Brilehaven Location

    A Dagger, a Ring, and a Rake Quest

    Thoroughfare Square, Martira Location

    Test of Courage (Spirited Youth) Activity

    Throughfare Square, Martira Location

    Peak Curiosity Quest

    Village of Pagans, Virga Island Location

    Another option for boosting your Courage is the book titled “Top Secret Poetry! Do Not Read!.” This book can be found in the Gauntlet Runner area and is a simple way to rack up Courage points with each read. Regularly sharing time with Strohl while on the Gauntlet Runner is also highly beneficial. For those seeking a more dynamic approach to increasing Courage, visiting the Coliseum is a fantastic idea.

    Five Unique Ranks of Courage

    How To Reach Informed Wisdom In Metaphor ReFantazio 0-2 screenshot
    Gamers Heroes

    In Metaphor: ReFantazio, players can track their Courage progression through a series of levels that reflect their bravery. The journey begins at the Craven rank, with opportunities to gain Courage through various activities. Over time, players can climb the ranks to achieve Spirited, Fearless, Dauntless, and Heroic statuses, as demonstrated in a video by Legendary#7 on YouTube.

    Leveling up can be challenging, particularly when attempting to improve a single skill, which may take longer than expected. Trying to enhance multiple skills at once may hinder overall progress. Thus, it’s wise to concentrate on the skills that matter most to you. Higher Courage levels unlock special missions and tougher adversaries, making it a favored attribute among players of Atlus titles. Therefore, its presence in Metaphor: ReFantazio isn’t surprising.

    Source: Legendary#7/YouTube

  • Discovering the Rayfield Caliburn (Batmobile) in Cyberpunk 2077

    Discovering the Rayfield Caliburn (Batmobile) in Cyberpunk 2077

    If you’re looking for a vehicle reminiscent of the Batmobile in Cyberpunk 2077, you’re in luck! You can snag this iconic ride for free by completing a specific questline early in the game. As one of the most recognizable vehicles in pop culture, this ride allows you to zoom around Night City like the Caped Crusader himself. Its exceptional speed makes it a must-have, even if you’re not familiar with the source material.

    Though it’s not officially called the “Batmobile,” you’ll find it referred to as the Rayfield Caliburn. When compared to other vehicles introduced in the Phantom Liberty DLC, this car stands out as one of the fastest options available. To get your hands on it, however, you’ll need to use a motorbike to navigate to the tight space where it’s located in Cyberpunk 2077.

    How to Obtain the Rayfield Caliburn

    Complete a Quest for Panam

    You can get the Rayfield Caliburn by completing Panam’s “Ghost Town” quest. While you have the option to purchase this vehicle from the City Center Fixer, Dino Dinovic, for a whopping $157,000, completing the quest allows you to save a considerable amount of eddies and acquire it for free.

    If you opt to buy the car from Dino, note that the version you’ll receive is white, unlike the black version you can obtain through the quest. If you have the money, head to the Electric Orgasm bar in Night City to negotiate with Dino for this alternate color.

    Upon starting Panam’s main quest, you’ll gain access to a cave where the Caliburn is stored. To unlock this shipping container, you need to be at least Street Cred Level 40. After your initial visit to the cave, simply wait two in-game days before returning to find the container ready for you.

    Once inside the cave, you can fast travel to the Sunset Motel to reach the area more easily. In addition to the Caliburn, you’ll find other useful loot within the container.

    Map Location of Cyberpunk 2077’s Batmobile

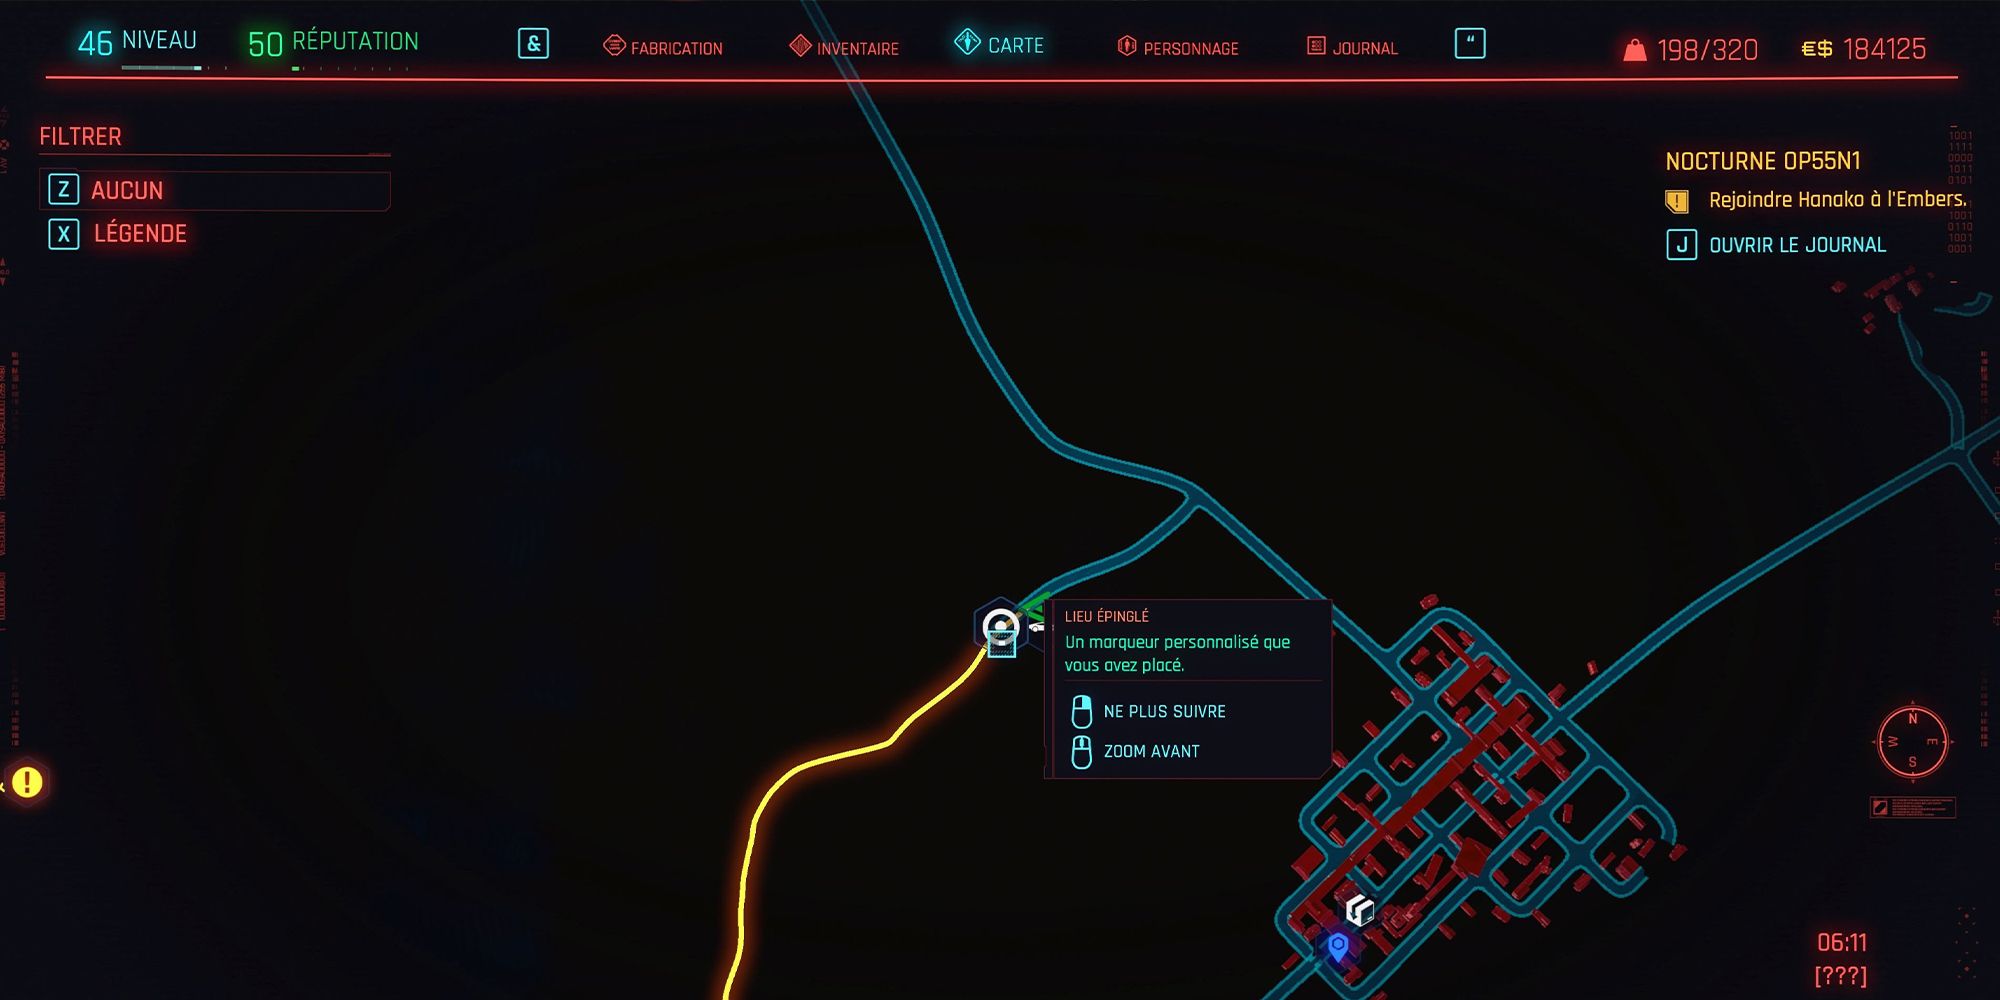
    The location of Cyberpunk 2077's Batmobile on the in-game map

    When you reach the cave, you can refer to the map to locate the container. You’ll also find a legendary T-shirt and a shard inside. Simply entering the car adds the legendary Caliburn to your collection. Don’t overlook its performance; after all, the Rayfield Caliburn is one of the top-speed vehicles in Cyberpunk 2077.

    The image above highlights the cave’s exact location containing the Batmobile. For a close-up look at the interior of the cave, check out Jason’s Video Games Source on YouTube.

    How to Utilize the Rayfield Caliburn (Batmobile)

    Speed is Key

    The Rayfield Caliburn in Cyberpunk 2077

    The Rayfield Caliburn is best used for both travel and quick escapes. Its impressive speed allows you to reach mission objectives swiftly, and it’s an excellent getaway vehicle if you’re under attack, despite lacking combat capabilities found in some new vehicles from the Cyberpunk 2077 DLC.

    Once you own the Caliburn, you can access it anytime from your garage. There’s no need to worry about theft or destruction; once acquired through purchase or quest completion, it remains part of your garage for the entirety of your playthrough.

    Here’s a breakdown of the Rayfield Caliburn’s official stats to help you navigate the game world more effectively:

    Class Drive Train Horsepower Top Speed Weight
    Hypercar AWD 1,660 211 mph 3,682

    While it’s uncertain how much the design of the Rayfield Caliburn draws from Batman’s vehicle, navigating Night City feels even more thrilling when imagining Keanu Reeves as the Joker alongside this car. Cyberpunk 2077 is packed with various pop culture references, from Hideo Kojima to nods to CD Projekt Red’s own The Witcher series, rendering the experience of driving a Batmobile-like car surprisingly fitting.

    Source: Jason’s Video Games Source/YouTube

  • Ultimate Guide to Finding the Raimei Angelfish

    Ultimate Guide to Finding the Raimei Angelfish

    The Raimei Angelfish is a special fish introduced in the Genshin Impact 2.1 update. This update added a new fishing feature, providing players with an exciting new challenge. Among the various fish, the Raimei Angelfish stands out as one of the more difficult catches. To reel it in, you must venture to its specific location and use a particular type of bait.

    You’ll find the Raimei Angelfish in the Inazuma region of Genshin Impact. However, you’ll need to gather the right bait recipe from Mondstadt. As long as you can use the fast travel Waypoints, the trip shouldn’t take too long. After you catch the Raimei Angelfish, you can even have it as a pet in your Serenitea Pot.

    How to Catch the Raimei Angelfish

    Craft a Special Lure

    First, you’ll need to obtain False Worm Bait, a special lure to catch Raimei Angelfish. This bait is suitable for catching various fish, including the Shirakodai and Angelfish types. To create this bait, you must purchase the recipe from the Mondstadt Fishing Association, located just outside the city walls.

    Talk to the vendor named Nantuck, who will give you the lure recipe in exchange for three Medaka fish. Once you have the recipe, you can craft the bait using the following ingredients:

    • 1x Slime Condensate
    • 1x Berry

    It’s wise to craft several batches of False Worm Bait at any Crafting Bench in town. One recipe yields ten pieces of bait, which is likely enough for a fishing outing. However, making three to four batches can significantly increase your chances of catching a Raimei Angelfish at the right spots.

    Where to Find the Raimei Angelfish

    Search Specific Locations to Cast Your Line

    Genshin Impact Raimei Angelfish Map Location

    The fishing spot for the Raimei Angelfish is located to the east of Tatarsuna on Kannazuka, one of the islands in the Inazuma region. Specifically, you will find it near an electrified shipwreck guarded by Cryo Slimes and an Electro Abyss Mage. You’ll need to deal with or avoid these enemies before you can focus on catching the fish.

    Keep in mind that the Raimei Angelfish only spawns between 6:00 PM and 6:00 AM in-game time. If you try to fish outside of these hours, the fish won’t be present, and you’ll have to wait for the right time to catch it.

    Once you see the fish, approach it and press the button prompt to begin fishing. Make sure you have the False Worm Bait selected before casting your line near the Raimei Angelfish. Fishing in Genshin Impact is relatively straightforward, but catching a Raimei Angelfish can be quite a challenge.

    Monitor the tension bar carefully, and don’t panic if mistakes happen. Depending on your fishing rod’s strength, catching a Raimei Angelfish could be either easy or quite a struggle. If you’re fortunate, you might even snag a rare Ornamental variant, adding a unique pet to your Serenitea Pot.

    Why You Should Catch a Raimei Angelfish

    Exchange for Rare Items and Unlock Achievements

    Genshin Impact The Catch polearm weapon with Reimei Angelfish

    By catching the Raimei Angelfish, you acquire a valuable three-star fish and unlock the achievement “Yon Mirror’d Moon, Broken.” Like other fish, you can choose to cook it for health restoratives or keep it as a pet. Additionally, some NPCs within Genshin Impact will offer rare items in exchange for a fish as special as the Raimei Angelfish.

    Related

    How Genshin Impact Could Improve Fishing

    Genshin Impact recently added fishing to the game. Even though it’s only been available for a short while, fishing is already growing a bit stale.

    When interacting with vendors at the Fishing Association, you can exchange Raimei Angelfish along with other aquatic creatures for exciting items:

    Item

    Cost

    Description

    Ako’s Sake Vessel

    • 10x Pufferfish
    • 10x Bitter Pufferfish
    • 3x Raimei Angelfish

    A valuable weapon refinement material with four-star rarity, used to enhance your arsenal.

    The Catch

    • 20x Rusty Koi
    • 20x Golden Koi
    • 6x Raimei Angelfish

    This item, sold by Kujirai Momiji at the Fishing Association, is a four-star polearm weapon usable by certain characters.

    To catch the Koi and Pufferfish required for these items in addition to your Raimei Angelfish, you’ll also need different types of bait. Like all fish in Genshin Impact, each of these aquatic creatures has unique spawn times and locations. Fortunately, you can adjust your in-game clock to ensure you are fishing at the right time for the specific fish you need.

    Regardless of how you decide to use the Raimei Angelfish, its rarity and versatility make it a worthwhile pursuit for any player looking to farm in the electrically charged waters of Genshin Impact.

  • Ultimate Team: Top Starter Roster for Premier League Success

    Ultimate Team: Top Starter Roster for Premier League Success

    EA Sports FC 25 is off to an exciting start, particularly with the Ultimate Team feature, where players are busy crafting a variety of squads. Choosing the right players to create a cohesive team is crucial in the competitive online arena, especially with the new skill moves introduced in EA Sports FC 25. If you’re new to the game or looking to form a Premier League team, we’ve got some great suggestions for you.

    Every year, gamers scramble to assemble their teams with favorite players, and while the best cards are always changing, there are numerous affordable Premier League stars to consider. Our recommended Premier League starter lineup consists solely of gold cards accessible to all players, plus a few that may not be available for purchase or earning anymore.

    Best Starter Premier League Team Build

    11 Affordable Stars You Can Acquire

    Below is a table showcasing our recommended players:

    Position Player Overall Rating
    GK Nick Pope 84
    LB Luke Shaw 82
    RB Diogo Dalot 82
    CB Nathan Ake 84
    CB Manuel Akanji 84
    RM Leon Bailey 82
    LM Gabriel Martinelli 83
    CM Mateo Kovacic 83
    CM Moises Caicedo 82
    ST Cody Gakpo 83
    ST Darwin Nunez 82

    These players can all be acquired for under 2,500 coins right now on the Transfer Market, with many even priced lower. This allows you to quickly build the recommended squad simply by completing early objectives and playing a few matches. For goalkeepers, while there are still many good value options, Nick Pope stands out as a favorite due to his solid 84 overall rating.

    In defense, the Manchester City duo of Manuel Akanji and Nathan Ake can both be bought affordably. Although not the most "meta," they offer solid pace and strong defensive skills. For full-backs, we recommend using Manchester United’s Luke Shaw and Diogo Dalot. Shaw remains a trusted left-back option, while the faster Dalot on the right adds tactical versatility to your formation.

    Formation Choice: 4-4-2

    For the starter team, we recommend the reliable 4-4-2 formation. Our chosen center midfielders, Mateo Kovacic and Moises Caicedo, may lack speed, but their ability to distribute the ball makes them invaluable.

    For your wingers, speed is essential, which is why we are including Leon Bailey, known for his pace, and the agile Gabriel Martinelli, who offers exceptional dribbling skills.

    Finding good strikers on a budget can be challenging, but we suggest the Liverpool striking duo of Cody Gakpo and Darwin Nunez. Each brings unique skill sets—Gakpo provides strength and versatility while Nunez’s pace makes him a constant threat.

    Tips for Building a Team

    Quick Ways to Earn Coins and Packs

    This budget-friendly starter team will be attainable in the early weeks of Ultimate Team’s release. There are various strategies to improve your chances of acquiring better players, primarily through earning free packs and coins from different game modes like Rivals, Squad Battles, and Weekend League.

    Utilizing speedy players in both offense and defense can significantly enhance your gameplay. As you compete in these modes, you’ll also complete objectives that provide additional packs and coins as rewards. Players you receive in free packs can bolster your squad or be sold for coins, or maybe applied in Squad Building Challenges for further rewards.

    There are plenty of Premier League bargains to be found in Ultimate Team’s marketplace, allowing you to build a competitive squad for just a few coins, letting you hold your own against opponents in EA Sports FC 25.

  • ReFantazio: Unlocking Your Imagination’s Full Potential

    ReFantazio: Unlocking Your Imagination’s Full Potential

    In Metaphor: ReFantazio, players vie for the opportunity to be selected by the populace as the upcoming ruler. To achieve the coveted throne, players must enhance key attributes that demonstrate their leadership capabilities. One such set of qualities, known as the Royal Virtues, consists of five traits: Courage, Wisdom, Tolerance, Eloquence, and Imagination.

    Each Royal Virtue embodies distinct traits and attributes. For instance, Imagination plays a crucial role in problem-solving. Furthermore, boosting your Imagination strengthens your connections with followers and opens up new dialogue and quest opportunities. Remember, however, that players must develop each Royal Virtue to advance and uncover more of the story.

    How to Enhance Imagination

    Engage with Characters and Take on Quests

    To increase your chosen character’s Imagination attribute in Metaphor: ReFantazio, you need to engage with your surroundings. This can be achieved by conversing and spending time with various characters, reading books, and completing designated quests. For example, interactions with characters like the Chatty Elder and the Clumsy Man can enhance your imagination.

    The Chatty Elder is typically found around Sunlumeo Street and the Grad Trad, while the Clumsy Man is often at the Opera House Square, although you might also spot him at Altabury Heights throughout the day. Additionally, reading the New World Travel Diary or the Literacy Workbook can boost your Imagination, but it’s essential to also work on your Eloquence and other virtues in tandem.

    If you enjoy tackling quests, you’ll be pleased to know there are several that award you with Imagination points. Notable examples include More’s Task: Foreword and Prologue, More’s Task Chapter One: Ordeal, More’s Task Chapter Two: Solitude, and More’s Task Chapter Three: Drifting. Each of these chapters contains tasks that will enhance your Imagination within Metaphor: ReFantazio.

    Here’s a comprehensive list of activities you can undertake to boost your Imagination:

    Activity

    Location

    Talk to the Chatty Elder

    Sunlumeo Street, Grad Trad

    Talk to the Nostalgic Elder

    Thoroughfare Square, Martira

    Talk to Sanctor

    Angler’s Inn Square, Port Brilehaven

    Talk to the Clumsy Man

    Opera House Square, daytime at Altabury Heights

    Talk to the Chipper Old Woman

    Lower Dia Franco Street, nighttime at Altabury Heights

    Read the New World Travel Diary

    The Gauntlet Runner Bookshelf

    Read the Literacy Workbook

    The Gauntlet Runner Bookshelf

    Spend time with Strohl

    The Gauntlet Runner

    Spend time with Hulkenberg

    The Gauntlet Runner

    Spend time with Eupha

    The Gauntlet Runner

    Quest: More’s Task Foreword and Prologue

    Akademeia

    Quest: More’s Task Chapter One: Ordeal

    Akademeia

    Quest: More’s Task Chapter Two: Solitude

    Akademeia

    Quest: More’s Task Chapter Three: Drifting

    Akademeia

    Quest: More’s Task Chapter Four: Turmoil

    Akademeia

    Quest: More’s Task Chapter Five: Resolve

    Akademeia

    Quest: More’s Task Chapter Six: The End

    Akademeia

    Save the Mourning Snakes

    Village of Pagans, Virga Island

    As you engage in these activities and quests, your Imagination level will steadily rise. With each improvement, you’ll unlock new conversation choices and additional quests, including a storyline with Alonzo, which necessitates an Imagination level of 2.

    All Imagination Levels

    Ascend to the Highest Level for Enhanced Gameplay

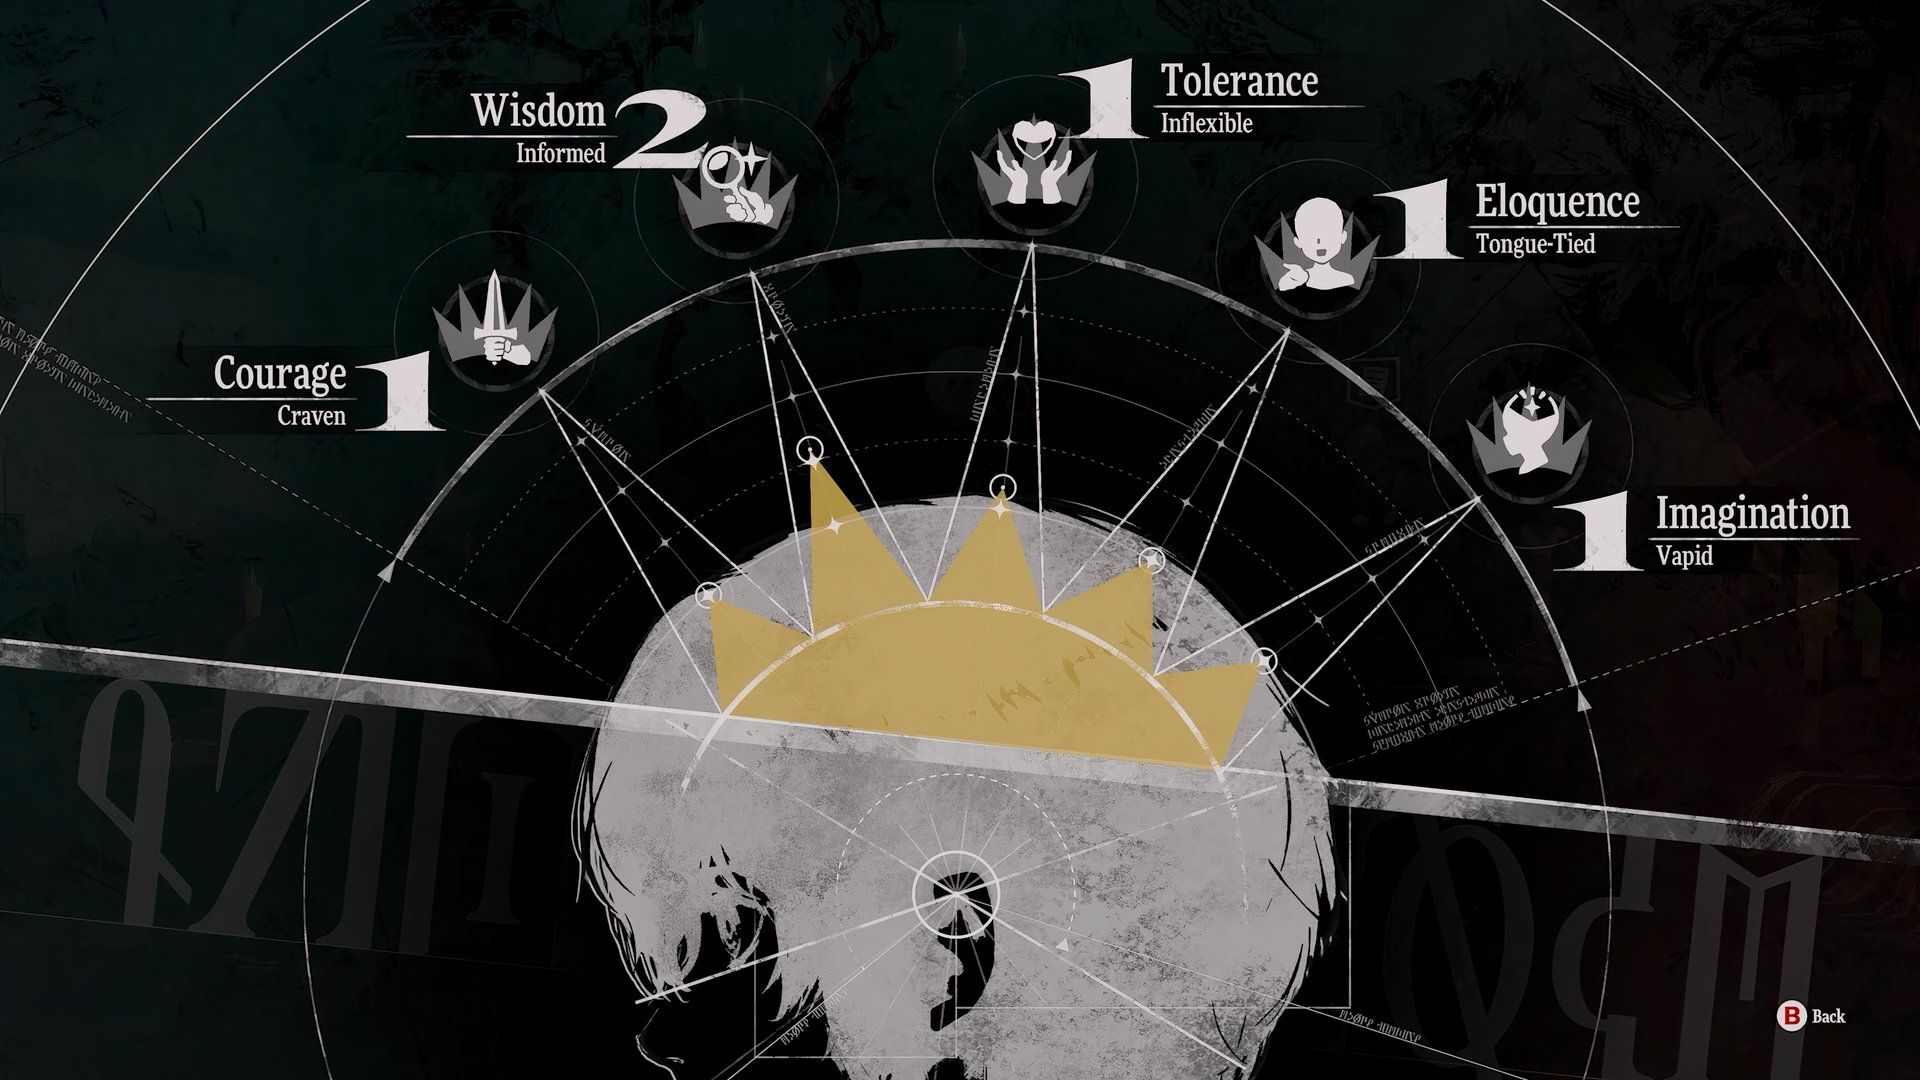
    Royal Virtues Ranking System in Metaphor ReFantazio

    The Imagination Royal Virtue in Metaphor: ReFantazio comprises five different levels. Striving for the top level will grant you access to a broader range of conversations, quests, and gameplay features. To achieve the highest rank, engage regularly with the appropriate characters and complete the right missions. For a full experience of Metaphor: ReFantazio, aim to elevate all your Royal Virtues to their maximum potential.

    As you progress through the ranks, you’ll also unlock more shops. Be sure to check them frequently, as their inventories are always changing.

    Here’s a simplified table outlining the Imagination ranks:

    Rank

    Name

    Imagination Rank 1

    Vapid

    Imagination Rank 2

    Inspired

    Imagination Rank 3

    Visionary

    Imagination Rank 4

    Revolutionary

    Imagination Rank 5

    Demiurgic

    To claim the throne in Metaphor: ReFantazio, focus on improving all your Royal Virtues. Enhancing these virtues will not only support your quest for the crown but also unlock additional gameplay features, allowing you to fully enjoy the experience. Take the time to interact with characters like the Chatty Elder and the Clumsy Man, as they are key to enhancing your Imagination. By connecting with the right characters and completing quests, you can quickly elevate your Imagination rank.

  • ReFantazio: Quick Strategies to Conquer Elmenta

    ReFantazio: Quick Strategies to Conquer Elmenta

    In Metaphor: ReFantazio, one of the rarest adversaries you might encounter are the Elementa. Their unique characteristics make them quite challenging to defeat. These colorful creatures tend to flee the moment their turn arrives, making it difficult to earn experience or magic points from them, even though they pose no real threat with their attacks.

    Elementa are comparable to the Mitama from Shin Megami Tensei 5; they are elusive enemies that prefer to escape during combat. However, taking down an Elementa can yield great rewards, so it’s worth your effort when the opportunity arises. There are four distinct types of Elementa, each possessing specific weaknesses that you can exploit to make your battle easier.

    How to Quickly Defeat Elementa

    Stun or Delay Their Turns

    Elementa have no offensive capabilities and tend to run away when it’s their turn. To increase your chances of taking one down, it’s wise to delay their turn as much as possible. You can do this by stunning them or targeting their elemental weaknesses. One way to stun an Elementa is by attacking it in the overworld to deplete its yellow stun meter before entering combat.

    By stunning an Elementa before the battle, you can ensure it misses its first turn, giving you an additional round to inflict damage and potentially defeat it.

    As you explore, you’ll encounter four types of Elementa: the Blue, Red, Green, and Golden Elementa. Using the elemental skills of your Archetypes in ReFantazio that exploit these creatures’ weaknesses can amplify the damage you deal within the limited time before they escape. Here are the weaknesses of each Elementa type:

    • Blue – Weak to Fire
    • Red – Weak to Ice
    • Green – Weak to Electric
    • Golden – Weak to Wind

    When you hit an Elementa with an attack that exploits its weakness, you might land a critical hit, giving you an extra turn with the character that struck it. Additionally, some physical attacks can also yield critical hits if you have a character that uses an Archetype specializing in that damage type. Experiment with both approaches to see how lucky you can get when facing these foes.

    Related

    Metaphor: ReFantazio – How to Purify Weapons

    In Metaphor: ReFantazio, you may encounter weapons and armor that can be purified, but you must unlock this ability first.

    No specific Archetype stands out as the “best” choice for taking down Elementa; the key is to select one with an elemental affinity that targets their weaknesses. Avoid relying on status ailments in ReFantazio since Elementa will escape before these effects can take hold. Defeating an Elementa primarily revolves around the damage-per-second output of your Protagonist and allies.

    How to Farm Elementa for EXP & MAG

    Wear a Special Item for Enhanced Chances

    Protagonist chasing down Blue Elementa in a low-level dungeon

    Elementa rarely spawn in dungeons or aboard the Gauntlet Runner, with each area hosting only one type of Elementa. In addition to experience and magic points, they can also drop various other valuable items. Here’s where to find each type:

    Elementa

    Location

    Item Drops

    Blue Elementa
    • Low-level dungeons
    • Belega Corridor
    • Regalith Grand Cathedral
    • Splintering Ice Crystal
    • Onyx
    Red Elementa
    • Mid-level dungeons
    • Martira Outskirts
    • Underneath the castle
    Green Elementa
    • High-level dungeons
    • Oceania
    • The Road (Inclement Weather only)
    • Stormcaller Flute
    • Amethyst
    Golden Elementa
    • Virga Island Outskirts
    • The Road (Inclement Weather only)
    • Electrifying Drum
    • Aquamarine

    To efficiently farm Elementa, strengthen your bonds in Metaphor: ReFantazio with your party members to enhance their skill damage. The more connected you are with your characters, the greater the damage output against Elementa, which is especially important on harder difficulties where they have more health.

    Another effective strategy involves using items that deal damage, especially if your party isn’t well-equipped to handle the Elementa. Some items can target an Elementa’s weakness, even if you don’t have the right Archetype in your party. Remember to stock up on essential items during Idlesday when all vendor goods are sold at a 20% discount.

    A great item for farming Elementa is the Phantasmal Doll, available at the Grand Trad magic shop for 49,000 Reeve. This item allows an equipped character to act twice at the beginning of a fight, giving you additional opportunities to damage an Elementa.

    Elementa yield a substantial amount of EXP and MAG upon defeat, significantly more than typical enemies you encounter in dungeons. It may take some trial and error to determine the best strategy to defeat each Elementa in Metaphor: ReFantazio, but once you find a reliable approach, you’ll be able to dispatch these foes with speed.

  • Diablo 4: The Source of Hatred Unleashed

    Diablo 4: The Source of Hatred Unleashed

    Diablo 4 recently introduced its latest expansion, Vessel of Hatred, and the Spiritborn Class is currently the most powerful class we’ve encountered since the game’s debut. This class has outperformed all others, which is typical for a newly launched character type that players are eager to explore. It’s likely that the Spiritborn class will be adjusted in the future to balance it with the other classes, but for now, it will maintain its impressive strength throughout Season 6.

    This Spiritborn build builds on the Quill Volley leveling strategy I outlined before. The endgame version of this build will require several Unique items, which players can best acquire by consistently farming Tormented Bosses. Still, players should aim to transition to this build as they progress with their Spiritborn character.

    Best Endgame Skills & Passives

    Three Defensive Skills Enhance Survivability

    The endgame variation of the Quill Volley build features three defensive skills that significantly enhance survivability, as players will primarily rely on two skills for damage output. Quill Volley serves dual roles as both a Basic and Core Skill due to the Rod of Kepeleke, which will function as both the resource generator and main source of damage for this build. Damage output will be further boosted by The Hunter Ultimate Skill, which works in harmony with the appropriate Runewords.

    Skill Tree (58 Points)

    Skills

    Passives

    Basic Skills

    Enhanced Thunderspike 1/5

    N/A

    Core Skills

    Advantageous Quill Volley 5/5

    Vigorous 1/3 Balanced Exertion 3/3 Follow Through 3/3

    Focus Skills

    Measured Ravager 1/5

    Focal Point 1/3 Apex 3/3 Diminishment 3/3

    Defensive Skills

    Reinforced Armored Hide 2/5 Reinforced Counterattack 1/5 Adaptable Scourge 1/5

    Endurance 1/3 Perseverance 3/3 Patient Guard 1/3 Auspicious 3/3

    Potency Skills

    N/A

    Resilient 1/3 Dominant 3/3 Brilliance 3/3 Potent 3/3 Furnace 3/3

    Ultimate Skills

    Exalted The Hunter 1/5

    3/3 Resolution 3/3 Spiritual Attunement 3/3 Supremacy

    Key Passive

    N/A

    Prodigy’s Tempo

    Spirit Hall

    Jaguar Spirit Gorilla Spirit

    N/A

    For this build to function effectively, the Spirit Hall bonuses must differ in alignment, maximizing the stacking damage bonus provided by Harmony of Ebewaka. Hence, this build incorporates the Jaguar Spirit in the Primary slot and the Gorilla Spirit in the Secondary slot. This setup ensures the Spiritborn maintains high stacks of both Ferocity and Resolve, resulting in increased Attack Speed and Damage Reduction.

    Incorporate Amethyst Gems in your armor to boost Barrier Generation and enhance the Auspicious Passive.

    Best Weapons & Gear

    Craft Tyrael’s Might

    Tyrael's Might Mythic Unique in Diablo 4

    The endgame version of this build requires substantial gear investment and specific Greater Affixes on each Unique gear piece. Enhancing Maximum Resource will boost the damage output of this build via the Rod of Kepeleke, so prioritizing Greater Affixes for Maximum Resource is essential. Tibault’s Will and the Rod of Kepeleke can both acquire this Greater Affix. When transitioning from the leveling build to the endgame version, it’s crucial to keep the Aspect of Redirecting Force, as it remains one of the most powerful Spiritborn Legendary Aspects.

    Gear Piece

    Legendary Aspect / Unique

    Aspect’s Effect

    Helm

    Harmony of Ebewaka

    Based on your secondary Spirit Hall choice, your Skills can also be classified as Jaguar, Eagle, Gorilla, or Centipede Skills, granting a 10-30% damage boost for each Spirit Type present. (Greater Affix in Velocity)

    Chest Armor

    Tyrael’s Might

    When at full health, your Skills unleash a divine barrage dealing 845 damage. (Greater Affix in Damage Reduction)

    Gloves

    Aspect of the Moonrise

    Using a Basic Skill against an enemy grants you 4% Attack Speed for 10 seconds, stacking up to 5 times. At maximum stacks, you enter a Vampiric Bloodrage, boosting Basic Skill damage by 40-100% and Movement Speed by 15% for 10 seconds. (Greater Affix in Ranks to Quill Volley)

    Pants

    Tibault’s Will

    You deal 10-20% more damage while Unstoppable and for 5 seconds afterward. When you become Unstoppable, gain 50 of your Primary Resource. (Greater Affix in Maximum Resource)

    Boots

    Duelist’s Aspect

    Increases Maximum Ferocity by 1-5. (Greater Affix in Armor)

    Quarterstaff

    Rod of Kepeleke

    Your Core Skills function as Basic Skills, enabling free casting while reducing damage by up to 30% depending on Vigor Cost. Casting at Maximum Vigor allows Core Skills to consume all Vigor for full damage, maximum size, and guaranteed Critical Strikes, raising Critical Strike Damage by 1-3% for each Vigor point spent. (Greater Affix in Maximum Resource)

    Amulet

    Banished Lord’s Talisman

    After using 275 of your Primary Resource, your next Core skill is guaranteed to Overpower, with Critical Strikes dealing 48% extra damage. (Greater Affix in Ranks to Core Skills)

    Ring

    Ring of the Midnight Sun

    Upon landing a Critical Strike, regain 20-50% of the Vigor spent in the last 2 seconds and gain the Counterattack ability. (Greater Affix in Cooldown Reduction)

    Ring

    Aspect of Redirecting Force

    Increases Critical Strike Damage by 50% of your Block Chance, doubling this bonus for 10 seconds after a block. (Greater Affix in Attack Speed)

    To address the resistance challenges faced by Spiritborn, the Mythic Unique item Tyrael’s Might is essential. The Spiritborn class struggles to achieve maximum elemental resistance, which this equipment effectively resolves. Additionally, the passive Damage Reduction feature allows players to delve deeper into endgame content.

    Ensure that you include Runewords in your gear, such as the PocQue Runeword and the TamKry Runeword.

    New & Improved Paragon Board

    Max Out Those Glyphs

    A crucial step to making this one of the top builds in the game involves upgrading its Glyphs to Legendary rank. This enhancement significantly expands their area of effect and provides additional bonuses. Glyphs have undergone a complete rework and can now be leveled in the Artificer’s Pit, allowing upgrades up to level 100. This improvement makes Glyphs more powerful than ever, encouraging players to focus on specific Glyph builds instead of simply activating as many as possible.

    Paragon Board

    Rare Glyph

    Glyph Effect

    Starter

    Spirit

    For every 5 points of Dexterity purchased within range, you gain 22.2% increased Critical Strike Damage. Critical Strikes elevate the damage an enemy takes from you by x3% for 20 seconds, stacking up to x15%. Additionally, damage to Elites is increased by 8%.

    Sapping

    Menagerist

    Grants a +25% bonus to all Magic nodes within range. Hitting an enemy with your Gorilla, Jaguar, Eagle, or Centipede Skills raises your overall damage by 4% for 10 seconds, stacking once per Spirit. It also boosts Incarnate Skill damage by 5%.

    Viscous Shield

    Canny

    For every 5 points of Intelligence purchased within range, you deal 2% more Non-physical damage. Non-physical damage increases all Non-physical damage an enemy sustains from you by 1%, stacking up to 10% for 15 seconds. Increases Non-physical damage by 5%.

    Convergence

    Talon

    For every 5 points of Dexterity bought within range, you gain 16.7% more damage with Eagle Skills. Your Eagle Skills also receive a x15% boost in Critical Strike Damage. Increases Lightning damage by 5%.

    Revealing

    Colossal

    For every 5 points of Strength purchased within range, gain +16.7% increased damage with Gorilla Skills. You also receive x2% more damage for each stack of Resolve you possess. Furthermore, you deal 6% more damage to nearby enemies.

    The Spirit Glyph is prioritized first because of the high number of Dexterity nodes in the Starter Board, potentially reaching up to 105/40 Dexterity, which provides a substantial advantage in Critical Strike Damage. The Menagerist Glyph follows to enhance the Maximum Resource Magic nodes around it, amplifying the build’s overall damage thanks to the Rod of Kepeleke.

    The next three Glyphs—Canny, Talon, and Colossal—are selected for their stacking damage bonuses, maximizing the build’s utilization of various Spirit types. This setup enables the potential for billions in damage output during Torment IV, allowing players to engage freely with all endgame content in Diablo 4.

    Video Credit: Rob2628/YouTube

  • Unlocking the Cathedral’s Hidden Chest: A Guide

    Unlocking the Cathedral’s Hidden Chest: A Guide

    As you explore the Regalith Grand Cathedral dungeon in Metaphor: ReFantazio, you’ll find a locked chest situated at the top of a small staircase in the Servants’ Chambers. While previous chests haven’t posed much of a challenge, this one will require you to track down two keys hidden within the church. The search begins by following the soldiers who hastily retreat as soon as you enter the area.

    Inside the Cathedral, you’ll encounter several enemies, particularly the wandering Morneto variants. They’re not too difficult to defeat, but make sure to heal and address any status issues, as you’ll soon face a more formidable Homo Oppo enemy. Taking them down will grant you access to the keys needed to advance.

    How to Obtain the Guest Room Key

    Speak with the Dying Monk

    Your first objective for unlocking the mysterious chest is to retrieve the Guest Room Key. This task is relatively close to where you discovered the chest; head east along the corridor. You’ll notice an entrance obstructed by rubble further down the hallway, with a Homo Oppo enemy lurking nearby. Use Hulkenberg’s Perfect Punch and powerful Archetypes in Metaphor: ReFantazio to eliminate this threat.

    In a room on the right side of the hallway, you’ll find a severely injured monk propped against the wall. Speak with the Dying Monk, who will disclose that a soldier responsible for his injuries has died close by. To locate the soldier, break the barrels positioned between the two bookshelves to uncover a crawlspace, then proceed to the next room.

    Tip: Before you leave, grab the Ailment Absolution found in the first room’s doorway. This item is useful for curing any status ailments outside of battle.

    Upon entering the next room, you’ll see the soldier lying on the floor ahead. Gallica will inform you that he has a key attached to his waist when you interact with him. This is the Guest Room Key you require. Hulkenberg will suggest it be used to access a small room, leading you to your next task.

    How to Obtain the Treasure Chest Key

    Listen to the Pale Monk

    Next, make your way to the Guest Room. This requires returning through the previous room and heading south. At a fork in the path, take the staircase downward. This area is swarming with weak Hundo enemies, so be prepared to engage them as you make your way forward.

    You’ll soon encounter a room filled with smoke pouring from beneath the door. Approach and unlock it using the Guest Room Key. Be ready, as a group of Morneto enemies awaits inside. It’s wise to heal up before rushing in; you can dispatch them quickly with an area attack.

    Tip: Most Morneto enemies are vulnerable to Fire and/or Light attacks, so use these for an easier victory.

    After defeating the enemies, speak with the Pale Monk directly in front of you. In his final moments, he’ll mention the locked chest near the dungeon’s entrance and urge you to claim its contents before they fall into the wrong hands. Strohl will notice that the monk is holding something, leading you to acquire the Treasure Chest Key. Now, you’re ready to claim your treasure.

    All Treasure Chest Rewards

    Behold a New Key Item

    Return to the locked chest at the entrance of the Grand Cathedral and use the Treasure Chest Key to open it. Inside, you’ll discover the Sanctified Amulet, which is a new key item essential for opening another chest deeper within the Cathedral later. Although you won’t receive immediate rewards, rest assured that you’ll eventually obtain a new piece of armor as you progress in the captivating story of Metaphor: ReFantazio.

    Source: Adam Beck/HackerGamer

  • ReFantazio Guide: Navigating the Dragon Temple Adventure

    ReFantazio Guide: Navigating the Dragon Temple Adventure

    Exploring the Dragon Temple in Metaphor: ReFantazio

    The Dragon Temple is a formidable dungeon that your party must conquer during an essential operation in Metaphor: ReFantazio. Among all the dungeons featured in the main storyline, this one stands out as one of the most challenging due to the diverse range of enemies you will encounter. It’s nearly impossible to form an ideal team to face the various foes and bosses within unless you’re well-prepared for the battle ahead.

    Just like any other dungeon, time is the enemy in the Dragon Temple. One of the biggest challenges is completing it within a limited number of days. Success hinges on your knowledge of enemy weaknesses, the status effects to beware of, and a slew of other survival tactics.

    Preparing for the Dragon Temple Dungeon

    Strengthen Your Party

    Given the wide array of enemies in the Dragon Temple, there’s no one-size-fits-all party configuration. The key to conquering this dungeon is to frequently adapt and modify your team, especially as you ascend to new floors with unfamiliar adversaries. While flexibility will be a significant part of your strategy, consider these easy preparation tips:

    • Tackle Available Side Quests: Completing these will help level up your party members and yield valuable loot that can be helpful within the dungeon.
    • Hone Your Skills Against Basic Enemies: Level up through combat with simpler foes to gain experience.
    • Gather Gold Beetles: These collectibles lead to acquiring the important Venomward Charm, which protects you from various physical ailments.
    • Enhance Follower Bonds: This will unlock new items for purchase that can bolster your party’s capabilities.

    The Dragon Temple is situated in the Virga Islands, which are rife with side quests to explore. Engaging in these will allow your party to strengthen while also rewarding you with crucial items for your journey. Notably, you can unlock a quest called “The Guiding Gift” that can be pursued within the Dragon Temple for extra rewards.

    Another effective preparation method is to grind against low-level enemies to elevate your Commander level. Achieving the "General" Archetype will provide you with enhanced abilities as you face the enemies in the Dragon Temple.

    Entering the Dragon Temple Dungeon

    Overcoming the Obstructive Tree

    If you arrive at the Dragon Temple ahead of the main storyline, you’ll find that you won’t be able to enter until you overcome a massive tree at the entrance. To get past this obstacle, you’ll need to craft a Potion of Blight. Start by visiting the Comfort Concoctions shop in Grand Trad to purchase a necessary ingredient for this potion.

    After gathering the required Parchwater for 500 Reeve, return it to the NPC Edeni on the Virga Islands. They will aid you in creating the Potion of Blight, which will then allow you to accept the Dragon Temple operation quest. Once accepted, you can venture into the Temple and confront an enemy known as Treebeast Alento.

    Treebeast Alentos are prevalent within the Dragon Temple, and knowing how to defeat them swiftly is vital. They have a notable weakness to Fire, which suggests optimal Archetypes in Metaphor: ReFantazio for dealing with them. Assemble the right party members to make quick work of this fight and progress to the dungeon’s first area, The Corridor.

    Navigating the Dragon Temple Dungeon

    Finding Your Path and Avoiding Enemies

    The Dragon Temple is structured with six main floors aside from the entrance and the Corridor. Each level presents unique challenges and puzzles, alongside treasures to discover. While it’s beneficial to explore thoroughly, remember that more time spent leads to more encounters with enemies, which can drain your resources.

    Floor 2 – The Labyrinthine Path is particularly intricate. You’ll encounter a series of paths that can lead to dead ends or even send you back to the start. Although some paths lead to valuable loot, navigation can easily become confusing.

    Focus on using Archetypes with Fire and Wind abilities to take down Treebeast Alento and Gold Elementa foes.

    To discern false paths, keep an eye out for any fog on the screen or a gold thread on the ceiling to navigate more effectively.

    Floor 3 – Canopy Chamber is straightforward and introduces two new enemies, Spektos of Lament and Spellwrought Gargostas, each with weaknesses that vary from earlier foes. Prepare your party according to these changes.

    As you climb to Floor 4 – Drakongrace Shinjuku, be mindful of your resources. The floor is extensive, featuring many new foes that can quickly deplete your supplies. Save points are available, so consider using them to take breaks, even if it means more time passing.

    Defeating the Dungeon’s Bosses

    When you finally reach The Altar of the Twelve, expect a fierce battle against Malvirta Drako Eht and Homo Margo. The strategy here is to focus on Homo Margo first, managing debuffs and buffs throughout the battle to strengthen your party’s chances. Utilize your team composition to create a balanced approach with offensive and healing skills.

    All set to tackle Homo Margo? Watch out for elemental shifts that can complicate your strategy. Utilizing items and maintaining awareness of your foes’ elemental resistances will guide you through these fights.

    After taking down the bosses, your journey through the Dragon Temple will conclude, letting you advance the overarching narrative in Metaphor: ReFantazio. Keep your strategy dynamic, and pay attention to enemy strengths and weaknesses to emerge victorious.

  • Unlocking All Endings in Metaphor: ReFantazio Guide

    Unlocking All Endings in Metaphor: ReFantazio Guide

    Metaphor: ReFantazio presents players with four unique endings that capture the protagonist’s journey in different ways. Among these, three endings are categorized as “bad” outcomes, as they can only be accessed by making choices that stray from the game’s intended path, often leading to unsettling conclusions. These negative endings feature themes of doubt and acceptance of alternate realities, ultimately truncating the narrative and leaving the essence of the world shrouded in mystery. Fortunately, players can avoid or intentionally pursue these undesirable outcomes by making informed choices.

    The fourth ending, often referred to as the "true" ending, can be attained by adhering to the narrative structure and aligning choices with the protagonist’s aims. Many players find the positive resolutions in Metaphor: ReFantazio to be more fulfilling than those in Persona 5, with the true ending typically offering a more uplifting conclusion. However, the specifics of this ending can shift depending on the depth of the player’s relationships with their companions, maintaining a consistent overarching theme. While the negative endings lack gameplay rewards, they offer intriguing insights and experiences that can be explored while progressing toward the true conclusion.

    Can You Experience Every Ending?

    You can unlock all four endings of Metaphor: ReFantazio in a single playthrough by cleverly utilizing the save system. Although the game incorporates branching paths, players have the opportunity to witness all possible outcomes. To achieve this, one must follow certain dialogue choices to navigate toward different conclusions that ultimately lead to obtaining the various endings. The initial three endings, often labeled as "bad endings," are brief and heavily dialogue-focused but can still be uncovered by choosing paths leading to them.

    These choices are marked within the game, usually occurring after an autosave checkpoint. Thus, players can easily return to a previous save and opt for alternate decisions after experiencing the endings. In essence, players only need to select the "bad" choice during key moments and then reload their game to proceed with the main story. The true ending culminates in a confrontation with the final boss, Louis, meaning there is no risk of missing out on the ultimate conclusions.

    Ways to Achieve the Bad Ending

    Metaphor: ReFantazio offers three different bad endings, each branching from critical decision points in the storyline. These conclusions reveal various alternate paths in which the protagonist gives in to despair, accepts a distorted reality, or ultimately forsakes their quest for a constructed existence. Unlocking these endings involves making specific choices that run contrary to the game’s core narrative. Their expected paths make them relatively easy to identify, allowing players to either avoid or embrace them based on their decisions.

    To secure the bad endings, players must reject their true identity and heritage, fall for Louis’s manipulative rhetoric, and embrace a false narrative. Any choices reflecting these themes will lead to one of the bad endings. The directions they take are evident, so players should prepare themselves to navigate accordingly. Detailed explanations of each ending and the necessary actions to obtain them are available, but saving progress before critical decisions is advisable to ensure access to all potential outcomes.

    Bad Ending: Prince

    The first bad ending players may encounter in Metaphor: ReFantazio revolves around the Prince. This outcome occurs when players reach a pivotal point in the story and discover the lifeless body of the Prince in the Ancient Eldan Sanctum. Here, a mysterious voice reveals the protagonist’s identity as an idealized form of the Prince, created from magma. Players then have the choice to reject this revelation. Despite the dismay expressed by the companions, choosing this option leads to a sudden termination of the journey, marking a denial of one’s true self and an end to the adventure.

    Bad Ending: Louis

    The Louis bad ending transpires during the late stages of Metaphor: ReFantazio, specifically within the Skybound Avatar dungeon, which players can access during certain storyline segments. Instead of facing a traditional boss battle at the end of this extended dungeon, players encounter Louis, who delivers a lengthy, philosophical monologue about his vision for a reformed world, one that may come at the expense of cruelty and oppression.

    Louis persuades the protagonist to join him in establishing this grim new order, where humans dominate and other creatures are subjugated. Accepting his invitation by selecting the dialogue option, "You’re absolutely right," leads to a bad ending. While the companions are shocked by this choice, they eventually accept it as a preferable alternative to the ongoing cycle of injustice. The world transforms, falling under human rule and resulting in significant loss, ultimately concluding the narrative with no regard for future consequences.

    More on the Bad Ending

    Another bad ending materializes during the final encounter with Louis on 10/26. After overcoming Louis’s initial phase and enduring numerous cutscenes, the protagonist appears to perish but is saved by More, who teleports them back to Akademeia. The setting shifts dramatically to Shibuya, Tokyo, where More then discloses a staggering truth: everything within the United Kingdom of Euchronia and the Tournament was merely a fabricated narrative. The protagonist’s real world is, in fact, More’s reality.

    Choosing to accept this explanation seals a bad ending, bringing the narrative to a conclusion that underscores the fantasy as mere fiction. Unlike the other endings, this one unfolds after an extensive boss battle and multiple cutscenes, so players should be aware that if they want to resume the story for its true ending, they will need to replay the boss encounter.

    How to Achieve the True Ending

    To unlock the true ending in Metaphor: ReFantazio, players must navigate the storyline without choosing any options leading to the bad endings. The goal is to defeat Louis, the main antagonist, on 10/26 at the final confrontation. Straying from this path will result in one of the negatives. However, if players remain focused on defeating Louis, they can progress toward the true ending, where the protagonist emerges as the hero.

    Successfully beating Louis signifies a crucial victory, etching the protagonist’s face onto a mountain as a symbol of their ascendance to power and winning the hearts of the kingdom’s citizens. If players have encountered any bad endings prior to this point, they will not experience this major achievement. However, bypassing negatives means that players are on track for the true conclusion.

    The epilogue extends beyond mere coronation ceremonies, fast-forwarding one year into the future to reveal the positive changes that have taken place in Euchronia. The protagonist’s reign is portrayed as prosperous, marked by the happiness of the people. Players will also reconnect with their loyal companions, exploring their individual narratives in greater depth. The details of the true ending hinge on the connections established with companions throughout the game.

    Video credit: GamersPrey/YouTube

  • ReFantazio: Mastering the Imitic Boss in Trove

    ReFantazio: Mastering the Imitic Boss in Trove

    In Metaphor: ReFantazio, players may encounter the fierce boss Trove Imitec at an early stage, potentially leading to a tough battle if they aren’t adequately equipped. It’s not uncommon to face this challenge prematurely, making it crucial for players to be prepared. Fortunately, there are effective strategies you can employ to simplify this encounter and reduce the associated frustration.

    Praise has already been heaped upon Metaphor: ReFantazio as one of the top RPGs of 2024. Within this game, players can assemble and hone their party by selecting from numerous **Archetypes** and skills unique to each character. To conquer the various boss challenges throughout the game, **leveraging these techniques is essential for crafting a formidable team** that can take on any adversary, regardless of your current progress.

    Preparing for the Trove Imitec Boss

    Essential Items & Archetypes

    One solid strategy is to acquire three Mint Charms at night from the merchant in Gloamhall. These charms prevent sleep, tackling one of the most irritating aspects of the Trove Imitec confrontation. However, there are other approaches to consider as well.

    Additionally, you can opt to buy or bring Thrilling Tintinnabulators, which can cure the Sleep ailment even if they don’t prevent it entirely. Equipping Patra on your Healer can also help in resolving status ailments within Metaphor: ReFantazio. All of these options are valid, and it’s important to find what works best for your strategy.

    Patra is a Recovery Skill that you can learn to remove status ailments from an ally.

    For your Archetype setup, aim to have a variety: one Brawler, one Healer, and one Merchant. At this moment in the game, you may only have three party members, equating to three Archetypes. However, you can recruit Heismay at this stage to unlock the Thief Archetype. If you manage to recruit him, you’ll enter this battle with four party members, giving you a significant edge.

    To unlock the Merchant and Brawler Archetypes, you’ll need to do a little extra work. You can find Brigitta in Grand Tran to unlock the Merchant. Heismay will unlock automatically in the main story, so if he’s not on your team, consider waiting to tackle this dungeon until you recruit him.

    With these Archetypes in mind, let’s look at the ideal party members to ensure your success.

    Optimal Party Combinations for the Trove Imitec Boss

    Include Everyone

    Hulkenberg facing the Trove Imitec boss in Metaphor Refantazio

    While you may have limited choices for which characters will be part of your party in this battle, selecting their roles is crucial. Here’s a recommended lineup:

    • Protagonist: Merchant with Second Highest Agility/Endurance
    • Strohl: Brawler with Highest ATK
    • Hulkenberg: Healer with Highest Magic
    • Heismay: Thief featuring Gold Attack

    This configuration focuses on positioning the Protagonist to act second, thereby allowing them to distract Trove Imitec during their turn, which can lead to a missed turn for the boss while Strohl unleashes a powerful attack.

    This guide is tailored towards the Normal difficulty mode, so your experience may vary on higher difficulties like Hard mode.

    Additionally, consider having the Protagonist learn the Strike Dodge ability to improve your evasion and potentially avoid several of Trove Imitec’s attacks. Equipping Hama on your Healer will be helpful, and make sure your Thief, if present, has a Gold Attack. If not, the Merchant can step in for this role.

    If you can’t follow this exact character setup, you can opt for a lineup featuring two Brawlers and a Healer, allowing for strategic support while the Healer employs Hama without issue. The Thief may serve as a backup in this scenario, but their presence can definitely make completing the fight easier. If you’re unable to recruit him, don’t stress—this guide will still be beneficial.

    Strategies to Defeat the Trove Imitec

    Utilize His Weakness

    To effectively tackle Trove Imitec, familiarize yourself with his strengths and weaknesses. While he reacts normally to most elements, focus on the following two:

    Here are some of the attacks the boss can unleash:

    Move

    Effect

    Hellbound

    Deals heavy physical damage to one target

    Sleepy Air

    Attempts to inflict Sleep ailment on all party members, with a high chance of success

    Skull Cracker

    Delivers extreme physical damage to one target

    Crushing Blow

    Inflicts heavy physical damage to all party members

    To secure victory, start by having the Brawler strike with an Energy Ray. This will inflict Light damage on the boss, exploiting his weakness. Next, the Merchant should follow up with a Gold Attack, creating a distraction, as highlighted in a demonstration by YouTuber Naz talgic.

    Finally, have the Healer use Hama to deal additional Light damage. This may not be the strongest attack, but it capitalizes on Trove Imitic’s elemental susceptibility. By continuing to employ these three moves in rotation, you can eventually overpower the boss. However, there are other strategies available.

    For example, let either the Healer or Brawler utilize Strike Dodge for a better chance of evading Trove’s attacks. If you have Heismay in the Thief Archetype, use him for Gold Attacks, broadening your tactical options.

    If necessary, the Merchant can provide healing and utilize healing items, while the Healer focuses on Hama. Aim for Light damage whenever possible, gearing up for a successful confrontation. Soon, you’ll be ready to embark on your next adventure in Metaphor: ReFantazio.

    Source: YouTube/Naz talgic