Tag: Xbox Series X

  • Release Date, Pricing, Editions, and Additional Details

    Release Date, Pricing, Editions, and Additional Details

    Xbox wrapped up 2024 with an impressive showcase, launching titles like Call of Duty: Black Ops 6, Microsoft Flight Simulator 2024, and Indiana Jones And The Great Circle in just two months. This strong finish will carry into 2025, as Xbox has officially announced that the long-awaited Avowed will debut on February 18, 2025. Xbox leader Phil Spencer clarified that the delay was not for further game polishing but rather to allow players time to enjoy other releases before Avowed hits the shelves.

    With other big-name titles like Assassin’s Creed Shadows and Like A Dragon: Pirate Yakuza In Hawaii coming out around the same time, Avowed might have faced stiff competition if released earlier. Now, however, it’s set to launch during a particularly crowded release period. If you’re considering picking up Avowed in addition to these other anticipated games, pre-orders for this Xbox exclusive have already begun.

    Differences Between Avowed’s Standard And Premium Editions


    via Obsidian

    There are officially three versions of Avowed available for players, with the premium edition offering some physical extras. Below is a breakdown of what’s included with each edition:

    Standard Edition

    Premium Edition

    Premium Edition Steelbook

    Base Game

    Five Days Early Access

    Two Premium Skin Packs

    Digital Artbook And Soundtrack

    Avowed SteelBook

    Map Of The Living Lands

    The biggest draw of opting for one of the premium editions is the five days of early access, especially if you’re also eyeing other major games releasing around the same time. Both premium editions will allow players to dive in five days early. Additionally, you’ll receive bonus skin packs, a chance to check out the digital artbook and soundtrack, and if you choose the most costly option, you’ll also get a physical map of the game world along with a SteelBook case.


    AVOWED

    Avowed is a next-gen RPG from Obsidian Entertainment, set in the same universe as their Pillars of Eternity series. The game features a first-person perspective where players must confront a mysterious plague threatening the Living Lands of Eora.

    Playing And Upgrading Avowed On Xbox Game Pass


    character using magic in Avowed.
    via Obsidian

    If you’re worried about potential spending on games this February, rest assured that Avowed will also be part of Game Pass. However, you’ll need either Game Pass Ultimate or PC Game Pass to access it on release day. Although the standard edition will be available on Game Pass, you can still upgrade to the premium edition.

    Xbox has announced a premium upgrade, which is available for pre-order at Best Buy and GameStop) for $24.99. This is aimed at players who plan to use Game Pass but want the benefits of the premium edition. The upgrade provides five days of early access—if purchased more than five days before the release—as well as additional skins and digital extras such as the artbook and soundtrack.

    Mark your calendars: Avowed will launch on Xbox Series X|S, PC, and Game Pass on February 18, 2025, and those who opt for early access will be able to begin playing on February 13, 2025.

    FAQ

    Will Avowed Be As Big As Skyrim?

    Avowed has often been likened to Skyrim. Although Obsidian intended for their new title to be on a similar scale, it’s been confirmed that the final game will be somewhat smaller than Bethesda’s latest Elder Scrolls installment.

    Is Avowed A Sequel Or A Prequel?

    While Avowed is set within the same universe as Obsidian’s Pillars of Eternity games, it does not directly continue their story. In-game references confirm that it takes place after Pillars of Eternity 2.
  • Elden Ring Dragon Build: Stats, Weapons, Armor, and More!

    Elden Ring Dragon Build: Stats, Weapons, Armor, and More!

    A Dragon Build in Elden Ring stands out as one of the most distinctive builds available. They offer a different approach compared to more traditional builds.

    This guide is here to help. We’ll dive into crafting the ultimate Dragon build in Elden Ring, covering everything from your initial class choice and flask distribution to the recommended shield, weapons, and the best incantations to incorporate.

    Table of Contents

    • Elden Ring Dragon Build Overview
    • Stats for Dragon Build
    • Best Weapon for Dragon Build in Elden Ring
    • Best Shield
    • Top Ashes of War Choices
    • Best Incantations To Choose
    • Optimal Spirit Summons
    • Recommended Armor
    • Best Flask of Wondrous Physick for Dragon Build
    • Top Talismans

    Elden Ring Dragon Build Overview

    This Dragon Build utilizes Dragon Communion Incantations, enabling you to scorch foes with fiery attacks. Additionally, it employs the Ripple Blade for effective physical damage:

    • Starting Class: Prophet
    • Flask Distribution: Balanced between HP and FP
    • Stats: Strength, Faith, and Arcane (Primary), with Endurance, Vigor, and Mind (Secondary)
    • Weapons: Ripple Blade
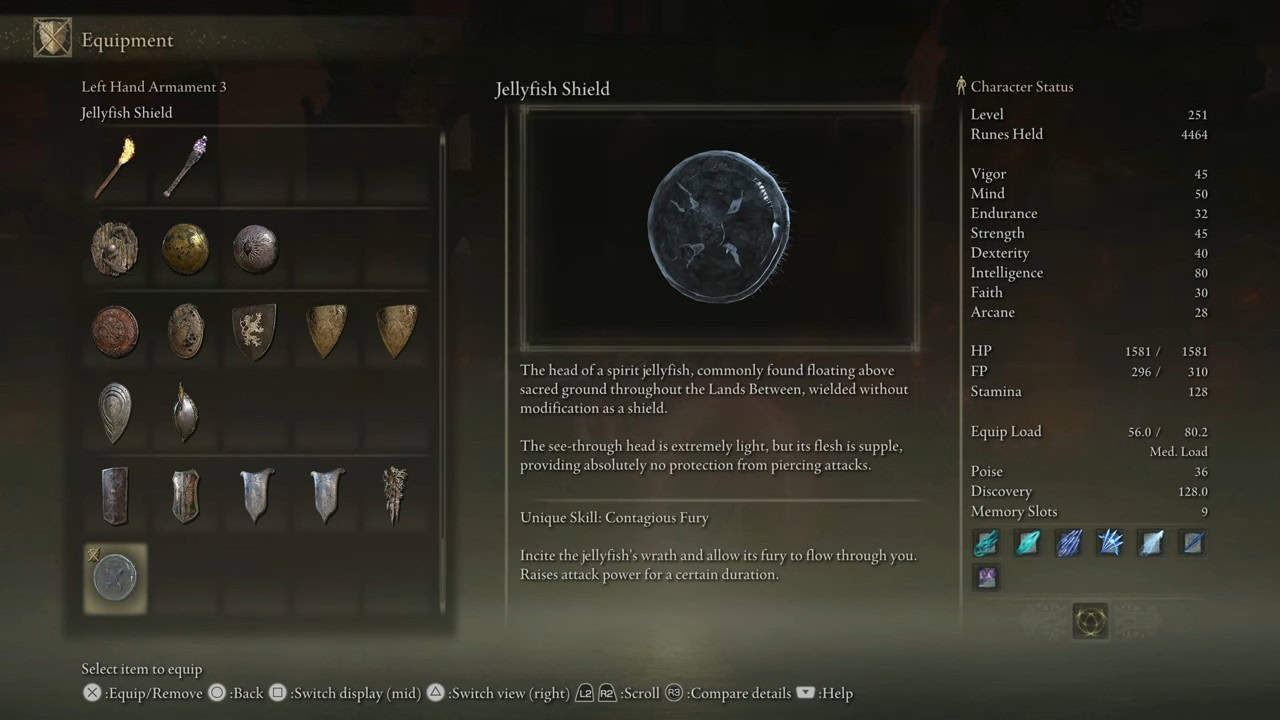
    • Shield: Jellyfish Shield
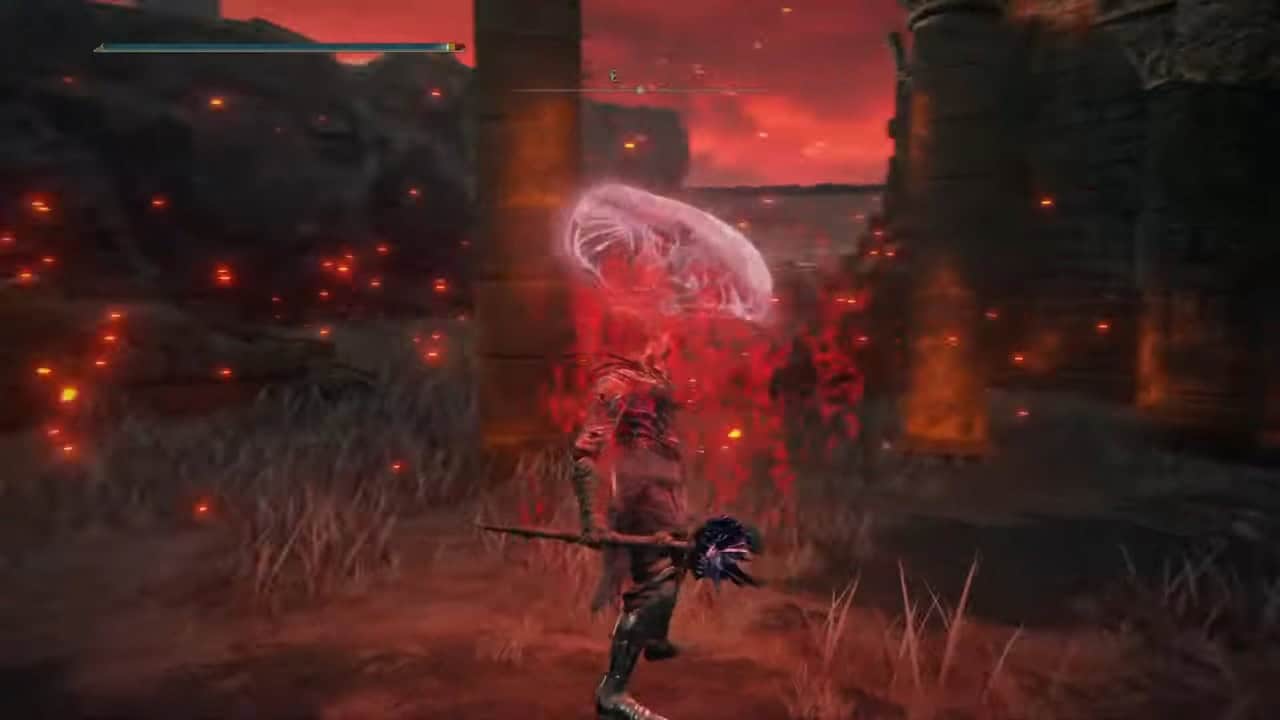
    • Ash of War: Wild Strikes and Contagious Fury
    • Incantations: Dragonfire, Bayle’s Tyranny, Dragonmaw, Theodorix’s Magma, Bloodflame Blade, and Flame, Grant Me Strength.
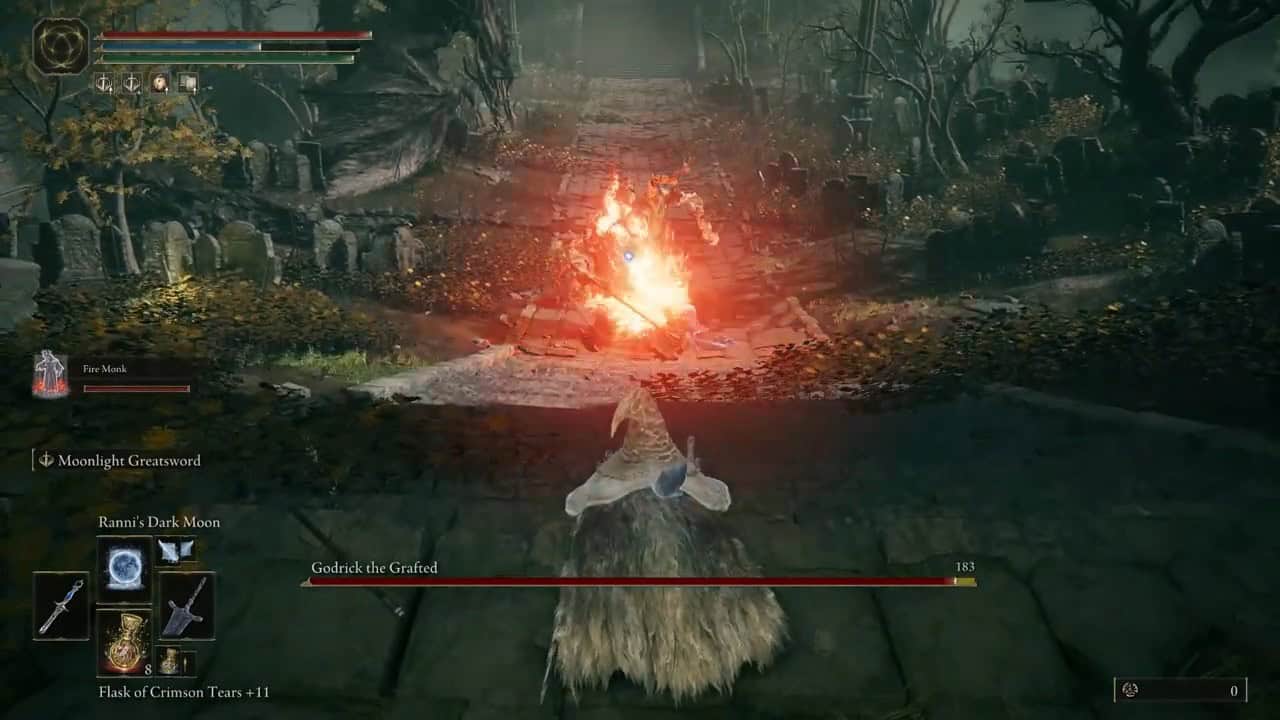
    • Spirit Summons: Mimic Tear or Fire Monk
    • Armor: Drake-Knight Armor
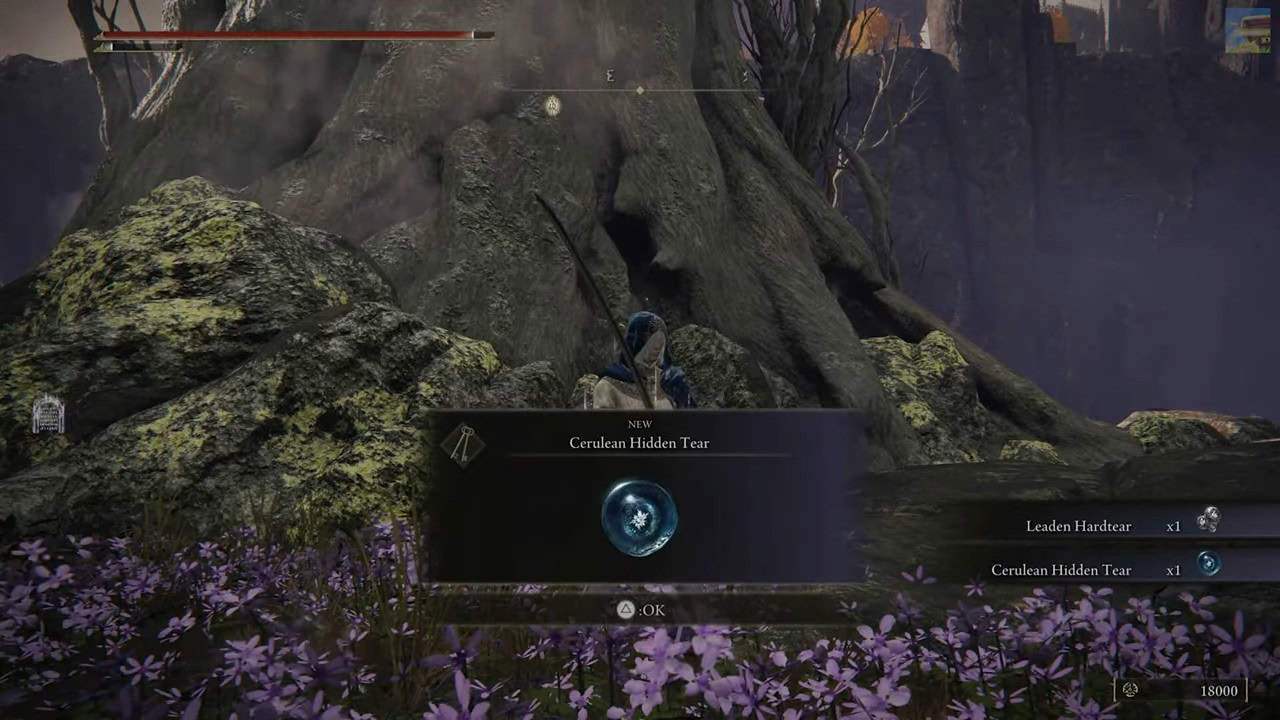
    • Flask of Wondrous Physick: Greenburst Crystal Tear and Cerulean Hidden Tear
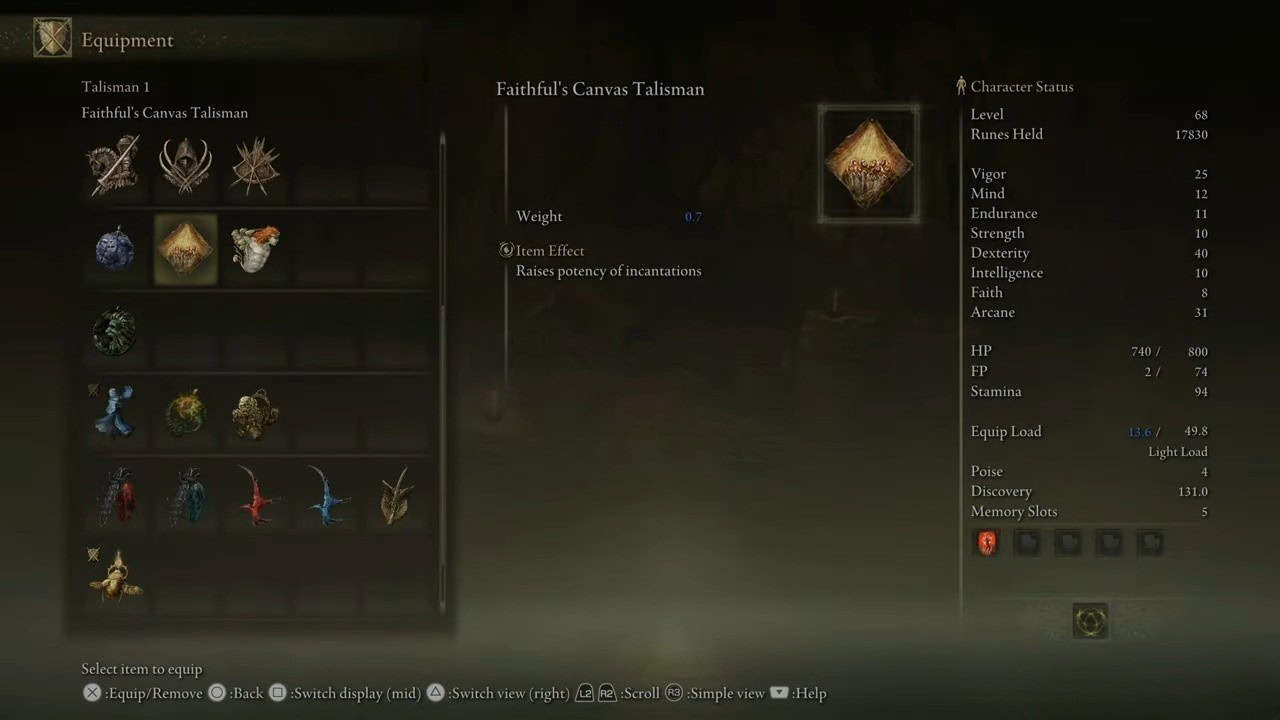
    • Talismans: Faithful’s Canvas Talisman, Flock’s Canvas Talisman, Fire Scorpion Charm, and Radagon Icon

    Stats for Dragon Build

    Stat Level 60 Level 100 Level 150
    Faith 33 43 45
    Mind 17 19 28
    Dexterity 11 13 14
    Strength 16 21 29
    Endurance 12 16 27
    Vigor 13 15 26
    Intelligence 7 7 7
    Arcane 30 45 52

    Best Weapon for Dragon Build in Elden Ring

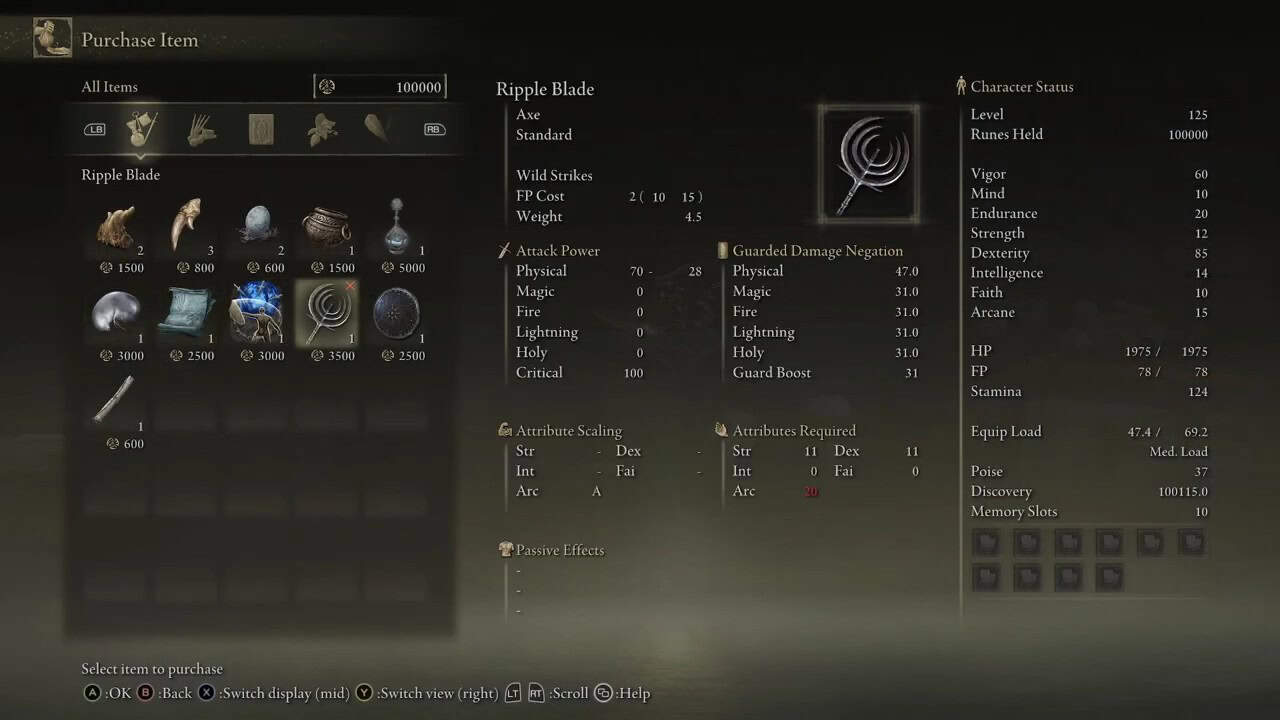
    Given that this build heavily relies on Incantations that require both Faith and Arcane, we’re opting for a weapon that primarily scales with Arcane: the Ripple Blade. This weapon offers an A scaling in Arcane and deals 75 physical damage and 100 critical damage.

    Additionally, it inflicts 31 fire damage, which we will explore further below. You can acquire this weapon from Pidia, the Carian Servant located at Caria Manor.

    Best Shield

    For your shield, we recommend the Jellyfish Shield. Its Ash of War feature enhances your damage output. This small shield requires minimal stats to wield, making it very accessible.

    You can find the Jellyfish Shield north of the Foot of the Four Belfries Site of Grace in Liurnia of the Lakes, surrounded by several jellyfish.

    Best Ashes of War Choices

    Elden Ring Dragon Build best ashes of war

    We’ll utilize the default Ashes of War for both the shield and primary weapon. For the Jellyfish Shield, this is Contagious Fury, which boosts your damage by 12.5% for 30 seconds, while for the Ripple Sword, it is Wild Strikes.

    This attack allows you to unleash a series of rapid hits before finishing with a ground strike that significantly staggers opponents.

    Best Incantations To Choose

    Incantations are crucial for maximizing this build’s damage capabilities. We’ll be utilizing six different incantations:

    1. Dragonfire: This conjuration unleashes a dragon head that breathes fire on adversaries.
    2. Bayle’s Tyranny: Similar to Dragonfire, this incantation summons a dragon head but inflicts AOE lighting and fire damage.

    3. Dragonmaw: Dragonmaw allows you to summon a dragon’s mouth that bites down fiercely on foes.
    4. Theodorix’s Magma: This powerful incantation rains magma down on enemies from the sky, offering significant crowd control.
    5. Bloodflame Blade: This imbues your weapon with festering blood flame, dealing both bleed and fire damage. A perfect fit for our fire-focused Dragon build.
    6. Flame, Grant Me Strength: This incantation boosts your physical and fire damage by 20%.
    TIP

    Equip the Dragon Communion Seal to amplify your Dragon Communion incantations by 15%.

    Best Spirit Summons

    Elden Ring Dragon Build best spirit summons

    For Spirit Summons, choose between the Mimic Tear to double your attacking power or the Fire Monk to boost your fire damage output.

    1. Mimic Tear: This summon duplicates your character, allowing for enhanced damage output.
    2. Fire Monk: This option uses flames to deal immense damage to your foes.

    Best Armor To Wear

    While any light to medium armor can serve this build, we suggest the Drake-Knight armor as it aligns perfectly with the dragon aesthetic. This armor set can be located in the Crumbling Farum Azula area.

    Stats Drake-Knight Set
    Damage Negation
    Physical 22.6
    Physical (Strike) 23.6
    Physical (Slash) 19.1
    Physical (Pierce) 22.6
    Magic 20.4
    Fire 22.6
    Lightning 17.8
    Holy 20.4
    Resistance
    Immunity 60
    Robustness 110
    Focus 50
    Vitality 50
    Poise 40

    Best Flask of Wondrous Physick for Dragon Build

    The Flask of Wondrous Physick permits the use of two temporary buffs in one single-use flask. For the Dragon build, we recommend the following:

    1. Greenburst Crystal Tear: This tear enhances your stamina regeneration rate.
    2. Cerulean Hidden Tear: This tear temporarily negates FP usage when performing incantations or skills.

    Best Talismans

    Elden Ring Dragon Build best talismans

    Talismans can enhance your build in various ways. There are four Talisman slots available for you to unlock and utilize. For the Dragon build, here are the ideal Talisman choices:

    1. Faithful’s Canvas Talisman: This talisman boosts the effectiveness of all incantations by 4%.
    2. Flock’s Canvas Talisman: Similar to the previous one, this talisman increases incantation potency by 8%.
    3. Fire Scorpion Charm: This Talisman raises your fire damage by 12%, but be aware it also increases the damage you receive by 10%.
    4. Radagon Icon: This talisman shortens the casting time for incantations.

    The post Elden Ring Dragon Build: Stat, Weapons, Armor, And More appeared first on SegmentNext.

  • Guide to the Bloody Finger Hunter Yura Questline in Elden Ring

    Guide to the Bloody Finger Hunter Yura Questline in Elden Ring

    Bloody Finger Hunter Yura is one of many NPCs in Elden Ring that offers players a side quest. His storyline leads you through different areas of the Elden Ring map, featuring several challenging tasks to overcome, and we’re here to assist you with that.

    This guide will cover all aspects of the Hunter of Bloody Fingers Yura quest in Elden Ring, including where to find this NPC, how to initiate his questline, the steps involved, the consequences of your decisions, and all the rewards you can earn.

    Location of Bloody Finger Hunter Yura

    Locator Image

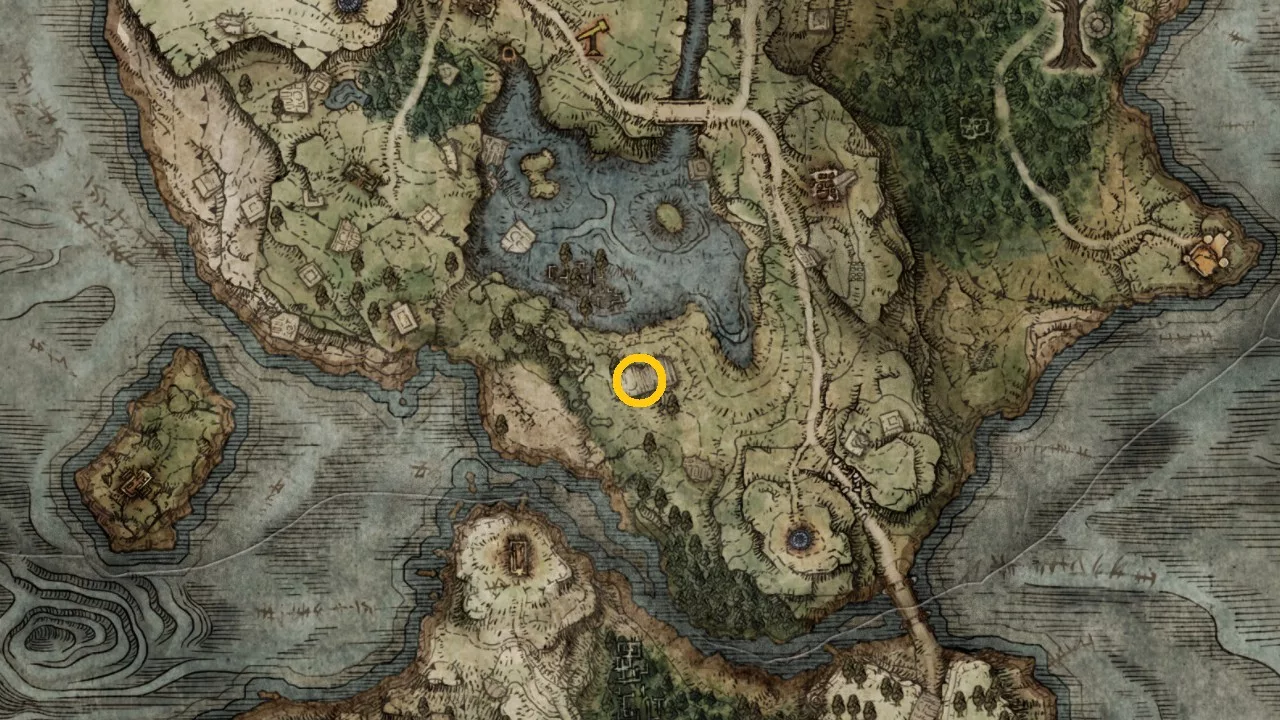
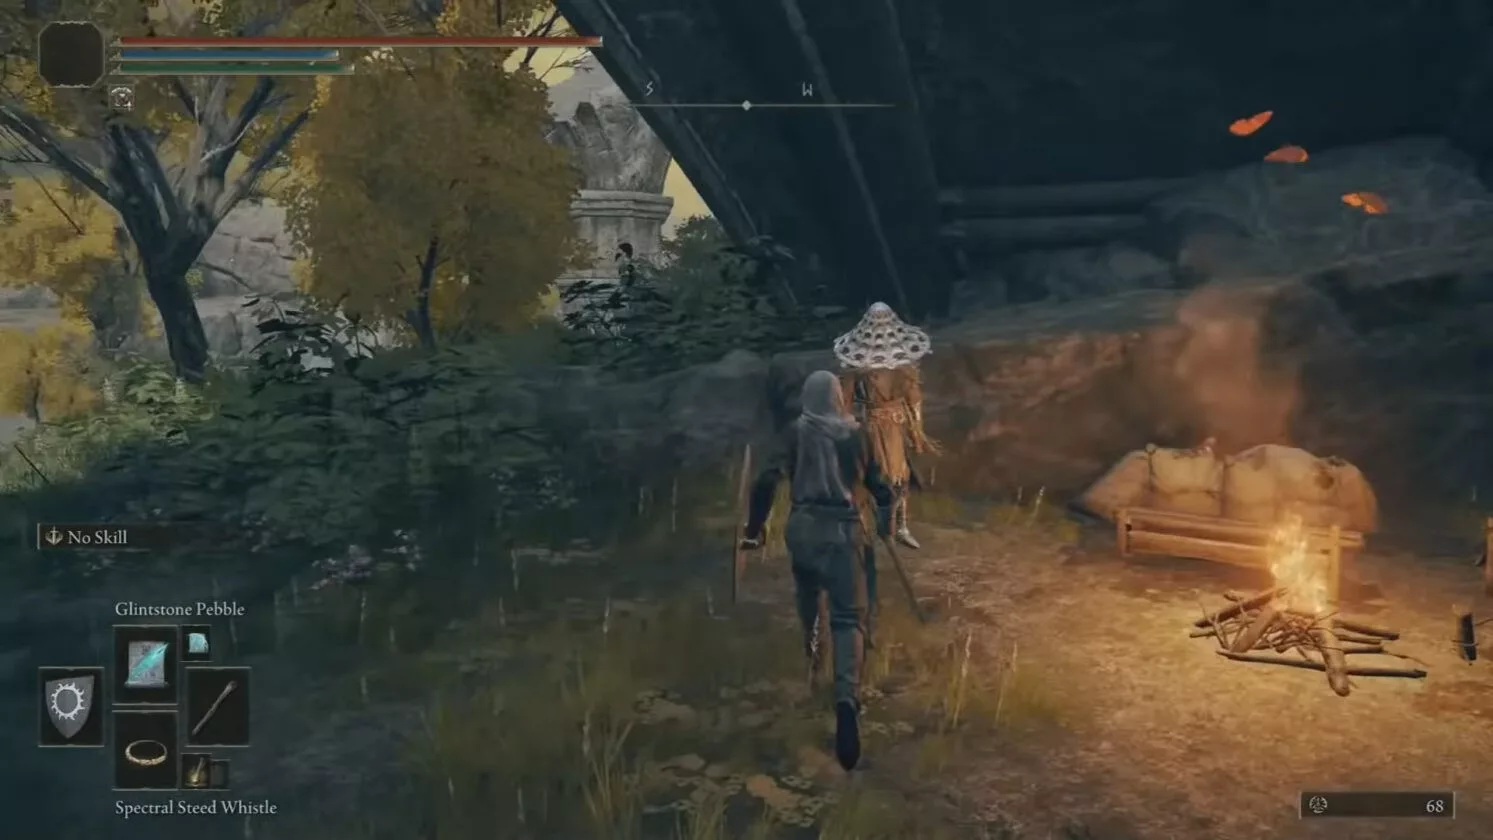
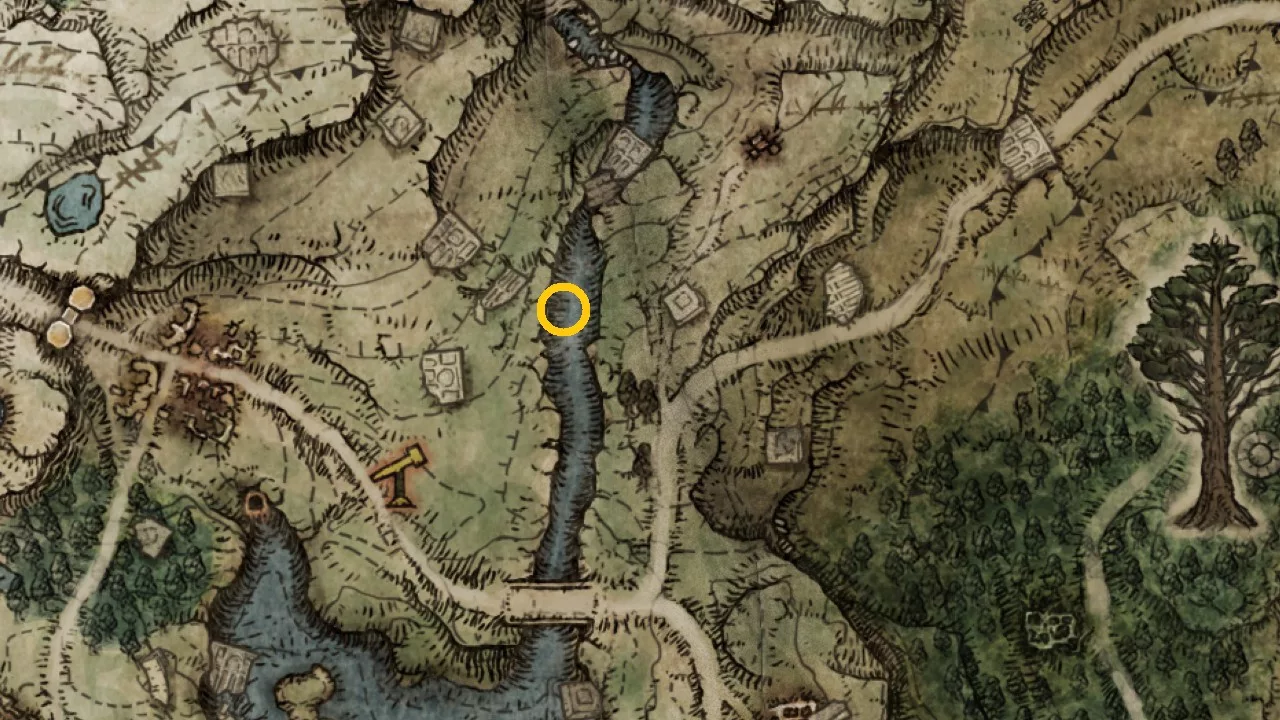
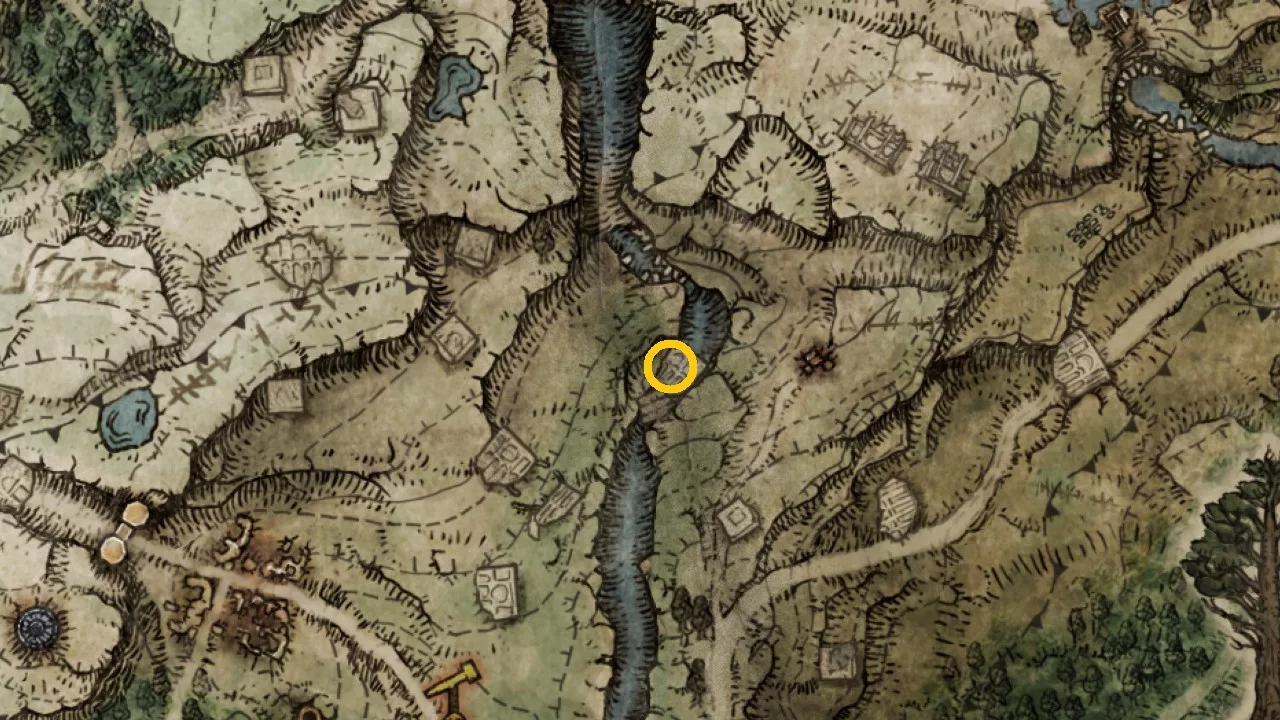
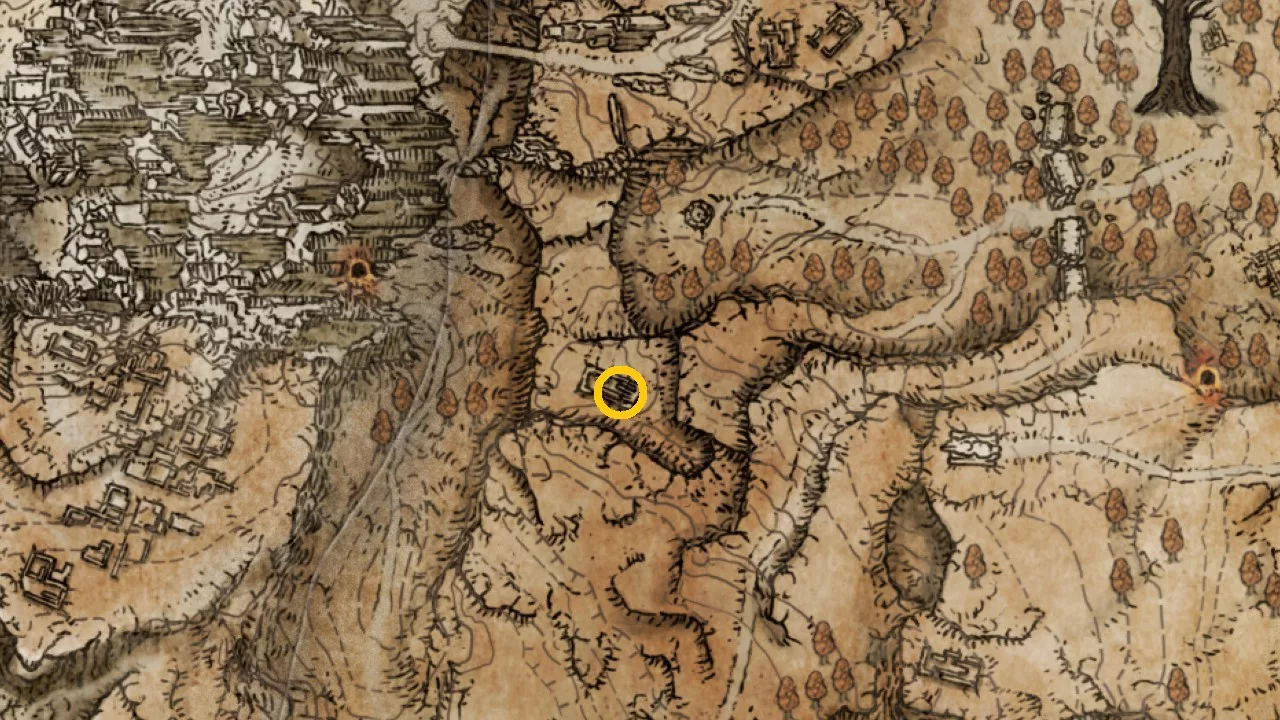
    You can find Yura, the Hunter of Bloody Fingers, in the Limgrave region of Elden Ring, specifically in the southern part. Refer to the images for the detailed location. Yura possesses extensive knowledge about the Dragon Cult and can be located in the underpass beneath the ruins by heading right from this Site of Grace.

    This isn’t the last encounter players will have with Yura, as he plays a pivotal role in an alternative questline. You can engage and defeat Yura as you progress through the game.

    Yura NPC

    Similar to other side quests in Elden Ring, the Bloody Finger Hunter Yura Quest consists of numerous twists and turns. While some optional steps can be skipped, we strongly recommend completing them to earn valuable loot.

    1. Defeat Dragon Agheel

    Dragon Agheel

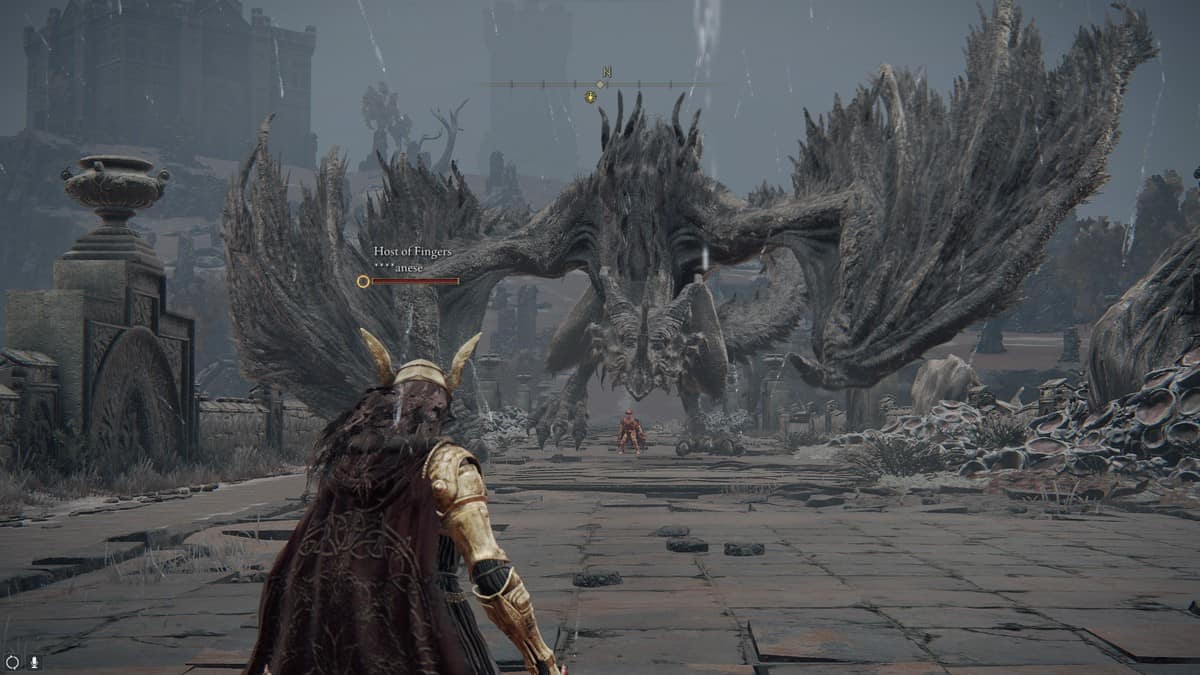
    Although the location of Yura was mentioned earlier, it’s not essential to speak with him to initiate the quest. However, if you choose to engage him, he will warn you about the nearby Flying Dragon Agheel and advise you to keep your distance. If you’re seeking information on the Church of the Dragon Communion, ignore his warning and go defeat Dragon Agheel for some loot.

    At the Dragon Communion Church, you can trade dragon hearts for Incantations within Elden Ring. Regardless of whether you defeat the dragon, you’ll need to follow the mandatory steps that follow to finish the Yura questline.

    2. Vanquish Bloody Finger Nerijus

    Nerijus Battle

    Next, proceed to Murkwater Cave located north of Agheel Lake. Bloody Finger Nerijus will confront you along the way, but Yura will join the battle to assist you. If your character isn’t very strong at the start, you can use Yura as a distraction and attempt to attack Nerijus when he is focused on Yura.

    Be sure to make your initial strikes count, as Nerijus will redirect his attention to you once you engage him. Additionally, you must ensure Yura survives the encounter if you wish to acquire the Reduvia Dagger that Bloody Finger Nerijus will drop upon his defeat.

    3. Speak with Yura Again

    Talking to Yura

    After dispatching Bloody Finger Nerijus, make your way north to find Yura again. He is located near the Murkwater Coast Grace, further up from Murkwater Cave. Speak with Yura to learn more about his mission related to hunting Bloody Fingers.

    4. Unlock the South Raya Lucaria Gate

    Raya Lucaria Gate

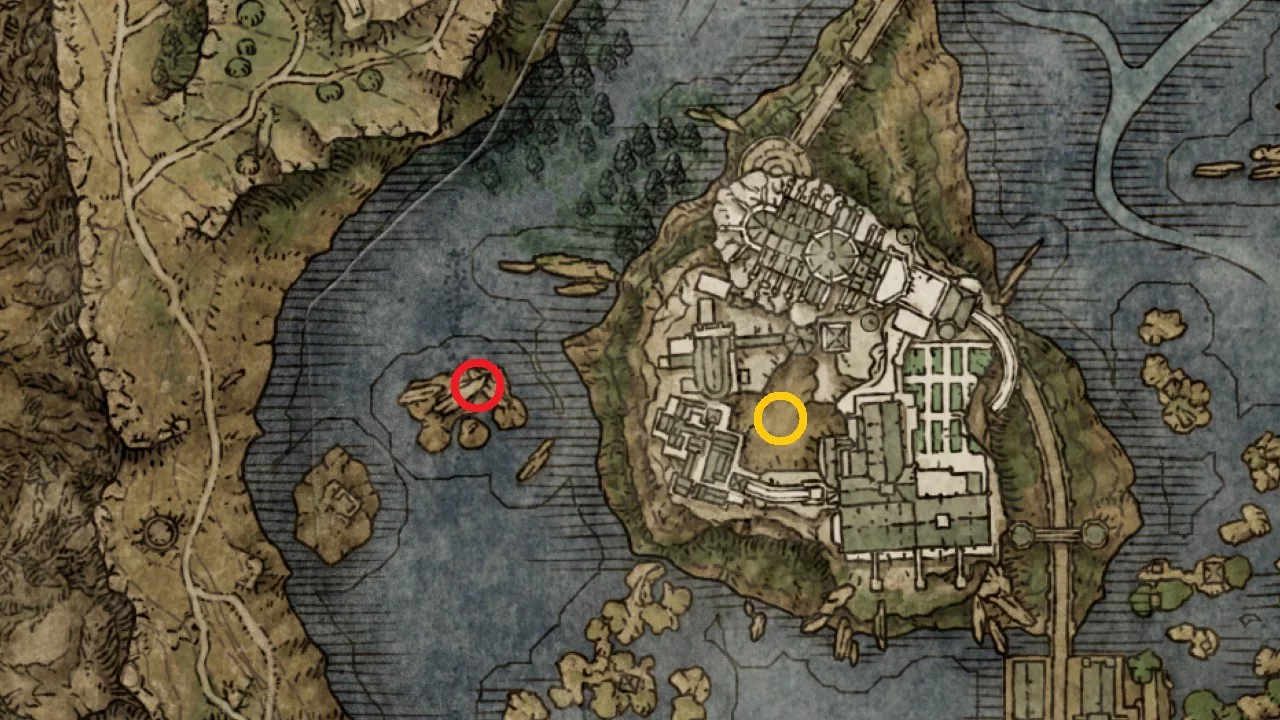
    After your conversation with Yura at Murkwater Coast Grace, proceed to the Academy of Raya Lucaria, located north of Stormveil Castle in the central area of Liurnia.

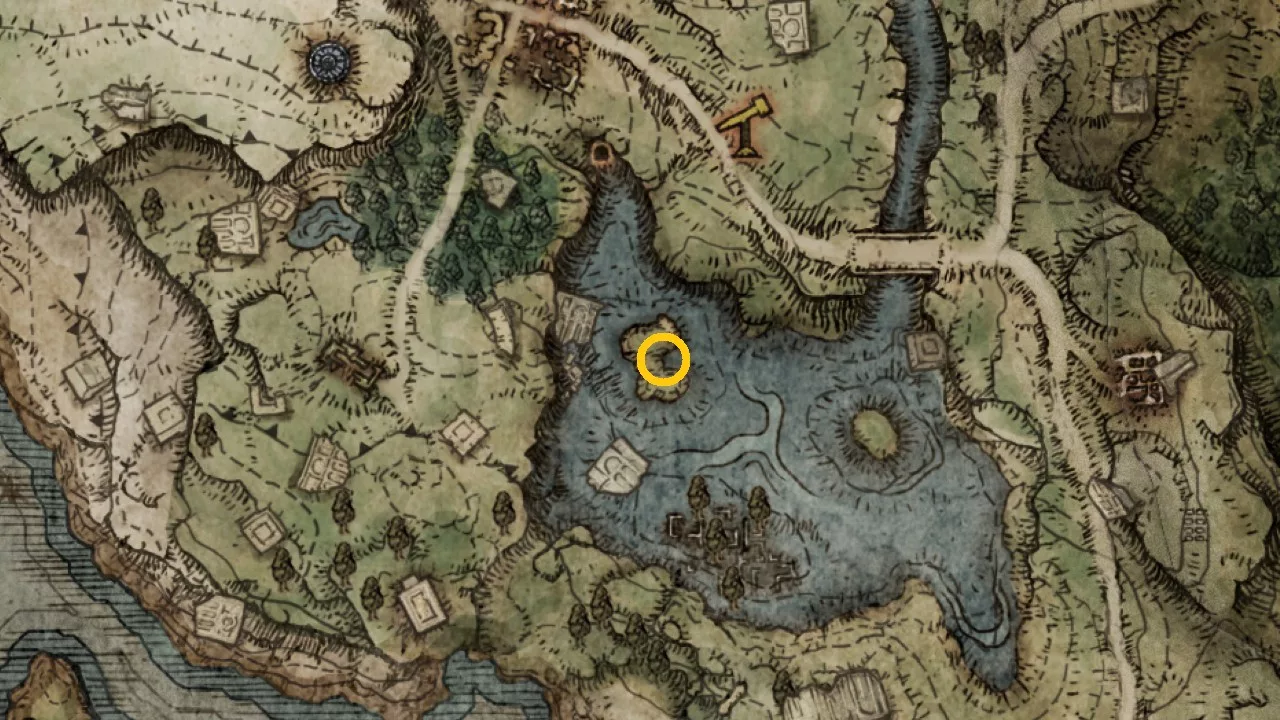
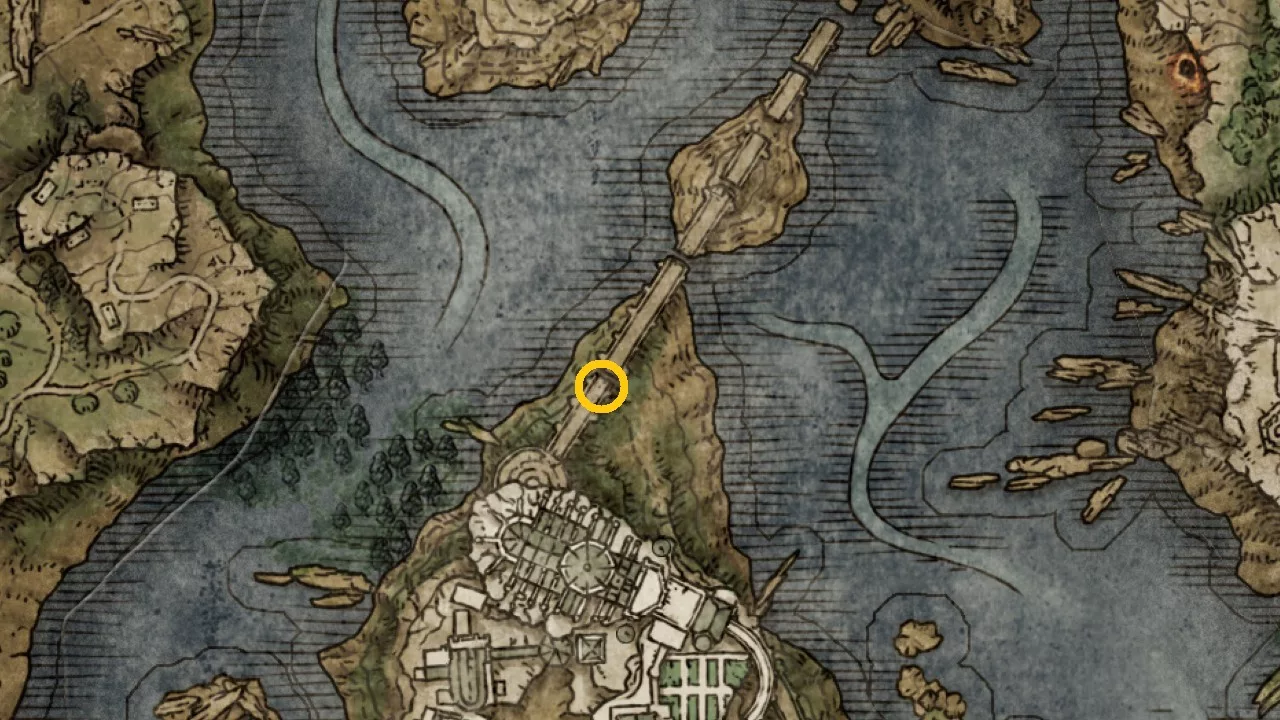
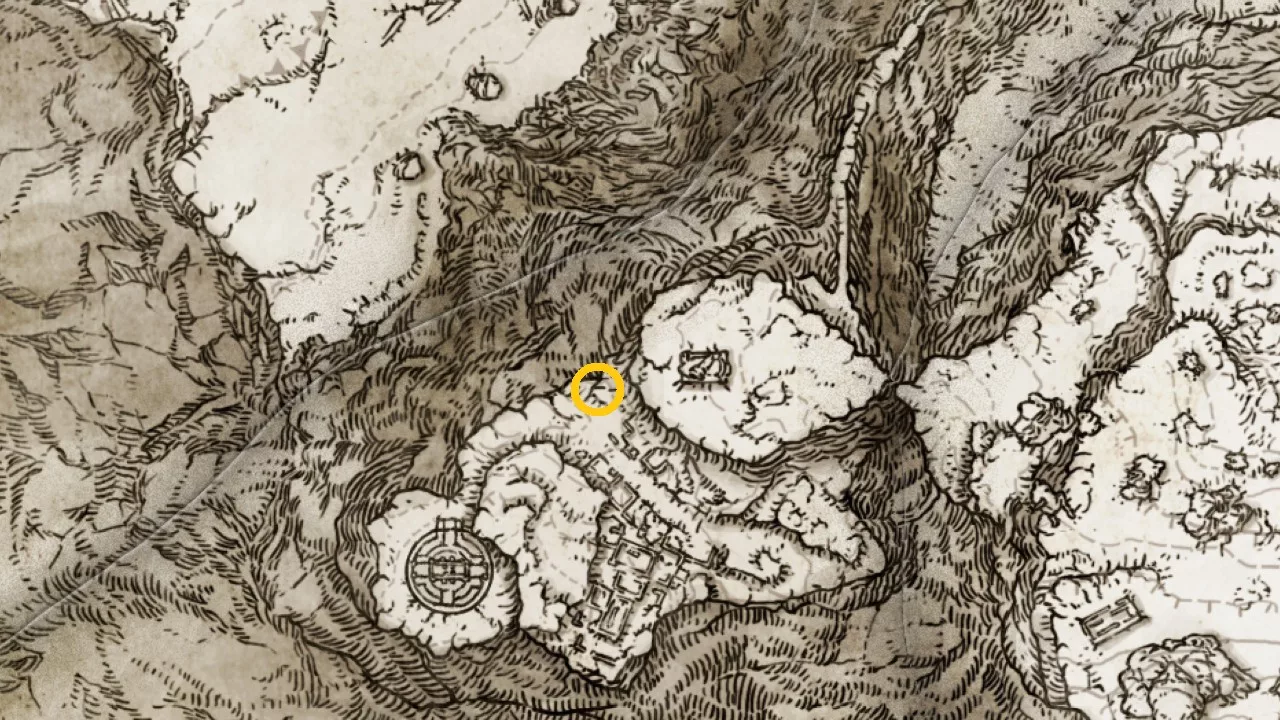
    Acquire the Glintstone Key from the western side of the Academy, positioned behind a slumbering dragon on a small piece of land (highlighted in red above). Once you have the Glintstone Key, travel to the south gate of the Academy of Raya Lucaria and interact with the seal to gain entry, indicated in yellow.

    5. Defeat the Bloody Finger Ravenmount Assassin

    Ravenmount Assassin Battle

    Access the Site of Grace and head through the seal to the north without interacting with it. Cross the bridge and look for a red summon sign on the ground before the first significant break. Engage with the Red Summon Sign to initiate the combat against the Bloody Finger Ravenmount Assassin and eliminate him. After your victory, speak with Yura at the bridge next to the summon sign, where he will update you on his hunt for Bloody Finger Eleonora.

    Upon defeating this foe, you’ll be granted a Rune Arc, a Furlcalling Finger Remedy, and the Ash of War: Raptor of the Mists when you return to your world, along with a Smithing Stone after conversing with Yura.

    6. Take Down the Bloody Finger Eleonora

    Eleonora Encounter

    Next, head to the Second Church of Marika located in the Altus Plateau. You may need to unlock the Grand Lift of Dectus to access this area. Speak with Yura at the Church of Marika to receive the Nagakiba katana. In addition, you’ll earn the Purifying Crystal Tear, one Furlcalling Finger Remedy, and Eleonora’s Poleblade as rewards. Utilize the Nagakiba Katana to defeat the Violet Bloody Finger Eleonora who will spawn near the statue.

    7. Converse with the Imposter Bloody Finger Hunter Yura

    Imposter Yura

    Afterward, travel to the Zamor Ruins Site of Grace in the Mountaintop of the Giants, where you will encounter the Imposter Yura. He will attempt to persuade you to seek out the Three Fingers and the Frenzied Flame. He will reference Shabriri Grapes, connecting this quest to the Hyetta quest.

    If you decide to eliminate this Imposter Yura, you will receive the Iron Kasa helmet and the Ronin armor set. Alternatively, if you follow Yura’s guidance, you could potentially discover the Three Fingers and unlock an alternative game ending!

  • How to Obtain the Shining Essence Echo in Remnant 2?

    How to Obtain the Shining Essence Echo in Remnant 2?

    In Remnant 2, a variety of essential items can be crafted using specific materials, one example being the Shining Essence Echo.

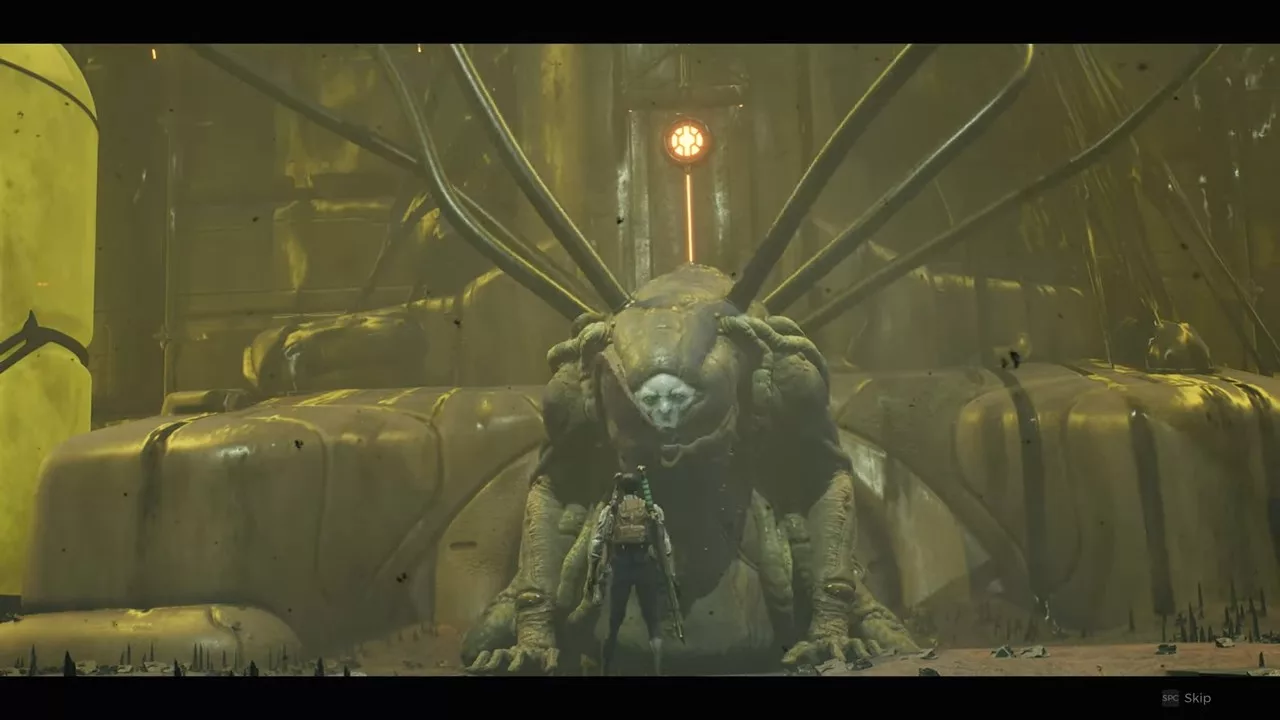
    To acquire this echo, you’ll need to finish the Souls Sparks Storyline located in the N’Erud world. Throughout this quest, you’ll encounter the boss Tal’Ratha. When facing this boss, you’ll be presented with a decision, but worry not—you’ll secure the echo no matter what choice you make.

    1. Locate and engage the Custodian

    The Shining Essence Echo plays a crucial role in the overarching Souls Sparks storyline in Remnant 2. Before you can claim the Echo, you need to gain entry to the N’Erud world.

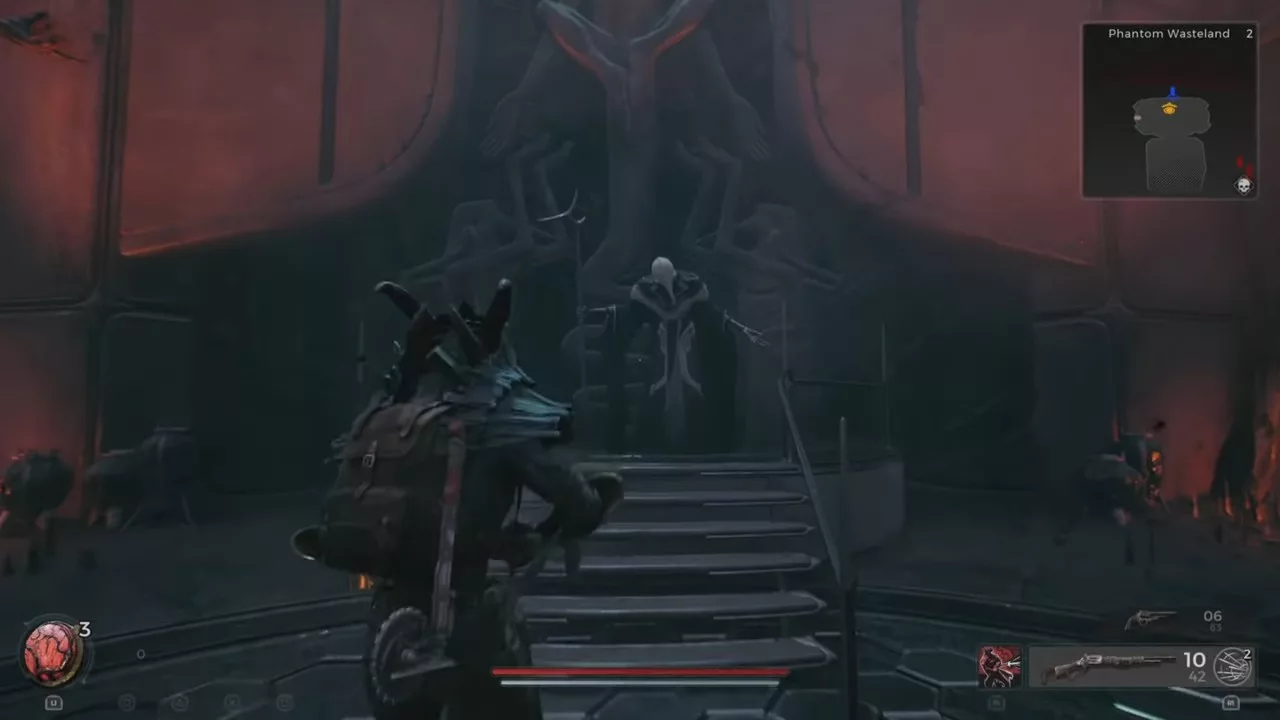
    Once in the N’Erud world, track down the Custodian who is positioned near the Phantom Wasteland’s Ascension Spire Waypoint.

    This intriguing NPC serves as the guardian of the realm and will prompt you to confront Tal’Ratha to obtain the Shining Essence Echo.

    2. Acquire the Soul Spark Cylinder

    Remnant 2 Shining Essence Echo get the soul spark cylinder

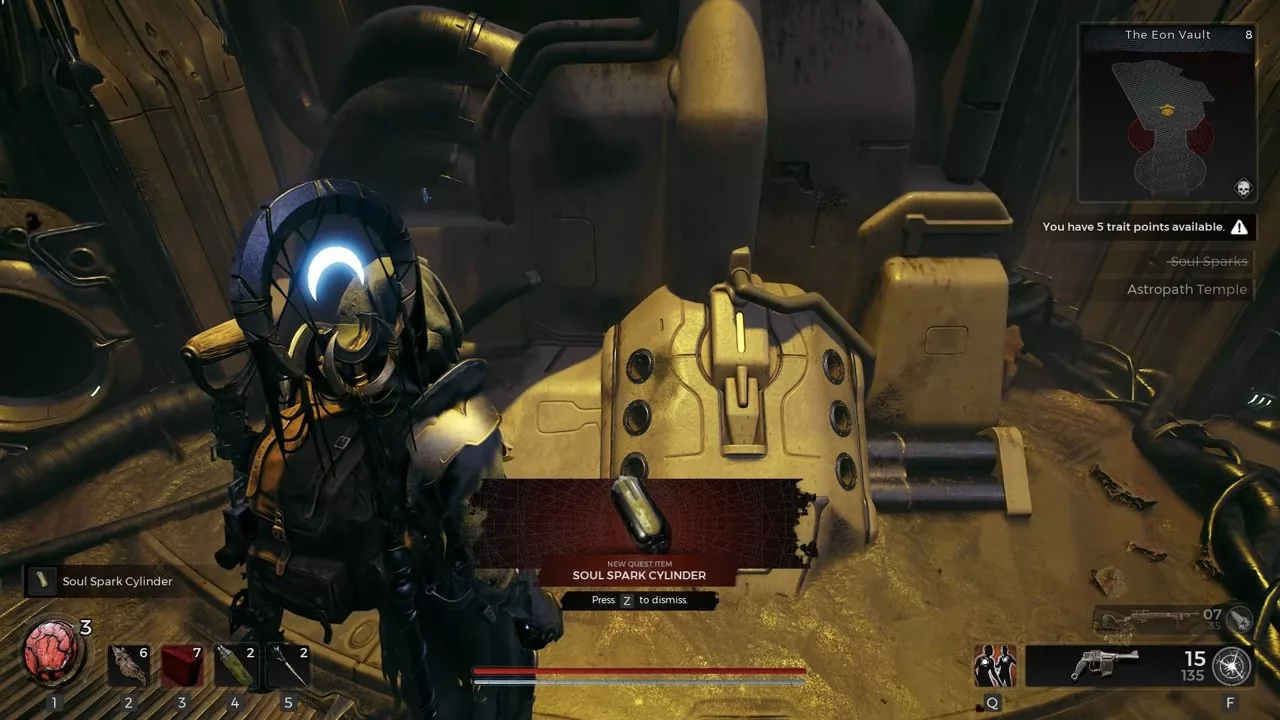
    To locate Tal’Ratha in Remnant 2, you’ll need access to the Forgotten Prison, which marks the initiation point of the Soul Sparks storyline. However, you must first procure the Soul Sparks Cylinder before confronting the boss.

    This item is concealed within a peculiar mine that is aglow with yellow light. Given that this world is procedurally generated, discovering this object may take some time.

    3. Overcome Tal’Ratha

    After acquiring the Soul Sparks Cylinder, you can head over to the Forgotten Prison to engage with Tal’Ratha.

    Tal’Ratha makes an unusual request of players—to consume them, quite literally. Choosing to be devoured or to fight Tal’Ratha in Remnant 2 is entirely up to you. Regardless of your decision, battle commences against Tal’Ratha, albeit with slight variations depending on your choice.

    Ultimately, you’ll still receive the Shining Essence Echo regardless of your decision, so feel free to select as it won’t affect the item we’re after.

    However, the other rewards for defeating Tal’Ratha differ based on which version you confront. If you opt to be consumed, you will encounter the Tal’Ratha (Metaphysical) variant, while the alternative choice leads to a fight with the standard version.

    In summary, after triumphing over the Tal’Ratha boss, you will earn the Shining Essence Echo, a sphere resonating with Tal’Ratha’s thoughts.

    How to utilize the Shining Essence Echo?

    Remnant 2 Shining Essence Echo uses

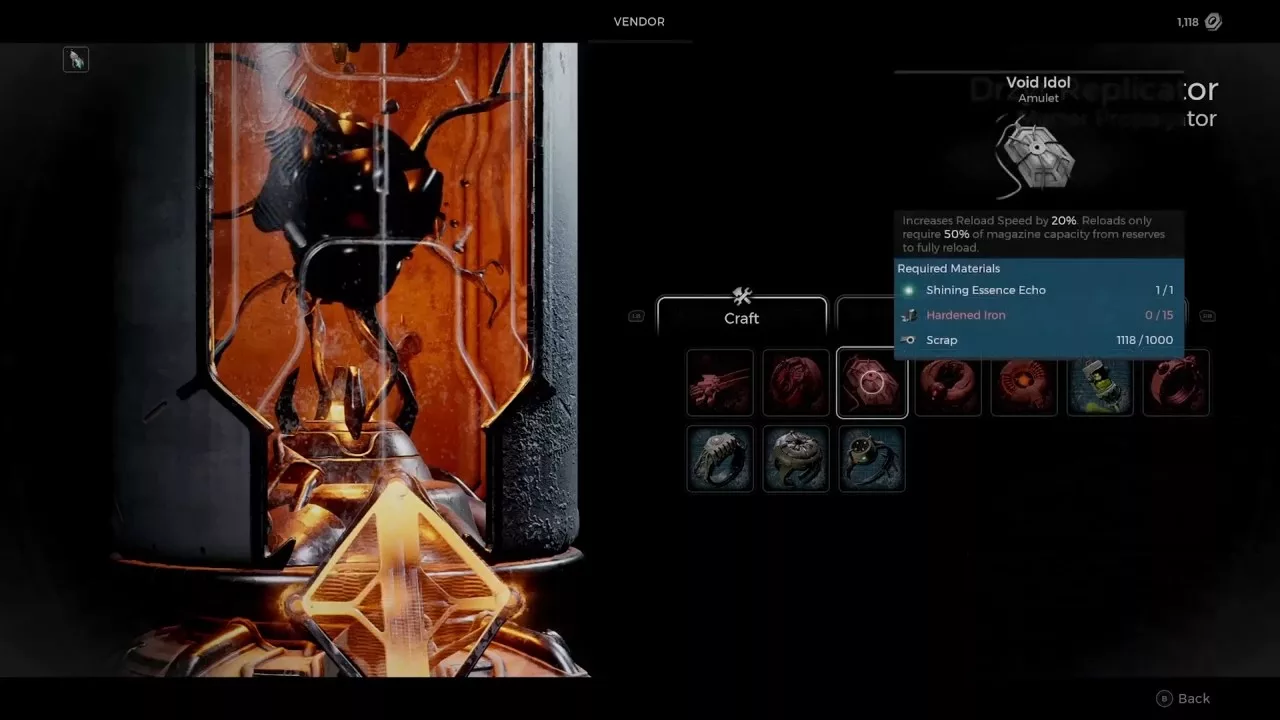
    The Shining Essence Echo serves as a crafting component that can be utilized to create two distinct items. You may opt for either item, but keep in mind that you can only secure one during a single playthrough.

    First, you can present the Shining Essence Echo to the Custodian, who, in return, grants you the Siphon Heart Relic. This Relic provides a Lifesteal effect for a limited period.

    Alternatively, you can utilize the Shining Essence Echo at the Drzyr Replicator to forge the Void Idol Amulet, which enhances your Reload Speed to a certain degree.

  • How to Obtain the Rusted Heirloom in Remnant 2

    How to Obtain the Rusted Heirloom in Remnant 2

    A piece of jewelry from the Renthir lineage, the Rusted Heirloom is a ring in Remnant 2. This heirloom manifests as an aged gold band adorned with green gems and is designed for defensive purposes. It can be secured within an iron safe that is tucked away in a randomly generated location within Losomn.

    When your health dips below 50%, the ring provides two stacks of the Bulwark perk. This feature mitigates damage taken and enhances your longevity in combat.

    Where to Find the Rusted Heirloom Ring in Remnant 2

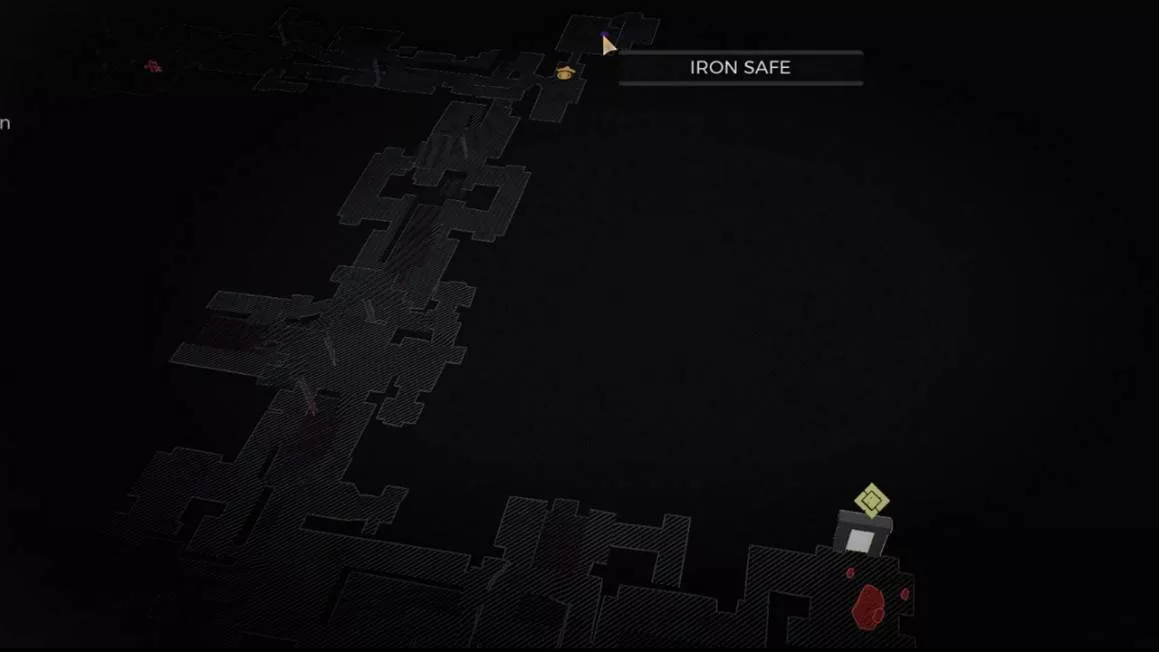
    You can discover the Rusted Heirloom in Remnant 2 within The Great Sewers, Tiller’s Reset, or Harvester’s Reach areas of Losomn. A secret room with an iron safe is located in one of these areas, marked by a small blue icon on the map.

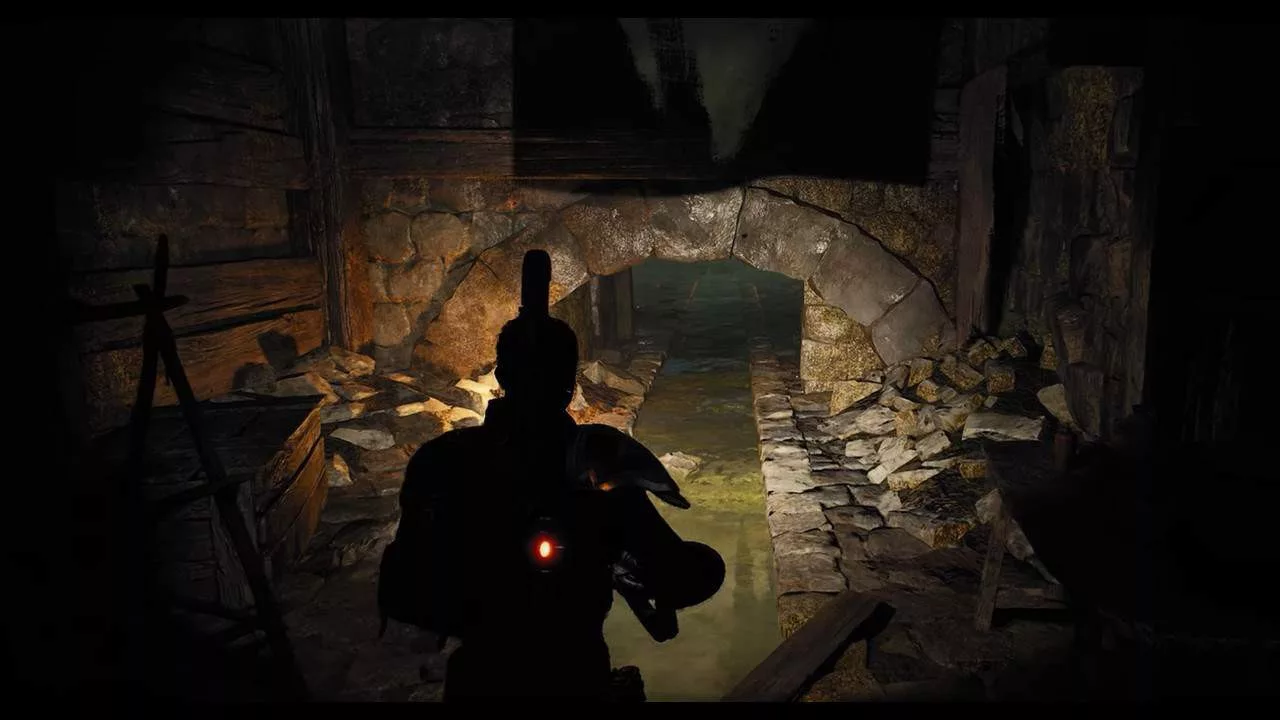
    To enter the secret room, you will need to crawl through a small archway to access the other side. Since the maps in Remnant 2 are procedurally generated, you’ll need to search for this specific spot in your world. If your map doesn’t contain the room, you’ll need to reroll Losomn in Adventure Mode until you come across it.

    This concealed area contains a locked iron safe, which requires a 4-digit code to open. The walls of the room are covered with chalk markings indicating various lock combinations. To uncover the correct code, use your flashlight to shine light on the numbers, as four of them will glow yellow.

    Keep track of the positions of the glowing numbers. For instance, if you see that 8 is glowing in the sequence 5809, then 8 will occupy the second position in your final code, represented as X8XX.

    The code will always consist of a combination of the numbers 1, 3, 8, and 5. Inputting the correct combination will unlock the safe and reward you with the Rusted Heirloom Ring in Remnant 2.

    Effects and Stats of the Rusted Heirloom

    The Rusted Heirloom Ring offers defense-oriented advantages in Remnant 2. It grants you 2 stacks of Bulwark whenever your health drops below 50%. Each Bulwark stack decreases damage received by 5%, enhancing your overall survivability.

    This ring is particularly beneficial for defensive playstyles.

    While it suits any build aiming to bolster survivability, it is especially crucial for tank builds. Engineers and the Challenger Archetype in Remnant 2 will find that the Rusted Heirloom Ring complements their abilities perfectly, as the added Bulwark stats work in harmony with their skill set. It improves defense and aids in surviving low health situations, making it an exceptional choice for shield and tank builds.

  • Guide to Stock Car Races in GTA V

    Guide to Stock Car Races in GTA V

    In Grand Theft Auto V, participating in Stock Car races allows players to unlock distinct and powerful vehicles that enhance your cruising experience across the vibrant streets of Los Santos. However, obtaining these cars involves a bit of effort, and that’s where we come in.

    You can find Stock Car races in GTA V situated in the Grand Senora Desert. By taking part in these races, you stand the chance to earn the ultimate reward: the Cheval Marshall Monster Truck.

    Location of Stock Car Races in GTA V

    All five Stock Car races are hosted in the same region. Head over to the Grand Senora Desert and look for an individual standing next to a Burger Shot-themed vehicle along Route 66. As you approach, a prompt will appear, allowing you to enter the first Stock Car race.

    Keep in mind that these missions unlock after you finish Trevor’s mission, “Mr. Phillips.” You will receive a text notification from Ron indicating they are now accessible.

    These races are not available on the older PS3 and Xbox 360 versions of the game.

    How to Unlock the Cheval Marshall Monster Truck?

    You must complete the Stock Car races five times in GTA V. Each race consists of five laps, and the difficulty increases with each subsequent race. To gain an advantage over your rivals, a fast car is essential. The Imponte Duke O’Death, known for its exceptional handling and speed, will help players maintain a competitive edge by outpacing opponents enough to secure victory.

    You can complete these races with any character.

    For each race completed, you will unlock a unique Stock Car. Once you finish the fifth and final race, the Cheval Marshall Monster Truck will be unlocked. Here’s the order of Stock Cars you will unlock:

    • Race #1 reward: Declasse Burger Shot Stallion
    • Race #2 reward: Bravado Redwood Gauntlet
    • Race #3 reward: Vapid Pisswasser Dominator
    • Race #4 reward: Bravado Sprunk Buffalo
    • Race #5 reward: Cheval Marshall Monster Truck

    After unlocking these vehicles, they will be available across all characters in their respective garages. Additionally, the Cheval Marshall truck will spawn at Trevor’s airstrip in the Grand Senora Desert, where players can customize it with one of 25 different flag options.

    If you’re having trouble seeing the races, try uninstalling and then reinstalling the game.

  • Armored Core 6: Moonlight Blade – Location and Stats Guide

    Armored Core 6: Moonlight Blade – Location and Stats Guide

    To obtain one of the most legendary weapons, the IA-Co1W2 Moonlight, also known as the Moonlight Blade, in Armored Core 6, you must reach the conclusion of chapter 4, titled Reach the Coral Convergence. It’s advisable to equip the Songbird Grenade Launcher and Ben Machine Guns for efficient enemy elimination. After you acquire the weapon, it will appear in your inventory only upon defeating the chapter’s boss.

    Now, let’s dive into why acquiring this weapon in Armored Core 6 is essential and how to do it.

    Location of the Moonlight Blade

    At the conclusion of the Reach the Coral Convergence mission, eliminate V6 and Gun 3 before advancing to the next checkpoint. From there, proceed toward the damaged bridge.

    You can either drop into the water or stick to the left side and jet over the bridge to reach the opposite shore.

    Beneath the bridge, you’ll encounter three Ancient Coral Wheel Machines; use Songbirds to eliminate them, or simply grab the weapon and take off.

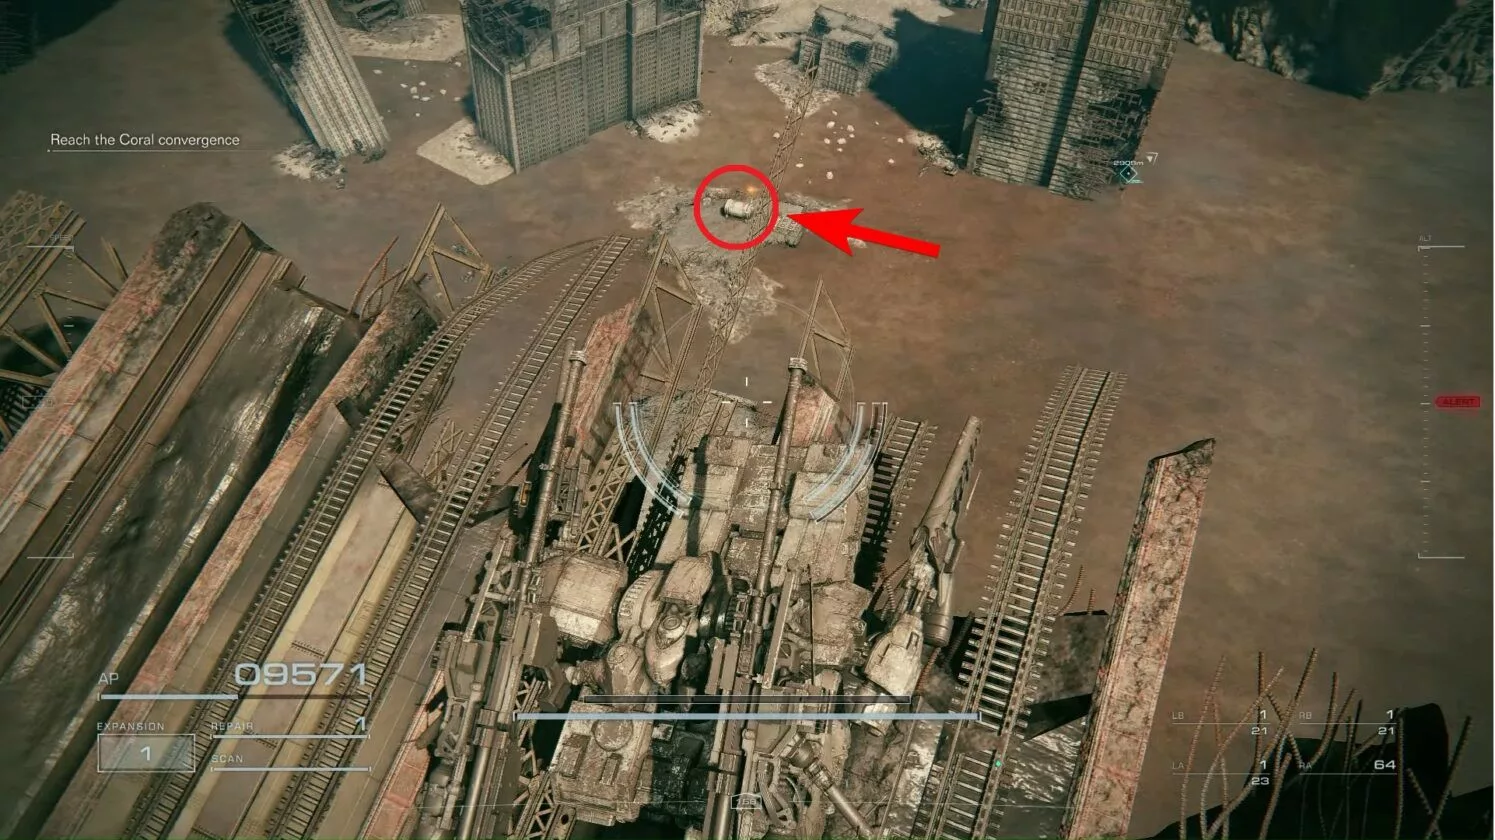
    Upon reaching the other side, you will find a box marked with an objective indicator. This contains the Moonlight Blade.

    Armored Core 6 Moonlight Blade

    If you’d prefer to avoid the foes guarding the box, fly across the bridge and move directly to its end. Jump off the left edge, and you will land right in front of the chest containing the Moonlight Blade.

    Stats and Attack Methods of the Moonlight Blade

    The Moonlight Blade is a formidable melee weapon in Armored Core 6 that emits powerful energy waves towards foes. It features a two-hit combo that offers impressive reach while maintaining a shorter distance but providing a wider arc for charged attacks.

    A normal strike hits at a maximum distance of 290m.

    This two-hit combo can target two nearby enemies simultaneously, permitting you to re-target efficiently. For engaging multiple enemies together, utilize the charged attack; it maxes out at around 220m with a broad width that strikes a larger area.

    During a charge, you can cancel the attack at any moment to outsmart your opponent’s dodge and quickly follow up with a faster combo.

    Armored Core 6 Moonlight Blade

    As for its specifications, the weapon boasts an attack power of 615 alongside an impact rating of 495. The charged attack of the Moonlight Blade surpasses all other weapons in AC6. Additionally, the Direct Hit Adjustment stat significantly boosts damage against staggered enemies, while the light PA Interference enhances its effectiveness against shields.

  • F1 22 Career Mode Guide: Mastering MyTeam Gameplay Tips

    F1 22 Career Mode Guide: Mastering MyTeam Gameplay Tips

    MyTeam Career Mode presents some challenging decisions, but it promises to pave the way for your triumph in F1 22. Before diving into the setup process, it’s essential to grasp the various options this mode provides for creating a unique character or team.

    The Career Mode in F1 22 serves as a complete toolkit that allows you to personalize your gameplay experience. Let’s jump into some useful tips that can enhance your time in the game.

    1. Choose Wisely During the Interview

    The Will Buxton interview might appear to be a simple addition for realism, but it significantly influences your journey in F1 22.

    Your responses during the interview can uplift the morale of the department you commend, leading to reduced costs for its parts. Make sure to consider your answers carefully to kick off your career with an advantage.

    For your sponsor selection, opt for one that offers the highest starting fee. Although the objectives set by these sponsors may seem daunting at first, you’ll find them easily achievable by the season’s close.

    Securing the largest initial budget from your sponsors allows you to invest in an exceptional engine and a high-caliber driver.

    3. Securing a Driver

    While you can choose your favorite driver from the available options, opting for a less expensive driver can provide more flexibility in your budget for upgrading engines or facilities right from the start. We suggest considering Oscar Piastri, who stands out as the top rookie driver in the series.

    4. Engine Durability

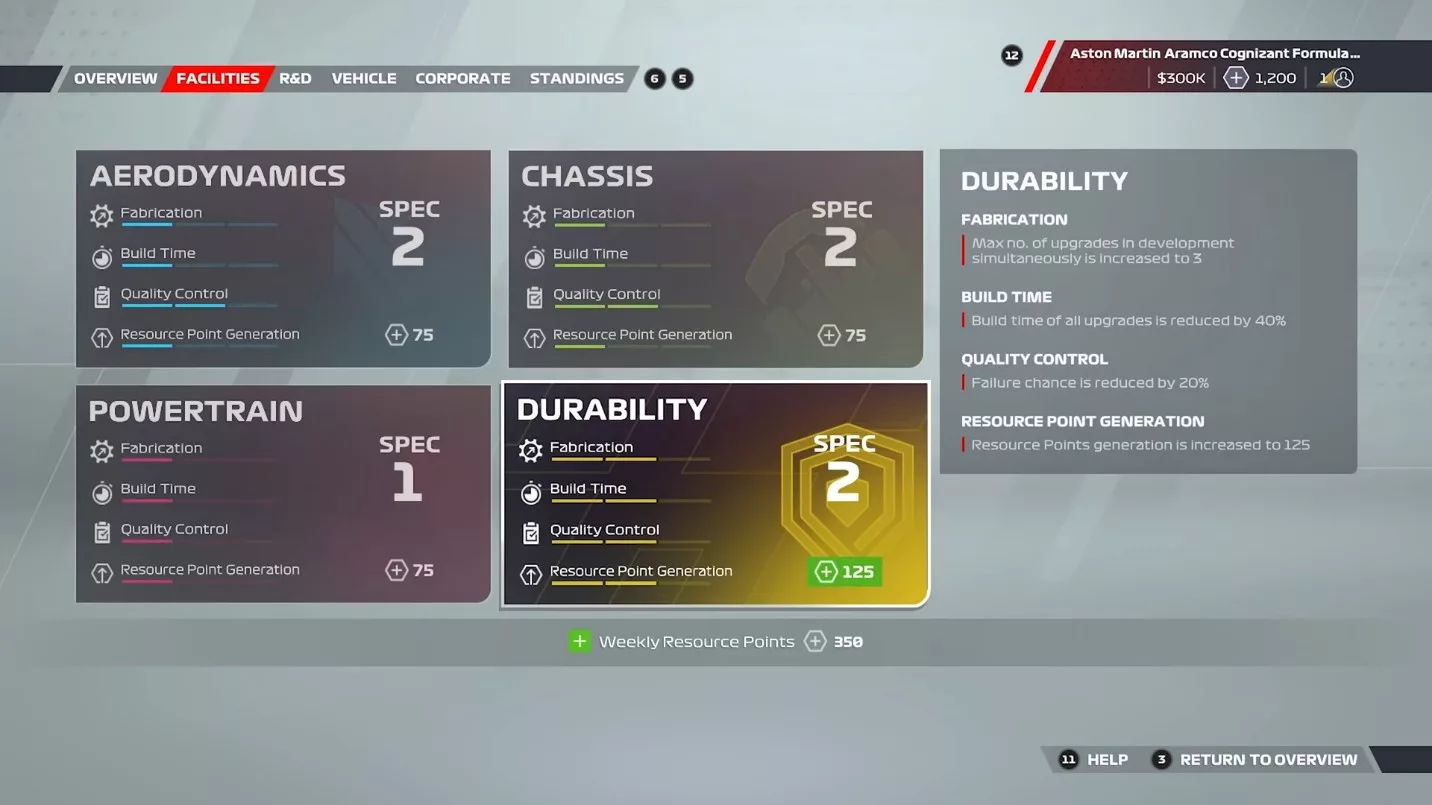
    The durability focus manages your car’s engine maintenance. This will minimize penalties when you need to swap out and replace parts. As the latter half of the season approaches, consider obtaining extra engine components to save for future races.

    If you accrue all your penalties at once, their impact will be limited to that specific race. This eases the burden on the Durability department, as having several spare engines at hand enables you to allocate resource points to enhance your car’s cornering speed. Keep in mind that poor durability can negatively affect your teammate as well.

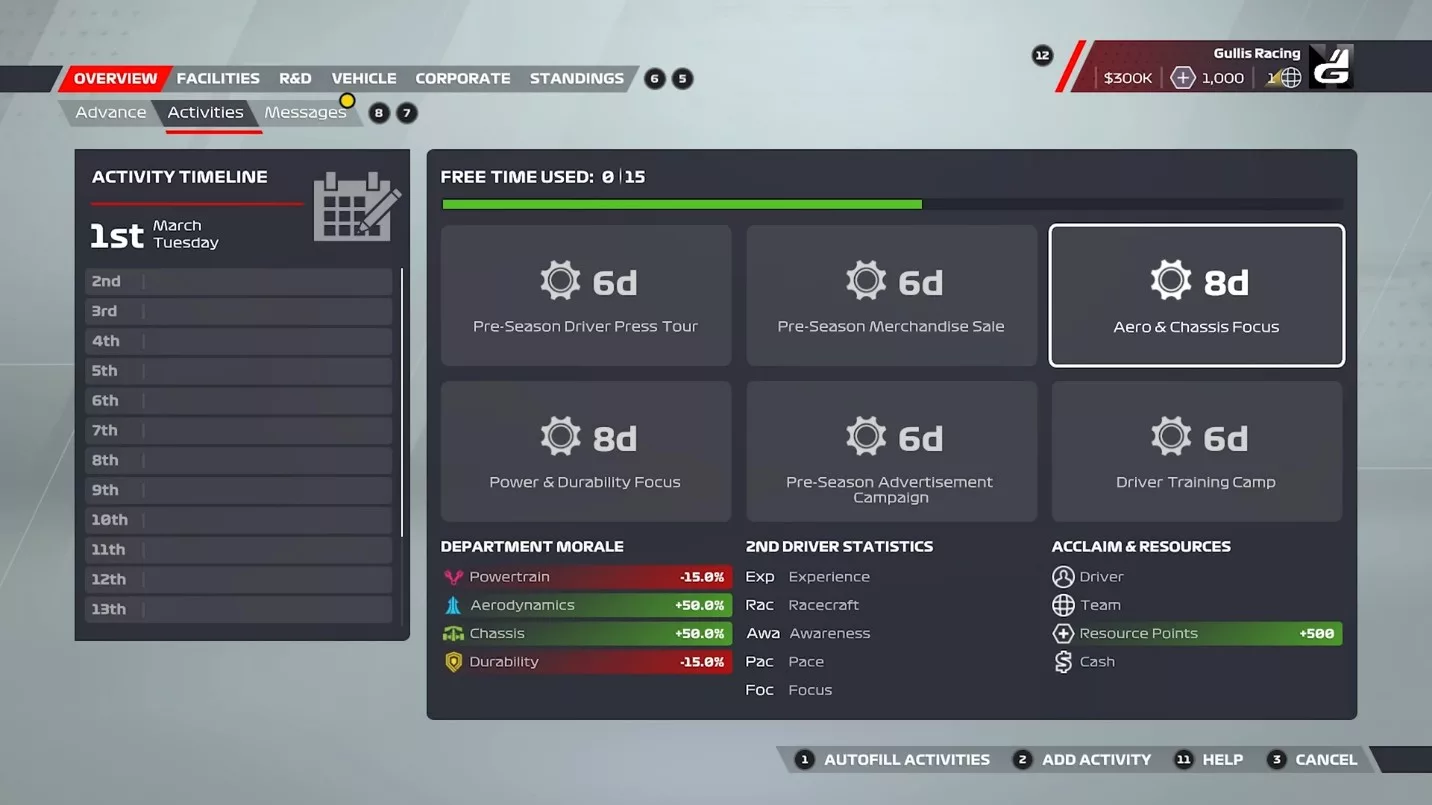
    5. Participate in Activities

    Activities can shift within the race weekend and can range from a couple of weeks to just two days of team engagement. Be sure to participate in these activities to accumulate team acclaim, financial resources, and resource points.

    6. Increase Focus Whenever Possible

    In F1 22, the term “Focus” refers to a mechanic linked to your crew’s performance on the track.

    Throughout your MyTeam experience, you’ll encounter various choices that will impact your crew’s level of focus directly. It’s vital to prioritize their Focus above any other considerations and make informed decisions accordingly.

    If your secondary driver experiences low Focus, it could cause significant troubles as you progress through the later stages of the game.

    To monitor your crew’s performance, access the Personnel HQ to explore available upgrades aimed at keeping them motivated and satisfied.

    7. Accumulating R&D Points

    R&D points are essential for enhancing your car’s parts and upgrading your team’s facilities. Fortunately, gathering R&D in F1 22 is fairly easy. All you need to do is engage in the Quick Practice mini-game, which serves as an excellent way to accumulate R&D points in the MyTeam mode.

    8. Upgrade Your Facilities

    Facilities play a vital role in F1 22. Therefore, upon entering Career Mode, take note of which facilities have been upgraded and which require attention. Make sure to upgrade them all at a steady rate.

    9. Engage in Career Mode Events

    Prior to each race weekend, you will get an invitation to participate in the Pirelli Hot Lap. These events allow you to hop into any supercar and tackle specified challenges. While skipping these events to dive straight into practice sessions is an option, we recommend completing them. Mastering the hot laps can earn you both acclaim and monetary rewards based on your performance.

    Acclaim helps determine how many sponsors you can place on your car and the revenue you can generate throughout the year. Additionally, for driver career mode, it influences which teams will be willing to sign you.

    10. Engage in Practice Programs

    Practice programs are pivotal during the F1 weekend, as they enable you to accumulate nearly all your resource points. These points can be used to invest in upgrades that increase your car’s speed.

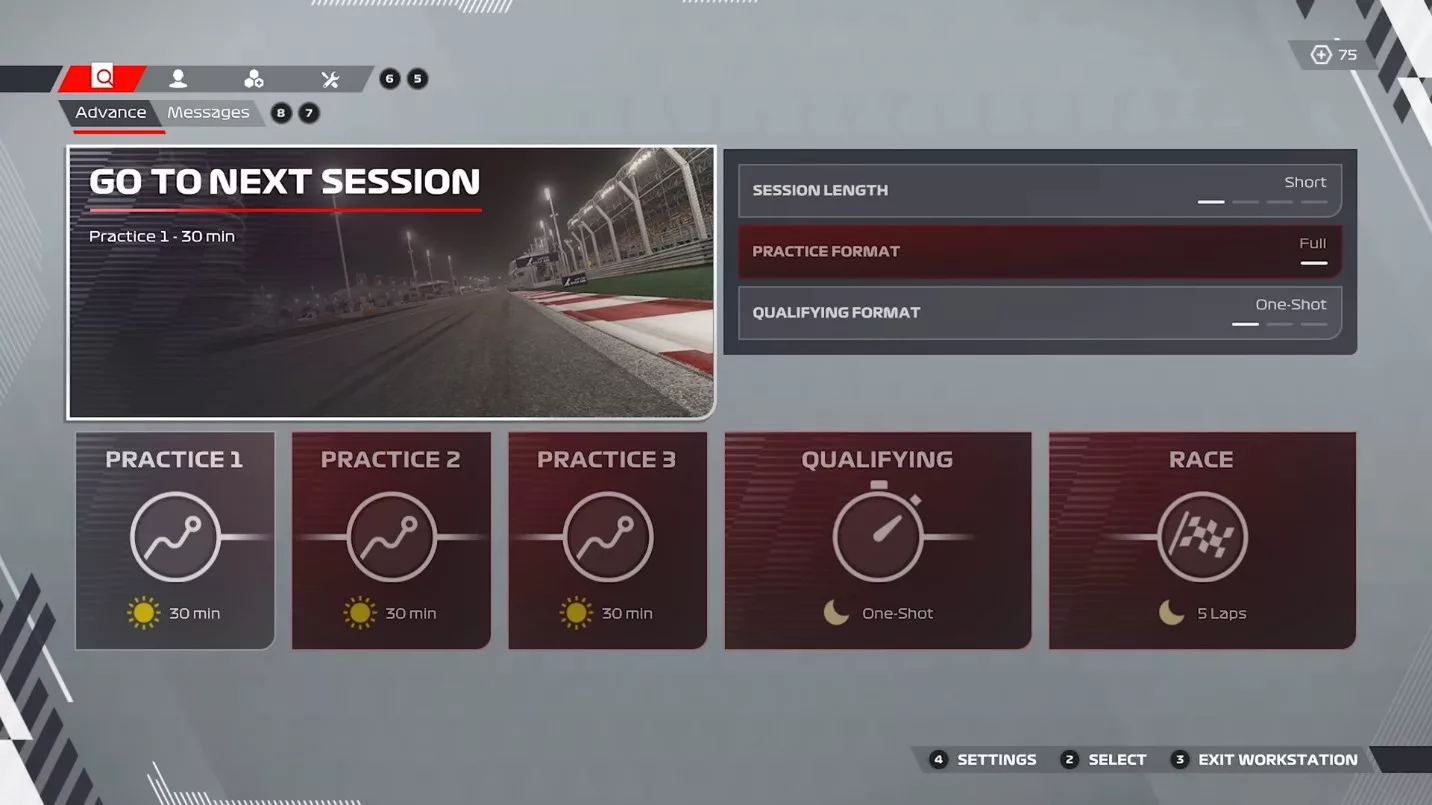
    Before starting your first practice, consider lowering your AI Difficulty by around 10 points from your usual setting.

    You can also utilize Quick Practice to fulfill bonus challenges.

  • How to Obtain the Dran Memento Ring in Remnant 2

    How to Obtain the Dran Memento Ring in Remnant 2

    For those aiming to enhance their stamina and speed, the Dran Memento Ring is the perfect solution in Remnant 2. This ring lightens your load while boosting your stamina. To obtain this ring, you’ll need to make a quick decision during the Burning Event.

    This guide provides the precise location of the ring in Remnant 2, but keep in mind that the event is randomly initiated. If you miss out, you’ll need to reroll and check again.

    Where to Find the Dran Memento Ring in Remnant 2

    To acquire the Dran Memento Ring, start fresh in adventure mode and head to Butcher’s Quarry. Navigate through the Burning Event in Remnant 2 and make your way to the indicated spot below from the entrance.

    If you allow the foes to burn the man, you’ll need to restart the game, and his corpse will provide you with the Singed Ring.

    Upon reaching the highlighted checkpoint, eliminate any nearby enemies and rescue the hanging man from the flames. After saving him, he will grant you the Dran Memento Ring as a reward.

    How to Utilize the Dran Memento Ring?

    The Dran Memento Ring is particularly effective for robust builds, especially when agility and stamina are priorities. This ring enhances the wearer’s strength while cutting down on gear weight, resulting in improved mobility and endurance. A useful tip is to pair the ring with the Leto Mark II Set to further enhance your agility.

  • How to Acquire the Decrepit Rune in Remnant 2?

    How to Acquire the Decrepit Rune in Remnant 2?

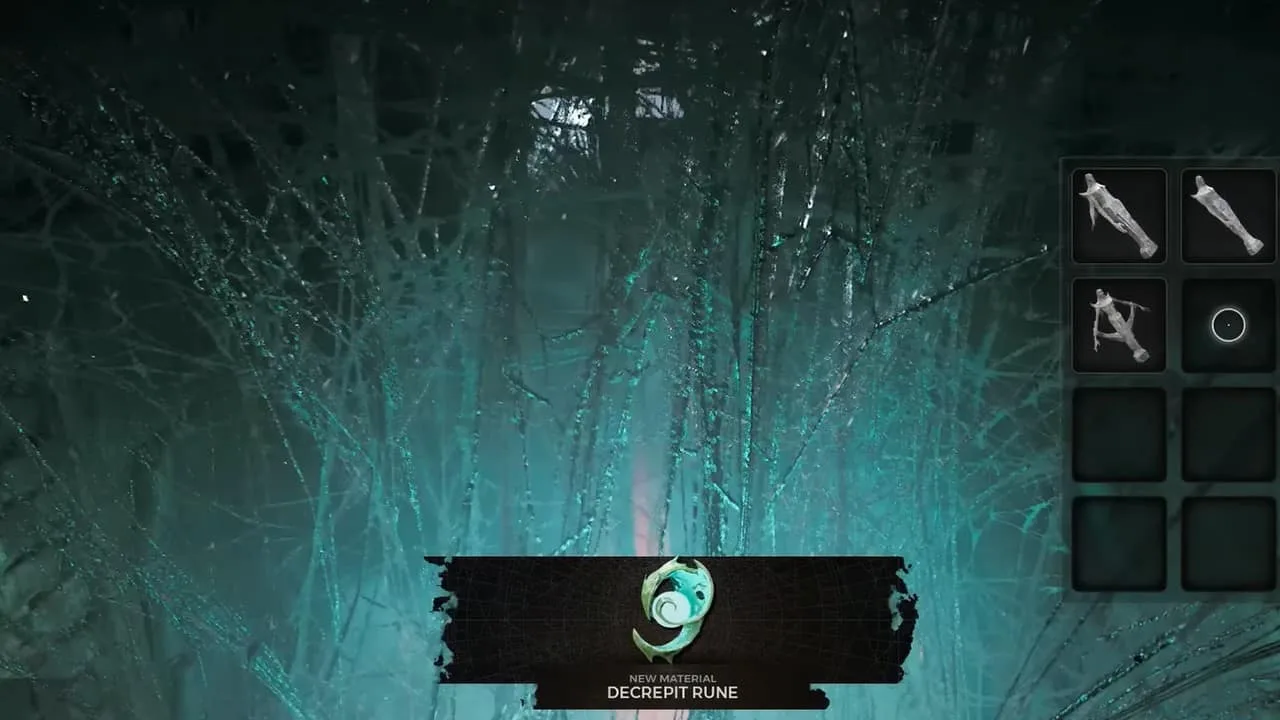
    The Decrepit Rune serves as a crucial crafting material in Remnant 2. This vibrant gem, adorned with runic symbols, is essential for creating the formidable Rune Pistol handgun, which is regarded as one of the best mid-range weapons in the game. Players can discover this mysterious gem hidden within the depths of the Great Hall.

    To acquire the Decrepit Rune, you must first obtain two specific quest items associated with the Nightweaver’s web. After trading these items, the Decrepit Rune will be yours. Keep reading to find out how to obtain and utilize the Decrepit Rune in Remnant 2.

    Location of the Decrepit Rune in Remnant 2

    Decrepit Rune Location

    To locate the Decrepit Rune, you need to reroll the game in Adventure Mode within the Losomn World. Start at Morrow Parish and aim to unlock the Forsaken Quarter region. Your objective is to find The Great Hall dungeon in this area.

    If you don’t see the dungeon on your map, simply reroll the game and try again.

    1. Locate the Ravenous Medallion

    Ravenous Medallion Location

    Once you reach the Great Hall, ride the giant lift and advance to the two branching areas on the lower map. Choose the right path, ascend the stairs, and turn left from the Great Hall Kitchen. The Ravenous Medallion can be found tucked away at the back of the kitchen.

    Ravenous Medallion

    Entering the Great Hall Kitchen will activate The Feast Event.

    2. Acquire the Soulkey Tribute

    Soulkey Tribute Location

    The next necessary item is the Soulkey Tribute. To obtain this, either ask Nimue to transport you to Nightweaver’s hunting ground or explore the Forsaken Quarter for an unmarked spot.

    Note that this location varies for each player, ranging from the Shattered Gallery to the Glided Chambers. Regardless of the location, the process remains the same.

    Soulkey Tribute

    After defeating the final boss, you will find an exit point on your map. Look for a wraith feeding on a corpse during your exit; the Soulkey Tribute will be on that corpse.

    3. Return to Morrow Sanatorium

    Morrow Sanatorium

    Once you have both the Ravenous Medallion and the Soulkey Tribute, head to the basement of Morrow Sanatorium in the Morrow Parish area. You’ll find a heart ensnared in a web; present the Soulkey Tribute to it, and you’ll transition to another dimension.

    4. Obtain the Decrepit Rune

    Getting the Decrepit Rune

    This crossover leads you to the Tormented Asylum. Upon arrival, take the left path and enter the first door on your left. Inside, you’ll encounter webs you can interact with. Give the Ravenous Medallion to the web, and in return, you will receive the Decrepit Rune.

    How to Utilize the Decrepit Rune?

    Using the Decrepit Rune

    The Decrepit Rune can be returned to Nimue, the goddess of Fae, located at Nimue’s Retreat. In addition to her role in the main storyline of Losomn, Nimue is capable of crafting unique items. She will use the Decrepit Rune to forge the Rune Pistol Handgun.

  • How to Access the Secret Portal in Ward 13 of Remnant 2?

    How to Access the Secret Portal in Ward 13 of Remnant 2?

    Ward 13 conceals a hidden portal leading to one of the powerful weapons in Remnant 2. To access this area, you first need to complete Ford’s Safe puzzle and obtain the Biome Portal Key. With these steps completed, proceed to the Labyrinth Zone.

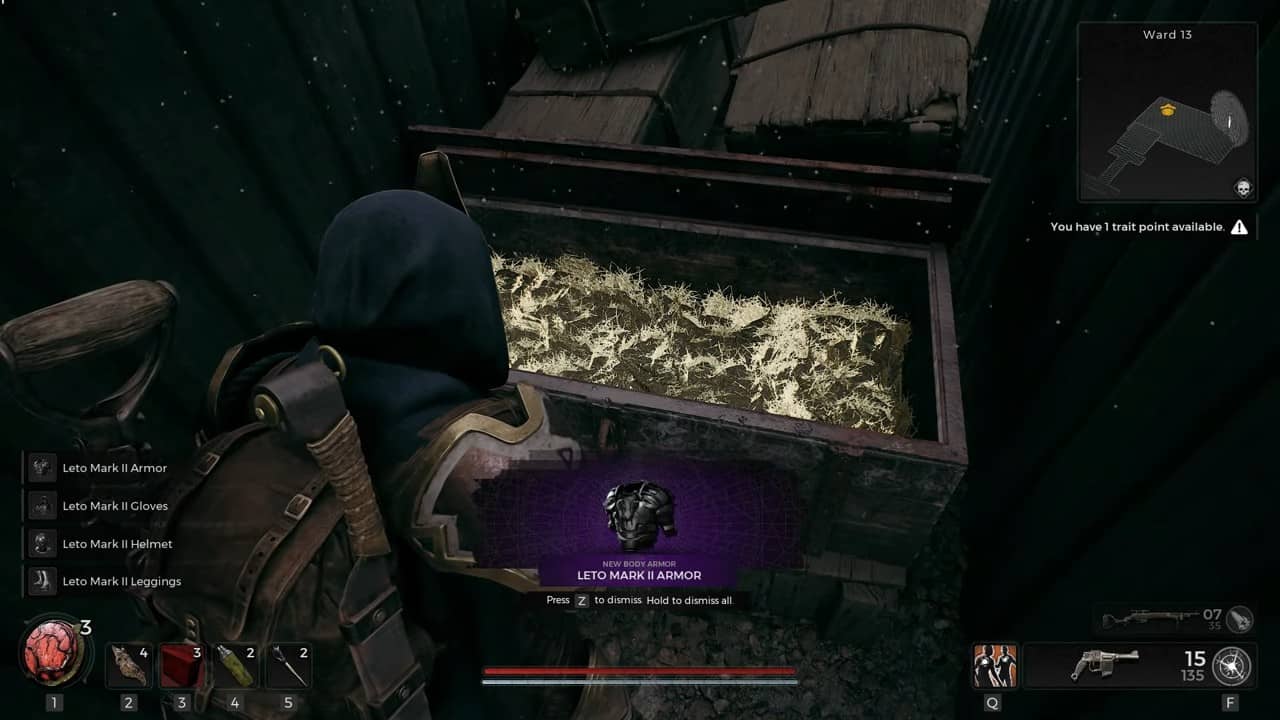
    Your objective is to locate the secret portal that transports you to the Biome Gate. This will lead you to a section of Ward 13 where the Chicago Typewriter SMG and the Leto Mark 2 Armor set are stored. Follow this guide closely to successfully reach the hidden portal in Remnant 2.

    Remnant 2 Secret Portal Location

    Remnant 2 Secret Portal

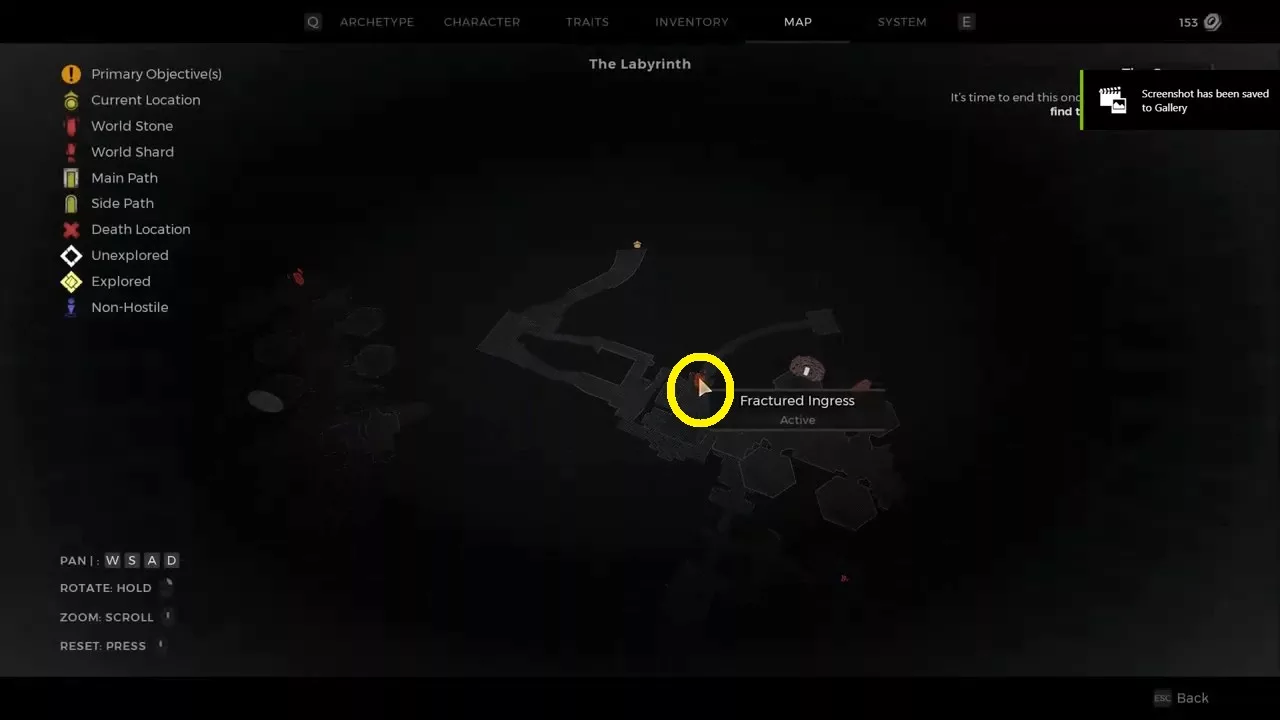
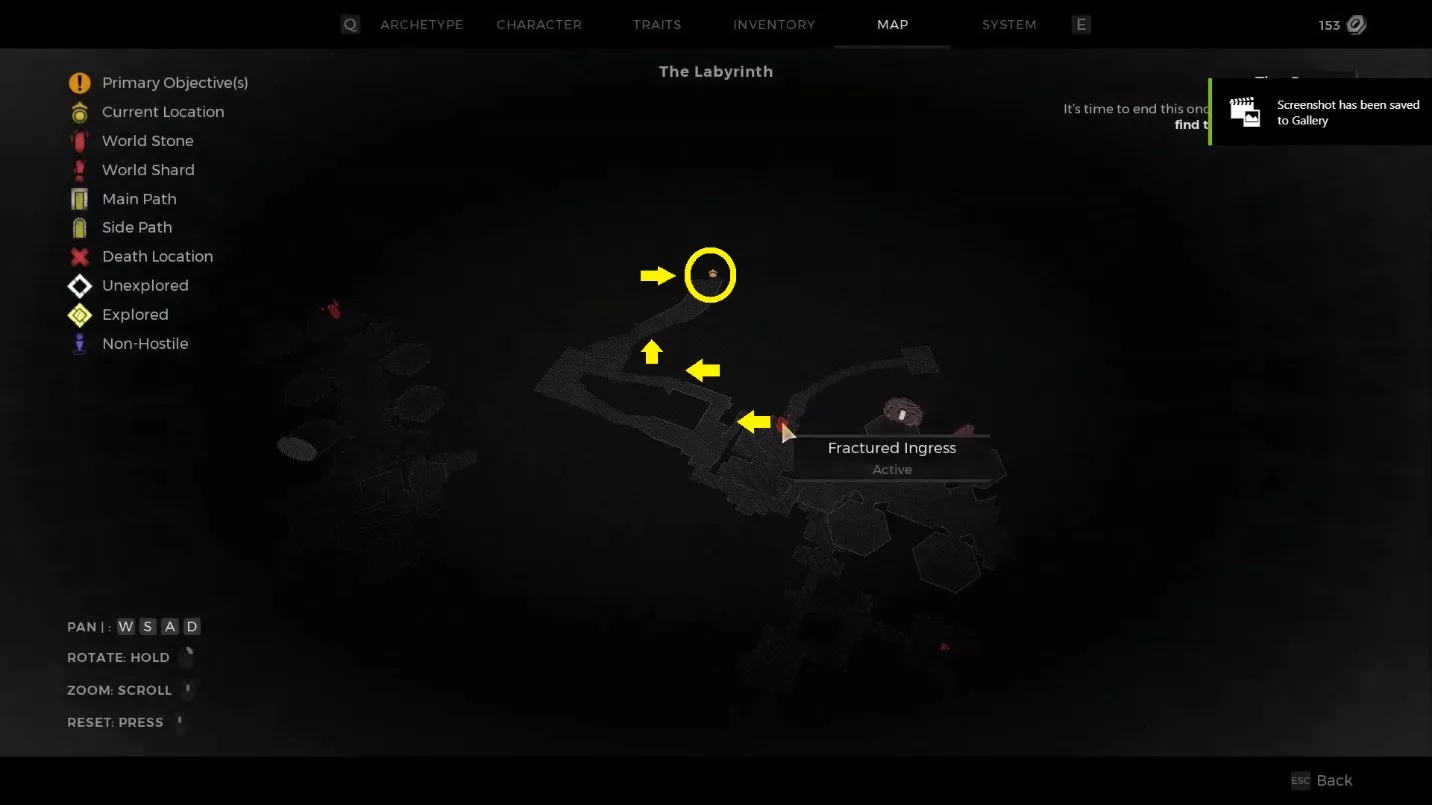
    Before accessing the portal, you must unlock Ford’s Safe in Remnant 2. Once this is done, head to the Labyrinth Zone, defeat the Labyrinth Sentinel, and acquire the Biome Portal Key. Afterward, make your way to the Fracture Ingress via the Entangled Gauntlet.

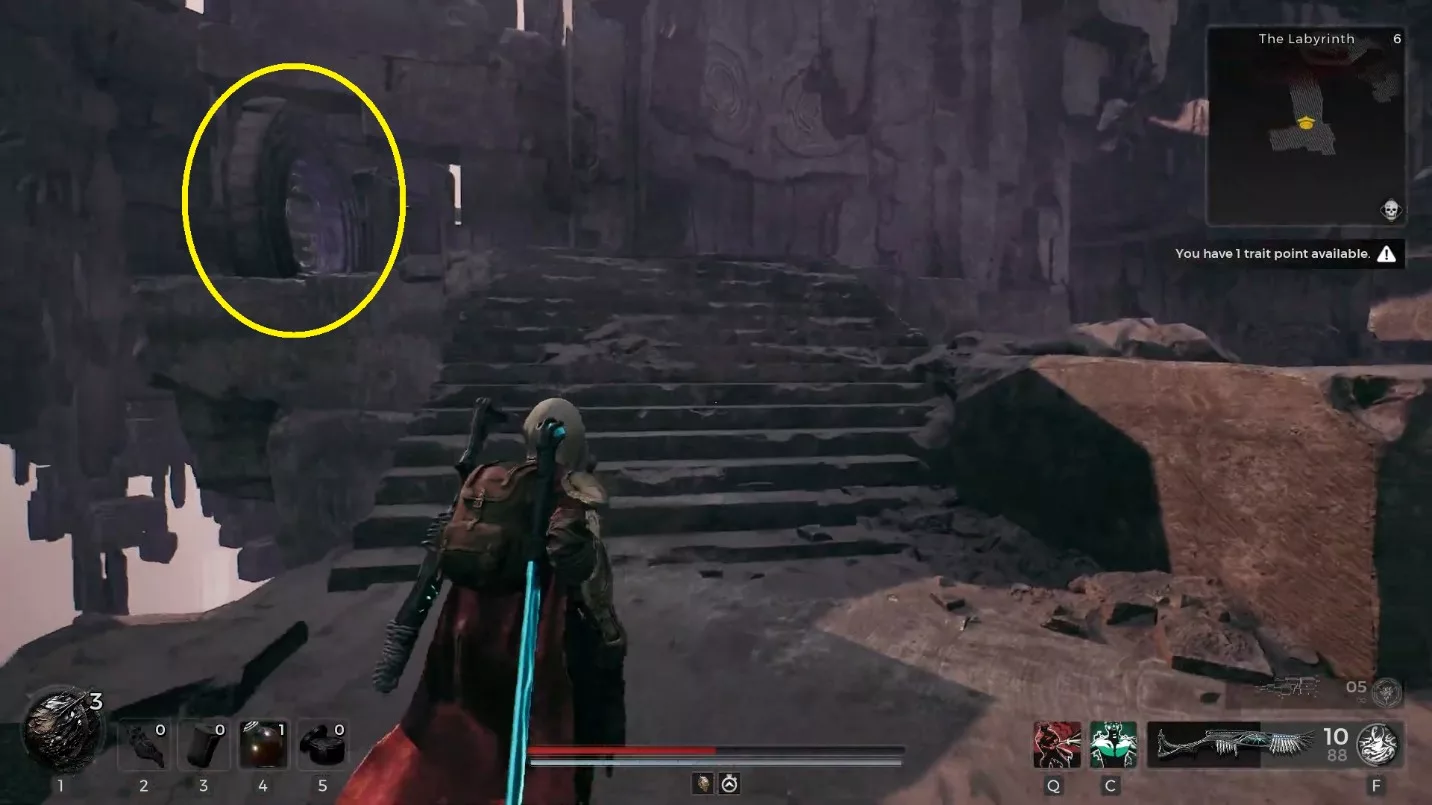
    When you arrive at the designated location, use the stairs on the right of the large portal to ascend. Follow the path on the right, navigating through the twists and turns until you reach a fork. Continue along this route until you spot a portal; drop down from the edge behind it to access the hidden portal below.

    This action will teleport you to a new area. Climb the stairs directly in front of you to reach the secret portal.

    What to Do in the Secret Portal in Remnant 2?

    Remnant 2 Secret Portal

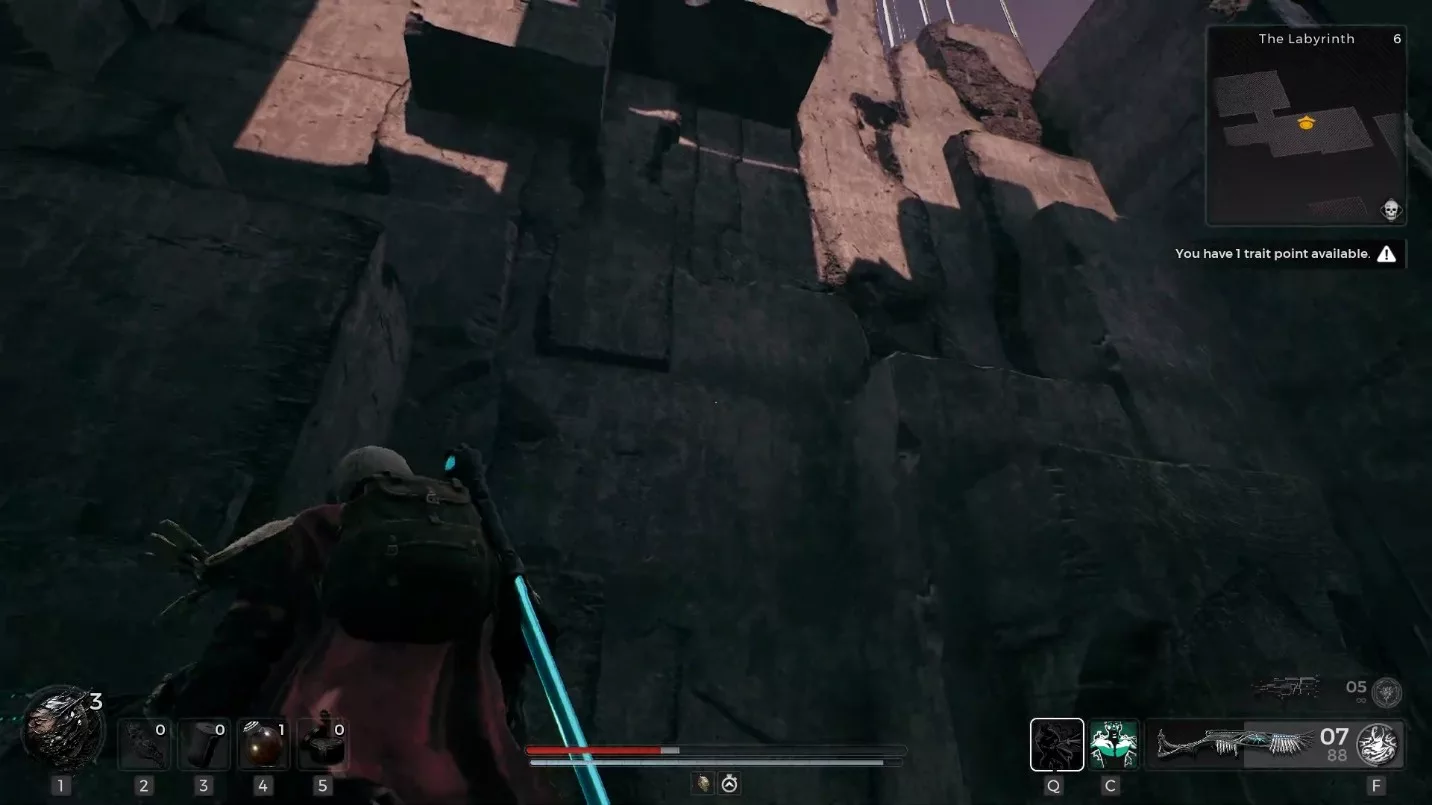
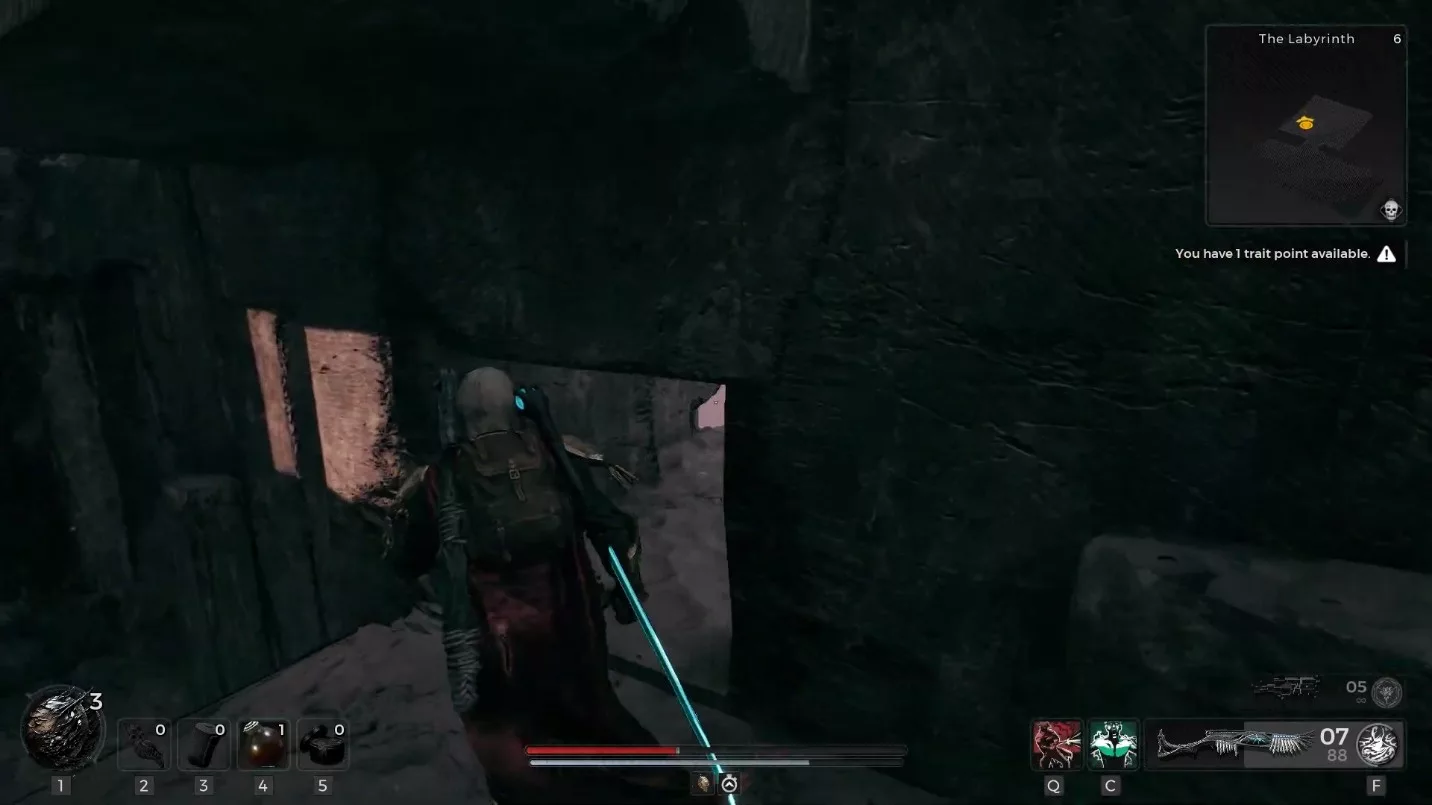
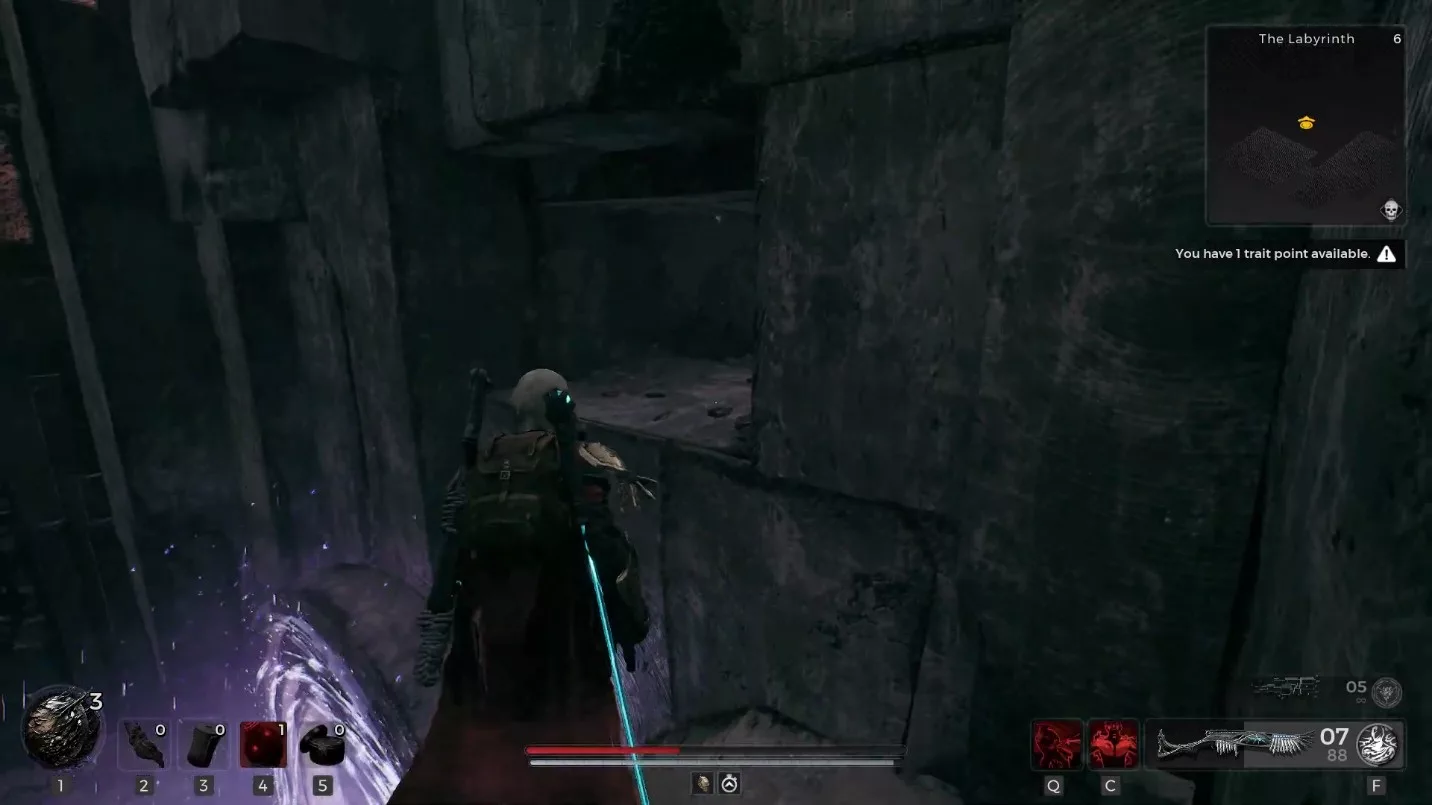
    After entering the portal, turn left and follow the path to find a hallway with climbable rocks. Keep climbing until you reach a narrow ledge that has a small opening on the left.

    This opening will lead you to the top of the portal. Climb onto the rock to your right and leap onto the platform in front of you.

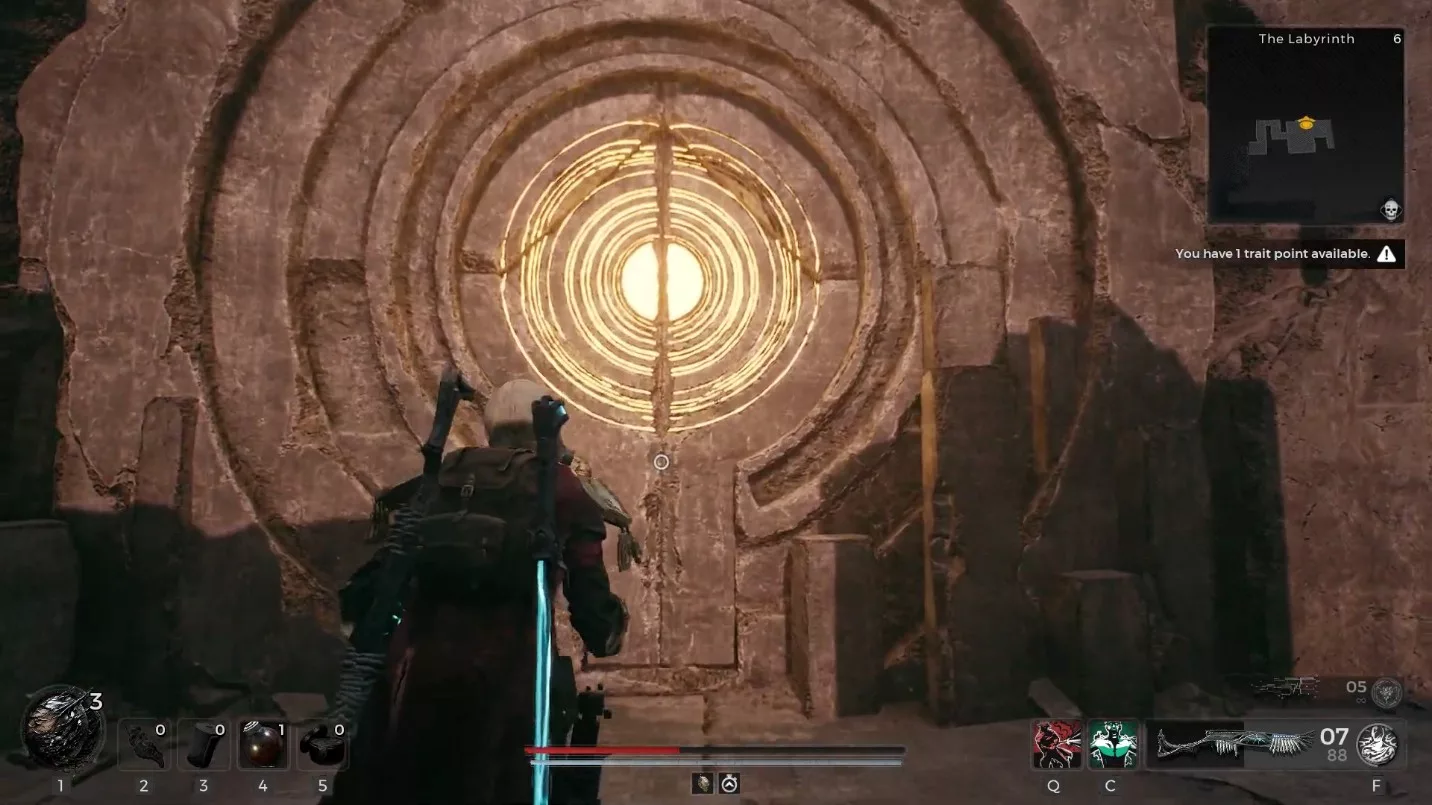
    Proceed through this area to arrive at the hidden Portal Gate. Utilize the Biome Key to enter this location.

    Remnant 2 Secret Portal

    Chicago Typewriter SMG

    The Chicago Typewriter SMG is a long gun that inflicts 10 damage, delivering up to 139 damage per second. You can reload the magazine 80 times, with a capacity of 240 bullets per reload. It can also achieve critical hits, with damage per second ranging from 290 to 300. The gun has a rate of fire of 11 rounds per second.

    Leto Mark 2 Armor Set

    This armor set offers 168 protection and weighs 90 units. It provides substantial resistance against fire, bleeding, shock, corrosion, and blight. However, be aware that it is quite heavy, imposing a 75% stamina penalty on your movements.

  • Guide to Locations of Dragon Hearts in Elden Ring

    Guide to Locations of Dragon Hearts in Elden Ring

    In Elden Ring, one of the rarest and most sought-after items is the Dragon Heart, which allows you to wield the powers of a melee dragon. These items aren’t bought or looted but earned by slaying dragons throughout the game. There are over 23 Dragon Hearts available, but only 20 are required to unlock every Dragon Communion Spell.

    To collect Dragon Hearts, you must locate and defeat specific dragon bosses. Each slain dragon drops one Dragon Heart, and there are 19 locations where you can gather them.

    Limgrave

    Elden Ring Dragon Hearts location in Limgrave

    Head south from the Limgrave Tunnel Site of Grace and travel east of the Church of Elleh to find the Flying Dragon Agheel. This is the first and easiest dragon you’ll come across. Be prepared for a tough fight—level 25 or higher is recommended.

    Caelid

    Elden Ring Dragon Hearts location in Caelid

    In the Caelid region, the second dragon is located between the Cathedral of Dragon Communion Site of Grace and the Caelid Highway South. Continue southeast from Gael Tunnel to find Magma Wyrm near the borders of Caelid and Limgrave.

    In another part of Caelid, travel to the Sellia Hideaway Site of Grace and head northwest to encounter Elder Dragon Greyol, which grants you five Dragon Hearts. You can also find Flying Dragon Greyll on the Farum Greatbridge in Caelid.

    Liurnia

    Elden Ring Dragon Hearts location in Liurnia

    In Liurnia, head west from the Cathedral of Manus Celes Site of Grace to the Village of the Albinaurics. Defeating Glintstone Dragon Adula here rewards you with three Dragon Hearts.

    Altus Plateau

    Elden Ring Dragon Hearts location in Altus Plateau

    To reach Magma Wyrm Makar, travel west of the Ruin-Strewn Precipice Overlook Site of Grace, which borders the Liurnia and Altus Plateau regions.

  • Elden Ring Guide to Defeating the Draconic Tree Sentinel Boss

    Elden Ring Guide to Defeating the Draconic Tree Sentinel Boss

    Elden Ring Guide: Draconic Tree Sentinel Boss

    Get ready to face one of the key challenges in Elden Ring!


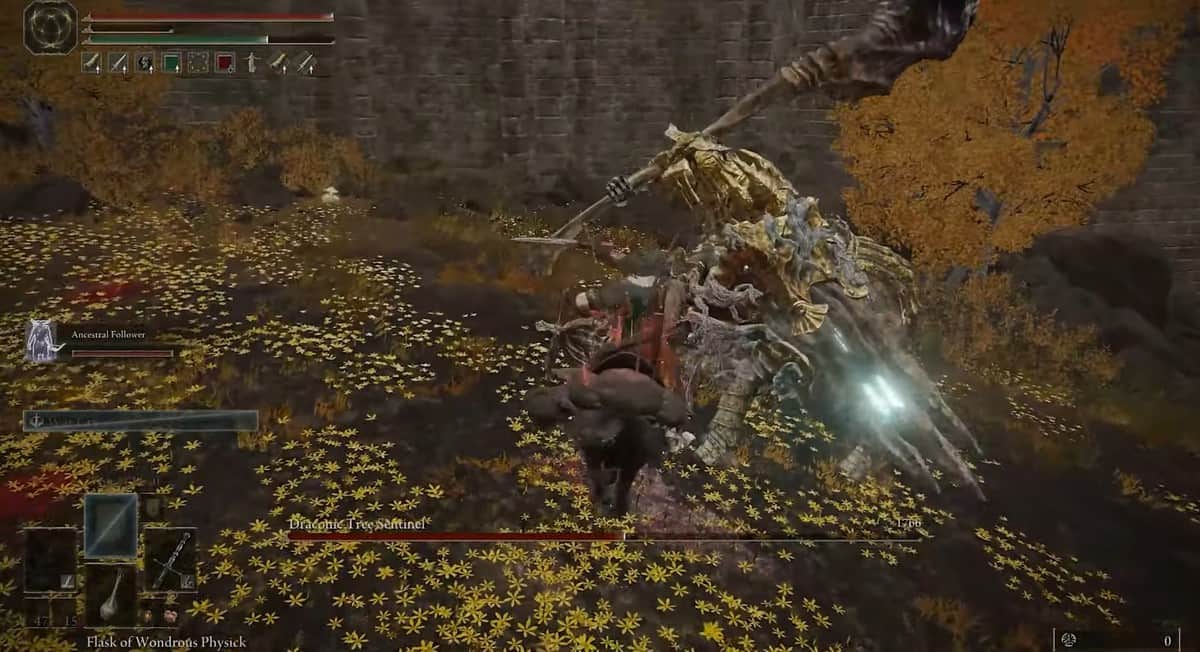
    In Elden Ring, optional bosses abound, but the Draconic Tree Sentinel stands out. He blocks the entrance to the Royal Capital, and you can’t move forward without defeating him or finding another way around.

    This guide covers everything about the Draconic Tree Sentinel, including his location, strategies to defeat him, and some clever tactics to secure an easy win.

    Elden Ring Draconic Tree Sentinel Location

    Elden Ring Draconic Tree Sentinel

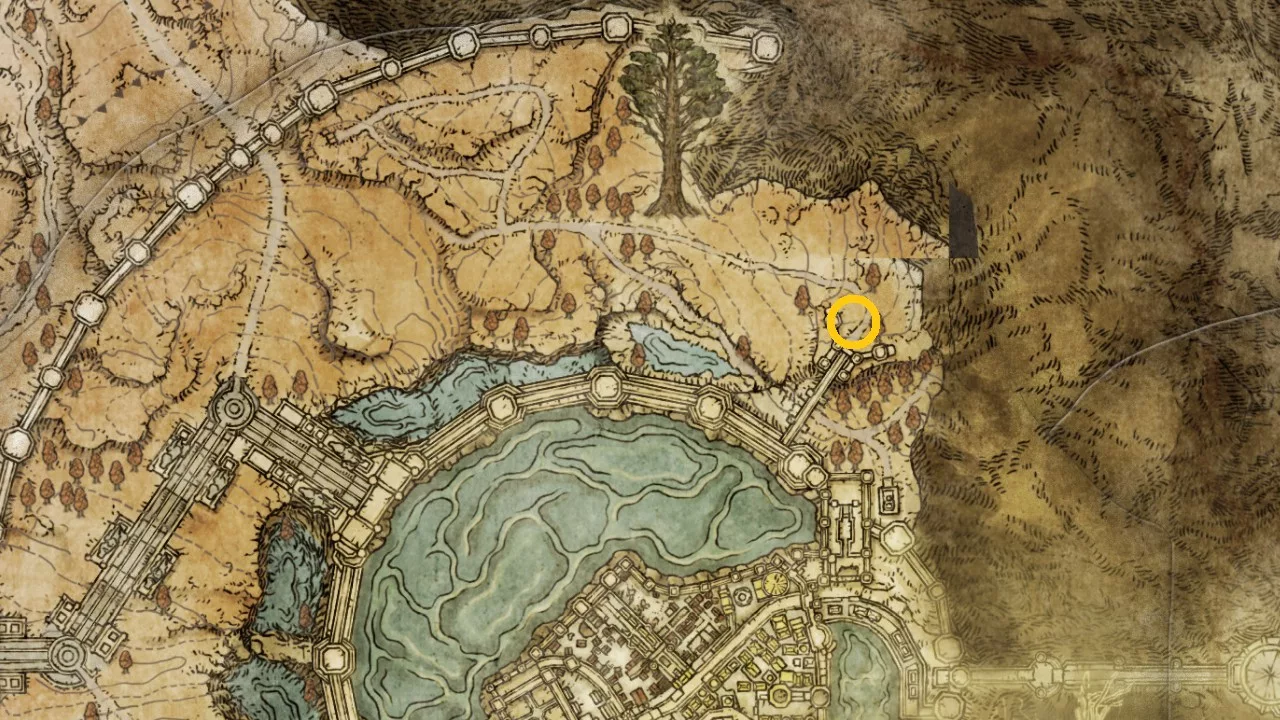
    You’ll find this boss in the Altus Plateau, guarding the direct route to Lyndell Royal Capital. While there are other paths, they can be time-consuming.

    To reach him, head east from the Hermit’s Shack Grace in the Capital Outskirts. Follow the round wall of the city until you arrive at the bridge guarded by the Draconic Tree Sentinel.

    Tip: Since this boss roams freely without a specific arena, other enemies might interfere. Eliminate any nearby foes first to focus on the Sentinel.

    How to Defeat the Draconic Tree Sentinel

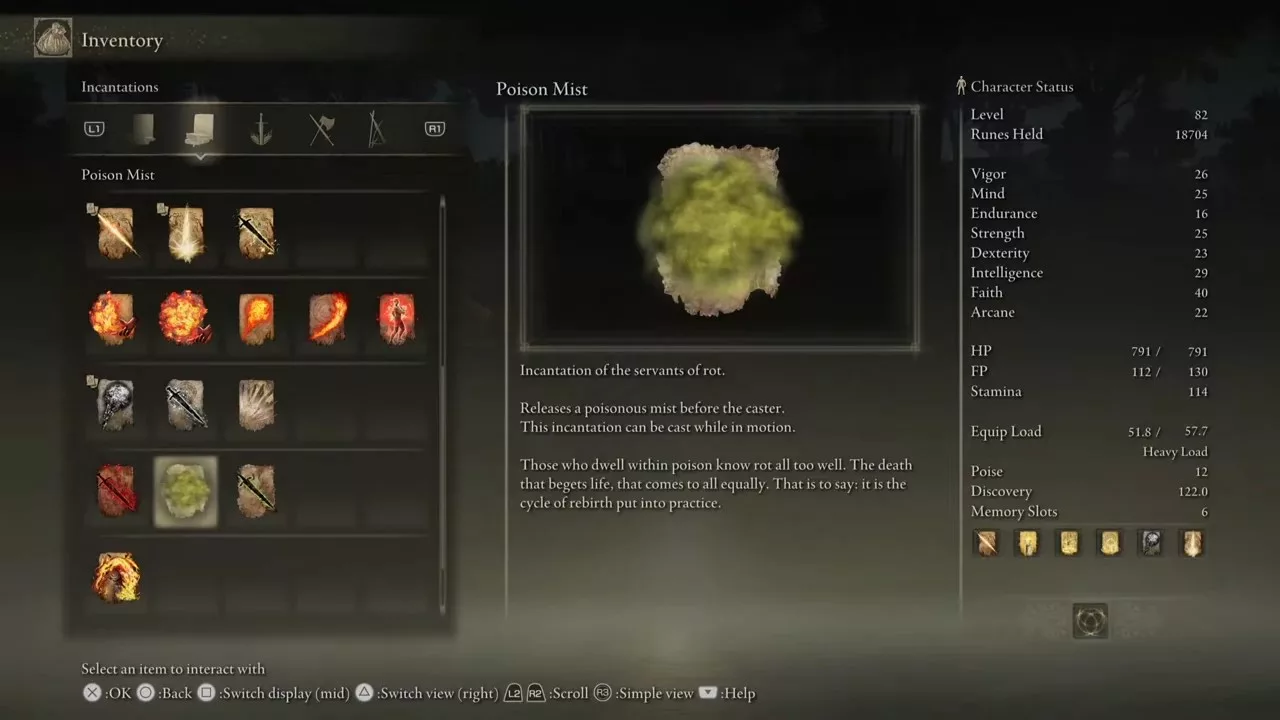
    The Draconic Tree Sentinel is especially vulnerable to Poison and Bleed attacks. A single cast of the Poison Mist spell can deal over 1000 damage to him.

    If you’re playing a melee character, agility is key. You can’t withstand his attacks, so ride Torrent to dodge or absorb damage.

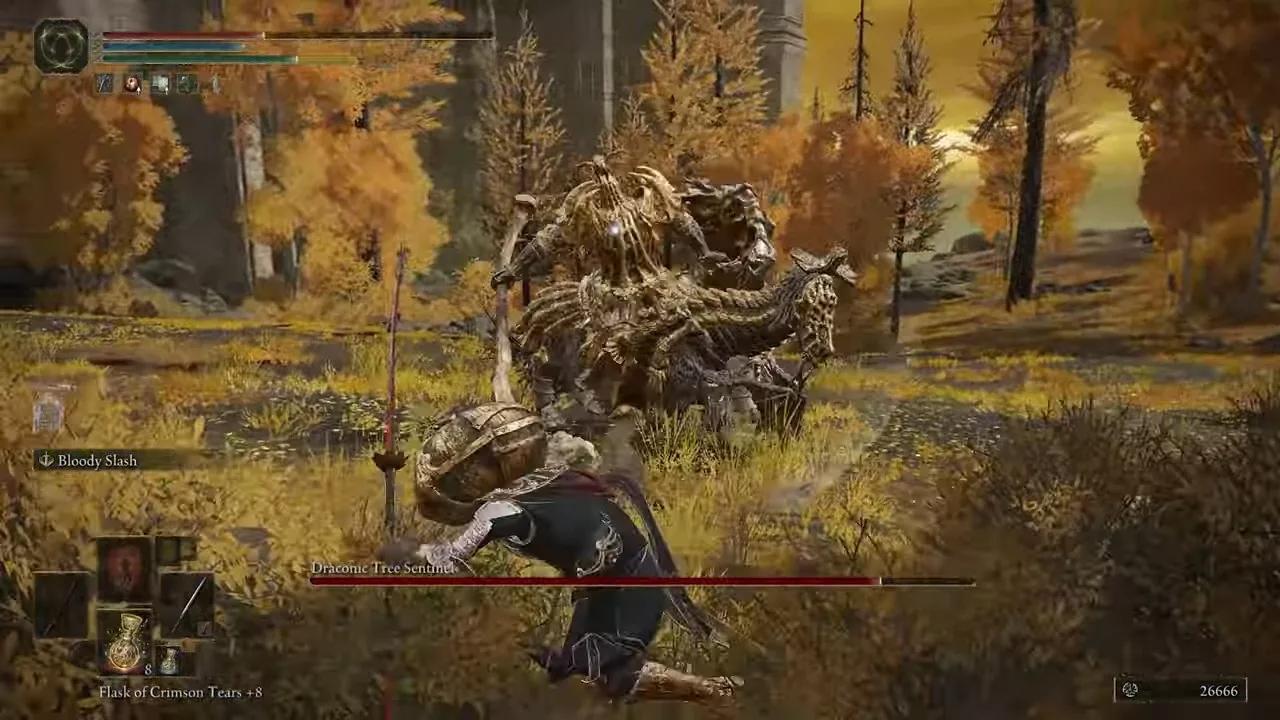
    Using a weapon with good range helps a lot. For Colossal Sword users, a crouch attack can be effective. Spears offer good range as well. If you wield a straight sword or Katana, capitalize on openings during his attack patterns.

    You can also summon help by using the Furlcalling Finger Remedy. If you’re struggling, work on Millicent’s questline. After giving her the Prosthesis Arm and defeating the Windmill Village boss, you can summon her for assistance.

    Don’t hesitate to use summons—they can provide crucial breathing room. Ranged summons, especially archers, work well here.

    When the Sentinel’s health drops below 50%, he’ll empower himself with dragon magic, unleashing ferocious lightning attacks. Use quick spells and maintain your distance to stay safe.

    Defeating the Draconic Tree Sentinel rewards you with 50,000 Runes, Dragon Greatclaw, and Dragonclaw Shield.

    Draconic Tree Sentinel Attacks and Counters

    Elden Ring Draconic Tree Sentinel

    The Sentinel wields a massive hammer that deals significant damage. If you’re positioned on the side with the hammer, prepare for swift attacks with little windup.

    He can charge at you from a distance and slam his weapon down, causing area damage. His horse can stomp on you or breathe fireballs, which add an extra layer of challenge.

    Tip: Aim to fight him when your level is around 20.

    In addition to hammer strikes, the Draconic Tree Sentinel has shield attacks that can knock you back. He can also slam his shield to deliver front and back strikes.

    In his second phase, he’ll start using lightning attacks, making the fight even more unpredictable.

    He can imbue his shield with lightning and either summon random lightning strikes or drop targeted bolts on you. Keep an eye on the ground for the first attack and master your timing for the second to dodge effectively.

    For hammer attacks, he may slam down to create an area damage effect or swing his hammer to send out a wave of lightning. This attack tracks well, so be ready to run when you see him charge up.

    How to Cheese the Draconic Tree Sentinel

    Elden Ring Draconic Tree Sentinel

    To cheese the Draconic Tree Sentinel, start by acquiring the Poison Mist Incantation. Travel to Weeping Peninsula and enter Castle Morne Rampart. Defeat a Scarab here to get the Poison Mist.

    Next, buy a Finger Seal for casting the mist. Sneak behind the Sentinel by moving through the trees and bushes so he can’t see you, then cast the Poison Mist.

    Once cast, the boss won’t detect your location, allowing his health to drop. If you notice the health decrease slowing, recast the spell.

    Repeat this process until he’s defeated!

  • Elden Ring Boss Guide: Morgott, the Omen King

    Elden Ring Boss Guide: Morgott, the Omen King

    Morgott, the Omen Kin, is one of the demigods in Elden Ring and a required encounter. Players must face him to advance in the game. Morgott is among the most challenging bosses in the mid-game section and demands significant effort to defeat.

    Located in Leyndell, players should be well-leveled and equipped with strong weapons. Besides the conventional strategies, there are ways to “cheese” him.

    Elden Ring Morgott, the Omen King Location

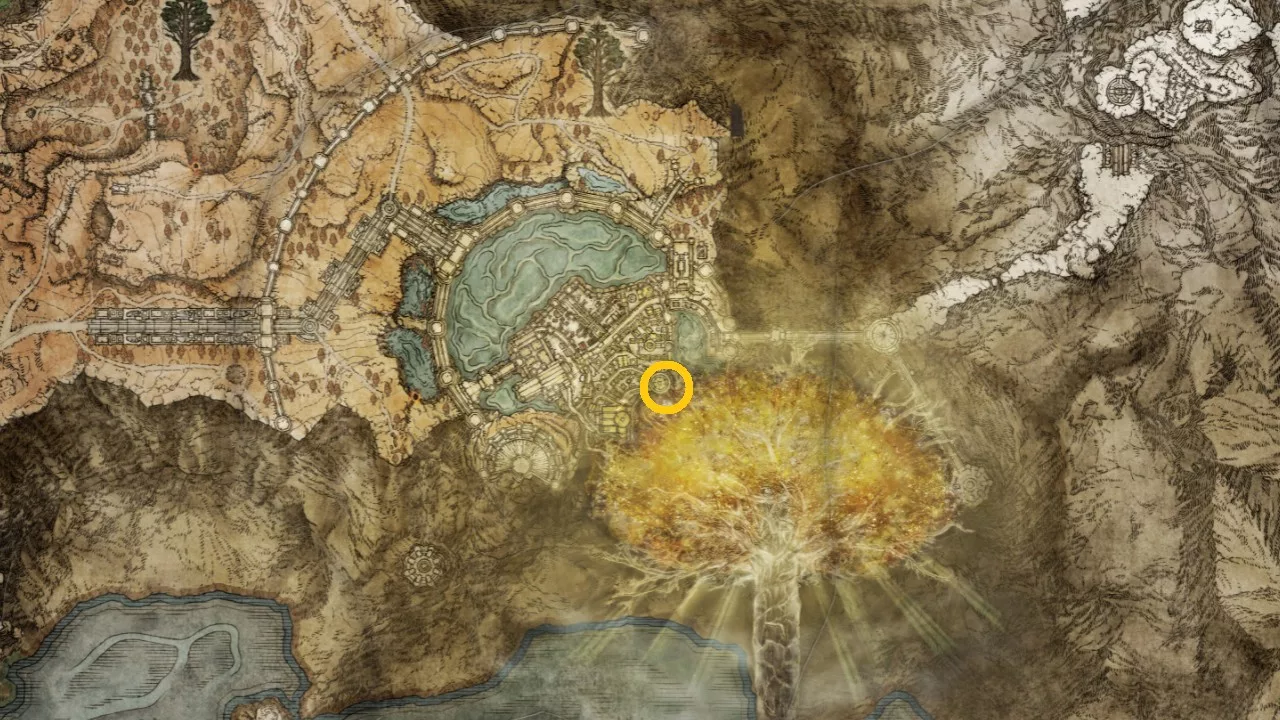
    Elden Ring Morgott location image

    This demigod can be found in Leyndell, Royal Capital. Players should head east toward the balcony after defeating the First Elden Lord, Godfrey. There, a branch will lead them to the second level of the room in Elden Ring.

    Next, players should make their way to the Queen’s Bedchamber site of grace across the bridge, which is the closest grace point to the boss. From there, head south to find Morgott’s chamber.

    The recommended level to challenge Morgott is 80 or higher, with weapons upgraded to +15.

    Your battle against Morgott, the Omen King, will occur in two phases. Below, we outline both stages and strategies to defeat him.

    Boss Fight – Phase 1

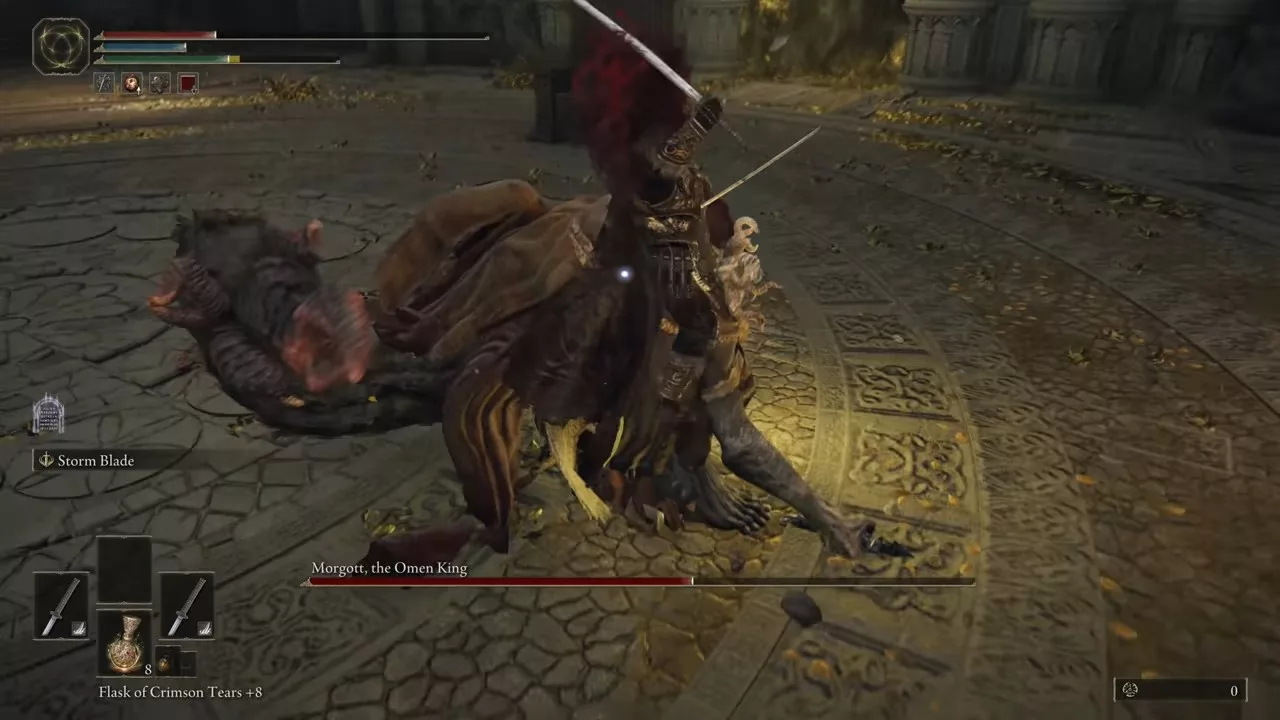
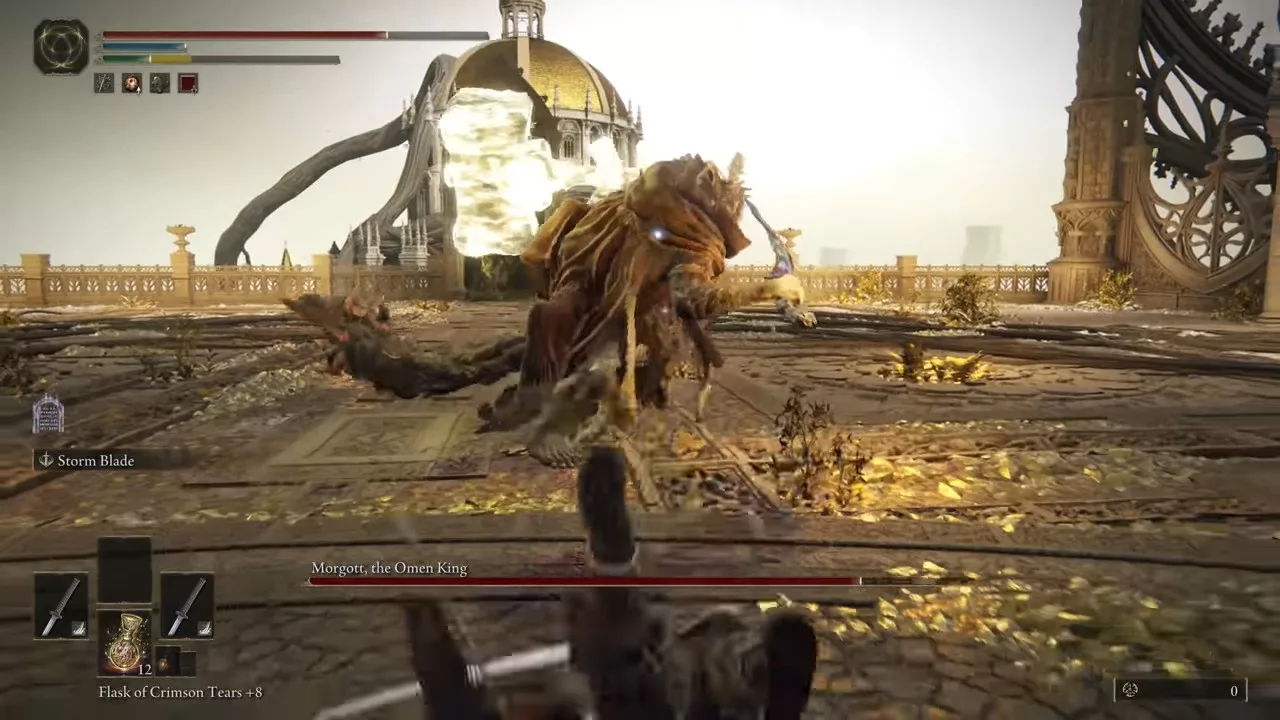
    Elden Ring Morgott phase 1 boss fight

    Call Melina before the fight begins, as her assistance can be invaluable; she can absorb a significant amount of damage. Additionally, players can summon spirit ashes for help.

    The fight starts when Morgott transforms his weapon into a long lightning blade. From the beginning, maintain distance. While Morgott focuses on Melina, take the opportunity to attack from behind.

    Avoid staying too close for too long, and maximize damage before retreating. Use your Ashes of War abilities from a distance, such as Storm Blade, to deal effective range damage. If executed well, you should reduce Morgott’s health by 50% during this phase.

    Boss Fight – Phase 2

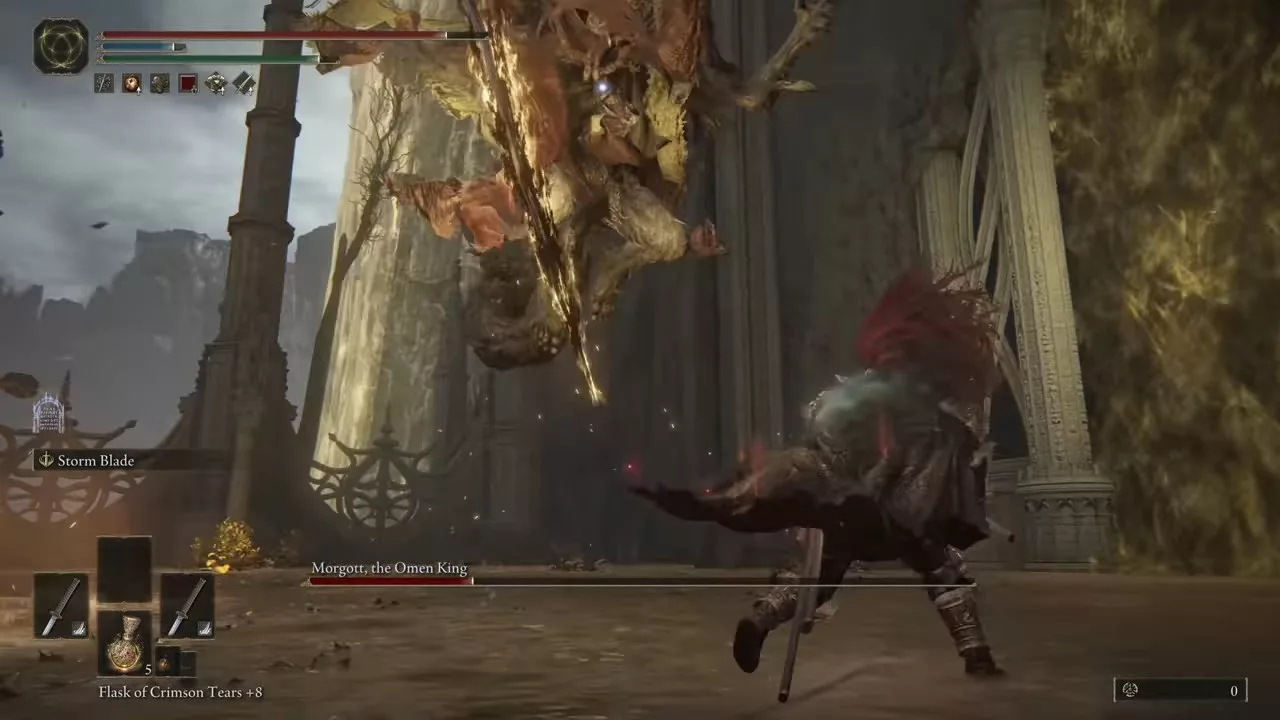
    The second phase begins when Morgott crouches, preparing to unleash a massive AOE thrust that can deal significant damage. This attack will ignite the arena, but it causes minimal damage, so maintain your distance to avoid the thrust.

    By this point, Melina may be defeated, and you should summon an Ash of War for backup; Lone Wolf Ashes are recommended.

    The strategy remains similar to the first phase: dodge and attack from behind Morgott. Defeating him will unlock the Shardbearer Morgott trophy.

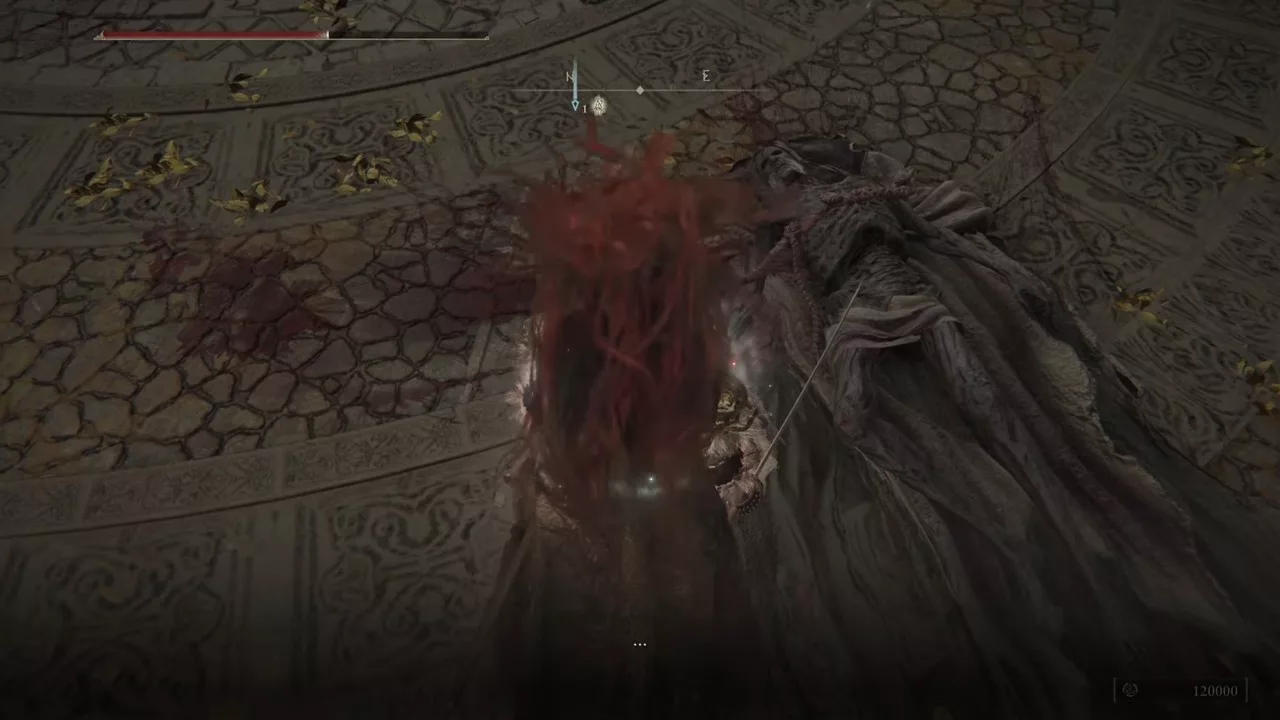
    Upon victory, players will receive 120,000 Runes, Morgott’s Great Rune, and the Omen King’s Remembrance.

    Attacks and Counters

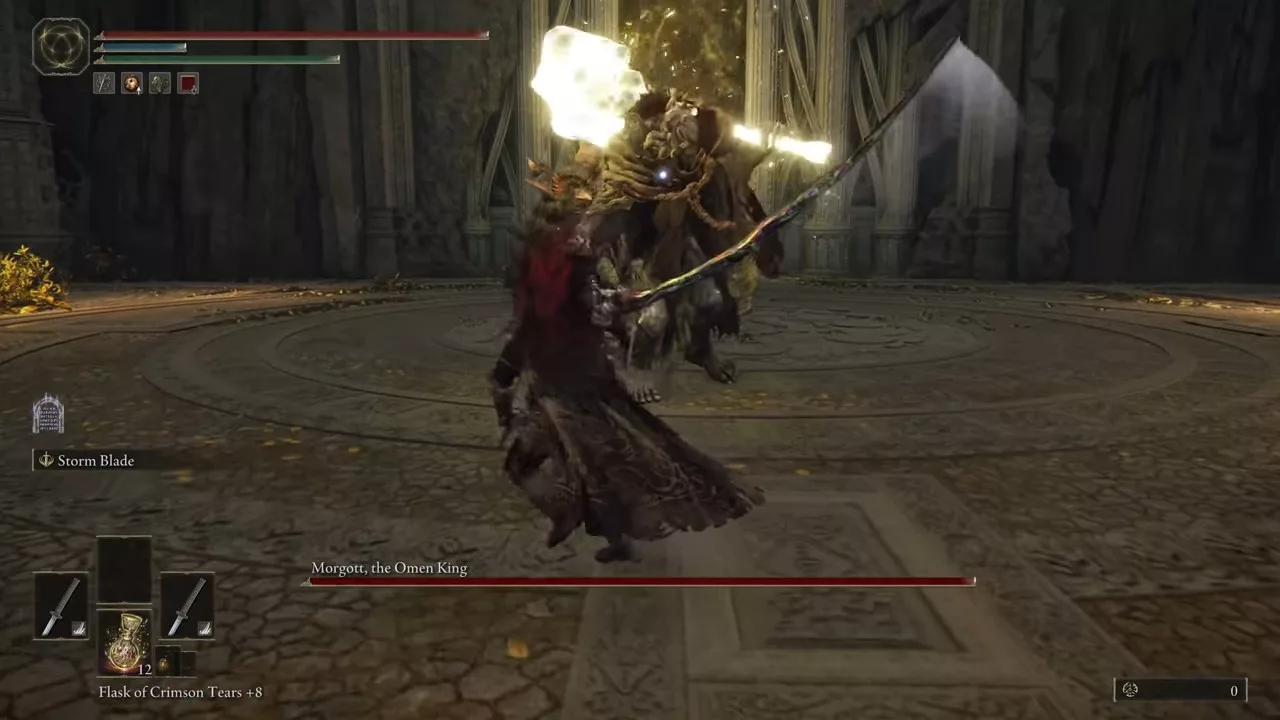
    Elden Ring Morgott attacks and counters

    Holy Blade, Rain, and Bloody Thrust are among the deadliest attacks Morgott employs, which require precise dodging to avoid substantial damage.

    In his Holy Spear Throw attack, Morgott will launch a massive Holy Spear at you. Even at a distance, it can hit hard, so rolling forward is advised to evade it.

    He may also charge at you with a Holy Spear. This charge can be avoided by rolling to the side. As the fight intensifies, Morgott will utilize a Holy Hammer to slam down; sidestep or roll to evade this attack. He can also perform a combo, which is dodged by rolling away as he dashes towards you.

    Morgott is particularly vulnerable to slashing attacks, so we recommend a build focused on slashing weapons for maximum damage.

    Morgott can throw three Holy Daggers that you can dodge by rolling forward. He may also execute the Holy Blade Rain attack, where you should look up and roll away from where the swords will land.

    When he drops below 50% health, Morgott will unleash a powerful burst attack that can be avoided by stepping back. He will also perform the Bloody Slice, rushing at players to slash; rolling towards him will help you dodge it.

    Finally, Morgott’s Bloody Thrust attack is a charging thrust that can be evaded by rolling towards him.

    How to Cheese Morgott, the Omen King?

    Elden Ring Morgott cheese strategy

    If you’re looking to bypass the lengthy two-phase fight with Morgott, a cheese strategy can save you time. To defeat Morgott quickly, utilize Poison Mist, which can be found in a forest southeast of the Castle Morne Rampart Site of Grace. Before entering the boss arena, use Margit’s Shackle three times at the fog door to immobilize him.

    Once inside, apply Poison Mist twice and wait for the damage to accumulate. Morgott will shake as his health diminishes, leading to a swift defeat.

  • Ways to Unlock the Door

    Ways to Unlock the Door

    As you journey through the surface of N’erud in Remnant 2, you may have stumbled upon a securely locked door within the Dormant N’Erudian Facility, a dungeon filled with zombies. This locked door is situated right next to a checkpoint, and a glimmering object is visible inside.

    The item required to open the door to the Dormant N’Erudian Facility is located close by. Accessing this door will grant you the Memory Core II, which can then be used to unlock the Core Booster and the Pulse Rifle.

    How to unlock the Dormant N’Erudian Facility door in Remnant 2?

    remnant 2 dormant n'erudian facility

    To unlock the Dormant Facility Door in Remnant 2, you will need an item called the Biome Control Glyph. While you may possess a Biome Portal Key in your inventory, it won’t work for this door.

    The Biome Control Glyph is found within the confines of the Dormant N’Erudian Facility dungeon itself, so there’s no need for extensive travel. Given that the dungeon operates on a 5-minute timer before elimination of all players, it’s advisable to look for this item after completing the dungeon run. Doing so ensures that the lockdown is lifted and that no enemies will disrupt your search.

    Where to find Biome Control Glyph in Remnant 2?

    As you navigate the dungeon, you’ll likely come across a section with metallic platforms suspended above a gaping chasm, supported by visible pipes below. The precise location of this segment may vary, but the general layout should be recognizable.

    There should be solid metal railings lining both sides of the platforms, but as you make your way along them, keep an eye out for a section where the railings are absent. If you look down carefully, you will notice some pipes and another platform awaiting beneath you. You need to drop down gently (avoid jumping, as you might overshoot and fall to your demise) onto this platform.

    This platform will guide you through a corridor leading to an elevator. Once you ride the elevator up, you will find yourself positioned above the platforms from which you dropped earlier. In the distance, a control room can be seen glowing red. Make your way toward it.

    remnant 2 dormant n'erudian facility

    Upon entering the control room, you should find the Biome Control Glyph sitting on a control terminal. After picking it up, make use of the nearby checkpoint for fast travel back to the entrance of the Dormant N’Erudian Facility. Interact with the locked door, insert the Control Glyph, and step inside.

    Inside the room, you can collect Memory Core II, which can be taken to the Ascension Spire for the Core Booster and Pulse Rifle.

  • A Guide to Acquiring Silenced Weapons in Sniper Elite 5

    A Guide to Acquiring Silenced Weapons in Sniper Elite 5

    Stealth plays a crucial role in Sniper Elite 5, making the use of silenced weapons both essential and deadly. You can come across these weapons in various missions, but they cannot be unlocked for future use and are limited to the mission in which you find them. Moreover, you can attach a suppressor to your firearms to achieve silence.

    For even greater stealth, consider utilizing subsonic ammunition. These special rounds generate less noise compared to standard bullets.

    How To Acquire Silenced Weapons?

    In the game, locate silenced weapons, which can only be discovered and are categorized as “Found Weapons” in Sniper Elite 5.

    Typically, these can be found near deceased enemies or secured in guarded areas. The armory and various sniper hideouts scattered throughout the maps are prime locations to search for silenced weapons.

    Keep in mind that you cannot add these silenced weapons to your inventory, nor can you carry them into subsequent missions. They are only available for the duration of the current mission.

    Once you run out of ammunition, these weapons will not reload, rendering them useless. Should you need to clear your hands, simply abandon the silenced weapon by either switching to another or cycling through your available weapons.

    The primary benefit of silenced weapons is their early accessibility in the game. As you progress, you will also find silencers and suppressors to upgrade your arsenal.

    How To Unlock a Silencer/Suppressor?

    Throughout the game, you can unlock various attachments such as magazines, barrels, and suppressors. Specifically, you can acquire a silencer using the workbench located in the Chateau basement during the second mission, Occupied Residence.

    During this mission, go down the stairs to your right within the Chateau. Follow the path until you reach the entrance to the armory and eliminate the two guards standing watch. Once inside, you’ll find the workbench positioned prominently in the center.

    Utilize the workbench to unlock the suppressor along with other enhancements.

    Then, head into the menu and check the customization options for the weapon you’re using. You should find the suppressor available for attachment to your firearms in Sniper Elite 5.

    Weapon workbenches allow you to customize your firearms by adding muzzles or changing their ammunition type.

    How To Unlock Subsonic Ammo?

    Sniper Elite 5 features subsonic ammunition to further minimize the sound of your shots. This type of ammunition is accessible quite early in the game and enhances your stealth capabilities while you’re still looking for a silencer. Similar to a suppressor, subsonic ammo allows you to maintain stealth while firing your weapon.

    Initially, you’ll only be able to collect subsonic ammo from fallen enemies. However, after completing the Factory mission later in the game, you can unlock this ammo type and make it a part of your permanent inventory for future missions.

    To load subsonic ammo into your weapon, press L1 if you’re on PlayStation and LB if you’re on Xbox. If you want to switch between different types of suppressed ammo during a mission, simply press R1.

    Once your supply of subsonic ammo is depleted, you’ll automatically revert to standard ammunition, so be mindful of your remaining rounds.

  • Skyrim Deathbrand Armor: A Guide to Collecting All Pieces

    Skyrim Deathbrand Armor: A Guide to Collecting All Pieces

    The Deathbrand armor set is a light armor collection designed for players who utilize magic or prefer a spell-sword combat style, introduced in the Skyrim Dragonborn DLC. This distinctive armor becomes more powerful as you gather more pieces, which can be acquired by embarking on the associated quest aptly named Deathbrand.

    First, you will need to initiate the quest before searching for the armor pieces. All components can be found in the Solstheim area of Skyrim.

    Table of Contents

    • How to Start the Deathbrand Armor Set Quest?
    • Deathbrand Armor Pieces Locations
    • Deathbrand Armor Stats and Item ID

    How to Start the Deathbrand Armor Set Quest?

    To commence the quest, you need to be at least level 38; if you’re lower than that, you won’t be able to start it. Next, locate and read a copy of the Deathbrand book—this can be found in the Temple at Raven Rock.

    Upon reading the book, you’ll gain the ability to open Ancient Chests. If you’ve previously unlocked any of these chests (typically through lock-picking) before reading the book, they would have been empty.

    Alternatively, you can head directly to Haknir’s Shoal without completing the prior tasks. Take out the pirates and loot the chest where you’ll find the Deathbrand Helm, thus starting the quest. From one of the defeated enemies, likely the leader, you can acquire a map detailing the locations of the remaining armor pieces.

    Deathbrand Armor Pieces Locations

    There are four unique pieces of the Deathbrand Armor, and below is a list of their locations:

    Deathbrand Helmet

    Location: This piece can be found at Haknir’s Shoal, a small island situated north of Solstheim.

    Enchantment: Wearing the full set of Deathbrand Armor grants +100 Armor and allows the wearer to breathe underwater.

    Deathbrand Armor

    Location: You can find the Deathbrand Armor northwest of Raven Rock, guarded by two bandits.

    Enchantment: Wearing any piece of the Deathbrand set grants +15 Stamina for each item equipped.

    Deathbrand Gauntlets

    Location: The gauntlets are located across a waterfall south of Bristleback Cave, near a river.

    Enchantment: They provide a bonus of +10% damage with one-handed weapons for each Deathbrand piece worn.

    Deathbrand Boots

    Location: The final piece of the Deathbrand Armor can be located west of Tel Mithryn in a chest by the riverbank. Be cautious as it is surrounded by Ash Spawn.

    Enchantment: The boots increase carrying capacity by +10 for each Deathbrand item equipped.

    Deathbrand Armor Stats and Item ID

    Below are the stats along with the item IDs for each piece of the Deathbrand Armor in Skyrim:

    Armor Piece Armor Rating Item ID
    Deathbrand Helmet 16.5 XX02401D
    Deathbrand Armor 39 XX02401B
    Deathbrand Gauntlets 11.5 XX02401C
    Deathbrand Boots 11.5 XX02401A

    The post Skyrim Deathbrand Armor: How To Obtain All Pieces? appeared first on SegmentNext.