A new initiative unveiled this month is offering gamers a novel way to experience Xbox One titles on their Windows machines, addressing a significant barrier in console emulation.
XWine1 is not an emulator; it functions as a translation layer, converting Xbox software so it can operate on Windows. This process mirrors the functionality of the Proton compatibility layer utilized on the Steam Deck, which allows Windows games to run on the Linux-based operating system of the device.
According to the XWine1 team’s announcement on September 8, a handful of games are completely playable, such as Minecraft: Xbox One Edition, Limbo, Peggle 2, Undertale, and Sonic Mania. Additional titles have shown partial functionality, as seen in Forza Horizon 2, which can bypass its introductory sequences, and Forza Horizon 3, which allows access to its menu.
Introducing XWine1, an Xbox One translation layer for Windows PCs. Currently six games are fully playable, with others reaching logos and in-game. More news to come! pic.twitter.com/Du6puJz6Dj
Historically, emulating Xbox One titles has been challenging due to robust security measures, as noted by YouTuber Modern Vintage Gamer in a recent video discussing XWine1. Previously, there was no known method to exploit the console’s kernel, but this changed with a development known as Collateral Damage. This progress enables users to extract Xbox One game files and decrypt them for use on other platforms. In theory, XWine1 can function with any file that has been extracted and decrypted.
Finally! Xbox One Emulation is here
The project remains in its early stages and is not yet available for public download. Once it is ready, developers indicate it will likely be offered as an open-source solution.
There’s a wealth of Xbox One exclusives that could become playable, like Halo 5: Guardians. However, since the Xbox Series X and S are backward compatible with Xbox One titles, games like Guardians won’t be lost forever, even if the XWine1 team’s efforts prove successful. Nonetheless, this development is an important advancement for the emulation scene, supporting the preservation of games that may eventually lose support on contemporary consoles or PCs.
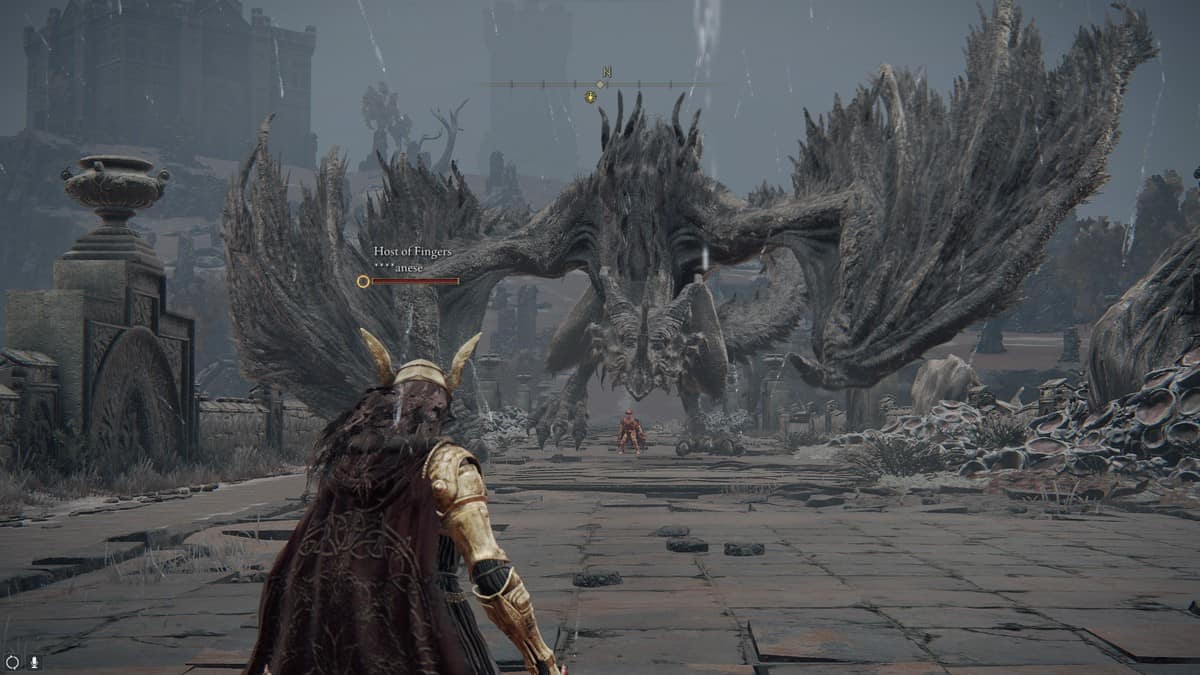
A Dragon Build in Elden Ring stands out as one of the most distinctive builds available. They offer a different approach compared to more traditional builds.
This guide is here to help. We’ll dive into crafting the ultimate Dragon build in Elden Ring, covering everything from your initial class choice and flask distribution to the recommended shield, weapons, and the best incantations to incorporate.
Table of Contents
Elden Ring Dragon Build Overview
Stats for Dragon Build
Best Weapon for Dragon Build in Elden Ring
Best Shield
Top Ashes of War Choices
Best Incantations To Choose
Optimal Spirit Summons
Recommended Armor
Best Flask of Wondrous Physick for Dragon Build
Top Talismans
Elden Ring Dragon Build Overview
This Dragon Build utilizes Dragon Communion Incantations, enabling you to scorch foes with fiery attacks. Additionally, it employs the Ripple Blade for effective physical damage:
Starting Class: Prophet
Flask Distribution: Balanced between HP and FP
Stats: Strength, Faith, and Arcane (Primary), with Endurance, Vigor, and Mind (Secondary)
Weapons: Ripple Blade
Shield: Jellyfish Shield
Ash of War: Wild Strikes and Contagious Fury
Incantations: Dragonfire, Bayle’s Tyranny, Dragonmaw, Theodorix’s Magma, Bloodflame Blade, and Flame, Grant Me Strength.
Spirit Summons: Mimic Tear or Fire Monk
Armor: Drake-Knight Armor
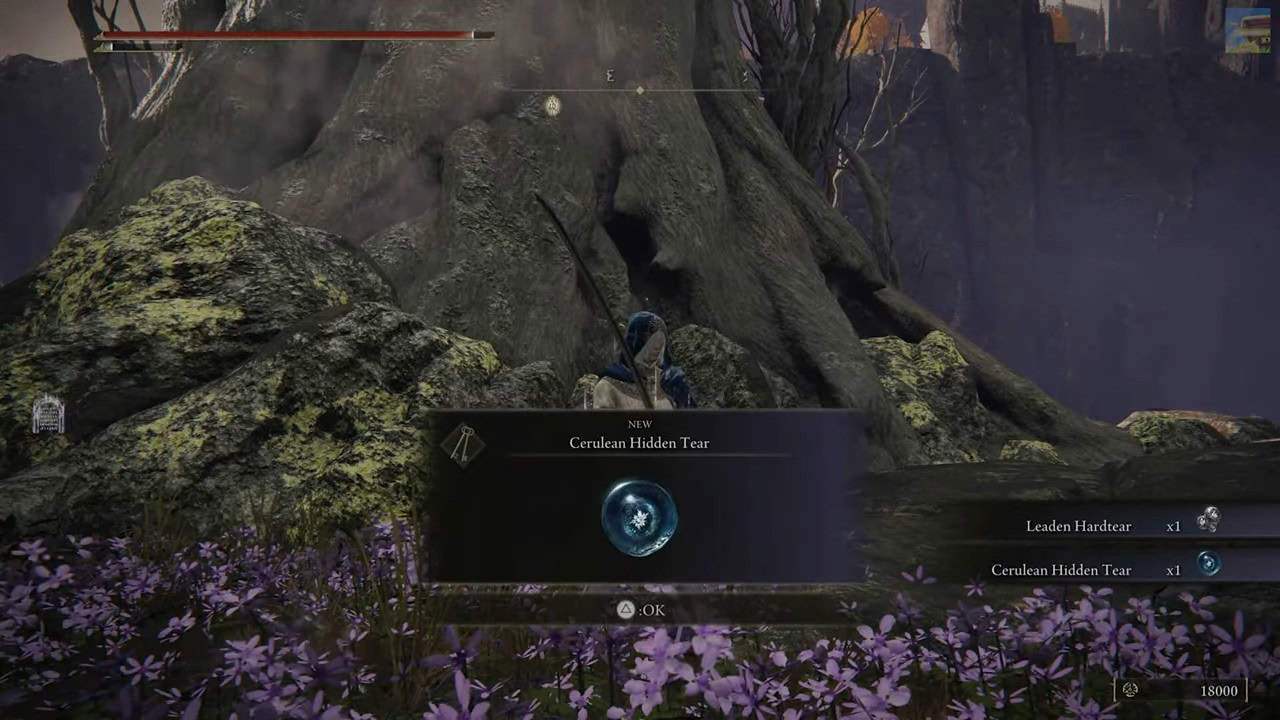
Flask of Wondrous Physick: Greenburst Crystal Tear and Cerulean Hidden Tear
Talismans: Faithful’s Canvas Talisman, Flock’s Canvas Talisman, Fire Scorpion Charm, and Radagon Icon
Stats for Dragon Build
Stat
Level 60
Level 100
Level 150
Faith
33
43
45
Mind
17
19
28
Dexterity
11
13
14
Strength
16
21
29
Endurance
12
16
27
Vigor
13
15
26
Intelligence
7
7
7
Arcane
30
45
52
Best Weapon for Dragon Build in Elden Ring
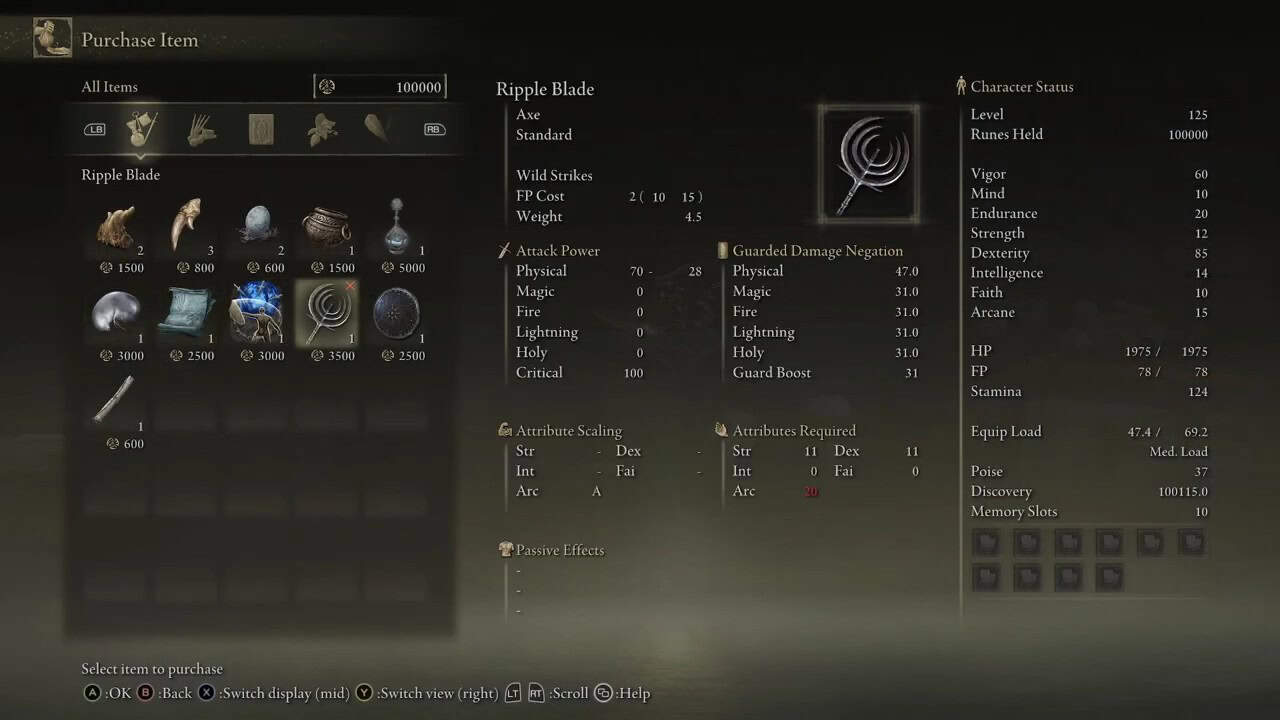
Given that this build heavily relies on Incantations that require both Faith and Arcane, we’re opting for a weapon that primarily scales with Arcane: the Ripple Blade. This weapon offers an A scaling in Arcane and deals 75 physical damage and 100 critical damage.
Additionally, it inflicts 31 fire damage, which we will explore further below. You can acquire this weapon from Pidia, the Carian Servant located at Caria Manor.
Best Shield
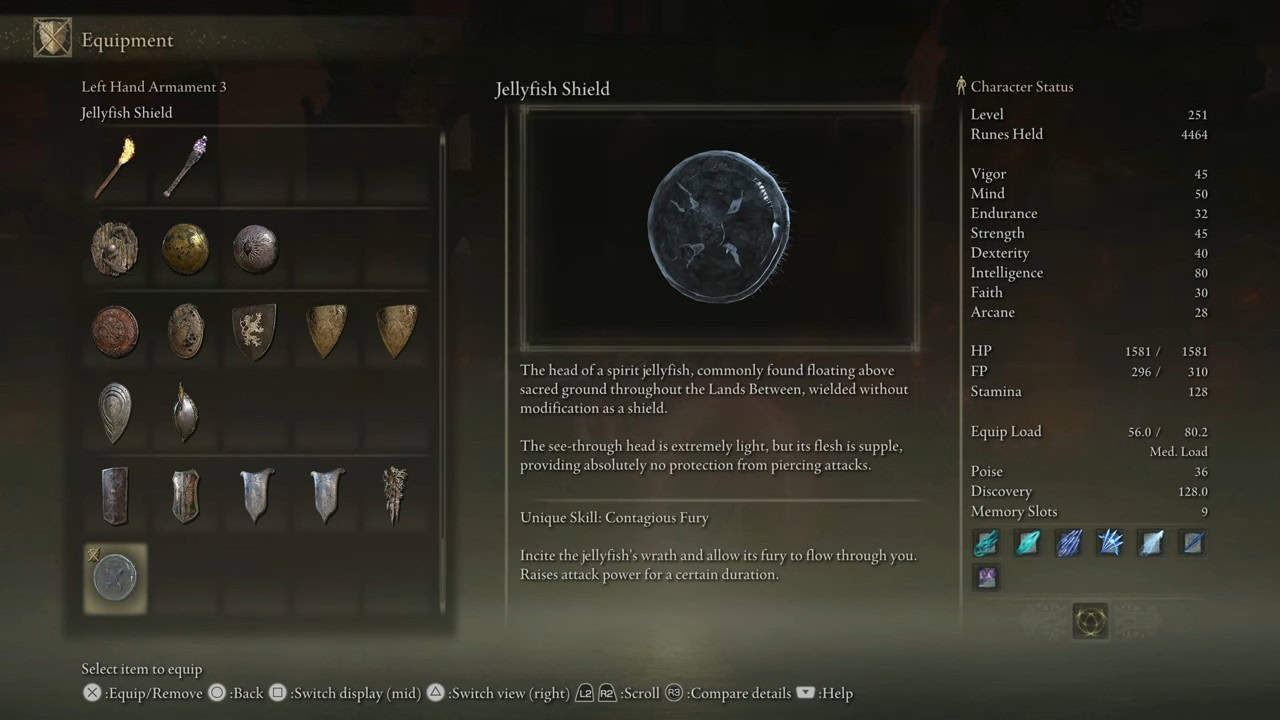
For your shield, we recommend the Jellyfish Shield. Its Ash of War feature enhances your damage output. This small shield requires minimal stats to wield, making it very accessible.
You can find the Jellyfish Shield north of the Foot of the Four Belfries Site of Grace in Liurnia of the Lakes, surrounded by several jellyfish.
Best Ashes of War Choices
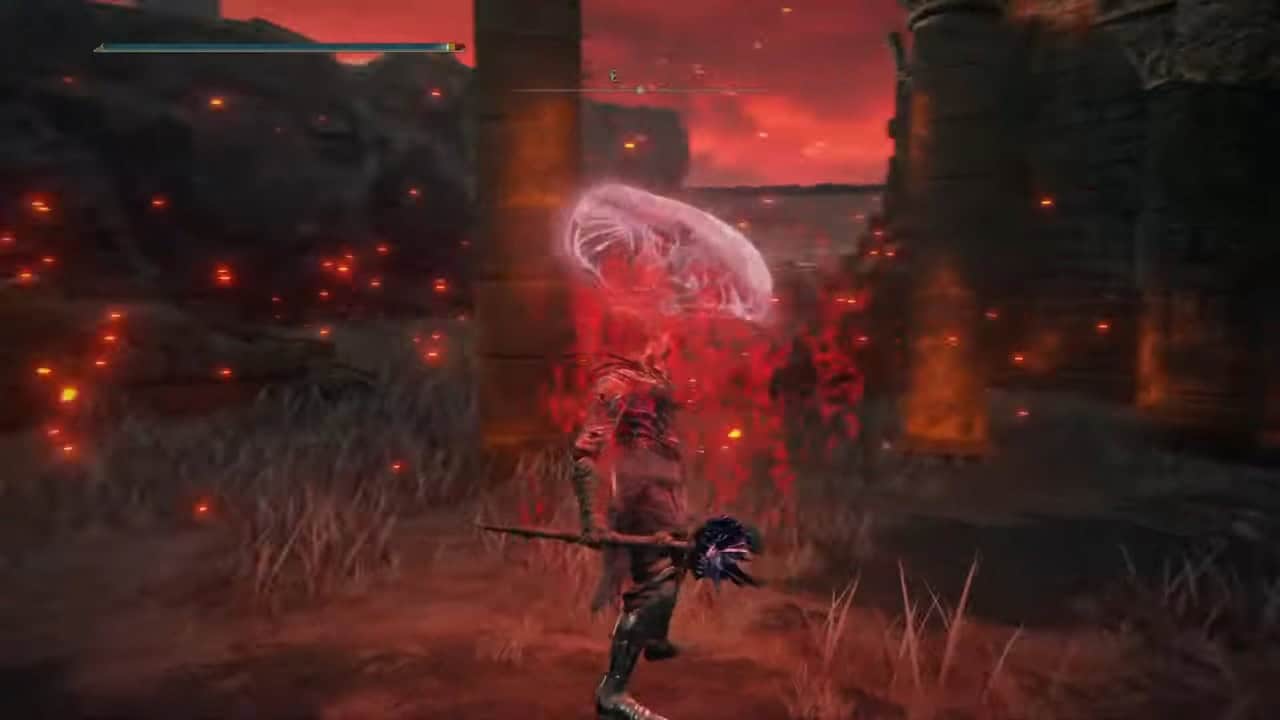
We’ll utilize the default Ashes of War for both the shield and primary weapon. For the Jellyfish Shield, this is Contagious Fury, which boosts your damage by 12.5% for 30 seconds, while for the Ripple Sword, it is Wild Strikes.
This attack allows you to unleash a series of rapid hits before finishing with a ground strike that significantly staggers opponents.
Best Incantations To Choose
Incantations are crucial for maximizing this build’s damage capabilities. We’ll be utilizing six different incantations:
Dragonfire: This conjuration unleashes a dragon head that breathes fire on adversaries.
Bayle’s Tyranny: Similar to Dragonfire, this incantation summons a dragon head but inflicts AOE lighting and fire damage.
Dragonmaw: Dragonmaw allows you to summon a dragon’s mouth that bites down fiercely on foes.
Theodorix’s Magma: This powerful incantation rains magma down on enemies from the sky, offering significant crowd control.
Bloodflame Blade: This imbues your weapon with festering blood flame, dealing both bleed and fire damage. A perfect fit for our fire-focused Dragon build.
Flame, Grant Me Strength: This incantation boosts your physical and fire damage by 20%.
TIP
Equip the Dragon Communion Seal to amplify your Dragon Communion incantations by 15%.
Best Spirit Summons
For Spirit Summons, choose between the Mimic Tear to double your attacking power or the Fire Monk to boost your fire damage output.
Mimic Tear: This summon duplicates your character, allowing for enhanced damage output.
Fire Monk: This option uses flames to deal immense damage to your foes.
Best Armor To Wear
While any light to medium armor can serve this build, we suggest the Drake-Knight armor as it aligns perfectly with the dragon aesthetic. This armor set can be located in the Crumbling Farum Azula area.
Stats
Drake-Knight Set
Damage Negation
Physical
22.6
Physical (Strike)
23.6
Physical (Slash)
19.1
Physical (Pierce)
22.6
Magic
20.4
Fire
22.6
Lightning
17.8
Holy
20.4
Resistance
Immunity
60
Robustness
110
Focus
50
Vitality
50
Poise
40
Best Flask of Wondrous Physick for Dragon Build
The Flask of Wondrous Physick permits the use of two temporary buffs in one single-use flask. For the Dragon build, we recommend the following:
Greenburst Crystal Tear: This tear enhances your stamina regeneration rate.
Cerulean Hidden Tear: This tear temporarily negates FP usage when performing incantations or skills.
Best Talismans
Talismans can enhance your build in various ways. There are four Talisman slots available for you to unlock and utilize. For the Dragon build, here are the ideal Talisman choices:
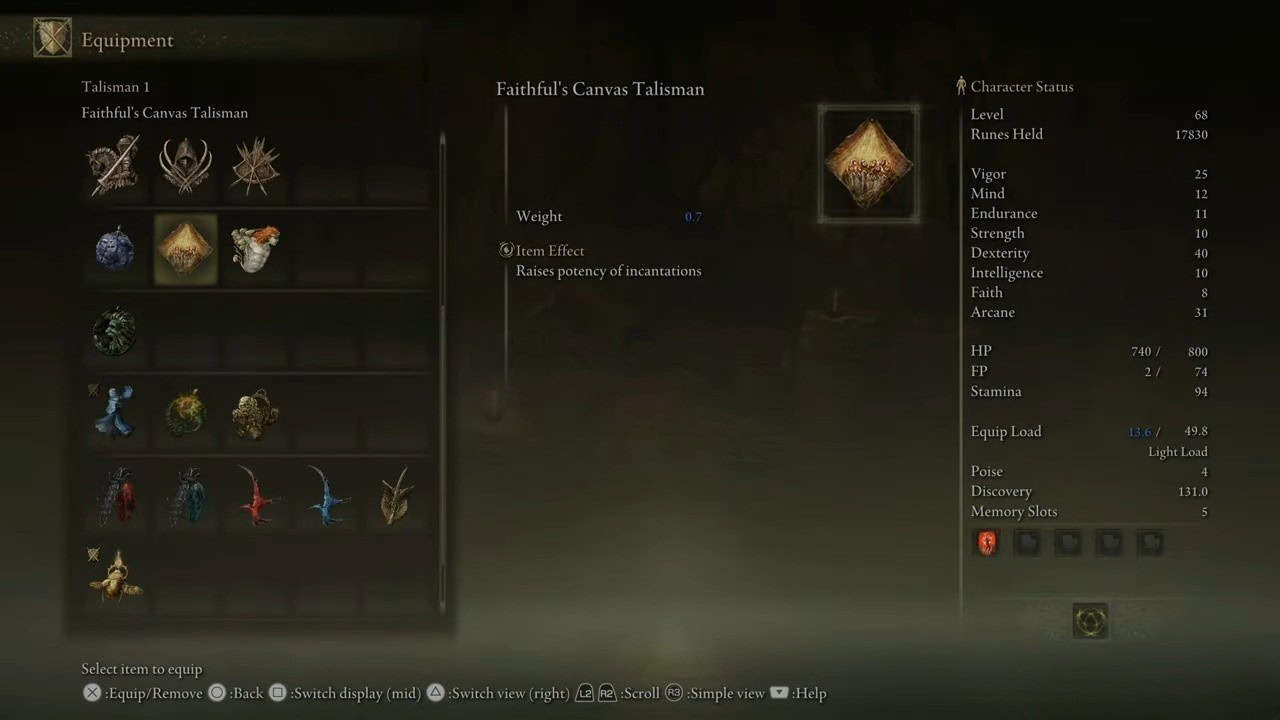
Faithful’s Canvas Talisman: This talisman boosts the effectiveness of all incantations by 4%.
Flock’s Canvas Talisman: Similar to the previous one, this talisman increases incantation potency by 8%.
Fire Scorpion Charm: This Talisman raises your fire damage by 12%, but be aware it also increases the damage you receive by 10%.
Radagon Icon: This talisman shortens the casting time for incantations.
The post Elden Ring Dragon Build: Stat, Weapons, Armor, And More appeared first on SegmentNext.
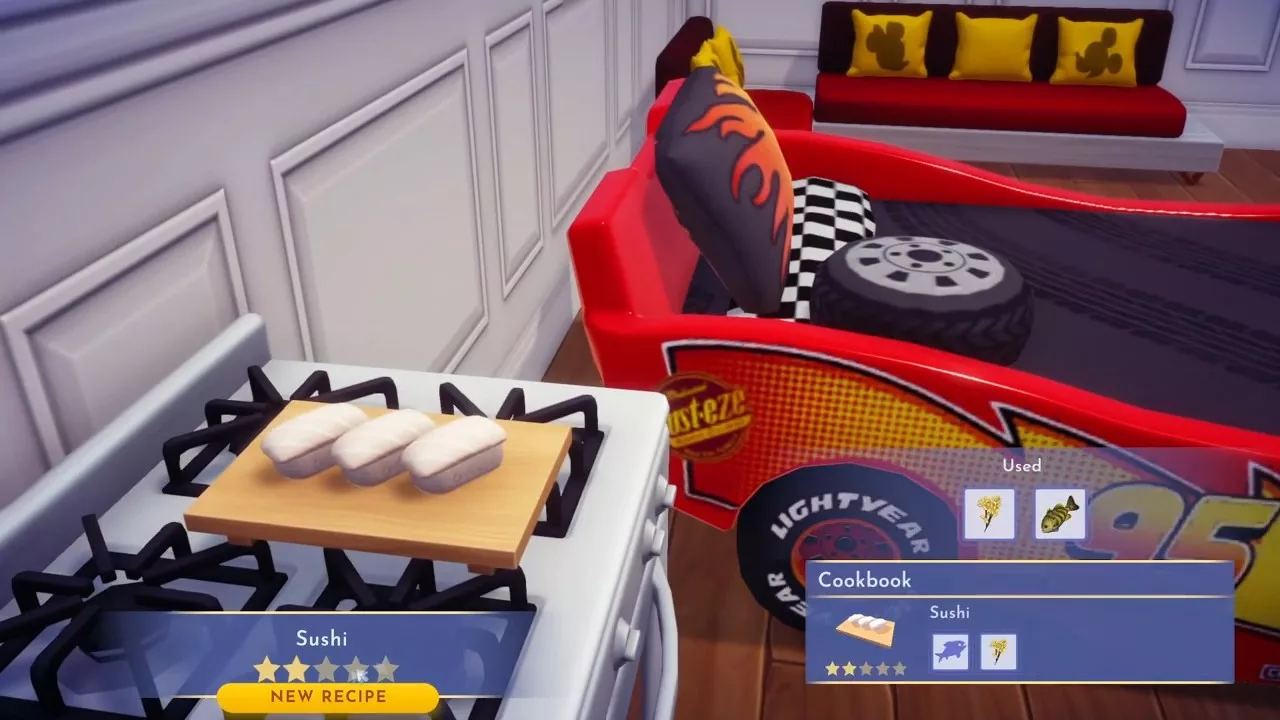
A notable aspect of Disney Dreamlight Valley is the cooking system, and one of the dishes you can create is Sushi. This dish, rated two stars, is among the easiest to make, requiring only two ingredients.
While you don’t need to make it for most of the game, it becomes essential during the Magic Moments quest assigned by Ursula.
Necessary Ingredients for Sushi in Dreamlight Valley
Creating Sushi in Disney’s Dreamlight Valley is relatively straightforward, requiring just two items and only a few moments of your time.
The two ingredients needed to whip up sushi in Dreamlight Valley are:
Fish (1x of any kind)
Rice (1x)
Simply head to your kitchen or stove, combine these two ingredients, and you’ll have sushi ready in no time.
To gather your ingredients, you can catch fish in various water locations throughout the valley with your fishing rod. If you’re short on rice, you can buy it from Goofy’s stand in the Glade of Trust biome for 35 coins each, provided you’ve repaired the stall.
Though it may look like just a simple dish, sushi has various uses in Dreamlight Valley. You can consume it for energy (providing 405 points), give it to an NPC to boost your Friendship level, or sell it for 111 coins each.
Presenting sushi to an NPC who enjoys it can earn you bonus rewards.
Different Types of Sushi and How to Cook Them in Dreamlight Valley
You can create a total of eight distinct Sushi dishes. The foundational ingredient across all Sushi types is Rice. Each Sushi variant, once crafted, will yield a unique rating, detailed in the table below.
Bloody Finger Hunter Yura is one of many NPCs in Elden Ring that offers players a side quest. His storyline leads you through different areas of the Elden Ring map, featuring several challenging tasks to overcome, and we’re here to assist you with that.
This guide will cover all aspects of the Hunter of Bloody Fingers Yura quest in Elden Ring, including where to find this NPC, how to initiate his questline, the steps involved, the consequences of your decisions, and all the rewards you can earn.
Location of Bloody Finger Hunter Yura
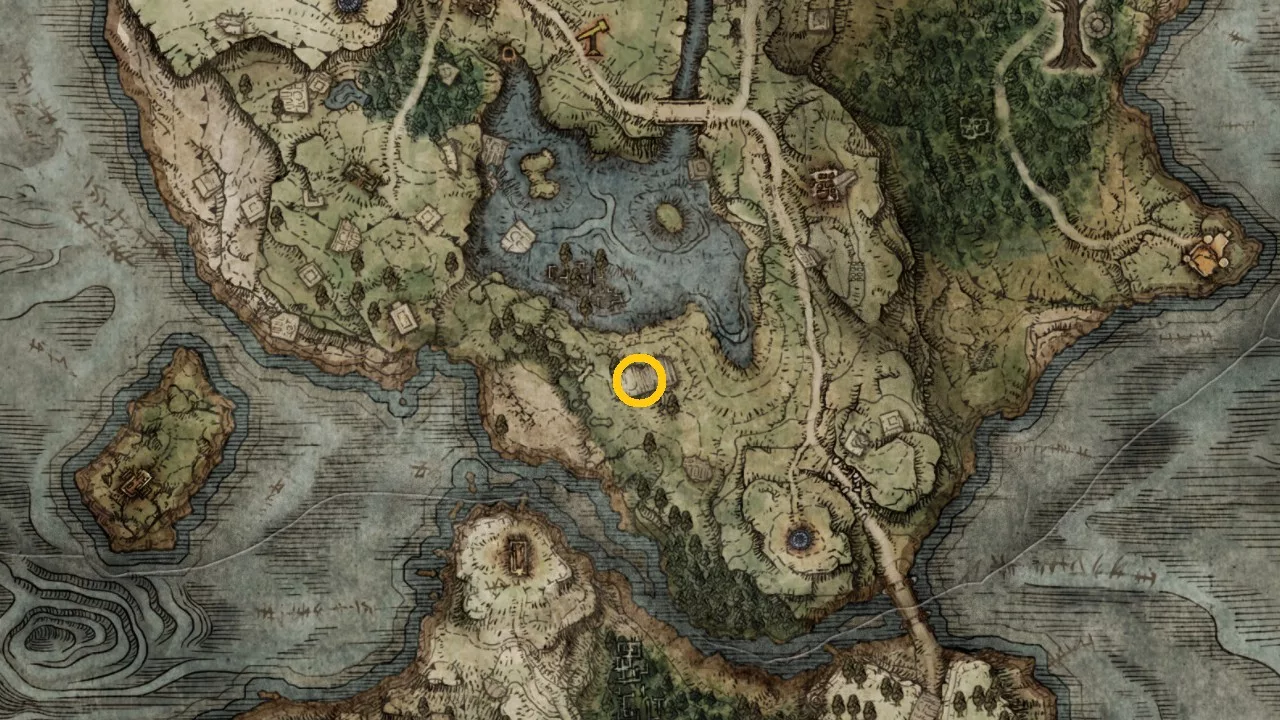
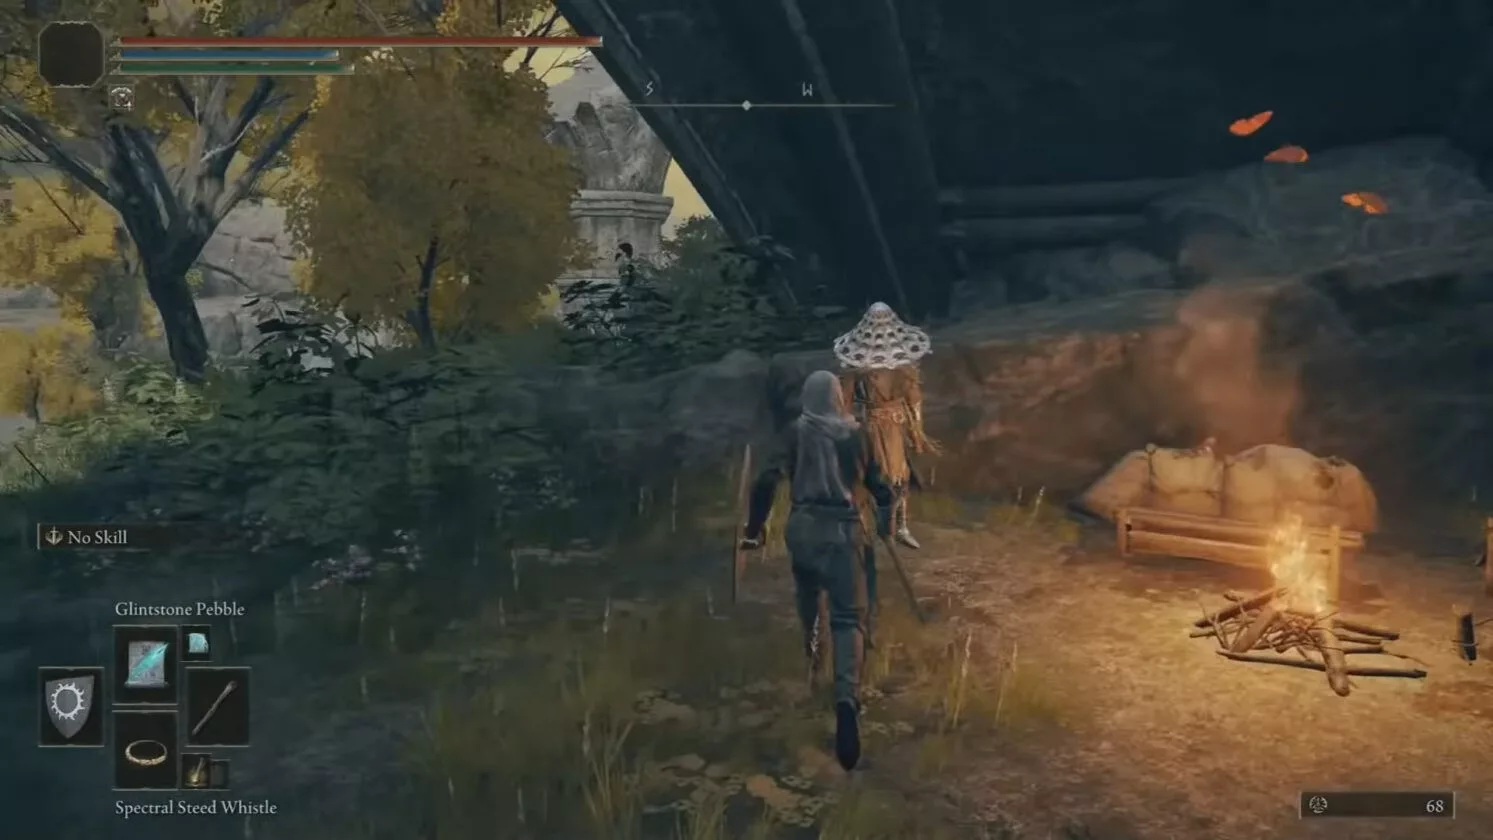
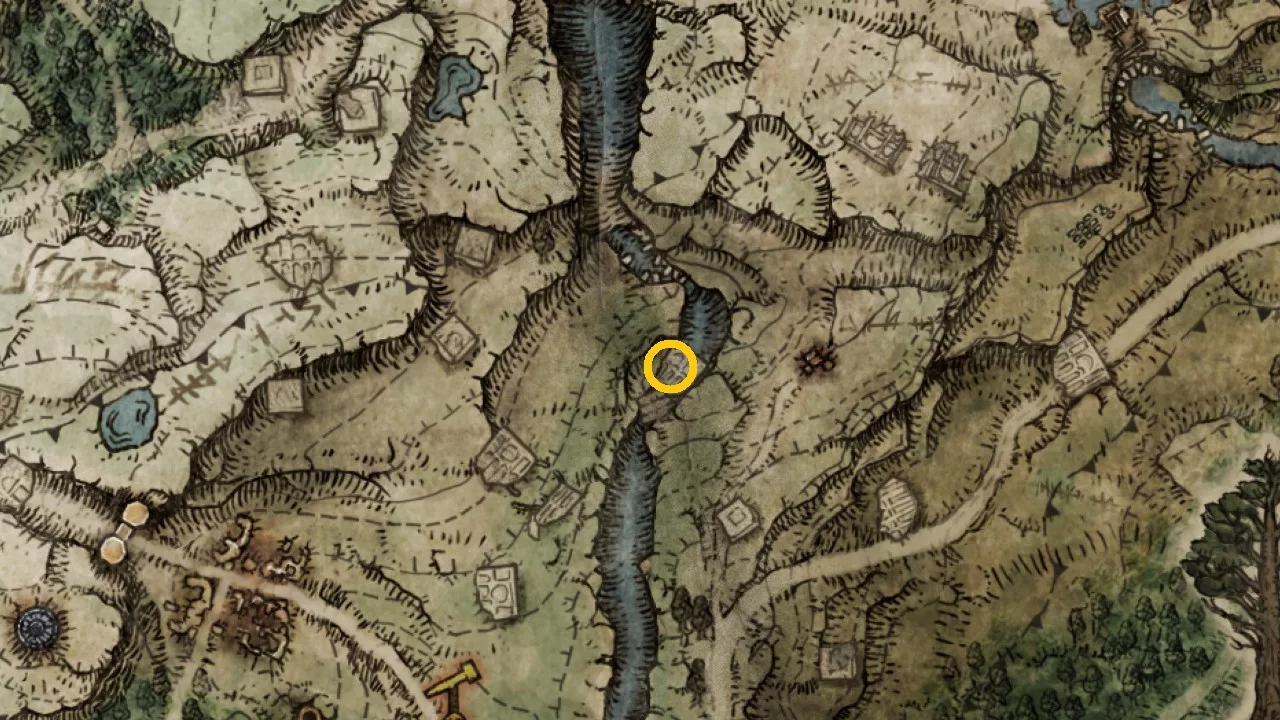
You can find Yura, the Hunter of Bloody Fingers, in the Limgrave region of Elden Ring, specifically in the southern part. Refer to the images for the detailed location. Yura possesses extensive knowledge about the Dragon Cult and can be located in the underpass beneath the ruins by heading right from this Site of Grace.
This isn’t the last encounter players will have with Yura, as he plays a pivotal role in an alternative questline. You can engage and defeat Yura as you progress through the game.
Similar to other side quests in Elden Ring, the Bloody Finger Hunter Yura Quest consists of numerous twists and turns. While some optional steps can be skipped, we strongly recommend completing them to earn valuable loot.
1. Defeat Dragon Agheel
Although the location of Yura was mentioned earlier, it’s not essential to speak with him to initiate the quest. However, if you choose to engage him, he will warn you about the nearby Flying Dragon Agheel and advise you to keep your distance. If you’re seeking information on the Church of the Dragon Communion, ignore his warning and go defeat Dragon Agheel for some loot.
At the Dragon Communion Church, you can trade dragon hearts for Incantations within Elden Ring. Regardless of whether you defeat the dragon, you’ll need to follow the mandatory steps that follow to finish the Yura questline.
2. Vanquish Bloody Finger Nerijus
Next, proceed to Murkwater Cave located north of Agheel Lake. Bloody Finger Nerijus will confront you along the way, but Yura will join the battle to assist you. If your character isn’t very strong at the start, you can use Yura as a distraction and attempt to attack Nerijus when he is focused on Yura.
Be sure to make your initial strikes count, as Nerijus will redirect his attention to you once you engage him. Additionally, you must ensure Yura survives the encounter if you wish to acquire the Reduvia Dagger that Bloody Finger Nerijus will drop upon his defeat.
3. Speak with Yura Again
After dispatching Bloody Finger Nerijus, make your way north to find Yura again. He is located near the Murkwater Coast Grace, further up from Murkwater Cave. Speak with Yura to learn more about his mission related to hunting Bloody Fingers.
4. Unlock the South Raya Lucaria Gate
After your conversation with Yura at Murkwater Coast Grace, proceed to the Academy of Raya Lucaria, located north of Stormveil Castle in the central area of Liurnia.
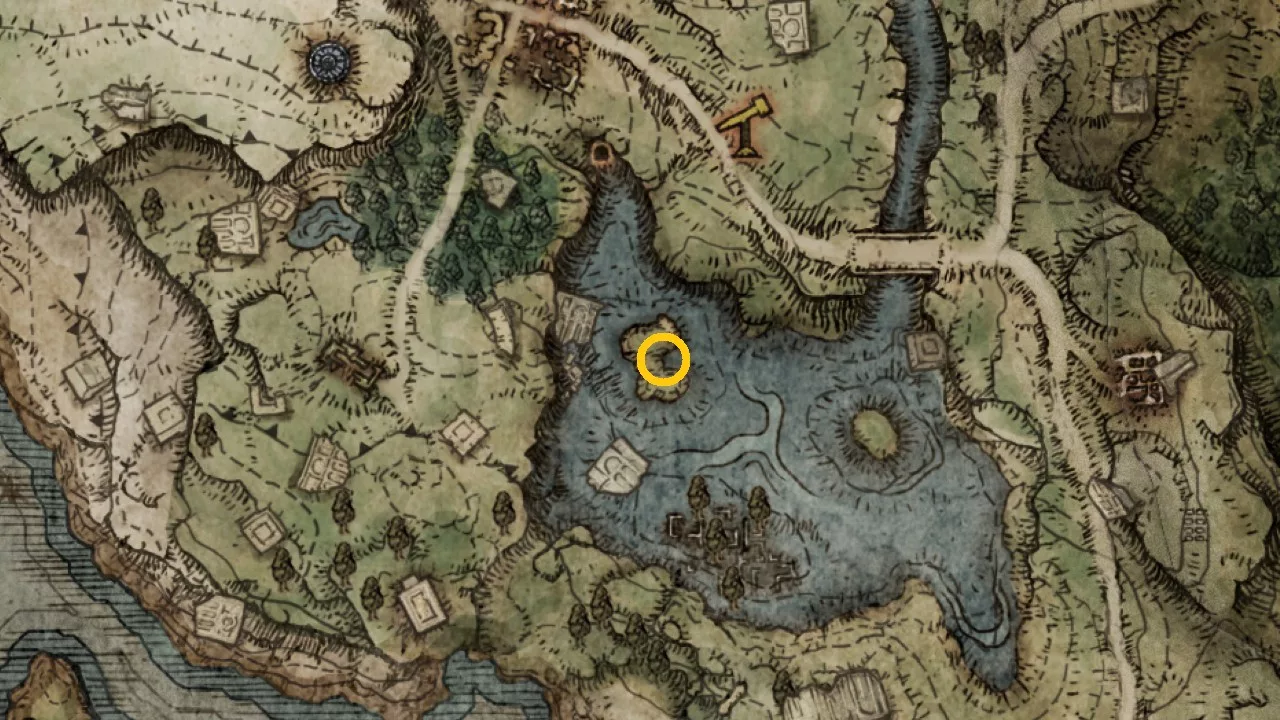
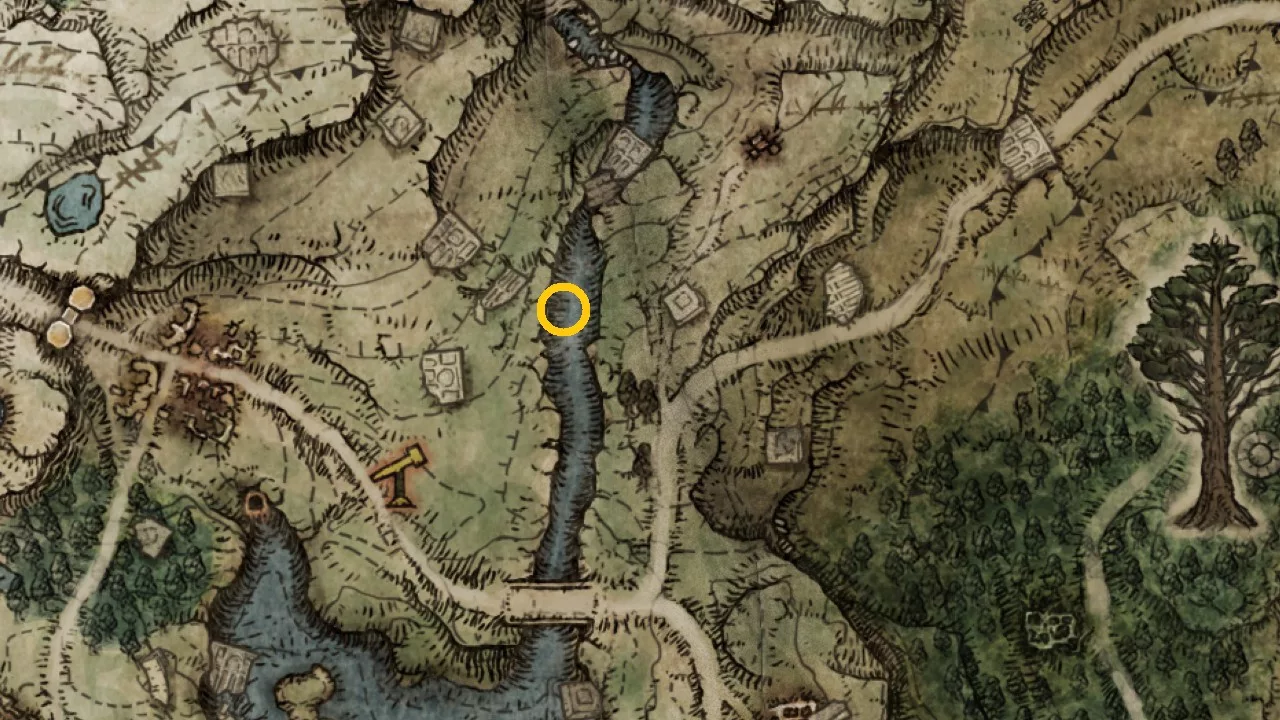
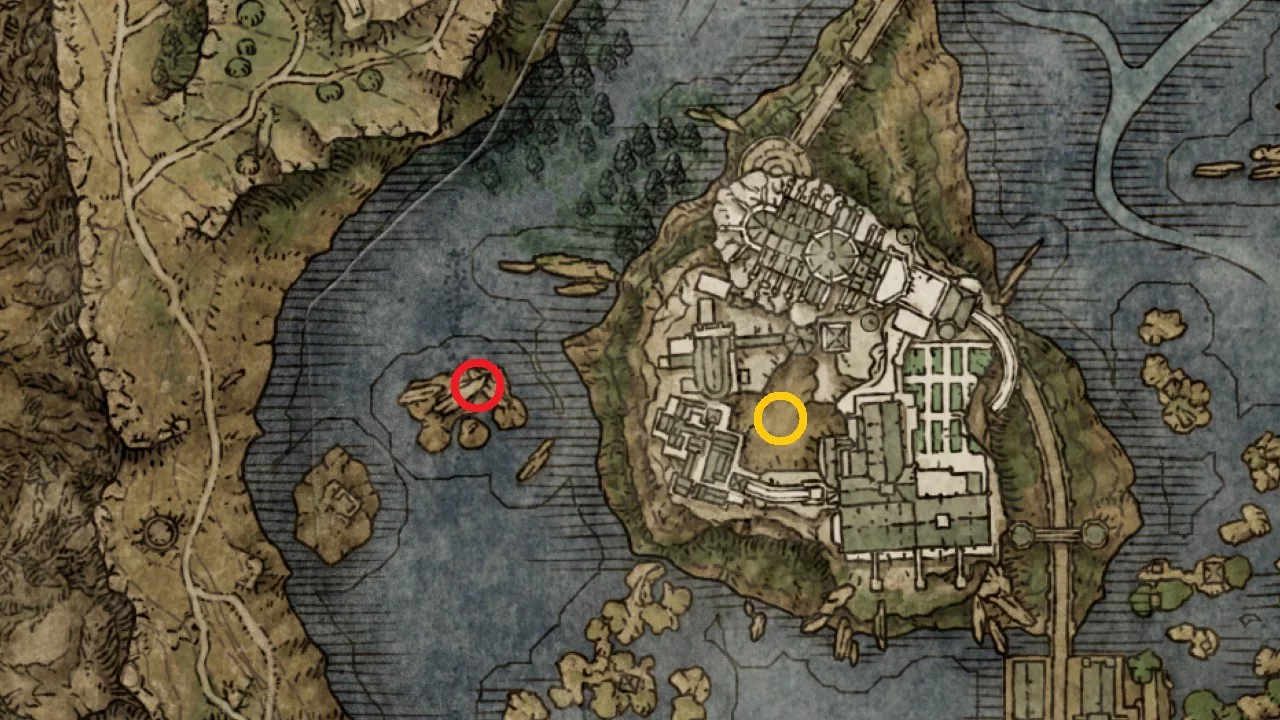
Acquire the Glintstone Key from the western side of the Academy, positioned behind a slumbering dragon on a small piece of land (highlighted in red above). Once you have the Glintstone Key, travel to the south gate of the Academy of Raya Lucaria and interact with the seal to gain entry, indicated in yellow.
5. Defeat the Bloody Finger Ravenmount Assassin
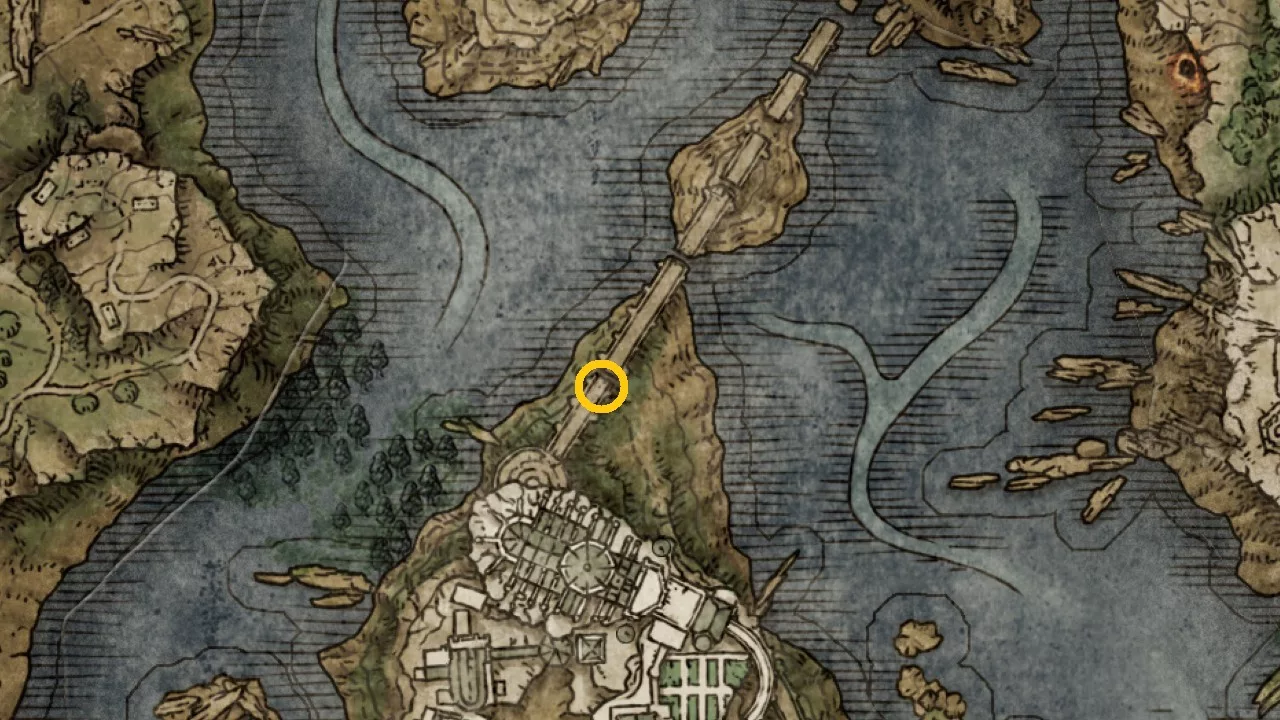
Access the Site of Grace and head through the seal to the north without interacting with it. Cross the bridge and look for a red summon sign on the ground before the first significant break. Engage with the Red Summon Sign to initiate the combat against the Bloody Finger Ravenmount Assassin and eliminate him. After your victory, speak with Yura at the bridge next to the summon sign, where he will update you on his hunt for Bloody Finger Eleonora.
Upon defeating this foe, you’ll be granted a Rune Arc, a Furlcalling Finger Remedy, and the Ash of War: Raptor of the Mists when you return to your world, along with a Smithing Stone after conversing with Yura.
6. Take Down the Bloody Finger Eleonora
Next, head to the Second Church of Marika located in the Altus Plateau. You may need to unlock the Grand Lift of Dectus to access this area. Speak with Yura at the Church of Marika to receive the Nagakiba katana. In addition, you’ll earn the Purifying Crystal Tear, one Furlcalling Finger Remedy, and Eleonora’s Poleblade as rewards. Utilize the Nagakiba Katana to defeat the Violet Bloody Finger Eleonora who will spawn near the statue.
7. Converse with the Imposter Bloody Finger Hunter Yura
Afterward, travel to the Zamor Ruins Site of Grace in the Mountaintop of the Giants, where you will encounter the Imposter Yura. He will attempt to persuade you to seek out the Three Fingers and the Frenzied Flame. He will reference Shabriri Grapes, connecting this quest to the Hyetta quest.
If you decide to eliminate this Imposter Yura, you will receive the Iron Kasa helmet and the Ronin armor set. Alternatively, if you follow Yura’s guidance, you could potentially discover the Three Fingers and unlock an alternative game ending!
In Grand Theft Auto V, participating in Stock Car races allows players to unlock distinct and powerful vehicles that enhance your cruising experience across the vibrant streets of Los Santos. However, obtaining these cars involves a bit of effort, and that’s where we come in.
You can find Stock Car races in GTA V situated in the Grand Senora Desert. By taking part in these races, you stand the chance to earn the ultimate reward: the Cheval Marshall Monster Truck.
Location of Stock Car Races in GTA V
All five Stock Car races are hosted in the same region. Head over to the Grand Senora Desert and look for an individual standing next to a Burger Shot-themed vehicle along Route 66. As you approach, a prompt will appear, allowing you to enter the first Stock Car race.
Keep in mind that these missions unlock after you finish Trevor’s mission, “Mr. Phillips.” You will receive a text notification from Ron indicating they are now accessible.
These races are not available on the older PS3 and Xbox 360 versions of the game.
How to Unlock the Cheval Marshall Monster Truck?
You must complete the Stock Car races five times in GTA V. Each race consists of five laps, and the difficulty increases with each subsequent race. To gain an advantage over your rivals, a fast car is essential. The Imponte Duke O’Death, known for its exceptional handling and speed, will help players maintain a competitive edge by outpacing opponents enough to secure victory.
You can complete these races with any character.
For each race completed, you will unlock a unique Stock Car. Once you finish the fifth and final race, the Cheval Marshall Monster Truck will be unlocked. Here’s the order of Stock Cars you will unlock:
Race #1 reward: Declasse Burger Shot Stallion
Race #2 reward: Bravado Redwood Gauntlet
Race #3 reward: Vapid Pisswasser Dominator
Race #4 reward: Bravado Sprunk Buffalo
Race #5 reward: Cheval Marshall Monster Truck
After unlocking these vehicles, they will be available across all characters in their respective garages. Additionally, the Cheval Marshall truck will spawn at Trevor’s airstrip in the Grand Senora Desert, where players can customize it with one of 25 different flag options.
If you’re having trouble seeing the races, try uninstalling and then reinstalling the game.
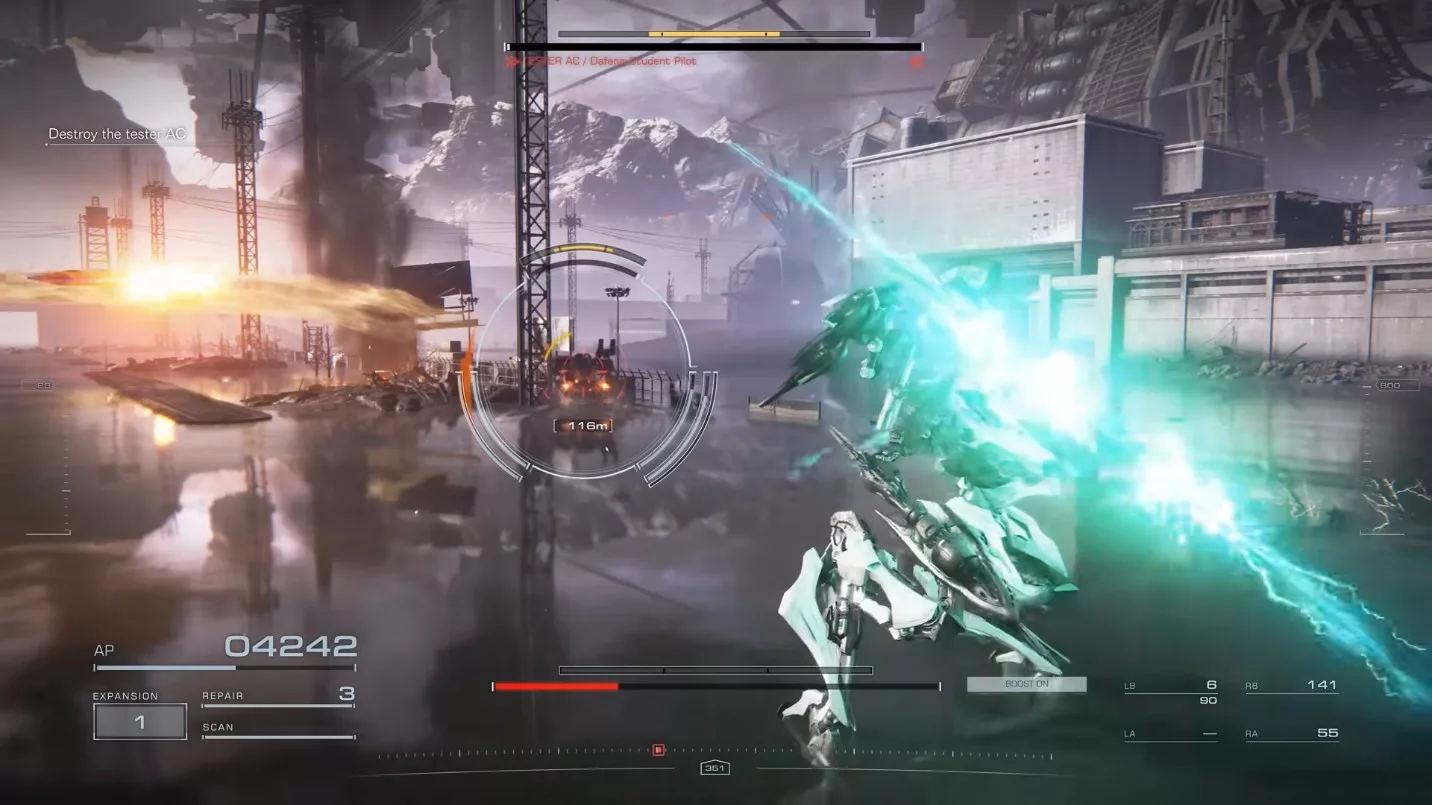
To obtain one of the most legendary weapons, the IA-Co1W2 Moonlight, also known as the Moonlight Blade, in Armored Core 6, you must reach the conclusion of chapter 4, titled Reach the Coral Convergence. It’s advisable to equip the Songbird Grenade Launcher and Ben Machine Guns for efficient enemy elimination. After you acquire the weapon, it will appear in your inventory only upon defeating the chapter’s boss.
Now, let’s dive into why acquiring this weapon in Armored Core 6 is essential and how to do it.
Location of the Moonlight Blade
At the conclusion of the Reach the Coral Convergence mission, eliminate V6 and Gun 3 before advancing to the next checkpoint. From there, proceed toward the damaged bridge.
You can either drop into the water or stick to the left side and jet over the bridge to reach the opposite shore.
Beneath the bridge, you’ll encounter three Ancient Coral Wheel Machines; use Songbirds to eliminate them, or simply grab the weapon and take off.
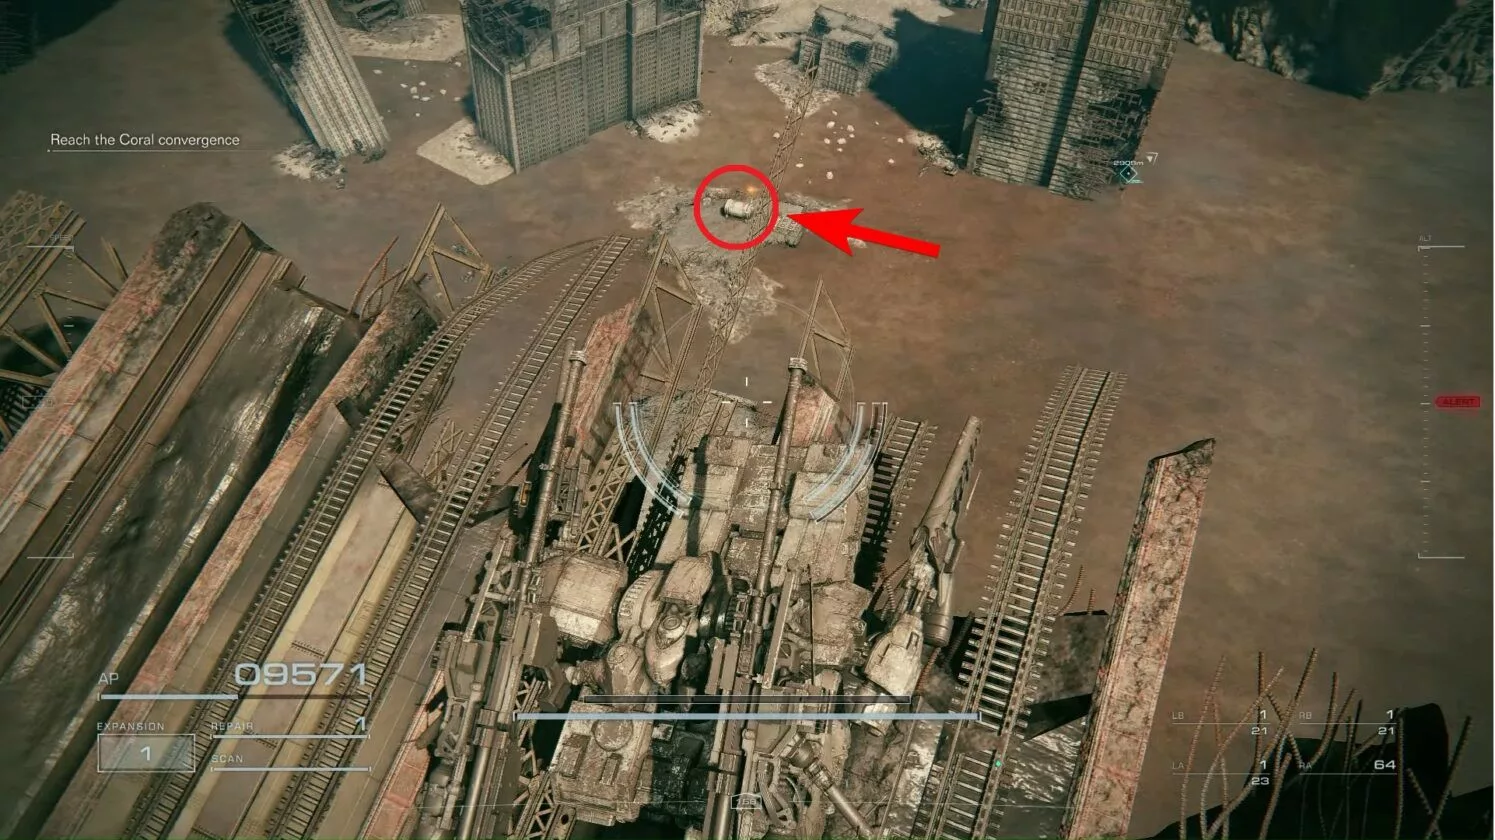
Upon reaching the other side, you will find a box marked with an objective indicator. This contains the Moonlight Blade.
If you’d prefer to avoid the foes guarding the box, fly across the bridge and move directly to its end. Jump off the left edge, and you will land right in front of the chest containing the Moonlight Blade.
Stats and Attack Methods of the Moonlight Blade
The Moonlight Blade is a formidable melee weapon in Armored Core 6 that emits powerful energy waves towards foes. It features a two-hit combo that offers impressive reach while maintaining a shorter distance but providing a wider arc for charged attacks.
A normal strike hits at a maximum distance of 290m.
This two-hit combo can target two nearby enemies simultaneously, permitting you to re-target efficiently. For engaging multiple enemies together, utilize the charged attack; it maxes out at around 220m with a broad width that strikes a larger area.
During a charge, you can cancel the attack at any moment to outsmart your opponent’s dodge and quickly follow up with a faster combo.
As for its specifications, the weapon boasts an attack power of 615 alongside an impact rating of 495. The charged attack of the Moonlight Blade surpasses all other weapons in AC6. Additionally, the Direct Hit Adjustment stat significantly boosts damage against staggered enemies, while the light PA Interference enhances its effectiveness against shields.
MyTeam Career Mode presents some challenging decisions, but it promises to pave the way for your triumph in F1 22. Before diving into the setup process, it’s essential to grasp the various options this mode provides for creating a unique character or team.
The Career Mode in F1 22 serves as a complete toolkit that allows you to personalize your gameplay experience. Let’s jump into some useful tips that can enhance your time in the game.
1. Choose Wisely During the Interview
The Will Buxton interview might appear to be a simple addition for realism, but it significantly influences your journey in F1 22.
Your responses during the interview can uplift the morale of the department you commend, leading to reduced costs for its parts. Make sure to consider your answers carefully to kick off your career with an advantage.
For your sponsor selection, opt for one that offers the highest starting fee. Although the objectives set by these sponsors may seem daunting at first, you’ll find them easily achievable by the season’s close.
Securing the largest initial budget from your sponsors allows you to invest in an exceptional engine and a high-caliber driver.
3. Securing a Driver
While you can choose your favorite driver from the available options, opting for a less expensive driver can provide more flexibility in your budget for upgrading engines or facilities right from the start. We suggest considering Oscar Piastri, who stands out as the top rookie driver in the series.
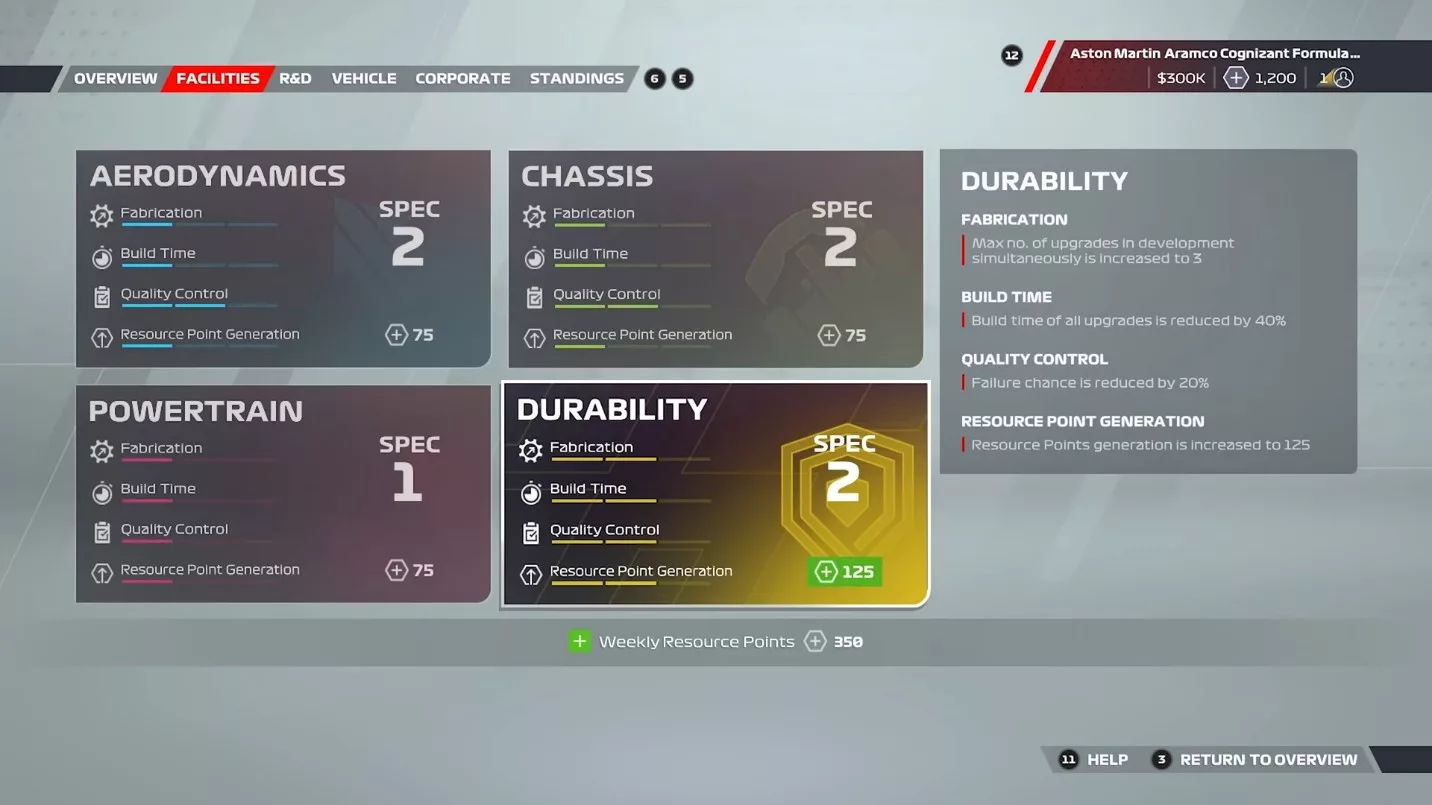
4. Engine Durability
The durability focus manages your car’s engine maintenance. This will minimize penalties when you need to swap out and replace parts. As the latter half of the season approaches, consider obtaining extra engine components to save for future races.
If you accrue all your penalties at once, their impact will be limited to that specific race. This eases the burden on the Durability department, as having several spare engines at hand enables you to allocate resource points to enhance your car’s cornering speed. Keep in mind that poor durability can negatively affect your teammate as well.
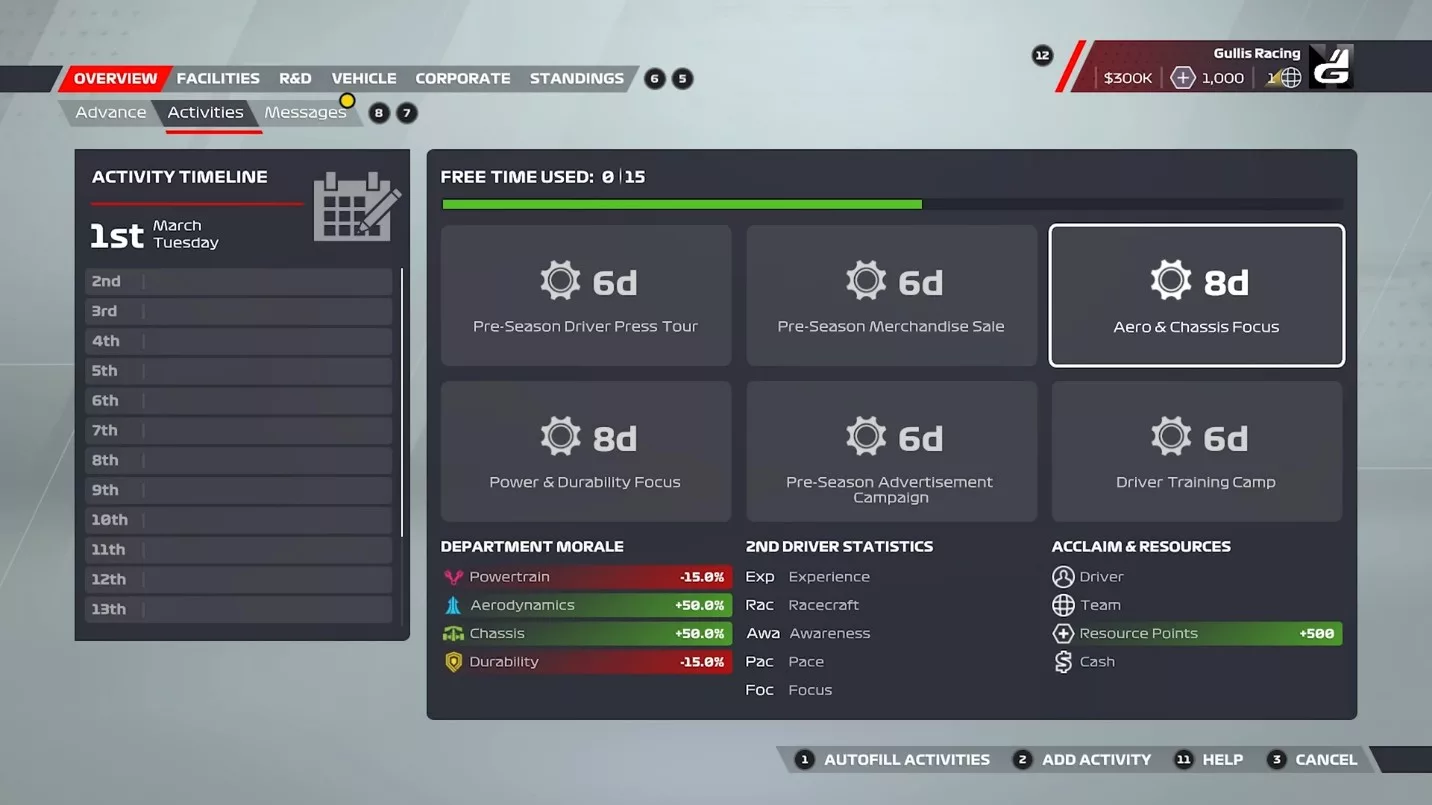
5. Participate in Activities
Activities can shift within the race weekend and can range from a couple of weeks to just two days of team engagement. Be sure to participate in these activities to accumulate team acclaim, financial resources, and resource points.
6. Increase Focus Whenever Possible
In F1 22, the term “Focus” refers to a mechanic linked to your crew’s performance on the track.
Throughout your MyTeam experience, you’ll encounter various choices that will impact your crew’s level of focus directly. It’s vital to prioritize their Focus above any other considerations and make informed decisions accordingly.
If your secondary driver experiences low Focus, it could cause significant troubles as you progress through the later stages of the game.
To monitor your crew’s performance, access the Personnel HQ to explore available upgrades aimed at keeping them motivated and satisfied.
7. Accumulating R&D Points
R&D points are essential for enhancing your car’s parts and upgrading your team’s facilities. Fortunately, gathering R&D in F1 22 is fairly easy. All you need to do is engage in the Quick Practice mini-game, which serves as an excellent way to accumulate R&D points in the MyTeam mode.
8. Upgrade Your Facilities
Facilities play a vital role in F1 22. Therefore, upon entering Career Mode, take note of which facilities have been upgraded and which require attention. Make sure to upgrade them all at a steady rate.
9. Engage in Career Mode Events
Prior to each race weekend, you will get an invitation to participate in the Pirelli Hot Lap. These events allow you to hop into any supercar and tackle specified challenges. While skipping these events to dive straight into practice sessions is an option, we recommend completing them. Mastering the hot laps can earn you both acclaim and monetary rewards based on your performance.
Acclaim helps determine how many sponsors you can place on your car and the revenue you can generate throughout the year. Additionally, for driver career mode, it influences which teams will be willing to sign you.
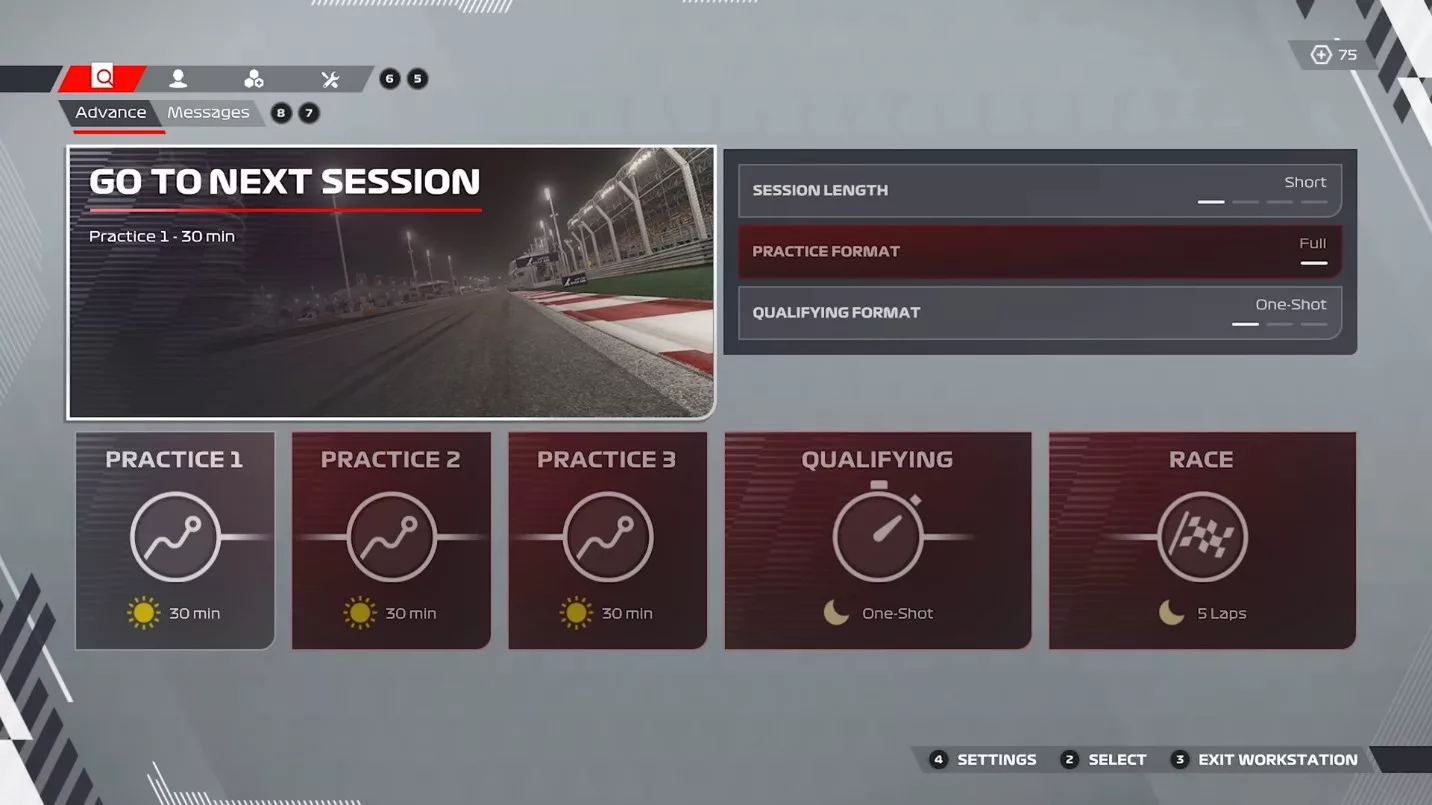
10. Engage in Practice Programs
Practice programs are pivotal during the F1 weekend, as they enable you to accumulate nearly all your resource points. These points can be used to invest in upgrades that increase your car’s speed.
Before starting your first practice, consider lowering your AI Difficulty by around 10 points from your usual setting.
You can also utilize Quick Practice to fulfill bonus challenges.
Faith is one of the many attributes in Elden Ring. It primarily influences your capability to cast incantations, but various weapons throughout the game also benefit from it, establishing Faith as a viable option for character builds. The goal of a dedicated Faith build is to locate a powerful Faith weapon that enhances your Faith attributes.
This focus is crucial for maximizing damage output during the late stages of the game, as Faith builds often struggle with damage output against the tougher late-game bosses.
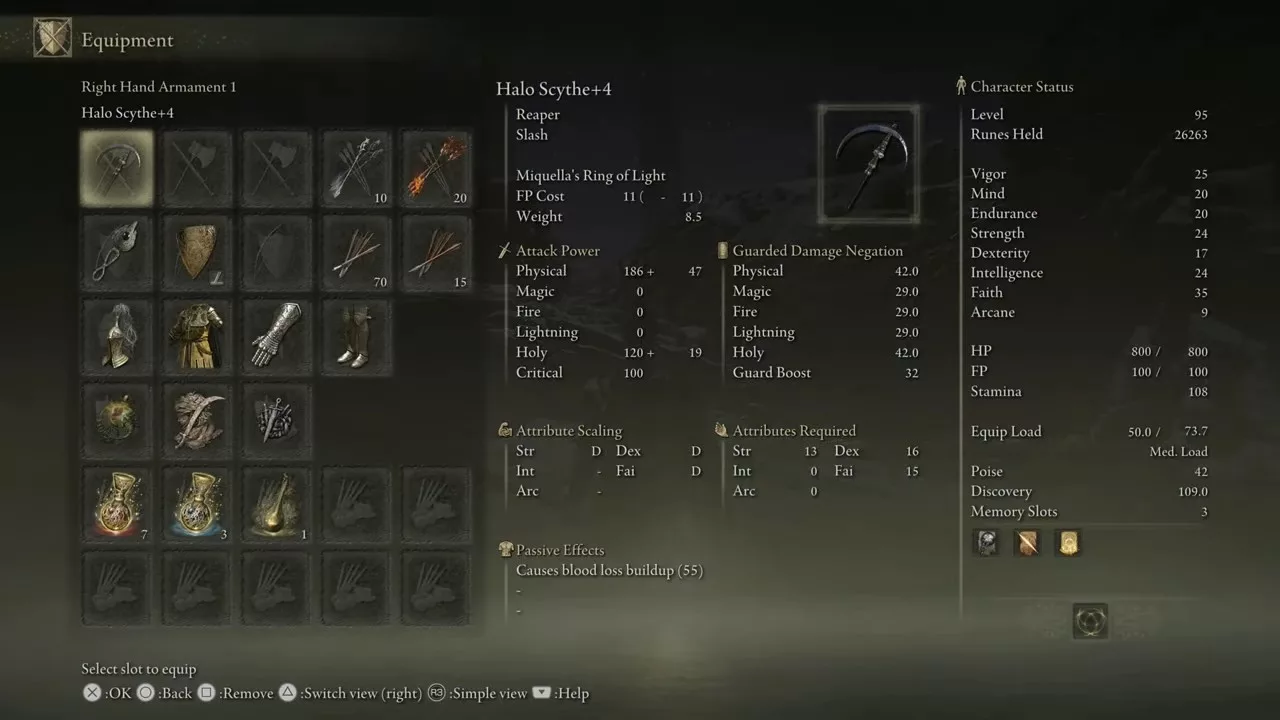
10) Halo Scythe
The Halo Scythe is attainable early on in the game, allowing you to develop your Faith build right away in Elden Ring. It is also among the simpler Faith weapons to acquire in the game.
This weapon inflicts Bleed damage, which aids in stacking blood loss on enemies. Its special skill, Miquella’s Ring of Light, releases Rings that pursue enemies at a mid-range distance. It excels against undead opponents due to its Holy Damage and can follow up with additional attacks if you possess enough Focus Points for casting.
Here are the Halo Scythe’s scaling stats:
Strength: 13 (D)
Dexterity: 16 (D)
Faith: 15 (E)
Location: To acquire the Halo Scythe in Elden Ring, you will need to defeat the Clean Rot Knights, which can be found at various locations on the map, with new players likely encountering them in the center of Aoenia Swamp located in Caelid.
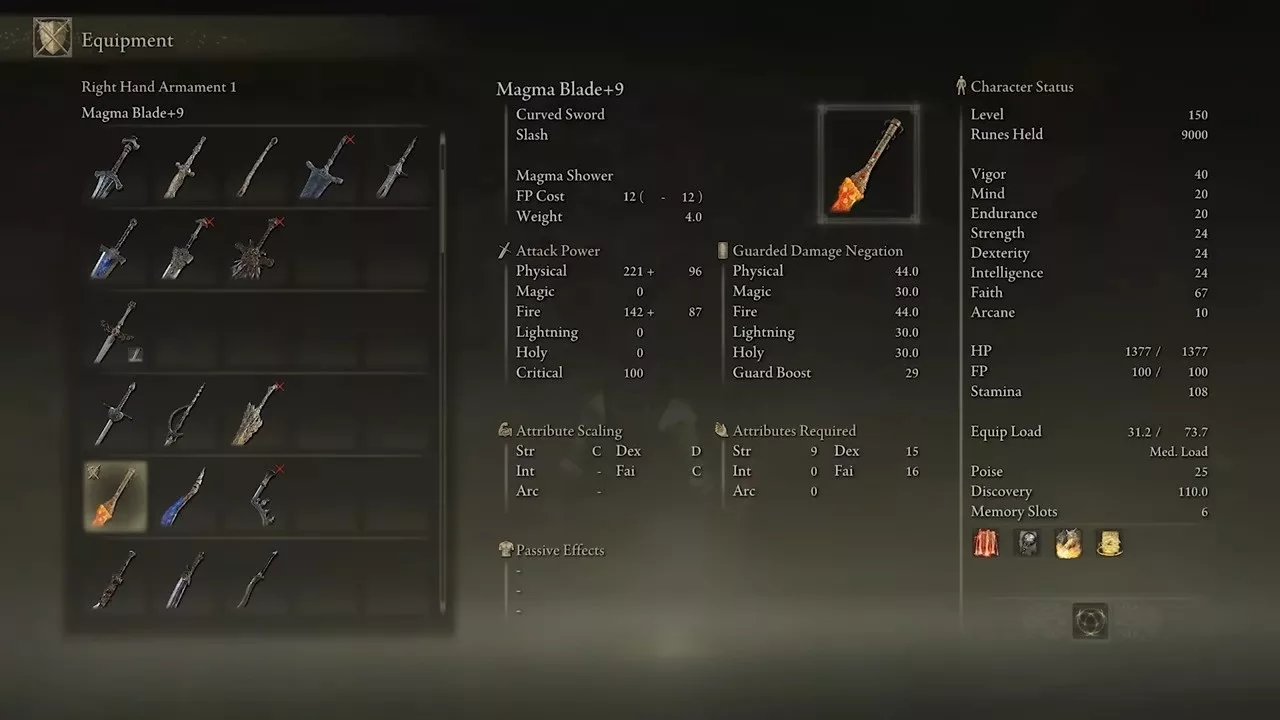
9) Magma Blade
The Magma Blade, as a curved sword, boasts an exceptional attack set that allows for rapid assaults and significant damage per second (DPS). Additionally, as both a fire and physical weapon, the Magma Blade is easily buffed, enabling you to unleash devastating damage with consecutive hits.
Its weapon skill, Magma Shower, enables the user to slash foes while simultaneously showering magma upon them. The Magma Blade can be enhanced with Ashes of War, making it a formidable choice in PvP settings, where you can relentlessly bombard your opponent with attacks.
As for the scaling stats of the Magma Blade:
Strength: 9 (D)
Dexterity: 15 (D)
Faith: 16 (D)
Location: You can obtain this curved sword in Elden Ring by defeating the Man-serpent enemies at the Volcano Manor.
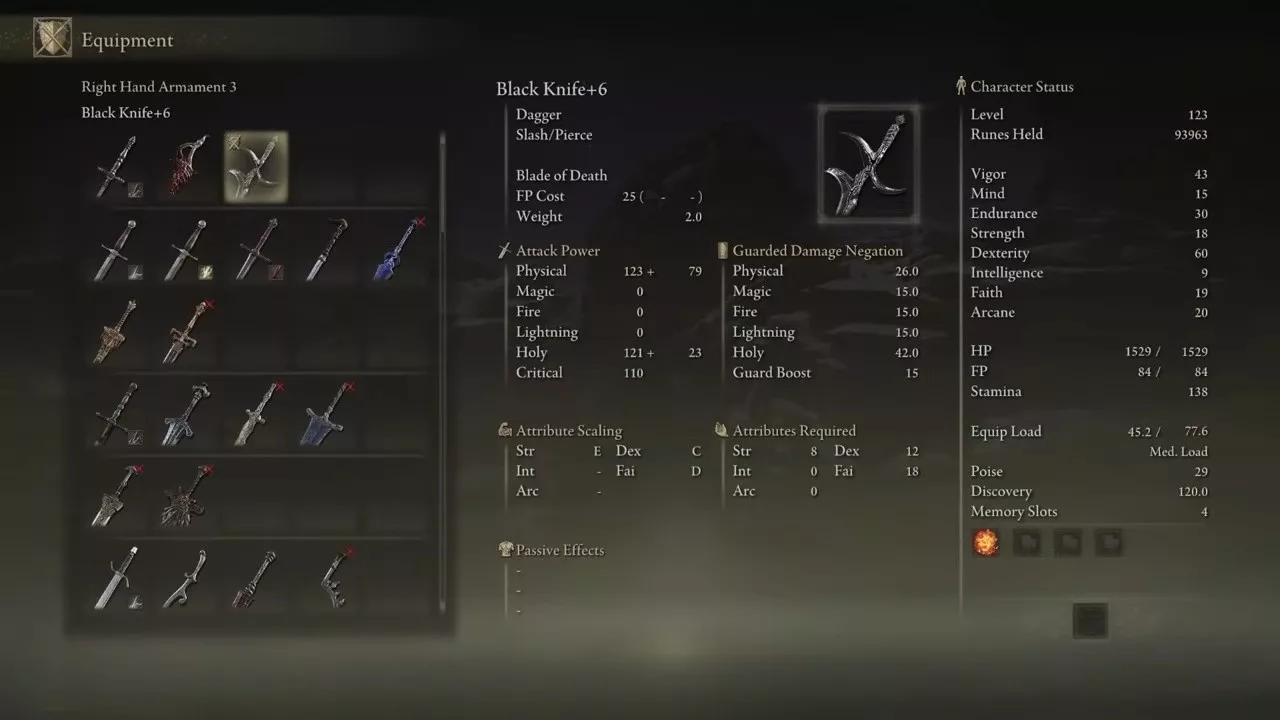
8) Black Knife
Although it’s a Dagger, the Black Knife stands out as a fantastic option among the best Faith weapons in Elden Ring. It inflicts extra Holy damage on enemies. The unique ability of the Black Knife is Blade of Death, allowing you to project a deadly projectile at your foe, significantly damaging their health.
This Ash of War is among the best in the game, as it introduces a death effect that inflicts damage over time on various enemies.
The scaling stats for the Black Knife are as follows:
Strength: 8 (E)
Dexterity: 12 (D)
Faith: 18 (D)
Location: To obtain this Dagger, you must defeat the Black Knife Assassin, found just outside the Sainted Hero’s Grave located in the Altus Plateau.
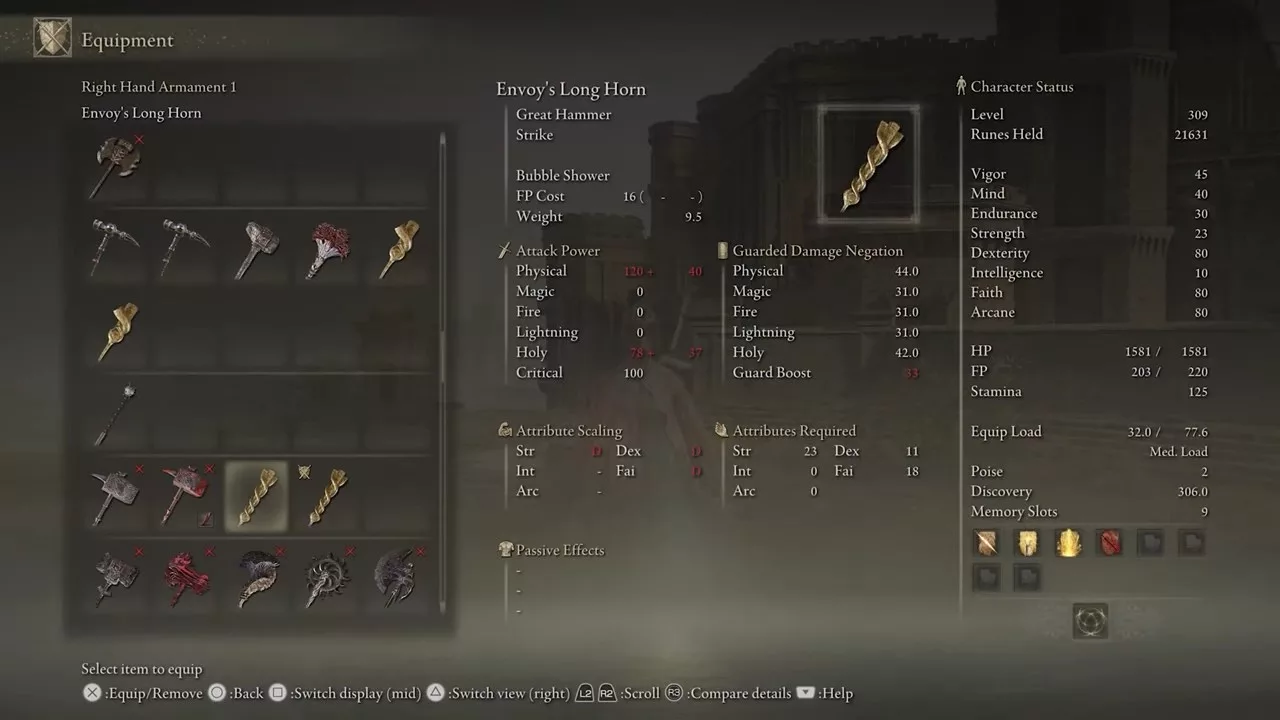
7) Envoy’s Longhorn
The Envoy’s Longhorn is a colossal weapon that commands respect for its immense damage in Elden Ring. It proves to be a formidable Faith weapon capable of tackling any foe, functioning best for those focusing on Strength and Faith builds.
Its high DPS potential allows you to utilize the Longhorn’s Bubble Shower Ash of War, unleashing a multitude of heat-seeking bubbles that target enemies, inflicting significant damage simultaneously.
Here are the scaling stats for the Envoy’s Longhorn:
Strength: 23 (D)
Dexterity: 11 (D)
Faith: 18 (C)
Location: You can farm this weapon by defeating enemies like the Large Oracle Envoy, commonly found at the East Capital Rampart in Leyndell, the Royal Capital.
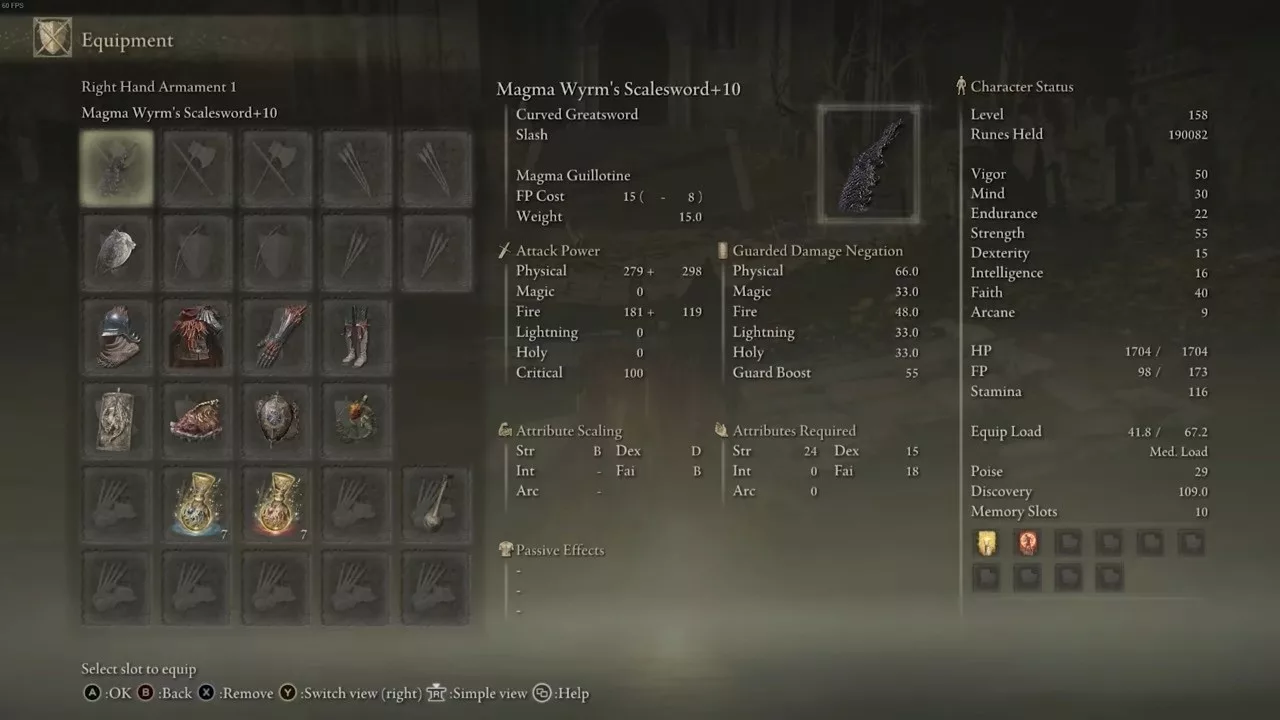
6) Magma Wyrm’s Scalesword
The next weapon is the Magma Wyrm’s Scalesword. This incredible Curved Greatsword delivers tremendous damage, depending on your build. Its Ash of War skill, Magma Guillotine, inflicts significant damage, though it requires careful timing to execute correctly.
The weapon is excellent for exchanging blows with opponents, rewarding timing and skillful execution of its special attack, which allows for follow-ups when you have enough Focus Points (FP).
This weapon is most effective in the mid-game. Its scaling stats are as follows:
Strength: 24 (C)
Dexterity: 15 (D)
Faith: 18 (D)
Location: To acquire this weapon, you need to travel to the Ruin-Strewn Precipice and defeat Magma Wyrm Makar, located directly above the Grand Lift of Dectus.
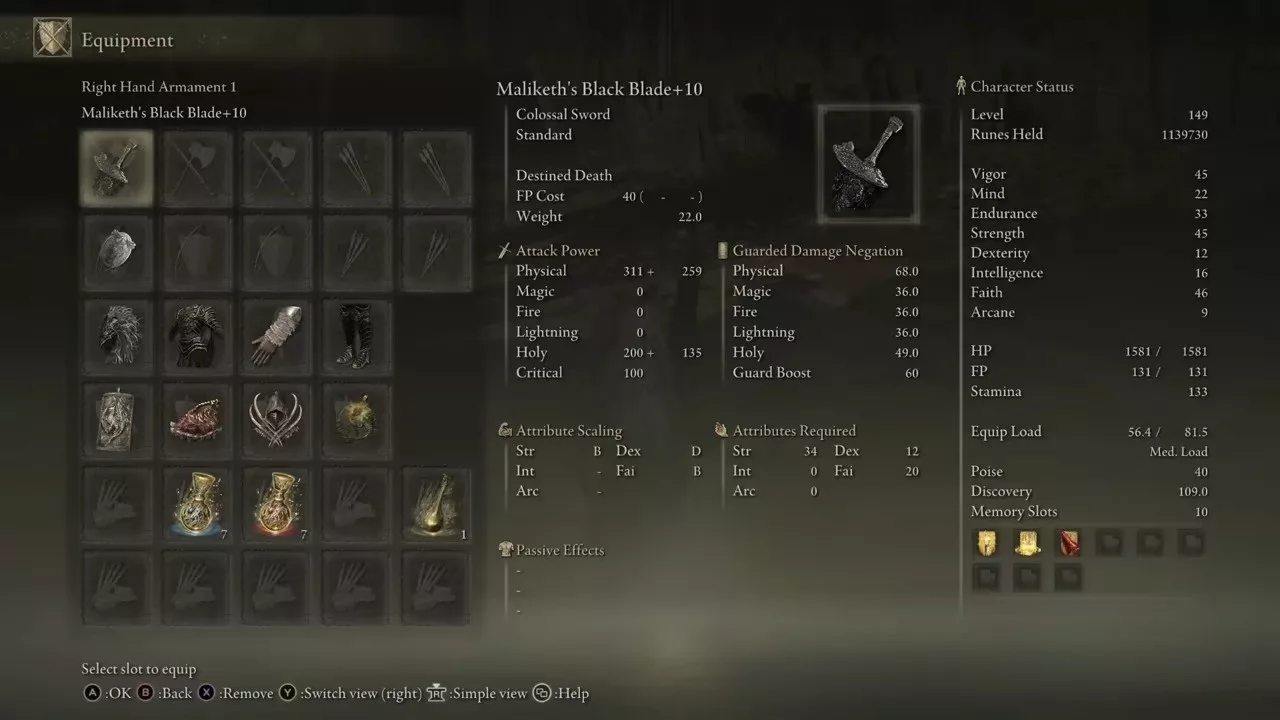
5) Maliketh’s Black Blade
Maliketh’s Black Blade is essential for any Faith build in Elden Ring. It possesses the unique skill, Destined Death, allowing its user to plant the blade in the ground and summon a flurry of blade assaults upon their foes.
The scaling stats for Maliketh’s Black Blade are:
Strength: 34 (C)
Dexterity: 12 (E)
Faith: 20 (D)
Location: To obtain this blade, you must acquire the consumable item Remembrance of the Black Blade by defeating Maliketh, the Black Blade. Afterward, take this item to the Roundtable Hold and exchange it with Enia to receive Maliketh’s Black Blade.
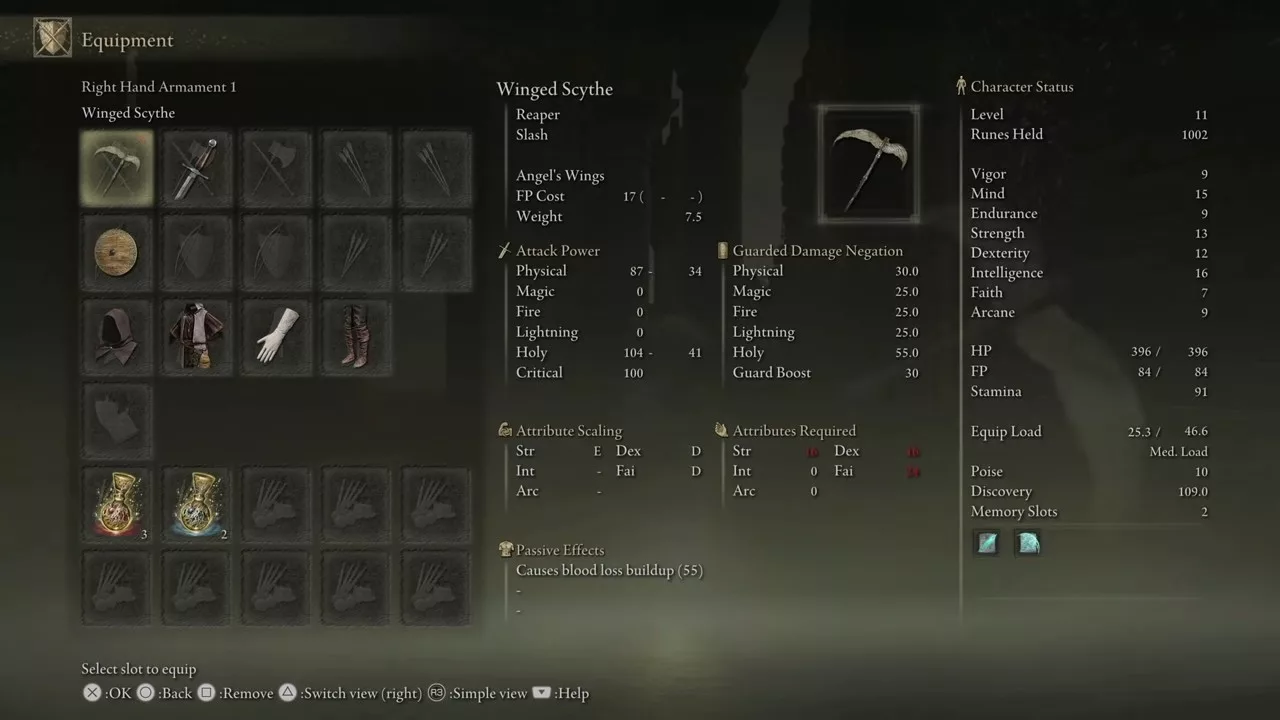
4) Winged Scythe
The Winged Scythe is perfect for players who enjoy Power Stancing weapons in Elden Ring, even though its strike speed may be on the slower side.
The unique skill, Angel’s Wings, may take some practice to use effectively, but once mastered, it can deal substantial damage to enemies while also building blood loss.
Here are the scaling stats for the Winged Scythe:
Strength: 16 (E)
Dexterity: 16 (D)
Faith: 24 (D)
Location: To find the Winged Scythe, venture to the Church of Pilgrimage site of Grace. After activating the site, head southwest towards the ruins of Tombsward Village. In those ruins, you’ll discover a tunnel entrance housing the Winged Scythe.
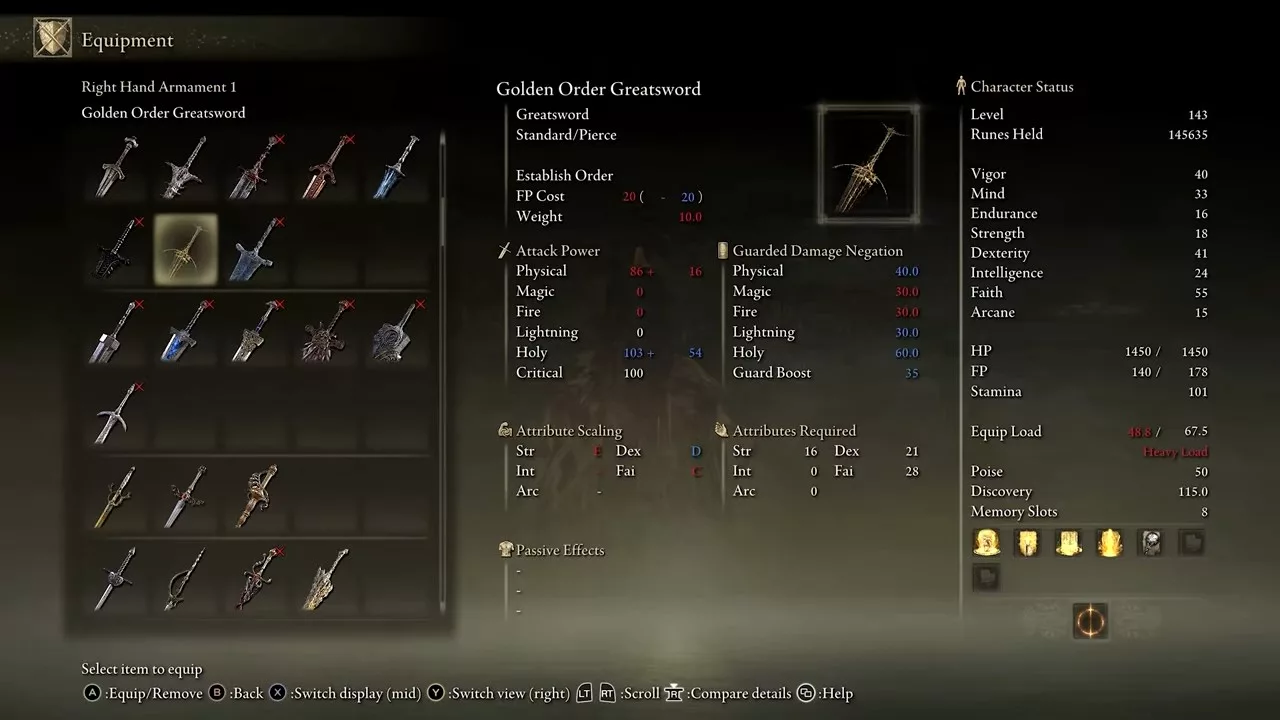
3) Golden Order Greatsword
This weapon belongs to the Greatsword category, and it is versatile enough to inflict substantial Holy damage to enemies at medium range. The unique skill, Establish Order, allows you to release a golden explosion around yourself while simultaneously launching a potent follow-up strike in the form of an arc of Holy light against foes. This sword also deals an additional 20% damage to undead enemies.
Here are the scaling stats for the Golden Order Greatsword:
Strength: 16 (E)
Dexterity: 21 (D)
Faith: 28 (C)
Location: To find the Golden Order Greatsword, you must defeat the Misbegotten Crusader situated at the Cave of the Forlorn.
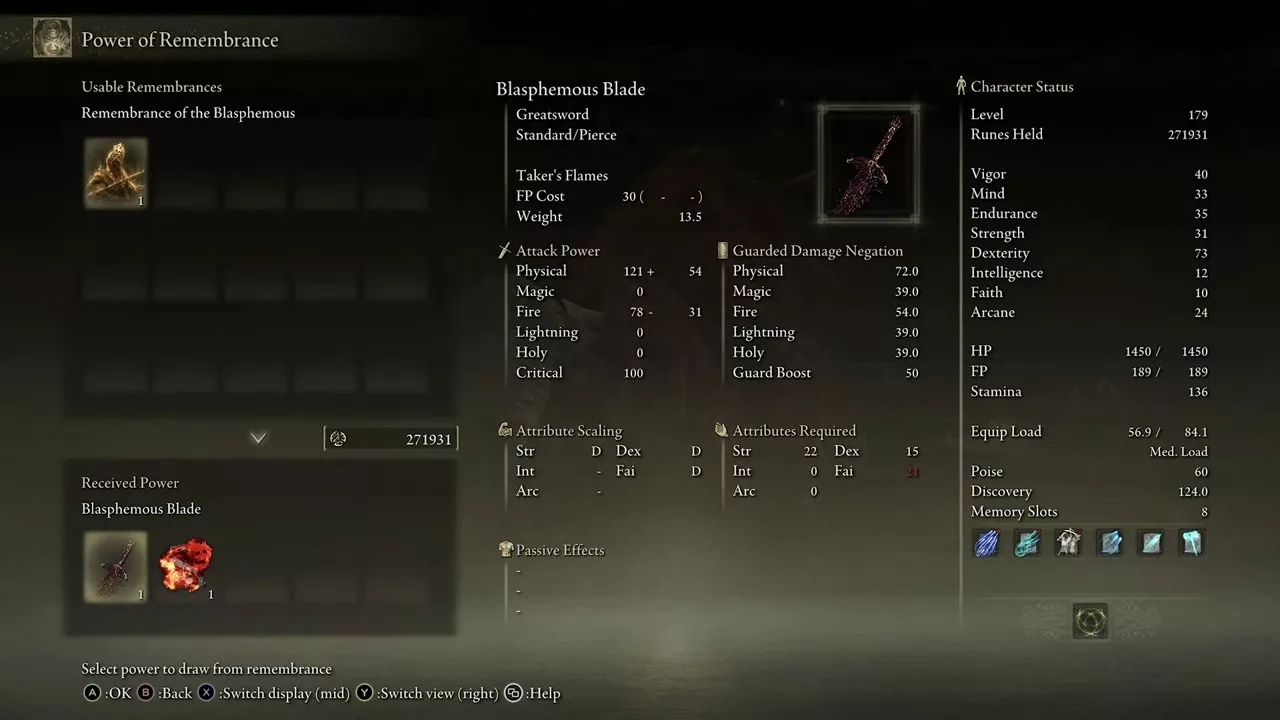
2) Blasphemous Blade
The Blasphemous Blade features a life-steal ability called Taker’s Flames, allowing you to restore health while dealing considerable damage to enemies. Taker’s Flames ignites foes and heals you for every successful attack against the afflicted enemies, providing incredible value.
Moreover, its default Ash of War is fixed, meaning it cannot be altered or enchanted with incantations. Despite this limitation, its Taker’s Flames ability makes it an excellent damage source.
The scaling stats for the Blasphemous Blade are detailed below:
Strength: 22 (D)
Dexterity: 15 (D)
Faith: 21 (D)
Location: To acquire the Blade, you need to obtain the Remembrance of the Blasphemous, a consumable item dropped by Rykard, Lord of Blasphemy. You then trade this item at the Roundtable Hold with Enia to receive the Blasphemous Blade in Elden Ring.
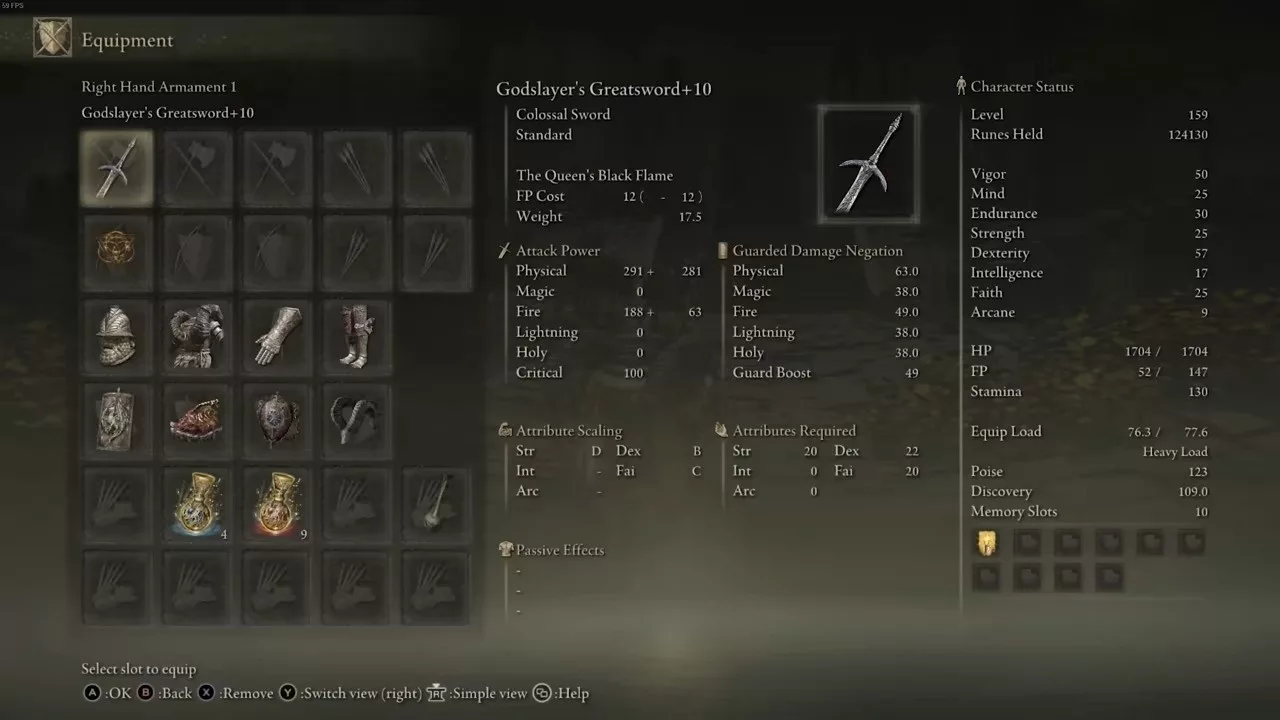
1) Godslayer’s Greatsword
The top Faith weapon on our list is the Godslayer’s Greatsword. As the best Colossal Sword for Faith builds, it offers impressive speed for its size, featuring a unique heavy attack: an uppercut.
Its Ash of War, The Queen’s Black Flame, inflicts enormous damage. Though the special attack takes time to charge, it can deliver formidable damage if timed correctly. You’ll want to carefully time your special moves to unleash their full power.
The Godslayer’s Greatsword serves well in both early and mid-game, scaling effectively with Faith and Dexterity. Its scaling stats include:
Strength: 20 (D)
Dexterity: 22 (D)
Faith: 20 (D)
Location: You can find the Godslayer’s Greatsword in the Divine Tower of Caelid. To obtain this weapon, you must defeat the boss residing in the tower, after which the weapon will be located in a chest within the boss room.
Even though it is regarded as one of the finest football games, FIFA 23 has been plagued by issues like frozen loading screens, which can severely disrupt the overall gaming experience.
This problem could stem from outdated drivers, corrupted game files, or not meeting the necessary system specifications. Regardless of the cause, we’ve compiled several quick solutions that may resolve your issues.
FIFA 23 Won’t Launch
If your game is stuck on the loading screen, give it a few minutes. If it still doesn’t progress, follow these steps:
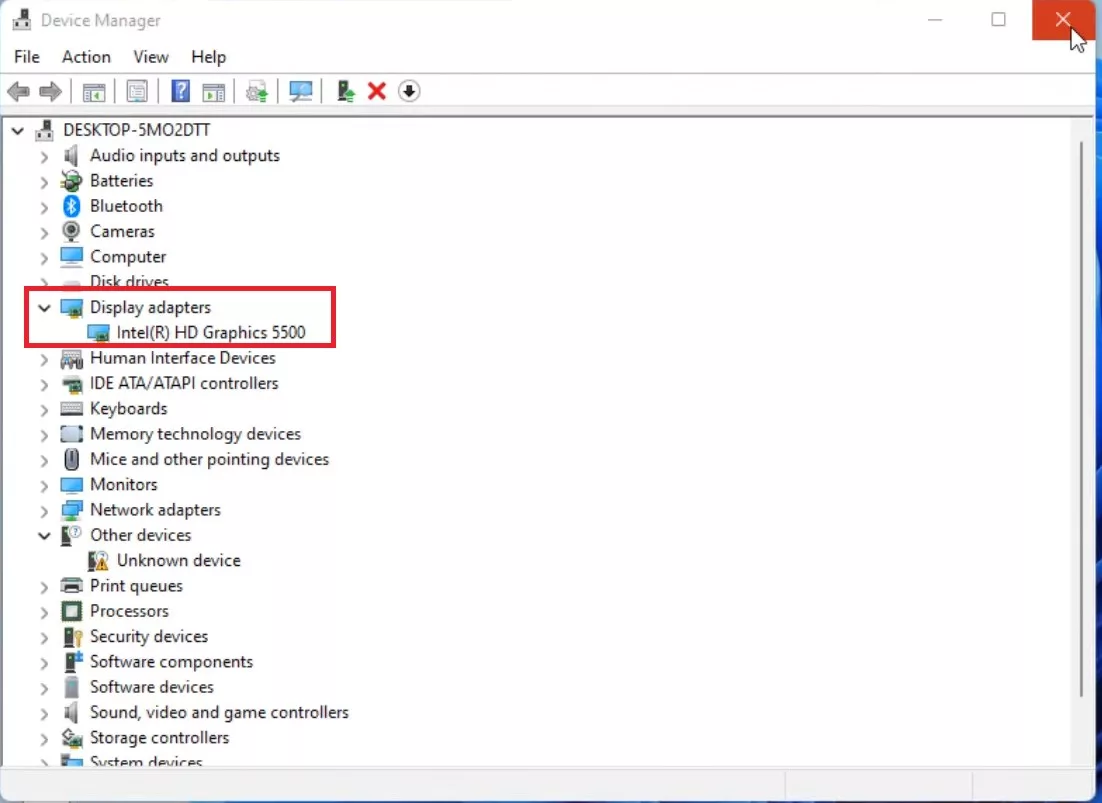
Launch Device Manager and expand the Display Adapters section.
Right-click on your graphics card and click on update it.
Reboot your device and try launching the game again.
If the issue persists, access the Task Manager to close unnecessary tasks and free up RAM. Ensure your system meets the game’s requirements. To check your specifications, search for Run in the Windows start menu, type dxdiag, and compare your specs with the requirements listed below for FIFA 23.
Minimum Requirements
Requires a 64-bit processor and operating system
OS: Windows 10 64-bit
Processor: Intel Core i5 6600k or AMD Ryzen 5 1600
Memory: 8 GB RAM
Graphics: NVIDIA GeForce GTX 1050 Ti or AMD Radeon RX 570
DirectX: Version 12
Recommended Requirements
Requires a 64-bit processor and operating system
OS: Windows 10 64-bit
Processor: Intel Core i7 6700 or AMD Ryzen 7 2700X
On Epic Games Launch your Epic Game Launcher and navigate to the library section. This page displays all the games you’ve installed from Epic Games. Locate FIFA 23, right-click on it, and select the Auto-Update option to initiate the update process.
On Steam If you’re playing FIFA 23 on Steam, open your Steam account, go to the library, and click on FIFA 23. Click on Update to begin the update.
Check Your Game Files
On Epic Games Open Epic Games Launcher and look for FIFA 23 in your Library. Click the three dots next to the game and select Verify to check the FIFA 23 game files from Epic Games.
On Steam Open Steam and locate the FIFA 23 game in your library. Right-click the game to access its properties. Go to Local Files and select Verify Integrity of Game Files.
Turn Off Overlays
If your game continues to freeze on the loading screen, you may need to disable overlays from applications like Discord or Nvidia. To do this, log into the Control Panel of the software, go to General, and turn off In-Game Overlays. Then, try launching the game again for smoother gameplay.
Reinstall EA AntiCheat
If none of the prior solutions have resolved the issue, try the following quick fix:
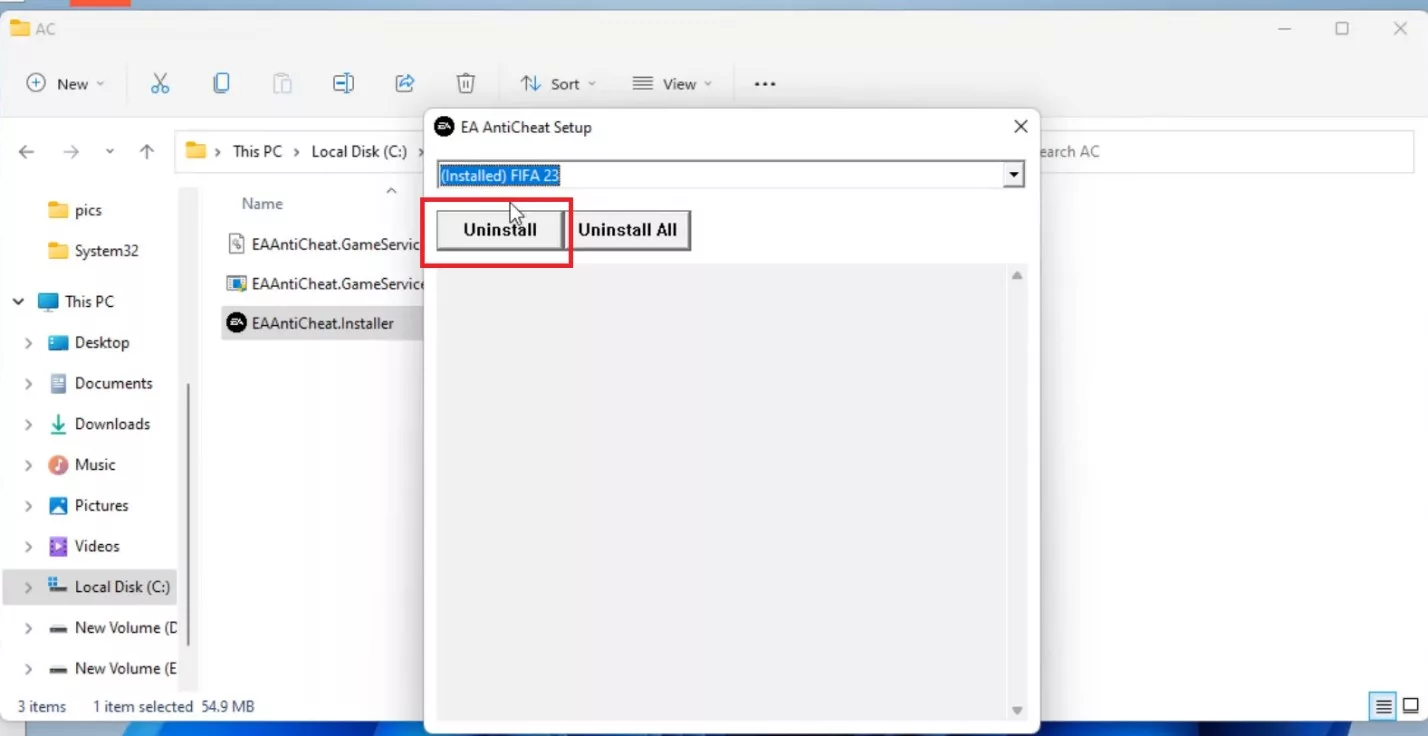
Open C Drive from This PC, then click on Program Files.
Navigate to the EA folder and then the AC folder to find the EAAntiCheatInstaller.
Double-click to open the file and select FIFA 23 from the dropdown list.
Click on the Uninstall option.
Visit the official EA AntiCheat website and download the EA AntiCheat installer.
After downloading, run the installer and reinstall FIFA 23.
Once the installation is complete, restart your device and launch the game again.
Adjusting the fifasetup File
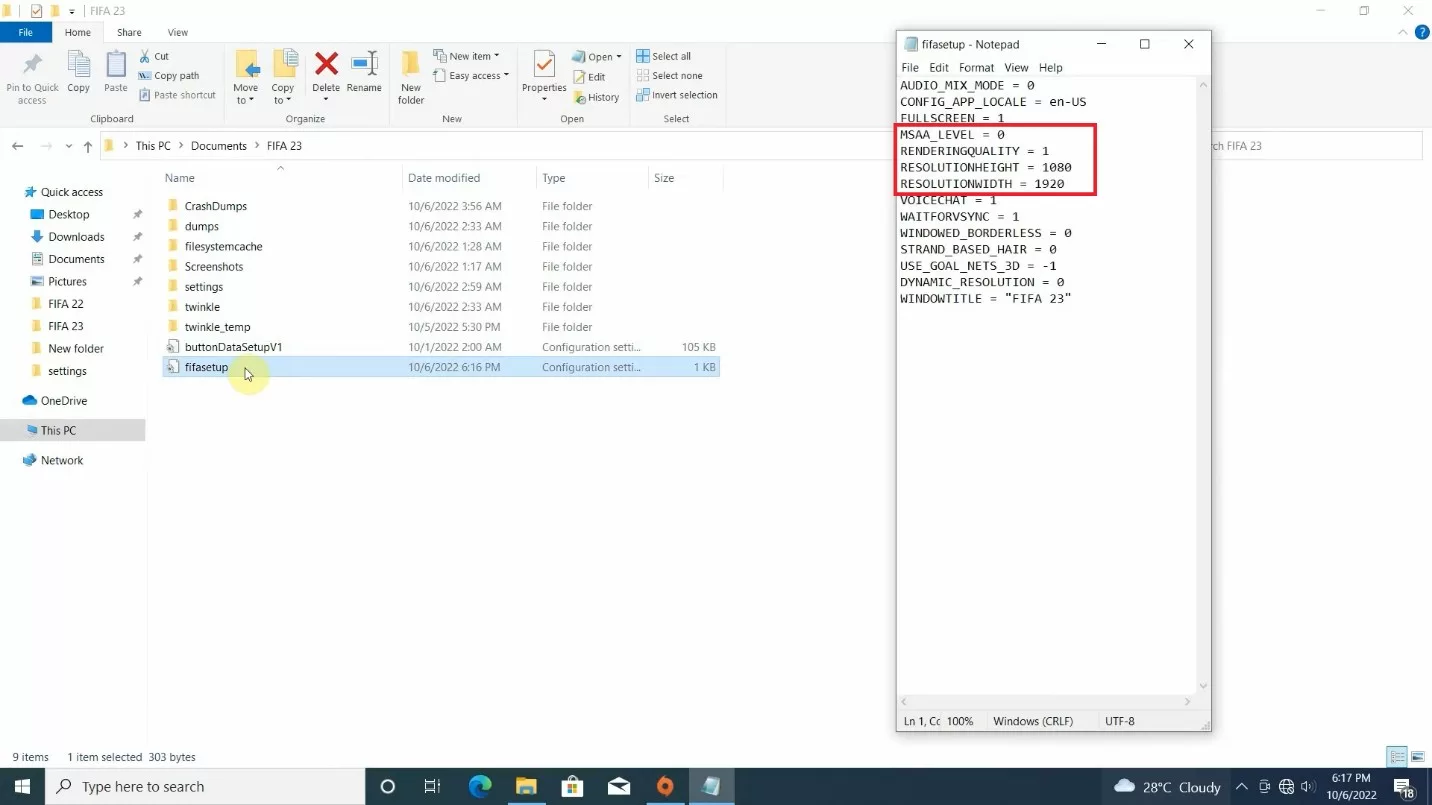
Navigate to the Documents folder and locate the FIFA 23 folder.
Open the fifasetup file and make the following edits to the text file:
MSAA_LEVEL = 0
RENDERINGQUALITY = 0
RESOLUTIONHEIGHT = 1280
RESOLUTIONWIDTH = 720
Save your changes and exit the file.
Launch the game again.
Running EA as Administrator
For the final steps, attempt to run the game as an administrator.
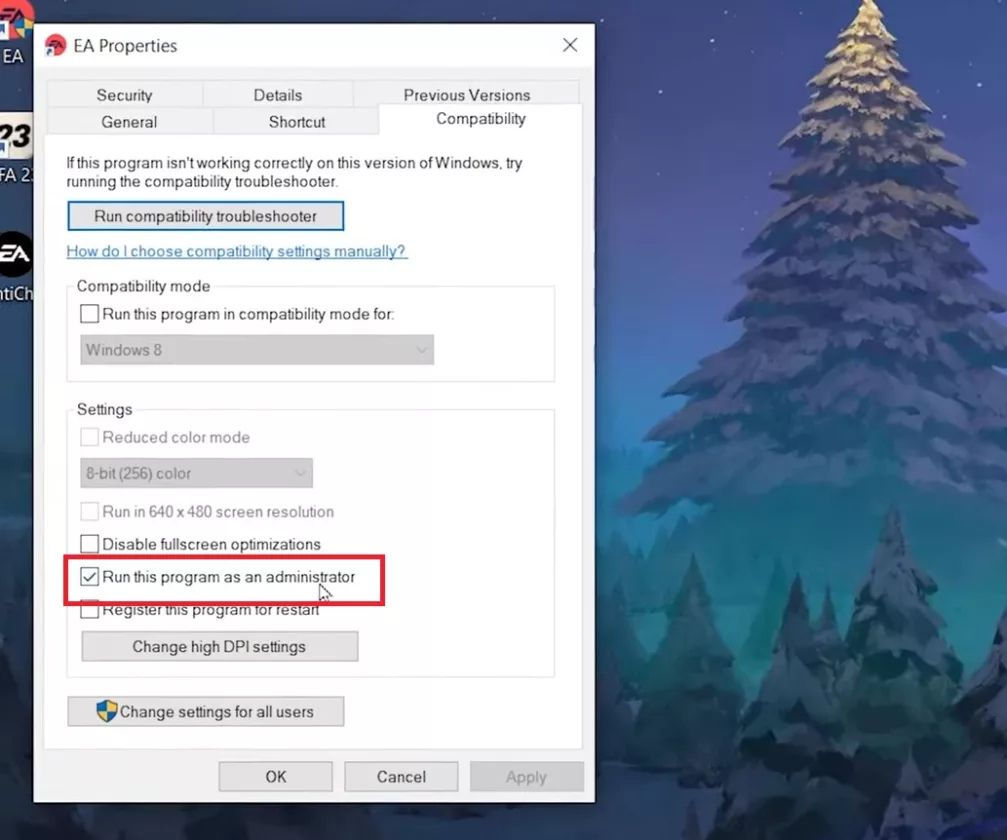
Right-click the EA desktop shortcut, then select Properties.
Go to the Compatibility tab and check the Run this program as an administrator option.
Click Apply and then OK.
Launch the game.
Disable or Remove Antivirus Software
Many players have mentioned that antivirus software can interfere with FIFA 23’s performance; you can either deactivate your antivirus temporarily or add FIFA as an exception in its settings.
Update FIFA 23’s Certificates
If none of the previous solutions have resolved the issue of FIFA 23 getting stuck on the loading screen, it may be necessary to update the game’s certificates. Follow these steps:
Navigate to the FIFA 23 directory from This PC.
Open the _Installer folder, click on Cleanup, and then go back to the previous directory.
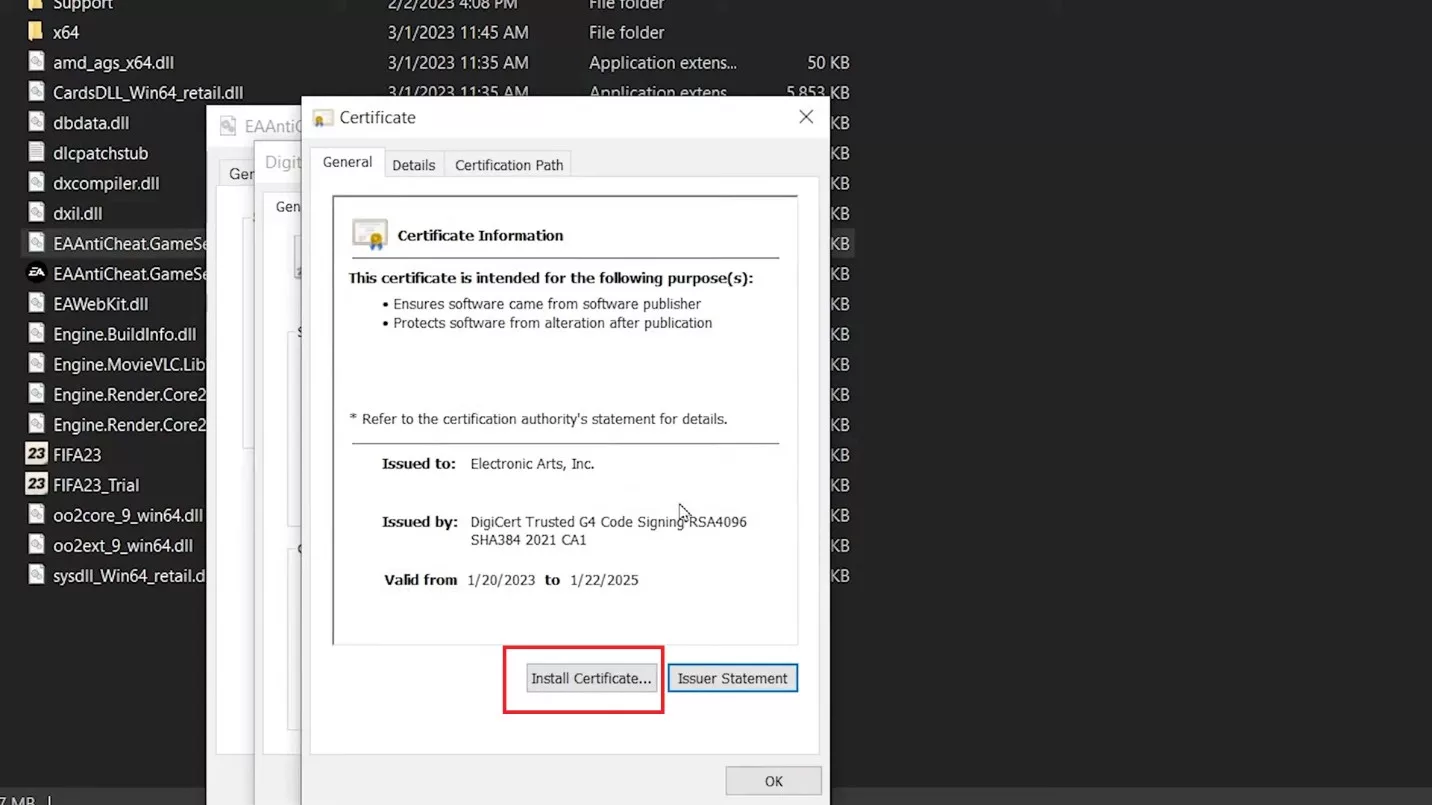
Right-click on EAAntiCheat.GameServiceLauncher.dll and select Properties.
Access the Digital Signatures tab and click on Details.
Choose the View Certificate option, then click on Install Certificate.
Select a storage location, click Next, click Next twice, and then finish the installation.
Repeat the process for EAAntiCheat.GameServiceLauncher before running the game again.
Whether you’re a veteran or just starting out in Black Ops 3, assembling the right loadouts is crucial for improving your chances of survival in the heat of battle. Yet, figuring out the best weapon, attachments, and perks can be quite a challenge.
If you’re feeling overwhelmed in the loadout menu, you’ve found the right resource. This guide will walk you through creating top-tier loadouts for both single and multiplayer modes in BO3.
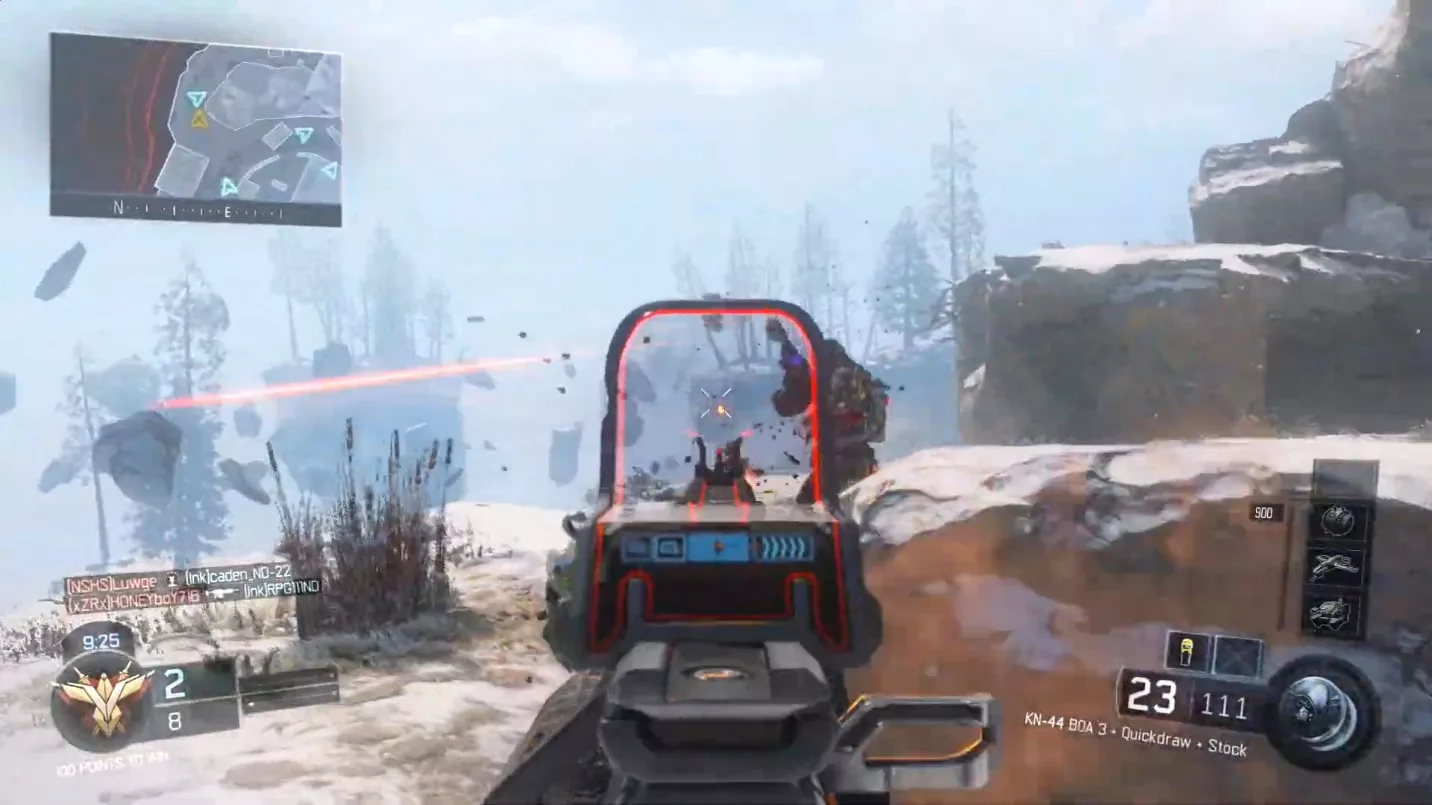
5. KN-44 – Assault Rifle Setup
Primary Weapon
Weapon: KN-44 Optic: BOA 3 Attachment: Stock and Quickdraw
Secondary Weapon
N/A
Lethal
N/A
Tactical
Concussion
Perks
Sixth Sense, Ghost, Hard Wired, Blast Suppressor
This setup is straightforward with the KN-44, which is one of the top weapons in the game due to its three-hit kill potential, making it effective at close range, similar to an SMG. The Stock attachment allows for continuous firing while on the move, and Quickdraw enables fast target acquisition. You could swap Quickdraw for High Caliber to take down opponents even quicker.
The Ghost and Blast Suppressor perks help you remain undetected by UAVs while you stay mobile. This loadout suits aggressive players who prefer a stealthy approach.
The key concept with this configuration is to keep your distance from opponents instead of relying on an SMG; this strategy grants you more time to aim down sights instead of sprinting. Additionally, Hard Wired protects you from being killed by shock charges or trip mines.
4. 205 Brecci – Simple Kills
Primary Weapon
Weapon: 205 Brecci Optic: N/A Attachment: Fast Mags and Extended Mags
Secondary Weapon
N/A
Lethal
N/A
Tactical
Concussion (x2)
Perks
Sixth Sense, Ghost, Hard Wired, Gung-Ho
The Brecci can be quite aggravating to face due to its high kill rate, making this loadout invaluable in hectic situations. This weapon’s design eliminates the need to aim down sights, and the Gung-Ho perk gets you ready to fire quickly as you move.
The rationale behind carrying two concussions is that in mid-range skirmishes, the Brecci experiences a damage fall-off, which diminishes its effectiveness at longer distances. If you prefer Flashbangs, feel free to swap them in for the Concussions.
3. Locus – Search and Destroy
Primary Weapon
Weapon: Locus Optic: Thermal Attachment: N/A
Secondary Weapon
Weapon: VMP Optic: BOA 3 Attachment: N/A
Lethal
N/A
Tactical
N/A
Perks
Sixth Sense, Hard Wired, Dead Silence, Blast Suppressor
The thermal scope enhances your sniper capabilities, allowing you to spot enemies more easily, though it lacks aim assist. The Sixth Sense perk alerts you to nearby enemies, while Dead Silence and Blast Suppressor ensure you can move undetected.
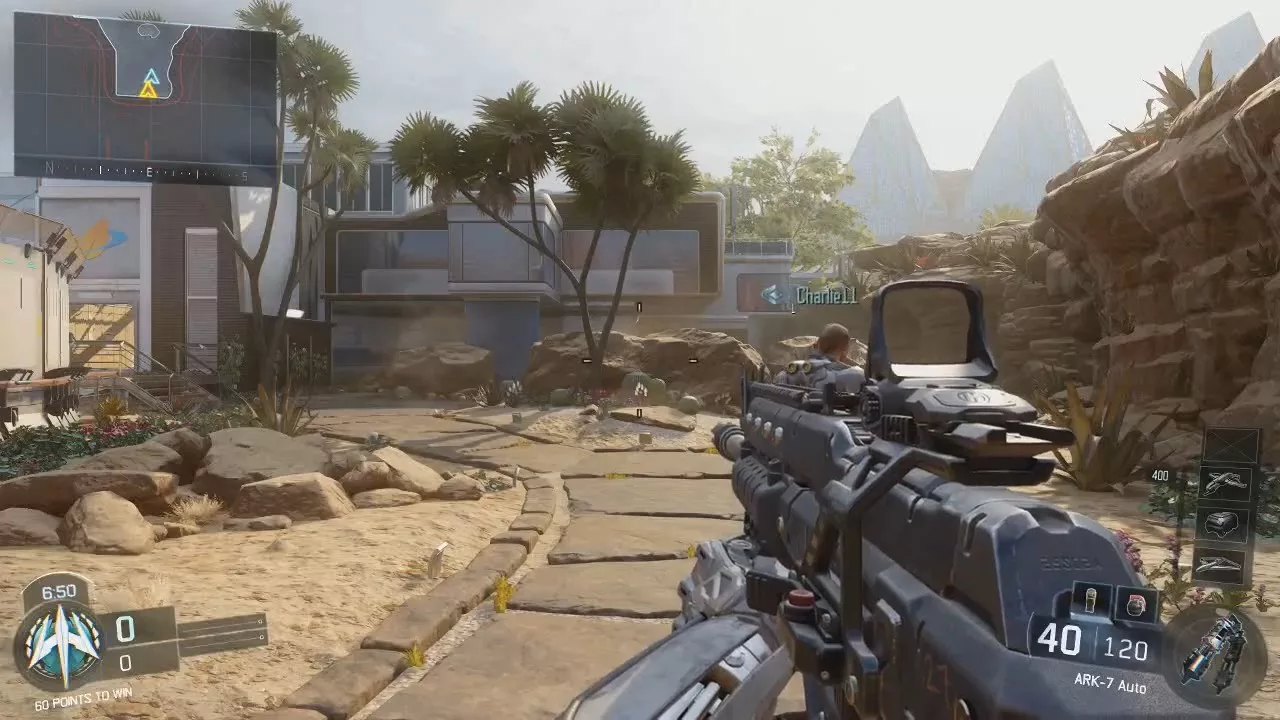
2. ARK-7 – The Flanking Ninja
Primary Weapon
Weapon: ARK-7 Optic: N/A Attachment: Suppressor, Quickdraw, and Stock
Secondary Weapon
N/A
Lethal
N/A
Tactical
Concussion (x2)
Perks
Afterburn, Fast Hands, Awareness
This loadout is tailor-made for players who love to dart around the map, flank opponents, and disrupt spawn points to rack up kills. The ARK-7 is a strong choice early on, offering manageable recoil and a solid fire rate.
Utilizing Quickdraw and Fast Hands allows for quick weapon raises, giving you an edge in gunfights. The Suppressor and Stock help maximize your kill opportunities by letting you stealthily flank your adversaries.
Finally, Afterburner is an excellent perk since you’ll be constantly on the move. It replenishes your thruster pack quickly, helping you stay agile and secure early kills for your team.
1. Kuda – Newcomer’s Loadout
Primary Weapon
Weapon: Kuda Optic: Reflex Attachment: Quickdraw and Grip
Secondary Weapon
N/A
Lethal
Frag
Tactical
Concussion (x2)
Perks
Sixth Sense, Fast Hands, Blast Suppressor
If you’re new to Black Ops 3 and in search of a beginner loadout, this configuration is ideal for you! The Kuda is an impressive SMG that excels in close-quarters combat. The Grip will help you tackle Assault Rifles in medium-range encounters, while Quickdraw enhances your chances of winning close-range duels. Additionally, the Fast Hands perk provides increased weapon readiness.
For perks, the Blast Suppressor keeps you safe from nearby grenades, and the Sixth Sense alerts you if enemies are close, allowing you to quickly respond and secure easy kills.
The design behind this loadout is that it consists of early-unlocked equipment, giving you a significant advantage.
In Elden Ring, one of the rarest and most sought-after items is the Dragon Heart, which allows you to wield the powers of a melee dragon. These items aren’t bought or looted but earned by slaying dragons throughout the game. There are over 23 Dragon Hearts available, but only 20 are required to unlock every Dragon Communion Spell.
To collect Dragon Hearts, you must locate and defeat specific dragon bosses. Each slain dragon drops one Dragon Heart, and there are 19 locations where you can gather them.
Limgrave
Head south from the Limgrave Tunnel Site of Grace and travel east of the Church of Elleh to find the Flying Dragon Agheel. This is the first and easiest dragon you’ll come across. Be prepared for a tough fight—level 25 or higher is recommended.
Caelid
In the Caelid region, the second dragon is located between the Cathedral of Dragon Communion Site of Grace and the Caelid Highway South. Continue southeast from Gael Tunnel to find Magma Wyrm near the borders of Caelid and Limgrave.
In another part of Caelid, travel to the Sellia Hideaway Site of Grace and head northwest to encounter Elder Dragon Greyol, which grants you five Dragon Hearts. You can also find Flying Dragon Greyll on the Farum Greatbridge in Caelid.
Liurnia
In Liurnia, head west from the Cathedral of Manus Celes Site of Grace to the Village of the Albinaurics. Defeating Glintstone Dragon Adula here rewards you with three Dragon Hearts.
Altus Plateau
To reach Magma Wyrm Makar, travel west of the Ruin-Strewn Precipice Overlook Site of Grace, which borders the Liurnia and Altus Plateau regions.
Get ready to face one of the key challenges in Elden Ring!
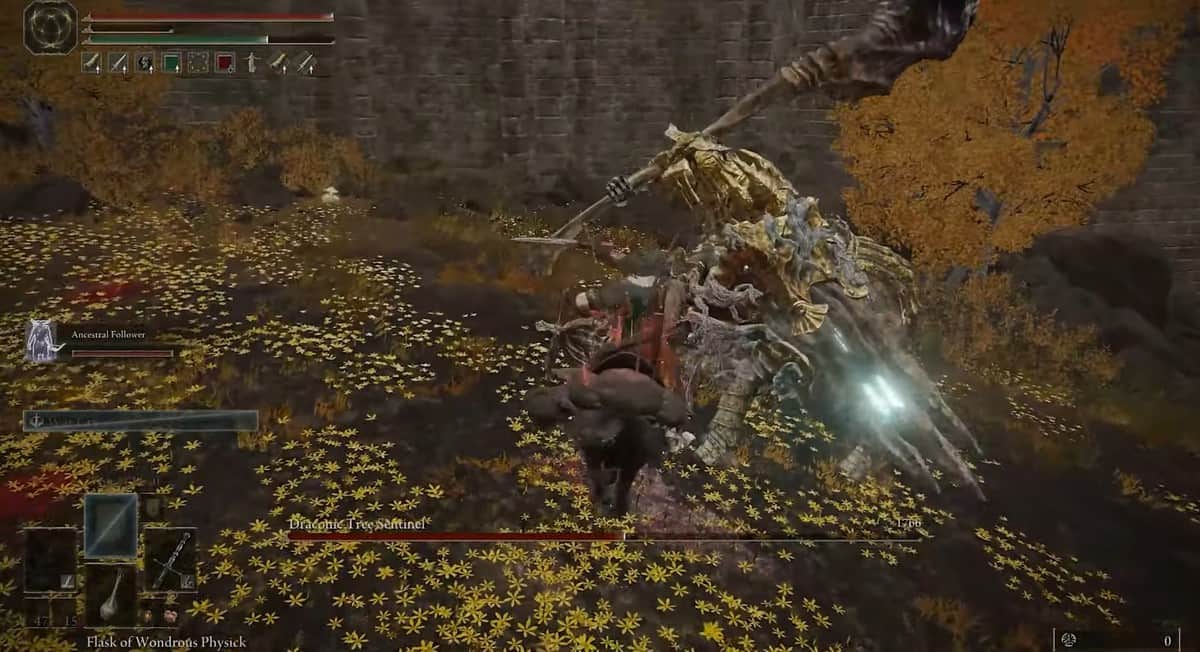
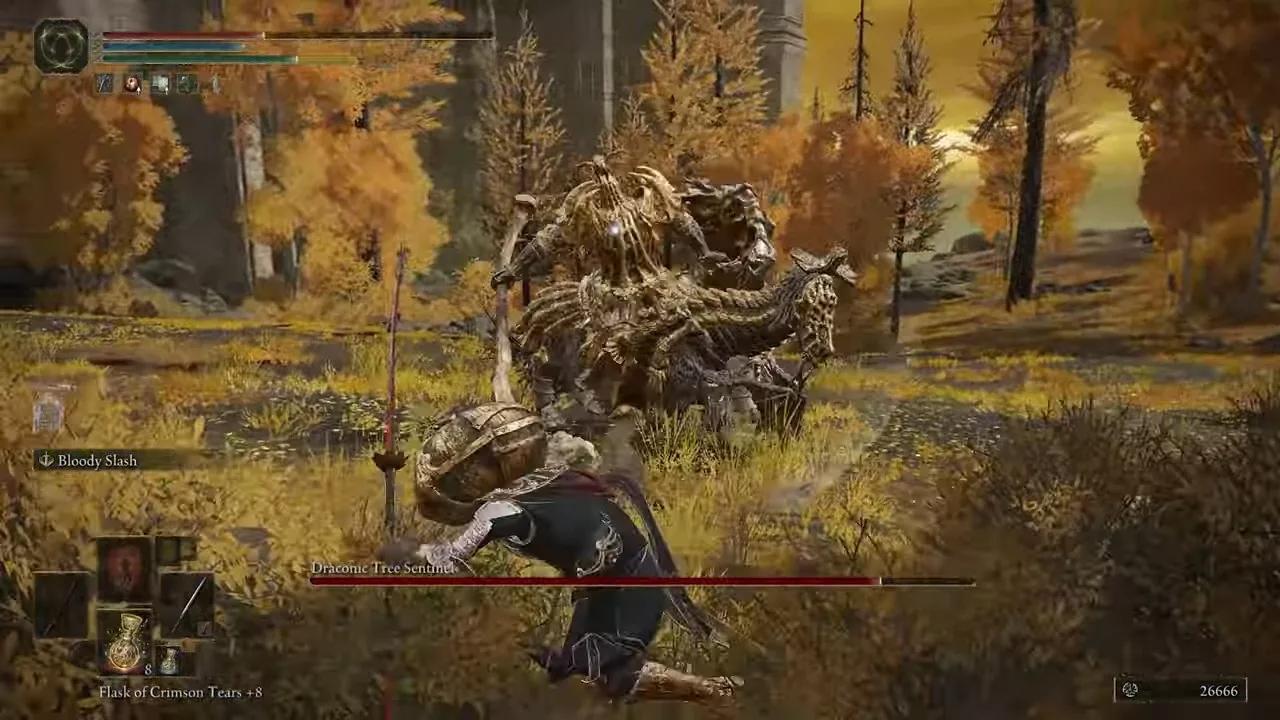
In Elden Ring, optional bosses abound, but the Draconic Tree Sentinel stands out. He blocks the entrance to the Royal Capital, and you can’t move forward without defeating him or finding another way around.
This guide covers everything about the Draconic Tree Sentinel, including his location, strategies to defeat him, and some clever tactics to secure an easy win.
Elden Ring Draconic Tree Sentinel Location
You’ll find this boss in the Altus Plateau, guarding the direct route to Lyndell Royal Capital. While there are other paths, they can be time-consuming.
To reach him, head east from the Hermit’s Shack Grace in the Capital Outskirts. Follow the round wall of the city until you arrive at the bridge guarded by the Draconic Tree Sentinel.
Tip: Since this boss roams freely without a specific arena, other enemies might interfere. Eliminate any nearby foes first to focus on the Sentinel.
How to Defeat the Draconic Tree Sentinel
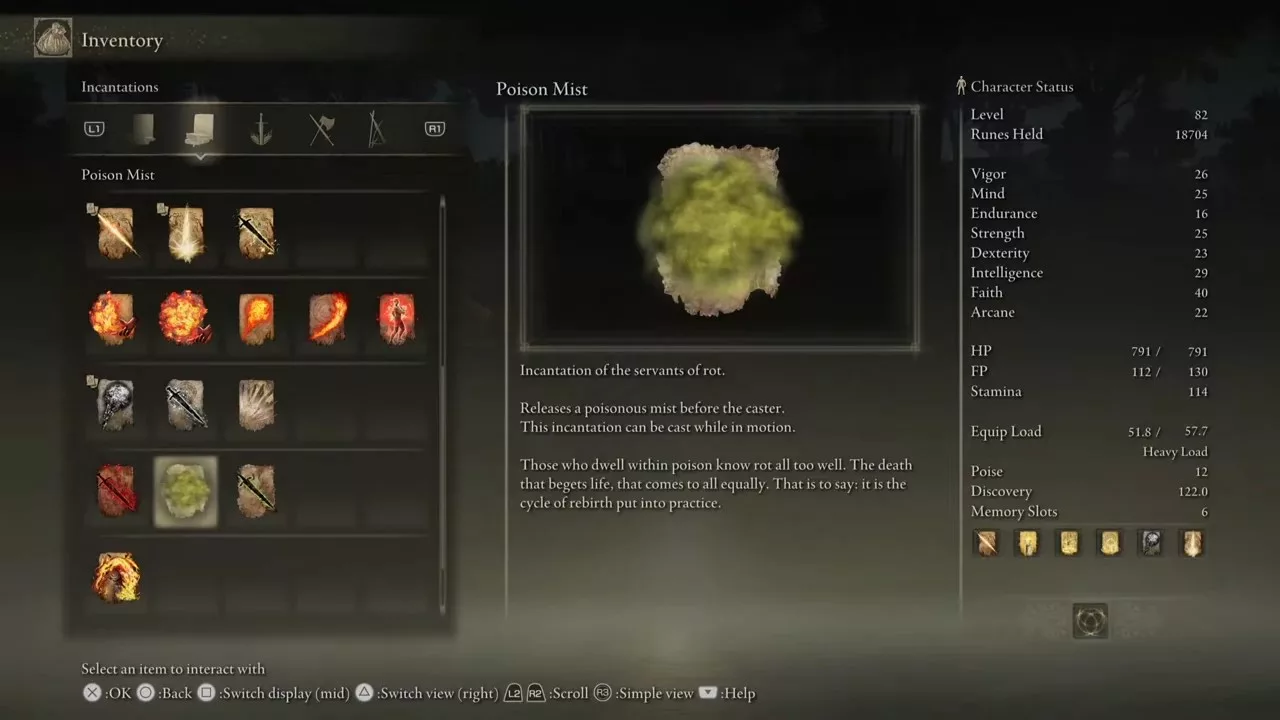
The Draconic Tree Sentinel is especially vulnerable to Poison and Bleed attacks. A single cast of the Poison Mist spell can deal over 1000 damage to him.
If you’re playing a melee character, agility is key. You can’t withstand his attacks, so ride Torrent to dodge or absorb damage.
Using a weapon with good range helps a lot. For Colossal Sword users, a crouch attack can be effective. Spears offer good range as well. If you wield a straight sword or Katana, capitalize on openings during his attack patterns.
You can also summon help by using the Furlcalling Finger Remedy. If you’re struggling, work on Millicent’s questline. After giving her the Prosthesis Arm and defeating the Windmill Village boss, you can summon her for assistance.
Don’t hesitate to use summons—they can provide crucial breathing room. Ranged summons, especially archers, work well here.
When the Sentinel’s health drops below 50%, he’ll empower himself with dragon magic, unleashing ferocious lightning attacks. Use quick spells and maintain your distance to stay safe.
Defeating the Draconic Tree Sentinel rewards you with 50,000 Runes, Dragon Greatclaw, and Dragonclaw Shield.
Draconic Tree Sentinel Attacks and Counters
The Sentinel wields a massive hammer that deals significant damage. If you’re positioned on the side with the hammer, prepare for swift attacks with little windup.
He can charge at you from a distance and slam his weapon down, causing area damage. His horse can stomp on you or breathe fireballs, which add an extra layer of challenge.
Tip: Aim to fight him when your level is around 20.
In addition to hammer strikes, the Draconic Tree Sentinel has shield attacks that can knock you back. He can also slam his shield to deliver front and back strikes.
In his second phase, he’ll start using lightning attacks, making the fight even more unpredictable.
He can imbue his shield with lightning and either summon random lightning strikes or drop targeted bolts on you. Keep an eye on the ground for the first attack and master your timing for the second to dodge effectively.
For hammer attacks, he may slam down to create an area damage effect or swing his hammer to send out a wave of lightning. This attack tracks well, so be ready to run when you see him charge up.
How to Cheese the Draconic Tree Sentinel
To cheese the Draconic Tree Sentinel, start by acquiring the Poison Mist Incantation. Travel to Weeping Peninsula and enter Castle Morne Rampart. Defeat a Scarab here to get the Poison Mist.
Next, buy a Finger Seal for casting the mist. Sneak behind the Sentinel by moving through the trees and bushes so he can’t see you, then cast the Poison Mist.
Once cast, the boss won’t detect your location, allowing his health to drop. If you notice the health decrease slowing, recast the spell.
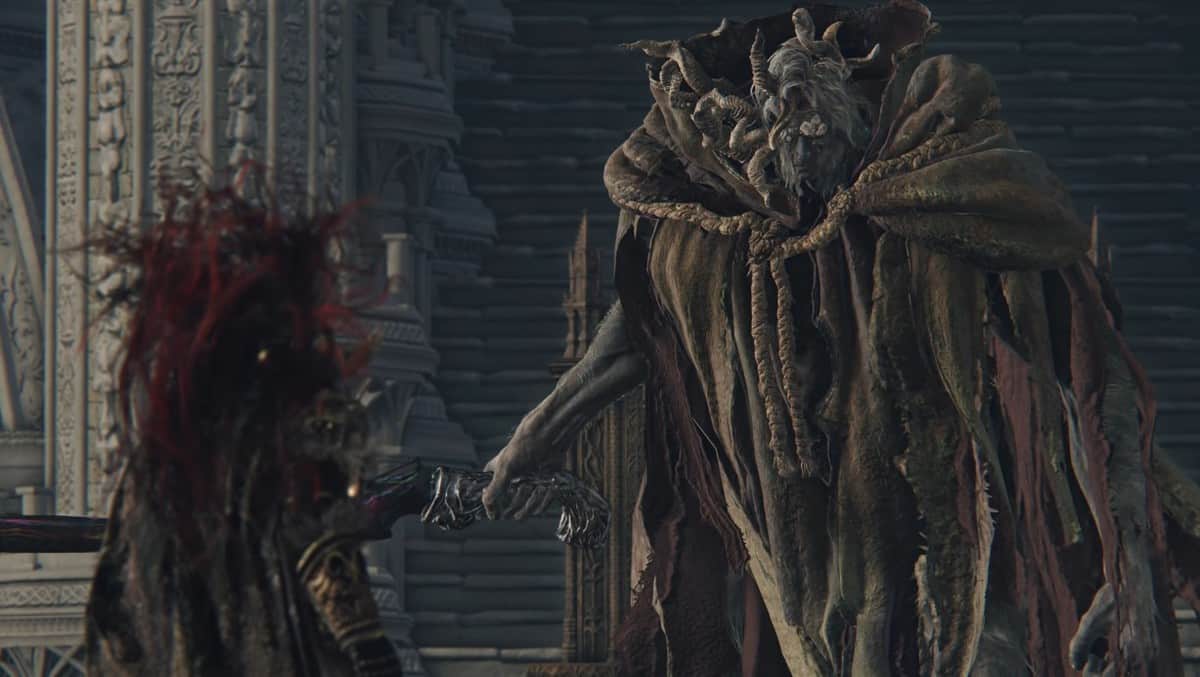
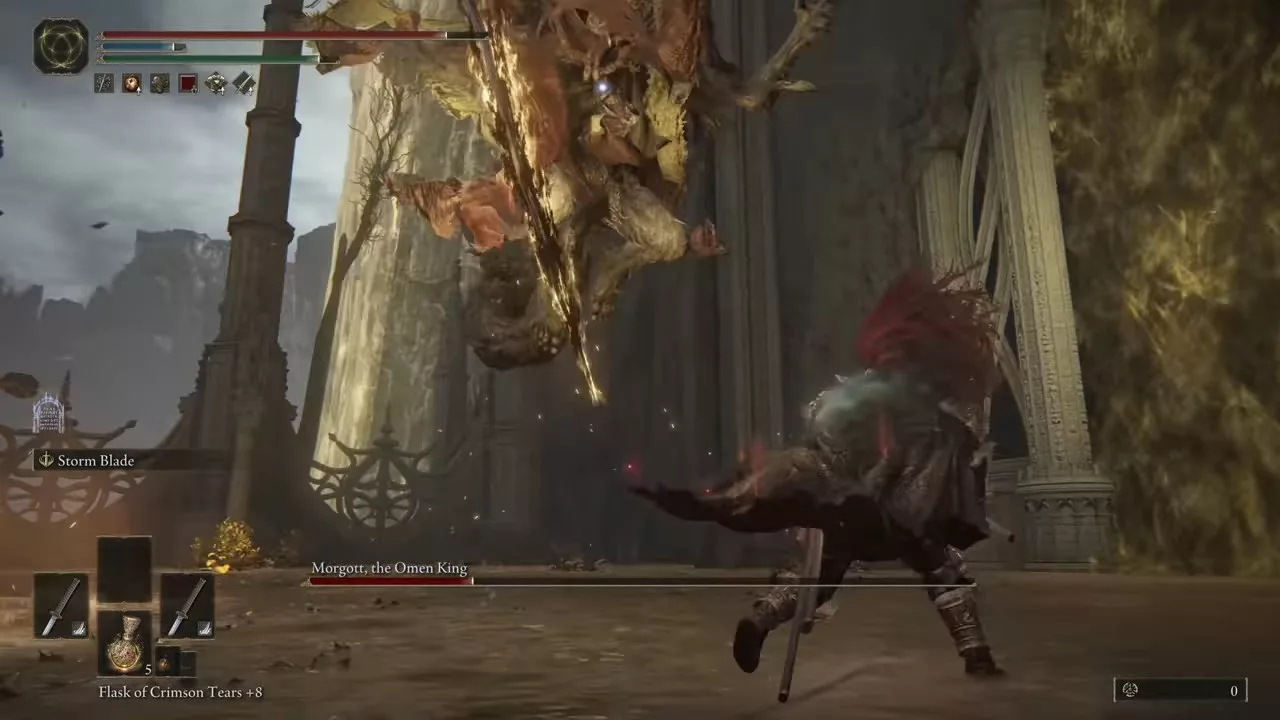
Morgott, the Omen Kin, is one of the demigods in Elden Ring and a required encounter. Players must face him to advance in the game. Morgott is among the most challenging bosses in the mid-game section and demands significant effort to defeat.
Located in Leyndell, players should be well-leveled and equipped with strong weapons. Besides the conventional strategies, there are ways to “cheese” him.
Elden Ring Morgott, the Omen King Location
This demigod can be found in Leyndell, Royal Capital. Players should head east toward the balcony after defeating the First Elden Lord, Godfrey. There, a branch will lead them to the second level of the room in Elden Ring.
Next, players should make their way to the Queen’s Bedchamber site of grace across the bridge, which is the closest grace point to the boss. From there, head south to find Morgott’s chamber.
The recommended level to challenge Morgott is 80 or higher, with weapons upgraded to +15.
Your battle against Morgott, the Omen King, will occur in two phases. Below, we outline both stages and strategies to defeat him.
Boss Fight – Phase 1
Call Melina before the fight begins, as her assistance can be invaluable; she can absorb a significant amount of damage. Additionally, players can summon spirit ashes for help.
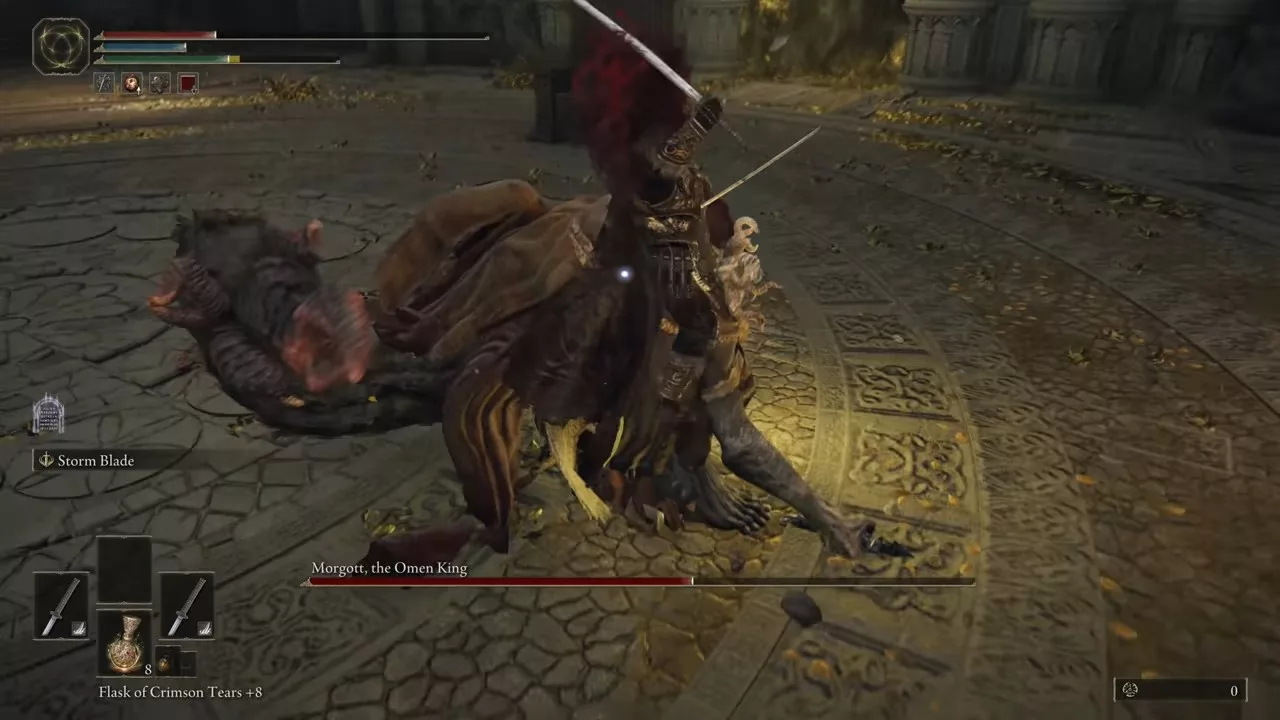
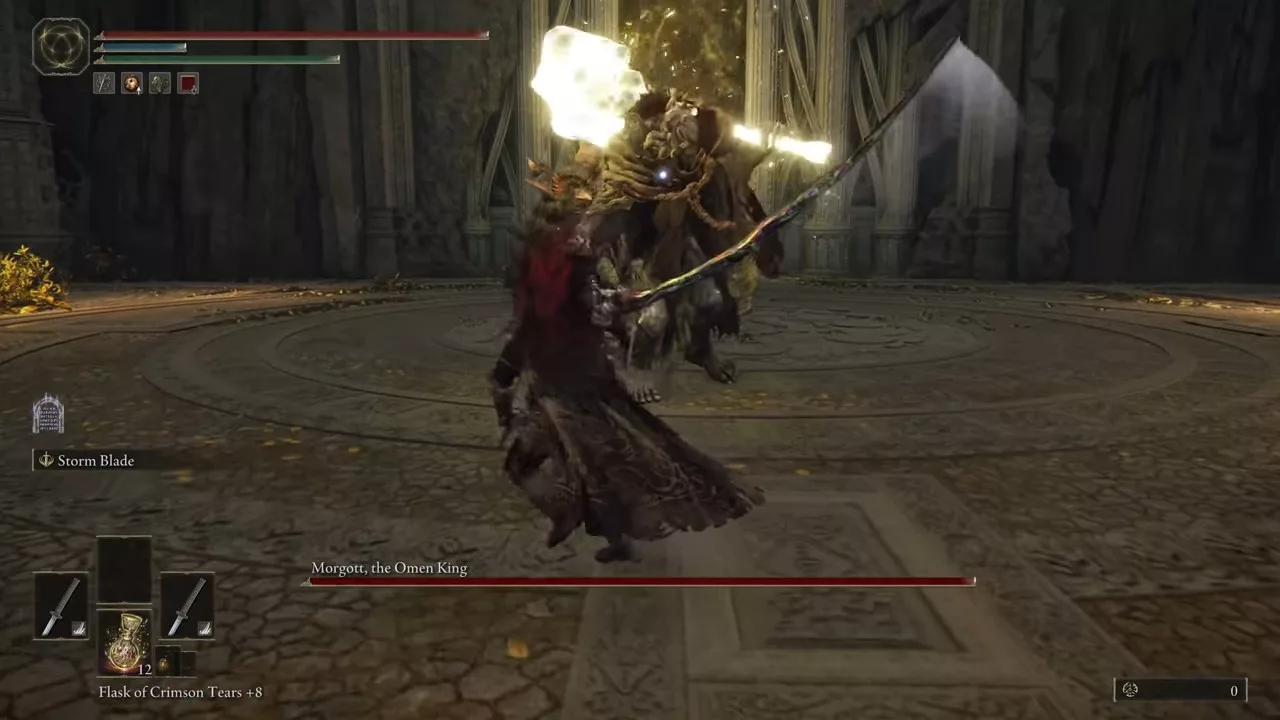
The fight starts when Morgott transforms his weapon into a long lightning blade. From the beginning, maintain distance. While Morgott focuses on Melina, take the opportunity to attack from behind.
Avoid staying too close for too long, and maximize damage before retreating. Use your Ashes of War abilities from a distance, such as Storm Blade, to deal effective range damage. If executed well, you should reduce Morgott’s health by 50% during this phase.
Boss Fight – Phase 2
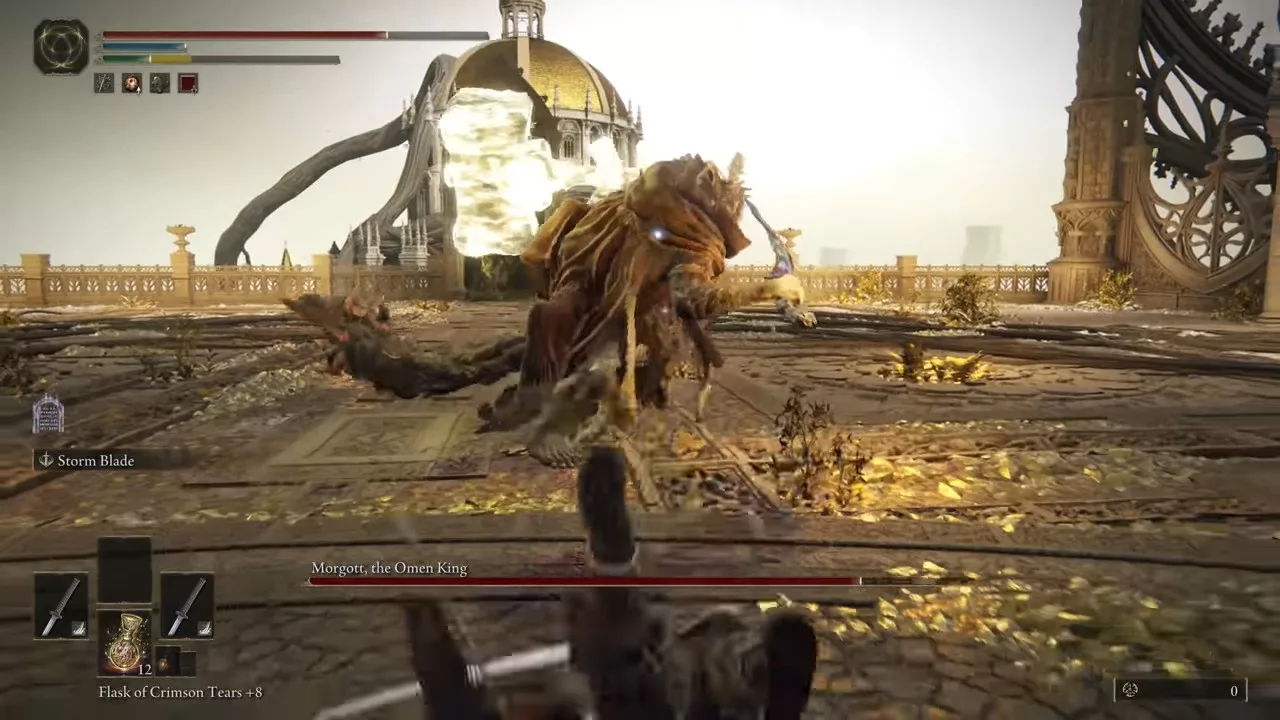
The second phase begins when Morgott crouches, preparing to unleash a massive AOE thrust that can deal significant damage. This attack will ignite the arena, but it causes minimal damage, so maintain your distance to avoid the thrust.
By this point, Melina may be defeated, and you should summon an Ash of War for backup; Lone Wolf Ashes are recommended.
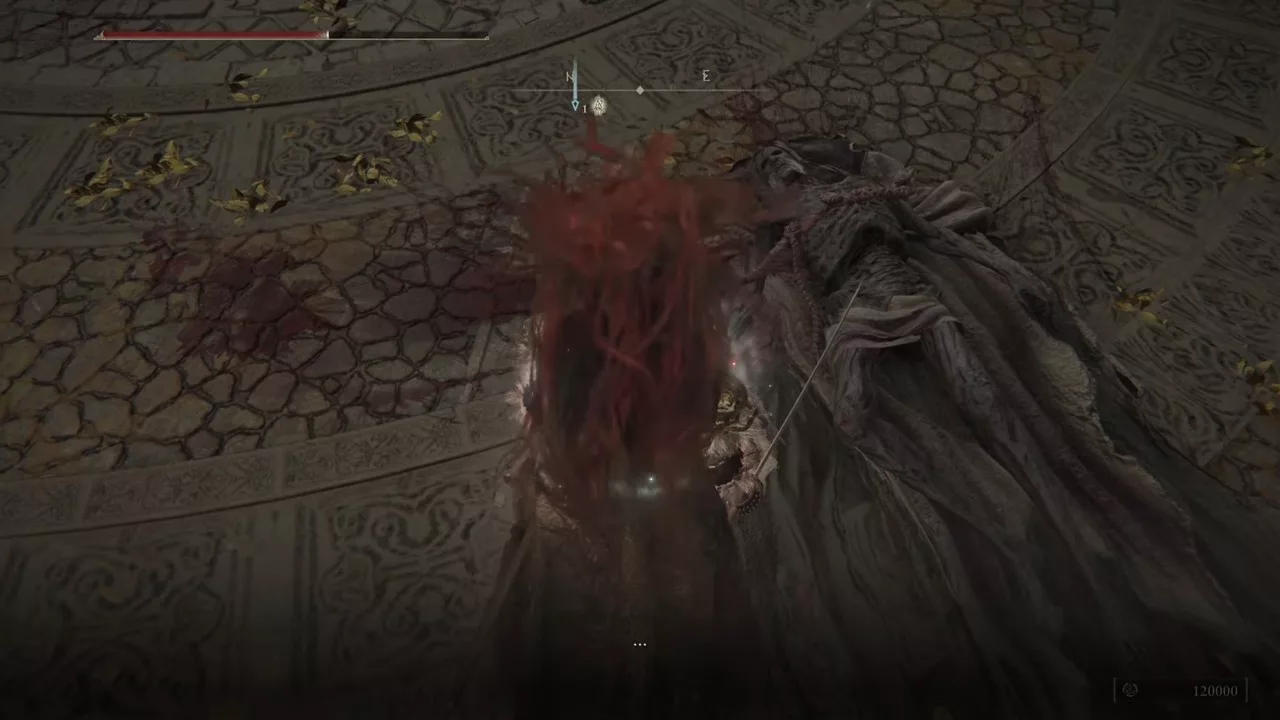
The strategy remains similar to the first phase: dodge and attack from behind Morgott. Defeating him will unlock the Shardbearer Morgott trophy.
Upon victory, players will receive 120,000 Runes, Morgott’s Great Rune, and the Omen King’s Remembrance.
Attacks and Counters
Holy Blade, Rain, and Bloody Thrust are among the deadliest attacks Morgott employs, which require precise dodging to avoid substantial damage.
In his Holy Spear Throw attack, Morgott will launch a massive Holy Spear at you. Even at a distance, it can hit hard, so rolling forward is advised to evade it.
He may also charge at you with a Holy Spear. This charge can be avoided by rolling to the side. As the fight intensifies, Morgott will utilize a Holy Hammer to slam down; sidestep or roll to evade this attack. He can also perform a combo, which is dodged by rolling away as he dashes towards you.
Morgott is particularly vulnerable to slashing attacks, so we recommend a build focused on slashing weapons for maximum damage.
Morgott can throw three Holy Daggers that you can dodge by rolling forward. He may also execute the Holy Blade Rain attack, where you should look up and roll away from where the swords will land.
When he drops below 50% health, Morgott will unleash a powerful burst attack that can be avoided by stepping back. He will also perform the Bloody Slice, rushing at players to slash; rolling towards him will help you dodge it.
Finally, Morgott’s Bloody Thrust attack is a charging thrust that can be evaded by rolling towards him.
How to Cheese Morgott, the Omen King?
If you’re looking to bypass the lengthy two-phase fight with Morgott, a cheese strategy can save you time. To defeat Morgott quickly, utilize Poison Mist, which can be found in a forest southeast of the Castle Morne Rampart Site of Grace. Before entering the boss arena, use Margit’s Shackle three times at the fog door to immobilize him.
Once inside, apply Poison Mist twice and wait for the damage to accumulate. Morgott will shake as his health diminishes, leading to a swift defeat.
Stealth plays a crucial role in Sniper Elite 5, making the use of silenced weapons both essential and deadly. You can come across these weapons in various missions, but they cannot be unlocked for future use and are limited to the mission in which you find them. Moreover, you can attach a suppressor to your firearms to achieve silence.
For even greater stealth, consider utilizing subsonic ammunition. These special rounds generate less noise compared to standard bullets.
How To Acquire Silenced Weapons?
In the game, locate silenced weapons, which can only be discovered and are categorized as “Found Weapons” in Sniper Elite 5.
Typically, these can be found near deceased enemies or secured in guarded areas. The armory and various sniper hideouts scattered throughout the maps are prime locations to search for silenced weapons.
Keep in mind that you cannot add these silenced weapons to your inventory, nor can you carry them into subsequent missions. They are only available for the duration of the current mission.
Once you run out of ammunition, these weapons will not reload, rendering them useless. Should you need to clear your hands, simply abandon the silenced weapon by either switching to another or cycling through your available weapons.
The primary benefit of silenced weapons is their early accessibility in the game. As you progress, you will also find silencers and suppressors to upgrade your arsenal.
How To Unlock a Silencer/Suppressor?
Throughout the game, you can unlock various attachments such as magazines, barrels, and suppressors. Specifically, you can acquire a silencer using the workbench located in the Chateau basement during the second mission, Occupied Residence.
During this mission, go down the stairs to your right within the Chateau. Follow the path until you reach the entrance to the armory and eliminate the two guards standing watch. Once inside, you’ll find the workbench positioned prominently in the center.
Utilize the workbench to unlock the suppressor along with other enhancements.
Then, head into the menu and check the customization options for the weapon you’re using. You should find the suppressor available for attachment to your firearms in Sniper Elite 5.
Weapon workbenches allow you to customize your firearms by adding muzzles or changing their ammunition type.
How To Unlock Subsonic Ammo?
Sniper Elite 5 features subsonic ammunition to further minimize the sound of your shots. This type of ammunition is accessible quite early in the game and enhances your stealth capabilities while you’re still looking for a silencer. Similar to a suppressor, subsonic ammo allows you to maintain stealth while firing your weapon.
Initially, you’ll only be able to collect subsonic ammo from fallen enemies. However, after completing the Factory mission later in the game, you can unlock this ammo type and make it a part of your permanent inventory for future missions.
To load subsonic ammo into your weapon, press L1 if you’re on PlayStation and LB if you’re on Xbox. If you want to switch between different types of suppressed ammo during a mission, simply press R1.
Once your supply of subsonic ammo is depleted, you’ll automatically revert to standard ammunition, so be mindful of your remaining rounds.
Two-handing and Power Stancing are methods to wield your weapons in Elden Ring. Each option offers a range of possibilities for your character build and playstyle, providing various benefits and drawbacks.
This guide will explain how to Two-hand and Power Stance in Elden Ring. Moreover, we’ll explore the benefits of each configuration. So, without further ado, let’s dive in.
How to Two-Hand Weapons in Elden Ring?
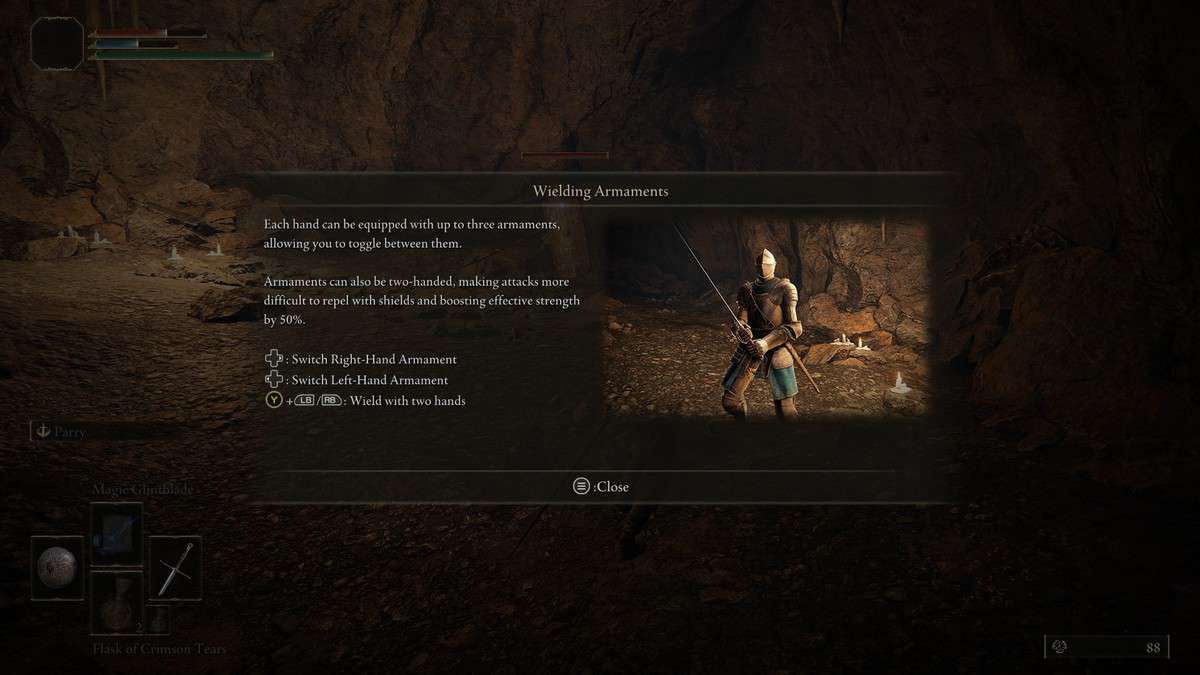
The majority of weapons in Elden Ring can be Two-handed, with the exception of bows and other ranged equipment, which require both hands from the outset.
To Two-hand a weapon in your left hand, hold down Triangle on PlayStation or Yon Xbox. After that, press either L1/LB or L2/LT, and your character will use both hands for the weapon. To Two-hand a weapon in your right hand, simply press Triangle/Y, then press either R1/RB or R2/RB.
For PC users, you need to hold the E key to Two-hand a weapon with a keyboard and mouse. To use your left and right-handed weapons, click the Left and Right mouse buttons, respectively.
How to Power Stance in Elden Ring?
Power Stancing functions similarly to Two-handing, as it enhances your damage output. However, instead of wielding the same weapon in both hands, Power Stancing involves equipping different versions of the same weapon in both your right and left hands.
For instance, if you have one Nagakiba in your left hand and another Nagakiba in your right, you’re effectively Power Stancing. Conversely, if you wield a single Nagakiba with both hands, you are simply Two-handing it.
Power Stancing is commonly referred to as Dual-wielding.
To engage in Power Stancing, you need to procure two copies of the same weapon, access your gear/inventory menu, and equip one in the left-hand slot while placing another in the right-hand slot.
Power Stancing isn’t applicable to all weapons, as some can only be acquired once during a playthrough. To use Power Stance with certain weapons, you may need to enter a New Game Plus (NG+) run.
Two-Handing Weapons vs Power Stancing?
The primary advantage of Two-handing weapons is the ability to handle weapons that have higher strength requirements than your current level. Two-handing grants you an approximate 50 percent boost to your strength, allowing you to wield and utilize the weapon even if your strength isn’t sufficient.
Two-handing weapons offers significant benefits during boss encounters, as it amplifies the damage dealt by light and heavy attacks. On the flip side, Dual-wielding operates as a high-risk, high-reward strategy, which can yield impressive results with the right attack combinations.
However, the downside to Two-handing is the inability to use a shield, which means you’ll have to evade enemy strikes without the extra protection a shield provides.
In contrast, Power Stancing introduces a host of fresh combos for your chosen weapon. This style is often preferred over Two-handing for this reason. Additionally, if you’re using a build that leverages elemental or status effects (like bleed, frost, or poison), equipping two of the same weapon will expedite the build-up of these effects.
This can significantly augment the effectiveness of your builds. Like Two-handing, Power Stancing also eliminates the option to utilize a shield, presenting a noteworthy risk.
The Deathbrand armor set is a light armor collection designed for players who utilize magic or prefer a spell-sword combat style, introduced in the Skyrim Dragonborn DLC. This distinctive armor becomes more powerful as you gather more pieces, which can be acquired by embarking on the associated quest aptly named Deathbrand.
First, you will need to initiate the quest before searching for the armor pieces. All components can be found in the Solstheim area of Skyrim.
Table of Contents
How to Start the Deathbrand Armor Set Quest?
Deathbrand Armor Pieces Locations
Deathbrand Armor Stats and Item ID
How to Start the Deathbrand Armor Set Quest?
To commence the quest, you need to be at least level 38; if you’re lower than that, you won’t be able to start it. Next, locate and read a copy of the Deathbrand book—this can be found in the Temple at Raven Rock.
Upon reading the book, you’ll gain the ability to open Ancient Chests. If you’ve previously unlocked any of these chests (typically through lock-picking) before reading the book, they would have been empty.
Alternatively, you can head directly to Haknir’s Shoal without completing the prior tasks. Take out the pirates and loot the chest where you’ll find the Deathbrand Helm, thus starting the quest. From one of the defeated enemies, likely the leader, you can acquire a map detailing the locations of the remaining armor pieces.
Deathbrand Armor Pieces Locations
There are four unique pieces of the Deathbrand Armor, and below is a list of their locations:
Deathbrand Helmet
Location: This piece can be found at Haknir’s Shoal, a small island situated north of Solstheim.
Enchantment: Wearing the full set of Deathbrand Armor grants +100 Armor and allows the wearer to breathe underwater.
Deathbrand Armor
Location: You can find the Deathbrand Armor northwest of Raven Rock, guarded by two bandits.
Enchantment: Wearing any piece of the Deathbrand set grants +15 Stamina for each item equipped.
Deathbrand Gauntlets
Location: The gauntlets are located across a waterfall south of Bristleback Cave, near a river.
Enchantment: They provide a bonus of +10% damage with one-handed weapons for each Deathbrand piece worn.
Deathbrand Boots
Location: The final piece of the Deathbrand Armor can be located west of Tel Mithryn in a chest by the riverbank. Be cautious as it is surrounded by Ash Spawn.
Enchantment: The boots increase carrying capacity by +10 for each Deathbrand item equipped.
Deathbrand Armor Stats and Item ID
Below are the stats along with the item IDs for each piece of the Deathbrand Armor in Skyrim:
Armor Piece
Armor Rating
Item ID
Deathbrand Helmet
16.5
XX02401D
Deathbrand Armor
39
XX02401B
Deathbrand Gauntlets
11.5
XX02401C
Deathbrand Boots
11.5
XX02401A
The post Skyrim Deathbrand Armor: How To Obtain All Pieces? appeared first on SegmentNext.
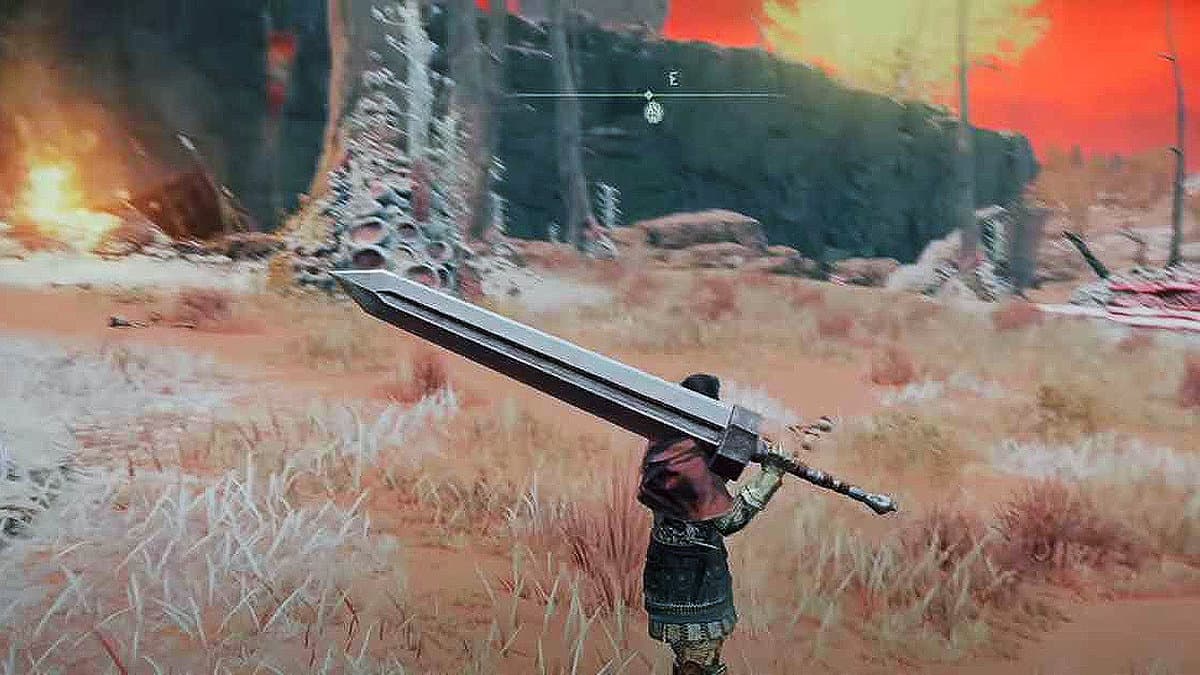
In Elden Ring, players can wield the Guts Sword from the iconic Berserk manga and anime, allowing for an immersive cosplay experience. Officially just referred to as the “Greatsword,” it is classified as a Colossal Weapon, making it ideal for heavier builds.
Its high strength requirement means you should allocate a good number of Runes to utilize it effectively. You can discover this powerful weapon in the Caelid region.
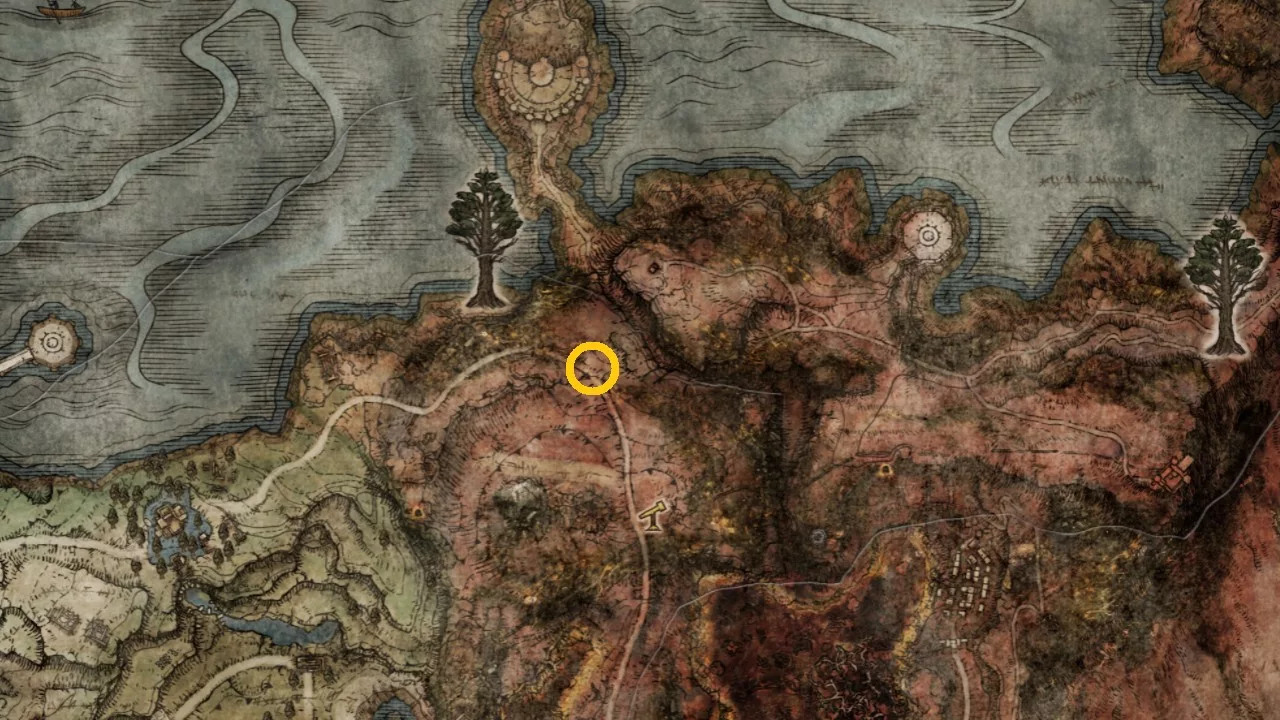
Location of Guts’ Berserk Greatsword in Elden Ring
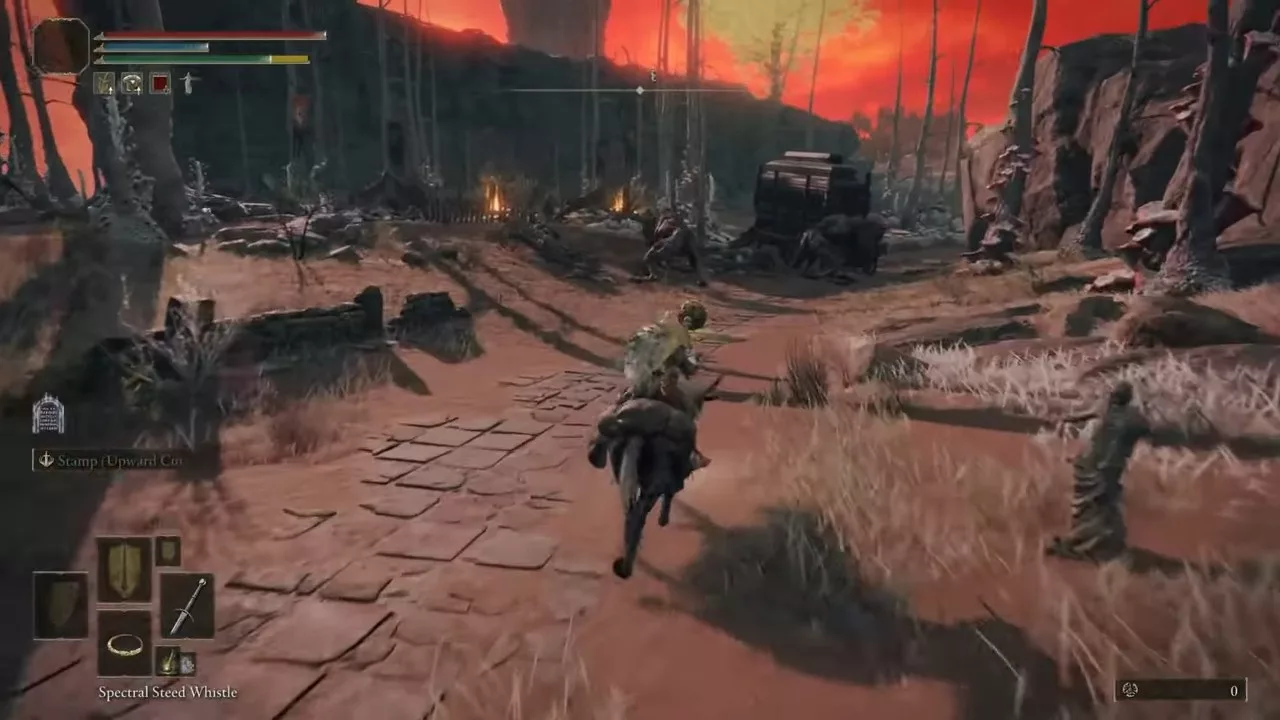
Guts’ Berserk Greatsword can be found in a wagon situated in the Caelid region of Elden Ring. This area is known to be quite challenging to navigate early in the game.
Follow the northern Caelid Highway and proceed along the path. As you approach the Minor Erdtree, glance to the south to spot a large field populated by numerous giant dogs guarding a solitary wagon.
At the rear of this wagon, you will find a chest containing the Berserk Greatsword (though it’s simply labeled Greatsword in Elden Ring).
You can choose to eliminate all the dogs guarding the wagon or stealthily bypass them to obtain the sword. Engaging the dogs early in the game can prove challenging.
Berserk Greatsword Stats in Elden Ring
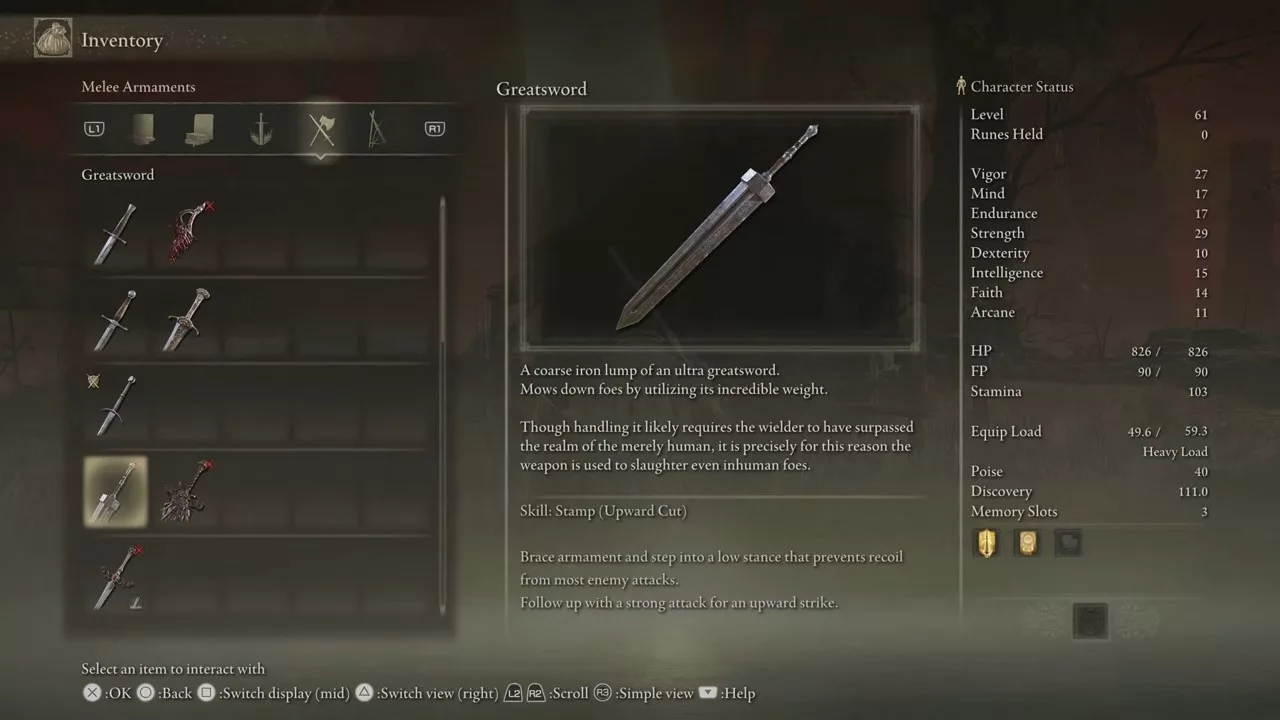
The Greatsword is a Colossal Sword that boasts impressive range and utilizes the standard colossal sword moveset. To wield it effectively in one hand, you will need 31 Strength and 12 Dexterity. It begins with a scaling of C in Strength and E in Dexterity.
As a colossal weapon, it ranks among the heaviest in the game, weighing in at 23. The default weapon skill for the Greatsword is Stamp, followed by an Upward Cut. You can customize this weapon skill with any Ash of War, allowing you to modify the affinities for your Greatsword.
This weapon can be upgraded using Smithing Stones and has a total of 25 upgrade levels. Furthermore, it provides decent defense when used for blocking during dual-wielding.
The Guts Berserk Greatsword is particularly effective within Strength-focused builds due to its formidable scaling of 162 physical attack damage, even without enhancements. This feature positions it as one of the most powerful and sought-after greatswords in Elden Ring.
Its staggering potential offers additional benefits, giving players the ability to interrupt enemy attacks and create opportunities for counterattacks. The sword’s greater range also allows players to engage enemies from a distance, offering a tactical advantage over foes wielding shorter-range weapons. The sheer satisfaction derived from its use is something most players will appreciate.
Conversely, this Greatsword does have its drawbacks. Players may find themselves moving slower due to its weight, necessitating careful planning of their build. However, for those fond of greatswords, this weapon can carry you through the majority of the game, particularly if fully upgraded.
It’s also essential to acknowledge that alternatives exist for greatsword enthusiasts in Elden Ring, such as General Radhan’s Greatsword and the Blasphemous Greatsword. Considering dual-wielding Greatswords with jump attacks can also prove effective, be mindful of this while making your choice.