الوسم: Third Person Shooters

  • Effective Strategies to Defeat Helldivers 2 Crushers

    Effective Strategies to Defeat Helldivers 2 Crushers

    Helldivers 2 Crushers are large, slow-moving enemies that belong to the Illuminate faction. They can kill players instantly with powerful club strikes. Right now, you’ll only encounter these beasts during missions where the Vote Snatcher enemies are active. It’s crucial to know how to take them down quickly if you want to survive. Having fought many of these giant foes myself, I’ll share some key tips on how to defeat Illuminate Crushers in Helldivers 2.

    There are two main ways to kill a Crusher, and neither is particularly easy. One way is to keep shooting them repeatedly until they die. The other is to break their helmet first and then shoot their vulnerable head.

    The simplest method is to attack them with sustained fire. Crushers have a lot of health and can heal back unless they’re taking damage. To stop their regeneration, use fast-firing guns to wear them down. Since they don’t have much armor, weapons that penetrate light armor work well, like the Machine Gun, Heavy Machine Gun, Bullet Storm, Maxigun, Stalwart, or WASP Launcher. Fire-type weapons such as the Cremator flamethrower are also very effective because Crushers are susceptible to fire, as are Helldivers 2 Wretches.

    Another faster method is to destroy their helmet, which counts as heavy armor, and then aim for their tiny head. To do this efficiently, you need specialized gear. Use heavy-armor-penetration weapons like the Autocannon, Railgun, Recoilless Rifle, Expendable Anti-Tank, Quasar Cannon, or the Bolt Pistol and Senator revolver, both of which are excellent secondary weapons. Once the helmet is gone, the head becomes an exposed, fragile spot. Any standard weapon can then shoot it, and the Crusher will go down quickly.

    Crushers are generally straightforward to handle but can be deadly. Their overhead slam attack has a surprising reach and can kill you instantly. My main advice is to stay as far away from them as possible. I’ve been caught by that attack many times, so if you’re too close, sprint away and dive to escape its reach.

    Remember, staying cautious and using the right weapons are key to defeating these heavy enemies in Helldivers 2.

  • Helldivers 2: Top Secondary Weapons Guide

    The Bolt Pistol from Helldivers 2 Warhammer 40K Warbond is a powerful sidearm designed to deliver heavy damage with explosive shots that can pierce through tough armor. It’s capable of taking out difficult enemies, but its small six-round magazine and strong recoil can make it hard to handle.

    The Bushwhacker is a triple-barrel shotgun that acts like a pocket Punisher, firing all barrels at once or one at a time. It’s effective at close range but struggles against heavily armored foes due to limited penetration.

    The Crisper is a short-range flamethrower in pistol form, ideal when you want to add firepower without fully switching to a flamethrower. It’s best for soft targets like bugs or Voteless in tight quarters.

    The Dagger is a small laser weapon similar to a miniature Scythe. It’s good for quick, easy kills on weak enemies and can also ignite or finish off mid-tier foes. Its virtually unlimited ammo depends on managing its overheating.

    The Grenade Pistol fires a single grenade, useful for attacking groups or blowing up bug nests, fabricators, and warp ships. It’s versatile but limited by its small ammo capacity.

    The Loyalist functions like a compact Purifier, offering explosive plasma firepower that can complement your main weapon or grenades. It’s useful for dealing with tougher enemies thanks to its destructive power.

    The Missile Pistol is a reliable tool for knocking out large or heavily armored targets with guided missiles. Although it’s great against Automatons, its ammo is scarce, making precision critical.

    The Peacemaker is a straightforward pistol, suitable for beginners. However, it’s not very effective against tougher enemies and should be replaced with a better secondary as soon as possible.

    The Redeemer is a rapid-fire machine pistol that consumes ammo quickly but is effective up close against weaker enemies. It’s useful for quick bursts to clear out threats in tight spots.

    The Re-Educator is a suppressed dart gun that confuses enemies by applying gas damage. While good for sneaking past enemies, it’s generally not worth sacrificing your primary weapon for.

    The Senator is a revolver capable of penetrating heavy armor and damaging tough enemies, but it has a small magazine and slow reload. It’s an excellent choice if you’re accurate.

    The SOCOM Pistol works well for stealthy missions, offering suppression, but its poor armor penetration limits its overall effectiveness.

    The Stim Pistol is a medic tool that applies healing or buffs, but in its current form, it’s not very useful and isn’t recommended for your secondary slot.

    The Talon is an energy-based pistol similar to the Senator, with good accuracy and damage. Its heatsink prevents rapid firing, but pacing your shots makes it a reliable sidearm across distances.

    The Ultimatum is a small grenade launcher that fires an extremely powerful explosive. Its limited range and ammo make it challenging to use, but mastering it can allow you to wipe out most enemies and certain structures.

    The Verdict is a medium-caliber pistol that offers decent damage and armor penetration. It’s a good alternative for those who prefer a more traditional handgun with a larger magazine than the Senator.

    The Veto is a sidearm added in the Helldivers 2 Entrenched Division Warbond. While it looks cool, it’s not very effective compared to other options, with less damage and only medium armor penetration. Its unconventional reload style isn’t worth the trade-off.

    The Warrant is a high-quality Superstore weapon with guided rounds, echoing the style of the Titanfall Smart Pistol. It offers a good mix of power and precision, though its handling can be a bit tricky.

  • Exclusive Warhammer 40K: Helldivers 2 Warbond Collectibles

    Exclusive Warhammer 40K: Helldivers 2 Warbond Collectibles

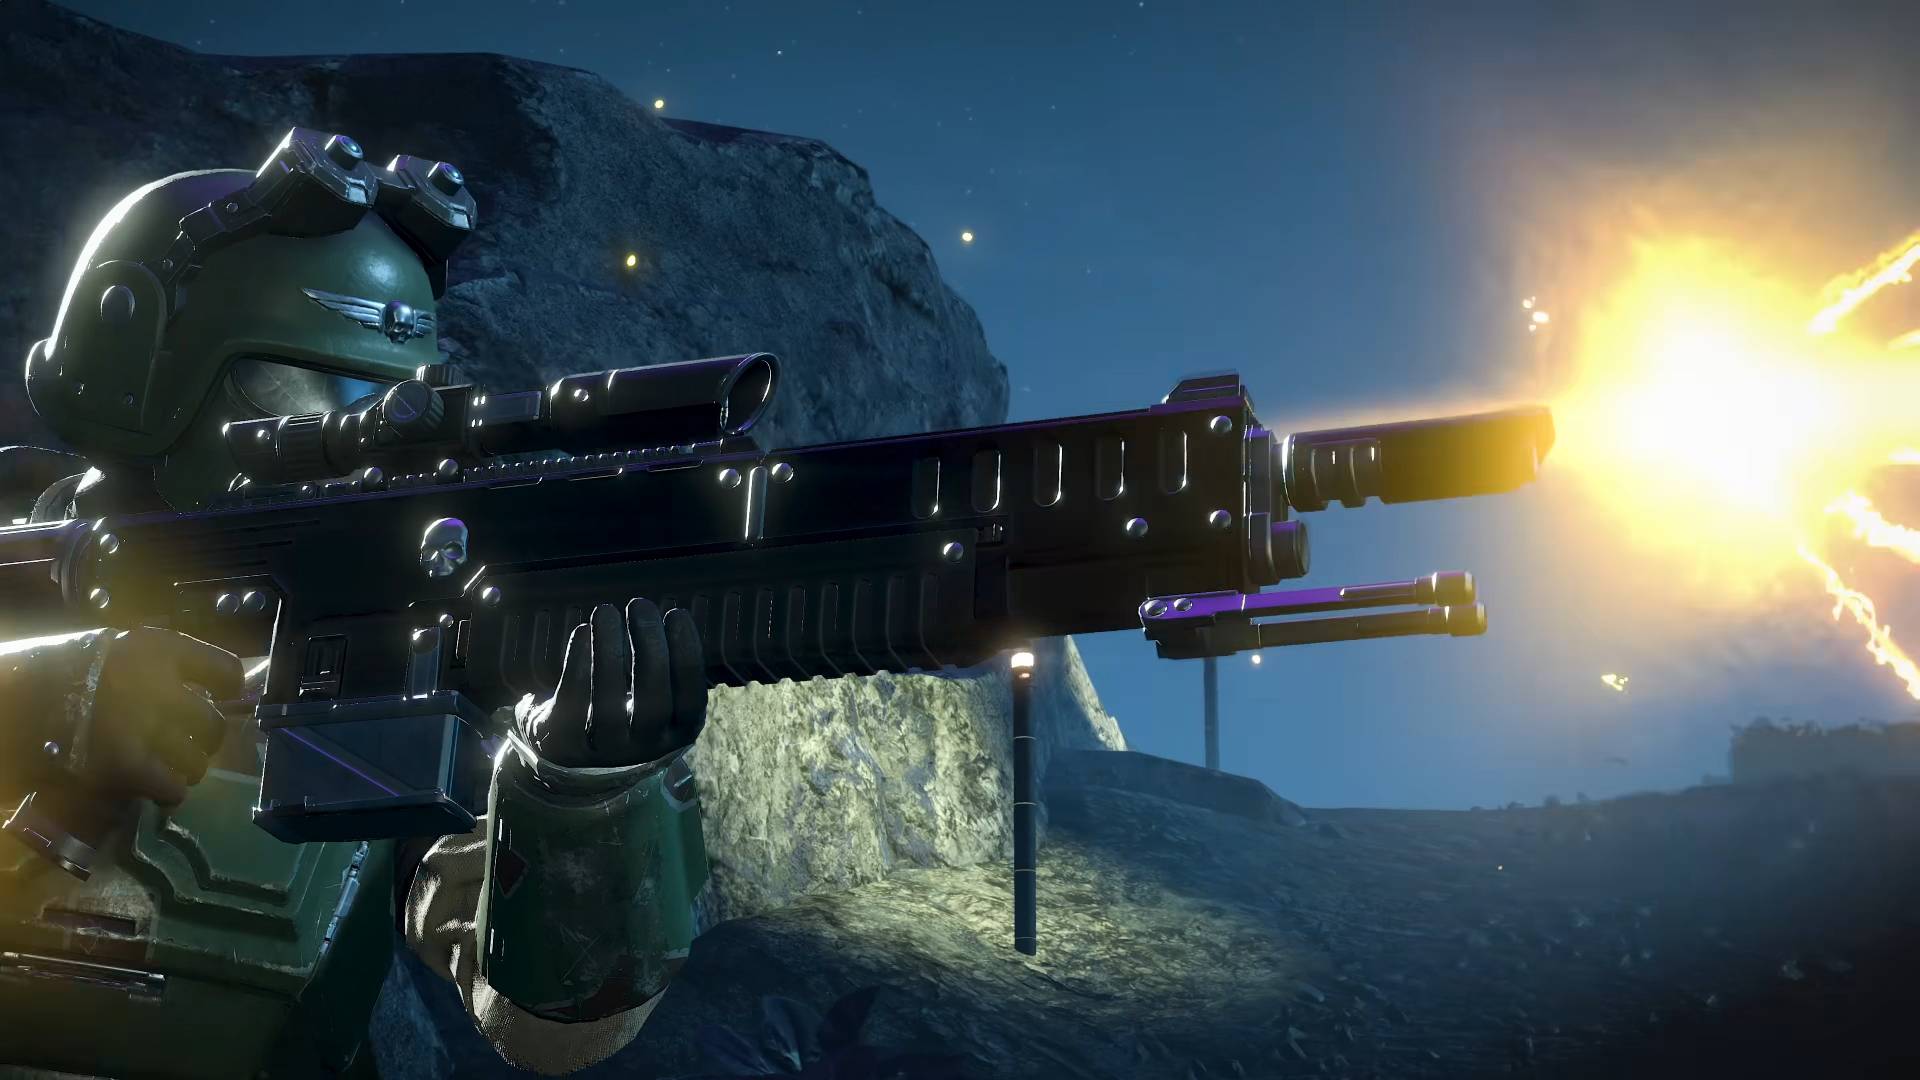
    The highly anticipated Helldivers 2 Warhammer 40K Warbond is finally coming soon. It will allow players to equip Kasrkin-inspired gear, including a Hot-Shot Marksman Rifle and the classic Bolt Pistol. There will also be more powerful options like superhot melta weapons, which look quite impressive based on current previews. Here’s everything you need to know about the upcoming Helldivers 2 x Warhammer 40K Legendary Warbond, including its release date and what’s included.

    The Warhammer 40K Warbond is set to hit the Superstore on August 12. The exact time hasn’t been confirmed, but it’s expected to appear around 12 p.m. UTC.

    Since this Warhammer 40K crossover is a Legendary Warbond—similar to the Helldivers 2 Halo Warbond—it will cost 1,500 Helldivers 2 Super Credits instead of the usual 1,000. There’s still time to gather enough credits beforehand! Keep in mind, because it’s a Legendary Warbond, you won’t be able to unlock it using Warbond Tokens.

    The Warbond pack will include 18 different items, such as three weapons for loadouts, two sets of armor, and various cosmetic options. While details about the specific functions of each weapon are scarce, judging from the trailer and tabletop versions of Astra Militarum guns, we can make educated guesses. Some of the in-game items you’ll be able to unlock with this Warbond are:

    Weapons:

    • R/40-K Hot-Shot Marksman Rifle: A sniper-style variant of the Hot-Shot Lasgun, expected to be a semi-automatic energy rifle with great range.
    • P/40-K Bolt Pistol: Not quite as powerful as the full-sized bolt pistol used by Space Marines but still formidable, likely with decent armor penetration and notable recoil.
    • G/40-K Meltamine: A thermal explosive that functions like a throwable anti-tank mine.

    Stratagems:

    • 40-K Meltagun: Fires a short-range thermal beam capable of penetrating armor.

    Armor:

    • TG-8 Sharpshooter Armor and Helmet: Medium armor with the “True Grit” ability, which boosts weapon handling and increases support weapon reload speed by 30%. Its appearance resembles Kasrkin troops with green camouflage.
    • TG-122 Demo-Trooper Armor and Helmet: Heavy armor also with “True Grit,” styled to look like urban-camo Kasrkin demo troops.

    Cosmetics:

    • Castellan’s Green pattern across all vehicle types, inspired by dark green camo adorned with off-white and red bars, similar to Cadian Rogal Dorn tanks.
    • Camo Cloak Cape
    • Camo Cloak Player Card
    • City Fighter’s Resolve Cape
    • City Fighter’s Resolve Player Card
    • Still Standing Title

    The Warbond will feature a total of 18 items, including weapons, armor, and cosmetics, offering a variety of customization options inspired by Warhammer 40K.

  • Arc Raiders: Lost Artifacts and Merging Destinies

    Arc Raiders: Lost Artifacts and Merging Destinies

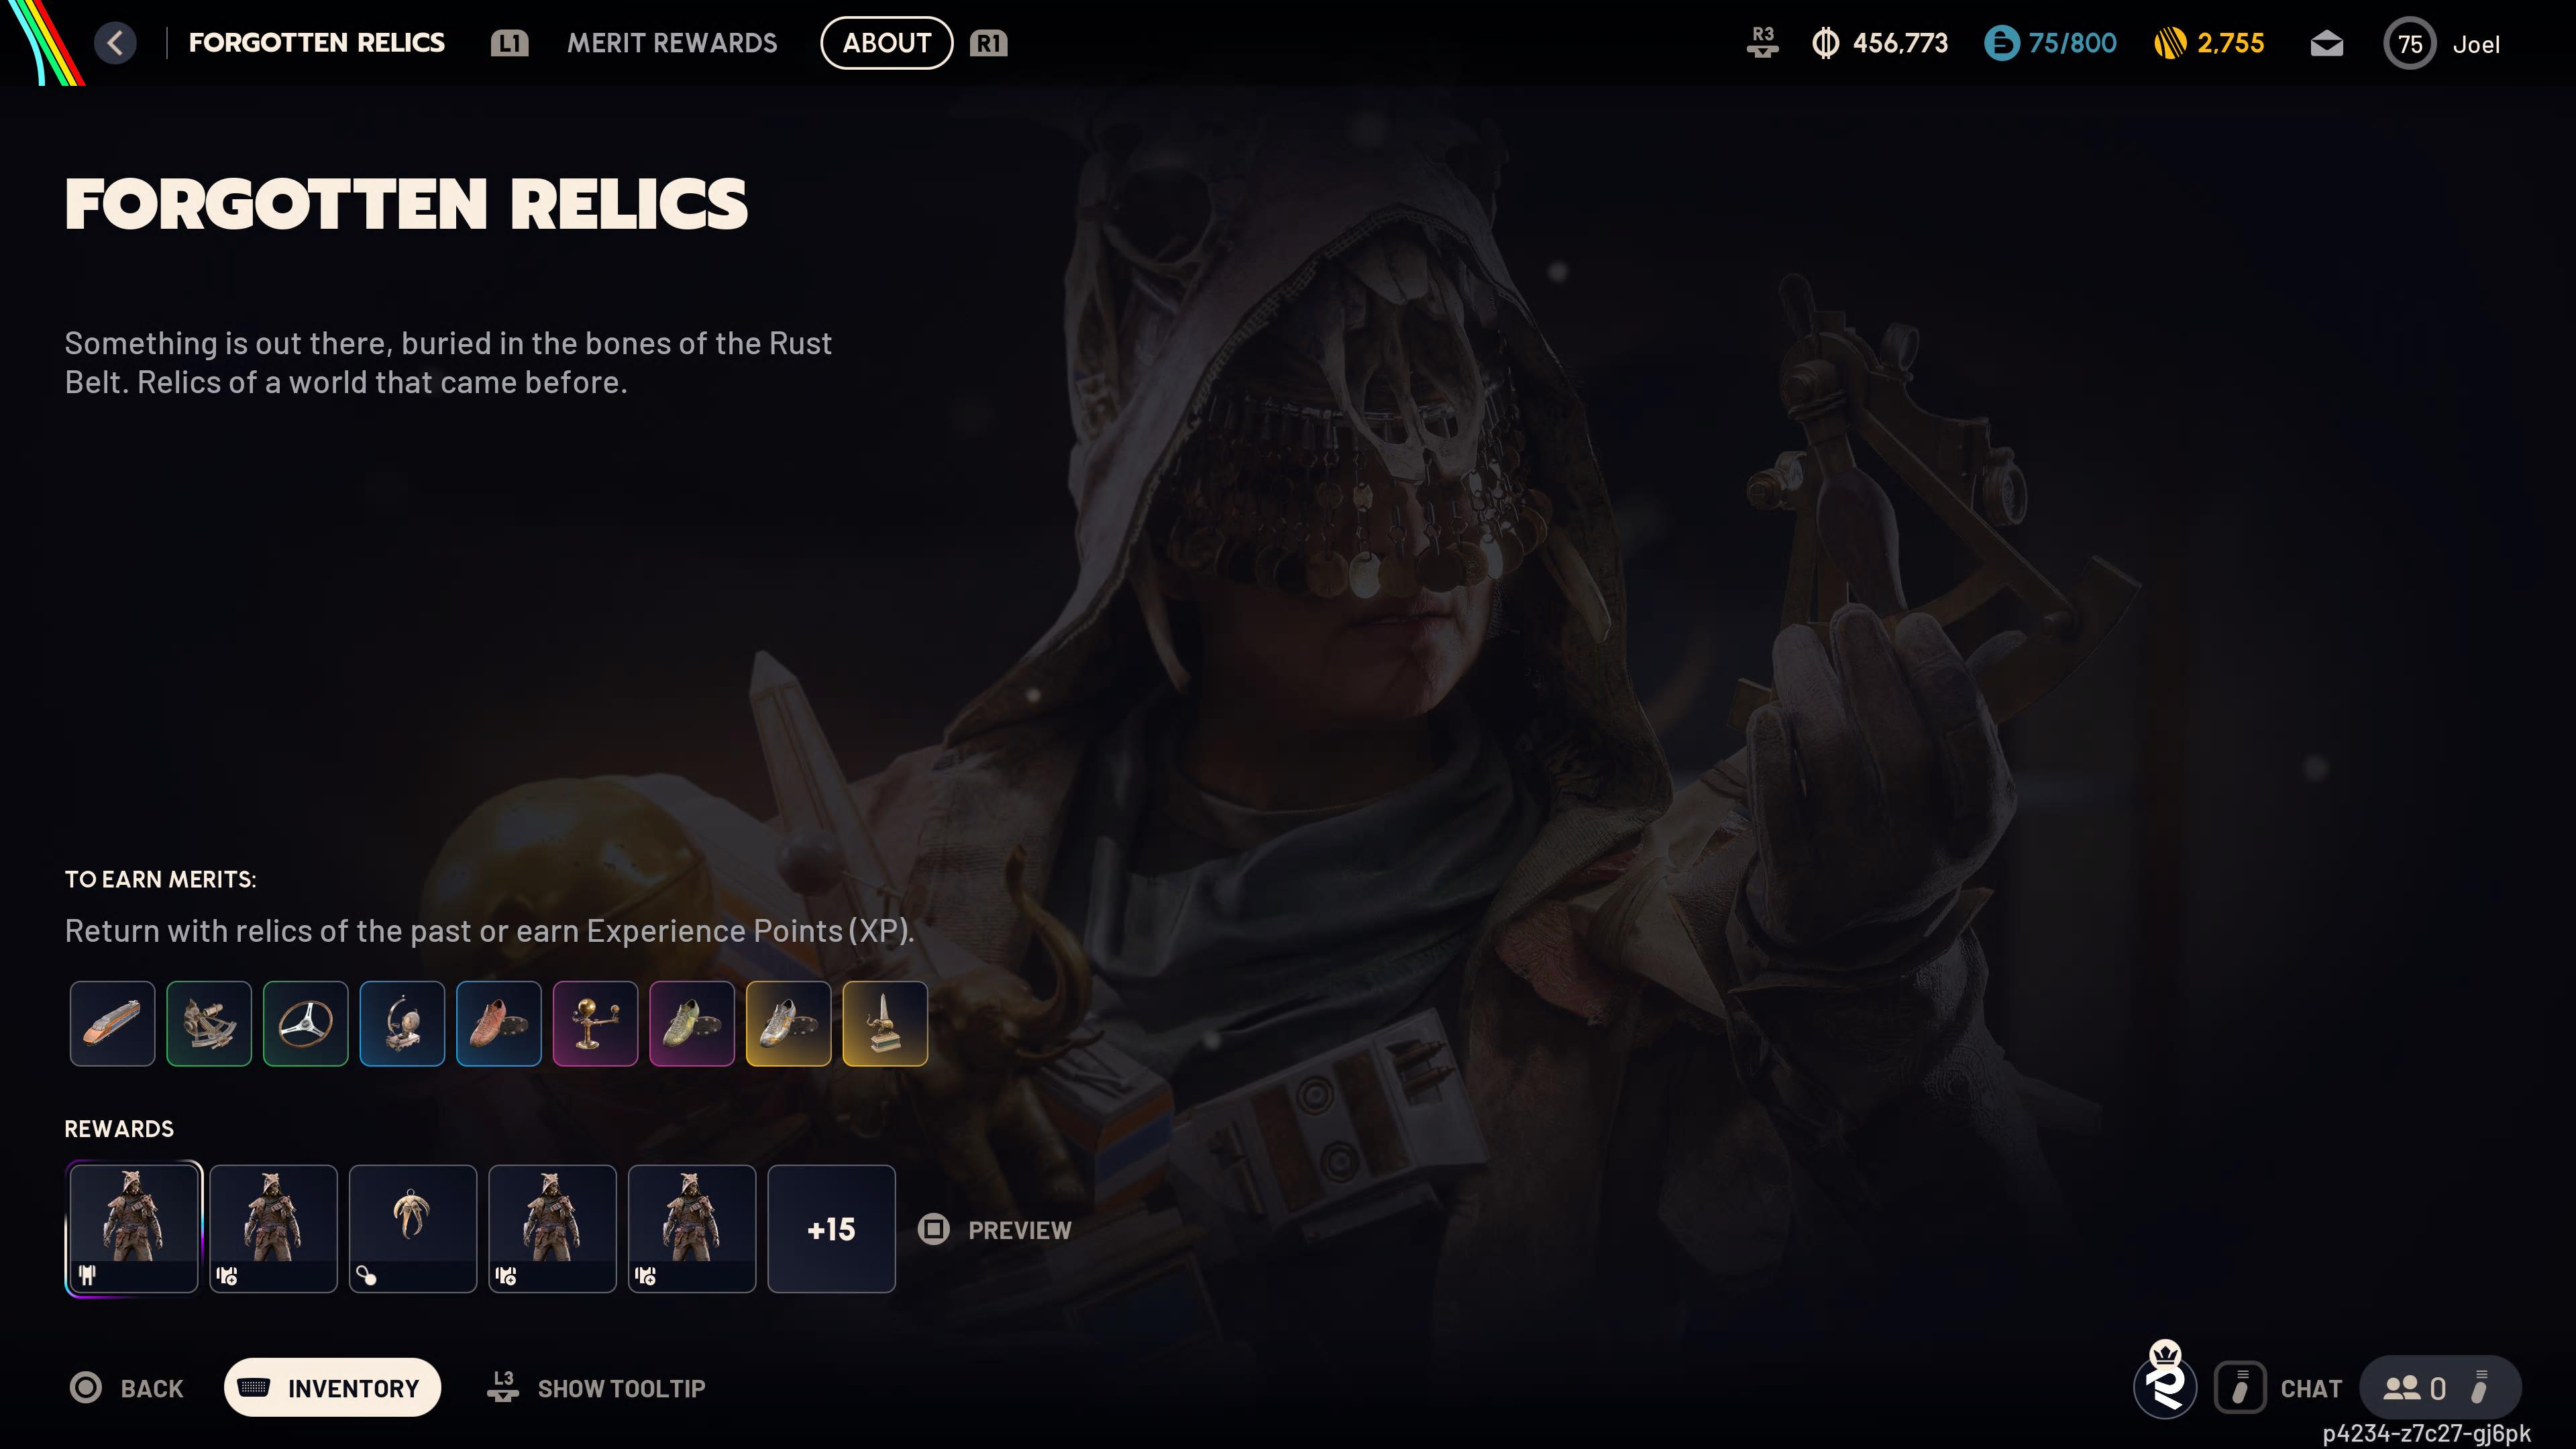
    The Forgotten Relics event in Arc Raiders is pretty simple. It has a clear goal and a project called Converging Paths, where players need to find and return different items added to the game during the event. To start, players must deal some damage to Arc Robots in the Swamp area. If you complete this step, you can earn various rewards, including a new outfit and a Blueprint for the Surge Coil, as explained below. Here’s a guide for completing the Forgotten Relics event, along with the Converging Paths progress, and how to unlock all associated rewards.

    How to Complete the Forgotten Relics Event in Arc Raiders

    This event is time-limited and will be available for 42 days from launch—until July 28, 2026. It features a progression path where you earn Merit points for rewards, plus a new project called Converging Paths, which is a separate challenge.

    In the event’s progression path, players gather Merits mainly by earning XP. Extra Merits can be earned by extracting items like:

    • Train Model
    • Sextant
    • Vintage Steering Wheel
    • Equatorial Sundial
    • Rare Colorful Shoes
    • Tellurion
    • Epic Colorful Shoes
    • Legendary Colorful Shoes
    • Elephant Obelisk

    Most of these Trinkets are easiest to find in Commercial and Residential areas, especially in the Bird City map modifier and the Buried City. Accumulating a total of 3,150 Merits allows players to unlock all 21 rewards on the path.

    Converging Paths Project Walkthrough

    Accessible in the Projects tab of the Raider menu, Converging Paths is made up of six stages:

    1. Secure Safe Passage for the Nomads
      Deal 1,200 damage to Arc enemies in the Swamp, south of Dam Battlegrounds. Simply spawn and hunt enemies in the area until you reach the damage goal. It might take a few runs, but persistence is key.

    2. Collect Supplies
      Gather items such as three Train Models, two Vintage Steering Wheels, two Air Fresheners, and six Arc Thermo Linings. Completing this grants smoke grenades, explosive mines, and Raider Tokens.

    3. Procure Relics
      Collect rarer items: four Sextants, three Equatorial Sundials, five Metal Brackets, and seven Steel for Arc Performance. Rewards include explosive grenades, Jolt Mines, a level 2 Rascal, and more Tokens.

    4. Create Emergency Caches
      Gather legendary items like three Tellurions, one Elephant Obelisk, six Light Bulbs, and nine Arc Coolants. Rewards include Surge Coils, more mines, and Token bonuses.

    5. Finish the Cabinet of Curiosities
      This phase demands more rare and legendary items, such as six Rare Colorful Shoes, three Epic Shoes, two Legendary Shoes, and ten Arc Synthetic Resin. Successful completion rewards several high-tier items and Tokens.

    6. Use Nomad Tactics to Fight Arc
      This stage is about damage — specifically, using mines and traps like Blaze Grenade Traps, Pulse Mines, Jolt Mines, Explosive Mines, and Surge Coils to damage Arc enemies. It’s most straightforward on big enemies like Bastions, which are easy to lead into traps. Rewards include a Sextant Backpack Charm, outfit color, Tokens, and a Surge Coil Blueprint.

    By completing all stages, especially on the hardest one, players can maximize their rewards and fully participate in the event.

  • Arc Raider Comet Igniters – Exclusive Insights | GamesRadar+

    Arc Raider Comet Igniters – Exclusive Insights | GamesRadar+

    Finding a Comet Igniter in Arc Raiders can be tricky, but it’s manageable once you know what to look for. Basically, you need to locate and destroy a Comet, which is one of the new large, armored rolling balls introduced with the Shrouded Sky update. These things are about twice the size of a person, with a blue light pointing forward that turns red when it senses you.

    The challenge is that they will charge straight at you and explode immediately upon detection. They tend to roam near larger Arcs like Bastion, making the encounter even more difficult. To take one down, you’ll need patience and strategy, especially if you’re trying to complete the Weather Monitor System Project.

    A good spot to hunt for Comet Igniters is in Buried City. This location is preferred because it offers plenty of buildings and open spaces—perfect for fighting from cover or making a quick escape. Comets seem to prefer open areas, but they can also appear indoors, although this is less common. Be warned: fighting them in tight narrow corridors is risky, since their explosions are huge and deadly. Climbing onto small boxes won’t help much in avoiding their blast.

    When you spot a Comet, aim your best weapon at it and act fast. Using two homing grenades in quick succession is an effective way to destroy it before it gets too close. After you score a hit, keep in mind that Comets will break into two pieces of wreckage. If you don’t find the Igniter right away, check both halves thoroughly for the part you need.

    Remember, because Comets are aggressive, it’s best to eliminate them from a distance with powerful weapons. Getting too close can be deadly, especially if they start chasing after you. Stay alert, keep your distance, and don’t get cornered—success is within reach.

  • Arc Raiders: Surging Waves of the Rising Tide

    Arc Raiders: Surging Waves of the Rising Tide

    A Rising Tide in Arc Raiders is a new quest that was added with the Shrouded Sky update. In this mission, you start by locating the foreman’s apartment, which is behind a barricade south of Piazza Roma in the Buried City. The apartment is in an unnamed building shown on the map, roughly midway up the structure. There are two similar apartment blocks nearby; the foreman’s place is in the northern one.

    To get inside, the best way is to use the zipline connecting the two buildings and then jump through the window about halfway up. This method is more reliable than rappelling in with a Snaphook. Once you’re inside, head to the central room surrounded by stairs and go up to the top floor where there’s an office overlooking the area. Inside, interact with the whiteboard to capture a photo of the Foreman’s Digital Logbook. This action will give you the next objective in your quest — heading to Dam Battlegrounds to find clues.

    The first step there is to gain access to the Dam Battlegrounds Power Generation Complex. It might seem a bit confusing because the game directs you there first, but you can actually reach the Controlled Access Zone (CAZ) directly without going through the complex. Just go to any part of the area marked on your map to complete this step.

    Once at the Power Complex, use the lower walkways to cross into the CAZ, head to the southern High Loot Area, or drop down through a hole in the grating above. From there, go to the central room encircled by stairs and climb to the top office. Inside, you’ll find a whiteboard—just take a quick photo to gather clues and finish the quest.

    Completing A Rising Tide rewards you with a level 2 Anvil, featuring the powerful Anvil Splitter modification, along with an Extended Barrel and 40 heavy rounds. This makes your revolver really deadly and turns it into one of the best weapons in the game’s latest update, Shrouded Sky.

    For more details and tips on this mission, check the full guide on Arc Raiders.

  • Arc Raiders: Shrouded Sky Expansion Unveiled

    Arc Raiders: Shrouded Sky Expansion Unveiled

    The latest update for Arc Raiders, called Shrouded Sky, is now live. It introduces extreme weather conditions like hurricanes, along with two dangerous new Arc enemies—the Firefly and the Comet. These weather changes and new enemies will make your missions more challenging. But that’s not all—this free update also brings a variety of new content.

    One of the biggest additions is a new project that players can work on together. Other new features include a new area on Dam Battlegrounds, a surgeon-themed deck for your raider, and even options for facial hair customization! Here’s a quick rundown of everything included in the Shrouded Sky update:

    • New Map Conditions: The Hurricane mode introduces strong winds that push players around, create debris hazards, and encourage sneaky gameplay.
    • New Enemies:
      • Firefly: A flying drone armed with a flamethrower that targets Raiders.
      • Comet: A large, spherical robot that rolls at high speed toward players and explodes violently upon impact.
    • Weather Monitor System Project: A new way to track and respond to weather threats.
    • New Surgeon Deck: The third Raider deck, themed around medical gear. You can dress your character in scrubs, surgical masks, and even give Scrappy a surgeon’s hat. It also adds facial hair options, including a full beard.
    • Weapon Adjustments, Feat Re-rolls, and Bugs Fixed: Several weapons, such as the Stitcher, Kettle, Venator, Jupiter, and Aphelion, have been balanced to improve gameplay. Check out the detailed patch notes for all the changes.
    • Map Update: The Dam Battlegrounds now features a new high-level area called the Controlled Access Zone, located between the Power Generation Complex and the Hydroponic Dome.
    • Expedition Window: Players have a new opportunity to start and reset Expeditions, giving more flexibility in planning and gameplay.
    • Facial Hair Customization: Beards are now available for all players, with additional styles unlockable through decks or premium cosmetics.

    With this update, Arc Raiders offers new challenges and customization options to keep players engaged. Stay tuned for more updates as the game continues to evolve!

  • Arc Raiders: Spotting the Collapsed Highway Location

    Arc Raiders: Spotting the Collapsed Highway Location

    The “Keeping an Eye Out” mission in Arc Raiders is simple and quick, but as usual, the clue to find the collapsed highway near the Southern Edge of the Barren Clearing can lead you astray. Once you realize where to go, the whole task should take no more than 10 minutes. Just make sure you have a zipline or snap hook, as you’ll need it to climb at certain points.

    Here’s where you need to head and what to do:

    The location of the collapsed highway is marked on the map above, labeled “Highway Collapse.” Interestingly, it’s quite far from the Barren Clearing you’re directed to, which can be confusing and frustrating. Just focus on the Highway Collapse area instead. When you arrive, you’ll see an objective to tick off the highway, and a new task to find Bilguun’s shelter and look for any clues of him.

    Bilguun’s shelter is located within one of the standing sections of the highway, near a stop sign. To access it, you’ll need to make your way up there using a zipline or snap hook. If you use a zipline, try to angle it carefully so you can get back down afterward. I accidentally hit the edge of the opening and didn’t have a spare, so I just had to fall out — it’s safe enough, losing about a third of your health, but not the neatest way to finish.

    Once inside, you’ll find a stash to search and some graffiti that you can photograph. Taking the picture completes the quest, and then it’s just a matter of exiting the area. Finally, head back to Celeste to collect your reward: five pulse mines and a flame spray.

    That’s it! Pretty straightforward once you know where to go, and only requires a bit of climbing and a camera to wrap things up.

  • Cyberstan Tips & Major Orders for Helldivers 2

    Cyberstan Tips & Major Orders for Helldivers 2

    The battle for Cyberstan in Helldivers 2 is intense, with the Automaton homeworld proving to be heavily fortified and tough to get through. The cities are filled with massive factories and a variety of robotic enemies, constantly sending waves of bots to attack, along with mortar batteries and stronghold defenses.

    This mission isn’t going to be easy. Here are some tips to help you survive on Cyberstan and complete the current Major Orders to help bring victory to Super Earth.

    Current Helldivers 2 Cyberstan Major Order

    After eliminating over 700 million Automatons on Cyberstan in less than a day, a Drophead has been established. We’re now waiting for the next Major Order to move forward.

    Tips for Surviving on Cyberstan in Helldivers 2

    Cyberstan is a very harsh planet, even at medium levels of difficulty. The endless horde of bots and cyborgs defending the city, combined with the dense urban environment, makes it a challenge. While some of these tips might seem obvious—like general tactics for fighting Automatons—they are crucial for making it through this homeworld:

    • Use weapons with moderate armor penetration: This is essential against the Automatons, especially since you’ll face many Helldivers 2 Devastators and Cyborgs.

    • Carry anti-tank gear: Equipment like the Recoilless Rifle, Expendable Anti-Tank, Leveller, Spear, Eagle 500kg Bomb, Eagle Airstrike, orbital barrages, or thermite grenades are key. Higher levels will introduce Vox Engines, War Striders, and Factory Striders, which need quick destruction to clear your path.

    • Have a way to take down Gunships: Large numbers of Automaton aircraft appear frequently, covering the city and attacking from above. Make sure you have a strong ranged weapon capable of shooting down gunships quickly.

    • Start outside the city walls: Cyberstan’s cities have small areas outside the factory walls where your mission begins. Pick a landing spot here to set up safely, call in support stratagems, and avoid getting overwhelmed immediately. Later, find a broken wall or drain to enter the factory and get to work.

    • Prioritize destroying Cyborgs: These enemies that support the Automatons can cause big problems. Focus on taking out the Cyborg leaders, like the Agitators—who control the bots—and Radicals, who are aggressive and attack aggressively at close range.

    • Blow open gates with heavy weapons: The factory walls have locked gates you can blow open with C4, Ultimatum shots, rockets, dynamite, or bombs. Use these to reach the exit if needed.

    While on Cyberstan, you’ll encounter every type of Automaton, so make sure you’re ready to face Factory Striders and Hulks as well. Proper preparation and a good strategy are key to surviving the brutal environment of Cyberstan.

  • Meet the Cyborg Foes in Helldivers 2

    Meet the Cyborg Foes in Helldivers 2

    Helldivers 2 introduces Cyborg enemies now that the Machinery of Oppression update has expanded the fight to Cyberstan, the home of the Automatons. These frightening hybrids of human and machine pose a real threat on the battlefield, but they also have clear weaknesses that make them easier to take down if you choose the right weapons. If you’re heading into the dangerous zone of Cyberstan, it’s important to know how to handle the Cyborgs and what gear to bring.

    There are two new types of enemies exclusive to Cyberstan: the Agitators and the Radicals. As the second Galactic War forces Helldivers into robot territory, these new bot overlords—known as Helldivers 2 Automatons—have started deploying these units to fight back.

    Agitators are the armored leaders of the Cyborgs. They control Helldivers 2 troops and carry a powerful laser cannon, which they fire from afar. When you shoot an Agitator, it can briefly stun nearby Automatons. Interestingly, they are weaker than they appear, with only light armor covering their heads and bodies. Shooting them in the chest can break off their torso armor, but this doesn’t seem to cause additional damage.

    Radicals are fast and aggressive soldiers that carry a shotgun-like weapon, throw smoke grenades to hide their movements, and love to charge into melee combat. They’re less protected than their leaders, wearing only light armor, which makes them vulnerable. Still, don’t underestimate them—Radicals can damage your limbs, cause bleeding with their blasts, and are quick to close the distance and attack with kicks, often knocking you down. They’re fierce enemies that should be dealt with swiftly before they get close.

    The main weakness of Cyborgs is their lack of heavy armor. Agitators have light armor, and Radicals are even less protected, which means most weapons in the game can damage them effectively. For the fastest kills, use weapons with medium armor penetration. The Double Eagle shotgun is a solid choice, but others like the PLAS-101 Purifier, PLAS-1 Scorcher, Adjudicator assault rifle, and Coyote assault rifle work well too. Many support weapons can also do the job, especially when facing these enemy types.

    When fighting Cyberstan’s automaton foes, remember you’ll also encounter other machine enemies like Factory Striders and Gunships—be prepared to take those down as well.

    Stay prepared, choose your weapons wisely, and you’ll be able to survive the cyborg onslaught in Helldivers 2.

  • Arc Raiders: Exclusive Shared Watch Event Rewards

    Arc Raiders: Exclusive Shared Watch Event Rewards

    The Arc Raiders Shared Watch event is now live, offering 21 different rewards that players can earn until it ends on February 24. During this event, every time you damage or destroy an Arc, you will gain merits that help unlock various rewards—such as Raider Tokens, a new Slugger outfit, and helpful blueprints like the Tactical MK.3, which is a healing blueprint recently added to the game. There’s also a Vita Spray blueprint, which could be useful if you don’t already have it.

    To earn merits in this event, all you need to do is damage and eliminate Arcs, which you probably already do regularly. More specifically, you will gain merits by earning XP from damaging Arcs, destroying them, or assisting in their destruction. If you want to unlock all these rewards, you’ll need to skip some scavenging matches and focus on attacking every Arc you find. Hearing gunfire nearby? Join the fight.

    The rewards are unlocked in stages, with each set requiring a total of 50 merits to access. In total, you’ll need to earn 1,050 merits to get all 21 rewards. Here’s what you can earn:

    – Slugger outfit — 50 merits
    – 20 Raider Tokens — 100 merits
    – Vita Spray — 150 merits
    – Tactical MK.3 (Healing Blueprint) — 200 merits
    – Grenades Slugger Variant — 250 merits
    – Baseball backpack charm — 300 merits
    – 20 Raider Tokens — 350 merits
    – Grey and yellow Slugger color — 400 merits
    – Snap Hook — 450 merits
    – Hand Signals emote — 500 merits
    – 20 Raider Tokens — 550 merits
    – Chest Piece Slugger Variant — 600 merits
    – 20 Raider Tokens — 650 merits
    – Sport Face Paint Blue — 700 merits
    – Blue Glow Slugger color — 750 merits
    – Vita Spray blueprint — 800 merits
    – 20 Raider Tokens — 850 merits
    – Headgear Slugger Variant — 900 merits
    – Acoustic Guitar — 950 merits
    – 50 Raider Tokens — 1,000 merits
    – Batting Helmet Scrappy cosmetic — 1,050 merits

    That wraps up everything you need to know about the rewards in the Shared Watch event and how to earn them. You have until February 24 to unlock all these items, so get out there and start fighting Arcs. Good luck!

  • Complete Loot Guide for Arc Raiders

    Here’s a human-written, unique, and clear version of the list in American English:

    – Advanced ARC Powercell: Used against high-level enemies like Arc. Usually found as a rare item, mainly scrap unless you need energy clips.
    – Advanced Electrical Components: Necessary for many recipes and used in Gear Bench level 3 and Utility Station level 3. Rare, typically stored in your stash.
    – Advanced Mechanical Components: A rare item, mainly kept in stash, especially useful at Gunsmith level 3.
    – Agave: An uncommon plant from nature, often sold.
    – Air Freshener: An uncommon mechanical item, best sold.
    – Alarm Clock: Rarity is rare; best sold.
    – Antiseptic: A rare medical supply used in stash for the ‘Doctor’s Orders’ quest.
    – Apricot: An uncommon fruit, stored for upgrades and stash level 3 or 5.
    – ARC Alloy: Uncommon, collected from various arc sources, used in clear skies missions and multiple workshop upgrades.
    – ARC Circuitry: Rare, stored in the refiner at level 3.
    – ARC Coolant: A rare chemical material, scrapped from chemicals.
    – ARC Flex Rubber: Rare rubber scrap used in various arc components.
    – ARC Motion Core: Rare, stored in refiner at level 2.
    – ARC Performance Steel: A rare metal, usually sold.
    – ARC Powercell: Very common in different arc items, stored in stash for refiner level 1 and shield crafting.
    – ARC Synthetic Resin: Rare, scrapable from chemicals.
    – ARC Thermo Lining: Rare and scrapped from fabric.
    – Assorted Seeds: Common—used to grow plants like Celeste, stored in stash.
    – Bastion Cell: An epic Arc item, stored in stash for gear bench level 3.
    – Battery: Uncommon tech or electrical item, stored in stash for the ‘Trash into Treasure’ quest.
    – Bicycle Pump: A rare residential item, usually sold.
    – Bloated Tuna Can: Common, found in commercial or residential areas, typically sold.
    – Blue Gate Keys (Communication Tower, Confiscation Room, Cellar, Village): Rarity varies (rare to uncommon); mostly stored as stash.
    – Bombardier Cell: An epic arc item used in refiner at level 3.
    – Breathtaking Snow Globe: Epic, found in residential, old world, or commercial areas, usually sold.
    – Broken Items (Flashlight, Guidance System, Handheld Radio, Taser): All are rare scrap items, collected for parts and upgrades.
    – Buried City keys and cards (Hospital, Employee, Mastery, Town Hall): Ranging from uncommon to epic, mostly stash.
    – Burned ARC Circuitry: Uncommon, used in arc processes and scrap for arc alloy.
    – Camera Lens: Uncommon, especially for security, kept in stash for certain quests.
    – Candle Holder: Uncommon scrap, mostly metal, sold or scrapped.
    – Canister: Uncommon, found in commercial contexts, scrapped or stored.
    – Cat Bed: Common, in commercial or residential areas, stored in stash.
    – Chemicals: Common, used extensively all over in recipes, stored or scrapped depending on needs.
    – Coffee Pot: Common, usually sold.
    – Complex Gun Parts: Epic, needed for crafting high-end weapons and stored in stash.
    – Coolant: Rare, scrapped from chemicals and oil.
    – Cooling Coil: Rare, sold.
    – Cooling Fan: Rare, used during expeditions and stored in stash.
    – Cracked Bioscanner: Rare, useful in medical labs.
    – Crude Explosives: Uncommon, scrap from industrial or security areas.
    – Plastic Bottle: Uncommon, scrap from plastic.
    – Dam Control Tower Key & Staff Room Key: Both rare, stash items, the second also from specific quest rewards.
    – Dam Surveillance & Testing Annex Keys: Uncommon and rare respectively, mainly stash.
    – Dam Utility & damaged ARC cores: Uncommon and common, scrap or stored, used in specific quests.
    – Damaged Fireball Burner, Heat Sink, Hornet Driver, Rocketeer Driver, Snitch Scanner, Tick Pod, Wasp Driver: All are common to rare parts or scrap, used in crafting or quests.
    – Dart Board & Degraded ARC Rubber: Uncommon, sold or scrapped.
    – Diving Goggles, Dog Collar: Rare, kept for crafting or stash.
    – Dried ARC Resin: Uncommon, scrap from plastic.
    – Duct Tape: Uncommon, used widely for modifications.
    – Durable Cloth: Uncommon, handy for recipes and quests.
    – Electrical Components: Uncommon, used in recipes, stored accordingly.
    – Empty Wine Bottle: Common, best sold.
    – Exodus Modules & other Exodus-related items (like Spectrum Analyzer): Epic, kept for crafting and quests.
    – Expired Pasta & Respirator: Common and rare, sold or scrapped.
    – Explosive Compound: Rare, scrap from security/industrial sites.
    – Fabric & other textiles (like Torn Book, Blanket, Accordion): Uncommon or rare, sold or scrapped.
    – Films, posters, and decorations (Natural Wonders poster, Vase): Uncommon or rare, sold.
    – Fireball Burner, Flow Controller, Frequency Modulation Box: Rarer parts used in various tech and quests.
    – Fried Motherboard: Rare, stored for utility purposes.
    – Frying Pan & Garlic Press: Rare or uncommon, scrapped for metal or stored.
    – Geiger Counter: Epic, stored for trophies or recycled.
    – Great Mullein & Headphones: Uncommon, often stored.
    – Heavy Gun Parts & Hornet Driver: Rare, used in weapon crafting.
    – Household Cleaner, Humidifier, Ice Cream Scooper: Uncommon, used for recipes or sold.
    – Impure ARC Coolant: Uncommon, scrap chemical material.
    – Industrial Battery & Charger & Magnet: Rare, stored for upgrades.
    – Ion Sputter & Lab Reagents & other scientific parts: Rare, mainly stash or scrapped.
    – Lance’s Mixtape, Leaper Pulse Unit: Epic, in stash for quests.
    – Lemon: Uncommon, stored for crafting or upgrades.
    – Light Bulb & Light Gun Parts: Uncommon or rare, used for crafting or sale.
    – Magnetron, Magnet, and Magnetic Accelerator: Epic or uncommon, used in advanced weaponry.
    – Mechanical & Metallic Components (like Mechanical Components, Metal Brackets, Metal Parts): Rare or common—used widely in crafting.
    – Microscope & Mini Centrifuge: Rare, sold or recycled.
    – Mod Components & Moss: Rare, used for weapon mods or seeds.
    – Motor & Mushrooms: Uncommon, for crafting; mushrooms more so for farming.
    – Music Album & Music Box: Rare, mostly sold.
    – Number Plate & Oil & Olives: Uncommon or common, used in recipes.
    – Painted Box & Patrol Car Key & Plastic Parts: Common, valuable for crafting, quests, and gear upgrades.
    – Playing Cards & Polluted Air Filter: Rare or uncommon, for sale or scrap.
    – Pop Trigger & Portable TV: Common or rare, used or sold.
    – Poster of Natural Wonders & Very Comfortable Pillow: Uncommon or common, sold or kept for decor.
    – Volcanic Rock & Voltage Converter: Common and rare respectively, for sale or scrap.
    – Wasp Driver & Water Filter & Water Pump: Rare, essential parts for certain quests and crafting.
    – Wires & other electrical parts: Uncommon but used often for recipes or quests.
    – Various other scrap items (like Rusted Bolts, Rusted Gear, Rusted Shut Medical Kit): Usually rare or uncommon scrap.

    This list simplifies and clarifies each item, emphasizing its common usage, rarity, and typical storage or disposal method in the game.

  • Arc Raiders Battle Recon – Featured on GamesRadar+

    Arc Raiders Battle Recon – Featured on GamesRadar+

    The Combat Recon quest in Arc Raiders requires you to explore Buried City and identify three key hiding spots. Once you’ve marked these locations on your map, your next step is to hunt down two Spotters and bring a Spotter Relay back to Shani in Speranza. Since Spotters tend to stay near Bombardiers, you’ll need to navigate around these dangerous tanks to complete your mission. During special map modifiers, such as the Arc Raiders Bird City update, you’ll find extra ziplines that make moving between rooftops easier.

    First, head to the parking garage and use the staircase on the north side to reach the roof. Here, you’ll find an interaction point to mark the first cover spot. Be aware, the parking lot is risky, often filled with high-level enemies and limited cover.

    Next, make your way to the bushes near Marano Park. On the west side of the town’s center, locate the large bus partially buried in sand. Use the rooftop of the nearby building to access the attic, where you can mark another cover position. Keep in mind, the park is a hostile zone with powerful robots that usually guard this area.

    Finally, go to the center of town to Plaza Rosa and climb to the rooftop of the westernmost building. Open the skylights and drop into the attic to mark the third hiding spot. Be cautious, as this area is heavily guarded by enemies.

    To find Spotters, look for small flying robots that shadow Bombardiers. You’ll need to find a Bombardier to locate the Spotters, which can spawn in the parking center, Marano Park, or Main Street. Be warned—the Bombardiers are extremely dangerous, firing deadly mortar shots. Spotters help Bombardiers identify targets, making them a priority to eliminate.

    For best results, attack Spotters from inside buildings, taking cover on rooftops. After killing them, wait for the Bombardier to become passive before looting the Spotters for the Spotter Relay. This relay isn’t worth much on its own, so handing it over to Shani is the smart move. Once the relay has been delivered, your quest is complete.

  • Complete List of Arc Raiders Augments and Their Effects

    Complete List of Arc Raiders Augments and Their Effects

    Arc Raiders’ Augments are an essential part of your equipment, each offering extra backpack space for different items and bonuses if you find a really good one. Like many items in Arc Raiders, you can find them through looting, craft them with blueprints, or upgrade them to higher tiers. There are three main types of Augments, each with various rarities and versions, affecting your inventory slots differently. It can be confusing to choose the right one, so here’s a straightforward guide to help you understand Augments, including new additions and what they do.

    New Arc Raiders Augments

    Two Epic Augments have just been added: Tactical Mk. 3 (Revival) and Looting Mk. 3 (Safekeeper). These are part of the first phase of the Headwinds expansion. The Tactical Revival features a built-in defibrillator, allowing you to revive teammates without using items, with a four-minute cooldown. The Looting Safekeeper grants its single Safe Pocket Slot the ability to hold any item—meaning you can safely store a weapon to prevent losing it during a fight. Detailed stats for these Augments are listed below.

    How Augments Work

    Augments primarily increase your inventory capacity with extra backpack slots and weight limits. You can earn them by looting containers or fallen enemies, or craft them using blueprints. Different types of Augments—Combat, Looting, or Tactical—offer unique benefits:

    • Combat focus on shield compatibility and fighting advantages.
    • Looting improve your carrying capacity and weight limits.
    • Tactical enhance item usage, with more Quick-Use slots, but tend to have smaller backpacks and less shield compatibility.

    Augments also determine what kind of shield you can equip: all work with a Light Shield, but fewer are compatible with Medium or Heavy Shields. Rare and Epic Augments include perks that grant additional field benefits, like health regeneration or automatic item use.

    The best approach is to carry a mix of all three types—so you’re prepared whether you’re fighting ARC enemies, other players, or just looting. Switching between Augments based on your mission helps maximize your effectiveness.

    Full List of Augments

    Below are all available Augments, including their stats, perks, and shield compatibility. (Note: Swipe horizontally on the table to see all details.)

    Augment Stats Perk Shield Compatibility
    Combat Mk 1 45 Weight, 16 Backpack Slots, 4 Quick-Use, 1 Safe Pocket None Light & Medium
    Combat Mk 2 55 Weight, 18 Backpack Slots, 4 Quick-Use, 1 Grenade Slot, 1 Safe Pocket Restores 1 health/sec, pauses for 30 sec when damaged All Shields
    Combat Mk 3 (Aggressive) 65 Weight, 18 Backpack, 4 Quick-Use, 2 Grenades, 1 Safe Restores 2 health/sec, pauses when damaged All Shields
    Combat Mk 3 (Flanking) 60 Weight, 20 Backpack, 5 Quick-Use, utilities, 2 Safe Faster pistol/equipment swapping Light Shield
    Looting Mk 1 50 Weight, 18 Backpack, 4 Quick-Use, 1 Safe None Light Shield
    Looting Mk 2 60 Weight, 22 Backpack, 4 Quick-Use, Trinkets, 2 Safe Automatically eject ticks after one second Light Shield
    Looting Mk 3 (Cautious) 70 Weight, 24 Backpack, 5 Quick-Use, binoculars, 2 Safe Auto-use weak adrenaline when shield breaks Light Shield
    Looting Mk 3 (Safekeeper) 65 Weight, 18 Backpack, 4 Quick-Use, Trinkets, 1 Safe Can store any item in Safe Pocket All Shields
    Looting Mk 3 (Survivor) 80 Weight, 20 Backpack, 5 Quick-Use, utility, 3 Safe Heal up to 75% health when downed Light & Medium
    Tactical Mk 1 40 Weight, 15 Backpack, 5 Quick-Use, 1 Safe None Light & Medium
    Tactical Mk 2 45 Weight, 17 Backpack, 5 Quick-Use, utility, 1 Safe Deploy smoke grenade when shield breaks Light & Medium
    Tactical Mk 3 (Defensive) 60 Weight, 20 Backpack, 5 Quick-Use, shield recharger, 1 Safe Rechargers usable while running All Shields
    Tactical Mk 3 (Healing) 55 Weight, 16 Backpack, 4 Quick-Use, heals, 3 Safe Creates healing cloud when revived Light & Medium
    Tactical Mk 3 (Revival) 65 Weight, 16 Backpack, 5 Quick-Use, defibrillator, 2 Safe Restores health over time after damage Light Shield

    Additionally, if you choose the free loadout, you get a basic Augment with a 35-weight limit, 14 Backpack Slots, and four Quick-Use slots. It’s limited and can’t be swapped during a match, so it’s mainly for emergency situations.

    Choosing the right Augment depends on your playstyle and the situation. Mixing different types keeps you flexible and ready for whatever the game throws at you.

  • Helldivers 2: Siege Breakers Warbond Uncovered

    Helldivers 2: Siege Breakers Warbond Uncovered

    The upcoming Helldivers 2 Siege Breakers Warbond will soon be available, offering a variety of powerful weapons and Stratagems designed to give players the firepower needed to take down enemy defenses. While it’s unlikely all structures will be instantly demolished, the tools included promise significant destruction. We don’t know exactly how effective some weapons like the Breaching Hammer or Leveller launcher will be, but they certainly suggest maximum damage. Below is a list of all the destructive gear players can unlock through this Warbond.

    The Siege Breakers Warbond launches in Helldivers 2 on February 3, just under two weeks after the release of the Redacted Regiment Warbond. Players will be able to purchase it from the Superstore for 1,000 Helldivers 2 Super Credits or with a Warbond Token if they have one. To unlock the items, Medals earned in the game will be required.

    Interestingly, the trailer for this Warbond hints at something special at the end—most believe it teases the return of the Cyborg faction from the original Helldivers. Since this Warbond drops five days before Helldivers 2’s second birthday, it’s possible we might see a major update either on the same day or shortly afterward, around February 5.

    Here’s what players can earn from the Siege Breakers Warbond:

    • Weaponry:

      • LAS-16 Trident: An energy shotgun that shoots six laser beams at once. This is an upgraded version of the powerful Trident from Helldivers 1, though it may be balanced for gameplay.
      • G/SH-39 Shield: A throwable device that creates a small, stationary bubble shield, offering protection similar to a grenade but in shield form.
    • Stratagems:

      • CQC-20 Breaching Hammer: A giant sledgehammer with explosive charges that can be fitted to increase damage on impact.
      • EAT-411 Leveller: A one-time-use rocket launcher firing a huge warhead. Think of it as Helldivers’ answer to Fallout’s Fat Man launcher.
      • GL-28 Belt-Fed Grenade Launcher: A grenade launcher fed from a backpack belt, likely causing slower movement while firing but offering rapid explosive fire.
    • Armors:

      • SA-8 Ram Armor and Helmet: Heavy armor providing high protection, with a new passive ability called Supplementary Adrenaline, which restores stamina when damaged.
      • SA-7 Headfirst Armor and Helmet: A medium armor set also featuring the same stamina-recovery passive.
    • Cosmetics:

      • Fashionable capes and player cards, emotes, and camouflage patterns for various suits and vehicles, along with a title to showcase your achievements.

    We will update this guide with all the detailed costs and additional info when the Warbond drops on February 3. In the meantime, if you’re eager for some explosive action, check out the Helldivers 2 Democratic Detonation and Servants of Freedom Warbonds. You can also see how they compare in our best Helldivers 2 Warbonds list.

  • Arc Raiders Trophy Showcase Initiative

    Arc Raiders Trophy Showcase Initiative

    The Trophy Display project was introduced with the January Headwinds update in Arc Raiders. Although it’s still early, we’re working to uncover all the specific items needed to complete this new challenge. Successfully finishing all five stages offers exciting rewards, and we’ll keep updating this guide as new information emerges. If your goal is to be the top tracker of enemies in Speranza, here’s everything we’ve learned about the Headwinds Trophy Display project and how to finish it, marking the first big update in the ongoing Arc Raiders Escalation Roadmap.

    Trophy Display Walkthrough and Rewards

    The Trophy Display project currently has no set end date and is divided into five stages, each requiring players to submit different items for rewards. So far, most of the Arc Raiders community has only unlocked the first stage, “Roaming Threats,” but we’ll update this guide as more steps are uncovered. With the new Bird City map modifier, many items might be found near nests or on rooftops.

    Item How to Obtain Reward
    Rusted Bolts (3) Found in industrial or mechanical areas 10 Mod Components
    Pop Trigger (15) Dropped by defeating exploding Arc “Pop” robots 3 Power Rods
    Tick Pod (15) Dropped by defeating spider-like Arc “Tick” robots 10 Raider Tokens
    Surveyor Vault (5) Dropped by rolling Arc “Surveyor” robots or located on Arc Couriers 1 Light Gun Parts Blueprint

    Final Rewards for Completing All Stages

    While each step gives individual rewards, completing all five phases grants some really valuable items:

    • Howl emote
    • Jupiter Legendary Sniper Rifle
    • Acoustic Guitar Legendary Quick Use item
    • Energy Clip (Ammo)
    • 300,000 Coins

    The full list of ingredients and rewards will become clearer as more of the community progresses through each stage. Keep an eye out for items in nests and rooftops, especially with the new map modifier.

    While we’re still discovering all the details, finishing all five steps will give you some of the best gear and collectibles in Arc Raiders. Stay tuned for updates as the community advances!

  • Helldivers 2: Key Voice Actors and Cast Details

    Helldivers 2: Key Voice Actors and Cast Details

    There are several voice actors in Helldivers 2 whose voices might sound familiar, even with all the shouting and screams. Many of these actors have previously lent their voices to popular games like Marvel’s Spider-Man, Sonic series, Hi-Fi Rush, and Apex Legends. So, as you fight for freedom on Super Earth, you’re likely to recognize at least one voice. Below is a list of the main voice actors in Helldivers 2, along with the characters they play and other projects they’ve worked on.

    Main voice actors in Helldivers 2

    Here are the key voice talents bringing the characters to life, from the Helldivers themselves to the heroes communicating through radio:

    • Cindy Robinson as Coretta Kelly — Robinson is known for voicing Astrid in Skyrim and Amy Rose in various Sonic games and shows.
    • Ike Amadi as Democracy Officer — Amadi’s voice is familiar as the Prowler and Aaron Davis in Marvel’s Spider-Man games, Seer in Apex Legends, and Jax, Cyrax, and Shao Kahn in Mortal Kombat.
    • Todd Haberkorn as General Brasch — Haberkorn recently appeared in Starfield, especially as part of the Crimson Fleet, and is well known for his role as the Drifter in Destiny 2, along with many roles in anime like Fairy Tail.
    • Erica Lindbeck as Helldiver 1 — Lindbeck has appeared in numerous games and shows, notably voicing Black Cat in Marvel’s Spider-Man, Meredith Stout and Misty in Cyberpunk 2077, and Peppermint in Hi-Fi Rush.
    • Yuri Lowenthal as Helldiver 2 — Lowenthal is famous for playing Spider-Man in the Insomniac Marvel games and reprising the role in Midnight Suns. His extensive voice work spans many video games and animated series.
    • Julie Nathanson as Helldiver 3 — Nathanson’s credits include Briar in League of Legends, Samantha Maxis in Call of Duty Zombies, and roles in Starfield, Deathloop, and Bugsnax.
    • Robbie Daymond as Helldiver 4 — Daymond voiced Chai in Hi-Fi Rush and has appeared in Critical Role campaigns, Cyberpunk 2077, and Jujutsu Kaisen.
    • Roger Craig Smith as Mission Control — Smith is a veteran voice actor known for Ezio in Assassin’s Creed, Sonic in multiple Sonic games, Mirage in Apex Legends, and other roles.
    • Sarah Elmaleh as Service Technician (not currently in the game) — Elmaleh has voiced characters like Korsica in Hi-Fi Rush, the Cube Queen in Fortnite, and Lizzie Carmine in Gears 5.
    • Michelle Wong as Ship Master — Wong’s work includes Radel in Horizon: Call of the Mountain, Doc in Back 4 Blood, and Rei Nanako in Fallout 4’s Far Harbor.
    • Craig Lee Thomas as Super Earth Spokesperson — Thomas provides voice and likeness for the spokesperson in the intro cinematic, and also voices characters in Honkai: Star Rail, Starfield, Octopath Traveler II, and Star Wars: Squadrons. He has appeared on TV shows like Jane The Virgin.

    These talented voices bring depth and personality to the game, making each character memorable.