Tag: List

  • UK Defence Minister Healey resigns over PM Starmer’s security failures

    UK Defence Minister Healey resigns over PM Starmer’s security failures

    British Defense Secretary John Healey walks along Downing Street to attend a cabinet meeting the day before the State Opening of Parliament in London, May 12, 2026—Reuters/File.

    – Healey resigns over delayed and contested Defense Investment Plan (DIP).
    – Resignation follows Streeting’s departure earlier in May.
    – Military officials push for increased defense funding.

    Healey stepped down Thursday amid disagreements over military spending, accusing Prime Minister Keir Starmer of failing to allocate sufficient funds to safeguard the nation during a period of rising threats. His surprise departure included a pointed public letter, intensifying pressure on Starmer, who is facing potential leadership challenges and highlighting the government’s dilemma on how to boost defense budgets without additional revenue.

    For months, the UK’s defense and finance departments have been in negotiations over how to meet escalating demands for military expenditure, delaying the release of Britain’s Defense Investment Plan (DIP), initially slated for last year.

    Defense leaders emphasize the necessity of the plan to address growing security challenges, such as frequent Russian incursions into British waters. Meanwhile, the government struggles with debt reduction efforts amidst the highest tax rates seen in decades.

    Healey’s outspoken resignation adds to a series of political shakeups. Starmer has already faced the resignation of Wes Streeting from the health ministry in May, with another politician, Andy Burnham, seeking to re-enter frontline politics and possibly challenge the leadership.

    “Inadequate resource commitments from the Treasury threaten our ability to defend the nation during this dangerous time,” Healey wrote in his letter to Starmer.

    The UK’s defense sector has voiced frustration over the DIP’s delay, which hampers their capacity to plan long-term investments. The situation is compounded by the U.S. moving away from European security commitments and recent conflicts involving Israel and Iran exposing deficiencies in Britain’s naval preparedness, with ships unable to swiftly respond to regional crises.

    The DIP aims to outline funding allocations for military equipment and operations to prepare the armed forces for active combat. Starmer indicated that the plan would be released before the NATO summit starting July 7.

    Healey criticized the current financial package, stating, “The DIP funding you provided — which I only saw fully this Monday — falls well short of what’s needed for national security in this perilous period.” He warned that inadequate funding forces decisions that could compromise military readiness and personnel safety, ultimately making the country less secure.

  • Best Weapons Tier List in Arknights: Completing Endfield

    Best Weapons Tier List in Arknights: Completing Endfield

    With many different weapon types constantly appearing in the Arsenal Exchange in Arknights: Endfield, it’s tempting to build the best weapons for your favorite operators to make them the most powerful on the battlefield.

    However, not all weapons are equal. Some stand out significantly when it comes to quality and effectiveness. In our weapon tier list for Arknights: Endfield, we help you identify the top gear to maximize the strength of your best operators.

    How Do Tiers Work?

    [Insert relevant image here]

    Weapons are ranked into tiers based on their overall usefulness, stats, and synergy with operators. The highest tier, S-Tier, includes weapons that are the absolute best—often signature six-star weapons or those obtained from the highest-level Protocol Pass weapons. These are worth prioritizing for your strongest operators. Lower tiers, like A, B, and so forth, contain weapons that are good but not the top choice, typically easier to obtain and useful as stepping stones until you find better gear.

    All Weapon Types

    Like many combat-focused games, Arknights: Endfield offers a range of weapon types, each suited to different characters. Every operator can wield weapons matching their primary weapon type—these are their signature weapons, unique to them and seen in the main story. Until you unlock their signature weapon, you’ll rely on a variety of other weapons that work well with their stats.

    Operators can use five main weapon types:

    • Swords: Commonly used by primary damage dealers, especially those focusing on physical damage and debuffs.
    • Handcannons: These are ranged guns ideal for operators who excel at dealing damage from a distance, often by triggering Arts Reactions or inflicting status effects.
    • Arts Units: Designed for elemental damage and Arts Reactions, these operators harness nature or elemental forces.
    • Greatswords: Less common but powerful, they have high attack ratings. They deliver slower but colossal hits.
    • Polearms: Offer a good mix of speed and attack power, ideal for agile characters fighting physical enemies and controlling enemy movement.

    [Insert Weapon Image here]

    While each operator can use any weapon that matches their primary type, some six-star operators have signature weapons, which are iconic and often exclusive to them. These signature six-star weapons are generally the best options for their operators and are often acquired through the Arsenal Exchange. Many five-star weapons also work well, especially those that match their stat profile, and can be used effectively until better options become available.

    In addition, many basic “filler” weapons are available—these are the level-one versions of common weapons, which you receive from pulls or as initial equipment. These are useful for leveling up your top-tier weapons and swapping them out when more powerful gear is unlocked.

    Our Weapon Tier List Criteria

    Because there are over four dozen weapons and new ones added regularly, not every weapon makes this list. Instead, we’ve selected key weapons based on their performance, availability, and how well they support various operator roles. We classify weapons into tiers based on their overall effectiveness and utility on the battlefield:

    • S-Tier: Top-tier weapons, often signature six-star items or those obtained from high-level passes. These are highly recommended to build first.
    • A-Tier: Very solid weapons that are great investments and work well for multiple operators. Easier to obtain than S-Tier and useful until you find your ideal gear.
    • B-Tier: Good weapons that still have decent stats but are not the best choice in slot. Useful temporarily or for less critical operators, especially when better weapons are unavailable.

    [Insert Tier List Table here]

    Arknights: Endfield Weapons Tier List

    S-Tier Weapons

    Weapon Name & Type Reason for Inclusion
    Artzy Tyranical (Six-Star Handcannon) Signature weapon for Yvonne, providing Cryo damage boost, especially effective with critical hits.
    Brigand’s Calling (A-Star Handcannon) The signature weapon of Tangtang, enhances Cryo damage and is versatile for other Cryo operators.
    Delivery Guaranteed (Six-Star Arts Unit) Boosts Arts Ultimate gain and team Arts damage. Ideal for Giulberta.
    Dreams of the Starry Beach (Six-Star Arts Unit) Improves healing effects for support operators like Ardelia by increasing intellect and support attributes.
    Forgeborn Scathe (Six-Star Sword) Improves attack and ultimate effects for her, increasing damage output significantly.

    (Further weapons continue in the list, each with detailed reasons)

    A-Tier Weapons

    Weapon Name & Type Reason for Inclusion
    Clannibal (Six-Star Handcannon) Key for Wulfgard, boosting Arts damage and main attributes.
    Detonation Unit (Six-Star Arts Unit) Enhances Arts intensity, main attribute, and increases enemy Arts damage intake.
    Eminent Repute (A-Star Sword) Great for Endmin, boosting main attribute and physical damage.
    Exemplar (Six-Star Greatsword) Increasing physical attack and main attribute, suitable for powerful melee units.

    (Additional weapons in this tier focus on balance and versatility)

    B-Tier Weapons

    Weapon Name & Type Reason for Inclusion
    Chimeric Justice (Five-Star Polearm) Good for physical damage and crit rate; useful against uninjured enemies.
    Freedom to Proselytize (Five-Star Arts Unit) Enhances healing capabilities and overall team survivability.
    OBJ Arts Identifier (Five-Star Arts Unit) Boosts arts damage and intensity, beneficial for arts-dependant operators.

    (Further weapons follow, with notes on their place in gameplay)

    Conclusion

    This tier list aims to help you prioritize your gear investment. Signature six-star weapons are the best options, but many five-star and even some four-star weapons remain valuable. Focus first on obtaining and upgrading S-tier weapons for your main operators, then supplement with solid A-tier options. Use tier below weapons as temporary or situational tools to maximize your team’s effectiveness in Arknights: Endfield.

  • Complete Controls Guide for Crimson Desert: Solving All Features

    Complete Controls Guide for Crimson Desert: Solving All Features

    Crimson Desert received mixed reviews at launch. While many appreciated its detailed systems and vast world, a common complaint was its complicated controls. Unlike most games that have a few straightforward action buttons, Crimson Desert requires players to learn and correctly time several button combinations to stay effective in combat.

    Even basic tasks like solving puzzles and moving around can become confusing if you skip tutorials or don’t memorize each ability. Due to the game’s level of complexity, it’s a good idea to keep a list of the most important controls nearby as you get used to playing.

    ### Full Controller and Keyboard Input List

    The controls vary depending on the situation, but the game offers specific control guides for each big activity. To see the complete list of controls:

    1. Pause the game.
    2. Go to the “Others” tab on the far right of the screen.
    3. Switch to the “Guides” sub-tab (using RT or R2).

    Here, you’ll find detailed instructions for interacting, combat, climbing, and mini-games.

    #### Basic Movement Controls:
    | Action | Xbox | PlayStation | PC |
    |——————-|—————–|—————–|—————-|
    | Walk | LS | L | W/A/S/D |
    | Move Camera | RS | R | Mouse |
    | Basic Attack | RB | R1 | Left Click |
    | Power Attack | RT | R2 | Right Click |
    | Run | Tap A | Tap X | Shift |
    | Jump | X | Square | Space |
    | Dodge/Roll | B | Circle | Alt |
    | Kick/Unarmed | Y | Triangle | F |
    | Summon Horse | D-Pad Up | Arrow Up | H |
    | Quick Slot 1 | Hold D-Pad Up | Hold Arrow Up | Hold H |
    | Sheathe Weapon | D-Pad Left | Arrow Left | T |
    | Quick Slot 2 | Hold D-Pad Left | Hold Arrow Left | Hold T |
    | Food | D-Pad Right | Arrow Right | – |
    | Camera Lock | D-Pad Down | Arrow Down | CAPS Lock |
    | Crouch/Slide | Click LS | L3 | C |
    | Axion Force | Hold LS | Hold L3 | Tab |
    | Force Palm | Hold RS | Hold R3 | Middle Mouse |
    | Aim Ranged | LT | L2 | Q |
    | Block/Parry/Aim Lantern | LB | L1 | Ctrl |
    | Change Camera | View Button | Select Button | – |
    | Map | Hold buttons for pause and map | Hold buttons for pause and map | – |

    ### Can You Remap Controls?

    As of now, you cannot change control mappings on consoles. Pearl Abyss announced that a future update might allow full control customization, but it hasn’t been confirmed yet.

    PC players, however, can completely rebind their keys. To do this:

    1. Open the pause menu.
    2. Select Settings.
    3. Go to the “Inputs” submenu.
    4. Assign new keys to suit your preference.

    Players on Steam using a controller can also remap inputs, though the game will still show default controls in tutorials and menus even if you’ve customized them.

  • MTG Strixhaven Quandrix Unlimited Commander Deck: Completing & Solving Tips

    MTG Strixhaven Quandrix Unlimited Commander Deck: Completing & Solving Tips

    If you’re thinking about getting one of the new Magic: The Gathering Secrets of Strixhaven Commander pre-constructed decks for your next game night, the mysterious Quandrix Unlimited green and blue deck is a solid choice.

    Although the complete deck list isn’t out yet, we have a good idea of some of the key cards and mechanics it will include. If you enjoy boosting your creatures with +1/+1 counters and casting X-cost spells for maximum benefit, this deck aligns with that playstyle.

    Quandrix Unlimited Deck List

    While we wait for the full list, here are some cards we know are likely to be in the deck:

    • Zimone, Infinite Analyst
    • Sol Ring
    • Arcane Signet
    • Talisman of Curiosity

    The full deck list is expected to be revealed between late March and early April, and we will update as more spoilers come out.

    Commander Breakdown

    The main commander for this deck is Zimone, Infinite Analyst. This card has a lot of text, so understanding its abilities is important before you jump into a game:

    • Whenever you cast your first spell with an X cost each turn, it costs one less mana for each +1/+1 counter on Zimone.
    • When you cast your first X spell each turn, you also put two +1/+1 counters on Zimone.

    This makes Zimone a powerful and potentially game-breaking card, especially as you add more counters to it. Focus on creating ways to add counters to Zimone, so you can reduce the cost of your X-spells and cast bigger spells more easily, rapidly shifting the board state in your favor.

    Deck Strategy & Themes

    The deck’s main strategy revolves around two key mechanics:

    • Placing many +1/+1 counters on your creatures.
    • Casting X-cost spells to maximize their impact.

    Zimone only places counters on itself, so you will need other ways to buff your other creatures. Timing your X-spells is crucial—they can be used for various effects like creating tokens or dealing damage to opponent’s creatures. It’s best to cast these spells selectively, choosing the right moment to get the most benefit rather than just going for maximum value every time.

    Upgrades

    There are many ways to boost this deck, especially by adding impactful X-spells. Some potential upgrades may include reprints of powerful cards, once we see the official list.

    Notable Upgrade Options:

    Nissa, Steward of Elements
    This planeswalker is unique because it’s cast with an X-value, giving it a dynamic entry. If you can cast her with at least seven X, her -6 ability becomes available immediately, allowing you to turn two lands into 5/5 flying, haste creatures that stay on the battlefield. This can deal a lot of damage quickly. Her other abilities help with drawing cards and finding lands, making her a flexible upgrade.

    Repulsive Mutation
    An instant that’s great as both an offensive tool and a counterspell. It puts X +1/+1 counters on a creature you control and counters an opponent’s spell unless they pay mana equal to the highest power among your creatures. For example, if you have a creature at 12/12, the opponent must pay 12 mana to cast their spell, effectively making it very hard to counter your big threats.

    Zimone, Paradox Sculptor
    Consider using a different version of the commander for additional synergy. This version can put a +1/+1 counter on up to two creatures at the start of your turn, and with some mana and tapping, can double the counters on those creatures or artifacts, further amplifying your growth.

    Hydroid Krasis
    A versatile X-spell that gains you life and draws cards based on X. When cast, you gain half of X in life and draw that many cards, then it enters with X +1/+1 counters, flying, and trample—making it both a big threat and a sustain source.


    This deck revolves around stacking counters and casting impactful X-spells at the right moments to dominate the game. Keeping your focus on speeding up your threats and controlling the pacing with well-timed spells will give you a strong edge.

  • Strixhaven Witherbloom Pestilence: Completing Commander Deck & Upgrades

    Strixhaven Witherbloom Pestilence: Completing Commander Deck & Upgrades

    Witherbloom is one of the most intriguing colleges at Strixhaven because of its conflicting beliefs. These contrasts are clearly shown in the Witherbloom Pestilence Commander pre-con deck. Out of five new Magic: The Gathering pre-constructed decks, this one stands out if you’re interested in balancing life gain with sacrifice mechanics.

    Led by a Dryad Druid named Dina, this green and black Commander deck focuses on strengthening creatures just to sacrifice them for a greater purpose. Here’s what we know so far about the deck and some ideas for improvements.

    Witherbloom Pestilence Deck List

    As with most Secrets of Strixhaven pre-cons, aside from Prismari Artistry which was leaked, detailed information about the Witherbloom Pestilence deck remains limited. We’ll keep you updated once more spoilers are available.

    Sample Cards in the Deck Include:

    • Dina, Essence Brewer — a legendary creature costing 1 black, 1 green, and 1 colorless.
    • Sol Ring — an artifact costing 2 colorless.
    • Arcane Signet — another artifact costing 2 colorless.
    • Talisman of Resilience — an artifact costing 2 colorless.

    Commander Breakdown

    Dina, Essence Brewer, serves as the deck’s Commander. Her main ability allows you to draw a card each time you sacrifice a creature, but only once per turn. This means you can sacrifice creatures on your opponent’s turn to draw cards if you prefer.

    Additionally, for two mana and tapping Dina, you can sacrifice a creature and gain X life while putting X +1/+1 counters on another creature you control. For example, sacrificing a 4/4 creature grants four life and adds four +1/+1 counters to a different creature.

    Deck Themes & Strategy

    The college’s conflicting beliefs stem from Dean Lisette, who promotes nurturing and protecting all life, versus Dean Valentin, who sees death and decay as natural and essential. This duality is reflected in the deck’s mechanics, which pair life gain with sacrifice.

    Expect cards that focus on gaining +1/+1 counters, interacting with the graveyard, and draining opponents’ life totals. The deck is likely built around developing strong creatures to deal big damage, then sacrificing them to maintain high life totals or activate other battlefield effects that harm opponents.

    Upgrades

    While specific cards haven’t been identified for removal, updates will be provided once the full deck list is revealed. Some cards may be reprints included in the deck, which could be swapped out if necessary. Expect the complete deck list to be available in late March or early April.

    Dina, Soul Steeper

    It’s notable that many cards from Strixhaven are useful in this new Commander deck, including Dina, Soul Steeper. This 1/3 legendary creature drains one life from each opponent whenever you gain life. Its ability to sacrifice other creatures and add their power to Dina until the end of turn makes it a valuable component of the deck.

    Infuse With Vitality is a common instant spell that complements the deck’s themes. It grants a creature deathtouch and allows it to return tapped to its owner’s hand when it dies. This lets you sacrifice small creatures in combat, knowing they will return afterward, and also triggers life gain.

    Tend the Pests fits well too; it sacrifices a creature and produces X pest tokens, where X is the sacrificed creature’s power. These tokens are pitiful on their own, but when they die, you gain extra life.

    Diregraf Rebirth is a versatile sorcery costing five mana that gets cheaper as creatures die during the turn. It allows you to return a creature from your graveyard to the battlefield, with a flashback option for seven mana, providing flexibility for resurrection strategies.

  • Strixhaven Lorehold Spirit Commander Deck List & Completing Upgrades

    Strixhaven Lorehold Spirit Commander Deck List & Completing Upgrades

    Five new Commander pre-constructed decks are arriving in Secrets of Strixhaven, and we’re here to break down each one so you can decide which fits your play style best.

    If your strategy involves graveyard recursion, token creation, or if you have a soft spot for Lorehold College, the Lorehold Spirit deck is an excellent choice. We’ll also look at possible upgrades, especially from the white and red mana pools.

    Lorehold Spirit Deck List

    Much about the full deck list is currently unknown, unlike the Prismari Artistry deck which leaked earlier. More details are expected during spoiler season.

    Here’s what we know so far about the deck’s key cards:

    Card Name Card Type Cost
    Quintorius, History Chaser Planeswalker 1 Red, 1 White + 2 Colorless
    Arcane Signet Artifact 2 Colorless
    Sol Ring Artifact 2 Colorless
    Talisman of Conviction Artifact 2 Colorless

    Full deck details are anticipated in late March or early April.

    Commander Breakdown

    The Commander for this deck is Quintorius, History Chaser, which is a planewalker, not a legendary creature—a rare choice for Commander decks that can work if explicitly specified. Planeswalkers as Commanders are uncommon but powerful when used correctly.

    Quintorius’s abilities clearly define the deck’s focus: whenever cards leave your graveyard, you get to create a 3/2 white and red spirit token. Its +1 ability allows you to discard a card, draw two, and mill one, helping to fill your graveyard and draw more cards to interact with it. The -4 grants all your spirit tokens vigilance and double strike, making them more formidable in combat.

    Deck Theme & Strategy

    From the packaging and the Commander, the deck centers around two main themes: casting cards from the graveyard and generating spirit tokens. Mechanics like flashback, unearth, dredge, or delve are likely included, as they all involve interacting with your graveyard. While most focus on creature cards, non-creature cards that leave your graveyard can also be part of the strategy, especially creature cards that can return to the battlefield repeatedly, creating recurring threats for opponents.

    Enhancing your spirits and creatures with spells or enchantments to boost their power is also expected, making your tokens even more menacing alongside your graveyard recursion.

    Upgrades

    We can’t specify which cards will be removed until the full deck list is available, but we can suggest existing Commander-legal cards that would complement this deck.

    Some promising options include:

    • Sacred Fire: This flashback spell deals two damage to any target and restores two life. Its initial cost is low, making it good for early removal of small creatures. Its flashback cost is six mana, but it can also help when your life is low by dealing damage and creating a spirit token if Quintorius is on the battlefield.

    • Quintorius, Field Historian: A legendary creature that shares the same ability as Quintorius, creating a spirit token whenever you leave cards from your graveyard. Having both on the battlefield means you’ll consistently generate two spirits each time you interact with your graveyard, and it also boosts spirits’ power by +1/+0.

    • Firemane Angel: A 4/3 flying, first strike creature that gains you one life at the start of each upkeep if it’s on the battlefield or in your graveyard. Recasting it from the graveyard costs ten mana but can be done during your upkeep, providing a way to activate Quintorius’s talent repeatedly. Accumulating life over time can be a useful buffer.

    • Rally The Peasants: An instant that gives all creatures +2/0 until end of turn, ideal for boosting your spirits’ attack power. It has a flashback cost similar to its original, allowing you to cast it twice, maximizing its value during the match.

    The deck will likely revolve around mechanics that involve cards leaving your graveyard, with creature cards that can repeatedly return to play being particularly disruptive for opponents. Expect numerous ways to enhance your spirits and creatures, either through instant spells or enchantments, to strengthen your tokens and overall board presence.

  • Strixhaven Prismari Artistry: Completing and Solving MTG Commander Decks

    Strixhaven Prismari Artistry: Completing and Solving MTG Commander Decks

    If you’re part of Prismari, the Strixhaven College, you’ll likely want to check out the Secrets of Strixhaven Commander pre-constructed deck. This deck focuses on red and blue mana, emphasizing spellcasting and generating elemental creatures to attack your opponents.

    This deck appears ideal for aggressive players who want to flood the board with spells and creatures to overwhelm their opponents. If this matches your style, let’s go over its main themes and some ideas for upgrades.

    Prismari Artistry Deck List

    While some cards in this deck have been leaked, and we expect to see more revealed as spoiler season continues, the current list includes several key cards. According to a leak, more cards are confirmed, but additional cards like Prismari Pianist, Gleaming Shallows, Renegade Bull, and a card ending with Flocking are expected but haven’t been fully revealed yet. Until we see these cards, we won’t include them in the official list, especially since names and abilities could change.

    Here’s some of the confirmed cards expected in the deck:

    Card Name Type Cost
    Rootha, Mastering the Moment Legendary Creature 1 Blue, 1 Red + 2 Colorless
    Talisman of Creativity Artifact 2 Colorless
    Sol Ring Artifact 2 Colorless
    Cursed Mirror Artifact 1 Red + 2 Colorless
    Arcane Signet Artifact 2 Colorless
    Archmage Emeritus Creature 2 Blue + 2 Colorless
    Brazen Borrower / Petty Theft Creature / Instant 2 Blue + 1 Colorless / 1 Blue + 1 Colorless
    Brudiclad, Telchor Engineer Legendary Artifact Creature 1 Blue, 1 Red + 4 Colorless
    Curiosity Crafter Creature 1 Blue + 3 Colorless
    Goldspan Dragon Creature 2 Red + 3 Colorless
    Fabled Passage Land N/A
    Frostboil Snarl Land N/A
    Hall of Oracles Land N/A
    Creative Technique Sorcery 1 Red + 4 Colorless
    Dance With Calamity Sorcery 1 Red + 7 Colorless
    Surge to Victory Sorcery 2 Red + 4 Colorless
    Twinflame Sorcery 1 Red + 1 Colorless
    Volcanic Salvo Sorcery 2 Red + 10 Colorless

    Note: These are the reprints suggested by the leak, but the final deck may include additional or different cards, including the aforementioned new ones. The specifics on those new cards are yet to be fully known.


    Commander Breakdown

    The commander for this deck is Rootha, Mastering the Moment. She is an Orc Sorcerer who, at the start of combat, creates a red/blue elemental with flying and haste. Its power and toughness are equal to the highest mana cost of a spell (instant or sorcery) you cast during your first main phase.

    Rootha only displays red and blue mana symbols, so the deck must include only red, blue, or hybrid mana cards. For example, if you cast a 12-mana Volcanic Salvo during your first main phase, Rootha will create a 12/12 elemental token with flying and haste. Opponents will need to be ready for sudden large attacks whenever Rootha is on the battlefield.


    Deck Theme & Strategy

    This deck revolves around casting spells early to trigger Rootha’s ability, then either protecting your tokens or flooding the board with elemental creatures to maximize damage. Cards like Goldspan Dragon help generate treasure tokens, ensuring you have enough mana to cast expensive spells and summon formidable elemental tokens.

    The game plan involves repeatedly casting spells during your first main phase to grow your elemental army quickly while using treasures to manage mana costs, thus maintaining a relentless attack.


    Suggested Upgrades

    Since the full list isn’t finalized, we won’t recommend removing any cards but will suggest some thematically fitting and synergistic additions.

    • Vivi Ornitier: This strong card from the Final Fantasy set fits well with the deck’s spell-casting theme. It adds red and blue mana equal to its power and gains a +1/+1 counter when you cast a noncreature spell, helping it grow while fueling your spells.

    • Twinflame Travelers: An elemental from Lorwyn, this creature triggers the abilities of other elementals an extra time. Pairing it with powerful elemental creatures can double their effectiveness.

    • Galvanic Iteration: A two-mana instant that copies your next spell and allows you to choose new targets. Its flashback ability lets you cast it again from the graveyard for three mana before exiling it.

    • Sorcerer Class: An enchantment that helps with card draw and mana generation. When it levels up, it allows you to tap creatures for red or blue mana or deal damage based on the number of spells cast that turn, increasing your damage output during combat.


    Note: This deck emphasizes casting spells early, activating Rootha, and then maintaining pressure by either protecting elemental tokens or flooding the field with additional creatures. With cards like Goldspan Dragon to generate treasures, you’ll have the resources to keep your spells and constructs flowing, making for a dynamic and high-impact gameplay style.

  • Ramadan 2026: New 15-Episode Series List and Air Times

    Ramadan 2026: New 15-Episode Series List and Air Times

    Digital Phablet — A new list of 15-episode series is set to premiere as we enter the second half of Ramadan 2026.

    Many production companies are now emphasizing 15-episode series after their success during the Ramadan seasons in recent years.

    Schedule and details for upcoming 15-episode series

    1. “El Loon El Azraq” Series – مسلسل اللون الأزرق

    Actress Jumana Murad and actor Ahmed Rizk are participating in Ramadan 2026 with their series “El Loon El Azraq” [The Blue Color], which is featured as part of the second-half Ramadan drama lineup.

    Air times:

    The series airs on CBC at 11:00 p.m.

    – First rerun: 7:45 a.m.

    – Second rerun: 5:15 a.m.

    The storyline revolves around “Amina,” who returns to Egypt with her husband “Adham” and their son “Hamza” after her husband’s work contract in the UAE abruptly ends. The family faces tough challenges as they work to continue treatment for their autistic son.

    "El Loon El Azraq" series

    2. “Aab Walaken” Series – مسلسل أب ولكن

    Actor Mohamed Farag is contributing to Ramadan 2026 with his series “Aab Walaken” [A Father, But], consisting of 15 episodes that explore the struggles of fatherhood and family responsibilities.

    Air times:

    The show airs on dmc channel at:

    – 8:30 p.m.

    – First rerun at 11:45 a.m.

    The series tells the story of a man fighting to reconnect with his daughter following his divorce, amid numerous dramatic conflicts.

    3. “El-Meter Samir” Series – مسلسل المتر سمير

    Set within a social comedy genre, “El-Meter Samir” highlights humorous situations faced by a lawyer in his professional life.

    Starring Karim Mahmoud Abdel Aziz, Nahed El Sebai, Mohamed Abdel Rahman, Mohamed Otaka, and Islam Ibrahim, written by Mamdouh Metwally and directed by Khaled Marei.

    Air times:

    The series airs on MBC Egypt at 11:00 p.m. and is also available on the MBC Shahid streaming platform.

    Aard Wa Talab

    4. “Aard Wa Talab” Series – مسلسل عرض وطلب

    This series follows a popular drama format, focusing on characters battling severe financial hardships. The protagonist struggles valiantly to keep her family afloat.

    The cast features Salma Abu Deif, Intisar, Alaa Morsi, Samah Anwar, Rahma Ahmed, and Mohamed Hatem. It is scripted by Mahmoud Ezzat and directed by Amr Moussa.

    Air times:

    It airs on ON channel at 7:00 p.m.

    – First rerun: 5:15 a.m.

    – Second rerun: 2:00 p.m.

    It is also accessible via the Watch It platform.

    Hekayet Nargis

    5. “Hekayet Nargis” Series – مسلسل حكاية نرجس

    “Hekayet Nargis” [Nargis’ Story] presents a psychological and social drama, inspired by real-life events. It portrays a woman’s struggles with delayed childbearing, which leads to conflicts culminating in the formation of a “fake family.”

    The cast includes Reham Abdel Ghafour, Hamza El-Aily, Ahmed Azmy, Donia Maher, Tamer Nabil, and Samah Anwar. The series is written by Ammar Sabry and directed by Sameh Alaa.

    Air times:

    It airs on Al-Hayat TV at 9:45 p.m.

    – First rerun at 4:15 p.m.

    – Second rerun at 1:30 a.m.

    It is also available on the Watch It platform.

  • Heartopia’s Complete Gardening Catalog: Solving and Completing

    Heartopia’s Complete Gardening Catalog: Solving and Completing

    Starting your garden in Heartopia is straightforward, but you’ll need to gather the right tools and plan your layout carefully. With some luck, you’ll be able to crossbreed flowers early on to get the colors you want without much trouble.

    We’re here to guide you through gardening in Heartopia. From planning your space to choosing the best crops and flowers, this guide will help your gardening skills grow. Enjoy creating beautiful decorations and tasty dishes from your harvests in your new home.

    Updated February 17, 2026 by Zoë J. Osik: We’ve added more details on how to crossbreed your favorite flowers, so you can create a stunning, glowing garden. Flowers take time and care to grow, so it’s important to make each day count. Check out our tips and see what you can create!

    How to Plant a Garden

    One of the first things you’ll learn is gardening, and Blanc is a great teacher. He’ll give you your first garden plots and a watering can. To start, place the plots on your Home Lot, then approach them with seeds from your inventory.

    Plant the seeds in the soil, then water them regularly with your watering can. Keeping the soil moist improves your crops’ quality. As you level up, you can buy more seeds and better tools from Blanc, who sells them at his shop on Garden Street in town.

    While your crops grow, you might need to pull weeds that appear. Fertilizer can boost the quality of your harvest, and Growth Boosters purchased from Blanc will speed up plant growth.

    Eventually, you’ll unlock flower seeds. Unlike crops, flowers grow directly in bare soil on your lot and can’t be planted in boxes. Once planted, they stay until they mature the next day and can’t be moved during that time. Flowers placed near each other can crossbreed to produce new colors. When they’re close, they have a chance to crossbreed, especially if you water them often. Using Rainbow Powder from Blanc can help guarantee crossbreeding when possible.

    Crossbreeding Tip: Place two of the same flower breed next to each other for better chances of crossing. Avoid overcrowding, as crossbreeding occurs randomly and with certain pairings for best results. Combining higher-tier flowers increases the chances of getting new colors.

    Gardening Skills You Can Unlock

    As you harvest, you’ll earn points that unlock new gardening perks:

    • Agronomy Expert: Increase the number of planters you can own.
    • Planting Skill: Tend to more tiles at once.
    • Bountiful Crops: Double the harvest chances.
    • Watering Can Maintenance: Make your watering tool last longer.
    • Flower Expert: Grow more flowers on your property.
    • Crop Expert: Improve the quality of your crops.
    • Cultivation Expert: Increase crossbreeding chances among flowers.
    • Rainbow Breeding Powder: Purchase this from Blanc to aid with crossbreeding efforts.

    All Flowers and How to Crossbreed Them

    Flowers are a beautiful addition to your garden. You can plant them outside your home to crossbreed the basic colors—red, white, and yellow—to create pinks and oranges. Flowers are not planted in boxes; they grow directly in soil and stay until they mature the next day.

    To encourage crossbreeding, place two flowers of the same breed next to each other. Keep in mind, the chance of crossing is random, so pairing the same flowers helps guide the process. For better odds of getting new colors, pair higher-tier flowers and consider using Rainbow Powder.

    Available Flower Colors and Ratings:

    Star Rating Colors Seed Price Level Unlock
    1 Star Red, White, Yellow 30G Level 3
    2 Star Pink, Orange 30G Level 4
    3 Star Peach, Black 60G Level 5
    4 Star Purple, Green, Blue 60G Level 5
    5 Star Selene, Sunglow 90G Level 6

    Flowers can take up to 18 hours or more to fully grow, even with watering, so plan ahead. Keep watering your flowers to increase crossbreeding chances—more water equals better odds.

    Flower Variants: Flowers can be either Selene or Sunglow, but not both. To keep flowers available for future crossbreeding, place them in storage via build mode instead of deleting.

    Color List by Star Rating:

    Stars Colors
    1 Red, White, Yellow
    2 Pink, Orange
    3 Peach, Black
    4 Purple, Green, Blue
    5 Selene, Sunglow

    Crossbreeding Tips:

    • Water your flowers often; more watering increases the likelihood of crossing.
    • Use Rainbow Powder to influence crossbreeding if needed.
    • Pair flowers of the same breed, preferably higher star ratings, to improve chances of new color creation.

    All Crops and Their Basic Sale Prices

    Crops serve as ingredients in recipes or feed for wild animals once that feature is unlocked. They grow at different rates and have varying seed costs:

    Crop Growth Time Seed Price Base Sale Price Level Unlock
    Tomato 15 min 10G 30G Level 1
    Potato 1 hour 30G 90G Level 1
    Wheat 4 hours 95G 285G Level 2
    Lettuce 8 hours 145G 435G Level 3
    Pineapple 30 min 15G 52G Level 4
    Carrot 2 hours 50G 155G Level 5
    Strawberry 6 hours 125G 375G Level 6
    Corn 12 hours 170G 510G Level 6

    Plant crops according to your schedule, and watch for visual clues showing their growth stage. Harvesting at the right time is key to maximizing value.

    Enjoy observing how your plants grow through each stage of their life cycle, and visit regularly to harvest the fruits of your labor before they spoil or wither!

  • Cairn: Complete Recipe List for Solving and Completing

    Cairn: Full List of Recipes

    • Breakfast Ideas

      • Pancakes: Mix flour, eggs, milk, baking powder, and a pinch of salt. Cook on a hot griddle until golden brown.
      • Oatmeal: Combine oats with water or milk, and cook until soft. Top with fruits and honey if desired.
      • Breakfast Burrito: Fill a tortilla with scrambled eggs, cheese, and your favorite veggies, then wrap it up.
    • Appetizers

      • Stuffed Mushrooms: Fill mushroom caps with a mix of cream cheese, garlic, herbs, and breadcrumbs. Bake until browned.
      • Deviled Eggs: Mix boiled egg yolks with mayonnaise, mustard, salt, and pepper. Spoon into halved egg whites.
      • Bruschetta: Toast slices of baguette, then top with chopped tomatoes, basil, garlic, olive oil, and a splash of balsamic vinegar.
    • Soups and Salads

      • Tomato Soup: Blend cooked tomatoes, onion, garlic, and broth, then simmer. Finish with some cream if desired.
      • Chicken Caesar Salad: Toss romaine lettuce with grilled chicken, croutons, parmesan, and Caesar dressing.
      • Greek Salad: Combine cucumbers, tomatoes, red onion, kalamata olives, and feta cheese. Drizzle with olive oil and lemon juice.
    • Main Dishes

      • Spaghetti Carbonara: Cook spaghetti and toss with cooked pancetta, beaten eggs, Parmesan cheese, and black pepper.
      • Grilled Chicken: Marinate chicken breasts in lemon juice, olive oil, garlic, and herbs, then grill until cooked through.
      • Veggie Stir-Fry: Sauté sliced vegetables like bell peppers, broccoli, and carrots in soy sauce and sesame oil.
    • Side Dishes

      • Roast Potatoes: Toss potatoes with olive oil, rosemary, salt, and pepper. Roast until crispy and golden.
      • Steamed Vegetables: Steam broccoli, green beans, or carrots until tender, then season as desired.
      • Mashed Cauliflower: Boil cauliflower until soft, then mash with butter, salt, and pepper.
    • Desserts

      • Chocolate Chip Cookies: Cream butter and sugar, add eggs and vanilla, then stir in flour, baking soda, and chocolate chips. Bake until golden.
      • Fruit Salad: Mix a variety of fresh fruits such as berries, melons, and grapes.
      • Lemon Bars: Prepare a shortbread crust, top with lemon custard, then bake and dust with powdered sugar.
    • Breads and Baked Goods

      • Banana Bread: Mash ripe bananas, then mix with flour, eggs, sugar, and baking soda. Bake until a toothpick comes out clean.
      • Homemade Muffins: Combine flour, sugar, baking powder, milk, and eggs, then fold in berries or nuts before baking.
      • Dinner Rolls: Make dough with flour, yeast, water, sugar, and butter. Let rise, then shape and bake until golden.
    • Beverages

      • Lemonade: Mix fresh lemon juice with water and sugar to taste.
      • Iced Tea: Brew tea, sweeten as preferred, then chill and serve over ice.
      • Fruit Smoothie: Blend together your favorite fruits with yogurt or juice for a refreshing drink.
  • Dwarves’ Complete Formation List: Glory, Death, and Solving Loot

    Dwarves’ Complete Formation List: Glory, Death, and Solving Loot

    Brute forcing your way through Dwarves: Glory, Death And Loot without adjusting your formations will likely lead to defeat. Whether you’re setting up your main clan or your profession group, it’s important to tailor your team’s build to match the key settings.

    We’ll show you how to unlock each formation quickly, explain what each one does, and help you choose the best options for your clan. Here is everything you need to understand about formations in the game.


    What Are Formations?

    Formations are strategies for positioning your dwarves during battles, influencing their movement and attack style. There are two types:

    1. Clan Formations
    2. Profession Formations

    Clan Formations

    These control how fast your dwarves move and how aggressively they attack. They are available regardless of the number of dwarves or their professions, but only one can be used each battle. These formations impact the speed and combat behavior of your entire clan.

    Profession Formations

    These provide bonuses based on the specific professions of your dwarves, offering different advantages depending on your team composition. You can mix these with clan formations, but each one must be used in a battle at least once to unlock its full potential.


    How to Use Clan and Profession Formations

    Using a clan formation requires selecting one of four options before each fight:

    Formation Name How It Works
    Free For All All dwarves rush forward as fast as possible
    Strength in Numbers Dwarves farther from the center slow down to catch up
    Phalanx Dwarves’ speed is limited by the dwarf directly ahead; speed updates only at fight start
    Hold the Line Dwarves stay stationary, but gain increased range and resistance

    Once you pick a formation, it stays active for that entire battle. Each formation has its own strengths:

    • Free For All is best for melee units.
    • Strength in Numbers is versatile, especially if you want to keep front and back lines separated.
    • Phalanx suits shield-heavy or ranged compositions.
    • Hold the Line is situational, mainly for defense with ranged attacks.

    You can switch to a different formation for each fight, but only one per battle. Some setups are better for specific strategies based on your team makeup.


    Profession Formations

    There are 13 different formations based on professions, each offering unique benefits. These are unlocked by using certain combos once in battle, and then continued use grants additional bonuses.

    Formation Name Unlock Condition Main Boon Notes
    Bannerlords Have at least 3 Supporters Supporters’ ultimates heal 20% of clan members’ HP Good for support-heavy teams
    Berserkers Use 3+ two-handed weapon users Parry chance increases by 8% per berserker, gain Berserker passive Great against damage reflection
    Burning Legion 80% of clan can apply Burning Burning chance +10%, damage +50% Best with magic, archers, thieves
    Crusade Only Knights, Priests, Paladins; min 3 Priests and 3 Knights AoE damage based on dwarf weight Strict profession restrictions
    Order of Frost 80% of clan can Cool or Freeze Chance to Chill enemies Useful for magic teams
    Pack of Thieves Use ≥3 Thieves Poison damage increased by 10% stacking per Thief Focused on stacking damage
    Rangers 3+ Archers and 3+ Cannoneers Jumpback based on Dexter, 25% armor penetration Keeps ranged units alive
    Ragtag All 7 professions present All stats +15% End-game boost for maximum gain
    Soldiers of Heaven 80% can Shock enemies Shocked enemies do less damage, take more damage Versatile, especially against magic teams
    Wizardry 5+ magic users 30% chance to cast Ultimate twice with each use Boosts healing and damage output
    Battlerune: Celestial Arrows Have Ultimates: Staggering Shock, Piercing Arrow, Arrowgance Special arrow-based damage bonus Effective against foes weak to arrows
    Battlerune: Inferno Have Ultimates: Phoenix, Eruption, Pyromania Access to inferno effects Strong for fire-based attacks
    Battlerune: Cataclysm Ultimates: Harvest, Nightmare, Void Slash Unlocks devastating effects Powerful for large-scale damage

    After unlocking these formations through initial use, you can combine them strategically to amplify damage and maximize your clan’s strengths.


    Unlocking and Combining Formations

    You gain access to a formation by deploying it at least once in battle. Continued use unlocks additional benefits, especially when you repeat the same formation. Combining different formations during battles helps you stack buffs and increase overall damage output, making your team more effective.

  • Syrian Series About the Assad Era: Ramadan 2026 Preview

    Syrian Series About the Assad Era: Ramadan 2026 Preview

    Following the collapse of the Bashar Assad regime in December 2024, production companies hurried to develop series inspired by the events of that period. Ramadan 2026 promises to be filled with dramas centered around the Assad family.

    It’s noteworthy that this marks the first Ramadan after the fall of Bashar Assad’s government in Syria, with five series set to depict the era when Bashar Assad and his family held power.

    Ramadan 2026: List of Syrian Series About the Assad Era:

    1. “Saadet El Majnon” Series:
    Written by Alaa Muhanna and directed by Saif Eddin Subaie, this series is based on events from 2022 to 2024. It explores a widespread corruption network that reaches from neighborhood level to the justice system, highlighting crime as a lens to reveal the social and psychological upheaval caused by years of war and economic downturn.
    Set to premiere during Ramadan 2026, the series comprises 30 episodes featuring Syrian actress Sulafa Memar and star Abed Fahed.

    Image courtesy of Instagram/GoldenLineTv.

    2. “Eilat Al Malek” Series:
    Also known as The King’s Family (عيلة الملك), this series examines social mobility driven by political influence, focusing on the links between class and power before the Syrian revolution.
    Directed by Mohammed Abdel Aziz, the show stars Syrian actor Salloum Haddad and follows the story of Jabri Al Malik, a merchant from Damascus who rises to wealth and influence through strategic alliances with prominent families.

    3. “Al Khoroj Ela al-Ber” Series:
    “Al Khoroj Ela al-Ber” (الخروج إلى البئر) stands out as a significant project exploring pivotal moments in recent Syrian history, inspired by the 2008 Saydnaya Prison incidents. The screenplay is by Samer Radwan, with Muhammad Lutfi at the helm as director.

    4. “Qaysar – La Makan Wala Zaman” Series:
    Translating as Emperor – No Place, No Time (القيصر – لا مكان لا زمان), this series narrates true stories of individuals released from Assad’s prisons. The production is divided into ten segments, each comprising three episodes. It aims to depict the torture and hardships endured within prisons during Assad’s rule. The cast includes Ghassan Massoud, Salloum Haddad, Sabah Jazairi, and Samer Ismail, with a cover song performed by singer Asala Nasri.
    Poster of "Eilat Al Malek"

    5. “Syrians Are Enemies” Series:
    Spanning approximately 40 years, this series covers key events from the onset of the Corrective Movement in the Ba’ath Party in 1970, through the Hama massacre in 1982, up to the Syrian revolution of 2011. It aims to portray the tumultuous history and internal conflicts within Syria during that period.

    Stay tuned for more updates as these compelling stories bring to life the complex history of Syria during the Assad era.

  • All Animals in Hytale: Completing and Solving Locations Guide

    All Animals in Hytale: Completing and Solving Locations Guide

    Encountering, fighting, and potentially domesticating animals is a key part of the open-world adventure RPG, Hytale. The game world is divided into different biomes called Zones, each featuring a variety of unique animals.

    Some animals are friendly to your character right away, while others are more aggressive and might attack as soon as you approach when you leave your starting location. This varies based on where they spawn and the loot they drop. Here’s what you should know about the animals in Hytale.

    Animals Overview

    As you explore the colorful pixel landscape, you’ll come across many different animals. Some are solitary, while others move in groups, often acting as packs. Some animals may not see you initially, giving you the chance to sneak up behind them. You can choose to fight them to gather resources or tame them to use as riding mounts or farm animals once you’ve built your base.

    Many animals drop valuable resources, such as leather and hides, which are essential for construction and crafting powerful tools. While killing animals yields resources, some items like eggs and milk can be obtained interactively without harm, provided you use the right tools.

    How To Capture And Breed Animals

    Exploring the world, you’ll encounter a range of animals unique to each Zone. To prevent animals from fleeing when you get close, use a Feed Bag from the Farmer’s Workbench, which keeps smaller animals nearby longer. When animals seem eager or endearing, hearts will appear above them. To make a Feed Bag, you’ll need:

    • Five vegetables you’ve grown near your base
    • Five fruits that can be farmed or foraged
    • Ten Essences of Life from plants
    • Ten wheat plants grown or harvested

    If you want to capture an animal and bring it back to your farm, you’ll need a Capture Box. Upgrading your Farmer’s Workbench to the second tier allows you to craft one with:

    • Five wheat
    • Five heads of lettuce
    • Five softwood trunks from beech trees
    • 50 Essences of Life (which require some effort to gather)

    Once you’ve captured animals in the crate, transport them to a fenced area on your farm, which should be at least two blocks high to keep predators out.

    Animal Behavior: Will It Attack You?

    Animals that see you will have an exclamation mark above their heads. Their reactions depend on their behavioral type:

    • Passive Animals: Don’t mind your presence and will try to run away if you attack.
    • Neutral or Defensive Animals: Are wary but won’t attack unless provoked.
    • Hostile Animals: Will attack immediately upon sight. Sneaking up on them is recommended if you’re preparing for combat.

    Predators And Prey

    Throughout each biome, you may notice bones or carcasses of animals. These indicate the presence of dangerous predators that hunt smaller creatures and are immediately aggressive towards you. When building enclosures to keep captured animals safe, it’s best to make fences at least two blocks high, as predators can vault over single-high fences.

    All Animals In Hytale

    A comprehensive list provides details on where each animal can be found and what resources they offer, often grouped by Zone. Some animals, like owls, wolves, and mice, appear in multiple zones, so they’re not limited to a single area.

    Every Animal In Hytale And Where It Drops

    The game features a wide array of animals, each with different attitudes and resource drops. For example:

    • Zone 1 Animals: Boars provide light leather and wildmeat; chickens can be passive or protective, dropping eggs and raw chicken.
    • Zone 2 Animals: Antelopes yield light leather; crocodiles drop heavy hides; foxes are neutral or passive, offering raw wildmeat.
    • Zone 3 Animals: Bison and moose are passive, providing hides and wildmeat; the snow leopard is hostile, dropping medium hides.
    • Zone 4 Animals: Creatures like the cave rex and dragon-like pterodactyl are hostile, dropping heavy hides and wildmeat; some, like the Archaeopteryx, are passive.

    Note: If you activate the arachnophobia mode, spiders will appear as crabs, making the game less creepy for some players.

    The variety and behavior of animals across the Zones add depth and strategy to your exploration, resource gathering, and farming in Hytale.

  • Complete Cooking Recipe List for Hytale: Solving and Completing

    Complete Cooking Recipe List for Hytale: Solving and Completing

    Food plays a vital role in Hytale, much like in many survival games. When you start, you’ll encounter items such as Wild Berries and Raw Wildmeat, which are likely the first foods you’ll eat. Instead of filling a hunger meter, these foods restore your health and provide useful buffs.

    However, relying solely on Wild Berries and raw meat isn’t sustainable for long. As you progress and undertake lengthy adventures, you’ll want better options that restore more health. It’s time to cook up some tastier meals using the Chef’s Stove, like a delicious Apple Pie.

    How To Cook Meals

    The earliest way to cook food is with a Campfire, which you can craft from your inventory or any Workbench with four Sticks and one Rubble. Cooking on the Campfire allows you to prepare simple dishes such as Cooked Wildmeat or Roast Vegetables using Wood, Sticks, or Charcoal as fuel.

    Upgrading to a Chef’s Stove requires crafting at a Workbench with two Copper Ingots, ten Tree Logs, and six Stones. Placing the Stove unlocks a wider variety of recipes across three categories: Prepared, Baked, and Ingredient.

    Until you find potions, eating cooked food is your best method to boost health. Most basic foods instantly restore at least 5% of your health and give various buffs like Health Regen I or Stamina Regen I.

    How to Eat Food

    To eat, select an item from your hotbar and press the Secondary Action button. It takes a few seconds to consume, and actions such as climbing or taking damage can interrupt the process. You can eat multiple food items during battle to keep restoring health, but buffs won’t stack. The duration resets if the same buff is reapplied or replaced by a stronger version.

    Benefits of Cooking

    Cooking meals increases their effectiveness. Cooked foods generally take more ingredients but provide more immediate health restoration, making them more useful during fights. They often also offer better buffs that last longer. For example:

    • Baked meals like Apple Pie and Pumpkin Pie provide a combination of Health Regen III and Stamina Boost III, plus extra buffs.
    • Common early-game cooked foods include Skewers and Salads, made from easily farmed ingredients, ideal until you unlock higher-tier recipes like Apple Pie from an Apple Tree.

    All Cooking Recipes

    Prepared Recipes
    | Recipe | Ingredients | Effects | Duration | How To Unlock |
    |———|————–|———|————|————–|
    | Mushroom Skewer | Stick x1; Any Mushroom x3 | Restores 10% Health; Health Regen II and Stamina Boost II | 2m 30s | Auto-unlocked |
    | Fruit Skewer | Stick x1; Any Fruit x4 | Same as above | | |
    | Meat Skewer | Stick x1; Raw Meat x4 | Same as above | | |
    | Vegetable Skewer | Stick x1; Vegetable x4 | Same as above | | |
    | Mushroom Salad | Lettuce x1; Mushrooms x3 | Restores 10% Health; Buffs similar to skewers | | |
    | Berry Salad | Lettuce x1; Wild Berries x5 | Same as above | | |
    | Caesar Salad | Lettuce x1; Cheese x1; Raw Meat x1; Salt x1; Spices x1 | Restores 15% Health; Buffs like Regen III, Boost III | 6 mins | Purchase from Rootling Trader |

    Baked Recipes
    | Recipe | Ingredients | Effects | Duration | How To Unlock |
    |———|————–|———|————|————–|
    | Bread | Dough x1; Fuel x3 | Restores 15% Health | N/A | Auto-unlocked |
    | Popcorn | Corn x2; Salt x1; Fuel x2 | Restores 15% Health | | |
    | Apple Pie | Dough x1; Apples x3; Spices x1; Fuel x3 | Restores 15% Health; Regen III and Boost III | 6 mins | Buy from Rootling Trader |
    | Pumpkin Pie | Dough x1; Pumpkin x1; Spices x1; Fuel x3 | Same as above | | |
    | Meat Pie | Dough x1; Raw Meat x3; Spices x1; Salt x1; Fuel x3 | Same as above | | |

    Ingredient Recipes
    | Recipe | Ingredients | Effects | Duration | How To Unlock |
    |———|————–|———|————|————–|
    | Raw Fish | Any Fish x1 | Restores 5% Health | N/A | Auto-unlocked |
    | Cheese | Milk Bucket x1 | Restores 15% Health | | |
    | Dough | Wheat x10; Egg x2; Water Bucket | N/A | | |
    | Flour | Wheat x10 | N/A | | |
    | Salt | Salt Block x1 | N/A | | |
    | Spices | Vegetable x1; Flower x5 | N/A | | |

    Cooking in Hytale enhances your survival chances by providing more powerful health restorations and longer-lasting buffs, especially during combat.

  • Hytale Weapon Tier List: Completing and Solving Every Weapon

    Hytale Weapon Tier List: Completing and Solving Every Weapon

    Weapons are essential in Hytale because you spend much of the game facing hostile creatures, and bare fists aren’t very effective in fights. To avoid getting eaten or overwhelmed, it’s important to keep at least one strong weapon ready in your hotbar.

    Choosing the right weapon isn’t always straightforward, as the game offers a wide variety. You can find long-range options like bows and staffs, as well as close-range weapons such as swords and axes. Here’s a tier list ranking the best weapons by effectiveness.

    Note: Since Hytale is in early access, some weapons might be updated or improved in future updates.

    How the Tiers Work

    The list includes only the top versions of each weapon type, typically the Mithril upgrade, for clarity. This results in eight main weapons across five tiers: S through D. Here’s what each tier means:

    Tier Explanation
    S The best in the game, excelling in damage, speed, and other attributes. Craft these if you can.
    A Very effective against most enemies but may have one weakness that keeps them from top tier.
    B Decent weapons that can handle many situations but have notable drawbacks.
    C Slightly underwhelming; usable but not worth prioritizing over better options.
    D The weakest, not recommended for resource investment. Better to use higher-tier weapons instead.

    S Tier Weapons

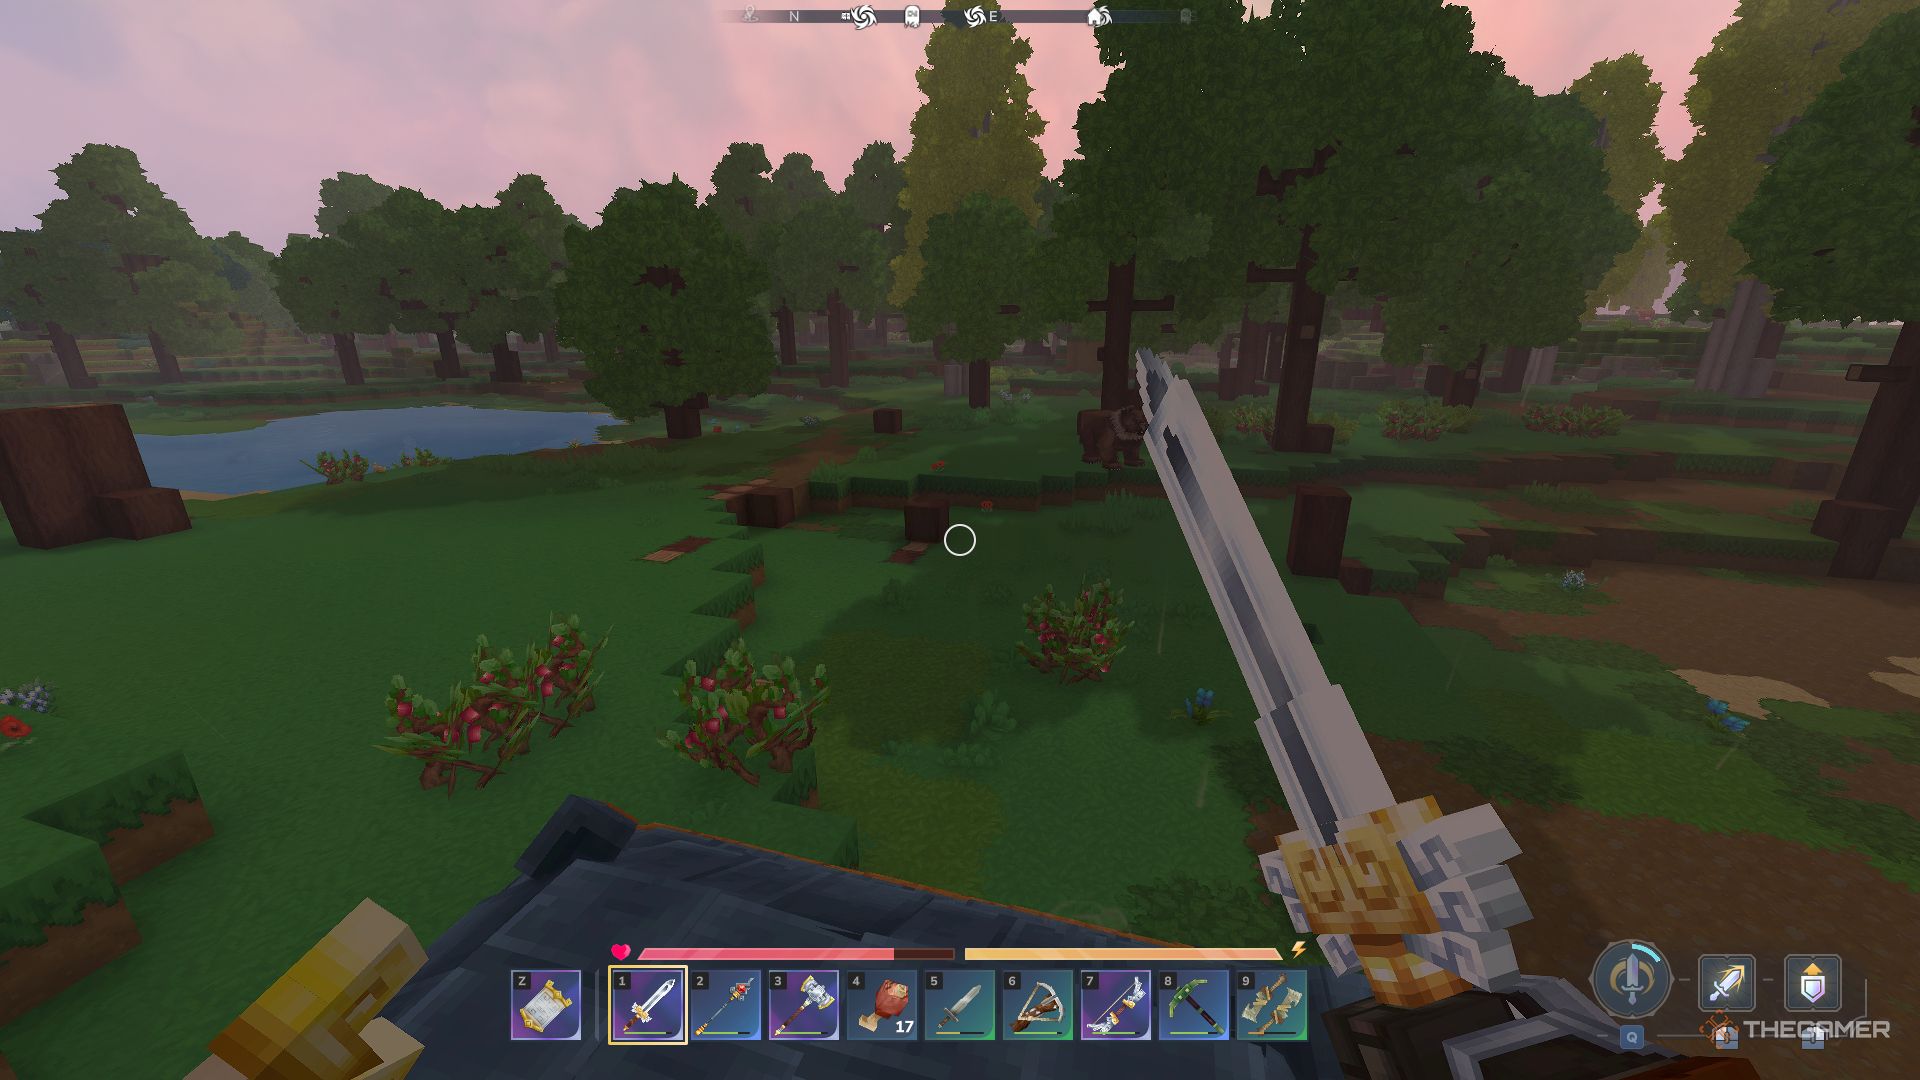
    The only S tier weapon is the Mithril Sword. It combines good range, damage, and speed, and being one-handed allows you to use it with a shield. This makes it the top choice overall, as swords are balanced and versatile, suited for both swift melee attacks and providing protection.

    Image: Player holding Mithril Sword


    A Tier Weapons

    The A tier features two distinct weapons with different strengths:

    • Mithril Daggers: These are incredibly fast, making them the quickest weapons in the game. They have slightly more punch than other daggers but still don’t do much damage overall.

    • Mithril Mace: This is a powerful blunt weapon capable of dealing significant damage. Its slowness makes it less preferred for rapid attacks, but it compensates with deadly power.

    Both excel in hitting multiple enemies at once and offer a mix of speed and strength, making them valuable A tier choices.

    Image: Player holding Mithril Daggers


    B Tier Weapons

    The B tier holds the game’s top ranged options:

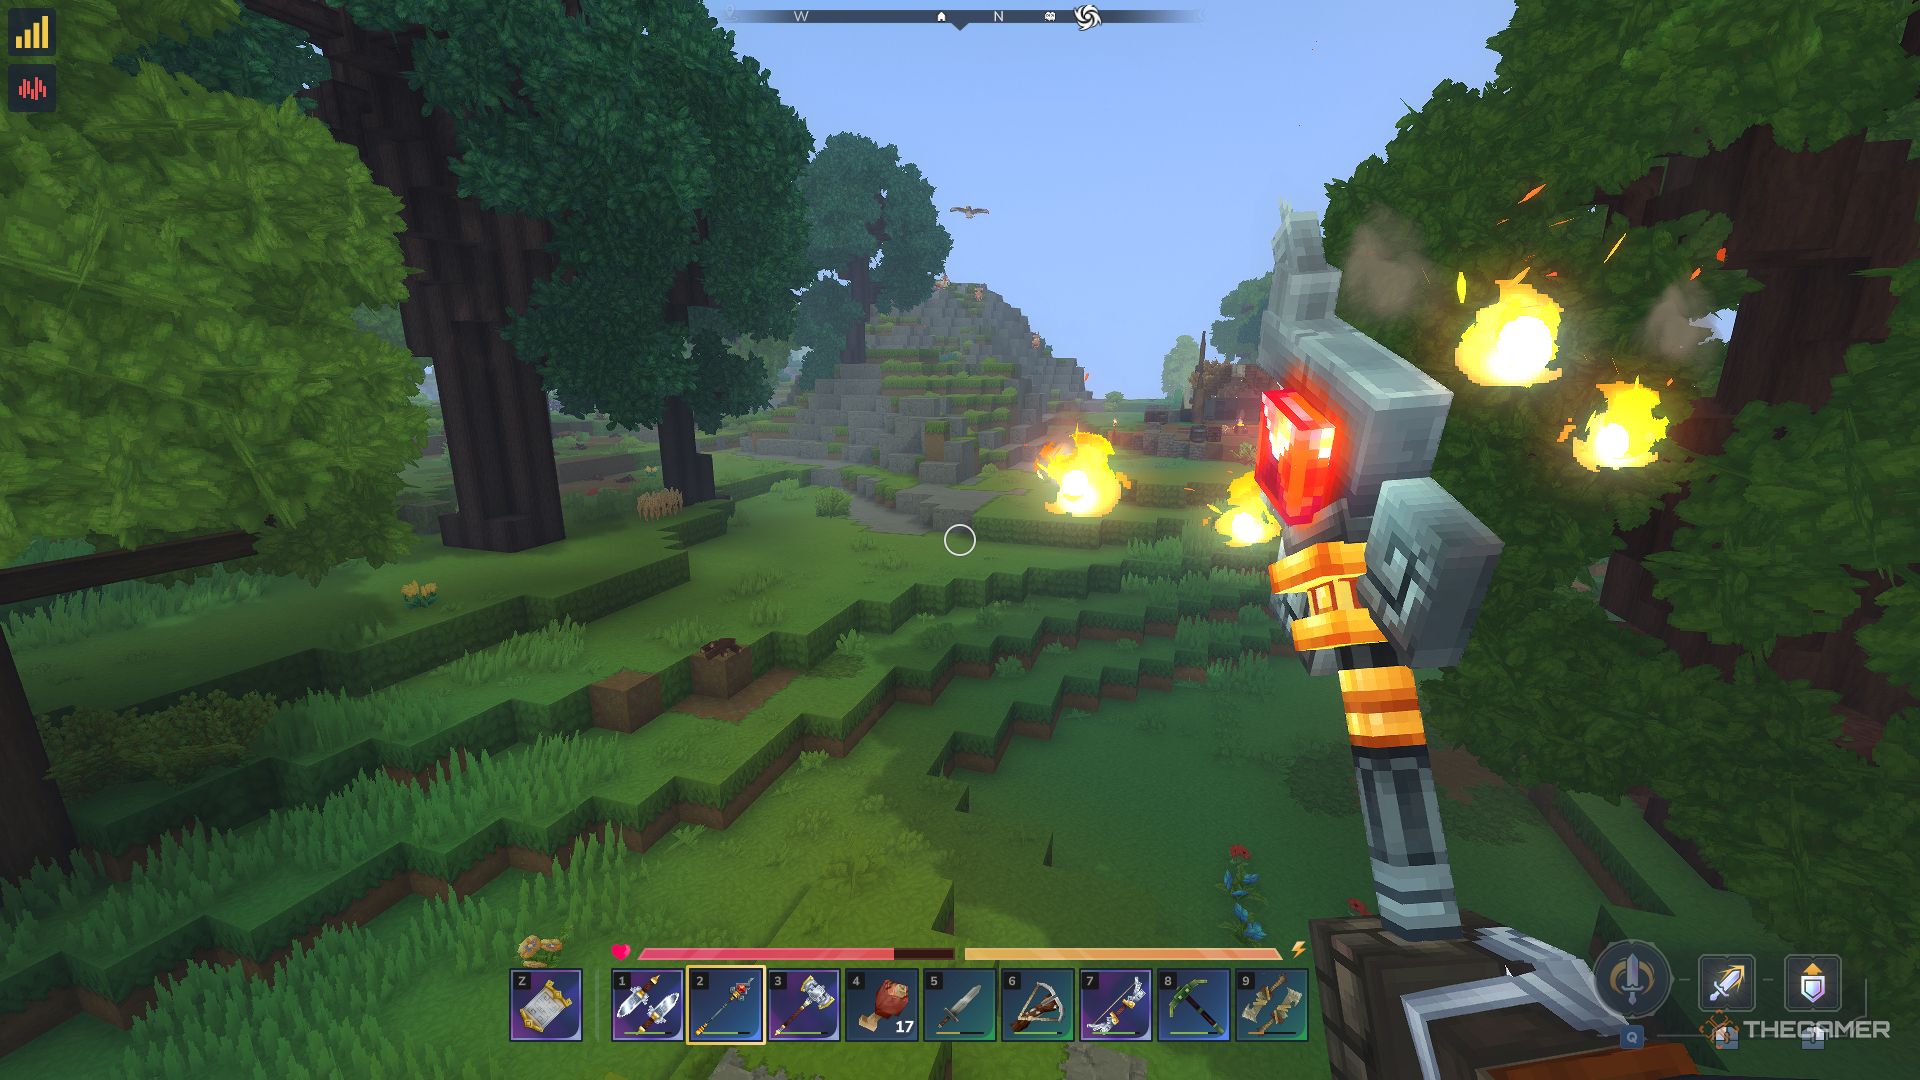
    • Flame Crystal Staff: Versatile in close and distant combat. It fires fireballs that stay on target without dropping, making it more accurate than bows. However, it requires the rare Essence of Fire to operate, which limits its usability.

    • Mithril Shortbow: Deals the highest damage per shot among bows, but you must pause after each shot to load a new arrow. Arrows also tend to dip, making accurate shooting more difficult.

    Both weapons are strong within their category. The staff is deadly in both melee and ranged fight scenarios, while the shortbow packs a powerful punch despite its slow firing rate.

    Image: Player holding Flame Crystal Staff


    C Tier Weapon

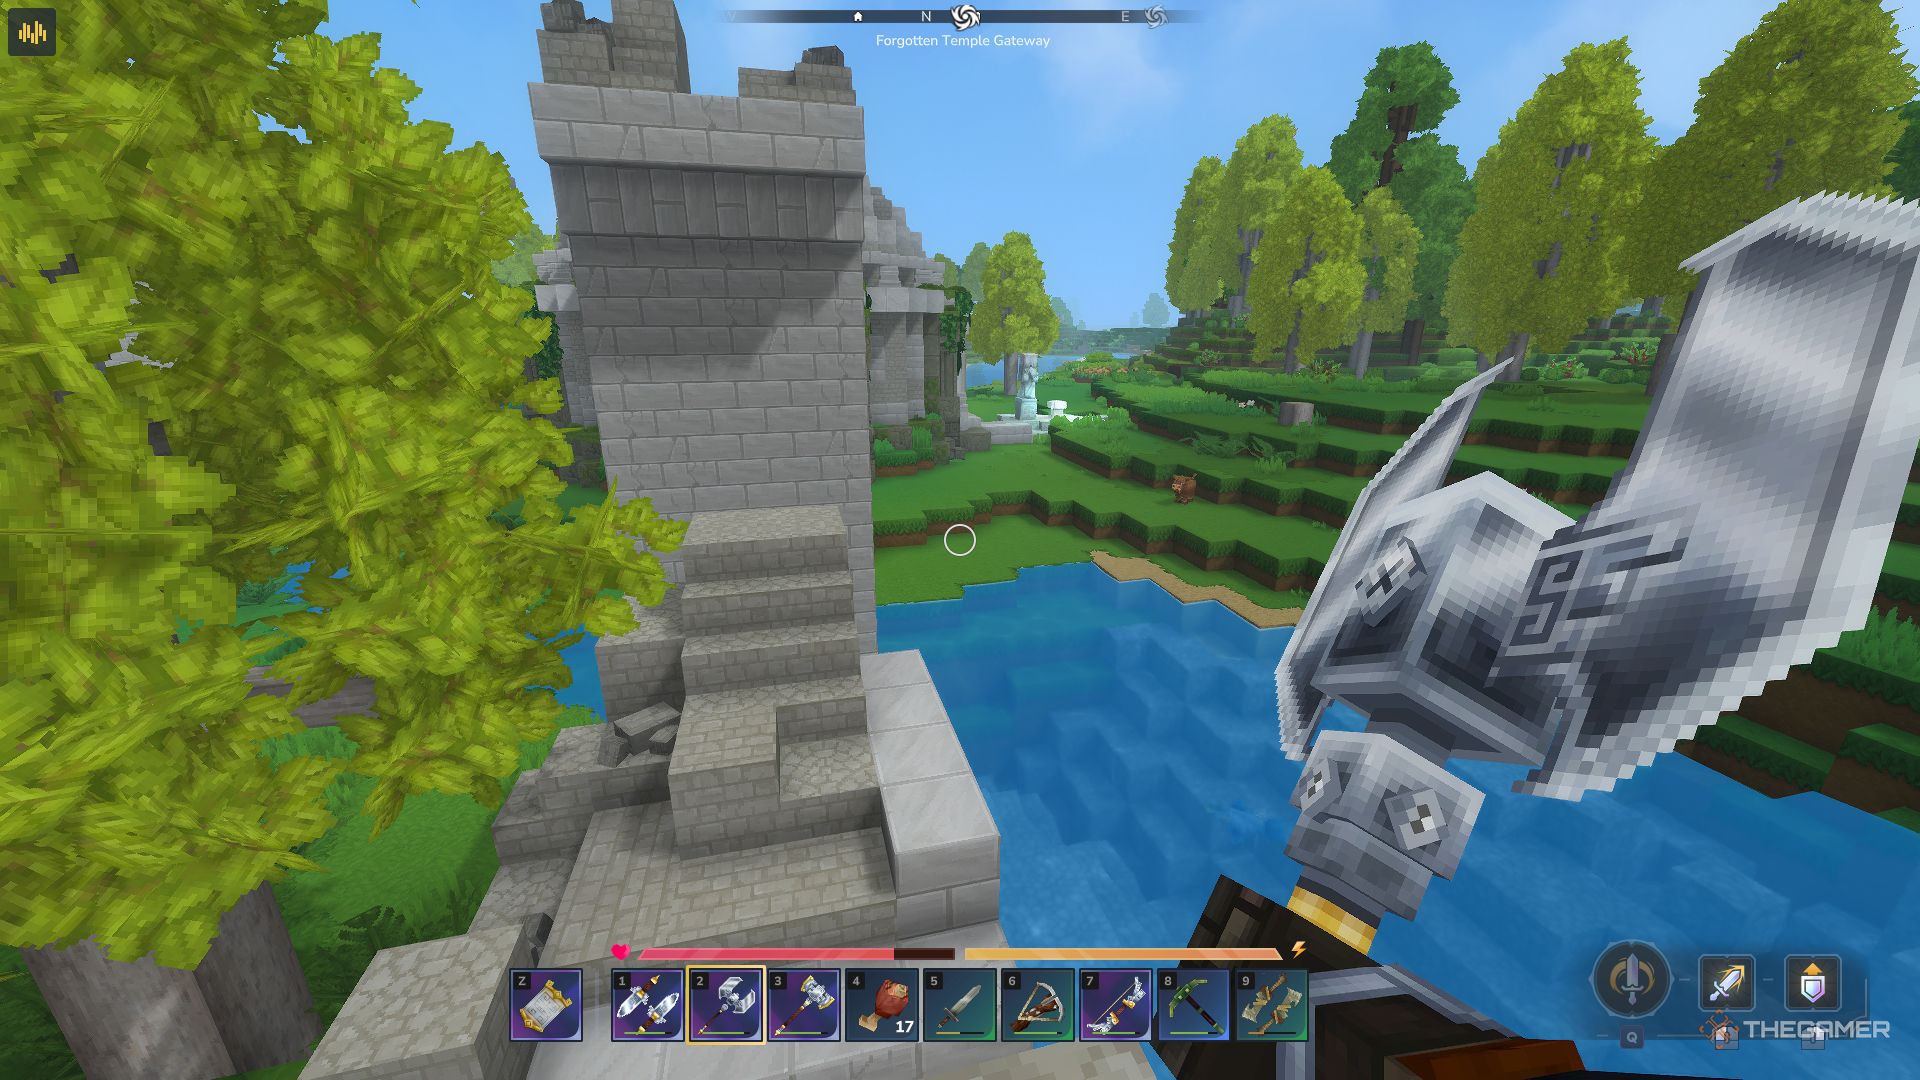
    The Mithril Battleaxe is the sole C tier weapon. It’s a slow but high-damage weapon, comparable to the Mithril Mace. However, it offers no significant advantage over the Mace and feels somewhat redundant. Its speed improvement isn’t enough to justify choosing it over better options.

    Image: Player holding Mithril Battleaxe


    D Tier Weapons

    The D tier includes the worst ranged weapons:

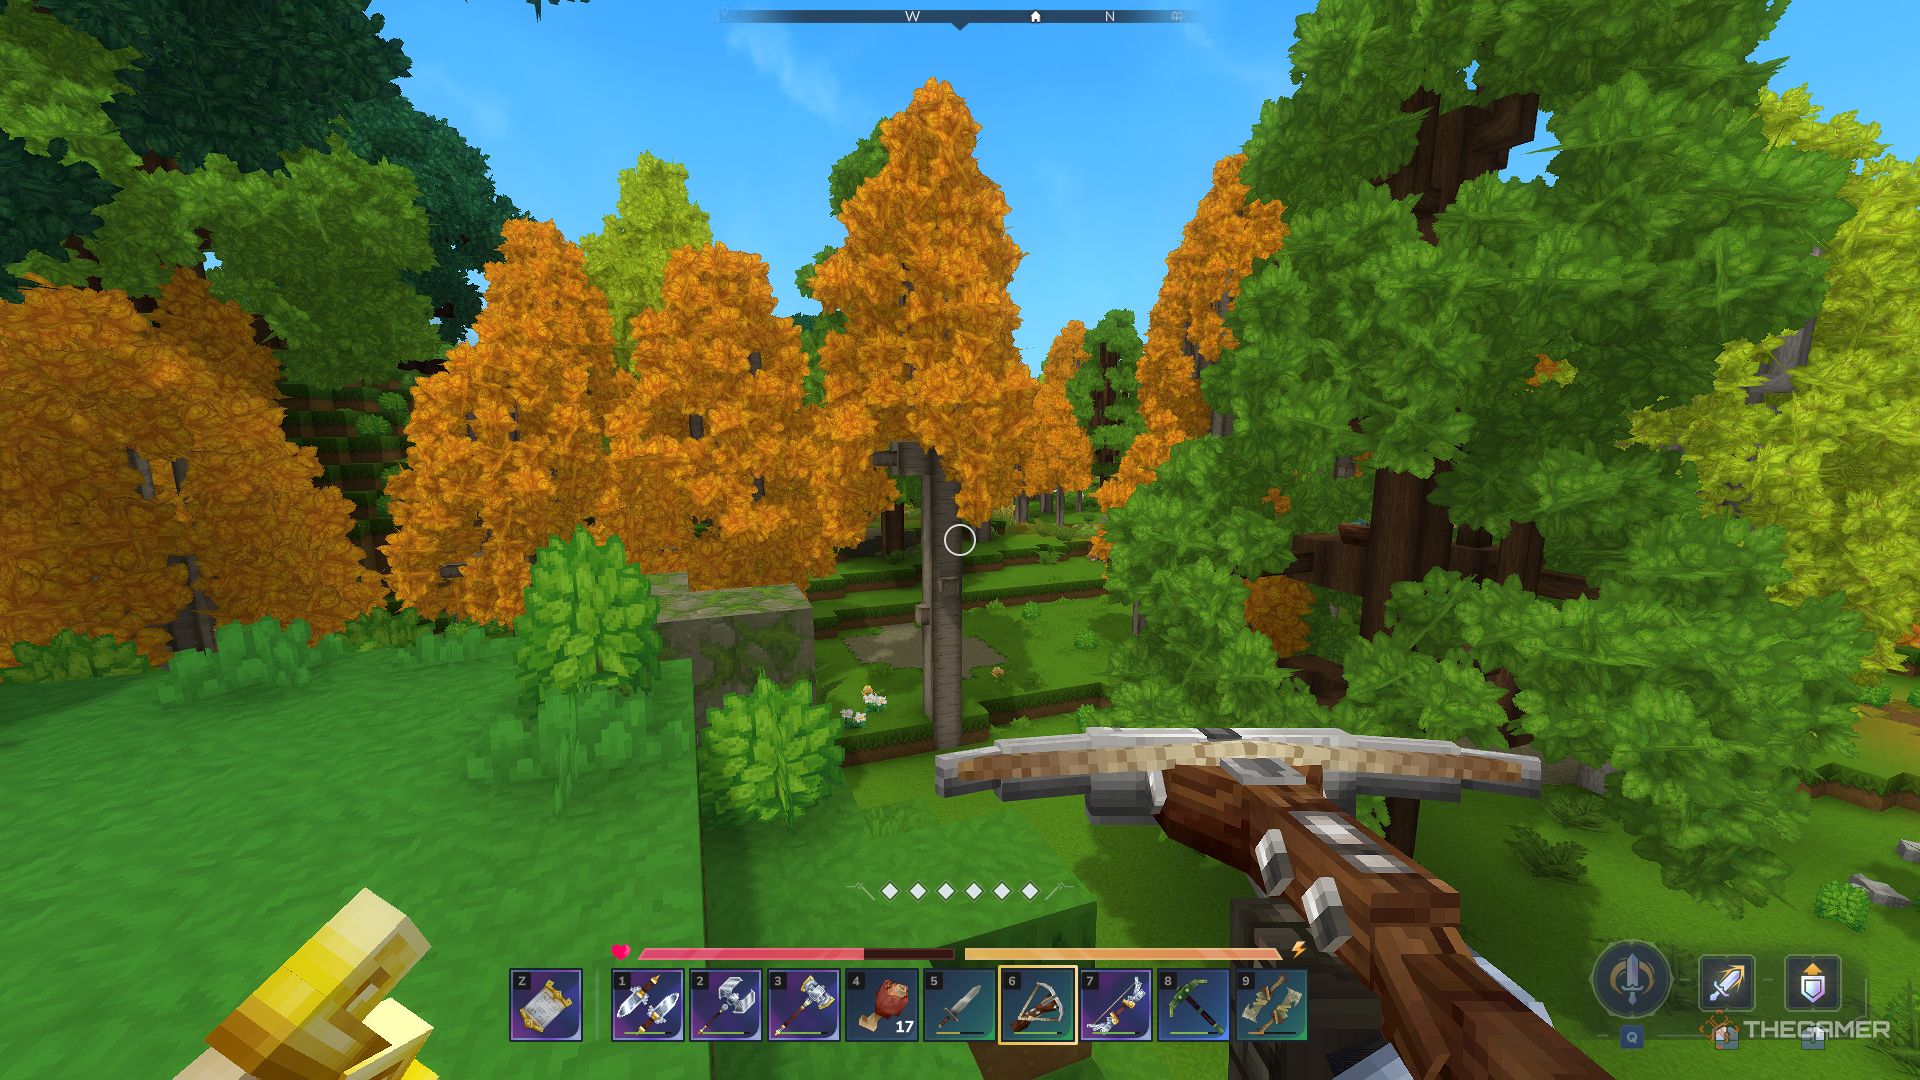
    • Iron Crossbow: Fires faster than the Shortbow but suffers from poor damage and long reload times. Its limited range also makes it less effective.

    • Ice Crystal Staff: As a work-in-progress weapon, it currently does little damage and doesn’t freeze enemies as intended. Its performance is underwhelming and unlikely to improve significantly in its current state.

    Image: Player holding Iron Crossbow


    Choosing the right weapon depends on your play style, but generally, the Mithril Sword is your best all-around option. For specialized roles, the daggers and mace offer distinct advantages, while the staff and bow provide excellent ranged options, albeit with some limitations until further updates.

  • Complete Gourmet Life Recipe List for Heartopia: Solving the Secrets

    Complete Gourmet Life Recipe List for Heartopia: Solving the Secrets

    In Heartopia, there are many activities to enjoy, but to truly experience what the game offers, it’s helpful to spend some time on hobbies. There are various hobbies to pick from, and some, like cooking, can be especially useful early in the game if you take the time to learn them.

    To start learning cooking, you need to talk to Massimo, the mentor located in the middle of town. Once you begin the cooking hobby, just start cooking and leveling up will increase your list of recipes. However, to cook all the dishes in Heartopia, you’ll also need to explore other hobbies.

    ### How to Unlock the Cooking Hobby

    You can unlock cooking by speaking with Massimo and giving him one of your Hobby Expansion Tickets. These tickets are rewards from the Developer’s Guild. Your first two tickets should be used for Fishing and Gardening, and after reaching Level 5 in the Developer’s Guild, you’ll get the option to choose between three hobbies: Cooking, Insect Catching, and Birdwatching.

    You can pick any of these three, but cooking is recommended first because it complements your fishing and gardening hobbies well. If you don’t choose cooking now, you’ll get another chance at levels 8 and 11. When you give Massimo a ticket, he will give you a brief intro, and then you can start cooking.

    ### How to Cook

    After unlocking cooking, you’ll need ingredients. Massimo sells some, but his stock only allows for a few basic recipes. You’ll need to gather other ingredients—like crops from your garden, fish you catch, and natural items found around Heartopia—that will be used in cooking.

    To cook, interact with a stove either at home or at Massimo’s stall. You’ll see a prompt to pick a known recipe and the ingredients needed. You can’t randomly combine items without a recipe, unlike in other games such as Disney Dreamlight Valley. But, you can create variants by substituting different available ingredients within a recipe. For example, using different fruits instead of tomatoes can produce different jams, which counts as different recipes and helps you earn more points toward leveling up.

    ### Cooking Process

    Once you select a recipe and start cooking, a timer will show over the stove until the dish is ready. During cooking, an icon will change and prompt you to tap it before the timer runs out—this adjusts the cooking temperature and saves the dish. Failing to do this will burn your meal, resulting in a “Bizarre Food or Drink,” which basically means burnt food.

    It’s a good idea to burn at least one food and one drink to earn discovery points for new recipes, but avoid using valuable ingredients for this. Different dishes require repeated attention to the timer, so stay nearby until the dish fully completes.

    ### How to Unlock New Recipes

    Your cooking skill advances by leveling up in the hobby. You can do this by earning Hobby Upgrade Tickets, obtained through various game tasks, such as completing requests from NPCs or through the Developer’s Guild. When you level up, new recipes become available.

    To check your progress, open the hobby icon on your watch, select cooking, and observe the experience meter. Cooking new dishes grants experience points, which fill this meter. Even repeating dishes gives some points, helping you level up faster. Variants of recipes also count as new recipes and will earn you extra points.

    ### All Recipes and How to Unlock Them

    Many recipes unlock by progressing through the game and leveling your cooking hobby. Some, like Bizarre Food and Bizarre Drink, are unlocked by burning dishes. Classic recipes like House Salad or Fish and Chips need specific ingredients and recipes that become available as you upgrade your hobbies and purchase ingredients from Massimo or find them in the wild.

    Additional recipes, such as Mushroom Pies, require completing specific quests or reaching certain levels to unlock. For example, Mushroom Pie becomes available after completing Massimo’s gossip quest, and its variants are unlocked through recipes or ingredients found in the wild.

    ### Where to Get Ingredients

    Gathering ingredients is essential. Crops are bought as seeds from Blanc when you reach the right level, while fruits and fungi can be found around Heartopia. Fish and shellfish come from any water body, and leveling your fishing hobby improves your catch variety and quality.

    Dairy and baking ingredients are mainly purchased from Massimo, who has a daily stock reset. For rarer recipes, Doris, a traveling merchant, appears only during specific weather events—like meteor showers, rain, snow, or rainbows—and sells rare ingredients or recipes in exchange for Star Fragments, which must be collected beforehand.

    ### How to Find Doris

    Doris appears in different locations depending on the weather:

    – During rain or snow, look for her on the main street with art supplies.
    – At the end of a rainbow, she appears as a surprise.
    – During a meteor shower at night, she can be found on Onsen Mountain.

    Always check the top right corner of your map for weather info, as actual snow conditions differ from just having snow on the ground. Doris only accepts Star Fragments as payment, so gather some before seeking her out.

  • StarRupture Complete Food Recipe List: Solving and Completing

    StarRupture Complete Food Recipe List: Solving and Completing

    When you arrive on the planet in StarRupture, your first resource is a few small rations. It’s crucial to start producing your own food quickly. Fortunately, the companies that sent you to mine ore and craft high-priced resources want you to stay healthy, alive, and in good shape—because they need your help.

    They’ve provided a way for you to make your own meals, each offering unique boosts or healing effects. But, of course, things with these corporations are never straightforward.

    How to Make Your Own Food

    The corporations sent you to Arcadia-7 with a limited supply of Survival Food Packs to keep you going while you establish your food production. These packs won’t last forever, so you’ll need to find other ways to satisfy your hunger and quench your thirst.

    Exploring the world is essential in StarRupture. You’ll discover everything you need scattered around—ore, plants, and even leftover rations from fallen workers. Once your initial supplies run out, you’ll need to start crafting your own snacks to prevent starvation and dehydration. As you explore, you’ll gather resources that serve as ingredients for unlocking and creating new recipes.

    The first step in producing your own food is building the Recipe Station. To unlock it, you must complete the level 2 contract for the Moon Energy Corporation by producing Titanium Bars and sending them through the Orbital Cargo Launcher (OCL).

    Quick tip: When you’re in a bind, eating raw ingredients can provide small boosts to your Calories or Hydration, but it’s more effective to craft snacks for better benefits.

    With the Recipe Station in place, you can unlock various food recipes. Later, you’ll be able to craft these at the Food Station, which becomes available once you complete the level 6 contract for Future Health Solutions by delivering ceramics. The Food Station will contain all the recipes you unlock at the Recipe Station, plus other items needed by the corporations. As you progress, prioritize learning new recipes and expanding your cooking options.

    All Food Recipes in StarRupture

    Since inventory space is limited early on, it’s wise to choose your supplies carefully. For short trips gathering nearby resources, snacks like the Figler or the Nutri Bar are best—they boost Calories and Hydration quickly. For longer journeys, stay ahead by using Calorie and Hydration Block Capsules to maintain your levels longer. Serpent Sticks are also excellent when exploring biomes that tire you out.

    If you head into dangerous areas infested with bugs or toxins, prepare by taking foods and remedies like Plasms and Antidotes to combat toxins and infections.

    Below is a summary of some key foods and their ingredients:

    Food Ingredients Effect
    Calorie Bar 3 Polifruit, 1 Serpent Root +50 Calories
    Calorie Block Capsules 5 Polifruit, 1 Oxallop Stops Calories loss for 60 minutes, +45 Toxicity
    Calorie Chew 5 Polifruit, 1 Prism Herb +40 Calories
    Calorie Fluid 2 Polifruit, 1 Star Tears +30 HP, +20 Calories, +20 Toxicity
    Calorie Gel 4 Polifruit, 1 Grubbler +65 Calories
    Calorie Stim Shards 4 Polifruit, 1 Sulheart Boost Calories limit by 50% for 45 minutes
    Polisnack 4 Polifruit +35 Calories
    Aqua Bar 5 Hydrabulb, 1 Serpent Root +50 Hydration
    Aqua Block Capsules 5 Hydrabulb, 1 Oxallop Stops Hydration loss for 50 minutes, +45 Toxicity
    Aqua Chew 3 Hydrabulb, 1 Prism Herb +100 Hydration
    Aqua Fluid 2 Hydrabulb, 1 Star Tears +30 HP, +28 Hydration, +10 Toxicity
    Aqua Gel 4 Hydrabulb, 1 Grubbler +75 Hydration
    Aqua Stim Shards 4 Hydrabulb, 1 Sulheart Boost Hydration limit by 50% for 45 minutes
    Hydrolite 4 Hydrabulb +55 Hydration

    Other key foods include Figler, providing a quick boost of Calories and Hydration, and Nutri Bar, great for longer trips with higher hydration needs. For dangerous areas, carry antidotes like Antidote Fluid, Antidote Gel, and Antidote Shards to counteract toxins.

    Making your own food is essential to survival in StarRupture. Gather resources, craft effective snacks, and keep yourself ready for whatever challenges lie ahead.