Tag: light

  • Scientists unveil method to see inside unhatched eggs with light

    Scientists unveil method to see inside unhatched eggs with light

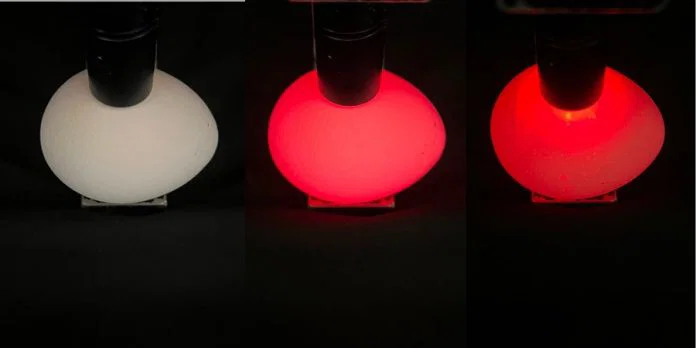
    Scientists have uncovered a unique property of chicken eggs that could potentially address one of the poultry industry’s major ethical issues. By shining light into intact eggs, researchers have found a way to look inside without cracking the shell open. This method could one day help determine the sex of the developing embryo, identify fertilized eggs, and evaluate egg quality.

    If this approach proves successful, it might reduce the current practice of killing male chicks shortly after they hatch. In the poultry industry, male chicks are often considered unprofitable because they can’t lay eggs and don’t grow fast enough for meat production. Consequently, over 300 million male chicks are culled annually in European hatcheries alone. This practice has faced heavy criticism from animal welfare advocates, prompting several countries to seek alternatives.

    The research focused on how light behaves inside a chicken egg. Scientists discovered that when light enters an unbroken eggshell, it doesn’t just pass through; instead, the shell traps the light, causing it to bounce around repeatedly inside. Tiny particles of light, known as photons, can travel up to two meters inside an egg—despite the egg’s only about four centimeters in length. This means the photons’ paths are roughly 50 times longer than the egg itself.

    The team examined how visible and near-infrared light moved through whole eggs before incubation and during the first eight days of embryo development. They described the eggshell as an “integrating sphere,” acting like a small chamber that effectively scatters and traps light. The eggshell’s ability to keep photons inside was surprising, as such long light paths are rarely observed in natural materials.

    This discovery opens up exciting possibilities. Since light interacts with the structures inside the egg, scientists could someday analyze the returning light to gather information about the embryo’s development without physically disturbing the shell. This could enable non-invasive methods to determine if an egg is fertilized, monitor embryo growth, and detect the embryo’s sex.

    The technique falls under the field of optical spectroscopy, which uses light to reveal physical and chemical properties. Similar methods are already employed in medicine to examine tissues and organs, as well as in agriculture to study fruits and plants.

    However, the researchers note that much work remains. The light behavior inside eggs is complex and not fully understood yet. Future studies will explore how these light patterns evolve as the embryo continues to develop and how various parts of the egg influence these effects.

    Scientists also speculate that this remarkable ability of eggs to scatter light may have evolved to shield developing embryos from harmful ultraviolet radiation and help conserve temperature when parent birds leave the nest. Although this technology is still in its early stages, shining light into eggs could one day lead to more humane and sustainable poultry farming practices.

  • How to Completing Every Achievement and Solving Trophies in 007 First Light

    | Name | Description | Type |
    | — | — | — |
    | Icebreaker | Survive a helicopter crash | Story |
    | From Malta with Love | Finish your training as a new recruit in Malta | Story |
    | Shaken Not Stirred | Complete your first mission at the nightclub | Story |
    | I Expect You to Die | Survive an explosion at the hotel in Slovakia | Story |
    | Skyfall | Jump out of a plane in Slovakia | Story |
    | Win, Lose or Die | Win an auction | Story |
    | Nobody Lives Forever | Find the body of agent 009 | Story |
    | Trigger Mortis | Escape an ambush alive | Story |
    | A Hard Man to Kill | Survive an assassination attempt | Story |
    | You Only Live Twice | Defeat the assassin | Story |
    | Agent Under Fire | Escape in the trash truck | Story |
    | All Time High | Infiltrate Nicholas Webb’s penthouse | Story |
    | No Time to Die | Escape by helicopter | Story |
    | Double or Die | Save Theresa Lorca | Story |
    | You Know My Name | Defeat Damian Webb | Story |
    | Solo | Leave MI6 as a rogue agent | Story |
    | The Writing on the Wall | Catch Isola | Story |
    | For King and Country | Protect MI6 | Story |
    | A Legacy of Spycraft | Find all Legacy collectibles | To earn this, find all Legacy items. You don’t need to do it all in one go; you can revisit past chapters. Use our guide for all Legacy item locations. |
    | Casino Royale | Collect all 36 playing cards | Throughout the game, find all the playing cards. You can replay chapters to get any missed. Our guide shows where to find each card. |
    | Recovered Assets | Find all Mementos | There are 14 total. Use our guide to find all Mementos and complete this achievement. |
    | For Your Eyes Only | Collect every MI6 file | These are labeled as “Intel” in your collectibles menu. Use our guide for the locations of all MI6 files. |
    | The World Is Not Enough | Collect all 10 postcards | Find all postcards across the game using our guide to complete this achievement. |
    | Sleight of Hand | Disarm an enemy by shooting the weapon from their hand | Aim at an enemy’s gun and shoot, knocking it away. Use slow motion by pressing the Left Stick while aiming for better accuracy. |
    | Short Fuse | Shoot an enemy throwing a grenade | Listen for enemies warning about throwing grenades, then use slow aiming to shoot before it explodes. |
    | Firestarter | Push an enemy into a fire extinguisher | Hold the Right Trigger to throw enemies into wall-mounted fire extinguishers. Often easiest in confined spaces like the Knightfall mission. |
    | Disarming Personality | Disarm an enemy using a laser | Use the Laser Strap gadget, target an enemy, and fire to make them drop their weapon. |
    | Damp Squib | Hack a grenade before it explodes | Quickly hack enemy grenades in your Q-Lens after they throw them to prevent detonation. |
    | Soft Landing | Tackle an enemy over the edge of a ledge | Rush an enemy and hold R2 on a ledge until both of you fall. This knocks out the enemy below. |
    | He’ll Live | Kill an enemy by shooting their legs | Aim for and shoot an enemy’s legs until they die. The final shot needs to be a leg shot to count. |
    | Positively Shocking | Taser an enemy using their own taser | Wait for an enemy to draw their taser (signified by a blue line), then grab and hold them in front of it. When they taser, you’ll get this achievement. |
    | Always Have an Exit Plan | Escape using a gadget during confrontation | When caught trespassing, instead of confronting or bluffing, use a gadget to distract enemies, like turning on a radio with your watch. |
    | What If…? | Complete an operation in TacSim mode | Finish any operation in the replay mode, which allows you to redo story actions. Unlocks after completing a single TacSim operation. |
    | A Change of Pace | Complete an escalation TacSim | Finish an escalation, available after completing “A Night Out.” These are quick and easier on the first try, unlocking this achievement. |
    | Keep Moving Forward | Reach clearance level 3 in TacSim | Play through TacSim and complete objectives to level up. Level 3 is doable without much effort. |
    | The Readiness Is All | Complete tier 3 of an escalation in TacSim | Finish all objectives in tier 3 of an escalation, which unlocks after completing the first tier. Reaching tier 3 on the first escalation is recommended for simplicity. |
    | A Collector’s Habit | Find all collectibles | Collect all Mementos, Postcards, MI6 files, Legacy items, and Playing Cards. |

  • Where To Find All 14 Mementos in 007 First Light: Solving Complete Collection

    Where To Find All 14 Mementos in 007 First Light: Solving Complete Collection

    007 First Light is a stealth adventure game that puts you in James Bond’s shoes during the early part of his spy career. As you progress, you’ll face off against villains, solve puzzles, and fight through different locations worldwide.

    During your mission, you’ll find various collectibles. These not only help you learn more about the story but also unlock achievements. One such achievement is called “Recovered Assets,” which you earn after finding all 14 Mementos in the game. Below, you’ll find all the locations of these Mementos, making it easier to gather them without wandering aimlessly.

    All Memento Locations — Recovered Assets

    Similar to legacy items, Mementos are physical objects hidden throughout the levels in 007 First Light. There are 14 in total, and multiple Mementos can be in a single mission. Here’s a list of every Memento to help you find them easily.

    Satellite Part

    • During the opening mission, near the back left corner of the base, you’ll find a green G9 trailer. Inside, a guard will be standing with his back turned. Knock him out, approach the computer table, and you’ll spot the Satellite Part next to the screen.

    Cocktail Napkin

    • In the nightclub where your first mission takes place, go to the bar where you meet your contact. After talking, you’ll be instructed to use the bathroom; before heading there, quickly grab the napkin on the back counter to avoid detection.

    All The Time In The World (Pillow Mint)

    • In the hotel, after the first floor, look for the bedroom with the chess match. Use Q-Lens to spot a staff member with a yellow key. Poison him with a dart, then pickpocket the key. The Pillow Mint is located on a shelf near the cleaning cart outside the staff door.

    Championship Badge

    • Still in the hotel, once you’re exploring the top floor, head downstairs behind the referee’s station. Behind a black crate next to a locked door, you’ll find this badge sitting on top.

    Pirate Grillz

    • During the mission “The Past Never Dies,” earn $100,000 in the black market. The stall selling Pirate Grillz is directly across from your location after you’ve amassed the money. Purchase them for $1,000, then return to grab the Memento.

    Crocodile Tooth

    • After escaping the crocodile pit with Greenway, Bawma will escort you back to the Land Rover. Before getting inside, grab the Crocodile Tooth on the table behind the vehicle.

    Tero Murto Locket

    • At the start of “Man Of The Hour,” after the opening cutscene, go to the desk below. The Niko Murto Locket is resting on the left side of the desk.

    Niko Murto Locket

    • Found after defeating Bawma in the basement of “Uninvited.” Exit the boss fight area, and in the following room, a white box on a table contains the Restoration Room Keycard. Use it to open the door across, where you’ll find the locket on a table.

    Anniversary Pin

    • During “Uninvited,” reach the second floor into the gala. Head to the left side of the room where the press and café are, eavesdrop on the guards, and after the challenge “Always On Duty,” go to the coat check room. Inside, the pin is on a cart.

    Snow Globe

    • In “Wave of the Future,” when getting two ID bracelets in the cable car station, approach the reception desk. The Snow Globe is sitting on the right side of the counter.

    “For England” Model Car

    • Near the end of the mission “For England,” inside the Q-Lab when fighting enemies, go to the wardrobe room. Across from the changing rooms, on a table, you’ll find a model car.

    Additional Mementos (Examples)

    • Many Mementos are on tables, shelves, or tucked into hidden spots within the levels. For instance, in levels like “Knightfall,” you can find the Office Toy on a table in the office area after passing through a vent. In “Knightfall,” the Office Toy is located on a table after navigating a vent and passing the level’s sensors.

    With this guide, you should be able to track down all the collectibles needed to unlock the Recovered Assets achievement and enjoy a complete experience in 007 First Light.

  • How To Beat Murto During Uninvited in 007 First Light by Completing and Solving

    How To Beat Murto During Uninvited in 007 First Light by Completing and Solving

    “007 First Light” has been released, so it’s time to get dressed in your best suit, prepare a laser watch, and get ready to take down some unnamed henchmen. The game covers the early years of James Bond’s career as an MI6 agent, featuring a mix of sneaky stealth and intense action scenes.

    Most of your gameplay will have you sneaking around beautiful, exotic locations. But there will also be moments when you need to confront enemies directly. One of these moments is during your second fight with Murto in the museum basement during the “Uninvited” mission. Here’s how to defeat him if you’re having trouble taking him down.

    ### How To Defeat Murto

    The fight with Murto is a complex game of hide-and-seek. You start unarmed, and fighting him face-to-face will only get you killed. Instead, you need to sneak around the storage room below the museum and find ways to harm him using the environment. Your success depends on the gadgets you have with you, as some work better against Murto than others.

    When the fight begins, if you have the Laser Strap or Dart Phone, look to your right and up at the chandelier. Wait for Murto to walk underneath it, then use your gadget to drop the chandelier on him. This will take away one of his health bars, so don’t rush to attack him when he’s stunned.

    If you don’t have the Laser Strap, go left and squeeze through a gap in the shelves to reach an area with two big lights. Wait for Murto to come in front of one, then use your watch to hack it. This will cause the light to shoot fire at him, causing damage. There are two such lights, so if he avoids one, reposition and wait for him to approach the second.

    You can tell when Murto is in trap range because a yellow triangle with an exclamation point will appear over him when looking at him through your Q-Lens.

    Between the traps, you’ll need to move quickly, as Murto will be searching the room at a rapid pace. Be cautious because the room is filled with motion sensors. Walking in front of them will trigger them, flash red, and cause Murto to charge toward you. These sensors can be deadly, so always stay alert.

    You also have the option to hack the motion sensors to set them off intentionally, drawing Murto toward you. This tactic is helpful because the room is large and sometimes difficult to lure him into certain areas. Additionally, you can hack the radio devices around the room to play sounds that will attract Murto, but be careful not to stand too close to the radios when doing this.

    Murto’s detection range is wide, so if you walk directly in front of him, he’s likely to spot you and open fire. If that happens, quickly move to another part of the room to hide until he loses track of you. To fully deplete his health, you will need to trigger three different traps with Murto nearby.

    Once you’ve managed to hit all the traps and reduce his health, a cutscene will trigger, ending with Murto defeated. There’s no extra fight or phase afterward.

    After beating him, head into the open room on the right outside the storage area. You will find a box in the back corner containing the Restoration Room Keycard. Use this keycard to open the door across from you, where you’ll find the Tero Murto Locket on a table.

  • Scientists unveil crystal that extracts drinking water solely with light

    Scientists unveil crystal that extracts drinking water solely with light

    Scientists at the University of Iowa have created a new material capable of extracting water directly from the air using only light. This breakthrough could help supply drinking water to arid regions where clean water sources are scarce.

    Published in the Journal of the American Chemical Society, the research details a crystal-like substance that responds to ultraviolet (UV) light by changing its shape. When exposed to UV rays, this material’s structure shifts, creating tiny internal pockets that trap water molecules from the surrounding atmosphere. The scientists describe it as resembling a vast collection of microscopic water bottles.

    Leonard MacGillivray, one of the lead researchers, explains, “We’ve figured out a way to capture and store water solely through sunlight. The crystal structure can be transported and then released on demand.”

    This innovative material belongs to a class called metal-organic frameworks, or MOFs. These substances are composed of metal atoms connected by organic molecules, forming three-dimensional frameworks full of small pores. For decades, scientists have studied MOFs because they can effectively trap gases, chemicals, and other substances within their tiny cavities.

    Initially, the Iowa team faced challenges designing cavities suitable for water storage. Their original framework incorporated flexible molecular linkers, but the structure remained too dense. When they exposed the material to UV light, however, surprising results emerged. The light induced a chemical reaction that reconfigured the molecular linkers, which shifted from parallel lines to an X-shaped form. This reorganization created numerous small cavities throughout the structure.

    X-ray analysis confirmed that water molecules had already entered these newly formed pockets. Each cavity can hold two water molecules, which collectively amount to about 5% of the material’s total weight when fully saturated.

    The team suggests that water molecules likely migrate along the surface through hydrogen bonding before settling into the open cavities. Although the current version of the material only stores a modest amount of water, its self-assembling crystal structure means it could be produced in large quantities.

    The researchers are now working to increase the material’s water capacity and plan to replace cadmium—a toxic metal used in the current framework—with safer alternatives. They describe this technology as “intelligent” because the water harvesting process is triggered by light, primarily sunlight, making it a potentially low-energy way to extract clean water from the atmosphere.

    As climate change intensifies and water shortages threaten more communities globally, such advancements could become critical solutions in the future.

  • New research shows atoms can detect ripples in spacetime

    New research shows atoms can detect ripples in spacetime

    Gravitational waves are minute disturbances in spacetime caused by some of the universe’s most explosive events, like the collision of two black holes. Since their first detection in 2015, scientists have used massive instruments capable of measuring incredibly tiny changes in distance—smaller than a proton’s width—to identify these ripples.

    However, a new theoretical study suggests an entirely different, potentially more subtle method of detection: examining how atoms emit light. Researchers from Stockholm University, Nordita, and the University of Tübingen propose that gravitational waves could subtly influence the light emitted by atoms.

    This study, published in Physical Review Letters, doesn’t yet include experimental verification, but it introduces an exciting new avenue for detecting gravitational waves in the future.

    Understanding this idea starts with how atoms normally behave. When atoms absorb energy, they enter an excited state. They don’t stay excited for long; instead, they quickly release that energy as light at a specific frequency—a process called spontaneous emission, fundamental to quantum physics.

    The scientists suggest that gravitational waves can slightly disrupt the quantum fields surrounding atoms. When this occurs, the light emitted by the atoms isn’t perfectly uniform in every direction. Instead, the frequency of the emitted light may vary depending on its direction of travel.

    Imagine a music player that always plays the same steady note. A gravitational wave wouldn’t change the volume of the note, but it might subtly alter its tone depending on where you’re listening from. This minor variation could encode information about the gravitational wave’s properties and direction.

    One reason this effect hasn’t been observed before is because the total amount of light emitted remains unchanged; only the tiny details—such as the light’s frequency in different directions—are affected. Detecting these slight variations would require highly sensitive instruments.

    The researchers believe that existing atomic clock technologies could help test this concept. These systems depend on extremely stable light signals, making them capable of detecting tiny shifts. Particularly, cold atoms—atoms cooled to near absolute zero—could be used to observe these effects over longer durations.

    If viable, this approach could pave the way for a new class of gravitational wave detectors that are much more compact than current giant observatories. Instead of sprawling facilities spanning kilometers, future detectors might be small enough to fit on a tabletop or even within millimeter-sized devices.

    While more research is necessary to address practical challenges like background noise, the initial findings are promising. This work suggests that even the tiniest particles—atoms—could someday help us “listen” to the faint ripples of spacetime in an entirely new way.

  • How to Complete the Beaver’s Stick Mission in Dying Light: The Beast

    How to Complete the Beaver’s Stick Mission in Dying Light: The Beast

    Dying Light: The Beast offers a variety of strong weapons, but have you tried the Mysterious Stick? This hidden weapon can only be unlocked by following certain steps involving wood, water, and a secret safe zone tucked inside an underwater cave.

    The Mysterious Stick isn’t something you’ll find just wandering around Castor Woods. If you want to add it to your inventory, follow these steps carefully. Here’s how to get the Mysterious Stick in Dying Light: The Beast.

    How To Find The Mysterious Stick

    The Mysterious Stick is a legendary blunt weapon that deals 538 base damage. It has 160 durability, but once it’s damaged, it can’t be repaired. Use it wisely. This weapon increases damage by 10% against humans and 6% against infected enemies, and it always knocks enemies down. That allows you to easily stomp enemies’ heads once they’re on the ground.

    To unlock this secret weapon, you need to find six wooden sticks near rivers throughout Castor Woods, rebuild a beaver dam, and then explore an underwater cave. Here are the exact steps.

    Stick One Location

    Start by heading to the far left of the Castor Woods map. Along this river, you’ll find the first stick on some rocks by the water and a broken beaver dam. Your goal is to find six sticks and rebuild this dam before discovering the Mysterious Stick.

    Go to the spot shown on the map and pick up the first stick sitting on the rocks above the water. Use your Survivor Sense to help locate them if you’re having trouble.

    Next, move to the location below to find the second stick across the river on the opposite bank. It’s sitting in the water before the river widens, near some trees and a wrecked car.

    The third stick is further downstream, before the overpass. Look near the water’s edge, close to some trees and debris.

    Stick Four Location

    After crossing the overpass at Beaver Creek, just before reaching Old Town, the fourth stick is in the grass by the water’s edge. Find it in this area to continue.

    Stick Five Location

    Head to the shore near the Mentel Asylum, crossing into Old Town. The fifth stick is hidden in the water beside some rocks. Use Survivor Sense for easier spotting.

    Stick Six Location

    The final stick is under a large overpass, sitting beneath some rocks. This completes your collection of sticks needed to rebuild the dam.

    Rebuild The Beaver Dam

    The next morning, return to the first location where you found the beaver dam and the first stick. Carefully place each of the six sticks in the broken dam, which stretches across the water. Walk slowly to find each spot where a stick fits, as some are hard to see. Use Survivor Sense if needed.

    When all sticks are in place, go to a nearby safe zone and sleep until morning. This allows the dam to be repaired, raising the water level. The closest safe spot is the Power Plant.

    Find The Beaver Den

    The morning after, go back to the dam and cross the newly reconstructed bridge of sticks. Dive into the water to the right of the dam and swim down into the underwater cave.

    Inside, explore the rooms. You’ll find a cozy den with a Beaver bed and a family photo on the bedside table. Down the corridor, there’s a larger safe zone with a workbench, stash bag, and a bed. Approach the bed and sleep until morning.

    Pick Up The Mysterious Stick

    The next morning, the Mysterious Stick will be on the workbench inside the safe zone. You can then take it and use it right away. Feel free to make this hidden den your safe spot for nighttime survival if needed.

  • Top Evernight Builds, Light Cones, And Relics For Completing Honkai: Star Rail

    Top Evernight Builds, Light Cones, And Relics For Completing Honkai: Star Rail

    Honkai: Star Rail has consistently released five-star characters that fans eagerly anticipate. There’s something particularly exciting about finally obtaining a five-star version of a character you’ve known and loved for a long time. That’s exactly what happened in the Version 3.6 update.

    In the first half of this update, Evernight was introduced as a playable character. She’s a different version of March 7th, following the Remembrance path. Her abilities clearly reflect her devotion to this path, but they also make her quite difficult to use effectively.

    Best Light Cones for Evernight

    The light cone plays the most crucial role in any character’s kit in Honkai: Star Rail, and Evernight is no exception. While she has several good light cone options, her signature one, called To Evernight’s Star, is undoubtedly the best. It provides impressive benefits like increasing her HP and damage by 30%, and she also regenerates energy when her memosprite disappears. When her memosprite uses any skill, all her memosprites ignore 20% of the enemy’s defense.

    Other good choices include:

    • Make Farewells More Beautiful: Best if you want Evernight to serve as a damage dealer. It allows her to ignore 30% of the enemy’s defense when she loses HP with her skill, along with the standard 30% HP boost. Plus, her actions can be advanced when her memosprite vanishes.

    • Memory’s Curtain Never Falls: A decent all-rounder that boosts her speed and enhances her allies’ damage after she uses her skill. This light cone is especially friendly for free-to-play players.

    • The Flower Remembers: This is a four-star battle pass light cone, increasing her Crit Damage by 24% and also boosting her memosprite’s Crit Damage by the same amount. It’s her strongest four-star option.

    Best Relics and Planar Ornaments for Evernight

    Grouping two or more relics and ornaments from the same set provides powerful bonuses. The top sets for Evernight are:

    • World-Remaking Deliverer: This set increases her Crit Rate by 8% with two pieces and grants a 24% max HP boost when she uses her basic attack or skill with her memosprite present. It also boosts all allies’ damage by 15% under the same conditions.

    • Bone Collection’s Serene Demesne: Offers a 12% Max HP boost and, when her HP exceeds 5,000, grants her 28% Crit Damage. This is excellent for consistent damage output.

    Other viable options include:

    • Hunter of Glacial Forest: Good early-game relic for Crit Damage and Ice Damage boosts, but better to replace it later.

    For planar ornaments:

    • Bone Collection’s Serene Demesne is highly effective, providing a 12% Max HP boost and 28% Crit Damage when her HP is above 5,000—a condition that’s usually met.

    • The Wondrous BananAmusement Park: Offers up to a 48% Crit Damage boost when her memosprite is active, making it ideal for maximizing her damage potential.

    • Arcadia of Woven Dreams: Potentially increases her damage by up to 36% if your team includes four Remembrance characters, making it a solid choice for DPS-oriented builds.

    Stat Priority for Evernight

    • Focus first on Crit Damage and Crit Rate.
    • Then prioritize HP percentage on her Feet, Sphere, and Rope.
    • Substats should aim for Crit Rate or Crit Damage, followed by HP percentage, then Speed.

    It’s recommended to aim for around 70% Crit Rate, with as much Crit Damage and HP as possible.

    Team Composition for Evernight

    Currently, Evernight fits best in teams with Castorice, Remembrance Trailblazer, and Hyacine. Hyacine is somewhat replaceable, but using her light cone, which reduces team HP with each Hyacine attack, allows Evernight to gain free memosprite stacks. Without Hyacine, alternatives like Luocha or Lingsha can work to some extent. However, if you lack Castorice, her practical use drops significantly, although she can still be paired with characters like Aglaea for lesser impact or waited for upcoming Remembrance DPS characters.

    Overview and Trace Priority

    Evernight’s kit is complex, especially with her memosprite interactions. Her abilities include boosting all memosprites’ Crit Damage based on her Crit Damage, and her ultimate puts her in the Darkest Riddle state, increasing enemies’ damage taken by 30% and herself and her memosprite’s damage by 60%. Maintaining this state requires managing stacks, which are consumed with her self-destruct attack.

    She has a memosprite called Evey, summoned at battle start, and through her skill or ultimate. Evey’s attacks are powerful, especially when she has 16 or more Memoria stacks, which can be gained by her skill, her memosprite’s actions, or HP loss. Her kit revolves around summoning Evey repeatedly, using its enhanced attacks to deal damage and buff allies.

    Her trace upgrades should follow this order:

    1. Skill
    2. Ultimate
    3. Memosprite Skill
    4. Memosprite Talent
    5. Talent
    6. Basic Attack (less priority)
  • How to Complete The What Lurks Beyond The Pines Side Quest in Dying Light: The Beast

    How to Complete The What Lurks Beyond The Pines Side Quest in Dying Light: The Beast

    In Dying Light: The Beast, side quests help expand the story of Castor Woods and give more details about the characters nearby. One of the first side quests you will find is “What Lurks Beyond The Pines.” During this quest, you will meet Eli, who is in the Town Hall trying to find his father.

    The quest starts at the Town Hall, usually around the time you are working on the Power Gambit part of the main story. Look for an exclamation mark icon in one of the rooms in the Town Hall and talk to Eli. He explains that he’s worried about his father, William, who has dementia and keeps wandering off. Eli thinks William might be somewhere familiar where he would feel safe.

    Next, you are sent to find William at the family cabin in the National Park, southeast of the Town Hall. Follow the marker to the cabin. Clear out any infected nearby before entering. Inside, you will find a map on the table pointing to nearby caves. There is also a Cave Spare Key to take with you. Read the letter near the bed and check the graffiti on the wall, which shows William is having a tough time mentally. It becomes clear that William is struggling from a past event before he moved into the Town Hall with Eli.

    Leave the cabin and climb ledges to reach the top, following the quest marker. You will come to a locked gate, and use the Cave Spare Key to get inside. Continue climbing by using ledges and jumping across to reach the next set of explosives. Be careful of infected and stay high to avoid them. When you reach the third cable, you’ll notice it is broken, so fix it quickly before continuing.

    Follow the blue cable to the final explosive. Carefully crouch, stay quiet, and avoid infected as you track the cable down into the caves. Attach the cable to the explosive once you find it. After connecting all cables, speak to William, who will give you his knife as a gift for Eli. Then, detonate the explosives and escape the caves by jumping into the water. Swim out through a tunnel, crawling through the water to reach safety.

    After escaping, return to the Town Hall and inform Eli about what happened. He will tell you to keep the knife for his father, which rewards you with a free knife, some manual pages, and 10,000 XP for finishing the side quest.

  • New Light Challenges Event Guide: Completing and Solving Tips

    New Light Challenges Event Guide: Completing and Solving Tips

    Destiny: Rising is a gacha game set in the Destiny universe where you collect and upgrade characters while completing various challenges, main story quests, and side missions. Among these challenges are the New Light Challenges, which serve as introductory tasks to help new players learn the game. These tasks include activities like petting cats and completing character tutorials.

    This guide explains how to finish all the New Light Challenges so you can earn rewards such as Bon Voyage Charms and Glimmer. Completing all 14 stages allows you to unlock either Xuan Wei or Finnala.

    New Light Challenges Overview

    The New Light Challenges are divided into 14 categories. Currently, only the challenges in Stage 1 are available, with stages 2-14 coming later. These challenges are meant to be completed over time and require consistent gameplay.

    Casual: Pet Cats In Haven Once Guide

    This is a simple challenge that you can complete in Haven, the game’s main hub. To do so:

    • Go to the Archives building (shown on the map).
    • Find the statue just to the right of the main entrance.
    • There, you’ll see a cat. Pet the cat to finish the challenge and claim your rewards.

    Note: The game suggests feeding the cat, but since the fishing mechanic isn’t available early on, you only need to pet the cat to complete the task.

    Reach Jiangshi Metro Reputation Rank 3

    You can easily reach Jiangshi Metro Reputation Rank 3 by doing quests in the area. The game will guide you to complete story and optional quests, such as defeating roaming Elites or destroying collectibles, which will speed up your leveling process.

    Note: Additional challenges are still being developed, and updates will be provided when they are released.

  • Completing Martin’s Journey: Solving The Dragonfires Quest in Oblivion Remastered

    The epic tale of The Elder Scrolls 4: Oblivion Remastered remains a classic, and the final quest poses a real challenge, particularly for high-level players. As you near the conclusion, with both Martin and the Amulet of Kings in your possession, it seems like everything is on track—unless something unexpected happens.

    One of the concluding quests is called “Light The Dragonfires.” Here, Martin Septim must fulfill his role as Emperor and establish a barrier against Oblivion. Will he succeed, or will Mehrunes Dagon disrupt everything at the last moment? The outcome rests in your hands, hero.

    Starting the Light The Dragonfires Quest

    Talking to Martin on the last quest in The Elder Scrolls IV Oblivion.

    The quest begins automatically after completing the Paradise quest, when you hand the Amulet of Kings to Martin Septim. He will instruct you to accompany him to the Imperial City for a meeting with Chancellor Ocato. Following that, Martin will need to light the Dragonfires to close off all Oblivion gates.

    Completing the Light The Dragonfires Quest

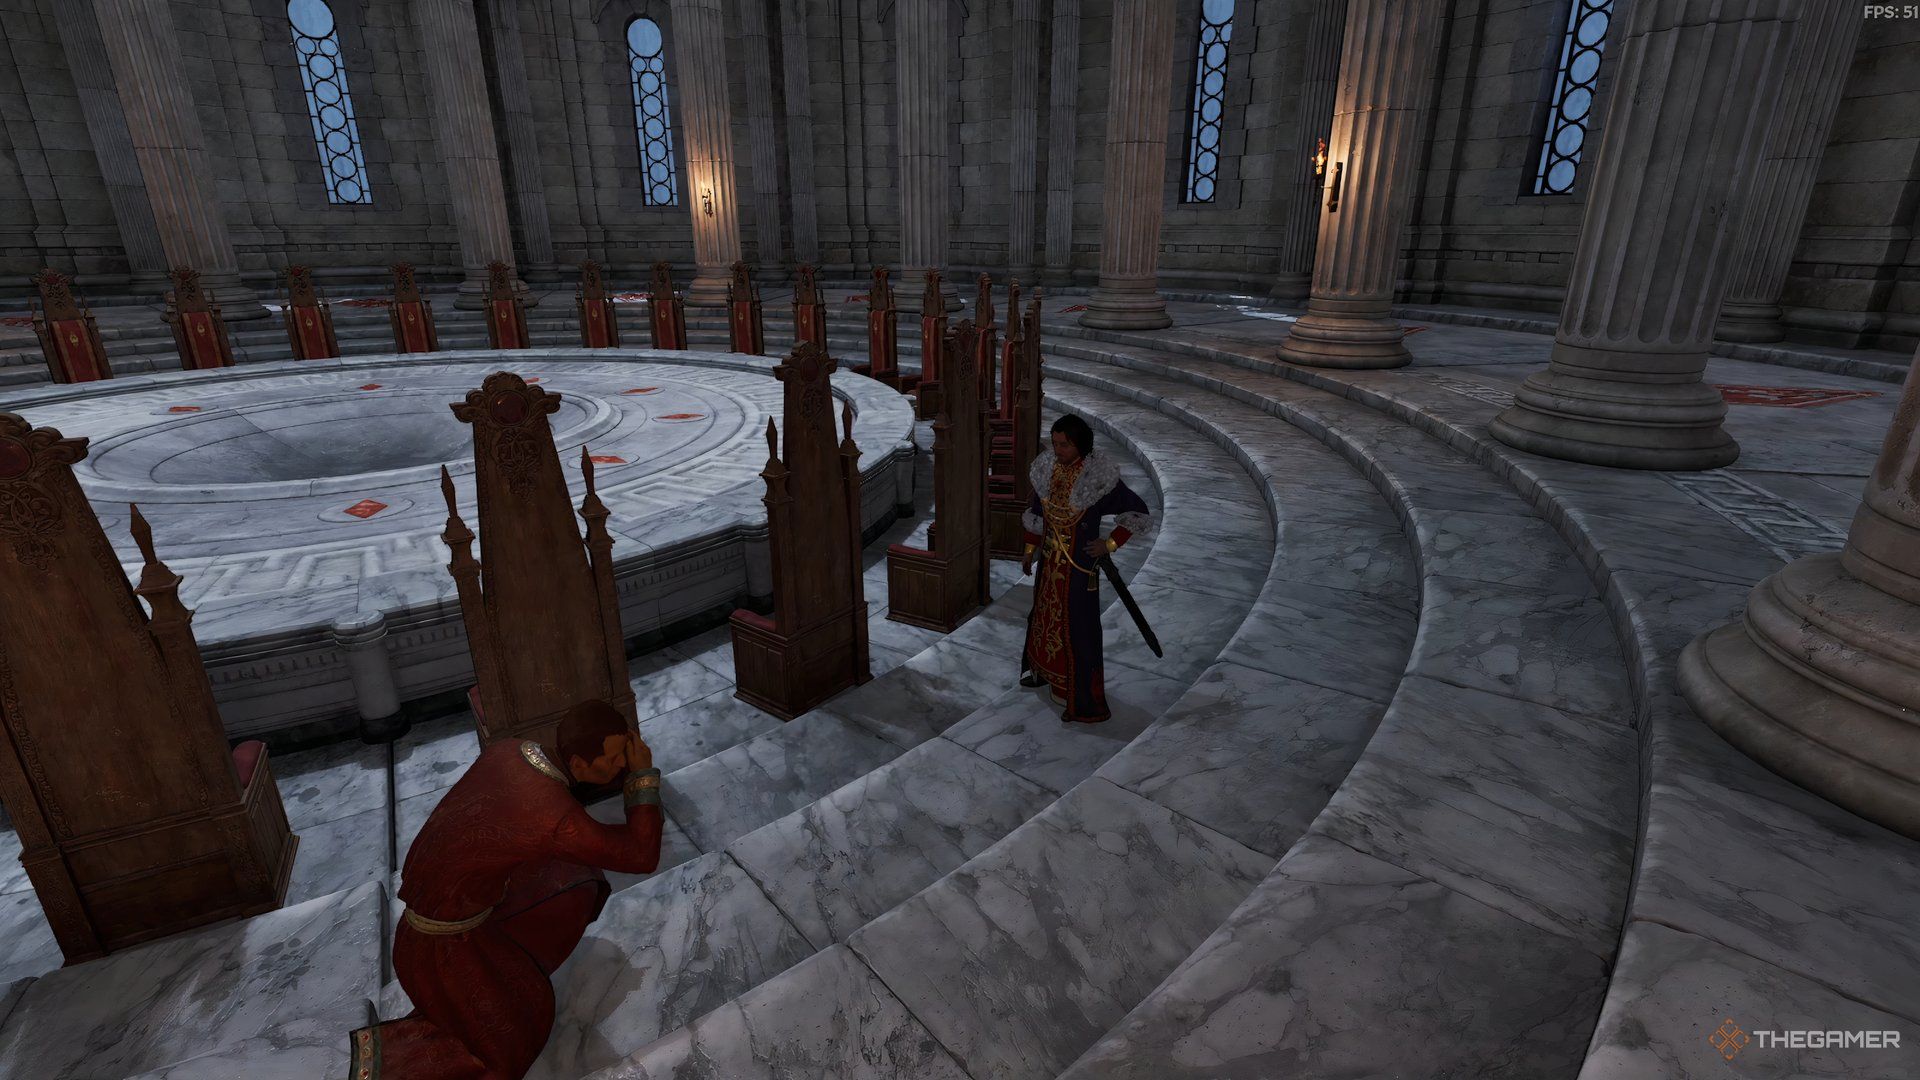
    Councilor Ocato talking to Martin Septim in The Elder Scrolls IV Oblivion.

    Request Martin Septim to follow you, and then make your way to the Imperial City Palace, located in the city center. You can either fast travel or walk or ride there.

    Using fast travel is recommended, as followers may have issues navigating the open world.

    Upon arriving at the Imperial City, enter the White-Gold Tower and proceed to the Elder Council Chambers. There, you will meet Councilor Ocato. Martin will approach him to advance the quest. Get close enough for Ocato to address you and then have a conversation with Martin regarding the necessary formalities.

    Daedra attacking the Council Chambers in The Elder Scrolls IV Oblivion.

    Your conversation will be interrupted by an Imperial Watch officer rushing in to announce that the city is under attack. Oblivion Gates are opening throughout the city, leading to leveled Daedra flooding the chambers and targeting Martin. Your task is to protect him.

    Martin will instruct you to escort him to the Temple District. You’ll have to battle through the Daedra. It’s wise to concentrate on the enemies Martin is engaging, as his death results in a game over.

    Everyone present, except Councilor Ocato, is immortal, so remember that as you fight.

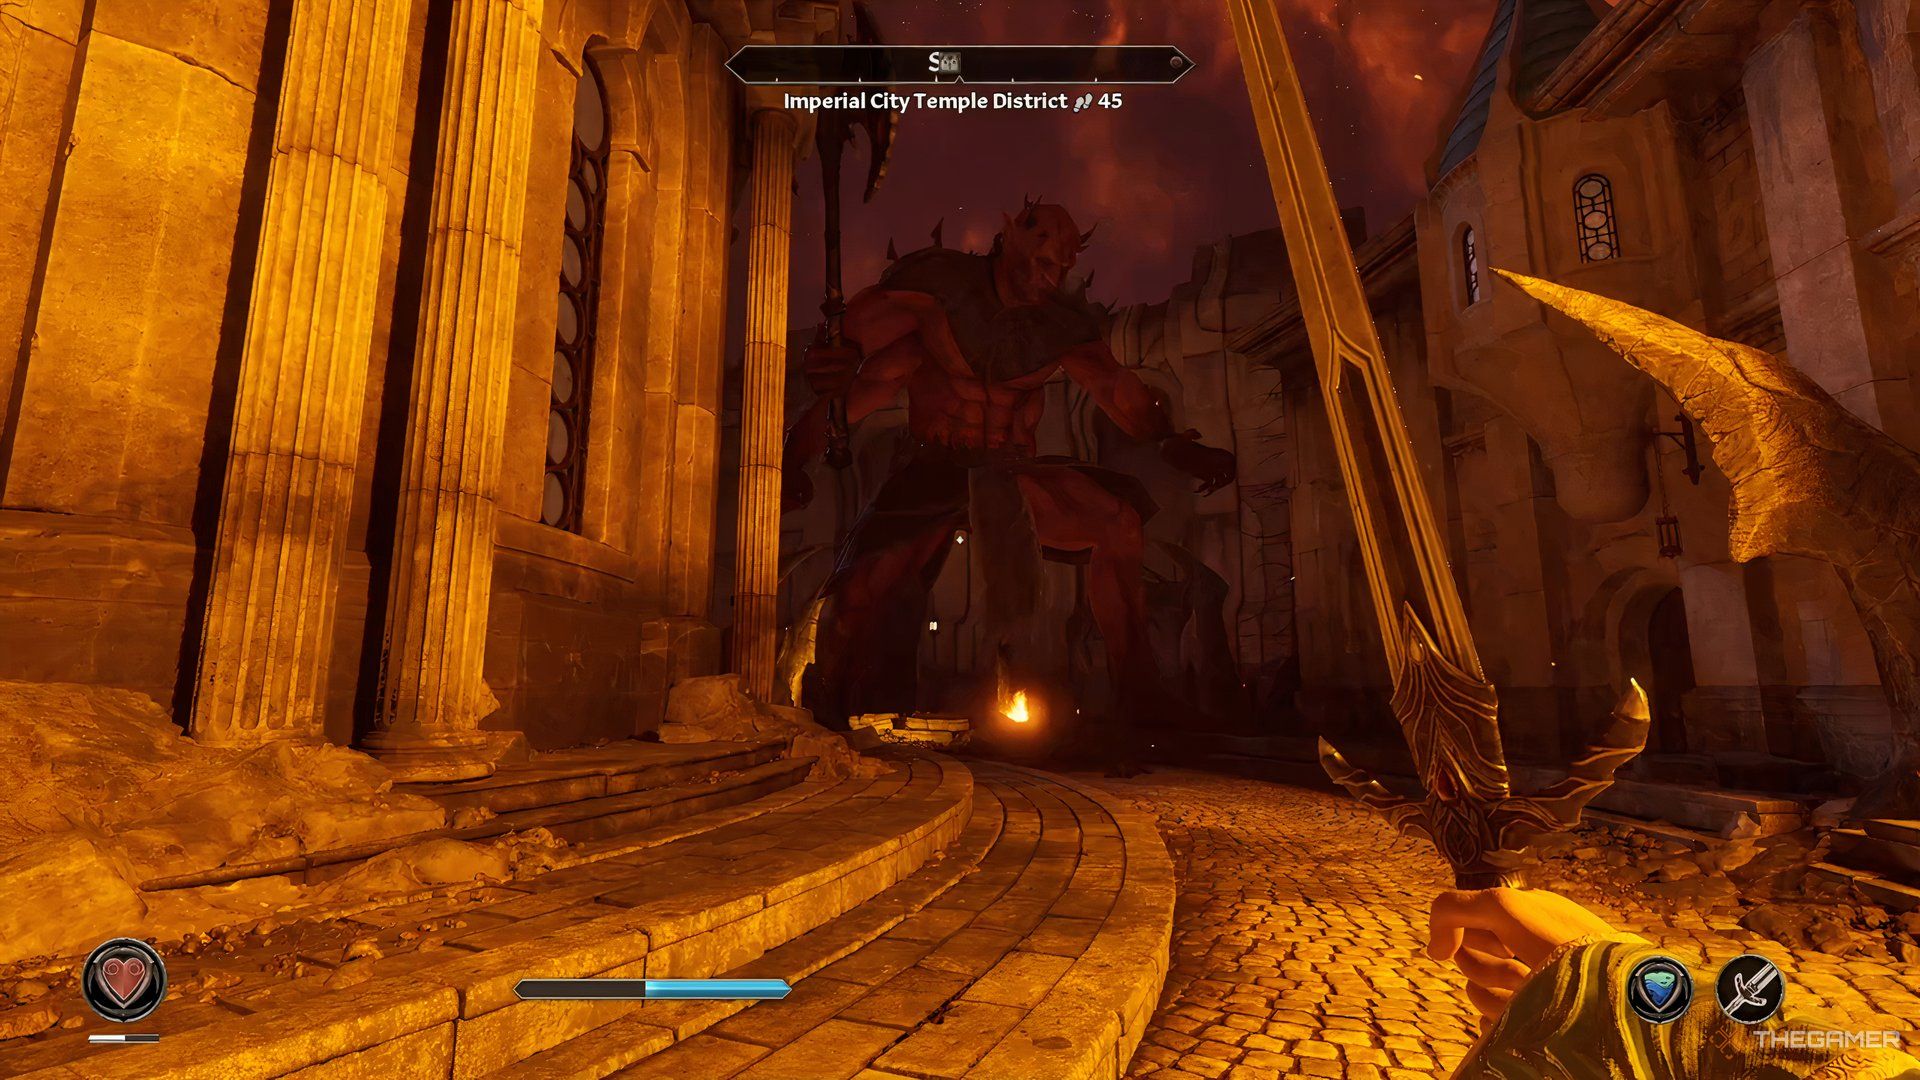
    Mehrunes Dagon in the Imperial City in The Elder Scrolls IV Oblivion.

    As you reach the Temple District, expect to see an Oblivion Gate and hordes of Daedra spilling out. Battle your way through and head towards the temple entrance, located to the south-southwest. As you approach, you will see Mehrunes Dagon has entered the city.

    Martin will share his plan and request that both of you make your way into the Temple. The entrance is situated next to Mehrunes Dagon. Since the Daedric Prince cannot be defeated, run past him and enter the temple while ensuring Martin’s safety.

    Mehrunes Dagon fighting Martin in The Elder Scrolls IV Oblivion.

    Once inside the temple, Martin will have a final conversation with you before confronting Dagon with the Amulet. Enjoy the dramatic cutscene that concludes your quest.

  • Completing the Crimson Cave: Light the Pyre or Solve the Prisoner?

    In The Elder Scrolls 4: Oblivion, you’ll interact with various characters to help improve the world of Cyrodiil. However, you also have the option to create chaos and support the schemes of Daedra worshippers across Tamriel. Your true intentions may not be clear until you’re deep into the action.

    Specifically, when it comes to the Crimson Cave, it’s evident that you’re tracking a perilous cult. We’ll guide you on how to find the necessary notes and sleeper agent to lead you to the cave and complete your initiation—unless you prefer to dismantle them from the inside.

    Where to Find the Burning Trail Notes

    Before you reach the Crimson Cave, you’ll undertake the Burning Trail quest. In this quest, you’ll need to follow a hidden trail of notes across Cyrodiil to uncover a secretive Mythic Dawn agent.

    You need to find four Mythic Dawn Pamphlets, which are located in the following areas:

    Simply read the pamphlets to advance; there’s no need to collect them.

    Note Number

    Location

    Mythic Dawn Pamphlet 1

    On a barrel in Talos Plaza, Imperial City.

    Mythic Dawn Pamphlet 2

    At the back of a tree, following the gaze of the wolf statue at Hircine’s Shrine.

    Mythic Dawn Pamphlet 3

    Near the Molag Bal shrine, oriented towards the sun.

    Mythic Dawn Pamphlet 4

    Inside the basin of the Lady Luck statue in Bravil.

    Once you’ve collected the notes, head to the Lonely Suitor Lodge and talk to the innkeeper about finding a reserved Dunmer. He’ll direct you to Ranaline, who resides not far from the Lady Luck statue.

    Speak with her to receive a set of Mythic Dawn Robes, a Mythic Dawn hood, and directions to the pyre.

    If Ranaline seems clueless about your inquiries, try the persuasion minigame to improve her mood. Offering gold as a bribe can also be effective.

    Should You Light the Pyre?

    Make your way back to Hircine’s Shrine and head south to Mingo Cave. Ensure you wear the Mythic Dawn attire before entering; otherwise, the cultists will turn hostile and attack you on sight.

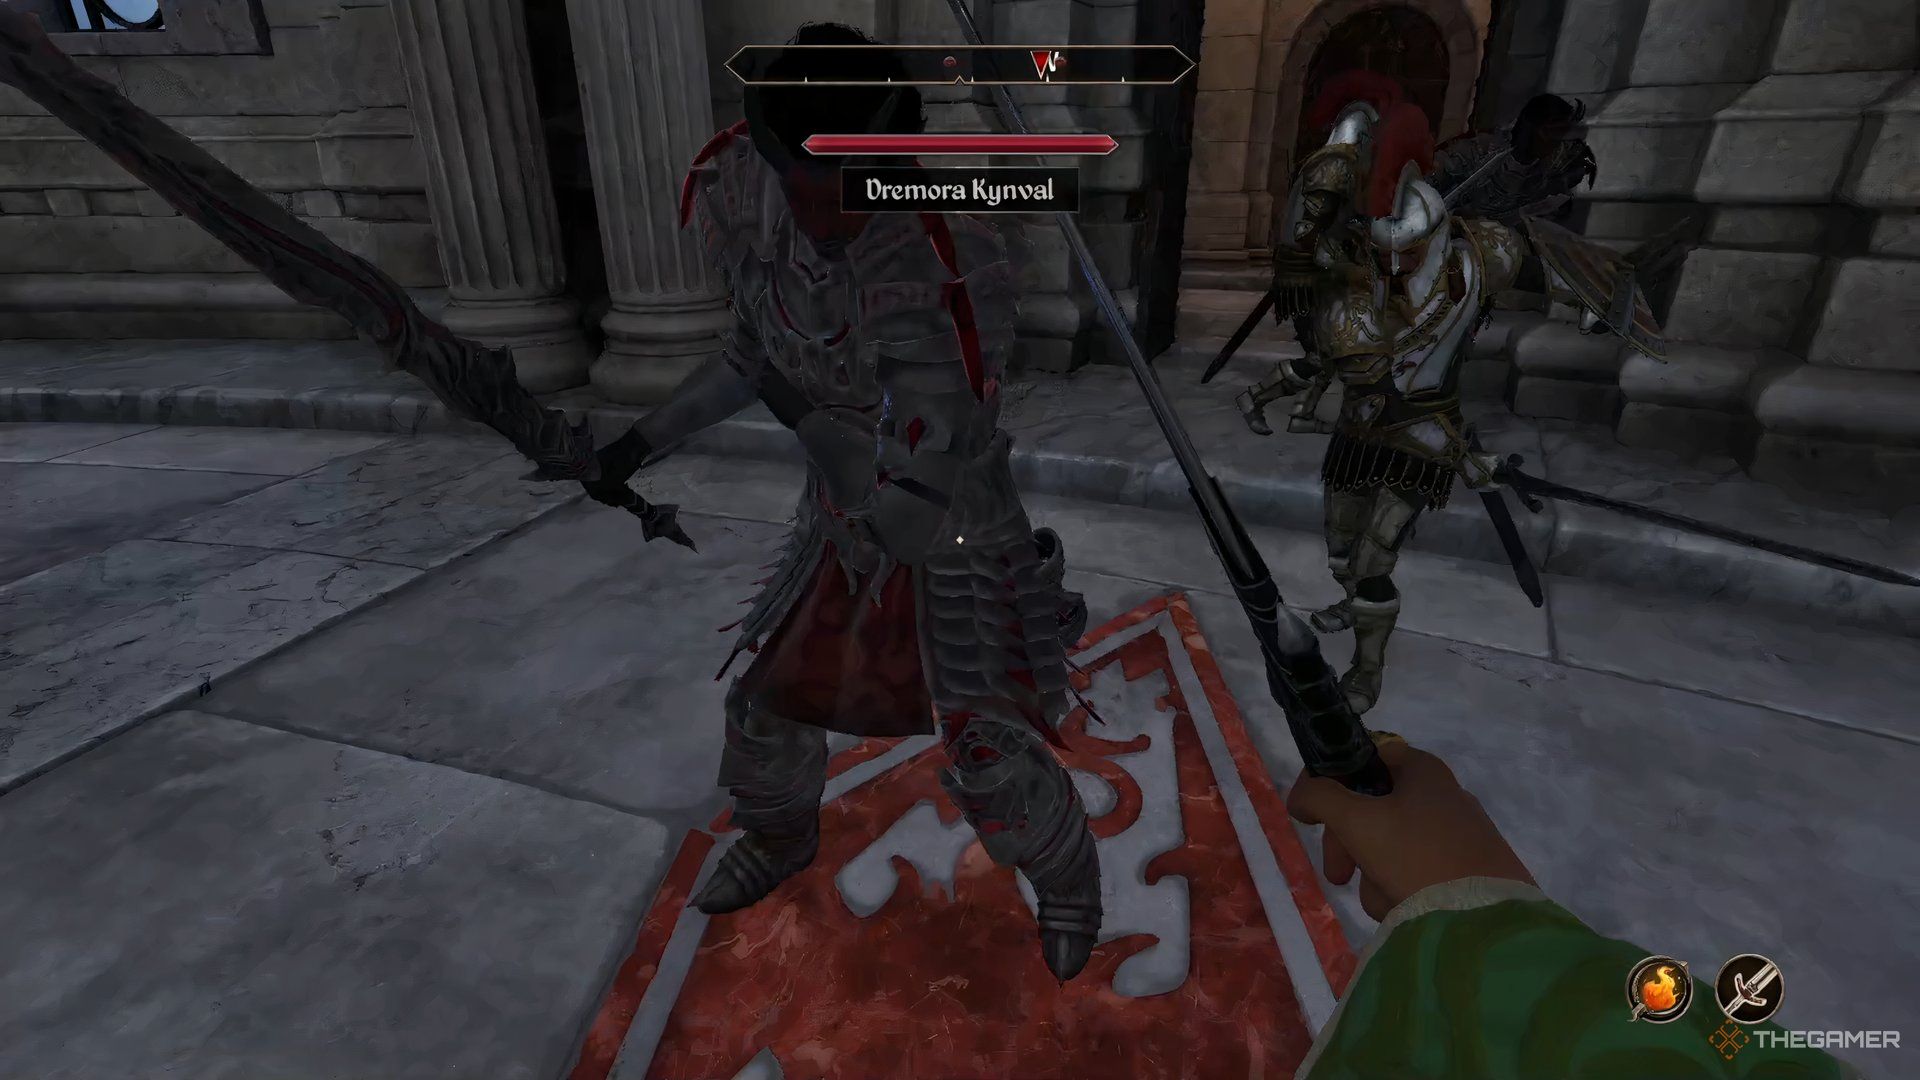
    Inside, the typical cave structure has been transformed into a Mythic Dawn hideout. You can converse with the cultists if you wish, but aim to delve deeper to find an Imperial Guard locked in a cage, flanked by two cult leaders and a Dremora.

    Talk to the Dremora, known as Mehrune’s Harbinger, who will inform you that the privilege of lighting the pyre is yours. You need to interact with the cage to carry out this act and incinerate the guard.

    It’s important to note that while you can eliminate the cultists, there’s no actual way to free the guard.

    If you opt to slay the cultists, Mehrune’s Harbinger will commend you for bringing down those unworthy of serving the Daedric lord. Alternatively, for those who prefer to maintain a good rapport with the cult, you can choose to simply harm the guard, which might be easier to manage. However, many virtuous heroes from Kvatch might feel compelled to eradicate the cult.

    Regardless of your choice, the quest wraps up after talking again with the Dremora. She will grant you a spell called Summon Mehrunes’ Harbinger. This conjuration spell has no cost and can be activated at any time to call her forth.

    Once you summon her, speak with her to claim your rewards, which will be plentiful.

    How to Get Cataclysm Armor and Weapons

    After summoning your new Dremora ally, you can request weapons and armor from the Cataclysm set. These items exceed normal crafting abilities, so you’ll need to converse with her to obtain enhanced sets as you progress. You can ask her for the following items at any time:

    Category

    Cataclysm Items

    Armor

    • Boots of Cataclysm
    • Cuirass of Cataclysm
    • Gauntlets of Cataclysm
    • Greaves of Cataclysm
    • Helm of Cataclysm
    • Shield of Cataclysm

    Weapons

    • Battle-Axe of Cataclysm
    • Bow of Cataclysm
    • Claymore of Cataclysm
    • Dagger of Cataclysm
    • Longsword of Cataclysm
    • Mace of Cataclysm
    • Shortsword of Cataclysm
    • War Axe of Cataclysm
    • Warhammer of Cataclysm

    To obtain the matching Cataclysm Horse Armor, visit Snak gra-Bura at the stables outside the Imperial City. While it’s unclear how she knows how to craft it, the armor is both sleek and Daedric in design.

  • Completing Your Light or Dark Alignment in Fortnite: Chapter 6, Season 3

    Completing Your Light or Dark Alignment in Fortnite: Chapter 6, Season 3

    The clash between Light and Dark is not just a tale from fairy tales—it’s happening in Fortnite, and your decisions play a key role. The Alignment system allows you to choose your side and earn some serious XP while doing so. So, how do you level up in your chosen faction? And what’s the significance of this global bar everyone is buzzing about?

    If you’re ready to align yourself, earn rewards, and potentially shape the season’s storyline, you’ve come to the right spot. This guide will walk you through everything you need to know to advance your Alignment. Get ready to shift the balance!

    How to Advance Your Light or Dark Alignment


    To start, simply open your quests menu and select the Alignment quests. This will allow you to find missions tied to either the Light or Dark side. Each completed quest not only boosts your personal Alignment bar but also contributes to the global community bar.

    This means that every Fortnite player plays a part in shaping the outcome through their choices.

    For every Light or Dark quest you complete, you’ll earn 3,000 XP and make strides toward your personal Alignment stages. Each Alignment has 20 stages, with each stage containing ten quests.

    While many of the quest objectives may repeat weekly, the XP rewards are substantial. Completing all 20 stages in either path will earn you over 100,000 XP. This doesn’t even include the bonus rewards: finishing all Alignment missions for one side gives you an extra 10,000 XP, with another 10,000 available for completing both sides completely.

  • Top Mydei Builds and Light Cones for Honkai: Star Rail

    Top Mydei Builds and Light Cones for Honkai: Star Rail

    Once you arrive at the Amphoreus planet while journeying in Honkai: Star Rail, chaos quickly envelops both the Trailblazer and Dan Heng. As the narrative progresses, you’ll encounter various members of the Chrysos Heir organization along with other allies who can assist you in your adventure.

    Among these characters, some like Mydei become playable units, particularly introduced in the latter half of the Version 3.1 update. His gameplay abilities align well with his character traits, making him an interesting choice for players. Here’s a complete guide on how to build him effectively.

    Mydei Overview

    Attribute Details
    Rarity Five-Star
    Path Destruction
    Combat Type Imaginary
    Overworld Rating S Tier
    Memory of Chaos Rating S+ Tier
    Pure Fiction Rating A Tier
    Apocalyptic Shadow Rating S Tier

    Belonging to the formidable Chrysos Heir organization, Mydei serves as a primary DPS character, inflicting significant damage on foes weak to Imaginary attacks. A unique aspect of his playstyle is that he remains in auto-battle mode during fights, even if you are manually controlling other characters.

    While this might seem underwhelming, it can be satisfying when done correctly. With the right team composition and upgrades, you can significantly enhance Mydei’s efficiency. Before diving into his light cones and relics, it’s essential to grasp his skill set:

    Mydei’s Kit Explained

    Ability Name Type Description
    Vow of Voyage Basic Attack Deals Imaginary damage to a single enemy but is seldom used.
    Deaths are Legion, Regrets are None Normal Skill Consumes 50% of Mydei’s HP to deal damage to three adjacent enemies, with the primary target receiving the most damage.
    Throne of Bones Ultimate Damages three adjacent enemies, restores Mydei’s HP, and taunts those enemies for two turns, also granting him 20 charge. The next skill will focus on the main enemy targeted here.
    Blood for Blood Talent Gains charge based on HP lost and enters a Vendetta state at 100 charge, restoring and increasing his HP but reducing defense to zero. Can auto-use a special skill during this state.
    Kingslayer Be King Second Skill Sacrifices 35% of Mydei’s HP to deal more damage to adjacent targets than his normal skill.
    Godslayer Be God Final Skill Consumes 150 charge to unleash massive damage on three targets, making it his most powerful move.
    Cage of Broken Lance Technique Pulls in enemies and applies Dazed for ten seconds, dealing damage at the start of a battle while taunting and gaining charge.
    Earth and Water Bonus Ability Prevents exiting the vendetta state even after a fatal blow three times in a battle.
    Thirty Tyrants Bonus Ability Grants immunity to crowd control during the vendetta state.
    Bloodied Chiton Bonus Ability Each 100 HP above 4,000 increases Crit Rate, charge accumulation, and healing received, capping at 8,000 HP with impressive bonuses.

    Mydei proves to be a somewhat self-sufficient fighter. He can heal and even revive himself multiple times without any drawbacks. Despite his boosts in Crit Rate from his abilities, this can complicate the ideal relic stats needed for an effective build.

    Mydei’s Eidolons Explained

    Achieving Eidolons enhances Mydei’s damage capabilities. Here’s what each Eidolon brings:

    1. First Eidolon: The Final Skill deals 30% more damage and hits all enemies rather than just three.
    2. Second Eidolon: Grants Mydei 15% DEF penetration during vendetta, allowing for charge gain upon healing.
    3. Third Eidolon: Further boosts Skills and Basic ATK levels.
    4. Fourth Eidolon: Provides an extra 30% Crit DMG and 10% HP restoration when struck during vendetta.
    5. Fifth Eidolon: Enhances Ultimate and Talent levels.
    6. Sixth Eidolon: Begins battles in the Vendetta state, enabling the use of Final Skill with just 100 charge.

    Best Builds for Mydei

    When constructing a build for Mydei, focus on his light cones, relics, and planar ornaments since each light cone carries unique passives. The best light cone for him is Flame of Blood, Blaze My Path, which enhances his max HP and healing while providing additional charge based on HP consumed through Skills and the Ultimate. Here are some other solid alternatives if you don’t have this specific one.

    Best Light Cones

    Light Cone Effect
    Flame of Blood, Blaze My Path Boosts Max HP, improves damage based on consumed HP.
    The Unreachable Side Raises Crit Rate, Max HP, and damage upon losing HP, though may lead to over-critting.
    Flames Afar Triggers healing and damage boosts when Mydei loses a significant amount of HP.
    Ninja Record: Sound Hunt Raises HP and Crit DMG with any HP change, making it accessible for F2P users.
    Collapsing Sky Offers a decent damage increase for basic attacks, if no better options are available.

    Mydei’s Best Relics

    For relics, the focus should be on enhancing Mydei’s destructive capabilities:

    Relic Effect
    Scholar Lost in Erudition Increases Skill and Ultimate DMG along with a small Crit Rate boost.
    Longevous Disciple Provides an HP increase and additional Crit boosts during HP loss.
    Wastelander of Banditry Desert Functions well in early-game to improve damage output.

    Mydei’s Stats Priority

    When prioritizing Mydei’s stats, the following should be noted:

    Position Main Stat Sub-Stat Priority
    Head HP Crit DMG > HP% > Crit Rate > SPD
    Hands ATK Crit DMG > HP% > Crit Rate > SPD
    Body Crit DMG HP% > Crit Rate > SPD
    Feet SPD Crit DMG > HP% > Crit Rate
    Planar Sphere Imaginary DMG Bonus Crit DMG > HP% > Crit Rate > SPD
    Link Rope HP% Crit DMG > Crit Rate > SPD

    Mydei’s Trace Priority

    To maximize Mydei’s potential, prioritize upgrades in this order:

    1. Skill
    2. Ultimate
    3. Talent (at least level 8, do not further upgrade)
    4. Basic Attack (ignore entirely)

    As for his bonus abilities, focus on them in this order: Bloodied Chiton > Thirty Tyrants > Earth and Water.

    Is Mydei Worth Pulling?

    Mydei stands out as one of the best DPS characters available at his launch, but the urgency of his pull is mitigated by the anticipation for other characters like Castorice and Anaxa. The game tends to introduce new high-powered DPS options quickly, so while Mydei is currently strong, you may want to consider your long-term strategy.

    Ultimately, you should only pursue characters you enjoy, as the meta in Honkai: Star Rail shifts rapidly.

  • Essential Tips for the Triumphant Light SP Emblem Event in Pokémon TCG

    Essential Tips for the Triumphant Light SP Emblem Event in Pokémon TCG

    The SP Emblem Event, a fan-favorite in the Pokémon TCG Pocket community, is making its return for Triumphant Light! While this popular PVP event was missing during the Space-Time Smackdown, it’s now back with the chance to win an eye-catching new gold emblem.

    It’s clear that many players have expressed their frustrations about the SP Emblem Events. However, if you’re someone who enjoys collecting exclusive emblems, you’ll want to participate. Thankfully, we’ve prepared a straightforward guide to help you achieve your winning streak so you can relax until the next Wonder Pick event arrives.

    What Is the Triumphant Light SP Emblem Event?

    The Triumphant Light SP Emblem Event is a week-long PVP challenge taking place from March 6, 2025, to March 13, 2025. During this time, participants can earn four new emblems to adorn their profiles, alongside Shinedust and Pack Hourglasses.

    Unlike the typical emblem events, the SP Emblem events don’t require farming for wins. Instead, you’ll need to maintain a winning streak to collect your emblems. You can snag new emblems with streaks of two to five consecutive wins.

    If you lose a match, you’ll have to restart your streak. Fortunately, you won’t lose any emblems you’ve already earned, so your Silver Emblem will remain safe even if you drop your fifth match.

    Missions and Rewards for the Mythical Island SP Emblem Event

    This event’s title makes it clear: new PVP emblems are the main rewards for players. You can score a participation emblem by winning two consecutive games, then progress to bronze, silver, and gold as your streak continues.

    Four emblems are available this time around.

    Emblem Name and Requirements

    Emblem

    Mythical Island SP Emblem Participation Emblem

    Win two consecutive Event Battles.

    Mythical Island SP Emblem Bronze Emblem

    TL SP Emblem Bronze

    Win three consecutive Event Battles.

    Mythical Island SP Emblem Silver Emblem

    TL SP Emblem Silver

    Win four consecutive Event Battles.

    Mythical Island SP Emblem Gold Emblem

    TL SP Gold Emblem

    Win five consecutive Event Battles.

    Additionally, there are ten missions to complete throughout the event. These missions offer Pack Hourglasses for engaging in PVP battles and Shinedust for winning them.

    Mission

    Reward

    Participate in one versus battle.

    Pack Hourglass x3

    Participate in three versus battles.

    Pack Hourglass x3

    Participate in five versus battles.

    Pack Hourglass x6

    Participate in ten versus battles.

    Pack Hourglass x12

    Win one versus battle.

    Shinedust x50

    Win three versus battles.

    Shinedust x100

    Win five versus battles.

    Shinedust x200

    Win seven versus battles.

    Shinedust x500

    Win ten versus battles.

    Shinedust x1000

    Win fifteen versus battles.

    Shinedust x2000

    These missions don’t require participation in Event Battles, so feel free to engage in random PVP matches, private games with friends, or utilize the “thanks lobby” for quick rewards.

    Tips for the Triumphant Light SP Emblem Event

    In Pokémon TCG Pocket, luck plays a significant role. Some of the stronger decks at the outset of this event rely on a single Water-type Pokémon with Misty for Energy acceleration. If your winning streak depends on coin flips, try to stay calm when things don’t go your way.

    Watch out for top-tier decks like Arceus ex / Dialga ex, and think about adding anti-meta counters like Sudowoodo to your deck. These counters can enhance your chances against the most formidable decks you might face.

    If you’re finding it hard to keep a winning streak, try playing at different times. We’ve had better success playing late at night rather than during the afternoon.

    The toughest competition generally occurs in the first few hours of SP events, when the most determined players aim to secure their emblem early on.

    If you ever feel frustrated, it’s a good idea to take a short break. Hydrate and give yourself a few minutes to reset your mind before diving back in. When you’re ready, come back and crush it!

  • Top Smart Light Bulbs You Need

    Top Smart Light Bulbs You Need


    Smart light bulbs are a great way to modernize your living space. They’re budget-friendly and straightforward to install, making them accessible even for those new to smart technology. With features like scheduling, color-changing capabilities, vacation modes, and compatibility with other smart devices, these bulbs make a versatile addition to any area of your home.

    However, selecting the ideal smart bulb can be overwhelming due to the vast array of choices available. While many bulbs have overlapping features, reliability can vary. Some bulbs may lag in response to your commands or offer a limited color palette. Fortunately, the majority of these smart bulbs are LED, which ensures they will likely help reduce your energy bills regardless of your choice.

    Unsure of which smart bulb to select? Here’s a breakdown of some of the top models currently on the market, catering to various budgets and showcasing compatibility with both Amazon Alexa and Google Home. Some options also include Matter support for enhanced functionality.

    Kim Wetzel/Digital Trends

    Philips Hue Smart Light Bulb Starter Kit

    Pros

    • Informative features
    • Excellent range and responsiveness
    • Broad compatibility with third-party apps
    • Compatible with Alexa, Siri, and Google Assistant

    Cons

    • Bridge needs to be connected to your router
    • Higher price point

    While the Philips Hue White Ambiance Smart Light Bulb Starter Kit may be pricier, it stands out as one of the best options available. This kit includes four A19 LED smart bulbs that emit a soft white light adjustable from “warm white” to “cool daylight.” The Philips Hue Bridge included can connect up to 50 bulbs. You have control over brightness, scheduling, and dimming via the Hue app for iOS and Android.

    In addition to app control, these bulbs are compatible with various smart hubs, such as Amazon Echo, Google Home, and Apple HomePod, allowing for command via voice control.

    smart home Sengled Element Classic LED Smart Bulbs
    Image used with permission by copyright holder

    The best budget kit

    Sengled Element Classic A19 Kit

    Pros

    • Cost-effective
    • Energy-efficient
    • Supports Alexa and Google Assistant

    Cons

    • Not as high-end as other models

    The Sengled Element Classic A19 Kit is a budget-friendly package that includes two light bulbs and a hub with an Ethernet cable. Each bulb emits 800 lumens while consuming only 9 watts, lasting up to 25,000 hours. These bulbs easily connect with Amazon Echo and Google Home devices for convenient voice control.

    The accompanying Element Home app, available for iOS and Android, allows group control so all lights can be turned on or off simultaneously. You can program the lights’ schedules and even use the Wake-up Time feature for a gentle morning illumination. The app also shows energy consumption compared to the money saved, making the Sengled Element Classic A19 Kit ideal for newcomers to smart lighting.

    Sengled Element Classic Smart LED Light Bulbs A19 2700K 60W Starter Kit (2 A19 bulbs and Hub)

    Sengled Element Classic A19 Kit

    The best budget kit

    Image used with permission by copyright holder

    The best starter bulb

    Sengled Wi-Fi Smart Bulb

    Pros

    • Simple installation
    • User-friendly smartphone application
    • Affordable pricing

    Cons

    • Limited integrations with smart home features

    The Sengled Wi-Fi smart bulb connects directly to your 2.4 GHz network without requiring a hub. Setup is straightforward: just download the Sengled Home app, screw in the bulb, and it will flash to indicate readiness. After logging in and connecting the device to your network, you’ll have dimmable smart lights controllable through your phone or via voice with Amazon Alexa.

    This bulb’s low price and hassle-free setup make it an excellent choice for beginners. It offers a soft white color at 2700K.

    Sengled Smart Wi-Fi LED Soft White A19 Bulb, No Hub Required

    Sengled Wi-Fi Smart Bulb

    The best starter bulb

    wyze bulb color review 3 of 10
    John Velasco / Digital Trends

    The best budget bulb

    Wyze Color Bulb

    Pros

    • Very bright output
    • Vibrant color saturation
    • No bridge required
    • Extremely affordable

    Priced at under $10 (or under $40 for a pack of four), the Wyze bulb is an excellent bargain. You can manage multiple bulbs or just one using the Wyze app or voice commands through Alexa or Google Assistant. The bulb allows for dimming and lets you adjust the color temperature from warm to cool. It ranges from 2,700K to 6,500K and provides 800 lumens (equivalent to 60W).

    If you’re interested in the Wyze Bulb Color but only need varying shades of white light, check out the standard Wyze Bulb.

    Wyze Bulb Color

    Wyze Color Bulb

    The best budget bulb

    Nanoleaf Essentials A19 3-Pack of bulbs in living room.
    Image used with permission by copyright holder

    The best smart bulbs for Matter

    Nanoleaf Matter A19 Smart Bulb

    Pros

    • Vast array of color choices
    • Complete Matter support
    • Control via app or voice commands

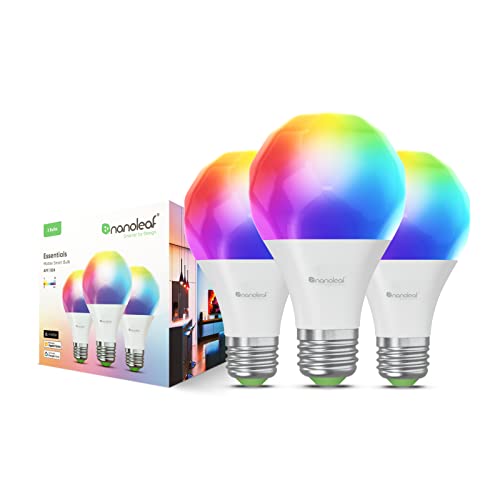
    At $20 per bulb, the Nanoleaf Matter A19 Smart Bulbs offer robust support for the Matter interoperability standard. With over 16 million colors, they provide easy control through the Nanoleaf app or voice commands, along with various customization options. As one of the few smart bulbs that support Matter, they’re a leading choice among competitors.

    Nanoleaf Essentials Smart LED Color-Changing Light Bulb (60W)

    Nanoleaf Matter A19 Smart Bulb

    The best smart bulbs for Matter