Tag: game mechanics

  • Completing Your Character’s Stats in Scum: A Guide to Solving It

    Completing Your Character’s Stats in Scum: A Guide to Solving It

    Before you set out on the harsh landscape of Scum‘s prison island, it’s essential to create your character. Although the character creation process may appear straightforward—with just four Attributes and a few Skills—it’s crucial to tailor your choices for early survival.

    Since your character’s abilities improve based on usage, prioritizing skills that you will actively utilize in the beginning can greatly enhance your chances of survival before you expand into other areas.

    How Does Character Creation Work in Scum?

    Once you finalize your character’s looks, it’s time to assign their stats. Start by determining their Attributes, then continue to Skills.

    Attributes

    You have twelve points to allocate among four Attributes, with each starting at 3.0. Adjust the sliders to change these Attributes in increments of 0.1.

    Note: The maximum for any Attribute is 5.0.

    Besides influencing how many Skill points you can assign in each category, each Attribute has specific effects:

    Attribute Skill Category Effects
    Strength Combat Skills Increases maximum carry weight and melee damage.
    Constitution Movement Skills Boosts overall health, stamina, and resistances.
    Dexterity Vehicle and Stealth Skills Enhances speed and reduces action time.
    Intelligence Crafting and Survival Skills Accelerates Skill leveling and enables larger squad sizes.

    Tip: While Sniping and Camouflage fall under Intelligence, they align more with Skills from the other categories.

    Skills

    Skill points are assigned like Attribute points—you receive double the number of Skills for each relevant Attribute. However, Skills don’t just rely on their quantity; putting points into them helps progress toward their next experience level, which is essential.

    For instance, as you slide the Archery point up, you’ll notice a bar filling up. Once it’s complete, Archery advances from No Skill to Basic. You won’t gain immediate benefits from Skills that haven’t reached their next level, but you can improve them in-game through practice, like shooting arrows with a bow.

    Which Attributes Should You Focus On?

    At character creation, it’s wise to reduce points in Constitution and Dexterity to bolster Strength and Intelligence. Early on, even a lone roaming Puppet can pose a serious danger. A higher Strength will increase your combat effectiveness, making it easier to fight, especially unarmed. Intelligence is key too, as it allows you to invest in crucial Skills and speeds up leveling for those that you couldn’t max out initially.

    While Dexterity and Constitution hold value, they’re less critical at the start. You can compensate for losses in speed and stamina simply by enhancing the two Skills under Constitution: Running and Endurance.

    Tip: With a high Intelligence, Skills will level up as you navigate the island, consequently boosting your Constitution score for better health.

    Moving a point from Dexterity and Constitution to Strength and Intelligence results in a solid 4/3/3/4 stat line, providing numerous benefits without too many drawbacks.

    Which Skills Should You Prioritize?

    To make your Skills effective in Scum, it’s crucial to concentrate your points rather than spreading them thin. Choose the Skills you need immediately, ensuring they’re at least Basic. Key Skills can even reach Medium without severely impacting others.

    Strength Skills

    Focus on Brawling, Melee Weapons, and Archery. Firearms skills can wait—it’s likely to be a while until you come across a gun, and resources like ammunition will be scarce. It’s more sensible to be prepared to fight with improvised weapons.

    Constitution Skills

    Level up both Constitution Skills to at least Basic. If you have additional points, aim to increase Endurance. Getting it to Medium is beneficial; otherwise, you can capitalize on its slower leveling later.

    Tip: Increasing Endurance in-game means moving while carrying heavy loads. Initially, it’s better to travel light, so you’ll likely find success in running while your Endurance builds up later.

    Dexterity Skills

    Dexterity Skills require advanced knowledge, and you probably won’t get a vehicle running for some time. However, investing in Stealth can be effective for avoiding detection. Thievery might also save valuable lockpicks.

    Tip: Consider investing in vehicle Skills like Aviation, but only if you are more experienced, as early investments in complex Skills may not yield immediate benefits.

    Intelligence Skills

    Focus on Awareness and Survival. Awareness boosts your chances of finding items while searching, and Survival can reduce crafting costs. If you have leftover points, consider Engineering, which helps in constructing structures for your base.

    By selectively investing in Attributes and Skills, you’ll set your character on a strong path to thrive in the dangerous world of Scum.

  • Completing Elden Ring Nightreign: Solving Shifting Earth Effects

    Completing Elden Ring Nightreign: Solving Shifting Earth Effects

    In the roguelike souls RPG adventure Elden Ring Nightreign, players embark on solo missions or team up with up to three others to take down powerful Nightlords. Before facing these formidable foes, you’ll need to strengthen your character by collecting gear and various items to enhance your abilities. You’ll encounter enemies in numerous locations, including villages, caves, and other terrains, where you can battle foes, conquer bosses, and uncover treasures.

    Your journeys will take you across an expansive map known as Limveld. As you explore, you’ll experience certain effects triggered by a phenomenon called Shifting Earth, which alters the landscape and presents new challenges and hidden secrets.

    What Is Shifting Earth?

    Shifting Earth becomes part of your adventure after you defeat the first Nightlord during the Tricephalos expedition. This phenomenon occurs following a successful encounter with a Nightlord and temporarily modifies the map of Limveld, creating unique conditions that change over time before reverting to the original state.

    Shifting Earth conditions can end either after multiple expeditions or by using a resting spot to pass time.

    Types of Shifting Earth Modifiers

    You will encounter several Shifting Earth modifiers throughout your journey.

    The Crater Shifting Earth

    When this modifier is active, a large crater will appear on the Limveld map. You can explore this crater, and it offers numerous rewards for defeating the bosses found within.

    Be cautious, as the crater will have pools of lava both on the surface and inside. Make sure to avoid these to prevent taking damage. At the bottom of the crater lies a Magma Wyrm, and defeating it will grant you access to a smithing table that enables you to upgrade your weapon to legendary status.

    The Mountaintop Shifting Earth

    This modifier unveils a snowy mountainous region in Limveld. To fully explore this area, you’ll need to make your way to its center. The boss here is the Mountaintop Ice Dragon, and its defeat will reward you with Dormant Power, which helps reduce frostbite damage and buildup.

    The Rotted Woods Shifting Earth

    In this area, you’ll find the landscape affected by Scarlet Rot. To reap the rewards from this modifier, you must first explore a nearby fort. Ascend to the top of the fort’s tower to interact with a map that reveals key locations, including boss encounters in the vicinity.

    Staying in the Scarlet Rot-infected area will cause damage over time, so it’s essential to move quickly to avoid losing health.

    The map will also mark a location where you can obtain the Shifting Earth’s main reward. Approach the area and interact with a red flower on a nearby tree to receive a buff that allows you to navigate through the Scarlet Rot unharmed, increase your maximum health, and regain health after taking damage.

    The Noklateo Shifting Earth

    This condition brings a vast city to Limveld, concealed within a massive structure. To claim the main reward from this Shifting Earth, you must explore the city and overcome the bosses within it.

    Defeating the Naturalborn of the Void boss will break the seal on the area. Once you’re inside the boss arena, you will receive a unique reward that allows you to revive from near-death once and grants you increased power for a limited time afterward.

  • Completing the Galapa Race in Daggerheart: A Solving Guide

    Completing the Galapa Race in Daggerheart: A Solving Guide

    Galapas resemble large turtles or tortoises and are one of the playable ancestries in Daggerheart. Aesthetically, these beings stand between four to six feet tall and feature various cool earth tones. Similar to real turtles, they can retreat into their shells, making them particularly resilient.

    If you’re new to Daggerheart, you might wonder about the advantages of choosing a galapa for your character. This guide aims to provide all the necessary information for playing as a galapa in Daggerheart.

    Galapa Ancestry Overview

    Galapa and Ally via Darrington Press

    As highlighted, galapas are strong and resourceful, making them ideal for melee or close-range combat. They can even equip armor or engrave designs on their shells.

    Here’s an overview of a galapa’s ancestry features.

    Galapa Feature

    Details

    Shell

    By choosing this ancestry, you receive a bonus to your damage threshold equal to your Proficiency, which increases as you gain levels.

    Retract

    Much like real turtles, galapas can retract into their shell by marking a Stress.


    While in your shell, you have resistance to physical damage, but you also face a disadvantage on action rolls and cannot move.

    Galapa Life Span

    Galapas can live for up to 150 years and age very slowly.

    While creating your galapa character, discuss potential armor enhancements for your shell or decorative designs with your DM.

    What Are The Best Classes For Galapa?

    The campaign frame artwork for the Motherboard Campaign Frame in Daggerheart.
    Motherboard Campaign Frame via Darrington Press

    For galapa, their ancestry traits primarily offer damage resistance in combat, making them ideal candidates for martial-based classes.

    Consider these class options that complement galapas well.

    Class

    Details

    Stalwart Guardian

    Stalwart Guardians are heavy fighters accustomed to enduring damage in close-range skirmishes.


    Many features of the Stalwart subclass include permanent enhancements to damage thresholds, which pairs nicely with the foundational galapa damage boost.

    Vengeance Guardian

    Your specialization feature in this subclass grants you a +1 to your Proficiency for your next successful attack.


    Since the galapa’s damage threshold rises with Proficiency, this ability increases in power as you level up.

    Warden of the Elements Druid

    Your base ability in this subclass allows you to receive an additional boost to your damage thresholds equal to your Proficiency.


    This means the galapa’s damage threshold improvements stack, potentially becoming quite powerful early on.

    For galapas, abilities, Domain Cards, or features that enhance your Proficiency will be beneficial due to the benefits of your Shell feature.

    What Are The Best Communities For Galapa?

    The artwork for the Seaborne community in Daggerheart, showcasing a pastoral seaside village.
    Seaborne Community by Sam Key via Darrington Press

    While the ancestry features of galapa don’t significantly affect your community choices, there are two communities that synergize well with them from a character-building and roleplay perspective.

    Community

    Details

    Wildborne

    Selecting this community grants you the Lightfoot feature, allowing you to move stealthily with advantage on your rolls.


    As galapa can be somewhat awkward and slow, being stealthy is a significant advantage.

    Seaborne

    The Seaborne community is fitting for galapa in terms of roleplay.


    In addition, their community feature grants bonuses to action rolls, which can be useful, even if it doesn’t fully align with the galapa’s ancestry traits.

    When selecting starting equipment and armor for your galapa, aim for something with a high base damage threshold to optimize your natural shell armor.

    Chainmail and Full Plate Armor are excellent options, but keep in mind that both Tier One armor types come with disadvantages to Evasion and Agility.

  • Completing the Nemesis System in Last Epoch: A Guide to Solving It

    Completing the Nemesis System in Last Epoch: A Guide to Solving It

    Last Epoch offers a wealth of options to enhance your character’s abilities, featuring extensive skill trees and comprehensive gear crafting. This ARPG provides everything you need. As you make your way through the campaign, you’ll eventually encounter a Nemesis, represented as a purple corpse with a sword embedded in it.

    Nemeses are indicated on the map by an orange circle, and engaging with them is definitely worthwhile. Here’s what you should know about the Nemesis system, including their loot and the effects of Empowering them.

    Understanding the Nemesis System


    A Nemesis encounter can be found in regular maps, Monolith Echoes, and Dungeons. When activated, it will showcase four items that you can obtain upon defeating it. You can either Challenge the Nemesis, Empower its loot, or Banish it completely.

    Choosing to challenge the Nemesis rewards you with the four displayed items and some Shards. The next Nemesis you face will drop four completely different items.

    By opting to Empower the Nemesis, its four items will be upgraded up to two times. These upgrades can change Rare and Exalted items into Tier 7 items or enhance their Forging Potential. Additionally, empowered Unique items can gain Legendary Potential or even transform into Legendary items with extra affixes.

    While fighting an Empowered Nemesis, it will drop only Shards. After Empowering it twice, you’ll need to challenge it again to receive the enhanced loot after you defeat it.

    Remember, the loot from a Nemesis is based on your level and will always contain at least one Unique item.

    Nemeses in Multiplayer

    In a multiplayer setting, each player experiences their own unique Nemesis loot drops. They can Empower or Challenge the Nemesis independently. When one player activates the Nemesis, it appears, allowing everyone to fight it; however, only the player who initiated the encounter will receive Empowered loot or specific drops.

    Other players can activate the Nemesis afterward, ensuring everyone has a chance to empower it as well. This means you won’t lose your Nemesis loot if someone else activates it afterward.

    The Egg of the Forgotten


    The Egg of the Forgotten in Nemesis rewards in Last Epoch.

    Sometimes, Nemesis loot includes an item known as the Egg of the Forgotten. This allows you to include one of your Uniques that lacks Legendary Potential or Weaver’s Will in the Nemesis loot, enabling you to Empower it.

    If you don’t insert an item into the Egg of the Forgotten, it will instead turn into a random Unique item.

    The likelihood of finding an Egg of the Forgotten increases at certain levels, with up to a 60 percent chance of it appearing at level 100.

  • Understanding How Defender Functions in Magic: The Gathering

    Understanding How Defender Functions in Magic: The Gathering

    Defender is one of the original mechanics in Magic: The Gathering, first introduced in the Alpha set. Although it was not officially named until the 2004 Champions of Kamigawa set, defender has been a staple mechanic ever since. As an evergreen keyword, it consistently appears in new card releases.

    Even with its long history, the number of cards featuring defender is relatively limited compared to other long-standing mechanics. The small pool of defender cards is intentional, as they generally serve less purpose outside of Limited formats and can often feel less useful than other abilities.

    Understanding Defender


    Creatures with defender cannot attack; their role is strictly to block. These creatures typically have low power but high toughness, which makes them suitable for defense rather than offense. In most cases, having defender is seen as a disadvantage since the inability to attack often outweighs the benefits of high toughness.

    The Wall creature type automatically has defender. Before the mechanic received its formal name, all Walls had this ability. If a Wall card doesn’t explicitly mention it, it has been adjusted to include defender.

    To counterbalance the inherent limitations of creatures with defender, many possess useful abilities or effects. For example, a creature may have deathtouch, ensuring that it trades favorably with stronger attackers, or it may provide consistent damage over time.

    While they typically can’t attack, some cards allow defenders to strike as though they didn’t have this limitation. When this occurs, they often deal damage based on their toughness instead of their power.

    This alternative damage mechanic is called “backbone.” While not an official keyword, it was named on Magic: Arena in 2020 and often accompanies cards allowing defenders to attack.

    You can also give the defender ability to other creatures, commonly seen in Auras designed to deprive opponents of their ability to attack. This effect occasionally merges with the ability to disable all of the enchanted creature’s other abilities.

    Maximizing the Use of Defender


    MTG Mnemonic Wall card with the art in the background.

    Generally, creatures with defender do not stand alone effectively. Outside of Limited formats, there’s usually little reason to include them in your deck. However, you can create a strong deck tailored specifically around this mechanic.

    Many cards support the defender creature type, enabling cohesive strategies. A defender deck is especially effective in Commander, where you have access to the widest array of cards. If you’re searching for a suitable commander, Arcades, the Strategist is an excellent choice, allowing your defenders to attack and drawing cards when defender creatures enter the battlefield.

    High Alert and Assault Formation both grant defenders the ability to attack while using their toughness for damage. Towering Titan provides major boosts based on toughness and trample if you sacrifice a defender. Overgrown Battlement and Axebane Guardian can generate mana equal to the number of defenders you control, making them effective mana producers for a defender-focused deck.

    When playing with a lot of defenders, you can effectively protect your life total from attackers unless your opponent has a massive board presence. With high toughness, defenders can comfortably block most attacking creatures without the threat of being defeated in combat.

    Top Cards Featuring Defender

    Tree of Perdition


    MTG Tree of Perdition card with the art in the background.

    Tree of Perdition has seen competitive play, not for its casting but rather for its ability to be sent to the graveyard and then exiled using Agatha’s Soul Cauldron to transfer its effect to another creature, creating a potent combo.

    Using a creature with only one toughness, you can easily reduce your opponent’s life total to one and then close the game with simple burn damage. Alternatively, you can win by attacking with any creature that can inflict at least one damage.

    Thermo-Alchemist


    MTG Thermo-Alchemist card with the art in the background.

    Thermo-Alchemist is a standout card in burn strategies, as every burn spell can untap it and deal more damage. Its significant toughness makes it durable in combat, allowing it to remain on the battlefield.

    While many defenders struggle to impact gameplay, Thermo-Alchemist shines. With the right combination of burn spells, it’s possible to deal a substantial portion of an opponent’s life total in a single turn.

    Sunscape Familiar


    MTG Sunscape Familiar card with the art in the background.

    Sunscape Familiar straightforwardly reduces the cost of green and blue spells by one. This mechanic is crucial to the Familiars archetype in the Pauper format, enabling infinite loops that generate unlimited tokens, and it can also facilitate substantial card draws.

    Furthermore, Sunscape Familiar is considered only a mono-white card, allowing it to be played in decks that limit colors to white and green. This flexibility can be quite advantageous.

  • Understanding Celebrations in Civilization 7

    Understanding Celebrations in Civilization 7

    In the world of Civilization 7, Celebrations add an exciting new dimension to the gameplay by rewarding you for fostering happiness within your empire. Whether you’re a seasoned player or new to the franchise, you might be curious about how Celebrations function and how you can make the most of them, especially during the initial 100 turns.

    This guide has got you covered. While Civilization 7 includes tutorials that explain the fundamentals of Celebrations, we’ll share additional tips and strategies to help you optimize your Celebrations for greater benefits. Here’s everything you need to know.

    What Are Celebrations?

    During your journey in Civilization 7, your cities and citizens will produce happiness, which triggers a Celebration once you reach a specific level.

    After you start receiving Celebrations, click on the Social Policies icon located at the top left of your screen to check how many turns remain until your next Celebration is ready.

    Celebrations offer various bonuses, which we’ll outline below.

    How Do Celebrations Work?

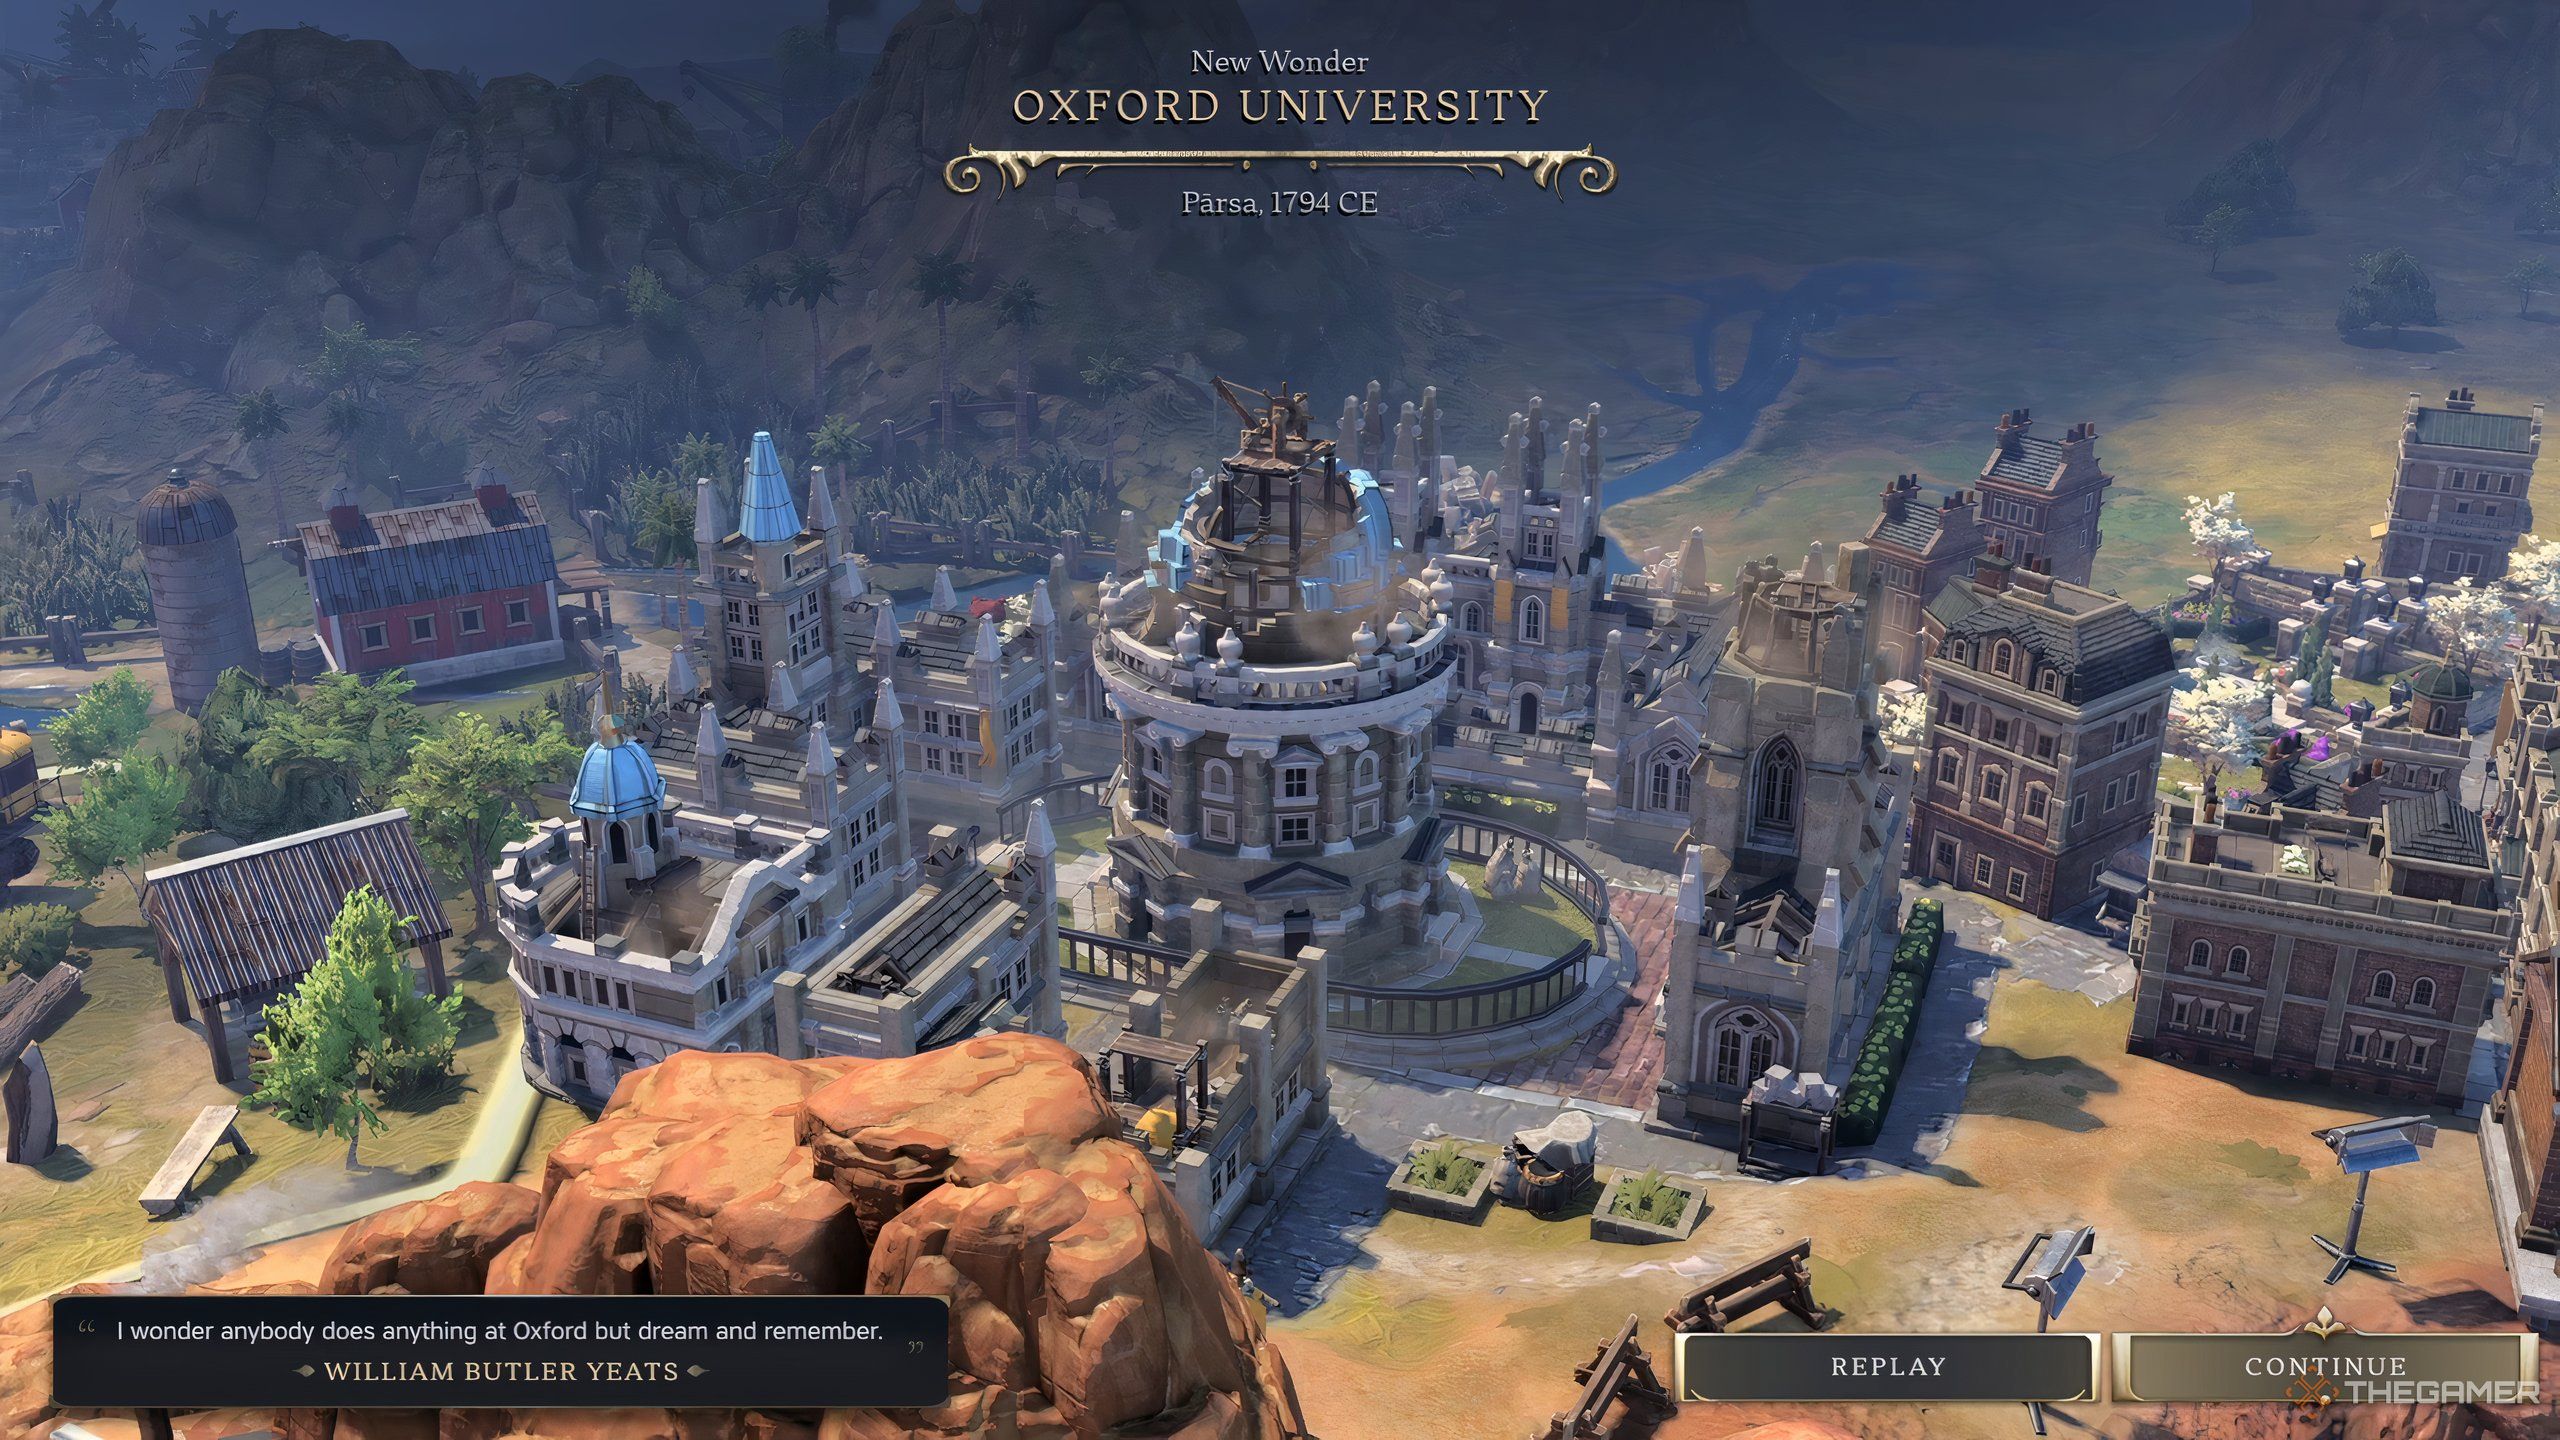
    The Oxford University Wonder being constructed in Civilization VII.

    When you earn a Celebration, a pop-up will appear allowing you to choose between two temporary bonuses that last for a maximum of ten turns.

    Some leaders have specific agendas related to Celebrations. When you engage in diplomacy, be sure to find out if the civilization you’re interacting with appreciates your Celebrations.

    Here is an example of a celebration you can earn early in the game if you have the right government type.

    We Love The Assembly Day!

    +20% Culture for 10 turns.

    +15% Production for constructing Wonders over 10 turns.

    The buffs you receive depend on your active government type, so it’s wise to try different government configurations in various playthroughs.

    In addition to earning Celebrations, you will also unlock a Social Policy slot, enabling you to implement new policies that can amplify your civilization’s outputs and yields.

    How To Get More Celebrations

    The Civilization 7 Happiness tutorial explanation.

    Each time you achieve a Celebration, the cost of obtaining the next one will increase gradually throughout your campaign.

    The key to continuously earning Celebrations is to maintain happiness across your empire.

    Happiness is crucial, especially in later stages of the game, as it helps maintain productivity and keeps specialists active in your cities.

    How To Earn Happiness

    There are several methods to boost happiness throughout your Civilization 7 playthrough. The most reliable way to increase happiness is to build specific structures and enhance tile resources.

    Here are examples of structures and tile improvements that can boost your happiness:

    • Altars
    • Villas
    • City Parks
    • Dates
    • Horses
    • Wine

    This list is not exhaustive and includes only some structures and tiles that yield happiness. When expanding your cities or towns, pay attention to the happiness icon to identify those that contribute positively to your Celebrations.

    You can also implement social policies to enhance happiness within both cities and towns. Here are a few examples of such policies:

    Social Policy

    Details

    Avant Gard

    Increases Culture and Happiness from showcased Great Works.

    Constitution

    Increases food and happiness for maintaining specialists.

    Divine Right

    Boosts happiness and influence in your capital.

    Implementing any of these policies can decrease your happiness requirements in your empire or enhance your current yields, thereby allowing you to achieve Celebrations more quickly.

    Finally, stationing Army Commanders in areas with low happiness can help improve overall contentment. This should be a last resort, particularly in settlements at risk of rebellion.

  • Understanding Religion’s Role in Civilization 7

    Understanding Religion’s Role in Civilization 7

    In Civilization 7, while religion isn’t the sole path to victory anymore, it remains a vital component that players must understand to succeed over the span of about 500 turns. The religion system has been made more straightforward compared to previous versions, yet there are specific steps you’ll want to take to lead your civilization to prominence.

    Whether you’re aiming to fulfill the Cultural Legacy path or simply seeking to enrich your society with various benefits through religious structures and units, mastering religion is crucial. This guide will provide you with everything you need to establish a flourishing theocracy in Civilization 7.

    What Is Religion In Civ 7?


    As in earlier entries of the series, Religion plays a significant role in gameplay and must be developed from the Antiquity Age onward.

    In contrast to previous versions, the focus on religion is now much clearer. The religious combat system from Civ 6 has been removed, and your main responsibility will revolve around using Missionaries to convert both your cities and those of other civilizations.

    Here are some key aspects of Religion to consider as you advance through the ages:

    1. Focus on the Right Civics – To establish a religion, you will need to study specific civics (explained below).
    2. Prepare to Produce Missionaries – In the Exploration Age, invest time in producing or purchasing plenty of Missionaries for success.
    3. Look Out for Bonuses – In the Antiquity Age and beyond, you can gain bonuses from collecting Reliquaries (crucial later) and for founding a selected Pantheon. Keep an eye on these to enhance your religious strategy.

    How Religion Works In The Antiquity Age


    Queen Isabella's Starting Screen in Civilization 7.

    Your journey toward founding a religion in Civ 7 starts in the Antiquity Age by establishing a Pantheon, an action that can be taken fairly early in the game. Pantheons provide various passive bonuses, which should be chosen based on your play style.

    Pantheons are key to how Religion plays out in the Antiquity Age, and they lay the groundwork for religious practices in the upcoming Age of Exploration.

    Here are some examples of effective Pantheons.

    Pantheon

    Effect

    God of the Forge

    +10% production toward constructing buildings in cities with an altar.

    Monument to the Gods

    +10% production toward constructing Wonders in cities with an altar.

    Fertility Rites

    +10% Growth Rate in cities with an altar.

    City Patron Goddess

    +3 Influence on the altar.

    God of the Sun

    +1 Culture, Food, Gold, Happiness, Production, and Science on the altar.

    How To Found A Pantheon

    To establish a Pantheon, you must first research the Mysticism Civic, which is available early on in the game. Focus on this research task as soon as it’s unlocked.

    While establishing a Pantheon is important, remember that the Antiquity Age is not heavily centered on Religion.

    Feel free to prioritize other Legacy Paths and win conditions during this period if you are looking for a more balanced civilization.

    How Religion Works In The Exploration Age


    The menu screen stating that the Exploration Age has begun in Civ 7.

    The Exploration Age is where Religion truly begins to flourish in Civ 7 and represents the most crucial age for faith development.

    If you’re aiming for a Culture Victory, and you have tutorials enabled, your Cultural Advisor will provide tips on leveraging Religion to your advantage.

    As this age commences, you will receive specific objectives. Once you complete these two tasks, you can establish a religion that will provide a range of bonuses.

    1. Study the Piety Civic
    2. Construct a Temple

    If you’re focusing on a Culture Victory, prioritize completing these objectives over anything else. Don’t waste valuable turns!

    How To Found A Religion


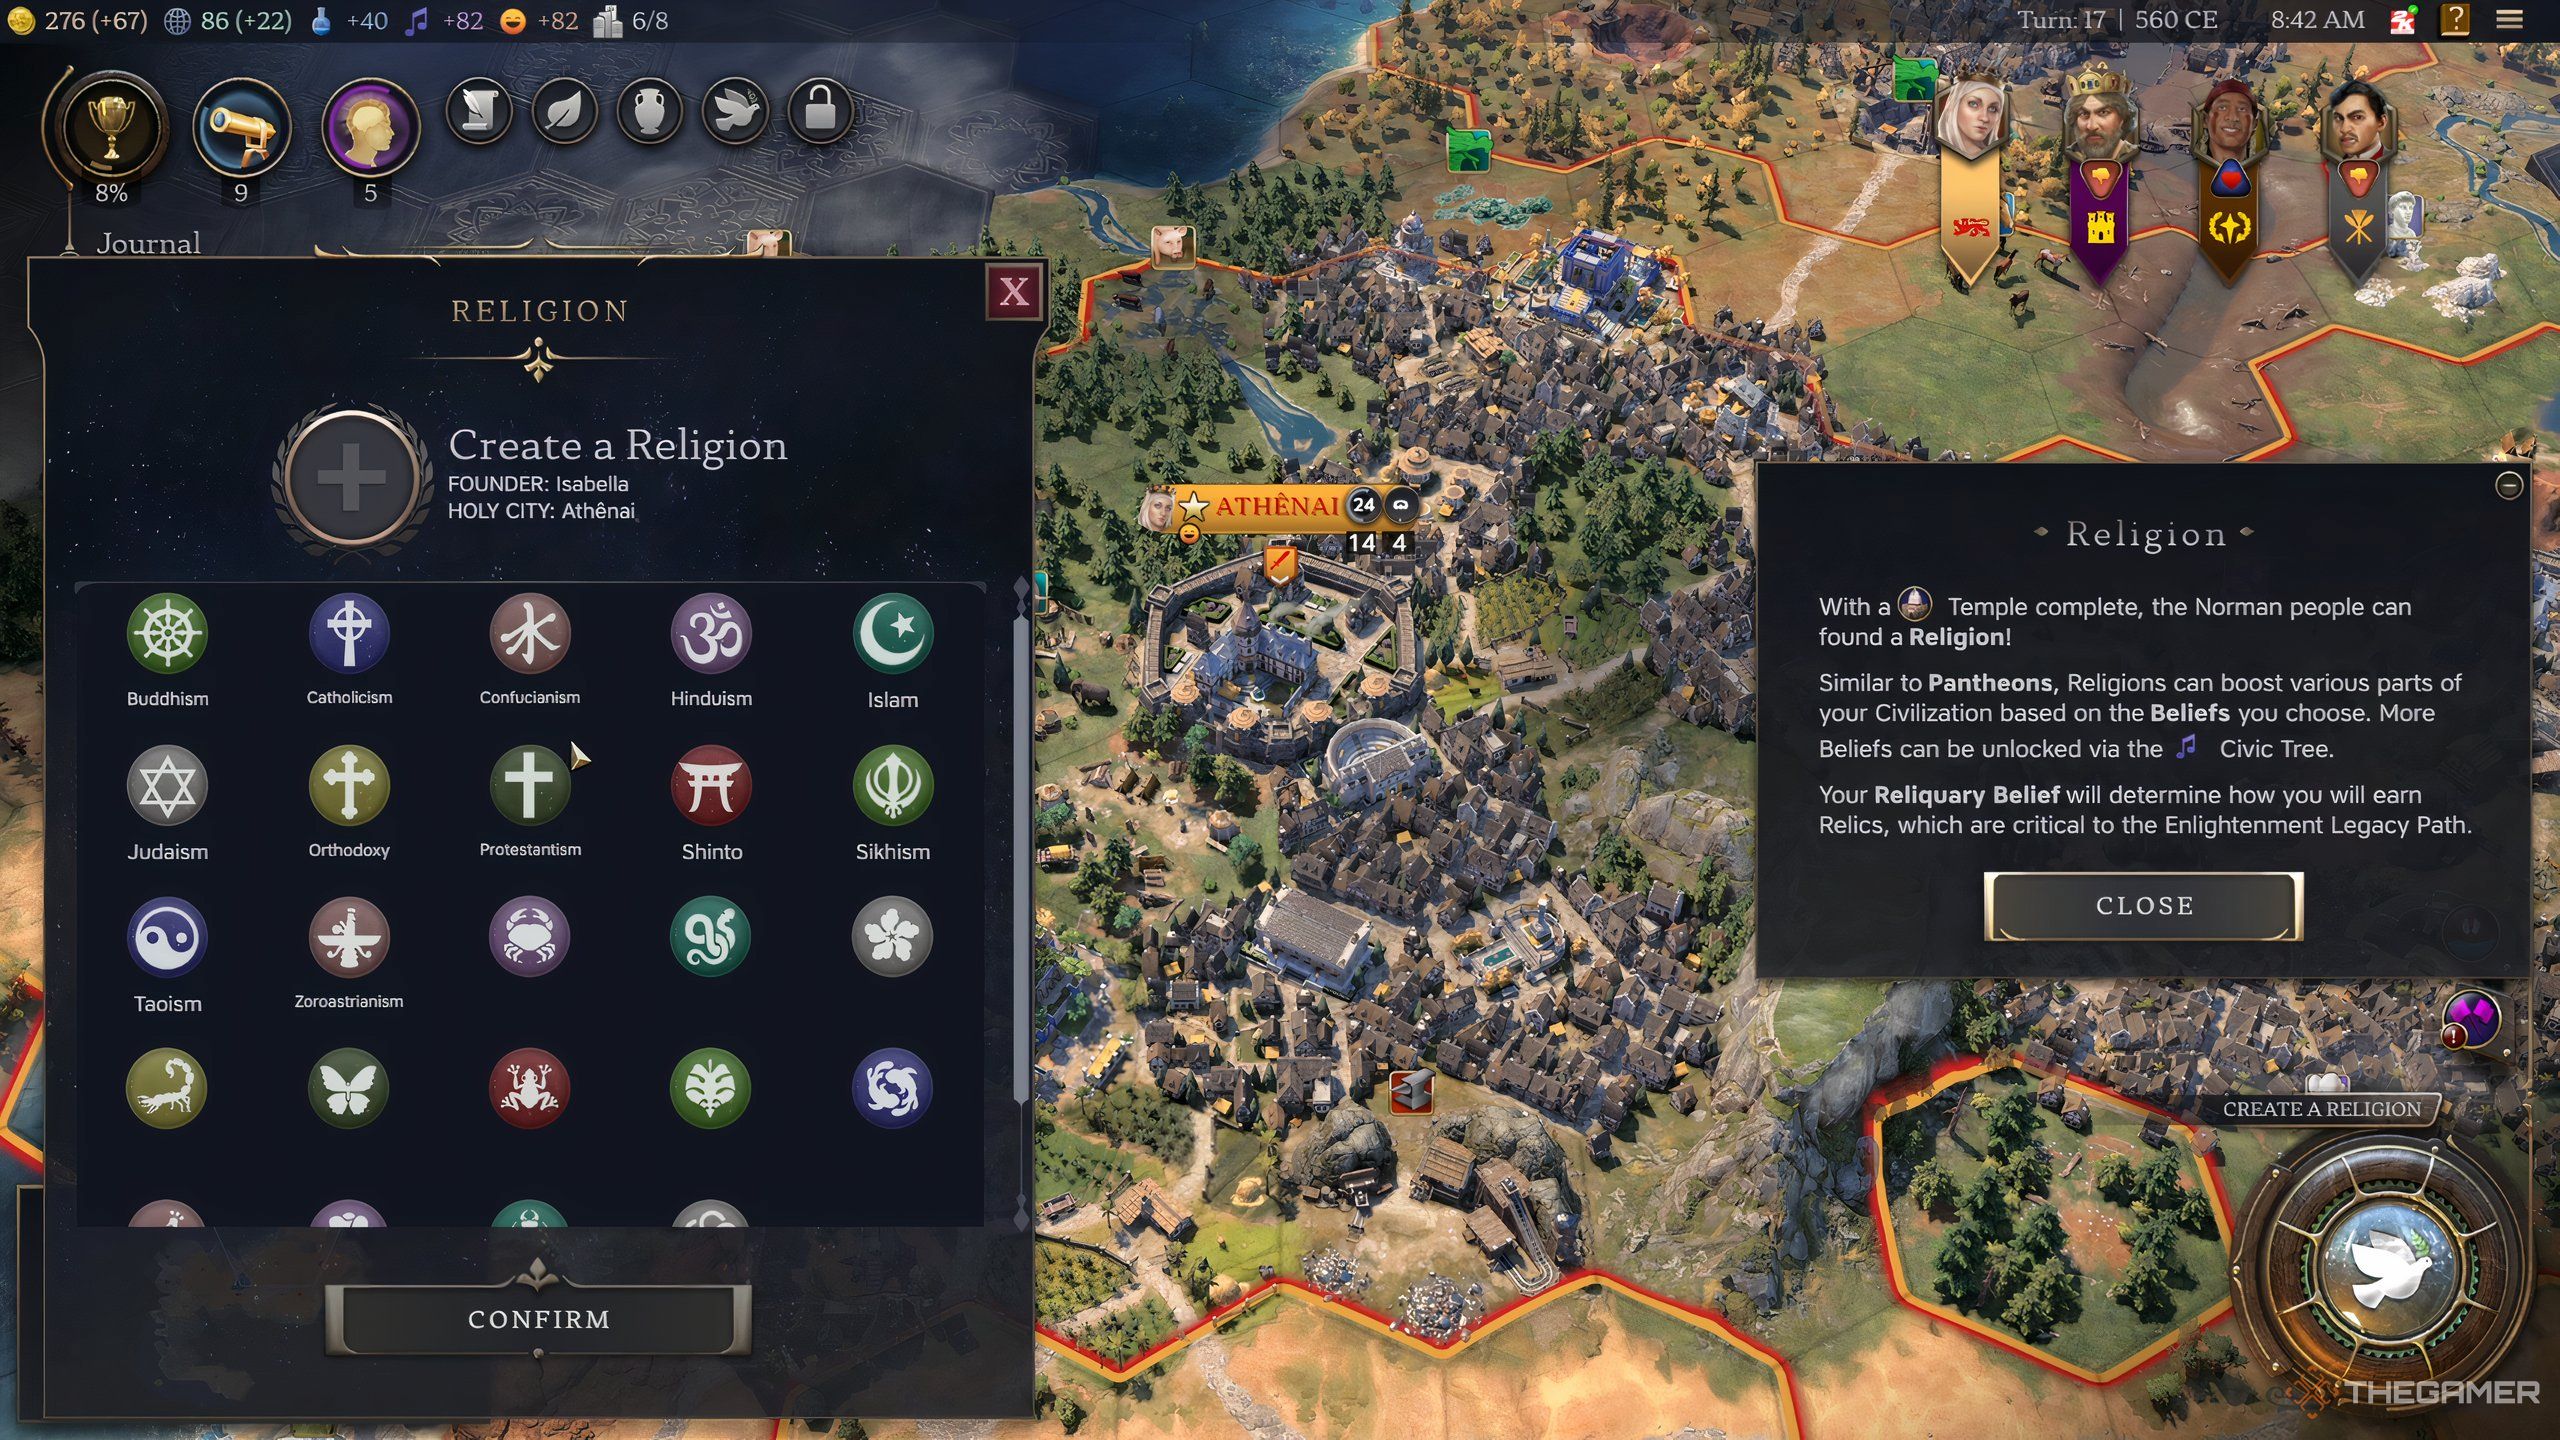
    The UI screen for founding a religion in Civ 7.

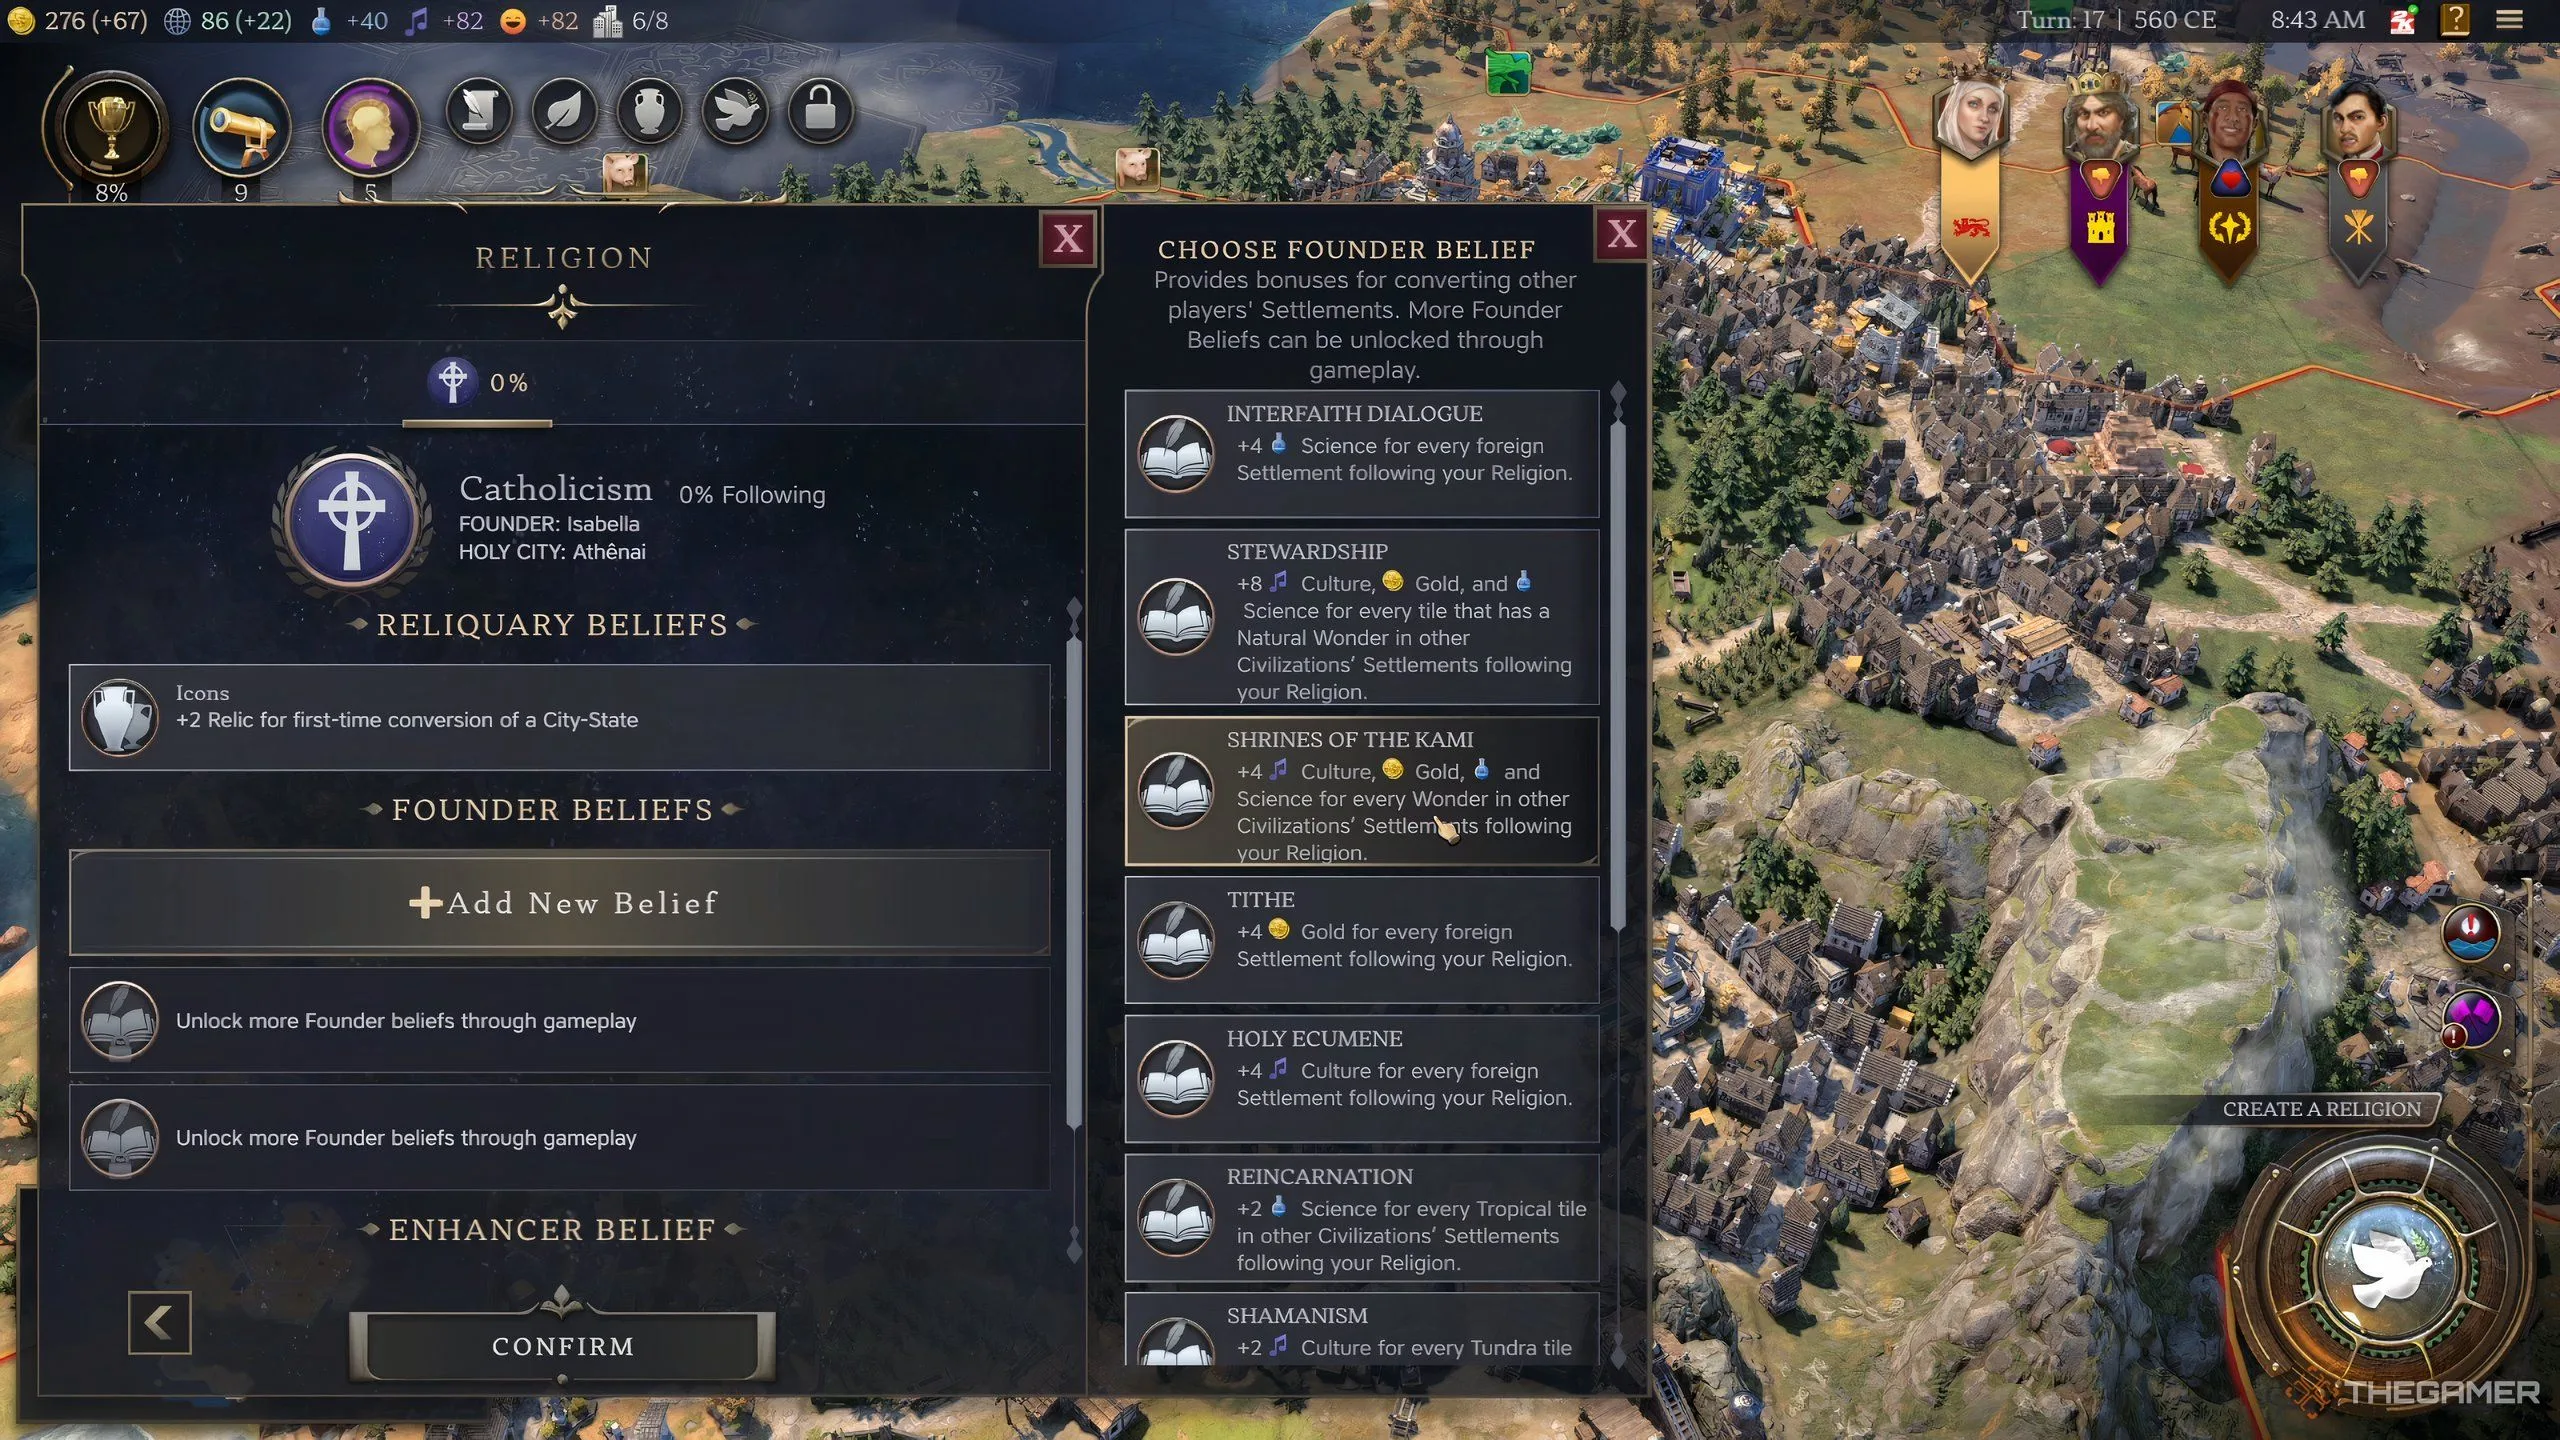
    After completing your temple, you’ll be prompted to establish a religion where you can select several bonuses detailed below.

    Belief

    Effect

    How to Unlock

    Reliquary

    Provides bonuses and new methods for obtaining Reliquaries, which are essential for Legacy Paths.

    This is a unique benefit you receive upon founding a religion.

    Founder

    These buffs increase as your religion spreads.

    Unlocked at the time of founding your religion; you can gain more by expanding your faith.

    Enhancer

    Offers even greater buffs for gameplay.

    Unlocked through studying the Theology Civic.

    How To Spread Your Religion

    Once your Religion is established, you should aim to spread your faith worldwide. The primary method to achieve this is by producing Missionaries and dispatching them to other civilizations.

    Once you’ve created a Missionary, you can use it to convert your cities or those of another civilization to your faith. Follow these steps:

    1. Send your Missionary into the borders of the settlement.
    2. Select the Convert Action to convert the city (required for first-time conversions).
    3. If the city is already following a religion and has both rural and urban populations, you’ll need to perform two Convert Actions to convert both groups.

    When trying to convert a city with both rural and urban populations, ensure you execute the Convert Action once on an urban tile and once on a rural tile to convert the entire city successfully.

    How To Earn Relics


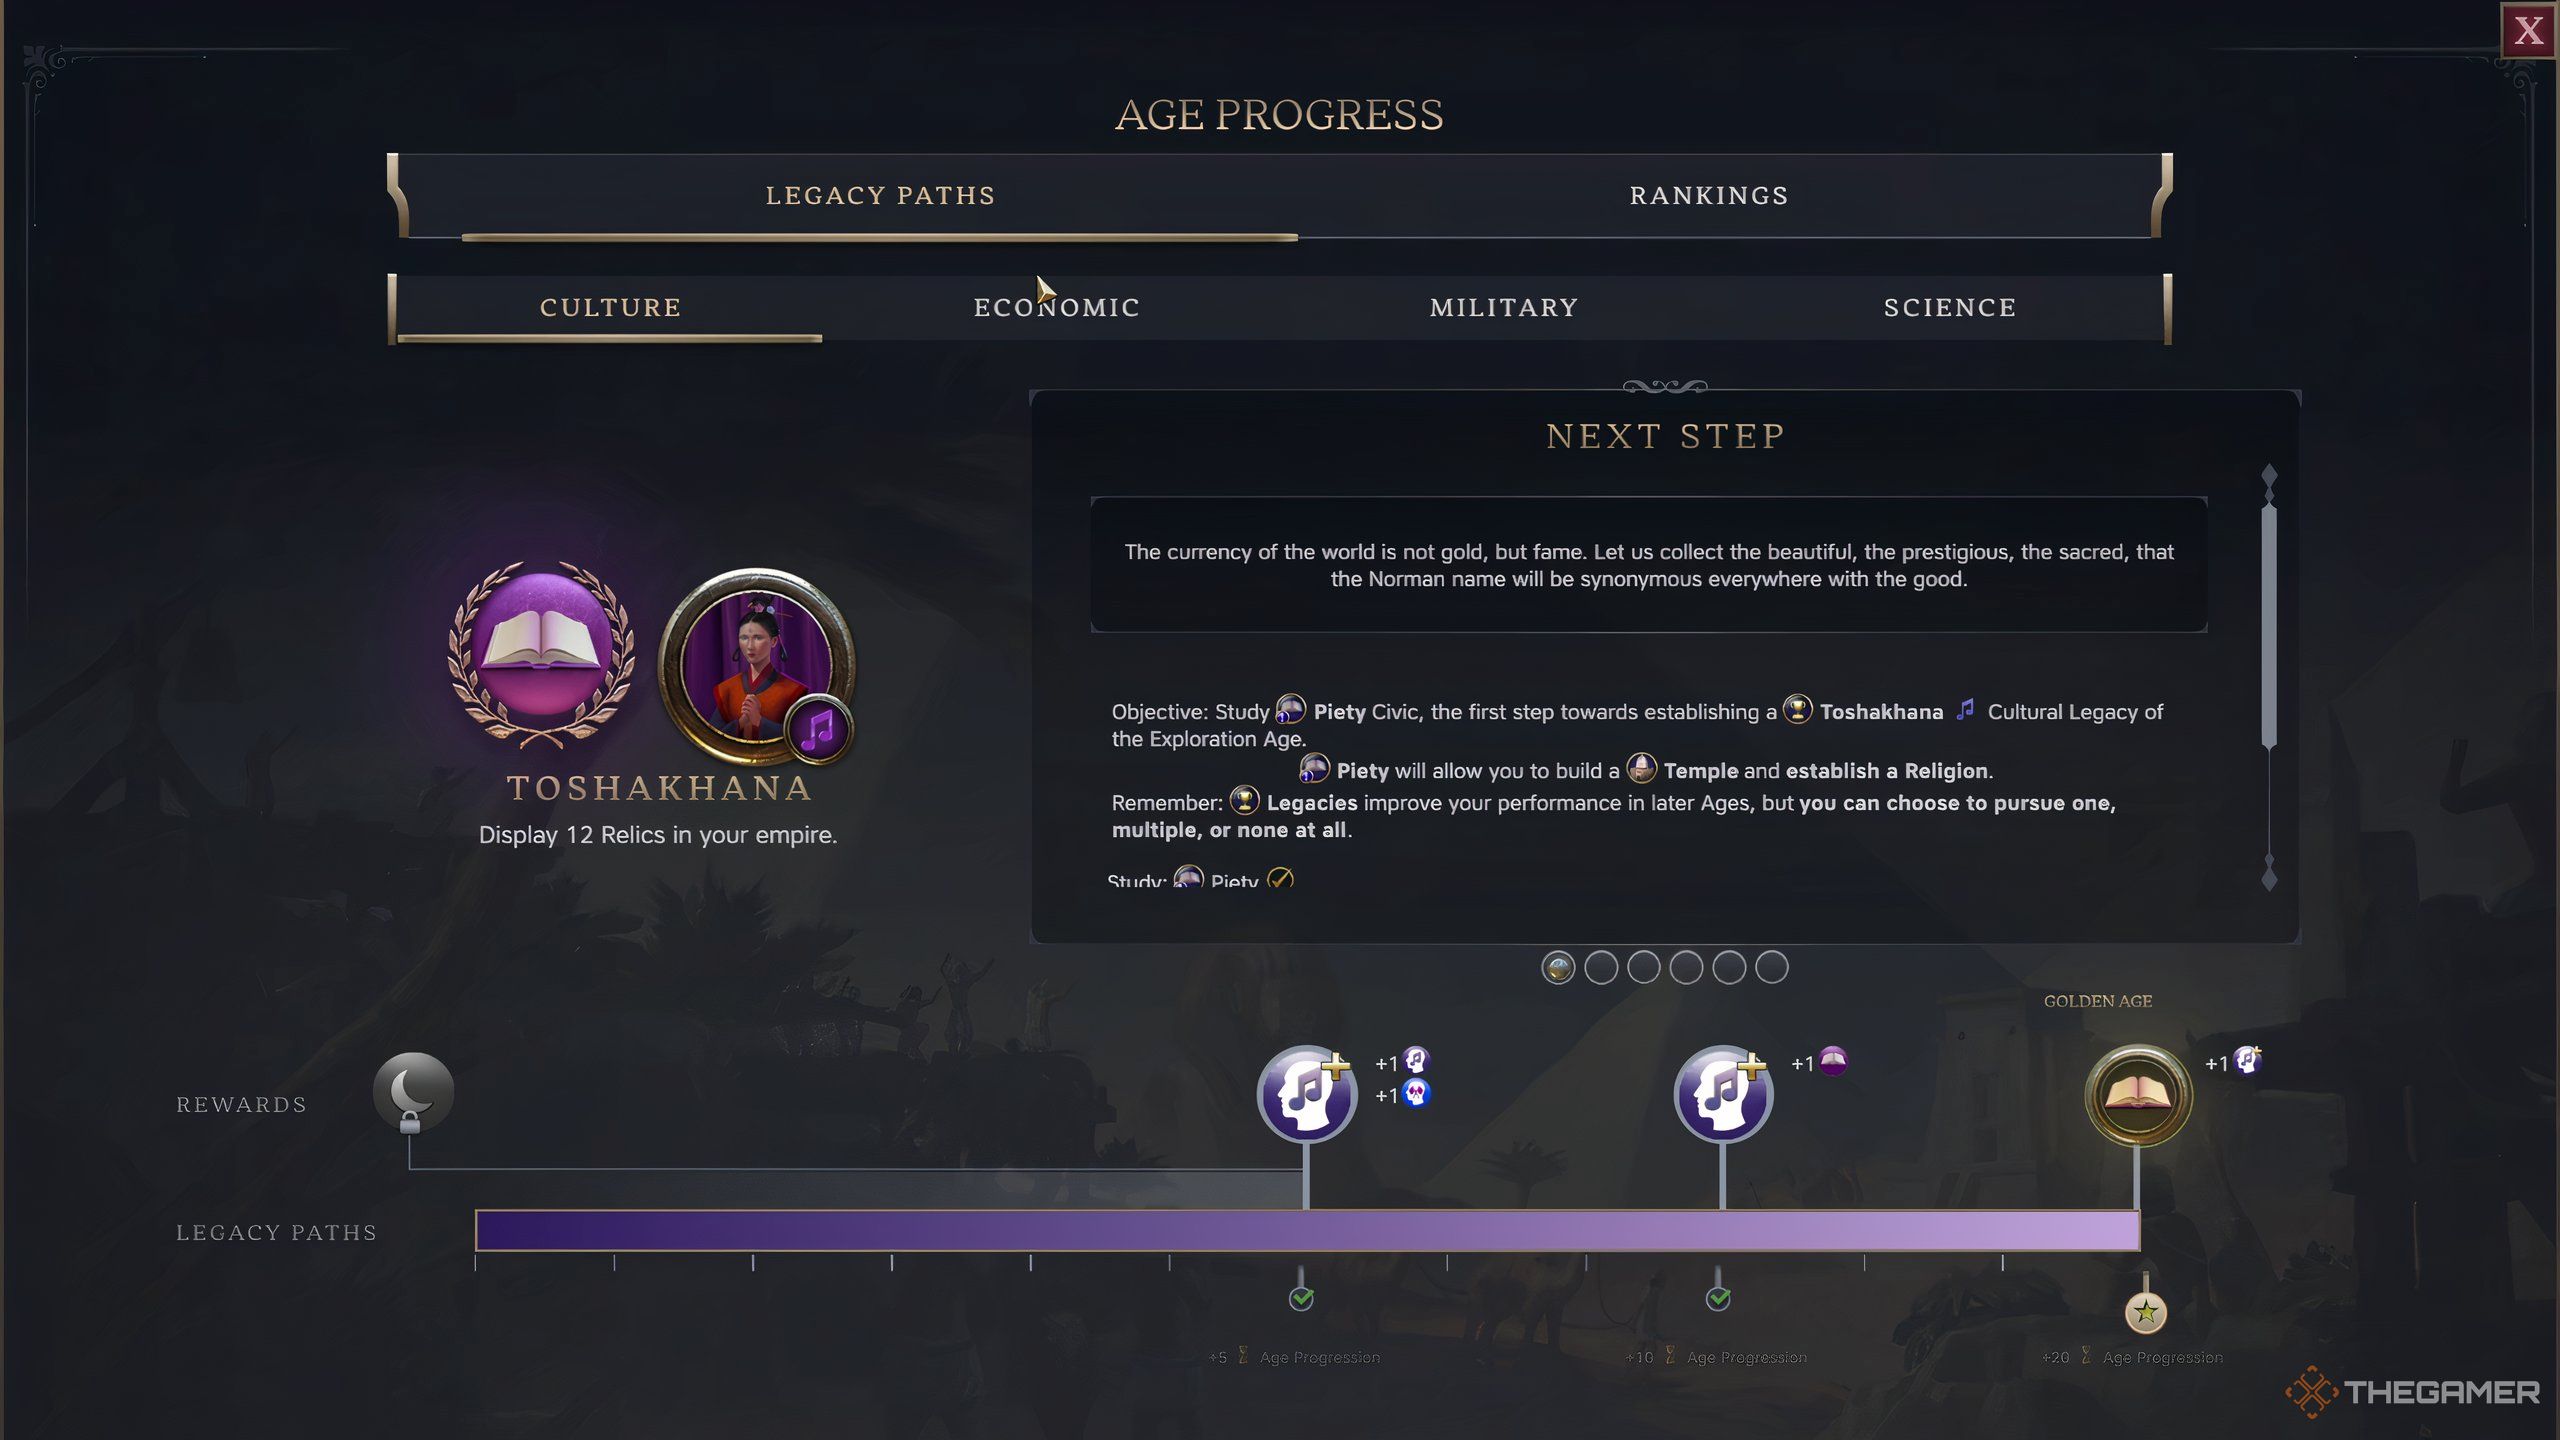
    The Legacy Path screen showing Relics in Civ 7.

    During the Exploration Age, earning and showcasing 12 relics is essential as part of the Cultural Legacy Path. Gaining relics through Religion and other respects is crucial for achieving a Cultural Victory before the game’s conclusion.

    There are several ways to obtain Relics during this period.

    Method

    Details

    Use Your Reliquary Belief

    The Reliquary Belief selected when founding a religion will provide unique ways to acquire Relics.

    Research Civics or Technologies

    Certain Civics or Technologies, such as Theology or Education, can provide Relics.

    Narrative Events

    Randomized narrative events may grant you a Relic.

    Construct Wonders

    Building certain Wonders will yield Relics.

    When you earn Relics, ensure you display them properly. Make sure to construct Temples and Wonders that support displaying Relics. You can manage Relic display options in the Great Works menu.

    How Religion Works In The Modern Age


    The Civ 7 Modern age selection screen, in which players pick a new civ to play as.

    While Religion is influential throughout all three ages, it is particularly significant in achieving legacy points during the Exploration Age. In the Modern Age, although Religion remains a factor in gameplay, it is not the central focus.

    If you effectively spread your Religion during the Exploration Age, you will continue to reap benefits from your Reliquary, Founder, and Enhancer beliefs, as well as from your Pantheon beliefs during the Modern Age.

    The Legacy Points obtained in prior ages from advancing your religion can significantly aid in achieving victory in the Modern Age.

  • Understanding Snapshotting Mechanics in Genshin Impact

    Understanding Snapshotting Mechanics in Genshin Impact

    Genshin Impact is a widely enjoyed RPG known for its easy-to-understand mechanics and richly crafted universe. Whether you’re a laid-back gamer or someone who dives deep into the game’s finer details, Genshin Impact offers a diverse experience. This is particularly evident in its combat system, which allows players to engage enemies using a variety of straightforward attacks.

    Though the combat appears simple, with no complex combos or precision shots required, there’s a lot happening beneath the surface. Understanding how to utilize snapshotting buffs is essential if you wish to enhance your team’s damage output.

    What Is Snapshotting?

    Snapshotting is a method to optimize your buffs by leveraging specific skill properties. This technique can either extend the duration of buffs or allow them to apply to multiple characters by retaining the active buff, even when switching to a different character. However, not all skills support snapshotting; only those known for Static Scaling can do this, as they calculate damage values upon activation instead of adjusting in real-time.

    What Is Dynamic Scaling?


    In Genshin Impact, buffs affect most skills directly and clearly. Generally, a character’s skills are linked to their own stats.

    For instance, when using Eula within Bennett’s Burst, stepping away from it means that her Lightfall Sword no longer benefits from the buff. Skills like this are categorized as Dynamic Scaling.

    Advantages Of Dynamic Scaling

    While Dynamic Buffs and Skills don’t utilize Snapshotting, they do offer several benefits:

    • Dynamic skills can be activated at the beginning of rotations before buffs are applied, making rotations smoother.
    • Such skills allow your active character to make the most of the buff duration.
    • Buffs that require time to build up, like Yelan’s, can be charged during setup, allowing rotations to benefit from stronger buffs later.

    Disadvantages Of Dynamic Scaling

    Despite some advantages, Dynamic Scaling is less effective compared to Static Scaling skills.

    • Most buffs apply solely to the character currently in action, meaning off-field characters cannot benefit from them.
    • If a buff expires during your rotation, you lose significant damage potential from staying on the field without buffs.

    What Is Static Scaling?


    Xiangling from Genshin Impact twirling a spear.

    Static Scaling refers to an attribute that some skills possess, and it is essentially the opposite of Dynamic Scaling. This is what allows Snapshotting buffs to function.

    In a nutshell, skills with Static Scaling only consider the stats of your character at the moment the skill is activated, rather than being influenced by buffs and debuffs in real-time.

    For example, suppose you have C6 Bennett, who provides a 15% Pyro DMG Bonus to your characters. If you activate Xiangling’s Pyronado while inside Bennett’s Burst, and later check Xiangling’s stats, you will notice how much ATK and Pyro DMG Bonus she has.

    Once the Burst has concluded or if Xiangling exits, her ATK and Pyro DMG Bonus will decline. However, the damage of Pyronado remains unchanged.

    Advantages Of Static Scaling

    Characters with Static Scaling, especially those who deal off-field damage, are some of the strongest in Genshin Impact. Besides being able to snapshot buffs, they offer additional benefits:

    • Snapshot buffs effectively.
    • Static Scaling skills can be enhanced while off-field.
    • They can extend buff durations.
    • Turn on-field buffs into ones applicable to the entire team.

    Disadvantages Of Static Scaling

    Despite the advantages of Snapshotting buffs, Static Scaling isn’t superior in every aspect.

    • Due to needing to apply buffs before casting skills, your rotations may need to be tighter.
    • Buffs that require time to build up, like Yelan’s A4 passive, can’t be leveraged in shorter rotations in the same way.
    • If your primary damage dealer, like Neuvillette, takes longer to set up, spending buff uptime on other characters could lead to reduced damage output.

    How To Snapshot Buffs?

    Utilizing Snapshotting can greatly enhance your team’s DPS since buffs that generally apply to a single character can be shared among multiple characters this way.

    For instance, Bennett’s buffs are among the strongest in Genshin Impact, though they only affect the active character. However, by employing a Static Scaling skill like Xiangling’s Pyronado or Fischl’s Oz, you can amplify the effect of the buff, leading to increased DPS.

    Another reason to use Snapshotting is to prolong buff duration. For example, Gorou’s buff has a very brief duration. But using Albedo’s Elemental Skill allows you to take advantage of it for a full 30 seconds.

    To snapshot a buff, begin by casting the buff skill first. Then use any skill with Static Scaling, which will retain the buff for its entire duration.

    This holds true even if the characters move off the field.

    Which Characters Are Capable of Snapshotting?


    Bennett from Genshin Impact looking back at the camera.

    We’ve highlighted a few notable characters capable of snapshotting buffs, but here’s a comprehensive list of all characters that can Snapshot buffs.

    Which Buffs Cannot Be Snapshot?

    The developers behind Genshin Impact recognized how powerful Snapshotting can become. As a result, they ceased creating characters whose main damage sources could be Snapshotted. They also adjusted many buffs to be dynamic.

    Dynamic buffs, like Furina’s Elemental Burst, work as extensions of your character’s stats instead of direct additions. If this extension is interrupted, the character loses the buff instantly, even if the buff would normally have been maintained.

    Character

    Ability

    Faruzan

    Passive

    Faruzan

    C6

    Furina

    Elemental Burst

    Gorou

    C6

    Kujou Sara

    C6

    Mika

    C6

    Raiden Shogun

    Elemental Skill

    Shenhe

    Passive

    Shenhe

    Elemental Skill

    Shenhe

    C2

    Yelan

    Passive

    Yunjin

    Elemental Burst

    Outside of the characters listed above, all other buffs in Genshin Impact can be Snapshotted by characters that use Static Scaling.

  • Understanding Overbuilding in Civilization VII: A Guide

    Understanding Overbuilding in Civilization VII: A Guide

    Civilization 7 has taken the renowned strategy series on an exciting new path. Instead of dividing your gameplay into multiple eras that offer only minor changes, Civ 7 introduces three distinct “Ages,” each featuring significant transformations.

    In this new setup, you will switch civilizations while adapting to various outdated structures that no longer serve their original purpose. The key to success lies in overbuilding, although how to execute this may not be immediately clear. Fortunately, through trial and error, we’ve gained a solid understanding of this new system.

    Improvement Replacements: The "Minor" Overbuilding

    You may find yourself puzzled at first because there is an option for overbuilding available from the onset of the game. This straightforward form of overbuilding allows you to replace rural buildings with urban constructions whenever you choose to build something new. When you select a building like a Granary, Library, or Monument, you’ll see both green tiles and yellow-green tiles.

    Choosing a green tile means you’re selecting an unimproved tile, meaning you’re not replacing a Farm, Pasture, or Mine. On the other hand, picking a yellow-green tile signifies that your new building will replace the existing improvement.

    So, why would you want to do this? Aside from potentially running out of unused tiles, there’s a more advantageous reason: forward-building.

    Note: There’s no established term for this concept, and it isn’t explicitly outlined in the game, so we’ve coined it ourselves!

    Each tile you work on in your settlements operates because you’ve assigned a citizen to it. As settlements expand, they gain additional citizens, which you can allocate to either rural or urban tiles. This part is straightforward, but here’s the exciting aspect: If you replace a rural tile with an urban one, that citizen is displaced. While it may seem troublesome for a brief moment, the displaced citizen can then be sent to another tile, allowing you to gain a new tile every time you move a citizen out.

    This strategy can be effective in expanding your territory, as it allows you to seize valuable land from nearby rivals or move closer to essential resources.

    How "Official" Overbuilding Works in Civilization 7

    The more complex aspect of overbuilding comes into play when the game progresses from the Antiquity Age to the Exploration Age and later to the Modern Age. During your previous gameplay, you’d have encountered buildings labeled as "Ageless," including all Wonders, which are permanent and cannot be replaced. Their placement is crucial, so consider potential adjacency bonuses when constructing these important structures.

    When transitioning between Ages, you’ll experience a reset; many buildings, such as the Library, Market, and Altar, will become obsolete with the start of the Exploration Age.

    To make the most of this transition, focus on overbuilding previous Age urban structures with newer buildings of the same type. For instance, building an Observatory over a Library or a Bazaar over a Market will maximize adjacency benefits.

    Overbuilding Considerations

    Don’t allow this concept to dictate your every move. Instead, take stock of how the game has evolved throughout the previous Age. A coastal city previously in a safe location may now be surrounded by hostile neighbors. In such cases, it could be prudent to revamp that settlement with military buildings.

    Keep in mind the shifting Legacy Path goals as well. Even if you’re aiming for an Economic Victory from the start, your objectives will change. In the Exploration Age, you might focus on building Treasure Fleets, while in the Modern Age, you’ll prioritize establishing Factories.

    The takeaway? As the game progresses, adapt your settlement’s focus to reflect these changes. Outposts dedicated to trade might need to pivot to production-heavy establishments by the game’s conclusion.

    If your goals shift between Age transitions, be open to more adaptive strategies. For example, if you were focused on Science in the Antiquity Age but want to change to a cultural focus in Exploration Age, consider overbuilding Libraries into Temples. This flexibility in your approach makes Civilization 7 a refreshing twist on the classic formula, providing a fun and engaging experience once you grasp the concepts involved.

  • Mastering the Event Sequencer in Planet Coaster 2: A Guide

    As you build your park in Planet Coaster 2, it’s a great idea to get creative with your scenery and see what unique setups you can create. Adding custom decorations will not only boost your scenery rating but also enhance the comfort of your visitors. Incorporating animatronics, in particular, can significantly elevate the park’s ambiance.

    We’ll guide you on how to craft your very own animatronics and utilize the event sequencer for creating engaging interactions for your guests. With a little creativity and strategy, you can elevate your rides, pathways, and overall park experience. Here’s a comprehensive guide on making animatronics in Planet Coaster 2!

    Creating Your Own Animatronics

    To get started with animatronics, open the scenery menu and select Create Custom. This option will provide you with access to a wide range of scenery elements.

    You can combine existing scenery, statues, and animatronics to compose an outstanding scenery group.

    Feel free to decorate with as many items as you like. You can design an animatronic with a consistent theme or merge various concepts for something fresh and unique. Adding statues and previously built animatronics can make your park’s attractions and paths really stand out!

    Utilize the tools available to adjust the height and rotation of the scenery, enhancing the overall look of your decorations. Once you’re satisfied, make sure to mark the scenery group as complete so you can move it all as a single unit!

    Saving Your Blueprint

    When you’re really pleased with your creation, you can save it as a blueprint. This feature allows you to place copies and transport your custom animatronic to other parks.

    You can also share your creations online for others to enjoy through the workshop!

    To save your work, use the selection tool to highlight all the scenery you want to keep, including pathways and nearby items not part of the group. After making your selection, confirm it and choose the option to save the blueprint.

    A menu will pop up where you’ll need to fill out a few required fields before saving:

    • Scenery title
    • Item description
    • Browsing location

    You can also set filters for your animatronic and preview the in-game cost to add it to your park. Once you’ve completed these steps, you’re ready to save the blueprint and use it as you wish.

    Using the Event Sequencer

    Another way to enhance your animatronics is by utilizing special effects and the event sequencer. Start by placing various special effects from the custom scenery menu, like bubble makers, alongside an event sequencer.

    From there, you can interact with the event sequencer to set the triggers for the scene. This could be a repeating loop, a single occurrence, or anything in between based on what you prefer.

    You can add more objects to the sequencer and explore additional tracks to fully personalize the experience!

    With the event sequencer, you can start or stop special effects, alter their colors, and manage specific triggers to create something truly exceptional. You can also adjust the timing for how long an effect lasts.

    The options are limitless, so take your time experimenting in sandbox mode to better understand the controls and hone your skills as a theme park designer!