الوسم: Build

  • Creating Extra Park Entrances in Planet Coaster 2: A Guide

    Creating Extra Park Entrances in Planet Coaster 2: A Guide

    In Planet Coaster 2, when you create a large park, it becomes inefficient for every guest to enter through the original entrance. This often results in attractions situated far from the entrance being overlooked, as guests are reluctant to walk long distances to reach them.

    To improve traffic flow and direct visitors to different areas of your park, adding a new entrance is essential. There are several steps to consider for constructing either a custom entrance or a pre-designed one. You’ll also want to implement strategies to encourage guests to utilize this new access point rather than the main entrance.

    Creating a New Park Entrance


    You can create your own park entrance with the custom tools, combining wooden panels and branding to give it a unique flair. Alternatively, you can also use the themed entrances available in Blueprints.

    To access these Blueprints, navigate to the Facilities tab and click on the icon that shows three little people. You’ll find the Park Entrance Blueprints there. Choose one that you like and place it in your desired location.

    Position your Park Entrances as close to the boundary of your park as possible to optimize space for rides.

    Encouraging Guests to Use a New Entrance


    A park entrance gate with one guest in Planet Coaster 2.

    After placing your Park Entrance blueprint, make sure guests can pay to enter your park. You’ll notice two black pads featuring the Planet Coaster symbol when positioning the blueprint. This is where guests will spawn.

    If desired, you can manually position the Planet Coaster 2 entrance pads to adjust where guests will spawn.

    Entrance gates also need to be placed manually so you can set entry fees and allow guests to access the nearby park section. Go to the Custom Creator section under facilities and look for the Park Entrance Gate in the three people icon area. Then, place them where you see fit.

    It’s important to connect the entrance gates on both sides for an efficient flow of guests in and out, and you can set entrance prices at this stage as well.

    If possible, create pathways linking the entrances to one another for easier guest movement.

    Lastly, keep in mind that guests are less likely to use a new entrance if the surrounding area lacks attractions or activities. Build out the park before introducing additional entrances, as otherwise, guests will likely stick to the main entrance.

  • Crafting a Druid Stronghold in DND: A Step-by-Step Guide

    Crafting a Druid Stronghold in DND: A Step-by-Step Guide

    Understanding Druids’ Bastions in Dungeons & Dragons

    In Dungeons & Dragons, a player’s bastion is a personalized sanctuary where they exercise control and feel at home. If your Dungeon Master (DM) permits bastions in your campaign, you may want to explore the best options available for druids, who are typically not portrayed as property owners.

    Contrary to common belief, druids can possess bastions just like any other class. Additionally, they have access to exclusive facilities due to their connection to nature. This guide will delve into the optimal facilities for druids and suggest some spells to maximize your bastion’s potential.

    Acquiring a Bastion at Level Five

    You can establish a bastion at level five, which includes two fundamental facilities and two special ones. You have the creative freedom to design the layout of your bastion, and while you can invest in more basic facilities, special ones are available only at certain levels.

    Visually, your bastion can be anything you envision, so you are not limited to traditional castles or towers. It might be a hidden cave or a charming woodland cottage, and as long as there is sufficient space and a roof, your DM is likely to approve.

    Regarding basic facilities, we won’t elaborate much since they mainly serve narrative purposes. If your Dungeon Master allows, you could have nature-themed enhancements, such as a garden filled with trees and wildlife.

    Special Facilities

    Among the special options at level five, the sanctuary stands out. This facility is exclusive to characters with a holy symbol or druidic focus. Spending a long rest here grants you a charm, allowing you to cast Healing Word once in the next seven days without consuming a spell slot.

    If you are frequently away from your bastion, it risks being invaded. Therefore, having a barrack as your second special facility can enhance your defenses. This facility enables you to recruit guards, providing security against potential attackers.

    You can fortify your bastion further by building walls, though this may become costly at lower levels. However, if you’re actively managing your bastion, it is safe and can benefit from a garden instead of a barrack. This choice not only fits the druid theme but also provides a free healing potion each week, along with other supplies like rations and antidotes.

    Useful Spells

    Maintaining communication with your bastion while you’re away is key. Druids receive a handy spell called Animal Messenger at level five, allowing you to send a small animal to relay orders to your hirelings. Keep in mind that distance can affect the success of this spell—an animal can fly up to 50 miles per day, and using a higher-level spell slot can extend its range.

    Level Nine Bastion Enhancements

    At level nine, you can select two new special facilities, adding even more versatility and options to your bastion. You also have the opportunity to swap out existing facilities every time you level up. For instance, consider replacing a barrack with something more useful for your gameplay style.

    Special Facilities at Level Nine

    One valuable addition is the sacristy, which is exclusive to druidic characters. This facility allows you to create holy water at no cost and craft common and uncommon relics for half their purchase price.

    The teleportation circle is another crucial feature, facilitating quick access to your bastion depending on how many nearby settlements possess their own circles.

    You also retain access to the workshop, which becomes even more beneficial at this level. The workshop enables you to create various equipment, but if it allows spellcasting for items, you will need to craft them personally.

    Replacing Facilities at Level Nine

    If you opted for a garden at level five, consider upgrading to a greenhouse. It offers similar benefits but enhances your capabilities by generating rations as well.

    Level 13 Bastion Developments

    Reaching level 13 unlocks new tiers for special facilities, although you’ll only gain one additional option. You can also make improvements to existing options, though druids may find some enhancements less necessary based on their playstyle, particularly Circle of the Moon druids.

    New Special Facilities

    The meditation chamber at this level allows for increased resilience by granting advantage on two types of saving throws for a week if you spend seven days in your bastion. Furthermore, it allows you to roll twice during your next bastion event and choose the result.

    Alternatively, for those more focused on financial gain, investing in a storehouse can yield profits—an injection of 5,000 gold can net you 7,500 in a week.

    If you enjoy roleplaying, consider adding a menagerie, filled with animals that can serve as defenders for your bastion.

    Replacing Facilities at Level 13

    At this level, you can transition from the sanctuary to a reliquary, which provides even greater benefits, such as a free cast of Greater Restoration and additional support for spells requiring components.

    Level 17 Bastion Opportunities

    If your campaign reaches level 17, you unlock some of the most powerful special facilities available, although you can only select one new option. Thanks to the ability to replace facilities, you can enjoy various powerful benefits.

    Special Facilities at Level 17

    While druids typically lack access to a guild hall, several feats can help fulfill that requirement, allowing you to create walls around your bastion or establish a druidic guild.

    The sanctum adds further advantages, including:

    • A free use of Heal
    • Temporary hit points when you’re away from the bastion
    • The ability to learn the spell Word of Recall ordinarily reserved for clerics.

    By this point, you should have a comprehensive understanding of your bastion’s potential and how beneficial it can be in your adventures, even when you’re not physically present.


  • Top Brotato Hunter Build for Ultimate Gameplay Success

    Top Brotato Hunter Build for Ultimate Gameplay Success

    The Hunter character in Brotato can be quite challenging to master, often causing frustration until you discover effective strategies. Fortunately, once you grasp the right techniques, winning becomes much easier.

    Like any spud, Hunter has multiple playstyles, but the one outlined here is the quickest and simplest. This build is effective for conquering Danger 5 in both Crash Zone and the Abyss.

    The Optimal Hunter Build

    Here are some excellent items to consider for this Hunter build:

    Bandana Projectiles pierce through one additional target; -10% Damage
    Pumpkin +15% Piercing Damage; Can’t exceed base damage; -2% Damage
    Sharp Bullet Projectiles pierce through one additional target; -20% Piercing Damage; -5% Damage; -3 Knockback
    Banner +20 Range; +10% Attack Speed; -5 Knockback
    Sunglasses +10% Critical Chance; -1 Armor
    Ricochet Your projectiles gain one bounce; -25% Damage
    Small Magazine +2 Ranged Damage; +10% Attack Speed; -6% Damage
    Cyclops Worm +12% Damage; -12 Range
    Glasses +20 Range

    The Hunter has some intriguing advantages and drawbacks. Right off the bat, he starts with +100 Range, plus +1% Damage for every 10 points of Range. This means you start with a 10% Damage boost before firing a single shot. Additionally, your Critical Chance is enhanced by 25%. However, there is a significant trade-off: he cannot harvest at all and his Max HP is reduced by 33%.

    Key stats to focus on with Hunter include:

    • Critical Chance
    • Range
    • Speed
    • Luck
    • Max HP
    • Attack Speed

    Since Hunter thrives on range, it’s best to use ranged weapons like Crossbows. While melee weapons can cover more area, they often come with longer cooldown times.


    Equipping yourself with 6 Crossbows transforms you into a powerful enemy-slaying force, as these weapons strongly benefit from Critical Chance. Critical hits allow the Crossbow to pierce through multiple foes. By leveling these weapons quickly or acquiring a Cursed version, you could pierce even more enemies.

    Be aware that while this piercing crit setup is impressive, it may not be as efficient as using explosive weapons like the Shredder or Rocket Launcher, so you might find that eliminating enemies takes longer than anticipated.

    Range is a clear priority since it boosts your Damage percentage and allows you to eliminate enemies off-screen. However, do not overly prioritize Range. For instance, if you get a +12 damage boost, it’s worth taking, as achieving 120 Range to equal that number can be challenging.

    Focus on boosting Luck and Speed early in the game. Luck increases the quality of items you find and offers more healing items. As your Luck grows, be sure to grab consumable healing items like Weird Food or Lemonade. Speed enhances your ability to dodge attacks and collect dropped resources. With 25+ Speed, you can easily evade bosses if direct confrontation seems too risky.

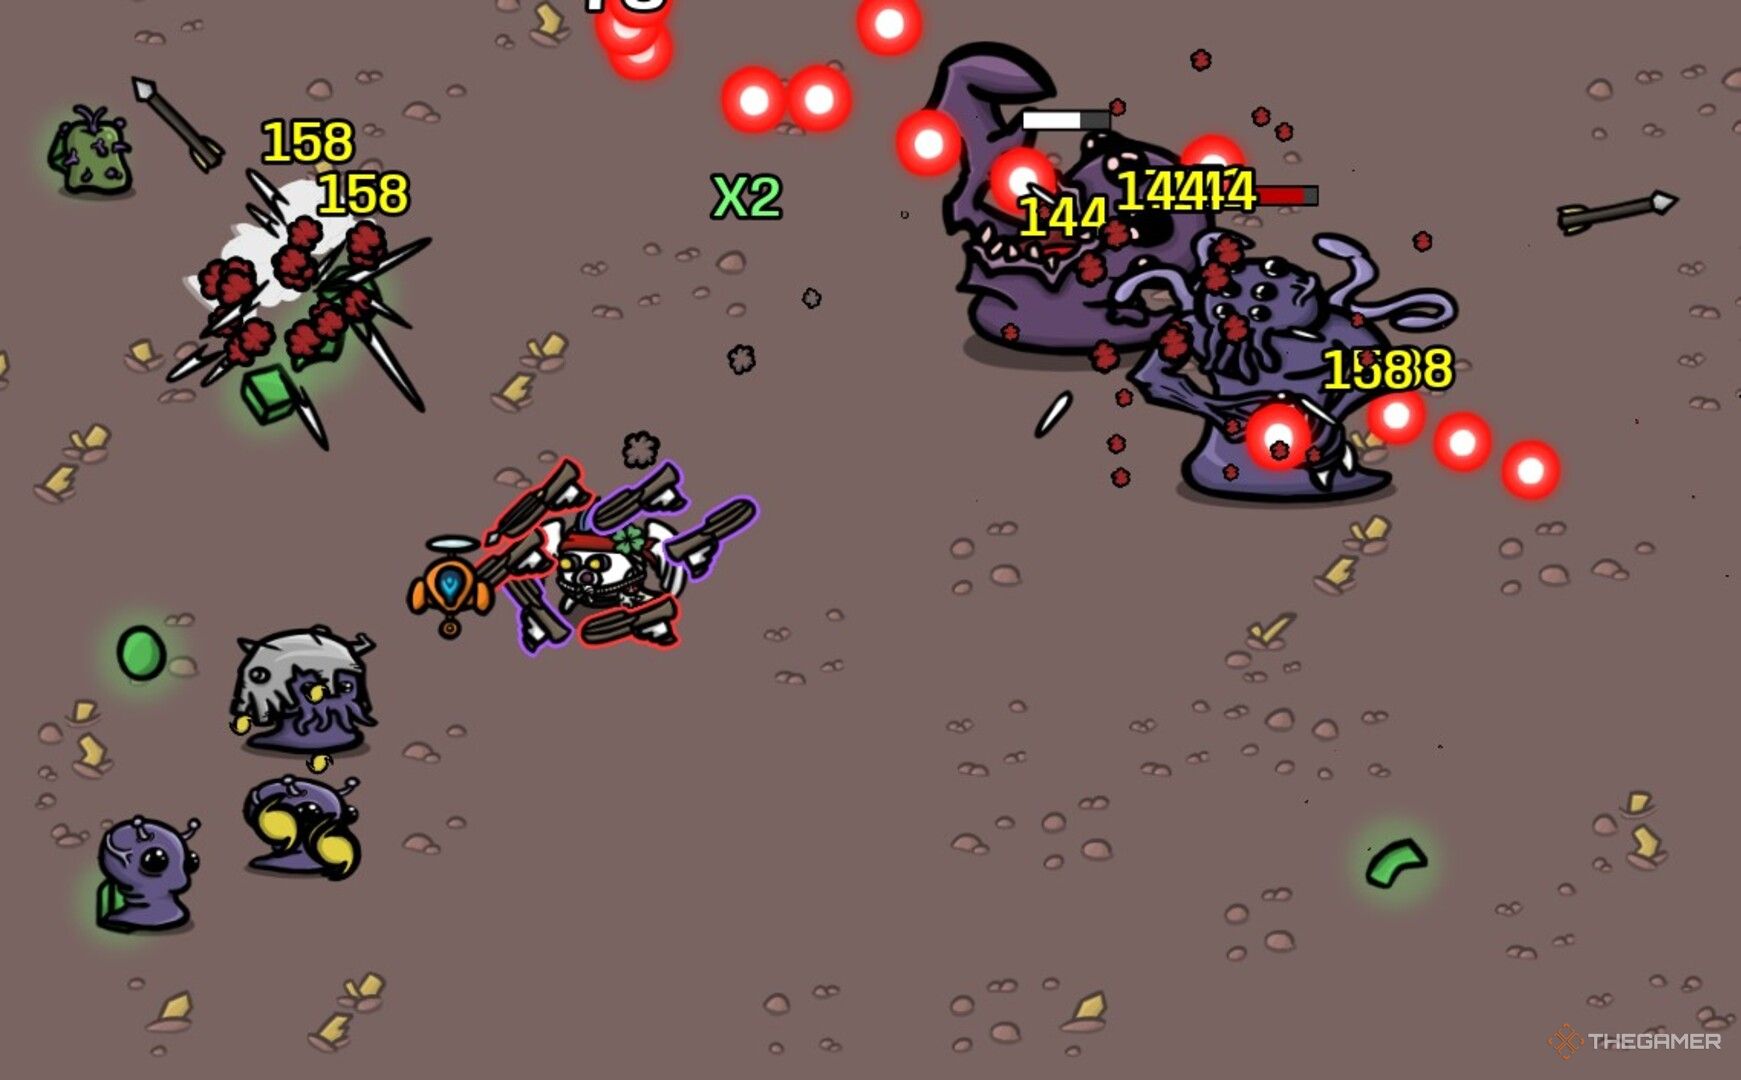
    Brotato Crossbow build Hunter fighting in the Abyss.

    While Hunter has lowered Max HP, it’s a crucial stat to invest in. Grab it whenever you can; if you come across a +3 or +4 Armor during level up, don’t hesitate to take it. This addition can significantly enhance the existing +3 Armor from having six Crossbows.

    Lastly, don’t overlook Attack Speed. Depending on RNG, you might have varying amounts, but aim for at least 50 Attack Speed. Since you won’t be using area damage weapons, quick firing is essential to handle waves of alien enemies.

    Tips for Playing as the Crossbow Hunter

    With the Crossbow build outlined here, you’ll need to be cautious while maneuvering. The Hunter’s limited Max HP will become more apparent as the game advances, particularly against Danger 5 foes (and bosses), who pack a punch. Therefore, securing Speed is vital.

    Brotato Hunter with Crossbow build fighting 2 bosses.

    With a Speed of 20 or higher, you can effectively outpace hordes, including the speediest bosses, gaining precious moments to eliminate enemies with your formidable critical hits. If you manage to secure decent Dodge (30+), you can maneuver closer to your enemies to collect valuable resources, but avoid making this a habit, as you’re still quite vulnerable.

    When facing bosses, try to keep your distance rather than engaging directly. Instead, maintain your distance, allowing your piercing attacks to reach them and swiftly chip away at their health.

  • Crafting and Mastering a Pikachu & Zapdos EX Deck in Pokémon TCG

    Crafting and Mastering a Pikachu & Zapdos EX Deck in Pokémon TCG

    The Pikachu ex and Zapdos ex deck is a fan favorite in Pokemon TCG Pocket, and that’s not without reason. This deck is exceptionally reliable, deals impressive damage, and stands strong against other top decks, such as Starmie and Articuno ex.

    At the core of this deck is Pikachu ex’s Circle Circuit ability, which increases damage based on how many Pokemon you have sitting on the bench. We’ll go over the essential cards needed to construct this deck, strategies for playing it effectively, and its key matchups.

    Pikachu and Zapdos ex Deck List

    The key players in this deck are Pikachu ex and Zapdos ex, both formidable Electric-type attackers. Pikachu’s Circle Circuit can deliver 90 damage for just two Energy, but it requires having three Pokemon on your bench. To help with this, we include two Voltorb and two Electrode to fill the bench quickly and maximize Circle Circuit’s potential.

    Zapdos provides an alternative attack method, although it depends on coin flips for higher damage. This aspect can be unreliable, especially since Zapdos requires three Energy, making Pikachu more consistent overall.

    The additional cards in the deck serve to support Pikachu and Zapdos, featuring staples like Giovanni, Sabrina, Poke Ball, and Professor’s Research. Here is the complete list of cards you’ll need:

    Pikachu ex/Zapdos ex

    Pikachu ex x2

    Zapdos ex x2

    Voltorb x2

    Electrode x2

    Pikachu EX

    Zapdos EX

    Voltorb

    Electrode

    Giovanni x2

    Sabrina x2

    Potion x2

    X Speed x2

    Poke Ball x2

    Professor’s Research x2

    To fully assemble this deck, you’ll need to draw cards from all three Genetic Apex packs, so some luck is involved. As an alternative, you can replace Zapdos ex with a standard Zapdos or include Pincurchin for Paralyze support.

    Deck Strategy

    Zapdos Ex Pokemon TCG Pocket Card Art.

    The main approach of this deck is to quickly get Pikachu in play and fill your bench with other Pokemon. Since the deck is primarily composed of Basic Pokemon, you can use Poke Ball to draw the remaining Pokemon and set them on your bench efficiently.

    Zapdos and Voltorb/Electrode are also solid opening cards, especially against decks that incorporate Energy acceleration cards like Misty, Gardevoir, or Moltres ex. Electrode has no retreat cost, which makes it ideal for charging Energy onto Pikachu. With only a one Energy retreat cost, Zapdos ex can also be easily switched out using X Speed.

    Zapdos features Peck, which only requires one Energy, making it a great early damage option, especially against Water-type decks where Peck is particularly effective.

    In summary, the strategy of this deck is straightforward and user-friendly, which contributes to its strength.

    Deck Matchups

    This deck performs particularly well against Water-type opponents, especially against the Starmie and Articuno ex deck. If they set Staryu as their active Pokemon, a Zapdos ex using Peck in conjunction with Giovanni can quickly eliminate it, giving you an opportunity to build up Energy on your Zapdos or Pikachu.

    Overall, this deck is strong against most neutral matchups thanks to Pikachu’s high energy-to-damage efficiency. However, it does struggle against Fighting-type decks like Marowak ex or Machamp ex. Fortunately, these decks aren’t as commonly played, so the types that pose a risk to Pikachu ex are relatively limited.

  • Top Apprentice Build Strategies in Brotato

    Playing as the Apprentice in Brotato and the Brotato Abyssal Terrors DLC offers a similar yet distinct experience. While you’re still using the same character with its strengths and weaknesses, the introduction of new items and mechanics—like the Curse—adds enough variety to the game that we all could use a refresher on this roguelike.

    Here, we’ll discuss two builds that we think are the best for this little potato. These builds serve as a general guideline since we can’t predict which weapons, items, or stats you’ll find in the game’s randomness. However, either build can help you tackle Danger 5 in both Crash Zone and The Abyss.

    Apprentice Ghost Scepter Build

    As the name suggests, this build focuses on using Ghost Scepters, which provide you with health points as they accumulate kills on their counter. In the early waves, it’s wise to invest in +Max HP since Ghost Scepters might struggle to decimate enemies right away, leaving you with around 8 or 9 HP. After wave 5 or 6, consider picking up one or two Ghost Axes to boost your damage output.

    In the mid-game, you’ll start accumulating significant HP from the Ghost Scepters, and although they will secure most of the kills, Ghost Axes will contribute enough to increase your damage percentage.

    The primary stats to prioritize with the Apprentice Ghost Scepter build include:

    • Attack Speed
    • Crit Chance
    • Speed
    • Dodge

    Attack Speed and Crit Chance create a powerful combo that’s essential to this build, as Ghost Scepters will be your main source of damage and are designed for single-target attacks. As you’ll notice, the enemy hordes in each level will continuously grow larger and stronger, so quick elimination is crucial for survival.

    Boosting your Dodge is beneficial since Ghost weapons inherently provide extra Dodge and reduce Armor. Holding 6 Ghost weapons grants you +30% Dodge, meaning you only need an additional 30% through leveling or items to hit maximum Dodge.

    Adding Speed in increments to maintain at least 15-20 (more is better) helps you stay ahead of any looming hordes or tough bosses that you may not be able to defeat easily. Being able to evade their reach allows you to navigate through levels without getting defeated.

    Don’t overlook your secondary stats, as they can play a vital role. Always look to acquire Piercing, Bounces, and + XP Gain to enhance your performance.

    Apprentice Guns Build

    The Guns build is one of the most favored strategies for many characters in Brotato, and it can be effectively utilized with the Apprentice as well. This build acts as a glass cannon, so if you choose this route, you must be cautious to avoid taking multiple hits at once.

    For your weaponry, ensure you have SMGs paired with one or two Shredders. As you progress into the mid to late game, you can swap out one SMG for either a Laser Gun or Revolver for higher single-shot damage. If you come across them, you can also replace Shredders with Rocket Launchers or Nuclear Launchers, and swap an SMG for a Minigun or Chain Gun if those become available.

    The key stats for the Apprentice Guns build are:

    • Max HP
    • Attack Speed
    • Luck
    • Damage %
    • Speed

    Since leveling up comes at the cost of HP, it’s important to focus on +Max HP early on. Aim to keep your HP around 50 or higher, and occasionally boost your Armor, as it scales well in the 1 to 10 range. This strategy will enhance your survivability and help you avoid being defeated in a single strike.

    Avoid confronting large enemies directly, as they can quickly chip away at your HP. If you’re surrounded by aliens with no escape route, it’s better to push through smaller enemies, which will only inflict minimal damage.

    Increasing your Luck consistently is crucial, as it will yield better +6 and +9 HP boosts when leveling up, which are essential. Higher Luck translates to more healing item drops, allowing you to forgo HP regeneration items.

    When clearing waves, Attack Speed combined with a Damage percentage increase becomes essential. You won’t need to focus on Ranged Damage, as you gain +1 every time you level up.

    Lastly, ensure you maintain your Speed, which is critical for evading boss attacks and grabbing resources dropped by your foes since letting them lie around is not beneficial.

    For your secondary stats, prioritize Piercing and Piercing Damage with this gun build, as they significantly enhance your ability to clear waves. Additionally, having Consumable Heal and improvements for Explosions can be incredibly beneficial since you’ll likely have one or two explosive weapons in your arsenal.

  • Crafting a Charizard & Moltres ex Deck in Pokémon TCG Pocket

    Crafting a Charizard & Moltres ex Deck in Pokémon TCG Pocket

    Quick Links

    “Strong Pokémon. Weak Pokémon. That’s just the arrogant viewpoint of some people. True experts aim to win with the Pokémon they cherish most.” Karen from the Elite Four captured this sentiment, yet in the world of Pokémon TCG Pocket, many players find their favorites to also be powerful contenders.

    Charizard has been a prominent figure in the Pokémon franchise since the initial game launches, only closely rivaled by Pikachu when it comes to recognition and marketing. This impressive Pokémon has made a significant impact in the Scarlet & Violet era of the Pokémon Trading Card Game, bringing its strength to Pokémon TCG Pocket as well!

    Sample Charizard ex Decklist

    Decks in Pokémon TCG Pocket tend to be smaller and more straightforward compared to those in the Pokémon Trading Card Game. The game also ensures that you start with a Basic Pokémon in your opening hand, making it unnecessary to search for them. This, along with a limited card pool, means that most decks share a similar lineup of Trainer cards and use a small range of Pokémon cards to implement their strategies.

    Charizard ex / Moltres ex

    Charmander card from Genetic Apex.

    Charmeleon from Genetic Apex.

    Charizard ex from Genetic Apex.

    Moltres ex from Genetic Apex.

    Charmander x2

    Charmeleon x2

    Charizard ex x2

    Moltres ex x2

    Professor's Research from Pokémon TCG Pocket.

    Giovanni from Genetic Apex.

    Sabrina from Genetic Apex.

    Poke Ball from Genetic Apex.

    Professor’s Research x2

    Giovanni x2

    Sabrina x2

    Poke Ball x2

    X-Speed from Pokémon TCG Pocket.

    Potion from Pokémon TCG Pocket.

    X-Speed x2

    Potion x2

    You can obtain both Charmanders needed by selecting the Charizard pack during the tutorial. However, both Charizard ex and Moltres ex are quite rare, each having just three prints in Genetic Apex. This deck can still function with one Moltres ex, and you can replace both Charizard ex cards with the regular Charizard for a more budget-friendly option. Just ensure that you don’t add any extra Basic Pokémon, as this might hinder your chances of setting up with Moltres ex.

    Keep an eye on Wonder Pick for chances to acquire additional cards you need.

    Charizard ex Strategy

    Rainbow-bordered Moltres ex from Pokémon TCG Pocket.

    The Charizard ex/Moltres ex combination is primarily focused on one goal: activate Charizard as quickly as possible, enabling you to accumulate Prize Points before your opponent has a chance to respond.

    While Water-type decks benefit from Misty’s supporter card to quickly flood the field with Energy, Charizard ex depends on Moltres ex to accumulate enough Energy for the costly Crimson Storm attack. Thus, having Moltres ex in your starting hand is crucial for establishing your strategy.

    Always place Moltres ex as your Active Pokémon if it’s in your starting hand, and put a Charmander on the Bench. On your first turn, utilize Poke Ball to sift through your deck and find your Charmander or Moltres ex if necessary. Then, play Professor’s Research to look for your Charmeleon and Charizard ex. If you go second, attach an Energy to Moltres ex and use Inferno Dance to add some energy to Charmander.

    Don’t stress if you’re going first; Moltres ex is tough to knock out on the first turn, giving you ample time to begin stacking Energy on your Charmander.

    Quickly evolve Charmander into Charmeleon and then into Charizard ex, using Inferno Dance to accumulate more Energy. Once Charizard ex has five Energy, retreat Moltres ex and unleash Crimson Storm for a knockout.

    Since using Crimson Storm requires you to discard Energy from Charizard ex, consider using Slash and Giovanni to preserve your Energy if your opponent’s Active Pokémon has low HP.

    Utilize Potions as needed to keep Moltres ex in play until you can switch to Charizard ex. Deploy Giovanni and Sabrina to chip away that last 10 HP or force your opponent to bring in a weaker Pokémon, as required.

    Charizard ex Deck Matchups

    Venusaur ex card art from Pokémon TCG Pocket.

    Charizard ex has a strong advantage against the Venusaur ex archetype. Thanks to Moltres ex’s Inferno Dance, Charizard ex can establish itself much quicker than Venusaur ex, allowing you to react faster than your opponent can finalize their setup.

    Add to this the fact that most Pokémon commonly found in a Venusaur ex deck are weak to fire-type attacks, which significantly increases the damage you can deal. Just be prepared for the substantial healing that your opponent might employ.

    Pikachu ex card art from Pokémon TCG Pocket.

    The Charizard ex deck doesn’t have significant weaknesses to a single type, but keep in mind that Moltres ex is vulnerable to Electric-types. Pikachu ex can build up Energy rapidly and can knock out Moltres ex before you have a chance to power up Charizard if luck is not on your side.

    Starmie EX card from Pokémon TCG Pocket.

    Starmie ex poses another major challenge as it can inflict enough damage to take down Moltres ex in just two hits with minimal setup. It can similarly impact Charizard ex due to its weakness to water, potentially leading to a swift loss even before you can establish your strategy—especially if your opponent harnesses Misty to set up a more dangerous Articuno ex.

  • Creating a Lazy River in Planet Coaster 2: A Step-by-Step Guide

    Creating a Lazy River in Planet Coaster 2: A Step-by-Step Guide

    In Planet Coaster 2, there’s an array of rides you can create to keep your guests entertained. From thrilling roller coasters to relaxing lazy rivers, there’s something for everyone. The challenge lies in mastering the construction of each attraction to maximize their appeal.

    In this guide, we’ll show you how to construct a lazy river in your theme park. We’ll cover everything you need to know to get this attraction up and running, so your guests can kick back and enjoy their time in the water. Let’s dive into building your own lazy river!

    Creating Your Custom Lazy River

    To kick off your lazy river project, you’ll first need a pool. You can start with a prebuilt pool or create a large custom one. From there, utilize the custom path pool tool to design a meandering river where your guests can drift leisurely.

    Keep your lazy river at a manageable length; if it’s too long, guests might not make it to the end!

    Make sure to connect both ends of your river. This allows the water jet tab to unlock, enabling you to fine-tune the settings for the best guest experience. Additionally, consider providing pool rings for guests to float on.

    It’s a good idea to place a Splash Emporium Shop Facility nearby, allowing guests to browse and buy items that enhance their experience in the lazy river.

    Remember, some guests might use the lazy river like a traditional pool. To encourage the proper use of your attraction, consider adjusting the pool’s depth and offering competitively priced pool rings!

    Add extra charm to the lazy river by decorating it with attractive scenery and situating shops around the area for added guest interaction. It’s also wise to hire additional lifeguards to ensure safety and assist any guests who might get stuck.

    Powering Your Lazy River

    Building a circular pool to become a lazy river, with the radial menu overlayed.

    Like a traditional pool, your lazy river will require a water filter and pump. You’ll also need to install water jets throughout the lazy river to keep guests moving and prevent them from getting stuck.

    Feel free to experiment with the placement and frequency of the water jets. You can tailor your lazy river’s flow and even create multiple pathways for a more engaging experience.

  • Essential First Builds in Sengoku Dynasty

    Essential First Builds in Sengoku Dynasty

    In Sengoku Dynasty, there’s a lot to construct. Even at the start, when many options are still locked, having a clear goal is essential. You’ll be doing most of the work until your village starts attracting more residents, so it’s vital to have the right tools and workspaces at your disposal.

    If you’re uncertain about what your initial village requires, consider following these steps. They’ll help ensure that you can feed and shelter your people while also expanding and gaining access to better equipment.
    Where Should You Place The Bell Tower?

    After the introductory sequence where you create a campfire for Ako, you’ll travel down the road to the ruins of Sosogi Village. There, Toshichi will give you a bell that you can use to build your Bell Tower.

    All village buildings need to be built within the blue radius of the nearest Bell Tower.

    Toshichi recommends scouting different locations for your tower, but the best place is right where you’re standing. Use your axe to demolish the ruined Bell Tower next to Toshichi, and then build a new one in its place. Establishing your town on the ruins of Sosogi offers numerous advantages:

    • You can salvage materials such as planks and charcoal from the burnt trees and structures.
    • It’s near the shore, enabling fishing.
    • There is an abundance of resources in all directions within a short distance.
    • Once cleared, there’s ample space available for construction.
    • It’s also close to early-game quests.

    If you prefer a different location, try the hills to the north, near the abandoned shrine. There won’t be any fishing, but you’ll find plenty of wildlife for hunting. Just be cautious of bears and bandits, who may be more frequent in this area.

    How Many Houses To Build

    While Toshichi’s quest only asks for one house, you’ll need more for your villagers to settle in. At first, aim for three beds: one for yourself, one for Ako, and one for Yonaisuke, a nearby refugee who will join if you invite him.

    Many of the buildings you will construct will include bed space, so you don’t need to rush to build extra houses right away.

    Key Buildings

    Once Ako and Yonaisuke settle in, you should balance your time among quests, resource gathering, and construction.

    • First, build a General Storage to hold surplus inventory, providing villagers easy access to materials for their tasks.
    • Next, establish a Workshop. It not only provides an extra bed but also a workbench to craft crucial items like a Copper Yari and a Shortbow.

    Planting Crops

    You may need to make several trips into the wilderness for resources. While doing this, talk to Chiyone in the cherry grove east of the ruins. Completing her quest will reward you with Gobo Seeds, which can be used to create a crop field. A small 2×2 plot is sufficient. Assign a villager to tend to it and ensure they have the seeds and a hoe in storage for the first harvest by the end of summer.
    You can also collect Bamboo near Chiyone’s house. It’s a required resource for certain buildings and furniture, though only a little is needed.

    Woodcutters And Foragers

    When the Workshop is complete, build a Woodcutter’s Hut. This will enable you to efficiently produce planks for larger constructions. You’re likely running low on salvageable burned buildings by now.

    With lumber production up and running, construct a Forager’s Hut near Mata’s tent by the river. Assign a villager here to gather readily available materials, especially Grass, which is necessary to make Straw for later structures.

    Rebuilding The Bridge

    Your growth will now depend heavily on your finances and workforce. If you haven’t done so, complete the quests from Kengyo and Matsumaru. Kengyo’s quest becomes a lot simpler with a Shortbow, and hunting deer provides valuable XP to help you level up in the Way of the Warrior.

    After finishing the quests, Toshichi will tell you to speak with his sister, Sayuri. She will ask you to repair the bridge near Chiyone’s house. Gather the necessary materials and prepare the construction site; then reassign your Forager to work on the bridge. It should be finished by the next season.

    While waiting, search for bandit camps along the river and engage with solitary enemies to earn extra money. Aim to save enough to unlock the Drying Rack, which converts Grass into Straw.

    Liberating Sosogi

    Once the bridge is complete, talk to Sayuri again, and she will join your village. If you have the Drying Rack, place her there, as you’ll need a significant amount of Straw for future projects.

    Have a chat with Toshichi and wear the Peasant Clothes he gives you, which offer better protection than your initial Refugee Rags. Craft an extra Copper Yari and Shortbow, along with plenty of arrows; it’s time to take on the Looters in the northwest.

    If you want to be extra cautious, follow Toshichi’s quest to talk to Onibaba first. She’ll give you a mask that provides additional armor.

    Travel north from the ruins to the northwest beach, where you first washed ashore. You’ll encounter many Looters; however, you can typically pick them off one by one. You’ll need to defeat at least five along with the Leader at the main camp by the shore. By the end of this raid, you should have enough money to unlock the Drying Rack if you didn’t before.

    After defeating the Leader and his gang, the Sosogi Region will be fully under your control. You’ll then be able to craft Copper tools at the Workshop – no more relying on just wood and stone!

    Next Steps

    What you decide to do next is up to you, but a solid move would be to construct a Fisherman’s Hut near the shore before venturing out to explore. If you were fortunate enough to recruit a refugee while hunting bandits by the river, they can use Straw to create Rope and then Fishing Nets, which can provide a substantial food supply for the village.

  • Crafting the Beamsmasher in Black Ops 6: A Step-by-Step Guide

    Crafting the Beamsmasher in Black Ops 6: A Step-by-Step Guide

    Wonder weapons are some of the most powerful firearms in Call of Duty: Black Ops 6 Zombies mode, but getting your hands on them can be tricky. You might stumble upon one in the mystery box, but if you’re looking for a more reliable way to obtain them, crafting is a solid option. While it can be a bit of work, it’s definitely worth the effort.

    In the Terminus map, you can create a special wonder weapon known as the Beamsmasher, which is not only formidable but also a key component in completing the main quest. If you want to know how to craft it, follow this step-by-step guide.

    How to Craft the Beamsmasher

    In the Zombies mode on the Terminus map, you can gather the necessary parts to craft the Beamsmasher. Begin by starting your game on the Terminus map and activating the three AMP machines to progress towards the Pack-a-Punch.

    First, make sure to equip the Dead Wire Ammo Mod on your weapon. You can do this at the nearby Arsenal machine, but ensure that you have at least 500 Salvage to apply the modification.

    After restoring power, head to the inclined lift and activate it. As you ascend, look back at the wall to find an electrical box in a window. Shoot it with the weapon that has Dead Wire equipped.

    This will transfer the electricity to the next box, which is located just to your right. Shoot that box, then immediately look to your right again to find another box that you need to hit.

    If you miss any boxes, you can call the inclined lift back to try again.

    You’ll need to shoot two more boxes: one near the second AMP generator and the other just outside to the right.

    If you successfully shoot all five boxes, a room with a green door will open near the last electrical box, revealing a hidden area. Inside, you’ll find a zombie on the floor. Eliminate it to collect the EMF FOB it drops, initiating the crafting process for the Beamsmasher.

    Next, you must interact with the device in this room. However, you can only do so after retrieving the Multiphasic Resonator from the briefcase held by a zombie, which is located on a table beside the Elemental Pop machine in the sea tower.

    Once you have the resonator, return to the secret room and insert it into the device. Your next task is to find three laptops scattered across the map.

    The first laptop is at the docks below the sea tower, the second is outside the room where Quick Revive is located, and the third can be found outside the Stamin-Up room.

    After interacting with all three laptops, go back to the machine and interact with it again to see a prompt for a code. While it involves mathematics, you can skip the math by visiting Peck in the spawn room and paying 5,000 Essence to easily obtain the code. Enter the code into the machine, and it will start its process.

    Keep in mind that the code changes every match.

    Afterward, complete one or two rounds until you’re notified that the machine has finished its task. Return to the machine and check its screen, which will point to an island, typically located to the east; that will be your destination. Don’t forget to pick up the Multiphasic Resonator.

    As you approach the island using a raft, you’ll see a blue energy ball. Interact with it using the Multiphasic Resonator to activate it.

    This is where zombies will spawn. Your goal here is to wait for the energy ball to target a zombie, which will turn blue and begin smoking; that’s the one you need to kill.

    Once defeated, it will drop a small orb that you must collect and return to the blue energy ball.

    You might need to repeat this process two or three times, as it can be random. Once completed, the energy source will move to another island, and you will need to follow it.

    Essentially, you will repeat this process on two more islands: the southern island and the northwestern island. The orb will change from green to purple, but the steps will remain the same.

    Completing this step will yield the final part of the Beamsmasher, which is the AMP ammunition part. With all the necessary components, return to the secret room and interact with the workbench to craft the Beamsmasher, and you’ll be ready to unleash its power.

  • Top Rappa Build for Dominating in Honkai: Star Rail

    Top Rappa Build for Dominating in Honkai: Star Rail

    It’s quite uncommon to encounter a character in Honkai: Star Rail before they officially launch, but Rappa is a notable exception. Characters like her come with no prior buzz, so they have a lot to showcase right out of the gate, and Rappa has certainly made her mark with her vibrant and lively persona.

    As a five-star Imaginary unit aligned with the Path of Erudition, Rappa primarily focuses on Break-based damage. Even though her options might seem limited, if you equip her correctly, Rappa can shine in late-game content.

    Best Relics and Planar Ornaments for Rappa


    Break-based damage setups were not a part of Honkai: Star Rail until the addition of Boothill. While there were a few four-star units that dabbled in this approach, they struggled without appropriate gear. Thankfully, Rappa now offers solid options:

    Type

    Name

    Synergy With Rappa

    Relics

    Iron Cavalry Against the Scourge

    This relic set is ideal for Rappa, granting her additional Break Effect and allowing her to bypass up to 25% of the enemy’s DEF in certain scenarios.


    These scenarios occur when she exceeds 250% Break Effect, which is achievable with the right team composition.

    Thief of Shooting Meteor

    For players in the early stages, this set yields a substantial 32% Break Effect while also restoring Energy upon triggering Weakness Breaks.

    Planar Ornaments

    Talia: Kingdom of Banditry

    Although not the most exceptional choice, Talia remains Rappa’s best option, offering an initial 16% Break Effect and an additional 20% if you maintain over 145 SPD.

    Forge of the Kalpagni Lantern (situational)

    If you consistently hit enemies with Fire weakness, this set can provide an increase in SPD and a significant 40% Break Effect.

    Rappa Relic Stat Priority

    Type

    Main Stat Priority

    Sub Stat Priority

    Head

    HP

    Break Effect > SPD > ATK Percent

    Hands

    ATK

    Break Effect > SPD > ATK Percent

    Body

    ATK Percent

    Break Effect > SPD

    Feet

    SPD

    Break Effect > ATK Percent

    Planar Sphere

    Imaginary DMG Bonus

    Break Effect > SPD > ATK Percent

    Link Rope

    Break Effect

    SPD > ATK Percent

    Top Light Cones for Rappa


    Honkai Star Rail Rappa light cone screen in the trial menu.

    Rappa’s light cone options are comparable to her relics, with the following being her top picks:

    Ninjutsu Inscription: Dazzling Evilbreaker

    Rappa’s signature light cone, this is her top choice, offering significant Break Effect and extra Energy at the battle’s start.


    Additionally, after using two basic attacks past the Ultimate, she can advance movement by 50%, enabling her to land that next buffed attack more efficiently.

    Night on the Milky Way

    While the ATK boost from this light cone is beneficial, the true highlight is the 30% DMG increase upon breaking an enemy’s weakness.

    After the Charmony Fall

    This gacha light cone enhances both Break Effect and SPD, with the SPD boost kicking in after you use your Ultimate for two turns.

    Eternal Calculus

    A friendly option for free-to-play players, this light cone grants 16% SPD when hitting more than three enemies, which pairs nicely if you use the Talia ornament set.

    Overview of Rappa’s Skills and Prioritization

    Rappa’s abilities can seem a bit confusing at first, but they are straightforward to use once you become familiar with them. Here’s a breakdown of her skills:

    • Rappa’s skill targets all enemies, reducing their weaknesses, though you will not use this frequently.
    • When activating Rappa’s Ultimate, she gains three enhanced basic attacks that hit three enemies in the first two, while the final attack targets all foes.
    • When hitting a Weakness Broken enemy, Rappa can inflict Super Break DMG. Additionally, the last hit in each enhanced basic attack can deliver extra Break DMG and Toughness DMG based on her charges.
    • Rappa can accumulate charges by breaking enemy weaknesses. Notably, Elite enemies provide an extra charge and some Energy recovery upon their weakness breaking.

    To improve Rappa effectively, prioritize upgrading her Talent first, as it amplifies the additional Break DMG she deals. Next, focus on her Ultimate, followed by her Basic Attack. Although upgrading her Skill isn’t crucial, aiming for a level six can be helpful for those rare moments when you might want to use it.

    Lastly, unlocking Rappa’s additional abilities should be a top priority since they significantly enhance her effectiveness.

  • Crafting Your Deck in Potionomics: A How-To Guide

    Crafting Your Deck in Potionomics: A How-To Guide

    Potionomics blends various game genres into one fun package, combining card games, shop management, and a touch of dating simulation. The core of the game revolves around the card mechanics, so mastering this aspect is essential for success.

    Making deals with customers or engaging in competitions unlocks more game content but can also lead to a Game Over if you’re not careful. Once you become familiar with the card game, you’ll find it easier to upgrade your shop and build relationships, whether romantic or friendly.

    Each Card Costs Patience

    Using a card in Potionomics is similar to casting a spell that requires mana; each card action costs Patience. Customers enter your shop with varying levels of Patience, which decreases with every decision you make in the card game.

    Wrapping up your turn also consumes Patience, but the amount varies, so be mindful of your choices. Typically, ending your turn might use up one or two units of Patience.

    If you fail to sell the potion before the customer’s Patience runs out, they will leave without making a purchase. The objective is to maximize the price of your potion while managing the limited Patience available.

    Your Goal Is To Increase Interest

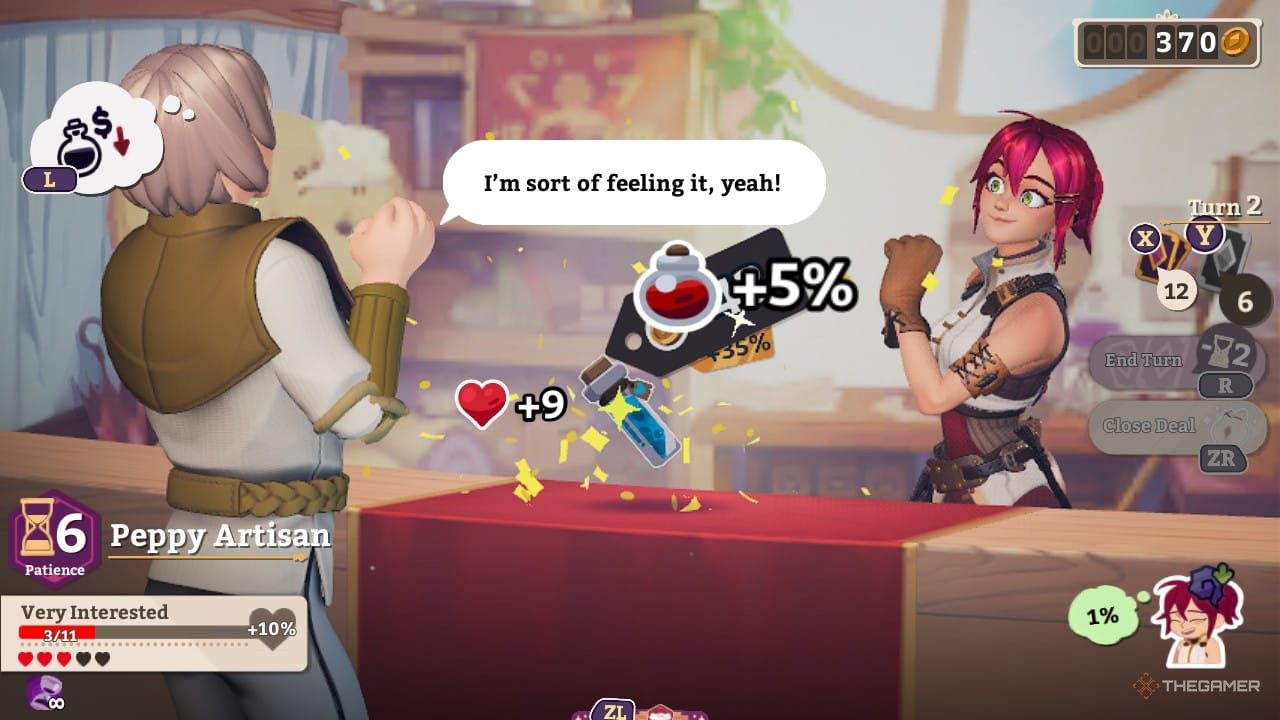
    Customer receiving increased Interest and Value from a deal in Potionomics.

    To boost the price of the potion, play cards that enhance Interest; the more engaged a customer is, the higher the price they’ll pay. Initial cards offer a maximum increase of nine Interest points.

    Interacting with side characters can yield superior cards, especially if you build a friendship with them.

    Muktuk has a useful starter card that adds sixteen points of Interest. To acquire this card, you need to level up his friendship twice.

    Avoid Getting Stressed

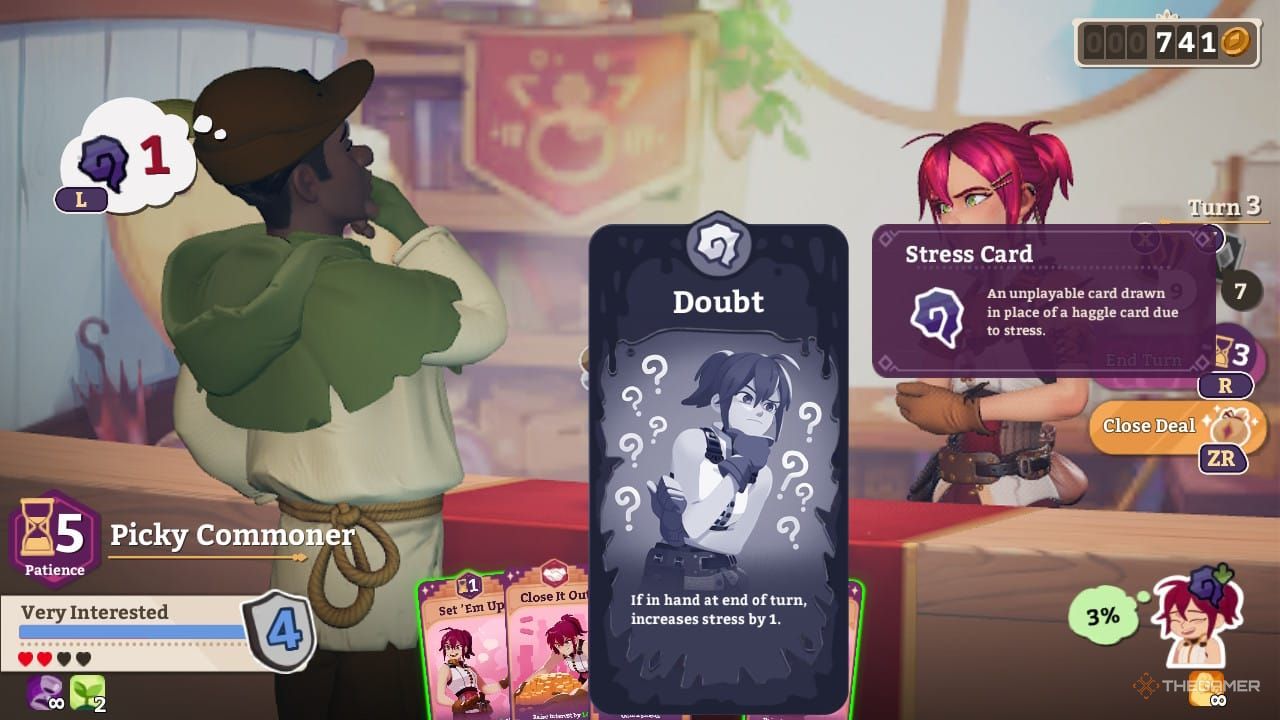
    Stress card activated during a deal in Potionomics.

    During your turn, focus on increasing Interest. When the customer takes their turn, they might reduce the potion’s value and increase your Stress levels. Managing your Stress is crucial because it results in unplayable cards that can complicate your strategy.

    Falling into stress during a deal will hinder your ability to sell the potion effectively, and your cards will become less effective. The Interest points available on your cards drop as your Stress levels rise.

    Collect The Right Cards From Friends

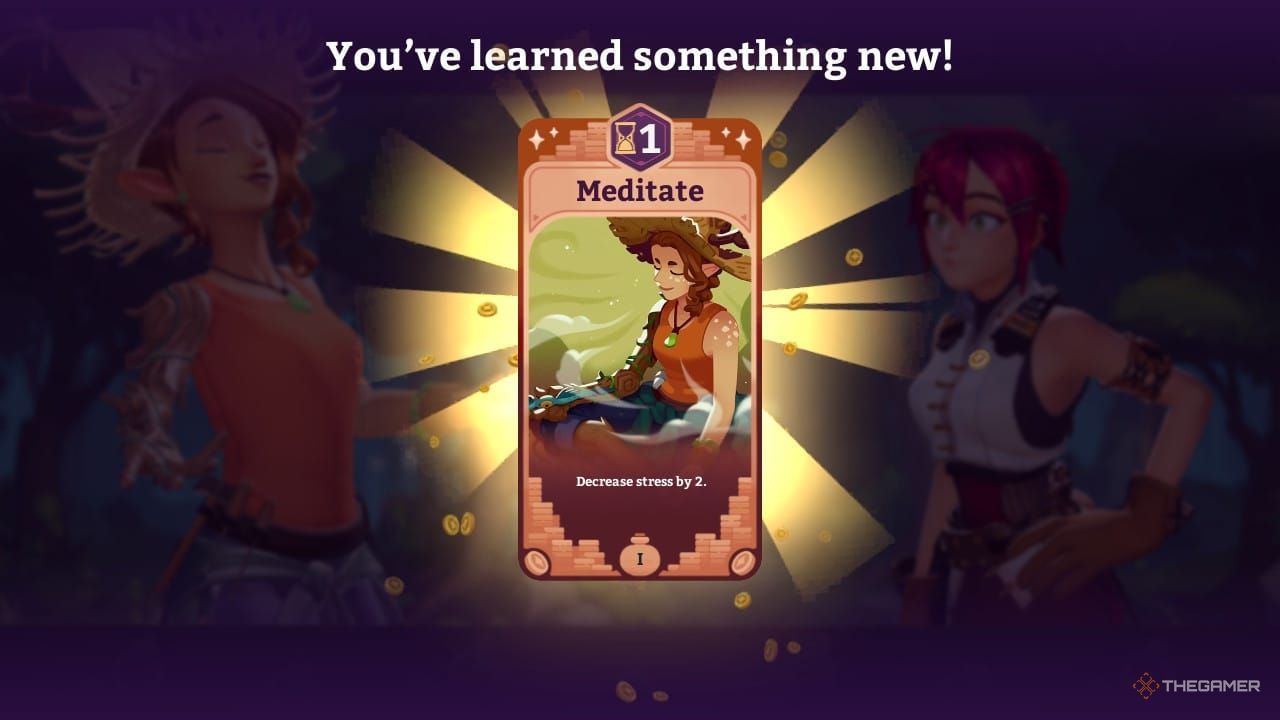
    Player receiving a Meditate card from Saffron in Potionomics.

    Building romantic or friendly relationships with characters unlocks new cards for your deck. Each friend has their strengths; for instance, Saffron has cards that focus on lowering Stress and managing negative effects during gameplay.

    It’s valuable to know which cards unlock and when so you can gather them before a competition. If you head into a challenge without a suitable card deck, you risk a Game Over.

    Identify your weaknesses during negotiations. Whether you easily get stressed or find it hard to boost Interest, forging closer ties with NPCs that offer cards suited to your style is beneficial.

    NPC Card Specialization
    Quinn

    Sneaky


    Gradually increases Interest over multiple turns.

    Mint

    Defensive


    Gains shields while slightly increasing Interest.

    MukTuk

    Brute-Force


    Raises Interest significantly in one go.

    Baptiste

    Longer Battles


    Increases Patience.

    Saffron

    Avoiding Debuffs


    Reduces Stress levels.