الوسم: Black Ops 6

  • Unlocking Alchemist Medals in Black Ops 6: A Complete Guide

    Unlocking Alchemist Medals in Black Ops 6: A Complete Guide

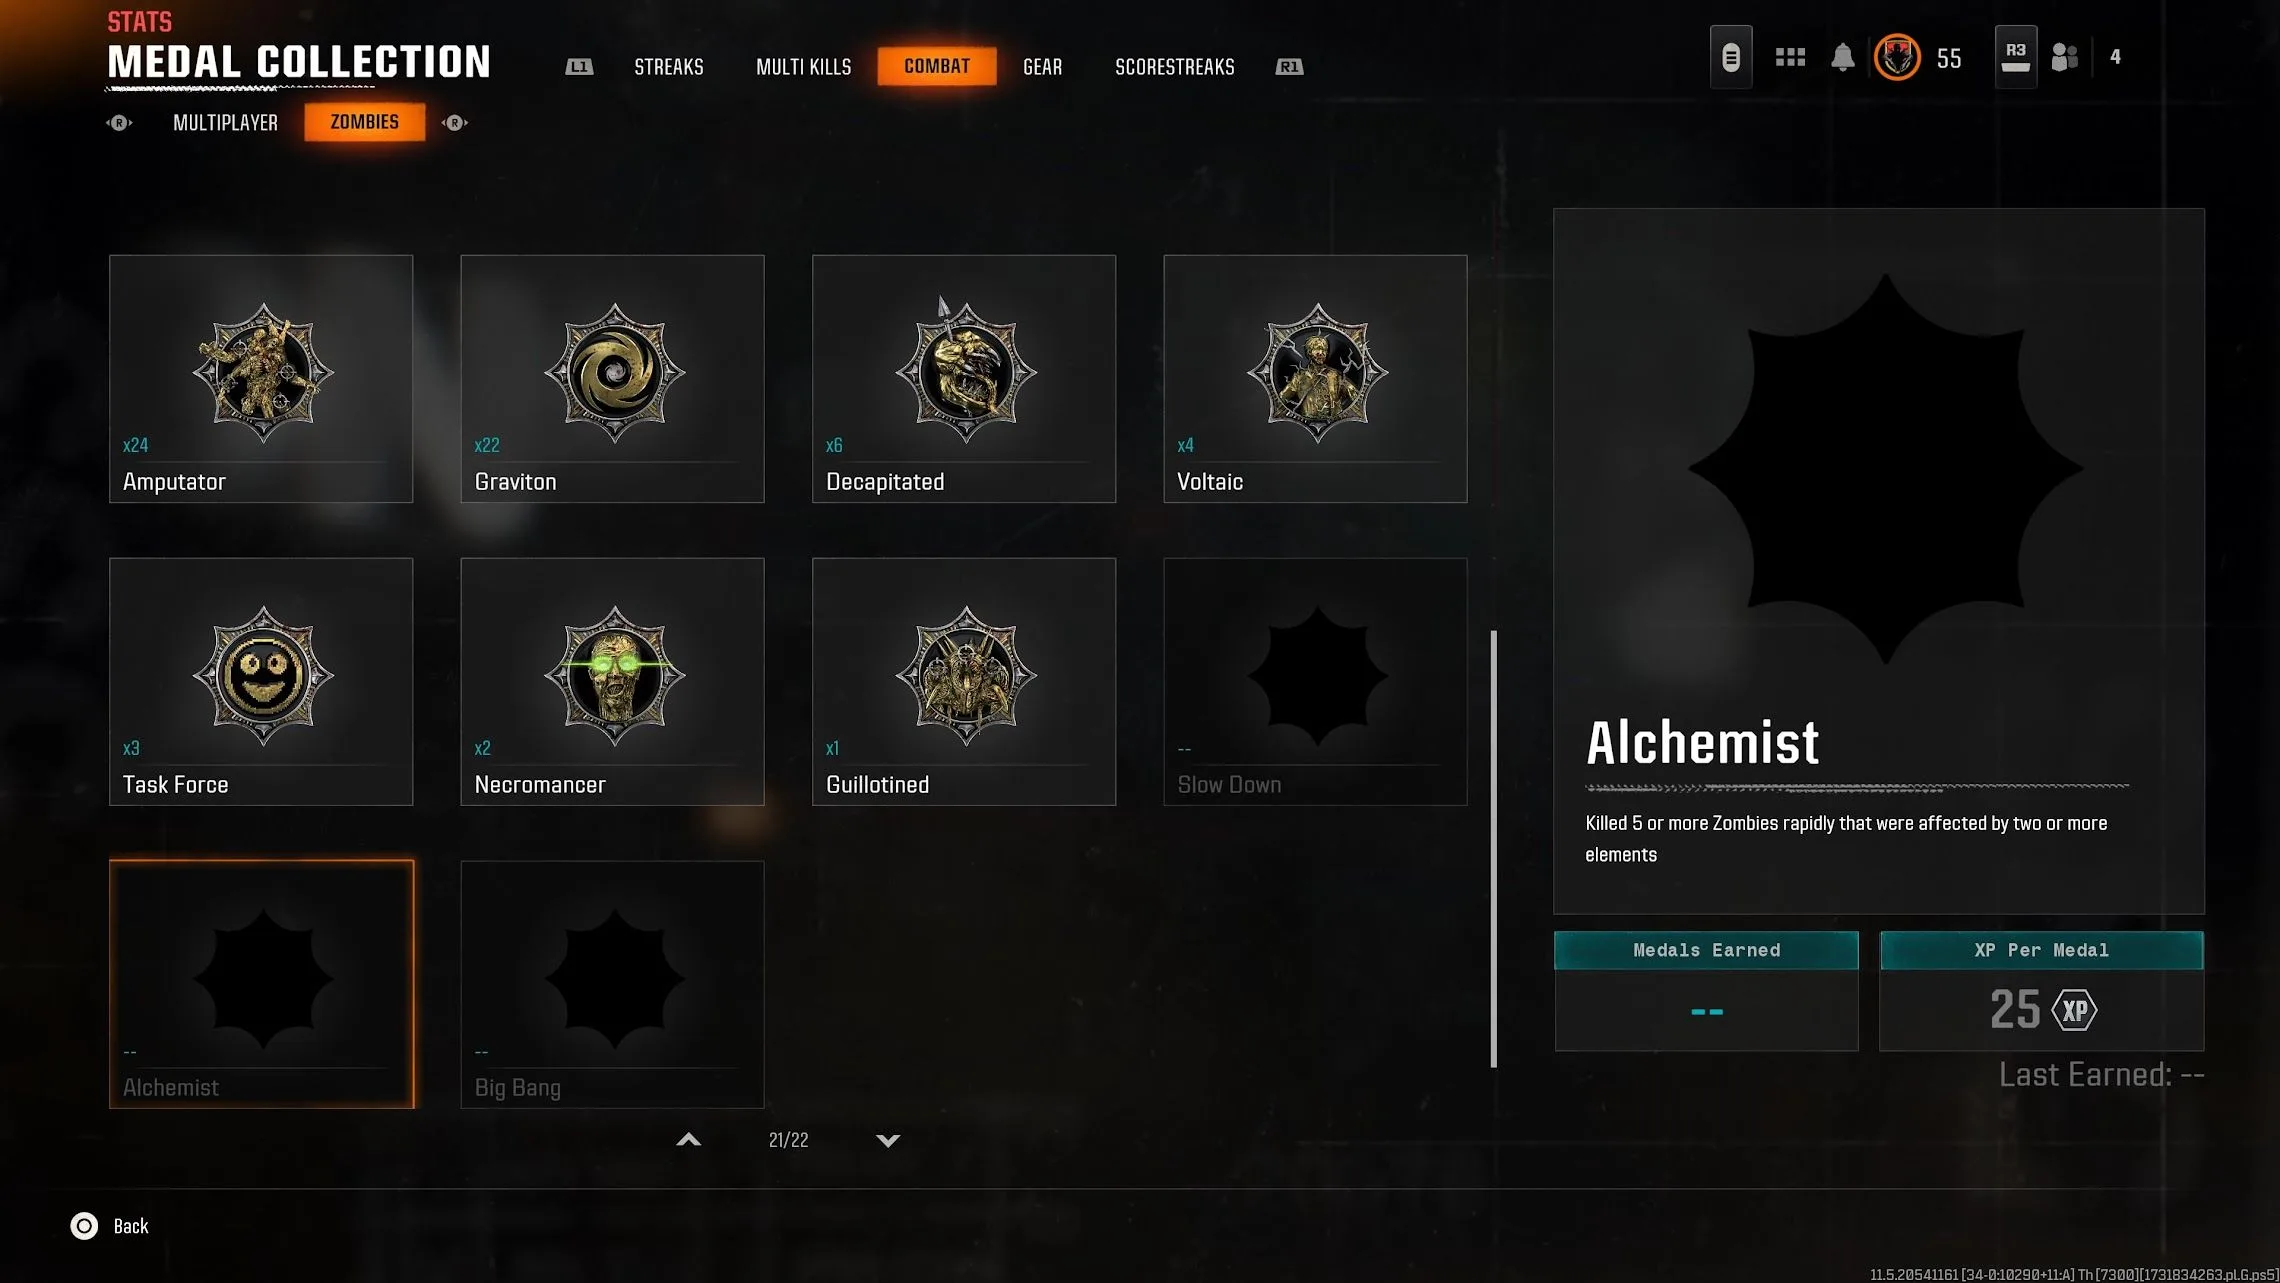
    If you’re diving into the Zombies mode in Call of Duty: Black Ops 6, you’ll notice that completing certain actions earns you medals. For example, you can earn medals for defeating a set number of enemies without taking damage or taking down multiple foes in a single attack. These medals provide more than just bragging rights; they grant extra XP that helps you level up your weapons.

    There’s a range of medals to earn, and while some are straightforward, others are tied to specific challenges. Among these is the Alchemist Medal, which might seem tough at first glance, but it’s more achievable with the right strategy.

    The Alchemist Medal Bug

    It’s worth noting that many players have reported issues with the Alchemist Medal seemingly being bugged. If you’re having trouble getting it to register, rest assured that it is, in fact, still experiencing issues, and there’s little that can be done until there’s an official fix.

    How to Earn Alchemist Medals

    To qualify for the Alchemist Medal, you must quickly eliminate five enemies who are affected by two or more types of elemental damage. This can be effectively accomplished by utilizing your tactical and lethal equipment as well as Ammo mods.

    The good news is that you’re not limited to just one method; any mix of more than two types of elemental damage will do.

    Items That Inflict Elemental Damage

    Here’s a list of items that can deal elemental damage:

    • Shock Charge
    • Molotov
    • Dead Wire Ammo Mod
    • Cryo Freeze Ammo Mod
    • Elemental Pop Perk-a-Cola

    You can create multiple Shock Charges and Molotovs using a crafting table and some Salvage. For Ammo mods, you can equip them via an Arsenal machine.

    For example, you could throw a Molotov along with a Shock Charge, then eliminate the zombies affected by both. Alternatively, deploying a Cryo Freeze Ammo Mod after tossing a Molotov can work just as well. Essentially, any pairing of two elemental damage types should suffice.

    To succeed, just lead a group of zombies your way, set up the elemental damage combinations, and take them down quickly with your weapon or an explosive. Happy gaming!

  • Top Krig C Build for Dominating in Black Ops 6

    Call of Duty: Black Ops 6 has introduced two exciting new weapons in its first season. One of these is the Krig C, an assault rifle that packs a punch and features minimal recoil on its initial shots. If you can aim close to an opponent’s head, you’ll be able to take them down quicker than most rifles in the game.

    Like many weapons in Black Ops 6, you can enhance the performance of the Krig C with a few strategic attachments. This guide outlines a versatile build for the Krig C, which is great for both core multiplayer and Zombies modes. If you add an extended magazine, this setup will also serve you well in Warzone.

    Stealth Krig C Build

    Krig C Build
    Attachment Pros And Cons Advanced Stats
    Suppressor (Muzzle)
    CHF Barrel (Barrel)
    • +18% Headshot Damage
    • +20% Recoil
    Ranger Foregrip (Underbarrel)
    • +Horizontal Recoil Control
    • +Sprinting Movement Speed
    • -15% Horizontal Recoil Control
    • +6% Sprint Speed
    Quickdraw Grip (Rear Grip)
    Recoil Springs (Fire Mod)
    • -10% Recoil Kick
    • -10% Vertical Recoil
    • -15% Horizontal Recoil

    The Krig C is a formidable weapon, comparable to the AK-74 but with significantly reduced recoil at the start. This rifle excels when you consistently aim for headshots. With its already high accuracy, using a CHF Barrel can help decrease your optimal time-to-kill (TTK). Landing two headshots will secure a three-hit kill in core multiplayer. This makes it one of the strongest options if you can hit your mark.

    You don’t need many attachments to make this weapon shine. The Recoil Springs tackle vertical recoil, while the Ranger Foregrip is sufficient for horizontal control. Once recoil is minimalized, add a Quickdraw Grip for improved aim down sights (ADS) speed and a Suppressor to remain undetected on enemy radars. If you lean towards long-range engagement, consider swapping this for a Compensator.

    Loadout Recommendations

    Perks
    Specialty Recon
    Column One Scavenger, Dexterity
    Column Two Fast Hands
    Column Three Double Time
    Equipment
    Wildcard Perk Greed
    Lethal Your Choice
    Tactical Stim
    Field Upgrade War Cry

    For optimal performance, pair suppressed weapons with the Recon specialty. Using Ghost will keep you off enemy radars while you’re on the move. You can also take advantage of Perk Greed to equip Ninja, which silences your footsteps. Utilize Vigilance to avoid detection from CUAVs, and Fast Hands for quick weapon swaps.

    When it comes to gear, Stims are useful for healing after engagements, while War Cry grants you the Enforcer specialty momentarily. Feel free to choose your preferred tactical equipment.

  • Understanding the Battle Pass Mechanics in Black Ops 6

    Understanding the Battle Pass Mechanics in Black Ops 6

    Call of Duty: Black Ops 6 has returned to its classic elements, reviving features such as prestige progression, simplified weapon balancing, and more conventional map layouts. This installment also introduces a revamped version of the Battle Pass that’s much clearer for players to navigate.

    The battle sector system from MW2 and MW3 has been replaced with a traditional Battle Pass format that offers numerous cosmetic rewards and experience point boosters for active players throughout the season. In this guide, we’ll break down how the Battle Pass functions in BO6, how to earn Battle Pass Tokens, and give a brief overview of the Blackcell feature this year.

    Understanding the Battle Pass in Black Ops 6

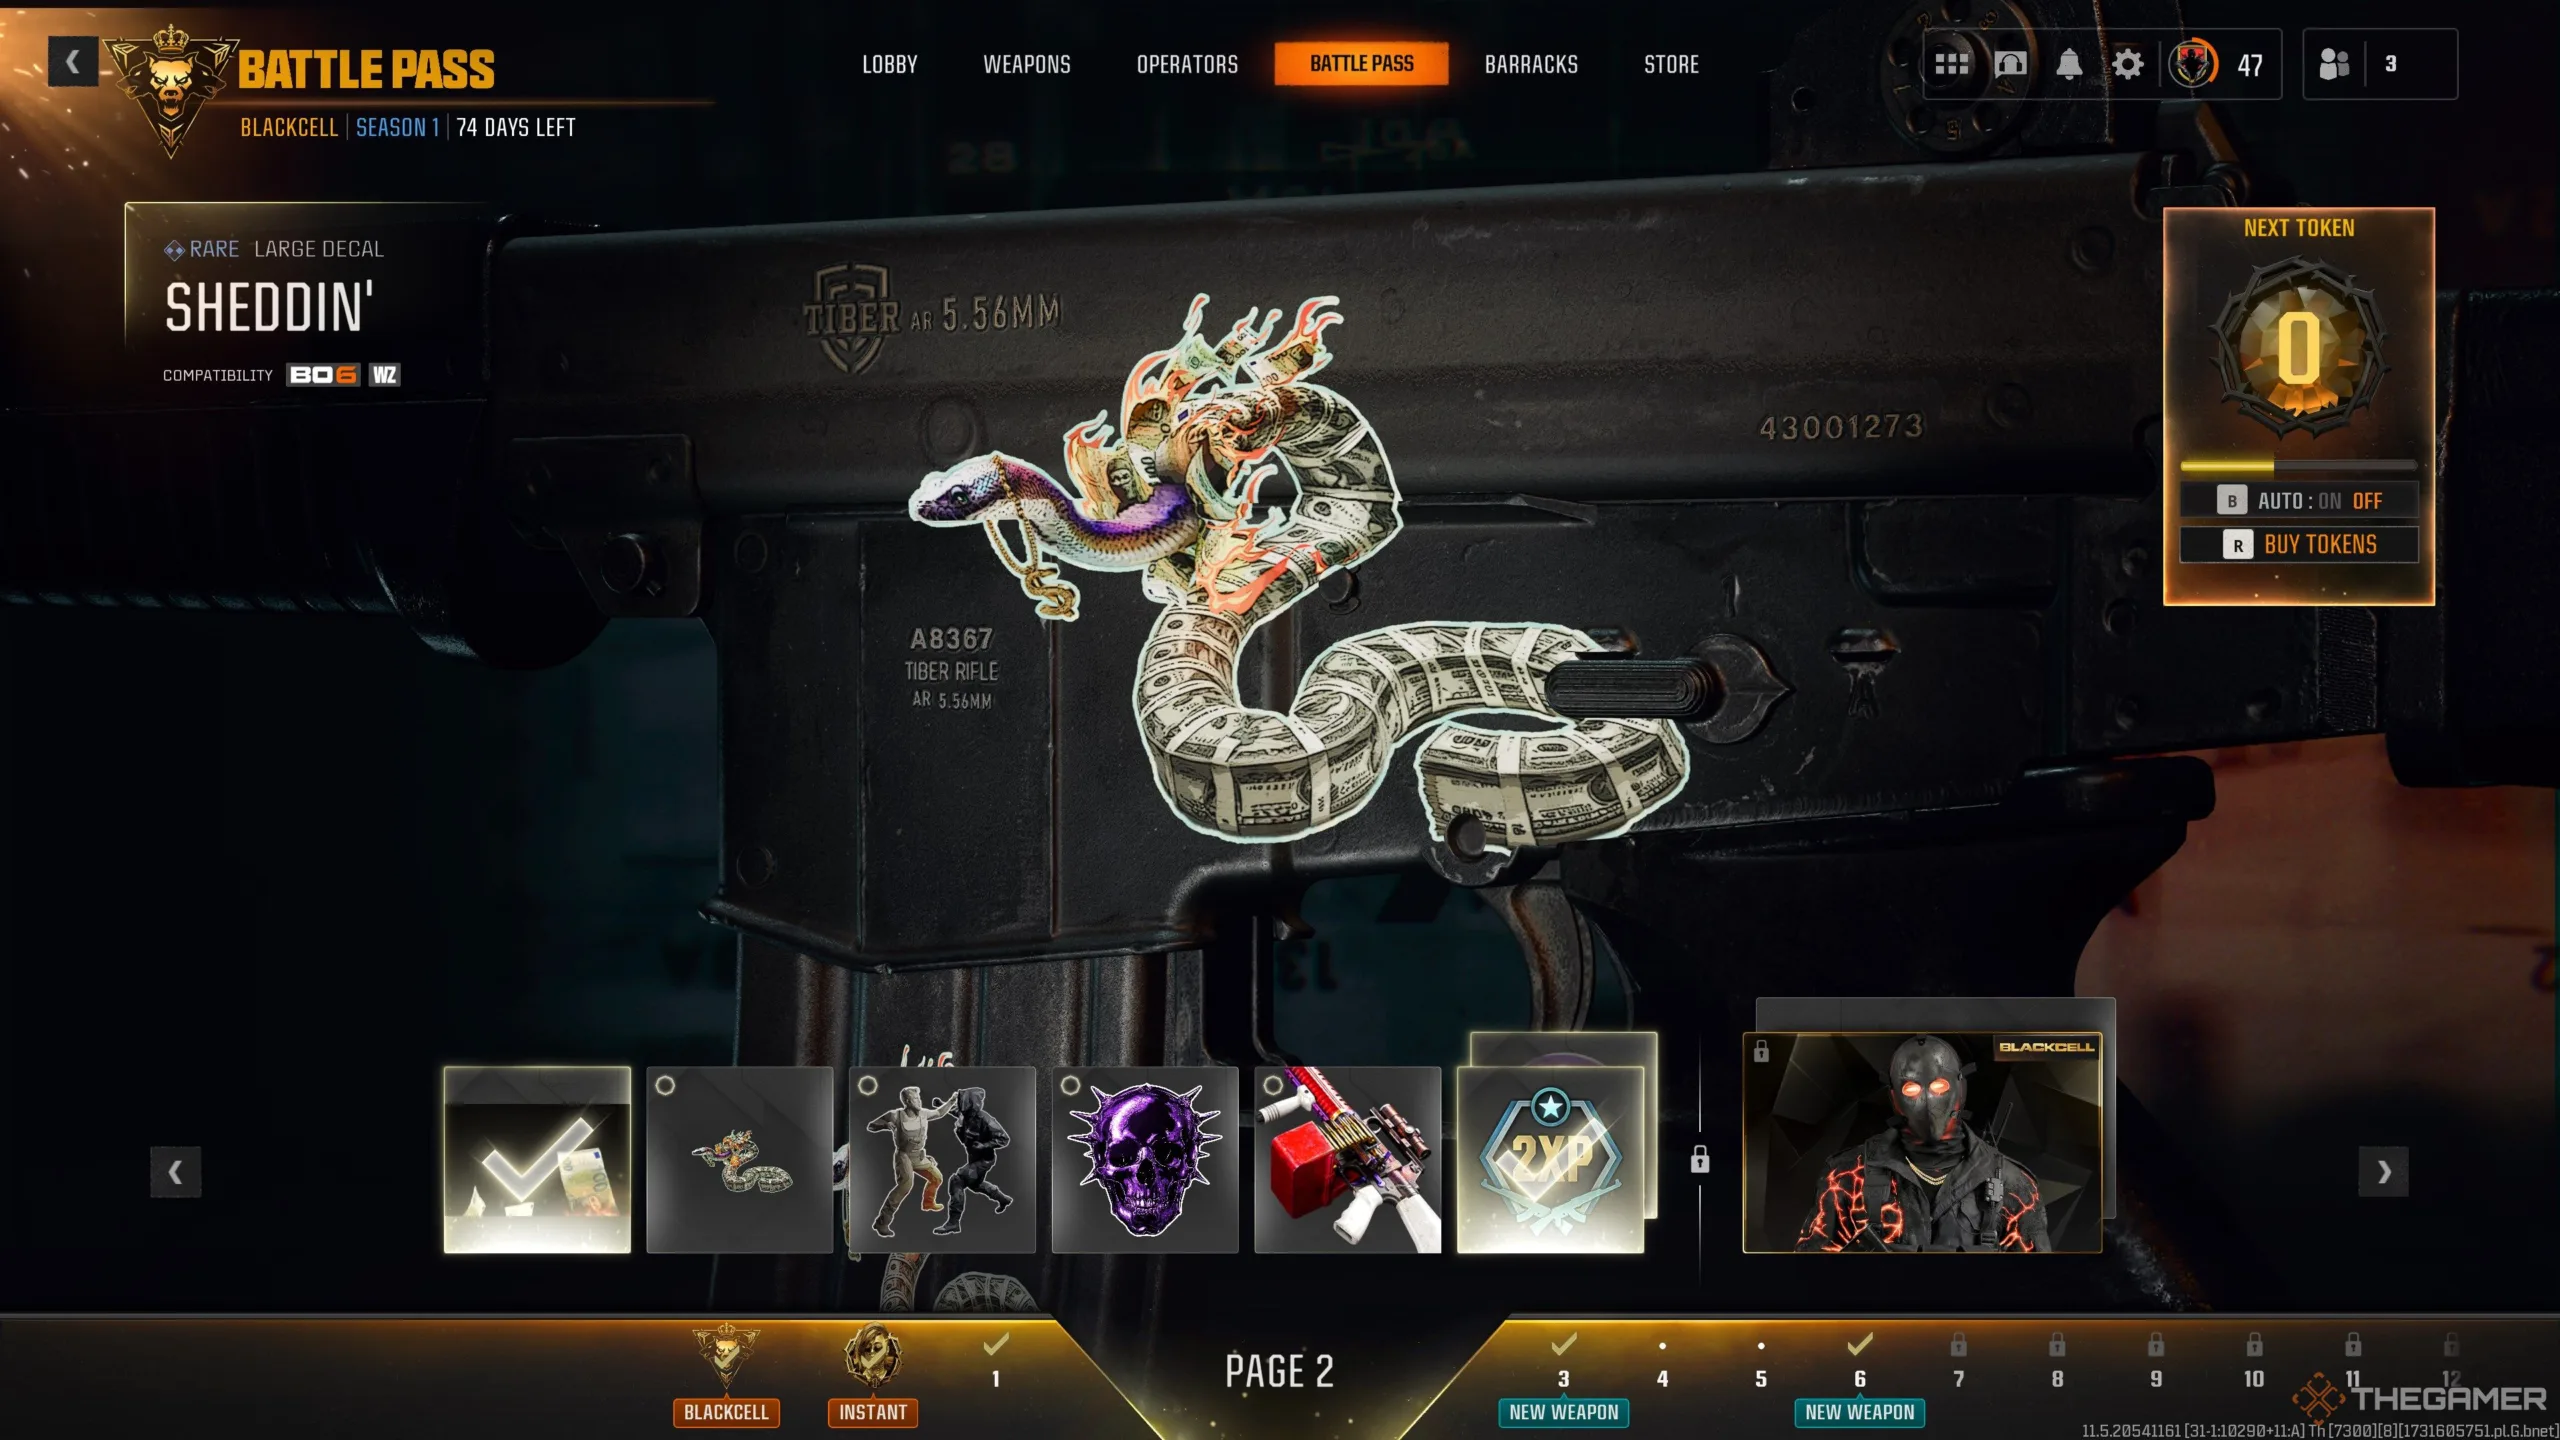
    The Battle Pass in Black Ops 6 closely resembles those from MW2019 and Cold War, rather than the earlier titles. It utilizes a linear progression model consisting of 14 pages that you unlock by playing Multiplayer, Zombies, and Warzone. The complicated battle grid system from MW2 and MW3 has been phased out.

    If you’ve participated in any live service game with a Battle Pass, you’ll find this system familiar. As you compete in Black Ops 6 or Warzone, you’ll work towards earning a Battle Pass Token, which you can use to unlock items on each Battle Pass page. By unlocking enough items on a given page, you can access the next one in line.

    Battle Pass Pages

    Rewards from the Battle Pass are divided into pages. When you first access the Battle Pass—found in the lobby menu for Multiplayer, Zombies, and Warzone—you’ll see 14 sets of unlockable rewards. Initially, you can only start with the first page, but as you redeem rewards, you’ll unlock further pages.

    Each page offers 7-9 rewards that you can redeem with Battle Pass Tokens earned from playing BO6. You can choose any reward from accessible pages, except for the item on the far right of the page. This exclusive item can only be claimed after you unlock all the other rewards on the same page. For instance, if you want to claim the XM4 blueprint on Page 1, you must first unlock all six items on that page. Additionally, that locked reward also requires a Battle Pass Token to claim, meaning each page needs seven Battle Pass Tokens to be fully completed.

    Unlocking Rewards

    When you first enter the Battle Pass, it will automatically set to redeem your tokens. We suggest turning off this automatic token spending. You can change this setting in the Battle Pass menu, allowing you to use tokens on the rewards you genuinely want.

    To claim your rewards, select any reward on a page that you’ve unlocked. Doing so will make that item available for use across all game modes. If you unlock a weapon blueprint, that weapon becomes permanently accessible, even after you prestige. We highly recommend unlocking weapon blueprints first to expand your arsenal while you level up, and getting experience point boosters is also beneficial.

    Earning Battle Pass Tokens

    Battle Pass Tokens are earned passively while playing Multiplayer, Zombies, and Warzone. Your progress toward tokens is solely based on the time you spend playing, not your match performance or skill. Progress is gained at a consistent rate across all game modes. You can speed up your Battle Pass progress by using a Double Battle Pass XP Token before a match. Be mindful that Double XP Tokens expire in real-time, so ensure you have enough playtime to maximize their use.

    Aside from XP tokens, the best way to increase your Battle Pass progression is to minimize downtime between games. Generally, Zombies and Warzone tend to award Battle Pass Tokens slightly faster since you stay in-game longer rather than waiting for matchmaking.

    Tier Skips

    Occasionally, promotional offers and in-game events provide Tier Skips that work similarly to Battle Pass Tokens. Currently, the only source for Tier Skips is the Blackcell Battle Pass, which grants you 20 Battle Pass Tokens for that season.

    Instant Page Unlock

    For Blackcell owners, there’s an instant page unlock feature. This allows you to bypass the prerequisites for a page and start collecting rewards from it immediately. You can use this feature once per season, so plan carefully.

    For example, if you wanted to unlock a weapon blueprint on Page 14 but just began the season, you could apply your page unlock to start gaining those rewards right away. However, this doesn’t unlock all the rewards on that page; it only grants you the chance to claim those with Battle Pass Tokens.

    What is Blackcell?

    Blackcell serves as a premium version of the Battle Pass, offering exclusive skin variants and 20 Battle Pass Tokens. The skins in the Blackcell package often feature a black and gold theme with dynamic elements, unique to that season’s Battle Pass and not available in the cash shop afterward.

    If you aren’t particularly interested in the skins, your main reason for getting Blackcell would be the 20 Battle Pass Tokens it provides. Normally, acquiring a Battle Pass with those tokens would cost 2,400 CoD Points, or around $20. However, Blackcell costs $30, so it’s up to you to weigh the value of those additional skins against the price.

  • Black Ops 6 and Warzone: The Next Chapter Unveiled

    Black Ops 6 and Warzone: The Next Chapter Unveiled

    With the introduction of Call of Duty: Black Ops 6, players will find new weapons and gameplay mechanics from Black Ops integrated into Warzone. Season One comes with two fresh weapons for players to level up, though they won’t be available to everyone immediately.

    The new additions include the Krig-C and the Saug. While players are still figuring out where these weapons fit into the overall strategy of Warzone and Black Ops 6, it’s wise to unlock them quickly so you can start customizing with attachments. Fortunately, acquiring these weapons simply requires some dedication.

    How to Unlock the Krig-C

    Assault Rifle


    To unlock the Krig-C, keep playing Warzone and Black Ops 6 while earning tokens to advance your battle pass tiers.

    You don’t need to purchase the battle pass, as the Krig-C is available at a free tier.

    You can unlock the Krig-C at Battle Pass Page Six, with an extra blueprint accessible on Page 14.

    Weapon XP Levels

    Number of Magazines

    Magazine Size

    Mastery Badges

    Attachment Options

    43

    Three

    30

    Yes

    Optic, Muzzle, Barrel, Underbarrel, Magazine, Rear Grip, Stock, Laser, Fire Mods

    The Krig-C delivers high damage as an assault rifle but isn’t the most precise choice. It’s effective at moderate ranges, though its unpredictable recoil can make long-range engagements challenging. In multiplayer, it can take down enemies with just four shots at medium range.

    How to Unlock the Saug

    SMG


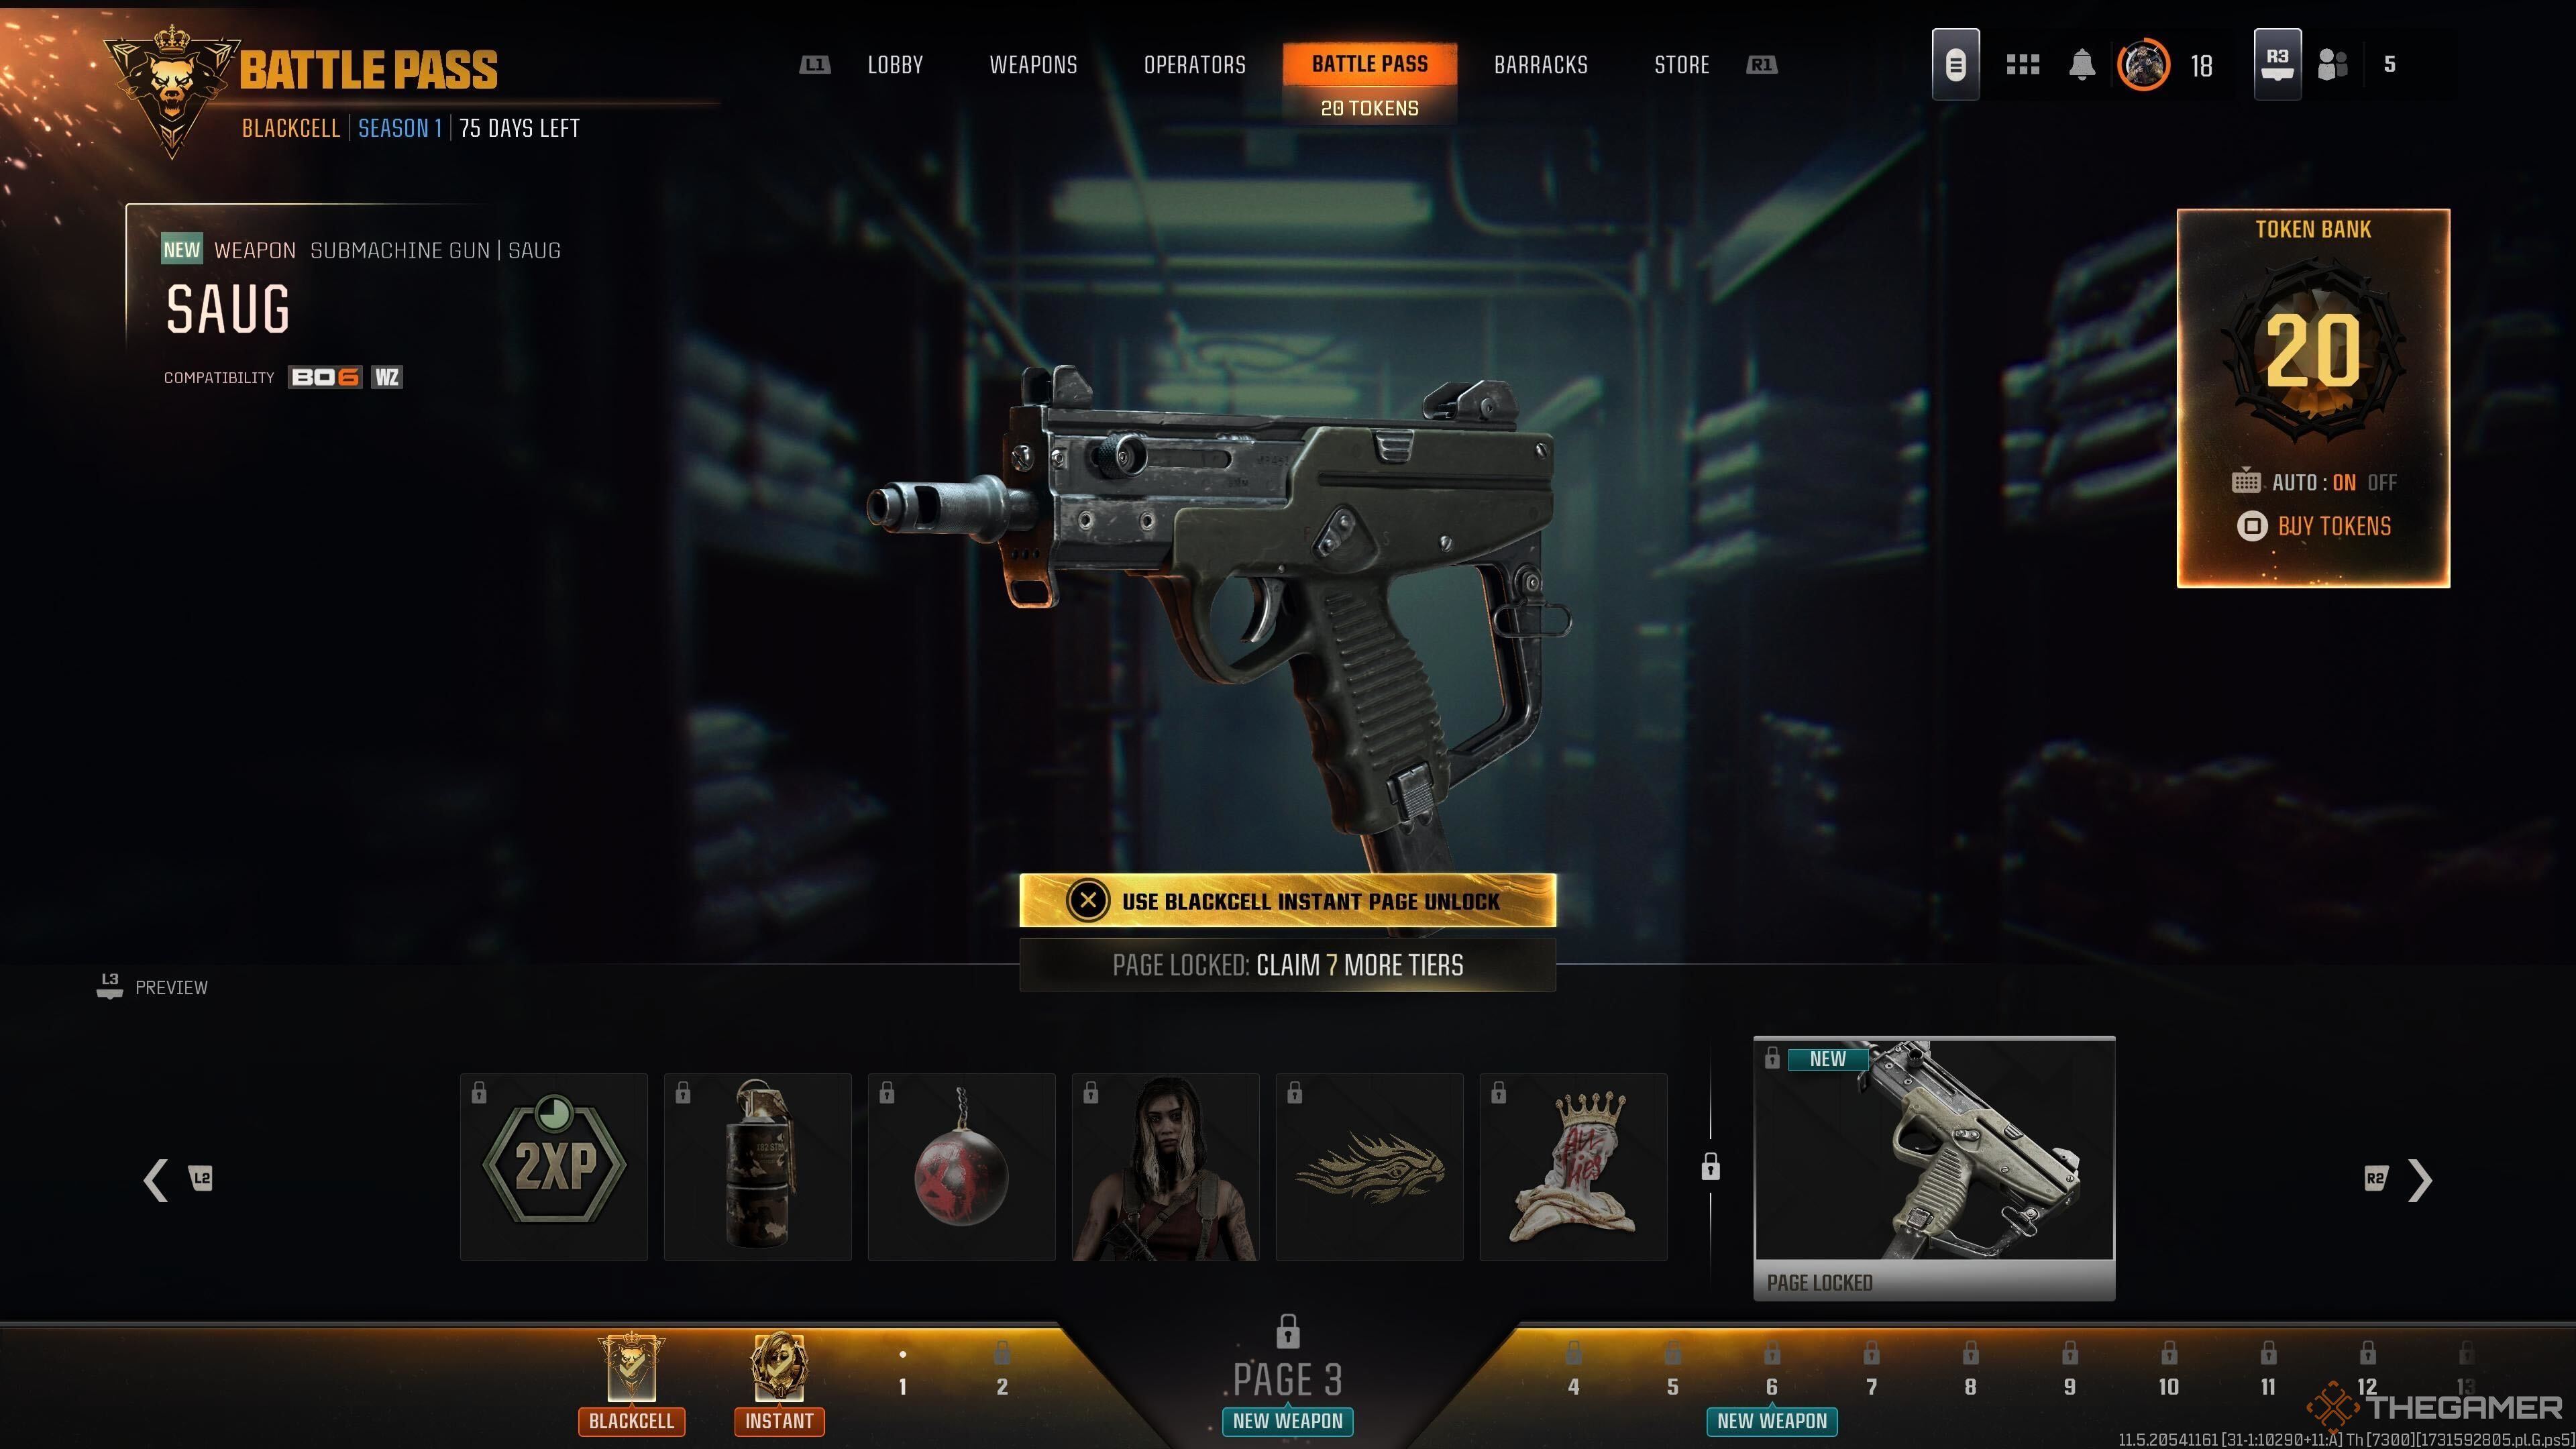
    The Saug from Black Ops 6 Battle Pass.

    The Saug SMG can also be unlocked for free through the Season One battle pass. You can get it as a Page Three High Value Target Tier Reward, with a blueprint also available on Page 11. Level up by playing and earn the tier using a token from the free pass.

    Weapon XP Levels

    Number of Magazines

    Magazine Size

    Mastery Badges

    Attachment Options

    39

    Four

    36

    Yes

    Optic, Muzzle, Barrel, Underbarrel, Magazine, Rear Grip, Stock, Laser, Fire Mods

    The Saug is a lightweight submachine gun that boasts excellent mobility, although it does come with high recoil. This firearm is perfect for close-quarters combat in Black Ops 6 (particularly in tight areas like the central parts of Babylon), but it doesn’t fare as well on the expansive maps of Warzone. You can easily flank enemies and utilize speed with Omnimovement to dodge enemy fire. There’s potential to create a hip-fire or Akimbo build to take advantage of its rapid rate of fire.

  • Crafting the Beamsmasher in Black Ops 6: A Step-by-Step Guide

    Crafting the Beamsmasher in Black Ops 6: A Step-by-Step Guide

    Wonder weapons are some of the most powerful firearms in Call of Duty: Black Ops 6 Zombies mode, but getting your hands on them can be tricky. You might stumble upon one in the mystery box, but if you’re looking for a more reliable way to obtain them, crafting is a solid option. While it can be a bit of work, it’s definitely worth the effort.

    In the Terminus map, you can create a special wonder weapon known as the Beamsmasher, which is not only formidable but also a key component in completing the main quest. If you want to know how to craft it, follow this step-by-step guide.

    How to Craft the Beamsmasher

    In the Zombies mode on the Terminus map, you can gather the necessary parts to craft the Beamsmasher. Begin by starting your game on the Terminus map and activating the three AMP machines to progress towards the Pack-a-Punch.

    First, make sure to equip the Dead Wire Ammo Mod on your weapon. You can do this at the nearby Arsenal machine, but ensure that you have at least 500 Salvage to apply the modification.

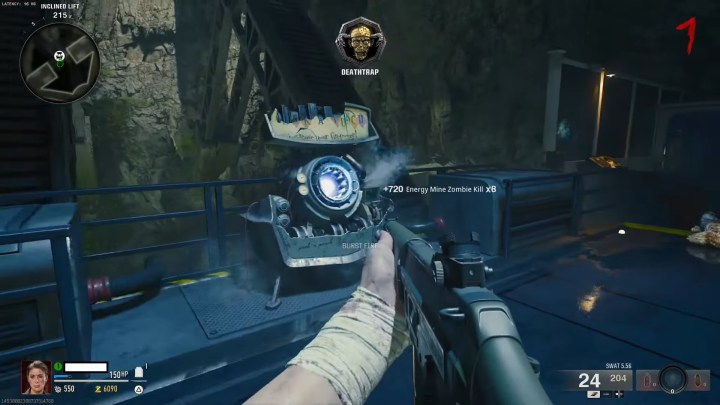
    After restoring power, head to the inclined lift and activate it. As you ascend, look back at the wall to find an electrical box in a window. Shoot it with the weapon that has Dead Wire equipped.

    This will transfer the electricity to the next box, which is located just to your right. Shoot that box, then immediately look to your right again to find another box that you need to hit.

    If you miss any boxes, you can call the inclined lift back to try again.

    You’ll need to shoot two more boxes: one near the second AMP generator and the other just outside to the right.

    If you successfully shoot all five boxes, a room with a green door will open near the last electrical box, revealing a hidden area. Inside, you’ll find a zombie on the floor. Eliminate it to collect the EMF FOB it drops, initiating the crafting process for the Beamsmasher.

    Next, you must interact with the device in this room. However, you can only do so after retrieving the Multiphasic Resonator from the briefcase held by a zombie, which is located on a table beside the Elemental Pop machine in the sea tower.

    Once you have the resonator, return to the secret room and insert it into the device. Your next task is to find three laptops scattered across the map.

    The first laptop is at the docks below the sea tower, the second is outside the room where Quick Revive is located, and the third can be found outside the Stamin-Up room.

    After interacting with all three laptops, go back to the machine and interact with it again to see a prompt for a code. While it involves mathematics, you can skip the math by visiting Peck in the spawn room and paying 5,000 Essence to easily obtain the code. Enter the code into the machine, and it will start its process.

    Keep in mind that the code changes every match.

    Afterward, complete one or two rounds until you’re notified that the machine has finished its task. Return to the machine and check its screen, which will point to an island, typically located to the east; that will be your destination. Don’t forget to pick up the Multiphasic Resonator.

    As you approach the island using a raft, you’ll see a blue energy ball. Interact with it using the Multiphasic Resonator to activate it.

    This is where zombies will spawn. Your goal here is to wait for the energy ball to target a zombie, which will turn blue and begin smoking; that’s the one you need to kill.

    Once defeated, it will drop a small orb that you must collect and return to the blue energy ball.

    You might need to repeat this process two or three times, as it can be random. Once completed, the energy source will move to another island, and you will need to follow it.

    Essentially, you will repeat this process on two more islands: the southern island and the northwestern island. The orb will change from green to purple, but the steps will remain the same.

    Completing this step will yield the final part of the Beamsmasher, which is the AMP ammunition part. With all the necessary components, return to the secret room and interact with the workbench to craft the Beamsmasher, and you’ll be ready to unleash its power.

  • Unlocking the Liberty Falls Easter Egg in Black Ops 6 Zombies

    Unlocking the Liberty Falls Easter Egg in Black Ops 6 Zombies

    Call of Duty: Black Ops 6 Zombies: Liberty Falls Easter Egg Guide

    The Zombies mode in Call of Duty: Black Ops 6 is making waves with its intricate Easter egg hunts. Players can tackle two main maps at launch: Liberty Falls and Terminus. Each map features extensive main quest Easter eggs that yield exclusive cosmetics and powerful upgrades.

    While Liberty Falls’ Easter egg is considered easier, it remains quite hidden and perplexing, characteristic of the Zombies mode. This guide will take you through the steps needed to solve this puzzle solo or with friends, as well as the rewards you can gain.

    Requirements for the Easter Egg

    Before diving into the Liberty Falls Easter egg, here are a few essentials to have in place:

    1. Unlock Pack-A-Punch: You need to access the Aether Device, which is crucial for this quest, and having a Pack-A-Punched weapon will be helpful later on.

    2. At least one player should have the Jet Gun: You can create the Jet Gun or find one in the Mystery Box.

      • A crafting guide for the Jet Gun will be available soon. Stay tuned!
    3. Acquire at least T2 Armor: While it’s not strictly necessary, you’ll face numerous enemies in certain segments, and armor will be crucial for survival.

    It’s important to note that you can complete this entire Easter egg solo. Utilize the alternative fire on the Jet Gun and carry a strong explosive weapon to get through most challenges.

    Crafting the LTG

    Your initial task is to create the LTG device. You need to gather three components using the primary fire of the Jet Gun. Find a good vantage point to locate the items, then hold the primary fire of your Jet Gun until they are pulled in. Repeat this for each of the three components.

    Note: Picking up any of the parts will apply to all squad members.

    Part #1 Location

    The first part can be found in quadrant B6 within the church. Activate the Dark Aether device to clear nearby zombies, which will spawn some debris. Look up from the church entrance to spot a floating top hat and pull it in with your Jet Gun.

    Part #2 Location

    Make your way to quadrant F4/5, close to the Speed Cola machine where a white van is parked. Climb the adjacent rooftops and jump onto the vehicle. Face the buildings across from the bank, aiming for the open second-story window at Buzz’s Cuts. This part is a distance away, so hold the trigger until you retrieve it.

    Part #3 Location

    The final LTG component is in quadrant G3, inside a comic book store at the northern part of town. Check the gap in the ceiling directly above the middle counter to locate this piece.

    Assembling the LTG

    With all three parts in hand, head to the crafting bench located at the top of the bank in quadrant F4. Use the bench to put together the components and obtain the LTG for the next phase.

    Charging the First Canister

    Next, you’ll need to charge two canisters for the Dark Aether device. Return to the church to grab a canister from the device. Hold the interact button until you see the prompt to drop the Aether canister. Once you have it, take it to the Dark Aether trap located outside of spawn in quadrant H5.

    After you place the canister next to the metal plate, you can then use the LTG. Move to the Aether storm down the street and interact at the storm’s center. This triggers a timed defense segment where you need to protect the LTG for 60 seconds from hordes of zombies. Use your Jet Gun or explosives to handle any approaching enemies and ensure that the device remains unharmed.

    If successful, an Abomination or Mauler will appear. Escort this miniboss towards the canister, activating the nearby Dark Aether trap. Defeat the boss while it is within the trap’s area to charge the canister. Doing this will also reward you with a Max Ammo drop.

    Escorting the Canister Back

    After charging the canister, you’ll have 90 seconds to escort it back to the Aether device in the church. The timer only starts once you grab the canister, so ensure your team is ready. It’s advisable to take the route through the bowling alley and up the stairs to reach the church quickly. When you arrive, interact with the Dark Aether device to deposit the canister.

    Tip: The player carrying the canister should equip a knife to enhance their movement speed, especially useful if they have the Stamin-Up perk.

    Calibrating the E-Field Machines

    After depositing the first canister, a tactical item called the Strauss Counter will appear next to the Aether device. Have one team member pick it up.

    Just like the previous step, you’ll need to calibrate three machines scattered across the map. Go to each machine and hold the tactical button to check its color. You must change it to the opposite color indicated on your Strauss Counter:

    • Red counter ➕ green machine
    • Green counter ➕ red machine
    • Yellow counter ➕ yellow machine

    Make sure you repeat this for all three machines.

    E-Field Machine Locations

    • E-Field Machine #1: Located in quadrant D4 at the toolshed where the Jet Gun’s handbrake is found. It’s positioned next to the stairs.

    • E-Field Machine #2: In quadrant G5, reach the roof of the bank using a grappling line. Look for a spot to drop down; this lower rooftop contains the second machine.

    • E-Field Machine #3: Found in quadrant E6, on a patch of grass across from the PhD Flopper machine.

    Collecting the LTG and Second Canister

    If all calibration is done correctly, the machines will start emitting Dark Aether energy that converges near spawn. Head to the gas station at the eastern edge of the map to retrieve the second canister from the machine next to evac. Meanwhile, ensure that one squad member pickup the LTG device you previously deployed in quadrant H4.

    Charging the Second Canister

    This process mirrors the first canister charging. Place the canister within the Dark Aether trap’s area to make capturing the boss’s soul easier. Once you are set, move to the second Aether storm in quadrant C5, deploy the LTG, and fend off enemies for another minute.

    Afterward, usher the Abomination or Mauler to the trap as before, and eliminate it inside the AoE to charge the second canister. Retrieve it again, and return to the church to deposit

    the canister within 90 seconds.

    Activating the Aether Device

    With all canister slots now filled, it’s time to activate the device. Engage with the Aether device in the church to commence the final challenge. You will face three waves of zombies, each more challenging than the last, with a variety of difficult types including Maulers and Abominations.

    Preparation is crucial for this part. Ensure your Jet Gun is upgraded or keep a powerful explosive weapon on hand, like the HE-1 or Pack-A-Punched GSP45. Focus your attacks on Maulers first, followed by Abominations, and then other zombies. Continuously repositioning will allow you to manage the chaotic spawns effectively.

    By clearing all three waves, you will successfully complete the Easter egg.

    Easter Egg Rewards

    Finishing the Liberty Falls Easter egg unlocks the Ray Gun PJ-SRU skin and a Liberty Falls-themed calling card, as well as a bit of XP. These rewards apply to your entire account and can be displayed in multiplayer and Zombies modes.

    If you opt not to extract upon completing the Easter egg, you will also gain all perks on the map and a stash of Legendary-tier weapons. However, none of these weapons will be Pack-A-Punched and will only remain with you until your current game ends.
  • Black Ops 6 Can’t Compete With These 2 RPGs On Steam

    Black Ops 6 Can’t Compete With These 2 RPGs On Steam

    Lucanis in Dragon Age: The Veilguard in center frame.
    Electronic Arts

    As Call of Duty: Black Ops 6 gears up to become one of the franchise’s most significant launches, two role-playing games are fiercely competing for attention.

    Dragon Age: The Veilguard, BioWare’s latest RPG and the first installment in the Dragon Age series in over ten years, has surpassed Black Ops 6 on Steam just one day after its launch. According to the Steam top sellers list, The Veilguard is currently leading in sales, closely followed by Black Ops 6’s single-player experience, along with the MMORPG Throne and Liberty and the recently launched open beta of Monster Hunter Wilds.

    SteamDB reports that The Veilguard has remained the top-selling title globally since its October 31 release. The game peaked at an impressive 170,623 players and currently boasts around 59,000 concurrent users, making it the highest number of players on Steam at this moment. This is a significant milestone for a Dragon Age title; previous entries, especially Inquisition, peaked at around 73,000 players in 2020, and that was before many new EA games were available on Steam.

    Dragon Age: The Veilguard | Release Date Trailer

    However, The Veilguard finds itself outpaced by another recent RPG: the open beta for Monster Hunter Wilds. This game is currently the most wish-listed on Steam and has reached nearly 363,000 concurrent players, peaking at a stunning 464,000. Clearly, excitement is building for its full release scheduled for February 28, 2025. Plus, the open beta is accessible to players willing to try their luck.

    Meanwhile, multiplayer for Call of Duty continues to thrive on Steam, achieving a peak of 220,759 players and maintaining around 192,000 concurrent users.

    On consoles, Black Ops is reportedly breaking records. Microsoft CEO Satya Nadella announced that it is the “largest Call of Duty release ever,” setting new highs for day-one players and Game Pass subscriptions. However, neither Activision nor Microsoft has disclosed specific figures. Industry analysts suggest the game is also drawing a significant player base on PlayStation 5.

    Regardless of personal preferences, it’s an exciting time for PC gamers as they have a wealth of gaming options at their fingertips as November approaches.

  • Easter Egg Whack-A-Mole in Black Ops 6 Uncovered!

    Easter Egg Whack-A-Mole in Black Ops 6 Uncovered!

    With the launch of Call of Duty: Black Ops 6, fans are excited to see the return of the popular round-based Zombies mode, a fan-favorite from earlier COD games. If you’ve been a player in the past, you know that solving Easter Eggs is a vital part of the Zombies experience.

    Everyone loves tackling these Easter Eggs for the satisfaction they bring, but many can be tough and intricate, often resulting in valuable rewards. Yet, not all Easter Eggs have to be complicated; sometimes, a simple Whack-A-Mole minigame is just as fun and offers a nice break from more intense challenges.

    How to Trigger the Whack-A-Mole Easter Egg

    This Easter Egg is likely the easiest one to complete on the Terminus map, as it only takes a Molotov and a bit of Whack-A-Mole technique.

    Be sure to add a Molotov to your starting loadout for convenience.

    If you can’t find one, you can craft it at any Crafting Table, but you’ll need some Salvage materials.

    Once you enter the Terminus map, unlock the doors and search for a boat, which can be found at the docks or in the lab beneath the island.

    After you’ve got the boat, head to the bigger southern island and search for a significant hole in the rock where zombies typically spawn.

    Above this hole, you’ll spot what appears to be a fishing net dangling. Toss your Molotov to ignite it. After you do this, you will see a bunch of crabs bouncing up and down nearby.

    Interact with the crabs to kick off the Whack-A-Mole Easter Egg.

    You’ll get a baseball bat and 30 seconds to hit the crabs that pop up from the sand, just like the classic Whack-A-Mole game.

    No need to worry about zombies during those 30 seconds; they will leave you alone.

    Your performance will determine the rewards you get. Since I wasn’t very experienced at Whack-A-Mole, I didn’t do so well and ended up with a bunch of grenades that knocked me down — so watch your step!

  • Understanding Augments in Zombies: Black Ops 6 Explained

    Understanding Augments in Zombies: Black Ops 6 Explained

    If you’ve spent time diving into COD Zombies, you’re well aware that as you progress to higher rounds, the action becomes more intense. Surviving requires all the advantages you can muster, from having your weapons upgraded at the Pack-a-Punch to stacking up on perks and utilizing the various wonder weapons at your disposal.

    In Call of Duty: Black Ops 6 Zombies, the familiar round-based gameplay has made a return, reviving the cherished mode that fans adore. Along with this classic gameplay, a new feature called Augments has been introduced to assist you in thriving through the tougher rounds.

    Understanding Augments

    Once you hit level 11, you’ll unlock the Augments menu within the Zombies mode.

    Augments in Black Ops 6 offer additional abilities that allow you to enhance your Perk-a-Colas, Ammo Mods, and Field Upgrades. However, before you can equip an Augment, you first need to explore and research it through the Augments menu’s "Research Augments" option.

    Initially, you may find that many Augments are locked. To unlock them, you will need to research and acquire them over time. To start this process, activate a research option like Stamin-Up, which is the first available. You’ll see a progress meter showcasing six augment options waiting to be unlocked, categorized as Major and Minor. Major Augments typically have more significant effects compared to Minor ones.

    To obtain these Augments, simply activate your desired research, such as the Stamin-Up Research, and participate in Zombies matches. The progress for unlocking the Augments is tied to experience points, which you gain through gameplay, including rounds completed, enemies defeated, and challenges fulfilled.

    The longer you play, the more Augments you will potentially unlock.

    After some matches, upon returning to the Research Augments menu, you may discover new options available to research in three categories: Perk-a-Colas, Ammo Mods, and Field Upgrades.

    With Augments now unlocked, it’s time to navigate to the "Equip Augments" menu. Here, you can equip one Major and one Minor Augment. Choose wisely to match your gameplay style. While all Augments have their benefits, it’s wise to focus on those that enhance the Perk-a-Colas, Ammo Mods, and Field Upgrades you favor the most, as they will significantly improve your gaming experience.

    Tip: You can earn extra XP when actively utilizing the Augment you’re currently researching. For example, if Stamin-Up research is active and you manage to acquire that perk, you’ll receive bonus XP.

  • Unlock Double XP Tokens in COD: Black Ops 6 Guide

    Unlock Double XP Tokens in COD: Black Ops 6 Guide

    Quick Links

    In the world of Call of Duty: Black Ops 6, players have varied approaches to climbing the ranks. Some enjoy a leisurely pace, while others are eager to level up quickly, diving into the returning Prestige system with enthusiasm.

    However, if you’re looking to advance faster than others, your options are somewhat restricted aside from simply dedicating more time to the game. Fortunately, there are several ways to earn Double XP Tokens, many of which can be obtained through promotional items that are available in various bundles.

    Promotions for Double XP Tokens

    Right now, there are two promotions for Black Ops 6 that offer Double XP Tokens: one from Monster Energy and another from Little Caesars.

    Both promotions will be valid until December 31st, 2024.

    Monster Energy Double XP Tokens

    Select Monster Energy drinks feature rewards that include a Double XP Token. Look for the code under the ring pull on the can. To redeem it, visit this link, create an account or log in, and submit the code in the My Codes section.

    If you don’t find a code under the ring pull, you can still participate. Simply go to this link, upload a copy of your receipt, and you should receive an email with a code in your My Codes section within 72 hours.

    Each code grants a 15-minute 2XP Token. The first six codes you redeem will also reward you with various items in the following order:

    • The Green Fury Weapon Blueprint
    • The Unleash The Truth Operator Skin
    • The Street Beast Weapon Vinyl
    • The Cold Trail Operator Skin
    • The Unleash It Weapon Vinyl
    • The Beast Inside Operator Skin

    Additionally, codes from Monster Energy drinks purchased at Walmart will provide extra rewards: one additional 15-minute 2XP token and a 15-minute Weapon 2XP token.

    Little Caesars Double XP Tokens

    Little Caesars is running its own Black Ops 6 promotion, which also offers Double XP Tokens. To qualify, you’ll need to spend a certain amount based on your location:

    • USA: $3 USD or more
    • Canada: $5 CAD or more
    • Mexico: 50 MXN or more

    After you receive a code from the Little Caesars promotion, visit this link to register and enter your code.

    Unlike the Monster Energy rewards, the Little Caesars promotion offers random rewards, but every reward includes some form of XP Token, such as:

    • Black Ops 6 Game Code + 30 Minutes of Dual 2XP Token
    • Battle Pass + 15 Minute 2XP Token
    • 500 CoD Points + 15 Minute 2XP Token
    • 1,100 CoD Points + 15 Minute 2XP Token
    • 2,400 CoD Points + 15 Minute 2XP Token
    • 5,000 CoD Points + 15 Minute 2XP Token
    • 9,500 CoD Points + 15 Minute 2XP Token
    • 13,000 CoD Points + 15 Minute 2XP Token
    • 21,000 CoD Points + 15 Minute 2XP Token
    • Little Caesars Operator Skin + 30 Minute 2XP Token
    • Little Caesars Emblem + 30 Minute 2XP Token
    • Little Caesars Charm + 30 Minute 2XP Token
    • Little Caesars Calling Card + 30 Minute 2XP Token
    • One Hour 2XP Token

    Additional Ways to Earn Double XP Tokens

    The classic prestige system returns in Black Ops 6, allowing players to earn Double XP Tokens through prestiging. Each time you prestige, you can unlock a variety of rewards. Among these is always a One-Hour Double XP Token, available at Prestige Level 20.

    Possibly Included In The Battle Pass

    While there’s no Battle Pass available during the preseason of Call of Duty: Black Ops 6, the first Battle Pass is set to launch with Season 1 on November 14th, 2024.

    Past Battle Passes typically featured various types of Double XP Tokens, and it’s likely this upcoming one will follow suit. These tokens are usually spread throughout the tiers of the Battle Pass, providing a steady influx of rewards during the season.

  • Unlocking the Little Caesars Operator Skin in CoD: Black Ops 6

    Unlocking the Little Caesars Operator Skin in CoD: Black Ops 6

    Like recent titles in the Call of Duty franchise, Call of Duty: Black Ops 6 features promotional content that can be purchased separately from the game itself. This time, Little Caesars is getting in on the action, offering various rewards, including special boosts and exclusive skins.

    Keep in mind, this promotional offer will conclude on December 31st, 2024. To snag any of the unique items or skins mentioned below, you’ll need to take part before the deadline. Here’s a detailed overview of the promotion.

    To start, there are several different rewards under this promotion, and there’s no guarantee you’ll score the exact item you’re after. Rewards are handed out randomly, so if you’re eyeing one particular item, you might need to make multiple purchases to get it.

    Here’s the first set of rewards you might receive:

    • Black Ops 6 Game Code AND 30 Minutes Dual 2XP
    • One Battle Pass AND 15 Minutes of 2XP
    • 500 CoD Points AND 15 Minutes of 2XP
    • 1,100 CoD Points AND 15 Minutes of 2XP
    • 2,400 CoD Points AND 15 Minutes of 2XP
    • 5,000 CoD Points AND 15 Minutes of 2XP
    • 9,500 CoD Points AND 15 Minutes of 2XP
    • 13,000 CoD Points AND 15 Minutes of 2XP
    • 21,000 CoD Points AND 15 Minutes of 2XP

    However, it’s important to mention that you aren’t guaranteed any of these rewards. If none of these are awarded, you’ll receive something from the second group instead:

    • Little Caesars Operator Skin AND 30 Minutes of 2XP
    • Little Caesars Emblem AND 30 Minutes of 2XP
    • Little Caesars Charm AND 30 Minutes of 2XP
    • Little Caesars Calling Card AND 30 Minutes of 2XP
    • One Hour of 2XP

    Your experience may vary depending on what you prefer; many players might lean towards the rewards from the second group, especially if they have already purchased Call of Duty: Black Ops 6.

    Multiplayer lobby interface in Call of Duty: Black Ops 6.

    The promotional rewards are exclusively available in the USA, Canada, and Mexico, and require a minimum purchase to qualify.

    USA

    Purchase of $3 USD or more

    Canada

    Purchase of $4.99 CAD or more

    Mexico

    Purchase of $50 MXN or more

    After making your purchase, you’ll receive a receipt that you can upload to the Call of Duty promotional website. Simply enter the code on your receipt, and you’ll get notified via the website and in your email about your reward.

  • How to Play Split Screen in Call of Duty: Black Ops 6: A Step-by-Step Guide

    How to Play Split Screen in Call of Duty: Black Ops 6: A Step-by-Step Guide

    Activision

    Playing through the Call of Duty: Black Ops 6 campaign is undoubtedly enjoyable, especially for those chasing trophies and achievements. However, most gamers gravitate towards the multiplayer modes for their extended playtime. The good news is that with cross-platform functionality, you can team up with friends online across various platforms. But what if a buddy or family member wants to join you on the couch? Yes, you can enjoy Black Ops 6 in split screen mode, but there are key details to keep in mind.

    Splitscreen in Black Ops 6.
    Activision

    How to Play Split Screen in Black Ops 6

    Before diving into the process of playing in split screen, it’s essential to determine if you can utilize this feature. First, split screen is exclusively available on PlayStation 5 and Xbox Series X/S. Unfortunately, if you’re using a PC, PS4, or Xbox One version of Black Ops 6, this option will not be accessible.

    Secondly, split screen functionality is limited to multiplayer and Zombies modes, excluding the campaign. Additionally, in multiplayer mode, players can only engage in bot matches and not compete online.

    Lastly, you will need two controllers and two separate accounts linked to Activision accounts to play.

    If you meet all these prerequisites, follow these steps to engage in split screen mode in Black Ops 6:

    Step 1: Launch Black Ops 6 and enter either a multiplayer or Zombies lobby.

    Step 2: Activate your second controller and press X (for PS5) or A (for Xbox).

    Step 3: Log into a second account.

    Step 4: Start your game.

    It’s crucial to remember that, even though split screen is restricted to bot matches and Zombies, you must be online to participate.

  • Mastering Loot Keys in CoD: Black Ops 6 Zombies

    Mastering Loot Keys in CoD: Black Ops 6 Zombies

    Call of Duty: Black Ops 6’s Zombies mode takes inspiration from Cold War in terms of item and loot mechanics. There are various item rarities and upgrade paths, which apply to dropped items as well.

    One of the rare items you’ll encounter from tougher zombies is the loot key—a consumable that unlocks valuable loot caches scattered throughout the map. If you find a rare key, head over to a designated area to unlock a container and score powerful weapons, perks, or essential consumables. Before diving into how loot keys function in Black Ops 6 and their locations, let’s clarify what they are.

    What Are Loot Keys?

    Loot keys are single-use consumables that drop from special and elite zombies. These keys open specific loot caches on the map, rewarding players with high-tier weapons, perks, and killstreaks. You can only carry one key at a time, so make sure to use it wisely.

    Similar to weapon tiers, loot keys also have varying rarities that affect the quality of the loot you receive:

    • Uncommon (Green): Unlocks green-tier weapons and armor.
    • Rare (Blue): Unlocks blue-tier weapons, with a chance to obtain perks and killstreaks.
    • Epic (Purple): Unlocks purple-tier weapons, along with a slight chance of finding yellow-tier items.
    • Legendary (Yellow): Offers a high chance of yellow-tier weapons and killstreaks.

    How To Get Loot Keys

    Loot keys are infrequent drops from special and elite zombies, such as Manglers, Abominations, and Amalgams. Tougher enemies appear to have a greater likelihood of dropping a loot key, though this isn’t guaranteed.

    The current round you’re in may also affect the rarity of the keys you find—higher rounds tend to yield more Epic and Legendary loot keys. While it’s possible to find a yellow-tier key early in the game, they become more common as the game progresses.

    Using Loot Keys

    Using a loot key is quite simple. You can unlock a loot cache located somewhere on the map, usually in specific places like a vault or armory. Each map has unique areas where loot keys can be redeemed, so here’s a breakdown of those locations.

    Liberty Falls

    In Liberty Falls, you can find two types of loot keys:

    1. Toolshed Key: Used to access the toolshed on the same street as the Pack-A-Punch church.

      • There isn’t a prompt for this door. Inside, you’ll find a Jet Gun part.
    2. Loot Key: Unlocks locked containers in the bank’s central vault.

    The bank is situated near the center of Liberty Falls, not far from the bowling alley. You’ll need to break into the vault inside that bank to use your key. For details on how to open the vault, check out our Liberty Falls vault guide. Once you’re inside, open any container to claim your rewards.

    Terminus

    In Terminus, redeeming loot keys is more straightforward. After obtaining a key, head to the armor and open any locker. The armory is located not far from the spawn point. Go to the first power generator, step outside, and enter the building next to the Gobblegum machine. The armory is at the bottom of the stairs on your left.

  • How To Pack-A-Punch in Black Ops 6 Zombies: Locations for Liberty Falls and Terminus

    How To Pack-A-Punch in Black Ops 6 Zombies: Locations for Liberty Falls and Terminus


    Activision

    If you ask any seasoned player of the Call of Duty franchise, they’ll likely emphasize the importance of the Pack-A-Punch machine in Zombies mode. This principle still stands firm in Call of Duty: Black Ops 6, which intensifies the challenge with new zombies, maps, and obstacles.

    As you progress through the rounds, the relentless undead become increasingly difficult to defeat, often rendering your standard weapons ineffective. To stay ahead of the rising challenge, you’ll need to upgrade your weapons using the Pack-A-Punch machines. However, locating these machines on each map is your first hurdle. Both Liberty Falls and Terminus each boast a Pack-A-Punch machine that has a fixed location, though getting there can be quite the challenge. Here’s how to locate each Pack-A-Punch in Black Ops 6.

    Difficulty

    Moderate

    Duration

    30 minutes

    Requirements

    • A substantial amount of Essence

    Finding the Pack-A-Punch in Terminus

    Accessing the Pack-A-Punch in Terminus involves a series of key steps, starting with activating the power in the Bio Lab area. Be prepared to spend Essence to unlock the necessary pathways; objective markers will guide you along the way. Follow these steps to reach the machine:

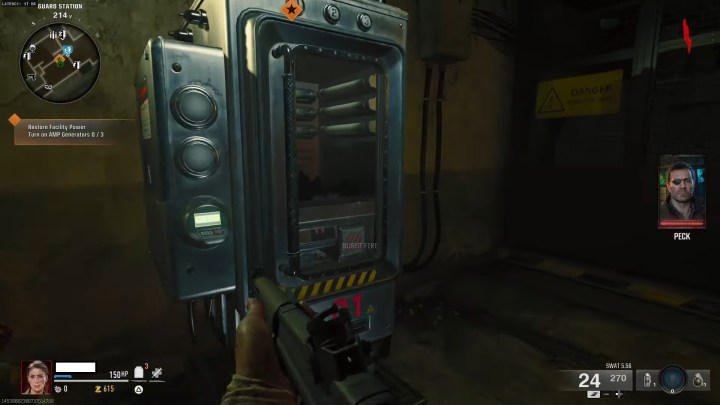
    Step 1: Head to the Living Quarters to find the first generator.

    Generator in Black Ops 6
    Activision

    Step 2: Spend 500 Essence to activate the generator, starting a 30-second countdown during which you must fend off attacking zombies.

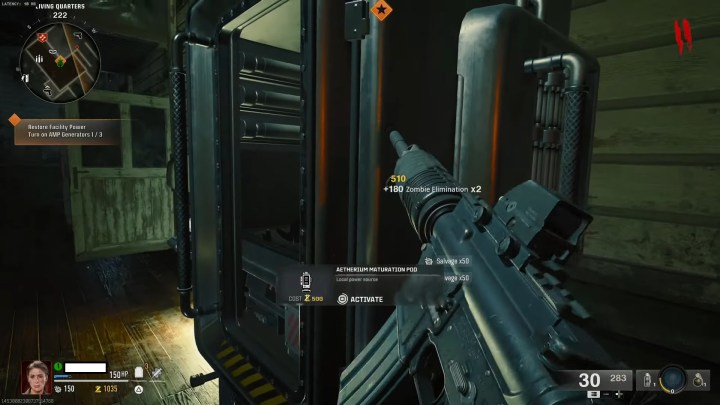
    Step 3: Locate the second generator in the Living Quarters and repeat the process.

    Second generator in Black Ops 6
    Activision

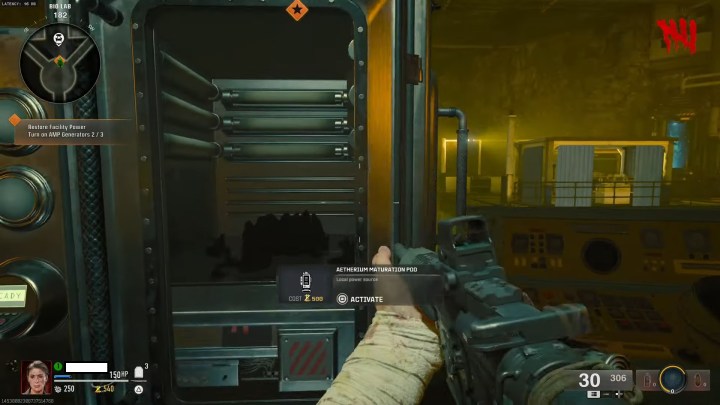
    Step 4: Complete this again with the generator located at the Bio Lab.

    Should any generator be destroyed during your defense, you must finish the current round before attempting to activate it again.

    A generator in Black Ops 6 during gameplay
    Activision

    Step 5: Once all three generators are operational, your next objective marker will direct you to a flooded area underneath the Bio Lab. Dive into the water and activate the inclined lift to raise the Pack-A-Punch machine from the depths. Once it’s operational, you can access the upgrade station.

    Pack-A-Punch machine in Black Ops 6
    Activision

    Finding the Pack-A-Punch in Liberty Falls

    Accessing the Pack-A-Punch in Liberty Falls is more straightforward but requires a larger Essence cost. Though the pathways are clearly marked, you have two options. Here’s one route:

    Step 1: Spend 1,500 Essence to unlock the barrier beneath the Motor Lodge.

    Step 2: Move into the bowling alley and spend 1,750 Essence to open the door leading outside.

    Dimension barrier in Black Ops 6
    Activision

    Step 3: Follow the path up to the church and pay 2,000 Essence to open the next barrier.

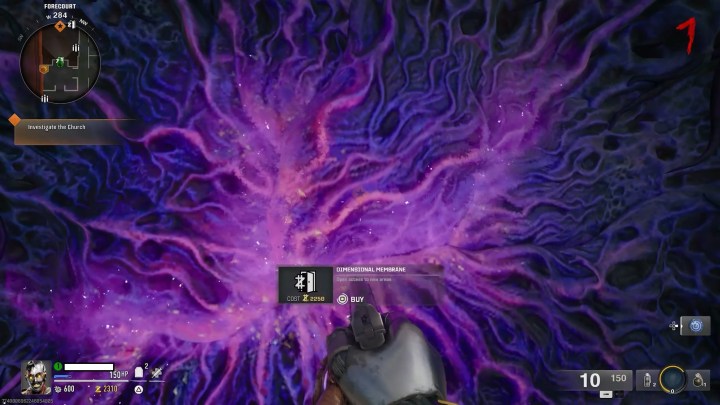
    Step 4: At the church doors, open the dimensional barrier with another 2,250 Essence.

    Pack-A-Punch machine in Black Ops 6
    Activision

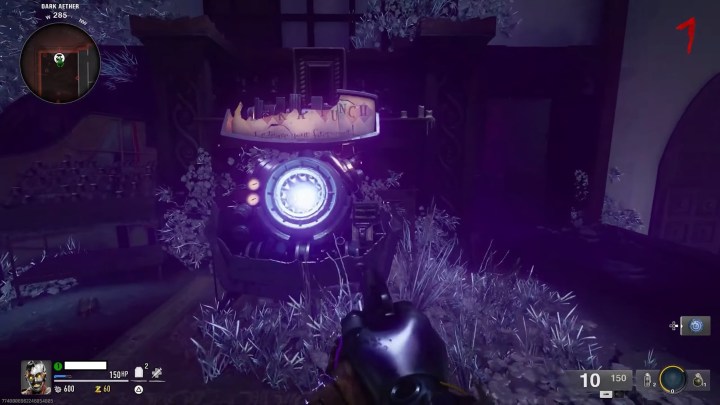
    Step 5: Enter the church, go to the back, and you’ll find the Pack-A-Punch machine waiting for you.

    For both maps, using the Pack-A-Punch to upgrade your weapons will cost the same: 5,000, 15,000, and 30,000 Essence for the three enhancements.

  • All Combat Roles in Call of Duty: Black Ops 6 Explained

    All Combat Roles in Call of Duty: Black Ops 6 Explained

    Call of Duty: Black Ops 6 (BO6) offers an extensive range of options for your loadouts. As you progress through the game, you’ll continuously unlock new items to experiment with, including various perks that will take some time to acquire.

    At first glance, perks may appear disconnected from Combat Specialties, but they actually play a crucial role in determining whether or not you can use a Combat Specialty and which one you activate. These Combat Specialties can significantly influence your gameplay, and while they aren’t absolutely necessary, they are key elements in certain builds.

    What Is A Combat Specialty?


    Combat Specialties function as a powerful fourth perk. There are three different Combat Specialties that we’ll explain shortly, each offering unique advantages that enhance your gameplay experience.

    How To Unlock Combat Specialties


    The Ninja Perk in the perk menu of Call of Duty: Black Ops 6.

    Unlocking Combat Specialties is straightforward, yet it requires some strategic choices. Equipping a Combat Specialty involves more than just selecting one; you’ll need to choose three perks from specific categories: Recon, Enforcer, and Strategist.

    Activating a Combat Specialty requires filling all three perk slots with perks from the same category.

    This might mean that you’ll have to give up a perk you prefer to utilize a Combat Specialty. Some players may choose to focus on different perks from separate categories instead of opting for a Combat Specialty.

    All Combat Specialties


    The Recon Combat Specialty in Call of Duty: Black Ops 6.

    Each of the three Combat Specialties enhances the capabilities of their corresponding perks, creating cohesive builds. Players will find that certain builds suit their gaming styles better than others, which means the Combat Specialty you focus on will depend on how you prefer to play.

    Combat Specialty

    Description

    Strategy

    Enforcer

    This provides a temporary speed and health regeneration boost whenever you take down enemies.

    This is the most all-or-nothing Combat Specialty available. If you stay active in battles and manage to secure kills, this will greatly benefit your gameplay.

    Recon

    This allows you to detect enemies through walls for a short duration after spawning, provides a visual alert when another player is watching you, and prevents you from leaving behind indicators on the map after getting kills.

    This Combat Specialty excels in intel gathering and denial. Knowing enemy positions when you respawn can lead to quick eliminations, and being aware of threats helps you find cover before being attacked.

    Strategist

    This boosts your score gains when completing objectives, allows you to deploy field upgrades and equipment faster, and reveals enemy upgrades and gear through walls.

    This Specialty helps you reach your Scorestreaks more reliably and makes acquiring high-cost Scorestreaks significantly easier. It also simplifies deploying Field Upgrades and helps avoid enemy traps.

    Effective Combat Specialty and Perk Combinations


    An Enforcer perk combination in Call of Duty: Black Ops 6.

    Due to the restrictions on perks needed to unlock a Combat Specialty, your options for perk combinations are somewhat limited. Here are some of the top perk combinations that pair well with each Combat Specialty.

    Omniscient (Recon)


    The Ghost perk in a loadout in Call of Duty: Black Ops 6.

    This Ghost-focused build requires the Ghost perk in Perk Slot 1, the Tracker perk in Perk Slot 2, and the Vigilance perk in Perk Slot 3. With these perks, you become almost invisible to detection equipment and can track enemy movements through their footprints.

    When you include this Combat Specialty, it enhances your ability to choose your attack angle upon respawning and alerts you when an enemy spots you.

    Making the Most of Each Life (Enforcer)


    The Bankroll perk in a loadout in Call of Duty: Black Ops 6.

    This build focuses on maximizing your effectiveness in each match, incorporating Scavenger in Perk Slot 1, Assassin in Perk Slot 2, and Bankroll in Perk Slot 3. These perks make it easier to stay aggressive and reach your Scorestreaks more quickly.

    With this setup, you’ll want to engage frequently, and the Combat Specialty enhances that approach. You’ll move faster than your opponents expect, heal swiftly, and consistently replenish your ammo.

    Taking the Objective (Strategist)


    The Fast Hands perk in a perk slot in Call of Duty: Black Ops 6.

    This build is particularly effective in objective-based game modes, such as Hardpoint. It uses Flak Jacket in the first perk slot, Fast Hands in the second, and Guardian in the third. Together, these perks make it hard for enemies to dislodge you from objectives, allowing you to take reduced explosive damage and heal faster while holding the objective.

    With the Strategist Combat Specialty, you’ll gain points rapidly while capturing objectives, making it easier to access your Scorestreaks. Set up in a strong position and challenge opponents to remove you. If played effectively, they will struggle to do so.

  • Wait A Bit To Play Call Of Duty: Black Ops 6 On Steam

    Wait A Bit To Play Call Of Duty: Black Ops 6 On Steam

    A player is engaged in multiplayer action in Call of Duty: Black Ops 6.
    Activision

    Today marks the launch of Call of Duty: Black Ops 6, leading to a surge of players diving into the single-player campaign, revamped multiplayer, and Zombies mode. Although gaming communities online are buzzing, reports indicate that players on PC, particularly those using Steam, are experiencing some difficulties.

    Frustration with third-party launchers on Steam has become increasingly common, and Black Ops 6 is no exception. The game utilizes Call of Duty HQ (COD HQ) as its main platform, allowing players to manage their installations. This means users can choose which game modes to download or initiate a specific game. Unfortunately, players often find themselves navigating through multiple menus to access the desired mode, and in some cases, they struggle to start the game at all.

    “COD HQ is the worst thing that has happened to the series. I shouldn’t have to click through ten menus just to find what I want,” voiced a disgruntled Reddit user, expressing frustrations about frequent crashes. Several others echoed this sentiment, stating that the HQ crashes when attempting to launch.

    Steam users who have purchased the Vault Edition are also facing issues, particularly with being unable to access the Woods Operate Pack. The development team is actively working on a solution.

    Despite these challenges, Black Ops 6 currently boasts a “Mostly Positive” rating on Steam. While it’s probable that most players won’t encounter problems, those eager to jump right into the game may find themselves needing to exercise a bit of patience.

    Overall, Black Ops 6 seems poised to continue the franchise’s legacy of success. Industry analysts predict that although releasing the game on Xbox Game Pass might decrease overall sales, it could attract 2.5 to 4 million new subscribers to the service.