الوسم: zombies

  • All Perk-A-Cola Locations in Astra Malorum for CoD: Black Ops 7 Zombies

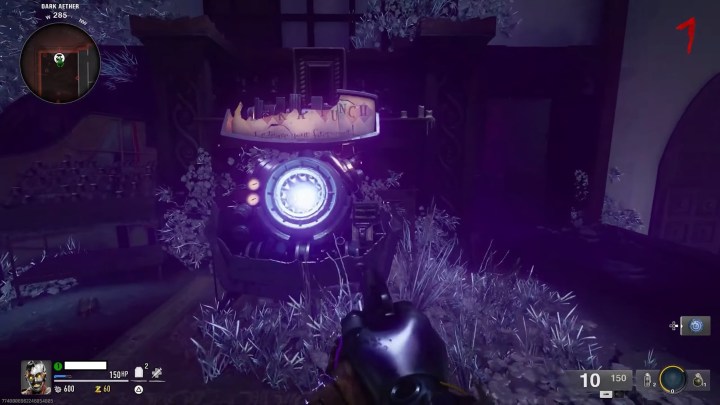
    A new zombie map, Astra Malorum, has been added to celebrate the launch of Call of Duty: Black Ops 7’s first season. The map includes everything players expect from a Zombies experience: undead enemies, the Pack-a-Punch, the mystery box, and several perk machines.

    There are six perk machines scattered across the map, each offering a different buff. Additionally, a Wunderfizz machine is available that provides a variety of perks. Here’s where to find each one:

    Quick Revive Location
    The Quick Revive machine is easy to spot. It’s in the open area where you start. Just climb a few stairs, and you’ll see it perched between the first two doors.

    Speed Cola Location
    After heading up the stairs at the beginning, take the eastern door to enter Museum Infinitum. The Speed Cola machine is positioned in the center of the room.

    Jugger-Nog Location
    From the west door at the start, go straight into The Luminarium. Once inside, you’ll find the Jugger-Nog machine on your left.

    Stamin-Up Location
    The Stamin-Up machine is on the eastern side of the map, just outside the large circular room.

    Mule Kick Location
    Near the area where you turn on the power with the Harmonic Oculus, you’ll find Mule Kick. Exit the room through the eastern door, then look to your left along the western wall for the machine.

    Wisp Tea Location
    The Wisp Tea machine is located outside, in the northwestern corner of the map. It’s visible from where the Jugger-Nog machine is and sits right at the edge.

    How To Find the Wunderfizz Machine
    The Wunderfizz machine is a bit trickier to locate. It only appears after you have four perks activated or once you reach round 20. After unlocking your fourth perk, wait for the round to end, and the machine will spawn. It appears in the Stargazer’s Courtyard—the central area of the map—with stairs leading down on one side and up on the other.

  • Black Ops 7 Zombies Astra Malorum: Completing and Solving the Secrets

    Black Ops 7 Zombies Astra Malorum: Completing and Solving the Secrets

    The second Zombies map for Call of Duty: Black Ops 7 is now available to start Season 1. This map is set at the Liberty Falls observatory, which floats inside a giant skull orbiting Saturn. As usual, there’s a new Wonder Weapon to discover and a fun Easter Egg to complete. Instead of solving complicated equations, your main goal is to survive several challenging encounters with a guardian named O.S.C.A.R., who patrols the area with a George Romero-like appearance.

    If you succeed, O.S.C.A.R. will drop the LGM-1, a unique weapon that contains a “Little Green Menace.” When fired, this weapon sends UFOs crashing toward enemies, adding a playful, retro-futuristic touch to your arsenal. It’s similar in style to weapons like the Ray Gun and Face Melter, and you can get it by following this guide.

    ### Find The Absolute Zero Fragments, Aberrant Wiring, Car Battery, And Crashed UFO Part

    To begin, you need to locate several parts scattered across the map. It’s best to do this early because some steps require waiting for O.S.C.A.R. to respawn, which can lead to higher rounds and increased difficulty.

    #### Absolute Zero Fragments
    Shoot three Aether Crystals with Cryo Freeze ammo to collect all the Absolute Zero Fragments.

    #### Aberrant Wiring
    Find and shoot a flickering lamp post to obtain the Aberrant Wiring. Keep in mind, the lamp post location is randomized each time.

    #### Car Battery
    Head back to the Crash Site once you have a Pack-a-Punch weapon. Shoot the gearstick inside “Ol’ Tessie” — the car’s exposed hood — to make the Car Battery drop.

    #### Crashed UFO Part
    Destroy one of the drones circling O.S.C.A.R., which will cause a Crashed UFO Part to drop.

    ### Destroy O.S.C.A.R. in the Luminarium

    Lure O.S.C.A.R. to the Luminarium by using Jugger-Nog, and enter the planetarium located to the northwest. Interact with the Stellar Dissector to place the Car Battery. Stay inside until the trap expires, and O.S.C.A.R. will dissipate, leaving behind a Shiny Trinket. Note, this trinket uses your Tactical slot but is useful for the next step.

    ### Destroy O.S.C.A.R. in the Museum Infinitum

    Wait until O.S.C.A.R. respawns (about 2-3 rounds) and lead him to the Museum Infinitum near Speed Cola. Interact with the rocket’s control panel to trigger a launch sequence. Make sure O.S.C.A.R. is behind the rocket—lure him with the Shiny Trinket if needed—and he will vanish again, completing this phase.

    ### Shoot The Steaming Valves

    While waiting for O.S.C.A.R. to respawn, go to the Observatory Dome and look for steaming valves. They produce a distinct sound when you get close. There are multiple valves positioned around the map: two below Pack-a-Punch, two above the piano on the upper balcony, and others on the portal room walls, on pillars, and near the console.

    Shoot each valve in sequence to trigger a timed event. The valves are placed randomly, so find, shoot, and repeat until the telescope in the center of the dome moves. If you miss, you’ll need to wait another round for the valves to reset.

    ### Destroy O.S.C.A.R. in the Observatory Dome

    Once O.S.C.A.R. respawns, bring him to the Observatory Dome and interact with the piano opposite the Pack-a-Punch. This activates a telescope view; aim your crosshair at the sun. A yellow laser will shoot into the room, and while safe from zombies and O.S.C.A.R., you should lure O.S.C.A.R. into the laser beam. Doing so will cause him to malfunction and drop the LGM-1 Wonder Weapon, giving you a powerful new tool for your fight.

  • How to Achieve Permanent Melee Double Points and Solve in CoD: Black Ops 7 Zombies

    How to Achieve Permanent Melee Double Points and Solve in CoD: Black Ops 7 Zombies

    The zombie mode in Call of Duty: Black Ops 7 is full of hidden secrets and Easter eggs. One interesting secret is a boss fight against a Zursa. These are zombified bears that players encounter multiple times during the mode.

    This fight isn’t much different from others, but it takes place in a different location. Defeating the Zursa can reward you with special items. Before starting, you need to locate the beast. Here’s a step-by-step guide on how to do that.

    What You Need

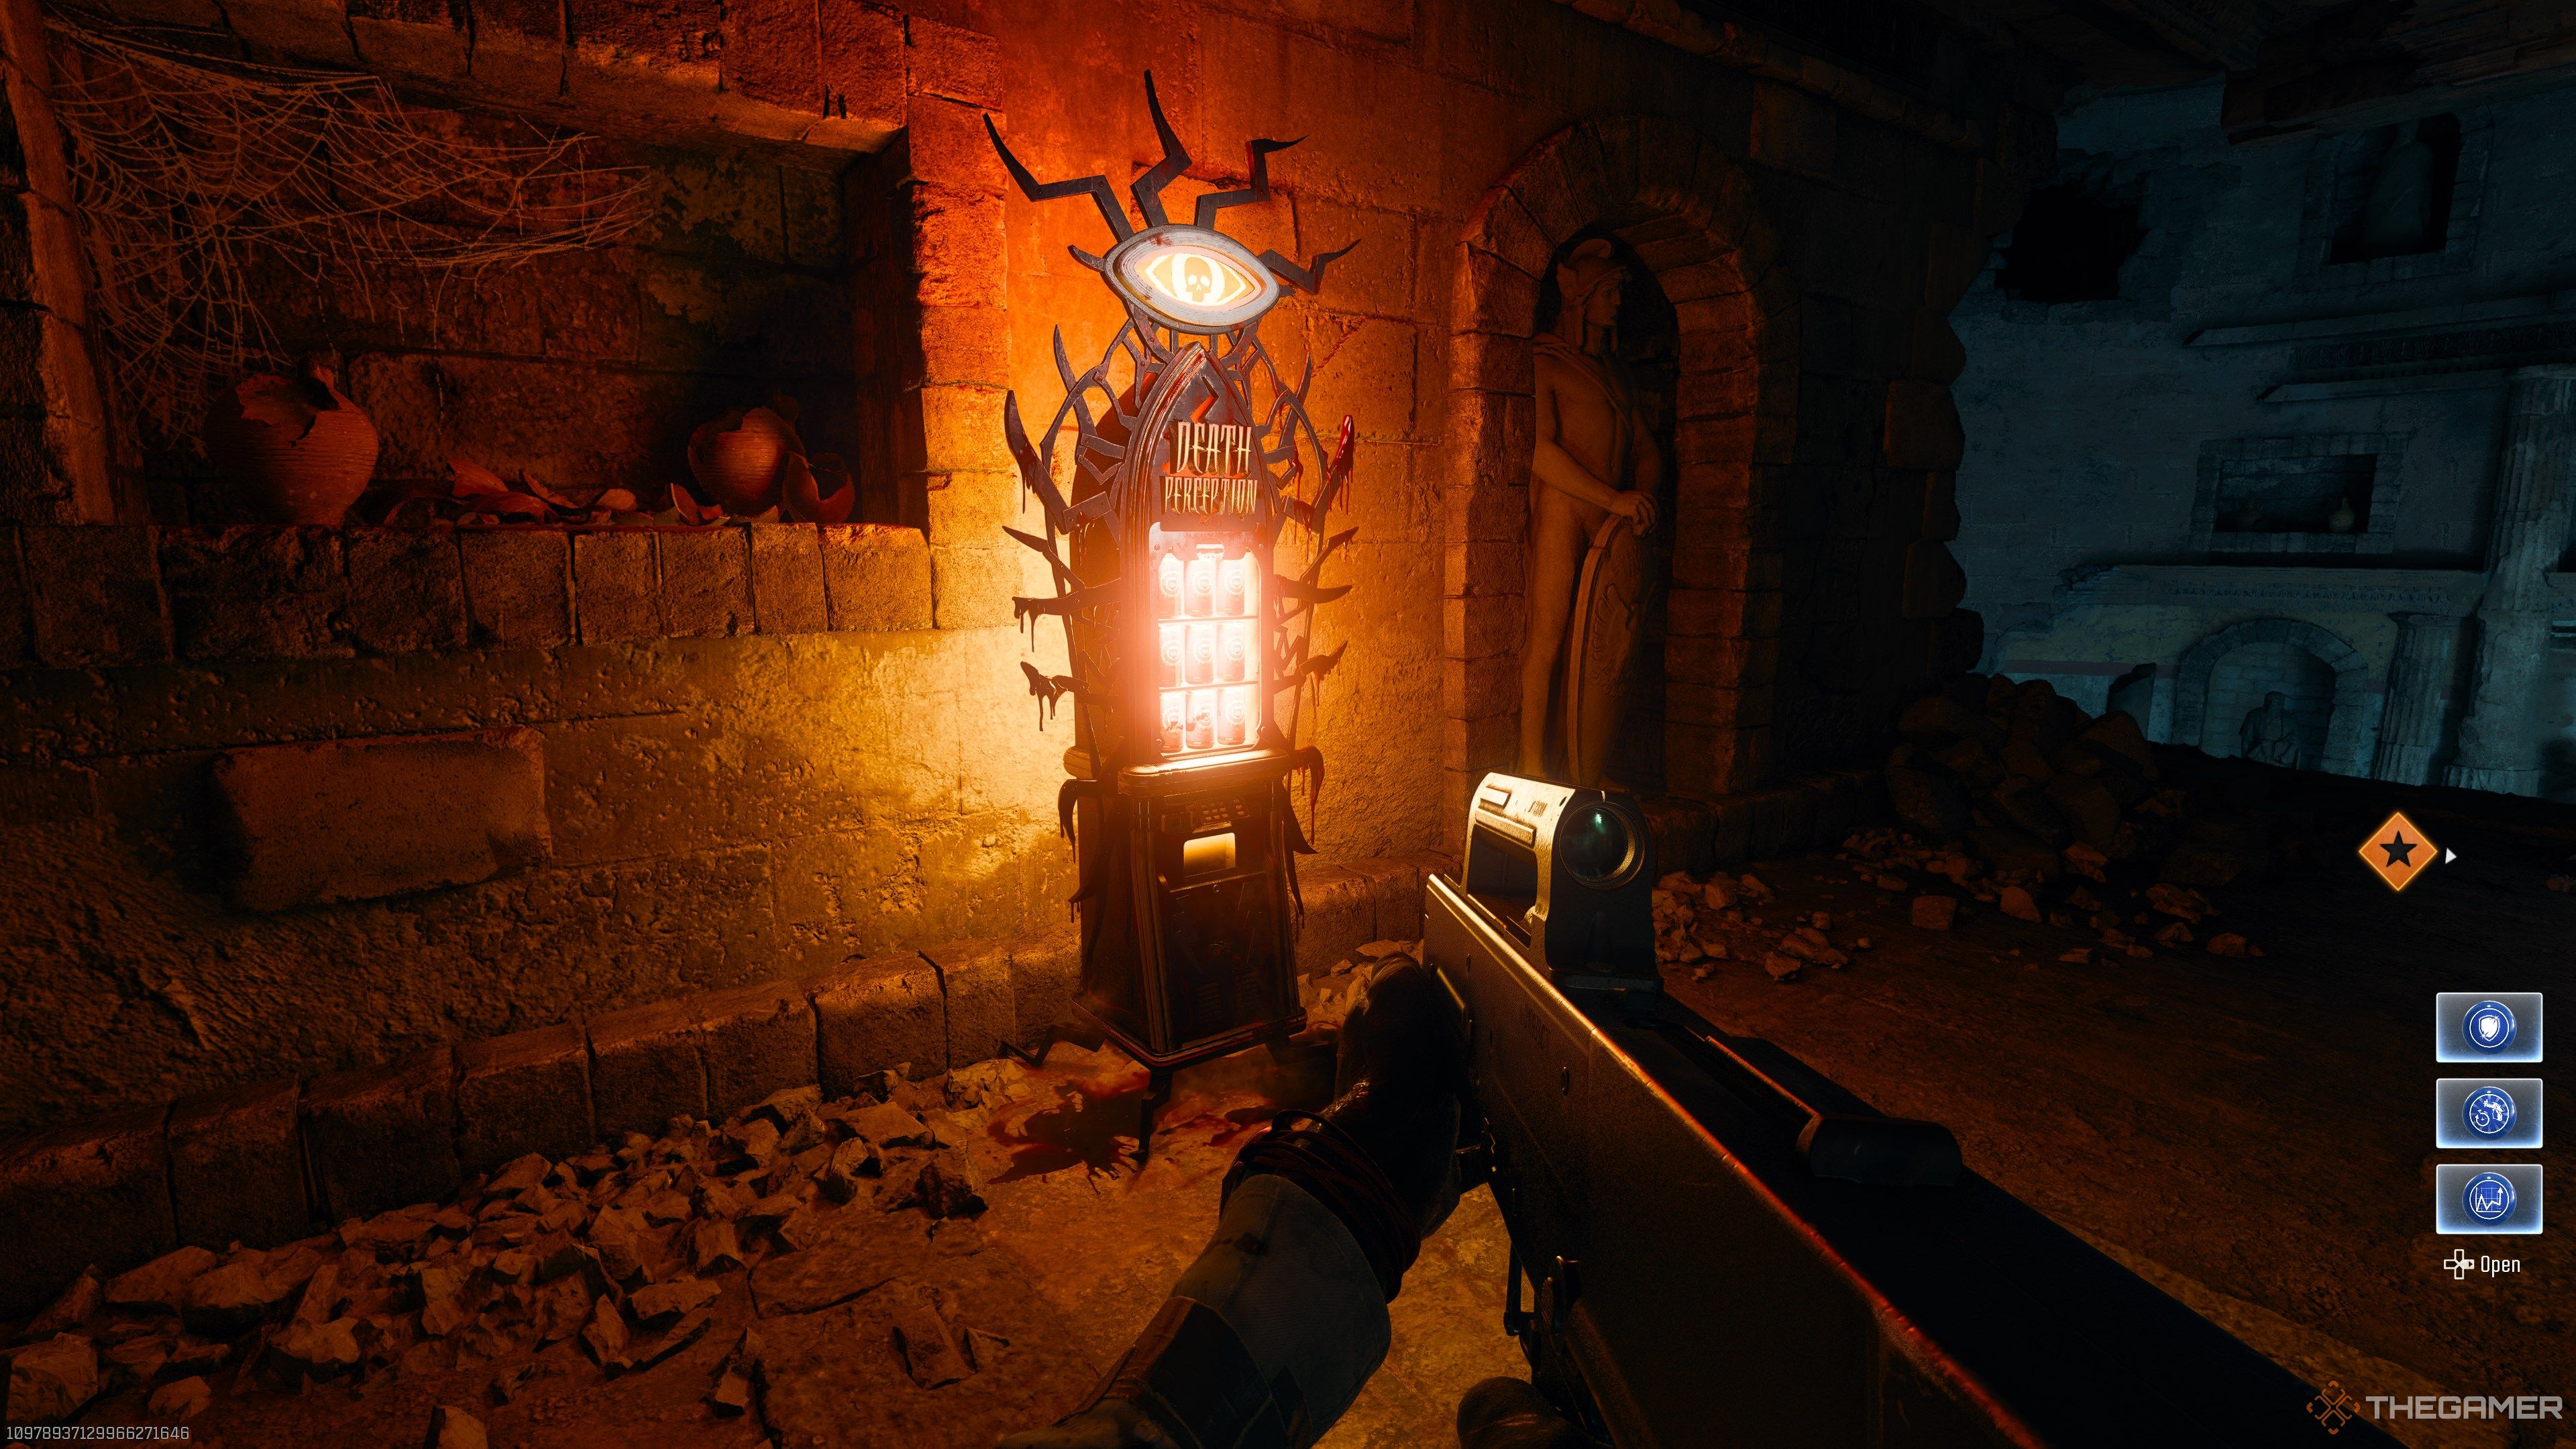
    First, you must pick up the Death Perception perk, which is available at Vandorn Farm. The machine to buy it from is upstairs in the barn. You also need access to the road between Ashwood and Exit 115, which requires turning on the power at Ashwood.

    Where to Find the Secret Zursa Boss

    To find the boss, look for shiny bear paws on the ground along the road between Ashwood and Exit 115. You can only see these paws if you have the Death Perception perk active. Drive out of Ashwood toward the snow, then get out of your vehicle to search for the first paw.

    To summon the Zursa, step on all six paws. This will teleport you to the area where the bear is. Be prepared to move quickly, as enemies will likely chase you during the process.

    Encountering the Bear

    After stepping on the last paw, you’ll be taken to a strange land where it’s just you and the bear. You will start with only a knife, but your weapons are nearby on the ground and can be picked up. Defeating the bear using only melee attacks will grant you a permanent double points boost for melee kills. If you use guns instead, you’ll still earn valuable rewards for defeating the beast.

  • Simple Method for Completing Pack-A-Punch in CoD Black Ops 7 Zombies

    Simple Method for Completing Pack-A-Punch in CoD Black Ops 7 Zombies

    Anyone who’s played a lot of zombies in the Call of Duty series knows how helpful Pack-A-Punches are. They instantly upgrade your weapon, making it much more powerful. That’s why they’re essential for lasting deep into Black Ops 7’s zombie mode.

    However, getting a Pack-A-Punch can be costly, as the first upgrade requires spending 5,000 essence from the Pack-A-Punch machine. But, there’s a way to upgrade your weapon for free without using your essence. Here’s a full guide on how to do it.

    Unlock and Equip Toxic Growth

    The Toxic Growth field upgrade is key to getting a free Pack-A-Punch.

    You need to reach level 29 to unlock it. After unlocking, make sure to add it to your loadout so you can use it when ready.

    Get the Fumigator

    On the Ashes of the Damned map, you’ll find various fumigators—small tanks with hoses attached. They can be found in multiple spots, like in the barn at Vandorn Farm near the power switch.

    Approach and pick one up to use it.

    Get the Free Pack-A-Punch

    With the Toxic Growth upgrade and a fumigator in hand, you’re prepared to upgrade your weapon for free.

    First, look for small green plants on the ground—these look like tiny green balls and are usually found in grassy areas around the farm.

    Use the fumigator to interact with these plants. After interacting, activate the Toxic Growth on them.

    This will cause the plant to grow quickly. When fully grown, the plant might sometimes spit out a Raw Aetherium Crystal. Gathering this crystal instantly grants your current weapon a Pack-A-Punch upgrade without spending any essence.

    Note that collecting the crystal involves a bit of luck, so you might need to try several times to get one.

    It’s best to start growing the plant at the beginning of a new round to avoid too many zombies attacking while you’re waiting.

  • How to Unlock Permanent Perks and Solving in CoD: Black Ops 7 Zombies

    How to Unlock Permanent Perks and Solving in CoD: Black Ops 7 Zombies

    Call of Duty: Black Ops 7 reintroduces perks that stay active for the duration of a match. Unlike Black Ops 2, where perks could be carried over between games, in Black Ops 7 perks only last while you’re in the current game. However, if you get downed, you won’t lose these perks, which makes a big difference, especially during the Easter Egg quests. Having quick access to perks like Quick Revive, along with a few self-revive kits, gives you more chances to survive without wasting too many resources.

    Unlocking permanent perks is fairly straightforward, though it takes some time. Many legendary rewards are almost always linked to a mystery perk, and if you already have all the perks unlocked, you’ll receive a permanent perk instead. Each mystery perk equals one permanent perk, meaning you’ll need to complete several TEDD Tasks to unlock all of them. Permanent perks stay active even if you get knocked down, but they are lost if the game ends.

    Sometimes, multiple mystery perks can appear from a single legendary reward. If not, you’ll need to wait about four to six rounds for a new TEDD Task to spawn if you’re aiming for more permanent perks. These perks are especially helpful for the Easter Egg, as dying during the final boss fight and losing perks can ruin your progress. However, if you’re focusing on completing the main quest, it’s best not to spend too much time trying to gather permanent perks, since it’s smarter to face the boss early and avoid high-round difficulties that come with extra perks.

  • Black Ops 7 Zombies: Completing Ashes of the Damned & Solving Secrets

    Black Ops 7 Zombies: Completing Ashes of the Damned & Solving Secrets

    In Call of Duty Zombies, Wonder Weapons are usually acquired by spinning the Mystery Box and hoping for the best, with the disembodied voice assisting you against the undead. However, recent games have added the option to craft Wonder Weapons through complex mini Easter Eggs, making the process more interesting and rewarding.

    In Black Ops 7’s “Ashes of the Damned,” you can obtain the Necrofluid Gauntlet, but it’s a challenging task. To get it, you’ll face an Uber Klaus, rescue a regular Klaus, move quickly around the map against a timer, and solve a random puzzle—classic Zombies activities.

    Necrofluid Gauntlet Easter Egg Step-by-Step Guide

    Before you begin, here are some helpful tips:

    • If playing solo, equip Aether Shroud for protection.
    • Klaus is essential for completing the Easter Egg but will leave after some time. You can re-summon him using the radio outside his cell.
    • Ensure the power is turned on at all three locations: Ashwood, Blackwater Lake, and Vandorn Farm.
    • The Necrofluid Gauntlet can be upgraded by Pack-A-Punch at Ol’ Tessie, and doing so will unlock Zombie intel.

    Steps to obtain the Necrofluid Gauntlet:

    1. Open the Sheriff’s Office in Ashwood (costs 500 points). It’s located next to the Vulture Aid perk machine.

    2. Head to Janus Tower Plaza through the Blackwater Lake entrance, where an Uber Klaus will spawn.

    3. Travel to Janus Tower Plaza; Klaus appears in the area.

    4. Bring Klaus to the jail cell in Ashwood and install the Stabiliser Chip inside the scanner next to the gate.

    5. Wake Klaus by throwing stun grenades into his cell.

    6. Lead Klaus to Zarya Cosmodrome, where a canister is locked behind glass in the Support Systems area. Use the underground passage.

    7. Interact with the canister, then stand inside the red spotlight to scan Klaus. Use Aether Shroud if playing solo to avoid timing out.

    8. Charge the canister at each of the three power stations (Ashwood, Blackwater Lake, Vandorn Farm) by killing nearby zombies. It’s best to go in the order: Ashwood → Blackwater Lake → Vandorn Farm.

    9. When charged at Vandorn Farm, take the canister to the basement and interact with the Eldritch box inside.

    10. Drive back to Janus Tower Plaza and use the jump pad to return to Vandorn Farm. Mid-air, observe the barn, farmhouse, and silo for the three runes; these are randomly placed, so take a screenshot for reference.

    11. Scan the runes: interact with each panel and input the symbols corresponding to each rune. Order doesn’t matter; each panel has unique symbols.

    12. After inputting the correct symbols, interact with the eye on the back of the Eldritch box. If successful, the gauntlet becomes available.

    13. Deactivate the lockdown by shooting the green orbs that spawn around the room. When orbs are attracted to you by reloading, each one will be pulled in. Once all are captured, the lockdown ends.

    14. Input the runes onto the box by interacting with each side, selecting the correct symbols.

    15. Once the symbols are entered correctly, interact with the eye again. If done correctly, the Necrofluid Gauntlet will be accessible for pickup.

    16. Finally, exit the farmhouse with your new Wonder Weapon.

  • How to Exfil and Complete in CoD: Black Ops 7 Zombies

    How to Exfil and Complete in CoD: Black Ops 7 Zombies

    “Call of Duty: Black Ops 7” follows the Zombies team as they get stuck in the Dark Aether. There are no pilots left to save them if the zombie horde becomes too large. However, players can still leave the game early, but the process is different from before.

    Instead of taking a helicopter, players teleport via phone booths to a strange mansion that looks a lot like Agartha. If you’re curious about how this works, this guide explains where to find exfil locations, how to trigger an exfil, and what rewards you’ll receive.

    How to Exfil

    Starting from Round 11, you can choose to exfil every five rounds—such as rounds 16, 21, 26, 31, and so on. When an exfil is available, you’ll see a pop-up message, and the nearest phone booth will be marked. These booths are located at key points around the map. Unlike in Black Ops 6, where exfil points were chosen randomly, here it will always be the closest phone booth to you.

    To exfil, interact with the phone booth. You will then have a limited time to defeat a special enemy, while waves of zombies with purple eyes swarm the area. In the Ashes of the Damned map, the boss is a Zursa Bear. Zursa Bears are vulnerable to Brain Rot and Napalm Burst attacks. After defeating the boss, the zombie waves will disappear along with the boss. Just interact with the phone booth again to finish the game.

    Exfil Locations in Ashes of the Damned

    Location Phone Booth
    Janus Tower Plaza Located along the Janus Tower wall on the west side.
    Vandorn Farm Found towards the southwest of the farm.
    Blackwater Lake Near the northeast exit, on the main road.
    Ashwood In Rabbit Alley outside the room with Jugger-Nog.
    Zarya Cosmodrome In the courtyard opposite the rocket.
    Exit 115 Near the southeast exit.

    How to Initiate Exfil

    Interact with a phone booth to start the exfil process. You’ll need to defeat a tough enemy—a Zursa Bear in Ashes of the Damned—while waves of purple-eyed zombies surround you. Zursa Bears are weak to Brain Rot and Napalm Burst. After defeating the boss, the zombies will vanish, and you can interact with the phone booth once more to end your game.

    Rewards for Exfil

    When you choose to exfil, all the essence you’re carrying converts into bonus experience points (XP). Exfilting is also the only way to obtain special GobbleGums, known as Whimsical GobbleGums, which you earn more of as the round gets higher. The higher the round, the more bonus rewards you can get by exfilling.

  • Where to Find All Perks and What They Do in Reckoning for CoD: Black Ops 6 Zombies

    Where to Find All Perks and What They Do in Reckoning for CoD: Black Ops 6 Zombies

    The last Zombies map for Call of Duty: Black Ops 6 is now available. Called Reckoning, it wraps up the Zombies storyline and includes many secret Easter eggs and gameplay features. The map has two towers, which means you’ll need to use gravity pads and teleporters to move around.

    Finding the perks on this map can be challenging since the in-game map doesn’t show the full layout at a glance. This guide will tell you where each perk is located and where the Der Wunderfizz machine appears after Round 25.

    All Perks in Reckoning
    Almost every perk from Black Ops 6 Zombies is available here, except for Death Perception. You’ll need to buy that one from the Der Wunderfizz machine after Round 25. Since the map is built around the towers, we’ll refer to perk locations by the tower and floor, not general map coordinates. The coordinates given are specific to the tower and the floor where the perk can be found.

    You start in Tower 1 – Reception. From there, you can move to the Mutant Research Lab or the Quantum Computing Lab. As you progress through the map, you’ll move between towers. Each floor typically has two perks.

    | Perk | Location | Effect |
    |——————|———————————————————|——————————————————|
    | Quick Revive | Tower 1 – Reception, Quadrant D5 | Boosts HP regeneration and faster reviving |
    | Deadshot Daiquiri | Tower 1 – Mutant Research Lab, Quadrant G5 | Improves aim accuracy |
    | PhD Flopper | Tower 1 – Mutant Research Test Area, Quadrant D3 | Dolphin dives cause an explosive AoE damage |
    | Speed Cola | Tower 1 – Quantum Computing Lab, Quadrant A4 | Speeds up reloading weapons |
    | Melee Macchiato | Tower 1 – Quantum Computing Lab, Quadrant D5 | Greatly increases melee damage |
    | Double Tap | Tower 2 – Android Assembly, Quadrant E4 | Improves the rate of fire for weapons |
    | Stamin-Up | Tower 2 – Dark Entity Containment, Quadrant F2 | Enhances movement speed and sprint duration |
    | Elemental Pop | Tower 1 – Director’s Office, Quadrant E1 | Adds a chance for weapons to trigger ammo mods |
    | Jugger-Nog | Tower 1 – Director’s Office, Quadrant E6 | Boosts armor durability and max health |
    | Vulture Aid | Tower 2 – Sublevel, Quadrant G6 | Slain enemies may drop extra ammo, essence, or equipment |

    Der Wunderfizz Location
    Like most Zombies maps, the Der Wunderfizz machine appears at Round 25. It’s located in Tower 2 – Android Assembly, in quadrant E7. This spot is near where Double Tap is found and one floor below Stamin-Up. The machine allows you to buy any perk in the game, including perks that aren’t normally available on this map—such as Death Perception.

  • Complete the Process of Creating and Curing Zombies in Schedule 1

    Complete the Process of Creating and Curing Zombies in Schedule 1

    Here’s a revised version of your content in American English, ensuring it’s clear and unique:


    Making and Curing Zombies in Schedule 1

    In this article, we’ll explore how to create and cure zombies in the game Schedule 1.

    Many interesting effects can be experimented with in Schedule 1, and the Zombifying effect stands out. This effect turns your clients into zombies, making them vomit and turn green. Although they seem to be in a bad state, you won’t be too concerned since you’re running a drug business.

    Creating a drug with the Zombifying effect is straightforward. You can use any drug you have, and with a few simple ingredients, you’ll have a zombie-infested town reminiscent of The Walking Dead in no time. You might even want to try it out yourself and join the ranks of the undead.

    How to Obtain the Zombifying Effect

    To achieve the Zombifying effect, you’ll need to start with any drug, but it first requires a euphoric effect. Begin by mixing Cuke with any ingredient at the Mixing Station. After that, add Gasoline to create the euphoric effect.

    • Ingredients: Drug + Cuke + Gasoline + Battery

    Ensure you purchase the Mixing Station from the Warehouse or Hardware store. You can find the mixing ingredients at the Gas Mart.

    Once you have the euphoric drug, mix in a Battery to finalize the Zombifying effect. After mixing, simply package the drug for sale.

    We suggest using Green Crack for this effect, as you can skip the Cuke step. Just combine Gasoline and the Battery to achieve your desired outcome.

    How to Create and Cure Zombies

    You can consume the drug yourself, leading to vomiting and a transformation into a zombie. After succumbing to the zombification process, you can either wander around in your new state or consume an energy drink to reverse the effect.

    If you distribute the drug to customers, expect to see zombies walking the streets. Don’t worry; the effect wears off after some time, returning the city to its usual state as if nothing had happened.


    This version maintains the core information while presenting it in a fresh, clear manner.

  • Completing Every Free Power-Up Location in Black Ops 6 Zombies

    Power-ups are essential in not just Call of Duty: Black Ops 6 but also in any CoD Zombies map. They give you and your teammates a significant advantage, whether it’s quickly taking out enemies or boosting your Essence collection. These items can really turn the tide when you find yourself in a tough spot.

    Traditionally, every new map comes with all power-ups available for players, though they can be quite hidden. Knowing where to find them can help you out of a jam. This guide will show you where to locate each power-up on the latest map, Shattered Veil.

    Max Ammo Location

    Begin at the spawn point and head towards the fountain by the bridge, where you’ll see a statue. To the right of that statue, look for a small Max Ammo icon. Shoot it to activate the power-up.

    Double Points Location

    On the west balcony of the mansion, just outside the PhD Flopper, you’ll find a GobbleGum Machine. To the left of this machine, examine a broken ledge. If you look over the edge of the map, you should be able to spot a log. This is where the Double Points power-up is waiting, although you might need a scope to see it clearly.

    Bonus Points Location

    From the mansion entrance, head up the stairs on your right and take the door on the right. Inside, you should find an empty window on the right wall. Just inside this window, the Bonus Points power-up will be located.

    Full Power Location

    Continue forward into the hallway outside the Study, where you’ll see a computer. If you go prone and look through the vent, the Full Power symbol will be visible hanging there.

    Insta Kill Location

    Make your way to the elevator that takes you to the pack-a-punch machine and descend. Once you land, return to the elevator and look up at the left wall; there you will see the golden skull icon.

    Nuke Location

    Travel to the service tunnel underground and find the section with the blue crystal. To the right, a white track leads to a box covered in a blue rag. Directly beneath this, in a small window, you should be able to see the Nuke power-up waiting for you.

  • Completing the Sam Lazer Trap in Black Ops 6 Zombies Explained

    Completing the Sam Lazer Trap in Black Ops 6 Zombies Explained

    Zombies players eagerly anticipate Easter eggs in their favorite maps, especially with the launch of new content in Call of Duty: Black Ops 6. While some of these hidden gems might not be found right away, players are determined to track down every one, particularly on the latest Shattered Veil map.

    One intriguing side Easter egg on Shattered Veil involves a character named SAM. When you encounter SAM in the underground area of the mansion, did you know you can transform him into a powerful weapon against the undead? This guide will walk you through the steps to make that happen.

    How to Activate the Lazer SAM Trap Easter Egg

    Your first step is to head over to SAM, located along the same route that leads to the Pack-a-Punch area on Shattered Veil.

    Once inside the Pack-a-Punch room, look for a computer on the left side. Interacting with it will display a message that reads ‘System Rebooting…‘.

    After this, while still in the same round, you need to use one of the three other computers found throughout the mansion.

    Once you’ve interacted with one, progress to the next round, then return to check the computer you used earlier.

    At this point, your screen will display one of two results: either a yellow screen labeled ‘Cleaning’ or a red screen resembling a skull.

    For this Easter egg, you will need to get the red screen. When you do, interact with the computer again to collect a floppy disk from it.

    Here are the locations of the computers in the mansion:

    • One computer is located in the Study, towards the east of the mansion.
    • Another computer can be found in the Overlook.
    • The last computer sits in the West Hallways, on the west side of the mansion.

    The interaction with the computer that gets you the red screen is entirely random, so it might take several attempts before you succeed, or you could get lucky on the first try. If you don’t get the red screen right away, just keep trying until it happens.

    After using one of these computers, make sure to progress to the next round and then check back.

    Once you have the floppy disk, return to the main computer in the Pack-a-Punch room and interact with it to insert the disk.

    This action will initiate the ‘System Booting…’ sequence. Next, move on to the next round and interact with the computer again, which should now present the ‘Cleaning’ menu.

    After progressing one more round, interact with the computer once more. This time, it will show a red screen that reads ‘SAM Infected.’

    Finally, after one last interaction with the computer, SAM will transform into a laser trap that can be used against zombies.

    Once activated, SAM will begin firing lasers, and you can reactivate this trap for 2,000 Essence.

    The laser trap effectively eliminates zombies and remains active longer than standard traps.

  • Unlocking Weapon Gifts from the Mystery Box in COD Zombies

    Unlocking Weapon Gifts from the Mystery Box in COD Zombies

    The Mystery Box in Call of Duty is a beloved feature that gives players a shot at acquiring powerful weapons and gear. Interestingly, many players are not aware that they can actually share these weapons with their teammates. Passing along weapons from the Mystery Box is a fantastic way to bolster your team’s efforts and improve cooperation, or simply to give your buddy their preferred weapon.

    If you happen to pull a second Raygun or another Wonder Weapon, sharing is not just nice; it’s essential, because sharing is caring! Despite being a lesser-known aspect of the game, not everyone is in the loop about this. If you’re looking to learn how to share Mystery Box items with your friends, this guide will walk you through it.

    How to Gift Weapons from the Mystery Box


    Engaging with the Mystery Box is fundamental to the Zombies mode, as it can yield high-rarity weapons or, with a little luck, Wonder Weapons. However, keep in mind that the Mystery Box location varies in each match, so your first task is to find it.

    You can do this in a couple of ways:

    • If you’re in an open-area Zombies map like Terminus or Liberty Falls, just look up at the sky for the light and follow it.
    • In a closed Zombies map like The Tomb, open your map, find the icon, and tag it to navigate there.

    Rolling the Mystery Box will cost you a steady price of 950 Essence. This action will trigger a spin for a random item.

    Once you snag a weapon that your friend would appreciate, or if you get an extra Raygun or Wonder Weapon you’re willing to share, just melee the box as the weapon starts to drop.


    Player about to pick up a weapon from the mystery box - bo6

    That’s all there is to it—just melee the box, and soon the weapon will become available for anyone on your team to grab. This is an excellent approach to avoid wasting duplicate weapons and actually make them useful.

    Your other option would be to pick up that weapon, find another weapon on the ground to swap it with, and let your friend take the one you dropped. But that method is not as straightforward.

  • Understanding the Death Perception Perk in BO6 Zombies

    Understanding the Death Perception Perk in BO6 Zombies

    In Season 2 of Call of Duty: Black Ops 6, the Death Perception perk makes a comeback. This Perk-A-Cola debuted in Black Ops 4 and gives players the ability to spot zombies through walls. While it doesn’t boost damage or durability, its practical benefits can be crucial for surviving tougher rounds and intense close-quarters combat in compact maps.

    If you haven’t dived into Zombies mode recently or simply need a quick refresher on how this perk functions, this guide is here to help. We’ll explore the mechanics of Death Perception, where to find it across maps, and the six different augments that enhance this revived Perk-A-Cola.

    What Does Death Perception Do?


    Death Perception highlights hidden zombies with an orange glow, making it easier to identify their positions. It provides a default visual range of about 15 meters, which can be extended with specific augments. While it doesn’t enhance damage or penetration, it can yield extra benefits depending on the augment selections.

    How To Obtain Death Perception


    Black Ops 6 Death Perception Machine

    You can spot Death Perception at a Perk-A-Cola machine in “The Tomb” map and any Der Wunderfizz machine. Every map introduces a Der Wunderfizz at Round 25, so if you’re patient and save up your Essence, you can buy Death Perception on any map.

    Augments for Death Perception


    Black Ops 6 Death Perception Augments

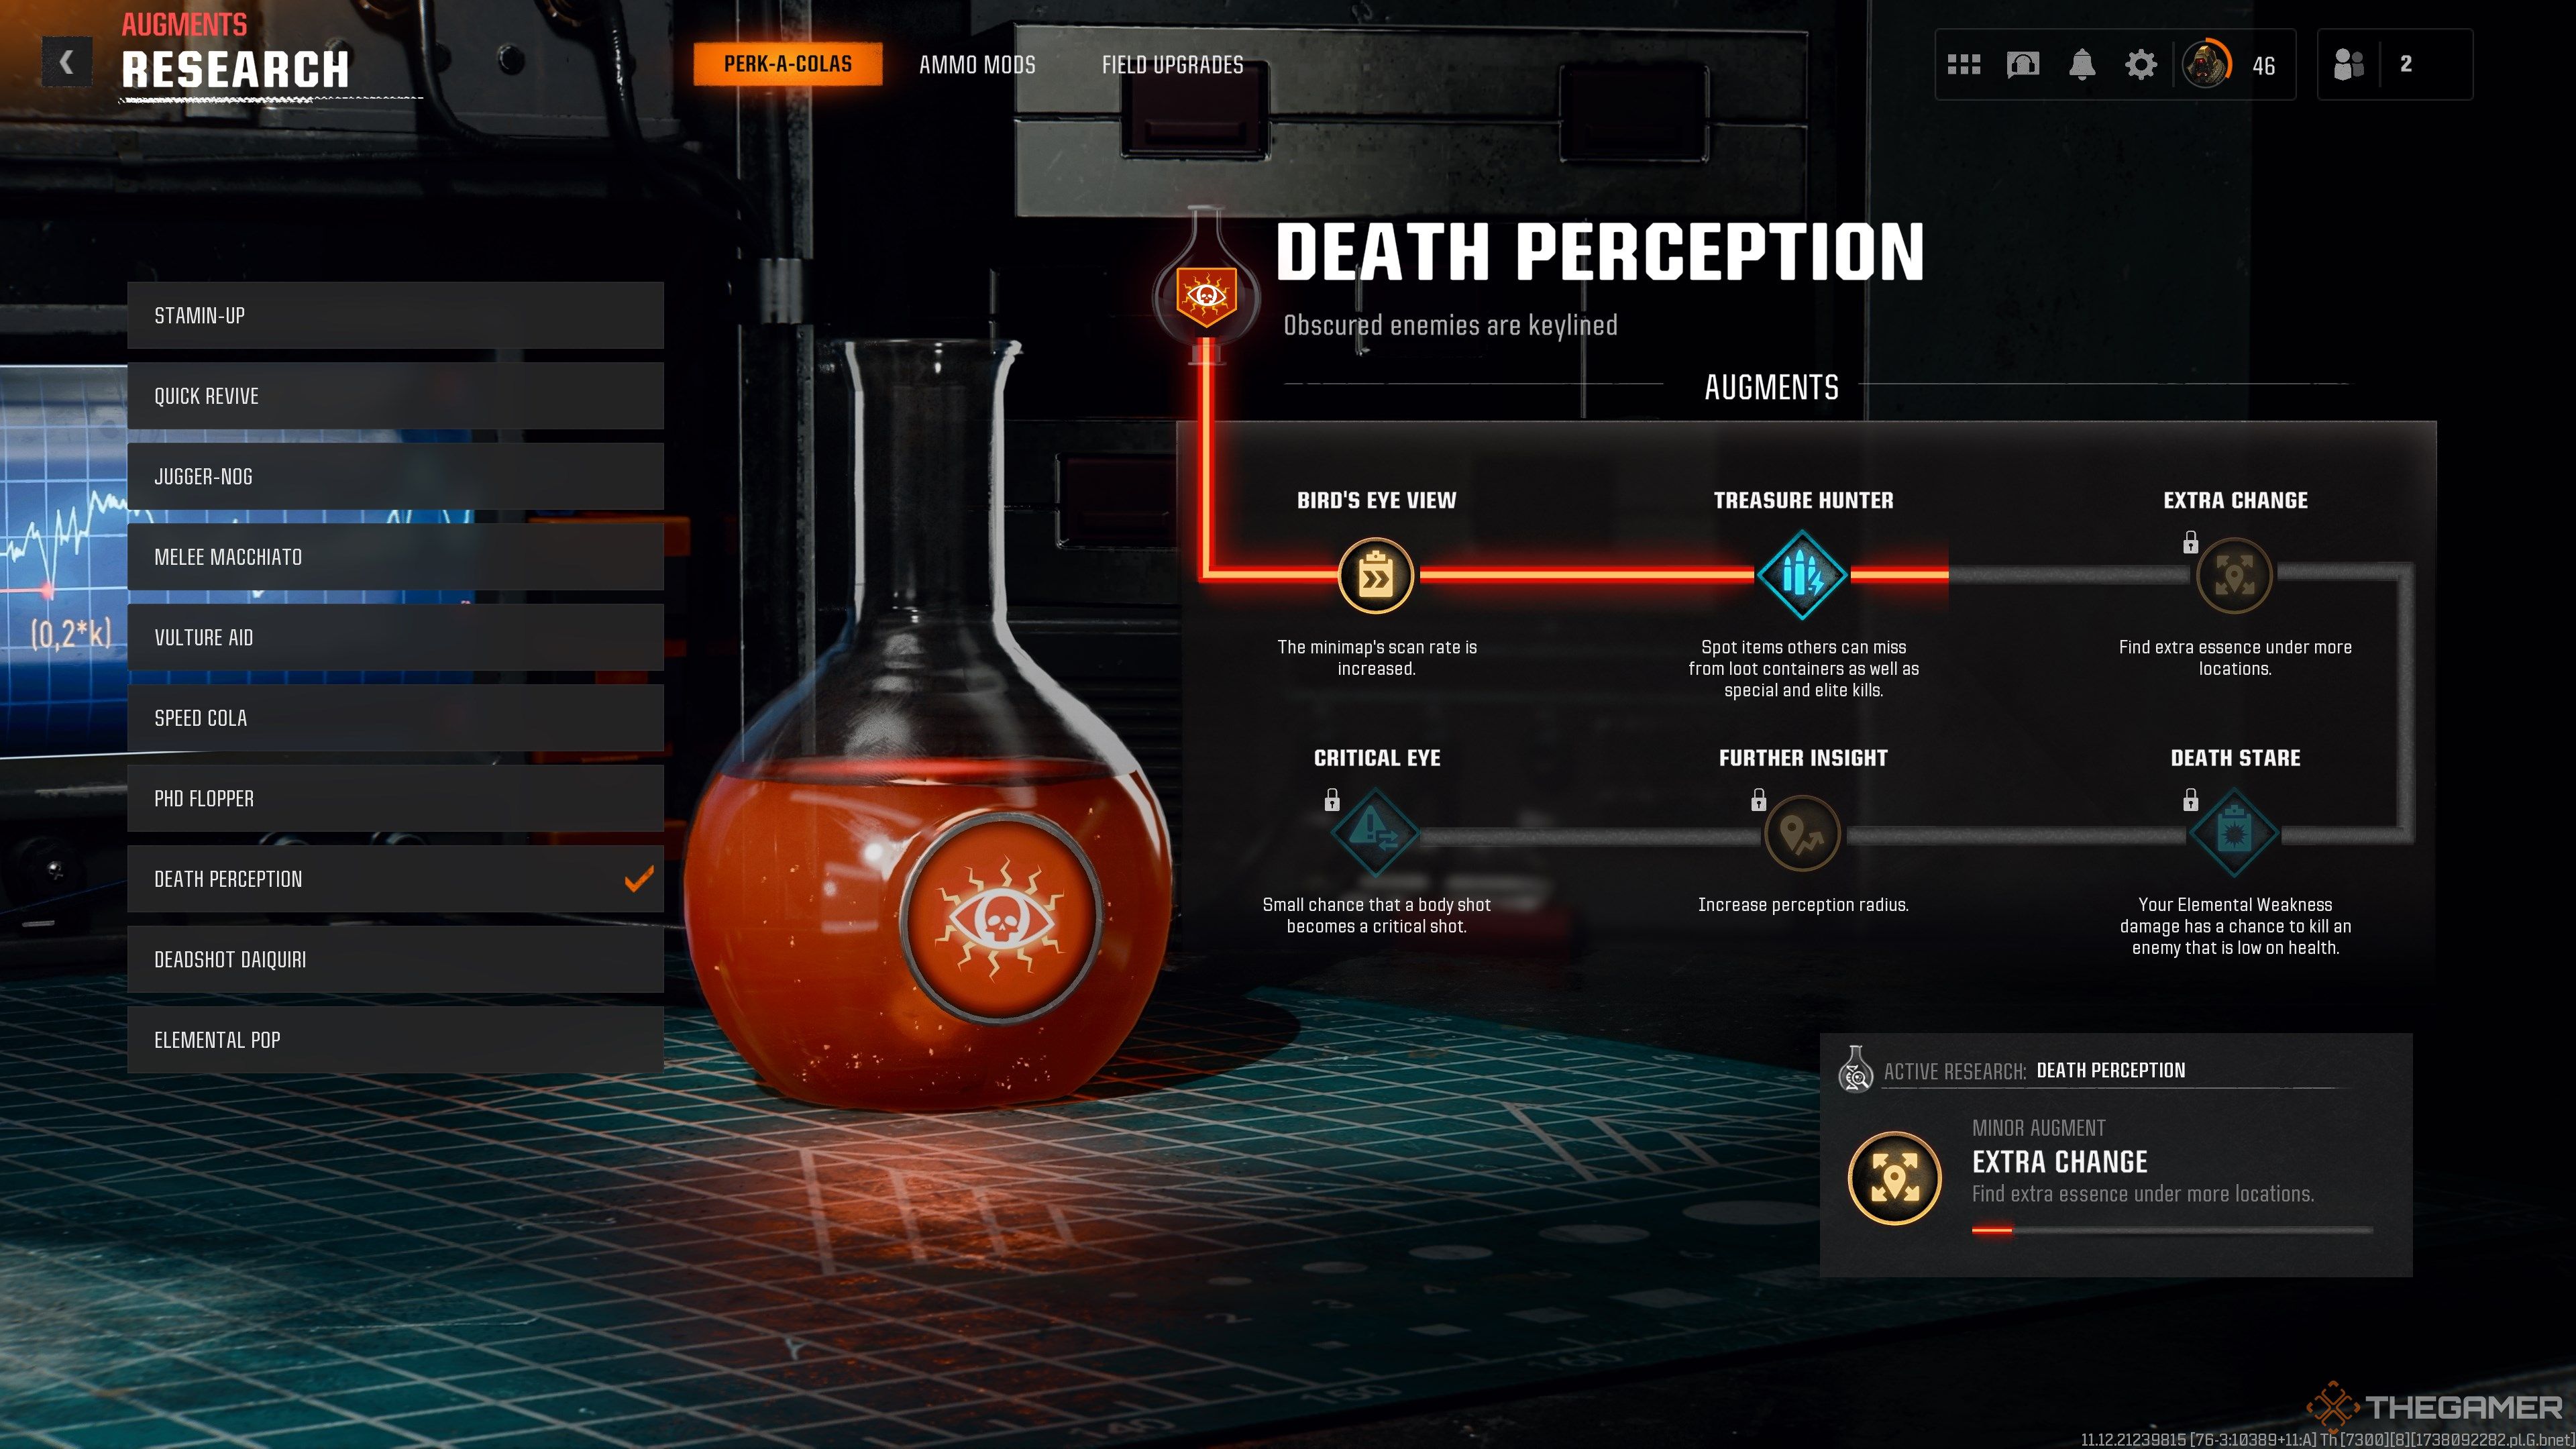
    Death Perception has six augments available: three major and three minor. The Critical Eye augment works well with Deadshot Daiquiri’s headshot bonus, making it particularly beneficial for rapid-fire weapons like the PPSH-41.

    Extra Change can help you gather Essence in the early rounds, while Bird’s Eye View effectively provides you with a constant UAV indicator for tracking zombies on your minimap. While Death Perception’s augments might not be as game-changing as PhD Flopper or Stamin-Up, they do offer useful quality-of-life improvements.

    Major Augments

    Treasure Hunter

    Spot items that others might overlook, including those from loot containers and special kills.

    Death Stare

    Your elemental weakness damage has a chance of finishing off low-health enemies.

    Critical Eye

    A slight chance that a regular shot becomes a critical shot.

    Minor Augments

    Bird’s Eye View

    The rate at which the minimap scans is increased.

    Extra Change

    Discover more Essence in various locations.

    Further Insight

    Expands your perception radius.

  • Unlocking the Liberty Falls Easter Egg in Black Ops 6 Zombies

    Unlocking the Liberty Falls Easter Egg in Black Ops 6 Zombies

    Call of Duty: Black Ops 6 Zombies: Liberty Falls Easter Egg Guide

    The Zombies mode in Call of Duty: Black Ops 6 is making waves with its intricate Easter egg hunts. Players can tackle two main maps at launch: Liberty Falls and Terminus. Each map features extensive main quest Easter eggs that yield exclusive cosmetics and powerful upgrades.

    While Liberty Falls’ Easter egg is considered easier, it remains quite hidden and perplexing, characteristic of the Zombies mode. This guide will take you through the steps needed to solve this puzzle solo or with friends, as well as the rewards you can gain.

    Requirements for the Easter Egg

    Before diving into the Liberty Falls Easter egg, here are a few essentials to have in place:

    1. Unlock Pack-A-Punch: You need to access the Aether Device, which is crucial for this quest, and having a Pack-A-Punched weapon will be helpful later on.

    2. At least one player should have the Jet Gun: You can create the Jet Gun or find one in the Mystery Box.

      • A crafting guide for the Jet Gun will be available soon. Stay tuned!
    3. Acquire at least T2 Armor: While it’s not strictly necessary, you’ll face numerous enemies in certain segments, and armor will be crucial for survival.

    It’s important to note that you can complete this entire Easter egg solo. Utilize the alternative fire on the Jet Gun and carry a strong explosive weapon to get through most challenges.

    Crafting the LTG

    Your initial task is to create the LTG device. You need to gather three components using the primary fire of the Jet Gun. Find a good vantage point to locate the items, then hold the primary fire of your Jet Gun until they are pulled in. Repeat this for each of the three components.

    Note: Picking up any of the parts will apply to all squad members.

    Part #1 Location

    The first part can be found in quadrant B6 within the church. Activate the Dark Aether device to clear nearby zombies, which will spawn some debris. Look up from the church entrance to spot a floating top hat and pull it in with your Jet Gun.

    Part #2 Location

    Make your way to quadrant F4/5, close to the Speed Cola machine where a white van is parked. Climb the adjacent rooftops and jump onto the vehicle. Face the buildings across from the bank, aiming for the open second-story window at Buzz’s Cuts. This part is a distance away, so hold the trigger until you retrieve it.

    Part #3 Location

    The final LTG component is in quadrant G3, inside a comic book store at the northern part of town. Check the gap in the ceiling directly above the middle counter to locate this piece.

    Assembling the LTG

    With all three parts in hand, head to the crafting bench located at the top of the bank in quadrant F4. Use the bench to put together the components and obtain the LTG for the next phase.

    Charging the First Canister

    Next, you’ll need to charge two canisters for the Dark Aether device. Return to the church to grab a canister from the device. Hold the interact button until you see the prompt to drop the Aether canister. Once you have it, take it to the Dark Aether trap located outside of spawn in quadrant H5.

    After you place the canister next to the metal plate, you can then use the LTG. Move to the Aether storm down the street and interact at the storm’s center. This triggers a timed defense segment where you need to protect the LTG for 60 seconds from hordes of zombies. Use your Jet Gun or explosives to handle any approaching enemies and ensure that the device remains unharmed.

    If successful, an Abomination or Mauler will appear. Escort this miniboss towards the canister, activating the nearby Dark Aether trap. Defeat the boss while it is within the trap’s area to charge the canister. Doing this will also reward you with a Max Ammo drop.

    Escorting the Canister Back

    After charging the canister, you’ll have 90 seconds to escort it back to the Aether device in the church. The timer only starts once you grab the canister, so ensure your team is ready. It’s advisable to take the route through the bowling alley and up the stairs to reach the church quickly. When you arrive, interact with the Dark Aether device to deposit the canister.

    Tip: The player carrying the canister should equip a knife to enhance their movement speed, especially useful if they have the Stamin-Up perk.

    Calibrating the E-Field Machines

    After depositing the first canister, a tactical item called the Strauss Counter will appear next to the Aether device. Have one team member pick it up.

    Just like the previous step, you’ll need to calibrate three machines scattered across the map. Go to each machine and hold the tactical button to check its color. You must change it to the opposite color indicated on your Strauss Counter:

    • Red counter ➕ green machine
    • Green counter ➕ red machine
    • Yellow counter ➕ yellow machine

    Make sure you repeat this for all three machines.

    E-Field Machine Locations

    • E-Field Machine #1: Located in quadrant D4 at the toolshed where the Jet Gun’s handbrake is found. It’s positioned next to the stairs.

    • E-Field Machine #2: In quadrant G5, reach the roof of the bank using a grappling line. Look for a spot to drop down; this lower rooftop contains the second machine.

    • E-Field Machine #3: Found in quadrant E6, on a patch of grass across from the PhD Flopper machine.

    Collecting the LTG and Second Canister

    If all calibration is done correctly, the machines will start emitting Dark Aether energy that converges near spawn. Head to the gas station at the eastern edge of the map to retrieve the second canister from the machine next to evac. Meanwhile, ensure that one squad member pickup the LTG device you previously deployed in quadrant H4.

    Charging the Second Canister

    This process mirrors the first canister charging. Place the canister within the Dark Aether trap’s area to make capturing the boss’s soul easier. Once you are set, move to the second Aether storm in quadrant C5, deploy the LTG, and fend off enemies for another minute.

    Afterward, usher the Abomination or Mauler to the trap as before, and eliminate it inside the AoE to charge the second canister. Retrieve it again, and return to the church to deposit

    the canister within 90 seconds.

    Activating the Aether Device

    With all canister slots now filled, it’s time to activate the device. Engage with the Aether device in the church to commence the final challenge. You will face three waves of zombies, each more challenging than the last, with a variety of difficult types including Maulers and Abominations.

    Preparation is crucial for this part. Ensure your Jet Gun is upgraded or keep a powerful explosive weapon on hand, like the HE-1 or Pack-A-Punched GSP45. Focus your attacks on Maulers first, followed by Abominations, and then other zombies. Continuously repositioning will allow you to manage the chaotic spawns effectively.

    By clearing all three waves, you will successfully complete the Easter egg.

    Easter Egg Rewards

    Finishing the Liberty Falls Easter egg unlocks the Ray Gun PJ-SRU skin and a Liberty Falls-themed calling card, as well as a bit of XP. These rewards apply to your entire account and can be displayed in multiplayer and Zombies modes.

    If you opt not to extract upon completing the Easter egg, you will also gain all perks on the map and a stash of Legendary-tier weapons. However, none of these weapons will be Pack-A-Punched and will only remain with you until your current game ends.

  • Understanding Augments in Zombies: Black Ops 6 Explained

    Understanding Augments in Zombies: Black Ops 6 Explained

    If you’ve spent time diving into COD Zombies, you’re well aware that as you progress to higher rounds, the action becomes more intense. Surviving requires all the advantages you can muster, from having your weapons upgraded at the Pack-a-Punch to stacking up on perks and utilizing the various wonder weapons at your disposal.

    In Call of Duty: Black Ops 6 Zombies, the familiar round-based gameplay has made a return, reviving the cherished mode that fans adore. Along with this classic gameplay, a new feature called Augments has been introduced to assist you in thriving through the tougher rounds.

    Understanding Augments

    Once you hit level 11, you’ll unlock the Augments menu within the Zombies mode.

    Augments in Black Ops 6 offer additional abilities that allow you to enhance your Perk-a-Colas, Ammo Mods, and Field Upgrades. However, before you can equip an Augment, you first need to explore and research it through the Augments menu’s "Research Augments" option.

    Initially, you may find that many Augments are locked. To unlock them, you will need to research and acquire them over time. To start this process, activate a research option like Stamin-Up, which is the first available. You’ll see a progress meter showcasing six augment options waiting to be unlocked, categorized as Major and Minor. Major Augments typically have more significant effects compared to Minor ones.

    To obtain these Augments, simply activate your desired research, such as the Stamin-Up Research, and participate in Zombies matches. The progress for unlocking the Augments is tied to experience points, which you gain through gameplay, including rounds completed, enemies defeated, and challenges fulfilled.

    The longer you play, the more Augments you will potentially unlock.

    After some matches, upon returning to the Research Augments menu, you may discover new options available to research in three categories: Perk-a-Colas, Ammo Mods, and Field Upgrades.

    With Augments now unlocked, it’s time to navigate to the "Equip Augments" menu. Here, you can equip one Major and one Minor Augment. Choose wisely to match your gameplay style. While all Augments have their benefits, it’s wise to focus on those that enhance the Perk-a-Colas, Ammo Mods, and Field Upgrades you favor the most, as they will significantly improve your gaming experience.

    Tip: You can earn extra XP when actively utilizing the Augment you’re currently researching. For example, if Stamin-Up research is active and you manage to acquire that perk, you’ll receive bonus XP.

  • Mastering Loot Keys in CoD: Black Ops 6 Zombies

    Mastering Loot Keys in CoD: Black Ops 6 Zombies

    Call of Duty: Black Ops 6’s Zombies mode takes inspiration from Cold War in terms of item and loot mechanics. There are various item rarities and upgrade paths, which apply to dropped items as well.

    One of the rare items you’ll encounter from tougher zombies is the loot key—a consumable that unlocks valuable loot caches scattered throughout the map. If you find a rare key, head over to a designated area to unlock a container and score powerful weapons, perks, or essential consumables. Before diving into how loot keys function in Black Ops 6 and their locations, let’s clarify what they are.

    What Are Loot Keys?

    Loot keys are single-use consumables that drop from special and elite zombies. These keys open specific loot caches on the map, rewarding players with high-tier weapons, perks, and killstreaks. You can only carry one key at a time, so make sure to use it wisely.

    Similar to weapon tiers, loot keys also have varying rarities that affect the quality of the loot you receive:

    • Uncommon (Green): Unlocks green-tier weapons and armor.
    • Rare (Blue): Unlocks blue-tier weapons, with a chance to obtain perks and killstreaks.
    • Epic (Purple): Unlocks purple-tier weapons, along with a slight chance of finding yellow-tier items.
    • Legendary (Yellow): Offers a high chance of yellow-tier weapons and killstreaks.

    How To Get Loot Keys

    Loot keys are infrequent drops from special and elite zombies, such as Manglers, Abominations, and Amalgams. Tougher enemies appear to have a greater likelihood of dropping a loot key, though this isn’t guaranteed.

    The current round you’re in may also affect the rarity of the keys you find—higher rounds tend to yield more Epic and Legendary loot keys. While it’s possible to find a yellow-tier key early in the game, they become more common as the game progresses.

    Using Loot Keys

    Using a loot key is quite simple. You can unlock a loot cache located somewhere on the map, usually in specific places like a vault or armory. Each map has unique areas where loot keys can be redeemed, so here’s a breakdown of those locations.

    Liberty Falls

    In Liberty Falls, you can find two types of loot keys:

    1. Toolshed Key: Used to access the toolshed on the same street as the Pack-A-Punch church.

      • There isn’t a prompt for this door. Inside, you’ll find a Jet Gun part.
    2. Loot Key: Unlocks locked containers in the bank’s central vault.

    The bank is situated near the center of Liberty Falls, not far from the bowling alley. You’ll need to break into the vault inside that bank to use your key. For details on how to open the vault, check out our Liberty Falls vault guide. Once you’re inside, open any container to claim your rewards.

    Terminus

    In Terminus, redeeming loot keys is more straightforward. After obtaining a key, head to the armor and open any locker. The armory is located not far from the spawn point. Go to the first power generator, step outside, and enter the building next to the Gobblegum machine. The armory is at the bottom of the stairs on your left.

  • How To Pack-A-Punch in Black Ops 6 Zombies: Locations for Liberty Falls and Terminus

    How To Pack-A-Punch in Black Ops 6 Zombies: Locations for Liberty Falls and Terminus


    Activision

    If you ask any seasoned player of the Call of Duty franchise, they’ll likely emphasize the importance of the Pack-A-Punch machine in Zombies mode. This principle still stands firm in Call of Duty: Black Ops 6, which intensifies the challenge with new zombies, maps, and obstacles.

    As you progress through the rounds, the relentless undead become increasingly difficult to defeat, often rendering your standard weapons ineffective. To stay ahead of the rising challenge, you’ll need to upgrade your weapons using the Pack-A-Punch machines. However, locating these machines on each map is your first hurdle. Both Liberty Falls and Terminus each boast a Pack-A-Punch machine that has a fixed location, though getting there can be quite the challenge. Here’s how to locate each Pack-A-Punch in Black Ops 6.

    Difficulty

    Moderate

    Duration

    30 minutes

    Requirements

    • A substantial amount of Essence

    Finding the Pack-A-Punch in Terminus

    Accessing the Pack-A-Punch in Terminus involves a series of key steps, starting with activating the power in the Bio Lab area. Be prepared to spend Essence to unlock the necessary pathways; objective markers will guide you along the way. Follow these steps to reach the machine:

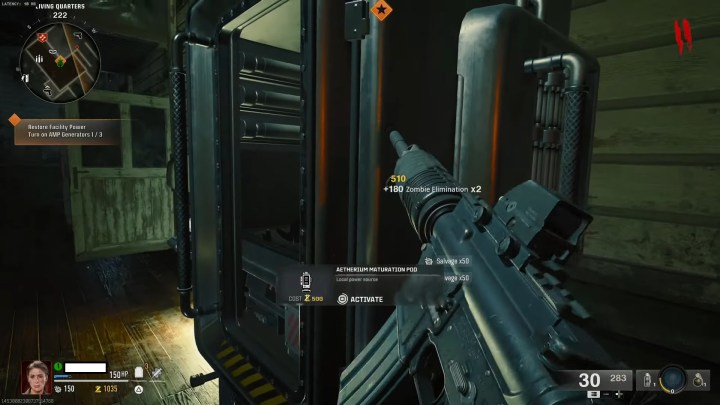
    Step 1: Head to the Living Quarters to find the first generator.

    Generator in Black Ops 6
    Activision

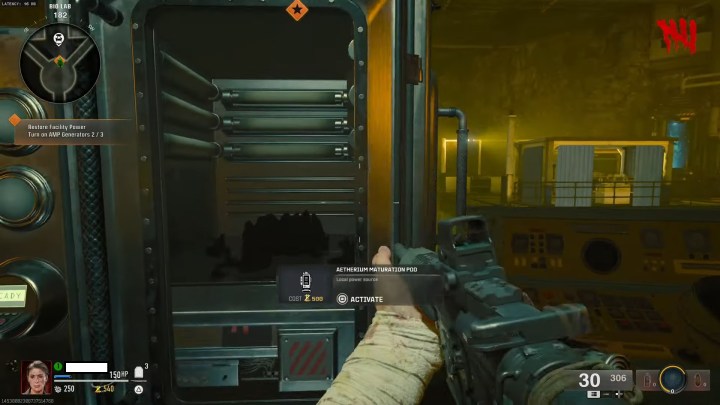
    Step 2: Spend 500 Essence to activate the generator, starting a 30-second countdown during which you must fend off attacking zombies.

    Step 3: Locate the second generator in the Living Quarters and repeat the process.

    Second generator in Black Ops 6
    Activision

    Step 4: Complete this again with the generator located at the Bio Lab.

    Should any generator be destroyed during your defense, you must finish the current round before attempting to activate it again.

    A generator in Black Ops 6 during gameplay
    Activision

    Step 5: Once all three generators are operational, your next objective marker will direct you to a flooded area underneath the Bio Lab. Dive into the water and activate the inclined lift to raise the Pack-A-Punch machine from the depths. Once it’s operational, you can access the upgrade station.

    Pack-A-Punch machine in Black Ops 6
    Activision

    Finding the Pack-A-Punch in Liberty Falls

    Accessing the Pack-A-Punch in Liberty Falls is more straightforward but requires a larger Essence cost. Though the pathways are clearly marked, you have two options. Here’s one route:

    Step 1: Spend 1,500 Essence to unlock the barrier beneath the Motor Lodge.

    Step 2: Move into the bowling alley and spend 1,750 Essence to open the door leading outside.

    Dimension barrier in Black Ops 6
    Activision

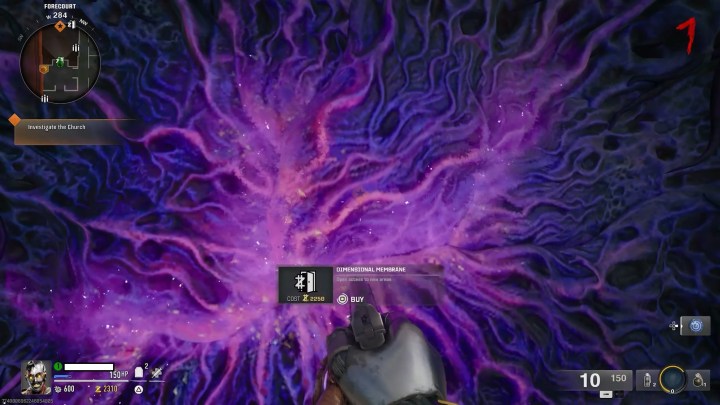
    Step 3: Follow the path up to the church and pay 2,000 Essence to open the next barrier.

    Step 4: At the church doors, open the dimensional barrier with another 2,250 Essence.

    Pack-A-Punch machine in Black Ops 6
    Activision

    Step 5: Enter the church, go to the back, and you’ll find the Pack-A-Punch machine waiting for you.

    For both maps, using the Pack-A-Punch to upgrade your weapons will cost the same: 5,000, 15,000, and 30,000 Essence for the three enhancements.