الوسم: Ys Memoire

  • Defeating Zirduros in Ys Memoire: The Oath in Felghana Guide

    Defeating Zirduros in Ys Memoire: The Oath in Felghana Guide

    At the bottom of Valestein Castle, hidden in the depths of the dungeons, lies the ultimate challenger: Zirduros. Access to this final battle is granted only after you conquer the first two bosses and thoroughly explore the area. Zirduros is the toughest foe you’ll encounter in this region.

    Although none of the enemies in Valestein Castle are easy, Zirduros presents a significant jump in difficulty. This battle is your last stop before you enter the penultimate dungeon in Ys Memoire: The Oath In Felghana, and it’s time to put an end to this formidable living weapon.

    Preparing for Zirduros


    Many strategies that worked against the previous two bosses also apply to Zirduros. This boss combines the toughest challenges of Death Faleon and Zellfel Zam Schultiger, so here’s how to prepare:

    • Level up to around 36. This will give you a buffer for mistakes without ruining your chances in battle.
    • If you’re having trouble, make sure you’ve fully upgraded the complete Battle equipment set.
    • The Terra Bracelet is extremely beneficial, so gather as many Topazes as you can find, including the one you get earlier in Valestein Castle.
    • Having the Double Boost for damage negation is crucial, so aim to obtain the Talisman of War from Randolph. You get it by trading him the Jade Ring after exchanging Raval Ore with Antonio.

    The key to defeating Zirduros is to inflict damage faster than they can on you. Be aggressive, but ensure that you have the necessary firepower to back it up.

    How to Defeat Zirduros

    Zirduros stands out as the toughest of Valestein Castle’s bosses, but they follow a distinct attack pattern. Their relentless barrage of attacks across the arena makes them formidable, and you can only target a specific weak spot on their back, namely: their vulnerable tail.

    Here’s a breakdown of Zirduros’ moves:

    • They shoot rockets that land randomly throughout the arena. Keep moving to avoid them.
    • They fire two homing rockets that chase Adol. You can either outrun them or use the Terra Bracelet to intercept them.
    • Zirduros slams their tail into the ground, laying down a series of mines. This usually happens when you are behind them.
    • The boss performs a 360-degree spin while firing. You can use the Terra Bracelet or position yourself behind them to evade damage.
    • Zirduros jumps and slams down near Adol, which also releases mines.
    • They unleash a powerful laser in a single direction. Step aside to avoid it.

    With so many moves to dodge, and many with lingering effects, engaging Zirduros can be tricky. This is why the Double Boost is so valuable: you can get in close and absorb damage. They don’t have the highest defense, so if you manage to stay behind them, you can take them down swiftly.

    Utilizing the descending slash allows you to deal damage effectively while avoiding mines.

    The Terra Bracelet is invaluable at this point since it provides a generous window of invulnerability and lets you close in on Zirduros. Pair this with Double Boost while behind the boss, and you won’t have to rely on the Ventus Bracelet to strike more.

    Once you defeat Zirduros, a bridge will emerge at the top of the room, revealing Elena and Aida’s missing grandson, Bob. Chat with them briefly, and you’ll receive the Clock Tower Key, allowing you to enter the next dungeon. Best of luck!

  • Conquering Zellfel Zam Schultiger in Ys Memoire: The Oath

    Conquering Zellfel Zam Schultiger in Ys Memoire: The Oath

    Valestein Castle, one of the last dungeons in Ys Memoire: The Oath In Felghana, presents a fitting challenge for players. The layout of the dungeon is somewhat complex, but the real test lies in the three bosses you’ll have to conquer to progress.

    The second boss in this sequence is Zellfel Zam Schultiger. With a name that’s quite unique, this adversary is essentially a very aggressive dog. However, a well-trained dog can be as dangerous as any other foe. Here’s how to take them down and delve deeper into the castle.

    Getting Ready for Zellfel Zam Schultiger

    Since most bosses in Valestein Castle are fought in close quarters, a lot of the same advice applies to all of them. This means that strategies can often be applied broadly, with some specific thoughts tailored for Zellfel Zam Schultiger.

    • Level up to 35 to ensure your stats are high enough to survive the encounter without it dragging on.
    • By this point, aim to have both the Battle Armor and Battle Shield. Fully upgrade them if possible before facing this boss for a smoother fight.
    • The Ignis Bracelet is a valuable asset here, so collect every Ruby you can find leading up to this battle.
    • Obtain the Talisman of War by giving Randolph the Jade Ring from Antonio. This item boosts the duration of your Boost Mode, which can be advantageous in the fight.

    With these preparations, you’re ready to face the hound of Valestein Castle.

    Defeating Zellfel Zam Schultiger

    The battle with Zellfel Zam Schultiger unfolds in an entirely sidescrolling arena, which makes dodging some of the boss’s attacks challenging. This is why the Ignis Bracelet will be your ally during this fight. Maintain as much distance as possible, as the boss can close in on you quickly.

    This boss doesn’t have any special gimmicks, nor does it switch up its moves as its health diminishes. Despite its unassuming appearance, it can be surprisingly tough. Here’s a breakdown of their attacks:

    • The boss runs toward you before leaping into the air. You can avoid this by staying grounded.
    • They stand still and breathe fire across the arena. Move to the opposite side to dodge this attack.
    • A group of smaller wolves appears and runs across the arena. Jump over them using the Ventus Bracelet or dash through them with the Terra Bracelet.
    • The boss curls up and bounces around the arena. They become vulnerable for a few seconds afterward.
    • They jump high and slam down. Simply jump to avoid this move.

    That’s the extent of their moves. The trickiest attack to dodge is the leaping one, as it can be confused for the slam. This is another reason to keep your distance. Alternatively, you can use the Terra Bracelet to protect yourself if you’re uncertain about their next move.

    If the boss gets cornered, activate Double Boost and attack with your combo. They can get stunlocked, preventing them from escaping until your Boost finishes. Additionally, unleash fireballs at them whenever possible, only closing in for melee attacks when you’re out of magic points.

    Once you defeat them, you’ll receive the Holy Cross key item, which may be the last item needed to move forward in Valestein Castle.

  • Complete Guide to Organ Piece Locations in Ys Memoire’s Valestein Castle

    Complete Guide to Organ Piece Locations in Ys Memoire’s Valestein Castle

    Valestein Castle serves as one of the last dungeons in Ys Memoire: The Oath In Felghana, standing out as the largest dungeon in the game. This intricate locale challenges players by testing all their acquired skills and equipment.

    In contrast to other dungeons, Valestein Castle is designed in a more non-linear fashion, allowing players to face its bosses and discover key items in any sequence they choose. While this freedom makes the gameplay more enjoyable, it can also lead to moments of confusion. To help navigate this complex dungeon and ultimately defeat Count McGuire and Chester, we’ve put together this comprehensive guide.

    Exploring the East and West Wings

    Upon entering Valestein Castle, take a moment to talk to the characters outside before moving inside. You’ll notice stairs leading to another door, but since that door is currently locked, proceed down the lower entrance for now.

    As you move through the next couple of rooms, be cautious of spikes and prepare for some strong foes. You will soon reach a large area with a narrow pathway and swinging spiked balls, as well as two side passages. Since nothing significant lies down these side paths, stick to the main route.

    This main path is icy, so make sure to equip the Stone Shoes that you’ve likely obtained in the Elderm Mountains. If you missed picking them up earlier, now is the time to backtrack. Charge ahead, deftly jumping to avoid the spiked balls; the Stone Shoes should make avoiding them a breeze.

    Following this path, you’ll find yourself in a room with a spiral staircase leading both up and down, along with left and right exits. For now, let’s ascend the staircase. Carefully navigate the gaps, then use Double Jump and the Ventus Bracelet to cross over to the upper level, where you’ll encounter Count McGuire’s wife and children. They will share vital information and provide you with the Ivory Key, an essential item for later in your journey.

    Afterward, you can descend the stairs, but a quicker method is simply to jump down to the lowest level. From there, climb up the stairs to return to the middle of the spiral staircase area. At this point, you can choose to go left or right. Since the right path is somewhat limited, head through the left exit.

    Note: The game’s save points mistakenly label the West Wing as the East Wing and vice versa. We’ll stick with actual directional terms for clarity.

    Optional Items to Collect

    While this section of the castle doesn’t offer too many optional treasures, the ones available are worth the effort. Here’s where to find them:

    Item Location
    Raval Ore x200 In the room with the swinging spiked balls, drop down from a broken ledge into an alcove to find a chest.
    Topaz While climbing the spiral staircase, drop down through one of the gaps and use Double Jump along with the Ventus Bracelet to reach a chest on a separate platform.

    Given the strength of many foes in this dungeon, accumulating Raval Ore is highly beneficial. Hold onto it, as there are some fantastic armor upgrades approaching down the line.

    Advancing to the East Wing

    After taking the left path, you’ll arrive at an area filled with individual platforms occupied by enemies. Falling from any platform will send you back to the ground level, forcing you to restart the room, so tread carefully.

    If you’re struggling with the platforming sections, you can use the “No Fall” option in the settings, which will allow you to respawn in your current area if you fall.

    Jump onto the platforms and follow them north until you reach an impasse; then go left and continue south. When you encounter a fork, take the left path. The remainder of this section is straightforward, so follow it until you reach the exit.

    You only need to use Double Jump to navigate these jumps, but it’s a good idea to have the Ventus Bracelet equipped for extra safety. After entering the next room, you will find the first new save point and face the first boss of this dungeon.

    Optional Items in This Section

    Similar to the previous area, you won’t find an abundance of optional items here, but they are particularly valuable:

    Item Location
    Battle Armour Found on the bottom floor of the stairs or by falling from above; climb the spiked section to uncover a treasure chest.
    Raval Ore x500 Before reaching the fork, jump to the right using Double Jump combined with the Ventus Bracelet to reach a hidden platform with a chest.

    The Battle Armour is a standout reward here, but don’t forget to use the Raval Ore to upgrade it. Save your progress at the East Wing’s save point and then head back to Redmont to strengthen your gear before facing the boss.

    Conquering Death Faleon

    Death Faleon is your first boss in this dungeon, and fortunately, he isn’t too tough. However, he has a unique damage mechanic similar to the Ligaty boss encountered earlier.

    Throughout the battle, Death Faleon will change colors, with each color vulnerable to specific types of damage. Green can be hurt by wind, red by fire, yellow by earth, and white by your sword. Besides that, the fight itself remains relatively straightforward, without any new tricks introduced as the fight progresses.

    Once you defeat him, you will receive the Organ Pipe, another quest item that will be useful later, as well as a notification that some doors are now accessible. Head back to the circular staircase to continue your exploration.

    Entering the West Wing

    The opened doors are located at the far end of the right side of the circular staircase and above the entrance stairs; they connect back to each other. Since the first option is closer, head through the door near the circular staircase.

    The first room will lead outside to a courtyard. For now, you have two areas to choose from: a central building and an open door to the left. Since there’s not much to do in the center building right now, continue left.

    Move through this next linear area until you reach another circular room with stairs leading up and down. The south door leads back to the newly opened entrance, so ignore it. Both staircases offer optional items, so take the right exit.

    The next area is very dark and filled with misleading platforms. To illuminate the area, equip the Nightfire Gem you obtained from Aida earlier in the game. This lighting change will reveal the fake platforms, allowing you to avoid them while navigating.

    Even if you end up on a false platform, you will have a brief moment to jump off, which can turn them into legitimate platforms if you act quickly. This area is populated with enemies, so be cautious not to get knocked off the edges. Luckily, the enemies are also unaware of the false platforms, making it easy for them to tumble into the void.

    After making it across, you’ll arrive at Valestein Castle’s second save point, followed by the second boss.

    Optional Items in This Section

    You’ll discover a more substantial amount of optional items here, primarily Raval Ore. Here are their locations:

    Item Location
    Raval Ore x320 From the large icy area, take the east exit to a room with spikes, then climb the wall and break through using the Terra Bracelet to find a chest.
    Raval Ore x380 In the area with false platforms, jump to the northeast right at the start to reach a chest while avoiding the fake platforms.
    Battle Shield Climb the stairs in the circular area, then ascend the wall and break the cracked section using the Terra Bracelet to reveal a chest.
    Raval Ore x250 After crossing a platform, jump up to higher stairs and utilize the Ventus Bracelet and Double Jump to reach this chest.

    Aside from the Battle Shield, which is the second item you need for your set, the Raval Ore is invaluable for upgrades. Once you reach the West Wing save point, consider a trip to upgrade your gear again.

    Defeating Zellfel Zam Schultiger

    This doglike creature serves as your next boss, and the battle takes place in a side-scrolling arena. While not overly complex, the small size of this area adds a level of difficulty.

    Their attacks include shooting fire in one direction—best evaded by positioning yourself behind them—and a lunge that launches them over you, so stay low to dodge this attack. There’s also a howl attack that summons smaller wolves; you can either double jump over them using the Ventus Bracelet or negate the damage with the Terra Bracelet.

    The final attack has them curling into a wall and bouncing around the space. After this assault, they will pause for a few seconds, providing you with a prime opportunity to counterattack. In scenarios when you can’t approach closely, utilizing fireballs can effectively hit them even off-screen.

    After besting this foe, you will earn the Holy Cross, a crucial item for advancing further into the castle.

    Navigating to the Dungeon

    Return to the courtyard and enter the central building, noted as a chapel. On the floor, you’ll find Elena’s Silver Pendant; pick it up for a future quest. Head to the organ and place the items you’ve collected—Ivory Key, Organ Pipe, and Holy Cross—to unveil a secret passageway leading to the dungeon.

    The initial section of the dungeon is straightforward, so simply follow the stairs downwards until you arrive in the next area, which is teeming with powerful new enemies.

    As you navigate through this area, stay on the path, leading you to an open space. Head right to a set of stairs, one leading up and the other leading down. Opt for the downward staircase. Rush through this room to the right exit, which will take you to the final save point in Valestein Castle. You will face two exits ahead—north and east.

    The eastern exit leads to the Clock Tower, which you cannot access yet, so proceed north, where the final boss of Valestein Castle awaits.

    Optional Items in the Dungeon

    In the dungeons beneath Valestein Castle, you’ll discover only one optional item, the smallest section of the area:

    • Battle Saber: Located in the large room, ascend the stairs and climb the wall until you loop back to the previous area at a higher level. Jump across the falling platforms to reach a chest surrounded by Torieze enemies, which contains the sword.

    This is the second most powerful sword in the game, making it worth a trip back to upgrade once you find the next save point. You should be able to equip it right away.

    Overcoming Zirduros

    Zirduros is the last defender of Valestein Castle, and it’s quite amusing to note that they are a robot. Despite the game’s world not showcasing guns or electricity, here stands a mechanical being, equipped with everything you would expect from such a character.

    Nevertheless, even with their advanced technology, they can be defeated with a good sword and some magic. Zirduros has powerful strikes, but many of their moves can be entirely avoided with the Terra Bracelet. The strategy here is to attack from behind, as they struggle to deal damage when you are positioned correctly.

    The Terra Bracelet will be immensely helpful, allowing you to stick close to Zirduros without incurring too much damage. Use Double Boost as soon as it’s available to heal and inflict significant damage.

    Once you’ve taken them down, you’ll receive the Clock Tower Key, enabling you to rescue Elena and even Bob, Aida’s supposedly deceased grandson. This leads to a happy conclusion for everyone, setting the stage for the penultimate dungeon in the game.

  • Complete Guide to Katol Elixir Locations in Ys Memoire: Felghana

    In contrast to earlier Ys titles that focused heavily on item management like other classic RPGs, Ys Memoire: The Oath In Felghana emphasizes speed. Instead of carrying items, you collect them from defeated foes and use them right away. This change results in a quicker and more streamlined gameplay experience.

    There are plenty of treasures available, and Katol Elixirs provide a method to increase your HP beyond the usual level-ups. You can find several throughout the game, and here’s how to locate each one.

    What Do Katol Elixirs Do?

    All Katol Elixirs in the game are optional. If you zoom straight to the finish line, you might miss them completely. There are quite a few to discover, and their benefits definitely make the extra effort worthwhile.

    Katol Elixirs are single-use items that permanently boost your HP by a modest 5 points. While it may seem small, that extra health can make a difference as you collect more, especially since your total HP tends to be limited throughout your adventure. There’s no downside to using them, so consume them as soon as you obtain them.

    Keep in mind that Katol Elixirs do not restore your health when used, so don’t rely on them for quick healing in tough spots.

    Where To Find Every Katol Elixir

    Throughout Oath in Felghana, there are six guaranteed Katol Elixirs to collect, with others available for purchase. In Redmont, you can buy one from Cynthia’s Shop, though the price increases each time you buy one—from 10,000 gold to 20,000, then 30,000, and so on.

    Here’s a list of every free Katol Elixir you can find, but you’ll need to do some exploring to uncover them.

    Location

    Directions

    Katol Elixir #1

    Illburn Ruins

    Found in the inner chamber, down a southern path that locks you in a room until all enemies are defeated.

    Katol Elixir #2

    Abandoned Mine

    After getting to the second mine shaft, leap over the broken part on the left and drop off the edge to reach this platform and chest.

    Katol Elixir #3

    Zone of Lava

    Head west from the Topside warp point, then north until you enter a small cave that contains the chest. A Double Jump is required.

    Katol Elixir #4

    Elderm Mountain

    Located on a cliff just before entering the mountain’s interior.

    Katol Elixir #5

    Elderm Mountain

    In the side-scrolling section before the Icebound Cave.

    Katol Elixir #6

    Hugo Quest

    A reward for giving Hugo all the Berm Leaves found in Elderm Mountain.

    Katol Elixir (Recurring)

    Cynthia’s Shop, Redmont

    Costs an increasing 10,000 Gold each time.

    The third Katol Elixir in the Zone of Lava is the only one that cannot be obtained on your first visit, and the area itself can be easily overlooked.

    With all the guaranteed Katol Elixirs collected, you’ll gain an additional 30 HP, plus more with each one you buy from Cynthia.

  • Elena’s Location Guide in Ys Memoire: The Oath in Felghana

    Elena’s Location Guide in Ys Memoire: The Oath in Felghana

    The side quests in Ys Memoire: The Oath in Felghana can be a little tricky to spot. While characters in Redmont will usually show a big green exclamation mark when they want to speak with you, not all side quests are so obvious and some might be entirely missed if you’re not paying attention.

    Elena, Chester Stoddart’s sister, has a tendency to vanish throughout the game. She often leaves the village unexpectedly without anyone noticing. At one point, she goes missing, but the game doesn’t provide much guidance on where to find her. It’s up to you to track her down, so let’s get started.

    When Does Elena Go Missing?

    While Elena frequently disappears, she usually returns as part of the main storyline—except in one key instance. This quest is easy to overlook, so avoid rushing through the game’s locations.

    This particular quest unlocks after finishing the Abandoned Mine section, but before heading to Elderm Mountains. It’s crucial to not visit the Elderm Mountains until you’ve located her.

    Where To Find Elena

    Adol with Elena looking toward Genos Island in Ys Memoire: The Oath in Felghana.

    Fortunately, the world in Oath in Felghana is relatively small, with only a few paths connecting major areas. There are no real optional locations in the game.

    To find Elena, you should head towards Valestein Castle, then proceed downward towards the coast. This leads you to a small dock where you’ll find Elena gazing out at Genos Island.

    Escorting Elena Back To Redmont

    Elena with a health bar being escorted back to Redmont with Adol in Ys Memoire: The Oath in Felghana.

    Once you talk to Elena, she opens up about her feelings for Chester, her childhood memories, and her connection to Genos Island. She expresses her desire to return home, but Chester insists on accompanying her.

    This sets up the escort mission, where Elena will have a health bar and follow closely behind Chester. Your task is to ensure she doesn’t get attacked by enemies.

    Elena moves at a slower pace than Adol, so the game will alert you if she begins to lag behind.

    Elena’s health bar is quite small, so try to keep her from taking more than a couple of hits. The path back to Redmont is straightforward with no major challenges. Although Elena will thank you for your help, she won’t provide any rewards apart from her gratitude. Nonetheless, assisting her is rewarding in its own right.

  • Starting All Side Quests in Ys Memoire: The Oath In Felghana

    Starting All Side Quests in Ys Memoire: The Oath In Felghana

    In addition to the various locations and dungeons you’ll encounter while following the main story of Ys Memoire: The Oath in Felghana, there are numerous side quests to undertake. These side quests offer diverse rewards, making it worthwhile to seek them out and complete them.

    While the game doesn’t overwhelm you with side quests like some other JRPGs, there are enough to potentially overlook a few. Missing these can hinder your progress until you replay the game, which makes it even more essential to take on and finish them as soon as they’re available!

    How to Start Every Side Quest in Ys Memoire: The Oath in Felghana

    There are a total of seven side quests available in Ys Memoire: The Oath in Felghana. These quests will open up as you progress through the game but may become unavailable if you move too far ahead, so it’s important to complete them before reaching certain points in the story to gain valuable rewards.

    You can find detailed information about each side quest, including when they become available, when they expire, and the rewards you can earn upon completion, all in the table below. This will help you ensure you don’t miss out on anything as you navigate your adventure in Felghana!

    All Side Quests in Ys Memoire: The Oath in Felghana

    Throughout your journey, take time to chat with the residents of Redmont Town. You can receive Raval Ore and other items just by talking to them, so be sure to visit and engage with everyone who has an exclamation mark above their head after you explore a region or complete a dungeon for the first time!

  • Locating Double Jump in Ys Memoire’s Abandoned Mine

    Locating Double Jump in Ys Memoire’s Abandoned Mine

    After discovering a pair of statues and pondering their significance, you’ll find yourself heading to the Abandoned Mine in Ys Memoire: The Oath in Felghana. Nestled behind a locked entrance in Tigray Quarry, this mine is filled with formidable foes and contains the statue you’re looking for.

    Before diving into the mine, a little preparation is necessary, but the rewards awaiting you make it all worthwhile. It’s here that you’ll uncover the mystery behind these statues, so let’s get started.

    Finding The Mission Tablet

    Your primary objective in the Abandoned Mine is to locate the Missions Tablet left by Genos. Begin your journey by dropping to the bottom of the main shaft in Tigray Quarry. From there, move to the left or warp to the right to the Storehouse save point using the Wing Talisman. Enter through the door that was previously locked to continue your adventure through the Abandoned Mine.

    Assist Aida by first finding Bob’s Pendant within Tigray Quarry. This will earn you the Nightfire Gem, which enhances visibility in the Abandoned Mine.

    The tunnel ahead is pretty straightforward, so keep moving left until you come to a fork. You can either go down or continue left into another room. Opt for the left path and watch a lengthy cutscene that reveals the Mission Tablet, giving you motivation to take down Galbalan.

    Along with this, you will gain two new abilities: Double Jump and Double Boost. The Double Jump allows you to leap a second time to reach greater heights, while the Double Boost enables your Boost Gauge to fill up a second time, helping to restore your health, extend your combos, and unleash a powerful blast upon activation.

    Now equipped with these new skills, we can proceed deeper into the mine.

    Moving Towards The Boss


    After securing the Mission Tablet, return to the previous area and drop all the way down. Once at the bottom, head left into the next area. You’ll need to use your double jump to get over the ledge here.

    The passage is still fairly linear, so follow it to the next section. Be careful of the Minotaur enemies here, called Duradel, as they can be quite strong. Descend the stairs to reach the next area.

    The Double Boost is particularly effective against them if you want to give it a try.

    Navigate around the small lake and take the stairs down again on the left. Here, you’ll find a fork: one path leads down stairs while the other crosses a broken bridge. Choose the stairs to go down. If you drop onto the broken bridge, you’ll land right in the middle of a group of Duradels.

    There’s nothing worth seeing on this level, so head down the central stairs again. You’ll arrive at another large mineshaft, but this time we won’t drop to the very bottom. Go down about four flights of stairs until you come across a section of the platform without railings. Fully charge the Ventus Bracelet and perform a double jump to carry you across the gap. Keep moving forward.

    You’re almost there! This section features a side-scrolling format focusing on platforming. Utilize your double jump to stay on elevated areas as powerful enemies lurk below. There’s not much to distract you here, so remain high until you find the stairs leading downward.

    Remember, you can alter your jump direction using the double jump, which helps you reach platforms directly above you.

    At the bottom of these stairs, you’ll encounter a save point followed by the boss room. Take a moment to heal up before proceeding further.

    All Optional Items

    The Abandoned Mine is home to a variety of treasures waiting for you, so here’s a summary of what you can find:

    Item

    Location

    Raval Ore x50 A chest in a left-hand room on the first mineshaft.
    Raval Ore x25 Located at the southern edge of the area with the small lake.
    Raval Ore x40 Found in the second mineshaft beneath the stairs at the very bottom.
    Katol Elixir In the second mineshaft, drop down from the area leading deeper into the mine to find this platform.
    Raval Ore x65 In the side-scrolling platforming area, jump higher to a wider platform where a Duradel is located.
    Emerald In the area with the broken bridge, you need to use a fully charged Ventus Bracelet and a Double Jump to access this chest.
    Raval Ore x200 Located just before heading down the stairs to the boss arena; you’ll need the Terra Bracelet to access it.

    The Raval Ore will be particularly useful as the game’s challenge increases, allowing you to keep your weapons and armor in excellent condition, so don’t overlook the boosted power of the Ventus Bracelet.

    Conquering Istersiva

    Adol with a red exclamation point above his head as Istersiva appears in the abandoned mine in ys memoire the oath in felghana.

    Istersiva serves as the final boss of the Abandoned Mine and presents quite the challenge. The first stage involves them transforming from a giant worm to a more butterfly-like form, rapidly moving into their chrysalis state. The initial phase is relatively straightforward, as Istersiva is quite slow.

    Attack them a few times and then retreat to avoid their sweeping strikes. The real danger in this stage comes from the smaller enemies they summon. A laser beam will shoot from the crystal at the back of the room, which can chain between all enemies, making navigation tricky. Make sure to eliminate these smaller foes as soon as they appear.

    Once Istersiva’s health drops to half, they will retreat to the crystal and initiate the second phase. This phase ramps up the difficulty with bomb drops and a barrage of projectiles that can quickly clutter the screen. When a large shield expands around them, rush in and attack to inflict damage. Be patient, and you’ll persevere.

    While moving, they also create a smaller shield that inflicts massive damage, so steer clear of it.

    Defeating Istersiva will reward you with the Darkness Statue, allowing you to return to Redmont and continue your quest.

  • Conquer Chester in Ys Memoire’s Clock Tower Challenge

    Conquer Chester in Ys Memoire’s Clock Tower Challenge

    You’ve just conquered the Clock Tower in Ys Memoire: The Oath in Felghana, collected all those statues, and likely faced plenty of challenges while honing your platforming skills. But the ordeal isn’t finished yet, as you’re gearing up for one of the toughest boss encounters in the whole game.

    Chester Stoddart was already a formidable opponent the first time you faced him, and now he’s back, more ruthless than ever. Wielding two swords and boasting an enhanced moveset, he won’t give you a moment to catch your breath, let alone defeat him. However, he can be beaten, and here’s how.

    Preparing for the Battle with Chester


    Given how tough Chester is, it’s wise to prepare before diving into battle. His attack patterns haven’t changed dramatically since your first encounter, so you should have some familiarity. Notably, he’s immune to magic, rendering most of your bracelets ineffective.

    The exception is the Terra Bracelet. While it won’t inflict damage on him, it does allow you to negate damage from his attacks. Be sure to keep the Terra Bracelet equipped throughout the fight. You can collect two Topaz from the Elderm Mountains and Valestein Castle in advance.

    Next, acquire the Talisman of War, which you receive from Randolph after giving him the Jade Ring. To get the Jade Ring, you’ll need to trade 260 Raval Ore to Antonio. By this point in the story, that should be manageable. The Talisman of War extends the duration of your Boost Mode and is always active without needing to be equipped. This is crucial.

    Lastly, make sure to upgrade all your armor and weapons. The Battle set, which you can find in Valestein Castle, is the best available at this stage. If Chester is proving challenging, enhance your gear to the highest level possible.

    Try to reach at least level 40 before the battle for a better chance of success.

    How to Beat Chester Stoddart

    Chester’s fighting style remains similar to your initial encounter, but he’s significantly faster and hits harder this time. He offers very few opportunities for you to land full combos, as he constantly dashes around with swift tracking. In this battle, you’ll mostly be taking advantage of your hits.

    The key to winning is balance: stay too far away, and he’ll fire projectiles at you; stay too close, and he’ll hit you easily. Try to maintain a closer distance as this gives you the best chance to land two or three hits. A smart tactic is to jump over his attacks and follow up with a descending slash, which can connect for a few hits.

    If Chester raises a barrier in front of him, back off immediately. If you strike this barrier, he’ll counter-attack right away, typically following up with a series of strikes.

    As Chester’s health decreases, he’ll increase his speed, teleport around the arena, and shoot projectiles in all directions. This phase can be tricky to navigate, so use the Terra Bracelet to dash into the attack, negating the damage. The bracelet provides a generous window of invulnerability.

    Your best chance to deal significant damage to Chester is with Double Boost. Activating it inflicts substantial damage, and then you can unleash a series of attacks against him. Remember, though, you’re not invincible during this time, so be cautious. The HP you recover should help keep you alive while you focus on maximizing damage to Chester.

    You can also use Double Boost to regain some health if you’re worried you might not have enough to finish him off.

    Keep in mind that the first bar of your Boost Mode must be charged through both dealing and receiving damage. Only the Double Charge builds passively.

    That’s the strategy for the whole fight. With some careful jumping and smart use of Double Boost, you should be able to beat Chester in no time. Once you do, you’ll head to the top of the Clock Tower for an unwinnable encounter.

  • Locate All Statues in Ys Memoire’s Clock Tower: The Oath in Felghana

    The Clock Tower serves as the second to last dungeon in Ys Memoire: The Oath In Felghana. It’s a brief but engaging part of the game that sets the stage for the big finale. It comes with its own set of challenges that keep things interesting.

    This dungeon emphasizes platforming, which can occasionally be tricky due to the camera angle. You’ll also encounter some of the toughest bosses in the game here. Let’s gather those statues and climb our way up the Clock Tower!

    Collecting the Statues in the Clock Tower

    Once you obtain the key to the Clock Tower from Zirduros in the Valestein Dungeon, you can enter and start your ascent. This area is quite linear, requiring you to find all the statues in each room before moving on. So, you won’t overlook any of them. Let’s dive in.

    Moonstar Statue

    To start, be sure to equip the Stone Shoes. The slime creatures make the floor slippery, putting you at risk of slipping off and having to restart. Move to the left and hop onto the moving lift, then jump onto the cogs in motion. These cogs can move swiftly, so be careful not to get flung into spikes—try walking against the direction of the cogs to slow yourself down.

    After getting past the cogs, light the unlit torch with your fire spell to activate a moving platform. Leap up, and continue along the path until you reach another platform at the top. Bypass the locked door to discover four rising platforms. This is a balancing puzzle where you’ll need to elevate the second and fourth platforms to their maximum height.

    You can achieve this by jumping between solid ground on the left and the first platform, then repeating the process with the third and fourth platforms. If you’re feeling confident, you can fully charge the Ventus Bracelet and grab the statue from the second platform at its peak with a double jump. Collect the Moonstar Statue and move on to the next area.

    Sunset Statue

    In this area, utilize the rising platform to the left and steer clear of the spikes on the moving cogs. Jump to another rising platform and continue climbing up past several more moving cogs until you can take the path upwards toward a moving platform on the left. Make your way upwards, jumping from the moving cogs onto a rising platform, which leads you to the Sunset Statue.

    Now take the left path and ascend on the moving platform. This jump can be tricky, so don’t hesitate to use the Ventus Bracelet for assistance. If you struggle with the jump, you’ll land in an area with some enemies, but you can simply return to the same platform. Once you make it to the upper area, proceed into the next room.

    Darkness Statue

    Start by heading left and lighting a torch with your fire spell to activate a moving platform. Take this platform up, ensuring you light the torch at the end of this walkway before continuing your climb.

    The following jumps are straightforward, consisting of a series of moves between moving platforms. However, these platforms don’t all move at the same speed, so jump only when you’re sure you can make it.

    You’ll then reach a section with rapidly moving platforms that shift left and right. Ascend the first set, then move left onto the platforms traveling right, which will lead you to the Darkness Statue. With it in hand, you can proceed to the next area at the far end of the moving platforms.

    Light Statue

    In this room, light the torch on the right to start a series of platforms that shift left. Jump onto these platforms to reach a new area, activate the torch here, then ascend again. Keep moving up the horizontally shifting platforms until you reach a vertically moving one. Ride it up and then to the left to another vertical platform.

    Continue upwards until you’re back on solid ground. Move left and drop into the hole ahead to obtain the final statue, the Light Statue. After that, drop down and retrace your steps until you encounter another balancing puzzle.

    This one is a bit simpler than before. Jump onto the lowest platform from the moving platform, quickly hop to the leftmost one, then to the higher platform directly to its right. From here, jump quickly to exit. It’s crucial to jump before the platforms adjust their height. If you’re too slow, just leap off and wait for them to reset. Keep going from there.

    Optional Items in the Clock Tower

    There are just two optional items to uncover in the Clock Tower due to its brief length. They are the final Ruby for your Ignis Bracelet and 350 Raval Ore. Here’s where to find them.

    The Ruby is located in the very first area. Near the top, you’ll find a rising platform leading to the next area. Instead of going up, drop below it to discover a chest. Inside, you’ll find the last Ruby, enhancing your Ignis Bracelet even further.

    The 350 Raval Ore can be found in the second area. Before leaping onto the rising platform past the first set of cogs, jump onto the lower one on the right. This path leads you to a small ledge, which you can reach with a double jump. Inside, you’ll find the 350 Raval Ore.

    Defeating Chester Stoddart and Nikolas Garland

    After collecting all four statues, it’s a direct path to Chester at the top of the tower. Make sure to save before entering the room, or you’ll have to replay the entire Clock Tower if you want to exit the battle. Enter the main hall now.

    Chester fights similarly to your first encounter, but he’s significantly more aggressive this time. He gives you less time to strike, so most of the battle will involve dodging his attacks and sneaking in hits whenever possible.

    To complicate things, he’s almost completely immune to magic, rendering your bracelets nearly useless. However, the Terra Bracelet still provides immunity to his attacks.

    Your best strategy here is to fill your Double Boost gauge and unleash a flurry of attacks on Chester. You might still lose quite a bit of HP in the process, but this aggressive approach should give you enough recovery to stay in the fight if you’ve been dodging effectively. Take your time with this battle—patience is key.

    Once you defeat Chester, you’ll be met with new betrayals and face off against Nikolas Garland. No matter how hard you try, this battle is unwinnable. After losing, you’ll find yourself back in the town of Redmont. With that, the Clock Tower is complete, and your final destination is Genos Island.

  • Conquering Guilen in Ys Memoire: The Oath in Felghana

    Conquering Guilen in Ys Memoire: The Oath in Felghana

    Dungeons play a crucial role in most JRPGs, and Ys Memoire: The Oath in Felghana nails this aspect from the start with the Zone of Lava. It’s the first of many dungeons in the game, presenting a maze of exploration options alongside intensely challenging battles.

    The challenge intensifies as you cannot exit the dungeon until you’ve completed it. This means you won’t be able to backtrack for equipment upgrades or new gear. You’ll have to rely solely on what you bring with you, which can be intimidating for new players. Fortunately, there’s always a way to move forward, even when the odds seem tough!

    Boss Overview: Guilen, The Fire Eater in Ys Memoire: The Oath in Felghana

    As the initial boss in the first dungeon, Guilen, the Fire Eater, serves as your first true test of skill. Battling a massive fire serpent over a pool of lava provides a distinct advantage to Guilen. Additionally, there are specific tactics you must learn to effectively defeat it.

    Even with the limitation of not being able to exit to upgrade your gear or purchase new items, you should be ready for this battle if you’ve thoroughly explored the Zone of Lava. As long as you have the Broadsword and Small Shield (both obtainable from Illburn’s Ruins), this fight should be manageable!

    Guilen, The Fire Eater: Key Information

    Attribute Value
    HP 1,100
    Recommended Level Level 15

    Reaching Level 15 is advisable when facing Guilen, which is easily achievable with proper exploration along the way. If you’re at Level 13 or below, consider leveling up to at least Level 14 before taking on this challenge.

    Aside from that, having the Broadsword and Small Shield can significantly aid you. You can still find the Broadsword if you missed it, but you can no longer obtain the Small Shield. If you find the fight frustrating, remember that you can temporarily reduce the difficulty upon dying to a boss, allowing you to keep progressing!

    Defeating Guilen, The Fire Eater in Ys Memoire: The Oath in Felghana

    While Guilen, the Fire Eater, seems straightforward with limited attacks, the real difficulty comes from the various mechanics in play that demand your attention to defeat it successfully.

    In total, Guilen has about three to four primary attacks. As the fight progresses, it becomes increasingly harder to land hits, which catches many unprepared players off guard. Here’s how to overcome this challenge!

    Adol – Smothering The Flames

    At the start of the encounter, Guilen rises out of the lava pit in the bottom left corner of the arena and slithers toward Adol. Now, having just acquired the Ventus Bracelet, it’s time to utilize it to deal with one of the primary mechanics of this battle.

    As Guilen approaches, jump and activate the Ventus Bracelet to propel Adol higher into the air, avoiding its attack. From this vantage point, leap over Guilen and use the Ventus Bracelet to unleash a gust of wind down on it to douse its flames.

    With its fire extinguished, you can start inflicting damage. You’ll notice parts of its body becoming damaged over time. Keep slashing until Guilen retreats!

    Guilen – Fire Breath

    After emerging from the lava, one of Guilen’s primary attacks is its Fire Breath, where it spews flames while moving smoothly around the arena. In the early stages, this attack isn’t a big issue; just stay behind its long body to avoid the fire and strike it.

    Guilen – Into The Lava Pits

    Once enough damage is done, Guilen will dart to one of the five lava pits in the arena. When you notice it disengaging, pay attention to where it’s going and move away to avoid the lava splash damage, which can be quite painful if you’re too close.

    Guilen – Out Of The Lava Pits (Shorter)

    After a moment, Guilen will reemerge from one of the lava pits. Watch for the boiling lava, and move away as soon as you see it start to bubble. Stepping back will prevent damage. This time, Guilen will be shorter than before!

    Adol – Smothering The Flames, Part Two

    Though Guilen is now shorter, the mechanics remain similar to the previous phase. Use your Ventus Bracelet again to put out the flames, then stay behind it to make attacks until it decides to retreat once more. Plunging attacks are effective, so aim to jump right before Adol descends to maximize damage.

    Guilen – Back Into The Lava Pits

    Once you inflict enough damage, Guilen will rush to the lava pits again, just like before. Keep an eye on which pit it targets and step away from it to avoid taking damage.

    Guilen – Out Of The Lava Pits (Even Shorter)

    Again, stand in the center of the arena and watch for which pit Guilen chooses to emerge from. Move away as soon as the lava starts bubbling, as the fire serpent is now even shorter and significantly faster, making it trickier to deal with. You’ll need to be more cautious in this phase!

    Adol – Smothering The Flames, Part Three

    Utilize your Ventus Bracelet once more to extinguish Guilen’s flames. After that, attack its cooled-down body, but do so carefully, as it will be moving fast. Plunging attacks remain a strong option, but don’t get too impatient, as you don’t want to find yourself caught in its fire.

    Keep dealing damage until it decides to retreat.

    Guilen – Back Into The Lava Pits… Again

    After you successfully inflict damage, Guilen will dart towards a lava pit again. As always, pay attention to which pit it’s targeting and remove yourself from the danger zone to avoid damage.

    Guilen – Out Of The Lava Pits (Head Only)

    For Guilen’s final move, the head will dive into a pit of lava. You’ll need to create distance from the pit it targets to avoid damage. This is the last stretch, so focus and maintain your patience!

    Adol – Smothering The Flame, Part Four

    Now you’re in the final phase of the battle, which is considerably more intense. Not only is it just Guilen’s head, but it’s incredibly fast, making it challenging to keep up. Use your Ventus Bracelet to extinguish the flames again, and stick to normal attacks as you pursue it.

    Keeping up with Guilen is the hardest part, so don’t rush. Avoid any desperate plunging attacks, as it will still be breathing fire. Wait for the right moments to strike, and continue this strategy until Guilen is finally defeated!

    If you fail to defeat it quickly, there’s a chance that Guilen will reenter a pit of lava, forcing you to use your Ventus Bracelet one final time before you can resume your attacks. Stay on your toes!

  • Defeating Ellefale in Ys Memoire: A Felghana Guide

    Defeating Ellefale in Ys Memoire: A Felghana Guide

    Ys Memoire: The Oath in Felghana offers a rich world full of mysteries waiting to be discovered. As you delve into the central enigma of the island, your adventure unfolds with unexpected twists and exhilarating challenges. Along the way, you will face several daunting boss battles that remain thrilling even in today’s gaming landscape.

    One of these encounters features Ellefale, the Azure Queen of Death. While she isn’t the toughest foe you’ll face, this battle demands you make good use of your newly acquired Ignis Bracelet, a tactic that will be crucial for your time in Felghana.

    Overview of Ellefale in Ys Memoire: The Oath in Felghana

    Ellefale is the second major boss you’ll confront in the game, located at the end of the Tigray Quarry after you’ve secured the Ignis Bracelet. Unlike your previous encounter with Dularn, Ellefale offers a much more challenging fight, especially if you’re still getting used to the mechanics of your new gear.

    This battle is perfectly designed for your current skill level, teaching you the importance of being agile while incorporating the Bracelet’s abilities. You’ll need to practice charging it while dodging her attacks, a skill that can be tricky at first but becomes easier with practice.

    Information About Ellefale, the Azure Queen of Death

    Attribute Description
    Name Ellefale, the Azure Queen of Death
    HP 400 HP
    Recommended Level Level 8

    By the time you reach Ellefale, aiming for Level 8 is wise. If you’re below Level 6, consider farming for experience points before taking her on, as her attacks can deal significant damage.

    Ensure you have collected the Ruby from the secret red chest before this battle. It enhances your Ignis Bracelet and enables a powerful attack that will be advantageous in this fight.

    Strategies to Defeat Ellefale in Ys Memoire: The Oath in Felghana

    Similar to the Dularn encounter, Ellefale has a limited attack repertoire. This simplicity allows players to grasp her attack motions and devise a counter-strategy quickly. However, remember that you can only damage her using the Ignis Bracelet, a fact that may surprise some players.

    Ellefale has four distinct attacks, with some emerging as the battle progresses. Understanding these attacks is key to outmaneuvering her and ultimately winning a showdown for the coveted Moonstar Statue.

    Ellefale’s Magic Disc Attack

    One of Ellefale’s signature moves is the Magic Disc. She will raise her right arm and then hurl a sizeable magical disc toward you. Avoiding this attack is crucial, as it can inflict heavy damage. A good tactic is to run towards the screen as she starts casting it, then quickly double back and jump over the disc to evade it.

    The best time to strike back is when you see Ellefale execute her Magic Disc move, allowing you to dodge and counterattack effectively.

    Techniques with the Ignis Bracelet

    The only opportunity to inflict consistent damage on Ellefale comes during her Magic Disc attack. You can charge your Ignis Bracelet, and once you dodge her disc, turn towards her and launch a powerful fireball for substantial damage.

    While regular fireballs will work, they won’t deal as much damage, making the charged version far more effective for this encounter. Mastering this timing is worth the effort, as it lets you focus less on her other moves and more on attacking when the time is right.

    Ellefale’s Vertical Slash Attack

    Another significant maneuver is Ellefale’s Vertical Slash, where she raises her left arm and sends a magical slash your way. When you see this move, quickly run to one side of the arena to dodge the attack. After it passes, you can charge your Ignis Bracelet, then launch a fireball at her for damage.

    Ellefale’s Wind Orb

    Ellefale may occasionally cast a Wind Orb, which usually accompanies one of her previous attacks. This swirling orb will navigate the arena, presenting another challenge while you dodge. While it becomes more frequent when her health is reduced, it should not cause major issues as long as you maintain distance.

    Ellefale’s Lightning Strikes

    Be wary of her Lightning Strikes attack, which can inflict devastating damage if you get hit. Ellefale lifts her arms and unleashes five bolts of lightning, with a gap between the third and fourth strikes. Position yourself accordingly when you see her begin this attack.

    Focusing solely on avoidance during this move is recommended, as it can quickly turn the tide against you. Continue using the strategies mentioned, and you will soon find victory, unlocking the much-desired Moonstar Statue!

  • Unlock Fast Travel in Ys Memoire: The Oath in Felghana Now!

    Unlock Fast Travel in Ys Memoire: The Oath in Felghana Now!

    Ys Memoire: The Oath in Felghana offers a vast world filled with diverse regions and dungeons for you to explore as the hero, Adol Christin. Like many Action JRPGs, you will encounter checkpoints throughout your journey, and having the ability to fast travel between these locations is crucial.

    The good news is that fast travel is indeed available in this game! However, unlocking it does require some effort and time. Don’t worry; with a little patience and focus on the main storyline, you’ll be warping between checkpoints in no time!

    How to Unlock Fast Travel in Ys Memoire: The Oath in Felghana


    Fast travel is an option in Ys Memoire: The Oath in Felghana, but it takes some time before you can use it. You’ll need to complete certain tasks to get the item that allows instant travel between activated Travel Monuments.

    What Are Travel Monuments in Ys Memoire: The Oath in Felghana?

    Adol activating the Travel Monument near Redmont Town in Ys Memoire: The Oath in Felghana.

    Travel Monuments function as both saving points and checkpoints throughout your adventure. When you pass by a Travel Monument, it will replenish Adol’s HP and MP, making it essential to visit them, especially if you’re running low on health.

    Initially, you won’t be able to use Travel Monuments for fast travel, meaning you will need to explore new areas on foot. Fortunately, you’ll gain this ability sooner rather than later as you progress and acquire the Wing Talisman.

    How to Get the Wing Talisman in Ys Memoire: The Oath in Felghana

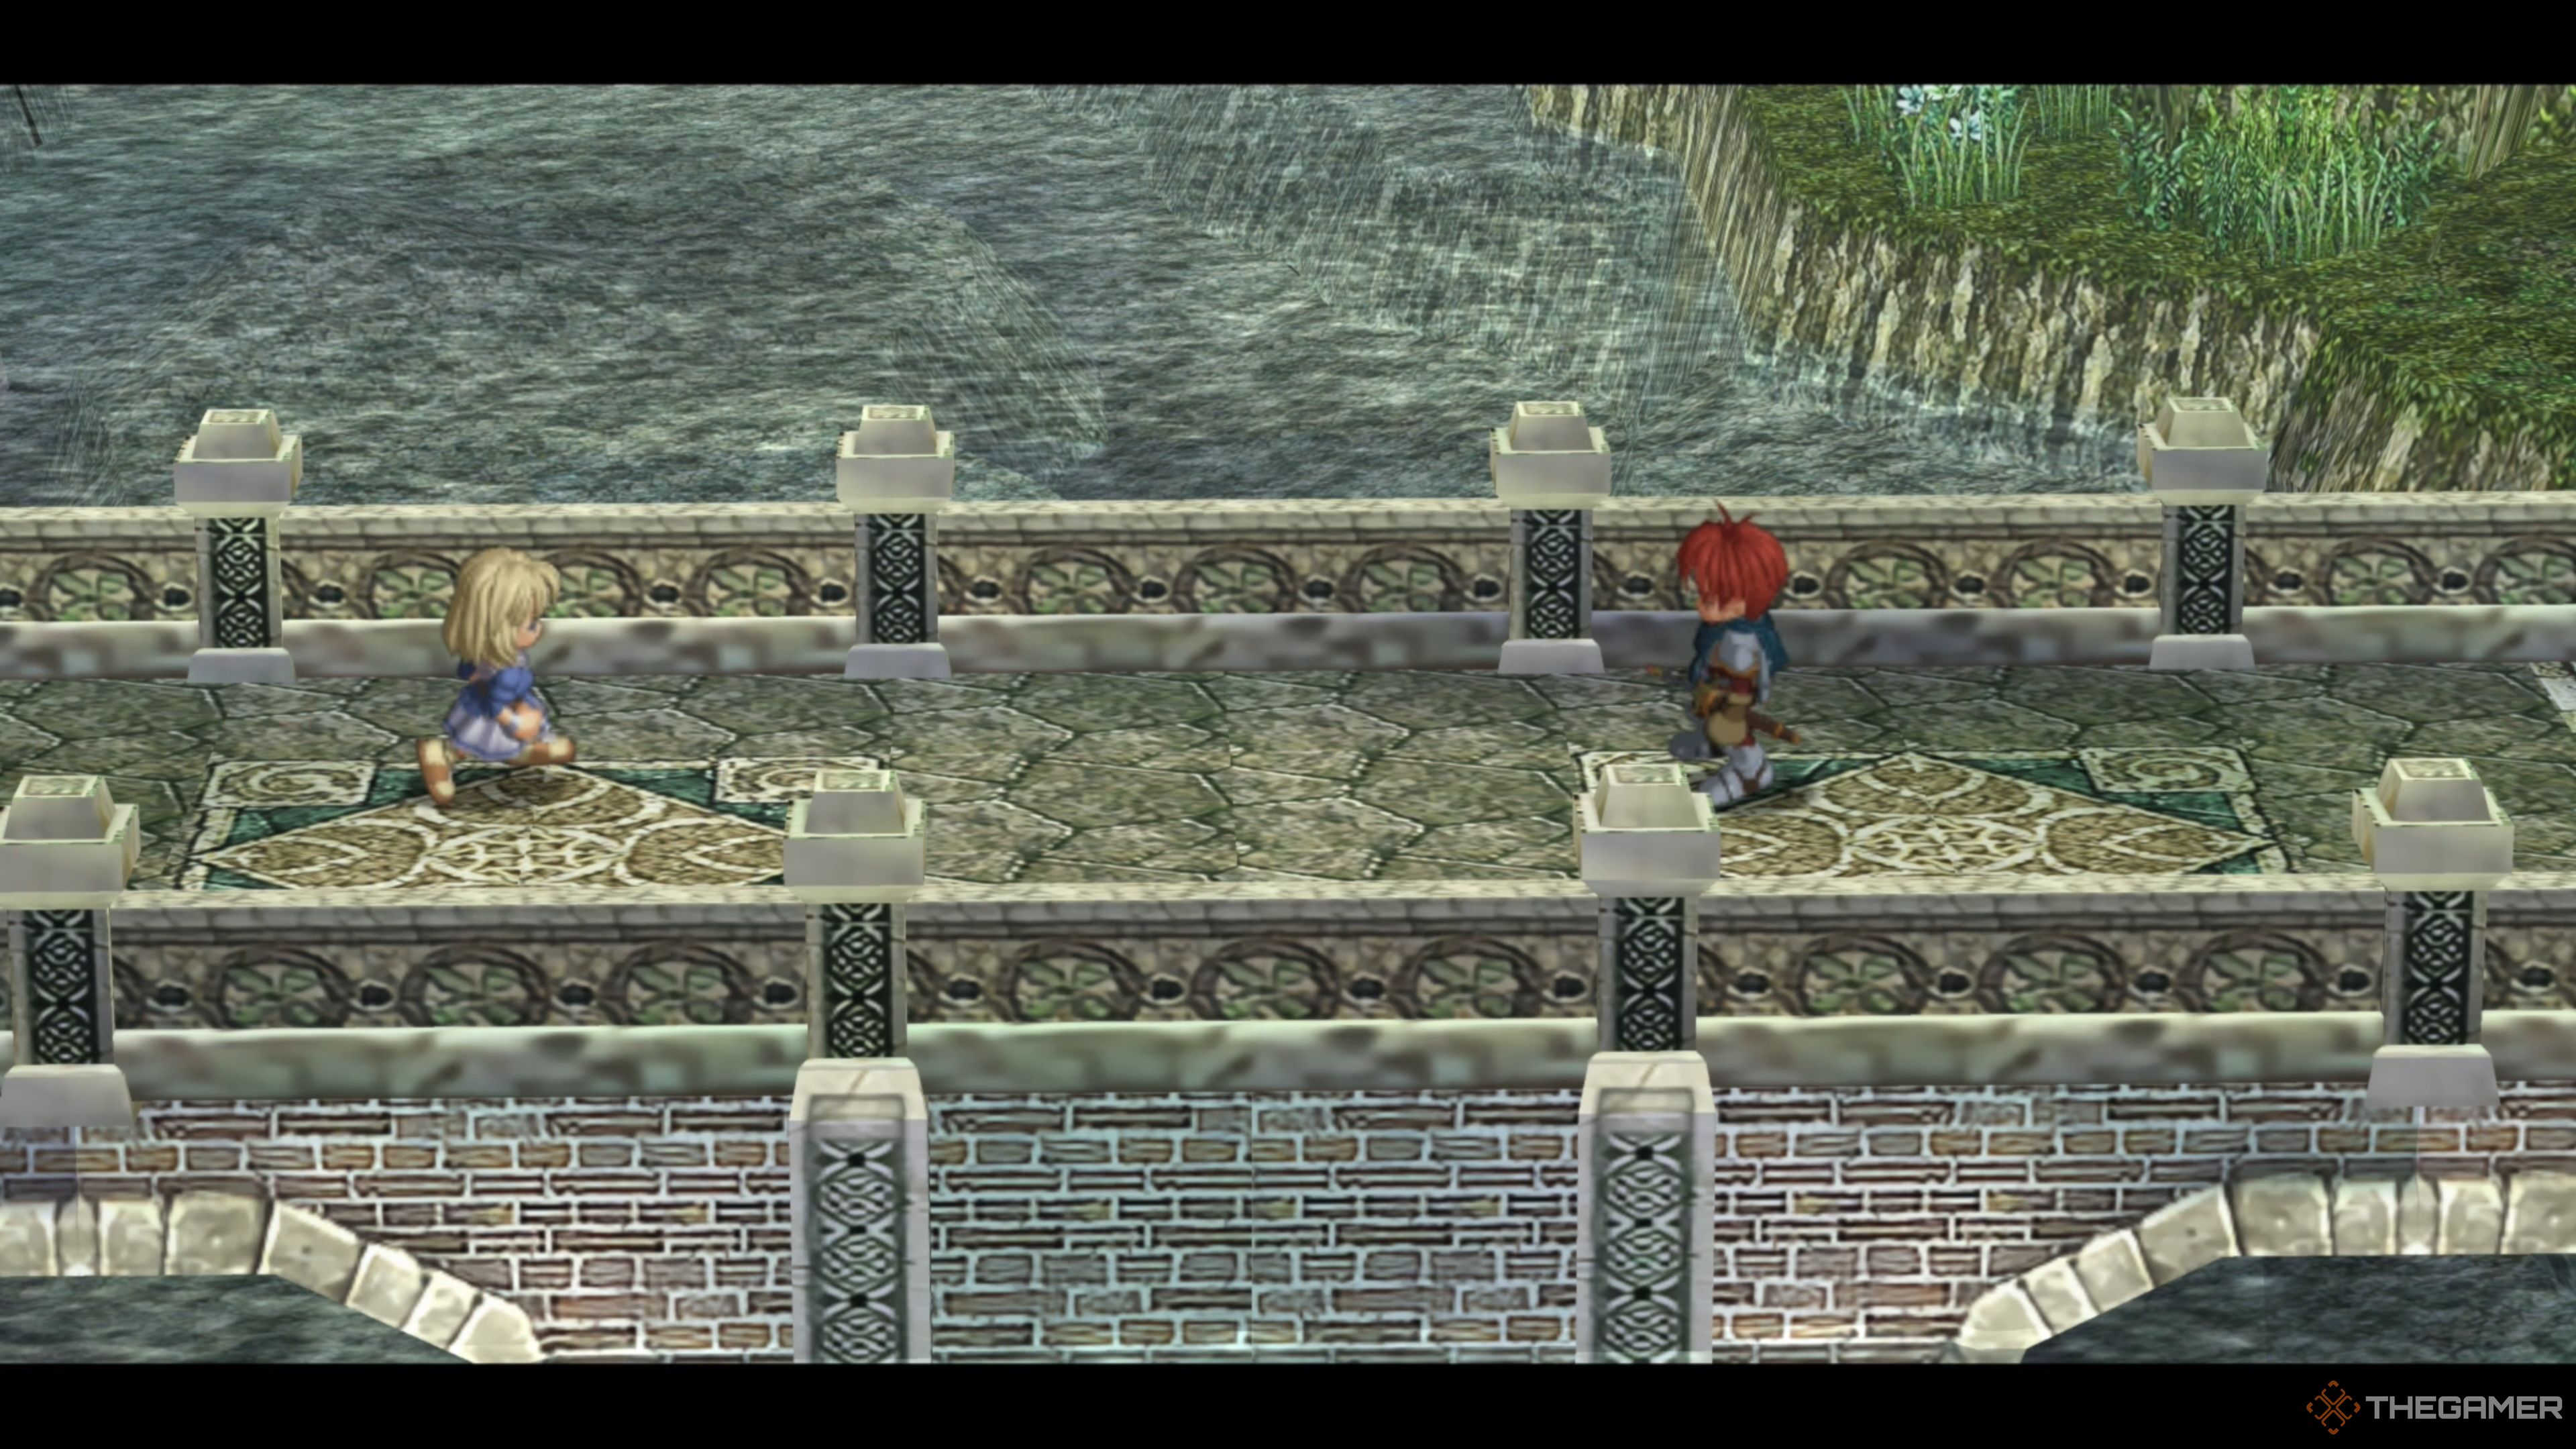
    Elena approaching Adol on the bridge leading to Redmont Town in Ys Memoire: The Oath in Felghana.

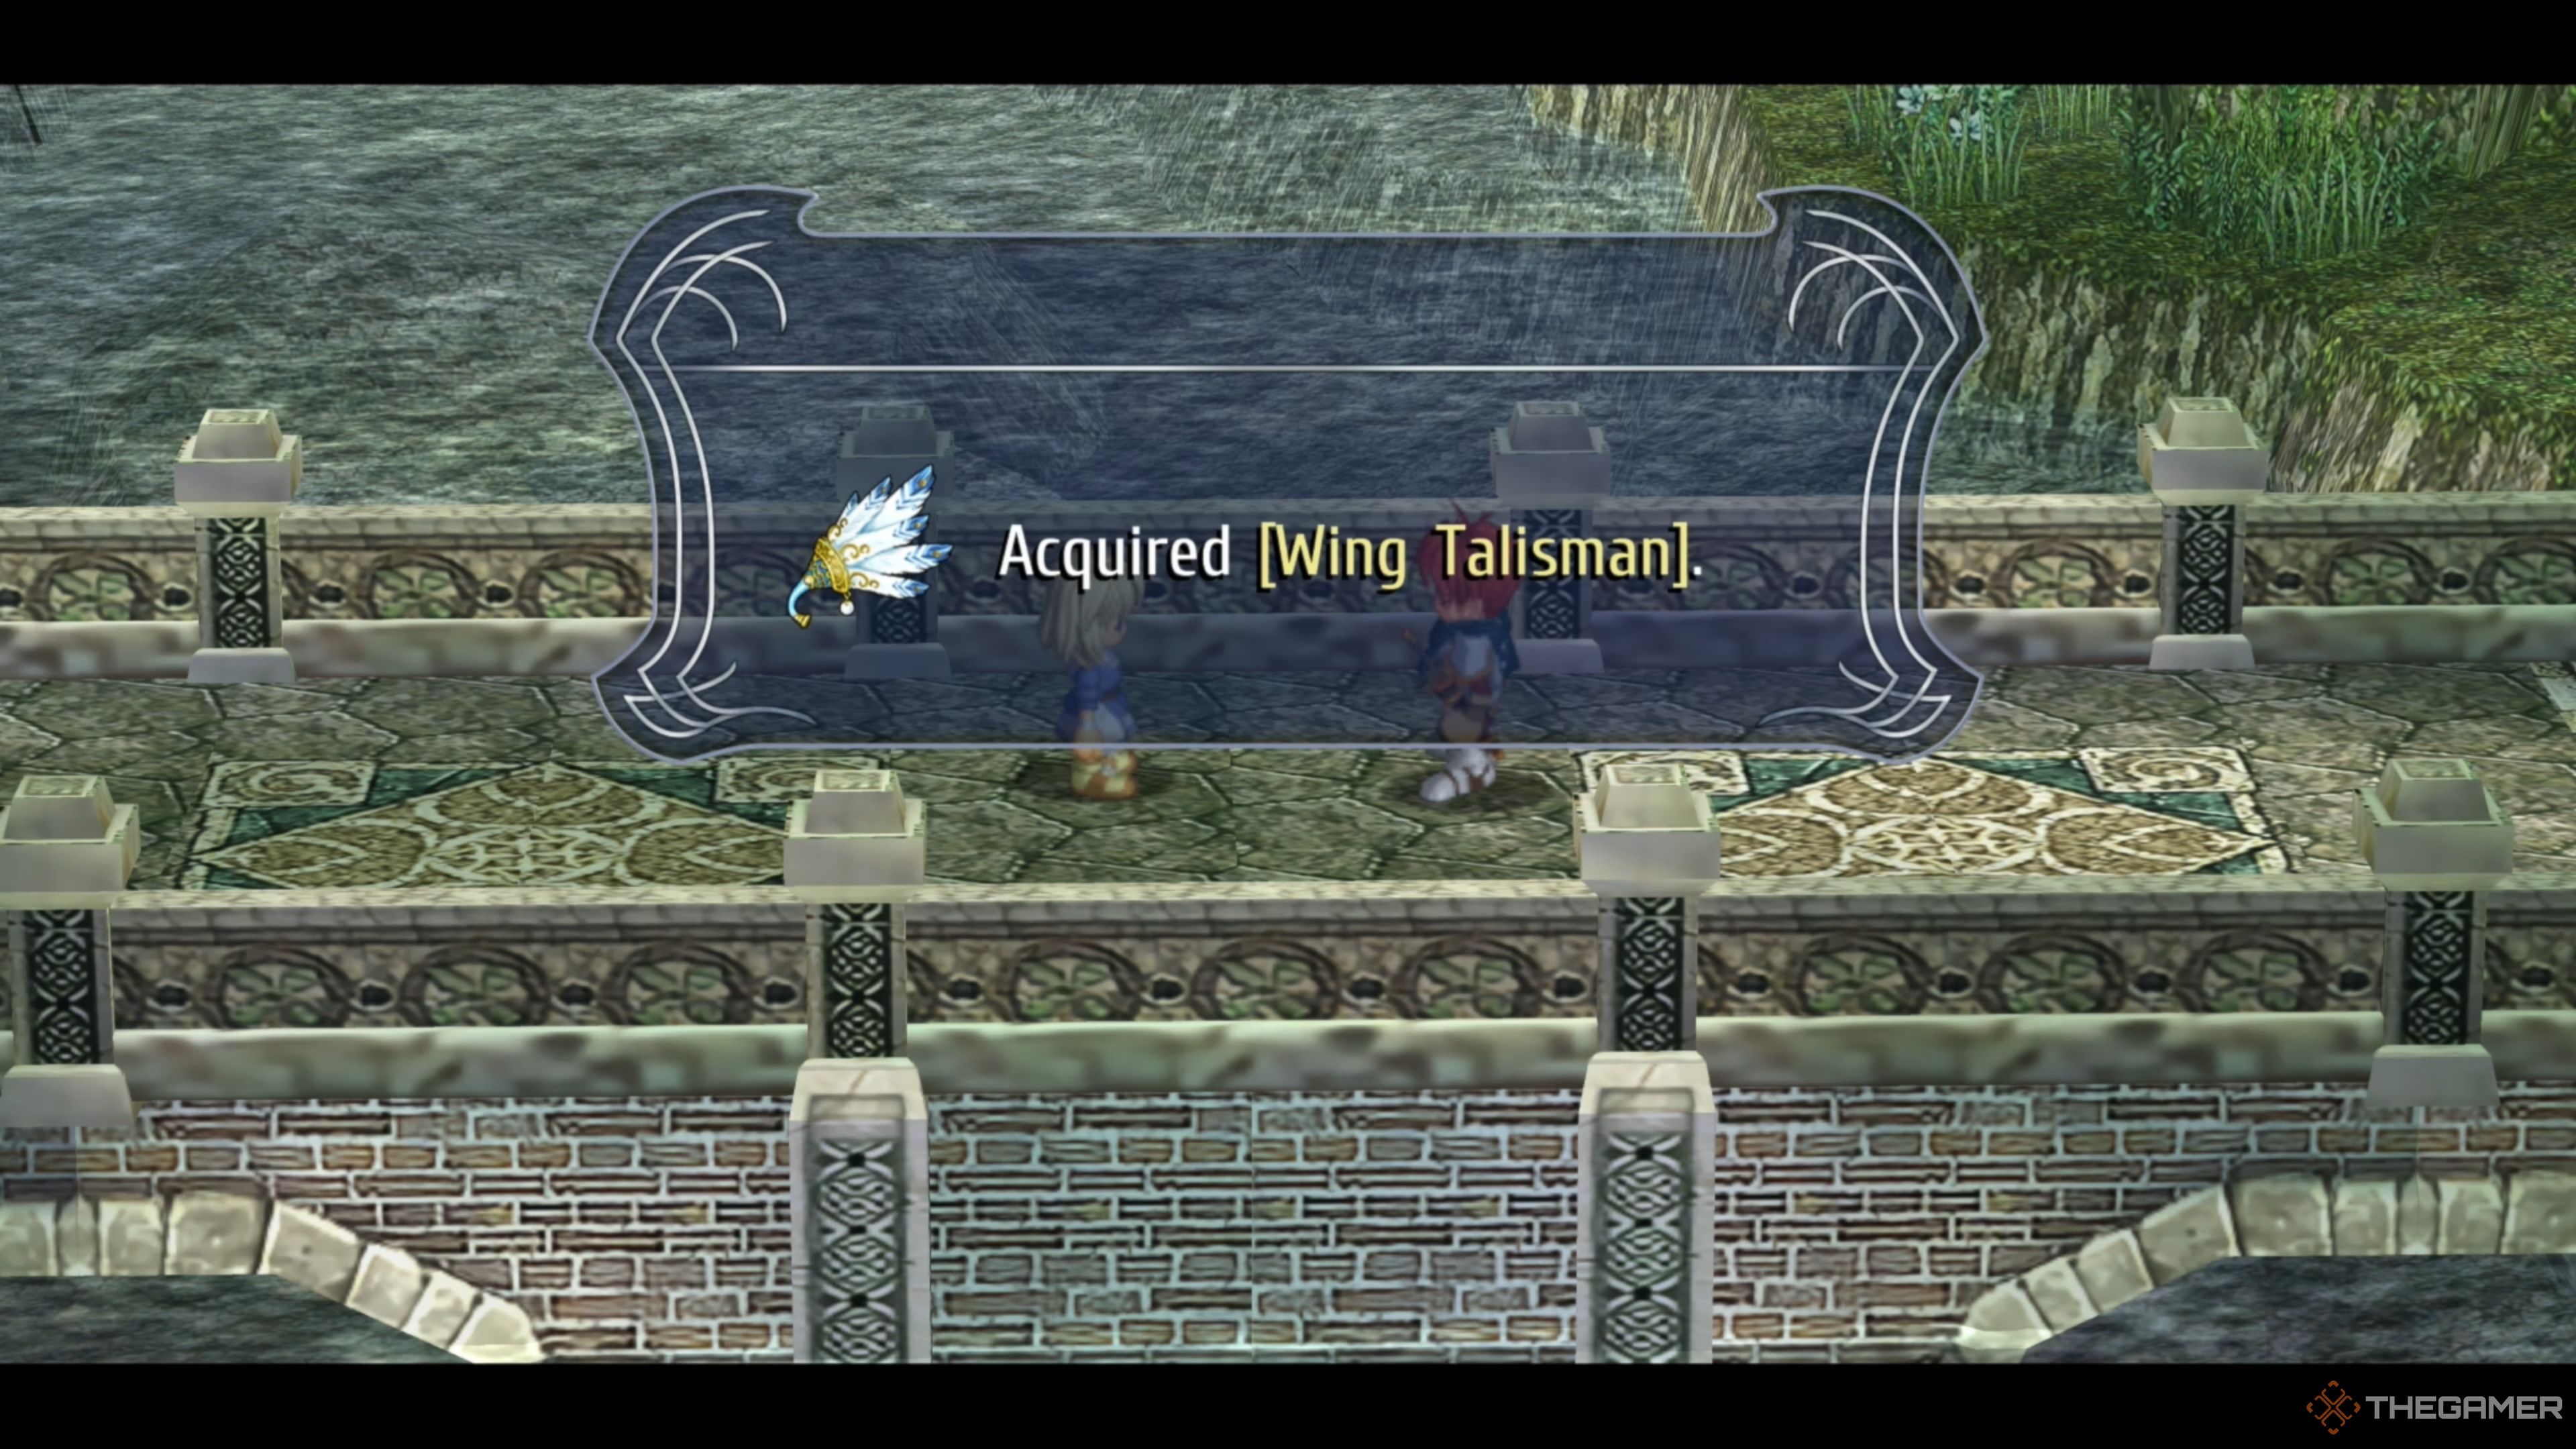
    The Wing Talisman is essential for fast travel in Ys Memoire: The Oath in Felghana, and you will receive it from Elena as you progress through the game. Unfortunately, it may take some time before you obtain it.

    To obtain the Wing Talisman, you must first clear the Tigray Quarry section and then complete the Zone of Lava dungeon, which is the first dungeon you’ll encounter. While the Tigray Quarry is straightforward, navigating through the Zone of Lava can be tricky, especially for newcomers.

    Additionally, you’ll need to defeat both Guilen and Gyalva to escape the Zone of Lava, and these battles are not easy. Make sure your equipment is top-notch before heading to Illburns Ruins after finishing the Tigray Quarry, as you won’t be able to return to Redmont Town once you enter the Zone of Lava.

    Acquiring the Wing Talisman in Ys Memoire: The Oath in Felghana

    Adol receiving the Wing Talisman from Elena in Ys Memoire: The Oath in Felghana.

    After you exit the Zone of Lava and watch a series of cutscenes, you’ll find yourself back in Redmont Town with Edgar, Dogi, Dewey, and Bishop Nikolas. Once their conversation ends, you’ll be free to explore the town and talk with the locals as you please.

    If you attempt to enter Elena’s house, you’ll discover it’s locked, preventing you from speaking with her. Don’t worry—leave Redmont Town and head to the Travel Monument to trigger another cutscene where Elena will approach Adol on the bridge to give him her Wing Talisman.

    How to Use the Wing Talisman in Ys Memoire: The Oath in Felghana

    Now that you possess the Wing Talisman, you can fast travel to any Travel Monument you’ve already activated. To do this, open your Menu, navigate to the Item tab, and you’ll find the Wing Talisman in the top row. Select it and click ‘Yes’ when prompted.

    This will open the entire map, allowing you to choose from all the activated Travel Monuments. For example, if you select the Illburns Ruins area, you’ll see all the Travel Monuments you activated in the Zone of Lava, since they are part of that region.

    Now, you can freely warp between all activated Travel Monuments, which will be very helpful when completing side quests or obtaining and upgrading equipment. There’s no limit on how often you can use it, so don’t hesitate to explore and uncover secrets using your new ability!

  • What’s New in Ys Memoire: The Oath In Felghana’s New Game Plus?

    What’s New in Ys Memoire: The Oath In Felghana’s New Game Plus?

    Quick Links

    Ys Memoire: The Oath In Felghana is based on the PlayStation Portable remake of the original 2006 game. The remake introduced a New Game Plus feature, which is also available in this updated version. However, this implementation differs from what you might find in many other titles.

    In this game, players need to make decisions about the items they carry into New Game Plus. The fundamental gameplay does not change dramatically, allowing you to tailor your adventure when revisiting the game. Let’s explore how this system works.

    How to Unlock New Game Plus


    Unlocking New Game Plus is straightforward. Once you defeat the final boss and complete the game, you will see a prompt to create Clear Data, which you can then use to start New Game Plus. It’s that simple.

    However, it’s important to note that you can’t load this Clear Data to revert to your previous save. Be sure to store it in a new file. To begin a New Game Plus run, you must select this data from the main menu instead of starting a new game, which is slightly unconventional, so keep that in mind.

    If you wish to gain more gold, levels, or other benefits, you can replay the game using an earlier save file before starting a New Game Plus run.

    After finishing the game, you also gain access to Time Attack mode, which functions independently from your other save files in terms of difficulty and equipment.

    What Changes in New Game Plus

    Typically, New Game Plus introduces new features and increases difficulty while allowing players to retain their levels and gear. However, this is not entirely how it works in Oath in Felghana. In this game, you need to select which bonuses to carry over into your New Game Plus run, with every option costing a limited number of points.

    You earn these points depending on the difficulty level you completed the game on:

    • Very Easy – 5 points
    • Easy – 10 points
    • Normal – 15 points
    • Hard – 20 points
    • Nightmare – 30 points
    • Inferno – 35 points

    Inferno difficulty is unlocked after completing the game once, regardless of the initial difficulty level you selected, and can subsequently be played in either a regular or New Game Plus run.

    Your points are not cumulative, meaning they are based solely on the highest difficulty you have beaten. For instance, if you complete the game on Hard but later finish it on Normal in New Game Plus, you’ll still have 20 points available for future runs.

    Available Bonuses in New Game Plus

    Option Effect Cost
    Inherit Gold and Raval Ore Brings over all Gold and Raval Ore you had at completion. 5 points
    Inherit Armor Level and Upgrade Cap Retains your armor level, increasing the cap from three to nine. 5 points
    Inherit Status Includes your stats, levels, and permanent boosts given by Katol Elixirs. 5 points
    Begin with Dash Ability Gives you the capability to dash right from the start. 1 point
    Begin with Double Jump and Charge Boost Allows double-jumping and double-charging your Boost from the beginning. 1 point
    Reduced Magic Usage and Increased Recovery Magic consumes less MP and recovers faster. 4 points
    Boost Recovery Rate Increase Boost meter charges more quickly. 4 points
    Max HP Increase of 50 Adds an extra 50 HP to your total. 10 points

    For the Inherit Armor Level bonus, be aware that you won’t receive all armor immediately. While the armor retains its level, you still need to find and purchase it again.

    After you select your options, you are committed for the entire game. However, these choices can be carried over to future runs. You can only activate all bonuses at once after beating the game on Inferno.

  • Defeating Gyalva in Ys Memoire: The Oath in Felghana

    Defeating Gyalva in Ys Memoire: The Oath in Felghana

    Ys Memoire: The Oath In Felghana offers an exciting blend of dungeon crawling and Metroidvania elements, inviting players to thoroughly explore its dungeons. Yet, be prepared for the unavoidable boss battles, as the skills you acquire in each dungeon significantly contribute to your success.

    In the Zone of Lava, which you tumble into after confronting Chester in the Illburn Ruins, numerous bosses await you. The most formidable of these is the final boss, Gyalva. At first glance, Gyalva might seem intricate and challenging, but with the right strategies, you’ll be able to defeat this foe quickly.

    Where Do You Fight Gyalva?

    After defeating Chester in the Illburn Ruins, you find yourself at the bottom of the ruins in the aptly named Zone of Lava. Here, you’ll encounter various bosses, including Guilen, who serves primarily as a stepping stone.

    Only after you gain the Ventus Bracelet and venture into the final regions of the Zone of Lava will you come face to face with Gyalva. This battle marks a noticeable increase in difficulty compared to Guilen, so it’s wise to save your progress beforehand.

    Strategies to Defeat Gyalva

    The fight against Gyalva is unique compared to others in the game. Instead of taking place in a three-dimensional arena, this battle unfolds in a side-scrolling environment. Gyalva, however, moves as if they’re in a 3D space, which can make the fight feel dizzying at times.

    While Gyalva may appear tough, the battle isn’t overwhelmingly difficult once you grasp the mechanics of their attacks. Using the Ventus Bracelet frequently is crucial for hitting Gyalva while they’re airborne.

    Your MP quickly replenishes on its own, so don’t hesitate to use magic attacks liberally.

    When the battle begins, Gyalva follows a straightforward attack pattern that remains consistent throughout the fight. They will soar around the arena, choosing their position, and then execute one of two attacks: they will either unleash a fiery breath or launch a fireball.

    The fiery breath attack has a wide range but is easily avoidable by simply running away. In contrast, the fireball attack is more manageable to dodge, though it causes the floor tiles to rise, which can cause damage if you’re in the wrong spot. Nevertheless, this attack can also create an opportunity to reach Gyalva and deal extra damage.

    As you whittle down Gyalva’s health, they will unlock a new move. In this phase, Gyalva will fly around before swooping toward you with high damage potential. This attack also triggers the floor tiles to flip, which can harm you if you’re standing on them at the wrong time.

    Note that only the tiles close to Gyalva get flipped, making it challenging to navigate. However, you can stay safe by positioning yourself at the far left or right edges of the arena. There, you’ll find sections without any tiles, providing protection from Gyalva’s swooping attacks. If you see them gearing up to dive, quickly move to one of these edges.

    Keep in mind that the edges do not shield you from the fireballs or flaming breath, so maintain caution while there.

    That’s all there is to it! Once you grasp how Gyalva manipulates the arena, the battle becomes much easier. After you emerge victorious, you’ll receive the Sunset Statue, allowing you to escape the Zone of Lava.

  • Locating Bob’s Pendant in Ys Memoire: The Oath in Felghana

    Locating Bob’s Pendant in Ys Memoire: The Oath in Felghana

    Ys Memoire: The Oath in Felghana is a delightful remaster of the original PC game, showcasing the best elements of its predecessor without unnecessary content. The game features a handful of side quests, making it a compact yet engaging experience.

    One of these side quests tasks you with assisting Aida. While she doesn’t clearly outline her needs, the following steps will help you restore some peace to her life.

    Where to Find Aida


    Redmont serves as the central hub of Oath in Felghana, where many NPCs reside. You’ll find Aida here, in her home on the lower level, right across from the inn and next to the water. Initially, she can be quite dismissive, repeatedly asking you to leave.

    Everything changes when you decide to explore the Abandoned Mine; at this point, a green exclamation mark will appear above her head, signaling that she has a quest for you. She mentions her desire for a keepsake of Bob’s to remember him by, giving you a minimal yet clear goal.

    Note that quests in Oath in Felghana don’t have a log, so stay alert to remember their details.

    Finding Bob’s Pendant


    Adol retrieving Bob's pendant in the Tigray Quarry in Ys Memoire: Oath in Felghana.

    Earlier, Aida spoke about her grandson, who tragically died in a mining accident at Tigray Quarry. Since you’ll soon have to explore the Abandoned Mine, now is the time to visit Tigray Quarry.

    You may remember seeing Bob’s Pendant during your first trip to the Quarry, but couldn’t reach it. Here are the directions to retrieve it:

    • From the entrance, turn right until you reach the main mining shaft.
    • Drop down to the bottom, then take the exit on the right.
    • In this room, go all the way left until you can climb a set of stairs to the next area.
    • In the next area, head left until you see a collapsed bridge.

    Now you need to cross the gap. There are two ways to do this, but one is your only option right now. Equip the Ventus Bracelet and charge it. Jump across the gap, using the Ventus Bracelet to carry you to the other side. This allows you to collect Bob’s Pendant and return to Aida.

    You can also obtain the double jump ability later on to reach Bob’s Pendant without using the Ventus Bracelet.

    Rewards for Assisting Aida

    When you return to Aida, you’ll find Elena comforting her as they discuss her grandson’s passing. Speak to Aida, and for the first time in the game, she smiles. Although her grandson is still gone, she now has a keepsake to remember him by.

    As a thank you for helping her through this tough time, Aida gifts you a new accessory, the Nightfire Jewel. This item provides light in dark areas and reveals illusions around you. It’s particularly useful in the upcoming Abandoned Mine, where Ricardo advises you to obtain a light source.