الوسم: Xenoblade Chronicles X

  • Completing FrontierNav: Solving for More Miranium in Xenoblade X

    Completing FrontierNav: Solving for More Miranium in Xenoblade X

    In Xenoblade Chronicles X: Definitive Edition, players use two main types of currency: Miranium and Credits. Credits serve as the primary money used for purchases in shops, as well as what you earn when you sell your items. On the other hand, Miranium is a raw resource extracted from Mira, vital for crafting and refueling Skells.

    To gather Miranium, you’ll need to utilize FrontierNav, the sole source of this valuable resource. Anytime you discover a FrontierNav site, a basic Data Probe is set up, providing a small amount of Miranium and income. However, if you’re looking to maximize your Miranium, there’s more to be done.

    What Boosts Your Miranium Earnings?

    While you can acquire Credits through various methods like selling items and completing missions, Miranium can only be obtained from FrontierNet. Each FrontierNav site allows you to place Mining Probes, which are crucial to increasing your Miranium earnings. You have access to a wide range of Mining Probes, with ranks ranging from G1 to G10, giving you plenty of options to create powerful and extensive chains.

    One important point to note is that even if your Miranium exceeds your storage limit, there’s no gain from the excess. Any extra Miranium beyond the limit is discarded, so you’ll want to make sure your production aligns with your storage capacity to avoid waste.

    If you reach a point where your storage limit decreases below your current Miranium, you’ll keep what remains until it’s used up. At that time, your storage will only fill up to the new limit.

    Each FN site features a letter grade that acts as a multiplier for the base income rate of probes. Make sure to strategically place more potent probes in high-grade areas, as they can significantly boost income for lower-ranked Mining Probes positioned in better sites.

    Even though you have a variety of Mining Probes, you should strategically deploy them for optimal efficiency and leave room for Research Probes. Excess probes won’t benefit you, so consider using Duplicator and Booster Probes to enhance your production without needing a large number of Mining Probes.

    Also, remember to place your Storage Probes early on, which effectively doubles the number of probes needed. Let’s dive into the setup.

    It’s advisable to establish the entire FrontierNav network before designing your ideal layout, enabling you to create extensive chains with your probes.

    Placing Storage Probes

    Start by placing your Storage Probes as quickly as you can. These come in only one grade and will consistently provide you with a +6,000 increase to your Storage Limit. Aim to create a long chain of these probes so they can amplify each other’s effect, linking them to a Duplicator or Booster to push your Storage Limit as high as possible.

    The ideal location for this is Oblivia. Begin at FN Site 315 with a Duplicator Probe, then place a Booster Probe II just to the north at FN Site 316. Starting from FN Site 312, build a chain all the way back to FN Site 118 at the far eastern side of Primordia. Be sure to fill out any shorter paths with fewer than three FN sites as well, as those won’t effectively connect with other probes.

    This approach should bring your Storage Limit close to 100,000, and possibly higher if you have sufficient Storage Probes to place elsewhere. This will dictate the maximum amount your Miranium income can reach, while any leftover space should be allocated for Research and Combat Probes.

    Mining Probes in Cauldros

    To start in Cauldros, which offers the best returns in Miranium and Revenue, place a Duplicator Probe at FN Site 508 and a Booster Probe at FN Site 507. Chain five Mining Probes north of the Duplicator, while building an even longer chain heading west into Sylvalum.

    Your chain of Mining Probes should aim for a minimum of nine probes and ideally include even more to cover gaps, using the highest-grade Mining Probes you have available.

    Mining Probes in Sylvalum

    In Sylvalum, place a Duplicator Probe at FN Site 408 and a Booster Probe to the north at FN Site 406. Your Mining Probes should connect to this Duplicator at FN Site 402. From FN Site 413, start a new chain to fill in the sites ahead, requiring high-quality Mining Probes, such as Mining Probe IX. If you’re short on those, opt for the next best available.

    At FN Site 405, create another five-probe chain before advancing toward Primordia. Use your highest available Mining Probes to fill these in.

    Mining Probes in Primordia

    With Cauldros and Sylvalum set up, it’s time to begin in Primordia. Start with a Duplicator Probe at FN Site 117 to connect to the Storage Probes in Oblivia, and then add a Booster Probe at FN Site 120.

    Now, focus on creating large chains in Primordia. Place your next Mining Probe at FN Site 116 and build a chain all the way to FN Site 102. A minimum of 10 Mining Probes will be necessary, so select the most abundant ones available. If you don’t have enough, create a chain reaching FN Site 107 followed by a short three-probe chain along FN Sites 106, 104, and 102.

    Feel free to fill in any remaining gaps, or leave them empty if you prefer to use them for Research or Combat Probes later.

    Mining Probes in Noctilum

    The last major region is Noctilum. Begin by setting up a Duplicator and Booster Probe at FN Sites 216 and 225 respectively. This might disrupt some chains you established at FN Site 220, but the gain in Miranium will be worthwhile.

    Now build a five-probe chain from FN Sites 214 to 223, and feel free to continue expanding northward as desired. By now, you might be nearing your Storage Limit, so if that’s the case, consider slowing down and starting to place other types of probes.

    Mining Probes in Oblivia

    Lastly, in Oblivia, most of your space will already be occupied by Storage Probes. At FN Site 304, you can create two chains of three, or one chain of six. This area is mostly open for whatever layout you wish since you should already be approaching your Storage Limit.

    Keep in mind that you can always swap or adjust your probes to find ways to maximize Miranium income and storage.

  • Locating Additional Research Probes in Xenoblade Chronicles X

    Locating Additional Research Probes in Xenoblade Chronicles X

    Xenoblade Chronicles X: Definitive Edition offers players a wealth of adventures. You can venture across the expansive world of Mira, battle formidable creatures, hang out with your teammates, and even create your own Skell, customizing it with your preferred weaponry. However, as you dive deeper into the game, you’ll discover that the real challenge lies in effectively managing your FrontierNav setup.

    FrontierNav serves as your primary means of acquiring Miranium, which is essential for your financial growth in the game. While you can earn credits through various quests, those opportunities will eventually run out. Fortunately, Mira is abundant with resources and wealth; you just need to gather enough Research Probes to tap into it. Here’s how to find more of them.

    How to Collect More Research Probes

    Types of Research Probes

    Before you start hunting for additional Research Probes, it’s essential to understand their function. There are significantly fewer Research Probes than Mining Probes, so using them wisely is crucial. Research Probes generate a smaller amount of Miranium compared to Mining Probes, but still contribute to your income.

    Each Research Probe has a basic credit generation rate, which is then multiplied by its Income Ability depending on the Grade of the area where it’s placed. Below are the different types of Research Probes and their attributes.

    Probe Name

    Base Credit Rate

    Income Ability

    Research Probe G1

    2,000

    200%

    Research Probe G2

    2,500

    250%

    Research Probe G3

    3,000

    300%

    Research Probe G4

    3,500

    350%

    Research Probe G5

    4,000

    400%

    Research Probe G6

    4,500

    450%

    For instance, a typical Research Probe G1 generates a base of 2,000 Credits. However, if it is set up in a site with a low grade, it may earn even less. Conversely, certain locations offer bonuses if you uncover all nearby secret areas, boosting that probe’s rate. So, if you placed a Research Probe in a site with two discovered hidden areas, its Base Credit Rate would rise to 6,000 Credits before any multipliers apply.

    If you were to use a Research Probe G6 in the same scenario, with two discovered secret areas, its Base Credit Rate could reach 13,500. With an Income Ability of 450%, it has the potential to generate tens of thousands of credits from just one probe!

    How to Acquire Research Probes

    You can find Research Probes using the same methods as other probes, though they appear far less frequently. To build your income through FrontierNav, be diligent in your search. Here are the ways you can gather them:

    • Looting Treasure Points. These may not always be tied to Segment Recon, so examine all Treasure Points you encounter.
    • Boosting Survey Rate. You can track rewards by pressing ‘Y’ in the Segments view of the map.
    • Completing Missions. Certain storyline missions grant you Research Probes, and Kirsty’s Probe-fessional Missions provide various probe types, including Research Probes.

    Ultimately, there’s no shortcut or quick fix for obtaining these probes, especially since they cannot be purchased. It’s all about playing the game, but focusing your efforts in the right areas can speed up your probe collection a little.

    Remember that certain Treasure Points may require an enhanced Mechanical, Biological, or Archaeological Field Skill, which you can unlock through Off The Record Basic Missions.

    Are Research Probes Depleted Upon Placement?


    The game introduces FrontierNav to players early on but throws a lot of information at you right away, making it challenging to grasp some of the smaller details, like what happens after you place a probe.

    All types of Probes can be reused, and each has fixed specific locations. So, what occurs after placing them? Nothing detrimental. If you’re unhappy with a probe’s location, you can simply replace it with another, including a default Data Probe. There is a cost associated with moving them, but you will never lose them. Once you obtain a Research Probe—or any probe—you have the freedom to place and relocate it as you see fit.

  • Completing the Verus Cain Skell in Xenoblade Chronicles X

    Completing the Verus Cain Skell in Xenoblade Chronicles X

    Choosing the right Skell in Xenoblade Chronicles X: Definitive Edition can be challenging, especially with so many options available. Whether you prioritize power or customization, there’s a Skell for everyone. However, if you’re looking for a Skell that has a striking appearance, the Verus Cain is the ideal choice.

    What makes the Verus Cain stand out among other Skells is its distinctive bunny ears atop its head. It also boasts some of the best weaponry in the game. This guide will help you gather all the materials needed to craft your very own Verus Cain.

    Materials Needed for the Verus Cain

    To begin crafting your Verus Cain, you’ll first need to complete Chapter 12 of the main storyline. This will unlock various Skell Frames that you can develop using the AM Manager in Armory Alley, including the Verus Cain.

    Below is a list of materials required to create the Verus Cain Skell:

    Material

    Amount

    Where to Find

    Rexoskell Sucker

    5

    Drop from the Rexoskell enemy, which appears only in the time attack mission “Gone Berserk.” Complete the mission “Definian Downfall” to unlock it.

    Crude Neilnail Mask

    2

    Available from the Neilnail Albus and Neilnail Furvus enemies, encountered in the time attack mission “Twin Dolls of Mystery,” which unlocks after Chapter 12.

    Xe-dom Golden Crest

    4

    These drop from Golden Xe-dom enemies, commonly found in Cauldros, and from the tyrant enemy Gi-zho, the Iron Deity.

    Ancient Armor

    3

    Obtained from all Xe-dom enemies throughout Mira, particularly from the silver ones wandering in Sylvalum.

    Advanced Crank

    6

    These materials drop from Seidr enemies located in Sylvalum and Cauldros, especially those near Ganglion outposts in Sylvalum or patrolling the skies in Cauldros.

    Xe-dom Hand

    1

    Like the Ancient Armor, this drops from Xe-dom enemies all over Mira.

    Ouroboros Crystal

    2

    These are only accessible by placing mining probes at FN Sites 308, 309, and 320 using FrontierNav.

    Miranium

    10,000

    Earned by placing mining probes across Mira, which will automatically start mining Miranium. You can boost this amount and storage by placing more probes.

    If you prefer not to spend time hunting for these materials, you can purchase all of them except the Ouroboros Crystals and Miranium from the Material Market. It will cost you a total of 4,875 material tickets to acquire everything this way.

    Once you have all the required materials, return to the AM Manager in Armory Alley. Select “Develop New Gear,” then “Skell Frames,” and you’ll find the Verus Cain listed as the third option from the top.

  • Completing the US0830 Dozer Skell in Xenoblade Chronicles X

    Xenoblade Chronicles X: Definitive Edition features a wide variety of Skells for you to control throughout the vast world of Mira, with each model boasting its own strengths. After finishing Chapter 12 of the main storyline, you unlock several exciting new Skell designs to create and experiment with.

    Among these newly accessible Skell models is the US0830 Dozer Skell, which closely resembles and operates like the construction Skells commonly seen in New Los Angeles. This guide will provide you with the details on where to gather the materials needed to craft your own US0830 Dozer Skell.

    Materials Needed for the US0830 Dozer Skell

    Crafting screen for the US0830 Dozer Skell in Xenoblade Chronicles X: Definitive Edition.

    To begin crafting this Skell model, it’s essential to first complete the affinity mission titled Boze’s Ignorance, which is the third and final mission for Boze. Successfully finishing this mission will unlock the file needed to incorporate this Skell into the Skell Frames menu at the Develop New Gear section of the AM Manager console in Armory Alley.

    The US0830 Dozer Skell requires the following materials for crafting:

    Material

    Quantity

    Acquisition Method

    Advanced Thruster

    1

    This material is frequently dropped by Puges in Sylvalum and Cauldros. Note that not all Puges yield this item; primarily, only the dark ones found in these regions do. They can also be purchased at the material market for 15 material tickets each.

    New Cylinder

    1

    These rare materials can be obtained from Pugiliths in Noctilum, Sylvalum, and Cauldros. Not every Pugilith will drop them; look for those with green lights in the mentioned areas. Additionally, they can be bought in the material market for 25 material tickets each.

    Standard Sensor Part

    1

    Commonly dropped by Zig enemies throughout Mira, these parts can be primarily found near Ganglion strongholds in Oblivia, Sylvalum, and Cauldros. They might also be located in parts of Primordia and Noctilum. Alternatively, they can be acquired at the material market for 5 material tickets each.

    Boiled-Egg Ore

    2

    These rare precious materials can be mined using FrontierNav and mining probes. Specifically, you will find Boiled-Egg Ore at FN Site 312, FN Site 318, FN Site 319, FN Site 417, and FN Site 418.

    Miranium

    10,000

    Miranium can be collected by placing mining probes at various locations on FrontierNav. To gather 10,000 Miranium, you will also need several storage probes.

    Once you have gathered all the necessary materials, head over to the AM Manager in Armory Alley. Select the Develop New Gear option followed by Skell Frames, and you will find the US0830 Dozer Skell listed as the fourth-to-last item available for crafting.

  • Completing the Amdusias Hades Skell in Xenoblade Chronicles X

    Completing the Amdusias Hades Skell in Xenoblade Chronicles X

    In Xenoblade Chronicles X: Definitive Edition, various factors play a role in deciding the best Skell type for your style. Whether you lean towards melee or ranged combat, prefer to dodge attacks, or want to absorb damage, there’s a Skell tailored for every player.

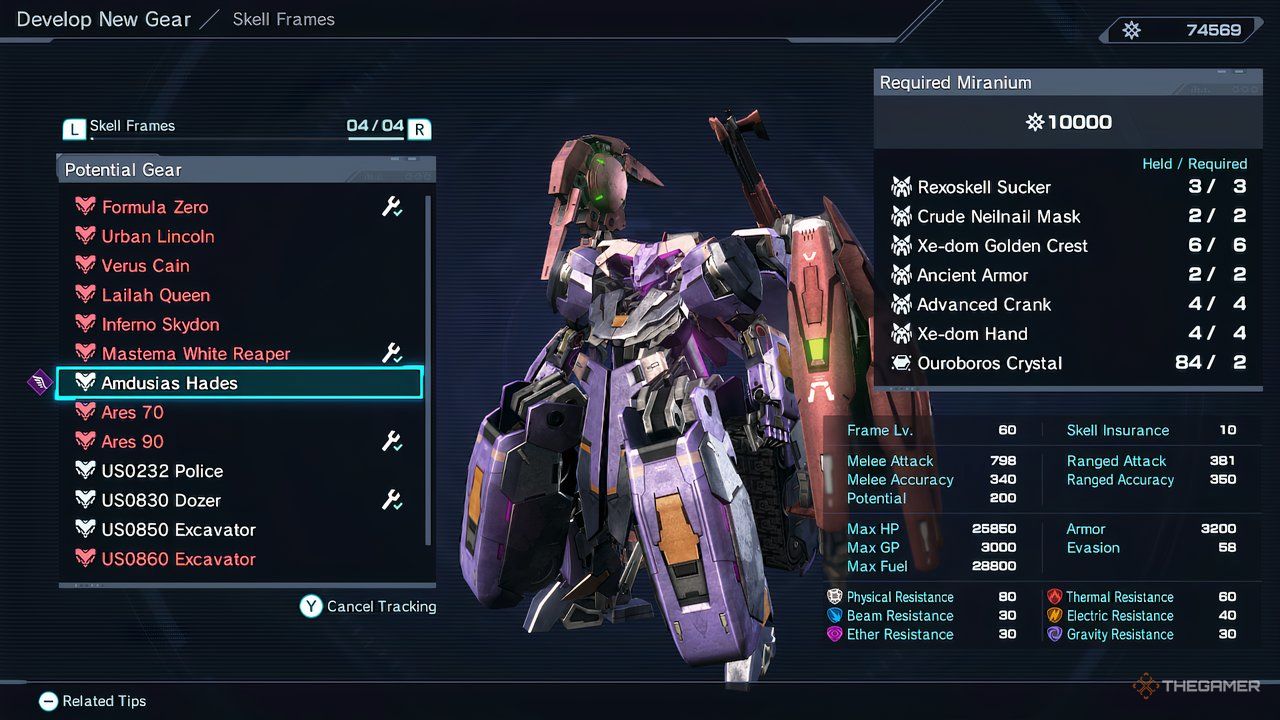
    If you’re looking for a Skell that can withstand damage and dish out substantial attacks, the Amdusias Hades is a great choice. This guide will walk you through how to gather all the materials needed to build your own Amdusias Hades.

    Materials Needed for the Amdusias Hades

    After finishing Chapter 12 of the main storyline, you’ll unlock the blueprints to create several new, powerful Skells, including the Amdusias Hades. Here’s a list of materials you’ll need to construct your own Amdusias Hades.

    Material

    Amount

    How to Obtain

    Rexoskell Sucker

    3

    Rare materials dropped by Rexoskell, found only in the time attack mission Gone Berserk, which unlocks after completing the mission Definian Downfall.

    Crude Neilnail Mask

    2

    Rare materials dropped by Neilnail Albus and Neilnail Furvus in the time attack mission Twin Dolls of Mystery, which becomes available after Chapter 12.

    Xe-dom Golden Crest

    6

    Prime materials dropped by Golden Xe-doms in Cauldros.

    Ancient Armor

    2

    Unique materials dropped by Xe-dom enemies throughout Mira, particularly in Sylvalum’s fields.

    Advanced Crank

    4

    Unique materials dropped by Seidrs in Sylvalum and Cauldros, commonly found near Ganglion camps and in the skies.

    Xe-dom Hand

    4

    Prime materials similar to Ancient Armor, dropped by Xe-doms.

    Ouroboros Crystal

    2

    Prime resources obtainable through FrontierNav. Mine this material by placing probes on FN Sites 308, 309, and 320.

    Miranium

    10,000

    Collected automatically through mining probes on FrontierNav. You’ll need to set up storage probes to hold this quantity of Miranium.

    All materials except Miranium and Ouroboros Crystals can be bought from the material market. Buying everything needed for this Skell will cost a total of 4,325 material tickets.

    After you’ve collected all the required materials, visit the AM Manager in Armory Alley, then select the Skell Frames section in the Develop New Gear menu. You should see the Amdusias Hades as the seventh option down.

  • Completing Lailah Queen Skell in Xenoblade Chronicles X: Definitive Edition

    Completing Lailah Queen Skell in Xenoblade Chronicles X: Definitive Edition

    In Xenoblade Chronicles X: Definitive Edition, each Skell has distinct characteristics that set it apart. Whether you’re looking for more health to absorb damage, a high attack stat for offense, or increased fuel capacity to minimize refueling, Skell customization offers a variety of choices.

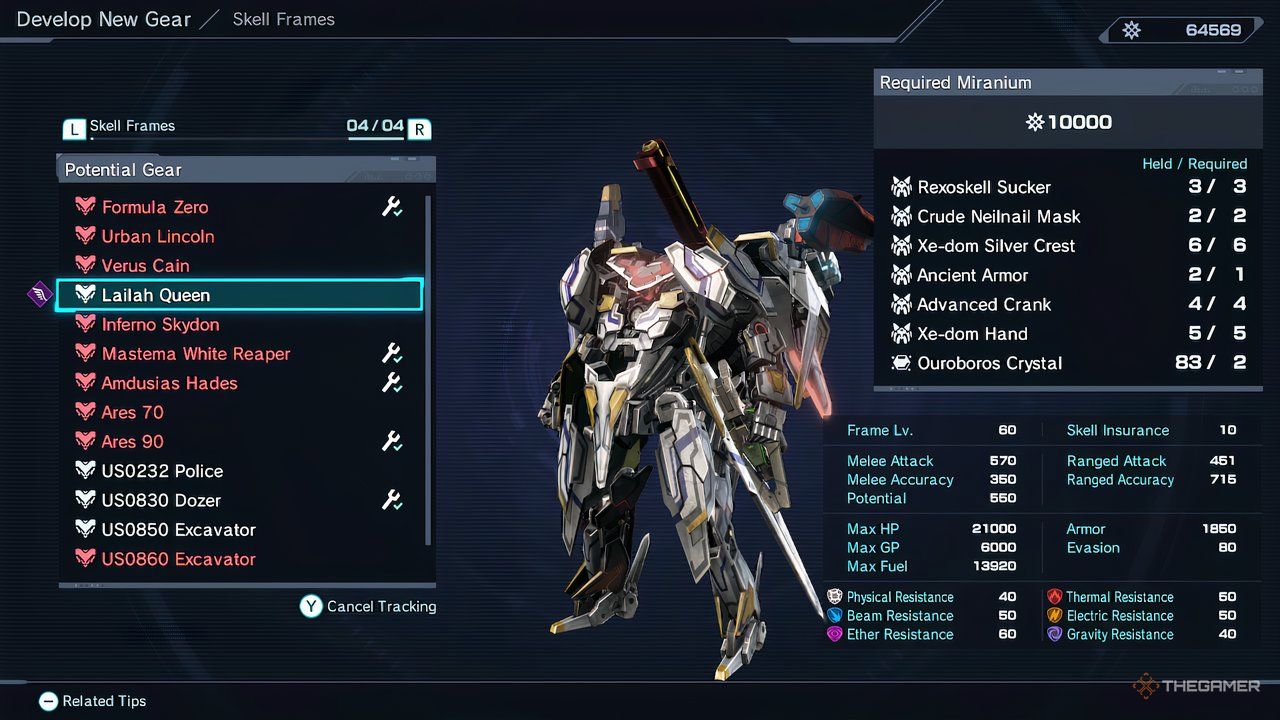
    With the various stats and customization features available, you might be tempted to create a versatile Skell. For players seeking that balance, the Lailah Queen Skell is an ideal choice. This guide will provide you with all the materials you need to craft your own Lailah Queen Skell.

    Materials Needed for the Lailah Queen Skell

    After finishing Chapter 12 of the main storyline, you’ll gain access to seven Skell designs at level 60, which include the Lailah Queen Skell. However, unlike the ones you can buy, the Lailah Queen and similar models require you to gather materials on your own to build them from the ground up.

    Here’s a comprehensive list of materials needed to create the Lailah Queen Skell, along with their locations.

    Material Amount How to Obtain
    Rexoskell Sucker 3 These are dropped by the Rexoskell enemy, which appears in the time attack mission Gone Berserk. You’ll need to complete the quest Definian Downfall first.
    Crude Neilnail Mask 2 Defeat Neilnail Albus and Neilnail Furvus in the time attack mission Twin Dolls of Mystery to obtain this material. This mission becomes available after completing Chapter 12 of the main story.
    Xe-dom Silver Crest 6 Only found by defeating Silver Xe-doms in Sylvalum, look specifically for Molybdenum and Bismuth Xe-doms. There’s also a Silver Xe-dom named Go-rha, the Guardian Diety in Noctilum.
    Ancient Armor 1 This can be dropped by any Xe-dom enemy throughout Mira. The easiest spot to find them is in the open fields of Sylvalum, but they will only attack if you’re piloting a Skell.
    Advanced Crank 4 Defeat Seidr enemies found in both Sylvalum and Cauldros. They appear near Ganglion camps in Sylvalum and can be found flying around Cauldros.
    Xe-dom Hand 5 Similar to Ancient Armor, these can be found from any Xe-dom enemy throughout Mira.
    Ouroboros Crystal 2 These can be mined in Oblivia via FrontierNav. Specifically, place mining probes at FN Site 308, FN Site 309, and FN Site 320 to gather enough for your crafting needs.
    Miranium 10,000 Place mining probes around Mira with FrontierNav to automatically gather Miranium while exploring and completing quests. Ensure you have enough storage probes set up to hold the required amount.

    If you prefer not to spend time farming these materials, you can also purchase them. Aside from those available through FrontierNav, check the material market. Using this option will cost you a total of 4,325 material tickets.

    Once you’ve gathered all the necessary materials, head to the AM Manager in Armory Alley and select Develop New Gear. From there, choose the Skell Frames option, and the Lailah Queen Skell will be the fourth option from the top.

  • Completing the Joker: Solving the Enigma in Xenoblade Chronicles X

    Completing the Joker: Solving the Enigma in Xenoblade Chronicles X

    In the universe of Xenoblade Chronicles X: Definitive Edition, you’ll encounter numerous creatures eager to battle. Among these foes, the Tyrants stand out as the most intricate and challenging encounters throughout the regions of Mira.

    One of the most formidable Tyrants is Telethia the Endbringer, found in the Divine Roost area of Noctilum. However, don’t ignore Joker, the Unknowable—this smaller bug nestled in a flower is a Tyrant worth your attention. This guide will cover tips on how to conquer Joker and the rewards that await you.

    Preparing for the Battle

    Let’s begin with some details about Joker.

    Joker, the Unknowable is a level 90 blatta Tyrant located in a giant flower within Noctilum’s Divine Roost. To access this area, you must obtain the Skell Flight Module, which means you need to have completed at least Chapter 9 of the main storyline.

    Although he lacks significant health, the presence of several lower-level blattas in his vicinity compensates for that. Fortunately, we can turn this to our advantage by eliminating them together for a substantial experience boost.

    Using Skells

    Make sure to choose a high-level Skell for this confrontation. You can unlock stronger Skells by leveling up Sakuraba Industries with the AM Manager in Armory Alley. This will grant you access to level 50 versions of all base Skells, which feature enhanced health and damage output.

    From these, the XS0650 Mastema ST or XS0750 Amdusias are excellent choices for absorbing damage, though level 30 versions or craftable level 60 versions could still work.

    Weapon Selection

    Your primary weapon should be the SRM-R450GG Phoenix, a thermal area attack capable of quickly dispatching multiple enemies within the flower and inflicting significant damage on Joker.

    On your Skell, equip an SAM-M154SA Shield on one side and an SAM-M151SA Shield on the other. These shields boost your ranged attack and accuracy, which will be advantageous in this battle.

    It’s also wise to equip weapons in all other slots to improve your chances of activating Overdrive while in your Skell, in case a single use of the Phoenix doesn’t suffice.

    Augmentations

    Next, visit the AM Manager to check out the Engineer Augments option. For the final touches to your setup, create three Slayer.INSECTOID XX augments for your Phoenix cannon. Each augment enhances damage against insectoid foes like Joker by 40%.

    If your Phoenix cannon has only two slots for augments, go to L’s shop in Armory Alley to unlock a third slot for 40,000 miranium. If you haven’t gained access to L’s shop, complete L’s quest, Booming Business, which is also located in Armory Alley.

    Consider giving your teammates similar Skell setups to optimize your fight against Joker.

    Facing Joker, The Unknowable

    At the start of the fight, Joker will be surrounded by numerous smaller Blatta enemies, each around level 60.

    Start the battle by activating the two shield arts you’ve prepared to boost your ranged attack and accuracy.

    Then, fire your Phoenix cannon. The smaller blattas will likely be eliminated almost instantaneously, and Joker will take substantial damage.

    The tyrant blatta Joker, the Unknowable in Xenoblade Chronicles X: Definitive Edition.

    By defeating many enemies at once, you’ll probably gain enough GP to activate Overdrive for your Skell, making it easier to handle Joker.

    After this phase, aim to activate cockpit time frequently or use Skell cooldown reduction for your Phoenix cannon if you’ve progressed to Chapter 13, Act 3 of the main story.

    Joker, the Unknowable is quite evasive, so it’s possible that one or two of your Phoenix shots may miss.

    Nonetheless, with your Skell Overdrive and support from your teammates, you should be capable of defeating Joker quickly after taking out his minions.

    Once you vanquish Joker and his allies, you’ll receive a plethora of loot, which may include high-level gear.

    Ultimately, the true reward lies in the substantial regular and class experience gained from defeating all these foes at once, providing a straightforward way to level up your character in the game.

  • Completing the Trade for Gold Nopopotamus Card in Xenoblade X

    Completing the Trade for Gold Nopopotamus Card in Xenoblade X

    Xenoblade Chronicles X: Definitive Edition offers a variety of quests for players to experience, ranging from minor tasks to challenges that could alter the fate of whole species. Each mission provides benefits, promoting a sense of community among the diverse inhabitants of New Los Angeles (NLA).

    The Trade Agreement mission stands out as a perfect example of this community spirit. It takes you across NLA to hunt for rare trading cards that everyone, from humans to alien races, is eager to collect. So, let’s dive into some exciting trading card adventures!

    How to Begin the Trade Agreement Mission

    Before you can embark on the Trade Agreement mission, you must complete several preceding quests since virtually every alien race in the game plays a role in this mission. After finishing Chapter Seven, make sure you’ve completed the following quests:

    • BFFs – This mission introduces the Nopon to NLA.
    • Dead Men Tell No Tales – Here, you help bring the Zaruboggans to NLA.
    • Circle of Life – This quest allows the Orpheans to reproduce, adding more of them to the city.
    • Prone Sweet Prone – This mission brings the Tree Clan of the Prone into the city.

    Once you’ve completed those, you’re set to start the Trade Agreement mission. Head over to East Melville Street in the Commercial District to speak with Warawa. She’s desperately seeking the Gold Nopopotamus Card but has only managed to accumulate a pile of Bronze Blatta Cards.

    Warawa will hand you one of her Bronze Blatta Cards and ask you to do your best to trade it up for a Gold Nopopotamus. After all, the Ganglion are no match for the excitement of trading card games. Let’s get started!

    All Available Trading Partners

    The Trade Agreement mission features a straightforward conclusion, yet it encompasses numerous paths to reach it. You’ll never hit a dead end; every card trade always leads to another, eventually guiding you to the prized Gold Nopopotamus card.

    Here’s the full list of trading partners you can find across NLA, detailing which card they want and what they will trade:

    Some NPCs accept two different cards, providing flexible trading routes for every player.

    Image Card to Trade Card Received Trader Location
    Bronze Blatta Card Bronze Cinicula Card Liviana North Founder Street
    Pirapira trading Bronze Cinicula Card + Five Coaletris + Two Meteo Eaters Silver Mortifole Card Pirapira By Rosemoss Restaurant
    Bronze Petramand Card + Five Coaletris + Two Meteo Eaters
    Capsica trading Silver Mortifole Card Ma-non Hunting Kit Capsica Ma-non Ship, Starboard Side
    Camber trading Bronze Cinicula Card Meal Ticket Camber Hangar beneath Administrative District by a Skell
    Ton'barac trading Silver Xiphias Card Gold Nopopotamus Ton’barac In the Sports Complex directly across from Wilbur

    Overall, you can trade with a total of 12 NPCs, but the final two exchanges will always involve Wilbur and Ton’barac. If you ever find yourself uncertain about who to trade with next, refer to the table above.

    Optimal Route to Obtain the Gold Nopopotamus Card

    Your goal should be to minimize trading time. Although you can’t get stuck in this mission, longer trade routes can be tedious. Here’s the quickest way to convert a Bronze Blatta Card into a Gold Nopopotamus in just five trades:

    1. Trade the Bronze Blatta Card for Laviana’s Bronze Cinicula Card.
    2. Trade the Bronze Cinicula Card along with Five Coaletris and Two Meteo Eaters for Pirapira’s Silver Mortifole Card.
    3. Exchange the Silver Mortifole Card for Capsica’s Ma-non Hunting Kit.
    4. Trade the Ma-non Hunting Kit for Wilbur’s Silver Xiphias Card.
    5. Finally, trade the Silver Xiphias Card for Ton’barac’s Gold Nopopotamus Card.

    While there are numerous ways to get the Gold Nopopotamus Card, following this route results in the least amount of trading. Considering the expansive nature of NLA and the lack of clear indications from NPCs about trading, it’s wise to reduce your travel time as much as possible.

    Once you have the coveted Gold Nopopotamus Card, return to Warawa. She’ll regale you with her whimsical dreams about the card, which are quite elaborate. After her storytelling, she’ll reward you with 20,000 Credits, 240 EXP, and several holofigures, including Clash of the Cute, Thwipper Series, Upgraded Diving Bottoms, and Upgraded Diving Mask.

  • Completing the Quest for Senirapa Water in Xenoblade Chronicles X

    Completing the Quest for Senirapa Water in Xenoblade Chronicles X

    Xenoblade Chronicles X: Definitive Edition stands out for its rich depiction of various alien species, particularly in the city of New Los Angeles (NLA). Among these fascinating beings is the Orphe, a unique race that experiences a collective consciousness through a connection known as the Ovah.

    Unlike most life forms, the Orphe cannot reproduce in the traditional sense. Instead, they split into two new individuals by utilizing a rare resource called Senirapa Water. Unfortunately, Senirapa Water is hard to come by on Mira, and Kun’luarb, a key Orphe character, is struggling to locate it. Your mission is to assist him in saving their dwindling population.

    How to Initiate the Circle of Life Mission

    Before you can embark on the Circle of Life mission, you’ll need to complete several prerequisite quests. This mission is essential for helping the Orphe in their quest for Senirapa Water and builds on several earlier tasks. One of the pivotal early quests involves bringing the Orphe to NLA, while another significant mission is Rescue at the Ensconced Citadel, which unlocks during Chapter 7.

    Here’s a list of the necessary quests to complete beforehand:

    • Sun’celeg Rises: This quest familiarizes you with the properties of Senirapa Water.
    • The Journey Begins: In this task, you gather materials for Kun’luarb’s journey to find Senirapa Water.
    • Water Woes: This leads to the establishment of the Biahno Water Purification Plant, allowing the Orphe to create an endless supply of Senirapa Water from a small sample.

    To begin the Circle of Life mission, you must have completed Chapter Seven. There’s no minimum level requirement to take on this quest. After it becomes available, you can find Kun’luarb near the Residential District’s bridge. He needs to be made aware of the possibility to synthesize Senirapa Water, meaning he only needs to find a tiny drop. You will be tasked with locating him and bringing him back if he obtains the water. His last known location was in Noctilum, so head there first.

    Should You Use the Senirapa Water on Kun’luarb?

    Kun’luarb can be found at the Lotus Keep Building Site, which is overrun by Ganglion enemies. However, he is positioned near a pool of toxic water in the back area, making it relatively easy to reach him without engaging in combat.

    When you speak with him, he reveals that he found a drop of Senirapa Water but at the cost of his own life. His excitement about the potential for synthesize more Senirapa Water is palpable, and he asks you to return to NLA with the water, allowing the Orphean race to survive. At this point, you will be presented with various dialogue choices, with the last two being pivotal in determining the quest’s outcome.

    Options for Kun’luarb’s Fate

    1. Allow Kun’luarb to Die
      In this scenario, Kun’luarb will pass away without the ability to transfer his spirit, but you will be able to take the Senirapa Water back to NLA. His companions will be saddened by his loss but will find solace in knowing he has saved the Orphean race.

    2. Use the Senirapa Water on Kun’luarb
      Here, Kun’luarb will also die, but he will divide into two new entities named Sin’luarb and Sen’luarb. You will then need to search for another drop of Senirapa Water somewhere on Mira for them. Only one new sample is required, and you can deliver it to Kun’luarb as soon as you acquire it.

    Regardless of your choice, the Orpean population will thrive after this mission, unlocking numerous new quests linked to their growing numbers. Furthermore, the rewards will remain the same, offering 24,000 Credits, 350 EXP, and the Noble Sacrifice and Orphean Heavy (Male) holofigures.

    Where to Find Senirapa Water

    If you decide to use the drop of Senirapa Water on Kun’luarb, you will have the substantial task of finding an additional sample somewhere in Mira. Unlike other missions, you won’t receive any hints, markers, or directions.

    You can find Senirapa Water in two locations:

    • The entrance of Headwater Cavern, located behind the waterfall in Biahno Lake.
    • In the Bestial Utopia beneath Mount M’gando in Cauldros.

    Once you collect a new sample of Senirapa Water, make your way back to Kun’luarb, who will now be joined by Sin’luarb and Sen’luarb. Completing this final step will successfully conclude the quest and allow the Orphe to flourish.

  • Completing the What The Skell Eyewitnesses in Xenoblade X

    Completing the What The Skell Eyewitnesses in Xenoblade X

    The universe of Xenoblade Chronicles X: Definitive Edition is vast, but the heart of its narrative lies within the densely populated New Los Angeles (NLA). It’s the characters that truly bring the game to life, including your team and the many others you encounter. One such character is Alexa, who shares a passion for Skells, often mirroring that of dedicated players.

    When she ends up damaging another Blade’s Skell, she vows to fix it, which leads her into a much larger predicament, including a plot against her life. Here’s a guide on how to successfully complete the “What the Skell?!” mission and take down its toughest foes.

    How to Begin the “What the Skell?!” Mission

    This mission is part of Alexa’s personal Affinity Missions, and you need to have completed her previous mission where she joined your team. This earlier mission is called Weaponized, which you can start in Chapter Four and it takes you to the area of Sylvalum. You also need to reach at least level 36, finish Chapter Nine, and have a minimum of two affinity hearts with Alexa.

    Once you meet these requirements, make your way to the Outfitter’s Test Hangar to speak with a downcast Alexa. She’s upset after a weapons test went awry and resulted in a Skell being heavily damaged. Accompany her to the Administrative District so she can apologize formally.

    Collecting the Repair Materials

    Upon your arrival at the Hangar, Mika immediately confronts Alexa over the failed test, claiming that she and Camber are out of work until it’s resolved and that spare parts are scarce. Feeling responsible for this situation, Alexa insists that she will find the necessary parts herself, no matter the challenge.

    Being the helpful person you are, you agree to assist her, even though locating these items won’t be a walk in the park. You’ll need to gather two types of materials: five Standard Blade Modules and six Pan-Analysis Chips, both of which can be found in Cauldros. This territory might be new to you, so brace yourself for the adventure.

    Standard Blade Modules

    Your primary focus should be on the Standard Blade Modules. These can mostly be obtained from Fleet Shrads, although any Shrad can potentially drop them. Remember that the game will typically direct you to the nearest Shrad, not necessarily the one that has the best chance of dropping what you need.

    Be cautious of certain Shrads, like Blast Shrads, which have a very slim chance of yielding Standard Blade Modules. Always check the name before engaging them in battle.

    Focus on hunting down Fleet Shrads, as they almost always drop Standard Blade Modules. These enemies are lower in level (around 20-25) compared to others that are level 30 and above. They can be found in abundance at the White Phosphor Lake in the northeastern part of Cauldros, but watch out for tougher enemies lurking nearby.

    Pan-Analysis Chips

    On the other hand, gathering Pan-Analysis Chips is more straightforward. These are simply blue collectibles scattered throughout the area, and they’ll be marked for you in the game. Once you have collected six, head back to Camber.

    A smart move is to add the Pan-Analysis Chip to your Collectopedia before collecting all six if you haven’t done so already, since the game points out their locations clearly.

    Testing the Sparkjet Rifle

    After you deliver the repair materials, Mika’s attitude towards Alexa softens slightly, though she’s still cool. Camber, on the other hand, expresses gratitude for your help. With that settled, Alexa decides to visit Tika to see if there are any new weapon tests available for her to take on.

    Indeed, there is. This part of the quest resembles Alexa’s previous Weaponized Affinity Mission. Tika provides you with the Sparkjet Rifle, which must be used to defeat certain enemies. Like the Ramjet Rifle, it boasts an impressive TP Gain Rating. You’ll need to take out some challenging foes in Sylvalum and then a Tyrant in Cauldros.

    Your first targets are the Cantors in Sylvalum, who only come out at night. You need to defeat three of them, but they shouldn’t pose much of a threat even if you meet only the minimum level requirement. Keep an eye out for a nearby Shadow Falsaxum that you might want to avoid.

    A fun tactic is to use your Skells to fight, but leave the character with the Sparkjet Rifle on foot, so they are forced to engage without a Skell. As long as they hit the enemies once with the rifle, it counts as using it.

    Next, you’ll need to battle the Tyrant, Rodriguez, the Twin-Tusked. This Potamus-type enemy isn’t overly strong, making it manageable to take down on foot, especially if you’re overleveled. There won’t be any backup enemies to complicate matters, allowing you to focus solely on it. You can still utilize the Skell method if you’re finding it difficult to fight without one.

    Once you complete both objectives, you can head back to Tika and return the Sparkjet Rifle.

    Investigating Eyewitness Accounts

    Upon your return, Tika notices something off about the rifle and insists that Alexa discard it just before it unexpectedly explodes. Discovering that the previous failures weren’t entirely Alexa’s fault reveals that someone is deliberately sabotaging her efforts. Your next task is to uncover the identity of this saboteur, who must be positioned close to the event.

    Initially, you’ll need eyewitness accounts to track down who is behind this. The first witness can be found right outside the Outfitter’s test Hangar. This person mentions seeing a woman run toward the Diner, marking your next target. Near the storage facility across from the Repenta Diner, another witness will indicate that they observed a Blade Operative rushing toward the Administrative District, looking distressed.

    Proceed north along the road, and check by the red stairway leading downwards where you can find another witness. They claim a woman from the Outfitter’s Division hurried down to lower levels. As you descend, you’ll notice the quest marker indicating a familiar figure—Mika. It turns out she was envious of the attention Camber was giving to Alexa and wanted to undermine her. While not intending to kill, her actions were aimed at tarnishing Alexa’s reputation.

    To Alexa’s credit, she’s more surprised by the notion that Mika could have feelings for anyone other than a Skell than by the attempted sabotage. She forgives Mika swiftly, provided that Mika allows her to pilot her Skell. As a reward for navigating these events, you will receive 26,000 Credits, 360 EXP, and one of Alexa’s unique Arts, Overclock, which is useful for Assault Rifles.

    If you prefer, you can bypass the eyewitness steps entirely and head straight to Mika’s location, as she appears there as soon as this objective becomes available.

  • Completing the Search for the Sky Castle Thief in Xenoblade X

    Completing the Search for the Sky Castle Thief in Xenoblade X

    Xenoblade Chronicles X: Definitive Edition features a variety of alien species drawn to the planet Mira, but the Nopon are among the unique natives. They inhabit regions all over the planet, ranging from the expansive plains of Oblivia to the fiery plateaus of Cauldros.

    In the snowy landscapes of Sylvalum, you’ll encounter the Dopang caravan, led by Kuta. He reports that his cargo has been stolen but admits he didn’t see the theft. To assist him, you’ll need to investigate and ask others for hints about its whereabouts.

    How to Start Castle in the Sky

    The "Castle in the Sky" mission can be found deep within Sylvalum, available once you’ve cleared Chapter Four. However, you’ll have to make a special trip to find it earlier on.

    To begin, head to the Cleansing Spring located to the east in Sylvalum, but keep in mind that Kuta only makes his appearance at night. Be sure to adjust the in-game time so you can speak with him.

    Upon conversing with him, Kuta will inform you about the cargo theft, but since he has no idea who or what is responsible, he will ask you to gather information from other caravan members who might have seen something.

    Finding the Thief

    Speaking With Dopang Caravan

    Your first step is to talk to the members of the Dopang Caravan, who, like Kuta, are available only at night. After you speak to Kuta, go straight to them for the next piece of information.

    You’ll gather some vague clues from them. They mention seeing a large shape flying away, likely heading toward Lake Ciel. Looking at your map, you’ll notice that Lake Ciel is quite large. Although the area will be marked, you’ll need to explore to identify the thief, who is still unknown to you.

    Speaking With Bobora

    If your search leads you to Bobora, you’ll have a significant advantage. Not mentioned in the quest or by any caravan members, Bobora can be found at the top of Xanadu Outlook, a scenic viewpoint with stunning views of Sylvalum.

    To get there, follow the narrow path up the mountain starting at FN Site 413. As you reach the summit, be cautious of a large enemy at level 60 that will become alert as you approach, requiring you to use an ability like Shadowrunner to sneak by.

    Once you get close enough to Bobora, he’ll provide a detailed description of what occurred. He reveals that a Jacul Ire is the culprit that took the cargo and that it flew to the southern area of Lake Ciel.

    Now, it’s time to head over and retrieve the stolen cargo.

    Defeating The Jacul Ire

    Make your way to the Jacul Ire, which is at a more manageable level 32 compared to some other foes in Sylvalum. This enemy resembles an Auravis, and the battle should be straightforward. Upon its defeat, it will drop the cargo Kuta is seeking.

    Return to Kuta at night once again to receive his gratitude and your rewards, which include 11,000 Credits, 190 EXP, and the Ensnared holofigure.

  • Completing the Choice: Santa Hat or Beanie in Xenoblade X?

    Completing the Choice: Santa Hat or Beanie in Xenoblade X?

    Xenoblade Chronicles X: Definitive Edition truly embraces its alien themes, featuring a multitude of extraterrestrial species across the expansive world of Mira. Among the exciting new life forms, the iconic Nopon return as some of Mira’s few native inhabitants.

    These adorable creatures are as savvy in business as ever, with some even showing an interest in fashion. This brings us to "A Tip of the Cap," where you can play an active role in shaping the next wave of Nopon fashion trends on Mira.

    How to Launch A Tip of the Cap

    Getting started with "A Tip of the Cap" is straightforward, but you need to meet two key requirements. First, you must have completed Chapter Four, and second, you need to finish the "The Ties That Bind" Affinity Mission. This mission is centered around Tatsu’s journey to find Dodonga Caravan and reunite with his family.

    The event unfolds in Dodonga Caravan. Once you’ve wrapped up "The Ties That Bind," chat with Nosusu to kick off the fashion project. Nosusu’s business is struggling, and she envisions hats as the solution.

    Which Hat Will You Create?

    Before you can start crafting hats, you’ll need to gather some initial materials: six Noctilucent Dragonflies, one piece of Harnenga Cotton, and two Lava Mangoes. You can find these items in Noctilum, and they will be marked on your map if you’re still searching for them.

    Once you’ve collected everything, return to Dodonga Caravan and hand the materials to Nosusu. At this point, you’ll need to provide one additional item, choosing from two options:

    • Two Vibrant Plumes to make a Santa Hat
    • Two Fluffy Tufts to create a Beanie

    Pick the option that appeals to you the most, as the rewards will remain the same regardless of your choice: 9,000 Credits, 170 EXP, and Soft Cat Ears. The real fun begins when you start seeing Nopon throughout the world sporting the hat you helped create. So, the next time you encounter a Nopon in your chosen style, you’ll know your decision made a fashion statement. You’re officially a trendsetter!

  • Completing the Skell Flight Module in Xenoblade Chronicles X

    Completing the Skell Flight Module in Xenoblade Chronicles X

    Among the many exciting features of Xenoblade Chronicles X: Definitive Edition, Skells stand out as a highlight. During cutscenes, you may notice several Skells soaring through the air. However, your initial Skell doesn’t have built-in flying capabilities by default.

    Luckily, there’s a workaround: the Skell Flight Module. This guide will explain how to get the Skell Flight Module so you can take to the skies in your very own Skell.

    Prerequisites for the Quest

    Before you can begin the affinity quest that unlocks Skell Flight, there are a few requirements. Fortunately, these are quite manageable, so you won’t have to spend too long preparing.

    • You need to have completed Chapter 9 of the main storyline, titled Warriors of Wroth. Be ready for a challenging boss fight in this chapter.
    • You must also have acquired your own Skell License, which grants you ownership of a Skell. This makes sense, as flying a Skell wouldn’t be possible without having one.

    Once you meet these conditions, make your way to the Outfitters Test Hangar in the Industrial District of New Los Angeles to kick off the quest.

    Affinity Quest – A Girl’s Wings

    The quest to unlock Skell Flight is called A Girl’s Wings and begins with Lin finishing her custom flight Skell design. However, it still needs a couple of essential parts before it can operate properly. Commander Vandham sends you out to gather these components.

    You’ll need to collect two items for this part of the mission, and they’re relatively easy to find.

    • First, you need an Upgraded Coil from Oc-Servs located in Sylvalum. These foes are easy to spot, as two of them spawn at the southern edge of Sylvalum, right where many players enter the region, just north of FN Site 403.
    • The second item is a Light-Speed Jet Fin from Aetrygons in Oblivia. These creatures can be found throughout the area, but you’ll have the best luck in Barbarich Desert and around FN Site 311.

    After collecting both items, return to the Outfitters Test Hangar in the Industrial District of New Los Angeles.

    When you arrive back at the hangar, you’ll see that Lin’s flight test Skell has exploded, prompting the arms manufacturers supporting the project to reconsider their stance. Vandham is upset about the situation but allows Lin to try again using the supplies you’ve gathered.

    By the next day, Lin has repaired the Skell, ensuring it’s safe and flight-ready. Soon, you’ll be sent to fly to a designated location for the test, which is FN Site 110, an area you couldn’t access before.

    To reach it, simply fly out from the top of New Los Angeles towards the large arching mountain that dominates Primordia. At the peak, you’ll find a laser marking the location to place a probe, which you need to do for this segment of the quest.

    Once you place the probe, a call from Lin and Vandham will confirm the success of your test. From there, head back to the Outfitters Test Hangar to wrap up the mission.

    We strongly recommend completing this quest in one go without deviating from the main path. While we aren’t sure if you can battle enemies while using the test Skell, the mission advises keeping the Skell in perfect condition, so it’s wise to follow that guidance.

    Upon your return to the Outfitters Test Hangar, Vandham will praise your flawless test flight and announce that flying Skells will soon be mass-produced, marking the conclusion of the quest.

    As a bonus, all Skells you already own will automatically receive an upgrade, enabling flight capabilities.

    Keep in mind that flying your Skell does use fuel, unlike running or jumping on the ground. It doesn’t deplete fuel too quickly, but be cautious to avoid running out while exploring or, worse yet, during a tough battle.

    With a flying Skell, the vast world of Mira is now at your fingertips. You can access previously unreachable areas, place probes across the map, and uncover hidden secrets that were impossible to find on the ground. With this upgrade, the sky is truly your playground.

  • Completing a Challenger Approaches to Solve Ga Jiarg in Xenoblade X

    Completing a Challenger Approaches to Solve Ga Jiarg in Xenoblade X

    Among the updates in the Xenoblade Chronicles X: Definitive Edition compared to its Wii U predecessor, one of the most thrilling features is the introduction of new party members. Whether they’re fresh characters from the world of Mira or familiar faces that have become playable, gaining new allies adds a delightful twist to the experience.

    One of the standout new characters is Ga Jiarg, the former prince of the Wrothians and a prominent boss encountered in Chapter Nine of the main storyline. This guide will explain what you need to do to unlock Ga Jiarg’s recruitment mission and how to successfully complete it.

    Requirements to Unlock Ga Jiarg’s Mission

    Unlocking Ga Jiarg’s recruitment quest is fairly straightforward; you need to finish two specific quests before you can start it.

    Complete ‘Chapter Ten: The Zu Pharg Menace’

    First, you have to finish ‘Chapter Ten: The Zu Pharg Menace’ from the main story. The boss of this chapter, the Zu Pharg, can be quite challenging for players who aren’t adequately prepared, due to its massive size, powerful attacks, and its capability to summon additional enemies.

    Ensure you have top-notch Skells and the best equipment possible to deal with this enormous adversary.

    Complete ‘Prospective Partners’

    The second requirement involves completing the affinity mission called ‘Prospective Partners’. You’ll need to have completed both Chapter Nine, where Ga Jiarg appears as a boss, and the affinity mission ‘Spy Games’ to accept this mission.

    Since the ‘Prospective Partners’ mission is required to even initiate the Chapter Ten story quest, once you’ve completed Chapter Ten, starting Ga Jiarg’s quest should be straightforward.

    ‘A Challenger Approaches’ Quest Walkthrough

    To kick off Ga Jiarg’s affinity quest, titled “A Challenger Approaches,” go to the B.L.A.D.E. barracks and accept the affinity mission located just to the right of the customization console.

    In this mission, Director General Maurice Chausson requests your help to deliver an alliance treaty to a Wrothian camp that B.L.A.D.E. has located in Oblivia, which is overseen by Prince Ga Jiarg.

    Upon reaching the Wrothian Stronghold, you and your team are confronted at the entrance by Ga Buidhe, who demands that you defeat her in a duel if you wish to meet the prince. This battle can be quite tough if you’re unprepared, just like your previous encounter with her and Ga Jiarg in Chapter Nine.

    Fortunately, in this fight, you can actually use Skells against her, making it much easier than your previous encounter.

    If you prefer to fight on foot for a fair challenge, it’s a good idea to build up enough TP to activate Overdrive before the battle, which you can accomplish by defeating the nearby enemies.

    Once you defeat Ga Buidhe, she implores you to take her life, but before you can react, Ga Jiarg intervenes and invites your team in to discuss the treaty. When you meet the prince, he expresses his willingness to form an alliance but mentions that he will need something in return from humanity.

    Ga Jiarg explains that after severing ties with the Ganglion, many of his fellow Wrothians have been left without medical assistance for wounds incurred in battle. As a result, he requests that you procure some Med Kits to aid his people, humbling himself in the process.

    You have two options for retrieving the medical supplies:

    • Option A involves raiding the Ganglion base located in the Hilial Stronghold in Sylvalum. Expect to face tough enemies, and remember that you cannot collect med kits while engaged in combat, so come prepared.
    • Option B allows you to head to New Los Angeles and talk to Jeffrey at the Restricted Hangar Entrance in the Administrative district. He has the medical supplies that Ga Jiarg needs. However, expect to pay a hefty fee of 100,000 credits to acquire them.

    After securing the five Med Kits using whichever method you chose, return to the Wrothian Stronghold in Oblivia to deliver the supplies. Once you provide the medicine, Ga Jiarg will express gratitude and officially solidify the alliance between humanity and the Wrothians, as long as the Ganglion remain a common enemy.

    Completing this quest unlocks Ga Jiarg as a party member. Ga Jiarg is a unique class based on the Galactic Knight, wielding a Photon Saber and a Raygun, making him a formidable addition to your team.

    Additionally, finishing this affinity mission unlocks the arms manufacturer Six Stars, which provides some of the best armor and weapons in the game once fully upgraded at the AM Manager Console in Armory Alley.

    You will also gain access to various side missions from the new Wrothian citizens in New Los Angeles.

  • Completing the Ares 90 Skell in Xenoblade Chronicles X

    Xenoblade Chronicles X: Definitive Edition has many features that make it appealing to new players, such as its engaging combat mechanics, expansive open world, and diverse character roster. Among the most exciting aspects of the game is the ability to pilot giant robots known as Skells.

    These Skells are formidable combat machines, and out of all the variants, one stands out: the Ares 90. This particular Skell boasts immense power, capable of taking down nearly any foe on Mira in a single blow. This guide will walk you through gathering all the materials needed to build the Ares 90 Skell.

    Materials Needed

    A screenshot showcasing the material list for the Ares 90 Skell in Xenoblade Chronicles X: Definitive Edition.

    After you’ve completed Chapter 12 of the main storyline and retrieved the Lifehold core, you will unlock the ability to develop new Skell Frames, including the Ares 90. Gathering the necessary materials for this Skell is one of the most challenging tasks in the game, although the Definitive Edition has made it a bit easier. Let’s go through each material and how to collect them effectively.

    Once you reach the Skell Frame development stage, you’ll also have access to the Ares 70, which is easier to acquire but doesn’t match the Ares 90 in damage output and overall effectiveness.

    Offline players will face a much more difficult challenge in gathering the required materials to create the Ares 90, as they have limited access to reward tickets required for certain materials.

    Golden Yggralith Heart & Silver Vita Core

    A screenshot showing the Dark Matter Phantom time attack mission in Xenoblade Chronicles X: Definitive Edition.

    The material list for the Ares 90 presents two notable challenges: the Golden Yggralith Heart and the Silver Vita Core. Let’s break down how to obtain them.

    The Golden Yggralith Heart can only be acquired by defeating Yggralith Zero, a global nemesis and one of the game’s online bosses, alongside the Telethia Plume. For offline players, this means it’s impossible to obtain this material without utilizing material tickets to access the online materials market.

    Even for online players, obtaining the Golden Yggralith Heart will still require significant effort, as it only drops if your party is responsible for reducing Yggralith Zero’s RP to zero. This can be tricky because if you take too long, its RP might drop to zero before you can engage, so ensure your team can deal enough damage within the time limit.

    The Silver Vita Cores are equally problematic; they only drop from one of the game’s final bosses, the Vita mech. Hence, if you don’t collect both cores during the last chapter of the main story, your only options will be to purchase them with material tickets or farm the time attack mission Dark Matter Phantom.

    Given the difficulty of acquiring these materials, it’s advisable to use material tickets for both. Other materials are easier to gather in-game, but these two are exceptionally costly: the Golden Yggralith Heart costs 1,590 material tickets, while each Silver Vita Core goes for 475 tickets.

    Upgraded Lens & Seidr Control Device

    A screenshot of a Seidr enemy in the skies above Cauldros in Xenoblade Chronicles X: Definitive Edition.

    The next two materials needed—eight Upgraded Lenses and four Seidr Control Devices—are much easier to gather than the previous ones and can be obtained from the same enemy type: Seidr enemies found in Sylvalum and Cauldros.

    These Seidr foes are commonly located around Ganglion camps in both of these areas. Many of them, like Badul’s Seidr in Sylvalum and Enhanced Attack Seidr in Cauldros, are tyrants that can drop valuable loot.

    While Seidr Control Devices are the rarer material, you can farm both types from the same enemies until you’ve collected what you need.

    If you’d prefer to acquire these materials quickly with material tickets, each Upgraded Lens is priced at 10 tickets, while a Seidr Control Device costs 90 tickets, totaling 440 tickets for everything needed.

    Advanced Core

    A screenshot of a Xe-Dom enemy patrolling the plains of Sylvalum in Xenoblade Chronicles X: Definitive Edition.

    Next, you’ll need six Advanced Cores, which you can acquire by defeating Xe-dom enemies patrolling Mira. These enemies are primarily found throughout Sylvalum and in several deactivated Xe-doms in Cauldros that will engage if approached.

    If you’re struggling against them using lower-tier Skells or while on foot, proper Overdrive use can make battles much easier. If you’re in a Skell, ensure you have strong arts and augments equipped to help with the fights.

    If you prefer to skip farming, each Advanced Core costs 75 material tickets, requiring a total of 450 tickets for all six needed for the Ares 90.

    Crude Neilnail Mask

    A screenshot of the time attack mission titled Twin Dolls of Mystery in Xenoblade Chronicles X: Definitive Edition.

    Excluding the Golden Yggralith Heart and Silver Vita Core, the six Crude Neilnail Masks are the toughest materials to acquire for the Ares 90—either through farming or purchasing.

    To naturally obtain them, defeat Neilnail Skells. In the main game, you’ll encounter only four: two in Neilnail’s first affinity mission and two in her second affinity mission. If you need more, take on the time attack challenge, Twin Dolls of Mystery, where they are rare rewards.

    Alternatively, if you’d like to buy them with material tickets, each Crude Neilnail Mask costs 475 tickets. However, unlike the Silver Vita Core that only requires two, you’ll need six of these masks, totaling 2,850 material tickets.

    You can earn material tickets by completing squad tasks, finishing online missions, or as a reward for surveying 60%, 85%, 95%, and 100% of any region.

    Cimmerian Cinnabar

    A screenshot of the FN 203 probe site with Cimmerian Cinnabar in Xenoblade Chronicles X: Definitive Edition.

    Differing from the other materials, Cimmerian Cinnabar can only be obtained through mining via FrontierNav.

    You can mine this resource by placing a mining probe at any of the following FrontierNav sites in Noctilum: FN Site 202, FN Site 203, FN Site 207, and FN Site 217. You’ll need only two of these materials, so deploying a high-level mining probe or chaining probes around one of these sites should yield the quantity you need.

    Miranium

    A screenshot of a large chain of storage probes on FrontierNav in Xenoblade Chronicles X: Definitive Edition.

    The final and arguably most critical resource you need to craft the Ares 90 is Miranium, which is abundant throughout the game. Mining probes will automatically gather Miranium wherever they’re placed, and the more probes you set up, the more you’ll collect.

    The real challenge lies not in obtaining Miranium, but rather in ensuring you have enough storage space for it. For the Ares 90, you’ll need a total of 100,000 Miranium, and the only way to hold that much is by having a substantial network of storage probes on your FrontierNav map.

    Once your storage capacity reaches 100,000, simply play the game while your probes gather Miranium passively. You must actively be playing for the probes to mine, so taking a break won’t help. Focus on other activities or gather other materials while your probes do their work.

    A screenshot of the player character standing before their own Ares 90 Skell in Xenoblade Chronicles X: Definitive Edition.

    After you’ve successfully acquired all these materials through effort and dedication, the reward awaits you. The Ares 90 is capable of delivering such extraordinary damage that it can take down almost every enemy in the game with a single hit, even without damage augments. This makes farming for materials a lot easier and significantly enhances your overall combat ability.

  • Completing the Foggy Dilemma Mission: Xenoblade Chronicles X Guide

    Completing the Foggy Dilemma Mission: Xenoblade Chronicles X Guide

    Phog, a downloadable content character from the original Japanese version of Xenoblade Chronicles X, made a free appearance in the West and is now available in the Definitive Edition. While the Switch version adds plenty of new features, Phog remains true to his character—thoughtful yet a bit forgetful.

    This guide will help you navigate Phog’s recruitment mission, titled ‘Foggy Dilemma.’ You’ll find out how to begin, where to complete the necessary tasks, and learn more about your new companion. Let’s get started!

    How to Start ‘Foggy Dilemma’

    To begin the ‘Foggy Dilemma’, you must first complete Chapter 4’s main story mission, ‘The Ganglion Menace’. However, there’s a unique twist to this affair.

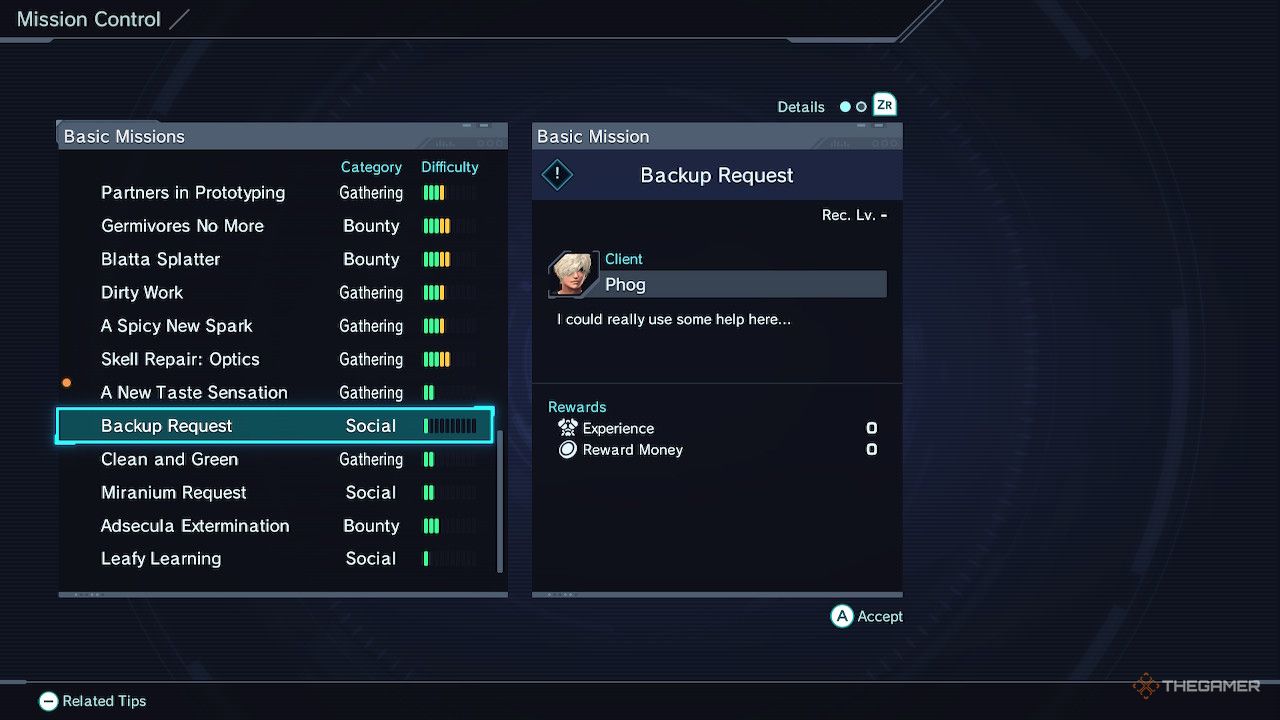
    You’ll need to start with the mission titled ‘Backup Request’. This Basic Mission can be found at Mission Control in the BLADE Concourse of New Los Angeles. Be sure to accept this brief quest as it will lead you to Phog.

    Many players have encountered issues getting ‘Backup Request’ to appear at Mission Control. First, check that you don’t have the maximum limit of 30 Basic Missions active at once, as that could block it from popping up. Make sure you’ve finished Chapter 4, and if it still doesn’t show, try completing a few other quests, return, and keep trying.

    You will find Phog near the Water Purification Plant in the Residential District. Talk to him and enjoy your dialogue choices, as they don’t affect the quest’s outcome. It’s all just for fun!

    Forget-Me-Not

    FN Site 309 in Xenoblade Chronicles X

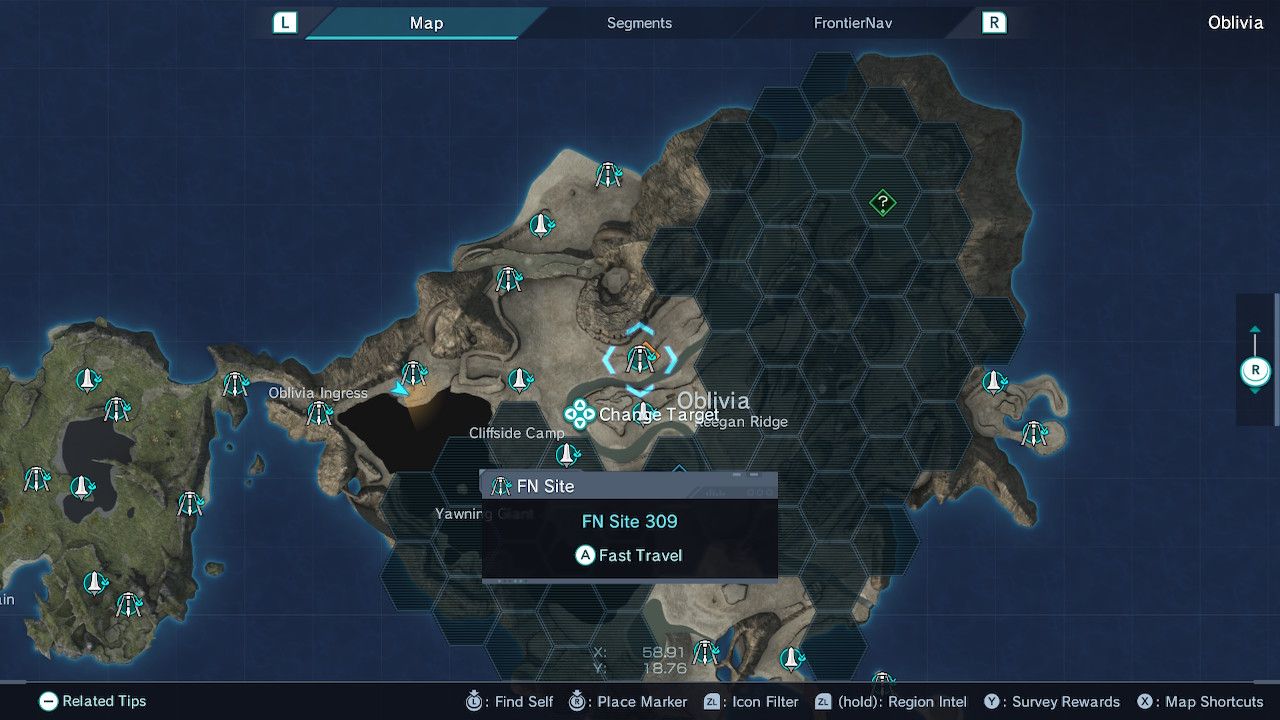
    Phog requires your assistance in investigating some faulty data probes located in Oblivia. Your first stop is near FN Site 309, situated in the heart of Oblivia. If you have explored this area previously, you can fast travel there.

    While ‘Foggy Dilemma’ features straightforward objectives, be aware that there are some strong creatures nearby. The level 27 beast near your initial location, Lake Falsaxam, can be quite challenging, especially if you’re under-leveled, so make sure to avoid it if you’re much lower in level.

    After the cutscene at the lake, follow the quest marker for several hundred meters. You’ll arrive at Aaroy Plain shortly. After another brief scene, return to your original location, where you’ll find that Phog has surprisingly forgotten the entire trip!

    You’ll head back to the second location afterward, but as seasoned players of Xenoblade Chronicles X advise newcomers, approach the objective during the night. You will face a battle soon, and there’s a level 65 Tyrant that tends to wander into the area during the day.

    Completing the Mission

    Prone in Oblivia in Xenoblade Chronicles X

    The Prone you will face aren’t too challenging, but their mech, called a Qmoeva Divider, can be a tougher opponent.

    Despite being level 14 (and you may not be much higher), it can absorb a number of standard attacks. Use debuffs to weaken it if possible and keep an eye on your team’s health.

    Once you’ve dealt with the enemies, ‘Foggy Dilemma’ will be marked as complete, and Phog will officially join your team! Phog is classified as a Winged Viper. However, from our perspective, he’s not the strongest member to have in your party. While he can hold his own, he’s basically a more limited version of Elma, who also comes with the added benefit of being just a bit cooler.

    If you choose to bring him along, make sure to utilize his abilities like Shadow Runner, Hundred Shells, Electric Surge, and Primer Arts, while upgrading Background Noise and Master Edge for Skills. Or you might want to experiment with different approaches—Phog has worked reasonably well for us with this essential setup.

  • Completing Efficiently in Xenoblade Chronicles X: Definitive Edition

    Completing Efficiently in Xenoblade Chronicles X: Definitive Edition

    In Xenoblade Chronicles X: Definitive Edition, similar to its predecessor on Wii U, many quests come with level requirements. Your character must meet a specific level before undertaking certain missions, and there are recommended levels for optimal play. This mechanic is integrated within the main storyline, so it can’t be avoided.

    Leveling up in Xenoblade Chronicles X can feel slow, but there are effective methods to speed it up, getting you to not just the necessary level but even the recommended one quickly. Here’s how to boost your progress.

    Complete Support Missions

    A great way to earn a lot of experience points quickly is by diving into Support Missions. You can find these missions at the BLADE Barracks by using the terminal located in the room next to the command center.

    Not only can you tackle online challenges with others, but you can also engage in these Support Missions solo. They are short missions in contained areas, and each one provides different rewards, including substantial amounts of experience points.

    The experience points you gather from many encounters in the open world will gradually decline if the enemies are below your level. However, the EXP you gain from Support Missions remains consistent with what’s advertised on the prep screen.

    Once you’re at a suitable level, you can complete various Support Missions in under two minutes, easily racking up hundreds of experience points in no time.

    Challenge Stronger Enemies

    Fighting a Prone Hawk in Oblivia in Xenoblade

    Taking down enemies who are above your level rewards you with extra experience points. At first, challenging much stronger foes might not be wise, but by around level 20 and once you’ve equipped decent Arts, this strategy will likely change.

    Look for enemies that are about 5-10 levels ahead of your character for decent EXP drops. Try to locate areas where multiple enemies are grouped together but spaced out enough not to overwhelm you.

    A great spot for this is the Prone camps along the western Oblivia shoreline. The Prone here are approximately level 30-36, and you can reach them early in your exploration of Oblivia if you come through Primordia.

    Keep in mind that even within the “5+” level suggestion, not all enemy types are equal. For instance, the level 39 Vice Simius close by is likely to be a far greater challenge for a party around level 25 than the nearby Prone enemies.

    Skells Are Key

    The player character with their Skell in Xenoblade Chronicles X: Definitive Edition.

    Many tips will advise you to get a Skell license as soon as possible. While this is solid advice, don’t rush through Chapter 6’s Main Story Mission, as this is a prerequisite.

    Once you complete that mission, make sure to acquire your Skells. Using them boosts your experience gain during battles, making the leveling process smoother and also helping with Class EXP.

    Skells also change the game when it comes to quicker exploration, but you won’t fully tap into that potential until you get the Flight Module later on.