Tag: what

  • How To Tame Pets in Crimson Desert and What Completing Can Do for You

    How To Tame Pets in Crimson Desert and What Completing Can Do for You

    During your travels through Crimson Desert’s Pywel region, you’ll find that stray cats and dogs are some of the most helpful allies. While they won’t fight enemies or soak up damage like weapons or armor, they save you plenty of time after battles. However, catching and keeping one requires patience and the right snacks to build trust quickly.

    Here’s everything you need to know about finding, taming, and making the most of these animal companions in Crimson Desert.


    How to Tame Cats and Dogs

    You can earn cats or dogs as pets by gradually building their trust through feeding and petting. Each animal has a trust meter starting at zero and needs to reach 100 to become your pet. Trust increases through daily limits on petting and feeding, which reset at midnight in the game. Patience is key.

    Getting Started:
    The first animals you’ll encounter are stray cats and dogs wandering Hernand, the city you arrive in early. This makes it easy to begin bonding before heading further into Pywel.


    Petting

    Petting increases trust by +5 points per interaction, with a daily cap of +25 trust. You can pet each animal up to five times a day.

    • For dogs: Walk up and hold the interaction button when prompted.
    • For cats: You need to pick them up first by holding the button, then press again to pet once they’re in your arms.

    Note that with a cap of +25 trust from petting per day, you’ll also need to feed your pets for faster taming.


    Feeding

    Dropping food near an animal is the quickest way to earn trust and unlock a new pet.

    • To feed: Open your inventory and discard a food item in front of the animal; it will come over and eat.
    • Each pet can only be fed three times per day, so choose your food carefully.

    Different foods provide varying trust boosts. Regular food grants +10 trust, but each animal has a favorite food that can give +35 trust per feeding—enough to tame a dog in a single day if you feed it three times and pet it five times.

    Best Locations and Favorite Foods

    Most cats and dogs can be found throughout Pywel, though each breed has preferred regions and foods. For example:

    • Cats: Found in Hernand (with squid as a favorite food) and desert regions (with eggs).

    • Dogs: Found near Hernand (with sweet potatoes) and Demeniss villages (with lean bird meat).

    Feeding pets at around 10 p.m. in game maximizes trust gain since counters reset at midnight, allowing you to speed up taming without wasting in-game days.


    Claiming Your Pet

    When trust hits 100, a prompt appears allowing you to claim the animal by holding the select button and choosing “Claim.” Your new pet is now part of your companions.

    You can keep up to 30 pets in total, but only one can be active and follow you at a time. Excess pets are stored at Greymane Camp, and you can unregister them via a menu—just remember, unregistering is permanent.

    A helpful tutorial for claiming stray dogs is available through the “The Greymanes’ New Fangs” quest from Chapter 4 onward, guiding you through the process with your companion Naira.


    What Pets Can Do for You

    While animals won’t attack enemies or draw aggression, they excel at looting. An active pet will automatically run across the battlefield and gather items from defeated foes, saving you time.

    However, pets have no loot filter—they’ll pick up everything they can reach, including junk, so you’ll need to monitor your inventory regularly.

    Pets aren’t combat fighters—they can take damage if enemies attack them, and if injured, they won’t be able to loot properly. To heal them, clear the area and use the Healing Force Palm skill.


    Dressing Up Your Pet

    Pets can be outfitted with cosmetic gear like hats, outfits, and armor, mainly for fun and aesthetics. These items are available at Pororin shops—one inside Pororin Forest Village (after completing the “The Unreachable Village” quest) and another in southeastern Demeniss.

    The gear doesn’t provide gameplay advantages; it’s purely for visual customization in photo mode or when collecting gear from defeated enemies.

  • What Are the Oddities in Where Winds Meet Completing?

    What Are the Oddities in Where Winds Meet Completing?

    There’s a lot happening in Where Winds Meet at any given time, and the game’s system names aren’t always user-friendly, making it hard to understand what they actually mean. For example, how would you know that Oddities are mostly insects?

    Every region in the game has plenty of them, but spotting them is tricky, and figuring out what to do with them isn’t always clear either.

    What Are Oddities?

    Oddities can be found all across the game world, in every area. In Qinghe, most of them are insects, but you’ll also find some strange flowers and mushrooms. They’re listed in your Journal under each area as Sentient Beings, meaning there’s a limited number of each in every region. To complete a specific area, you’ll need to find every one of them.

    Unlocking Oddities usually involves solving small puzzles. For example, Dagger Generals are hidden under rocks, so you’ll need to listen carefully and quickly catch them. Red Mushrooms are marked with red mist above them; you must touch this mist before you can grab the mushroom, sort of like a mini platforming challenge.

    Note: Each type of Oddity always has the same puzzle. For instance, whenever you see a red mushroom, it will always have the mist above it that you need to interact with.

    Where to Find Oddities

    Oddities are scattered everywhere. You can view how many there are in each region through your Journal — but it won’t tell you which types are there. They also aren’t marked on the full map, only on the mini-map. This means you’ll have to run around and search, which can be tricky since the areas don’t have clear borders.

    On your mini-map, Oddities appear as butterfly-like symbols. Using the Grand Lightness Skill can help here — it allows you to cover a lot of ground quickly, making it easier to scan the mini-map for these symbols. Remember, you can cancel the skill with a Mighty Drop if needed. Keep in mind, if you’re flying high or looking from above, the symbols might not show up, so it’s best to stay close to ground level.

    The Melodies of Peace

    You’ve collected some Oddities — now, what’s their purpose? You probably already met the person interested in them, Qi Sheng, who lives just north of the Wayfarer fast travel point near the General’s Shrine. Talking to him unlocks a new feature called the Melodies of Peace.

    The Melodies of Peace give you character upgrades, such as new Grand Lightness skills like Wallstride for quicker movement, and improvements to your Endurance and Vitality. They are represented as a series of connected nodes, each awarding rewards once you gather enough Oddities. You can’t choose which Oddities are used — the game only tracks the total number collected, not specific types.

    To unlock a node, you need to unlock the node it connects to first. This means you can skip over some nodes if you want, and come back to them later when you’re ready to prioritize certain upgrades.

  • How to Find and Completing Keys in Arc Raiders and What Solves

    How to Find and Completing Keys in Arc Raiders and What Solves

    Exploring the surface in Arc Raiders requires careful management of your resources, especially since danger lurks everywhere, and there’s a real risk you might not make it back. However, you can take precautions to improve your chances of gathering loot. The world is open to you—pretty much everything is accessible, except for doors that are locked.

    Getting past these barriers means securing access to more loot, but first, you need to find the keys. Without a set spawn point, locating keys can be quite challenging. We’re here to help you identify where to find keys for various regions, along with the best spots to use them for better loot and quick escapes.

    How To Get Keys

    Keys are special items you can pick up while exploring the world. They allow you to unlock certain doors, giving access to areas rich with loot that you wouldn’t otherwise be able to reach. Since locked areas tend to have higher-quality gear, hunting for these keys is essential for every raider.

    Keep in mind, keys are consumable—once you use one, it’s gone. This makes it especially important to be cautious during PvP encounters. Make sure to check areas carefully so you don’t end up in a shootout while rummaging through abandoned buildings.

    Tip: Keep your keys safe by storing them in your secure pocket. That way, you won’t accidentally drop them in the chaos.

    Every Key and Where to Use It

    Most keys drop randomly, but the following table highlights reliable locations where you can find each type:

    Key Name Where to Find Where to Use
    Raider Hatch Key Purchase from Shani, craft at the Utility Workbench, quest rewards, loot from other players Use at various hatch locations across the map for quick returns from the field. Check your map for specific spots.
    Dam Surveillance Key Residential buildings in Dam Battlegrounds, Research and Admin buildings Inside the Water Treatment Control building in Dam, near the southwest side of the map. Unlocks a room with loot.
    Dam Staff Room Key Random drop inside Research and Admin buildings Near the Control Tower, unlocks a locked door in that area.
    Dam Control Center Tower Key Random drop or quest reward from Trifecta Located at the center of the Dam, in the Security Tower entrance. Exercise caution—high security! Use the zipline and elevator to access.
    Dam Testing Annex Key Random drop in Research and Admin buildings, quest reward (A Lay of the Land) Southeastern corner of Dam, unlocks a room with loot inside.
    Spaceport Container Storage Key Found in residential areas like Ruby Residences Use to open a locked door on the top floor of a storage container in the Spaceport.
    Spaceport Ground Control Key Random drop in Dam residences, or the Ruby Residences Use to access the control tower in the center of the Spaceport. Expect resistance from ARC units.
    Spaceport Trench Tower Key Likely in Ruby Residences Unlock a tower door in the northeastern region after passing the trench towers.
    Spaceport Outskirts Bunker Key Hidden in cabinets and drawers across residential areas In the outskirts, unlock a bunker to the west of the Spaceport.
    Spaceport Warehouse Key Check the Research and Admin building, residences Opens a locked door in the upper level of the northern warehouse for loot.
    Buried City Hospital Key Resident areas or Research/Admin buildings Head to upper floors of the hospital to loot once the key is used.
    Buried City Town Hall Key Resident areas, or quest rewards (Our Presence Up There) Unlock the main locked door at the town hall’s front.
    Buried City Residential Master Key Likely in Research and Admin buildings Unlocks multiple apartments in the residential part of the city, west of the map.
    Buried City JKV Employee Access Card Resident areas Use to access the parking garage’s steel door, top floor.
    Blue Gate Communication Tower Key Likely in Pale Apartments Head to the north to unlock the communication tower entrance.
    Blue Gate Confiscation Room Key Resident areas, SarReenforced reception area Reach the tunnels beneath the reinforced reception to open the confiscation room.
    Blue Gate Cellar Key South of Olive Grove and the Ruined Homestead Use the hatch there to access the cellar.
    Blue Gate Village Key Resident areas or Research buildings Open a large double door in the village to the west.
    Patrol Car Key Resident areas, quests (Armored Transports) Unlock the back of a nearby patrol car in the Headhouse region for loot.

    Keep an eye on the map conditions to plan your routes effectively. If a harvester is active, consider adjusting your timing or using it as a distraction to do your loot runs. Your best strategy is to use your own judgment—when in doubt, protect your most valuable gear by stashing items in your safe pocket. This way, even if things turn sour, you’ll leave with loot rather than returning empty-handed.

    Persistence is key since most keys are dropped randomly. Keep trying, and each trip topside will bring new challenges—and chances to find what you’re after.

  • What Should You Do With Benny in Vampire: The Masquerade? Completing or Solving?

    What Should You Do With Benny in Vampire: The Masquerade? Completing or Solving?

    As you explore Seattle in Vampire: The Masquerade – Bloodlines 2, you’ll find yourself repeatedly working as the go-to person for various tasks in the vampire world. As you advance in the game, new main quests keep opening up, each demanding different actions from you.

    Some quests may have multiple endings based on your decisions, which can influence how your playthrough concludes. One example is the Star Of Cold Aspect quest, where you get to choose what to do with Benny at the end.

    How to Start the Star Of Cold Aspect Quest

    To begin this quest, you need to progress quite far into the main story. It’s a main quest, so it’s impossible to miss. First, you must enter the Weaver Tower and climb to meet Prince Ryong. Once you gain her trust a bit, she’ll ask you to meet her at Makom Bar the following day. Before that meeting, rest at your haven and go through Fabien’s initial flashback. Once you finish the flashback, you’ll wake up at your haven, and the quest will start.

    Finding Benny and the mess he left behind

    After meeting Prince Ryong at Makom Bar, she will tell you about the mess Benny left near the back entrance of the building. She asks you to handle it. To locate the mess, take the path on the right where Ryong was sitting—this leads you to the same place where Fabien’s flashback happened, where you’ll find a corpse against a large truck. Interact with the body to pick up Benny’s scent, then use your heightened senses to track his trail. This trail leads you to the bottom of the map behind the Glacier Hotel, where you’ll have to fight some Anarchs.

    How to Find Benny

    After defeating the Anarchs near the Glacier Hotel, check a nearby dumpster with a marker to find another body inside. This person will tell you Benny is hiding at his haven, an auto repair shop marked on your map. Head to this location, which is the next step in your quest.

    Entering Benny’s Haven

    When you arrive at Benny’s haven, the front door will be locked. Use your heightened senses to see scratch marks leading to the roof of the shop, where you’ll find a window. Climb through this window to meet Max, who will tell you Benny’s location. You can also choose a dialogue option to comfort him by saying, “You are not to blame.”

    Reaching Benny’s Location

    Follow the quest marker to an area called the Western construction site. The site will be filled with Anarchs, but you don’t have to fight them all. Instead, sneak past and use distraction tactics, like throwing a bottle or using abilities to lure enemies away. Using a special ability that makes enemies’ blood boil and attracts others around them can be especially helpful here.

    Once you’ve diverted the enemies, get close to the door and trigger a dialogue. This will highlight Benny’s trail when you use your heightened senses, showing it in white.

    Reaching Benny in the Construction Site

    Follow the scent into the building, descending a few floors to find Benny trapped behind a cement wall. Several enemies will be present — the best approach is stealth. Use gas cylinders scattered around to take out multiple enemies at once if you can group them together. Against tougher enemies, these cylinders are your best bet.

    At the bottom of the building, you’ll confront Benny, who is covered in cement. Approaching him triggers a fight. Benny will be your first boss fight in the game, with his HP bar displayed at the top of the screen. You must reduce his health three times to defeat him. He mainly uses two attacks: a claw slash after a charging move and a jumping kick followed by a slash. Benny can also dash to your location if you’re too far away, so stay alert.

    To defeat him efficiently, look for blue objects like guns in the environment with your heightened senses. These can deal significant damage. When phase two and three begin, four Anarchs will spawn and attack. It’s wise to draw their focus onto Benny first, letting them weaken each other, and then deal with the remaining enemies. Benny’s third-phase stomp attack deals massive damage in an area, so keep your distance during this move.

    What to Do After Defeating Benny

    Once Benny is defeated, Katsumi will arrive and give you a choice: either take Benny to Ryong or leave him with Katsumi. Choosing to take Benny with you doesn’t lead to a fight with Katsumi, but she will become angry. Leaving Benny with Katsumi will disappoint Ryong, but your decision may influence the game’s ending. Regardless, you will become the Sheriff of Seattle. You can also choose to say, “Alright. Let us talk,” which will earn a positive reaction from Katsumi.

  • How to Claim All Crests and Their Purpose in Hollow Knight: Silksong

    How to Claim All Crests and Their Purpose in Hollow Knight: Silksong

    In Hollow Knight: Silksong, crests are a key mechanic shaping how you explore, fight, and move around. Each crest provides a different set of moves, tools, and special effects, making them stand out in Pharloom’s most dangerous and isolated regions.

    Every time you find a new crest for the first time, you’re likely to want to try out its unique features. No crest is strictly better than the others, so each one offers something for different playing styles. If one crest doesn’t suit you, trying another might help sharpen your skills and discover what works best for your hunting approach.

    What Are Crests?

    Crests are special templates that influence various game mechanics. Learning what each crest does is vital for your success. Essentially, crests affect:

    • Your moveset
    • Your ability bindings
    • The types and slots of tools you can equip

    You can view and change your crests anytime while sitting on a bench. To do this, access the Tools menu, then press the button indicated on the bottom left of your screen to open the crest menu and switch between them.

    While a crest is active, you can unlock additional tool slots by using Memory Lockets. Hold down the interact button over a locked slot to use a Memory Locket and permanently unlock that slot.

    All Crest Effects

    There are seven crests, each with distinct movesets, load-outs, and effects. Major aspects like binding skills and pogo directions are important considerations when choosing a crest to leave a bench with.

    Crest Red Slots Blue Slots Yellow Slots Silk Skill Slots Charge Attack Damage Flintslate Damage Pogo Direction Moveset Changes Special Effects
    Hunter 2 2 2 1 58/70/76 88 Diagonal N/A Successive attacks boost damage on Needle attacks.
    Beast 2 2 1 52 78 Arc (Multi-Hit) Short-range claws, devastating appearance Attack heals with each successful hit during a short window; attacks deal more damage during binding.
    Reaper 2 2 2 1 65 100 Down Wider attack areas Attacks generate more silk after binding.
    Wanderer 1 2 3 1 52 78 Down Faster attacks Shorter nail; critical damage possible with 9+ silk stacks.
    Architect 3 2 2 65 100 Down (Multi-Hit) Spinning corkscrew moves Binding creates tools.
    Witch 2 3 1 102 156 Down (Multi-Hit) Wide silk arc; charge attacks hit multiple times Binding heal explodes to deal damage and restore health.
    Shaman 2 3 42 N/A Diagonal Generates short-range projectiles Silk Skill damage greatly increased, but binding requires being on the ground.

    How to Obtain Each Crest

    You unlock each crest by completing specific challenges or exploring certain areas. Collecting all seven will earn you the achievement “Consumed,” and provides versatility in handling various challenges.

    • Witch & Shaman crests are ideal for boss fights.
    • Architect is useful against groups or multiple enemies.
    • Wanderer & Reaper are great for widespread exploration and long trips between benches.
    • Hunter serves well as a reliable all-rounder.

    It’s recommended to unlock all crests to see which suits your playstyle best, keeping in mind that flexibility can be a game-changer.

    How to Get the Beast Crest

    Early in the game, in Hunter’s March, on the far right above Deep Docks, you’ll find a hidden chapel. Inside, guarded by the formidable Savage Beastfly, this crest is yours once you defeat it. Be prepared for a tough fight, but winning grants access to the coveted Beast Crest.

    How to Get the Reaper Crest

    Easily located during normal exploration in Greymoor, just above the Moorwing fight on the far left side, this crest requires no fights. A simple platforming ascent will lead you to a chapel. Reaching it before the Moorwing fight is recommended, as its pogo boost makes that fight easier.

    How to Get the Wanderer Crest

    This crest is in a remote part of Bonegrave, away from all fights. After acquiring Cling Grip, head to Bone Bottom, take the elevator up to Moss Home, and follow the route to the Chapel of the Wayfarer:

    1. Head west toward Wormways.
    2. Drop down instead of exiting at the Wormways, use Drifter’s Cloak to glide left across ledges.
    3. Climb the wall and continue west to a lake.
    4. The chapel is on the west side of the lake. Opening the shortcut door on the east side is wise in case of enemies.

    How to Get the Architect Crest

    Found in the Underworks of the Citadel, just above the Cauldron area, the Twelfth Architect sells the Architect’s Key for 110 rosaries, provided you have enough red tools to barter with. Use the key to unlock the door above the Twelfth Architect to claim the crest.

    How to Get the Witch Crest

    This is the most complex crest to obtain, requiring you to finish the Pollip Heart quest in Shellwood. After that, you must locate the Twisted Bud in Bilewater and bring it to Greyroot’s home, infesting you with a parasite. This process prevents healing and may impede Silk Skills, but it unlocks interactions with NPCs and ultimately allows you to access the crest.

    How to Get the Shaman Crest

    Accessible only during Act Three, it requires descending into the Abyss with Silk Soar and reaching the Ruined Chapel where the Snail Shamans are. Use Silk Soar to navigate through hidden paths and find a breakable wall concealed behind what seem to be dead ends. Inside, the crest awaits at the very end.

    Upgrading Your Crests

    Progressively, Eva can enhance your crests, boosting their effects. These upgrades typically require rosaries and are accessible at the Weavenest Atla, located in Moss Grove. You need to disable the Twisted Bud infection first and reach her chamber to gain her blessings, including increased attack power and tool integration.

    Once all crests are gathered and upgraded, you can return to Eva, accept her final wish, and receive the Sylphsong. This ability allows passive Silk regeneration at benches, similar to the Blessing from Salubra in the original game.

  • How to Complete The What Lurks Beyond The Pines Side Quest in Dying Light: The Beast

    How to Complete The What Lurks Beyond The Pines Side Quest in Dying Light: The Beast

    In Dying Light: The Beast, side quests help expand the story of Castor Woods and give more details about the characters nearby. One of the first side quests you will find is “What Lurks Beyond The Pines.” During this quest, you will meet Eli, who is in the Town Hall trying to find his father.

    The quest starts at the Town Hall, usually around the time you are working on the Power Gambit part of the main story. Look for an exclamation mark icon in one of the rooms in the Town Hall and talk to Eli. He explains that he’s worried about his father, William, who has dementia and keeps wandering off. Eli thinks William might be somewhere familiar where he would feel safe.

    Next, you are sent to find William at the family cabin in the National Park, southeast of the Town Hall. Follow the marker to the cabin. Clear out any infected nearby before entering. Inside, you will find a map on the table pointing to nearby caves. There is also a Cave Spare Key to take with you. Read the letter near the bed and check the graffiti on the wall, which shows William is having a tough time mentally. It becomes clear that William is struggling from a past event before he moved into the Town Hall with Eli.

    Leave the cabin and climb ledges to reach the top, following the quest marker. You will come to a locked gate, and use the Cave Spare Key to get inside. Continue climbing by using ledges and jumping across to reach the next set of explosives. Be careful of infected and stay high to avoid them. When you reach the third cable, you’ll notice it is broken, so fix it quickly before continuing.

    Follow the blue cable to the final explosive. Carefully crouch, stay quiet, and avoid infected as you track the cable down into the caves. Attach the cable to the explosive once you find it. After connecting all cables, speak to William, who will give you his knife as a gift for Eli. Then, detonate the explosives and escape the caves by jumping into the water. Swim out through a tunnel, crawling through the water to reach safety.

    After escaping, return to the Town Hall and inform Eli about what happened. He will tell you to keep the knife for his father, which rewards you with a free knife, some manual pages, and 10,000 XP for finishing the side quest.

  • Where to Find All Perks and What They Do in Reckoning for CoD: Black Ops 6 Zombies

    Where to Find All Perks and What They Do in Reckoning for CoD: Black Ops 6 Zombies

    The last Zombies map for Call of Duty: Black Ops 6 is now available. Called Reckoning, it wraps up the Zombies storyline and includes many secret Easter eggs and gameplay features. The map has two towers, which means you’ll need to use gravity pads and teleporters to move around.

    Finding the perks on this map can be challenging since the in-game map doesn’t show the full layout at a glance. This guide will tell you where each perk is located and where the Der Wunderfizz machine appears after Round 25.

    All Perks in Reckoning
    Almost every perk from Black Ops 6 Zombies is available here, except for Death Perception. You’ll need to buy that one from the Der Wunderfizz machine after Round 25. Since the map is built around the towers, we’ll refer to perk locations by the tower and floor, not general map coordinates. The coordinates given are specific to the tower and the floor where the perk can be found.

    You start in Tower 1 – Reception. From there, you can move to the Mutant Research Lab or the Quantum Computing Lab. As you progress through the map, you’ll move between towers. Each floor typically has two perks.

    | Perk | Location | Effect |
    |——————|———————————————————|——————————————————|
    | Quick Revive | Tower 1 – Reception, Quadrant D5 | Boosts HP regeneration and faster reviving |
    | Deadshot Daiquiri | Tower 1 – Mutant Research Lab, Quadrant G5 | Improves aim accuracy |
    | PhD Flopper | Tower 1 – Mutant Research Test Area, Quadrant D3 | Dolphin dives cause an explosive AoE damage |
    | Speed Cola | Tower 1 – Quantum Computing Lab, Quadrant A4 | Speeds up reloading weapons |
    | Melee Macchiato | Tower 1 – Quantum Computing Lab, Quadrant D5 | Greatly increases melee damage |
    | Double Tap | Tower 2 – Android Assembly, Quadrant E4 | Improves the rate of fire for weapons |
    | Stamin-Up | Tower 2 – Dark Entity Containment, Quadrant F2 | Enhances movement speed and sprint duration |
    | Elemental Pop | Tower 1 – Director’s Office, Quadrant E1 | Adds a chance for weapons to trigger ammo mods |
    | Jugger-Nog | Tower 1 – Director’s Office, Quadrant E6 | Boosts armor durability and max health |
    | Vulture Aid | Tower 2 – Sublevel, Quadrant G6 | Slain enemies may drop extra ammo, essence, or equipment |

    Der Wunderfizz Location
    Like most Zombies maps, the Der Wunderfizz machine appears at Round 25. It’s located in Tower 2 – Android Assembly, in quadrant E7. This spot is near where Double Tap is found and one floor below Stamin-Up. The machine allows you to buy any perk in the game, including perks that aren’t normally available on this map—such as Death Perception.

  • Completing the Crispberry Conundrum: What Each Variety Solves

    Peak: Understanding the Different Types of Crispberry

    Crispberry is a type of fruit that comes in various varieties, each offering its own unique flavor and benefits. Here’s a breakdown to help you understand what each type can do:

    1. Classic Crispberry: This variety is known for its sweet and tangy taste. It’s great for eating fresh or adding to desserts.

    2. Green Crispberry: A less common type, the green crispberry has a mild flavor and is often used in salads or smoothies for a refreshing twist.

    3. Golden Crispberry: With a hint of honey-like sweetness, this kind is perfect for baking and pairs well with spices, making it ideal for pies and crumbles.

    4. Red Crispberry: This variety is slightly tart and works wonderfully in jams or jellies. Its vibrant color also makes for an eye-catching addition to any dish.

    5. Black Crispberry: Rich in antioxidants, black crispberries are often used in health-focused recipes. Their bold flavor shines in sauces or as a topping on yogurt.

    Each crispberry type offers something special, making it easy to choose the right one for your next culinary creation!

  • What to Expect After Completing Death Stranding 2: A Guide to Solving

    What to Expect After Completing Death Stranding 2: A Guide to Solving

    Death Stranding 2: On The Beach is an extensive title, requiring players to invest numerous hours to complete the main storyline, even if they focus solely on essential missions. However, much more awaits those who venture off the main path after viewing the ending credits.

    Kojima Productions has made it easy for players to dive back into the open world post-completion. They understand that players might want to revisit past missions or tackle new ones to enhance connectivity across the chiral network. The game also adds fresh features that enhance the experience, especially if players prefer bypassing unnecessary combat.

    What Happens After You Finish the Game?

    After an intense climax where the entire crew of the DHV Magellan tackles Higgs on The Beach, players will experience a series of sequences regarding Lou’s survival as Sam makes his way back to Mexico. Tomorrow, heavily hinted throughout the narrative, is revealed to be an older version of Lou who aged at a different rate due to the unique timelines on the beach and beyond.

    Once players see the credits, they will unlock “Episode 17.” However, this seems more like an endgame descriptor than a continuation of the main story.

    Louise, now known as Tomorrow, shares an emotional moment with Sam as the credits start rolling. Players then enjoy scenic transitions against familiar sounds until they see Tomorrow before a new plate gate, donned in Sam’s classic porter outfit.

    As the final credits roll, players are prompted to assess their in-game performance and face a significant decision: keep the Drawbridge Q-Pid on or turn it off.

    What Does the Drawbridge Q-Pid Do?

    The Drawbridge Q-Pid is a new feature introduced following the concluding cutscene. It asks whether players wish to maintain a spiritual tie with 4,000 severed souls on the APAS Beach or sever that connection entirely.

    Keeping it activated will sustain the same level of BT and Ghost Mech presence encountered throughout the campaign, allowing defeated foes to respawn. Conversely, turning it off will decrease these entities’ activities in the open world, minimizing their chances of reappearing after an encounter.

    This mechanic essentially enhances the delivery aspect of Death Stranding 2’s endgame, allowing players to experience the landscape without the hindrance of hostile encounters.

    Are There Unique Items or Missions?

    Upon completing the game, players will receive several new items, which will carry over into the endgame:

    • Red Mask: Higg’s red mask, shrouded in mystery and blocks sunlight.
    • Golden Mask: A skull-shaped golden mask, also serving to block sunlight.
    • Tomorrow and Fragile Holograms: These shapes can be placed in your upgraded structures to greet others online.
    • Adult Cryptobiote Patch: A decorative patch for your backpack, though it has no functional purpose.
    • Two Music Tracks: Unlocks “Fragile Things” and “To the Wilder feat. Ellie Fanning” for use in the music player.

    After hours spent in the endgame, it seems there are no new epilogues or additional missions following the end of the main story. However, players can revisit locations like the Terminal Fort Knot to locate previously uncompleted orders.

    What Happens to the DHV Magellan?

    Your operational base remains active post-credits, although many characters are absent. Rainy has left for a medical checkup, accompanied by Tomorrow, while Fragile is revealed to have passed away during the concluding act. Heartman returns to his research, and Lou is no longer present, having previously been a figment of imagination.

    You will now continue your journey with Tarman and Dollman.

    If you choose to use the Polaroid camera found in Sam’s private room, you can select to ‘keep’ or ‘gift’ a photo, concluding with Sam awakening from a dream—aptly highlighting his solitude.

    Otherwise, everything on the DHV Magellan functions as before. Players can enjoy showers, participate in VR missions, and explore various aspects of their private space. Completing available orders will also provide additional VR challenges.

  • Completing Each Unit Stat in Broken Arrow: A Solving Guide

    Completing Each Unit Stat in Broken Arrow: A Solving Guide

    Broken Arrow

    Broken Arrow brings a high level of realism to its real-time strategy gameplay. The weapons are crafted to effectively counter specific threats with lethal accuracy. If you don’t fully understand the mechanics, your carefully planned battlegroup can be easily destroyed in moments.

    To succeed in the game, you’ll need to get familiar with the units and their stats. This guide will explain what each attribute means and how it can impact your strategy. Keeping this guide handy while you play will help until you’ve internalized the details.

    Unit Stats

    The stats of a unit define its capabilities, no matter which weapon it’s equipped with. These stats lay the groundwork for how quickly a unit can move, how much damage it can absorb, and more.

    Optics and Stealth

    In Broken Arrow, line of sight is vital. Often, you’ll require reconnaissance units to spot targets for artillery and long-range attacks. A unit’s visibility is determined by Optics and Stealth.

    • Optics, marked by a binoculars icon, indicates the maximum distance (in meters) at which the unit can spot an enemy. The number reflects the unit’s range for detecting ground units, and each unit has different ranges for spotting airborne targets at low and high altitudes.

    • Stealth, represented by a crossed-out eye icon, serves as a modifier to a unit’s visibility from enemy units. Higher Stealth means enemies must be closer to detect them.

    To find out if a unit can spot an enemy, divide the unit’s Optics by the enemy’s Stealth. This will give you the minimum distance required, although obstructions like trees and buildings can reduce it further.

    As long as one allied unit can see an enemy, any unit on your side can target them. But if detection is lost, that enemy will disappear from the map, and any munitions on their way to the target are likely to miss.

    Movement

    Rapidly reaching and securing objectives is crucial in almost every encounter in Broken Arrow. You’ll need to use transport vehicles to support slower units in moving efficiently.

    A unit’s speed is indicated by an arrow next to its type — whether it’s infantry, vehicles, or aircraft. Infantry moves the slowest but can use the Sprint ability (default hotkey: Z) for a temporary speed boost.

    • Ground vehicles have a Reverse Speed, making them slower when backing up, which is often necessary for repositioning.

    • Aircraft have a Turn Radius stat; a higher value means tighter turns, allowing them to make more passes or switch targets quickly. They also have a maximum fuel limit, so calling them back to base before they run out is essential to avoid emergency landings.

    • Helicopters possess an Agility stat that enables them to dodge attacks and respond to commands quickly.

    Transport

    When assembling your battlegroup, planning ahead ensures you have a reliable way to get your troops to the action. Thoughtful use of transports is essential.

    Each unit has a weight listed on their stats panel, and transport aircraft can only carry a maximum weight, indicated by a cargo icon. If the total weight exceeds this cap, they cannot take off.

    For transporting infantry, you also need to consider seating capacity, whether by ground or air. Multiple squads can board a single transport as long as their cumulative size doesn’t exceed its seating limit, while also adhering to weight restrictions.

    Armor and Health

    Units usually have limited hit points (represented by a cross icon). If their armor can be penetrated, they can be taken out quickly.

    Hit points are shared evenly among the soldiers in an infantry unit. When a soldier falls, their weapon becomes unusable, decreasing the unit’s overall strength. Vehicles risk system damage with each hit, which can be repaired using supply crates.

    Most units have some level of Armor (indicated by a shield icon). When struck, their Armor is compared to the attack’s Penetration; if the Armor is higher, the damage is reduced.

    • Ground vehicles often have different Armor ratings based on the direction of the attack, typically strongest from the front.

    • Planes generally lack Armor and must rely on evasion to survive, making defense against anti-air units critical.

    Weapon Stats

    When constructing your deck, you can equip units with a variety of weapons to tailor your battlegroup to anticipated threats.

    A weapon’s effectiveness is influenced by the ammunition type it uses. Although units can fire multiple weapons simultaneously, each weapon can only utilize one type of ammunition at a time.

    Basic Stats

    You can quickly view a round’s basic stats on the unit’s panel in the Army Builder, showing Penetration, Damage, and Effective Range.

    • Penetration, marked by a broken shield icon, is compared to the target’s Armor. If the Penetration matches or exceeds the Armor, the damage dealt is full; otherwise, it’s reduced. Penetration can be Kinetic (white) or Explosive (orange). Most Ground Vehicles have both types, while other units primarily possess Kinetic Armor.

    • Damage, indicated by a skull icon, reveals how many hit points a unit loses from a direct hit by a round that successfully penetrates its Armor. Explosive rounds affect everything within their blast radius.

    • Accuracy, shown by a crosshairs icon, indicates the optimal range for weapon efficiency. The farther away the target is, the lower the accuracy will be, up to the weapon’s maximum range.

    Advanced Stats

    During combat, selecting a unit’s panel offers a detailed view of weapon stats. Pay attention to Aim Time and Reload Time. Aim Time refers to how quickly a unit can fire after acquiring a target, while Reload Time is how long it takes to reload a weapon after it’s empty. Together, these stats reveal how frequently a weapon can fire as long as there’s ammunition available.

    Lastly, consider the Supply Weight of each round; units will need to resupply, and heavier rounds consume more from stockpiles. If you have heavy weapon teams holding a strategic point, send larger crates to keep them well-supplied.

  • Understanding the Golden Dome Missile Defense System

    Understanding the Golden Dome Missile Defense System

    US President Donald Trump announces the Golden Dome missile defense shield in the Oval Office, Washington, DC, May 20, 2025.

    President Donald Trump has chosen a design for the Golden Dome missile defense system and has appointed a leader for this ambitious $175 billion defense project. Here are the insights about Golden Dome, its origins, and its operational mechanics.

    How Will It Operate?

    The Golden Dome initiative aims to utilize a network of hundreds of satellites orbiting the Earth. These satellites will be equipped with advanced sensors and interceptors to neutralize enemy missiles shortly after their launch from nations like China, Iran, North Korea, or Russia.

    “I vowed to the American people that I would establish a state-of-the-art missile defense shield to safeguard our homeland from foreign missile threats,” Trump stated during his announcement on Tuesday.

    In April, the Pentagon sought input from defense contractors on designing a network capable of intercepting intercontinental ballistic missiles during their “boost phase,” which occurs immediately after lift-off when enemy missiles ascend slowly and predictably through the atmosphere. Current defense systems engage targets once they are in space.

    Upon detection of an incoming missile, the Golden Dome system will either intercept it with a missile or laser before it leaves the atmosphere or engage it further along its trajectory using existing missile defense systems based on land-based interceptors located in California and Alaska.

    In addition to the space-based interception layer, there will be another defensive layer positioned within or around the U.S. This concept was previously considered by the Pentagon’s Missile Defense Agency during Trump’s first term.

    Is Golden Dome Similar to Israel’s Iron Dome?

    “We assisted Israel in developing their system, which has proven to be very effective. Now, we possess technology that far surpasses that,” Trump remarked, referencing Israel’s Iron Dome missile defense system.

    The Iron Dome is a short-range air defense system designed to intercept projectiles like the rockets launched by Hamas from Gaza. It was developed by Israel’s Rafael Advanced Defense Systems with U.S. assistance and became operational in 2011. Each unit, transportable by truck, launches radar-guided missiles to destroy short-range threats, including rockets, mortars, and drones.

    This system evaluates whether a rocket will strike a populated area; if not, the rocket is disregarded and allowed to impact safely.

    The Iron Dome was initially promoted as providing city-sized coverage against rockets with ranges between 4 and 70 kilometers (about 2.5 to 43 miles), but experts suggest that its capabilities have since expanded.

    How Does It Compare to Reagan’s Star Wars Initiative?

    “We will be fulfilling the mission that President Reagan initiated four decades ago, ultimately eliminating the missile threat to our homeland,” Trump stated on Tuesday.

    The concept of equipping satellites with rocket launchers or lasers to intercept enemy intercontinental ballistic missiles is not novel; it was part of the Star Wars initiative developed during Ronald Reagan’s presidency. However, it represents a significant and costly advancement from current technologies.

    Reagan’s “Strategic Defense Initiative” (SDI), announced in 1983, aimed to create a defense system that could render nuclear weapons obsolete.

    The core of the SDI was a plan for a space-based missile defense system capable of protecting the U.S. from large-scale nuclear attacks by identifying and automatically intercepting numerous incoming ballistic missiles during different phases of their trajectories. However, the SDI failed to materialize due to factors like high costs, technical challenges, difficulties in testing, and conflicts with existing anti-ballistic missile treaties.

    Who Will Construct Golden Dome?

    Elon Musk’s SpaceX, alongside software firm Palantir and drone manufacturer Anduril, is positioned as a key player in developing essential components of the Golden Dome system.

    Many initial systems are anticipated to be sourced from existing production lines. During a recent White House press conference, L3Harris Technologies, Lockheed Martin, and RTX Corp were mentioned as potential contractors for this extensive project.

    L3 has invested $150 million to expand its new facility in Fort Wayne, Indiana, where it produces Hypersonic and Ballistic Tracking Space Sensor Satellites. These satellites are part of a Pentagon initiative aimed at improving detection and tracking of hypersonic weapons and could be adapted for the Golden Dome system.

    However, funding for Golden Dome remains uncertain. Some Republican lawmakers have proposed an initial investment of $25 billion as part of a broader $150 billion defense package; however, this funding is contingent on a contentious reconciliation bill facing significant opposition in Congress.

  • Completing Your Journey Together: Essential Pokémon TCG Purchases

    Completing Your Journey Together: Essential Pokémon TCG Purchases

    The latest addition to the Scarlet & Violet series of Pokémon TCG, titled Journey Together, highlights the bond between Trainers and their Pokémon partners. This concept harkens back to the Gym Heroes expansion, where it was originally introduced. While not every Trainer is featured here, familiar characters like N, Iono, Lillie, and Hop make appearances.

    Moreover, this set incorporates cards from the Japanese Battle Partners expansion. With Journey Together’s launch, a variety of products have been announced. To help you choose, this guide will detail everything included in each product from this collection.

    Booster Packs


    Every booster pack in the Journey Together series holds a total of ten cards plus one Energy card, consistent with other booster packs in the game. All of these cards belong to the Journey Together set.

    Additionally, remember that each booster pack includes a code card for use in Pokémon TCG Live.

    If you’re a collector, you might prefer the sleeved booster packs, but both regular and sleeved packs contain the same contents, differing only in packaging.

    Booster Display


    Booster Display box from Journey Together set in Pokémon TCG.

    If getting just one booster pack isn’t enough for you, the Booster Display—also known as a booster box—is the ideal option to consider. This product includes a total of 36 booster packs, giving you 396 cards in total. Out of these, 36 will be Energy cards, while the remainder consists of non-Energy cards.

    If you’re aiming to find valuable cards, investing in a booster display is smart. You can also choose the Enhanced Booster Display Box version, which features an added promo card—N’s Reshiram.

    Booster Bundle


    Booster Bundle box from Journey Together set in Pokémon TCG.

    If you’re looking for more than a single booster pack but find the Booster Display excessive or out of your budget, the Booster Bundle is a great compromise. Each Booster Bundle includes six booster packs, resulting in a total of 66 cards, with six of those being Energy cards.

    Build & Battle Box


    Build and Battle Box from Journey Together set in Pokémon TCG.

    If you’re eager to not just open booster packs but also build a deck and start battling, then the Build & Battle Box is what you need. This box includes a pre-constructed 40-card deck. Moreover, you’ll receive one of four exclusive promo cards:

    • N’s Darmanitan
    • Iono’s Kilowattrel
    • Lillie’s Ribombee
    • Hop’s Snorlax

    Inside each Build & Battle Box, the deck consists of two different Pokémon types from the four listed. This 40-card deck contains 17 Energy cards, plus four booster packs. Each pack comes with a code card for Pokémon TCG Live, and the box also includes one extra code card.

    This box is handy for storage as well, holding nearly 100 unsleeved cards or about 60 sleeved cards.

    Elite Trainer Box


    Elite Trainer Box from Journey Together set in Pokémon TCG.

    The Elite Trainer Box includes nine booster packs, giving you a total of 99 cards. It also features a Full Art Foil Promo Card, specifically N’s Zorua, along with 45 Energy cards.

    Besides the cards, the box comes with 65 card sleeves that showcase an art piece of N and his companion Pokémon, Zoroark. Other items included are:

    • Six teal damage counter dice
    • One competition-compliant coin flip die
    • Two plastic condition markers for Poison and Burn

    This box is also great for storing cards, incorporating four dividers for organization. Along with the nine code cards from the booster packs, there’s one additional code card in the box, totaling ten code cards you can use in Pokémon TCG Live.

    Pokemon Center Elite Trainer Box


    N's Zorua from Journey Together set in Pokémon TCG.

    The Pokemon Center Elite Trainer Box has a few differences compared to the standard version:

    1. It includes 11 booster packs instead of nine.
    2. This version provides two Full Art Foil Promo Cards featuring N’s Zorua; one features the Pokemon Center logo, which the regular box does not.
  • What Should You Long For in Elin?

    What Should You Long For in Elin?

    If you’ve been exploring the Nefias in Elin, you might have come across the unusual item called the “Fragrance of Goddess.” This item grants you the ability to wish for any in-game item, although its usage isn’t immediately clear.

    This guide will explain how to acquire the Fragrance of Goddess, how to utilize it for wishes, and recommend the best items to aim for. We’ll also discuss “Black Cat’s Saliva,” which enhances your wishes. Be cautious, as it’s easy to spoil your wishes, so we’ll highlight common pitfalls to avoid.

    How to Obtain the Fragrance of Goddess

    As you wander through the world or explore Nefias, you’ll occasionally encounter statues dedicated to various deities. Interacting with these statues offers rewards linked to their respective gods. Here, we are particularly interested in the Luck Goddess, Ehekatl:

    • The Luck Statues grant you the item Fragrance of Goddess, which you’ll use to make wishes.
    • The Harvest Statue provides a special book that gives an additional feat point when read. You can also give this book to companions.
    • The Machine Statue offers a high-tier gene that can be installed at half the usual cost.
    • Statues related to Element and Earth provide single-use transmutation hammers useful for altering most items, such as transforming a weapon into a more powerful material.

    These statues appear quite infrequently and can only be used once each. Their selling price is high but drops significantly after you receive their boon. Statues of Wind and Healing currently serve no purpose in the game, so feel free to sell them if you can bring them to a shop.

    A practical way to locate these statues is by using a Detector tool while traveling. This gadget beeps when you enter a map that contains a specific item. You can set the detector to focus on either finding Statues of Luck or just interesting items in general.

    • Inputting “Statue” into the detector will show the locations of shrines, which are more common but offer less exciting rewards.
    • By entering “Statue of,” you’ll mostly find god statues, possibly alongside some decorative statues in towns.
    • Inputting “Statue of Luck” will narrow it down to only that type of statue, though you might miss out on other valuable items like Element Hammers and Mani’s Genes.

    The detector requires you to take a few steps on the map before it starts beeping to indicate if you’ve found a statue. Remember, it must be actively held in your hand, not just equipped onto your hotbar. Some modded tools may alter how the detector functions for more efficiency.

    High-level Nefias can also yield statues. During our exploration of level 100+ dungeons, we found two Luck Statues on consecutive floors, but regular battles can make using the detector challenging.

    If you’d like to keep a statue for later—whether for decoration, monetary gain, or to save a wish—you have two options:

    • You can occasionally catch golden statues while fishing, but the results are random. In a test run with 1,000 bait and an 80 fishing skill, we only managed to catch two statues of different gods.
    • Claiming the land using a land deed will prevent the area from despawning. You can build a new base around the statue you discovered or use a delivery box to transport it to another location. This method does not work in dungeons.

    Regardless of how you collect the Fragrance of Goddess, the next step will be to learn how to use it for wishing.

    How to Make Wishes

    After you’ve acquired the Fragrance of Goddess necessary for making wishes, you need to understand how it works. The item description mentions its connection to the Goddess of Wishes but doesn’t explain the process.

    Early in the game, you might have learned to be cautious when drinking from wells and fountains since it could negatively impact your learning capabilities or cause harmful mutations. Now that you can make wishes, you should take every chance to drink from fountains.

    It’s a good idea to carry a Blessed Potion of Cure Mutation when drinking from fountains. This potion can nullify negative mutations while preserving the beneficial ones.

    You have about a 10% chance of making a wish, so some wells may not yield results. It’s beneficial to use wells located in settlements. The only source of drinking water that won’t work for wishes is the holy well in Noyel, but you can collect water from there for blessing potions and items.

    When you drink from a well while holding the Fragrance, a text box may appear, similar to when writing an epitaph or tuning the detector. Type your specific wish in this prompt; the game will then search for an item that matches your request and provide either a generic or enchanted version, depending on the context.

    If you’re not prepared for the wish prompt, it’s easy to accidentally confirm a wish without entering any text. This will cause you to lose your wish and receive a “quiver” since the text prompt starts with q already filled in.

    Best Items to Wish For

    Having the ability to wish for anything is both exciting and a bit daunting. Given the effort required to make a single wish, you’ll want to ensure you use it wisely.

    The outcome of your wishes may vary based on your language settings and the phrasing you use. Since the text box may not accommodate lengthy item names, you might struggle to obtain a specific item if multiple items share a name.

    This is particularly true for decorative items like “A Crystal,” which can misleadingly yield the crafting material “Earth Crystal.” All tests were conducted in English.

    If you’re playing with an Oath of Destiny, it’s often better to wish for items that yield consistent results. The Palmia Times features notes about wishes made by other adventurers and their results. If you need to, you can reload and try different phrasings for your wish.

    Item

    Wish Phrasing

    Benefits

    Other Ways to Acquire

    Generator

    “Generator”

    Wished generators are advantageous as they don’t require manual activation like crafted ones.

    A single generator can be found at the Truce Grounds. It does not respawn.


    A hypothetical character with about a thousand points in strength and pickpocketing could steal them from towns.

    Lightsaber

    “Lightsaber”

    This laser sword scales with your magic device and casting skills, ensuring 100% armor penetration.

    None

    Vindale Cloak

    “Vindale”

    This cloak protects you from Ether Disease, making it a critical item if you lack reliable antibody sources.

    None

    Seven League Boots

    “League”

    These boots boost your movement speed on the world map, essential for certain timed quests.

    None

    Machine Table

    “Machine Table”

    This crafting table is tough to gather materials for.

    Craftable, but requires rare microchips.

    Railgun

    “Railgun”

    This sci-fi rifle has significant power, and wished versions typically feature many upgrade slots.

    Available at high-level firearm shops, investment level 30+.

    Futon

    “Futon”

    The best portable bed, excellent for keeping on hand during travels.

    Craftable at higher levels.

    King’s Bed

    “King’s Bed”

    This bed significantly boosts the productivity of villagers and raises property value.

    Can be obtained with furniture tickets or crafted; requires high skill levels.

    Syringe of Ether Solvent

    “Solvent”

    This removes only the latest symptom of Ether Disease, allowing you to keep some benefits while losing others.

    Available in Little Garden after dealing with a Big Daddy and freeing a little sister.

    Rare Crafting Materials

    “Sun Crystal”


    “Mana Crystal”

    Used to craft valuable utility items like the Sun Lamp and Grimoire of Study.

    Mine in high-level Nefias.

    Unique Furniture

    “Tree of Cherry”


    “Ether”

    For those looking to create a unique base, these items are excellent starting points.

    Some furniture items can only be obtained through wishes, while others require hundreds of furniture tickets.

    If you’re not concerned with potential spoilers, you can access debug mode by adding “-DEV” to your startup properties in Steam. This will place you in a developer room with a Luck Statue right next to a well.

    You can repeatedly test different wishes before finalizing one in your game.

    Banned and Restricted Wishes

    Some wishes yield disappointing results, particularly when trying to acquire wealth:

    • Wishing for Oren may provide you with money, but it’s less than what you’d receive by wishing for a valuable item to sell.
    • You won’t get enough from wishing for small medals to buy an antibody potion (although you can directly wish for “antibody” to get the potion).
    • Wishing for gold nets you only four bars, whereas wishing for a “resident ticket” can grant you three, each valuable enough to exceed that amount.

    Additionally, some wishes are banned, either directly or indirectly. Attempting one of these will result in wasted wishes as the Gods will simply laugh:

    Banned Wish

    Details

    Specific Eggs

    To raise the ultimate pet you must do it through traditional means.

    Specific Spellbooks

    You can wish for a generic spellbook, but it won’t be impressive.

    Specific Spell Rods

    Except for the “Rod of Wish.”

    Choosing Item Materials

    You can ask for a “sword” but not specify “iron sword.”

    Statues or Shrines of Gods

    You can’t use your Statue of Luck to wish for another Statue of Luck.

    Statue Drops

    Items given by other god statues, like a “paper hammer,” are prohibited.

    Items With Stars In Their Name

    To obtain “★Ehekatl’s Body Pillow,” you’ll need to collect 40,000 chips at the casino.

    Finally, some wishes may grant you exactly what you requested, but in a counterproductive manner:

    • Wishing for a “Rod of Wish” will result in receiving a rod with zero charges, teaching you a lesson about greed.
    • Wishing for genes will yield blank genes lacking traits. While edible, these wished genes have no nutritional benefits.
    • Wishing for the gods by name results in (non-functional) statues or figures of them; not all deities have available statues or figurines.
    • Wishing for a fertilized egg without specifying the creature will produce a chicken when hatched.

    How to Obtain Black Cat’s Saliva

    You can only possess one Fragrance at a time and can only make one wish per year. Attempting to obtain a second Fragrance or a new one within the year following your last wish will result in the item “Black Cat’s Saliva.”

    This secondary item boosts the effectiveness of your wishes:

    • Items you wish for will be crafted with higher quality materials and enchantments. For example, your railgun might be made from real metal instead of grass.
    • You may wish for larger quantities of items.
    • Items that have levels (like monster balls) will appear at elevated levels.
    • Wishing for currencies results in larger drops (though they’re typically not worth wishing for).

    The method for collecting Saliva is akin to acquiring your first Fragrance, but it can accumulate. Walk around with your detector in hand and set it to “Statue Of.” You’ll likely gather various beneficial items from different god statues along with those of Ehekatl.

    Saliva isn’t used up when making a wish, allowing the strength of all subsequent wishes to increase through collection. You can intentionally hold onto your Fragrance to turn future rewards into Saliva.

    Since the potency of wishes grows with more Saliva, it’s usually wise to spend early wishes on items less influenced by quality and material. For example, the Seven League Boots can be swapped in combat, making their quality less critical beyond their travel speed.

  • Exploring the Role of Fufus in Infinity Nikki

    Exploring the Role of Fufus in Infinity Nikki

    As you journey through Infinity Nikki, you’ll encounter a delightful array of characters and creatures. One particularly interesting group, called the Fufus, can be found hidden within the Warp Spires in Miraland, eagerly waiting to trade skill insights for the collectibles you collect throughout your adventure.

    The Fufus have their own poignant backstory. They share with Nikki upon her arrival that they have lost their home world but have found comfort in the Realm of Nourishment. Be sure to pay them a visit to enhance your skills!

    Trade Collectibles with the Fufus for Skill Insights

    Early in your adventure, you’ll discover your first Warp Spire, vibrant purple structures that serve as teleportation hubs across Miraland. As you progress in the main storyline, you’ll unlock more of these beacons. Near your initial Warp Spire in Florawish town, you will meet Tokar, a human who will share valuable information about the Warp Spires.

    Upon entering the Realm of Nourishment for the first time, you’ll encounter five unique Fufus, each representing different emotions. These Fufus are not only tied to these emotions but are also aware of the five insight skills you’ll be developing as you gather collectibles in Infinity Nikki.

    After a cutscene where they describe their abilities and history, you’re free to begin trading your collectibles for skill insight points. You might already be familiar with utilizing your outfits to benefit from various abilities throughout Miraland. However, the process of gaining insight in this manner can be a bit gradual. The Fufus reward you with a substantial amount of insight when you trade them a collectible of brown rarity or higher.


    The amount of insight points awarded for each trade depends on the rarity of the collectible; higher rarity items provide more insight related to that Fufu’s specialty. As you advance in the story and delve into new areas, the collectibles you find will generally be rarer. The insight you gain also seems to enhance your collectible options, making the Fufus a valuable resource for rapid progression in your insights.

    There’s no limit to the number of items you can exchange with the Fufus, but you must use Vital Energy for trades. This energy source regenerates slowly and is essential for accessing the special features within the Warp Spires.

    Note that while most Fufus require a standard rate for trades, the Lazy Fufu asks for 20 Vital Essence for every kilogram of fish you offer.

    All Fufus and Their Insights in Infinity Nikki

    Fufu

    Insight

    Trade Cost

    Collectibles Required

    Loving Fufu

    Collection

    20 Vital Essence per item

    Any plants, flowers, and assorted items found in the world.

    Joy Fufu

    Bug-Catching

    Any insects, particularly ones from later regions of Miraland that yield higher point values.

    Lazy Fufu

    Fishing

    20 Vital Essence per kilo

    Any fish, taking into account their rarity and weight.

    Fear Fufu

    Animal-Grooming

    20 Vital Essence/item

    Any animal furs or feathers obtained by brushing critters in the world.

    Angry Fufu

    Combat

    Any materials gathered from defeated Esselings, with tougher enemies dropping more valuable items.

    As you accumulate insights from the Fufus, don’t forget to explore the Heart of Infinity. New abilities unlock as you gain skill insights, so be sure to purchase these sketches as they become available. These abilities can also be upgraded, allowing you to discover even rarer collectibles. Improve your insight with basic collectibles, then use your newfound knowledge to acquire rarer items and further enhance your skill progression.

  • Three New Nothing Phones Coming In 2025 Here’s What We Know

    Three New Nothing Phones Coming In 2025 Here’s What We Know

    Nothing has confirmed its plans to introduce the Nothing Phone 3 in 2025. Additionally, there’s speculation about the potential launch of several new models next year. According to insider Yogesh Brar, the company is currently in the development phase for three new Nothing smartphones, all of which are anticipated to debut in the first half of 2025.

    What exactly can we expect from these upcoming devices? Back in June, Nothing’s co-founder and CEO, Carl Pei, announced the forthcoming Nothing Phone 3, following the launch of the Nothing Phone 2 in 2023. At that time, Pei emphasized that the new device would revolutionize our interactions and perceptions of mobile technology.

    One of the key features of the upcoming phones will be the “hub,” an AI-driven interface that offers quick access to essential functionalities like weather updates, social media, calendar events, and messages. Below this streamlined interface, users will encounter a variety of “dynamic and context-aware” widgets. For example, it could automatically showcase a QR code for your boarding pass or concert ticket when there’s relevant information in your calendar.

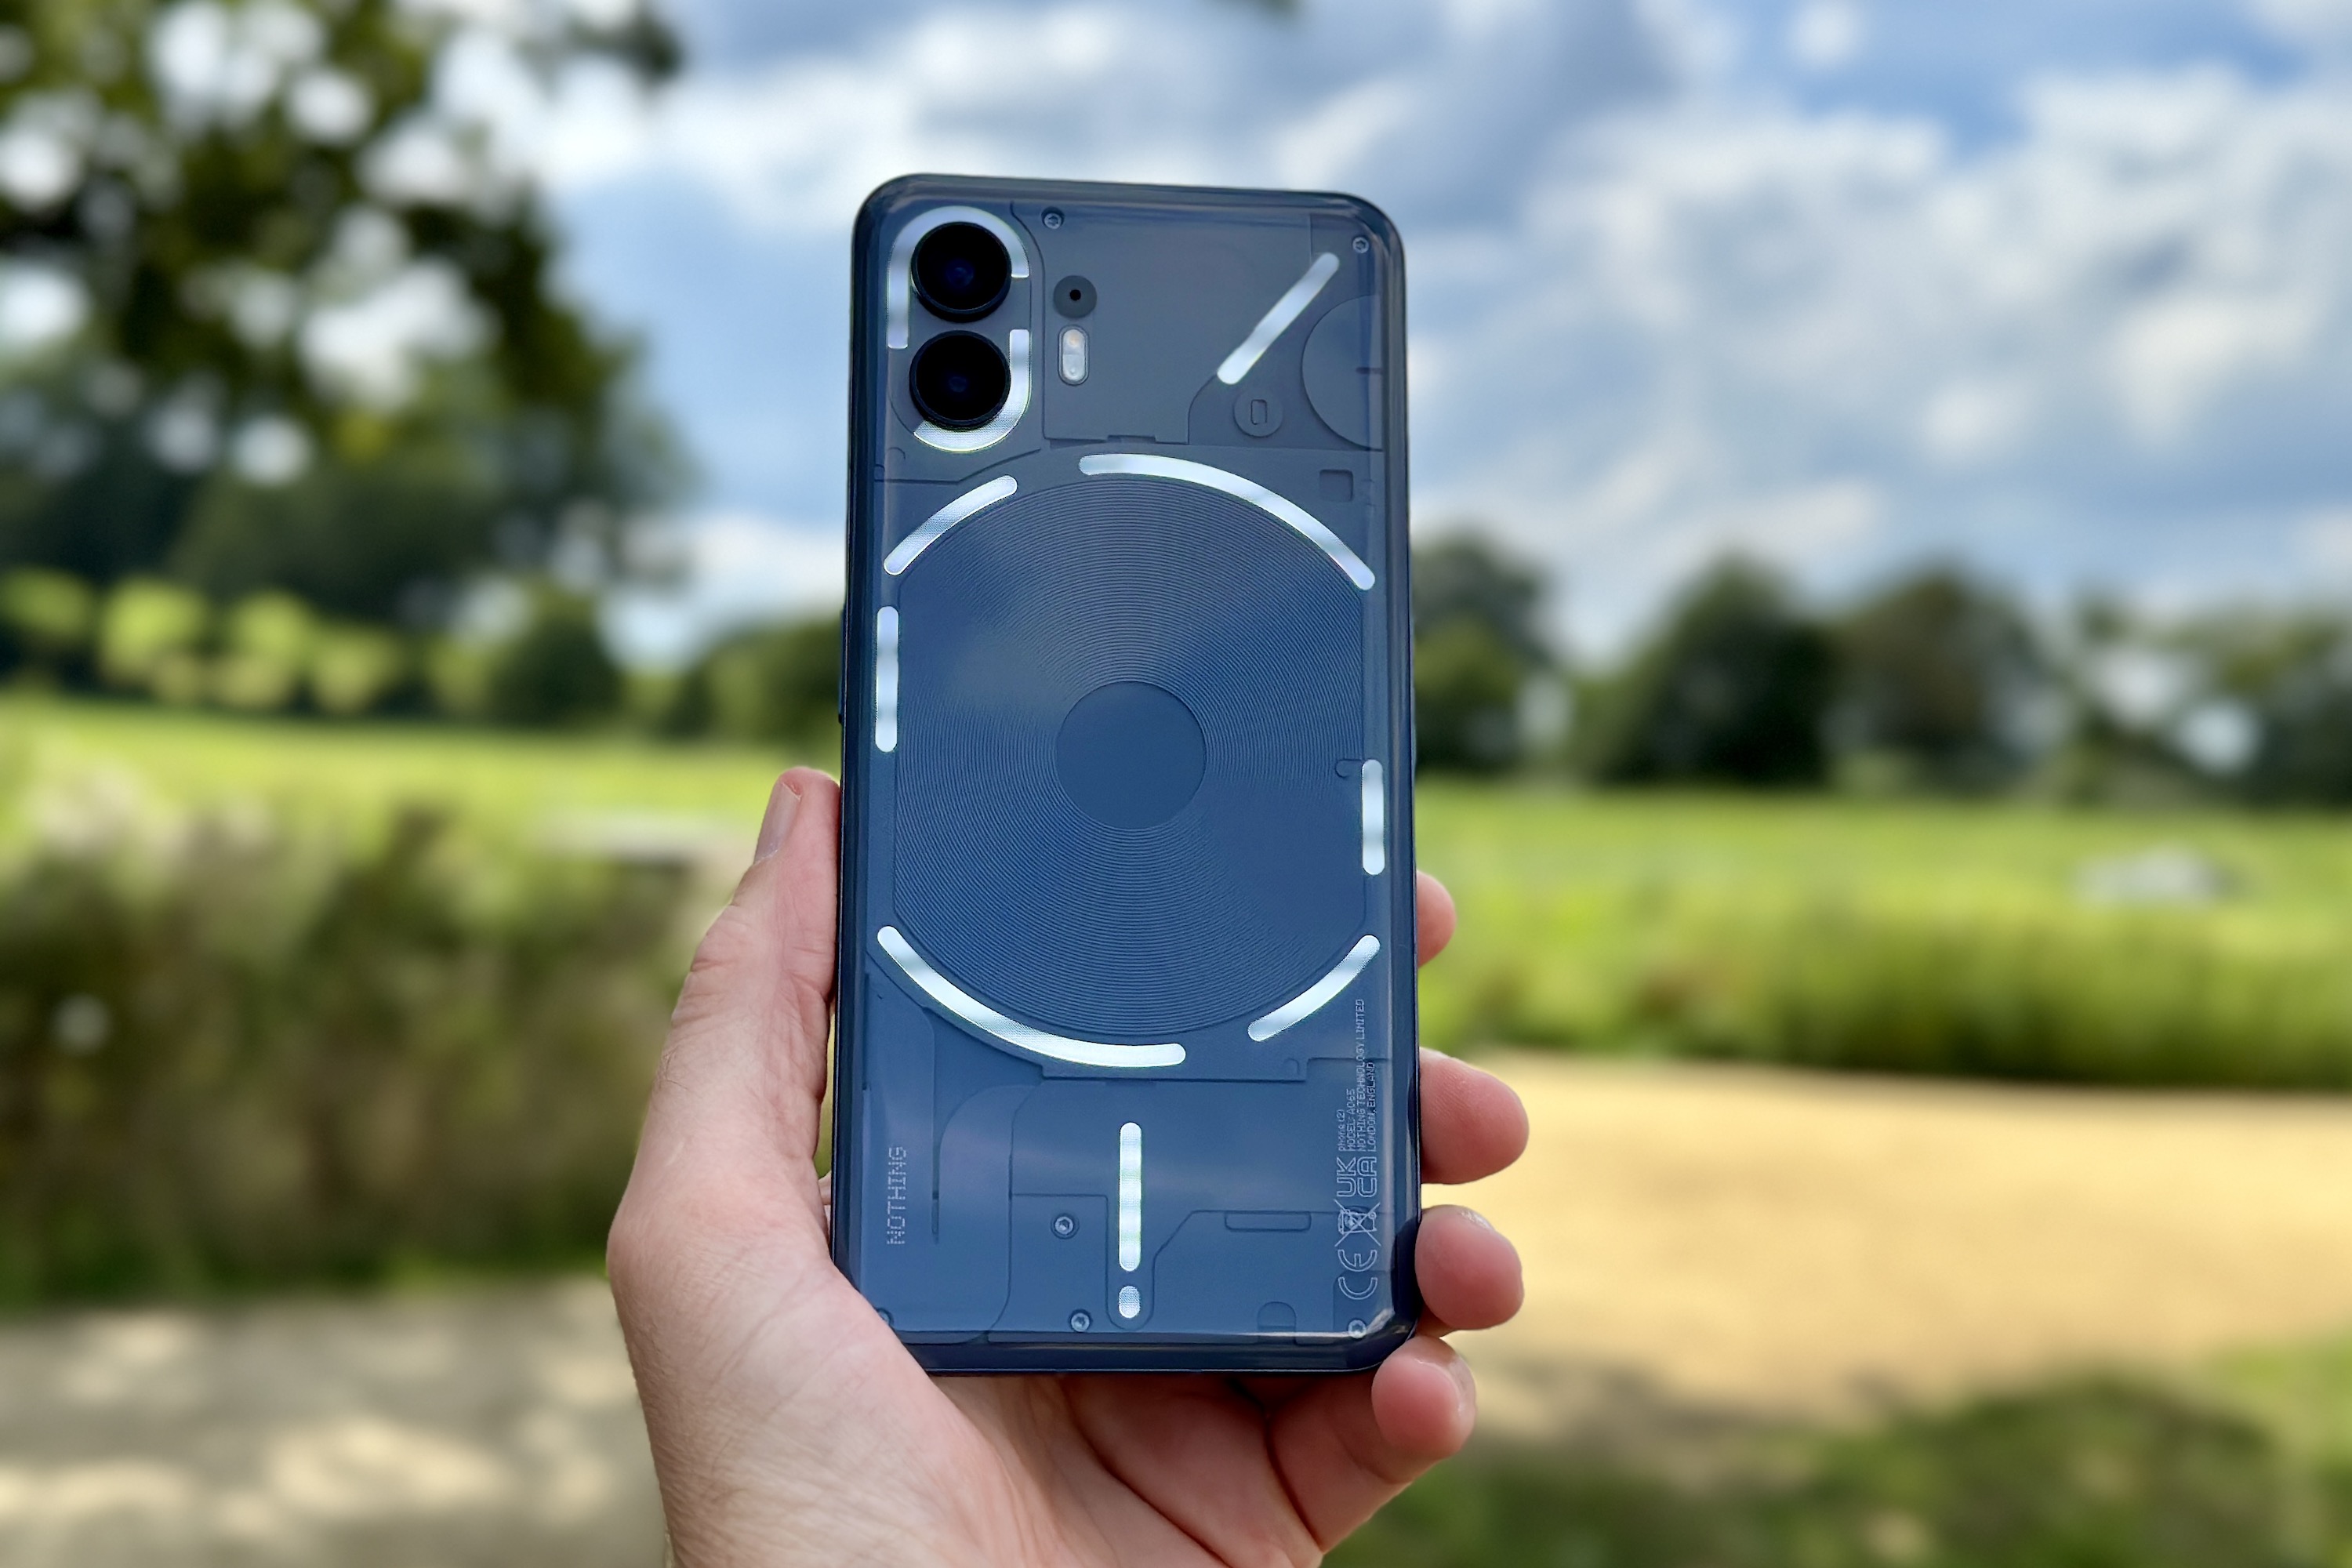
    A person holding the Nothing Phone 2.
    Andy Boxall / Digital Trends

    There may also be a budget-friendly option in the form of the Nothing Phone 3a. This model is expected to retain many of the flagship’s features but with some notable restrictions, allowing Nothing to offer it at a more accessible price point.

    What can we predict about the third model? Earlier rumors hinted that it could be a professional version, possibly titled the Nothing Phone 3 Pro. However, Brar suggests that this may not be the final name. Instead, he believes the third variant might come with distinct internal components when compared to the standard model, though it remains unclear if these specs will be an upgrade or a downgrade.

    We have long admired the devices produced by Nothing and are eager to see what the company unveils next year. The Nothing Phone 2 continues to be one of our top Android smartphones, but due to its age, it has slipped from our overall favorites list. Regardless, we always look forward to reviewing and using these innovative phones.