| Name | Rarity | Weapon Type | Manufacturer | Elemental Effects | Special Property | Associated Location |
|—|—|—|—|—|—|—|
| Barb’ara | Legendary | Grenade Launcher | Vladof | None, Incendiary, Shock, Cryo, Corrosive, and Radiation | Shoots a tentacle explosion on impact, causing elemental damage. This explosion spawns four smaller tentacle grenades, each spawning two more upon impact. All grenade chains explode either on impact or after six seconds, each dealing splash damage. | Crazed Earl; Bloodstained Hollows |
| Bismuth-Tipped Dagger | Legendary | Grenade | Jakobs | Incendiary, Shock, Cryo, Corrosive, and Radiation | Sticks to enemies; each dart increases the damage they take from elemental sources. | Corporal Brennan; Trans-Lunar Intactment at Crooked Teeth |
| Crazed Earl | Pearlescent | Shotgun | Ripper | None, Incendiary, Shock, Cryo, Corrosive, and Radiation | Shoots shards that stick to enemies; meleeing shards causes them to explode, inflicting damage and bouncing to nearby foes. | Bloodstained Hollows |
| Crow-Sourced | Pearlescent | Assault Rifle | Order | None | Fires random objects instead of bullets, creating unpredictable effects. | Captain Willis; Vault of the Damned at The Maelstrom |
| Falke | Legendary | SMG | Ripper | None, Incendiary, Shock, Cryo, Corrosive, and Radiation | Charging the weapon makes it fire three bullets in a spiral pattern per shot, with each shot rotating direction, dealing elemental damage. | Nightmare Rifts (Whispering Glacier) |
| Fearstalker | Legendary | Sniper | Jakobs | None | Critical hits build Deduction stacks, boosting damage on next non-critical hit; non-critical hits increase Observation stacks, boosting next critical damage. | Nightmare Rifts (Whispering Glacier) |
| Flash Cyclone | Legendary | SMG | Maliwan | Cryo | Increases fire rate from 50% to 100% over three seconds; bullets deal cryo splash damage, with a chance to explode, spawning homing projectiles targeting nearby enemies. | The Penitent Steel; Bunker: Crisis Star Weeping at Windswept Wastes |
| Heimdahl | Legendary | Heavy Ordnance | Torque | None, Incendiary, Shock, Cryo, Corrosive, and Radiation | Summons a Sentinel Skull for 10 seconds, firing homing rocket bursts that cause elemental splash damage. | Captain Willis; Vault of the Damned at The Maelstrom |
| Hemorrhage | Legendary | Sniper | Vladof | None | Damage increases with distance; more damage the farther the target is. | Colonel Crash; DCN Feuerman |
| Ichor | Legendary | Heavy Ordnance | Maliwan | Incendiary | Fires four tentacle projectiles on impact, exploding for fire and corrosive damage. | Nightmare Rifts (Whispering Glacier) |
| Laser Cutter | Legendary | Assault Rifle | Vladof | Incendiary, Shock, Cryo, Corrosive, and Radiation | Alternates between vertical and horizontal firing modes; vertical fires three bullets per shot with a spiral pattern, horizontal with decreased fire rate. | Corporal Brennan; Trans-Lunar Intactment at Crooked Teeth |
| Prowler | Legendary | SMG | Daedalus | None | When charged, fires slow homing bullets that explode on impact; airborne bullets home toward enemies upon reloading; bullets vanish after 5 seconds if they miss. | Air Raider Scremulous; Fuel Siphon: Thrombosis Purge at Crooked Teeth |
| Reminisce | Legendary | Shotgun | Maliwan | Incendiary, Shock, Cryo, Corrosive, and Radiation | Cannot be reloaded normally; projectiles return to the gun and refill ammo. | Captain Willis; Vault of the Damned at The Maelstrom |
| Scoot’n’Shoot | Legendary | Pistol | Torque | None, Incendiary, Shock, Cryo, Corrosive, and Radiation | Spawns phantom guns mimicking last shots, targeting enemies; reloading resets the phantom guns. | Crazed Earl; Bloodstained Hollows |
| Soul Survivor | Pearlescent | Pistol | Daedalus | None | Damage increases for each ally in Fight For Your Life. | The Penitent Steel; Bunker: Crisis Star Weeping at Windswept Wastes |
| Sunspot | Legendary | Pistol | Order | None | Damage increases as the magazine empties. | Big Oil; Fuel Siphon: The Gurgling Stent at Bloodstained Hollow |
Tag: weapon
-
Where to Farm Every New Legendary and Pearlescent Weapon in Borderlands 4’s Vault of the Damned
-

Complete Every Weapon Evolution and Union in Vampire Crawlers
Knowing how to use your initial cards and selecting rewards in Vampire Crawlers isn’t enough—you also need to enhance your cards and make them as strong as possible. You might also want to explore hidden combinations, called Evolutions, that can unlock new powerful cards.
Evolutions usually involve combining two cards to create a new one. The original cards are consumed in the process, but you get a new card that combines the best traits of both, sometimes with special abilities. Let’s go over all the Evolutions available in Vampire Crawlers and the card recipes needed for each.
How to Make Every Evolution
There are 17 Weapon Evolutions and Unions you can unlock if you have the right cards. Here are all the recipes:
Card 1 Card 2 Evolution Whip Hollow Heat Bloody Tear Magic Wand Any Tome Holy Wand Runetracer Any Armor No Future Knife Bracer Thousand Edge Fire Wand Spinach Hellfire Lightning Ring Duplicator Thunder Loop Axe Any Candle Death Spiral Garlic Pummarola Soul Eater King Bible Spellbinder Unholy Versper Cross Clover Heaven Sword Pentagram Crown Gorgeous Moon Song of Mana Tirajisú Mannajja Shadow Pinion Wings Valkyrie Turner Santa Water Attract Orb La Borra Gatti Amari Stone Mask Vicious Hunger Peachone Ebony Wings Vandalier Remember, one of the Evolutions requires eight different cards, including The Sparrow and Phiera Der Tuphello, to create Phieraggi—an extremely powerful gun.
Another helpful tip is that once you find the Grim Grimoire Relic in the Inlaid Library, you can pause the game and view a menu showing all the recipes you’ve unlocked so far, making it easier to keep track of your progress.
-

How to Evolve Weapon Cards and Solve Challenges in Vampire Crawlers
As you progress in Vampire Crawlers, you’ll build your deck with various weapon cards. These cards are essential for dealing damage to enemies and exploring different dungeons. You can upgrade your weapons in several ways, but evolving cards is one of the most effective methods.
By evolving your cards, you’ll unlock new, more powerful versions that can’t be obtained through other means. These evolutions usually significantly increase damage output, making them highly valuable. Here’s what you need to know about how to evolve your cards in Vampire Crawlers.
How Evolutions Work
To create an evolution, you need two things: at least two specific cards and a Red Gem. Red Gems can be acquired in two ways—either as rewards from chests (which is random) or by finding a stone slab that contains a gem (a 50-50 chance). Sometimes, the slab might also hold a Blue Gem, which grants +1 Mana instead.
Once you interact with a Red Gem, the game will automatically tell you if you can evolve two cards you currently have. Keep in mind that both cards will be replaced by the new, evolved card—usually much stronger—so choose carefully before confirming.
There’s no limit to how many evolutions you can perform in a single run — as long as you have the specific cards and Red Gems.
To know which evolutions are available and what cards you need, you should unlock the Relic Grim Grimoire.
How to Unlock the Grim Grimoire
The Grim Grimoire is a special relic that shows all possible evolutions you can make. At first, it displays question marks for unknown cards, but as you unlock certain evolutions, those will be revealed. The relic highlights in yellow the cards you currently possess.
You can find the Grim Grimoire on a shining bookshelf in the Inlaid Library, which is the first area of the second location you can unlock. You need to break this bookshelf to access it.
The location is random, but you can see points of interest marked on your map. Visit all of them on each floor to find it.
Performing Evolutions
After obtaining the necessary cards and a Red Gem, just pause the game. A menu for the Grim Grimoire will appear, allowing you to choose which cards to evolve. This process will replace your selected cards with their evolved versions.
-

How to Complete the Alabaster Curved Sword in Crimson Desert
There are many weapons and armor pieces to find in Crimson Desert. Some are part of the main quests, but others can be missed because they’re hidden around the world.
One of these items is the Alabaster Curved Sword. It’s a sturdy one-handed sword you can pick up early in the game if you don’t mind spending a lot of time on your horse.
Alabaster Curved Sword Location
To find the Alabaster Curved Sword, head northwest into the Crimson Desert area. It’s in Urdavah Province, just above the Forebearer’s Barrens. Specifically, mark your map just over the B in Forebearer’s on the map.
Before setting out, make sure you have the Visione helmet unlocked. This helmet lets you see memories and is gained after exploring the Lioncrest Watchtower in Hernand. Once you have it, hop on your horse and follow your map marker.
Be aware, Crimson Desert isn’t the safest area to fight enemies if you’re just starting out or haven’t leveled up Kliff much. It’s best to avoid combat whenever possible, as you don’t need to fight to get the sword. Also, try to have at least 5 Fire Resistance to prevent the heat from draining your stamina.
When you arrive at your destination, look for a large circular sandpit with a big rock circle in the middle. Cross the sand by hopping on the rocks, because the ground is quicksand, which pulls you under if you run across it normally.
Once on the platform, use your lantern to walk around the edge until you find a memory fragment. Watch the ghosts until you automatically gain the Visione and see the memory. The memory hints that some treasure was hidden here. After it ends, use your lantern to locate two buried spots on the ground—the sword and a small silver pouch.
Look for small glowing columns of energy, then interact with the ground at those spots. Surprisingly, you won’t need a shovel. Kliff will dig with his hands. Don’t forget to open the silver pouch in your inventory to collect the money inside.
Additional Details
The Alabaster Curved Sword is a good single-handed weapon with 16 Attack Power, Refinement Level 2, and three Abyss Gear slots. It doesn’t have any special moves or properties, like increased Critical Rate, so it’s mostly a visual choice unless you like how it looks.
Most weapons deal similar damage, but some, like the Acria Sword, have a default Critical Rate of 1. That makes certain weapons better against tough enemies. Still, the Alabaster Curved Sword can work well as a backup weapon if you’re dual-wielding swords. To improve its performance, add Abyss Gear like Attack Speed and Critical Rate.
-

Beat Weapon Loadouts in John Carpenter’s Toxic Commando: Completing and Solving
In John Carpenter’s Toxic Commando, the weapons and gear you choose really shape how your entire run feels. Some guns seem great on paper but fall apart when you’re overwhelmed, while others quietly help you get through tough fights without much trouble.
It’s all about finding the right combinations that work well together, instead of just picking the most powerful weapons. This guide covers some of the best loadouts so you can spend less time struggling and more time taking down enemies like a pro. Here are four recommended setups to help you get started.
Best Balanced Loadout
If you want a reliable, versatile setup that feels right in any situation, this balanced loadout is a great starting point.
The HAMR-17 is right in the middle of assault rifles, offering solid accuracy, good handling, and a slight penetration bonus, which helps when enemies start stacking up. It doesn’t excel in one area but keeps up everywhere, making it versatile for unpredictable battles.
The 1911 Protector acts as a dependable backup, with consistent damage and good handling. It’s useful if your primary runs out of ammo or enemies get too close.
Slot Weapon Why It Works Primary HAMR-17 Balanced stats with good accuracy and penetration Secondary 1911 Protector Reliable handling and damage for fallback Heavy (Pickup) MAG 5 / BF25 Strong burst damage for tougher enemies
Best Precision Sniper Loadout
For players who prefer controlling the fight, snipers allow you to take enemies out before they reach you.
The MK110 is the only sniper in the game, and it offers top-tier accuracy and strong penetration, letting you eliminate threats from a distance.
The Casull 6 complements it by dealing high damage with precise shots, perfect for when enemies get close.
Slot Weapon Why It Works Primary MK110 Highest range, accuracy, and penetration Secondary Casull 6 High damage and precision for close-range encounters Heavy (Pickup) Railgun Massive single-shot damage for elite enemies
Best Run-and-Gun SMG Loadout
If staying mobile and aggressive is your style, this setup focuses on speed and pressure.
The Keris V10 boasts a high fire rate, ideal for shredding enemies at close range. Its accuracy isn’t perfect, but that doesn’t matter when you’re constantly moving.
Pairing it with the Geist 17 gives you a fast-firing backup, keeping the fight going even if you need to switch weapons quickly.
Slot Weapon Why It Works Primary Keris V10 Extremely high fire rate for close-range destruction Secondary Geist 17 Fast-firing pistol to maintain pressure Heavy (Pickup) Hailstorm MGL / Thumper GL Great for quickly clearing crowds
Best Close-Range Tank Loadout
If you like to jump right into the thick of the fight and survive, this shotgun-focused setup packs a punch.
The Dunal SXS hits incredibly hard at close range, with excellent handling and mobility. It’s devastating when you land your shots but unforgiving if you miss.
The 1911 Protector again serves as a reliable backup, giving you a bit of extra reach when needed.
Slot Weapon Why It Works Primary Dunal SxS Massive damage at close range with good handling Secondary 1911 Protector Dependable fallback for mid-range encounters Heavy (Pickup) BF25GL / MAG 5 Adds explosive or sustained firepower -

Best Weapon Upgrades To Focus On First In High on Life 2: Completing & Solving
Weapons in High On Life 2 are more than just tools for combat; they are your closest friends, companions, and sometimes even the worst influences. While we appreciate every gun in their default state, the real excitement begins when you upgrade them at Jorb’s shop.
You can also unlock weapon upgrades by completing various challenges around the game world. These are often the best upgrades to consider, along with their unlock times.
What Weapon Upgrades Can You Get?
High On Life 2 features six main weapons, with an additional seventh possible:
- Bowie
- Creature
- Gus
- Sheath
- Sweezy
- Travis & Jan
Each weapon has a set of upgrades available either through gameplay or by purchasing from Jorb’s shop, found in your Quarters.
Weapon Upgrade Name Effect Cost / How to Get When Unlocked Gus Cartridge Canal Increases ammo magazine size 800 Pesos Immediately after unlocking Jorb’s shop Gus Slug Chunker Boosts stopping power 1,500 Pesos Once Jorb’s shop is available Sweezy Piercer Relaxant Faster piercing charge 1,200 Pesos After the first Bounty completed Sweezy Panic-Reloader Faster reload speed 1,500 Pesos After completing the first Bounty Bowie Flummis Increased stopping power Found in Circuit Arcadia After completing the James Stevenson Bounty Bowie Portal Capacitor Faster ability charge 1,200 Pesos After the James Stevenson Bounty Bowie Bone Lock Critical headshot multiplier 1,000 Pesos After the James Stevenson Bounty Creature Brain Drain Faster ability charge Complete a challenge in Circuit Arcadia After rescuing Jeppy, once Dinner With Mom is finished Creature Dogbrain Overcharger Faster reload speed 500 Pesos After rescuing Jeppy Creature Pressure Shot Increased charge shot damage 1,500 Pesos After completing Dinner With Mom Sheath Poise Frame Increased stopping power 1,500 Pesos After completing Pinkstock or Muppy Doo Bounties Sheath Cortex Cooler Faster ability charge 1,200 Pesos After completing Pinkstock or Muppy Doo Bounties Travis & Jan Pouch Rounds Increased ammunition 1,200 Pesos After rescuing your dad from a cult Travis & Jan Agony Dial Headshot multiplier 1,000 Pesos After rescuing your dad from a cult Focusing on the most beneficial upgrades helps you tackle tough boss fights with ease.
Which Weapon Upgrades Should You Prioritize?
First, decide which weapon suits your playstyle best and focus on upgrading that one first. High On Life 2 offers options for various strategies; don’t force a weapon to fit if it doesn’t suit your way of fighting.
To make your journey easier, consider these essential upgrades first:
- Bowie’s Bone Lock – Enhances headshot damage significantly. Mastering precision aiming makes this one of the most powerful shots.
- Gus’s Slug Chunker & Cartridge Canal – Gus is great for finishing big bosses, especially those with larger hit points like Tiffany and Muppy Doo.
- Travis & Jan’s Pouch Rounds & Agony Dial – These two are the top weapons overall. Upgrading both from Jorb’s shop is a smart move for maximizing damage and efficiency in both boss fights and regular combat.
While other upgrades are helpful, focusing on these will reduce boss fight times and allow you to clear mobs more effectively.
-

Hytale Weapon Tier List: Completing and Solving Every Weapon
Weapons are essential in Hytale because you spend much of the game facing hostile creatures, and bare fists aren’t very effective in fights. To avoid getting eaten or overwhelmed, it’s important to keep at least one strong weapon ready in your hotbar.
Choosing the right weapon isn’t always straightforward, as the game offers a wide variety. You can find long-range options like bows and staffs, as well as close-range weapons such as swords and axes. Here’s a tier list ranking the best weapons by effectiveness.
Note: Since Hytale is in early access, some weapons might be updated or improved in future updates.
How the Tiers Work
The list includes only the top versions of each weapon type, typically the Mithril upgrade, for clarity. This results in eight main weapons across five tiers: S through D. Here’s what each tier means:
Tier Explanation S The best in the game, excelling in damage, speed, and other attributes. Craft these if you can. A Very effective against most enemies but may have one weakness that keeps them from top tier. B Decent weapons that can handle many situations but have notable drawbacks. C Slightly underwhelming; usable but not worth prioritizing over better options. D The weakest, not recommended for resource investment. Better to use higher-tier weapons instead.
S Tier Weapons
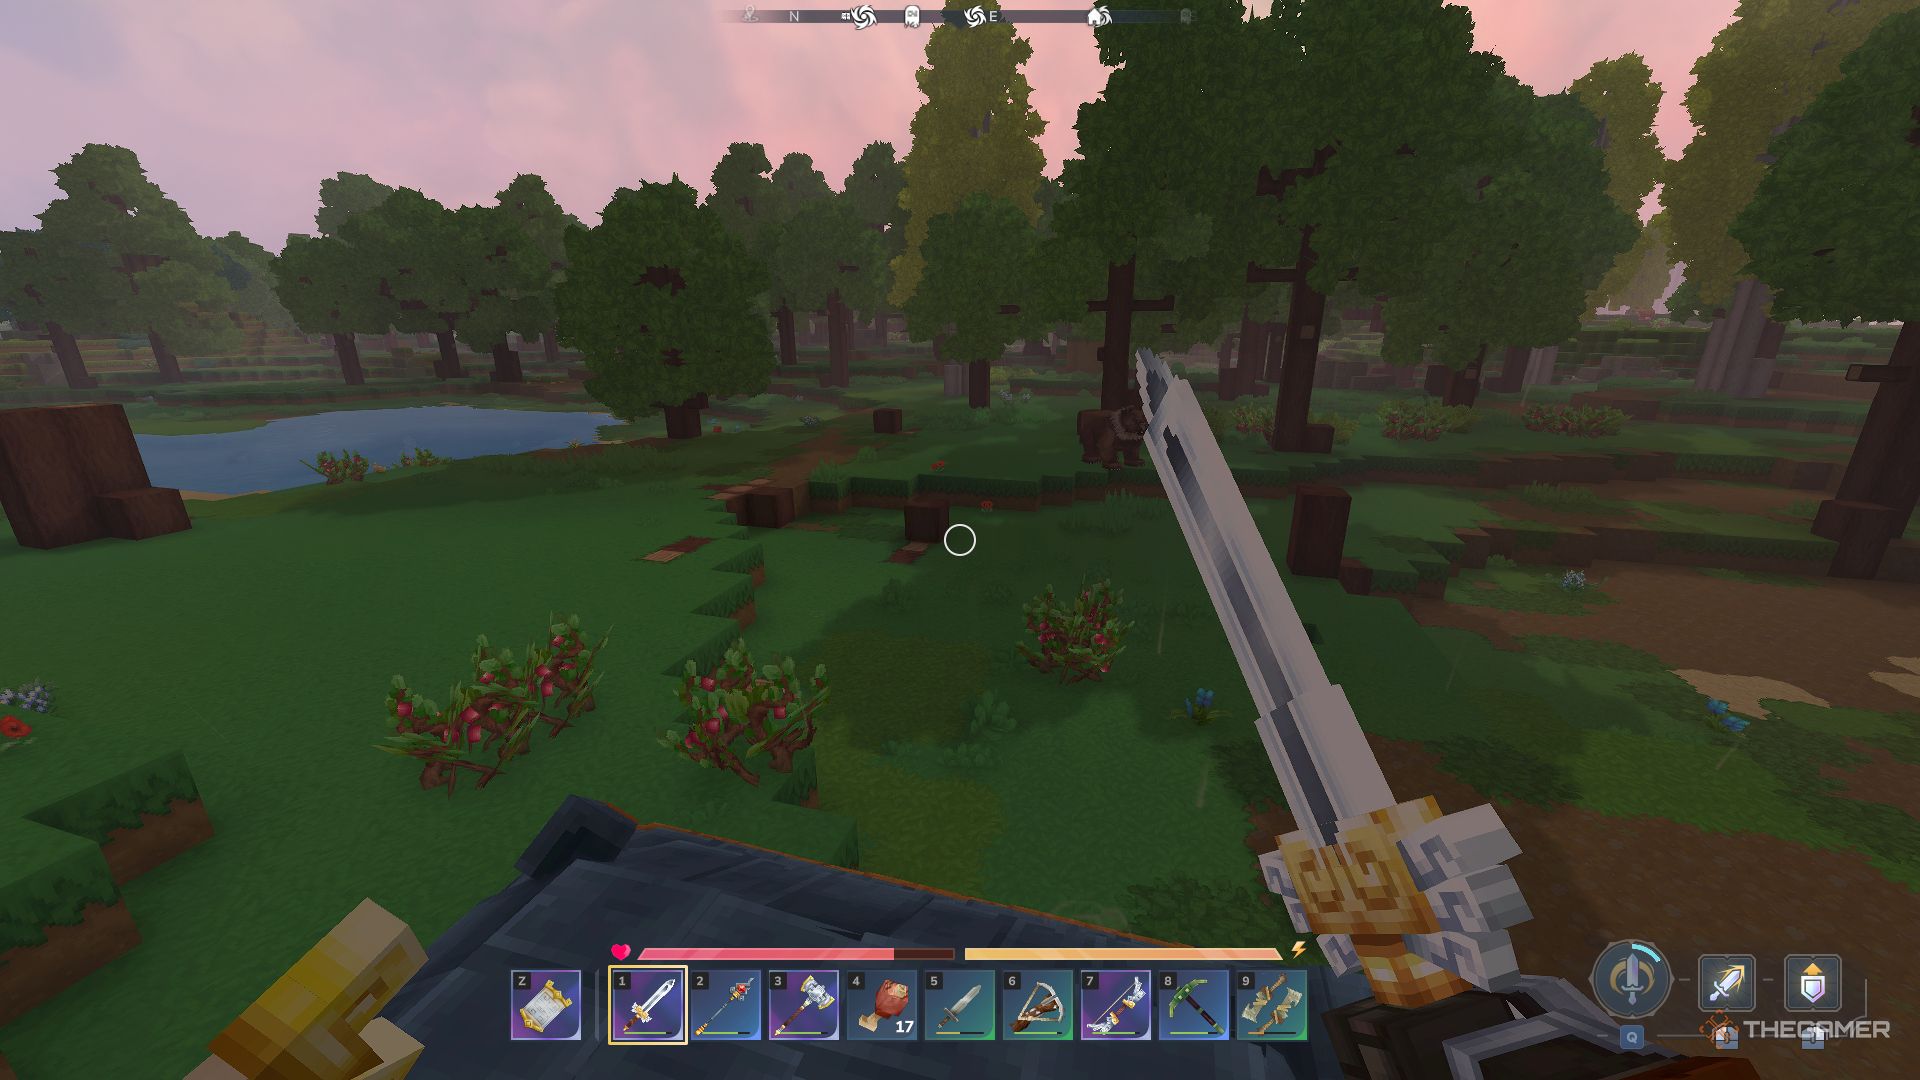
The only S tier weapon is the Mithril Sword. It combines good range, damage, and speed, and being one-handed allows you to use it with a shield. This makes it the top choice overall, as swords are balanced and versatile, suited for both swift melee attacks and providing protection.
Image: Player holding Mithril Sword
A Tier Weapons
The A tier features two distinct weapons with different strengths:
-
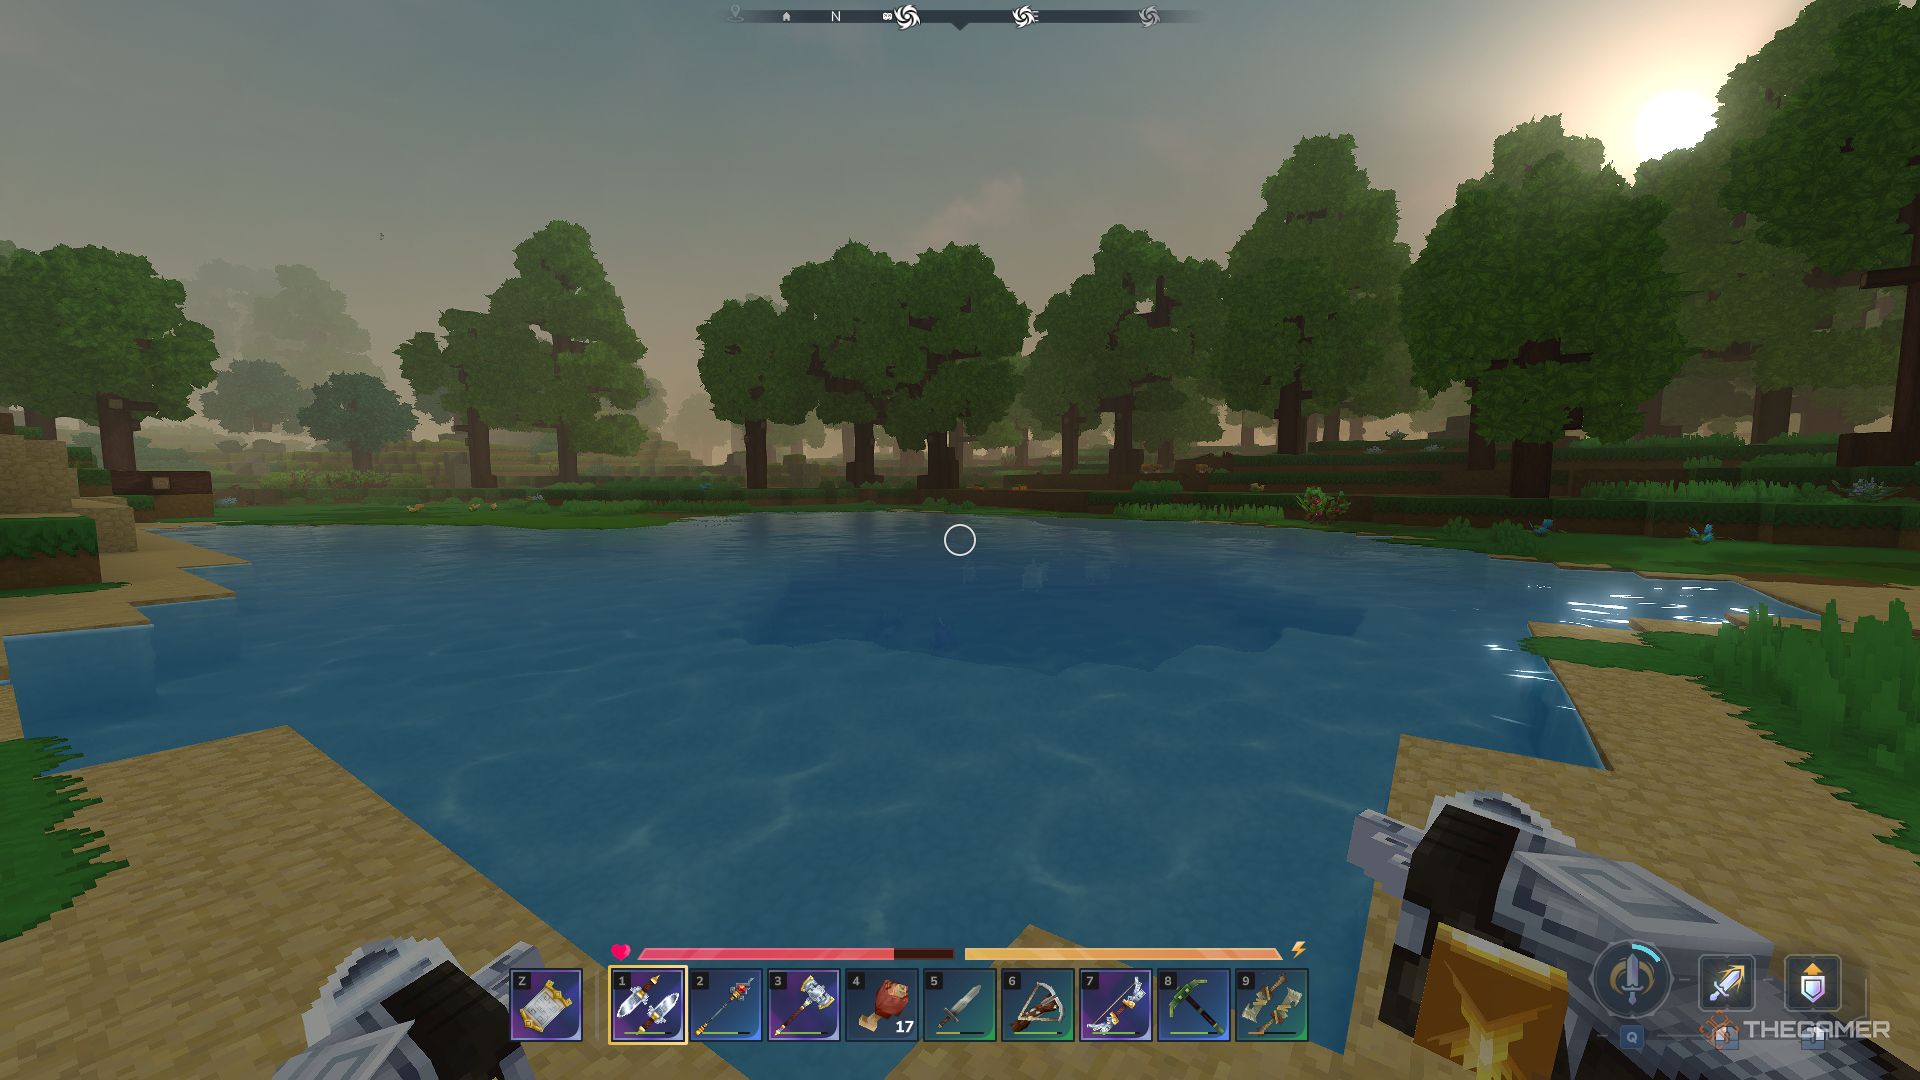
Mithril Daggers: These are incredibly fast, making them the quickest weapons in the game. They have slightly more punch than other daggers but still don’t do much damage overall.
-
Mithril Mace: This is a powerful blunt weapon capable of dealing significant damage. Its slowness makes it less preferred for rapid attacks, but it compensates with deadly power.
Both excel in hitting multiple enemies at once and offer a mix of speed and strength, making them valuable A tier choices.
Image: Player holding Mithril Daggers
B Tier Weapons
The B tier holds the game’s top ranged options:
-
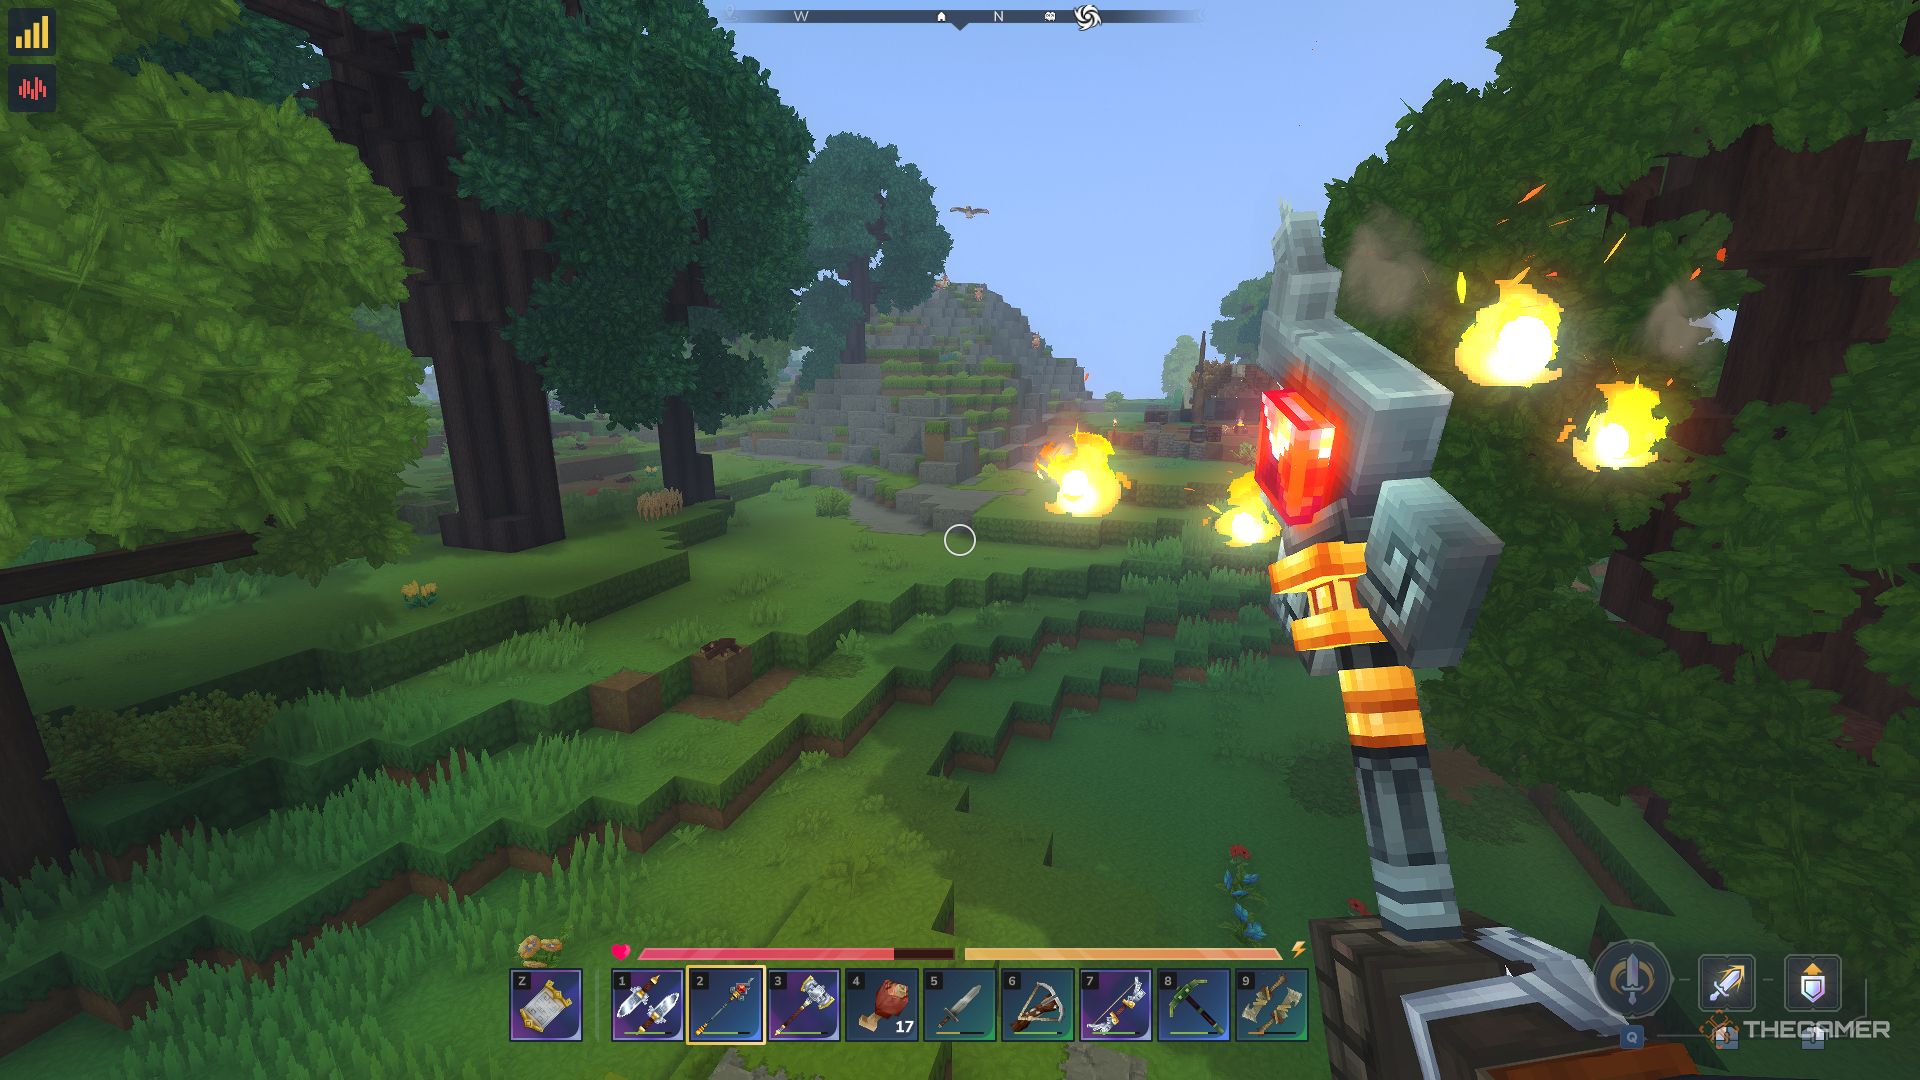
Flame Crystal Staff: Versatile in close and distant combat. It fires fireballs that stay on target without dropping, making it more accurate than bows. However, it requires the rare Essence of Fire to operate, which limits its usability.
-
Mithril Shortbow: Deals the highest damage per shot among bows, but you must pause after each shot to load a new arrow. Arrows also tend to dip, making accurate shooting more difficult.
Both weapons are strong within their category. The staff is deadly in both melee and ranged fight scenarios, while the shortbow packs a powerful punch despite its slow firing rate.
Image: Player holding Flame Crystal Staff
C Tier Weapon
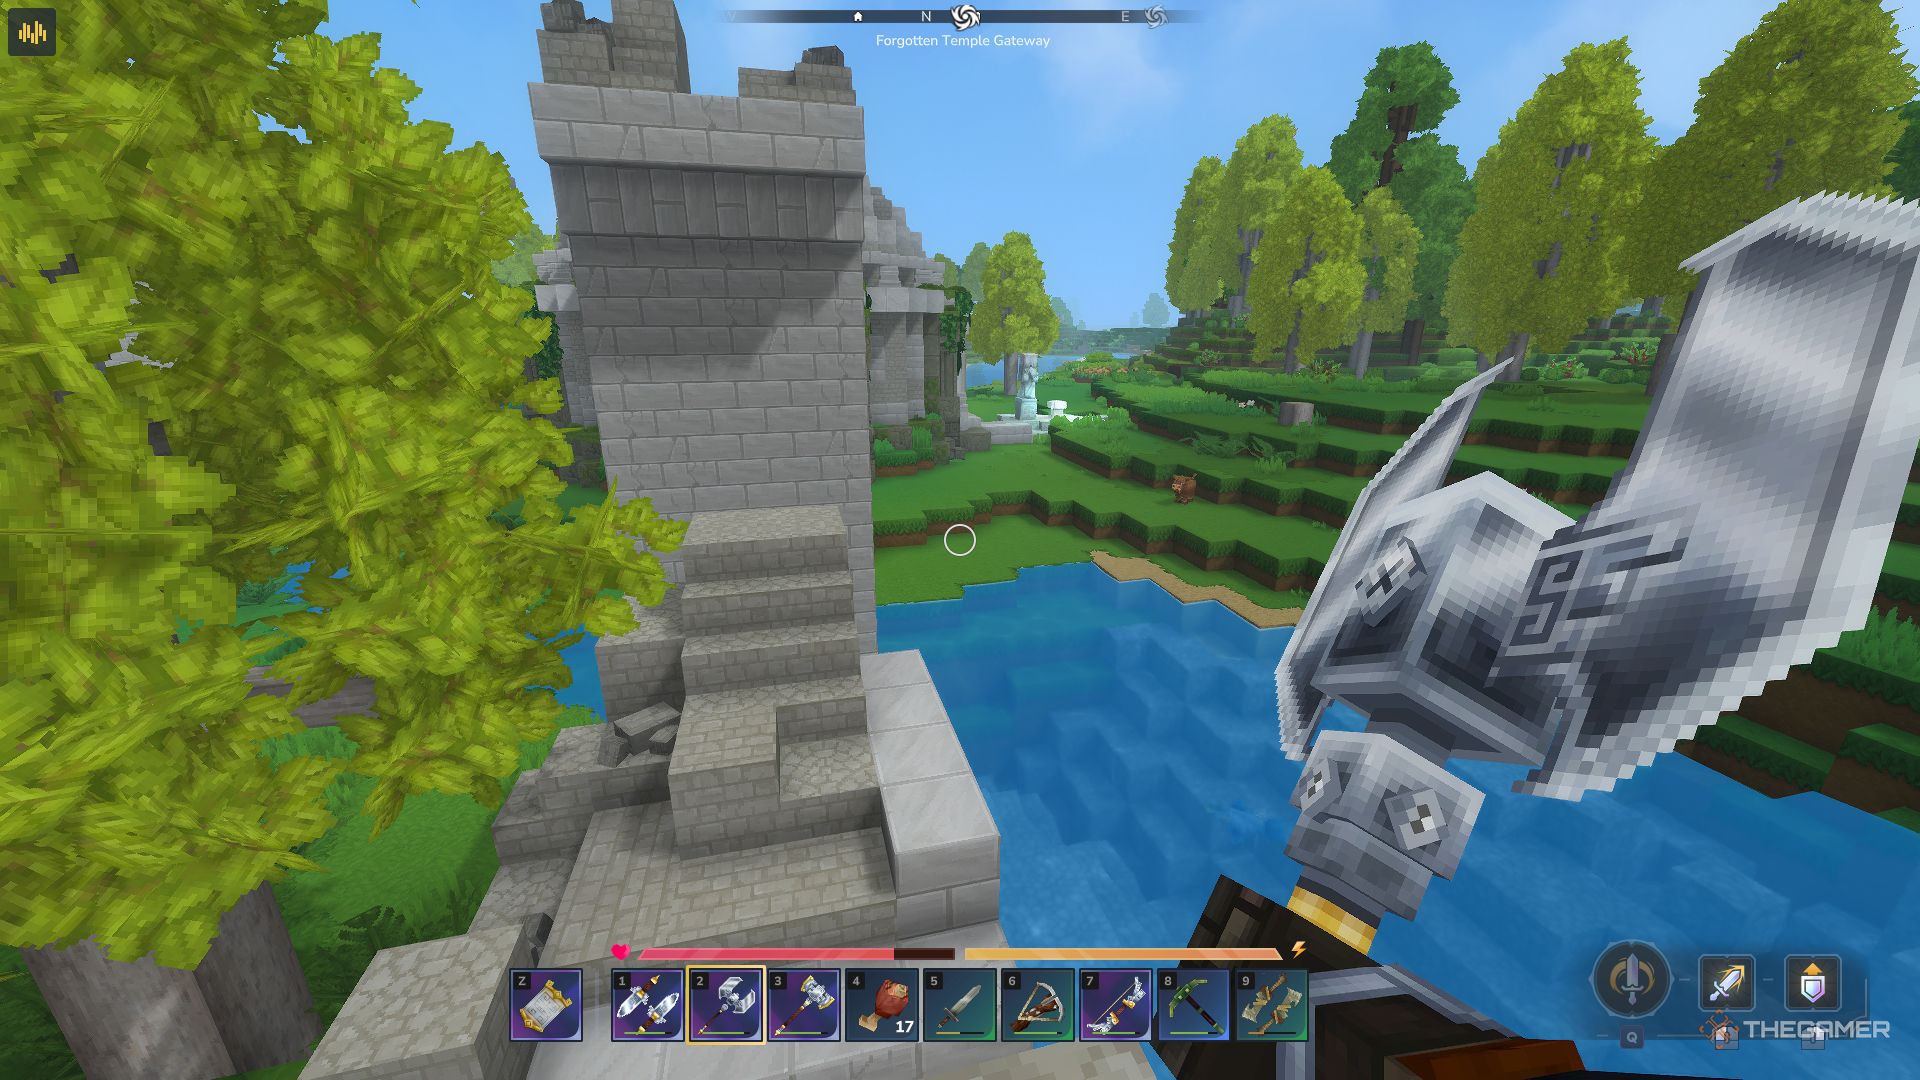
The Mithril Battleaxe is the sole C tier weapon. It’s a slow but high-damage weapon, comparable to the Mithril Mace. However, it offers no significant advantage over the Mace and feels somewhat redundant. Its speed improvement isn’t enough to justify choosing it over better options.
Image: Player holding Mithril Battleaxe
D Tier Weapons
The D tier includes the worst ranged weapons:
-
Iron Crossbow: Fires faster than the Shortbow but suffers from poor damage and long reload times. Its limited range also makes it less effective.
-
Ice Crystal Staff: As a work-in-progress weapon, it currently does little damage and doesn’t freeze enemies as intended. Its performance is underwhelming and unlikely to improve significantly in its current state.
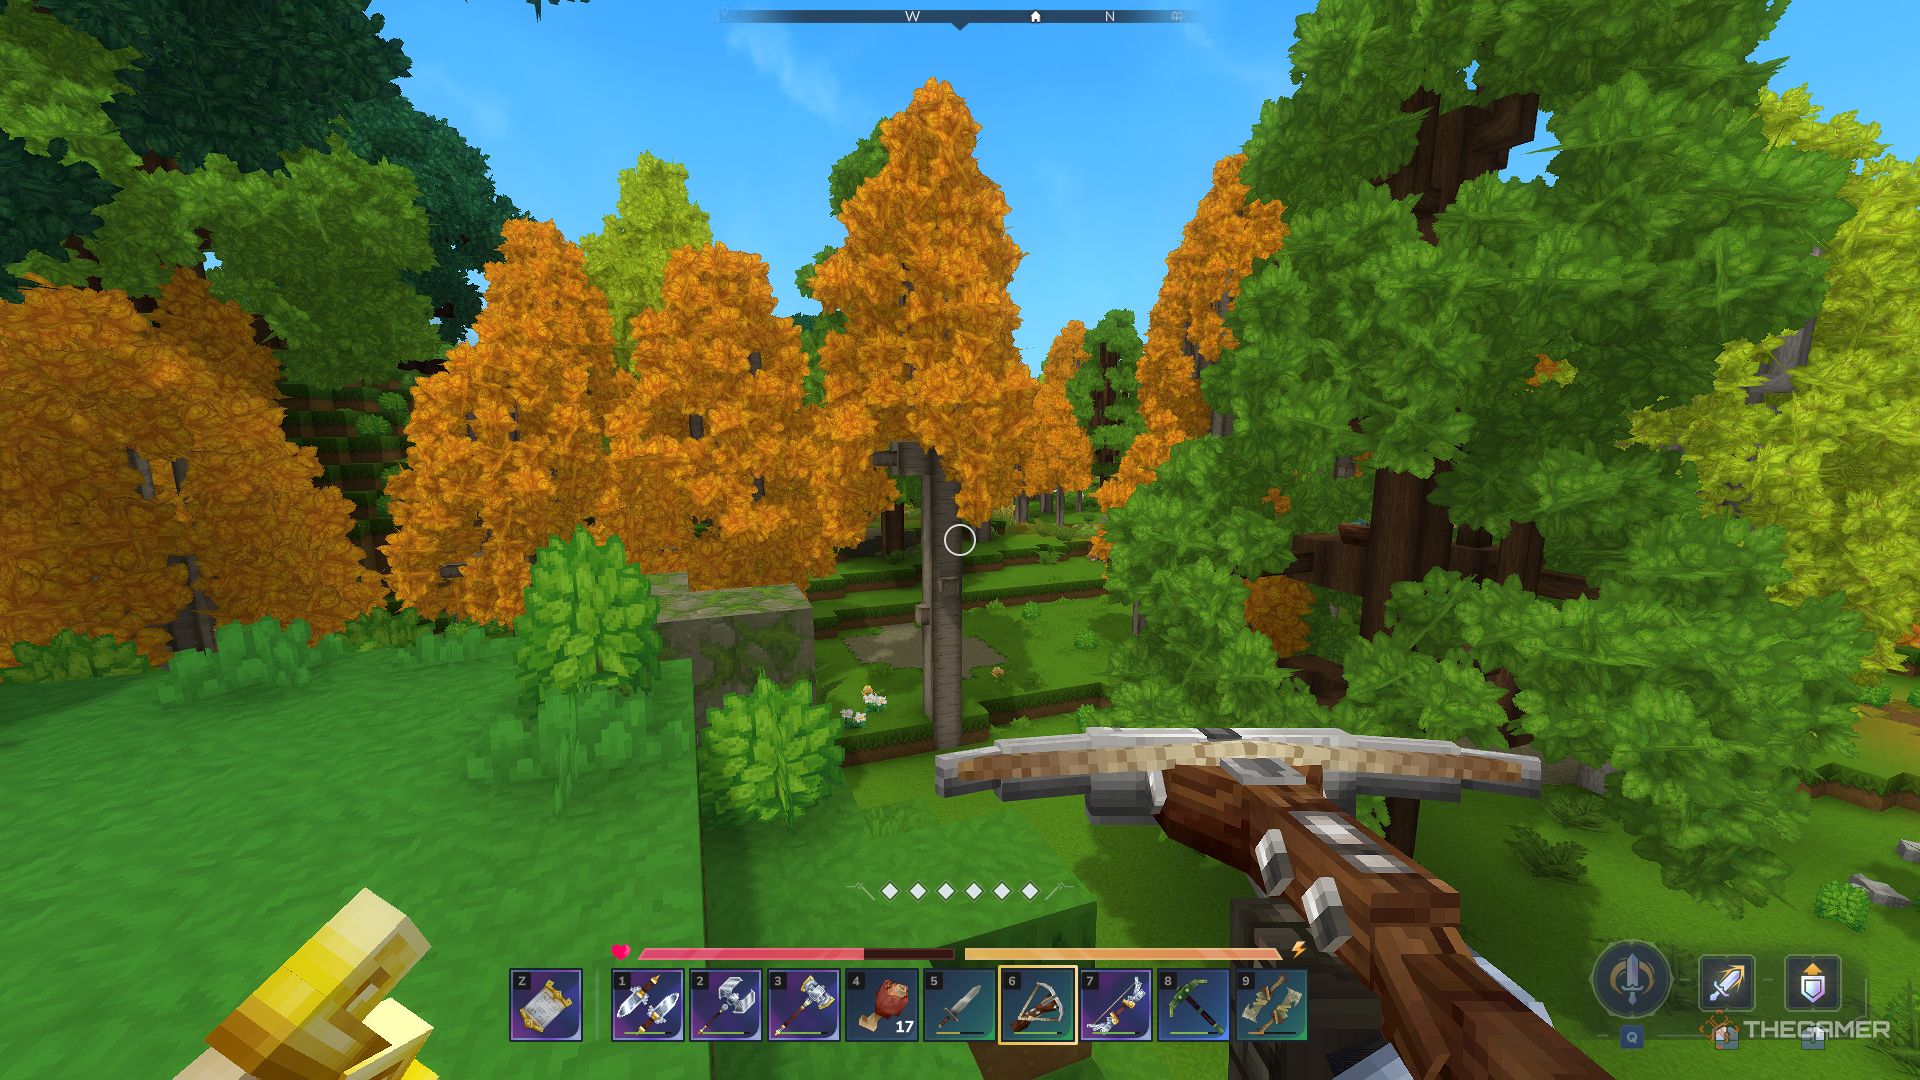
Image: Player holding Iron Crossbow
Choosing the right weapon depends on your play style, but generally, the Mithril Sword is your best all-around option. For specialized roles, the daggers and mace offer distinct advantages, while the staff and bow provide excellent ranged options, albeit with some limitations until further updates.
-
-

Where to Find Grenade Tubes in Arc Raiders for Completing and Solving
Arc Raiders offers a wide array of utility items, surpassing its weapon selection. These utilities include more than just grenades—players can use ziplines, mines, and cloaking devices that make them invisible to Arc.
Utility Cases, also called Grenade Tubes, hold these useful items. They are found scattered across all five maps in Arc Raiders. However, if you don’t know where to look, you might not come across them often. Typically, only a few are available in each match, and some are quite difficult to locate.
Dam Battlegrounds Utility Case Locations
Dam Battlegrounds is the first map players encounter in Arc Raiders, and it offers the greatest variety of spawn points for utility cases. The locations listed are approximate spots where a utility case might spawn, but there’s no guarantee they will always appear there.
- Formicai Outpost: One possible spawn on a metal grated floor, one level up.
- Water Towers: On top of the northernmost water tower, potential spawn.
- Water Treatment: Inside the locked surveillance room or on a table in the northeast corner.
- Hydrophonic Dome Complex: Near a small stack of containers in the southeast corner or in the center northeast corner, by dirt.
- Pale Apartments: In the east building, tucked into a corner of a room.
- Ruby Residence: On the floor beside a bed in the south building.
- West of Pattern House: In a small alcove on a broken bridge segment.
- Pipeline Tower: One location on the roof and another in a small shack to the east.
- Dam: Next to barrels on the ground south of The Breach.
- Control Tower: Inside the locked room or partially on the roof on the north side.
- Testing Annex: Both potential spawn points are in locked rooms.
Buried City Utility Case Locations
Buried City doesn’t have many spots for utility cases, but because the map is small and dense, it’s easy to check multiple locations quickly.
- Piazza Arbusto: Inside the small building on the west side of the central area.
- Buried Properties: Near remnants of a roof protruding from the sand.
- Hospital: Inside a locked room, or near broken walls by scaffolding on the southwest side.
- Abandoned Highway Camp: On the roof of the building east of the camp, or inside near a stove.
- Santa Maria Houses: Between two pillars inside one of the houses.
Spaceport Utility Case Locations
Spaceport has fewer spawn points, mostly concentrated on the northern side, making it quicker to search all potential locations.
- South Trench Tower: On the top floor, beside a yellow partition.
- Between Arrival Building and Shipping Warehouse: In a room between the two structures.
- Arrival Building: Under a desk with a computer or beside a desk in the vicinity.
- Hidden Bunker: Two possible spots inside the bunker.
- Departure Building: On the southern part of the roof next to an AC unit.
- Fuel Lines: Inside one of the empty fuel lines just north of a wall break.
- Control Tower A6: Inside the building on the east side, in front of yellow partitions.
Blue Gate Utility Case Locations
Blue Gate’s locations are mostly on the north side, aligning with Spaceport’s pattern, making it easy to scan all potential spots.
- Abandoned Housing Project: Near a chair and some boxes.
- Warehouse Complex: On a low shelf near the center.
- Between Gate Control and Checkpoint: On a concrete pillar above the area, next to a couch.
- Reinforced Reception: Underneath stairs or behind a chair near elevators.
- Village: On top of a piano.
- Raider’s Refuge: In the corner of a building ruin, inside a tower, and on top of a table in another ruin.
- Trapper’s Glade: Inside the locked room.
- Data Vault: On scaffolding in the northern section.
Stella Montis Utility Case Locations
Stella Montis has fewer spawn points, mostly in the upper levels, making it relatively straightforward to locate them.
- Auditorium: On top of electronics on the south side, or in the seating area on the north.
- Communications: Next to a covered crate in the southern part.
- Cargo Dock A: Underneath a container overlooking the area.
- Medical Research: On a red server rack in the northern section.
- Assembly Line: Inside suspended tubes above the area.
- Seed Vault: Inside the locked vault.
- Loading Bay: Near the metal walkway up high.
Overall, players should focus on these key areas for utility cases, using map knowledge to spot spawn points quickly and efficiently.
-

Where to Find Weapon Cases in Arc Raiders: Complete Solving Guide
Arc Raiders features a variety of maps, each with a good mix of size and activity. Nearly every area on the map has something going on or has the potential for loot. One of the most exciting finds are Weapon Cases, which are found across all five current maps. You’re almost always likely to find a weapon inside, with a chance for even better loot. These spawn locations aren’t guaranteed to always have a weapon case, but once you get used to checking them, you can easily plan routes to find multiple cases.
Dam Battlegrounds Weapon Case Locations
Dam Battlegrounds is one of the best spots to search for weapon cases. They are spread fairly evenly throughout the map, including dense interior areas and more open edges. It’s a good idea to bring some ziplines for accessing certain spots, especially elevated locations. Examples include:- Up the staircase on the roof of South Swamp Outpost.
- Inside the outpost on the couch.
- On top of three Water Towers, which may require tools to climb.
- Near the large hilltop tower between Water Towers and Scrap Yard.
- In the small abandoned camp south of the Electrical Tower, behind a truck with barrels.
- On a destroyed section of Arc halfway up a small tower between Testing Annex and Research and Administration, where a weapon case may be placed.
- On the ground inside Research and Administration on the east side.
- Center of a table in Water Treatment’s interior.
- Inside a locked room in the Control Tower.
- Just north of the Control Tower inside the dam, across from the red lockers.
- Near the exterior of the dam’s central area, slightly elevated on the ground.
- On top of the taller step of grated flooring on the north side of The Breach.
- On the roof of Pipeline Tower.
- Inside the Hydroponic Dome, either on the east side or on the southwest.
- Southwest of Power Generation close to electrical systems.
- Under a broken section of the bridge at the Broken Highway.
Buried City Weapon Case Locations
Buried City is smaller, with fewer spawn spots but is very dense, allowing quicker coverage. Key locations include:- Inside the tower on the south side of Piazza Arbusto or inside the building on the west side, accessible via stairs.
- On the roof and inside the Red Tower, near the top of stairs.
- Inside the “C” shaped building cluster east of the Abandoned Highway Camp.
- On top of the south apartments of Grandioso Apartments, directly above the staircase.
- On top of Marano Station, either outside or inside a small room further north.
- On the roof of the Library.
- On top of the antenna at Galleria, but be cautious while ziplining—it’s easy to fall.
- On the bottom level of the Parking Garage.
- Inside Space Travel’s locked room.
- Inside a semi-truck northwest of the Santa Maria houses on the Broken Highway.
Spaceport Weapon Case Locations
Spaceport is similar in size to Dam Battlegrounds but has a different flow and slightly fewer weapon case locations. These include:- Inside the locked room of the North Trench Tower, or on the roof of either Trench Tower.
- Inside the Arrival Building, on the roof, northwest corner, or on the southern end near the windows.
- Along the wall between Arrival and Departure Buildings inside the Tower.
- On the western corner of the bottom floor of the Departure Building, or on an elevated area inside the same building.
- Inside the locked room of the Control Tower.
- Just west of the Maintenance Hangar near a small metal building.
- On the east side of Container Storage on the ground.
- On top of the metal pipes east of Rocket Assembly.
- Inside the Hidden Bunker east of Fuel Processing, which has three spawn points.
Blue Gate Weapon Case Locations
Blue Gate is challenging, especially with threats from Arc enemies and players. However, it offers many potential weapon case spawn points, making it also a good choice for loot hunts. Locations include:- The locked room in Ancient Fort accessible via a puzzle.
- Inside a building near the south of Maintenance Bunker, just south of Gate Control Room, in a structure between the two, or in the underground area between Gate Control and Ridgeline, perched atop scaffolding or duct work.
- On a grated metal platform in the Warehouse Complex.
- Three spots in Checkpoint: west side near street signs, inside an abandoned bus, and above the road on an elevated platform.
- In Reinforced Reception’s locked room, with additional spots north of it near lockers or in front of an A/C unit.
- Inside Raiders Refuge’s locked door and a platform bed within.
- Two in the Data Vault: in a locked room and lying on scaffolding outside.
- On the circular walkway of the northeast tower.
Stella Mortis Weapon Case Locations
Stella Mortis is the tightest map, almost maze-like, with most loot locations on the upper levels. The lower section has very few spawn points. Notable spots include:- The Seed Vault’s limited locked areas.
- The Auditorium, with two locations—near the stairs on the north and in front of a counter on the west.
- Communications room on the spiral structure.
- Top of the hanging object in the Atrium.
- The kitchen in the Cafeteria.
- Inside a hanging tube in the large Assembly Room.
- Near a small pillar in the Assembly Workshops.
- On top of vaults in Medical Research, with additional spawn points inside a locked room.
-

How to Find Every Weapon During an Unholy Prophecy in Where Winds Meet
An Unholy Prophecy is the seventh Lost Chapter in the Kaifeng region of Where Winds Meet. After hearing rumors about a hidden weapons cache at the Martial Temple in Kaifeng, the Young Wanderer begins their investigation and encounters a Mysterious Painter.
This chapter is quite long and challenging. It tests both your combat skills and your ability to avoid traps. Below, you’ll find instructions on how to start this quest and how to solve every puzzle along the way.
How to Start An Unholy Prophecy
You can begin the quest at the Martial Temple in the southwest part of Kaifeng. Talk to the Mysterious Painter there to kick off the mission.An Unholy Prophecy Quest Walkthrough
After starting the quest with the Mysterious Painter, go up to the top level of the temple. Enter through the window into the Martial Temple’s interior. Talk to the Painter again, then search the area for signs of Bai Qi, the God of Killing. Clues point to “never seeing the light of day.” To progress, use fire arrows to light the three unlit braziers hanging from the ceiling.Speak to the Painter once more, then stand on the platform with a missing statue. Use the Unholy Prophecy emote to activate the elevator, which takes you down the corridor. Be cautious—an ambush may appear on your right as you proceed.
Continue forward, eliminating enemies along the way, until you reach a room with a bell and a locked door. Shoot an arrow at the bell to ring it. Then, use Meridian Touch on the door lock to open it. Inside, activate the Boundary Stone, then move into the next room where you’ll face three enemies. Afterward, explore the left and right passages, each containing three weapons necessary to open the core arsenal’s door.
Left Side
In the first room with spikes on the walls, eliminate the two enemies in there. Step into the hallway filled with spike traps on the sides. Use the Still Water skill to slow down time and run between the traps, waiting for your endurance to recover. At the end, pull the lever to deactivate the traps, then use the bell to ring and Meridian Touch to break the lock on the door.
Enter the next room to find the first weapon, the Wingfall spear. Proceed down the corridor until you reach a large room with spike traps on the floor. Look to your left and use Cloud Step to ascend to higher areas. Continue until you find the second weapon, the Rampage spear, which involves crossing another spike trap hallway. Use the dip in the floor to avoid spikes, ring the bell, and break the lock to obtain the Silver Spear of Discipline.
Right Side
Defeat the enemy there, then go down the staircase into a room with spike traps. Crouch to pass through the first set, then slow time with Still Water to run through the second. Pull the lever to stop the traps. In the next chamber, defeat the shielded enemy and pick up the Sovereign sword.
Continue into a large area with spike traps on the ground. Use the right side to Cloud Step upward repeatedly, moving past traps until you reach the Triumph sword. Collect it, then carefully navigate through a room full of seven spike traps, alternating between fully extended and halfway down. Use the same ring and lock-breaking method to access the final weapon, the Blackcloud Long Sword.
Once you have all three weapons, proceed to the final room where a chest awaits. Defeat the two ranged enemies nearby; then, you’ll return to the main hall.
The Core Arsenal
In the main hall, examine the armor on the left. Return its weapons to open the door, then go down the hallway to another spike-filled room. Use Cloud Step to safely ascend, even as spikes start moving again. Continue until you reach a treasure chest guarded by Shi Zhen and some guards. Defeat them to claim the loot, then exit through the back tunnel.On the way out, loot two chests above the main hall’s rafters using ladders and scaffolding to avoid unnecessary climbing. Exit the cave at the end to reach Jade Mirror Pond, completing the quest.
Talking to the Mysterious Painter afterwards can also start the Wandering Tale, Still Waters Run Deep.
-

Weapon Skill Tree Upgrades in Solo Leveling: Arise Overdrive for Completing and Solving
Focusing on choosing the right class for your playstyle in Solo Leveling: Arise Overdrive is essential. As you level up Sung Jinwoo with skill trees, don’t forget that there are also skill trees for your four weapon types, plus options for Sung Jinwoo’s overall physique and stats.
This might seem overwhelming at first, but making smart upgrades in your weapon skill trees can drastically improve your combat results. Prioritize upgrading the weapons you use most, and maximize your strength by investing in the relevant skill trees.
Weapon Skill Trees Overview
Each weapon type comes with its own skill tree. Early in the game, you’ll get familiar with your class skill tree, but as you pick specific weapons to specialize in, you should focus on investing in those weapon trees. Doing so unlocks more abilities and provides important stat boosts.
Almost all weapon trees have around 12 or 13 unlockable skills, offering various enhancements to your fighting capabilities. While the perks are similar across different weapons, only unlock skills in the trees for the weapons you use frequently. This way, the effects and bonuses apply to your weapons during combat, so keep your gear updated with the best options.
Additional Skill Trees
Besides the four weapon types, there are two other skill trees to consider. The first is the Physique Skill Tree, which boosts your combat stats and overall strength. The second is the Monarch’s Awakening Skill Tree, which unlocks after chapter five if you choose a specific story path.
All Weapon and Physique Skill Trees
Each weapon has two branches with multiple skills. For example, the Sword Skill Tree includes the Heartsteel and Resistance branches, each containing skills that increase damage, defenses, and other combat stats. Some skills can be purchased multiple times, marked with an asterisk (*), allowing further stacking of bonuses.
The Dagger Skill Tree has branches focused on bleeding effects and back attacks, enhancing damage-over-time abilities. The Bow Skill Tree offers options that increase damage at long range, critical hit rates, and attack power based on agility. Firearms focus on increasing damage, penetration, and attack speed, with bonuses stacking through various skill activations.
The Physique Skill Tree allows upgrades for attack, defense, HP, and critical hit chance. Each perk can often be obtained multiple times, leading to significant physical stat increases.
Summary of Key Skill Tree Details
-
Sword Skill Tree: Split into Heartsteel and Resistance branches; boosts damage, defense, and shield effects.
-
Dagger Skill Tree: Focuses on bleed damage and backstab bonuses, with branches like Lethal Wound and Overshadow.
-
Bow Skill Tree: Includes Focused Aim and Secure Aim, emphasizing damage at various ranges and critical hits.
-
Firearm Skill Tree: Features the Kata and Patience branches, enhancing damage, penetration, and attack stacking.
-
Physique Skill Tree: Offers multiple tiers of attack, defense, and HP increases; perks can be stacked up to three times for maximum effect.
-
-

How to Complete All Weapon and Martial Arts in Where Winds Meet
“Where Winds Meet” offers a variety of weapon types for players to choose from. You can wield two weapons at once to customize your character’s setup. Some weapons boost each other’s effects, while others are better for support roles like healing in multiplayer modes. Ultimately, you can pick any two weapons you like best.
You start the game with some weapons, but unlocking all types requires exploring the game world. If you’re interested in unlocking weapons like the Soulshade Umbrella, Inkwell Fan, or Strategic Sword, this guide will help. Below, you’ll find how to unlock each weapon type and how to obtain the Dragon Keys needed for some of them.
### How to Unlock Every Weapon Martial Art
There are seven main weapon types in the game, but several can have different Martial Arts associated with them, offering a unique set of skills. For example, although both the Nameless Sword and the Strategic Sword are swords, each provides different abilities.
Here are all the Weapon Martial Arts and how to unlock them:
| Martial Art | How to Unlock |
|————————–|————————————————————————————————————–|
| Nameless Sword | Unlocked by default. |
| Strategic Sword | Complete the Skill Theft challenge at the Strategic Sword Sanctum in Encircling Lake, southern Qinghe. |
| Infernal Twinblades | Complete Skill Theft at Midnight Mercy Sanctum in Crimson Cliff, Qinghe. Join the Midnight Blades Sect.|
| Nameless Spear | Unlocked by default. |
| Heavenquaker Spear | Complete Skill Theft at Heavenquaker Spear Sanctum at Wildmane Ranch, Sundara Land, northeast Qinghe. Join the Raging Tides Sect.|
| Stormbreaker Spear | Complete Skill Theft at Silver Needle Sanctum or receive it through in-game mail after reaching level 3. Join the Raging Tides Sect.|
| Panacea Fan | Choose when submitting your first Oddity to Qi Sheng. Join the Silver Needle Sect. |
| Inkwell Fan | Complete Skill Theft at Inkwell Fan Sanctum in Floral Expanse, northern Sundara Land, Qinghe. Join Silver Needle Sect.|
| Soulshade Umbrella | Complete Skill Theft at Post Station in Mistveil Forest, eastern Kaifeng. Submit your first Oddity to Qi Sheng.|
| Vernal Umbrella | Complete Skill Theft at Time Tower in Kaifeng City. Submit your first Oddity to Qi Sheng. |
| Thundercry Blade | Complete Skill Theft at Well of Heaven Martial Camp, Moonveil Mountains, Qinghe. Submit first Oddity. Join the Well of Heaven Sect.|
| Mortal Rope Dart | Infiltrate the Nine Mortal Ways Sect and perform Skill Theft on Nanmen Avenue, Kaifeng City. Join Nine Mortal Ways Sect.|Once you join a Sect and learn its Martial Art, you can leave and join another Sect to learn more. You keep everything you’ve earned, including Martial Arts and cosmetics. Leaving a Sect triggers a “Perception Forest” event where other players may try to attack you for extra rewards. After leaving, you can immediately join any other Sect, except the one you just left.
### How to Get Dragon Keys and Perform Skill Theft
Some Sanctums need a Dragon Key to enter, so you’ll need to obtain one before stealing skills from the masters inside. You can earn Dragon Keys by reaching Solo Mode level two, completing the “Skill Theft: Unearned Lesson” quest, or clearing certain locations like Bloomveil Monastery, Gourmand’s Grove, and Tiger Fort Outposts for the first time.
Each Sanctum has similar steps. You sneak in, locate the master inside, and watch as they perform the Martial Art. To steal their skills, press the observation button when the indicator ring turns gold. Repeating this process will teach you all the skills needed to master the Martial Art yourself.
Once you’ve successfully stolen a skill, you can use it while wielding the appropriate weapon. An especially helpful ability, Touch of Death, allows you to instantly knock out unaware enemies, making exploration much easier.
-

Complete Guide to Weapon Prestige and Solving in CoD: Black Ops 7
Call of Duty: Black Ops 7 has been released, kicking off another year of players trying to level up quickly in its fast-paced multiplayer. You can grind to reach the highest level and then reset it through Prestige to unlock various rewards. This time, you can also Prestige your weapons, which allows you to unlock some of the coolest camouflage skins in the game.
If you want to customize your weapons with unique camouflage patterns that stand out, you’ll need to reset your weapon’s rank. Although it might sound like a hassle, there are several advantages to doing this, and weapons can be leveled up fairly quickly in Black Ops 7. Whether the benefits make it worth it depends on the player, but many believe the advantages outweigh the drawbacks.
How to Prestige Your Weapon
Here’s how to do it: once your weapon reaches the maximum level, head to your Loadouts, find the maxed-out weapon, and hold down the designated button to Prestige. Prestiging your weapon resets its level back to zero, but you will receive a Prestige Camouflage that can be used on all your weapons.
Getting your weapon to max level is a normal part of gameplay. When you’re ready, select the weapon in your Loadouts, hover over it, and press and hold the button to Prestige. Keep in mind, once you Prestige a weapon, you can’t undo it, so be sure you’re ready before you do.
Although it might seem like extra work, your character’s overall level and your weapon levels carry over across all game modes, including multiplayer and zombies mode. Plus, using Double Weapon XP tokens can help you level up faster.
Prestige Camouflages
One of the biggest perks of Weapon Prestige is earning exclusive Prestige Camouflages, which are much better than regular skins. Each weapon can unlock six Prestige Camouflages in total, available after meeting certain levels. Some guns have more levels to reach max, so it takes longer to unlock all the camos for those.
Prestige Camouflage Requirements Weapon Prestige 1 Camo Reach max level, then prestige the weapon. Weapon Prestige 2 Camo Reach max level twice, then prestige again. Weapon Prestige Master Camo 1 Reach max level three times, then prestige and hit level 100. Weapon Prestige Master Camo 2 Level 150 in prestige. Weapon Prestige Master Camo 3 Level 200 in prestige. Weapon Max Camo Reach level 250 in Prestige Master. Performing a third prestige with a weapon will make it enter Prestige Master, increasing its max level to 250. You keep your current level, so there’s no need to re-level from scratch. Just keep leveling from where you left off to reach the new max for those exclusive camos.
Prestige Attachments
After entering Prestige 1 with a weapon, you’ll unlock special Prestige Attachments unique to that weapon. These attachments can boost your build and are specific to each firearm. To see what attachments are available, go to your loadout, select the gun, and scroll through the attachment options. Look for the blue diamond icon and “Prestige Attachment” label. Some are very useful, while others might be underwhelming, so it’s wise to pick carefully before prestiging.
Permanent Attachment Tokens
Another important reward is the Permanent Attachment Tokens. Each time you reset and prestige a weapon, you’ll earn a token you can spend on any attachment for that weapon. For example, if a particular grip isn’t unlocked until level 34, you can use your token to unlock it early and keep it even after prestiging again. Since you only get two tokens per weapon—one when you first prestige, and another when you reach Prestige Master—use them wisely to unlock your favorite attachments.
-

US sanctions $93M Javelin, Excalibur sales to India
India is requesting the procurement of up to 216 Excalibur projectiles and 100 units of the Javelin missile system. Currently, India employs Excalibur artillery ammunition in its M-777 howitzer guns. Recently, the U.S. State Department authorized the sale of these defense systems valued at $93 million to India, according to the Defense Security Cooperation Agency (DSCA).
This marks India’s first arms purchase from Washington’s foreign military sales program since relations deteriorated in August, following President Trump’s decision to increase tariffs on Indian imports to 50% as punishment for India’s Russian oil purchases. The move comes on the heels of a recent order for more General Electric-made fighter jet engines to power additional India-produced Tejas fighters.
The DSCA highlighted, “This proposed sale will advance U.S. foreign policy and national security interests by bolstering the strategic partnership with India and enhancing the security of a key ally that remains an influential force for stability, peace, and economic development in the Indo-Pacific and South Asia regions.”
India’s arms request includes 216 Excalibur tactical projectiles and 100 Javelin missile systems. The existing use of Excalibur ammunition by India in its M-777 artillery pieces was also noted. Raytheon Technologies will be the primary contractor for the Excalibur projectiles, while the Javelin sales will be handled through a joint venture with Lockheed Martin.
-

How to Complete Each Phantom Thief’s Weapon in Persona 5 Royal
Persona 5 Royal significantly overhauled many aspects of the series, especially the combat system. Now more expansive and filled with additional elements, players have more options than ever to deal damage.
With such a broad selection of weapons that boost either strength or other stats, it can be daunting to choose the best ones. That’s where this guide comes in. Whether you want raw attack power or a boost to your stats, our weapon guide helps you hit hard.
Note: This guide may contain slight spoilers for Persona 5 Royal.
Persona 5 Royal Weapons Overview
Early in the game, you’ll rely on weapons purchased from Untouchables or looted from palaces to equip your team. Each weapon has attack and accuracy stats, and may have an extra effect. Each Phantom Thief uses two main weapons for physical attacks: one melee and one ranged. Melee weapons include swords and whips, whereas ranged weapons are guns or slingshots.
Melee weapons can be used indefinitely, but ranged weapons require ammunition and are finite resources.
After each Palace deadline, Untouchables sell two types of weapons for each Thief. One deals straightforward damage without extra effects, and the other deals slightly less damage but provides a stat boost. These weapons serve well early on, but as the game progresses and enemies get tougher, you’ll want more powerful weapons, obtainable by sacrificing Personas in the Velvet Room.
Sacrifice Personas to Get Stronger Weapons
The Velvet Room’s electric chair allows you to sacrifice Personas to gain some of the best weapons in the game. During a fusion alarm, visit the Velvet Room, select the Persona you want to sacrifice, and choose Itemize Persona from the menu. The Persona gets shocked in the electric chair and leaves behind various items, including powerful weapons.
Even if the obtained item isn’t one of the best weapons, itemizing Personas is a great way to clear space in your Persona stock and acquire useful equipment. Keep in mind, sacrificing a Persona removes it from your collection until you find, withdraw, or fuse it again. However, this method yields some of the strongest weapons for your entire team, not just Joker.
How to Obtain the Ultimate Melee Weapons
Below are the Personas you need to sacrifice to get the most powerful melee weapons for each Phantom Thief. For Untouchables, we’ve listed the best weapons available for purchase and those obtained via itemizing Personas that offer the best damage or additional effects.
Teammate Weapon Persona Required Attack Accuracy Extra Effect In Stock After Joker Plasma Knife Satanael (Fool, Lv. 95) 296 96 Low chance to Shock 1/9 Joker Punish Dagger N/A 316 98 None — Morgana Megistos Sword Mother Harlot (Empress, Lv. 85) 290 97 +5 Magic 1/13 Morgana Vertical Edge N/A 310 99 None — Ryuji Sakamoto Arc Mace Thor (Chariot, Lv. 64) 300 91 Small Crit Rate boost — Ryuji Sakamoto Last Hammer N/A 320 93 None — Ann Takamaki Barog Whip Black Frost (Fool, Lv. 67) 292 97 Medium chance to Burn — Ann Takamaki Grapnel N/A 312 99 None — Yusuke Kitagawa Kaketsushinto Uriel (Justice, Lv. 81) 302 94 Low chance to Fear — Yusuke Kitagawa Ten Ichimonji N/A 322 96 None — Makoto Niijima Meteor Knuckle Michael (Judgment, Lv. 87) 296 94 +5 Agility — Makoto Niijima Champion N/A 316 96 None — Haru Okumura Taiji Axe Baal (Emperor, Lv. 82) 301 90 +5 Endurance — Haru Okumura Crusader N/A 321 92 None — Goro Akechi Dread Saber Futsunushi (Magician, Lv. 86) 296 96 Low chance to Fear 1/9 Goro Akechi Guillotine Saber N/A 316 98 None — Kasumi Yoshizawa White Snow Rapier Sandalphon (Moon, Lv. 75) 292 97 Low chance to Freeze 1/13 Kasumi Yoshizawa Zirah Bouk N/A 312 99 None — Note: Paradise Lost R, the ultimate weapon for Joker, can only be acquired in New Game Plus, as it requires Joker’s final Persona from the ending.
Best Weapons from Itemizing Personas
By itemizing Personas, you can obtain weapons that often outclass standard buyable weapons, especially for later game power.
Teammate Weapon Persona Required Attack Accuracy Extra Effect Joker Paradise Lost R Satanael (Lv. 95) 340 98 Reduces damage from Dark magic Morgana Claiomh Saolais R Mother Harlot (Lv. 85) 330 90 +50 SP Ryuji Sakamoto Imprisoned Mjolnir Thor (Lv. 64) 324 88 Boosts Electric attacks Ann Takamaki Dainaraka Whip Black Frost (Lv. 67) 320 90 High chance to Freeze Yusuke Kitagawa Usumidori R Yoshitsune (Lv. 87) 340 88 High chance to Fear Makoto Niijima Gordios Cybele (Lv. 83) 330 95 Large Crit Hit rate boost Haru Okumura Fleurs du Mal R Beelzebub (Lv. 87) 345 86 +6 Magic, high chance to Dizzy Goro Akechi Hinokagutsuchi II Futsunushi (Lv. 86) 360 90 High chance to Burn Kasumi Yoshizawa Sword of Sinai II Sandalphon (Lv. 75) 365 95 High chance to Dizzy Note: Some weapons like Paradise Lost R are only obtainable via New Game Plus, requiring the final Persona.
How to Get the Ultimate Ranged Weapons and Guns
Just like melee weapons, you can sacrifice Personas to craft the most powerful ranged weapons for your team. These weapons typically provide higher attack stats and additional effects, although their accuracy and ammunition may not improve as the game progresses.
Teammate Weapon Persona Required Attack Accuracy Max Ammo Extra Effects In Stock After Joker Nataraja EX Metatron (Lv. 89) 350 85 8 +6 to all stats 1/9 Morgana Falcon Vishnu (Lv. 83) 310 90 5 None — Ryuji Sakamoto Reversion Shiva (Lv. 82) 330 85 3 High chance to Burn — Ann Takamaki Balalaika Odin (Lv. 84) 315 90 11* Medium chance to inflict Despair Note: Less ammo due to upgrade Yusuke Kitagawa Star-H Uriel (Lv. 81) 325 75 10 High chance to Fear — Makoto Niijima Unlimited Michael (Lv. 87) 335 75 6 +11 to all stats — Haru Okumura Milkor Baal (Lv. 82) 340 70 1 High chance to Shock — Goro Akechi Ancient Day Vohu Manah (Lv. 80) 350 85 5 +6 to all stats — Kasumi Yoshizawa Yellow Girl Ardha (Lv. 84) 345 90 10 High chance to Dizzy — Note: Weapon and Persona requirements are for crafting the best ranged gear.
Best Ranged Weapons from Itemizing
Similarly, itemizing Personas can yield some of the strongest ranged weapons with extra effects.
Teammate Weapon Persona Required Attack Accuracy Extra Effects In Stock After Joker Nataraja EX Metatron (Lv. 89) 350 85 +6 to all stats 1/9 Morgana Sudarshana EX Vishnu (Lv. 83) 330 90 High chance to Dizzy — Ryuji Sakamoto Megido Blaster Shiva (Lv. 82) 380 85 High chance to Burn — Ann Takamaki Gungnir Odin (Lv. 84) 340 90 Medium chance to inflict Despair — Yusuke Kitagawa Providence Uriel (Lv. 81) 350 75 +13 to Agility — Makoto Niijima Judge End Michael (Lv. 87) 360 75 +11 to all stats — Haru Okumura Yagrush EX Baal (Lv. 82) 360 70 High chance to Shock — Goro Akechi Ancient Day Vohu Manah (Lv. 80) 350 85 +6 to all stats —
Many of these weapons require sacrificing Personas at the Velvet Room. Once sacrificed, the Personas are gone from your stock, but the weapons they generate are some of the best available for each character in the game. This process allows you to upgrade your team’s firepower significantly, especially in the later stages of Persona 5 Royal.
-

How to Complete Every Weapon Challenge in Megabonk and Solve Them All
Icon Name Description How to Unlock Flamewalker Leaves a trail of fire behind you. Unlocked by default. 
Sword Slashes through multiple enemies. Unlocked by default. 
Lightning Staff Summons lightning to strike nearby enemies. Unlocked by default. 
Firestaff Shoots fireballs that explode on impact. Unlocked by default. 
Chunkers Summons chunky rocks that orbit around you. Unlocked by default. 
Bone Throws bones that bounce off enemies. Unlocked by default. 
Bow Shoots arrows that pierce enemies. Unlocked by default. 
Revolver Fires multiple bullets at enemies. Kill 7,500 enemies. 
Aegis Blocks incoming attacks and sends out shockwaves. Block 500 damage with armor as Sir Oofie. 
Bananarang Throws bananas that return to the owner. Find the hidden Banana in the Forest. 
Aura Damages enemies in the area around you. Don’t take damage for two minutes. 
Axe Throws spinning axes that deal area damage. Kill 2,000 enemies with the Sword. 
Space Noodle Attaches to a nearby enemy. Deals damage in between. Complete Desert Tier 2 as Tony McZoom. 
Sniper Rifle Fires piercing bullets. Can be manually aimed. Reach level ten with the Precision Tome. 
Slutty Rocket Fires homing missiles. Kill 15,000 enemies as CL4NK by completing Forest Tier 1 and buying the Revolver. 
Shotgun Fires a spread shot, stronger at close range. Find it by breaking a tumbleweed on Desert Stage 2 (5% chance). 
Mines Deploys mines around you that explode near enemies. Kill 7,500 enemies with Slutty Rocket. 
Wireless Dagger Throws smart daggers at enemies. Reach level 15 with the Lightning Staff. 
Frostwalker Freezes and damages enemies around you. Freeze 1,000 enemies with the Ice Cube from chests. 
Tornado Sends out tornadoes to knock enemies back. Charge a Charge Shrine during a Sandstorm on Desert. 
Dexecutioner Piercing blade with a small chance to instantly execute enemies. Kill 12,500 enemies with the Sword. 
Blood Magic Summons blood magic. 5% chance to increase max HP on kill. Reach level 12 with the Bloody Tome, which requires killing 12,500 enemies. 
Black Hole Shoots a black hole pulling enemies in. Reach level ten with the Knockback Tome. 
Poison Flask Throws toxic flasks dealing area damage and poisoning enemies. Kill the Scorpionussy miniboss three times on Desert. 
Katana Sharp blade targeting the closest enemy. Find it by breaking a tumbleweed on Desert Stage 1 (5% chance). 
Dragon’s Breath Fires a fierce dragon’s breath in the movement direction. Kill 1,000 Wisps as Fox on Desert. 
Dice Throws dice dealing 1-6 damage, crit chance increases with six. Obtain Luck Tome at level 12, has a tiny chance to drop from enemies and can then be purchased. 
Hero Sword Slashes multiple enemies and fires slashing projectiles. Defeat a stage boss without pickups, power-ups, or shrine use. 
Cursed Sword Slashes in both directions, deals increased damage at low HP. Reach level 20 in under ten minutes with the Cursed Tome, unlocked by beating stage boss under 5 minutes. -

Top Weapon Builds in the Battlefield 6 Beta: Completing and Solving
Battlefield 6 has significantly expanded its weapon customization system, taking cues from recent Call of Duty games to offer a wide array of attachment options. This game features a “Pick 100” system, where each attachment costs a certain number of points. You start with 100 points to allocate, and more powerful attachments consume more points.
By choosing the right combination of attachments, you can eliminate recoil, enhance your weapon’s kill potential, or improve handling. Here are some of the top builds you can try in the Battlefield 6 beta, covering everything from the M4A1 carbine to the M87A1 shotgun.
M433 Build
The M433 is an assault rifle based on the M4, but it trades some firing speed for increased range. It can kill an enemy in five shots to the torso, making it one of the fastest in its class. However, out of the box, it suffers from poor accuracy deviation.
To fix this, start with the 6H64 Vertical Grip to greatly cut recoil both vertically and horizontally. Since the first shot still tends to kick, add the Compensated Brake to offset this issue. This combination makes the weapon’s recoil almost negligible, although bullet deviation can still be noticeable past 20 meters. To further improve precision, equip the 120mw Blue Laser, which boosts ADS accuracy and is well worth the points despite its higher cost.
Adjust your build by removing some attachments to accommodate this setup. For example, replace the standard barrel with the 16.5” Rifle Barrel, which improves bullet velocity over the default 12.5” barrel. Also, opt for iron sights to eliminate sway while aiming down sights, saving five points in the process.
M4A1 Build
The M4A1 is similar to the previous build but includes adjustments for better mid-range combat performance. It starts with a recoil control focus, using the Recoil Compensator on the muzzle and the 6H64 Vertical Grip underbarrel attachment to keep recoil minimal. The 12.5” Mid Barrel is chosen to boost bullet velocity.
Since this weapon has significant recoil initially, add the Blue Laser (50mw) to improve bullet deviation while ADS, which helps maintain accuracy during rapid firing. For magazine capacity, the 36 Round Magazine is recommended, providing a good balance between firepower and reload times. Iron sights are necessary if you’re using a larger magazine, but a close-range optic can be substituted if you prefer quicker reloading and don’t mind reloading after about 30 rounds.
M87A1 Build
The M87A1 shotgun excels at close quarters, able to eliminate enemies with a single shot from about ten meters. While attachments aren’t strictly necessary for quick kills, adding enhancements can push it to the next level.
Consider attaching a 5mw Red Laser to boost hipfire accuracy and reduce ADS time, making it more lethal at close range. The Angled Grip can also improve ADS speed; most underbarrel grips serve to speed up aiming, so experiment to find what works best for you.
A notable upgrade is the Slug Rounds. Unlike buckshot, slugs sacrifice pellet spread for increased range and one-hit kill distance, effectively turning the shotgun into a pump-action DMR. This allows for more precise shots at longer distances, giving you a versatile power option. Give it a try and see if you like this approach over traditional buckshot.