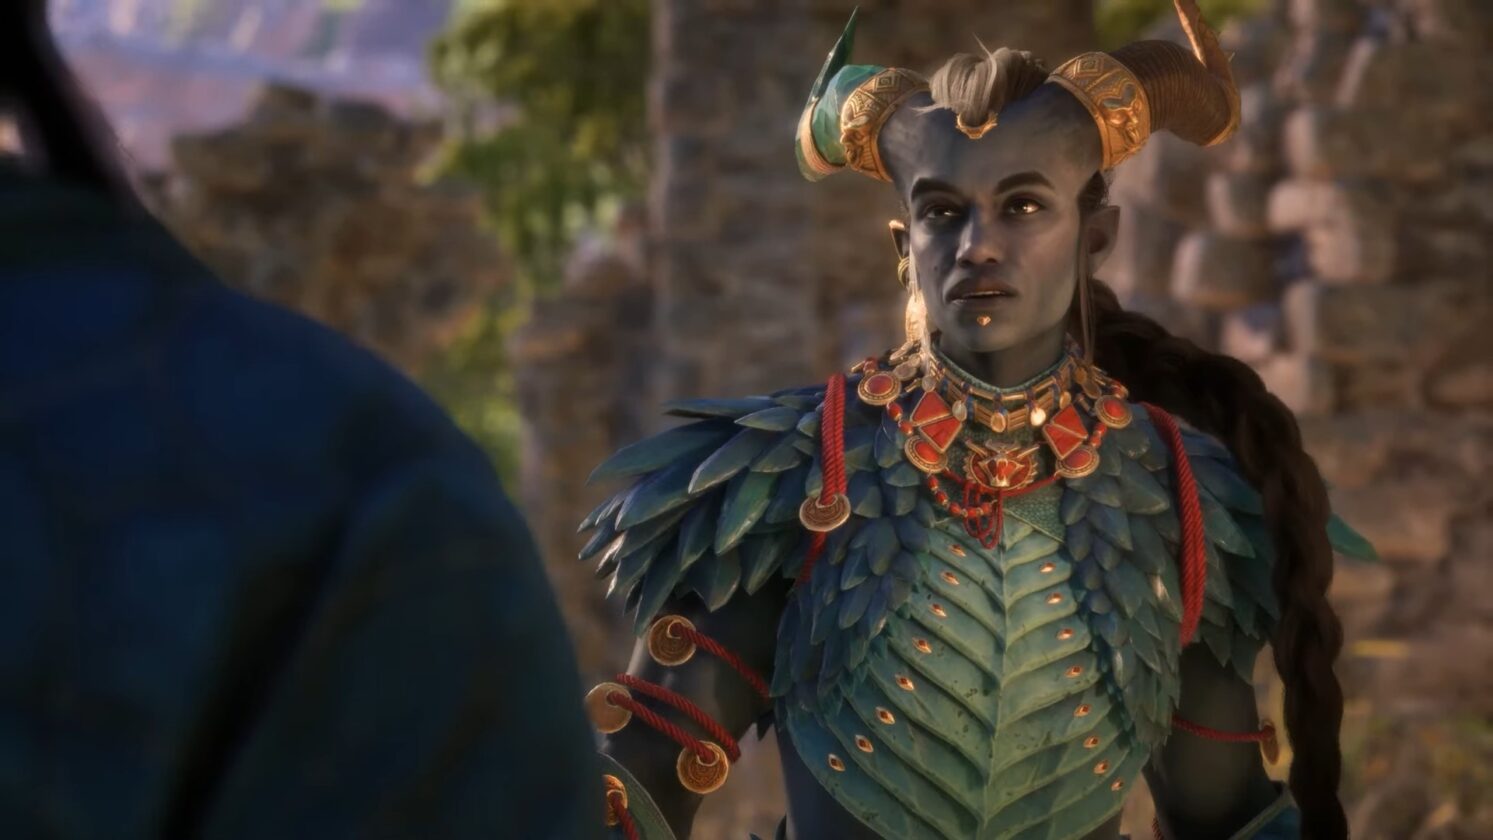
Dragon Age: The Veilguard focuses on Solas, following his setup as a potential villain in Dragon Age: Inquisition. In this sequel, players still work with Solas, but he maintains a confrontational role. The story centers on his goal to return the world of the ancient elves to glory, disregarding those who currently inhabit the realm.
Despite the focus on Solas, the actor who portrays him, Gareth David-Lloyd, has shared that his favorite game in the series is still Inquisition. At Power Con in Scotland, he mentioned that he has played through the series multiple times, with Inquisition holding a special place for him.
Gareth David-Lloyd Loves Dragon Age: Inquisition, And Has Played It Three Times
During a panel, Joseph Capp, who plays Elgar’nan, asked David-Lloyd about his favorite game in the series. He quickly replied, “Inquisition – if you romance Solas.” David-Lloyd confirmed this by mentioning that he always played as friends with Solas: “I actually played Inquisition three times, and each time, I romanced myself, which is a bit strange,” he joked.
He has played The Veilguard as well. Unsurprisingly, his favorite ending is where Solas finds a way to redeem himself. “Even with all his flaws, there’s a good heart inside him,” he said.
David-Lloyd also discussed the game’s development during the panel. Initially, he was supposed to perform the motion capture for Solas, but due to COVID, that plan changed. Someone else did the mocap, and he was told to record his lines to match that performance. This approach didn’t work well, so he returned to re-record his lines, and the mocap was adjusted to fit his performance.
Here’s a look at Dragon Age: The Veilguard:
Dragon Age: The Veilguard
Rating: 4.0 / 5
Released: October 31, 2024
ESRB: M for Mature 17+ (Blood, Nudity, Sexual Themes, Strong Language, Violence)
Dragon Age: The Veilguard could have been a very different game, potentially with a different title, if it had released in earlier drafts. During its development, the team created several versions, and you can see hints of the Veilguard characters in the early concept art.
One companion we see in this art who did not make it to the final version is Calpernia. Her name might ring a bell because she appears in Dragon Age: Inquisition if you choose to recruit the Templars. We already knew she was considered as a companion, but now we have artwork showing her with the Veilguard crew, implying she was part of the story for a long time.
Dragon Age: The Veilguard Concept Art Shows Calpernia And Early Versions Of The Companions
This artwork was shared by Dragon Age artist Matt Rhodes, who often posts discarded concepts for the next Dragon Age game. Here, we see earlier versions of characters like Davrin, Taash, Lucanis, and possibly Lace Harding. The figure resembling Calpernia matches the version from another piece of art.
What stands out is her prosthetic leg. This suggests her design might have been reused for Neve, who also has a similar prosthetic.
Previous concept art revealed other companions who were not included in the game, but it’s interesting that Calpernia appears alongside those who were intended to be in The Veilguard. This indicates she was part of at least one draft of the story, likely the first one, which was canceled when BioWare decided to make Dragon Age 4 a live-service game. Rhodes claims this art dates back to 2016, just a year before the original concept was dropped.
During the development of the live-service version, the game would have had limited options for world state imports, possibly leaving out characters like Calpernia. Her background and choices from Inquisition would affect her role in The Veilguard, which might explain her removal. Alternatively, the writers may have wanted a different Tevinter mage, as Calpernia and Neve have very different histories.
This concept art has revealed more than just characters. Recently, Rhodes showcased a design for a submarine that would have served as the party camp.
The Slayer is one of the three specialization branches available to the Warrior class in Dragon Age: The Veilguard. This specialization focuses on dealing damage at close range, highlighting abilities that stagger opponents, break guards, and maximize the damage output of two-handed weapons.
In this comprehensive guide, we’ll explore the ideal build for the Warrior Slayer, including the optimal faction and race to start, recommended skills, ultimate abilities, gear, and additional tips.
Warrior Slayer Build Overview
This build capitalizes on the Slayer’s capabilities, allowing you to absorb damage while delivering substantial hits in close combat and staggering your enemies efficiently. It emphasizes generating rage, the key resource for the Warrior class, which enhances your ability to use special skills and your ultimate more frequently in Dragon Age: The Veilguard.
Faction: Grey Wardens
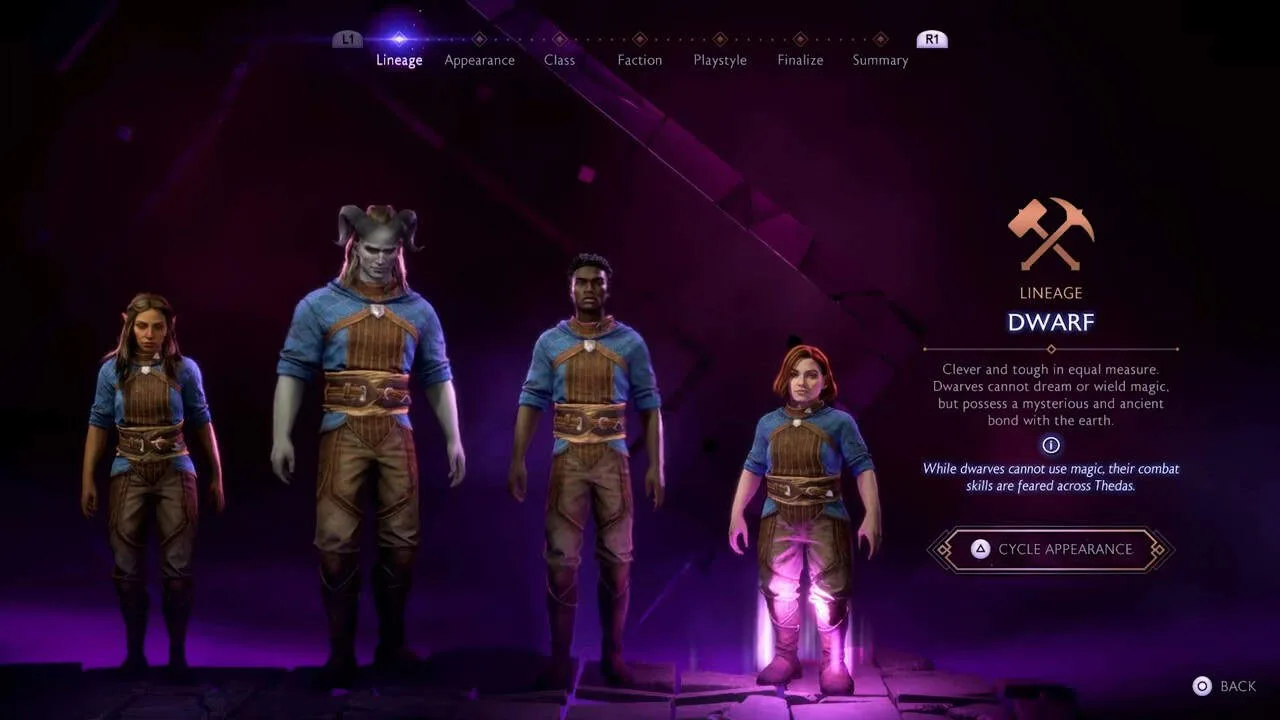
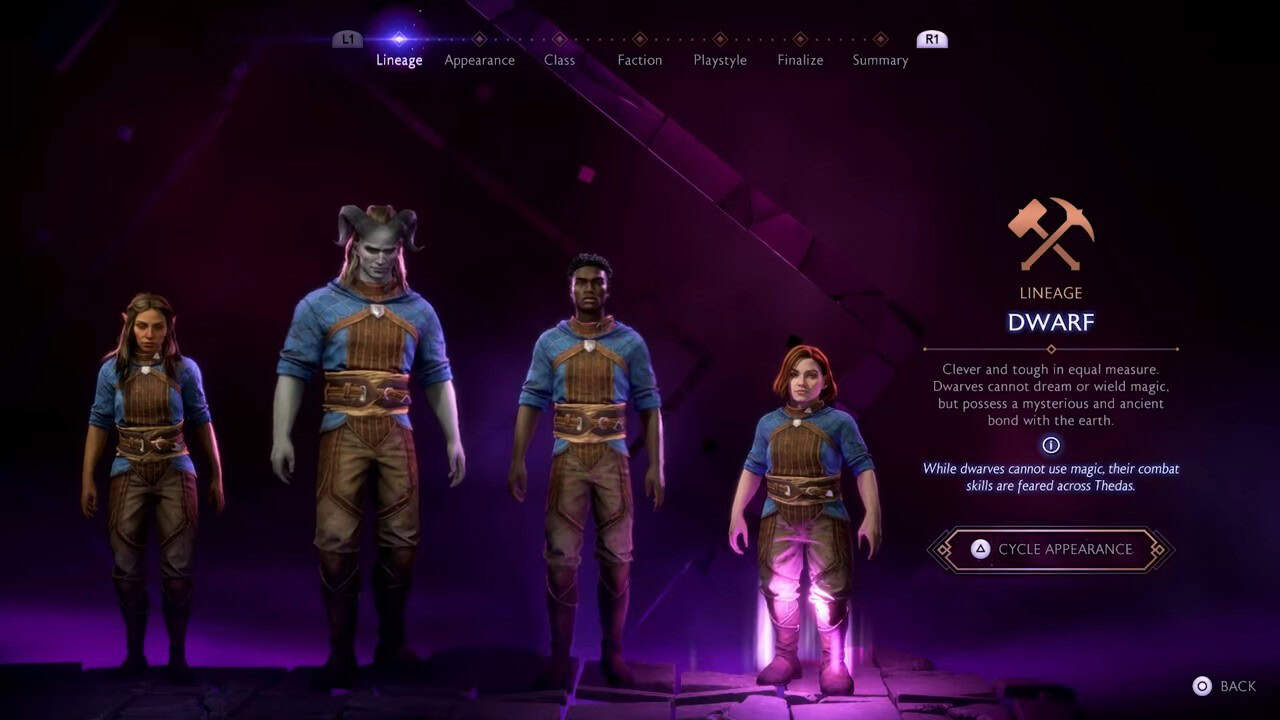
Race: Dwarf
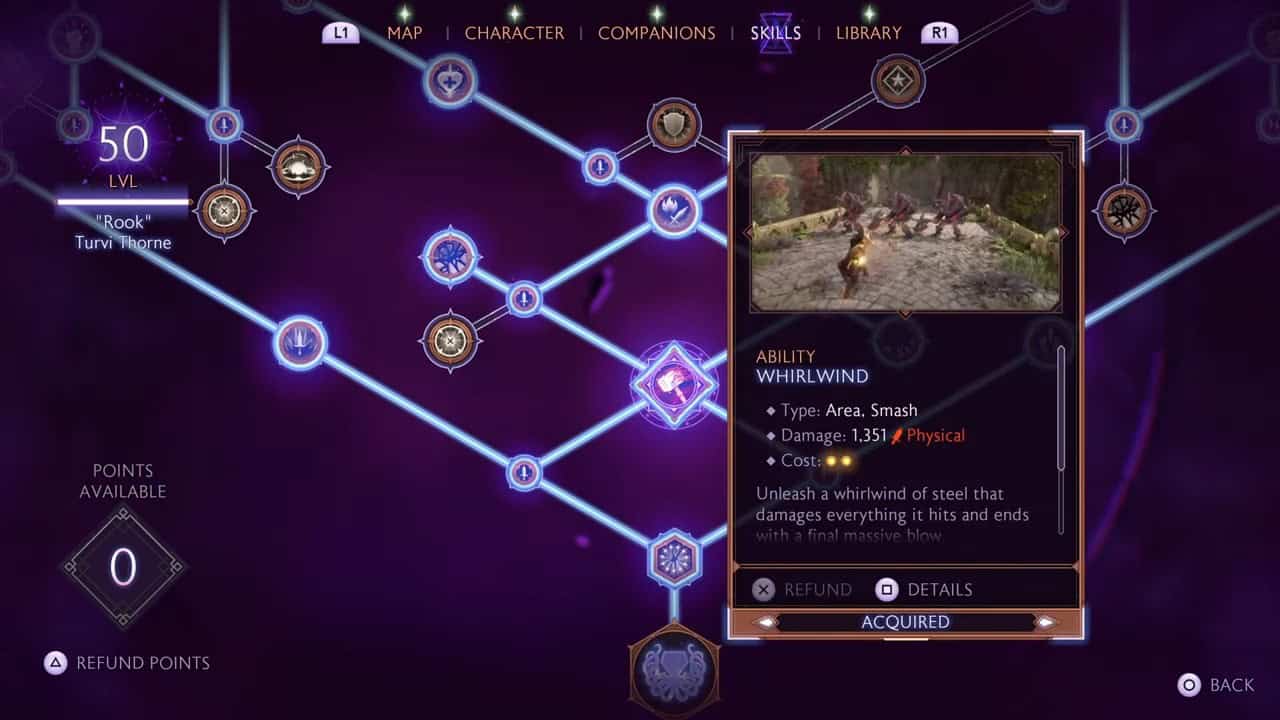
Active Skills: Titan Stomp, Whirlwind, Heroic Leap, Flashing Fist, Driving Kick, Fury of the Forge
Ultimate: Flashing Fist and For Gold and Glory
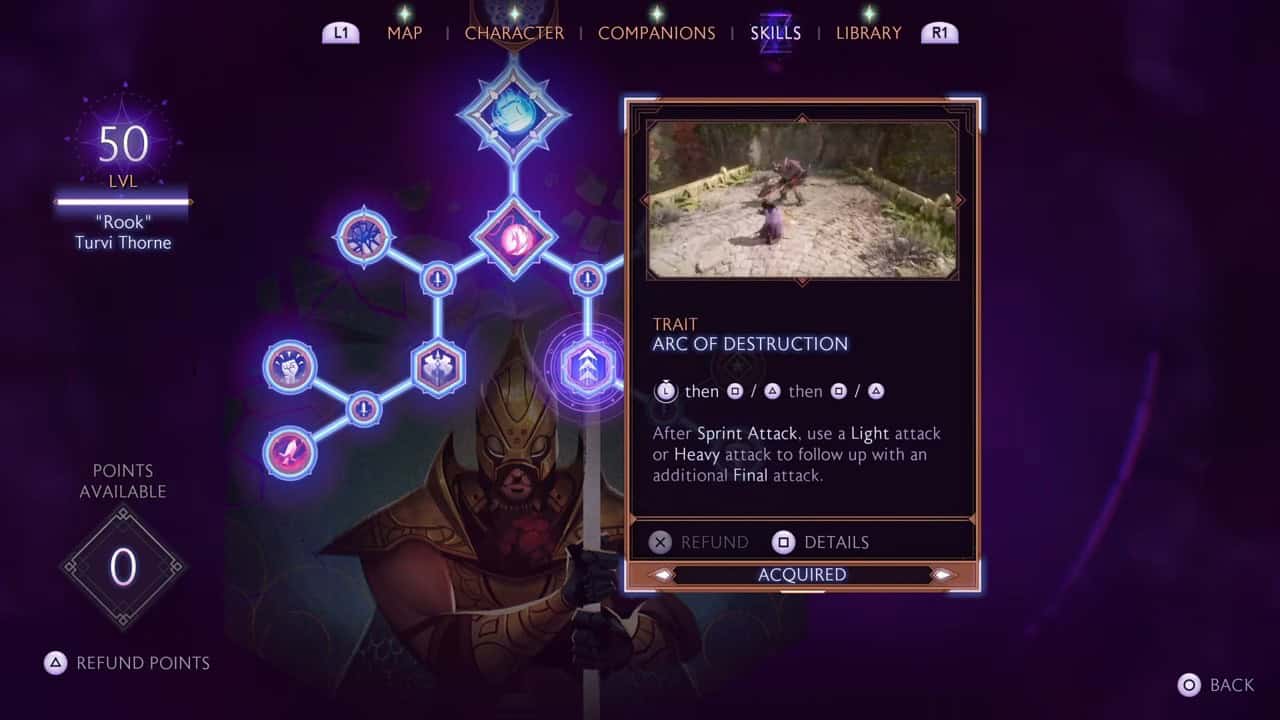
Trait: Shield Toss, Explosive Toss, and Arc of Destruction
Companions: Bellara and Lucanis
Gear: Woodsong Cleaver, Bandit’s Bulwark, Elven Rockbreaker, Carastes Double-Hat, Orchestrator’s Long Coat, Tincture Kit, A Pale Reflection, Call of the Hall, and Twin Palladium
Runes: Upend, Diminish, and Fortify
Best Faction and Race
For the Warrior Slayer build in Dragon Age: The Veilguard, the Grey Wardens are the optimal faction choice. This faction provides boosts in damage output and defense, which align perfectly with the Slayer’s playstyle.
Additionally, being part of this faction increases your damage dealt against Darkspawn and enhances your ability to earn faction strength. Although races do not provide significant bonuses, choosing Dwarf synergizes well with the tank-oriented gameplay of this class.
Best Abilities and Level Progression
You can begin specializing as a Slayer once you reach level 20 in Dragon Age: The Veilguard. This level unlocks new skills and enhances your ultimate attack options. Here’s a guide for your leveling journey:
Levels 1-10
Initially, your primary focus should be on acquiring Spectral Bulwark, your core ability. This skill envelops you in necrotic energy, dealing 377 damage to nearby enemies. At this point, you can also obtain Driving Kick, which provides some crowd control by pushing foes back when you’re surrounded.
Next, aim to unlock Titan Stomp, which inflicts 312 area damage and causes massive staggering to enemies in its vicinity. Don’t forget to eventually learn the Flashing Fist ultimate, delivering 2,336 physical damage in four shockwaves.
Levels 10-20
Continue using Spectral Bulwark, but replace Driving Kick with Whirlwind, an ability that creates a damaging cyclone of steel, finishing with a powerful blow.
Substitute Titan Stomp for Heroic Leap, a skill available when you achieve level 20. This move propels you forward, dealing substantial damage and exploding upon impacting weakened foes.
Lastly, switch your ultimate for For Gold and Glory, an ability that not only inflicts significant damage but also staggers enemies.
Level 20+
As you progress beyond level 20, most of your abilities will remain the same. The primary change here is the option to replace Spectral Bulwark with Fury of the Forge. This ability deals 366 fire damage and results in burning, making it advantageous against Darkspawn. However, Spectral Bulwark provides more utility overall, so if you prefer that, it’s a solid choice as well.
Best Traits
Choosing a trait allows you to perform special moves. For the Warrior Slayer, we recommend picking Shield Volley when reaching levels 1-10. This ability lets you perform a shield toss that bounces up to three times between enemies, dealing damage with each impact.
From levels 10-20, opt for Explosive Toss, causing your charged shield throw to explode upon hitting a target. At level 20 and beyond, select Arc of Destruction, enabling you to leap into battle with a devastating attack combo unlocked through the Slayer specialization.
Recommended Companions
For the Warrior Slayer build, the ideal companions are Lucanis and Bellara. They complement the specialization well, addressing its weaknesses.
Lucanis: His Abominate skill allows him to quickly strip enemies of their shields, which opens them up for you to deal heavy damage without the concern of their armor. His Adrenaline Rush skill also boosts damage for a short duration.
Bellara: Bellara’s Galvanized Tear and Time Slow are crucial for this build. The former pulls enemies to a single point, while the latter slows time. Using these skills in conjunction with Whirlwind can unleash devastating damage combos.
Top Gear Choices
In Dragon Age: The Veilguard, you have nine gear slots to fill. Here are the recommended items for the Warrior Slayer build:
Main-Hand Weapon
Woodsong Cleaver
Off-Hand Weapon / Shield
Bandit’s Bulwark
Two-Handed Weapon
Elven Rockbreaker
Helm/Vitaar
Carastes Double-Hat
Armor
Orchestrator’s Long Coat
Belt
Tincture Kit
Amulet
A Pale Reflection
Ring Slot 1
Call of the Hall
Ring Slot 2
Twin Palladium
Woodsong Cleaver: This weapon not only boasts high damage output but also enhances your rage generation significantly, with +15% from the start and an additional +100% rage regeneration when you take damage. This weapon pairs exceptionally well with the Whirlwind skill.
Bandit’s Bulwark: An outstanding shield for this build, Bandit’s Bulwark provides a +20% bonus to heavy attack damage and +25% against armored foes. It also grants you the immovable effect when breaking an enemy’s armor, which works seamlessly with Lucanis’s Abominate skill.
Elven Rockbreaker: Similar to the Woodsong Cleaver, this two-handed weapon increases rage generation by +15%. It additionally provides +8 rage per kill and boosts your maximum rage by +50. Each time you use three bars of rage in quick succession, your damage output soars for a short time.
Carastes Double-Hat: This piece of headgear gives you a +25% increase in staggering damage with every skill used, which can significantly enhance the effectiveness of Whirlwind and For Gold and Glory.
Orchestrator’s Long Coat: This armor piece boosts light attack damage by +15% and final attack damage by +25%. Moreover, defeating one enemy will inflict 150 physical damage to all nearby opponents, making it highly effective due to your close combat playstyle.
Tincture Kit: The Tincture Kit belt enhances healing by +20% and grants an extra revival charge. It especially excels in reducing companion healing cooldowns by -30%, ensuring your party stays in fighting shape longer.
A Pale Reflection: This amulet provides a +20% damage increase against low-health enemies. Once upgraded, this bonus applies to all foes, greatly boosting your overall damage potential. Defeating enemies also replenishes 5% of your ultimate ability.
Call of the Hall: This ring amplifies your staggering damage by +50% and increases takedown damage by the same amount.
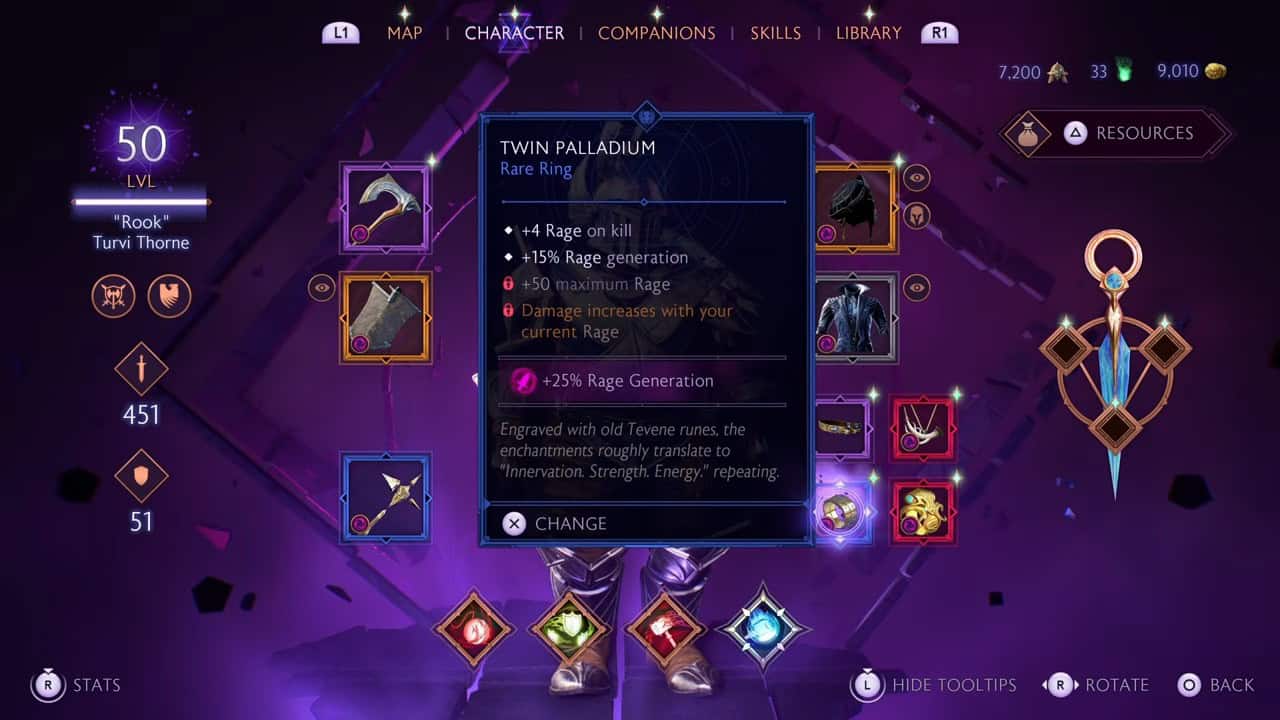
Twin Palladium: The final gear piece for this setup, Twin Palladium, offers an additional +15% rage generation and grants +4 rage for each enemy you eliminate.
Best Runes
Runes enhance your abilities and builds in various ways. You can equip up to three at a time. For the Warrior Slayer Build, we suggest the following:
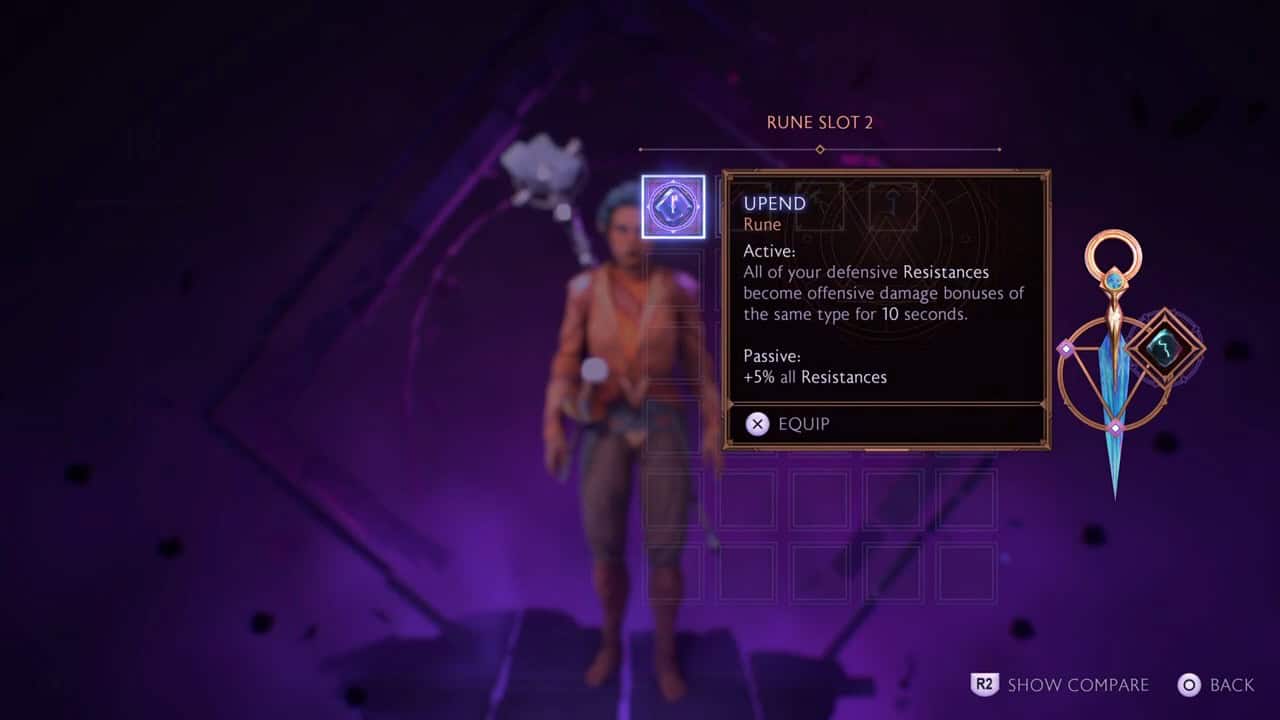
Upend: This rune converts your defensive attributes into offensive boosts for 10 seconds, allowing you to increase your damage output significantly during crucial moments.
Diminish: This rune weakens enemies within a 6-meter radius, making them more vulnerable to your attacks.
Fortify: The Fortify rune grants you invulnerability for a short time, allowing you to absorb damage without worry.
Building romantic relationships with your companions in Dragon Age: The Veilguard is relatively simple. Initially, you’ll need to wait for all seven companions to join your party—this occurs automatically. Following that, it’s important to choose dialogue options they appreciate; doing so will strengthen your connection with them.
Additionally, you’ll want to give them their specific companion gifts and complete their personal quests. Every companion has a distinctive gift and responds positively to specific dialogue choices in Dragon Age: The Veilguard. Lastly, engage with them during pivotal story moments to solidify your romantic relationship.
Bellara Romance
Meet Bellara Lutare, a whimsical Elf Veil Jumper obsessed with elven technology. Rook encounters her during the quest In Entropy’s Grasp, after which she joins the party. As a mage, Bellara uses magic and lightning spells against her foes.
She appreciates peaceful resolutions and favors it when Rook can settle conflicts non-violently. Bellara’s companion gift is an Elven Frog Figurine, which can be obtained from the Veil Jumper’s faction merchant in the Arlathan Forest. Her companion quests include:
Echoes of The Past
The Demon’s Bargain
Hummingbird’s Lament
Through the Shadows
The Forest of Spirits
Fit for a Veil Jumper
You’ll have the opportunity to commit to Bellara after completing the main quest Fire and Ice. Once you finish the Unwanted Guests main quest and the Hummingbird’s Lament quest, you can choose her as your exclusive romantic partner. For further assistance, check our “How to Romance Bellara Guide” on SegmentNext.
Davrin Romance
Davrin is another elf but differs from Bellara as a skilled warrior adept at slicing through enemies. He’s part of the Grey Wardens faction and travels with a Griffon named Assam. You’ll first meet him in the main quest, A Warden’s Best Friend.
To quickly foster your relationship with Davrin, choose direct and assertive responses marked with an armor symbol. His companion gift is a Display on Ancient Griffons, obtainable from the Hossberg Wetlands at the Grey Warden’s faction vendor. His companion quests consist of:
How to Train a Griffon
Cries from the Past
A Friend in Need
The Palate of a Griffon
The Profane and The Lost
Home Roost
Once you complete the main quest The Cauldron, you’ll be able to pursue a romantic commitment with Davrin. After starting his companion quest A Friend in Need, you can make him your exclusive romantic partner. For more details, refer to our guide on “How to Romance Davrin.”
Committing to one companion exclusively means you cannot pursue romances with other companions in Dragon Age: The Veilguard.
Emmrich Romance
Emmrich serves as the resident Necromancer in Dragon Age: The Veilguard. He hails from the Mourn Watch faction and is accompanied by his skeletal assistant, Manfred. You’ll first meet Emmrich during the main quest, Where the Dead Must Go.
As a strong advocate for necromancy, Emmrich favors pro-necromancy responses. Choosing these options will help you quickly bond with him. His companion gift is a Haunted Statuette, which you can buy from the Restless Spirit’s faction vendor in the Necropolis Halls. His companion quests comprise:
Walking the Graves
House of The Dead
Arrangements
The Sacrifice of Souls
Will and Testament
Once you complete the companion quest, House of the Dead, you can start a non-exclusive romance with Emmrich. During one of his later quests, Arrangements, you can solidify him as your permanent romantic partner.
Harding Romance
Lace Harding is the first companion you’ll encounter in Dragon Age: The Veilguard. She is a dwarf with no faction ties but is a formidable ranged warrior capable of swiftly eliminating enemies. You’ll first meet her during the main quest The End of the Beginning.
Harding values direct and honest answers; selecting dialogue options that reflect this will quickly earn her trust. Her companion gift is a Hinterland’s Oak available from the Black Emporium in Dock Town. Her companion quests include:
An Unfamiliar Sense
The Waiting Stone
The Bond Rekindled
The Heart of The Titan
The Eternal Hymn
To begin a romance with Harding, finish the main quest, After the Storm. To make her your sole romantic partner, converse with her after completing her companion quest, The Bond Rekindled.
Lucanis Romance
Lucanis Dellamorte is an assassin from the Antivan Crow faction and a potential romantic interest in Dragon Age: The Veilguard. He will join your party automatically during the main quest, Sea of Blood.
Lucanis enjoys witty and upbeat replies to dialogues. Opt for options featuring the comedy mask icon in the dialogue wheel whenever possible. His companion gift is an Antivan Tea Set, which can be bought from the Crows Merchant in the Cantori Diamond. His companion quests consist of:
Coffee With The Crows
Bidding Farewell
Blood Bath
Inner Demons
A Murder of Crows
A Moment’s Peace
You can initiate a romantic commitment with him after completing the main quest, The Cauldron. To make him your exclusive partner, converse with him during his companion quest, Dancing with a Demon. For additional details, check our Lucanis romance guide.
Neve Romance
Neve Gallus, an ice mage affiliated with the Shadow Dragons faction, is also a talented private investigator skilled in solving complex cases. You’ll first encounter her during the main quest, The End of the Beginning.
Much like Lucanis, Neve favors humorous dialogue options. Her companion gift is Collected Evidence, which can be procured in Dock Town, just outside the Shadow Dragon Sanctum. Her companion quests include:
A Study Of Dock Town
Chasing Leads
A Clear Mind
The Returned Cultist Case
To solidify your romance with Neve, speak with her right after finishing the main quest, The Siege of Weisshaupt. For a lasting romantic connection, engage her during her quest, A Clear Mind.
Taash Romance
Taash is a Qunari dragon slayer associated with the Lords of Fortune faction in Dragon Age: The Veilguard. With a thirst for adventure and a passion for dragons, they’re first introduced during the main quest, The Dragon Slayer.
Taash appreciates when individuals are straightforward, so aim for blunt dialogue choices that communicate your point clearly. Their companion gift is Priceless Ancient Trinkets, obtainable from the Lords of Fortune merchant in the Hall of Valor. Their companion quests include:
Fire on The Sands
A Little Dragon Hatches
Secrets of The Qunari
A Dragon Class
Slaying the Fangscorcher
Kataranda the Storm Rider
Lair of The Dragon King
Words of Fire
To begin your romance with Taash, speak with them at the lighthouse upon completing the main quest, The Siege of Weisshaupt. For an exclusive relationship, converse with them during the companion quest A Little Dragon Hatches.
The city of Treviso is a beautiful place in Dragon Age: The Veilguard, despite the chaos caused by the Antaam occupation. Charming cafés line the canals, offering delightful drinks, while lovely gardens provide a peaceful escape. Also, there’s an abundance of exquisite artwork to appreciate.
Unfortunately, the Antaam have developed a taste for fine art, stealing pieces from various galleries throughout the city. Given their oppressive control, it’s likely they’re not motivated by noble reasons. The Antivan Crows have enlisted your help to uncover their motives, so you’ll begin your investigation at a famous art dealer.
Where to Locate the Art Dealer
This quest is essentially three parts in one, with the first two sections happening consecutively, and the last part unfolding later in the storyline. You’ll kick off this quest at the Cantori Diamond, where you’ll find a note placed on one of the large crates situated across from Teia and Viago.
Once you’ve read the note, fast travel to the Heart and Central beacon and head south toward the market. Before crossing the bridge, take a detour down the stairs and around the corner.
Smash through the wooden debris blocking the door and enter to speak with Mistress Trella, who will now be free. She’ll inform you to consult the Market Master, and rescuing her also grants you some rewards: experience points, five Fade-Touched Crystals, a boost in reputation with the Antivan Crows, and access to her shop.
Tip:
You can interact with the stone wall behind Trella and use the Lyrium Dagger to uncover a hidden room containing a treasure chest.
How to Find the Antaam Camp
Next, head to the Grande Market and chat with the woman near the staircase. To gather more information, listen in on three sets of merchants nearby—just approach them and use the Listen interaction. After the third merchant, proceed to the Drowned District. Follow the path eastward until you reach the Antaam camp positioned by the water.
Eliminate the four Antaam guards, then explore three locations within the camp:
The first location is a group of barrels in the upper right corner, next to a broken roof by the water’s edge.
The second location is at the southern end, behind the largest shattered roof, next to a wooden wall.
The third location is another group of barrels on the western side of the camp, adjacent to an Antaam building.
Next, return to the Grande Market but this time visit the merchant in the upper left corner who previously mentioned the Antaam. You’ll need to read the note at their stall.
How to Find the Exchange Location
Fast travel back to Heart and Central, and cross the bridge leading to the large Antaam camp in the center, which now also includes some Venatori. The toughest enemies here are an armored cannon-wielder and a Venatori mage. After eliminating them, navigate around the wall closest to the bridge to read the note located near three sculptures.
Return to the Cantori Diamond one last time to update Teia and Viago about your findings. Once you’ve shared the information, you’ll conclude the quest and receive a reward: experience points, 200 Gold, five Fade-Touched Crystals, improved reputation with the Antivan Crows, and an increase in bonds with the two companions you brought along.
How to Find the Gaatlok Barrels
Later in the game, after finishing the story missions Siege of Weisshaupt and The Cobbled Swan Case, you’ll unlock several new quests in Treviso. One of these is the third part of Statuary, Fine Art, and Antaam, which has the same title as the previous segments. Start by speaking to Teia and Viago at the Cantori Diamond, then fast travel to the Heart and Central beacon.
Round the corner to engage in a major battle against multiple Venatori and Antaam at a nearby camp. Once they are taken care of, you’ll need to destroy three Gaatlok Barrels scattered throughout the city, each requiring a fight before you can do so:
The first barrel is located on a raised platform in the center area where you defeated the Venatori and Antaam, beside a wooden wall.
The second barrel can be found in the courtyard west of Heart and Central, in a corner next to two pillars and some crates after you pass through a building. You can reach this by teleporting to the Grande Market, taking the northwest path, and navigating through a hole in the wall with a crate beneath it.
The last barrel is situated in the Drowned District at a small pier located at the far end of the Antaam camp by the water’s edge.
Once you’ve destroyed the last Gaatlok Barrel, you’ll complete the quest and earn a piece of equipment, a bond increase with your two companions, and experience points.
“In Entropy’s Grasp” is the third major quest in Dragon Age: The Veilguard, where your mission involves unlocking a door at an ancient elven temple. This task is trickier than it sounds, as you initially only have one power crystal, and you need another one to proceed. The second crystal is located behind a barrier, and there seems to be no obvious way to retrieve it.
To obtain this crystal, you’ll need to break through a wall in the courtyard to clear a path. This can be accomplished using a ballista positioned at a lookout point. This guide for Dragon Age: The Veilguard will walk you through the necessary steps to locate and power the door.
Once you arrive at the old Elven Temple, the first task is to disable the Veil Bubble Artifact. Behind a locked door, you will spot the power crystal that you need to acquire.
1. Unlock the Door Opposite the Main Entrance
First, grab the crystal located on your left and carry it across the courtyard to the other door. Slot the crystal into the node next to this door, which opens up a staircase leading to an upper level. Climb the stairs to discover the ballista waiting for you.
2. Reach the Ballista
The ballista is unfortunately covered in blight boils, which you’ll need to eliminate. This is a simple task—approach the ballista and shoot at the glowing blight boils with your currently equipped weapon.
3. Break Down the Wall
Aim the ballista at the intact wall and fire a shot to break it down. Be prepared for some enemies to emerge, so take another shot to clear the area. Once the enemies are dealt with, drop down to ground level and enter through the broken wall area, where you’ll find the second power crystal waiting at the far end of the corridor.
Retrieve the crystal and insert it into the right node near the large door in “In Entropy’s Grasp.” Also, don’t forget to place the first crystal into the left node of the door to continue advancing in your quest.
In Dragon Age: The Veilguard, players encounter a pivotal decision: will you ally with Harding, the rugged dwarf, or Neve, the formidable mage, to thwart Solas’ plans?
This choice arises during the prologue when you’re trying to disrupt Solas’ ritual. You’ll need to select one of these companions to help you topple the statues that are crucial to interrupting the ceremony. Although both options have minor repercussions, they can enhance your approval ratings.
Choosing Neve
Opting for Neve allows you to leverage her magical abilities to dismantle the statues while Harding handles any approaching foes. However, this decision comes at a cost; Neve sustains injuries and won’t be able to assist during the search for Bellara. Nevertheless, she will join you for the mission to locate D’Meta and the mayor, earning you significant approval points from her, which may pave the way for a romantic relationship.
Choosing Harding
If you decide to team up with Harding, she will use her brute strength to help you remove the statues. Similar to Neve’s outcome, Harding will also be injured and unavailable while you seek out Bellara, but she will rejoin the party for the village quest. Choosing Harding also grants you plenty of approval points.
Should You Choose Neve or Harding in Dragon Age: The Veilguard?
The outcome of this decision does not significantly sway the game’s narrative, so it’s advisable to select the character with whom you wish to deepen romantic ties. Keep in mind that whichever companion you choose to confront Solas will not accompany you on the quest to find Bellara, but they will return for the subsequent mission to assist in locating D’Meta and the missing Veil Jumpers.
Both characters bring valuable skills to the table. If you prefer utilizing a mage’s powers in your next adventure, go with Harding. If you have different plans, then Neve might be the better pick for you.
The Blood Dragon Armor set has long been a beloved throwback for fans of the Dragon Age series, and it has made appearances in the Mass Effect games as well. With the launch of *Veilguard*, this iconic armor is now offered as a pre-order bonus. In the game, it functions as a cosmetic item, available for players to claim after completing the prologue.
To obtain your pre-order bonus and wear this legendary armor in *Dragon Age: The Veilguard*, you must access the Lighthouse.
How to Acquire the Blood Dragon Armor in Veilguard
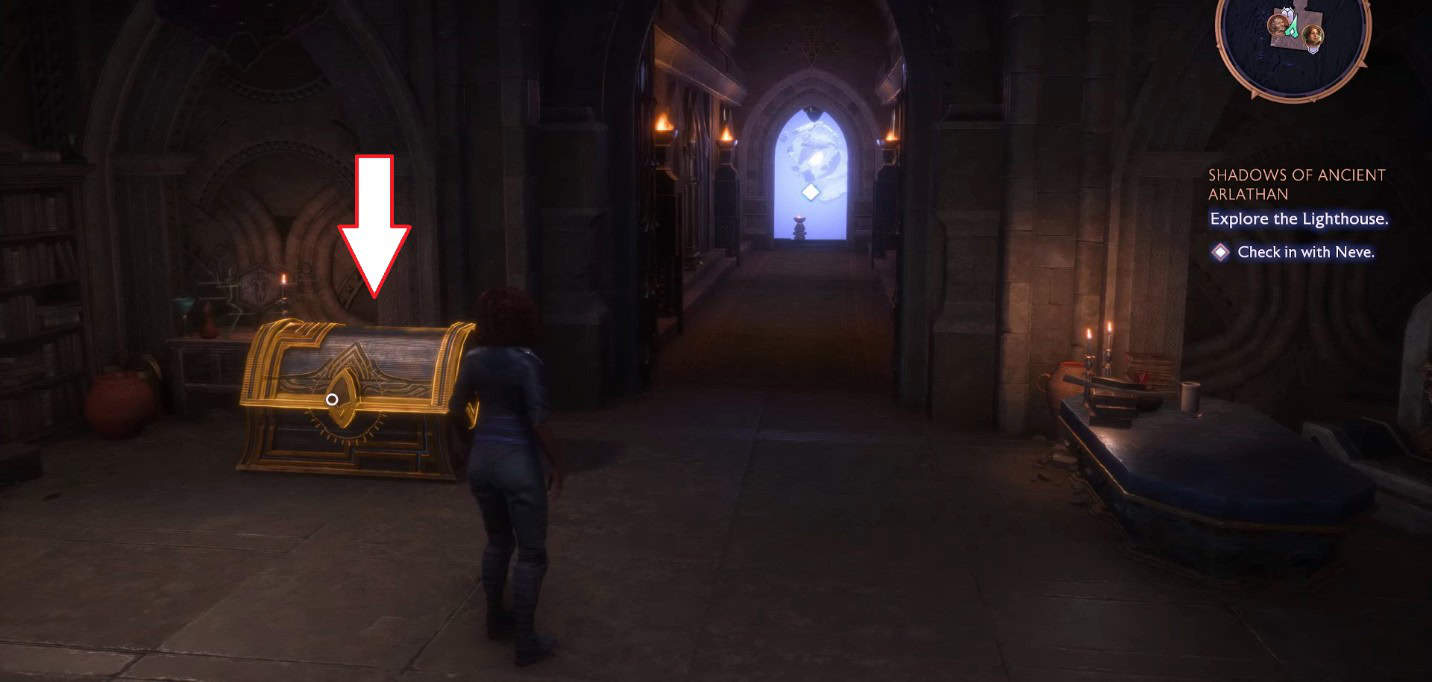
To get the Blood Dragon Armor, you need the pre-order edition of the game on any platform. Begin playing and work your way to the lighthouse during the Shadows of Ancient Arlathan quest. After speaking with Varric in the infirmary, you can access the golden chest, which contains Deluxe items along with the Blood Dragon armor set.
Blood Dragon Armor Characteristics
The Blood Dragon Armor is classified as a transmog set, meaning it serves only as a cosmetic overlay and does not provide any defensive benefits. However, the armor you have equipped will still confer protection.
Who Can Equip the Blood Dragon Armor in Veilguard?
Once you’ve got the Blood Dragon Armor Set, it can be worn by characters in the Warrior, Mage, and Rogue classes. It is important to note that this item cannot be shared with your companions in Veilguard.
How to Access Additional Deluxe Edition Armor Sets
The rest of the Deluxe Edition items are also found in the same chest located in the infirmary where you found the Blood Dragon Armor. These items consist of:
Deluxe Edition Weapon Cosmetic Skins:
Aegis of the Fallen Kingdom
Blades of the Fallen Kingdom
Bow of the Fallen Kingdom
Maul of the Fallen Kingdom
Spellblade of the Fallen Kingdom
Stave of the Fallen Kingdom
Sword of the Fallen Kingdom
Deluxe Edition Armor Cosmetic Skins:
Armor of Bellanaris
Circlet of Awe
Ghellara Helm
Harellan’s Bolts
Katriel’s False Face
Reva’s Robes
Deluxe Edition Companion Cosmetic Skins:
Bellara’s Nerve Armor
Ringlet of Sorrow Weapon
Davrin’s Resolve Armor
Beacon Edge Weapon
Plate of High Constable Shield
Emmrich’s Mystique Armor
Staff of Incessant Gaze Weapon
Harding’s Focus Armor
Sunderbow Weapon
Lucanis’s Gall Armor
Heartpiercer Weapon
Neve’s Fervor Armor
Cat’s Eye Weapon
Taash’s Might Armor
Grief Weapon
How to Modify Your Appearance in Veilguard
To change your appearance in *Dragon Age: The Veilguard*, you’ll need to advance further in the main storyline to unlock the Meditation Chamber. This chamber enables you to alter your look within the wardrobe.
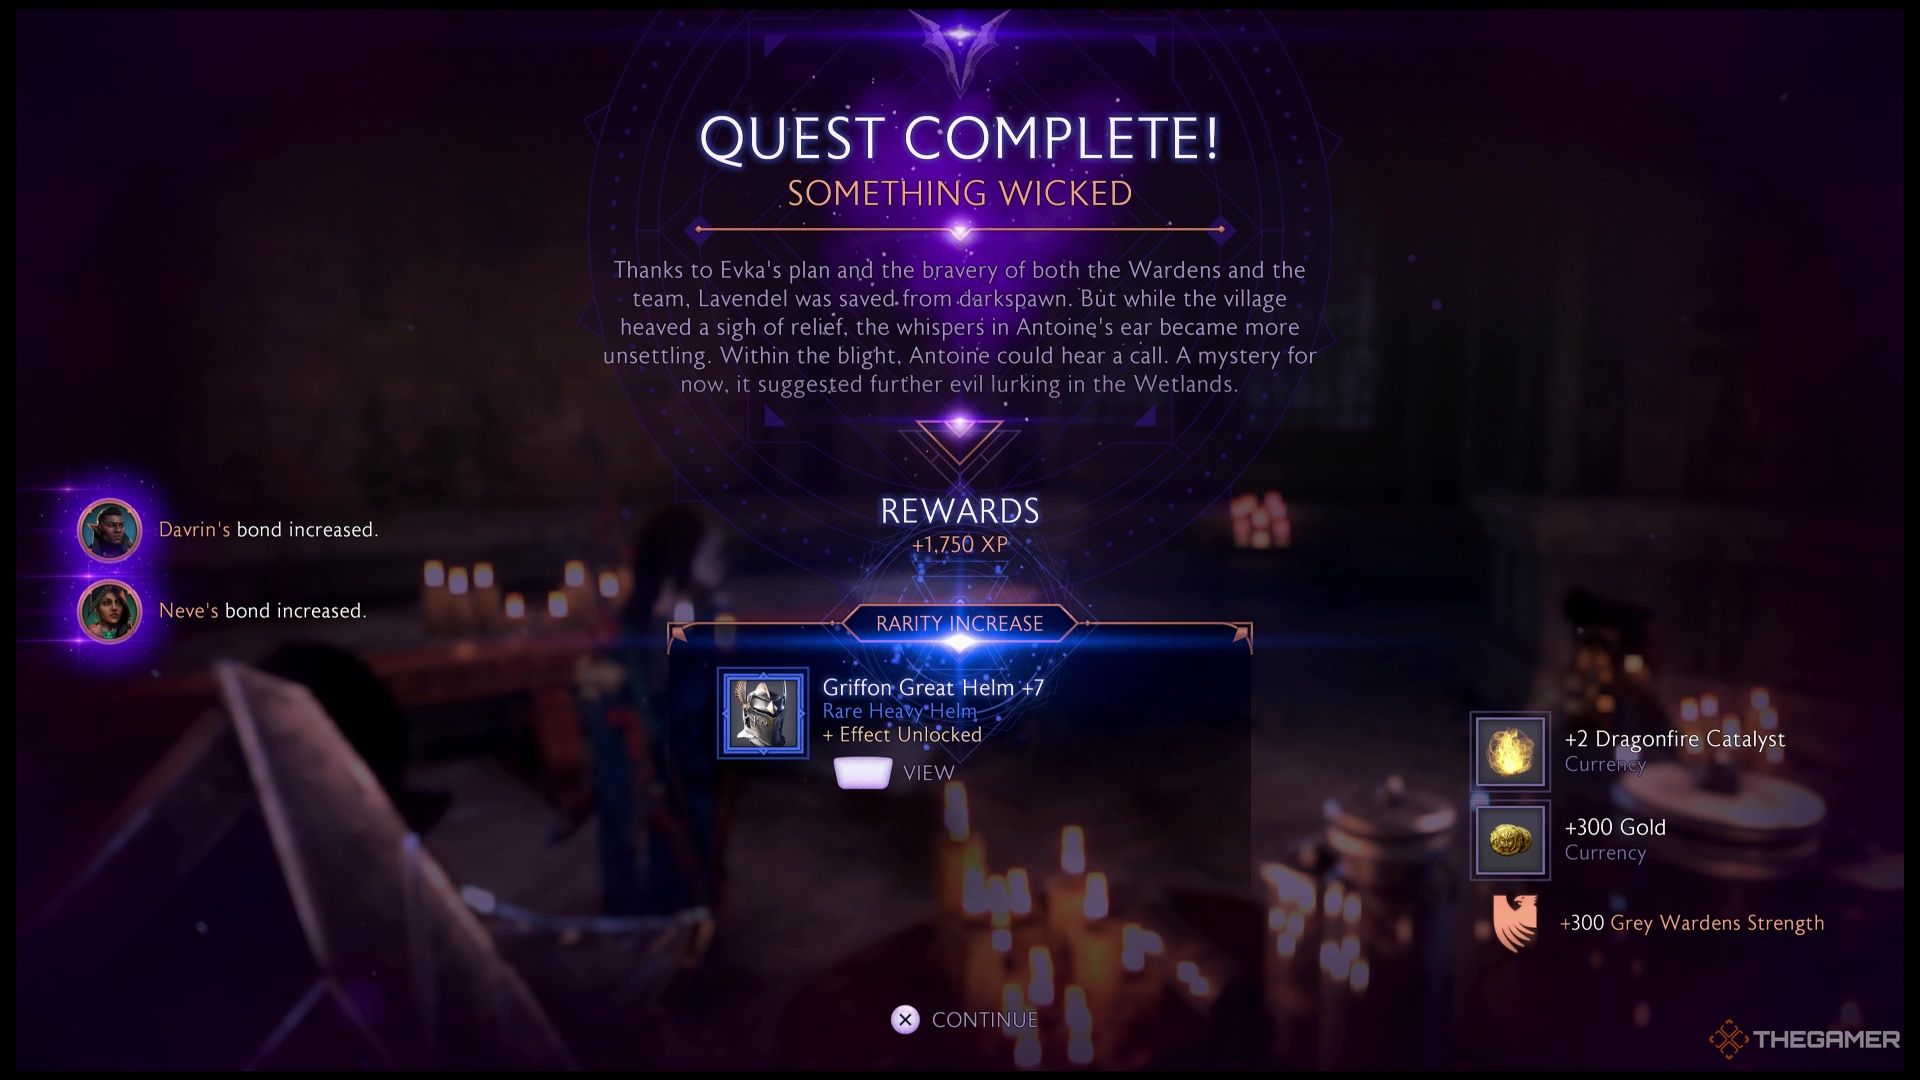
Dragon Age: The Veilguard takes you on an adventure to locate two escaped Elven gods, but you’ll also lend a hand to defend villages from Darkspawn along the way. The “Something Wicked” quest provides clear guidance on how to assist the Grey Wardens and the residents of Lavendel.
Your main contacts for this mission are Evka and Antoine. They will ask you to prepare for an impending attack and support the effort against the Darkspawn. During this quest, you’ll face two major battles. Fortunately, you only need to fully engage in one of them, while the other requires you to survive a set amount of time before moving on.
How to Support the Grey Wardens in Lavendel During Something Wicked
Your task begins with a straightforward instruction: check in with the Grey Wardens Evka and Antoine. After a brief conversation, your quest log will update, prompting you to consult the three Grey Warden sentries.
Exit the Grey Hold and follow your quest marker, turning left to find the large door leading to the Lavendel Barricade.
Speak with Warden Jaynie to make sure they’re ready for the approaching threat.
Next, return to the center of Lavendel and head southeast to meet Warden Greta, who is eager to confront the Darkspawn.
After talking to Warden Greta, follow the marker to the west where you’ll encounter Warden Augustine, who assures you he’s prepared for battle.
With all three Wardens briefed, head back to Evka and Antoine in front of the Grey Hold.
Once you report that everyone is ready, your next task is to engage the Darkspawn at Sheltered Glade.
You’ll encounter several types of enemies, including Greater Hurlocks (vulnerable to Fire, resist Necrotic), Ghouls, and Emissaries. All these foes share similar weaknesses.
Defeating the weaker enemies will lead to more challenging ones appearing in subsequent waves.
You’ll know you’ve cleared a wave when you receive 300 XP.
At this point, you’ll have two new objectives:
Defeat Darkspawn at the gates
Check on the Wardens
First, head to the eastern marker to check on the Wardens; as expected, they’re all set for more action.
Then, make your way north to enter a large battle with the Darkspawn at Lavendel’s gates.
Be prepared to face Greater Hurlocks and other formidable foes, and do not forget to take advantage of their Fire weakness.
After enduring the relentless assault for some time, you’ll trigger a cutscene featuring Evka and Antoine in a fight, which marks the end of this battle.
What Rewards Can You Earn from Something Wicked?
As the cutscene concludes, you will receive the following rewards for completing Something Wicked:
1,750 XP
Increased bond with your companions
Dragonfire Crystals
Gold
300 Grey Wardens Strength
Given the short duration of this quest, the rewards are certainly worthwhile.
Reports indicate that Dragon Age: The Veilguard has challenges running on handheld devices like the Steam Deck. However, by adjusting some settings, you can achieve a smoother performance.
The highly anticipated Dragon Age: The Veilguard has finally launched, bringing with it some initial optimization challenges. Players using handheld consoles like the Steam Deck may experience performance issues. Fortunately, by adjusting the game’s settings, you can significantly enhance your gaming experience.
The optimization options for the Steam Deck can lead to a much more enjoyable gaming session. With battery life ranging from 1.5 to 4 hours on the Steam Deck, here’s how to set up Dragon Age: The Veilguard:
In-Game Settings
Active Monitor
Generic non-PNP Monitor
Window Mode
Full Screen
Screen Resolution
1280×200
Refresh Rate
90.00Hz
Frame Rate Limit
Uncapped
VSync
Off
Triple Buffering
Off
Brightness
Default
Contrast
Default
Enable HDR
On
HDR Calibration
Adjust as needed
Upscale Method
Intel XESS
Upsample Quality
Quality
Frame Generation
Disabled
Anti-Aliasing
Disabled
Render Scale
100%
Dynamic Resolution Scaling
On
Target Frames Per Second
60
Minimum Resolution Scale
70%
Graphics Settings
Graphics Preset
Custom
Texture Quality
Low
Texture Filtering
Low
Lighting Quality
Low
Contact Shadows
Off
Ambient Occlusion
SSAO
Screen Space Reflection
Off
Volumetric Lighting
Low
Sky Quality
Low
Ray-Traced Reflections
Off
Ray-Traced Ambient Occlusion
Off
Ultra Ray Tracing
Off
Level of Detail
Low
Strand Hair
Off
Terrain Quality
Low
Terrain Decoration Quality
Low
Visual Effects Quality
Low
Depth of Field
Cinematics only; adjust based on preference
Vignette
Off
Motion Blur
Disabled; adjust based on preference
Post Processing Quality
Low
Field of View
100%
Steam Deck-Specific Settings
Frame Rate Limit
60
TDP
15 W
Battery Drain
25-20 W
About the Author
Namra is a passionate gamer and guide writer who eagerly anticipates the launch of AAA titles. Some of her favorites include The Last of Us, Uncharted, Spider-Man, Final Fantasy, and Alan Wake.
The Last Gambit is a pivotal quest in Dragon Age: The Veilguard, and it could prove dangerous for your companions. In contrast to the last mission, where you faced a mandatory choice, the decisions you make this time can lead to positive outcomes if you choose wisely and have the necessary strength to support those choices.
But it’s not solely about the decisions you make. There’s also a particularly challenging boss fight waiting for you at the end of this quest, and your allies may be limited in this encounter. We’re here to guide you so you can earn the "The Ones That Last" Trophy/Achievement for ensuring everyone’s survival.
Who Should Support the Factions?
Like the choices you faced in The Isle of Gods, we’ll provide a comprehensive overview of the decisions that influence the outcomes of these endgame quests. For now, let’s focus on the three (or actually four) key choices made at the start of The Last Gambit, including selecting your companions for the upcoming battle.
Ideally, you want each faction to be at three stars, except for the Shadow Dragons or Antivan Crows—which should remain at two stars, depending on whether you saved Minrathous or Treviso. Furthermore, every character should be a Hero of the Veilguard.
If you’re in this fortunate position, congratulations—keeping everyone alive will be quite straightforward. However, if everyone is at two stars or you lack Heroes of the Veilguard, the situation becomes more challenging. After playing through this quest multiple times, we found that while death isn’t guaranteed in such scenarios, poor choices can significantly increase the risk.
The Right Choices for Victory
The right choices are essential for success. For taking down the magic wards, opt for Emmrich, Neve, or Bellara. Since one of Neve or Bellara is likely captured, your choice is limited. This will also influence your subsequent decisions.
When it comes to eliminating the Venatori leader, choose either Neve or Lucanis, and for disabling the Juggernaut, select either Taash or Bellara. This situation means you’ll end up with either Harding or Davrin in your party for this quest. Given that Elgar’nan’s Wrath is Vulnerable to Necrotic and Resistant to Lightning, your ideal team would include either Emmrich or Lucanis, alongside Harding or Davrin.
If Neve is captured, your sequence should be: Bellara for wards, Lucanis for Venatori, and Taash for Juggernaut. If Bellara is the one captured, you should go with Neve or Emmrich for wards, Neve or Lucanis for Venatori, and Taash for Juggernaut. Ensure that one of these choices is Neve.
If your Rook is a Death Caller Mage or a Duelist Rogue with Necrotic Abilities, it’s wise to send Emmrich and Lucanis while keeping Neve, as she will be beneficial for area control and combating the Venatori.
Following this, you’ll encounter a lengthy cutscene revealing your companions’ fates, and with these choices, you should be in a good position. The combat section echoes the linear challenge found in The Isle of Gods, where you’ll face Darkspawn and Venatori. A team of Neve, Davrin, and yourself as the Necrotic fighter is ideal, though it’s no harder than previous confrontations.
Remember to prioritize eliminating ranged attackers, utilizing heavy attacks on armor and weak point attacks on barriers. If your allies have healing abilities, use these over potions, unless you can sustain yourself by finding additional potions along the way.
How to Defeat Elgar’nan’s Wrath
Elgar’nan’s Wrath is a Blood Prime, which you’ve likely faced in Blood of Arlathan. In this encounter, be aware of several significant attacks:
Fire breath (dodge timing is crucial)
Mace swings (move sideways immediately to evade)
Stomp (retreat when the ground glows red)
Earthquake (a more powerful version of the stomp)
Melee attacks (dodge or parry)
The best strategy against Elgar’nan’s Wrath is to immobilize it using an ability like Neve’s Blizzard while dealing heavy damage to its armor. Afterward, keep your distance and utilize Necrotic Abilities. When it breathes fire, you have two prime opportunities to inflict damage.
First, rush to the side since it won’t attack until the fire breath concludes, allowing solid hits while it’s defenseless. Second, aim for its open mouth during the fire attack—this is when it becomes vulnerable.
Save your Ultimate for these moments or use it to eliminate the smaller threats. While you can parry its circular mace swing, it’s generally not advisable due to the risk of getting stuck in a damaging cycle.
As you fight, several Venatori and Darkspawn will also engage you. While it’s important to thin their numbers, remember that the primary goal is to defeat Elgar’nan’s Wrath. Focus the Necrotic companion (or yourself) on the Blood Prime and use the rest of your party to set up detonation attacks or utilize area abilities to tackle multiple enemies at once.
The weaker enemies can still deal substantial damage, especially if you become overwhelmed by Elgar’nan’s Wrath. Once you defeat him, you can look forward to a cutscene with Solas, gearing up for the final confrontation ahead.
The Demon’s Bargain: A Bellara Quest in Dragon Age: The Veilguard
"The Demon’s Bargain" is a quest in Dragon Age: The Veilguard that delves into Bellara’s backstory. This quest is crucial not only for understanding Bellara but also for uncovering the lore of the elves and the mysterious Arlathan Forest, making it particularly enriching if you’re playing as an elf.
Throughout the quest, players will navigate through Fade rifts, battling various foes including Shades, Demons, and Constructs. We recommend bringing Neve along to utilize their Cold damage, paired with Bellara, who is essential for this challenge. The combination of these two characters provides excellent crowd control, so be sure to take advantage of that.
Find The Missing Veil Jumpers
To kick off the quest, enter the building and pass through the Fade tear. This will transport you to another location where you’ll encounter Greater Sentinels and a Voltaic Shade. While Greater Sentinels are vulnerable to electricity but resistant to cold attacks (making them Bellara’s responsibility), the Voltaic Shade is vulnerable to cold, which is where Neve shines.
The Sentinels will chase you, so it’s wise to retreat down the steps to isolate them, allowing you to launch attacks without fearing the Shade’s ranged assaults. After dealing with the Sentinels, return upstairs and eliminate the Shade using a ranged attack to break its Barrier.
When you defeat the Shade, a Greater Pride Demon will invade the scene. This creature is resistant to electricity, so while Bellara’s utilities are less effective, utilize heavy attacks on its armor and evade its sweeping purple beams. Once the demon is vanquished, instruct Bellara to repair the door and progress forward.
Survive The Assault
Once you exit the building, traverse the bridge using a fallen branch and slide down the ramp. Here, you’ll face more Greater Sentinels and Spellwights. Although Neve’s abilities are less effective against these foes, using Blizzard can provide you with much-needed breathing room. Focus on taking out the Spellwights first with ranged attacks and then focus your heavy strikes on the Sentinels’ armor.
Before you cross the branch, consider grabbing the Power Crystal from the initial room, which will enable you to create a side bridge leading to extra loot, including 21 gold and two pieces of Imperial Weave.
Proceed into the ruins, commanding Bellara to fix the mechanism while you transport the nearby Power Crystal to cross the bridge. This leads you to a clearing where you’ll face a single Frenzied Shade. Use cold attacks for effectiveness, but rapid melee strikes will also dispatch this enemy quickly. Once defeated, Bellara will identify the satchel as Mihlora’s.
What Lies Ahead?
After Bellara repairs the barrier, remove the Power Crystal and place it into the socket on the left to reveal a new area featuring a Death Mask cosmetic. As you continue, Bellara discovers that her brother Cyrian is now an ally of the demon Anaris, but their conversation is interrupted before she can learn more.
To free Yenarel and Hamuel, you’ll engage in three waves of enemies. The first wave consists of two Greater Shades and two Voltaic Shades. Eliminate the Voltaic Shades first with headshots before they unleash their full attacks, then use Neve’s cold attacks on the Greater Shades as they approach.
The Difficulty Increases
After the first phase, interact with either crystal to begin the second phase, which mirrors the first. Ensure you start in the center to get a clear shot at the Voltaic Shades. Collect health potions in the corners if needed before assigning Bellara to work on the crystal.
Next, Bellara will address the second crystal, and the final phase will commence. This phase is more challenging and introduces a Devouring Shade, a Shade Rejuvenator, and a Toxic Yearning. While both the Devouring Shade and Shade Rejuvenator are vulnerable to cold, the Toxic Yearning is best handled by Bellara due to its electricity weakness.
Focus on one enemy at a time, as the smaller foes regenerate barriers throughout the fight. Target one, eliminate it, then shift your attention to the next while avoiding any distractions.
Rewards For Completing The Quest
After defeating the Toxic Yearning and its minions, a chest will appear, granting you an upgrade for Bellara’s The Ready Explorer armor, along with 277 gold, in addition to the 88 gold and the 100 Veil Jumper strength awarded for completing the quest.
This quest provides a blend of combat, lore exploration, and character development, making it a significant chapter in Bellara’s journey within the world of Dragon Age: The Veilguard.
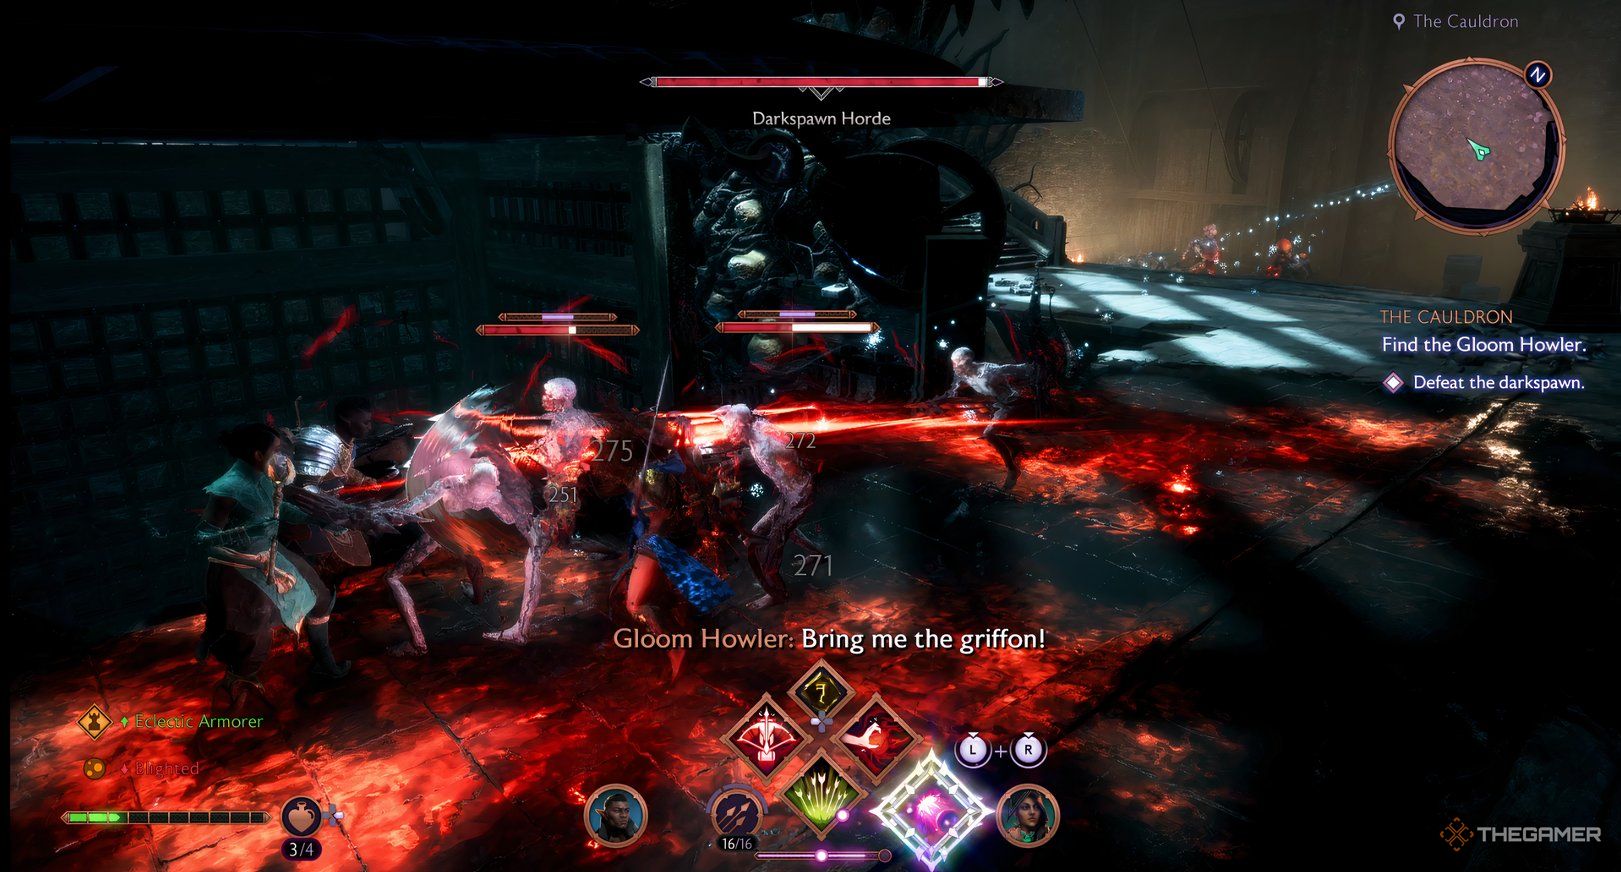
The Cauldron presents a captivating challenge in Dragon Age: The Veilguard. Interestingly, the quest begins in a state of limbo. When you arrive and talk to Davrin, you witness a brief cutscene that reveals the entrance is blocked, setting the stage for your next move.
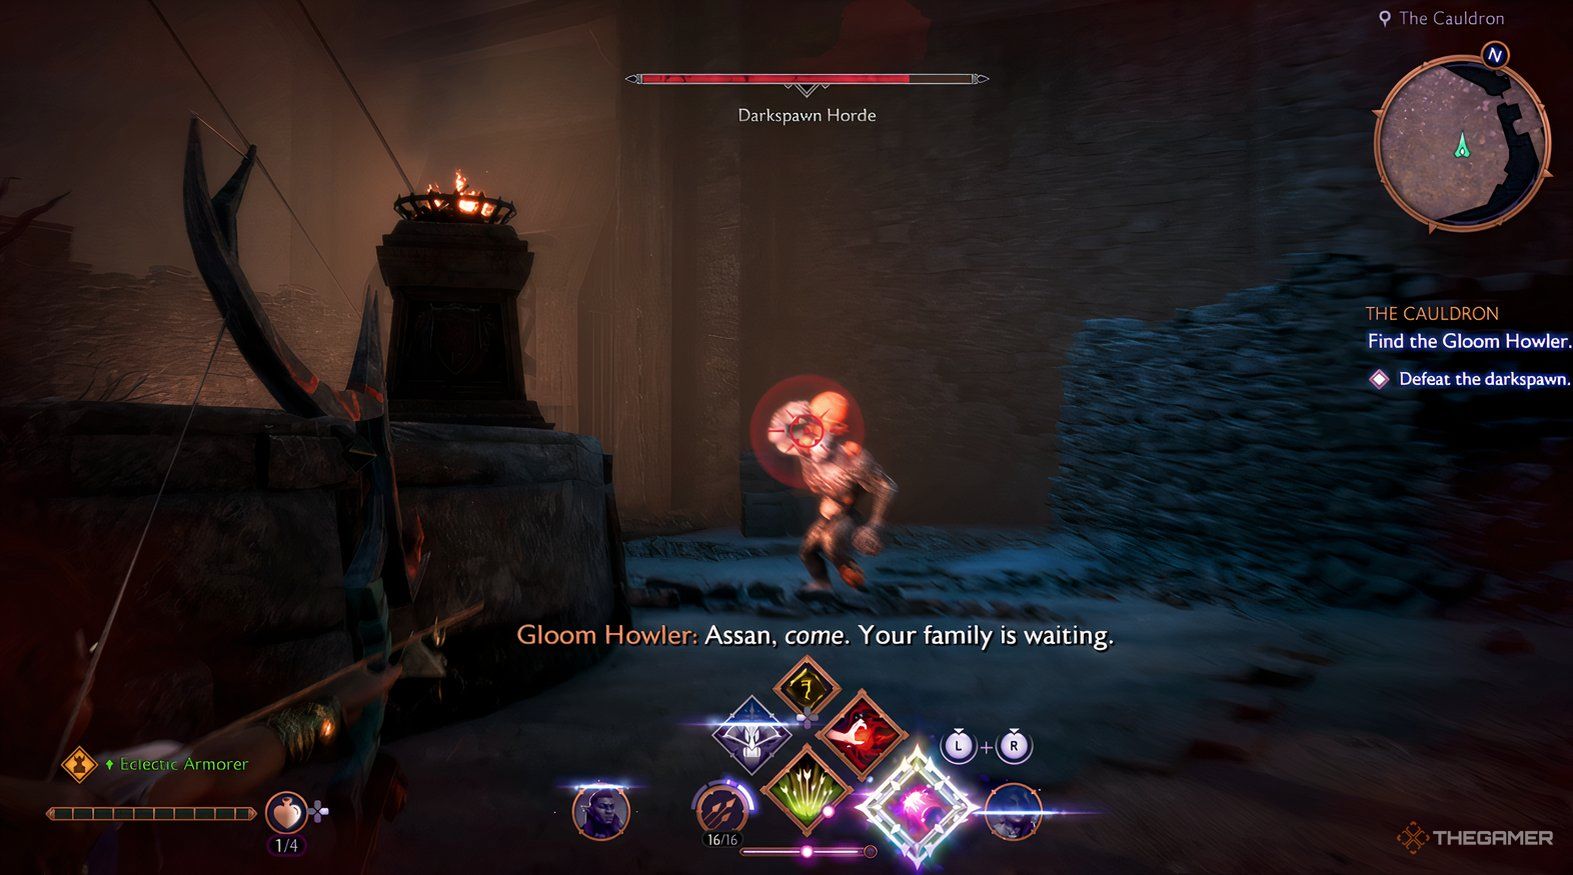
Your journey involves facing the Gloom Howler, but the main obstacle is the daunting Darkspawn Horde. Once you get inside, navigating most of the Cauldron is fairly straightforward—however, surviving until the end poses a significant challenge.
For this reason, we recommend bringing a character who can prime Davrin’s detonations, but avoid using Emmrich since the Darkspawn resist necrotic damage. Our suggestions would be Bellara or Neve for controlling the crowd or Taash to boost your fire damage.
How to Enter The Cauldron
After the cutscene, proceed up the ramp and use R1/RB to summon Assan. Climb onto the lowered platform and ascend the ladder. Inside, take out the three Blight Boils from a distance, then dispose of the Darkspawn. There aren’t many, so it should be manageable. Focus on utilizing fire and heavy attacks to strip away the armor of the Greater Hurlocks to finish quickly.
This will unveil four Blight Boils that you must eliminate to gain access to the Cauldron. Move through the archway on your left and defeat the Ghouls and a single Greater Hurlock as you did earlier. Another Blight Boil will fall; be sure to take it out before enemies appear. Then follow the path all the way to the left and up the ramp that loops back.
Continue along this path until you find a ballista. Use it to target the Blight Boil on the wall; this is another step towards your goal. After that, move past the ballista and cross the wooden gap, where two smaller boils will drop. Destroy them before they spawn enemies, or fight them quickly if they appear. They produce Javinleers, so engaging them in melee will diminish their impact. After this, climb the steps at the back to reach the second Blight Boil. You’re halfway there.
Return to the central courtyard and ascend the stairs on the right. Keep climbing and go up the wooden steps. This time, ignore the ballista and enter the castle, where you’ll find one Blight Boil on the right. Be prepared for two Frenzied Berserks appearing here, but with a detonation attack and heavy hits on their armor, you should be able to overcome them.
Next, go up the left stairs on the back wall, where you’ll spot the last Blight Boil. Attack it, and then make your way back to the courtyard.
Finding the Gloom Howler
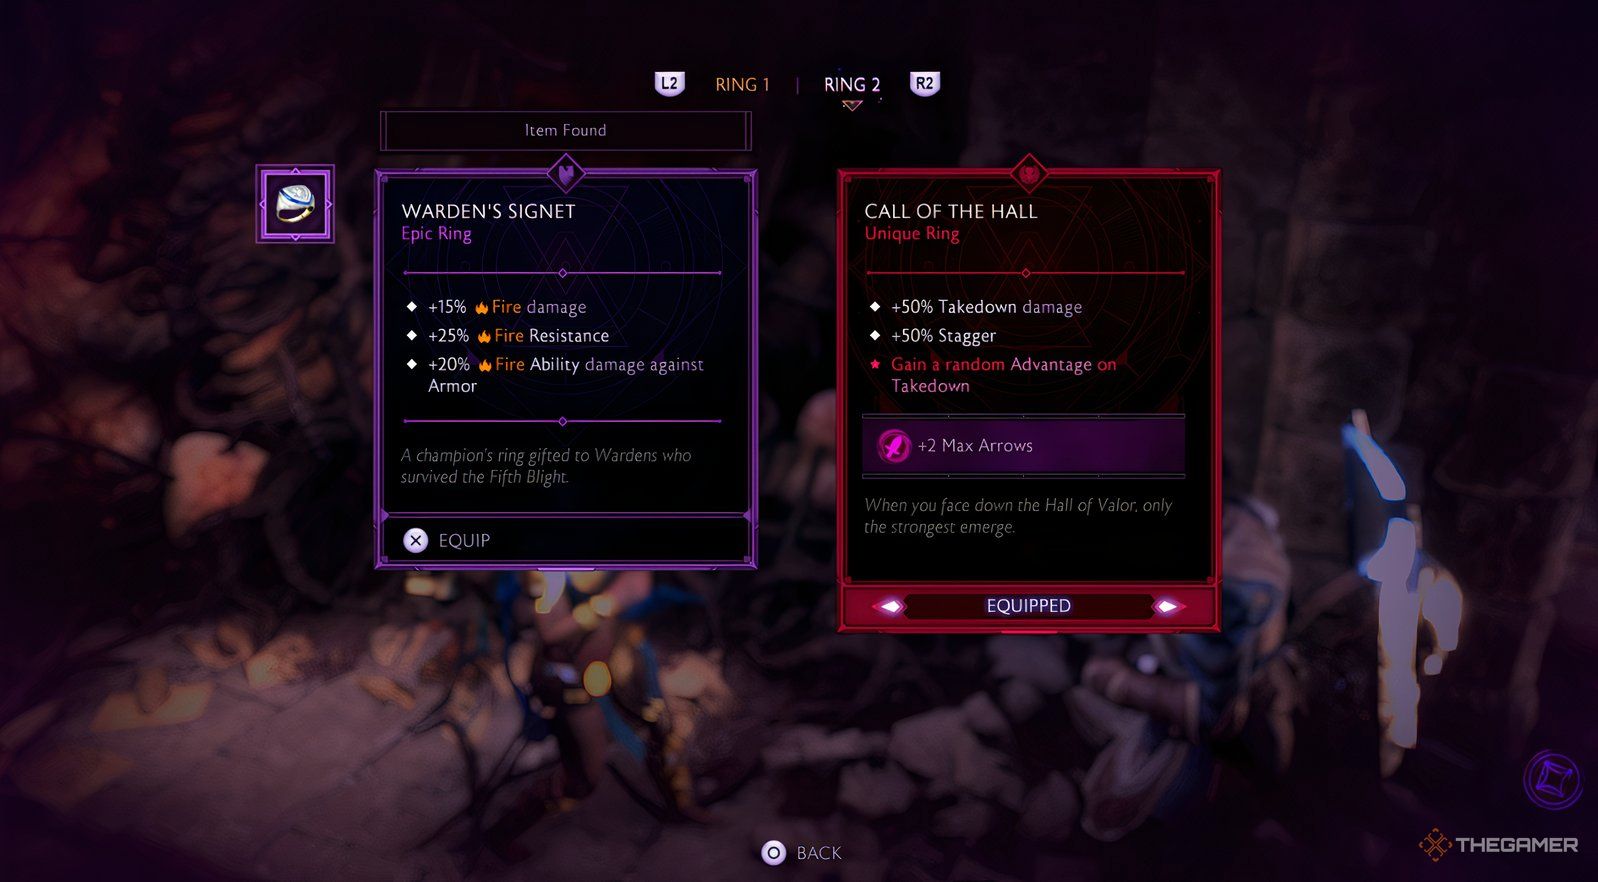
Progressing through The Cauldron is quite manageable. It features mostly linear exploration, and dialogues from Davrin or Rook, along with lore within the area, enhance the story. However, upon reaching the twin statues, check the alcove to the left for a Warden’s Signet.
Continue until you discover a room containing a Blight Boil. Once you destroy it and pass through the opening it creates, you will enter the Gloom Howler’s Lair, where you’ll face numerous Darkspawn—this serves as good practice for what’s ahead. Your main focus here should be on the Blight Boils. You must first take out the two located furthest to the left (up a ledge) and the one furthest to the right (around the corner), followed by the one in the center.
This will allow you to attack the Boil inside the left archway. Inside, destroy the Boil directly in front then continue around to the final one on the ledge. The battle concludes when you destroy this last Boil, so focus on evading enemies rather than engaging in combat as you make your way to the edge.
Defeat the Darkspawn Horde
This challenge mirrors typical ‘defeat all enemies’ missions, but there are a lot more foes to manage. Their overall numbers are shown by a health bar, which doesn’t impact the fight’s dynamics. Davrin’s support can be very helpful, and if you choose Taash, direct them to target the larger enemies, such as the Greater Hurlock Blighters or the Greater Ogre. On the other hand, if you opt for Bellara or Neve, they offer crowd control abilities like Galvanized Tear or Blizzard for thinning the weaker enemies.
You’ll quickly find yourself encircled by smaller Ghouls, making area abilities useful for taking them out swiftly. Just after you drop from the top platform, you’ll see Greater Hurlock Blighters spawning on the right. As these cause significant damage from afar, it’s crucial to take them down before larger foes can trap you.
Keep moving and aim for the Greater Hurlock Blighters since they will follow you, allowing you to lead them into area abilities. The most significant threat will be the Greater Ogre. It’s slow, so focus on clearing out as many smaller enemies as possible before confronting it, using ranged abilities against it as you go. Once you’ve dealt with all enemies, you’ll trigger a cutscene that concludes the quest, transitioning you to challenge the Gloom Howler herself.
"The Waiting Stone" is an important mission in Harding’s personal storyline within Dragon Age: The Veilguard. It’s unique because it offers one of the few glimpses into the Deep Roads, a significant location in the game. Since Harding accompanies you from the very beginning, this quest will likely be one of your earliest personal adventures.
As expected, the quest revolves around Harding and the intriguing setting of the Deep Roads, which is exclusive to this mission and similar quests in the storyline. It’s worth noting that the final boss in this encounter is susceptible to necrotic damage but resistant to electrical attacks. Therefore, bringing along Lucanis or Emmrich can be beneficial for this journey of self-discovery.
Once you arrive, you will need to navigate deeper into the Deep Roads. Expect to confront Deepstalkers, which, although resistant to necrotic attacks from your allies, are relatively weak and serve more to delay your progress than to cause significant harm. Fire abilities are effective against them, but even basic light and heavy attacks will do the trick. Be cautious of regular rock explosions—dodge when the ground turns red!
Your path will lead you to an elevator. Pull the lever and cross the stone area, fighting off a few Deepstalkers along the way. Soon after, you will encounter Stalgard during a cutscene. Follow him through the settlement until Darkspawn appear.
When you reach the elevated section, focus on eliminating the Blighted Boils to prevent more Darkspawn from coming. Stay vigilant and prioritize the orange pustule on the Hurlock Blighter. If Ghouls rush at you, use your abilities against the Hurlock Blighter first, then you can easily take down the Ghouls afterward. Keep following Stalgard until the Blight obstructs your advance.
Find the Root of the Blight
Follow the stairs on your left and navigate towards the elevator. If you take a brief detour using Harding’s Stone Song, you can secure a Traveler’s Kit +5 Armor for Harding. Before jumping into the elevator, make sure to use the Stone Song on the rock that’s blocking the shaft, then you can get in and pull the lever.
After exiting the elevator at the back, follow the Blighted vein into a corridor. Here, you will have to choose between going left or right. You’ll need to explore both paths, but let’s start with the left.
Immediately take out the Blighted Boil on your right as you enter and deal with the Ghouls. Use Harding’s Stone Song on the rock near the first Boil to climb up, and push that rock into the wall to clear a path to the second Blighted Boil. Once that’s destroyed, move the wall rock back to jump across to the ledge and take out the third Blighted Boil.
Activate Stone Song to reveal the next rock and jump across the wooden platforms and chutes to a new area filled with more Darkspawn. This section is narrow and winding, so be sure to avoid the explosive Darkspawn, using area abilities to damage as many as possible. Focus especially on the Hurlock Blighters’ orange pustles.
Once the Darkspawn are dealt with, you’ll spot a central column featuring three veins leading off. The Blighted Boils you need to destroy are indicated here: the one on the right is against a large wall, the left one is on a wooden tower, and the last one, which you should tackle last, is atop the column, leading to your exit.
Now, head back to the passage and take the right path. Defeat several Ghouls, then destroy two Blighted Boils hiding behind breakable wood barriers on the left and right. You’ll find another one right near the entrance, allowing you to reveal a climbable rock after using Stone Song.
After climbing up, traverse the wooden beams and leap to the hanging platform for Mayhem in Gold +5 for Harding. Continue down the corridor until you encounter a Frenzied Ogre.
Defeating the Frenzied Ogre
The Frenzied Ogre is resistant to necrotic damage but vulnerable to fire. It has armor, so prioritize ranged attacks to lower its defenses. Although it’s a large creature that hits hard, it’s also slow and has no allies to assist it. Watch for a glow red attack cue, which indicates you should dodge to maintain a safe distance and aim for its head. Avoid getting too close to simplify the fight.
Once you bring down the Ogre, strike the Blighted Boils on the rock wall, the ceiling of the stone building, and the final one on the large column to reveal an exit. Leave this area and take the elevator back to Stalgard. Destroy the three Boils on the door to proceed inside and follow Harding up the stairs.
Confronting the Iron Construct
The Iron Construct is a tough enemy equipped with armor, making ranged attacks essential to break it down. Be ready for its rush attacks that can disrupt your range. Protect yourself using area abilities and Harding’s Seismic Shot to stagger it while dodging away.
The Iron Construct employs three primary attacks:
Launching rocks: Keep an eye out for red circles on the ground to dodge quickly.
Hammer swings: Move away when you see it glowing red.
Hammer slams: Sidestep when it pulls back its hammer in a red cone shape.
It can also damage you by tunneling beneath the ground; you’ll know when this is about to happen if you see a larger red circle. If you’re close when it emerges, you could take substantial damage.
Utilize the entire arena to your advantage. Move up the steps for close combat when necessary, and evade around the stone pit to maintain distance when required. Once the Iron Construct’s armor is down, it will summon Greater Deepstalkers. While these foes are relatively weak, their numbers can become a hassle. Use Harding to target them while having Rook focus on the Construct. When the Deepstalkers swarm, shift your regular attacks to break up their ranks.
Rewards for Completing The Waiting Stone
Completing "The Waiting Stone" not only advances Harding’s story but also earns you Scout’s Compassion +5 for Harding, as well as two Dragonfire Catalysts and 2,500 XP. Back at the Lighthouse, you can guide Harding on how to perceive her magic—either as a gift or something to be cautious about. This choice will affect her character development moving forward, influencing how she utilizes her magic, although it won’t impact her combat abilities.