Tag: Throne and Liberty

  • Top PvP Builds for Throne and Liberty: Ultimate Guide

    Top PvP Builds for Throne and Liberty: Ultimate Guide

    Throne and Liberty: A Deep Dive into PvP Gameplay

    Throne and Liberty is an MMORPG that emphasizes player-versus-player (PvP) combat. The game features extensive PvP battles, including events like Castle Siege and nighttime open-world dungeon skirmishes, as well as smaller conflicts through weekly events like Riftstones and Boonstones. While most weapon combinations can work in PvP, some setups have emerged as particularly strong in the current game meta.

    For large-scale PvP, the Sword and Shield/Greatsword build is currently one of the most influential. This setup offers exceptional tankiness, crowd control (CC), and the ability to serve as a pivotal player for your team. However, there are other effective classes that can stand out as well.

    Current Build Rankings

    Rank Builds
    S-Tier Bow/Wand, Bow/Staff, SNS/Greatsword
    A-Tier Bow/Dagger, Dagger/Wand, SNS/Wand
    Situational Crossbow/Dagger, Staff/Dagger, Greatsword/Dagger

    Sword and Shield/Greatsword

    This build allows players to control the battlefield effectively. For instance, we’ve witnessed a Sword and Shield/Greatsword character single-handedly hold off an entire team in a Boonstone event. When paired with a dedicated healer, this setup becomes exceptionally challenging to break through.

    The main advantages of the Sword/Greatsword combo are high survivability and substantial damage output. Abilities like Counter Barrier let you reflect damage, while CC skills such as Chain Hook and Stunning Blow provide utility that can disrupt opponents. Additionally, Blood Devotion is a powerful ability that mitigates damage for nearby allies.

    The Vital Force passive for the Greatsword is also highly regarded. It enables you to enhance your Max Health stat, which in turn boosts Hit Chance, Skill Damage, and Stun Chance. This synergy allows for a well-rounded build even when focusing on health.

    Playing as a Tank

    If you’re looking for a more defensive approach, consider the Sword and Shield/Wand build. These players can withstand overwhelming attacks; I’ve seen a well-equipped player from this class hold off over ten opponents for an extended time. The Greatsword remains a strong option in small-scale PvP due to its balance of survivability, damage, and CC abilities.

    Bow/Staff

    The Bow and Staff combination is one of the hardest-hitting ranged setups currently in the game. The Flash Wave ability is particularly powerful, capable of dealing massive AoE damage, especially if your gear is maxed out. In organized group fights, using multiple Flash Waves at once can quickly turn the tide of battle.

    One of the strengths of the Bow/Staff build is its versatility. The bow provides solid support spells like Healing Touch along with excellent CC through Tornado. Meanwhile, the staff offers high damage abilities like Judgment Lightning and Chain Lightning, making it a formidable choice for securing kills on fleeing targets.

    Bow/Wand

    The Bow and Wand setup serves as a dedicated healer role within parties. Healers are crucial in Throne and Liberty, with guilds typically needing at least one healer per six-player party. Depending on gear choices, you can build for sustainability with AoE heals or focus on maximizing healing power, range, and cooldown reduction.

    The Wand boasts some of the game’s best support abilities, including Invincible Wall and Fountain of Life. For more crowd control, the Cursed Nightmare/Karmic Haze combo can put enemies to sleep, though it may require gear adjustments to specialize effectively in this area.

    Dagger/Greatsword

    The Dagger/Greatsword build excels in single-target damage and CC while struggling in larger battles due to its lack of range. In more confined environments, such as arenas, this build can dominate opponents. Be strategic with your engagements; using Precision Dash to take out key targets, such as healers, is essential despite the risk of becoming isolated.

    Crossbow/Dagger

    Representing the rogue archetype, the Crossbow excels in sneaky tactical play. Skills such as Camouflage Cloak allow you to infiltrate enemy lines, using powerful AoE attacks like Annihilation Barrage Shot and Thunderclouds Bombing. Even though opponents with higher gear scores may resist some damage, the right timing and coordination can lead to wiping out enemy healers and ranged attackers in a matter of seconds.

    Bow/Dagger

    This setup also thrives on stealth and skilled execution. Using Camouflage Cloak to sneak behind enemy formations and unleashing attacks like Flash Wave on vulnerable targets can lead to significant victory. When played well, this build can create utter chaos among enemy ranks.

    Wand/Dagger

    Similar to other stealth builds, the Wand/Dagger uses Camouflage Cloak to penetrate enemy lines and cast Cursed Nightmare/Karmic Haze for mass sleep effects. Specializing in Sleep Chance maximizes your effectiveness in these scenarios, turning the tide in clashes.

    In conclusion, the array of builds in Throne and Liberty provides unique opportunities for players to engage in thrilling PvP battles, each with its own strengths and strategies. Adaptability and team coordination will be key to mastering the art of combat in this diverse environment.

  • Mastering Hero of the Catapult in Throne and Liberty

    The Hero of the Catapult quest in Throne and Liberty is one of several exploration tasks that players can tackle while exploring the game world. Aside from the main storyline, these exploration quests serve as smaller side missions that offer valuable rewards upon completion.

    While the tasks involved in the Hero of the Catapult quest may seem simple, they can be tricky if you’re unsure how to acquire the necessary items. This article will walk you through everything you need to successfully complete this side quest in the Raging Wilds Region.

    How to Begin the Hero of the Catapult Quest

    To start the Hero of the Catapult quest, go to the Golem Control Tower, which can be found to the northeast of the Raging Wilds waypoint. As you approach the tower, look for the wizard NPC situated at the base of the tower next to a catapult.

    Be sure to unlock the Raging Wilds waypoint before attempting this quest; otherwise, it won’t appear in your Exploration Codex unless you’ve opened that part of the map.

    Talk to the Dispatched Wizard at the foot of the Golem Control Tower. When you interact with this NPC, you’ll find out that they need help gathering Magical Bell Flowers that grow in the Raging Wilds Region.

    The Raging Wilds is filled with aggressive mobs, including Large Stone Golems, Violent Temiterans, and Violent Tentacle Desert Flowers. These enemies can be quite tough, especially if your character is below level 40, so avoid confronting them unless you are ready for a serious fight.

    After you agree to assist the wizard, you’ll officially embark on the Hero of the Catapult quest.

    How to Finish the Hero of the Catapult Quest

    As you navigate the rugged terrain of the Raging Wilds, you may have spotted a floating rock located in the center of the Golem Field. Interestingly, the Magical Bell Flowers required for this quest only bloom atop that rock.

    While you could attempt to glide from the Golem Control Tower to the rock using your Glide Morph, it can be challenging to land successfully due to limited stamina. Your best option is to use the catapult situated next to the Dispatched Wizard.

    Operating the catapult alone can be tricky since you’ll need to manage two tasks within a short timeframe. It’s wise to recruit a friend or another player to assist you in operating the catapult while you prepare for launch.

    To operate the catapult, climb up to the first rocky platform on the right side of the device using your grappling hook. Once you’re on the platform, look for the interactable item labeled “Lever to operate Catapult” at the edge.

    After pulling the lever, there will be a brief delay before the catapult launches. Use this time to position yourself at the far end of the catapult by jumping directly from the platform onto the machine.

    As the catapult sends you soaring into the air, glide towards the floating rock to collect the Magical Bell Flowers. Once you have the flowers, return to the Dispatched Wizard to complete the quest.

  • Joining and Creating Parties in Throne and Liberty: A Guide

    Joining and Creating Parties in Throne and Liberty: A Guide

    Quick Links

    How to Invite Players to Your Party

    Throne and Liberty is a massively multiplayer online game (MMO) that allows for solo play but encourages players to team up. Being part of a guild is a major component of the game, and working with guildmates can lead to more reliable rewards.

    That said, you don’t need to join a guild to play with others. There are always players in Throne and Liberty searching for teammates, and knowing how to form or join a party can make this process much easier.

    How to Join Parties

    Getting into a party is straightforward. Usually, you’ll receive an invitation that you can either accept or decline. Invitations can come your way for various reasons, such as when you’re working on the same mission as another player or when someone is gathering a group for specific activities.

    Keep in Mind: Party invites will expire after a while, so if you don’t respond quickly, the invitation will need to be resent.

    Once you join a party, part of your user interface will display information about your teammates, including their health and mana levels. This is especially important if you play as a healer.

    Queuing for Dungeons

    You might also join a party by queuing for activities like cooperative dungeons. To do this, select the content you want to complete from the co-op dungeon section in your menu, choose your role, and be ready for the activity when you get the notification.

    Most of the time, the game will automatically team you with players who fill the necessary roles for the dungeon, typically including damage dealers, healers, and tanks. Once you’re in the dungeon, the party functionality remains the same.

    How to Create Parties

    If you’re looking to lead an adventure, you’ll want to create a party. To do so, go to your Quick Menu and locate the Manage Party section. From there, you can generate party invitation links and activate matchmaking, allowing you and your party members to queue for activities based on your roles.

    How to Invite Players to Your Party

    You can invite players to your party by creating a party invitation link and sharing that link in any relevant chat. Whether you post it in a general chat for wide access or privately message it to someone for a personal invite is up to you.

    If you are near another player, you can also select them and invite them directly from the menu.

    How to Join or Create a Guild

    If you want a consistent group of players to team up with, joining a guild is the way to go. A guild typically offers a stable group of members with whom you become familiar, sharing goals and fulfilling specific roles.

    Joining a Guild

    Joining a guild is a simple process: you receive an invite, and you can either accept or decline it. When you receive the invite, you can view details about the guild, such as its level and number of members.

    Make sure to keep an eye on the Global Chat to spot guilds that are recruiting.

    Creating a Guild

    Establishing a guild is a more involved process but is perfect if you aim to lead one. To create a guild, you first need to design a banner and choose a name for your guild; the process costs 30,000 Sollant. After your guild is set up, you can start inviting players and forming your group.

    Servers, Regions, and Platforms

    Regardless of which platform you play on, you’ll be able to team up with friends as long as you’re on the same server.

    Server Regions

    Throne and Liberty includes several server regions: North America East, North America West, Europe, Japan, and South America. Joining a server in your region usually results in better connection quality, but you can also opt for a server outside your region to play with friends globally.

    Server Swapping

    You can switch servers in Throne and Liberty if you want to collaborate with someone on a different one. However, it costs 750 Lucent, so think carefully before making the change.

    Which Modes Are Multiplayer?

    Most activities in Throne and Liberty can be done in multiplayer mode if you’re grouped with friends, with two exceptions: Taedal’s Tower and specific solo missions during leveling, particularly in Chapter Two. Taedal’s Tower is a solo challenge focusing on boss fights accessible at level 15.

    Aside from those instances, you can participate in everything else with fellow players, including open-world events, arenas, co-op dungeons, and various explorations.

  • Unlocking All Rewards from Teadal’s Tower in Throne and Liberty

    Unlocking All Rewards from Teadal’s Tower in Throne and Liberty

    Throne and Liberty has a wealth of content, but much of it requires teamwork. You’ll usually need to join a group or be part of a Guild to tackle the endgame content effectively.

    However, Taedal’s Tower stands out as a unique experience, offering solo, boss-focused challenges that increase in difficulty as you advance. While these bosses may not all have complex mechanics, you’ll need a solid character build to take them down, and each defeat yields a generous reward.

    Unlocking Taedal’s Tower


    Taedal’s Tower becomes accessible once you reach Chapter 3 and finish Ashien’s Strange Painting Quest. This quest takes you to the first floor of Taedal’s Tower, where you’ll battle the Charging Gatekeeper. After you defeat this boss and speak with Ashien, you can continue progressing through Taedal’s Tower as your character levels up.

    Taedal’s Tower Bosses and Rewards

    Each floor in Taedal’s Tower features a distinct boss, sometimes with multiple bosses at once. Most of these bosses don’t have complicated mechanics; instead, the fights are usually straightforward, with perhaps one special attack to watch out for.

    Every floor guarantees specific rewards, including Growthstones, Sollant, and Recovery Crystals, with the occasional extra item up for grabs.

    However, be prepared, especially for bosses after level 50; they will require solid gear and possibly a self-sustaining build to effectively defeat them. Without assistance, you’ll need to both inflict enough damage to bring them down and keep yourself alive with some form of healing or buffs.

    Floor Boss Reward Mechanics
    1 Charging Gatekeeper (Level 15) 7,827 Sollant / Quality Weapon Growthstone x10 / Quality Armor Growthstone x10 / Quality Accessory Growthstone x10 / Recovery Crystal x10
    2 Rushing Queen Spider (Level 19) 8,742 Sollant / Quality Weapon Growthstone x20 / Quality Armor Growthstone x20 / Quality Accessory Growthstone x20 / Recovery Crystal x10
    3 Screams And A Healing Song (Level 23) 9,917 Sollant / Quality Weapon Growthstone x25 / Quality Armor Growthstone x25 / Quality Accessory Growthstone x25 / Recovery Crystal x10 Defeat the zombies and avoid their explosions; the boss will appear afterward.
    4 Whirling Goblins (Level 27) 11,451 Sollant / Quality Weapon Growthstone x35 / Quality Armor Growthstone x35 / Quality Accessory Growthstone x35 / Recovery Crystal x10 Stay out of their spinning attack range, and the fight will be manageable.
    5 Warrior’s Cry (Level 31) 14,283 Sollant / Crafty Joker Amitoi / Rare Weapon Growthstone x12 / Rare Armor Growthstone x12 / Rare Accessory Growthstone x12 / Recovery Crystal x10
    6 Finding The Piton In The Flames (Level 35) 15,954 Sollant / Rare Weapon Growthstone x15 / Rare Armor Growthstone x15 / Rare Accessory Growthstone x15 / Recovery Crystal x10 Grapple to the pillars when they appear, or you risk heavy damage.
    7 The Bound (Level 39) 18,098 Sollant / Rare Weapon Growthstone x16 / Rare Armor Growthstone x16 / Rare Accessory Growthstone x16 / Recovery Crystal x10 This floor has two bosses, but you only need to defeat one to remove them both.
    8 Poisons, Explosions, And Detox Herbs (Level 43) 20,896 Sollant / Rare Weapon Growthstone x18 / Rare Armor Growthstone x18 / Rare Accessory Growthstone x18 / Recovery Crystal x10 If you get poisoned, quickly use the detox plants around the platform.
    9 Dance Of The Flashing Sword (Level 47) 24,618 Sollant / Rare Weapon Growthstone x20 / Rare Armor Growthstone x20 / Rare Accessory Growthstone x20 / Recovery Crystal x10 This boss hits hard, so ensure you have enough healing options ready.
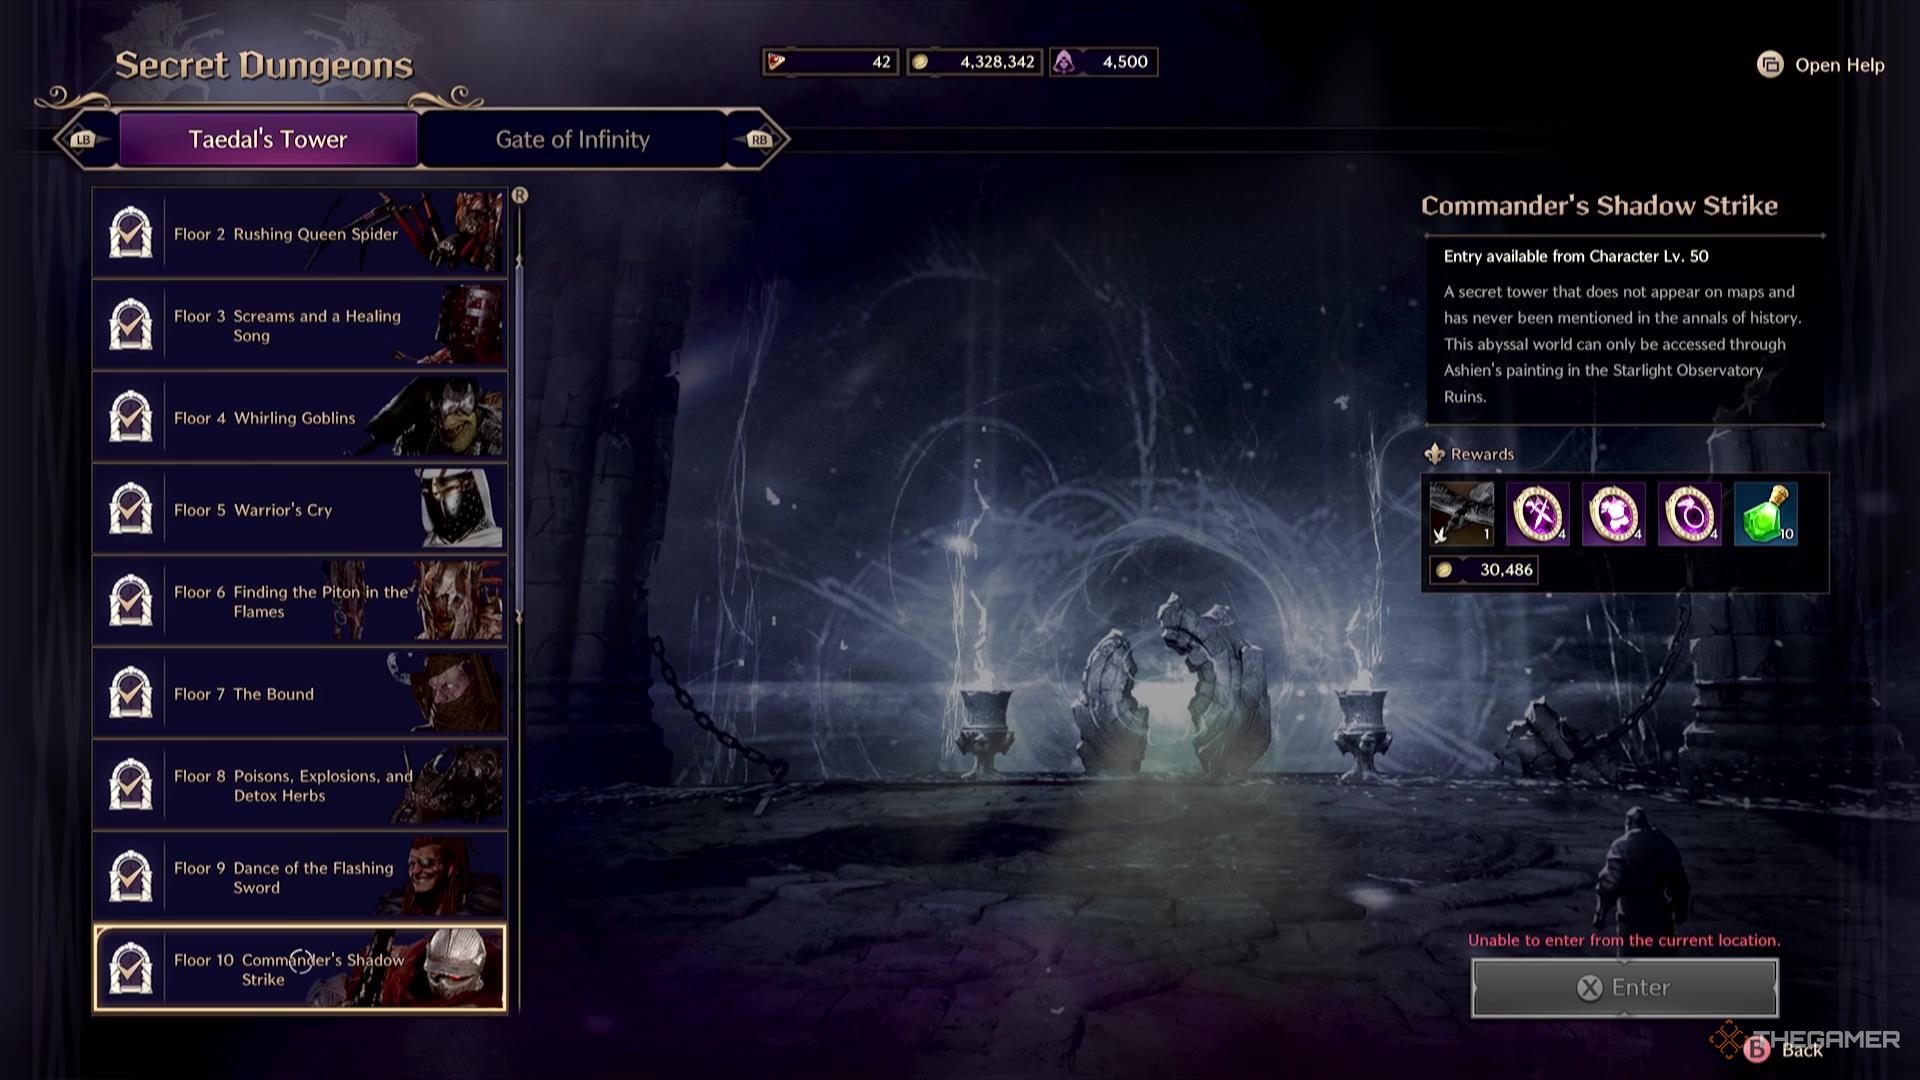
    10 Commander’s Shadow Strike (Level 50) 30,486 Sollant / Velvet Raven Glide Morph / Precious Weapon Growthstone x4 / Precious Armor Growthstone x4 / Precious Accessory Growthstone x4 / Rare Recovery Crystal x10 This boss has a ground slam; jump when they land to avoid severe damage.
    11 Maze Of Death (Level 50) 33,593 Sollant / Precious Weapon Growthstone x5 / Precious Armor Growthstone x5 / Precious Accessory Growthstone x5 / Rare Recovery Crystal x10 Escape the maze before the energy from the center reaches you.
    12 Answers In The Sand (Level 50) 37,523 Sollant / Precious Weapon Growthstone x5 / Precious Armor Growthstone x5 / Precious Accessory Growthstone x5 / Rare Recovery Crystal x10 Move the small scorpions into sandstorms to summon the larger scorpion.
    13 Fall, Shock, Destroy! (Level 50) 42,566 Sollant / Precious Weapon Growthstone x6 / Precious Armor Growthstone x6 / Precious Accessory Growthstone x6 / Rare Recovery Crystal x10 You must transfer energy between rocks to trigger the boss’s appearance.
    14 Out Of Sight (Level 50) 49,148 Sollant / Precious Weapon Growthstone x7 / Precious Armor Growthstone x7 / Precious Accessory Growthstone x7 / Rare Recovery Crystal x10 Avoid the boss’s area-of-effect (AoE) attack, as it cannot be blocked.
    15 Thieves And Retrievers (Level 50) 57,901 Sollant / Mischievous Joker Amitoi / Precious Weapon Growthstone x7 / Precious Armor Growthstone x7 / Precious Accessory Growthstone x7 / Rare Recovery Crystal x20 During the fight, the room will be cloaked in darkness; activate a light orb to see.
    16 Precise Moment (Level 50) 69,796 Sollant / Precious Weapon Growthstone x8 / Precious Armor Growthstone x8 / Precious Accessory Growthstone x8 / Rare Recovery Crystal x20 Similar to the 6th floor, you’ll need to grapple to a pillar during the fight.
    17 Shield Of Stalwart Cooperation (Level 50) 86,365 Sollant / Precious Weapon Growthstone x10 / Precious Armor Growthstone x10 / Precious Accessory Growthstone x10 / Rare Recovery Crystal x20
    18 Swirling Firestorm (Level 50) 110,102 Sollant / Precious Weapon Growthstone x12 / Precious Armor Growthstone x12 / Precious Accessory Growthstone x12 / Rare Recovery Crystal x20 Use the fire tornado that appears during the fight to dodge some of the boss’s attacks.
    19 Reaching Higher (Level 50) 145,216 Sollant / Precious Weapon Growthstone x14 / Precious Armor Growthstone x14 / Precious Accessory Growthstone x14 / Rare Recovery Crystal x20 Navigate through multiple platforms to avoid the boss’s worst attack.
    20 Revenge And Resurrection (Level 50) 199,098 Sollant / Fierce Taion Dash Morph / Precious Weapon Growthstone x16 / Precious Armor Growthstone x16 / Precious Accessory Growthstone x16 / Rare Recovery Crystal x30 This boss summons additional enemies, and you’ll need to defeat it twice.

    Recommended Builds for Taedal’s Tower


    Floor 10 of Taedal's Tower in Throne and Liberty.

    Some encounters in Taedal’s Tower, especially from Floor Ten onward, will demand extra preparation. You might need to adjust your build specifically for these challenging battles.

    Key Skills to Utilize


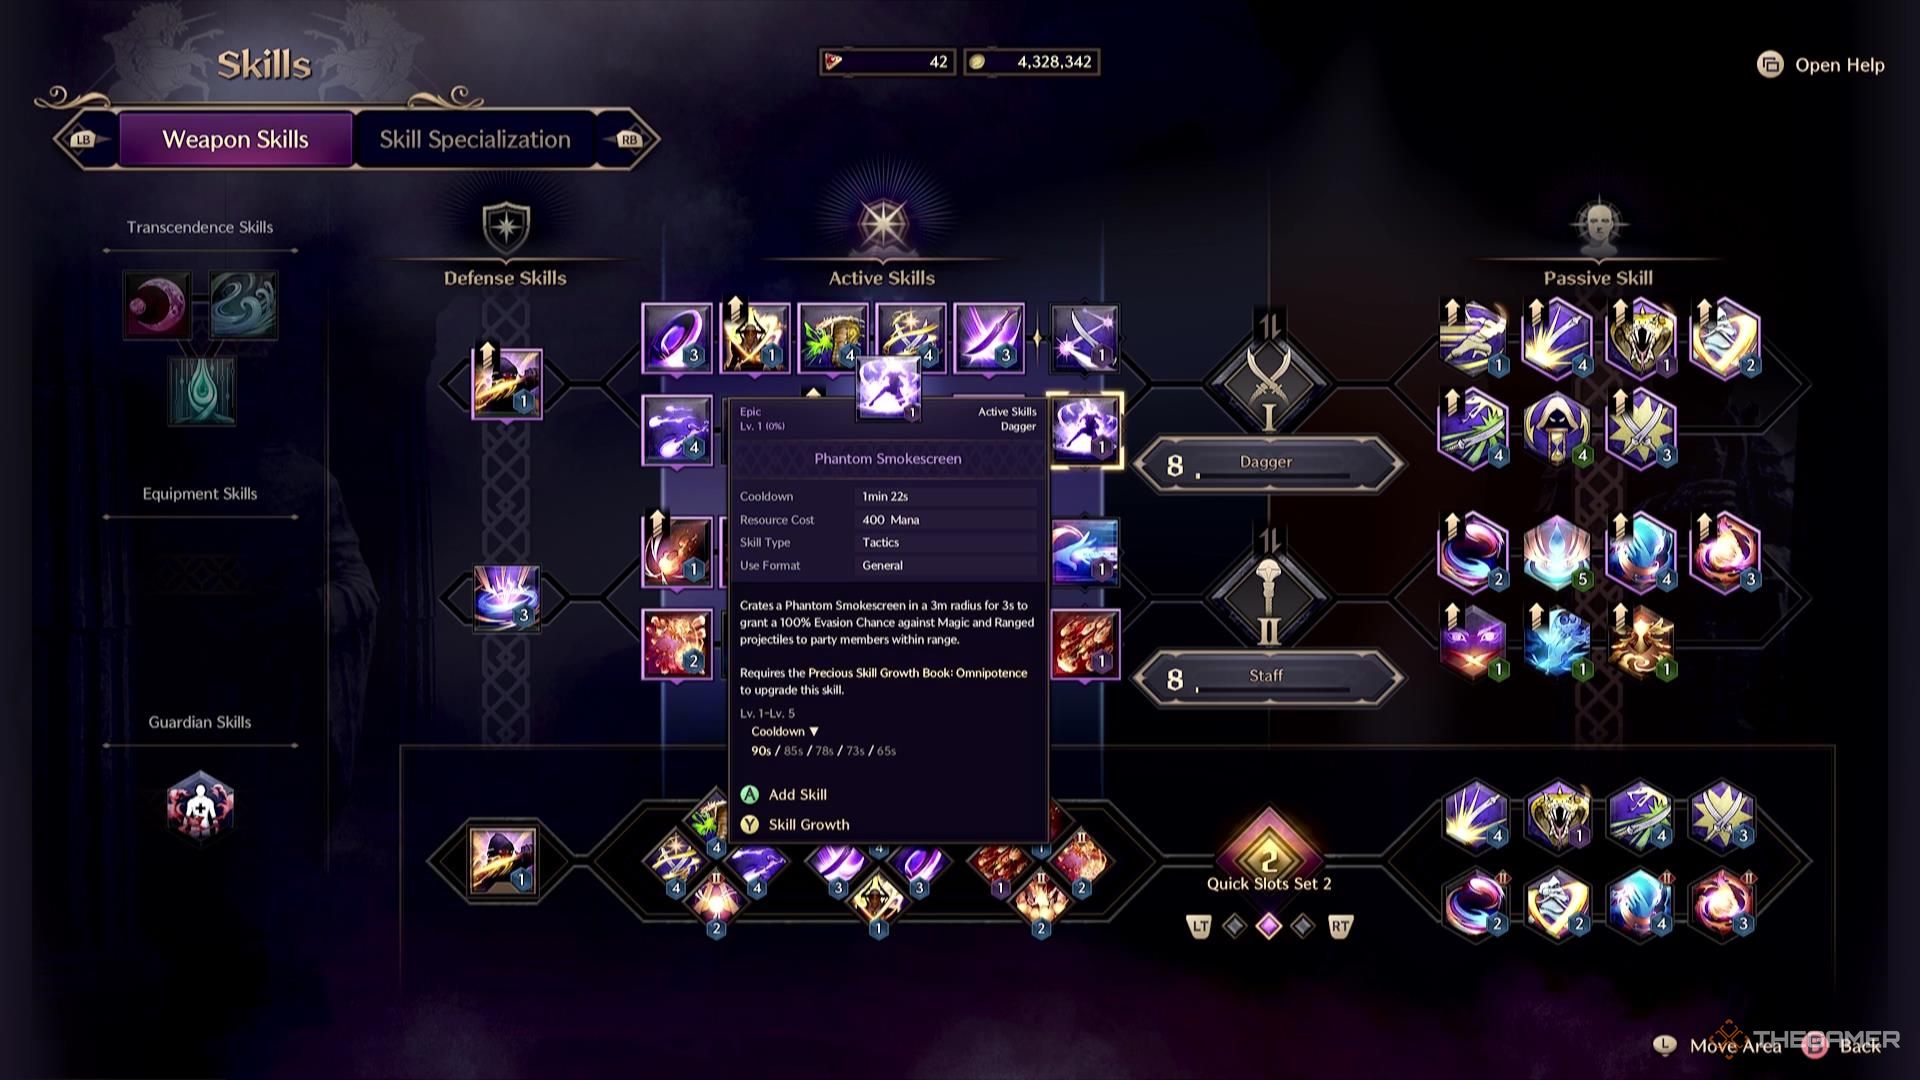
    The Phantom Smokescreen Daggers skill in Throne and Liberty.

    In addition to food buffs, consider having a healing skill or abilities that enhance your evasion or health to better withstand the damage dealt by these bosses.

    Weapons like the Greatsword, Wand and Tome, Longbow, and Daggers have skills that can be beneficial in these tough battles.

    Recommended Gear


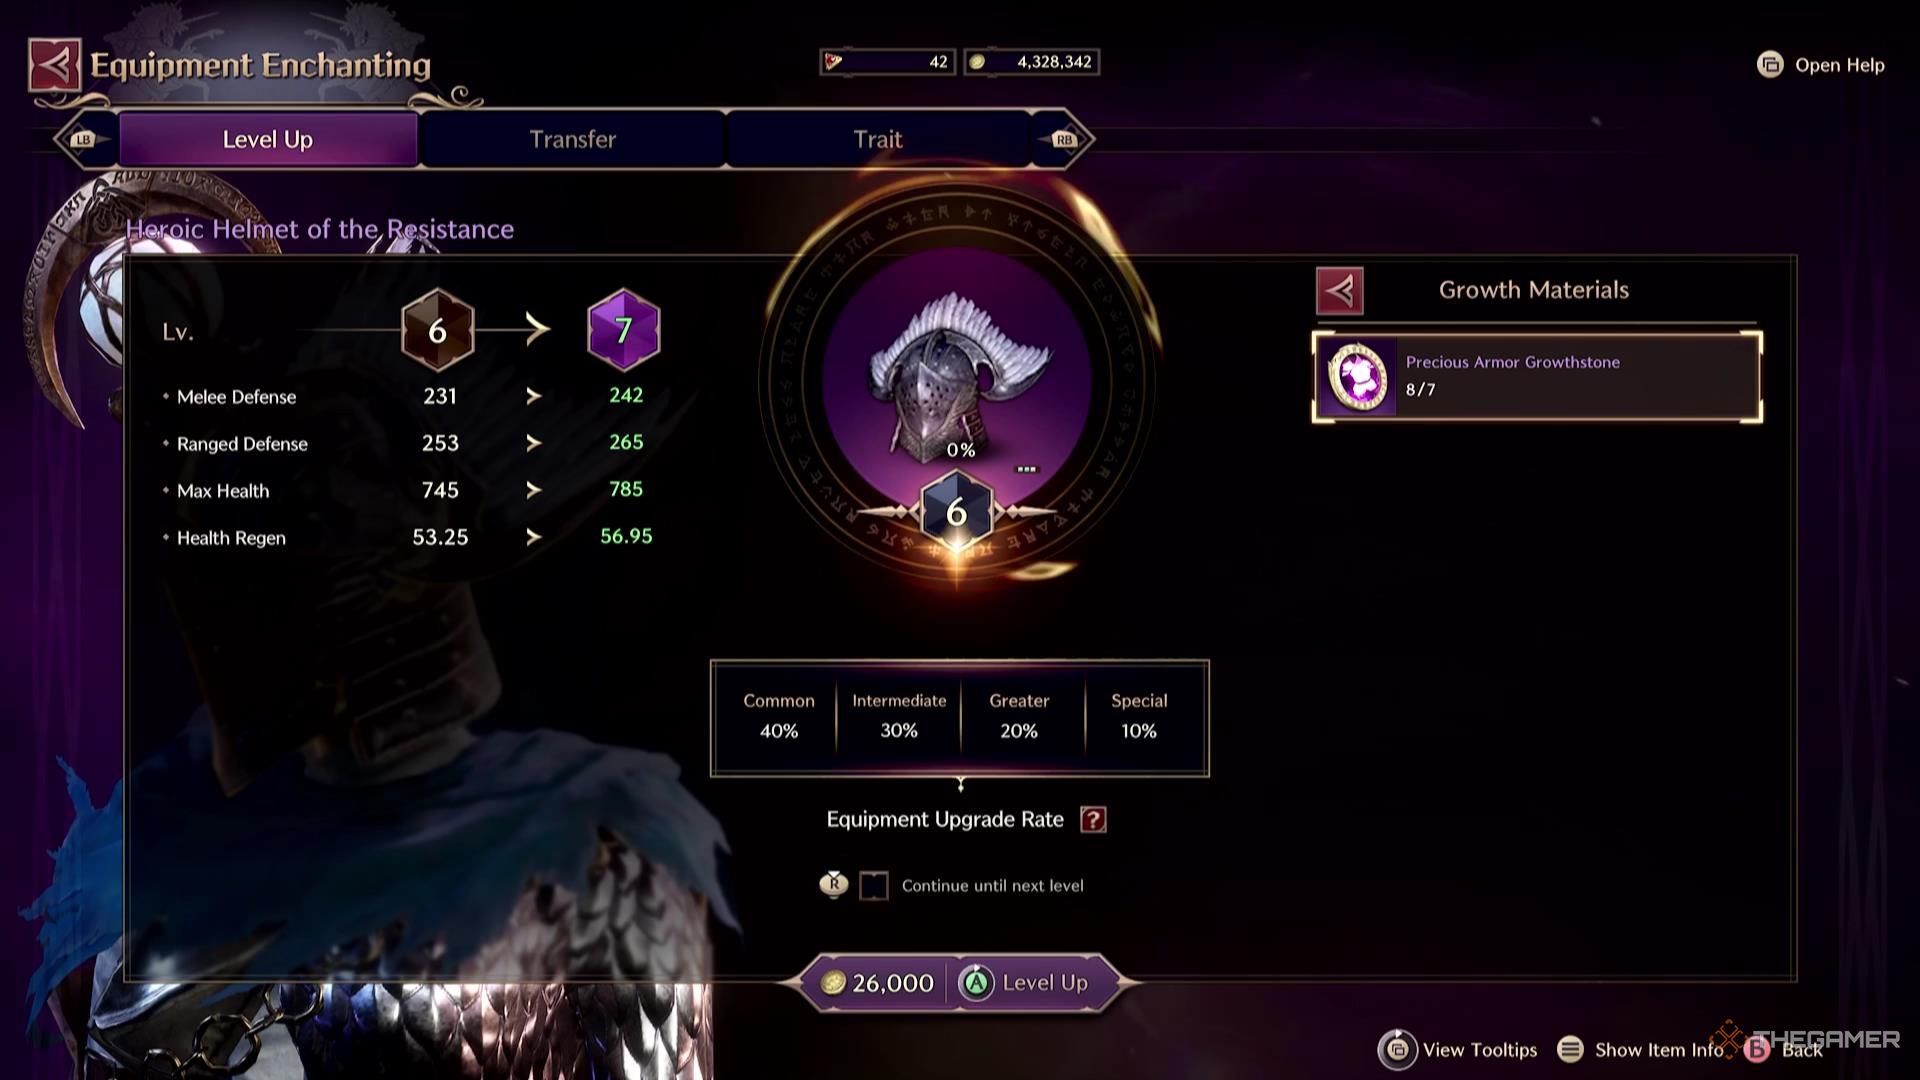
    A purple-quality helmet in Throne and Liberty.

    While there isn’t a specific gear set that guarantees success, you will need high-quality, upgraded gear to stand a chance, especially for the harder fights. Although many bosses are labeled as ‘Level 50,’ achieving victory in these encounters will often depend on your gear’s tier and quality.

  • Mastering the Rex Chimaerus Battle in Throne and Liberty

    Mastering the Rex Chimaerus Battle in Throne and Liberty

    The Temple of Slaughter in Throne and Liberty presents a more challenging experience compared to the earlier Roaring Temple dungeon. While the Roaring Temple requires characters to be at least level 30 with a Combat Power of 900, the Temple of Slaughter demands that all party members be at the maximum character level.

    Though the mechanics of the Temple of Slaughter are quite similar to those of the Roaring Temple, players attempting this dungeon for the first time may find it quite challenging. This guide will equip you with all the essential information for navigating this dungeon and understanding its mechanics.

    Temple of Slaughter Dungeon Guide


    Players gain access to multiple higher-level dungeons, including the Temple of Slaughter, after reaching character level 50. Like other dungeons in the Dimensional Circle, this one accommodates six players in a party.

    The typical party composition consists of one healer, four damage dealers (DPS), and one tank.

    The tank is crucial for navigating this dungeon successfully and for handling the final boss. It’s essential that an experienced player takes on the tank role since their performance is vital for a successful raid.

    As you begin, defeat the mobs in the hallway to your right. Eliminating these enemies will remove the barrier on the left side of the hallway, allowing you to drop down and continue your progress.

    While the upper level has only Ancient Dark Shamans and Monks, the lower level features tougher adversaries, including an Ancient Dark Enforcer and Wizard. Ensure your party drops down at the far end of the lower level to avoid drawing multiple enemies at once.

    After your party reaches the lower level, defeat the enemies to activate the Mana Fluid Regulator, which will fill the area with Mana Fluid, guiding you to the next zone. You can bypass the upper level entirely and head straight to the next Mana Fluid Regulator on the opposite side.

    Defeating the Ancient Berserk Shade Wizard

    Once you activate the next Mana Fluid Regulator and eliminate all foes on the third and final elevated platform, you’ll need to glide over an area filled with fire pillars. Be cautious of the fire circles appearing on the ground as the pillars activate, as a single hit can abruptly end your glide and cause serious damage.

    After safely landing, quickly move through the remaining dungeon with your teammates until you reach the final staircase.

    When playing with random party members, many players tend to rush through the dungeon and skip smaller mobs. This approach can make farming for higher-level loot more efficient, but it’s important to stick together to avoid getting overwhelmed by enemies.

    At this point, you need to defeat the Ancient Berserk Shade Wizard to eliminate the final barrier blocking the doorway to the main boss room.

    As the party approaches the Berserk Shade Wizard, the tank should pull in any remaining mobs away from the staircase to prevent the team from being overrun.

    This mini-boss utilizes simple yet effective attacks that can quickly stun you, including dark projectiles and area-of-effect (AOE) spells. Most of these attacks can be countered with your defense.

    Keep a close watch on the ground; most targeting spells show a visual cue indicating where they will impact. Once you defeat the wizard, you can proceed to the final boss room.

    Defeating the Rex Chimaerus

    Upon entering the boss room, be mindful of the four statues surrounding the battle area. Ideally, position one player near each statue, although your party can also cluster closer to assist the healer.

    The boss’s attack patterns are straightforward. If you attack from a distance instead of the front, you should be aware of three key attacks:

    1. Poison Circles: The chimaerus’s tail will target the three furthest players and unleash poison, affecting the nearby area. Exit this zone quickly to avoid substantial damage.
    2. Fireball Hits: A random player will get marked with a green beacon by the serpent, leading to an attack from the lion that will hurl three major fireballs.
    3. AOE Wipe: Watch for the message on your screen: “Launch Piton will be Summoned.” After this, floating pitons will appear above the arena, which can be utilized to reach the chandelier and mitigate the boss’s attack.

    Being struck by all three fireballs is fatal. To survive, the marked player must distance themselves from the group, while the tank should position themselves between the boss and the marked player, absorbing the first two fireballs.

    In addition to activating the chandelier, two players must also release two chains attached to the statues to properly counter the attack. Failing this will trigger a devastating AOE strike that could wipe the team.

    Once you defeat the boss, the dungeon will be complete, and you can redeem your rewards for 300-dimensional contract tokens.

  • Exploring Every Dungeon in Throne and Liberty’s Amitoi Realm

    Exploring Every Dungeon in Throne and Liberty’s Amitoi Realm

    Throne and Liberty features a delightful assortment of Amitoi companions to gather. You can have one of these adorable allies equipped at a time, and they will accompany you on your journeys, offering various helpful bonuses. These include boosting your Sollant earnings, autonomously collecting loot, and more.

    The Amitoi can be obtained through various methods. Some are rewards for completing specific quests, while others can be earned by defeating open-world bosses, discovered as random drops in Mystic Portals, or found as rewards in specific dungeons, whether they are open-world or instanced.

    Amitoi Available at Taedal’s Tower

    Taedal’s Tower is a unique dungeon that focuses solely on boss battles. This level-based structure has additional floors unlocked as you progress. As you advance to higher floors, having solid gear and making minimal errors is essential. Fortunately, the two Amitoi found within Taedal’s Tower are located on Floors 5 and 15 out of a total of 20, meaning they’re not on the most challenging levels.

    Amitoi

    Dungeon

    Lithograph Book

    Crafty Joker

    Taedal’s Tower (Floor 5 | Warrior’s Cry)

    Jolly Tourists (EXP Bonus) / Fantastic Pair, Assemble! (Sollant Bonus) / There’s Always Someone Better (Item Chance)

    Mischievous Joker

    Taedal’s Tower (Floor 15 | Thieves And Retrievers)

    Night-Time Traveler (Sollant Bonus) / We Use The Same Beauty Shop (Mastery Bonus) / Quite Lucky Fellows (EXP Bonus)

    Amitoi Available in Co-Op Dungeons

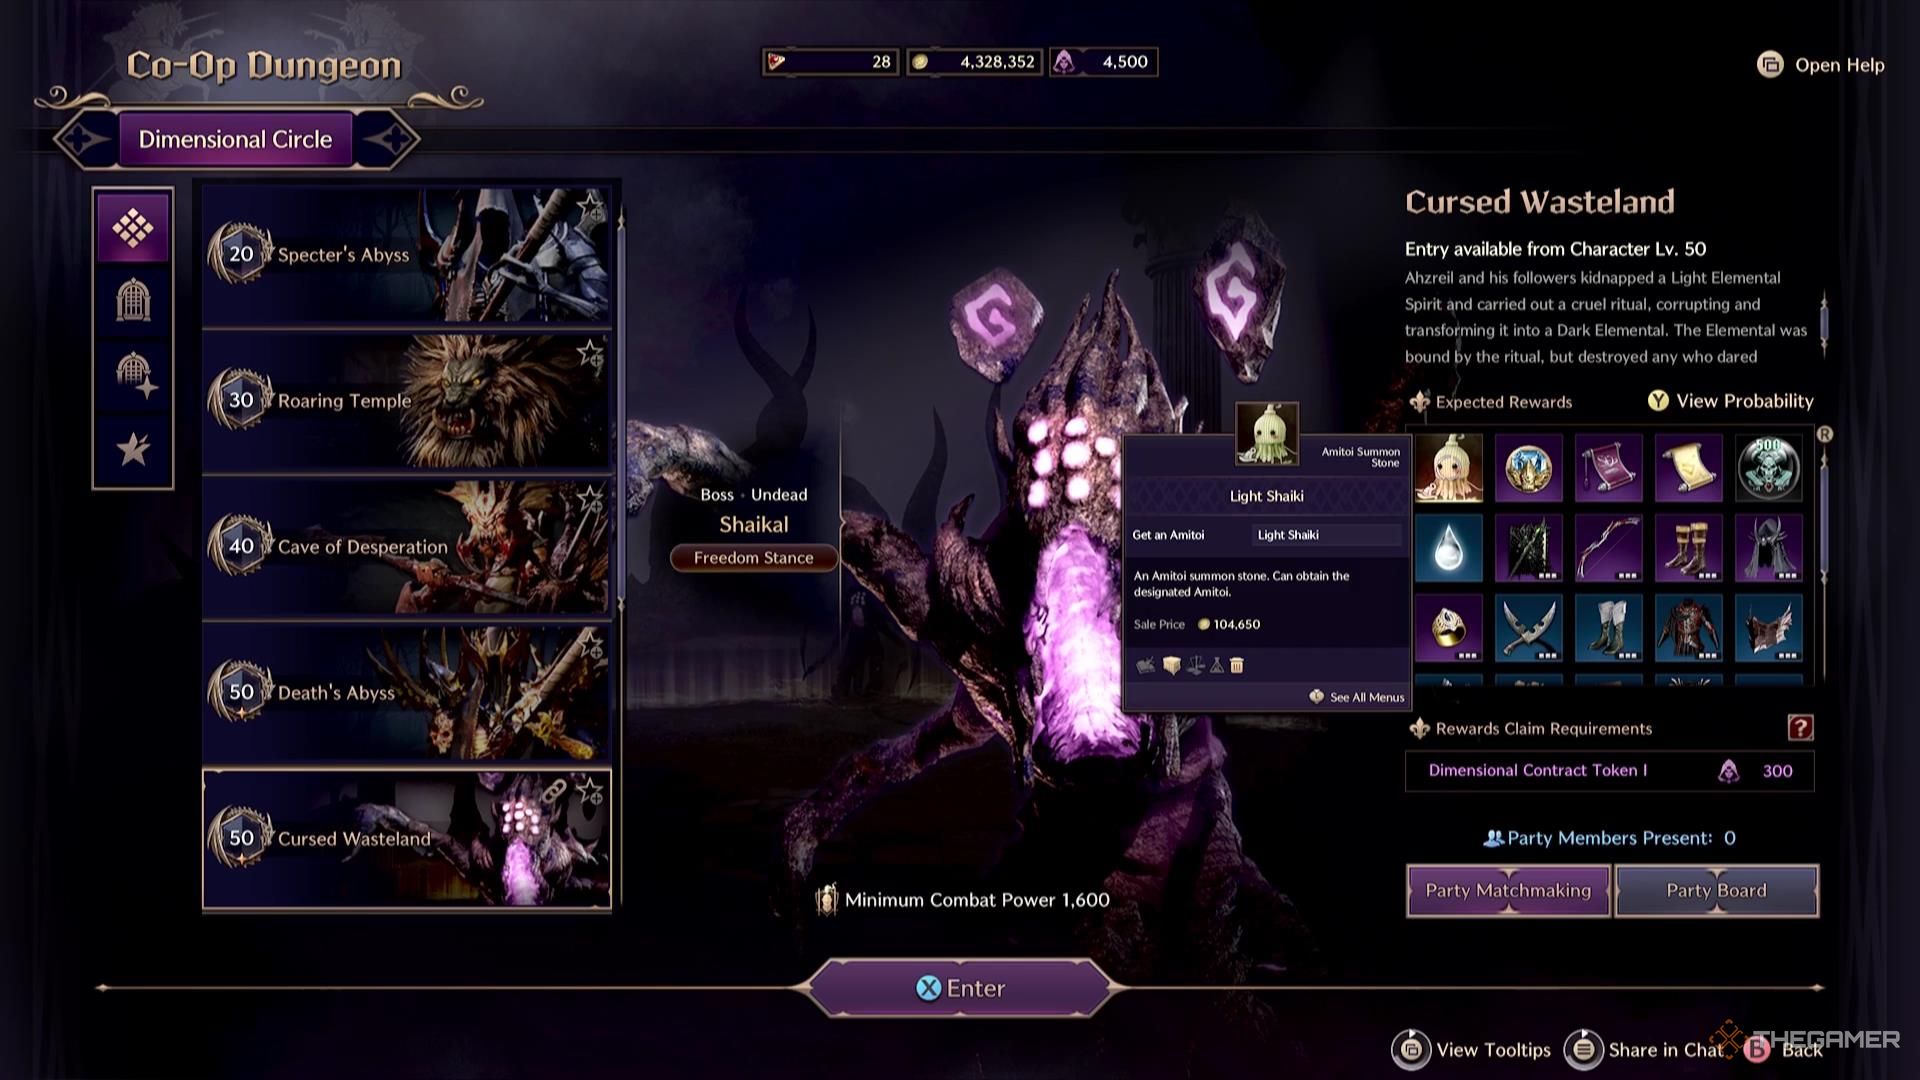
    The Light Shaiki Amitoi reward listed as a possibility in Throne and Liberty.

    Co-op Dungeons offer instanced challenges that engage groups of players in encounters against various foes. These dungeons vary in difficulty and level, and all Amitoi earned in these locations are found in Level 50 dungeons.

    Amitoi

    Dungeon

    Lithograph Book

    Tormented Writer Glynt

    Death’s Abyss (Level 50)

    Knight’s Memoirs (Item Chance) / Jack-Of-All-Trades (EXP Bonus)

    Fighter Dentwerp

    Cave Of Destruction (Level 50)

    Two! One! Two! Three! (Item Chance) / Get-Rich-Quick (Sollant Bonus) / Jack-Of-All-Trades (EXP Bonus)

    Steel Fist Dentwerp

    Butcher’s Canyon (Level 50)

    Hero Is Born Of Experience (Mastery Bonus) / Two! One! Two! Three! (Item Chance)

    Light Shaiki

    Cursed Wasteland (Level 50)

    The Cute VIP Guest (Item Chance) / Let’s Start A Band (Mastery Bonus) / Are You Here To Save Me? (Item Chance)

    Amitoi Found in Open-World Dungeons

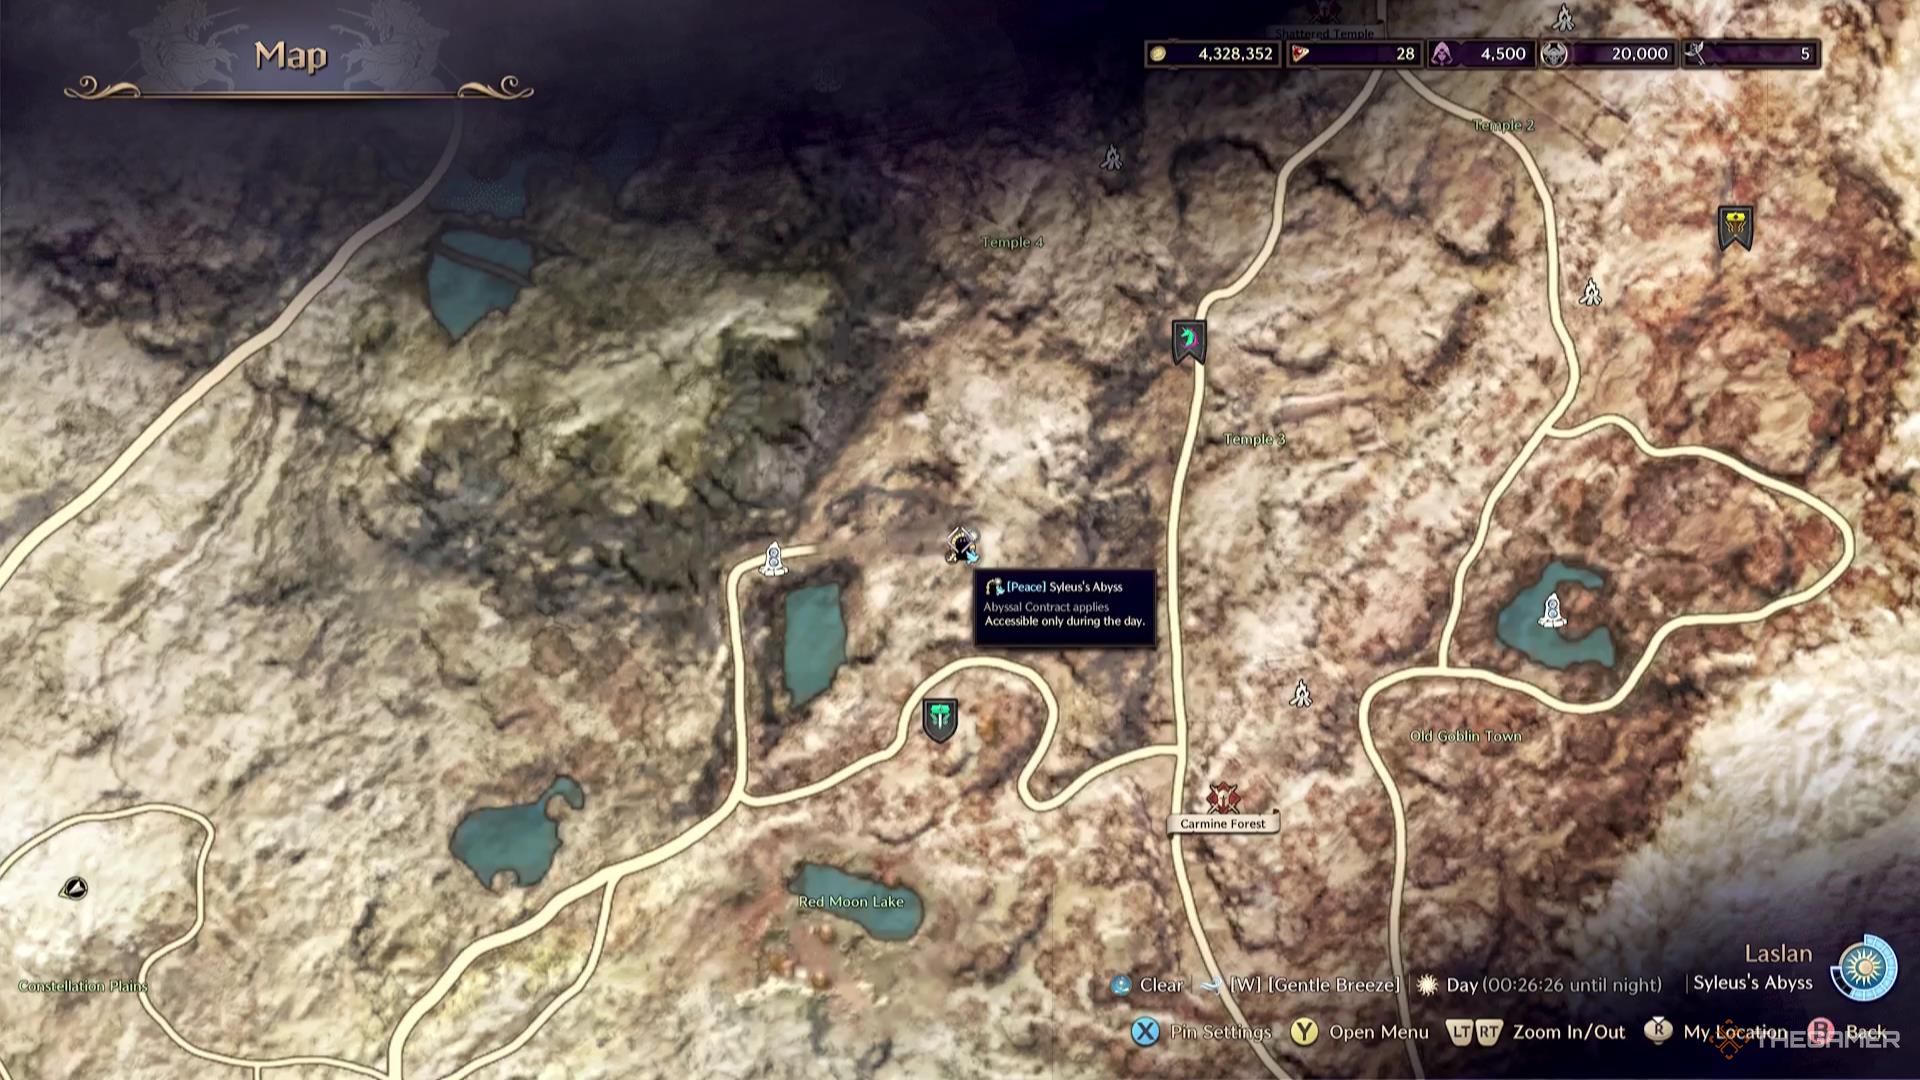
    Syleus's Abyss on the map in Throne and Liberty.

    Open-world Dungeons are among the most rewarding content in Throne and Liberty, featuring tougher enemies that drop significantly better loot. Once you have a few Amitoi that boost your item drop rates, these areas become excellent for farming high-quality items.

    Amitoi

    Dungeon

    Lithograph Book

    Bluish Figment

    Sanctum Of Desire (B1)

    The Devil Likes Trees! (Mastery Bonus) / Figment On The Tree (Sollant Bonus)

    Obsidian Knight Ossic

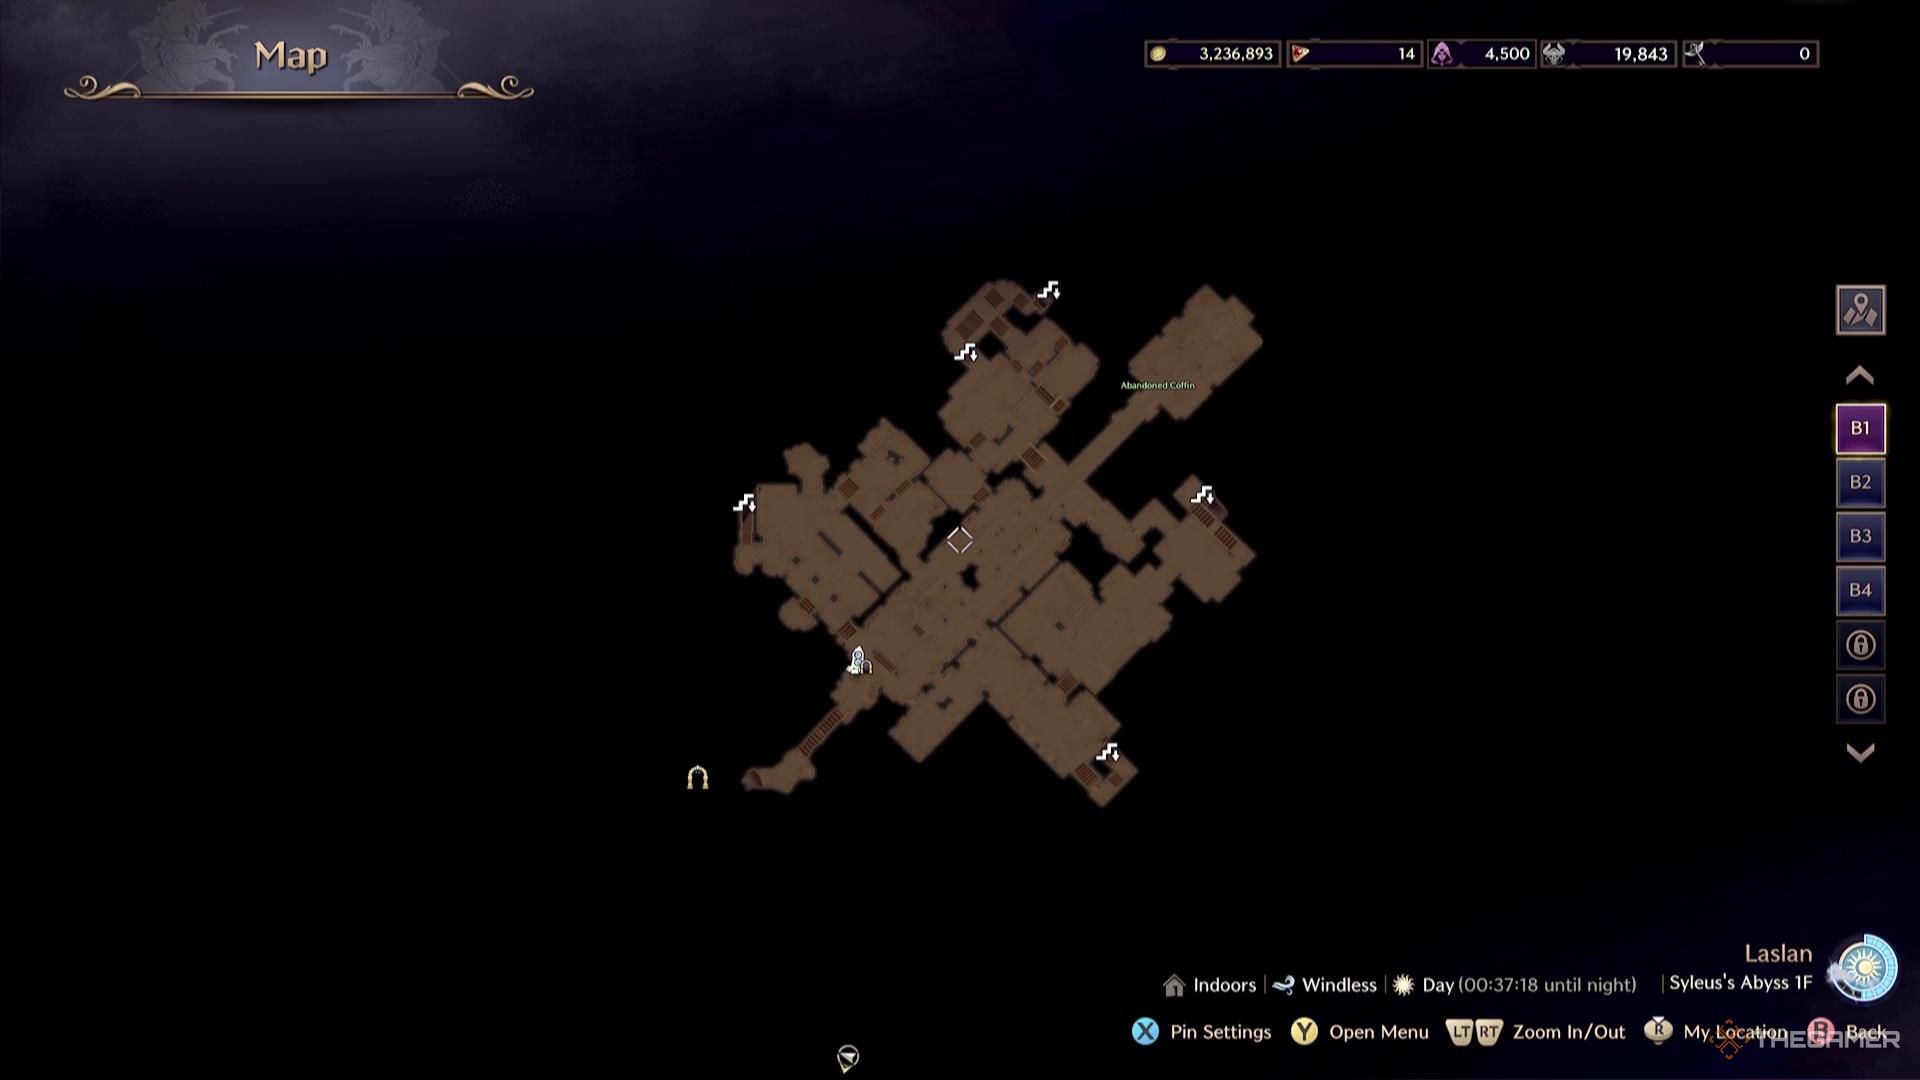
    Syleus’s Abyss (Floor 3)

    We Make A Good Pair (Mastery Bonus) / Knight’s Memoirs (Item Chance) / Are You Here To Save Me? (Item Chance)

    Serious Wizard Glynt

    Shadowed Crypt (Floor 1)

    Hero Is Born Of Experience (Mastery Bonus) / Magic To Save You (EXP Bonus) / Four Weapons Training Masters (Mastery Bonus)

    Forest Light Grover

    Syleus’s Abyss (Floor 5)

    Figment On The Tree (Sollant Bonus) / Are You Here To Save Me? (Item Chance)

  • Amitoi Boss Drop: Epic Loot in Throne and Liberty

    Amitoi Boss Drop: Epic Loot in Throne and Liberty

    In Throne and Liberty, there are various ways to acquire Amitoi, ranging from easy access through completing quests or random item collection to more challenging methods that involve defeating some of the toughest enemies—bosses.

    These bosses can be found scattered throughout the game, whether in the open world, during special events, or inside dungeons filled with tough foes and other players. Some boss encounters are solo fights that test your abilities to the limit. Due to their challenging nature, these bosses tend to drop the best loot, including Amitoi, which adds extra rewards to your victories.

    Amitoi from Open-World Bosses

    Open-world bosses are a significant aspect of the community experience in Throne and Liberty. They can be either PvE or PvPvE, which can complicate your efforts depending on the context. Regardless, defeating these bosses offers a variety of loot, including valuable Amitoi.

    Here’s a list of Amitoi and the bosses associated with them in open-world settings:

    Amitoi Boss Lithograph Book
    Prepared Adventurer Glynt Morokai (Morokai Dimension or Carmine Forest) Magic To Save You (EXP Bonus) / Quite Lucky Fellows (EXP Bonus)
    Sprouting Talem Talus (Talus Dimension or The Raging Wilds) Who Will Find First? (Item Chance) / Sollant Abundance (Sollant Bonus) / We Use The Same Beauty Shop (Mastery Bonus)
    Forest Protector Grover Grand Aelon (Grand Aelon Dimension or Purelight Hill) Let’s Start A Band (Mastery Bonus) / Are You Here To Save Me? (Item Chance)

    Amitoi from Open-World Dungeon Bosses

    Open-world dungeons also provide rewarding content, particularly through their bosses, who have unique drops available based on a loot table. Here are some Amitoi linked to specific dungeon bosses:

    Amitoi Boss Lithograph Book
    Obsidian Knight Ossic Cornelius (Syleus’s Abyss Floor 3) We Make A Good Pair (Mastery Bonus) / Knight’s Memoirs (Item Chance) / Are You Here To Save Me? (Item Chance)
    Forest Light Grover Aridus (Syleus’s Abyss Floor 5) Figment On The Tree (Sollant Bonus) / Are You Here To Save Me? (Item Chance)
    Serious Wizard Glynt Minezerok (Shadowed Crypt Floor 1) Hero Is Born Of Experience (Mastery Bonus) / Magic To Save You (EXP Bonus) / Four Weapons Training Masters (Mastery Bonus)

    Amitoi from Taedal’s Tower Bosses

    Taedal’s Tower features entirely solo challenges, with a boss at each level that you must defeat to progress. Each boss has specific loot, including certain Amitoi. Below is a summary of some Amitoi found through these tower bosses:

    Amitoi Boss Lithograph Book
    Crafty Joker Taedal’s Tower (Floor 5 Warrior’s Cry) Jolly Tourists (EXP Bonus) / Fantastic Pair, Assemble! (Sollant Bonus) / There’s Always Someone Better (Item Chance)
    Mischievous Joker Taedal’s Tower (Floor 15 Thieves And Retrievers) Night-Time Traveler (Sollant Bonus) / We Use The Same Beauty Shop (Mastery Bonus) / Quite Lucky Fellows (EXP Bonus)

    This variety of methods for obtaining Amitoi not only enriches the gameplay experience but also encourages players to engage with different aspects of Throne and Liberty.

  • Unlocking the Secrets of the Fonos Basin Chest in Throne and Liberty

    Unlocking the Secrets of the Fonos Basin Chest in Throne and Liberty

    The Fonos Basin Treasure Quest is an exciting adventure within the game Throne and Liberty, offering impressive loot once you successfully complete it. This region is inhabited by the formidable Fonos Clan orcs, making casual exploration quite a challenge. Similar to many exploration missions in the game, the Fonos Basin Treasure Quest consists of four distinct parts, each requiring you to traverse different areas of the region.

    Moreover, the final task of this quest involves solving a puzzle, which can be a bit tricky. This guide will provide you with all the information necessary to complete the Fonos Basin Treasure Quest.

    How to Initiate the Fonos Basin Treasure Quest


    The Fonos section of Throne and Liberty becomes available during the ninth chapter of the game’s main storyline. All the enemies in this area are level 50, so you’ll need to be at a similar level to handle them effectively.

    The orc mobs in this area tend to respawn quickly, which can lead to being overwhelmed by multiple foes simultaneously. If you find it tough to manage large amounts of damage, take down a Chief Orc Brawler first to acquire the Orc Brawler morph.

    Once you become active at the Fonos Basin waypoint, you’ll find the Fonos Basin Treasure Quest listed in your Exploration codex. Here’s a summary of the objectives involved in the quest:

    1. Speak with the treasure hunter at the Fonos Basin waypoint.
    2. Defeat an Orc Shaman to obtain the treasure key.
    3. Open the Mysterious Chest in Fonos Basin to get a copy of the Treasure Map.
    4. Retrieve the Fonos Basin treasure.

    How to Complete the Fonos Basin Treasure Quest

    After talking with the treasure hunter near the Fonos Basin waypoint, you should start taking out Orc Shamans in the area until you get a treasure chest key. After securing the key, locate the Mysterious Chest on the northeastern side of the Fonos Basin.

    Finding the Mysterious Chest can be a little tricky for some players, as the quest doesn’t provide an exact location. By generally heading northeast within the Fonos Basin, you will eventually arrive at the entrance of the Fire Cave.

    The exact spot of the Mysterious Chest is shrouded in black mist on the map, indicating that it’s outside the designated playable area. This might create some confusion, but you should have no trouble reaching this location, unlike other similar spots.

    When you approach the entrance of the Fire Cave, continue moving forward toward the cliff edge, where you’ll see wooden platforms to your left. The Mysterious Chest is situated inside one of the huts atop those wooden platforms.

    Be sure to pick up the map copy from the ground after opening the chest, as it won’t automatically be added to your collection codex. This step is essential for progressing in the quest.

    How to Obtain the Fonos Basin Treasure

    After collecting the hint from the treasure chest map, you’ll need to visit the area right as day turns to night. At night, you’ll spot an arena adjacent to the stone pillar featuring the Boonstone.

    The Fonos treasure appears in the arena only for a short time during the transition from day to night, so it’s crucial to be at this location beforehand to avoid missing it.

    The Fonos treasure will manifest right in front of the stairs leading to the Boonstone, next to the opening in the arena’s boundary.

    Rewards for Completing the Fonos Basin Treasure Quest

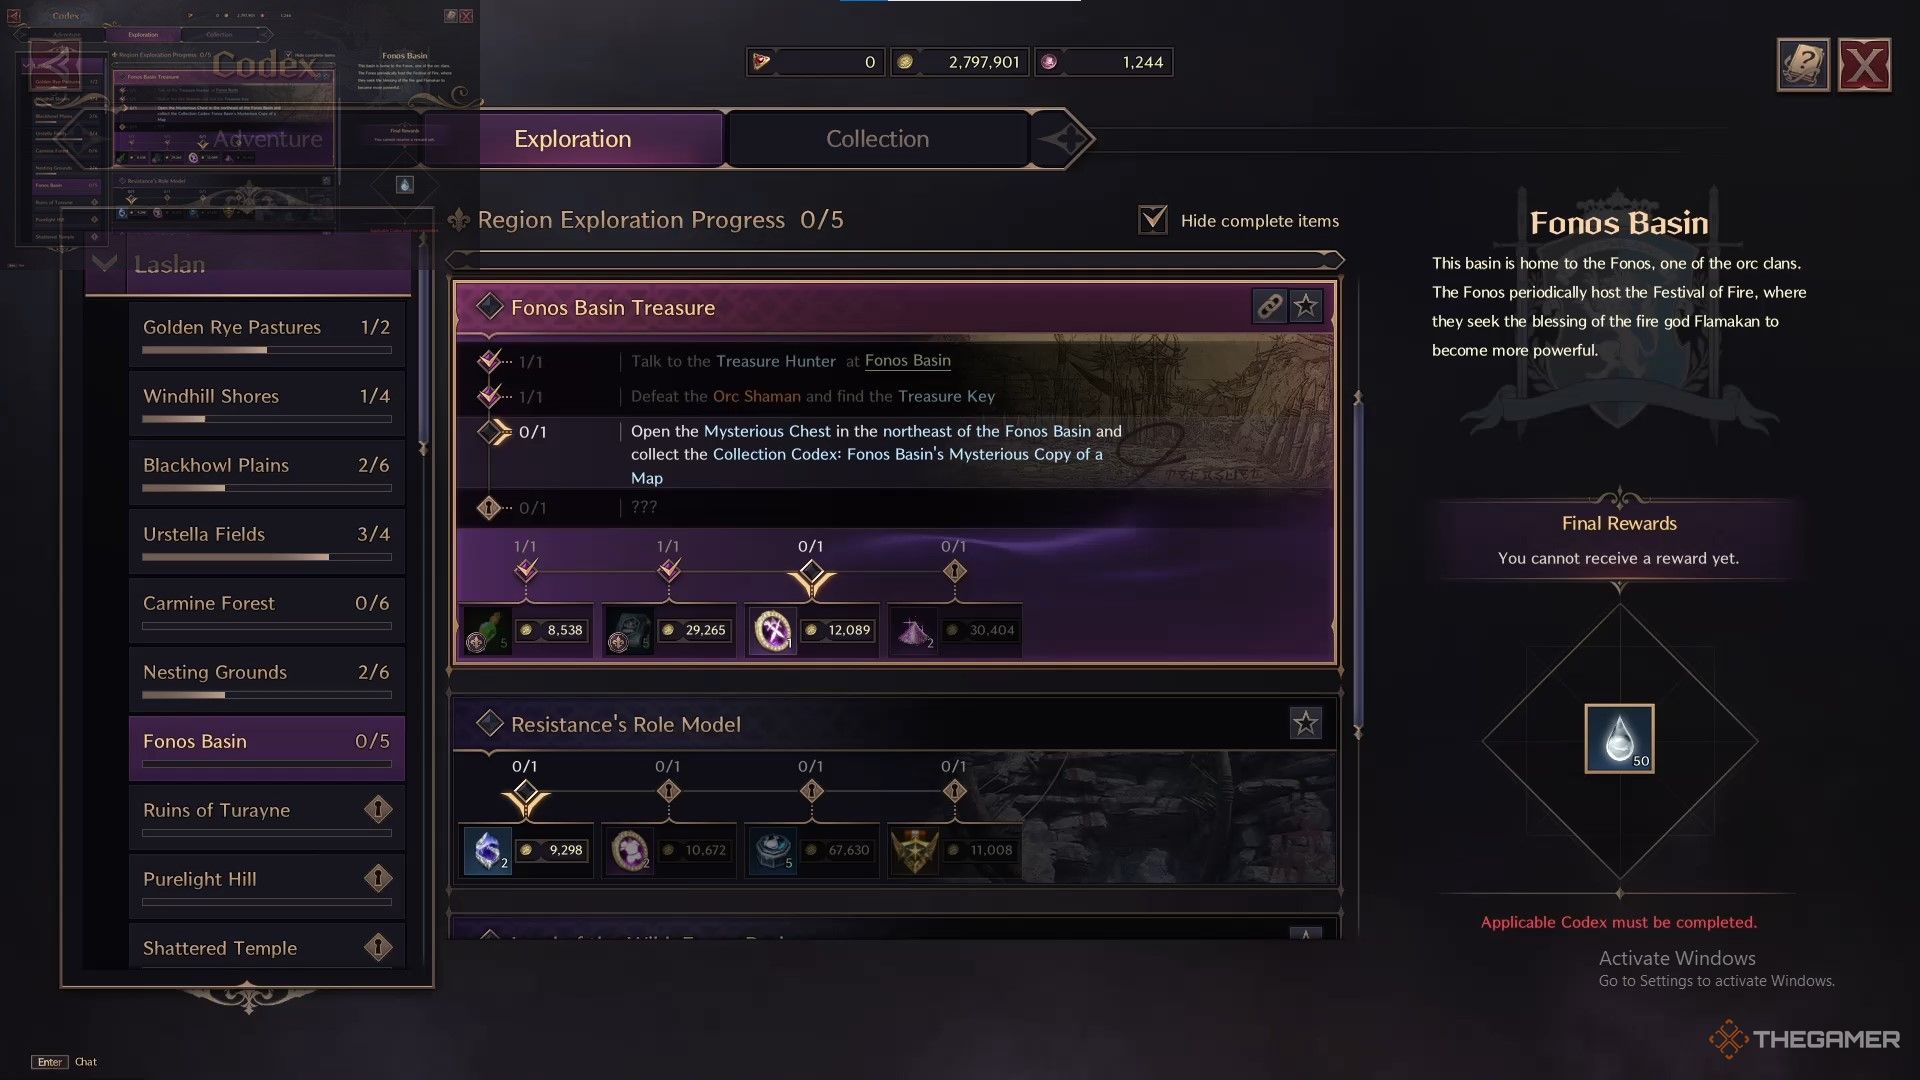
    The exploration codex menu showcasing the rewards for the Fonos Basin Treasure quest in Throne and Liberty.

    Similar to other exploration missions in Throne and Liberty, you will earn additional rewards for completing each quest objective. Here’s a detailed overview of the rewards you can expect:

    1. 5 Quality Recovery Crystals + 8,538 Sollant.
    2. 5 Rare Passive Skill Growthbooks + 29×265 Sollant.
    3. 1 Precious Weapon Growth Stone + 12,089 Sollant.
    4. 2 Precious Magic Powders + 30,404 Sollant.
  • Mastering the Lantern Seed Festival in Throne and Liberty

    Mastering the Lantern Seed Festival in Throne and Liberty

    Throne and Liberty features a variety of Dynamic Events that provide excellent rewards and significant experience points (EXP), making them ideal for players looking to immerse themselves in longer gaming sessions. Whether you’re aiming to complete your Region Exploration list or vying against numerous other players, we highly encourage diving into these events.

    One of the standout Dynamic Events is the Lantern Seed Festival, which offers great rewards for players eager to get a head start. With opportunities for upgrade materials and EXP, you’ll definitely find plenty to gain by participating!

    Getting Started with Seeds Popping in Throne and Liberty

    To access the side quests in the region, including the ‘Seeds Popping’ quest, you’ll need to activate the Nesting Grounds waypoint. This requires you to engage in the Lantern Seed Festival Dynamic Event to complete the quest. You can easily mark this quest as a favorite and track its location on your map, although you’ll need to wait for a specific time before you can make progress.

    To advance in this quest, you must jump into the Dynamic Event as soon as it starts and complete it. This involves taking down enemies within a designated area, collecting Lantern Seeds, and delivering them to Delivery Boxes. Fortunately, there are plenty of enemies to contend with in this region.

    How to Check When the Lantern Seed Festival Starts

    To find the start time of the Dynamic Event, go to your map in the Nesting Grounds. Click on the Event Schedule tab, and look for the blue flower icon. This will indicate the scheduled start time for the event. You can also check the current in-game time by looking at the clock displayed at the top of the event list.

    Once you know when the event starts, just wait until it goes live. The wait can be anywhere from a few minutes to several hours, so be prepared! As the start time approaches, head over to the marked area on your map and wait for the festivities to commence.

    Completing the Seeds Popping Quest

    During the Lantern Seed Festival, there are three tasks you need to complete as part of the Seeds Popping quest. If you don’t manage to finish these tasks, you’ll need to wait for the event to occur again.

    It’s recommended that you aim to be around Level 20-23 when you undertake this quest, as the enemies will be matching in level. Completing this quest early on is beneficial, as it offers solid EXP gains and upgrade materials crucial for your progression.

    Objective 1: Collect 50 Lantern Seeds

    The first goal in the Lantern Seed Festival is to gather 50 Lantern Seeds. You can snag these seeds in a few different ways, but the bulk will come from defeating enemies in the marked area.

    Keep an eye out for Tradepack Goblins—they drop a lot of Lantern Seeds during combat. Also, focus on taking down Headcrusher Terror Birds and other enemies throughout the region for additional drops.

    While you might encounter carts that contain seeds, it’s generally faster to hunt enemies than to scavenge for carts, especially since you’ll need to compete with other players for the loot.

    Objective 2: Deliver Lantern Seeds to Delivery Boxes

    Once you have collected at least 50 Lantern Seeds, make your way to one of the Delivery Boxes located nearby to deposit your gathered seeds. You’ll have the chance to offload your seeds roughly 15 minutes before the Lantern Seed Festival ends, ensuring that this part of your quest is completed.

    You can keep gathering more Lantern Seeds from defeated adversaries afterwards. This will help you boost your Personal Performance Score and earn better rewards at the end of the event.

    Objective 3: Earn a Performance Reward

    Finally, the last requirement of the Seeds Popping quest is to acquire a Performance Reward, which basically involves completing the Lantern Seed Festival. You’ll have to stay for the full 20 minutes if you want to check off this quest.

    As you gather more Lantern Seeds and turn them in at Delivery Boxes, you’ll increase your tier—a tier that determines your rewards once the event concludes. You can choose to either go all out for the best reward or take a more leisurely pace until the event wraps up.

    Popping Seeds Rewards

    Here’s what you can expect for completing the various objectives:

    Objective Reward
    Gather 50 Lantern Seeds – x4 Quality Accessory Growthstone
    – 7,079 EXP
    – 24,205 Sollant
    Deliver Lantern Seeds at a Delivery Box – x4 Quality Armor Growthstone
    – 14,914 EXP
    – 41,698 Sollant
    Acquire a Performance Reward – x4 Quality Weapon Growthstone
    – 16,687 EXP
    – 43,891 Sollant

    Lantern Seed Festival Rewards

    Your performance during the event will dictate the rewards you receive at the end. The better you do, the more tantalizing loot you’ll earn. Key rewards you can earn include Stellarite Elements and Sollants, depending on your ranking and the number of Lantern Seeds collected.

    Don’t forget: your performance rewards will differ based on how well you perform during the Lantern Seed Festival!

  • Farming Salt: Techniques and Its Various Uses

    Farming Salt: Techniques and Its Various Uses

    In the popular free-to-play MMORPG Throne and Liberty, salt is a crucial resource for players aiming to enhance their cooking abilities. Cooking is a key life skill in the game, as it allows you to create meals that provide valuable buffs while you navigate the world of Solisium. While many recipes call for salt, this essential ingredient can be tricky to locate.

    Investing time in developing your culinary skills and gathering necessary ingredients can truly pay off. The bonuses you receive from your crafted meals can significantly aid you in challenging boss fights, PvP battles, or while exploring Solisium. You can find all the necessary ingredients through various methods: gathering, fishing, defeating specific monsters, purchasing from Sundries Merchants, sending your Amitoi on Expeditions, or receiving them as quest rewards. Remember to keep an eye out for other essential ingredients to help prepare your next dish.

    Where To Find And Farm Salt

    Send Amitoi On Expeditions

    Custom image by Paul Vanasse

    There are several ways to locate and gather salt. One method is to defeat monsters in Windhill Shores, as they occasionally drop salt upon defeat. Use the Windhill Shores Waypoint to fast-travel and start targeting Chestaceans, Hermit Lobsters, Large Stone Crabs, and Megalobsters; any of these creatures could drop salt. You may also find salt by defeating Sea Crabs, Hermit Crabs, Starlight Fireflies, and Iron Chestaceans at Daybreak Shore in Stonegard at higher levels.

    You can also purchase salt in Zenus’s Star Shop using Star Crystals. Salt (x10) costs five Star Crystals. However, be cautious about spending too many Star Crystals on salt, as it may prevent you from acquiring more valuable items from the shop.

    A more effective method for gathering salt is through Amitoi Expeditions. As you progress in Throne and Liberty, you’ll gain access to the Amitoi House and can assign Amitoi to undertake timed missions to gather valuable resources. Assign boosted Amitoi (indicated by an arrow next to them during selection) to expeditions that yield salt as soon as you are able.

    Amitoi Expeditions Rewarding Salt

    Name

    Expedition Team Level

    Type

    Windhill Shores (Laslan)

    3

    Shore

    Ustella Fields (Laslan)

    4

    Plains

    Monolith Wastelands (Stonegard)

    7

    Desert

    Abandoned Stonemason Town (Stonegard)

    8

    Desert

    Moonlight Desert (Stonegard)

    9

    Desert

    Sandworm Lair (Stonegard)

    10

    Desert

    Always have an Amitoi Expedition in progress to maximize your salt collection while also leveling up your Amitoi.

    The quickest way to farm salt is to defeat monsters at Windhill Shores while your Amitoi Expeditions complete. A great time-saving tip is to aggro multiple enemies at once and eliminate them all using an area-of-effect attack.

    What Is Salt Used For?

    Use Salt To Cook Helpful Items

    Once you have gathered enough salt along with other ingredients, you can start cooking meals and progressing your cooking skills. To prepare a dish, find and interact with a Bonfire in the wild or a Cooking Oven in towns (there’s one in Kastleton near the crafting NPCs).

    To cook, make sure you have the recipe ingredients, then interact with the oven, select your meal, and begin cooking. Here is a list of recipes that require salt, with each using one salt per dish:

    Meal

    Cooking Level

    Effect

    Meat and Onion Soup

    1

    All Defense +150, Duration: 15-30 min.

    Vegetable Stir-Fry

    1

    Max Health +300, Health Regen +20, Duration: 15-30 min.

    Rye Bread

    1

    Fishing Mastery Bonus +15%, Duration: 15-30 min.

    Mushroom Stir-Fry

    2

    Max Mana +300, Mana Regen +20, Duration: 15-60 min.

    Kastler Salad

    3

    EXP Bonus +50%, Duration: 15-60 min.

    Wild Game Steak

    4

    All Hit Chance +60, All Heavy Attack Chance +60, Duration: 15-30 min.

    Laslan-Style Braised Meat

    9

    All Evasion +50, Skill Damage Resist. +60, Duration: 15-60 min.

    Crab Meat Pie

    9

    Sollant Bonus +50%, Abyssal Contract Token Efficiency +10%, Duration: 15-60 min.

    Grilled Crown Fish

    13

    Bonus Damage +7, Skill Damage Boost +50, Duration: 15-60 min.

    Vienta-Style Seafood

    15

    Incoming Heal +2.5%, Amitoi Heal +50%, Duration: 15-60 min.

    Scorpion Tail Fritters

    17

    Movement Speed +3.5%, Attack Speed +3%, Duration: 15-60 min.

    Always be on the lookout for extra ingredients while you explore; complex recipes will require more components. Improving your cooking and preparing meals for yourself or your guild will make you a valuable asset to any team, so don’t overlook the importance of spending time by the oven as you journey through the world of Throne and Liberty.

  • Switching Servers in Throne and Liberty: A Quick Guide

    Switching Servers in Throne and Liberty: A Quick Guide

    Throne of Liberty allows players the option to switch the server they are currently on. While this feature is available for free during the game’s early period, it will be priced at 750 Lucent, equivalent to approximately $7 USD, by 2024. Once purchased, the server transfer ticket is active for 24 hours, so you’ll need to use it within that timeframe. If timed correctly, it’s possible to use the ticket even after the campaign concludes.

    Server transfers are key for playing with friends if you find yourselves on different servers in Throne of Liberty. The game boasts nearly 90 servers located in various regions around the world. Coordinating where to start your journey can be challenging, especially since the game just entered Early Access in late September. Most servers have not yet developed their own unique identities, cultures, languages, or economies.

    How to Change Servers in Throne and Liberty

    Temporary Free Offer

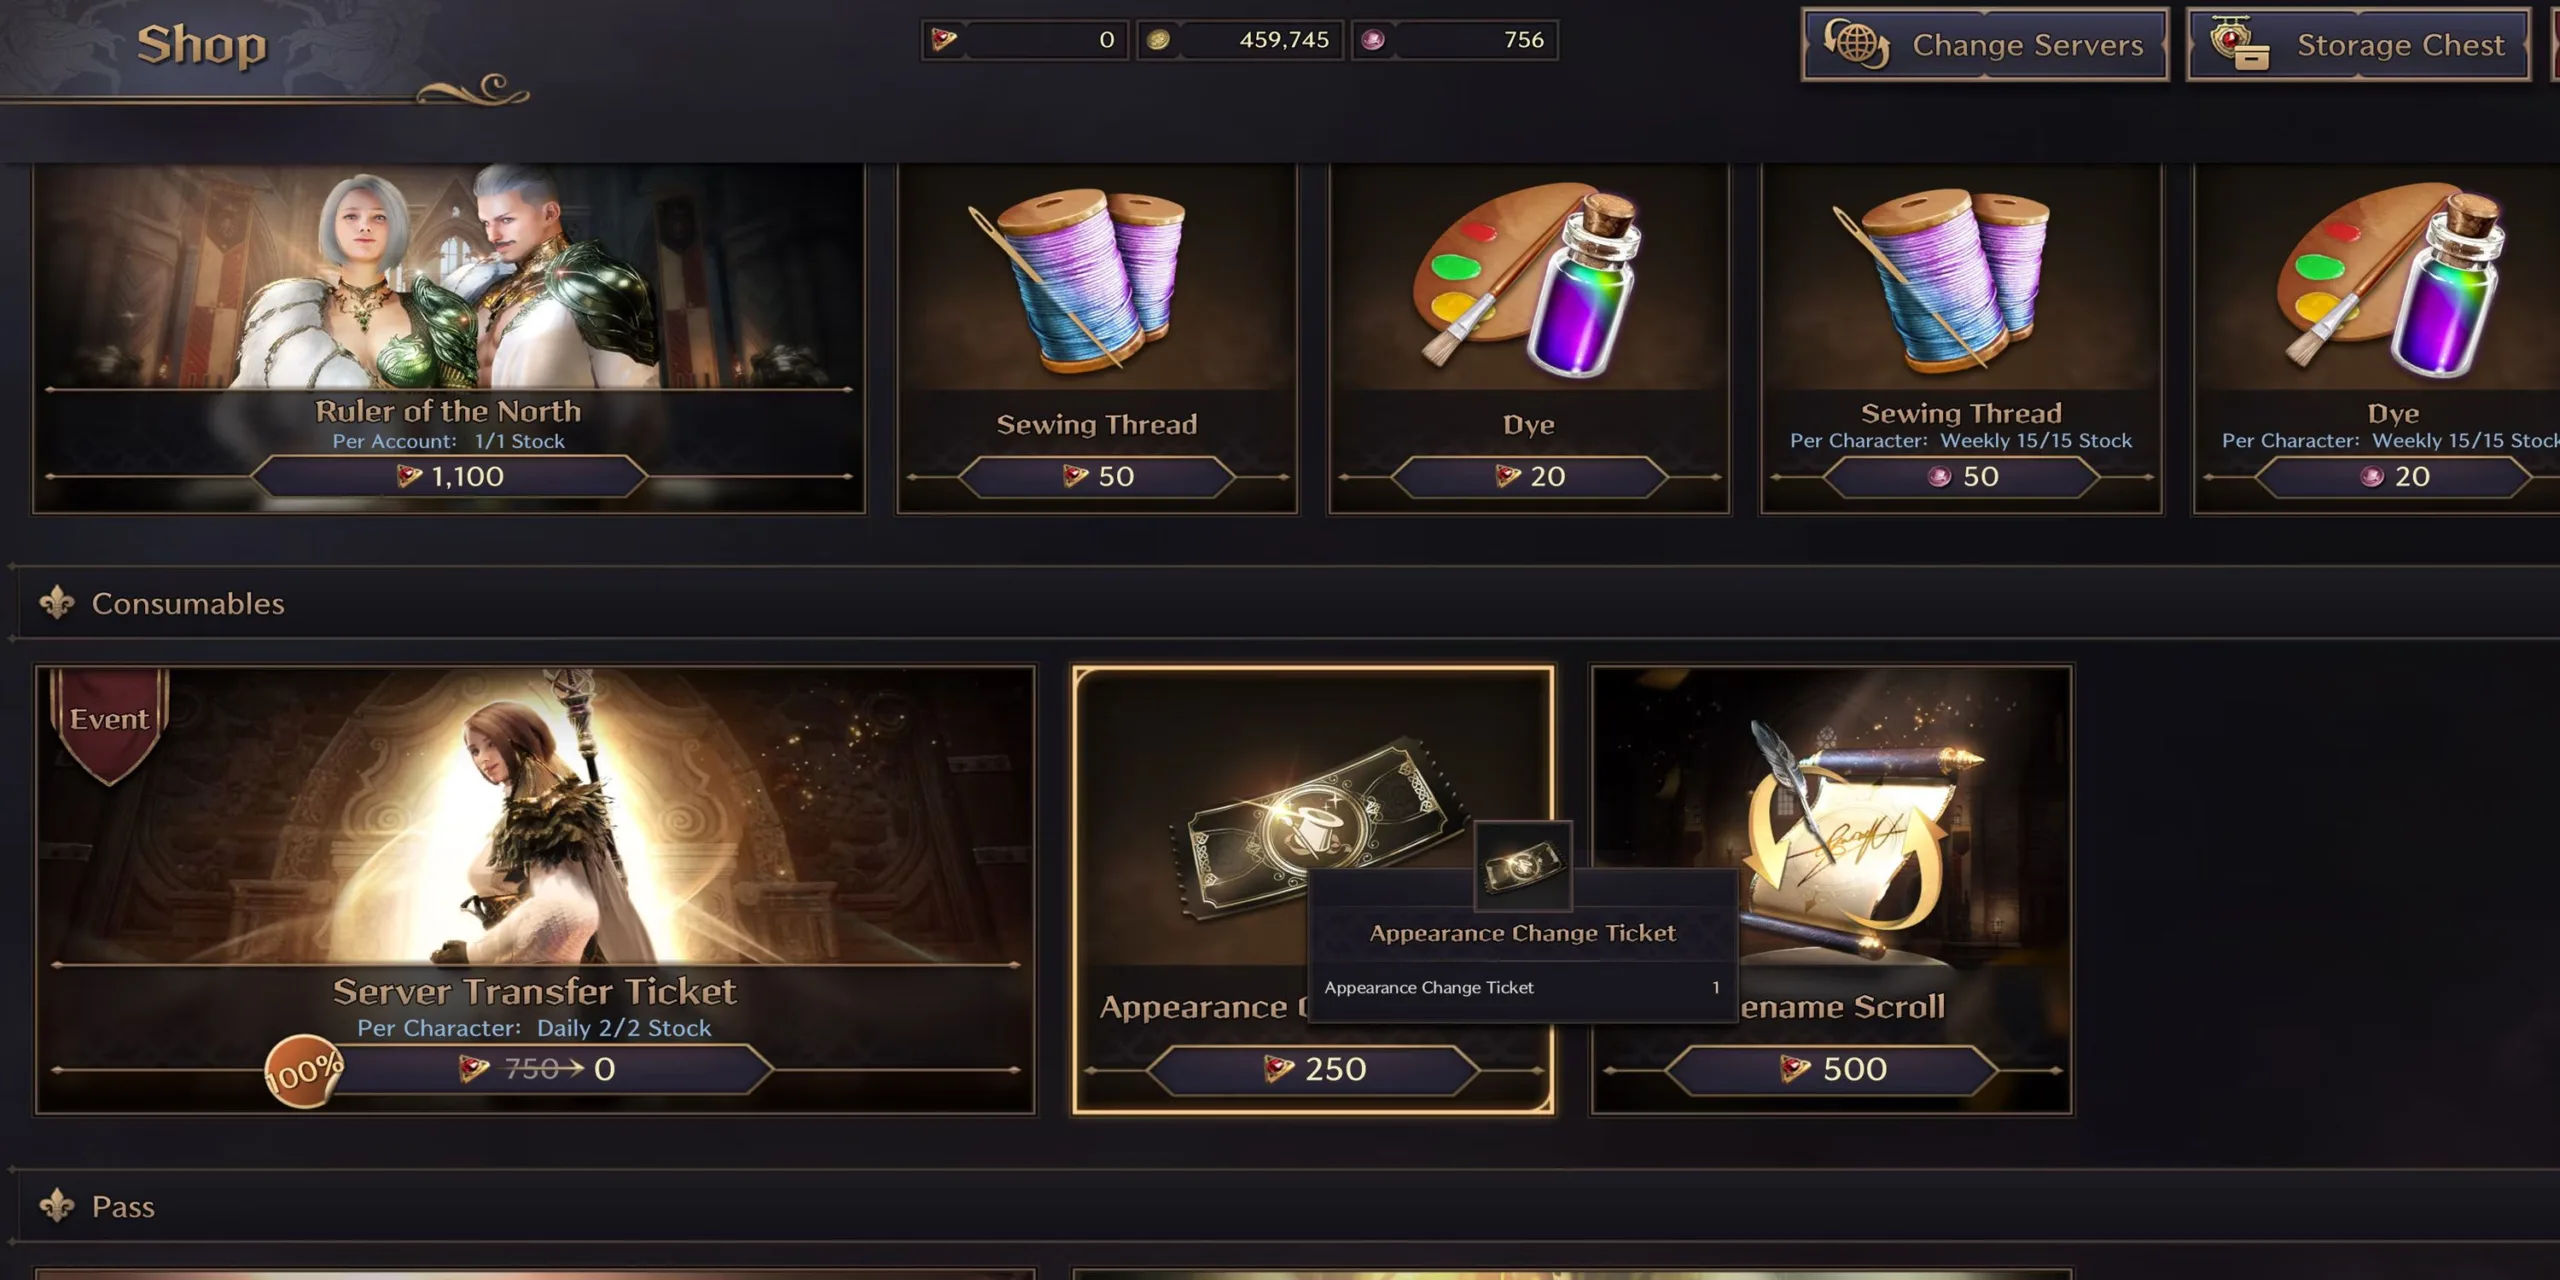
    The Server Transfer Ticket can be found in the cash shop of Throne and Liberty. To access it, open the main menu and click on the store icon in the top right corner. From there, scroll down to the “Consumables” tab to find the ticket. As you browse, you may also notice options for paid transformations, although you can utilize standard morph options as part of regular gameplay.

    Each ticket is designated for an individual character. If you wish to switch servers with multiple characters, you will need to buy and apply a ticket for each one. This gives you the flexibility to send each character to a different server.

    A YouTuber, Quick Tips, successfully acquired a Server Transfer Ticket while playing. However, they could not redeem it immediately as they were not in a safe area. Other restrictions also apply, including not being in a guild and having all items claimed from the Auction House.

    Choosing a Server Destination and Requirements

    Once you have at least one Server Transfer Ticket, a “Change Server” button will appear in the Throne and Liberty cash shop. Click this to access a new menu where you can select a server region. The options available include Western Americas, Eastern Americas, South America, Europe, and Japan/Oceania. A list of servers will display, allowing you to filter out those that are full or experiencing congestion.

    Within the selection menu, you will see nine requirements that must be met to proceed with the transfer. Most of these requirements ensure that you are not in a guild or selling items. Make sure to resolve any such obligations before attempting to transfer.

    1. Be at least Level 1.
    2. You must be in a Safe Zone.
    3. Ensure you are not in a party.
    4. You should not be a member of any guild.
    5. There should be no pending guild applications.
    6. All auction house items must be collected.
    7. All incoming mail should be claimed.
    8. All rewards from the Shop Chests must be collected.
    9. No remaining Gate of Infinity rewards.

    If you meet these conditions, click the purchase button in the lower right to finalize the transfer. Depending on server load, the process may take a few minutes, and you’ll soon be connected to a new server in Throne and Liberty.

    Source: Quick Tips/YouTube

  • Unlocking the Green Ranger Elowen in Throne and Liberty: A Complete Guide

    Unlocking the Green Ranger Elowen in Throne and Liberty: A Complete Guide

    In Throne and Liberty, Guardians are unique abilities that let you transform into special characters. When you change form, you gain unique bonuses and skills that significantly boost your combat effectiveness. This transformation is explained in-game during the “A Sacred Pledge of Blood” quest, which features the Vampire Slayer Ezekiel.

    As you explore the game, you’ll encounter various other Guardians to discover which one fits your gameplay style best. This guide will provide all the details you need to acquire the Green Ranger Elowen.

    How to Obtain the Green Ranger Elowen

    To obtain the Green Ranger Elowen, you must complete the exploration quest called “Elemental Tree Harvest” located in the Nesting Grounds. This quest involves interacting with a small elemental tree at the Nesting Grounds and transferring the elemental energy from a deceased tree to a living one.

    The Nesting Grounds is not an early-game area and is filled with aggressive terror birds and Quilix, which can inflict significant damage on lower-level players. It’s advisable to undertake this quest once you’re in the early-mid or late-early game stages.

    Make sure to activate the Nesting Grounds waypoint before starting this quest. The quest will not appear in your Exploration Codex unless you’ve collected the Nesting Grounds waypoint.

    The “Elemental Tree Harvest” consists of three main tasks, each yielding different rewards upon completion.

    Here’s the order of tasks to complete:

    1. Interact with the Small Elemental Tree found south of the Chief Terror Bird’s Mountain Nest.
    2. Follow the elemental tree spirit and pass by all the old elemental trees in the Nesting Grounds.
    3. Check the health of the second small elemental tree within the Nesting Grounds.

    Once you interact with the first tree, the elemental spirit will automatically guide you to the second tree. Be quick to follow the traces of the old tree spirits, as the quest is time-sensitive.

    After successfully completing the quest, you will receive the Green Ranger Elowen as your reward.

    How to Utilize the Green Ranger Elowen

    According to the lore of Throne and Liberty, Guardians are special characters that pledge their souls to assist players. As a player, you can call upon their powers and use them in battles.

    Once summoned, the Guardian will be in a ten-minute cooldown period until it can be used again.

    Overall, Guardians serve as a strategic advantage, particularly during intense combat situations. The Green Ranger Elowen is especially useful for longbow players who employ binding skills like the Ensnaring Arrow in battle.

    After acquiring it, assign the Green Ranger Elowen to your character through the Guardians’ menu found in the character tab of your main menu.

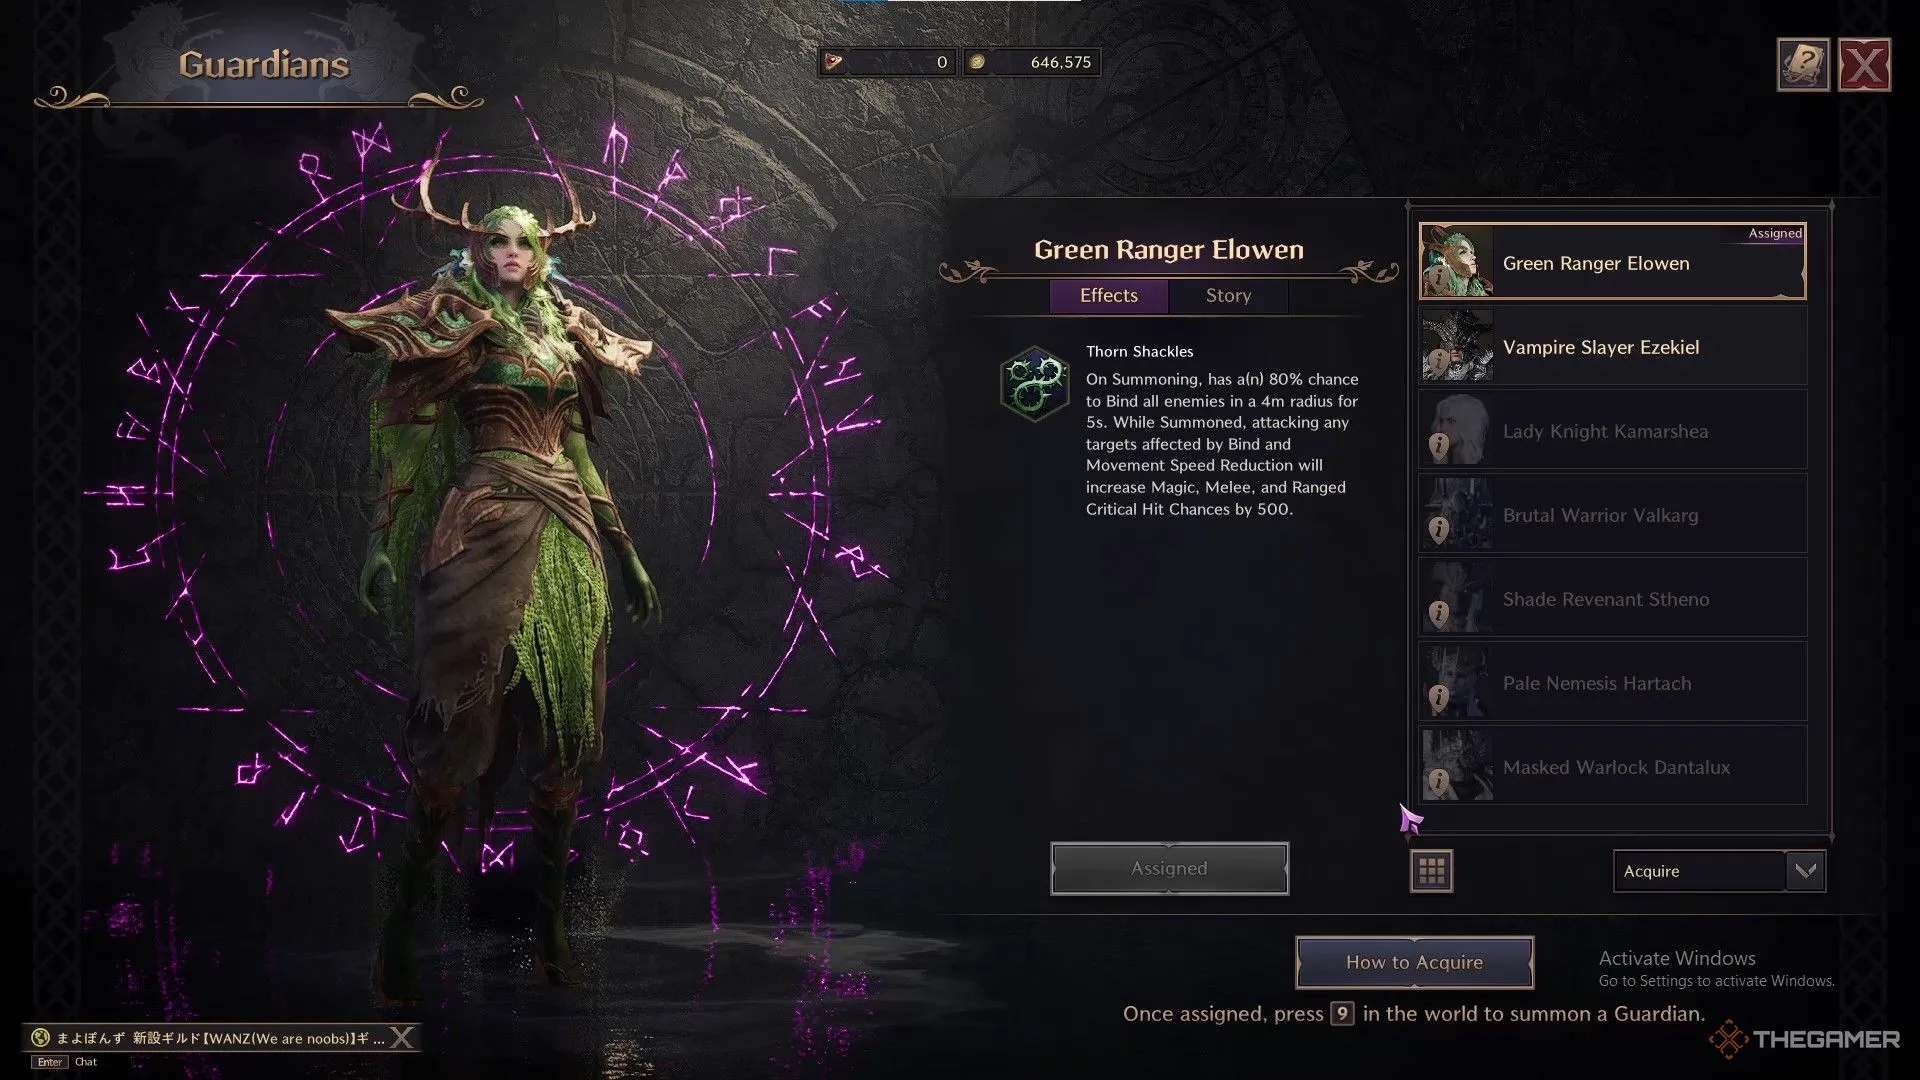
    The Green Ranger Elowen offers the following abilities:

    • When summoned, you have an 80 percent chance to bind all enemies within a four-meter radius for five seconds.
    • Attacking enemies affected by binding or movement speed reduction boosts the critical hit chances of all magic, melee, and ranged attacks by 500.
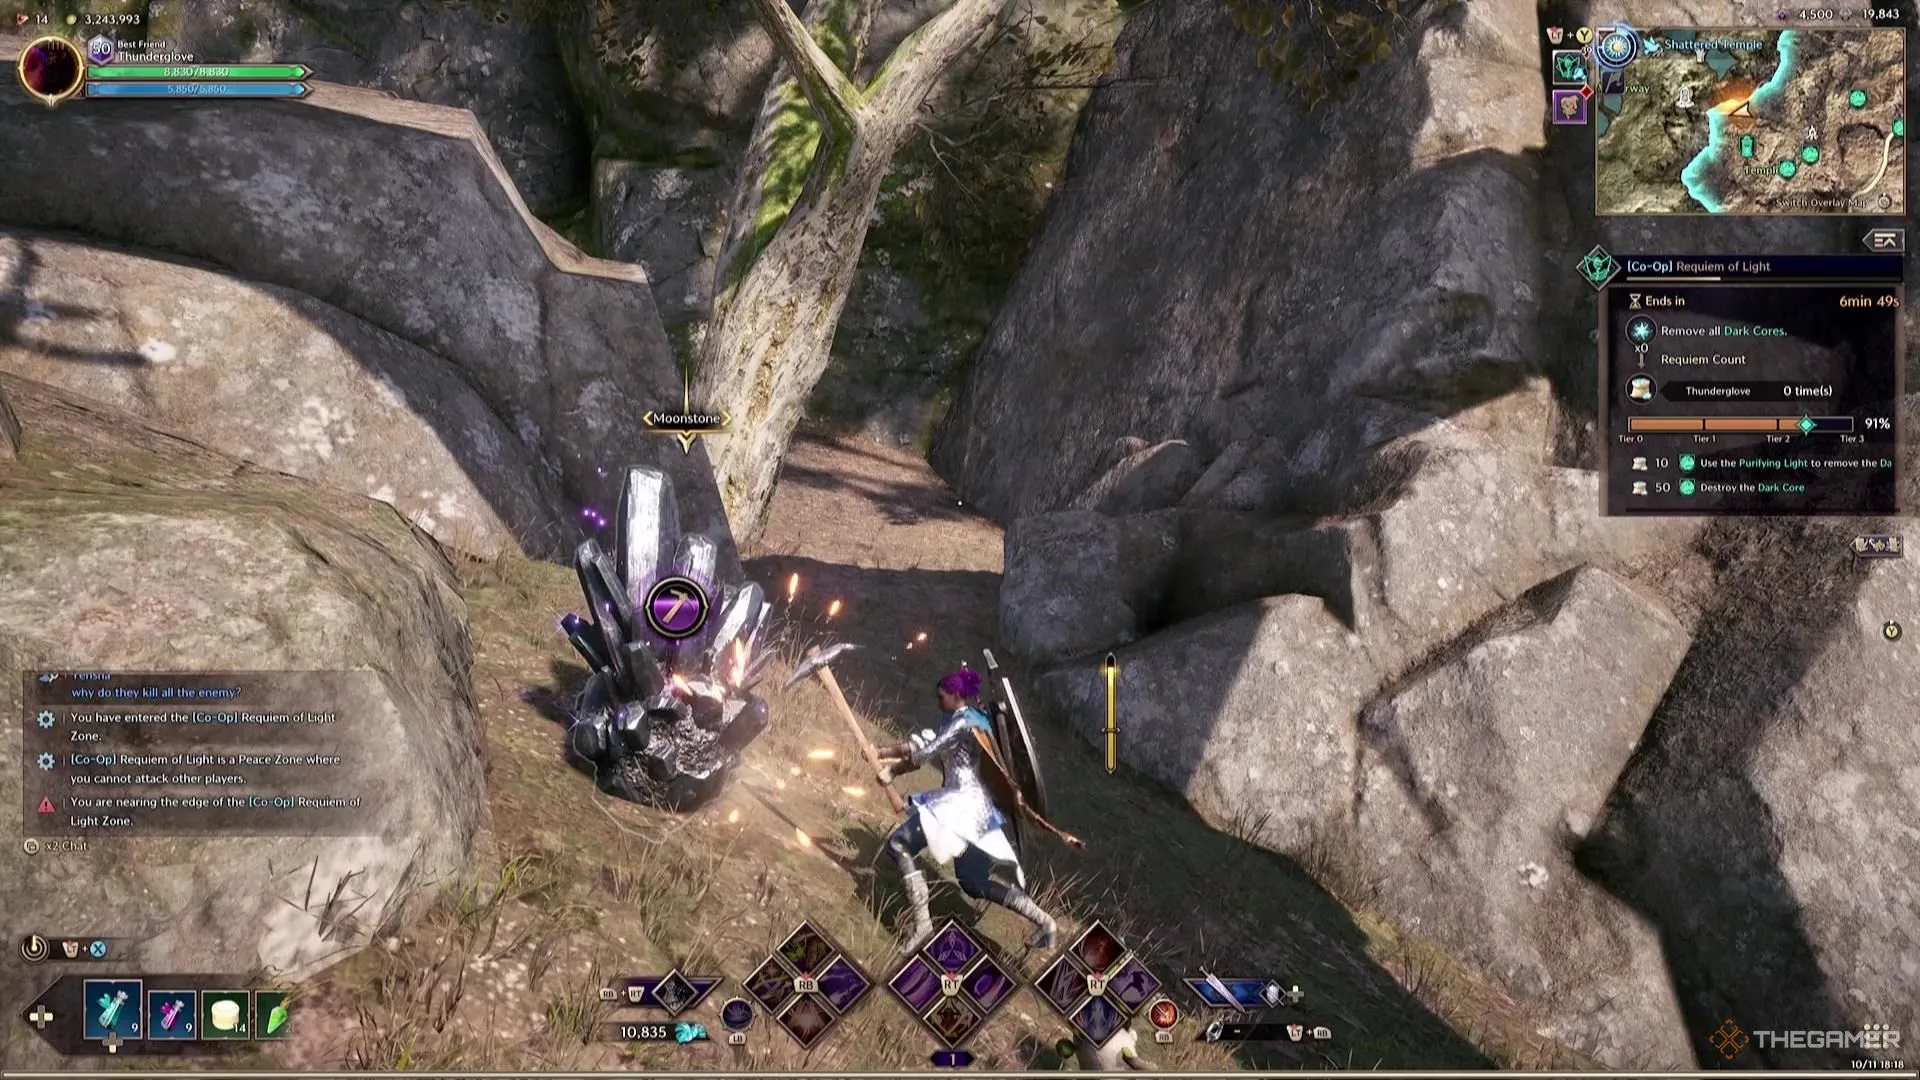
    A character looks at Moonstone Ore in Throne and Liberty.

    Next

    Thorne and Liberty: Where to Mine Moonstone and Marind Ore

    Discover everything you need to know about finding Moonstone, Marind Ore, and acquiring the Wandering Youth Gneiss Amitoi in Throne and Liberty.

  • Unlocking the Wandering Youth Gneiss Amitoi in Throne and Liberty: A Complete Guide

    Unlocking the Wandering Youth Gneiss Amitoi in Throne and Liberty: A Complete Guide

    In Throne and Liberty, you’ll find that Moonstones and Marind Ore are essential resources needed for a variety of crafting recipes. It can be overwhelming when you check a recipe and realize you don’t have enough of a specific resource.

    Fortunately, gathering Moonstones and Marind Ore isn’t overly complicated. While some resources may require significant hunting and exploration, you’ll find that collecting Moonstones and Marind Ore is relatively straightforward, though it may take a bit of time and effort. Sometimes, you might even need to be at a specific location during certain times.

    Where to Locate Moonstone


    Moonstones are easy to locate. If you’ve roamed around Solisium, you’ve more than likely spotted them. You can find Moonstones in various outcrops around the map. The type of Moonstone Ore collected will depend on the specific outcrop you mine.

    Some outcrops yield Manasteel and Pure Gold, while others might provide you with Rubrix, Stalon, or Emeret Ore. Each type of Moonstone varies in its value based on what you’re trying to craft, so certain Moonstones might be more valuable for your projects.

    Moonstones appear on the minimap as different rock-like symbols, reflecting the type of outcrop available. Keep in mind that resource nodes are shared by all players on the server, which means you may have to compete with others to gather them.

    You can gather ores while taking damage, but if your character is stunned, you will need to restart the gathering process.

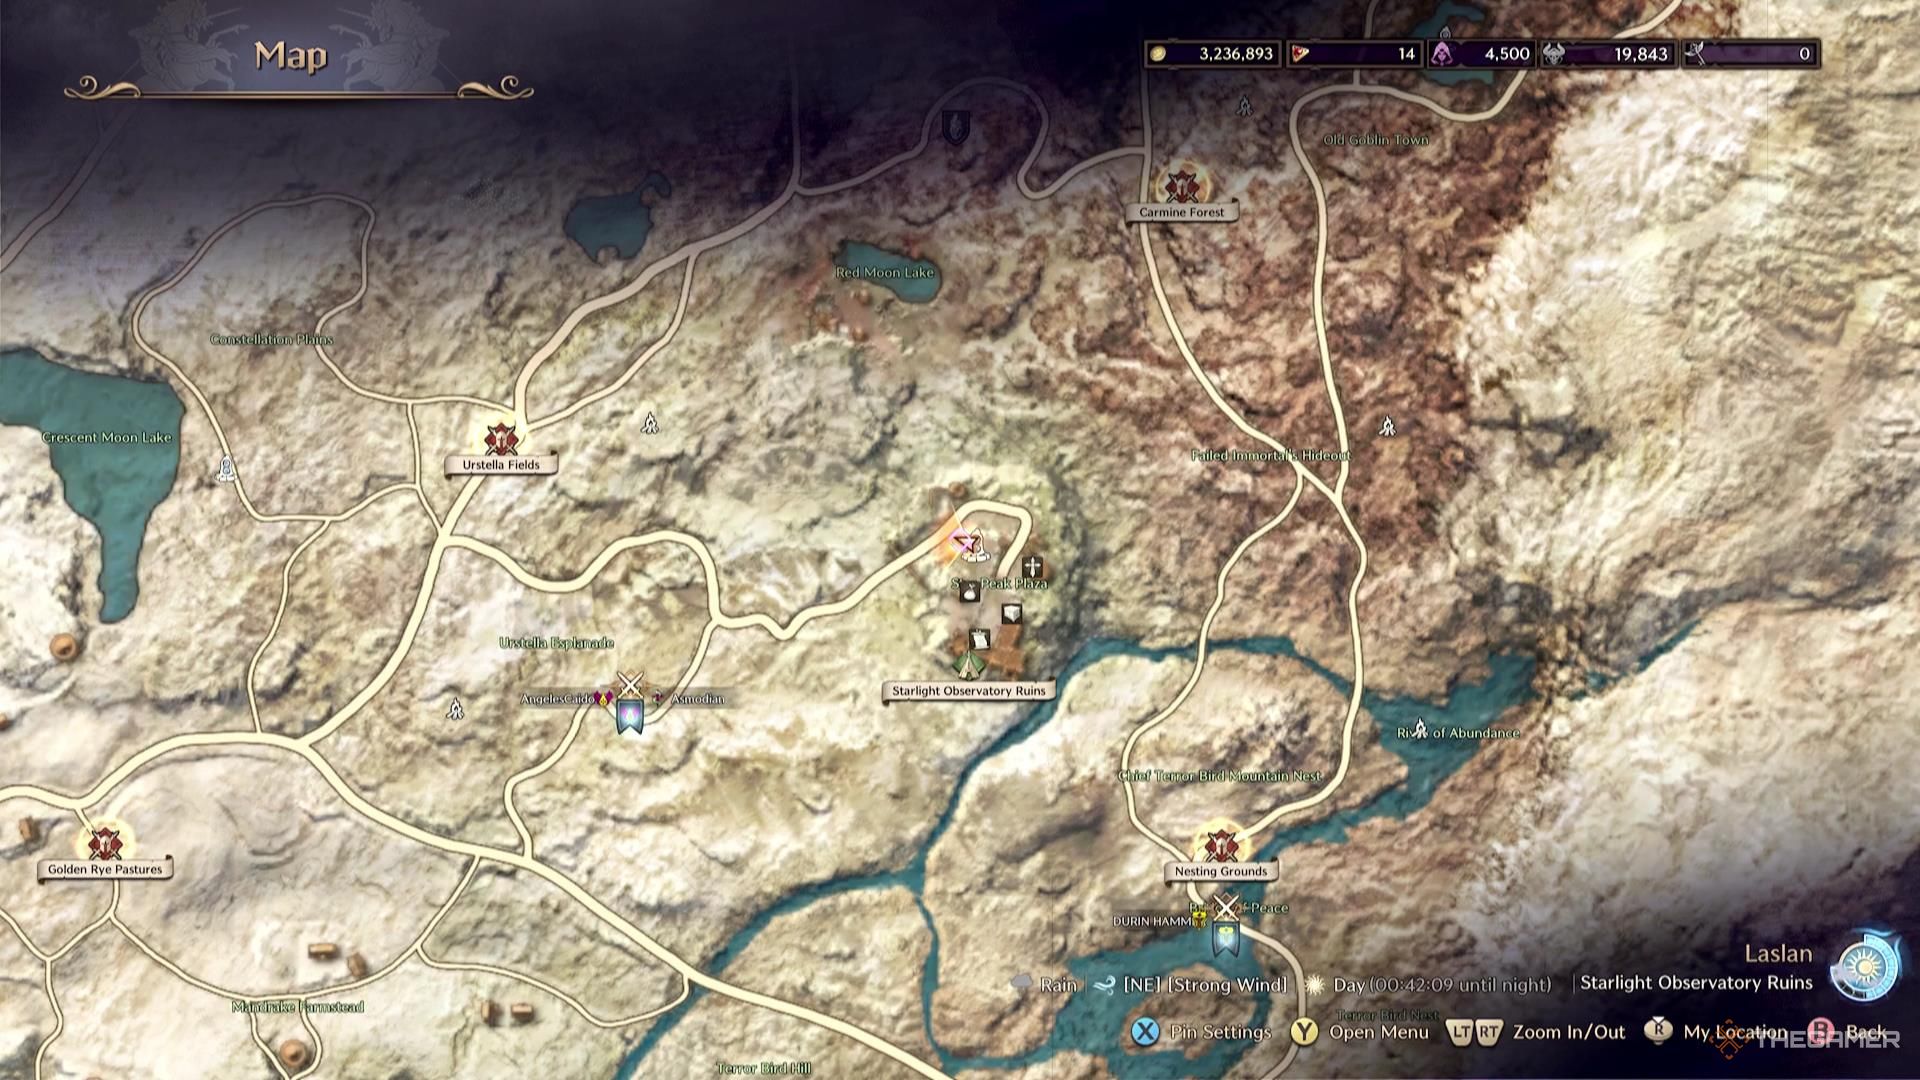
    Urstella Fields on the map in Throne and Liberty.

    While Moonstones are scattered across the map, certain areas have higher concentrations of them. Key spots include the southern shores and around Spiral Cliff, as well as significant deposits found south of the Shattered Temple and throughout Urstella Fields.

    What Are Moonstones Used For?

    Moonstones are primarily used for crafting various armor and weapons within the game. You can access the crafting menu to find recipes for any items you can create. It also allows you to see the specific types of Moonstones needed for different Ore requirements.

    Often, you might not have enough Ore to complete a crafting project. In such cases, it’s possible to trade a lower-quality Ore for a higher-quality version, thus saving yourself the trouble of searching for rarer resources.

    Where to Find Marind Ore

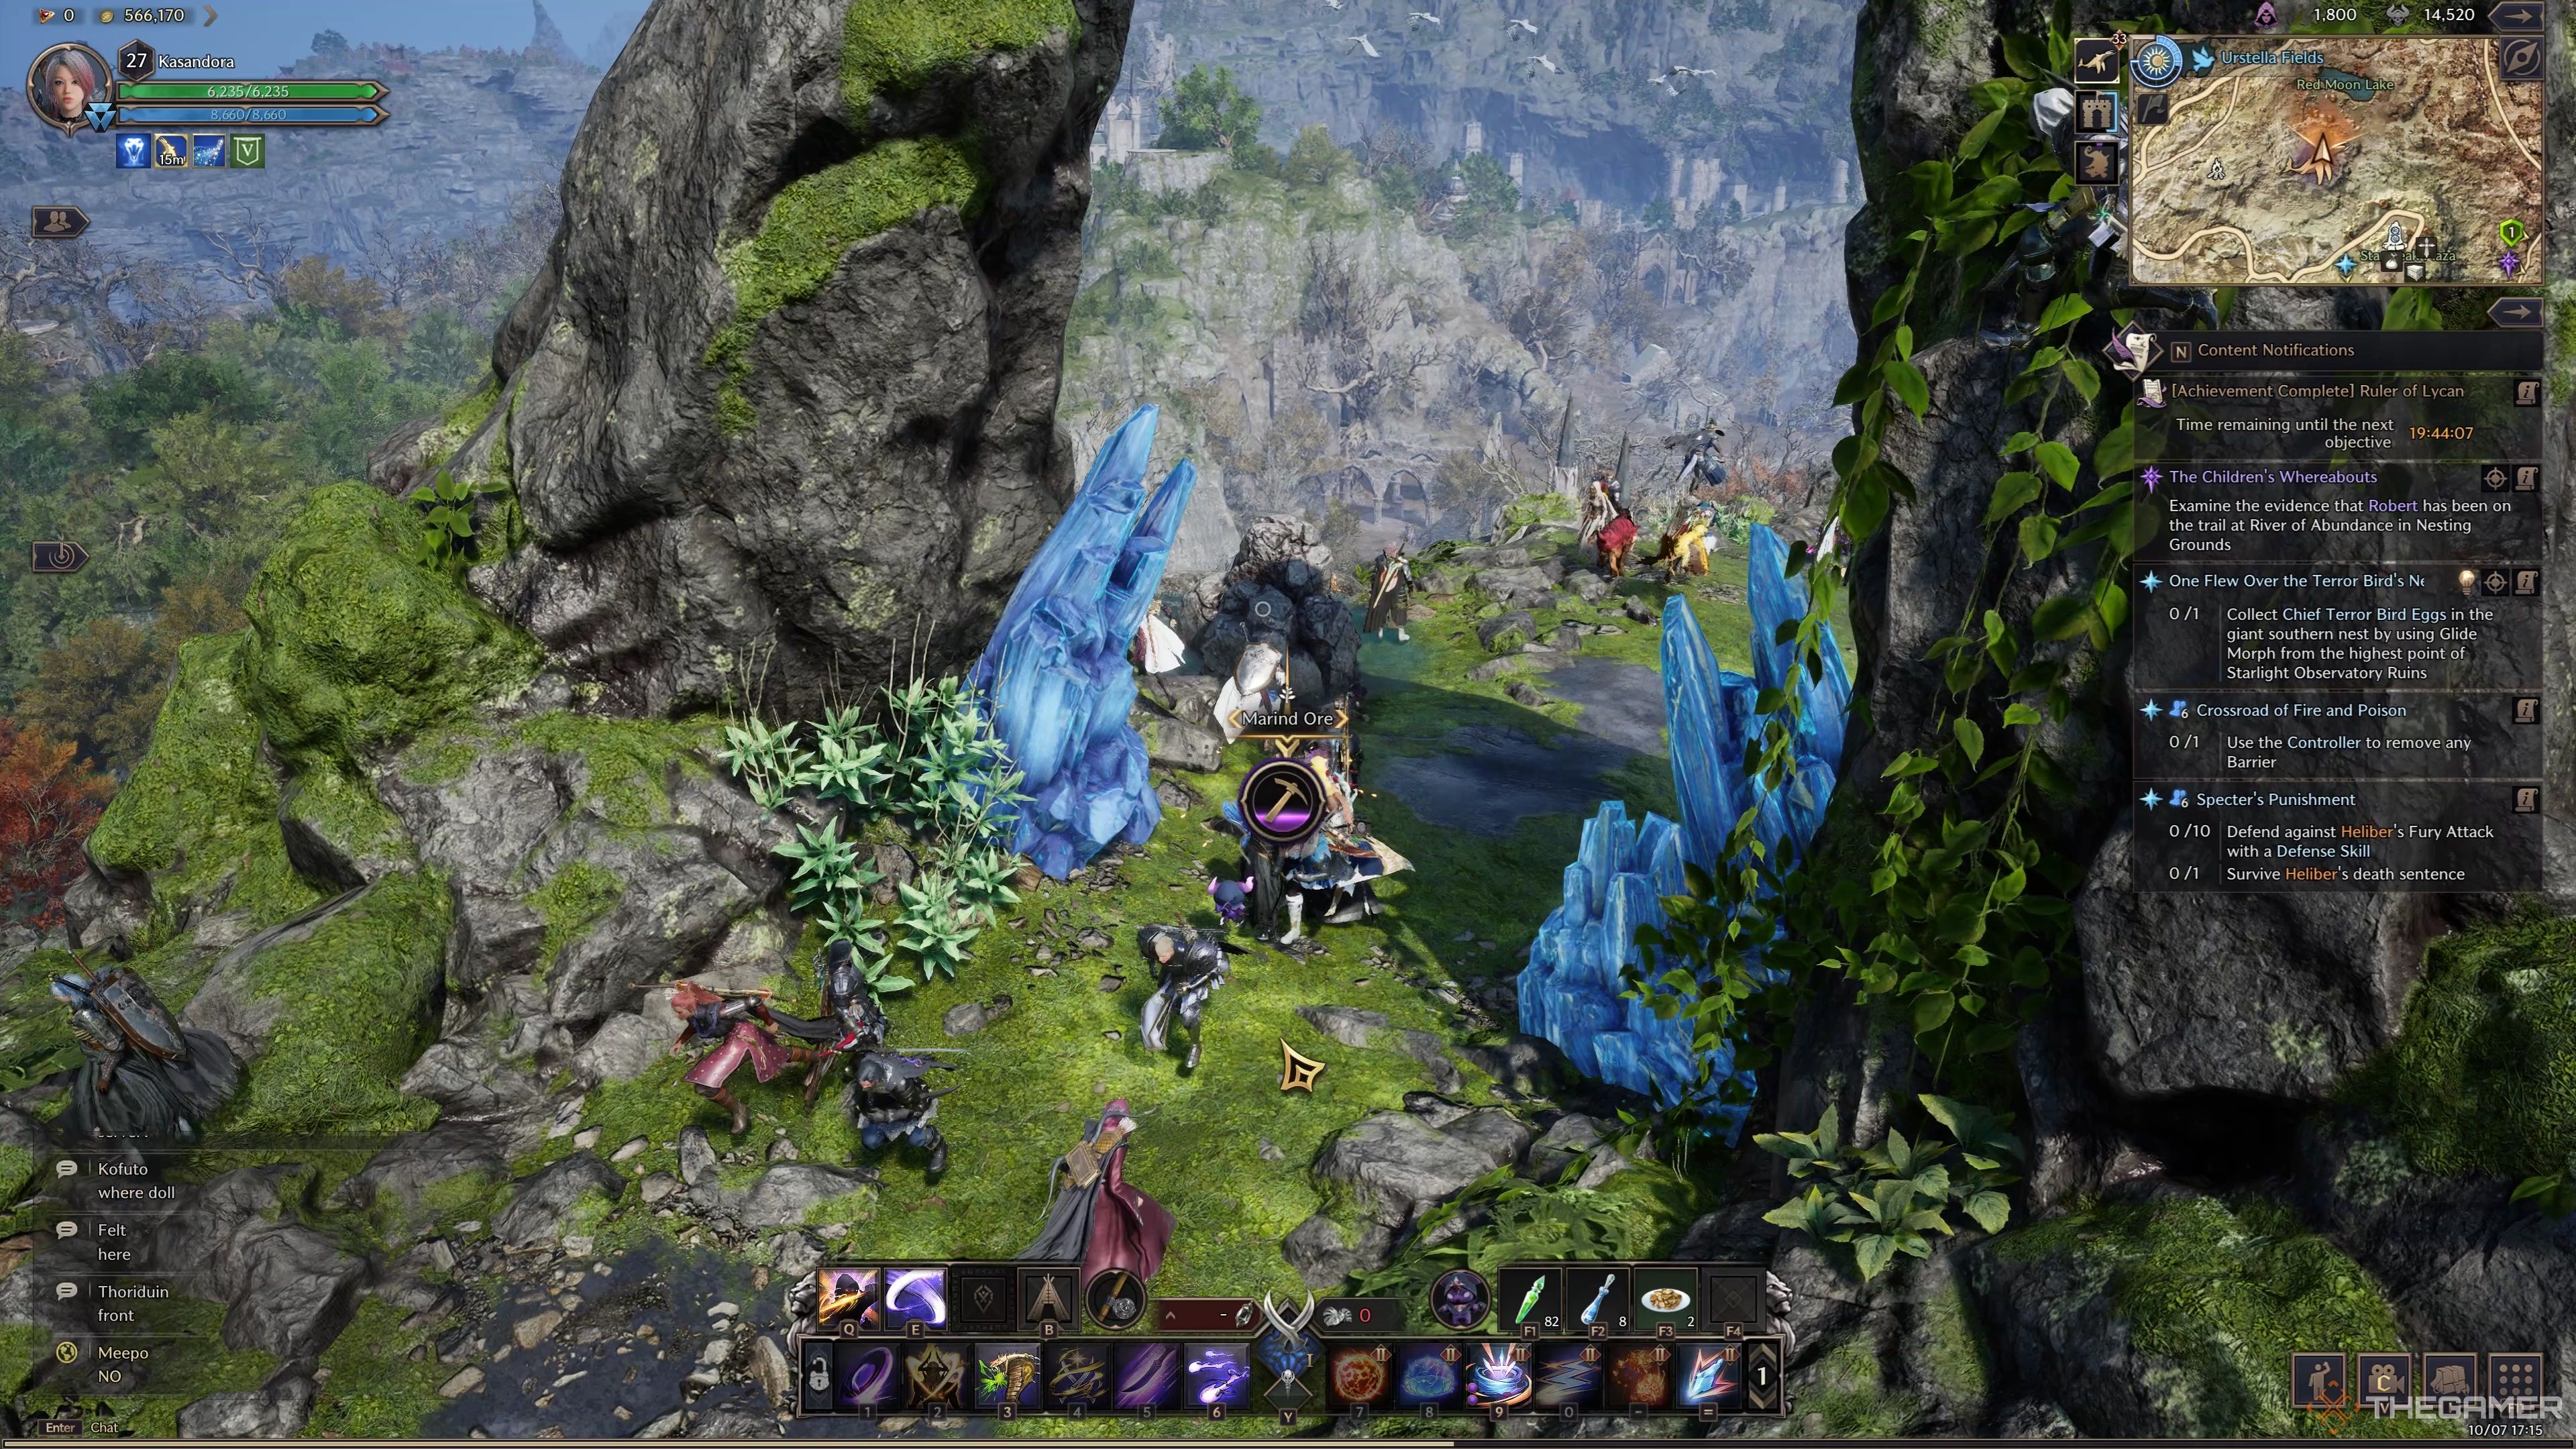
    Mining Marind Ore atop the Gigantrite in Throne and Liberty.

    You’ll likely find Marind Ore less frequently than Moonstones, but it’s still relatively accessible if you know where to search. A great location to gather Marind Ore is on the back of Gigantrite, the giant friendly flying creature wandering the skies of Solisium.

    While seeking Marind Ore on Gigantrite is your best bet, you can also find it from resource nodes during rain. However, unless you can control the weather, this method is less reliable and relies on finding the right conditions.

    The map for Syleus's Abyss in Throne and Liberty.

    In addition to mining, you can also acquire Marind Ore by defeating specific enemies. This includes foes encountered in open-world Dungeons. To secure Marind Ore drops, you’ll need Abyss Contract Tokens. Grinding through enemies in Syleus’s Abyss and the Ant Nest can be an effective farm strategy.

    What Is Marind Ore Used For?

    Marind Ore is mainly for crafting Skill Growth Books, essential for leveling up your skills. You’ll need to collect several of these, and quests, especially leveling ones, will reward you with a variety of them. However, you’ll likely need to start crafting your own once you reach level 50.

    The required quality of Marind Ore corresponds to the quality of the skill books: you’ll need green-quality Marind Ore for a green-quality Skill Growth Book, blue for blue, and purple for purple. If you have excess lower-quality Ore, you can convert it at a 15:1 ratio for the higher quality.

    How To Obtain The Wandering Youth Gneiss Amitoi

    Mining isn’t just about gathering Ores; there are Amitoi to discover as well. You can randomly obtain the Wandering Youth Gneiss Amitoi while mining Moonstone or Marind Ore, although it has a very low drop rate, making finding one quite exciting.

    Collecting the Wandering Youth Gneiss Amitoi completes one of the two Amitoi needed for the Sollands Abundance Pal Synergy within the Amitoi Lithograph Book. By gathering both the Wandering Youth Gneiss and the Sprouting Talem Amitoi, you will receive 0.5 percent extra Sollant passively, which is a nice perk.

    Next

    Throne And Liberty: Longbow Beginner Build Guide

    Deliver damage from a distance with the Longbow build in Throne and Liberty.

  • Conquer the Queen Blood Spider in Throne and Liberty: A Guide

    Conquer the Queen Blood Spider in Throne and Liberty: A Guide

    The Queen Blood Spider is one of the many arachnid adversaries you can encounter in Throne and Liberty. However, players often struggle to locate it. This difficulty arises from the quest requirements and the Queen’s surprising spawning point, along with numerous Mysterious Notes related to the quest that can mislead players. On the upside, while finding the spider can be a challenge, those who seek it out will generally find the ensuing battle manageable if they are at the appropriate level.

    As with most enemies and World Bosses in the game, defeating the Queen Blood Spider rewards players with various items, including a unique Shapeshift Morph to enhance your collection in Throne and Liberty. To participate in the encounter and claim the rewards, players should engage in the side quest titled "Friend of Morokai the Turncoat," which begins in the Carmine Forest area of Solisium.

    Where to Find the Queen Blood Spider

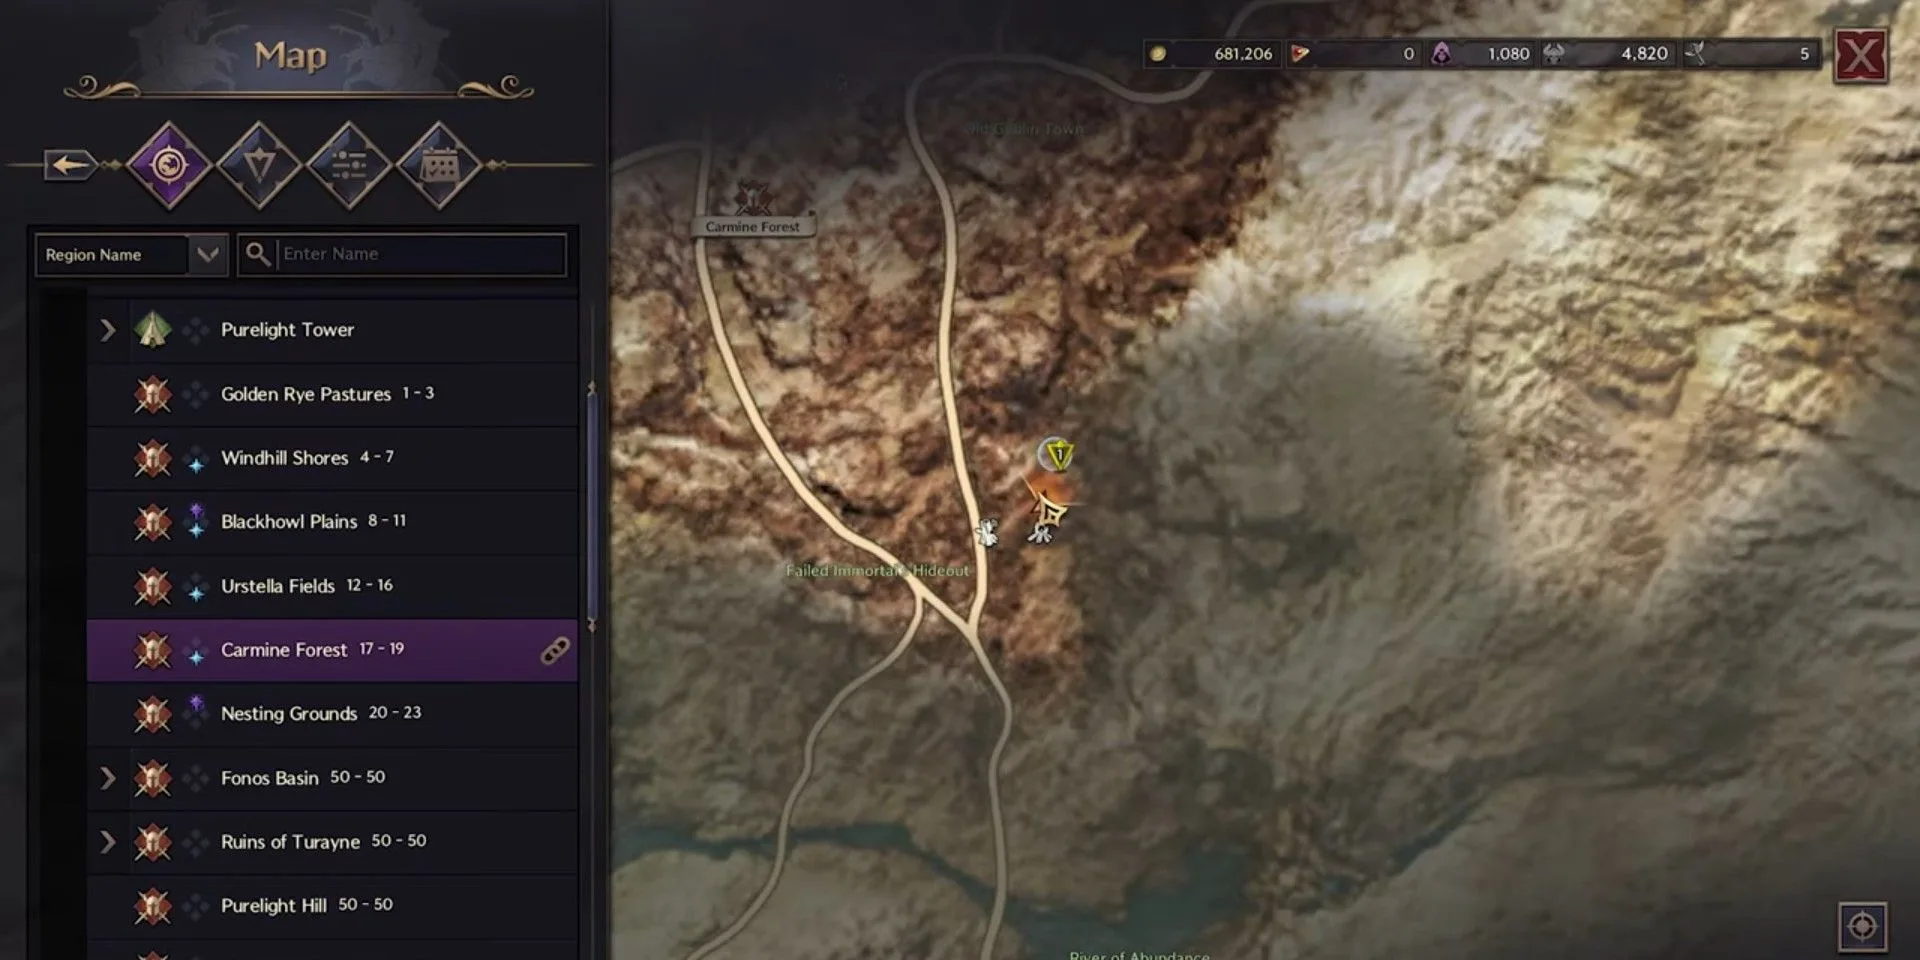
    Navigate to the Carmine Forest Waypoint

    To find the Queen Blood Spider in Throne and Liberty, you’ll first need to access the Carmine Forest area to unlock its related quests. The side quest "Friend of Morokai the Turncoat" becomes available after you activate the waypoint in this area and will lead you directly to the Queen herself. When looking at your map, head towards the section marked with a light blue circle and trek southeast from the Carmine Forest Waypoint.

    Players have reported that you could also venture west, but the southeast path is generally more efficient and trusted for those having trouble spawning the Queen.

    Once you reach the correct location, you’ll encounter numerous Blood Spiders patrolling the webs, accompanied by a nearby bonfire. A small, rocky ledge nearby contains a Mysterious Note. Collecting this note is the first step in the quest and will prompt the Queen Blood Spider to spawn, so make sure to prepare for action once you’re in the vicinity.

    If the Queen does not show up after you collect the Mysterious Note, it’s likely another player has already defeated her. In that case, you’ll need to wait approximately seven minutes for her to respawn.

    How to Defeat the Queen Blood Spider

    Recommended Level for an Easy Victory

    The Queen Blood Spider emerges at Level 19, immediately after examining the Mysterious Note. Be mindful that lesser Blood Spiders in the area may surround her, posing a risk to players aiming to engage closely. Nevertheless, these lesser spiders are not extremely powerful, so you should be able to handle the encounter comfortably at Level 20 or higher.

    To effectively tackle the Queen, it’s crucial to separate her from the other spiders. This task is simpler if you collaborate with teammates, as they can distract the smaller foes or focus on the Queen. If you’re going solo, utilize ranged attacks from your current location to lure the Queen away.

    Be cautious not to drift too far from the Queen’s initial spawn point, or she may return to that location and regroup with other Blood Spiders.

    Once the Queen is isolated, unleash your attacks while maintaining an eye on her movements. With the recommended level, you should be able to inflict steady damage while enduring her attacks. Her most dangerous move is a jumping attack, which can stun you upon landing. Stay alert and time your evasion—either Guard or Roll—to avoid being hit.

    Should you lose considerable health during the fight, Recovery Crystals can help. If you fail to defeat the Queen on your first attempt, you can always return for another shot. Teaming up with others may be beneficial, as you’ll still receive credit for her defeat, even if another player lands the final blow.

    Rewards for Defeating the Queen Blood Spider

    Toximaw Spider Shapeshift Morph and Additional Drops

    Upon defeating the Queen Blood Spider in Throne and Liberty, you will unlock the Toximaw Spider Shapeshift Morph, along with other potential rewards. While these additional items are not guaranteed, you may also receive various loot, including weapons. Completing the associated quest, "Friend of Morokai the Turncoat," will enhance the overall rewards, providing multiple bonuses throughout the quest.

    Here’s a summary of the rewards you can expect:

    Side Quest Objective Rewards
    Defeat Queen Blood Spider – Toximaw Spider Shapeshift Morph
    – Chance for Quality Base Material Chest
    Potential Additional Drops – Arena Sword
    – Moonglow Staff
    – Quality Polished Crystal
    Collect a Page of Collection: About Morokai – x3 Quality Weapon Growthstone

    Taking down the Queen Blood Spider is an excellent opportunity to earn weapon rewards and a new Shapeshift Morph early in the game. To maximize your gains and level up your character’s abilities, it’s advisable to complete the associated side quest and engage in other quests and World Bosses as well.

    Source: (Seth Parmer/TheGamer)
    Video Credit: (GhostArrow/YouTube)