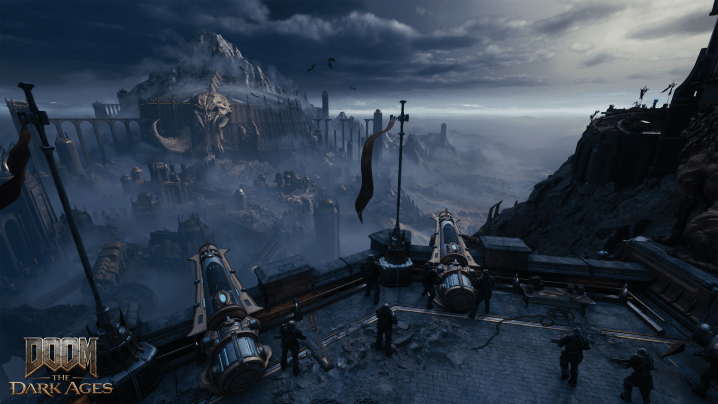
الوسم: The Dark Ages

  • Completing Chapter 22 of Doom: The Dark Ages – All Secrets Solved

    Completing Chapter 22 of Doom: The Dark Ages – All Secrets Solved

    The Reckoning is the concluding chapter of Doom: The Dark Ages. True to its name, this chapter is packed with some of the most challenging encounters in the game. It can be especially frustrating to get through, as you’ll frequently find locked gates, and you’ll need to collect keys that won’t be available until later in the level.

    This guide will assist you in overcoming tough battles, solving platforming challenges, and discovering treasures throughout the chapter. With our support, you can gather every collectible and, if you follow our directions, you should complete this stage with all chapters at 100%. Let’s get started!

    Secrets

    11

    Gold

    335

    Rubies

    3

    Wraithstone

    1

    Demonic Essence – Ammo

    1

    Codex

    1

    Toys

    2

    The Codex at the Start of the Level


    When you start this chapter, head straight down a narrow corridor, drop into the area below, turn right, and pick up the Codex. This collectible is one of the few you can grab without needing the Secret Key, which won’t be available until you complete the chapter.

    The First Major Battle and the Life Sigil

    This stage is heavily gated—most areas are locked. Besides the Codex, you’ll need to push through some tough fights before getting your rewards. After reaching the Codex, you’ll be thrust into a huge melee. Expect to face many foes, including Nightmare Imp Stalkers, a Mancubus, a Cyberdemon, Hell Knights, a Revenant, Arachnotrons, a Whiplash demon, a Komodo demon, and a Cacodemon Hybrid. Focus on eliminating the Mancubus and Hell Knights first.

    Once empowered demons appear, head to the northeast corner of the map to confront a Cyberdemon leader. Take them out quickly to avoid being overwhelmed. Move around the arena, isolate foes, and eliminate them one by one. The last phase includes battling a Komodo demon and a Cacodemon Hybrid.

    After you’ve defeated the demons, collect the Life Sigil in the southern area that has now opened.

    How to Find the Great Old One Toy

    Make your way to the eastern side of the map, where a demonic tree awaits. Smash through it and prepare for an intense battle. Initially, you’ll face a Pinky Rider, two Acolytes, and an Agaddon Hunter alongside an Arachnotron. Given the ample space and the large tree for cover, this fight shouldn’t be too difficult.

    Then comes a Battle Knight and a Revenant, along with several Nightmare Imp Stalkers and Stone Imps. This is quite hectic, as the Imp Stalkers can ambush you. Using grenades can help clear them out. Finally, you’ll contend with two Cosmic Barons simultaneously. This fight isn’t too challenging, as long as you time your parries correctly. However, mistiming even one parry can break your shield, making you vulnerable. Once all demons are defeated, you’ll find the Old One Toy tucked away in the southeastern corner of this area.

    If you’re concerned about tackling the Cosmic Barons, consider using your B.F.C. Bolt to take them out quickly. This will also count towards completing one of your challenges.

    Obtaining the Blue Skull

    The Blue Skull in The Reckoning chapter of Doom The Dark Ages.

    Ascend to the second floor in the northern section where you had that major fight. Follow the quest marker until you reach a large block. Look for a breakable wall nearby. After breaking it down, toss your shield into the glowing gears and then climb the wall that lowers on your right.

    Jump down the hole above, then shield charge the big block. Move to the other side of the area, climb the block you just destroyed, and drop down into the area below. Take out the Whiplash demon, Shield Soldiers, and the Mancubus. After that, grab the Blue Skull, but don’t leave this area just yet.

    The Treasure Chest and Ruby in the Blue Skull Area

    In the same room as the Blue Skull, there’s a hole in the floor. Jump down into it, and you’ll land on a launch pad that sends you to the floor above. You should see a wall with a breakable symbol. Destroy it to access the first Treasure Chest.

    The Gold Cache

    Go to the western side of the arena and unlock the door using the Blue Skull. Afterward, drop down and sprint past the Agaddon Hunter. Be sure to eliminate the Shield Soldier demon leader first, as this will prevent a stronger hunter from coming after you. Continue down the hall and pull the lever to lift a gate, but be prepared for a wave of enemies, including a Hell Knight, multiple fodder demons, a Whiplash demon, and several Shield Soldiers. Just run through them, as they are empowered.

    Use grenades to thin the crowd as you push through. Reach the end where you’ll encounter an Arachnotron Demon Leader. Blast it with your Super Shotgun and finish it off with your mace. Once the area is cleared, continue down the hallway to collect piles of gold.

    In the open area, look up to spot a chain above. Cut the chain, then shield charge the block that drops. This will open a gate; shield charge it from the other side to push it across the arena. Climb up the block, navigate around the path, and collect more gold. At the end, go for those gold piles at the end of the hallway. Just be cautious of the Revenant demon hiding there.

    The Second Treasure Chest

    The second treasure chest in The Reckoning chapter of Doom The Dark Ages.

    Next, stand on the large button and throw your shield through the hole in the wall at the distant gears. Proceed through the newly opened gate while your shield is still turning those gears. Once inside, you can recall the shield and continue onward. In the next area, you’ll face an Arachnotron. To your right, you’ll find another breakable wall. Shield Charge through it to discover the second Treasure Chest.

    In the same area, you’ll confront a Mancubus, Acolyte, Cosmic Baron, Pinky Demon, and then another Cosmic Baron, culminating in an encounter with a Cyberdemon.

    The Third Treasure Chest, Second Life Sigil, and Second Ruby

    In the following area, a Mancubus will burst through the wall. Once you take him down, enter the room he was hiding in to gather the gold. Now, find another breakable wall in the main chamber. Once you spot it, break it with a Shield Charge and place your shield in the newly exposed gears. A climbable wall will appear. Ascend it, and you’ll uncover the third Treasure Chest.

    Continue along this path, jump across a gap, throw your shield into some gears, climb up the scalable wall, and grab a Life Sigil. Now, recall your shield, which will open the gates ahead. Jump over to that area, climb up, and find another Ruby.

    The Final Section of The Reckoning

    Ahzrak's ship in The Reckoning chapter of Doom The Dark Ages.

    To finish up the stage, you’ll face one last epic battle against a variety of demons. However, you will enter this fight with berserk status, making it feel more empowering than difficult. You’ll be able to tear through enemies until you reach the end. And speaking of the end, you’ll come face to face with Ahzrak once more. For more tips on this challenging final boss fight, check our detailed guide below.

  • Completing Prince Ahzrak & Witch Boss in Doom: The Dark Ages

    Completing Prince Ahzrak & Witch Boss in Doom: The Dark Ages

    Even after defeating Prince Ahzrak in one-on-one combat, your journey in Doom: The Dark Ages isn’t finished. His escape in Chapter 21 leads to Chapter 22, where you’ll face him again, this time accompanied by his witch ally in the ultimate boss battle.

    This fight will feel familiar as it mirrors your previous encounter with Ahzrak, but you’ll have to deal with two enemies instead of just one. Although this is the final combat segment of the game, it’s surprisingly straightforward and can be completed faster than some of the earlier confrontations with less formidable foes.

    Phase One

    The climactic battle can be divided into two distinct phases: first, you’ll fight both Ahzrak and the witch, and then you’ll go head-to-head with the Prince alone. At the beginning, the witch will shield herself with a force field, so your initial focus should be on Ahzrak.

    He will use many of the same spear attacks you’ve encountered before, but the witch will also be launching energy projectiles your way to complicate things. Fortunately, dodging her shots is quite easy due to their wide spread. Concentrate on parrying Ahzrak’s hits and retaliating with your Super Shotgun or melee attacks.

    Both Ahzrak and the witch share a single health bar, so any damage you inflict on one will also affect the other.

    After some time, the force field will shift to cover Ahzrak, requiring you to redirect your attention back to the witch, who will try to escape while hurling projectiles at you. Close the distance with a shield charge and unleash a barrage of gunfire and melee combos until she retreats again.

    Once you’ve dealt enough damage, both Ahzrak and the witch will be encased in force fields. The Prince will then hurl fireballs your way—none of which can be parried. After this sequence, his defense will drop, and you’ll go back to battling him.

    The force field will continue to alternate between both enemies until their health is fully depleted. At that point, you can execute the witch, concluding the first phase of the battle.

    Phase Two

    Now, it’s just you and Ahzrak again. At this stage, you can easily take charge of the fight. His speed is noticeably slower than during your earlier encounter, likely because he’s no longer powered up.

    You won’t need to dodge any challenging attacks and can focus on standing your ground, parrying his moves before launching into your own strikes. Keep the pressure on until Ahzrak’s health bar runs out, and you’ll be rewarded with the final cutscene and the ending credits. Congrats on completing The Dark Ages!

  • Completing Enhanced Prince Ahzrak in Doom: The Dark Ages

    Completing Enhanced Prince Ahzrak in Doom: The Dark Ages

    In the Doom: The Dark Ages campaign, you’ll get a good look at the main villain, Prince Ahzrak. While he typically sends his minions to handle the dirty work, he finally faces you in a direct confrontation towards the end of the story.

    Your first battle with Prince Ahzrak occurs in Chapter 21, shortly after you defeat The Old One. He descends from his floating platform, armed with a spear. This boss fight is divided into three phases, testing your skills in the game’s mechanics.

    Phase One

    The first phase is quite simple. Ahzrak will swing his spear at you repeatedly, and all of these attacks can be parried. Time your dodges to wait for the end of his combos, then hit back hard with the Super Shotgun, rocket launcher, and melee attacks.

    If you need a moment to regroup, you can back away from Ahzrak with relative ease. He might fire an energy blast at you, but it moves slowly and is easy to dodge.

    Once you fill his stun meter, you can execute a Glory Strike. Keep this strategy up until you drain Ahzrak’s health, and a cutscene will follow.

    Phase Two

    Realizing you’re a tougher opponent than he expected, the Prince will drop his regal guise, unlock his third eye, and sprout fleshy wings from his back.

    During this phase, Ahzrak will summon four metal pillars to rise from the ground, which can periodically spew fireballs. To make things easier, destroy these pillars with a shield toss to earn health pickups.

    Overall, this phase plays similarly to the first one. Ahzrak becomes more aggressive, so keep an eye on the timing of his faster swings. Parry when necessary and counterattack to move on to the final phase.

    Final Phase

    This last phase kicks off with Ahzrak stabbing you. Just then, Serrat swoops in off-screen to protect you, unleashing his fire attack. Unfortunately, the Prince fatally impales Serrat, leaving you to seek revenge for your fallen ally.

    At this point, Ahzrak deploys some new moves. He’ll conjure red figures that send projectiles your way. Parrying these will grant you health items to keep fighting. After that, he’ll crash down from above, surrounded by blades that will shoot outwards.

    Some of those blades will be green. If you strafe back and forth, you can parry them to dodge damage.

    Once you handle that assault, he returns to attacking with his spear and summoning pillars. Keep countering after your parries, and you’ll eventually defeat the Prince. Sadly, he manages to escape, setting up the stage for one final showdown.

  • Completing Every Siege Secret in Doom: The Dark Ages – Part 2

    Completing Every Siege Secret in Doom: The Dark Ages – Part 2

    The Siege Part 2, as its title indicates, is the continuation of the siege saga in Doom: The Dark Ages. In this chapter, you’ll be battling your way through the stronghold, eliminating demons in their sacred surroundings, while uncovering hidden treasures along the way. Unlike the sprawling battlefield you previously navigated, this level is more straightforward, though you might find yourself backtracking occasionally.

    This stage is shorter than the last, but it features several points of no return. Make sure to gather all items before proceeding to each new area. No need to fret—this guide will provide ample warnings and lead you directly to every secret!

    Secrets

    9

    Gold

    183

    Rubies

    2

    Demonic Essence – Armor

    1

    Codex

    1

    Toy

    1

    The First Life Sigil


    Your journey begins in the courtyard with a turret section. After defeating the enemies, head to the corpse of the Titan demon and take a left. You’ll find a climbable wall in the corner. Breaking through a boarded entrance will lead to a Mancubus that you must defeat. After that, perform a Shield Charge on the large block to move it across the room.

    Do not follow that block! Instead, break through the plank wall that’s behind the large block and enter the secret room. Once you defeat the Hell Knight, gather the gold and a Life Sigil.

    The First Treasure Chest

    The first treasure chest in The Siege Part 2 stage of Doom The Dark Ages.

    After clearing the Secret Area, climb the box you pushed and up the wall. Don’t go straight ahead; look up instead. You’ll find another climbable wall nearby. Scale it to reach the treasure chest. Then, drop down onto the Arachnotron and hit the nearby switch.

    The Revenant

    The Revenant from The Siege Part 2 stage of Doom The Dark Ages.

    After crossing the courtyard, you’ll encounter a new enemy: the Revenant. These foes will shoot a barrage of skulls at you while trying to maintain their distance. Use your shield charge ability to close the gap. Rush in and defeat them with a combination of charges and melee attacks.

    Tons of Gold The first pile of gold in the back room in The Siege Part 2 stage of Doom The Dark Ages.

    After eliminating the Revenant (and a few Imp Stalkers along with a Mancubus), look up and sever the chain with your shield. Now, climb the wall in the room’s corner and up the wall you dropped down from. Once done, gather the pile of gold in the back room, but watch out—you’ll need to defeat the Imp Stalker in this area. Follow the gold trail around the room’s edge. But don’t leave yet, as there’s a toy to find!

    After this room, you will drop down to the next part of the level. There’s no turning back without restarting the mission.

    The Pinky Rider Toy

    Instead, jump back to the platform under the round window. Then, make a running jump to the corner platform (near the collapsed wall). Break through the blocked doorway and drop down into the area below. Make your way around, gathering gold, and collect the Pinky Rider toy. Once you have it, return the way you came and proceed to the next part of the level.

    The Second Life Sigil

    The second Life Sigil in The Siege Part 2 stage of Doom The Dark Ages.

    After dropping down and defeating the stalkers, you’ll reach a room filled with locked doors (which you can’t access yet) and a Pinky Rider Leader alongside two empowered Imp Stalkers. After clearing them out, you’ll find yourself in a small room with several Hell Knights and Mancubus enemies. Once defeated, make sure to grab the Life Sigil in the back corner, then head up the stairs.

    The Location of the Secret Key

    You’ll encounter an Arachnotron as you ascend to the second floor. After that, you’ll face a Revenant and some other lesser foes. In the back dining area, turn to your right. Shield Charge through the boarded-up doorway, eliminate the Nightmare Stalker, collect the gold, and leap onto the launch pad to access the other side of the stage. You’ll finally obtain the Secret Key!

    The Booby-Trapped Gold Room

    The booby-trapped gold room in The Siege Part 2 stage of Doom The Dark Ages.

    In the back room, you’ll face another Arachnotron protected by several Shield Soldiers. Toss your shield at them to dispatch them quickly, then engage the arachnid. Collect the gold present and cut the chain. However, don’t go through the gate that the chain was holding—turn around and jump into the room below instead. You’ll land in an area filled with gold and health items.

    Returning to the main room, you’ll see gold piled in the corner, but beware—the gates will close once you enter this area, trapping you with a few Imp Stalkers and a Hell Knight along with a fire trap ready to singe you.

    The First Ruby The first ruby in The Siege Part 2 stage of Doom The Dark Ages.

    Next, head to the gate that can be opened with the Secret Key in the center of this area. Inside, you can find a ruby, but be prepared—as a Mancubus will attack you. Although you can climb the wall at the top of the stairs to get back to the second floor, leave this room the same way you entered and then take a right.

    The Codex

    The codex in The Siege Part 2 stage of Doom The Dark Ages.

    In the corner of this area, you’ll find another door that can be opened with the Secret Key. Do so, and you’ll discover a treasure path that leads to a codex. Now, make your way back up to the second floor! Advance past that dining room, and you’ll fight through an extended hallway filled with Imps, Pinky Riders, Imp Stalkers, Shield Soldiers, and another Revenant. At the end of this hallway is an elevator, but don’t press the button unless you’re ready to proceed, as this is another point of no return.

    The Second Ruby

    The second ruby in The Siege Part 2 stage of Doom The Dark Ages.

    Prepare for some climbing, leading to a battle against an Arachnotron, Hell Knights, Imp Stalkers, and a Revenant. Once they are defeated, head to the back corner where all the shipping containers are piled. There, you’ll face another Hell Knight. After overcoming it, climb up to retrieve the second ruby.

    Barge through the damaged ship. Turn left and leap over the boxes to gather some gold, then drop down into the hull. This is another point of no return, so ensure you’ve collected that ruby!

    The Final Treasure Chest and Life Sigil

    Once you’ve defeated all enemies in the lower area, climb the wall, sever the chain in the room that’s ablaze, but don’t climb the wall that collapses. Instead, drop down and go into the room beside the climbable wall to obtain a treasure chest. Then, ascend the boxes outside this section and enter through the hole in the wall to discover a Life Sigil.

    Demonic Essence

    The demonic essence taken from the Hell Knight in The Siege Part 2 stage of Doom The Dark Ages.

    Your final task is to scale the climbable wall and face an overwhelming horde of demons, including Shield Soldiers, Hell Knights, and a Cyberdemon. After taking them down, a Hell Knight Champion will attack. Defeating it will grant you a Demonic Essence that permanently boosts your armor.

    If you still have challenges to finish, this battle features many fodder demons, making it an ideal spot to eliminate multiple enemies with a shield throw!

  • Completing the Secrets of Sentinel Barracks in Doom: The Dark Ages

    Completing the Secrets of Sentinel Barracks in Doom: The Dark Ages

    The Sentinel Barracks mission sits between thrilling experiences like piloting a giant mech and riding a dragon, making it a more traditional, straightforward mission in Doom: The Dark Ages. In this level, you’ll traverse a series of hallways, courtyards, and fortifications. Although there are numerous hidden secrets, the overall design keeps you on a more guided path.

    Don’t let that fool you—there are still puzzles to solve as you hunt for treasure. I spent more time than I’d like to admit trying to figure out how to reach a specific chest. But don’t worry! We’ll provide you with clear instructions on how to find all the secrets, so you can focus on battling demons instead.

    Secrets

    6

    Gold

    212

    Demonic Essence – Armor

    1

    Rubies

    2

    Codex

    1

    Collectible Toys

    1

    Skins

    1

    The Hell Knight Toy

    Your first collectible appears only after you’ve fought through a few monster-infested rooms. Once you reach the outdoor area, you can collect some gold. Although it may seem like that path leads to additional riches, it’s actually a dead end. Instead, head into the central room.

    In this long hallway, you’ll face three waves of Shield Soldiers backed by a Mancubus. Take out the Shield Soldiers using shield tosses, then deal with the Mancubus by parrying his Hell Surge blasts while firing at him from a distance—getting too close will result in flames engulfing you.

    After clearing the area, return to the entrance. With your back facing the entryway, look left, and you’ll spot a boarded-up doorway that can be demolished with a Shield Charge. Break through, and you’ll find a path lined with gold leading to a Hell Knight toy.

    The Treasure Chest

    During the stage where you need to stand on a button to lower a lift and access the superheated metal beneath it, there’s a corpse in the adjacent section where you can throw your shield. Do this, perform a Shield Jump, and you can grab additional gold.

    Follow that gold trail to the other end of the platform, then jump down where a significant block obstructs your path. Use Shield Rush to propel it, then climb up the block to claim more gold and open a treasure chest!

    The First Life Sigil


    After leaving the combat arena where you fend off waves of Hell Knights, you’ll enter a hallway. On your left, there’s a locked door with a terminal outside. You can only interact with this terminal after defeating all the enemies in the hallway. Once that’s done, use the terminal to unlock the door and follow the path of gold leading directly to the Life Sigil.

    The Point Of No Return And The First Ruby

    After exiting the hallway with the Life Sigil, you’ll encounter a deep elevator shaft. You must jump down to proceed, but make sure you’ve collected everything beforehand, as this is a point of no return (even though it’s not clearly marked on the map).

    After dropping down, you’ll have to deal with more demons before moving on to a large hangar where the first Ruby awaits. You won’t be able to continue until you secure it, so it’s impossible to miss.

    Demonic Essence – Armor


    The heart of the Champion Mancubus in the Sentinel Barracks of Doom The Dark Ages.

    Once you enter the area where you battle the Champion version of the Mancubus, you’ll confront a multitude of Shield Soldiers, Pinky Riders, Stalker Imps, and regular Mancubuses. Make sure to stay agile, moving around the arena and reducing the number of enemies. The Mancubus Champion won’t show up until the initial waves are defeated. Defeating the Champion rewards you with its heart, providing a permanent armor upgrade.

    The Second Life Sigil

    After taking out the Mancubus, look for armor shards leading toward the cliffside. Sprint to the ledge and jump to the nearby island. Once there, you can collect some gold and secure a Life Sigil.

    The Second Ruby, Cultists, And Gold

    Once you make it across the bridge, you’ll find a spiral tower. However, instead of moving forward, turn around to face the area you just came from. Beneath the island, there’s another space to explore. Jump over the gap and you’ll discover a gold trail on your right. Follow it while taking care of the Nightmare Stalker Imps (those sneaky, invisible foes) and lesser demons. Keep an eye out for fireballs filling the room and navigate to the back. There, you’ll find a climbable wall.

    Climb up to face another group of cultists and locate a Ruby. Next, follow the gold trail over the wall, grab any gold pile on top, and jump down. You’ll return to the upper section of the island. Then, jump back across to the other side of the bridge and head directly towards the spiral tower this time.

    The Treasure Chest


    The Sentinel Barracks climbable side of the movable block in Doom The Dark Ages.-1

    Move to the right and up the tower to find a room with a treasure chest. Be cautious—two Nightmare Imp Stalkers will be there as well.

    Nightmare Skin For The Accelerator

    As you drop into an area filled with flaming skeleton heads, look for a spiraling staircase lined with gold before you jump down. Follow these stairs to claim the skin for the Accelerator.

    More Gold And The Codex


    The Sentinel Barracks Codex in Doom The Dark Ages.

    In the area just before reaching the Dragon’s Aviary, which features a Sentinel Shrine shop, you’ll encounter several crates you can break to reveal gold. Near the Sentinel Shrine, look left while facing the shrine to find a gold trail leading up a hill. Follow that trail to discover the Codex.

  • Completing the Kreed Maykr Challenge in Doom: The Dark Ages

    Completing the Kreed Maykr Challenge in Doom: The Dark Ages

    Doom: The Dark Ages generally offers a lengthy campaign with a surprising lack of intense boss battles. Most of the thrilling and imaginative encounters are saved for the final chapters, where players can truly go wild with their destructive capabilities—providing a power trip that few games can rival.

    When it finally does present tough challenges, like facing the Kreed Maykr, it delivers without fail. This fight near the end of the main story requires players to master various combat strategies to win. You’ll need to dodge a barrage of projectiles, counter quick hits, and adapt to a wealth of unexpected attacks. Here’s a guide to help you defeat him.

    Kreed Maykr Boss Fight Overview

    The Doom Slayer has been battling the Kreed Maykr throughout the campaign. This formidable alien overlord, hidden away and commanding fleets of angelic warriors, initially seems daunting. At the story’s start, the Maykrs have ensnared our hero with an enchantment that binds him.

    Tip: Utilize shield bashes and melee strikes effectively, especially during the second phase when the Maykr loses his armor.

    Despite their might, the Maykrs aren’t invincible. The tables turn as we invade the Kreed Maykr’s ship, eliminate his subordinates, and face him on his home turf as a storm brews overhead.

    How to Defeat the Kreed Maykr – Phase One

    As you enter the boss room, the Maykr will float above you and initiate the battle by launching yellow orbs your way. You can dodge these by moving around the arena.

    Stay alert, though, because shortly after, he’ll attack with an electrified orb encased in barriers, along with an area-of-effect attack on the ground. Step back from its reach and use your Shield Saw to break it apart.

    Once you destroy it, the Kreed Maykr will become vulnerable for a brief moment. This is your chance to unleash a heavy offense, so choose a weapon with a high rate of fire and significant damage output.

    Tip: You can inflict minor damage to the Kreed Maykr whenever possible, but the best opportunities come during moments when he is vulnerable.

    The boss will cycle through his attacks while summoning weaker enemies to distract you, which you can take out quickly for extra health, armor, and ammo. He will also send out an orb attack from above, which you can parry to open him up for a counter-attack.

    As the fight goes on, expect him to combine attacks or alternate between orbs and explosive projectiles that you can either dodge or block. Stick to your strategy to fill up the boss’s stagger gauge; this opens the way for a powerful melee blow.

    Warning: Minion enemies will keep appearing as the fight escalates, so you’ll need to manage them effectively.

    Once you’ve reduced his health by a quarter, the Kreed Maykr will unleash a new attack featuring yellow spikes that shoot from the ground. You’ll need to dodge these and get close to deal with the energy shield surrounding him, which will temporarily leave him defenseless.

    How to Defeat the Kreed Maykr – Phase Two

    In the second phase, the battle moves to the roof of the Kreed Maykr’s ship. He begs for mercy before shedding his angelic facade to reveal his true form.

    As he floats high above, he will recreate the spike attacks from before and summon walls to contain you. Keep moving to avoid damage while attempting to break through his defenses. You’ll encounter green projectile attacks that, if parried, provide additional resources and minor damage.

    Keep in mind that the walls will shift as the Maykr adapts to larger arenas, employing more complex attacks, including projectiles falling from the sky, signaled by markings on the ground.

    During this part, I recommend focusing on melee attacks and shield bashes. They not only inflict solid damage but also significantly increase the Maykr’s stagger gauge, allowing for potent finishing moves.

    As the battle intensifies, expect faster and more relentless attacks from him than ever before. Stay alert, keep your strategy intact, and you’ll emerge victorious.

  • Doom: The Dark Ages Joins Game Pass This Month

    Doom: The Dark Ages Joins Game Pass This Month

    The lineup for May’s Game Pass has been unveiled, and as expected, Doom: The Dark Ages stands out as the highlight of the month. However, it’s not the only game grabbing attention during this period! The selection features a variety of titles, from anime-style fighters to charming Metroidvanias, promising hours of entertainment.

    Additionally, a previously featured Game Pass title is returning, with several games moving tiers, along with new perks and downloadable content on the horizon.

    Dredge (Cloud, PC, Console) — May 6

    Dredge merges fishing with Lovecraftian horror in this indie gem. It’s a single-player, narrative-driven adventure where you catch fish to earn money, upgrade your gear, and occasionally uncover mysteries lurking beneath the surface. For fans, there’s even a live-action film adaptation in the works!

    Dragon Ball Xenoverse 2 (Cloud, PC, Console) — May 7

    Dragon Ball Xenoverse 2 invites players into an expansive world, allowing them to engage in battles with iconic characters while enjoying a story crafted for fans of the Dragon Ball universe. Winning battles requires strategic skill rather than mere button-mashing, and with a total playtime of 30 to 40 hours, it’s packed with content.

    Revenge of the Savage Planet (Cloud, PC, Console) — May 8

    Revenge of the Savage Planet presents a satirical, over-the-top Metroidvania experience where you play a corporate worker left behind on a hostile planet. Equipped with minimal gear and an intense desire for revenge, you’ll explore and gather upgrades to make your escape back to Earth.

    Teenage Mutant Ninja Turtles: Mutants Unleashed (Cloud, PC, Console) — May 8

    Teenage Mutant Ninja Turtles: Mutants Unleashed blends RPG and relationship elements with classic brawler gameplay. Expect a thrilling adventure lasting about ten to fourteen hours, filled with the action and camaraderie you’d anticipate from the Turtles.

    Warhammer: Vermintide 2 (Cloud, Console) — May 13

    User fans will be delighted to see the return of Warhammer: Vermintide 2 to the Game Pass lineup after some time off. Join forces with three other players to tackle waves of enemies in this action-packed experience set within the Warhammer Fantasy universe, collecting loot and enhancing your character’s abilities along the way.

    Doom: The Dark Ages (Cloud, PC, Console) — May 15

    A prequel to both Doom and Doom: Eternal, Doom: The Dark Ages offers more demon-slaying excitement with a medieval flair. With a cloak and a shield rimmed with saw blades, you’ll face a plethora of demonic foes.

    Kulebra and the Souls of Limbo (Cloud, PC, Console) — May 16

    This Game Pass release welcomes players to Limbo, where they will aid lost souls in overcoming their regrets. The game features an adorable, brightly colored papercraft design, providing a refreshing change of pace from the darker titles on this list.

    Firefighting Simulator: The Squad (Cloud, PC, Console) — May 20

    Curious about what it’s like to be a firefighter? Firefighting Simulator allows you to experience it firsthand, whether solo or with up to three friends.

    Police Simulator: Patrol Officers (Cloud, PC, Console) — May 20

    Essentially the police version of Firefighting Simulator, this game lets you choose between diligently performing your duties or creating chaotic hilarity with friends a la Police Academy.

    Beyond these newcomers, titles such as Dungeons of Hinterberg, Flintlock: The Siege of Dawn, and Metal Slug Tactics will also be available in the Game Pass Standard tier starting May 7.

  • Doom: The Dark Ages Returns To Its PC Roots

    Doom: The Dark Ages Returns To Its PC Roots

    During today’s Xbox Developer Direct presentation, it was announced that Doom: The Dark Ages is set for release on May 15. The developer, Id Software, provided an extensive preview of the highly anticipated first-person shooter, revealing what they describe as a return to the franchise’s roots, drawing inspiration from the classic Doom.

    The announcement of Doom: The Dark Ages first came at the Xbox Games Summer Showcase in 2024. This title serves as a prequel to the 2016 reboot of Doom but reimagines the gameplay within a medieval fantasy environment. While details had been scarce since its initial reveal, Id Software showcased a deeper exploration of the game’s design, featuring new weapons and gameplay mechanics.

    Unlike Doom Eternal, which emphasized fast-paced mobility, The Dark Ages prioritizes raw power in its combat style. Id Software cites the original 1993 Doom as a major influence, suggesting a more grounded approach this time. As highlighted during the showcase, players will find that dodging enemy projectiles through strafing is a more effective tactic in this iteration. In a Q&A session prior to the reveal, Director Hugo Martin elaborated on how The Dark Ages connects with its predecessor.

    “I spent more time playing classic Doom during this project than any before,” Martin shared in response to a question from Noclip. “We conducted a thorough deep dive. There’s always a deep dive at the start of each project, but I realized that the original Doom has endured because it’s one of the most accessible first-person shooters with single-player campaigns ever crafted. Its combat is elegantly streamlined, which is why it remains enjoyable even today. So, we focused on making it a more powerful and grounded experience compared to the acrobatic style of Doom Eternal. When I say it’s a return to form, it feels more like classic Doom than any of our previous titles.”

    A fortress appears in Doom: The Dark Ages.
    Bethesda

    While the combat will feel familiar, The Dark Ages introduces significant innovations to the series. Among the new arsenal is the Shield Saw, which not only blocks and parries attacks but can also deflect them or be thrown at adversaries, reminiscent of Captain America’s shield mechanics. Players can now equip one of three melee weapons—a heavy flail, a mace, or an electrified gauntlet—all activated with a single button press. The glory kill system has also been revamped, allowing players to execute these finishing moves from various angles.

    This upcoming title will also expand its accessibility features, enabling players to adjust game speed and other elements to suit their preferences.

    In addition to its shooting mechanics and exploration, The Dark Ages will include bold new gameplay features. The Doom Slayer will get behind the controls of a towering 30-story Atlan mech and a dragon equipped with a Gatling gun. According to Id, these mechanics will not just serve as brief minigames; they will feature their own extensive boss battles.

    The Slayer holds a shotgun in Doom: The Dark Ages.
    Bethesda

    As for the narrative, which begins with the Doom Slayer in captivity, Id Software envisions a storyline comparable to a blockbuster film, emphasizing dramatic set pieces and a deeper focus on story development. This time around, the plot will unfold more through cutscenes rather than lore text, although collectibles and codex entries will still be present. Martin cites inspiration from the Batman comic Batman: Year One in shaping this narrative direction.

    “The inspiration was really the Batman comic Batman: Year One,” Martin stated in response to an inquiry from IGN. “My love for comic books, especially that particular narrative, informed how we constructed the Slayer’s backstory and mythology, which we internally referred to as the Slayer’s Testament. We even briefly called it Slayer: Year One during development.”

    One absence in The Dark Ages will be multiplayer modes. Marty Stratton from Id confirmed that fan-favorite multiplayer elements were sacrificed to dedicate resources to the single-player experience.

    “It’s campaign-only,” Stratton explained. “We decided on this from the outset. Our goal was to give ourselves the freedom to create elements like the Atlan and the dragon mechanics. These features are akin to mini-games within the game itself. We realized that players highly value our campaigns, so we focused solely on that to develop the largest and most exceptional Doom game we’ve ever produced.”

    Doom: The Dark Ages is slated for release on May 15 for PS5, Xbox Series X/S, and PC.

  • Doom: The Dark Ages Could Ruin 8GB GPU Performance

    Doom: The Dark Ages Could Ruin 8GB GPU Performance

    Doom: The Dark Ages has officially been given a release date during Xbox’s Developer Direct event. Mark your calendars for May 15! The developers at id Software have also shared the PC specifications required to run the game. In line with Indiana Jones and the Great Circle, which also utilizes the idTech engine, it appears Doom: The Dark Ages will demand some serious graphics power from 8GB video cards.

    For a quick look at the system requirements, you’ll need a graphics card with at least 8GB of VRAM just to get the game up and running. This is relatively low for a game set to debut in 2025. However, using an 8GB graphics card will only allow you to achieve 60 frames per second (fps) at 1080p under the Low graphics settings. This is a noteworthy concern, especially when considering that high-performance GPUs like the RTX 4060 Ti and RTX 3070 are stuck with 8GB of VRAM.

    PC requirements for Doom: The Dark Ages.
    id Software

    If players aim to enhance their graphical settings further, the requirements suggest needing a minimum of 10GB of VRAM. Ideally, a 12GB graphics card, such as the RX 7700 XT, would perform even better. Planning to play in 4K resolution? You’ll need a hefty 16GB card, which limits you to high-end options like the RX 7900 XTX or RTX 4080 Super, as well as the newest RTX 5090 boasting 32GB of memory.

    This isn’t entirely unexpected. The recently announced Indiana Jones and the Great Circle hinted at the VRAM requirements tied to the modern idTech engine, as 8GB may not suffice for smooth gameplay. Fortunately, the engine deploys a texture streaming method that can operate within 8GB of VRAM at the Low graphics preset without severely sacrificing image quality. Instead of merely using lower-resolution textures, the game dynamically streams high-res textures, effectively optimizing both visuals and performance.

    Aside from the VRAM specifications, Doom: The Dark Ages will also require a graphics card equipped with ray tracing capabilities. According to Nvida’s Jacob Freeman, the game will support path tracing and DLSS 4 technology.

    DOOM: The Dark Ages is releasing May 15th with DLSS 4 and Path Tracing support! System requirements are out now, RT hardware required. From what I have seen so far, it looks amazing. Huge DOOM fan, cannot wait! 😃 pic.twitter.com/hCvi8wKh1m

    — Jacob Freeman (@GeForce_JacobF) January 23, 2025

    While the idTech engine has built a reputation for its remarkable stability thanks to its innovative use of Vulkan, it has also become a focal point in discussions about VRAM. Although Doom: The Dark Ages may face challenges running on 8GB graphics cards at higher settings, we hope it will deliver a seamless gaming experience, as is typically expected from id’s technology.

  • Xbox Developer Direct Will Showcase Doom: The Dark Ages And More

    Xbox Developer Direct Will Showcase Doom: The Dark Ages And More

    Xbox has announced that another Developer_Direct is scheduled for later this month, showcasing upcoming titles such as Doom: The Dark Ages, South of Midnight, and Clair Obscur: Expedition 33. Additionally, fans can expect to see a “brand new game” from a secret studio during this event.

    The Developer_Direct in January 2025 is set to air via official Xbox social media channels at 10 a.m. PT on January 23. This will be the latest in a series of showcases that Xbox initiated in 2023, aimed at providing insight into future Xbox games and their development teams. The first Developer_Direct led to the surprise release of Hi-Fi Rush, and past showcases have featured titles such as Indiana Jones and the Great Circle, Minecraft Legends, Forza Motorsport, Redfall, Avowed, Senua’s Saga: Hellblade II, Visions of Mana, and Ara: History Untold.

    This upcoming event will spotlight games that are confirmed for release within the year, with an Xbox Wire post hinting at various details about them. We will finally experience the “full reveal” of Doom: The Dark Ages, the latest shooter from iD Software, which was initially teased during the 2024 Xbox Games Showcase. A comprehensive exploration of South of Midnight is also confirmed, providing another glimpse into the action-adventure game that takes inspiration from American Deep South folklore. Digital Trends was particularly impressed with the game during our visit to Complusion Games’ studio last November.

    Hazel sits cross-legged in South of Midnight.
    Compulsion Games

    On the independent games front, Clair Obscur: Expedition 33 is also set to appear. This visually stunning RPG garnered attention during the latest Xbox showcase, and developer Sandfall Interactive is expected to provide insights into the game’s development, sharing details about how they plan to deliver an engaging story set in an enchanting fantasy world. Fans are hopeful for release dates for these eagerly awaited titles on Game Pass.

    The most thrilling aspect of this Developer_Direct is the announcement that Xbox Wire hints at a visit to a surprise location to unveil another studio’s new game. While no specifics have been disclosed, rumors abound that it may involve an Unreal Engine 5 remake of The Elder Scrolls IV: Oblivion. However, the use of the term “brand new game” suggests otherwise, so we will have to tune in during the showcase in a couple of weeks to discover what’s in store.