الوسم: The Beast

  • How to Complete Every Armor Set in Dying Light: The Beast

    How to Complete Every Armor Set in Dying Light: The Beast

    Dying Light: The Beast features nine armor sets in total, each composed of six unique pieces that you can collect. Every piece provides different benefits, allowing you to customize your gear based on your needs.

    If Kyle is headed out for a loot run, the best choice is the Scavenger set. For more defensive protection, the Heavy Armor set is ideal. You can mix and match pieces from any of the sets to create the perfect combination for your playstyle. Here’s a full overview of each armor set in the game.

    All Armor Set Locations

    The armor sets are scattered throughout Castor Woods. You can acquire them by completing side quests, purchasing from vendors in the Exiles Cave or Town Hall, or finding them in Dark Zones.

    Each set contains six parts:

    • Headwear
    • Gloves
    • Bracers
    • Chestpiece
    • Joggers
    • Sneakers

    Once you find a piece, it goes straight into your inventory, where you can equip it or check its buffs.

    Tip: Mix different armor pieces to get a range of benefits suited for specific situations.


    Scavenger Armor Set

    Buffs:

    • 6% increase in loot from common craft parts
    • 3% increase in loot from uncommon craft parts
    • 4% damage boost from accessories

    Location of pieces:
    | Armor Piece | Location |
    |————–|———-|
    | Headwear | Nate Market Dark Zone – Town Hall |
    | Gloves | Nate Market Dark Zone – Farmlands |
    | Bracers | Nate Market Dark Zone – Industrial Zone |
    | Chestpiece | Vanity Store Dark Zone – Villa Area |
    | Joggers | Vanity Store Dark Zone – Town Hall |
    | Sneakers | Taurus Megastore Dark Zone – Recreation Island |


    Heavy Armor Set

    Buffs:

    • Provides the highest protection, with each piece offering 10 armor points

    Location of pieces:
    | Armor Piece | Location |
    |————–|———-|
    | Headwear | Gallery Sq. Apartment Dark Zone – Old Town |
    | Gloves | Factory Offices Dark Zone – Industrial Zone |
    | Bracers | School Dark Zone – Villa Area |
    | Chestpiece | Station Sq. Apartment Dark Zone – Old Town |
    | Joggers | Library Sq. Apartment Dark Zone – Old Town |
    | Sneakers | Warehouse Dark Zone – Industrial Zone |


    Bruiser Armor Set

    Buffs:

    • 1.5% damage resistance against infected
    • 3% damage boost with two-handed weapons
    • 3% attack damage increase

    Location of pieces:
    | Armor Piece | Location |
    |————–|———-|
    | Headwear | Trouble In Paradise side quest |
    | Gloves | Final quest (placed on your bed after completion) |
    | Bracers | Hydro Puzzle side quest |
    | Chestpiece | Found in a house across from Nate Market in the Vale |
    | Joggers | Good Vibrations side quest |
    | Sneakers | Killing Streak side quest |


    Explorer Armor Set

    Buffs:

    • +2% experience gain per piece, stacking up to +12% when wearing the full set

    Location of pieces:
    | Armor Piece | Location |
    |————–|———-|
    | Headwear | Vendor at Town Hall |
    | Gloves | Vendor at Town Hall |
    | Bracers | Vendor at Town Hall |
    | Chestpiece | Vendor at Town Hall |
    | Joggers | Vendor at Town Hall |
    | Sneakers | Vendor at Town Hall |


    Parkourist Armor Set

    Buffs:

    • +7% damage when parkouring
    • +4% damage from melee weapon throws
    • -3% stamina cost for melee weapons

    Location of pieces:
    | Armor Piece | Location |
    |————–|———-|
    | Headwear | Exiles’ Cave |
    | Gloves | Exiles’ Cave |
    | Bracers | Exiles’ Cave |
    | Chestpiece | Exiles’ Cave |
    | Joggers | Exiles’ Cave |
    | Sneakers | Exiles’ Cave |


    Survivor Armor Set

    Buffs:

    • -3% stamina cost for melee weapons
    • +2% damage with melee weapons
    • +3% health restored upon healing

    Location of pieces:
    | Armor Piece | Location |
    |————–|———-|
    | Headwear | Main quest “One Flew Over The Volatile’s Nest” |
    | Gloves | Main quest “Some Like It Dark” |
    | Bracers | Main quest “Requiem For A Scream” |
    | Chestpiece | Main quest “New Strain” |
    | Joggers | Main quest “Power Gambit” |
    | Sneakers | Main quest “Vengeance Is Mine” |


    Soldier Armor Set

    Buffs:

    • +3% damage from firearms
    • -3% recoil when using firearms
    • -1.5% damage taken from humans

    Location of pieces:
    | Armor Piece | Location |
    |————–|———-|
    | Headwear | Safe spot in Mountain Shelter Tower |
    | Gloves | Factory Offices, Industrial Zone |
    | Bracers | Village Tower, Old Town |
    | Chestpiece | Fisherman Island Tower Safe Spot |
    | Joggers | Chimney’s Tower Safe Spot |
    | Sneakers | Highway Tower Safe Spot |


    Merc Armor Set

    Buffs:

    • 1.5% increased damage resistance against infected
    • 3% increased headshot or headstrike damage
    • Reduced firearm recoil by 6%

    Location of pieces:
    | Armor Piece | Location |
    |————–|———-|
    | Headwear | Mountain Shelter Tower Safe Spot |
    | Gloves | Recreation Island Tower Safe Spot |
    | Bracers | Village Tower Safe Spot |
    | Chestpiece | Fisherman Island Tower Safe Spot |
    | Joggers | Chimney’s Tower Safe Spot |
    | Sneakers | Highway Tower Safe Spot |


    Rogue Armor Set

    Buffs:

    • +3% recognition time when enemies detect you
    • +6% stamina damage
    • +3% damage from backstabs

    Location of pieces:
    | Armor Piece | Location |
    |————–|———-|
    | Headwear | Safe in a green house in Old Town (clue 14-11-20) |
    | Gloves | House northwest of Hardware Store in Old Town |
    | Bracers | Opposite pharmacy in Golden Pines (behind a painting) |
    | Chestpiece | Unnamed bunker southwest of Old Town hills |
    | Joggers | Locked room in Library Tower during Killing Streak Final Chapter |
    | Sneakers | During Killing Streak Volume One |


    Soldier Armor Set

    Buffs:

    • +3% damage from firearms
    • -3% recoil on firearms
    • -1.5% damage from humans

    Location of pieces:
    | Armor Piece | Location |
    |————–|———-|
    | Headwear | House during “Killing Streak Volume Four” |
    | Gloves | Bench in church during “Killing Streak Volume Two” |
    | Bracers | Small bench near convoy in “Killing Streak Volume One” |
    | Chestpiece | Complete “Killing Streak” side mission |
    | Joggers | Locked room in Library Tower during “Killing Streak” Final Chapter |
    | Sneakers | Finish “Killing Streak Volume One” |


    Merc Armor Set

    Buffs:

    • 1.5% damage resistance against infected
    • 3% increased damage from headshots
    • Reduced firearm recoil by 6%

    Location of pieces:
    | Armor Piece | Location |
    |————–|———-|
    | Headwear | Mountain Shelter Tower Safe Spot |
    | Gloves | Recreation Island Tower Safe Spot |
    | Bracers | Village Tower Safe Spot |
    | Chestpiece | Fisherman Island Tower Safe Spot |
    | Joggers | Chimney’s Tower Safe Spot |
    | Sneakers | Highway Tower Safe Spot |


    Other sets follow similar patterns, with specific buffs and locations outlined for each piece. This variety gives players the flexibility to customize their gear, balancing protection, damage boosts, and special effects suitable for different combat or exploration scenarios.

  • How to Find All Weapon Mods in Dying Light: The Beast and Complete Your Arsenal

    How to Find All Weapon Mods in Dying Light: The Beast and Complete Your Arsenal

    Many weapons in Dying Light: The Beast have mod slots that let you add extra effects and power to your melee weapons. These mods can cause freezing, electrical shocks, and more. If you want to deal more damage beyond just blunt force or slashing, mods give your weapons special abilities.

    The weapon mods improve both base damage and elemental effects, as well as increasing your chances for critical hits. They also add bonus damage effects on every critical hit. You can electrify, ignite, and freeze the infected as you fight through Castor Woods with these weapon mods.

    All weapon blueprints for mods are found as you play through main and side missions, visit vendors in Old Town and the Exiles Cave, and explore Dark Zones and Safe Spots.

    If a weapon in your inventory has circle icons next to it, it has space for mods. There are three types of slots: Tip, Grip, and Shaft. Check your weapon to see which mod slots are available.

    Only melee weapons can hold mods. Firearms do not have mod slots.

    Most blueprints for weapon mods are unlocked through gameplay, by completing quests, visiting vendors, and exploring specific zones.

    | Mod | Type | Effect | Location |
    |————|———|————————————————————–|—————————————————————–|
    | Acid | Tip | Activates on charged attack. Applies Toxic. | Museum Relay Substation in Old Town (south) |
    | Blaze | Tip | Activates on charged attack. Applies Fire. | Residential Relay Substation in Old Town (west) |
    | Flame | Tip | Activates on critical hits. Applies Fire. | Buy from the Town Hall vendor |
    | Fling | Tip | Activates on critical hits. Applies Blast. | Touristic Relay Substation in Old Town (east) |
    | Frost | Tip | Activates on charged attack. Applies Freeze. | Exiles Cave vendor |
    | Ice | Tip | Activates on charged attack. Applies Freeze. | Farm Relay Substation in Farmlands (northeast) |
    | Laceration | Tip | Activates on charged attack. Applies Bleed. | Hardware Store Dark Zone in Old Town |
    | Puff | Tip | Activates on charged attacks. +2% to weapon and elemental damage. | Safe in house south of Nate Market, Old Town (north) |
    | Slit | Tip | Activates on critical hits. Applies Bleed. | Hardware Store Dark Zone in Industrial Zone (west) |
    | Spark | Tip | Activates on critical hits. Applies Shock. | The Inn Safe Zone, National Park |
    | Venom | Tip | Activates on critical hits. Applies Toxic. | Exiles Cave vendor |
    | Voltage | Tip | Activates on charged attacks. Applies Shock. | Mega Store America Dark Zone in Old Town |
    | Avalanche | Shaft | Activates on critical hits. Applies Freeze. | Buy from Town Hall vendor |
    | Bane | Shaft | Activates on critical hits. Applies Toxic. | Island Relay Substation at the Mental Asylum (SW) |
    | Catapult | Shaft | Activates on critical hits. Applies Blast. | Chimney atop a building in Industrial Area (SE) near Bizarre mural |
    | Inferno | Shaft | Activates on critical hits. Applies Fire. | Basement under a house SE of the Municipal Sewage Treatment in Farmland (beware mines) |
    | Lightning | Shaft | Activates on critical hits. Applies Shock. | Power Plant Safe Zone, Recreation Island (W) |
    | Slaughter | Shaft | Activates on critical hits. Applies Bleed. | Factory Relay in North Industrial Zone |
    | Empowerment| Grip | Provides a passive damage boost. | Taurus Gas Station Dark Zone in Villa Area |
    | Reinforcement | Grip | Grants a permanent durability increase. | Taurus Gas Station Dark Zone in Industrial Zone (W) |

    Charms are special weapon mods that boost damage, stamina regeneration, and looting. You craft charms using Scraps and Wiring and then add them to your weapon’s Charm Socket.

    | Charm | Effect | Location |
    |—————–|——————————|——————————————————————–|
    | Beast Among Us | +3% Damage to humans | Complete the “Beast Among Us” main story quest |
    | Carnage | +2% Damage (1-handed weapons)| Top of the Monument of Heroes in a bird’s nest |
    | Demolisher | +1% Damage Resistance | On a convoy truck on Old Town bridge |
    | Family Toy | +3% Health Recovery | In a cabinet in a back room in Old Town accessible via balcony, labeled ‘Taxi’ |
    | Flare | +3% Uncommon Craft Parts | Rescued hostage in a random event, no fixed spot |
    | Inhibitor | +3% XP gain | Inside maintenance shed by Factory Relay with Slaughter mod blueprint |
    | Lucky Duck | +5% Common Craft Parts | Vanity Dark Zone in Villa area |
    | Parkour | +5% Damage (Parkour) | Chimney’s Tower Safe Spot |
    | Survivor Wish | -3% Stamina cost for melee | Cabin right of Abandoned Safe House in National Park |
    | The Real Beast | +5% Stamina regen on kills | Completing “The Last Supper” main quest |
    | Volatile | +2% Damage with melee weapons | Room in Villa area, accessible through a locked door |

    Most blueprints are obtained by exploring, completing quests, and visiting specific vendors or zones.

  • All Scavenger Gear Locations in Dying Light: The Beast for Completing & Solving

    All Scavenger Gear Locations in Dying Light: The Beast for Completing & Solving

    The armor options in Dying Light: The Beast are flexible, allowing you to mix and match based on your needs. Sometimes, however, you’ll need a complete set of specific gear for certain activities like looting through Castor Woods. There are multiple armor sets available, and choosing the right one can be very important.

    The Scavenger Armor set is designed to increase your chances of finding common and uncommon loot, as well as boost the damage you deal when using accessories like throwing knives. If you want to maximize your scavenging efficiency and gather as much loot as possible during exploration, the Scavenger Armor might be your best choice. Here’s everything you need to know about where to find this armor set in Dying Light: The Beast.

    Where to Find All Scavenger Gear

    The Scavenger Armor set is perfect for early-game exploration, especially for players at lower levels who want to gather lots of crafting materials. Each piece of the set is located in Dark Zones spread across the Castor Woods map. These Dark Zones are prime looting sites, filled with resources and zombies to defeat and search.

    You will encounter these zones naturally as you explore, but if you’ve been mostly focused on story and side missions, you might not have discovered all of them yet.

    Wearing the full Scavenger Armor set increases your chance of finding different crafting parts and adds to your damage output. Summing up the benefits when the entire set is equipped:

    • +36% to common craft parts loot
    • +18% to uncommonly crafted parts loot
    • +24% increase in damage dealt with accessories like knives and grenades

    Looting Dark Zones and defeating enemies for gear will become much more rewarding with this set. The damage boost applies particularly to throwable accessories, so if you rely on those, this gear can be very advantageous.

    Tip: Before venturing into Dark Zones, craft plenty of lockpicks, as many locked doors and cabinets will block your progress.

    Scavenger Headset

    The headgear for the Scavenger Armor can be found in the Nate Market store located in the southeast of Old Town. This small Dark Zone is packed with zombies you can clear out before searching thoroughly. Use a lockpick to unlock the door, then go down to the basement. Search both rooms and look for a vent in a corner of the basement to access a hidden package placed on a small table.

    Scavenger Reinforced Jeans

    This part of the set is located at the Vanity Store in Old Town. Inside, you’ll find the jeans on a shelf just to the right of the locked door. To access it, you will need to pick the lock.

    Scavenger Boots

    Head over to the Taurus Megastore, a large warehouse filled with loot. Once inside, clear out the infected and proceed to the back to find the break room. Inside a locker in the break room, you will find the boots.

    Scavenger Arm Wrap

    For this piece, travel to the Nate Market in the Industrial Zone, across from the Old Hideout. Clear the area of infected, including Screamers, then enter the back room. Use a lockpick to open the door, then go through the vent to find the loot next to a dead body.

    Scavenger Reinforced Shirt

    Located in the Vanity Store in the Villa Area, the shirt is behind a locked backroom door. Use a lockpick to open it and retrieve the shirt inside.

    Note: Remember to pick up the blueprint for the Lucky Duck Charm while looting this set, so you can craft the perfect charm to complement your scavenging gear.

    Scavenger Fingerless Glove

    The final piece can be found in the Farmlands area, in a third Nate Market close to the Farms Tower Safe Spot. After eliminating the infected, go down to the basement. Use the vent to reach the loot room; the gloves are stored in a locked cupboard nearby.

  • How to Restore Power in Dying Light: The Beast by Completing the Puzzle

    How to Restore Power in Dying Light: The Beast by Completing the Puzzle

    Dying Light: The Beast offers many side activities that help you gain experience points quickly. The game guides you through these activities via missions, one of which is called The Cable Guy. During this side quest, you’ll learn how to unlock and power one of the many substations scattered across Castor Woods.

    Because this mission involves several steps, it can be easy to get confused about how to restore the power. Completing The Cable Guy mission, however, provides rewards that can greatly improve your chances of survival.

    How To Start The Cable Guy Mission

    You won’t be able to begin this quest until you turn on the power during the Power Gambit main story mission. After restoring the power and fighting off the Baron’s men, Pietro will contact you via walkie-talkie, asking you to turn on a substation.

    To continue, accept this side mission, which requires you to head west of the Town Hall in the Old Town. When you arrive at the location, you’ll find the substation inside a fenced area, surrounded by zombies, near a road.

    Substation Map

    How To Restore The Power

    Your task is to connect a cable to a wall outlet in the area to activate the substation. While this sounds simple, the large group of zombies nearby makes it challenging. Before attempting to power the substation, clear out the zombies first.

    Note: There may be one or two zombies with ranged acid attacks guarding the substation. Deal with these before taking on the main horde, as their acid attacks can cause significant health damage.

    Substation Under Light Post

    Once the area is clear, climb the light post with its back facing the forested area. From the top, turn right and jump onto the adjacent platform.

    Lamp Post Platform

    Interact with the cable on the platform to take it. Remember, you’ll have a limited length of cable, which you can see at the bottom right of your screen. After grabbing the cable, jump down and head to the small structure at the center of the area. Climb onto its roof to find a latch door that you’ll need to lockpick.

    Latch Door

    Tip: The tasks in this mission can be completed in any order. You can open the latch door before getting the cable, as long as you have lockpicks.

    Drop into the shack and you’ll see the connection point in front of the door. Turn to your right to interact with a machine on the wall to power the generator. Be sure to loot the shack before leaving.

    How To Complete The Cable Guy

    Finally, return to the Town Hall once the substation is functioning. Enter the same hallway where you first met Jacob, then proceed down the hall, turn right, and you’ll find Pietro beyond the door.

    Meeting Pietro

    After restoring power, head back to the Town Hall. From there, go to the hall where you met Jacob, and go all the way down, turning right at the corridor. Pietro will be just beyond that door.

    Interact with him to complete the mission, which awards you with the Remote Trap Controller—an important tool for triggering traps like car bombs throughout Castor Woods. This device becomes especially useful on higher difficulties of the game.

  • All Skills and Their Effects in Dying Light: The Beast – Completing and Solving

    All Skills and Their Effects in Dying Light: The Beast – Completing and Solving

    Skills are crucial in Dying Light: The Beast. They help you fight better, move more smoothly, and give you more options during gameplay. Like in earlier games of the series, the skill system remains similar, but with some updates that include new features like transforming into the Beast.

    In addition to managing your regular skills, you also need to keep up with your new Beast Powers. Earning these powers can be a bit tricky because they are gained through different methods. To survive in Castor Woods, it’s important to understand how the skill system works.

    How to Earn Skills

    There are two main types of skills in Dying Light: The Beast. One is for your standard skills, which are familiar from previous games, and the other is Beast Skills. Both are obtained differently.

    – Normal Skills: These are earned by completing side missions, main quests, and other activities. Actions like parkour moves and fighting also increase your experience points (XP).

    – Beast Skills: These are mostly earned through story progress. When you defeat Chrimeras, which are tied to the main story, you gain Beast Skills that help you better control your Beast Powers.

    During nighttime in Castor Woods, XP earned doubles, which could make leveling up faster. However, night also makes the game more dangerous because Volatiles hunt for humans, making encounters riskier if you’re not prepared.

    It’s important to note that on most difficulty levels, except for Story Mode, you will lose some XP if you die. Dying constantly will slow down your leveling, so having gear suitable for your level to reduce damage can be a big help.

    All Skills, Explained

    The skill tree — often called the cross — is divided into four branches, each focusing on different gameplay aspects:

    1. Agility Skills: Improve your parkour. These skills help you move faster and reduce fall damage.

    2. Survival Skills: Focus on crafting tools like flamethrowers and better equipment for fighting large groups of zombies.

    3. Power Skills: Enhance combat moves, such as drop-kicks and special attack moves. They expand your fighting capabilities.

    4. Beast Skills: Exclusively for Beast Powers, these skills add new moves and utilities, such as healing while in Beast Mode.

    It’s worth noting that not all skills cost the same points. Some skills require more XP as you progress, so saving points for desired skills is wise. Also, once you spend a skill point, you can’t respec — so pick your skills carefully before unlocking them.

    To make effective choices, you can review each skill and its cost beforehand. This helps you plan your skill development and adapt your play style, especially since Dying Light: The Beast can be quite challenging.

    All Agility Skills, Explained

    | Name of Skill | Cost | Function |
    |——————-|————–|————————————————————————–|
    | Active Landing | 1 Skill Point | Reduces fall damage and keeps your momentum going. |
    | Dash | 1 Skill Point | Lets you dash while you have stamina. |
    | Vault Kick | 1 Skill Point | Jump over staggered enemies and kick them midair into others. |
    | Enemy Jump | 2 Skill Points| Jump off enemies while dashing to reach higher spots. |
    | Afterboost | 2 Skill Points| Gain a burst of speed after performing parkour moves. |
    | Bash | 2 Skill Points| Break through groups of enemies without slowing down or taking damage.|
    | Parkour Shot | 3 Skill Points| Slow down time when aiming with ranged weapons. |

    All Survival Skills, Explained

    | Name of Skill | Cost | Function |
    |———————|————–|——————————————————————————–|
    | Stealth Expert | 1 Skill Point | Enemies take longer to notice you while crouching. |
    | Flamethrower | 1 Skill Point | Allows you to craft and use a flamethrower. |
    | Efficient Driving | 1 Skill Point | Uses less fuel when driving vehicles. |
    | Advanced Grenades | 2 Skill Points| Can craft flash grenades, pipe bombs, and gas grenades. |
    | Grenade Launcher | 2 Skill Points| Lets you craft a grenade launcher. |
    | Collision Expert | 2 Skill Points| Vehicles take less damage during collisions. |
    | Camouflage | 3 Skill Points| Use dead bodies as disguises to avoid zombies — attacking stops the disguise. |

    All Power Skills, Explained

    | Name of Skill | Cost | Function |
    |——————-|————–|——————————————————————————–|
    | Dropkick | 1 Skill Point | Perform midair kicks while jumping. |
    | Power Shot | 1 Skill Point | Deal extra damage with perfectly timed shots. |
    | Charged Kick | 1 Skill Point | Increase kick damage and push enemies back farther. |
    | Advanced Reload | 2 Skill Points| Reload faster and sprint while reloading. |
    | Head Stomp | 2 Skill Points| Stomp on any enemy on the ground. |
    | Efficient Fighter | 2 Skill Points| Use less stamina and cause less weapon damage during fights. |
    | Windmill | 3 Skill Points| Perform a spinning attack hitting all surrounding enemies. |

    All Beast Skills, Explained

    | Name of Skill | Cost | Function |
    |———————–|————–|————————————————————————————————|
    | Beast | 1 Beast Point| Enter Beast Mode when your meter is full. |
    | Charged Smash | 1 Beast Point| In Beast Mode, perform a ground smash to knock away enemies. |
    | Furious Charge | 1 Beast Point| Run faster while in Beast Mode. |
    | Heavy Lift | 1 Beast Point| Pick up heavy objects and throw them at enemies in Beast Mode. |
    | Beast Controlled | 2 Beast Points| Trigger Beast Mode manually instead of automatically. |
    | Battering Ram | 1 Beast Point| Charge into groups of enemies for high damage during Furious Charge. |
    | Launch | 1 Beast Point| Jump higher when in Beast Mode. |
    | Beast Conquered | 2 Beast Points| Roar to stun enemies upon entering Beast Mode. |
    | Aerial Smash | 2 Beast Points| Smash enemies below you while airborne in Beast Mode. |
    | Ferocious Swipe | 2 Skill Points| Circular attack during Charged Smash that causes bleeding. |
    | Beast Unleashed | 2 Skill Points| Recover a lot of health while attacking in Beast Mode. |
    | Hook Thrust | 2 Skill Points| Use grappling hook to change trajectory midair in Beast Mode. |
    | Agonizing Roar | 2 Skill Points| Roar with bigger area of effect, stunning enemies around you. |
    | Apex Predator | 3 Skill Points| Activate Beast Mode even if the meter isn’t full. |

    Planning your skills carefully is essential because respecs aren’t available — once you spend a point, it’s permanent. Studying each skill beforehand helps you decide which ones match your playstyle and how to prepare for tougher parts of the game.

  • How To Reach and Complete the Church in Dying Light: The Beast

    How To Reach and Complete the Church in Dying Light: The Beast

    What makes Dying Light: The Beast such an engaging game is its high level of immersion. Everything that happens feels more significant—fights with zombies are more satisfying, and the fear of being chased at night by Volatiles feels very real.

    This immersion encourages better gameplay. However, if you’re on the Beast Within mission, that same immersion can slow you down. Some parts of this mission can be tricky because there’s little guidance on what to do or where to go next.

    ### How to Start the Beast Within Quest

    To begin this mission, you need to complete both the Safe Haven and Life After Life story missions. After finishing those, head to the Town Hall in Old Town, which is located in the middle of Castor Woods.

    When you arrive at the Town Hall, go to the second floor, where you’ll meet a character named Jacob. Talking to him reveals that a new type of Volatile has been attacking both the town’s people and the Baron’s men.

    Next, go to the southern corner of the Town Hall and use the ladder to go outside. As you step outside, it will be nighttime, so use your flashlight to see better—but use it sparingly, as it can attract more zombies.

    ### Investigating the Body

    Once outside, look to your left for a body on the rooftop of a building opposite you. Jump over to investigate it. During this process, a cutscene will trigger showing that a Volatile is nearby.

    ### Following the Beast’s Tracks

    After examining the body, your next goal is to track where the Volatile is heading. Use your Survivor Sense to see the creature’s footprints, marked in yellow on the ground. Follow these marks until you reach inside a building.

    ### Dealing with the Explosion

    Before going in, handle a few zombies in the area—fighting at night is optional but recommended, as it provides experience points and makes climbing easier. If the area’s clear, move to the opposite side of the room to find the exit on the right. Use your Survivor Sense to locate the exit. When you exit, an explosion will happen in the distance on your left.

    ### Investigating the Explosion

    Head north from the rooftop. You’ll come across burning cars and Zombies feeding on fallen Barons’ men. You don’t have to fight them if you prefer not to. Instead, look for a truck with purple lights inside; this will be your next destination.

    After entering the truck, interact with the bodies on the floor—specifically the one on your left. A cutscene will play, showing you grabbing a walkie-talkie and being told about a church. This will be your next location.

    ### Approaching the Church

    The church is to the north and is fairly easy to reach. Staying on the roof is safest because you’ll arrive faster and be less visible to Volatiles. Once you get close, move towards the marked entry, which is covered with purple light.

    ### Entering the Church

    At the church, you’ll see a door also covered in purple light. You won’t be able to go in this way, so turn around and go down the stairs directly in front of those doors. When inside the basement, follow the corridor to an open area with many zombies and a large zombie wandering around. Deal with all the zombies to open up your path.

    Find the hole in the wall in the lower level and crawl through it. On the other side, an exit covered with a plank awaits you.

    ### Climbing the Church

    Carefully navigate from your position to the wooden platform next to a large angel statue. Jump onto the platform, then move left along the wall until you find a break in it. Climb through the gap to reach the roof of the church.

    After climbing, look for a small wooden platform to proceed to the main roof. Turn left and jump across the gap to hang onto the other side, then move along the wall. Reach the balcony, then proceed to the middle and jump onto the round platform in front.

    On the other side of the balcony, drop a ladder for quick access later. From there, run and jump onto a hanging rope. Use the momentum to swing and land on the opposite platform. If your swing isn’t fast enough, back and forth on the rope to gain speed.

    ### Reaching the Top

    After landing, look to your right and jump onto another wooden platform. From there, climb and scale along the wall, moving upward until you can’t go higher.

    Next, find a smaller wooden platform on the roof of the church. Carefully jump onto it and then turn right; you should be able to climb from there and along the wall. Continue upward to the roof of the church, which will be your final ascent before daylight.

    ### Getting to the Train Tunnel

    Once daytime starts, head south of the church to find the train tunnels. Surface access is blocked, so go underneath the area. Look for the train tracks next to the POI. Follow the tracks into a cave-like structure, where the path leads to a door with a body lying in front. Interact with the body to open the door and proceed inside.

    Inside, follow the path into a more open area with zombies and a large roaming zombie. Take care of the zombies, then open the crate to continue.

    ### Entering the Cave and Facing the Final Challenge

    Follow the trail into the cave until you see a door with blood around it. Interact with it for a cutscene involving a fallen soldier. During this event, the beast will attack and cause a grenade to explode, throwing you out of the area.

    You will then use the walkie-talkie to report to Jacob that the beast is still missing. Your main goal now is to escape—follow the same routes you used before, navigating the hallways and avoiding zombies as you run back to the surface.

  • How to Complete EXPcalibur in Dying Light: The Beast to Solve Its Secrets

    How to Complete EXPcalibur in Dying Light: The Beast to Solve Its Secrets

    If you’ve played a Dying Light game before, you probably know about the EXPcalibur Easter egg, which unlocks a very powerful weapon. It makes a comeback in Dying Light: The Beast.

    This time, finding EXPcalibur is a bit more complex. You not only need to locate the sword, but also collect eight Sigils scattered around Castor Woods that are required to unlock it. Let’s get started.

    ### Where to Find Every Sigil

    Dying Light: The Beast is full of collectibles. Most are just for decoration, but there’s one set that really matters—Sigils. There are eight of these carved stone markers found throughout Castor Woods. Finding all of them is necessary to unlock EXPcalibur.

    #### Blood Sigil
    The Blood Sigil is located in the Mental Asylum area of Castor Woods, which is a high-level zone. You should be at around Level 11 to approach it safely. It’s hidden in the middle of a fountain in the asylum’s garden, attached to the base of the fountain.

    #### Curse Sigil
    The Curse Sigil is in the Villa Area, close to the Village Voltage Pole Safe Spot. Inside the park, look for a spooky tree (which is part of a side quest). To the left of this tree, you’ll see a skeleton holding the Curse Sigil in its mouth.

    #### Death Sigil
    The Death Sigil can be found in Old Town, just above the Railway Station. Go to the church entrance indicated on the map, then enter and go through the hole to the right. Proceed into the room with a large statue—this is where the Death Sigil is located.

    #### Shadow Sigil
    The Shadow Sigil is one of the easiest to miss. It’s located in Exile’s Cave in the Villa Area. Inside the cave, find the NPC standing next to a candle in the middle. The Sigil is on the ground nearby. Using Survivor Sense can help highlight it.

    _Note: You encounter Exile’s Cave about halfway through the story, which seems intentional to prevent early access to EXPcalibur._

    #### Sacrifice Sigil
    The Sacrifice Sigil is in the National Park, specifically in a Stonehenge-style area that hosts a boss fight later. Climb down to the structure beneath the cliff, then turn around and face the pillar to spot the Sigil stuck to the wall.

    #### The Moon Sigil
    The Moon Sigil is in the southern part of the National Park, near the waterfall symbol. Head to the marked spot on the mountain trail, then go through the crack at the top. To the right, next to some trees and a stone partly buried in the ground, you’ll find the Sigil.

    #### The Void Sigil
    Close to where The Moon Sigil is located, The Void is behind the waterfall in the National Park. Behind the waterfall, there’s a hidden cave path. Follow it to reach a water body where the Sigil floats at the bottom.

    #### Witch’s Mark Sigil
    The last Sigil is also in the southern portion of the National Park, slightly east near the Safe Zone. Look for a small cabin, go inside, and you’ll find the Witch’s Mark Sigil attached to the wall.

    —

    ### How to Collect and Unlock EXPcalibur II

    After gathering all Sigils, head to the top of a large rock in the National Park. There’s a path to climb up involving circling the rock and swinging onto branches to reach a higher spot.

    Once at the top, the EXPcalibur II is embedded in the ground, marked with eight points around it. Approach each point and hold the action button to place the Sigils. After all are set, a zombie will spawn; dropkick it away, then spend a few minutes pulling the sword free from the ground.

    EXPcalibur II in Dying Light: The Beast is an extremely powerful sword. It can only be used once since it’s irreversible. Though it’s a lot of work for a one-time weapon, many players find the journey rewarding and fun.

  • How to Use Beast Form and Solve Its Powers in Dying Light: The Beast

    How to Use Beast Form and Solve Its Powers in Dying Light: The Beast

    Most of Dying Light: The Beast will feel familiar if you’ve played the previous games, with parkour movement and intense zombie combat.

    One big new feature in this game is the “Beast” itself. Kyle is somewhere between human and a Volatile, which gives him access to unique and powerful moves.

    How to Enter Beast Mode and What It’s Used For

    You’ll first see Beast mode during the very first mission. Kyle gets surrounded by zombies and transforms. This early moment shows how Beast mode works — it’s triggered when a meter fills up as Kyle takes or deals damage.

    In the beginning, Kyle can’t control Beast mode and automatically transforms when the meter is full. This might be frustrating if you want to save it for later. But as you level up and defeat Chimeras, you’ll upgrade the transformation ability, allowing you to trigger it manually by pressing L3 + R3.

    Once upgraded, you can activate Beast mode earlier, but that reduces its power. When in Beast mode, Kyle uses quick punches that eliminate most enemies in a few hits and moves faster than usual. Activating Beast mode also quickly restores some health, and more benefits can be unlocked as you upgrade your Beast Powers.

    Unlocking Beast Powers

    During the story, a character named Olivia assigns you quests to find and defeat powerful Chimeras, which upgrades your abilities. While the skill tree gives some customization, you’ll end up unlocking all the powers naturally by progressing through the story and defeating Chimeras.

    Most powers are combat-focused, such as heavy hits, knock-back moves, and the ability to pick up heavy objects. There are also special movement skills, like leaping high into the air or turning the grapple hook into a zipline.

    Two of the most important powers control the Beast transformation: one lets you choose when to activate it, and another allows you to access it when the meter is half-full.

    Tips and Tricks for Beast Mode

    Beast mode is fairly straightforward but keeping a few tips in mind can help you maximize it. Remember, the Beast meter resets whenever you rest—so using it at night, especially against Volatiles, is best saved for when you really need it.

    While the flashy special attacks look cool, they drain the meter fast and usually don’t do much more damage than simple attacks. It’s often better to just use quick swipes to keep your meter going, as they tend to take down enemies in one hit anyway. Using special moves for heavy damage isn’t worth the meter cost.

    A key piece of advice is to avoid activating Beast mode early if you have a power that grants control. Activating with a full meter gives you health regeneration, which is vital since taking damage fills the meter, leaving you more vulnerable if you activate it prematurely.

    Another useful tip — once you’ve unlocked the high jump and grapple hook in Beast mode, it’s a great way to get around quickly, especially during climbing sections. Combining these abilities lets Kyle reach almost any place, as long as you’re willing to spend some of your meter.

  • Complete Your Quest: Solving All Safes and Codes in Dying Light: The Beast

    Complete Your Quest: Solving All Safes and Codes in Dying Light: The Beast

    While you can find some resources by looting bodies and bags, many more valuable items are hidden inside locked safes in Dying Light: The Beast. To access these safes, you need a special code, which isn’t easy to find. Each safe and locked box has its own unique code, which you can either guess or discover nearby. Inside, you’ll find legendary med kits, valuable items, and cash. To save you from spending hours trying to crack the codes, here is a list of all safe locations and their combinations in Dying Light: The Beast.

    All Safes and Locked Box Locations and Codes

    Many safes appear during main or side quests, while others are found spontaneously during exploration of different areas and Dark Zones. Usually, the combination to open a safe is hidden nearby in a note or clue. If you’re struggling to find the codes, here are some of them, or you could try listening for a faint click when turning the dial to the correct number.

    Safe Location Combination
    School Safe School Dark Zone Found in binary on the whiteboard. Code: 5-40-90
    Iris’s Safe Iris’s House / Robbers’ Hideout During the Last Wish Quest. Code: 20-07-06
    Chief Engineer’s Safe Chief Engineer’s Office During the Hydro-Puzzle Quest. Code: 27-01-15
    Musician Safe Abandoned Musician Basement (North of the Vanity Store, Villa Area) On a Bloody Rabbits poster. Code: 02-02-19
    Supermarket Locker Nate Market in Villa Area On a nearby note. Code: 65-63-35
    Hotel Safe Northernmost Hotel in Old Town Count pencils, books, and TVs in the room. Code: 07-06-01

    Note that more safes and their combinations will be added as they are discovered, so check back later for updates.

  • Complete All Safe Spot Locations in Dying Light: The Beast

    Complete All Safe Spot Locations in Dying Light: The Beast

    Finding a safe place to wait or rest is crucial in Dying Light: The Beast. Walking through swamps or hopping across rooftops in the city can be dangerous, especially when night falls and you have nowhere to hide.

    Safe Spots are the only places where you are fully hidden from zombies trying to attack you. Each Safe Spot has a stash bag to store extra items and a bed to sleep in, allowing you to rest until morning and avoid relentless pursuits through the streets. Some of the larger Safe Spots also include a workbench for light modifications. Here’s how to find and unlock all Safe Spot locations in Dying Light: The Beast.

    There are different types of safe areas, from small wooden towers called Safe Spots to larger buildings known as Safe Zones. The wooden Safe Spots are scattered across the map and typically contain a bed and a stash bag. They’re perfect for those moments when you get caught outside after dark and aren’t ready for a nocturnal adventure.

    It’s a good idea to prepare before heading out by crafting items like bandages, grenades, and lockpicks to help restore Safe Spots if needed.

    Safe Zones are created in abandoned homes that need repair, as well as in larger locations inside old workplaces and churches. These elements require some work to restore. Restoring a Safe Spot or Safe Zone requires power, which is easier to activate in wooden towers—just climb up and turn on the power. For larger Safe Zones, you’ll need to find and repair power cables and fuse boxes, barricade entrances, and clear infected from the area.

    All Safe Spots and Safe Zones offer rewards once fully restored, such as blueprints for new weapons or ammo, fancy gear, or rare items. After eliminating the infected and restoring power, you can collect your rewards and take a well-earned rest.

    | Name | Location | Type | Reward |
    |——-|—————-|———|——–|
    | Gas Station Voltage Pole | Industrial Zone | Safe Spot | Shock Arrows Blueprint, 2K XP |
    | Highway Bus Refuge | Industrial Zone | Safe Zone | Rusty Weapon Blueprint, 3K XP |
    | Chimney’s Tower | Industrial Zone | Safe Spot (requires Grappling Hook) | Parkour Trophy, Epic Pants, 2K XP |
    | Cargo Station Tower | Industrial Zone | Safe Spot | Bleeding Knife Blueprint, 2K XP |
    | Old Hideout | Industrial Zone | Safe Zone | Workout Weapon Blueprint, 3K XP |
    | Power Plant | Recreation Zone | Safe Zone | Spark Weapon Mod Blueprint, 3K XP |
    | Recreation Island Tower | Recreation Zone | Safe Spot | Fingerless Gloves, 2K XP |
    | Library Tower | Old Town | Safe Zone | Extinguisher Weapon Blueprint, 3K XP |
    | Fisherman Island Tower | Old Town | Safe Spot | Merc Long Sleeved Shirt, 2K XP |
    | Town Hall | Old Town | Safe Zone | N/A |
    | Inn | National Park | Safe Zone | Spark Weapon Mod Blueprint, 2K XP |
    | Monastery | National Park | Safe Zone | Rare Hunting Bow, 3K XP |
    | Camping Tower | National Park | Safe Spot | Fire Bolts Blueprint, 2K XP |
    | Mountain Shelter Tower | National Park | Safe Spot | Merc Shooting Headset, 2K XP |
    | Abandoned House | National Park | Safe Zone | Break Knuckles Blueprint, 3K XP |
    | River Tower | Villa Area | Safe Spot | Exploding Knife Blueprint, 2K XP |
    | Village Tower | Villa Area | Safe Spot | Heavy Arm Protectors, 2K XP |
    | Village Voltage Pole | Villa Area | Safe Spot | Shock Knife Blueprint, 2K XP |
    | Groundskeeper’s House | Villa Area | Safe Zone | Heavy Weapon Blueprint, 3K XP |
    | Highway Tower | Villa Area | Safe Spot | Merc Boots, 2K XP |
    | Exiles’ Cave | Villa Area | Safe Zone | N/A |
    | Farms Tower (Grappling Hook needed) | Farmlands | Safe Spot | Fire Bolts Blueprint, 2K XP |
    | Silos | Farmlands | Safe Zone | Legendary Sawblade, Rare Night Weapon, 3K XP |
    | Asylum Island Tower | Mental Asylum | Safe Spot | Shock Bolts Blueprint, 2K XP |

    Once you restore each safe area, you will receive helpful rewards to assist in your journey and survival.

  • How To Throw Weapons in Dying Light: The Beast – Completing and Solving Skills

    How To Throw Weapons in Dying Light: The Beast – Completing and Solving Skills

    Since this is the third game in the series, you might think that long-time fans would find most of the returning mechanics easy to figure out in Dying Light: The Beast. However, not everything is so straightforward.

    One mechanic that isn’t clearly explained in the game is how to throw weapons. This can be frustrating because it’s different from previous entries in the series. Here’s how to do it.

    How to Throw Weapons

    If you’ve played any Dying Light game before, you probably know that your character can toss weapons at zombies to some success. Blunt weapons can knock zombies down, and sharp items might sometimes kill them instantly if you’re lucky. Usually, this skill needs to be unlocked, but it’s been a part of every game in the series.

    In Dying Light: The Beast, the game doesn’t tell you how to throw weapons, which might lead you to believe it’s not possible. That’s not true. Throwing your weapon is actually quite simple — you just need to charge up a regular attack and then press the right stick.

    Note: I spent around 25 hours figuring this out because there’s no tutorial or instruction. I found out by accident and it surprised me.

    Visual Example

    Doing this will make Kyle toss whatever weapon he’s holding. It’s not the most reliable combat method, but it can be useful in certain situations. Why this isn’t explained in the game is unclear, but now you know how to do it.

  • Dying Light: The Beast Release Date, Trailers, Gameplay And More

    Dying Light: The Beast Release Date, Trailers, Gameplay And More

    No other zombie game quite matches Dying Light. This series fuses frantic first-person action with an exhilarating parkour system that makes evading zombies as enjoyable as delivering a drop kick to them. While there are several exciting first-person titles on the horizon, such as Doom: The Dark Ages and Metroid Prime 4: Beyond, the zombie genre is a bit sparse on upcoming releases. However, Dying Light: The Beast is set to make waves. This new chapter in the Dying Light universe introduces an old favorite from the original title. So lace up your sneakers and don’t forget to head indoors before nightfall as we delve into everything known about Dying Light: The Beast.

    With numerous games on the slate, it can be overwhelming to keep track. To stay updated, check our compilations of forthcoming PS5, Xbox Series X, PC, and Switch games.

    Release Date Window

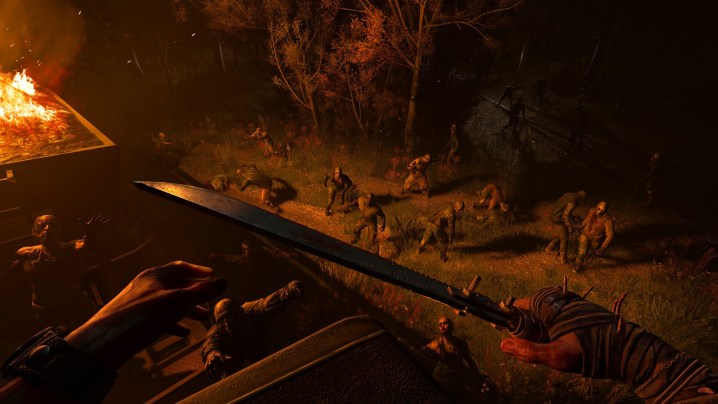
    A crowd of zombies illuminated by a fire in Dying Light: The Beast.
    Techland

    The expected release window for Dying Light: The Beast is set for summer 2025.

    Platforms

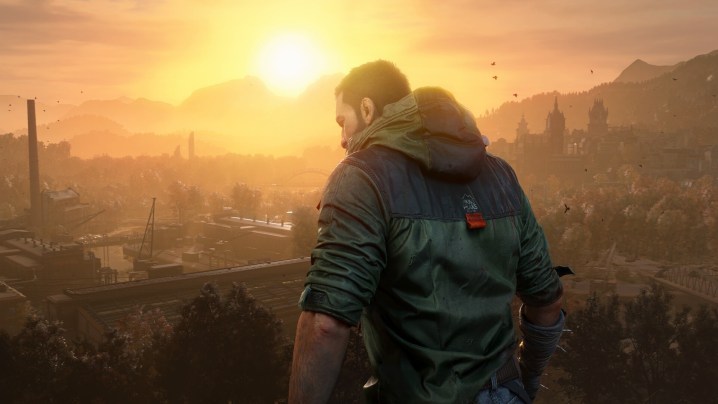
    Kyle Crane in Dying Light: The Beast.
    Techland

    Dying Light: The Beast will be available across most gaming platforms, including PlayStation 4, PS5, Xbox One, Xbox Series X/S, and PC. Unfortunately, for Nintendo Switch fans, a version may be planned for the Switch 2.

    Trailers

    Dying Light: The Beast — Announcement Trailer

    The announcement of Dying Light: The Beast took place at Gamescom 2024 with a brief trailer that reintroduces us to the franchise, set in a new location known as Castor Woods. After a gripping and chilling opening sequence featuring soldiers in peril, we see the return of the protagonist from the original game, Kyle Crane. After being captively held for over ten years and infused with zombie DNA, he now possesses the ability to transform into the beast. Now free, he is on a mission for vengeance against those who imprisoned and experimented on him.

    Dying Light: The Beast — MEET THE BARON - THE GAME AWARDS 2024 TRAILER

    Our second glimpse of the game emerged from The Game Awards 2024 with the Meet The Baron trailer. This segment features a character named The Baron, who reflects on "the code of nature" while observing Crane during his experiments. Although it doesn’t reveal extensive plot details, it gives insight into the character Crane will pursue for revenge.

    Gameplay

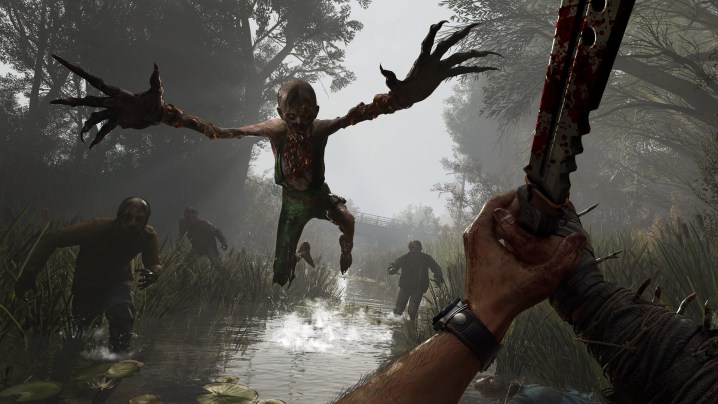
    A zombie lunges at a player in Dying Light: The Beast.
    Techland

    Dying Light: The Beast falls somewhere between a full sequel and downloadable content (DLC). Developers have indicated that this game will exceed 18 hours of gameplay, as its scope expanded beyond what could have been mere DLC for Dying Light 2. Thus, familiar mechanics such as first-person melee combat, shooting, and parkour will return. The new map promises to be an open environment filled with vehicles, city landscapes, and dark, eerie woods. The dreaded nighttime mechanic returns, wherein zombies become much more aggressive and lethal.

    One significant update is the introduction of enhanced beast powers that can enhance strength, agility, and stamina. This beast form will come with its own skill tree that players can develop while exploring the expansive world and interacting with new factions. Players will face choices on whether to assist or ignore these factions.

    Hints suggest that there could be another beast lurking in the woods, but it remains unclear whether it is another creation like Crane or something even more menacing.

    Preorder

    A crowd of zombies illuminated by a fire in Dying Light: The Beast.
    Techland

    Currently, Dying Light: The Beast is not available for preorder for most players. That said, those who own the Ultimate Edition of Dying Light 2 will receive Dying Light: The Beast at no extra cost upon its release, as it was initially designated as DLC for that edition. For everyone else, you can add the game to your wishlist and monitor this article for updates as we receive more details.