الوسم: Tears of the Kingdom

  • Where to Find Tireless Frogs in Zelda: Tears of the Kingdom

    Where to Find Tireless Frogs in Zelda: Tears of the Kingdom

    Tireless Frogs in *Zelda: Tears of the Kingdom* play a crucial role in crafting special elixirs. These elusive amphibians can only be found in moist, hidden areas. Renowned for their boundless energy, these frogs can be used to make the Enduring Elixir, which instantly replenishes your stamina and provides an extra boost of temporary stamina.

    In this guide, we will show you how to find Tireless Frogs in *Zelda: Tears of the Kingdom* and how to utilize them in your cooking endeavors.

    Where to Find Tireless Frogs

    You won’t find Tireless Frogs in open fields or dry areas in *Zelda: TotK*. Instead, they reside in dark caves or wells. With a total of 58 wells scattered throughout the game, not all of them house these rare frogs. We’ve pinpointed a few reliable spots where you can consistently find Tireless Frogs—especially after a Blood Moon.

    You can take a picture of a Tireless Frog and use the Sensor+ feature to track them more easily.

    Your first stop should be the northern well located in Hateno Village, close to the Zanmik Shrine. You can gather up to five Tireless Frogs from this well in a single visit.

    The second spot to check is the well next to the Dueling Peaks Stable. Keep in mind that these frogs tend to flee when you get too close, so it’s best to approach quietly or shoot them with arrows. After collecting the frogs, wait for the Blood Moon to see them reappear in these locations.

    Where to Purchase Tireless Frogs

    If you’re short on time, you can buy Tireless Frogs from Beedle, who often sets up his mobile shop near stables.

    • Wetland Stable (0914, -0248, 0034)
    • Snowfield Stable (-1630, 2587, 0234)
    • Foothill Stable (2610, 1144, 0148)
    • Kara Kara Bazaar (-3273, -2551, 0023)
    • New Serene Stable (-1348, 0745, 0085)
    • Riverside Stable (0326, -1087, 0009)

    Beedle sells each Tireless Frog for 100 Rupees, but he only offers two at a time, limiting you to a total of 12 in one playthrough.

    How to Use Tireless Frogs

    You can cook Tireless Frogs to create the Enduring Elixir. Combine them with other monster parts to craft this powerful elixir. The Enduring Elixir will fully restore your stamina and provide temporary extra stamina wheels.

    Keep in mind that the additional stamina wheel you gain is only temporary (indicated in yellow). Once it’s consumed, you’ll need to drink another Enduring Elixir for a new stamina boost.

    The number of extra stamina wheels you get will vary based on the monster parts mixed in. Avoid cooking Tireless Frogs with Endura Carrots, as blending insects and food doesn’t yield desirable results. You might just end up with Dubious Food despite their similar effects.

  • Unlocking and Solving Makurukis Shrine in Zelda: Tears of the Kingdom

    Unlocking and Solving Makurukis Shrine in Zelda: Tears of the Kingdom

    Among the 152 shrines featured in Zelda: Tears of the Kingdom, several early-game shrines act as tutorials for the game’s mechanics. One such shrine is the Makurukis Shrine, which instructs players on how to utilize bows effectively against both stationary and moving adversaries.

    Although this shrine does not present any puzzles or challenging tasks, it does reward you with a Light of Blessing, which you can use to enhance your health or stamina. This makes Makurukis Shrine particularly appealing for completionists.

    Location of Makurukis Shrine

    You’ll find Makurukis Shrine in the western part of Hyrule Ridge. It’s situated southwest of Lindor’s Brow Skyview Tower, right next to the Tabantha Bridge Stable. This shrine also provides a fast travel option to the stable.

    The shrine is located south of Mount Rhoam, with coordinates of (-2851, 0624, 0233). Approach its sigil to unlock the shrine and prepare for a combat challenge.

    Walkthrough for Makurukis Shrine

    Instead of puzzles, Makurukis Shrine features a combat challenge called Archery. Your goal is clear: hit the enemies in the head with arrows.

    Before you enter the main area, grab a bow and arrows from the left side. You’ll receive a brief tutorial on bow usage: hold down ZR to draw the bow, aim with the left analog stick, and release the ZR button to shoot your arrow.

    Consider using motion controls to enhance your aiming when targeting enemy heads.

    Your first task is to shoot the head of a stationary soldier construct. It’s pretty straightforward: aim at the glowing eyes and fire an arrow. Afterward, two additional soldier constructs will appear.

    One of these constructs is mobile, making it a bit trickier to aim for its head. Successfully hit the heads of both constructs to complete your objective.

    Upon completing this task, a small door will open, granting access to the altar room. Inside, you can open a treasure chest to obtain a Strong Construct Bow in Zelda: Tears of the Kingdom. To finalize your visit, interact with the sigil on Ruru’s altar to receive a Light of Blessing, marking your completion of Makurukis Shrine in Zelda: TotK.

  • Locating and Solving the Ishodag Shrine in Zelda: Tears of the Kingdom

    Locating and Solving the Ishodag Shrine in Zelda: Tears of the Kingdom

    The Ishodag Shrine in Zelda: Tears of the Kingdom focuses on the use of wind currents and Zonai fan devices. As an early-game shrine, it acts as an introduction for beginners to familiarize themselves with the Ultrahand and Ascend abilities.

    This guide will assist you in locating the shrine and completing it efficiently.

    Where to Find Ishodag Shrine

    You can find the Ishodag Shrine in the northeastern part of Hyrule Field, situated directly northwest of Lookout Landing and north of Mount Gustaf. Its location is close to the Hebra region border, with coordinates at (-0880, 0421, 0049).

    This shrine is accessible fairly early in the game.

    Ishodag Shrine Guide

    The challenge in the Ishodag Shrine is called The Windy Device. As the name suggests, the solution revolves around using the Zonai Fan device to reach your objective.

    Use the Ultrahand ability to grab a fan device and place it on the floor near the platform. Activate the device, then jump and deploy your Paraglider to land on the platform above.

    Next, grab another Zonai fan and attach it to the side of the plank so that it faces outward. Now, take the plank and place it on the water with the fan facing you.

    Step onto the plank and activate the fan. The fan boat will propel you across the pond. Once you reach the next platform, collect another Zonai fan and turn right to spot a broken bridge.

    Attach the fan to the edge of the bridge and activate it to reposition the bridge. Use the Ascend ability to ascend the bridge and open the treasure chest to claim an Opal.

    Once you’ve retrieved the Opal, return to the bridge and detach the fan. Network both fans from the surrounding area to the lift’s base, ensuring they both point downwards for proper lift-off.

    Step onto the lift and activate the fans. This will elevate you to the top of the Ishodag Shrine in Zelda: Tears of the Kingdom. Interact with the sigil near Rauru’s Altar to complete the puzzle and earn a Light of Blessing as your reward.

  • Unlocking the Radiant Armor Set in Zelda: Tears of the Kingdom

    Unlocking the Radiant Armor Set in Zelda: Tears of the Kingdom

    For those delving deep into the world of adventure, the Radiant Armor set in Zelda: Tears of the Kingdom stands out as a top choice. Made from crushed luminous stones, this set offers a unique appearance that keeps stal enemies at bay, preventing them from launching attacks against you.

    However, acquiring the Radiant Armor set in this game can be a challenge due to its steep cost. This guide will walk you through a budget-friendly way to get your hands on this coveted armor.

    Where to Find the Radiant Armor Set

    The Radiant Armor Set includes three pieces: the Radiant Mask, Radiant Shirt, and Radiant Trousers. You can purchase all three at the Enchanted Armor Shop located in Kakariko Village.

    This shop is managed by Claree, who sells each piece for 5,000 rupees. Claree needs the funds for her grandmother’s medical treatment, which activates the Gloom-Borne Illness side quest.

    If you’re feeling generous, you can always shell out 15,000 Rupees for the entire Radiant Armor set in Zelda: TotK.

    Look for Lesli, Claree’s sibling, near a cooking pot on the outskirts of Kakariko Village. She’ll ask you to find Sundelion, Hylian Rice, and Fresh Milk to prepare Sunny Veggie Porridge for her grandmother’s recovery.

    Sundelions can be sourced from the Sky Islands, while you can find the other ingredients at the general store in Kakariko Village or Lookout Landing. After cooking the porridge, you’ll need to return to Claree’s shop.

    Upon your return, Claree will drop the price of each armor piece to 800 Rupees, allowing you to acquire the complete Radiant Armor Set for just 2,400 Rupees in Zelda: Tears of the Kingdom.

    Armor Original Price Discounted Price
    Radiant Mask 5000 800
    Radiant Shirt 5000 800
    Radiant Trousers 5000 800

    Radiant Armor Set Stats and Upgrades

    While the Radiant Armor set doesn’t provide any bonuses when worn in its basic form, upgrading each piece to two stars offers you two notable perks.

    • Avoidance of Stal enemies
    • Increased damage with Bone weapons

    The first benefit allows you to bypass confrontation with Stal enemies, as they will ignore you unless provoked. The second benefit boosts your damage when using Bone weapons against foes. You can enhance each item of the Radiant Armor set to four stars at Fairy Fountains.

    Below is a table detailing what is needed to upgrade one piece of the set.

    Level Defense Required Items
    1 Star 5 10 Luminous Stones, 1 Bokoblin Guts, 10 Rupees
    2 Stars 8 15 Luminous Stones, 2 Moblin Guts, 50 Rupees
    3 Stars 12 20 Luminous Stones, 3 Horriblin Guts, 10 Gibdo Bones, 200 Rupees
    4 Stars 20 30 Luminous Stones, 3 Lynel Guts, 3 Molduga Jaw, 500 Rupees
  • Unlocking the Royal Guard’s Spear in Tears of the Kingdom

    Unlocking the Royal Guard’s Spear in Tears of the Kingdom

    The Royal Guard’s Spear is a weapon associated with royalty in Zelda: Tears of the Kingdom. While it boasts impressive attack power, its durability is somewhat compromised due to the materials from which it is crafted.

    This spear is wielded by the Royal Knights to defend their fortifications, delivering a base damage of 15 during fights. Its special passive ability, Break Point, allows it to inflict significant damage just before it shatters.

    Fortunately, players can discover the Royal Guard’s Spear in various locations, some of which may even contain additional royal items.

    Where to Find the Royal Guard’s Spear

    The premier location to obtain the Royal Guard’s Spear is Hyrule Castle, known for its rich loot, including powerful royal equipment in Zelda: Tears of the Kingdom.

    Let’s explore the options available for acquiring the Royal Guard’s Spear within the game.

    Chest in the Akkala Citadel Ruins

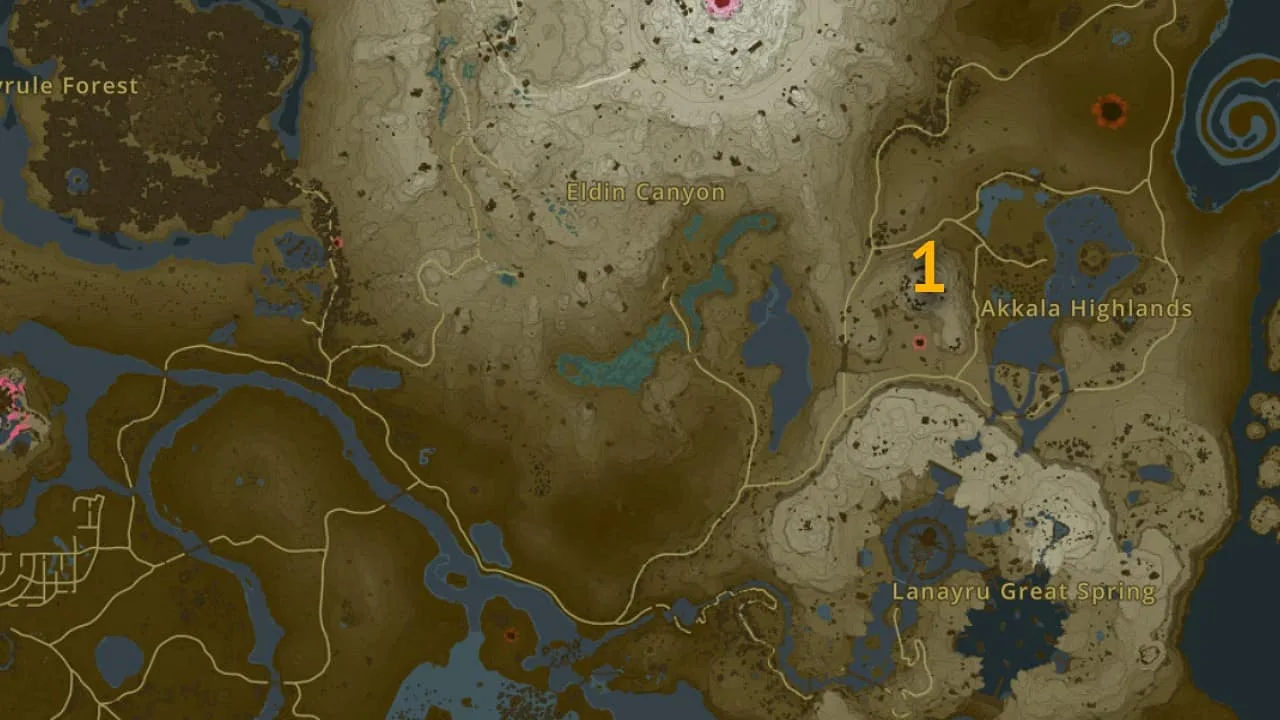
    To find the Royal Guard’s Spear, head toward the Akkala Citadel Ruins located between Akkala Highlands and Eldin Canyon in Zelda: Tears of the Kingdom.

    Access this area by traveling south from Shadow Pass and crossing the Kanalet Ridge. You’ll also discover the Domizuin Shrine to the south of the weapon’s location.

    Search for the chest inside the ruins at the coordinates (3312, 1515, 0415) and unlock it to easily acquire the Royal Guard’s Spear.

    Inside Hyrule Castle

    The top spot to snag the Royal Guard’s Spear is within Hyrule Castle in Zelda: Tears of the Kingdom. This iconic floating castle is hard to miss and becomes accessible after you’ve activated the first Skyview Tower in Lookout Landing.

    Simply glide north from the launch pad to reach the castle. If you’re attempting to explore the castle early in your journey, pack some elixirs and food to boost your stamina.

    Make your way to the Throne Room and proceed to the central landing area to collect the Royal Guard’s Spear at coordinates (-0260, 1065, 0466). Additionally, you can uncover more royal items by thoroughly exploring the castle.

    Stats for the Royal Guard’s Spear

    This spear inflicts 15 damage with each attack, and its compendium number is 430 in Zelda: Tears of the Kingdom. The weapon’s passive ability, Breaking Point, significantly boosts damage output when it is close to breaking.

    Additionally, there’s a pristine variant of the Royal Guard’s Spear that increases base damage to 24. To obtain this upgrade, you must first use the standard version until it breaks during combat.

    • Weapon Type: Spear (two-handed)
    • Base Damage: 15/24 (damaged/pristine)
    • Passive Ability: Breaking Point (damage escalates when the spear is near destruction)
    • Hyrule Compendium Number: 430

    In Zelda: Tears of the Kingdom, the pristine variant of the Royal Guard’s Spear enhances your damage to 24, but you’ll need to utilize the standard version and break it during combat to access this upgrade.