الوسم: Tails Of Iron 2

  • Conquer the Golden Forest Sky Scorcher in Tails of Iron 2

    Conquer the Golden Forest Sky Scorcher in Tails of Iron 2

    If you have completed all the Beast Hunts so far in Tails Of Iron 2: Whiskers Of Winter, your last challenge is Scorch The Forest. This Beast Hunt is tougher than the previous ones, but it should feel more manageable since you’re now accustomed to the attack patterns and know how to respond to them.

    Although the Darkwing threat has vanished, the Sky Scorchers are the remaining obstacles from Arlo’s challenging journey to restore his kingdom. Defeating these Sky Scorchers is essential to bring peace and safety to your new rat empire.

    How To Start “Scorch The Forest”

    Even though the Darkwings have been dealt with, Arlo and his companions still have work to do, as each Beast Hunt quest-giver has a new challenge: tracking down the remaining Sky Scorchers.

    Return to the Owl Hunter at the tavern in Nestminster within The Golden Forest, where you’ll be tasked with hunting one of these massive beasts.

    It’s crucial to prevent the Sky Scorcher from nesting in the forest, so head to the Totem Shrine—the same place you fought the WereOwl during “A Farmer for the Keep.”

    Fast travel to the Totem Shrine and make sure to restock at the merchant nearest the entrance if you’re low on supplies, especially ammo, which is crucial for this encounter.

    It’s a good idea to refill your Whetstones and use one before entering the shrine.

    Prepare yourself by equipping your best electric and poison weapons for the challenges ahead.

    How To Defeat The Golden Forest Sky Scorcher

    Upon entering The Shrine of the Golden Owl, you will face the Sky Scorcher that has been terrorizing The Golden Forest.

    Dodge the Sky Scorcher’s tail whips by getting underneath them, then attack from a distance using your ranged weapon to gradually lower its health.

    Continue your assault until you reduce its health by 33 percent, at which point it will retreat down and to the left toward the Abandoned Rangers Camp.

    How To Beat The Golden Forest Sky Scorcher Phase Two

    Chase the Sky Scorcher to the designated marker, then check out the dead owl in the center of the arena before it attacks.

    As always, engage immediately with some shots from your ranged weapon.

    When it lowers its tail, attack it with your melee weapon to save ammo and continue to reduce its health.

    Be on the lookout for its fiery breath attacks and keep up your ranged and melee assaults, depending on the proximity of its tail.

    Once it has 33 percent of its health left, it will retreat one final time to a familiar location: the Underoot Ditch.

    If you’ve completed Scorch the Outskirts and Scorch the Rift, you’re aware of what to expect next.

    Before you proceed, switch to your most effective fire and poison weapons; they will be crucial for this part.

    How To Beat The Golden Forest Sky Scorcher Phase Three


    As you reach the Underoot Ditch, you’ll face some WereOwl Cultists guarding the area. This is when your fire and poison weapons will prove essential, as these enemies are vulnerable to both elements.

    Once you’ve taken down the Cultists, the lurking Sky Scorcher will jump into the fray, so switch back to your top electric and poison weapons.

    If you’re unsure which to use, electric weapons have generally provided the best results for us.

    Steer clear of the red glow on the ground, which signals the Sky Scorcher’s powerful attacks, and watch for its fiery breath that can also strike from a distance.

    This Sky Scorcher will follow the same patterns as the previous ones you’ve battled, so be attentive to its tail and the red or yellow markings around its mouth that indicate whether to dodge or counter its moves.

    Your ranged attacks will be your safest bet during this phase, allowing you to deal significant damage while minimizing your exposure to danger, ultimately defeating the Sky Scorcher.

    What Rewards Do You Get From Scorch The Forest?


    Arlo completes the Scorch The Forest Side Quest in Tails Of Iron 2: Whiskers Of Winter.

    Once you’ve defeated the Sky Scorcher, collect the Green Sky Scorcher Egg from the center area to officially complete this side quest.

    In addition to the egg, you will also acquire:

    • One Scorcher Snout
    • One Scorcher Tail Spike
    • Two Scorcher Ears
    • Two Scorcher Fangs
    • Four Scorcher Talons
    • Five Scorcher Fur
    • 35 Gold coins

    Don’t forget to loot the remains of the Sky Scorcher for additional materials.

  • Conquer the Icewyrm in Tails of Iron 2: Winter’s Whiskers!

    Conquer the Icewyrm in Tails of Iron 2: Winter’s Whiskers!

    In Tails Of Iron 2: Whiskers Of Winter, Arlo faces a new worm-like foe. Even though this new enemy has a different classification, your strategy remains essentially the same. The area known as White Whiskers stands out visually with its beautiful, snow-covered landscape. However, its two main Beast Hunt adversaries are quite similar in nature.

    Whether you decide to confront Ice Breaker or take on this side quest first, you’ll gather crucial information about the significant monster threats lurking here. In the Holes In The Ice quest, you’ll continue to assist the White Whiskers of The Warren, following your earlier victories against the Darkwing menace in A Whisker Away and The Beasts Of White Whiskers.

    How To Start Holes In The Ice

    After completing The Beasts of White Whiskers and presumably finishing the hunt for the frost Death March during the Ice Breaker Beast Hunt, you’re ready to embark on another quest that focuses on an Icewyrm.

    Return to the White Whiskers Hunter situated in The Warren village to gather intel about this new enemy.

    As you exit the village through the gate on the right, a panicked rabbit will warn you about the dangerous Icewyrm lurking outside the walls.

    Make sure to stock up on Whetstones and any other supplies or gear you may need to battle the Icewyrm.

    Your target is vulnerable to electric and fire damage while it can use ice attacks and is resistant to poison, so equip Arlo appropriately.

    How To Defeat The Icewyrm

    Once you reach the designated area, the Icewyrm will burst from the ground and charge at you, followed by a tail slam attack, reminiscent of the frost Death March you encountered in the earlier Beast Hunt.

    Attack the Icewyrm right after it uses its tail slam or maintain your distance if you have a strong ranged electric or fire weapon to safely whittle down its health.

    Back away when the Icewyrm slams its head into the ground—this will trigger ice spikes to shoot up from below, which can harm and freeze Arlo.

    With a few strategic hits, you’ll lower the creature’s health to 50 percent; at this point, it will flee and retreat to the right side of the map. Make your way there now.

    How To Beat The Icewyrm Phase Two

    Upon reaching White Whiskers Peaks, take advantage of the merchant near the entrance to replenish any supplies you used in the first half of the battle and save your progress in case things don’t go as planned.

    Utilize the grapple point to climb up the cliffs, and then use the wooden scaffolding to ascend even higher. Soon, you’ll be back in action against the Icewyrm.

    Steer clear of the Icewyrm’s direct attacks and dodge behind it whenever it gears up to unleash another setback with ice spikes. This attack will be signaled by a glowing red patch on the ground.

    With a few consistent patterns of dodging and attacking, you’ll ultimately bring the Icewyrm down for good.

    What Rewards Do You Get From Holes In The Ice?

    Once you take down the beast, the side quest concludes, and you’ll receive the following rewards:

    • Two Ice Wyrm Tendrils
    • One Ice Wyrm Tail
    • One Blue Paint
    • 35 Gold

    Be sure to loot the Icewyrm for additional crafting materials!

  • Conquering the Slither Scale in Tails of Iron 2: Winter Whiskers

    Conquering the Slither Scale in Tails of Iron 2: Winter Whiskers

    If you love hunting beasts in Tails Of Iron 2: Whiskers Of Winter, here’s some exciting news! The Golden Forest is packed with more creatures for you to hunt. After wrapping up the Beast Hunts in The Outskirts and The Rift, it’s time to tackle the remaining monsters in The Golden Forest.

    While you need to finish the main storyline to unlock the last Beast Hunts in The Rift, Outskirts, and Forest for a 100% completion, it’s beneficial to tackle the hunts as you come across them. This will help you gather materials for crafting better equipment. One important hunt is The Slither Scale, which grants access to improved poison gear, so aim to tackle that one when you’re ready.

    How to Start Hunting The Slither Scale

    After completing your last Beast Hunt in The Rift, head to the Nestminster tavern located in The Golden Forest to speak with the Owl Hunter and start the Hunt for The Slither Scale.

    They will direct you to an area right beneath Nestminster, specifically, to the left of the Hollow Tree sign.

    Fast travel to the Hollow Tree area (if you’ve already unlocked the sign), then move carefully to the left to find your target.

    Before confronting the dangerous snake, ensure to equip your most effective fire and electric weapons to exploit the creature’s weaknesses.

    Once you enter Underoot Ditch, prepare to face the deadly Slither Scale.

    How to Defeat The Slither Scale

    Dodge the beast’s poisonous attacks while maximizing your damage output during its quick attacks. Exercise caution and don’t become overly aggressive, or you might fall prey to its lethal combos.

    Using a Whetstone to enhance your weapon damage will significantly speed up this stage.

    Stay close and focus on melee attacks, avoiding the use of ranged weapons and any ground slam strikes.

    Once you have reduced the Slither Scale’s HP to 50%, it will retreat to the southern part of the map, to the right of the Slither Scale Pit.

    How to Beat The Slither Scale: Phase Two

    If you have the sign unlocked, fast travel there and replenish your supplies and health potions before moving on.

    Venture into the serpent’s lair and defeat its Hatchlings to lure out the main target.

    Employ Erika’s ranged attacks to draw the Slither Scale’s attention while you strike from behind, near its tail.

    If you’re in a tough spot, use your Electric Elementa to stun the Slither Scale and follow up with further attacks to diminish its HP.

    Caution is key: steer clear of the Slither Scale’s Medusa-like gaze (which can freeze Arlo) and its hazardous poison attacks. Thankfully, the poison bite has a long enough windup, allowing you to reposition behind the beast safely.

    Watch out for poison residue on the ground left after the Slither Scale slams down, as this will limit your safe dodging and attacking spaces.

    In this battle, avoiding damage is as crucial as dealing it, so only counterattack from safe areas after the Slither Scale strikes.

    What Rewards Do You Get From Hunt The Slither Scale?

    Upon defeating the Slither Scale, you’ll be rewarded with:

    • Dull Slither Scale Spear
    • Rough Slither Scale Pauldron

    Celebrate your victory with Erika, who now has her revenge.

  • Conquer Glubba The Gutt in Tails Of Iron 2: Winter Whiskers!

    Conquer Glubba The Gutt in Tails Of Iron 2: Winter Whiskers!

    If you thought that Tails of Iron 2: Whiskers of Winter had scattered its pop culture references with Requiescat in Pace, think again. While Ezio Auditore’s famous catchphrase won’t pop up here, Revenge of the Frog borrows inspiration from another iconic franchise.

    Originally, George Lucas planned to title Return of the Jedi as Revenge of the Jedi, a clever nod echoed in Tails of Iron 2 through its quest. In this mission, Arlo sets out to confront a Warlord named Glubba the Gutt—his name unmistakably reminiscent of Jabba the Hutt. The allusions don’t end here; Arlo and his companion Short Tongue dive right into action in this intense Beast Hunt.

    How to Begin Revenge of the Frog

    After finishing Requiescat in Pace, return to Short Tongue’s Rift Hunter stall to kick off your next adventure: Revenge of the Frog. Short Tongue briefs you that it’s time to face Warlord Glubba the Gutt once more, so venture back to the right side of the map.

    Fast travel to the Temple Toadspire Ruins, then head left and descend toward the marked location.

    Tip: On your journey, Arlo will come across a clue that hints at your next battle with Toadcor. Make sure to equip your best fire and ice weapons for the encounter.

    As you continue, take out the Rift Lancer blocking your path. Keep an eye out for a merchant if you need to restock supplies. In the next section, you’ll face a few Rift Frogs. They shouldn’t be too tough if you exploit their weaknesses to fire and ice.

    How to Defeat Toadcor

    When you reach the marker, prepare to confront the Warlord, Glubba. He will throw you into a pit to face his monster, Toadcor.

    If you haven’t already picked up on the Return of the Jedi references, this encounter will surely ring a bell.

    Get ready: turn to face Toadcor and equip any fire or ice weapons for maximum effectiveness. When Toadcor rises, get in close and unleash as many melee hits as you can before it recovers.

    Watch out for Toadcor’s tongue attack as it latches onto the ceiling and prepares to swing down, delivering a powerful blow you can’t parry. When you see the ground shining around Toadcor, back off quickly to avoid its poisonous or electric explosion, which creates a damaging cloud.

    Take advantage of any downtime to heal up if you’ve taken hits, then launch your own counterattacks with your fire and ice abilities. Keep dodging and striking until Toadcor is defeated. For your hard work, you’ll receive a Rough Toadcor Gun, and Short Tongue will advise you to press on and confront Glubba.

    How to Defeat Glubba the Gutt

    Make your way left and tackle any remaining Rift Frog enemies as you climb upward. Before going up, look to the lower level of the cave on your left side to refill your potions and use the save point.

    After returning to the upper area, fight off the Rift enemies protecting the Warlord. Once the last enemy is down, Glubba will join the fray.

    Dodge his fiery barrel toss, then retaliate with your own melee attacks. Be alert for Glubba’s ground slam, indicated by a glowing red spot. This is the ideal time to inflict damage while he recovers.

    Glubba can be surprisingly fast with quick recovery times, so stay aware; otherwise, you might find yourself on the defensive.

    When Glubba is down to 33% health, he loses his helmet and starts tossing barrels wildly. Stay close to him to avoid the barrels and keep your attacks coming. His assault can be overwhelming, so maintaining a close distance is crucial.

    Use Short Tongue to distract Glubba, as his grab attack can deal significant damage. With skilled dodging and well-timed attacks, Glubba will eventually fall, liberating the Rift and the Frogs from his reign of terror.

    What Rewards Do You Get for Completing Revenge of the Frog?

    Upon defeating the formidable Warlord and his Toadcor, you’ll earn the following rewards:

    • Natural Toadcor Axe
    • Rough Toadcor Shield
    • Natural Toadcor Helmet
    • Natural Toadcor Armor

    Collecting these rewards will mark the completion of the Revenge of the Frog side quest and fulfill Arlo’s Bounty.

  • Conquering Necromancer Gouraz in Tails of Iron 2: Winter’s Grasp

    Conquering Necromancer Gouraz in Tails of Iron 2: Winter’s Grasp

    Arlo’s quest in Tails Of Iron 2: Whiskers Of Winter is marked by hardship and loss. Now, it’s time to fight back against the Darkwing forces in The Beasts Of White Whiskers. Previously, while in The Warren, Arlo defeated Captain Barrog Undead Swordsman and cleared out the Darkwing camp. However, the Darkwing forces tainted that victory by seizing The Warren and overpowering the village elder.

    Despite this setback, both Arlo and Grey Ears are committed to reclaiming their beloved land. Together, they set out to push back the Darkwings and seek retribution for the elder who was lost in the fray.

    How To Help Reclaim The Warren

    After finishing A Whisker Away and assisting Greg Ears along with the other survivors at Winter’s Edge, you’ll be ready to take on The Beasts of White Whiskers.

    Since the bats took over and claimed White Whiskers, your mission is to drive them out and restore The Warren to its rightful owners.

    Return to White Whiskers and battle the Zombie Rabbit enemies to gain access to The Warren.

    How To Defeat Undead Rabbit Elder White Paw

    Head to the right side of the area to face the Undead Rabbit Elder White Paw, who will rise up before you.

    While this miniboss looks daunting, he’s not as tough as he seems. Preserve your Elementa abilities for later challenges.

    Evade his slow attacks, and when you dodge successfully, hit back! Use Fire and Electric weapons to exploit his weaknesses and quickly chip away at his health bar.

    After a few rounds of dodging and counter-attacking, you will bring down Undead Rabbit Elder White Paw – that was surprisingly easy.

    How To Defeat Necromancer Gouraz

    After defeating the opening enemy, Necromancer Gouraz will join the fight. This explains why the earlier battle was simpler.

    Necromancer Gouraz is again vulnerable to Fire and Electric attacks, so try to save an Elementa attack for this fight.

    Watch the ground when Necromancer Gouraz raises his staff, as the red glowing sections indicate where he will strike and deal damage.

    Get close to unleash powerful hits on the Necromancer, who will be vulnerable at that range.

    When he teleports away, use your ranged weapon to maintain pressure while you close in again.

    With careful dodging and aggressive tactics, you’ll defeat Necromancer Gouraz.

    What Rewards Do You Get From The Beasts Of White Winter?

    Arlo completes The Beasts Of White Whiskers quest in Tails Of Iron 2: Whiskers Of Winter.

    In gratitude, Grey Ears pledges his allegiance to you. Head back to Winter’s Edge to collect your reward.

    Upon entering the banquet hall, completing The Beasts Of White Whiskers will net you the following rewards:

    • 25 Gold
    • Five Darkwing Ears
    • Five Darkwing Fangs
    • Five Darkwing Snouts
    • Five Wing Tips

    Although the Darkwings have been vanquished for now, it is apparent that more assistance is necessary to strike at the core of their operations.

    The upcoming quest, Finding Fellowship, will focus on gathering the allies you need to take on the Darkwing army.

  • Vanquishing the Elder WereOwl in Tails of Iron 2: Winter Whiskers

    Vanquishing the Elder WereOwl in Tails of Iron 2: Winter Whiskers

    One of the standout features of Tails Of Iron 2: Whiskers Of Winter is the wide array of imaginative foes you’ll face during your adventure. As you collaborate with the Rangers and undertake various side quests, you’ll find plenty of chances to take on these formidable enemies. The quest titled, “A Farmer for the Keep,” provides two additional opportunities to engage in battle.

    Recruiting a farmer might seem like a simple, peaceful task, but this quest quickly reveals itself to be a bit more complicated. Before you set off, it would be wise to enhance your equipment at the Smithy in Winter’s Edge to be ready for the obstacles ahead.

    Finding a Farmer for Winter’s Edge


    After completing the Hammer & Tongs quest, A Farmer for the Keep is one of the three quests available to help restore Winter’s Edge to its former glory. In this mission, you will return to The Golden Forest to seek the help of the Night-Eyes in locating a new farmer for your castle.

    Travel to the Nestminster fast travel point in The Golden Forest, where you’ll consult the Owl Elders. They will direct you to speak with the Badger brothers instead.

    Fast travel to the Abandoned Rangers Camp, where you will find Marco, who is anxiously searching for his brother Lorenzo, who has gone missing while collecting mushrooms.

    How to Rescue Lorenzo

    Navigate to the right and drop down through the gap in the broken tree stump bridge. This will lead you into battle with a Slither Scale.

    Switch to fire and electric weapons if you haven’t already equipped them, as they are particularly effective against Slither Scales.

    After depleting about a third of the Slither Scale’s HP, it will retreat, but Lorenzo will pursue it once more.

    Follow Lorenzo along the path to the right, using the grapple point and then descending into a patch of mushrooms.

    This will cause a Digger Death March and Spitter Death March to appear. Defeat these centipede-like foes with Fire and Electric attacks, and collect their carapaces for crafting.

    Continue right into the next area, then descend a ladder and turn left to find Lorenzo’s basket on the ground.

    Follow the trail into the next room and combat three more Death March enemies before interacting with Lorenzo, who is unconscious among the mushrooms.

    You will need a Stink Bug to revive him, which you can find at the bug farm located in the upper right area of the map.

    Go to the right to complete the fast travel point in the Slither Scale Pit and teleport to Nestminster to save time.

    From Nestminster, head to the right into The Bug Farm building, where you can purchase a stink bug for five coins.

    Then, fast travel back to the Slither Scale Pit and return to Lorenzo. However, you will find that Lorenzo has vanished, and in his place is a Night-Eye.

    You’ll learn that Lorenzo is being treated by a healer, and you will have to confront the WereOwls (who attacked you first) as you search for Lorenzo to the left of Nestminster.

    Throughout your journey, you’ll face additional WereOwl Cultists. Defeat the three that confront you and continue along the path they were obstructing.

    Along the route, you’ll catch a glimpse of what lies ahead. Prepare for a fight with an Elder WereOwl, who is vulnerable to Fire and Poison.

    There’s a merchant nearby, but their inventory may not be particularly helpful for the upcoming battle.

    How to Defeat the Elder WereOwl

    Enter the Shrine of the Elder Owl and take down the Cultists, dodging their attacks to avoid freezing effects.

    Once they are defeated, face off against an Elder WereOwl.

    Be ready to dodge the initial dive attack and retaliate with Fire and Poison Elementa for high damage.

    When the Elder WereOwl reaches 50 percent HP, it will briefly retreat before launching another dive, with its landing point marked by a red glow on the ground.

    After dodging the dive, unleash as many attacks as you can, then continue hitting it with ranged shots.

    Avoid the quick dive attack followed by a dash across the battlefield, indicated by red markers showing its direction, and counterattack quickly.

    After a series of exchanges, the WereOwl will fall. Wake Lorenzo and send him back to his brother.

    Exit the Shrine and head left until you find The Mushroom Farm. Speak to the brothers, and they will agree to help work the farm at Winter’s Edge once Lorenzo recovers.

    Rewards from A Farmer for the Keep

    Arlo completes A Farmer For The Keep in Tails Of Iron 2: Whiskers Of Winter.

    Once you wrap up your conversation with the Badger brothers, you’ll complete the A Farmer for the Keep quest and receive the following rewards:

    • Elder WereOwl Skull
    • Wereowl Blueprint
    • Dull Were Owl Bow
    • Dull Were Owl Helmet
    • Dull Were Owl Armor

    This finishes the A Farmer for the Keep quest, leading you into your next adventure: A Whisker Away.

  • Mastering Merlin’s Ritual in Tails of Iron 2: Winter’s Whiskers

    Mastering Merlin’s Ritual in Tails of Iron 2: Winter’s Whiskers

    Your quest in Tails Of Iron 2: Whiskers Of Winter is centered around restoring and enhancing Winter’s Edge as you anticipate the looming battle against the Darkwing threat. With the Smithy, Kitchen, and Tuck’s Emporium functioning well, it’s time to focus on upgrading your weapons to tackle the formidable enemies ahead.

    To achieve this, you’ll embark on the mission called “These Blessed Tools,” where you’ll assist Rita in maximizing her smithing skills. However, simply gathering high-quality ores or ingots won’t be enough; these tools need to receive blessings from the gods so that Rita can forge the finest weapons for you.

    The main questline opens up after finishing Hammer & Tongs, allowing you to choose between These Blessed Tools and two other quests.

    After initiating These Blessed Tools, Rita the Smith will request your help in seeking a blessing from the gods at a shrine located in The Rift.

    Travel to the Rift Docks and talk to Rita, then use fast travel to get to Bogmire Forge to save some time on your way to the shrine, which is guarded by an enormous octopus-like creature where you’ll find Rita praying.

    After you talk to Rita, follow her instructions to the right to locate a Druid who can assist with the blessing ritual.

    How To Get Ready For Merlin’s Ritual

    Navigate through the areas, either defeating or evading enemies as you wish, until you discover a path of herbs that guides you through an archway into a new area of The Rift.

    Arrive at Merlin’s Hut and expect a fight with the Frog enemies before Merlin shows himself. He agrees to help but requests your assistance in retrieving a special root from a nearby tower.

    Return toward the shrine, but instead of going up the stairs, veer left to find a locked door to the tower, which you can open with Merlin’s key.

    Defeat the Rift Frogs, then continue going left until you come to a series of ladders; take the leftmost ones and drop down through a hatch in the floor using another ladder.

    Once you reach the bottom, speak with the Mole to obtain the T-Pass. However, you’ll need to find a new fuse to unlock the door it opens.

    Where To Find A Fuse

    Head to the left section of the Rift map, past the Whale Boneyard, and enter the lower caverns shown on your map.

    Once inside, battle the Frog and two Tailspinners that attack you, then interact with the flashing machine in the center of the room to obtain a Yellow Fuse.

    Return to the Mole’s residence and converse with it. Once the Mole inserts the fuse into the box, you’ll receive the Mole Blueprint and the doors nearby will open.

    You will also acquire the Dull Mole Sword and Dull Mole Helmet.

    Climb up the nearest ladder, then go left into the newly accessible room and defeat the Tailspinners that you encounter.

    With the enemies cleared, you can now collect the Hedgehog’s Tea Plant and head back to the shrine.

    Offer the Druid the Tea and prepare to protect Merlin and Rita from the undead foes that will attack during the ritual.

    The undead enemies will only be vulnerable when they get close, so remain vigilant and avoid their ranged attacks, being cautious not to let them surround you.

    Once you defeat them, Merlin and Rita will complete the ritual and express their gratitude. Return to Winter’s Edge with Rita to finalize her upgrades through the next quest.


    Once the ritual concludes, you’ll obtain the following rewards:

    • Dull Iron Bug Axe
    • Dull Iron Bug Shield
    • Dull Iron Bug Helmet
    • Dull Iron Bug Armor

    This wraps up the quest “These Blessed Tools.” If you’ve finished the other two available quests, you’ll be ready to tackle the next main quests, including A Farmer For The Keep.

  • Upgrading the Electric Elementa in Tails of Iron 2: Winter’s Whiskers

    Upgrading the Electric Elementa in Tails of Iron 2: Winter’s Whiskers

    As you work on revitalizing Winter’s Edge in Tails Of Iron 2: Whiskers Of Winter, Tuck seeks your assistance in finding a captivating centerpiece to draw customers into his shop, Tuck’s Emporium. But before he can start selling items, you must track down a remarkable creature to serve as the ultimate attraction for Tuck’s opening day.

    Before you can meet the Bird Beast and secure a trophy for Tuck, you’ll need to gather ingredients to set a trap. What better way to catch a giant bird than to entice it with the aroma of a scrumptious meal?

    How to Assist Tuck in Opening His Emporium

    After completing the Return Of The Bats and Hammer and Tongs quests, you can choose from three different missions, one of which is Tuck’s Emporium. Your goal is to help Tuck launch a shop offering general goods and trinkets, but he needs something spectacular for his grand opening: the head of a beast.

    Accompany Tuck to the Outskirts and head left toward Mossburg Farm, where a farmer will provide you with information about the creature you’re hunting. Continue left with Tuck until you come across two Baby Mudwyrms that you must defeat. These enemies are vulnerable to Fire and Electric attacks, so don’t hesitate to utilize your Elementa powers to take them down efficiently.

    Cross the bridge, then squeeze into a small cave with a ladder leading downward into Blackfoot Caverns.

    Where to Find the Electric Elementa Upgrade

    Keep descending, using grappling hooks and sliding down walls to minimize fall damage. Before the final slide down, head left to collect the Electric Elementa Power Up, which enhances its damage output. This upgrade will be crucial for the upcoming battle, so be sure to grab it from the small room where it’s tucked away.

    Once you have the upgrade, mine some nearby ore for additional materials. When you reach the bottom, Tuck will need your help to get some fruit. Use your bow to knock it down.

    With the Blood Fruit in hand, you’ll be confronted by four Bird Beast Chicks (weak to Ice and Electric). Dispatch them and retrace your steps out of the caverns. Tuck will be waiting at the entrance and will then head to Long Fang Castle to set the trap for the beast. Make sure to follow him.

    Preparing for the Encounter

    As you travel, you’ll find a clue about what’s next. Get ready to use ice and electric weapons for the battle ahead. Trade with the merchant if needed, then move on to the next area and take down three more Bird Beast Chicks.

    How to Defeat the Bird Beast

    Ascend the scaffolding in the next area to help Tuck set the trap with the Blood Fruit you gathered earlier. The screen will darken as the Bird Beast swoops in, attempting to swipe at you with its claws multiple times.

    Dodge and run away from the swoops until the beast lands, allowing you to strike back.

    Utilize your Electric Elementa to stun the Bird Beast and follow up with powerful attacks. The Bird Beast will claw the ground and set it ablaze; avoid the fire as you regroup and prepare your next moves. After utilizing your Electric Elementa, switch to your Ice Elementa to freeze the beast and unleash further damage.

    Once you have weakened the Bird Beast, it will retreat off-screen and start dropping bomb eggs. Dodge these bombs and wait for its return to the fray. After defeating the beast, you’ll claim the Golden Beak, Tuck’s prize for his shop’s grand opening.

    What Rewards Await at Tuck’s Emporium?

    In addition to the Golden Beak, you’ll unlock the Bird Blueprint, which opens up access to Bird-themed weapons and armor at the Smithy, including these items:

    • Rough Bird Axe
    • Rough Bird Shield
    • Rough Bird Helmet
    • Rough Bird Armor

    With your inventory now brimming with new gear, return to Winter’s Edge and construct the Shop Base with these materials:

    • One Golden Beak
    • Five Wooden Logs
    • Five Stones
    • Five Small Bones
    • Ten Gold

    Once the new shop is established, the quest “Tuck’s Emporium” will be successfully completed.

  • Unlocking the Electric Element in Tails of Iron 2: Whiskers of Winter

    Unlocking the Electric Element in Tails of Iron 2: Whiskers of Winter

    In Tails Of Iron 2: Whiskers Of Winter, Arlo has primarily been defending against the relentless Darkwing forces. After successfully disrupting their front lines, it’s finally time to confront two of the most formidable Darkwing foes you’ve faced so far and hinder their plans for Winter’s Edge.

    Get ready for intense battles against a Darkwing Captain and General in “Return of the Bats.” Make sure your equipment is ready, as these encounters will test your skills. Fortunately, you won’t be fighting alone; Robin of Longtail will join you, thanks to the groundwork you laid in earlier quests.

    How to Push Back the Darkwing Forces in the Outskirts

    Once you’ve teamed up with Robin of Longtail and finished the Rescue The Rangers mission, you can dive into Return of the Bats. The Darkwing threat is back, and it’s up to you to put an end to it.

    Head to the Outskirts and go left with Robin. Here, you’ll quickly be attacked by Bat Scout Warriors who are pursuing fleeing villagers.

    After you defeat them, continue left until you discover Mossbug Farm ablaze and witness the Darkwing General commanding troops before vacating the area.

    Once you have engaged in another round of combat with more Darkwings, the village elder will guide you to the castle ruins on the hill.

    Continue heading left to embark on your journey to the ruins.

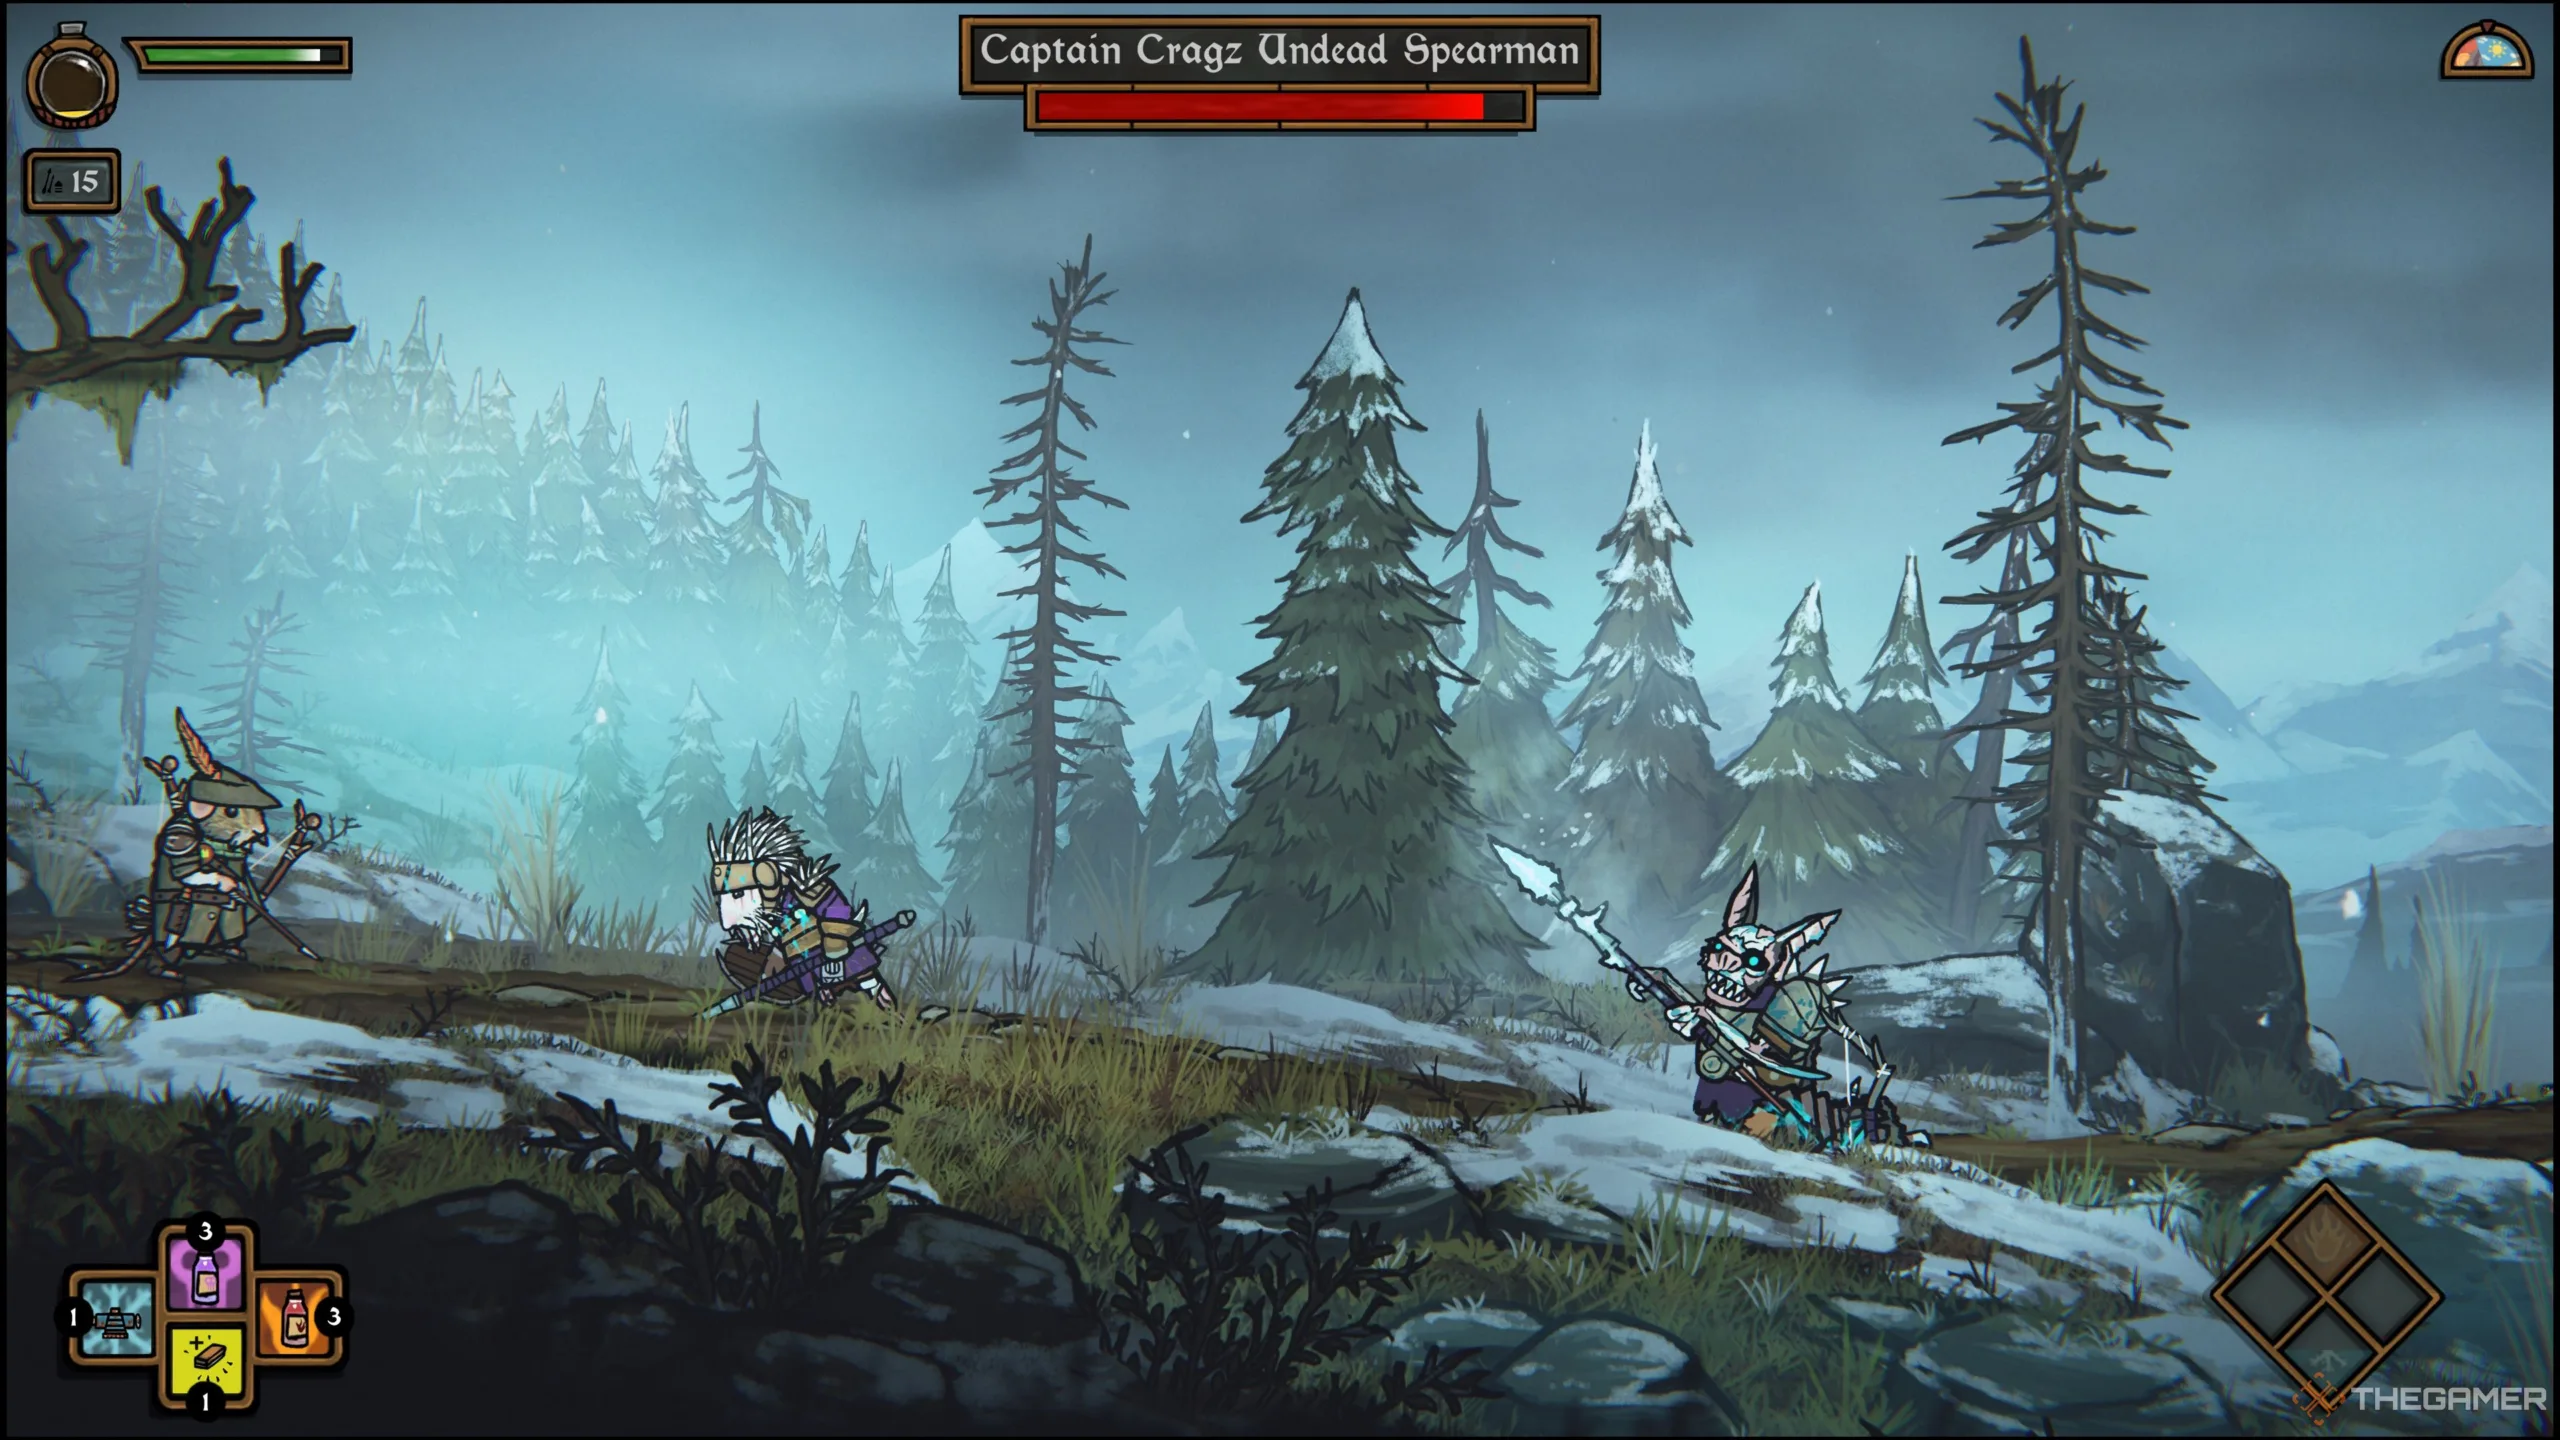
    How to Defeat Captain Cragz, Undead Spearman

    As you head towards the ruins, you’ll encounter Captain Cragz, Undead Spearman, blocking your path.

    Avoid his charge attacks and hit him with your ranged weapon to wear down his health.

    Watch out; the Spearman can transform into a swarm of bats and teleport around the battlefield!

    Utilize Robin’s presence as a distraction to land some hits on this mini-boss, and you’ll take him down in no time.

    After the encounter, keep heading left and pass under the archway to access the upper path.

    How to Unlock the Electric Elementa

    Smash through the vines with your two-handed weapon and climb up the ladder until you need to jump onto the left platform.

    Climb higher, then jump from the second ladder and use your grapple while in mid-air to reach the right side of the top area.

    Break the wooden boards to find a room containing a “Sapphire” in a chest along with some mining materials.

    Before entering the next area, make sure to equip your best Fire and Electric weapons; you will definitely need them.

    Climb the last ladder and head right into the final section of this path: the Ruins of Long Fang Castle.

    Here, you can save your progress, recharge your health potion, and trade with a merchant.

    When you’re prepared, advance into the next area to find the fourth magic statue that will grant you the Electric Elementa.

    How to Defeat Countess Iblis Riding the Scorching Ishtar

    Move right and up the ladder to face your true enemy: Countess Iblis on The Scorching Ishtar.

    Iblis will fly across the sky on her massive bat, forcing you to dodge her swooping attacks while hitting her from a distance until she lands.

    To avoid her tail swings, run underneath Iblis to the opposite side, and continue launching your ranged attacks with Robin’s help.

    When her health dips to about 30-40 percent, Iblis will dismount and fight you on the ground.

    Steer clear of her shield toss and the poison trails she leaves behind. Be on guard for her lunge attacks; Iblis can dash across the battlefield swiftly, so be ready to dodge and create some space.

    Her dash attacks can cover the entire battlefield, so stay alert even when she appears distant, as your timing needs to be spot on to avoid being struck.

    When she has just 10 percent health left, Iblis will ditch her weapons and start hurling ice at you. Stay agile or defend against the attacks to prevent freezing.

    While dodging these ice attacks can be tough, using an Ice-resistant shield is a safer alternative.

    Exercise patience and hold off on your attacks until after Iblis strikes, as her quick recovery offers limited opportunities to counter.

    After defeating Iblis, you can loot the ley and unlock the cage to free the captured villagers.

    Rewards from the Return of the Bats

    Arlo completes Return Of The Bats in Tails Of Iron 2: Whiskers Of Winter.

    Upon defeating Iblis and The Scorching Ishtar, you’ll receive the following rewards:

    • Dull TH Bat Sword
    • Dark Wing Crossbow
    • Bat Helmet

    Return to Mossbug Farm and have a chat with the village elder once more. He’ll express his gratitude, marking the completion of “Return Of The Bats.”

  • Upgrading Fire Elementa in Tails of Iron 2: Winter’s Whiskers Guide

    Upgrading Fire Elementa in Tails of Iron 2: Winter’s Whiskers Guide

    In Tails Of Iron 2: Whiskers Of Winter, Arlo’s main duty is to look after the various needs of his kingdom, which includes protecting his people. Your next mission involves rescuing a group of resourceful rats known as Rangers, with a particular focus on a valuable ally: Robin of Longtail.

    With the threat from the Darkwing faction still a serious concern for Winter’s Edge, the Rangers are vital to your efforts and need your assistance. As you might recall from earlier in the game, Arlo’s strength alone can’t take on the formidable Darkwing army. Forming alliances will be essential to securing Winter’s Edge while you prepare for a full-scale battle.

    How to Assist Robin of Longtail

    After finishing Forge and Stove, head back to your throne to start the Rescue The Rangers quest. A wounded Ranger will ask you to help save his father and brother from the Rift.

    Make your way to the Bogmire Forge in the Rift and remove the wooden planks blocking your path to the right, if you haven’t done so yet.

    Proceed through the Whale Boneyard and navigate the route past some Tailspinners and Darkwing enemies until you find Robin of Longtail.

    How to Improve Your Fire Elementa


    Defeat the attacking Darkwings and then head toward the right side of the map to find a statue that grants the Fire Elementa power-up, increasing your damage output.

    Consider visiting the merchant here if you need supplies since a fierce battle lies ahead.

    Once you gather some Ice Antidotes and any other necessary items, make sure to equip Fire weapons before moving to the next area.

    How to Overcome Bommy Knocker


    Arlo faces the Bommy Knocker in Tails Of Iron 2: Whiskers Of Winter.

    Go into the Temple Toadspire Ruins and make your way to the top to find the Bommy Knocker, which has a weakness to fire.

    Stay clear of this creature’s slams by keeping your distance, striking only when you have a clear opportunity or when it’s distracted by Robin.

    Be cautious of the elemental residue on the ground; don’t linger in it too long or you risk being frozen.

    If you do get frozen, use an Ice Antidote right away to free yourself, preventing additional damage from enemy strikes.

    Your newly enhanced Fire Elementa will be crucial for a quick triumph.

    After you take down the beast, gather your rewards, and don’t forget to loot the remains for valuable crafting materials.

    What Rewards Can You Expect from Rescuing the Rangers?


    Arlo completes Rescue The Rangers in Tails Of Iron 2: Whiskers Of Winter.

    The “Rescue the Rangers” mission concludes right after you defeat the Bommy Knocker, and you will receive the following items shortly after the fight:

    • Dull Dark Wing Lance
    • Dull Dark Wing Shield
    • Dull Dark Wing Armor

    Although the quest has officially ended, there’s one more reward waiting for you.

    When you meet Robin at Winter’s Edge, you will also acquire the Jagged Bone Bow.

  • Essential Materials to Rebuild Winter’s Edge in Tails of Iron 2

    Essential Materials to Rebuild Winter’s Edge in Tails of Iron 2

    Tails Of Iron 2: Whiskers Of Winter tasks players with collecting the necessary skills and materials to assist Arlo in revitalizing Winter’s Edge. After bringing a Smithy and Chef on board, and enlisting the Beaver Builder’s assistance, you can focus on transforming Winter’s Edge back into a livable area for your subjects.

    The journey to restore the four crucial resources is challenging, so your priority will be to establish the Kitchen and Smithy first. Your community will need to be equipped and well-fed to protect themselves from the Darkwing menace, so make sure to collaborate with your builder right away.

    How to Rebuild the Kitchen and Smithy

    After you finish A Builder’s Yard, head back to your throne room and initiate Forge and Stove, which will guide you in constructing both the Smithy and the Kitchen.

    Your recruited Beaver Builder will be your main contact as you work together to set things right.

    These resources are essential for fending off future Darkwing assaults, arming you and your subjects to retaliate.

    Step outside into the Winter’s Edge yard and talk to the Beaver to get started on constructing the Smithy Base and Kitchen Base.

    To upgrade these resources, you will need a Chef’s Pot for the Kitchen and Smith’s Tongs for the Smithy. For now, focus on the basic versions and keep other materials for future use.

    What Do You Need to Upgrade the Kitchen and Smithy?

    While some unique items must be obtained through upcoming quests, you can find most materials throughout your adventures as Arlo.

    Plot Type

    Upgrade Level

    Prerequisite Requirement

    Materials Required

    Kitchen

    Base

    Builder’s Yard Base

    • Chef’s Pot (obtained from recruiting a Chef)
    • Five Stones
    • Five Wood Logs
    • Ten Gold

    One

    Builder’s Yard Upgrade One

    • Five Stones
    • Five Wood Logs
    • One Slither Scale Tail
    • 20 Gold

    Two

    Builder’s Yard Upgrade Two

    • Marco The Farmer
    • One Slither Scale Tail
    • Giant Death March Fire Tail
    • 30 Gold

    Enjoying a tasty meal in the Kitchen boosts your maximum health.

    Plot Type

    Upgrade Level

    Prerequisite Requirement

    Materials Required

    Smithy

    Base

    Builder’s Yard Base

    • Five Stones
    • Five Clay
    • Ten Gold

    One

    Builder’s Yard Upgrade One

    • Smith’s Tongs
    • Five Stones
    • Five Clay
    • Stealth Claw Lamp
    • 20 Gold

    Two

    Builder’s Yard Upgrade Two

    • Smith’s Apron
    • Smith’s Tools
    • Five Stones
    • Five Clay
    • 30 Gold

    What Rewards Do You Get from Forge and Stove?

    After successfully constructing the Kitchen and Smithy on their respective sites, you will complete Forge and Stove and receive the following crafting materials along with access to new resources:

    • Five Iron Ore
    • Fire Copper Ore
    • Five Tin Ore
    • Five Small Bones
    • Five Large Bones
    • Five Wood Logs
    • 20 Gold
  • Unlocking the Poison Element in Tails of Iron 2: Winter’s Whiskers

    Unlocking the Poison Element in Tails of Iron 2: Winter’s Whiskers

    After the devastation of Winter’s Edge, your mission in Tails Of Iron 2: Whiskers Of Winter is to restore your shattered kingdom from the ground up. You’ll need to gather, manage, and develop the essential resources for your realm to flourish.

    This ambitious job requires assistance, so your first step is to recruit a builder. With a chef and a blacksmith on standby, you also need to confront the Darkwing menace threatening the nearby settlements at the Outskirts. Being the Warden just got a lot more challenging.

    Getting Started with a Builder’s Yard

    After finishing the missions to Recruit Chef and Recruit Smith, head back to your throne in Winter’s Edge to begin A Builder’s Yard.

    Leif suggests venturing to Mossbug Farm in The Outskirts to locate a builder. You can reach it via the docks or by leaving through the main gates of Winter’s Edge.

    Upon arrival, turn left and pick up a Silver Runestone key on the ground. Place it into the receptacle in front of a nearby tomb.

    There are three other receptacles, but you don’t have all the Runestones yet.

    Continue left towards Mossbug Farm. Enter the building on the left and speak with the Elder.

    You’ll be instructed to find a Beaver nearby whose building permits need verification.

    Progress further left, exit the village, and defeat a Bird Beast Chick to rescue a frightened farmer.

    Keep moving left and upwards through some ruins to get to the next marker where the Beaver is located.

    Acquiring the Poison Elementa


    You will encounter a magical statue that grants Arlo a new ability: the Poison Elementa. As always, some foes will be present for you to test your skills.

    The Poison Elementa generates a toxic branch that will poison your targeted enemy.

    Continue left and defeat another Backstabber while tracking the possibly hurt beaver.

    Before entering the final area, you’ll find a merchant to restock supplies for the upcoming encounter.

    Strategies to Overcome the Backstabber Mother

    Your chase for the beaver will lead you to the far left side of the map, where a Backstabber Mother awaits your arrival.

    This adversary is vulnerable to poison, so make good use of your new poison magic or any poisoned weapons you have equipped.

    Be sure to dodge the Backstabber Mother’s ground slams and watch out for the electric residue on the ground while delivering counterattacks after her moves.

    Once you manage to poison this enemy, it won’t be difficult to defeat her.


    A Builders Yard Menu tutorial in Tails Of Iron 2: Whiskers Of Winter.

    After defeating the Backstabber Mother, collect the Backstabber Fang and then examine the Beaver who was pretending to be dead during the fight.

    Rewards from the Builder’s Yard


    A Builders Yard Complete in Tails Of Iron 2: Whiskers Of Winter.

    Upon completing your conversation, you’ll receive the Backstabber Blueprint along with the following items:

    • Old Hunter’s Spear
    • Natural Hunter Shield
    • Natural Hunter Cap
    • Rough Hunter Armor

    Return to Winter’s Edge and meet the Beaver near the castle door to discover the four areas available for construction and upgrades in Winter’s Edge.

    Establish your Builder’s Yard Base to complete your quest.