الوسم: Survival Horror Games

  • حلول ضغط الدم، النبض، ومستوى الأكسجين للمريض في تاونفول

    حلول ضغط الدم، النبض، ومستوى الأكسجين للمريض في تاونفول

    في لعبة المدينة الصامتة سايلنت هيل تاون فول، مهمة حل الأحجية تتطلب منك معرفة ضغط الدم، معدل ضربات القلب، ومستوى الأكسجين في الدم. ستستخدم جهاز مراقبة على جهاز الاستقبال الداخلي، وهناك عدة آلات يجب أن تصل إليها وقائمة من الأرقام للاختيار من بينها. كل مرة تختار رقم خاطئ، تتلقى ضررًا. للحصول على الإجابات الصحيحة، عليك قراءة تعليمات كل جهاز على جهاز كمبيوتر محمول، لمعرفة الأرقام التي تكون غير صحيحة، واستخدام تلك الملاحظات للتوصل إلى الأرقام الصحيحة التي ترفع مستوى التفاعل مع الطبيب. إليك الخطوات التي تساعدك على ذلك.

    كيفية قياس ضغط الدم في اللعبة
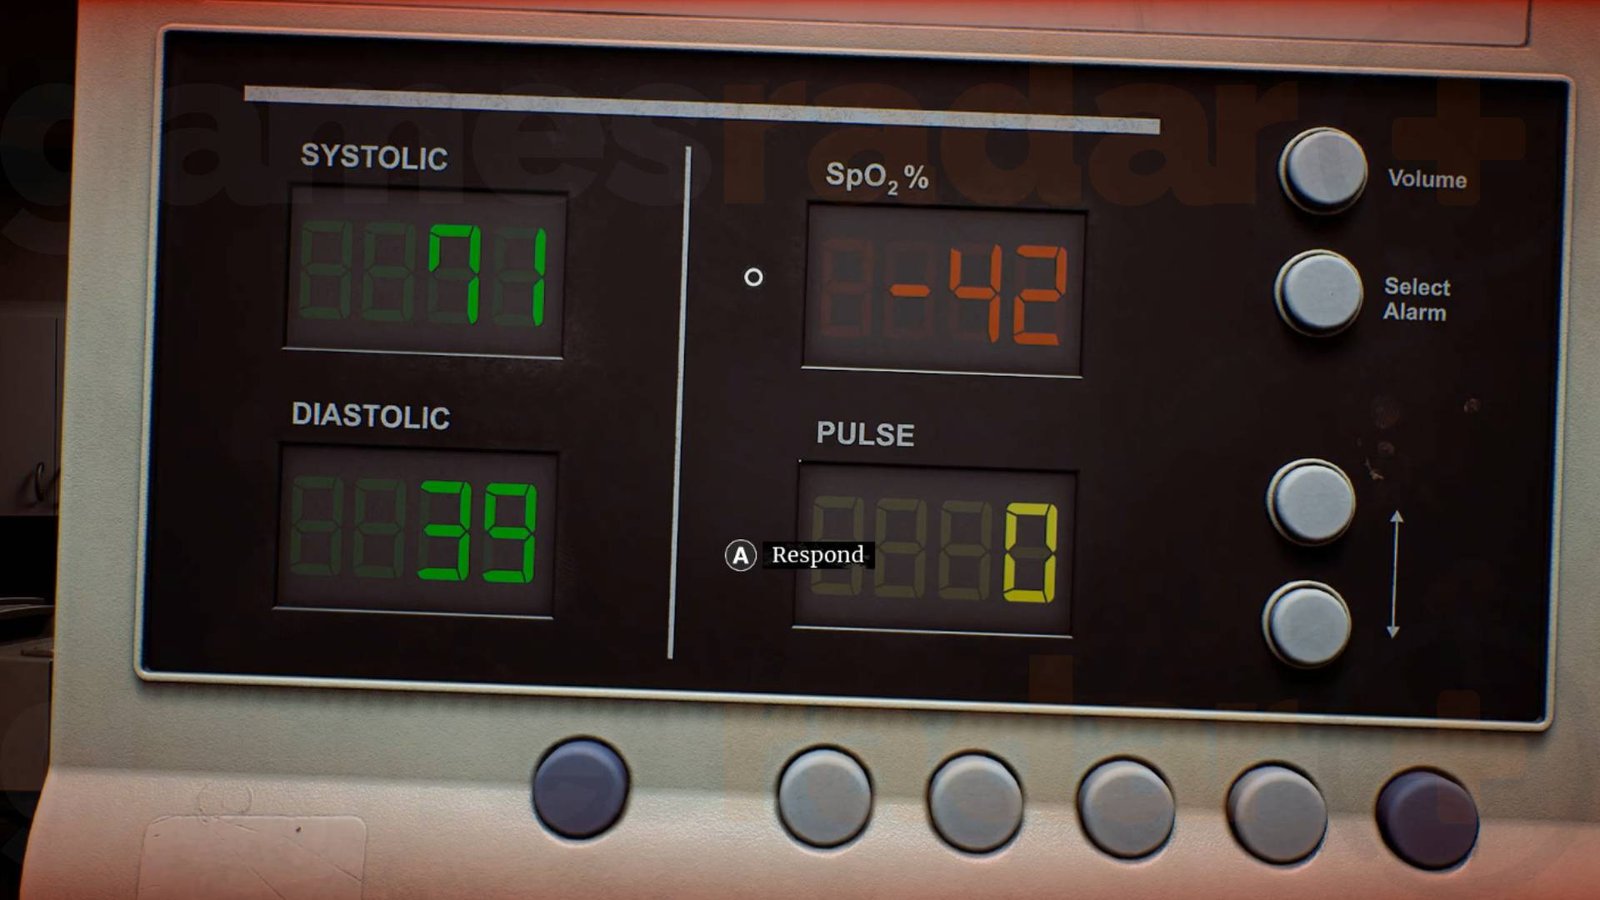
    الأمر المهم هو فحص الحاسوب في الزاوية، ودخول قائمة نظرة عامة على المعدات، ثم الاطلاع على خيار “نظرة عامة على جهاز فالنتودو فيو S-100”. هناك سترى دليل التعليمات الخاص بجهاز قياس العلامات الحيوية، والذي يوجهك إلى تجاهل القيم التي تتجاوز 70/100 ملم زئبق لضغط الدم. تأكد من البحث عن الأرقام الخضراء المقابلة لقياسي الضغط الانقباضي والانبساطي على الجانب الأيسر للشاشة، وقم بالتفاعل مع الجهاز الذي يطابق تلك القيم، والتي كانت في حالتي بين 71/39 و70/40.

    كيفية العثور على نبض القلب
    عندما يطلب منك الطبيب معدل القلب أو النبض، سترى على الحاسوب أن ملف “Valentudo View S-100” يذكر أن “قيم معدل القلب (بمعدل ضربات في الدقيقة) خارج نطاق 40 إلى 160 عادةً تكون غير دقيقة”. لذلك، عليك العثور على آلة تظهر رقم أصفر للنبض يقع خارج هذا النطاق. بالنسبة لي، كانت الآلة تظهر 161، وتغيّر إلى 162 عند إبلاغي بذلك. على الرغم من أن هذا الرقم يتجاوز الحد المسموح وفقاً للتعليمات، إلا أنه الأقرب من القيم التي تخطيتها.

    كيفية قياس مستوى الأكسجين في الدم (SpO2)
    عندما يطلب منك الطبيب قياس مستوى الأكسجين، سترى على الكمبيوتر أن خاصية “Valentudo View S-100” تشير إلى أن “قيم SpO2 (%) دون الـ 75% تكون غير موثوقة”. لذلك، يجب أن تبحث عن جهاز يعرض رقم أحمر لمستوى الأكسجين يتوافق مع هذا المعيار. في تجربتي، استخدمت الجهاز الذي أظهر 81%، وتغير إلى 80% عند إبلاغي.

    بمجرد أن تعلن عن القيم الثلاث الصحيحة، ستتمكن من فتح الغرفة التالية وستبدأ في حل باقي ألغاز المريض، التي تبدأ مع لغز الأشعة السينية، ثم البحث عن أدوية التسريب في اللعبة. كل هذه المهام تتطلب قراءة التعليمات وفهم الإجراءات بشكل دقيق لإنجاح المهمة.

    ملاحظة: بعد جمع كل القيم، ستحتاج للاستمرار في استكمال الأحجية الخاصة بالموقف، إذ أن كل جزء يكمل الآخر في رحلة حل اللغز داخل اللعبة.

  • حل لغز الدم في لعبة سايلنت هيل تاونفول

    حل لغز الدم في لعبة سايلنت هيل تاونفول

    عندما تجمع جميع أكياس الدم في لعبة Silent Hill Townfall، يظهر أمامك لغز يتطلب تحديد نوع الدم، والذي بدوره يفتح باب نقل الدم ويشكل حاجزاً يمنع تقدمك في المركز الطبي المختلف. عليك بعد ذلك فحص أنواع الدم المختلفة لضبط قرص كبير وتوجيه الأكياس المختارة إلى مركز معين للخروج أخيراً من المكان.

    هذه المرحلة طويلة وتحتاج إلى التسلل والتحرك بحذر كبير، حيث يتوجب عليك استكشاف المنطقة وجمع أكياس الدم لفتح الأبواب المختلفة، ثم جمع المزيد من الأكياس أثناء تجنب الوحوش التي تلاحقك. الأمر صعب في البداية، لذلك استخدم دليلي لتعرف أين تتجه دون عناء معاناة التفكير بنفسك.

    أماكن جمع أكياس الدم في لعبة Silent Hill Townfall:
    يوجد خمسة أكياس دم إجمالاً، لكن اثنين منها فقط لفتح أبواب أخرى والوصول إلى مناطق إضافية، أما الأكياس الثلاثة المتبقية فهي أساسية لحل اللغز النهائي. هذا الجزء يتطلب الكثير من التهرب والاختباء، مما يصعب تتبعه دون أن تضطر إلى الهروب المستمر.

    وفيما يلي نبذة مختصرة تلخص الخطوات المطلوب اتباعها مع خريطة مفصلة توضح المواقع:
    – ستجد كيس دم حولان دكان هنا يفتح الباب الجنوبي الغربي.
    – ثم تحصل على كيس دم سارة واتسون.
    – بعد ذلك، بالموقع يوجد مفتاح رئيسي لغرفة الوارد W يمكنك استخدامه للوصول إلى مكان آخر.
    – باستخدام المفتاح، تفتح الباب وتستخدم السلم للوصول إلى المنطقة التالية.
    – الآن، يمكنك الوصول إلى غرفة تحتوي على كيس دم لوسلي غريير ويفتح الباب الخاص بـDP.
    – من هنا تسقط عبر الفتحة لتحصل على كيس دم جورج مكيوان والمفتاح الرئيسي لغرفة Ward P.
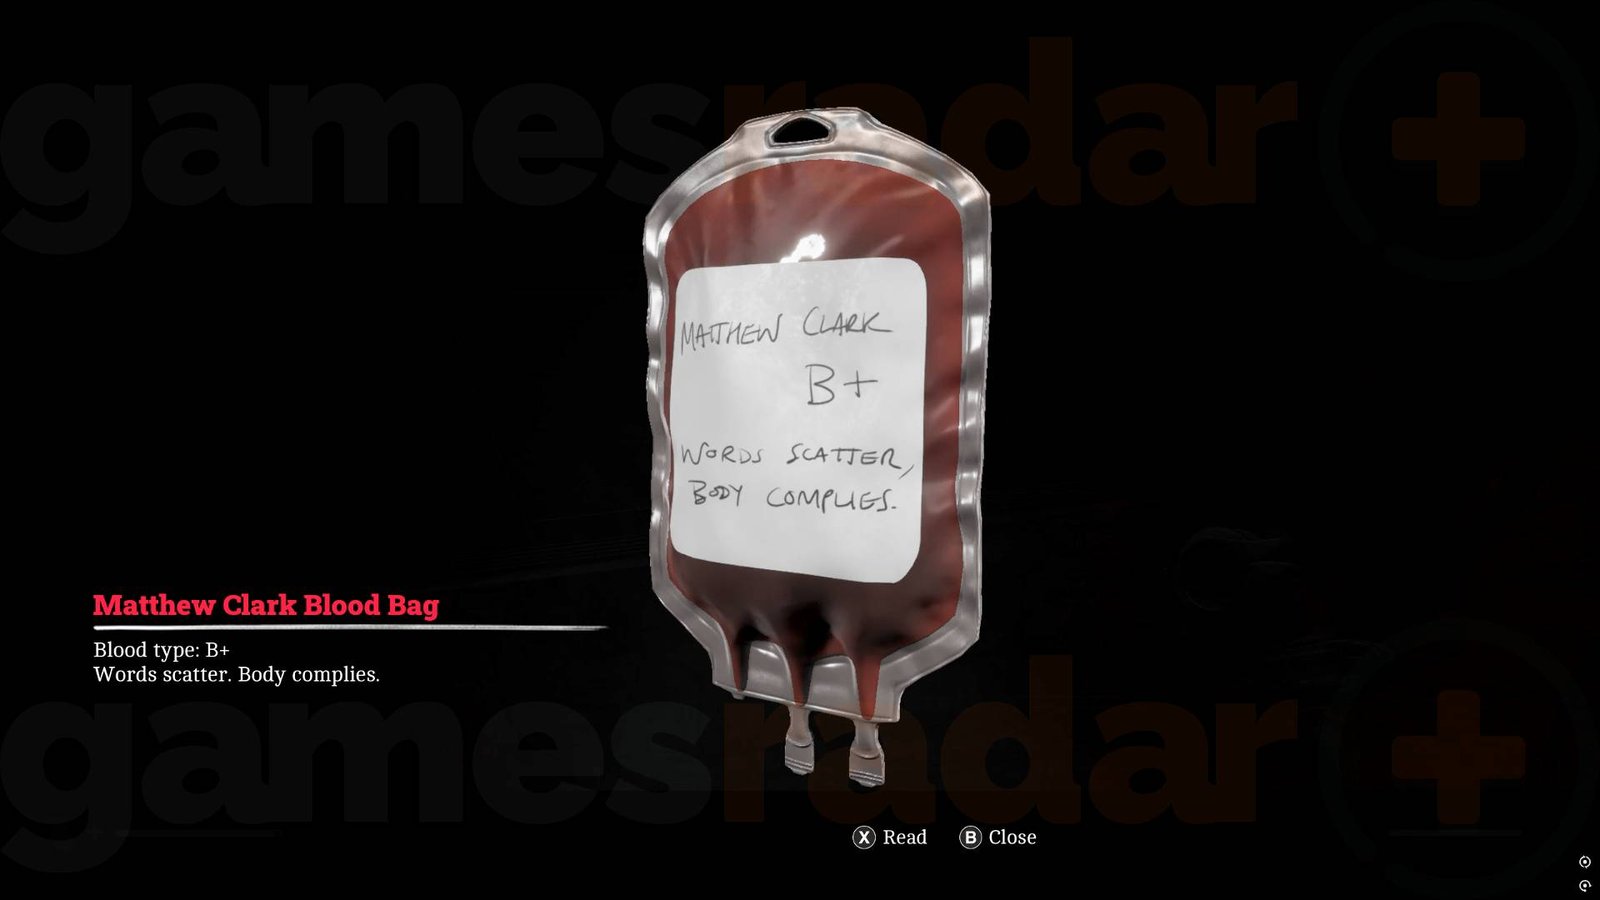
    – تفاعل مع كيس دم ماثيو كلارك في مصعد مما يؤدي إلى سقوطه لمستوى أدنى.
    – عند وصولك، تجد الكيس في المكان المخصص له، لكن جمعه يربك بعض الأبواب مما يجبرك على تشغيل آليتين لإيجاد مخرج.
    – تحتاج لتحريك عجلة إطلاق واحدة هنا والأخرى هناك، ثم يمكنك المغادرة عبر المدخل الذي أتيت منه.

    عند جمع جميع الأكياس وهروبك من المنطقة، ستعود إلى باب نقل الدم الذي وجدته عند دخولك للمرة الأولى، حيث يوجد ثلاث شخصيات غالية وهم: جورج مكيوان، ماثيو كلارك، وسارة واتسون، وكل واحد منهم يحمل ملاحظة عن وضعه في ذاكرتك، لترتيب الأكياس بشكل صحيح بناءً على تلك الملاحظات.

    كيفية فتح باب نقل الدم:
    – الموقع الثاني/الثالث: جورج مكيوان.
    – الملاحظة اللفظية: ماثيو كلارك، والذي يظهر مرتبكاً ويستجيب للأوامر.
    – النبض الطبيعي ثم إصابة في الرأس: سارة واتسون.

    بمزامنة تلك الملاحظات مع الأكياس، يمكنك تشغيل المفتاح بجانب الباب لفتحه ثم التقدم إلى المرحلة الأخيرة من اللغز.

    أما حل لغز أنواع الدم، فبعد فتح الباب، ستجد غرفة صغيرة يوجد فيها قرص كبير يُمكن تدويره، مع لوحات تشرح أنواع الدم الممكن تكاملها. عند فحص سوار سيمون في حوزتك، ستلاحظ أنه من نوع A+، وهو يقبل أنواع O-, O+, A- وA+. لذلك، عليك تدوير القرص بحيث تتجه هذه الأنواع فقط إلى المركز، مع ترتيب خطوط الأسماء بشكل يشمل تي إف، إتش إم، وإس دبليو، وهي تمثل الشخصيات المعنية. إذا قمت بترتيب الخطوط كما في الصورة، يمكنك استخدام قسم “Odell” في المركز لضخ الدم وفتح الباب، مما يتيح لك التقدم في القصة.

  • حل لغز أشعة إكس في لعبة سايلنت هيل تاونفال

    حل لغز أشعة إكس في لعبة سايلنت هيل تاونفال

    عندما تصل إلى مهمة تصوير الأشعة السينية في لعبة سايلنت هيل تاونفول، أول شيء عليك فعله هو تشغيل الكمبيوتر وتحريك الصورة للأعلى لتحديد الجمجمة، كما في الصورة أعلاه. ستلاحظ وجود مربعات بيضاء صغيرة يمكنك من خلالها ضبط الصورة بحيث تتطابق مع cellesما يظهر على الشاشة. ستعرف أنك في المكان الصحيح عندما يظهر على الشاشة عبارة “جمجمة المريض – تم التوازن”.

    الخطوة التالية هي تشغيل جهاز الأشعة باستخدام زر التشغيل على لوحة التحكم. قبل أن تتمكن من المتابعة، تحتاج إلى مراجعة جدول جرعات الأشعة على اللابتوب في الغرفة المجاورة، حيث يعطيك القيم التالية:

    – الموقع: الجمجمة
    – kV: 3
    – الوقت: 1 ثوانٍ
    – mA: 7

    يُظهر لك هذا الإعدادات على لوحة التحكم بشكل واضح، بحيث يمكنك تعديل الأزرار لتناسب القيم المذكورة. على لوحة التحكم، ستجد أن الإعدادات تبدو كما يلي:
    – الموقع: الجمجمة
    – kV: 3
    – الوقت: 1
    – mA: 7

    عند ضبط الأزرار على هذه القيم، يمكنك الضغط على زر الأشعة الأخضر لالتقاط الصورة. إذا كانت جميع الإعدادات صحيحة، ستتمكن من الحصول على نسخ مطبوعة من الصور من الطابعة الموجودة في الخلف، ويمكنك وضع تلك الصور على الضوء الموضح على الحائط في الغرفة الأخرى لإخبار الطبيب بما تظهره الصور عبر جهاز الاتصال الداخلي.

    بعد الانتهاء من تصوير الجمجمة، ستحتاج إلى تصوير صدر المريض. لتوجيه الجهاز بشكل صحيح، استخدم الكاميرا مرة أخرى لتحريك الجهاز لأسفل وضبطه ليتطابق مع الصف السفلي من المربعات البيضاء على اللوحة، كما في الصورة. من ثم، استعن بجدول جرعات الأشعة الموجود على اللابتوب لضبط الأزرار حسب القيم التالية:

    – الموقع: الصدر
    – kV: 7
    – الوقت: 1.2
    – mA: 3

    عند ضبط الأزرار على هذه القيم، سترى الإعدادات تظهر على لوحة التحكم بشكل واضح، وما عليك بعد ذلك هو الضغط على الزر الأخضر لالتقاط الصورة. إذا كانت جميع الإعدادات مناسبة، يمكنك أن تحصل على نسخ مطبوعة من الصور من الطابعة، وتعرضها على الضوء في الغرفة الأخرى ليستطيع الطبيب معاينتها بشكل واضح.

    وفي النهاية، بعد إتمام عملية التصوير، ستنتقل إلى مهمة العثور على أدوية التسريب في اللعبة، وهي قسم طويل يتطلب منك التسلل والبحث عبر عدة طوابق من مبنى كبير للعثور على الأدوية المطلوبة، وهي مهمة محفوفة بالمخاطر وتتطلب الحذر والذكاء.

  • رمز وصندوق علبة منظمة Silent Hill Townfall وحلها

    رمز وصندوق علبة منظمة Silent Hill Townfall وحلها

    لفتح صندوق الأعضاء في لعبة سايلنت هيل تاون فول، عليك أولًا إعادة تشغيل الكهرباء، ثم استخدام الكمبيوتر لقراءة البريد الإلكتروني والحصول على المعلومات التي تحتاجها لإدخال رمز فتح الصندوق. الطريق ليس صعبًا، لكنه يتطلب مجموعة من الخطوات المختلفة التي قد تنسى أحيانًا أنها مترابطة، وقد يستغرق الأمر بعض الوقت أكثر من المتوقع لتنفيذها. ومن المهم أن تعرف أنه عند محاولتك الثانية لحل هذا اللغز في وضع NG+، لن يسمح لك فقط باستخدام الرقم السري مباشرة، بل عليك إتمام كل الخطوات للوصول إليه.

    لحل صندوق الأعضاء بسرعة، اتبع هذه الخطوات:
    1. استعمل المصباح اليدوي الموجود في الدرج الأيسر من أمام الصندوق.
    2. احصل على البطاريات من درج آخر في الغرفة على اليسار فوق السلم.
    3. احصل على بطاقة الزراعة البشرية من حمام غرفة نوم زوي.
    4. قم بدمج المصباح والبطاريات، ثم استعمل المصباح المشتغل لفحص عداد الكهرباء تحت السلم.
    5. توجه إلى بائع الأخبار المميز على الخريط، وادخل من الباب الخلفي (هناك عدو هنا).
    6. استلم بطاقة الكهرباء من صندوق النقود.
    7. عُد إلى غرفة زوي وحقق في استخدام البطاقة لشحن عداد الكهرباء.
    8. بعد تشغيل الكهرباء، اقرأ رسائل البريد الإلكتروني على الكمبيوتر للحصول على المعلومات، حيث يتطلب الأمر النظر إلى الأرقام الثلاثة الأولى والأخيرة على الجانب الأيمن من بطاقة الزراعة البشرية، ثم تركيبها معًا لإيجاد الرمز.
    9. أخيرًا، افتح الصندوق.

    بالنسبة للرمز، هو 956 133. لكن كما ذكرت من قبل، لا يمكنك فقط استخدام هذا الرقم مباشرة، فجزء من هذا اللغز يتطلب أن تخضع لجزء تعليمي عن المعركة، لذا يُشترط أن تمر بجميع الخطوات قبل أن تتمكن من فتح الصندوق، حتى لو كنت تعرف الرقم بالفعل.

    دعونا نوضح هذه الخطوات بشكل أكثر تفصيلًا:
    – احصل على المصباح والبطاريات وأعد تشغيل الكهرباء لفحص العداد.
    – بعد تفعيل الكهرباء، توجه للبائع لشراء بطاقة الكهرباء من سجل النقود، ومن ثم أعدها إلى منزل زوي بطريقة آمنة.
    – استخدم البطاقة لتمكين الكهرباء مجددًا، ثم استعمل الكمبيوتر لقراءة البريد الإلكتروني المهم.
    – اقرأ البريد الإلكتروني الذي يقول إنه يجب استخدام الأرقام الثلاثة الأولى والأخيرة من رمز ET، والذي يوجد على بطاقة الزراعة البشرية الملتصقة في الحمام في الطابق العلوي.
    – عندما تتفقد البطاقة، ستلاحظ أن هناك رقمين تم تمييزهما بالأحمر.
    – باستخدام رقم ET الذي تراه باللون الأحمر، استنتج أن رمز صندوق الأعضاء هو 956 133.
    – أدخل الرمز، واختر “نعم” عند ظهور خيار فتح الصندوق.
    – ستجد داخل الصندوق بطاقة هوية زوي، والتي ستحتاجها لاحقًا في لغز المقاييس، لذا لا ترفض استخدامها.

    بعد أن تنتهي من كل ذلك، ستتمكن من التقدم في اللعبة وتجاوز أصعب العقبات، وتكملة رحلتك في عالم سايلنت هيل.

  • Sinking City 2: Unlocking the Locker Room Safe Code

    Sinking City 2: Unlocking the Locker Room Safe Code

    The code to open the safe in The Sinking City 2 at the Fish Market locker room is 1496. You can use this code directly without worrying about how it was figured out, but if you’re curious, here’s the story behind it.

    There are two notes you can find: one called Sacrifice (and Safe!) next to the safe, and another called Surprise in the Safe, which you can only access after opening the Salt Storage. These clues give some hints:
    – From Sacrifice (and Safe!), the last number isn’t 16; it’s 6.
    – From the Surprise in the Safe, it suggests the code is “the same as the door.”

    The clue about “the same as the door” refers to the code used to open the Salt Storage door, which was I-IV-IX-XVI or 1-4-9-16. Since the last number can’t be 16 (as the clue indicates it should be 6), that changes the sequence to 1-4-9-6. So, the safe’s code is 1496.

    Even though the hints are confusing and not very clear, opening the safe is definitely worth it because it gives you Pyre’s Ocularum—a grenade launcher upgrade that does more damage when multiple enemies are hit at once. This upgrade becomes especially helpful as enemies increase in number.

  • Sinking City 2: How to Unlock Salt Storage Code

    Sinking City 2: How to Unlock Salt Storage Code

    The salt storage code in The Sinking City 2 is Roman numerals I, IV, IX, and XVI, which correspond to the numbers 1, 4, 9, and 16. Once you understand what these represent, you can press the matching squares to unlock the door.

    To solve the puzzle properly, you’ll need three notes: the “16 Punishments of a Sailor” note found on the large brass wall plaque in the Bar, the “Instructions to Sybil” note located just before the Old Shop with the Ward, and the “Warning for Sybil” note in the Jeweler’s area.

    The “Instructions to Sybil” note lists four punishments, which you can cross-reference with the “16 Punishments of a Sailor” note to find the correct numbers:

    – Confined to ship (I) – 1
    – Deprived of beer (IV) – 4
    – Tarred and feathered (IX) – 9
    – Keelhauled (XVI) – 16

    To open the door, press the squares with these Roman numerals in order: I, IV, IX, XVI.

    Inside, you’ll find a woman turned into Dream Essence that you can smash for upgrade points, a note about a surprise in the safe, and the Pyre’s Squid Barrel—a grenade launcher upgrade that staggers multiple enemies caught in the blast.

  • Guide to Solving the Trident Puzzle in Sinking City 2

    Guide to Solving the Trident Puzzle in Sinking City 2

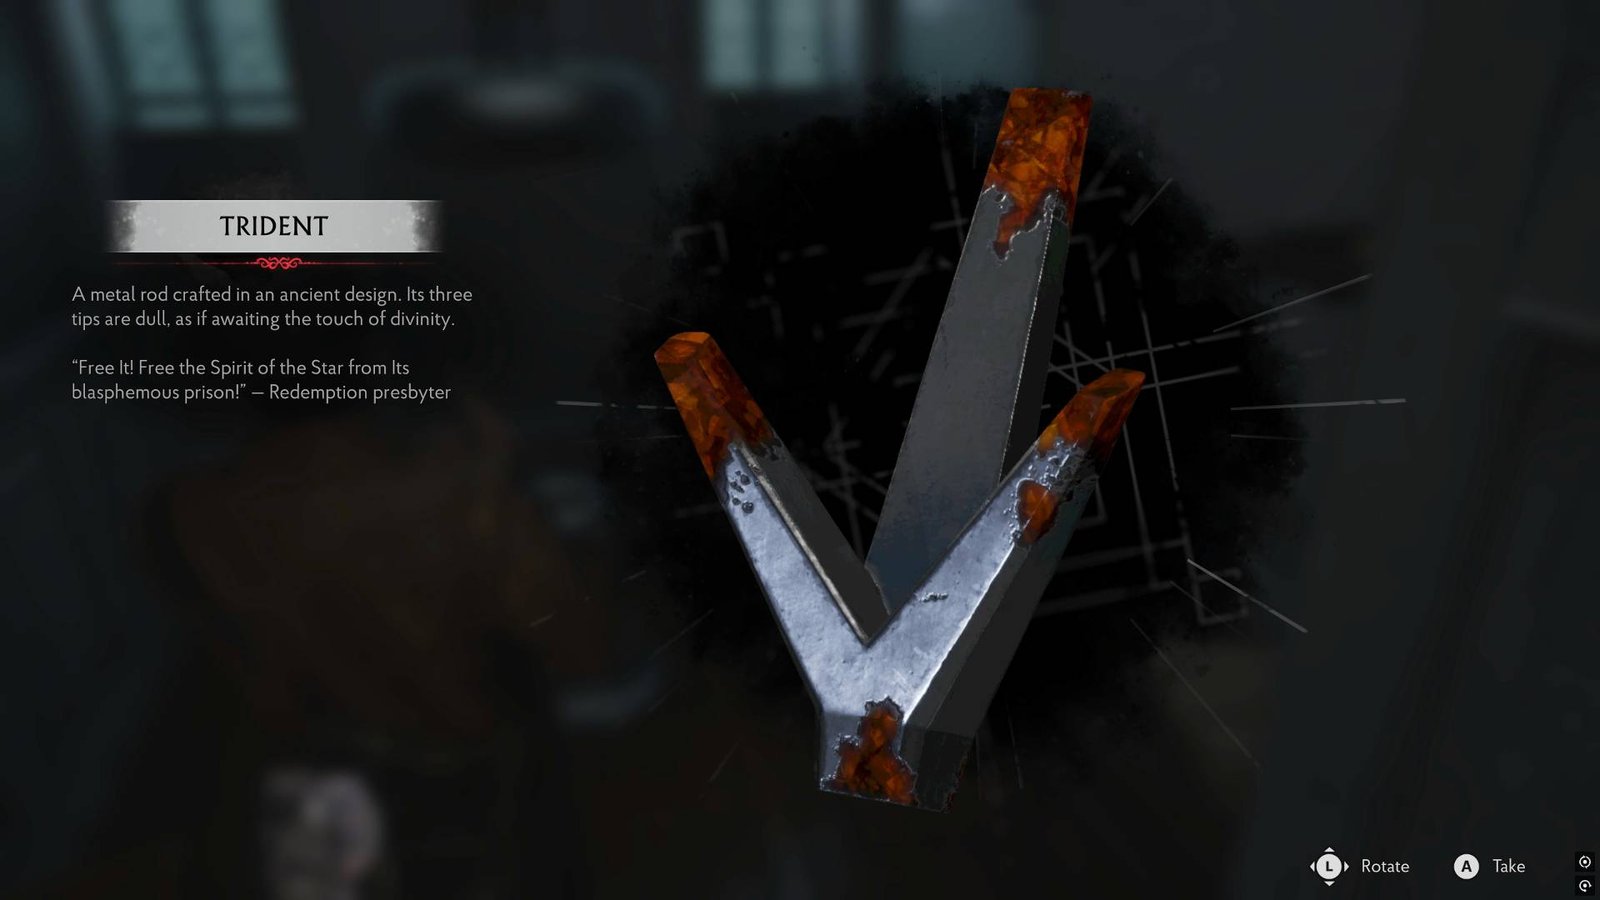
    The Trident in The Sinking City 2 is part of a puzzle located in the Church area, involving the nearby obelisk. The instructions are somewhat unclear, and even after reading all related notes, it can be confusing what steps to take.

    I’ve already figured it out and provided a detailed explanation in my full walkthrough of the flooded city section of The Sinking City 2. But if you want a quick summary, here it is.

    Unlike the printing press puzzle, which requires several locations, this puzzle can be solved the first time you encounter it, as long as you know what to do.

    You’ll find the Trident inside the Church behind the Star-locked door once you’ve obtained the Star key. However, it’s not obvious what your next move should be.

    First, take the Trident and place it on the Obelisk to begin. Then, rotate the symbols on the Obelisk using clues from two notes: the “Call Upon Believers,” which lists four gods (found on the altar when first entering the Church), and the “First Vision,” which shows their symbols (found in the Star-locked crypt in the graveyard).

    Matching each god to its symbol gives you the order in which to arrange the sections of the Obelisk. One note mentions “from the depth to the heights,” indicating the sequence starts from the top, going downward:

    1. Yig: Serpent Form
    2. Tsog-Nar: Crooked Cross
    3. Gyrh: Spearhead
    4. Cthylla: Splayed Womb

    Once the symbols are properly aligned, lightning will begin striking the Trident at regular intervals. Step back to stay safe. Some enemies may appear, so be ready to lure them into the electrical strikes. A visual indicator will show each time the Trident is hit. When all three sections are lit, quickly grab the Trident.

    Afterward, return the Trident to where you found it. Exiting the room will transport you to another dimension filled with statues. Approach the altar and take the dagger from the statue right in front. Insert the dagger into the slot on the altar, which will lower you into a basement area for a boss fight. Once defeated, you’ll find some Dream Essence upgrade points on your way out.

    This task generally happens around the halfway point of the flooded city section, though if you’ve been backtracking, you might be closer to the end. For further guidance, my detailed walkthrough of the hospital section may also be helpful.

  • Resident Evil Requiem Final Puzzle Guide and Solution

    Resident Evil Requiem Final Puzzle Guide and Solution

    The final puzzle in Resident Evil Requiem requires some careful planning. You’ll need to play through the game at least once, making sure to have a doll in your inventory when you finish. Most of the prep involves making that doll appear in the right spot, which can be tricky because there are multiple steps that could go wrong. To save time, it’s best to use separate save files at different points, so if the doll doesn’t show up, you can go back and redo specific steps without starting over entirely.

    Start your new game on easy difficulty—it’s easier to manage and ensures you reach the end with the doll in your inventory. The goal is to reach the very end of the game with the doll, so you can complete the Final Puzzle challenge. Now, here’s a step-by-step guide to help you through.

    Resident Evil Requiem Final Puzzle Walkthrough

    First, head to the Basement Processing Room in Rhodes Hill, where a conveyor belt dumps bodies into a pool of blood. This is part of collecting three Resident Evil Requiem Joint Plugs. Once there, wait at least 15 minutes to let enough bodies fall into the pool, creating enough blood for the later steps. After the wait, turn the crank to drain the pool, then go in to try to pick up the last plug. During this, you’ll need to survive without killing zombies—shoot their legs to disable them and melee to avoid killing them outright. As long as most are gone when the grinder turns off, you’ll be fine; I finished with one zombie still alive and still succeeded.

    After escaping with the plug, proceed through the story until you get to the Collection and Testing pool. When you drain and examine the blood, the message should confirm “a ton of blood flowed out”—this indicates you did the step correctly.

    Next, continue until you’re back at the medical center. You’ll receive the girl’s hand, which you need to analyze using one of the blood analyzers. When you scan it, you’ll see the message “let’s play” with an RNA sequence: GGC AAG AUA ACG UGU CAU.

    Before leaving the analyzer, check the sticker labeled ‘G = 150000000’—this distance to the sun in kilometers signifies that G equals ‘Sun.’ Keep this in mind, along with clues from other parts of the game, to decode the RNA sequence into a code.

    When you examine the hourglass in the office with the wine puzzle, you’ll see it shows ‘U = 380,000’—which is the distance to the moon in kilometers. This means U stands for ‘Moon.’ Similarly, check the file called Grace Ashcroft Blood Analysis Report in the room before the locked door; it states ‘C = 4.2 ly,’ the distance to Proxima Centauri in light-years, meaning C is ‘Star.’

    Pay attention to the clues that G = Sun, U = Moon, and C = Star. After analyzing the clues, you’ll find that you need to ignore the A’s in the initial RNA sequence. The correct code becomes GGC GUC GUG UCU. Map each to their meanings: G = Sun, U = Moon, C = Star. The sequence translates to: Sun Sun Star Sun Moon Star Sun Moon Sun Moon Star Moon.

    To solve the final puzzle, hold Emily and the doll and input this sequence into the puzzle box. If you do it right, you’ll hear a sinister laugh, and a message will appear confirming the success.

    Once completed, check the Challenges menu under Bonuses: the Final Puzzle will be marked as finished, earning you 20,000 CP. With that, you’ve successfully unlocked this secret ending.

  • Resident Evil Requiem: Finding the Pantry Key Location

    Resident Evil Requiem: Finding the Pantry Key Location

    Requiem is a Resident Evil game, so naturally, your path through Rhodes Hill Care Center is full of twists and turns. You’ll encounter locked doors, tricky puzzles, and scary enemies along the way. One obstacle is the pantry door in the Resident Evil Requiem area, which is locked at first and can only be accessed through the kitchen.

    So, where do you find the pantry key in Resident Evil Requiem? As you progress, you’ll discover information indicating that the key has been given to the chef. However, the chef has turned into a large zombie wielding a big cleaver. You can choose to fight and take him down before you get this info, but it’s easier to use a Hemolytic Injector if you’re playing as Grace. To do this, you’ll need to craft the injector after unlocking the East Wing keycard and solving the analyzer puzzles.

    You have two ways to get close enough to inject the chef. The preferred method is sneaking up behind him. If that doesn’t work, you can stun him briefly with an accurate shot. When playing as Leon, you do have the option to fight him directly, but I suggest getting in early to eliminate him, so you can access the pantry quickly.

    Once you’ve taken out the chef, head into the pantry. It’s best to do this with both Grace and Leon, as there’s a warped door inside—a useful shortcut. Inside, you’ll find plenty of supplies and the Stakeout Takeout charm, which boosts knife strength and durability. The pantry key can be found on the floor in a pool of blood, so keep an eye out for it.

    After unlocking the door, make sure to explore thoroughly, grabbing everything both characters need. This area is crucial for progressing further in the game and gathering essential items for your journey.

  • Hidden Character in Resident Evil: Requiem Reveal

    Hidden Character in Resident Evil: Requiem Reveal

    If you’re searching for a hidden character in Resident Evil Requiem, I have some tips on where and when to find a surprising cameo you probably haven’t expected. You might already guess who it is, but I’ll keep that a secret for now. I’ll just guide you to the right locations and times during the game. Once this info becomes more common knowledge, I’ll share the full name, but for now, follow these steps to discover who it is…

    The secret character appears in three different spots inside the RCP building. However, you need to complete a certain part of the game and then come back after moving forward a bit. The key moment is right after you leave the police station and finish a boss fight. After defeating the boss, instead of heading straight to your next objective, go back to RCP building and look out of these three windows:

    The character will show up in these windows at random, but mostly quite often. To catch them, just run between these spots for a while. You’ll hear a distinctive noise when they appear—don’t miss it. You can also try shooting at them to see their reaction, but Capcom confirms this is just for fun and not connected to any other riddles or hidden secrets in the game.

    And that’s it! Finish up at the police station, win the boss fight outside, then return and wait for that special appearance from a beloved character who’s been with the Resident Evil series since the original Resident Evil 2.

  • Exclusive Dead by Daylight Cheat Codes for February 2026

    Exclusive Dead by Daylight Cheat Codes for February 2026

    Dead by Daylight codes continue to be popular among players, especially after offering many free items over the years since its release. In the past, these codes mainly provided large amounts of Bloodpoints to help players level up their characters. Today, the focus has shifted more toward cosmetic items that allow players to customize their profiles.

    The most recent code was released at the end of November 2025. Historically, the game has shared new codes during celebrations like Lunar New Year, which suggests there might be more coming this February. For now, here are the active Dead by Daylight codes and instructions on how to use them.

    All Dead by Daylight Codes

    • HAPPYHORSEYEAR2026 – 168,888 Bloodpoints, Lunar Horse Charm (new!)
    • FINDERSCREEPERS – Elodie in the Catacombs banner and Elodie’s Skull player badge
    • IFLOOKSCOULDCHILL – Frosty Eyes killer cosmetics
    • REDDIT1MIL – 8-Bit Crow player badge
    • LETSROLL – Hand-painted Dwight charm
    • WARRIORPUPPERS – Warrior Puppers charm
    • BDGPRIDE – Rainbow Flag player badge
    • PRIDE – Rainbow Flag charm
    • BDGPRG – Progress Flag player badge
    • PRIDE2022 – Progress Pride Flag charm
    • BDGAG – Agender Pride Flag player badge
    • AFLAGG – Agender Pride Flag charm
    • BDGAR – Aromantic Pride Flag player badge
    • AROMFLAG – Aromantic Pride Flag charm
    • BDGAS – Asexual Pride Flag player badge
    • AFLAGS – Asexual Pride Flag charm
    • BDGB – Bisexual Pride Flag player badge
    • FLAGB – Bisexual Pride Flag charm
    • BDGDM – Demisexual Pride Flag player badge
    • DEMISFLAG – Demisexual Pride Flag charm
    • CAWCAW – Feathers of Pride charm
    • BDGGF – Gender–Fluid Pride Flag player badge
    • GFLAGF – Gender–Fluid Pride Flag charm
    • BDGGQ – Genderqueer Pride Flag player badge
    • GFLAGQ – Genderqueer Pride Flag charm
    • KINDRD – Glance of Pride charm
    • BDGIS – Intersex Pride Flag player badge
    • ISFLAG – Intersex Pride Flag charm
    • BDGL – Lesbian Pride Flag player badge
    • FLAGL – Lesbian Pride Flag charm
    • BDGM – MLM Pride Flag player badge
    • MFLAG – MLM Pride Flag charm
    • BDGNB – Nonbinary Pride Flag player badge
    • NBFLAG – Nonbinary Pride Flag charm
    • BDGP – Pansexual Pride Flag player badge
    • FLAGP – Pansexual Pride Flag charm
    • BDGPA – Polyamory Pride Flag player badge
    • POLYFLAG – Polyamory Pride Flag charm
    • BDGT – Trans Pride Flag player badge
    • FLAGT – Trans Pride Flag charm
    • BDG2S – Two-Spirit Pride Flag player badge
    • TWOSFLAG – Two-Spirit Pride Flag charm

    As you can see, there are many codes to claim. Some of the newest offers have been dropped recently, but most codes have been available for years and appear to stay active indefinitely, especially the Pride Flag badges and charms.

    How to Redeem Dead by Daylight Codes

    Redeeming codes is simple. Just open the main menu in the game and go to the Store page. On the bottom left, you’ll find a “REDEEM” button, which is mapped to the d-pad on consoles. Click on it, and you’ll see the “REDEEM CODE” screen. Type in the code in the “Enter Code” box and confirm. Your rewards will then appear at the bottom of the store screen. Codes are not case-sensitive, but they are listed in uppercase for clarity.

    Expired Dead by Daylight Codes

    Over the years, many codes have expired. Common expired codes include NIGHTSHIFT, 1MILLIONCROWS, BOULETBROTHERS, HAUNTED, GALAXIES, and others that offered Bloodpoints, banners, badges, or special items. The full list of expired codes is long, but most no longer work, so check for the latest updates.

    Keep in mind that codes change frequently, and some promotions may only be available for a limited time. Stay updated through the official channels for new codes and offers.

  • Alan Wake 2: Secret Stash Spots, Codes, and Fixes Guide

    Alan Wake 2: Secret Stash Spots, Codes, and Fixes Guide

    There are 22 hidden stash spots in Alan Wake 2, each guarded by a code or puzzle that you need to solve to open them. I’ve pinpointed all their locations and figured out their combinations so you can access every one without any trouble. These stashes are incredibly valuable because they are packed with supplies that will assist Saga during her investigation, including weapons, upgrades to increase inventory space, and other helpful items.

    However, unlocking these hidden caches won’t be easy. Many require you to crack number or symbol codes, find special keys, or solve puzzles—even some involve algebra! If you’re having trouble with a particular stash puzzle or want to make sure you find every one, I’ve created a complete map of all the stash locations along with step-by-step instructions to solve each puzzle.

    Where to find Cauldron Lake cult stashes in Alan Wake 2

    There are five stash locations around Cauldron Lake. When you first arrive in this area, not all of these spots will be accessible—you’ll need to progress through the story by investigating the crime scene and advancing the Nightingale case to unlock most of them.

    1. Mobile Home Stash Lock Combination

    This stash is just outside a mobile home, and you’ll need to note symbols inside based on clues on a nearby note. Specifically:

    • Wash your hands — bathroom sink
    • Take chicken out of fridge — fridge
    • Take a nap — bed

    You don’t have to do these actions—just find the symbols near the items and use them to open the lock. The combination is provided below, but while you’re inside the mobile home, be sure to pet the deer head for fun.

    2. Shoreline Stash

    Accessible after floodwaters recede. To find it, go off the main trail, under fallen trees, to a lake shore. The lock is an easy Simon Says puzzle—match the sequence of blinking lights as shown in the guide image.

    3. Campground Stash

    Once floodwaters recede, head to the camp near the bridge to the Streamside area. Look for a box with a picture of a lightbulb. Use your torch to follow glowing arrows to find the key hidden behind a tree marked “two.” Use this key to open the box.

    4. Rock, Rock, Tree Stash

    Involves finding three simple sums painted on trees and rocks. Pay close attention to the second rock, which can be easy to overlook. The correct padlock code can be cracked with the instructions provided in the guide.

    5. Rental Cabins Stash

    Available after you acquire bolt cutters. It’s in the rental cabin park, requiring a custom key. Follow the trail past the cabins, under a fallen tree, then continue through another cabin and to a rusty car. Shine your light on the trees to find the hidden Lake Cabins key behind a specific tree marked “two.” Use it to pry open the stash for supplies.


    Bright Falls Cult Stashes

    In Bright Falls, you’ll find a total of nine stash spots after progressing through the story. The first visit won’t reveal many—only after finishing the initial section and exploring more of the map will new caches become available.

    1. Elderwood Palace Lodge

    Hidden behind a truck outside the hotel, on the road. It’s locked with a “Simon says” pattern lock, so repeat the flashing button sequence. Contains ammo for Saga’s pistol and shotgun.

    2. Woods Stash 1

    Accessible after the Watery chapter. Follow the trail, and at a high ledge, find a stash locked with a “Simon says” code based on a pattern of lights.

    3. Abandoned Truck Stash

    Inside an abandoned truck, unlocked by solving a math puzzle based on the number of cars; the answer is 177.

    4. Forest Bunker

    Find three sums painted on trees and rocks. Careful for the second rock—it’s easy to miss. Use the provided code to gain entry.

    5. Rental Cabins

    Use bolt cutters to unlock the final stash at a rental cabin. It’s marked with a drawing hinting at obstacles around to lead you to the key, located behind a specific tree.

    6. Ranger Station

    Found on the hill opposite the station, once you’ve gained access to the basement after the Valhalla Nursing Home chapter. Search around the stone chimney for the key.

    7. Pier Stash

    Accessed with bolt cutters after the Valhalla chapter. The combo is based on the height of number cards around water, giving the code 697.

    8. Sheriff’s Evidence Room

    After reaching the basement with the keys from the sheriff, find the stash behind a wooden fence gate. The code is derived from the shapes’ edges—count the lines of each shape, giving 1, 4, and 6.

    9. Docks Stash

    Standing on a jetty just before leaving Watery, solve an algebra problem involving batteries and amps. The correct code is 496.


    Watery area stashes

    There are eight hidden locations across Watery, including spots near Coffee World, the lighthouse, and the main town. Some of these can only be accessed after the floodwaters recede.

    • Suomi Hiking Trail: See a high ledge with a stash requiring a “Simon says” pattern.
    • Shooting Range: Find a stash under a wooden shelter, unlocked with a code based on bolts on a display—code shows as 527.
    • Ferris Wheel in Coffee World: Use clues from striped cups to unlock the stash with code 147.
    • Wishing Well in Coffee World: The lock relates to painted Roman numeral symbols—code is 134.
    • Lighthouse: Use triangular cult symbols painted with yellow markings—code is sequences I, II, III, and their numbers.
    • Trailer Park: A key is hidden on a pole near an electrical box. Use it to unlock the final stash.
    • Docks: The final code involves an algebraic solution, which you can solve with the provided guide for code 496.
    • Motorcycle Club Workshop: Count spare parts around the grounds based on attractions’ parts—code 542.

    Additional tips:

    • Keep an eye out for hidden symbols on maps, signs, and objects—they usually hint at the code needed.
    • Use tools like bolt cutters and your torch carefully—many stashes are locked with puzzles matching their environment.
    • Explore story progression to unlock new areas and stash spots; some are only available after certain chapters.

    Map Reference

    A full map shows all stash locations for easy navigation, but keep in mind, some puzzles require deductive reasoning or puzzle-solving skills to crack the code.

    By following these hints and solutions, you should be able to find and open every stash in Alan Wake 2, collecting the valuable supplies and upgrades that will help you through the game’s tense moments.
  • Loved finishing Silent Hill F—things I wish I’d known first

    Loved finishing Silent Hill F—things I wish I’d known first

    I can’t believe Silent Hill f actually came out after years of no new releases from the series. And honestly, I was surprised at how good it turned out to be, especially after disappointing titles like Message and the odd, unpopular Ascension. But it happened, and it was fantastic—probably my favorite horror game of this year.

    What caught me off guard even more was that it’s set in Japan. The series has always been rooted in horror inspired by Midwestern Americana—originally aimed at Western audiences—so switching to a Japanese setting was unexpected, but it worked perfectly.

    There are several endings in Silent Hill f, and getting them isn’t easy. The game requires you to meet certain conditions—like having specific endings saved—before unlocking new options. It’s worth replaying because each playthrough offers new scenes, events, and small details that make it fun to explore and discover.

    The game’s 1960s rural Japanese environment feels much more mysterious. The rusty fences, the striking red spider lilies, and the coral-colored Otherworld blending with period-appropriate buildings created such a fresh atmosphere. The Japanese influence is front and center, and it adds a unique flavor to the experience. I didn’t expect my limited knowledge of Japanese culture to be a stumbling block, but there it was.

    For example, the Shrine Vault puzzle doesn’t explain what an ema (a traditional wooden plaque) is when you need to find one, even while you’re being chased by an unstoppable monster. The cultural elements in f—like the charms called Omamori, which can grant the protagonist Hinako special skills, or the altar puzzle where you leave traditional offerings—are embedded all over, unapologetically.

    Even recognizable puzzles, like the one you solve to escape a classroom using Japanese cherry blossom silhouettes, rely heavily on specific cultural knowledge. It’s refreshing because the game doesn’t hold your hand; it forces you to figure things out on your own.

    That said, some parts of the game were pretty confusing. A good example is the difficulty settings in Silent Hill f. You choose them early on, but the details about what each difficulty level means only become clear after you’ve played for several hours—around four or five—so you feel like you don’t really understand your choices until late in the game.

    Be warned, there’s a spoiler here: the mural puzzle. Don’t look up solutions for it until you’re ready, since there’s an unavoidable spoiler in the part you need to watch to solve it.

    Combat was one of the more debated aspects of the game. I didn’t find it too bad, especially after upgrading stamina, which I found to be the most crucial stat during fights. The Scarecrow puzzle is a good test of your skills, since you’ll be attacked every time you make a mistake. Learning from my errors will definitely help. Also, finding the school key can involve a mini-boss fight unless you follow a guide to avoid danger or reduce risks.

    The main challenge was knowing where to find everything, like trying to open the sacred door or locate Sakuko. The searches for these items are often confusing and convoluted. The missing object part and the locker codes are complete misdirections—they throw you off and make it hard to find what you need.

    Overall, the hardest part for me was the puzzle involving the key in front of the cage. I understand how the puzzle works, but I had to press buttons at random until luck was on my side. Sometimes, you just have to take your wins where you find them.

  • Silent Hill 2 Remake: Breaking the Mirror Puzzle Guide

    Silent Hill 2 Remake: Breaking the Mirror Puzzle Guide

    The mirror puzzle in the Silent Hill 2 Remake takes place in Room 202. To progress, you need to repair the broken mirror and then place an apple nearby to receive a figurine that’s needed elsewhere. This is a key step in solving the music box puzzle that runs through the first part of the hotel. The Snow White figurine you get from this is important for later in the game. If you’re struggling to put the mirror back together, I’ll explain how to do it and where to find the apple you need.

    Fixing the broken mirror is simple. The mirror pieces need to be put back together like a jigsaw puzzle. First, grab the piece behind you in the bedroom. After that, just figure out where the remaining pieces fit. I’ve included a clear image showing the correct placement, with numbers indicating where each piece goes. Once the mirror is reassembled, you’ll see an option to place something on the dish in front of it.

    For the object to place on the dish, you can choose either a Ripe Apple located in the second-floor hall or a Rotten Apple found at the dead-end path in the East Garden of the hotel. Both options will trigger the same result: spawning the Snow White figurine in Room 201 next door. They don’t seem to make a difference, but using either likely influences which ending you see.

    After you finish this puzzle, I recommend heading to the next challenge: the Silent Hill 2 Remake Suitcase and Vanity Mirror puzzle. This takes place in a larger, more dangerous part of the hotel and needs to be completed to continue advancing.

  • Tips to Defeat Eddie in Silent Hill 2 Boss Battle

    Tips to Defeat Eddie in Silent Hill 2 Boss Battle

    The boss fight against Eddie in Silent Hill 2 Remake is one of the hardest parts of the game, mainly because of his massive revolver and surprise attacks. This fight can catch you off guard, and it’s all about managing your speed, hiding, and staying aware. Eddie loves to dart out from the shadows and try to shoot you without warning, so you need to be quick and cautious—letting him get the drop on you with that deadly gun is not an option.

    This battle begins after you finish the Labyrinth and crack all the puzzles involving the rotating cube in the remake. When you finally reach the slaughterhouse, Eddie’s mental state begins to fray even more—it’s a fight between him and James, but it’s really you versus him. If you’re looking for tips on how to beat Eddie, here’s a clear guide that covers his weaknesses, helpful tactics, and how to come out on top.

    How to beat Eddie in Silent Hill 2 Remake

    The fight is broken into three parts, interrupted by short cutscenes. One key difference from earlier is how the environment changes—first, you encounter a fog of mist that obscures vision, and then hanging meat swings above you, moving in different patterns.

    This adds a layer of both help and challenge—on the plus side, the mist offers cover you can use to shield yourself from gunfire. But it also makes it harder to see Eddie, because he can hide in the darkness of the slaughterhouse as well.

    Having fought and beaten Eddie myself, I can offer you some tried-and-true tips:

    1. Eddie often takes cover in the shadows, waiting to ambush with powerful gunshots. The hanging meat provides a limited amount of cover before it gets destroyed, so take advantage of it.
    2. Stay alert and shoot Eddie before he can attack. Quickly firing at him can stagger him, so keep your weapons ready.
    3. Use sound to your advantage. If Eddie loses sight of you, making noise can help you locate him.
    4. Remember, Eddie can lose track of you too, but knocking the hanging meat can create noise that he’ll detect.
    5. Always keep your back against a wall. It’s tougher for Eddie to sneak around and attack you from behind.
    6. Avoid melee attacks unless you’re very close—Eddie hits harder than you can usually do damage to him in close combat.
    7. A smart move is to circle around one of the hanging meats. When Eddie shoots it and destroys it, you can shoot through the gap it leaves behind.

    This fight is as much about clever thinking as it is about reflexes. If you can outsmart Eddie, you’ll have a good chance to win. Since it might be a while before you face another boss, now’s a good time to use your best weapons, especially if you found the rifle and have extra ammo. Landing heavy shots at the right moments can make a big difference in this fight.

    Stay calm, stay alert, and use the environment to your advantage. Good luck!

  • Silent Hill 2: Find the Grand Market Keypad Code Guide

    Silent Hill 2: Find the Grand Market Keypad Code Guide

    The keypad code for the Silent Hill 2 Grand Market can be found nearby, but there’s no direct information telling you the combination. You’ll have to stumble upon it yourself, hoping to find a clue that narrows down your options. Visiting the Grand Market is optional, but it’s worth the effort because of the valuable items inside. If you’re trying to figure out the code, open the door and head inside; here’s what to look for.

    After locating the Auto Parts key to get into town, this is one of the first places you’ll probably explore. The keypad code for the Grand Market is 4444. You can find this code by a blue truck near the market. The location of both the keypad and the note with the code is close by.

    The note states the code is 4444 and it’s located just a short distance from the door. However, there’s very little guidance on exactly where to look. The area around the truck is your main clue: you’ll notice a body nearby with paper scattered around. One of these pieces of paper mentions trying different numbers from 0 up to 4013, suggesting you need to count up from the last number on the note. When you reach 4444, the code is correct, and the door will open.

    Inside you’ll find useful supplies, including health drinks on various shelves, handgun ammunition in several spots, and other helpful items. Once you’ve collected everything, you can exit through the front door and continue your journey. This found loot makes it well worth investigating the area and unlocking the market.

  • Decoding Silent Hill 2 Remake’s Gallows & Poem Puzzle

    Decoding Silent Hill 2 Remake’s Gallows & Poem Puzzle

    The gallows puzzle in Silent Hill 2 involves a series of poems about criminals and the act of pulling the execution lever in the prison yard. This puzzle comes right after you’ve completed the weights and scales puzzle in the remake’s prison, which unlocks the lever. It’s a confusing and unusual puzzle that feels like it doesn’t have a clear answer, because you’re asked to decide which of six criminals deserves to be hanged. Here, I’ll explain the steps to solve it, what the poems mean, and how to choose the correct noose.

    How to Solve the Gallows and Poem Puzzle in Silent Hill 2 Remake

    1. Use the execution lever you found in the yard and place it in the mechanism on the gallows.
    2. Doing this reveals six incomplete poems about prisoners, along with a plaque telling you to judge someone.
    3. The second halves of these poems are on the ground—you need to match each half with the correct first half.
    4. After correctly pairing all the poem halves, select the noose that matches the poem you think relates to the person you want to judge.
    5. Picking the right noose will move you to the next part of the game. If you get it wrong, you’ll face some enemies and have to try again.

    One tricky part of this puzzle is that the poems aren’t always logical or straightforward. They tend to be more about themes than concrete clues, unlike more straightforward puzzles, such as the hospital lock code you solved earlier.

    Matching the Poems to the Gallows

    The second halves of each poem are shown below, and there are two possible correct matches for each. Which one appears is random in each game. For example, the first poem always refers to an arsonist who burns an orphanage, but there are two possible conclusions. I’ve listed both options below so you can choose correctly regardless of what your game presents.

    Poem Number First Half (Beginning) Possible Match 1 Possible Match 2
    1 “For your grace I do not plead…” (Arsonist) “Though the young ones’ deaths I mourn…” “I watched them burn…”
    2 “The wealth of others I did take…” (Thief) “The reason, if I have to say…” “What were those reasons, you might ask…”
    3 “I took the child, you are quite right…” (Abductor father) “My only daughter, joy of days…” “Forgive me child, for I have failed…”
    4 “Once the sun has ceased its reign…” (Cat burglar) “I departed with great haste…” “So, my guilt is plain to see…”
    5 “Mommy dearest, mommy sweet…” (Matricide) “You were, oh, so kind to me…” “You broke my legs, I couldn’t walk…”
    6 “I waited long, I bid my time…” (Murderer) “In truth, I did not hesitate…” “In truth, he was less man than beast…”

    Which Noose to Pick and Who to Judge

    Once you’ve matched the poems, the next step is choosing the noose that corresponds to the person you believe should be executed. Each noose is numbered and linked to a specific poem. For example, I found that choosing the noose associated with the arsonist’s poem was acceptable, but this might change depending on the context and how you interpret the second halves.

    In essence, you want to pick a person you see as truly culpable. If the poem’s second half makes their crime look justifiable or sympathetic, avoid selecting them. Your goal is to identify the worst offender, so understanding the context of the poem’s conclusion is key—killing out of malice generally justifies a hang, but self-defense does not.

    Getting it right means you’ll move on, leaving the prison behind. If you choose incorrectly, you’ll be attacked by monsters and will have to fight your way out before trying again. Solving this puzzle marks the end of the prison segment, so it’s your last chance to explore and gather any missed items, including the weapons, before progressing further.