الوسم: Simulator

  • How to Make More Money in Retro Rewind by Completing and Solving

    How to Make More Money in Retro Rewind by Completing and Solving

    To purchase new stock, expand your store, and unlock exciting features to attract customers, your shop in Retro Rewind Video Store Simulator needs to make a profit. This can be challenging, especially early on when you’re busy increasing your movie collection and decorating the space.

    To help boost your earnings and improve your progress in Retro Rewind, here are some simple tips. This guide covers everything you need to know to make a profit in the game.

    ### How to Make a Profit in Retro Rewind

    At the end of each day, you’ll see how much money was spent and earned, with the final amount being your profit. The goal is to keep your income higher than your expenses, avoiding unnecessary purchases.

    In the early days, adding a few decorations can encourage customers to rent more movies. However, don’t go overboard, as money saved can be used later for bigger improvements like store expansions or arcade machines. Typically, you can expect to earn around $200 a day during your first few weeks. While this isn’t a lot, it’s enough to start saving for larger upgrades, but you will need strategies to increase your income, such as giving out flyers.

    ### Flyers

    Distributing flyers is a great way to attract new customers passing by. It’s easier if a staff member can hand out flyers when you’re busy outside, but it’s also useful during slow moments inside the store.

    You can hold up to five flyers at a time and only give them to people who aren’t already planning to visit the store. When approaching someone, an icon will appear; tap it to give a flyer. They will either respond positively, saying something like “Thanks! I’ll check it out,” or negatively, with a groan or a “meh” and a comment like “No thanks, I’m busy.” Regular flyer handouts can significantly boost your daily earnings, sometimes raising profits from around $200 to $500.

    ### Careful Spending

    To save money for expansions—which can be quite pricey—you should cut back on expenses. For example, firing your staff and waiting a few days before rehiring can save about $40 a day. If you prefer having staff, consider hiring cheaper employees or firing and re-hiring to save costs.

    Avoid buying new VHS tapes, shelving, or decorations during this period to keep profits high. You’ll be surprised how quickly your savings grow when you don’t spend on unnecessary items. If you need more videos, purchase those priced under $10 and visit the Video Guy on Tuesdays and Thursdays for affordable titles. When new releases are moved onto regular shelves, put extras into the clearance bin to clear space and recover some of your costs.

    ### Snacks, Sales, and Customer Service

    Snacks are very profitable—costing less than a dollar to buy and selling for two—but they shouldn’t be your main income source. Your best revenue will come from videos, so keep your shelves well-stocked by checking returns multiple times daily.

    Customers may request specific movies either in person or by phone. Always answer the phone, especially early in the morning before opening, since it could be a customer wanting to reserve a movie, someone offering spare VHS tapes, or even a wealthy supporter!

    Be sure to charge a damage fee if it appears in the system during checkout; $20 is standard and can cover lost tapes or add to your daily earnings. Although customers might not be happy about it, it’s a helpful way to increase profits.

  • How to Complete All Achievements in Retro Rewind: Video Store Solver

    How to Complete All Achievements in Retro Rewind: Video Store Solver

    Retro Rewind: Video Store Simulator allows players to experience nostalgic memories as they run their own VHS rental shop, aiming to earn profits. You will stock a mix of classic and recent movies, gradually adding different genres to your collection as you progress.

    The game features 18 achievements to unlock, starting with opening your store for the first time and hiring staff, up to unlocking every movie genre. Completing these achievements rewards you with in-game money and experience points, making it worthwhile even if you’re not a completionist.

    You earn rewards each time you unlock an achievement. For example, finishing your first day as a business owner grants you $100 and 50 XP. Helping customers or hiring staff also gives similar rewards. Some achievements involve specific tasks, like selling 20 slushy drinks, owning 250 movies, or checking in 1,000 movies at the return station. Others challenge you to display holographic movies or sell 20 popcorns, rewarding you with cash and XP for success.

    Certain achievements require reaching store levels to unlock new equipment or features, such as the cotton candy machine at level 12 or arcade machines at level 18. You can unlock all store expansions by checking the poster in the office and paying the required costs, boosting your store’s size and capabilities.

    Completing major financial milestones, like generating $10,000 in revenue or owning 1000 movies, also counts towards achievements. To reach these goals, save your earnings, hold off on unnecessary purchases, and manage staff wisely. Unlocking all movie genres and fully staffing your store also unlocks special achievements, adding to your progression.

    New updates may introduce additional achievements, which will be added to this list as they become available.

  • How to Get Scrap Quickly in the Baadlands by Completing and Solving Tasks in Goat Simulator 3

    How to Get Scrap Quickly in the Baadlands by Completing and Solving Tasks in Goat Simulator 3

    Scrap is the main currency in Goat Simulator 3’s Baadlands: Furry Road DLC, and you’ll need a lot of it to buy different items and upgrades. You can collect Scrap by headbutting and smashing breakable objects or people, but sometimes it feels like nothing you hit gives you Scrap.

    Luckily, there’s a faster and easier way to farm Scrap so you can quickly gather enough to buy everything you want in the post-apocalyptic San Angora world. Here’s what you need to know.

    How to Farm Scrap Quickly

    First, head to Newtown. Find the photocopier on the west side of town. If you haven’t already, break the fencing in front of it. Nearby, look for one of the blue breakable crates and drag it onto the left circular platform near the photocopier.

    Once there, headbutt the large red button on the left. This activates the photocopier to copy the crate onto a platform on the right. Drag the copied crate to the left platform, then press the button again. Keep repeating this process to produce a pile of blue crates on the left side.

    After collecting enough blue crates, photocopy them, then smash the ones that appear on the right to get Scrap. You can then just keep hitting the button repeatedly to farm Scrap very quickly.

    What Are Scraps Used For?

    The main use for Scrap is upgrading Pilgor Town Camp, with upgrades costing up to 3,500 Scrap each. Buying all upgrades is necessary to open the vault. You’ll also need Scrap to buy items from NPC merchants, including new gear. Sometimes, you’ll need Scrap for specific events, like paying taxes or spending 2,000 Scrap to get a Tower Viewer Pass.

  • Where to Find All Tokens for Dracula’s Castle Feast in Escape Simulator 2

    Where to Find All Tokens for Dracula’s Castle Feast in Escape Simulator 2

    All Puzzle Solutions in Dracula’s Feast

    You start this room sitting in a chair with only a few objects around. After eating the large cake in front of you, it’s time to solve some puzzles!

    ### How to Escape the Chair

    First, pick up and open the ornate box on the table to your left. This box has three slots on top that fit three small tiles you’ll find nearby. Arrange these tiles to form the image of a key, with the handle on the left. Once aligned properly, the box opens, giving you a goblet.

    The goblet has a single line on it. Place this in the circle marked ‘1’ in front of you. This puzzle involves filling the circles with the correct goblets. The goblets are:

    – Goblet from the chest puzzle
    – Goblet with two moon-shaped faces, starting to your left
    – Goblet with a Celtic cross with three points, starting in the 5 slot
    – Goblet with four triangles, starting to the right of the cake
    – Goblet with a pentagram inside the cake

    Match these goblets to their spots in the circles to unlock the chair.

    ### How to Solve the Animal Chains Puzzle

    The hint for this puzzle is inside the bright book on the middle shelf of the cabinet on the left. It provides clues on the order to pull the chains. If you’ve already pulled some, reset the chains first.

    Pull the chains in this order:

    1. Winged goat on the right
    2. Two-headed deer on the left
    3. Lion with antelope horns
    4. Boar with deer antlers
    5. Rabbit

    Pulling the chains in this sequence will reveal a small statuette under the rabbit, which is used later.

    ### How to Solve the Engraved Seal Puzzle

    Find the engraved seals in the room: one on the cabinet with torn paper, one next to the box with seals, and two in the nearby bookcase. Interact with the box containing seals and arrange them by matching their shapes, patterns, and colors.

    Pairs of matching seals will form uninterrupted lines between each other when placed correctly. To make it easier, collect all removable seals first and then ensure they fit the pattern.

    Completing this arrangement awards you another statuette.

    ### How to Solve the Board Game Puzzle

    Start by retrieving the key from the cabinet beneath the large bookcase in the main room. Use this key in the side room to unlock the table that holds the board game.

    The goal is to move four tiles so that each of the four kingdoms (green, white, yellow, and red) contains one of each resource: metal, paper, water, and wheat.

    Arrange the tiles as follows:

    – Water at the top-left corner
    – Paper just to the right of water
    – Metal in the bottom-left corner
    – Wheat in various positions to complete the pattern

    This will finalize another statuette.

    ### How to Complete the Family Tree

    Gather the scraps of paper from the room, found inside drawers, on the desk, and in the corner cabinet. Fit these scraps into the partial family document to complete the list of Dracula’s family, showing relationships and statuses (dead or alive).

    Use the three statuettes you obtained from previous puzzles and one from the bookshelf to complete the family tree display. The arrangement shows:

    – Bottom row: Vlad (dead)
    – Second row: Dead and alive members
    – Third row: Alive and dead members
    – Top row: Alternating alive and dead

    Completing this turns off the room lights.

    ### How to Finish the Knights Puzzle

    After completing the previous puzzle, the room’s knight statues have lost their weapons and are now bound to chairs. Retrieve the weapons—the axes, maces, and sword—and return them to the correct knight based on shield designs.

    First, twist the bands around the large cloche to match symbols on its sides. Then remove the cover to see clues about which weapon belongs to which knight:

    – The knight opposite the bookshelf has a mace and a single-blade axe.
    – The knight next to the family tree holds a mace and a double-blade axe.
    – The knight near the board game has the sword.

    ### How to Solve the Fireplace Puzzle

    Once the knights put out the fire, an upward arrow appears behind the fireplace. Crouch and pass through to reach the next puzzle.

    ### How to Solve the Portrait Puzzle

    Match the details within circles to the scene on the other side of the wall:

    – Sky shows a dragon with a fish
    – Upper right has an owl
    – The man bears a devil
    – Bottom left features a rabbit
    – Bottom right shows a fruit plate
    – Building right of the man has an acrobat

    Matching the picture reveals a key. Examine the key carefully; it has a signposted four-letter word. The obvious choice is “DEUS”. Fit the letters into the strips until they align to spell that word, then use the key to open the chest.

    ### How to Solve the Master Key Puzzle

    Inspect the master key from the previous puzzle. Adjust the tiny keys attached to match the keyholes of the room’s large door. Only two of these little keys are moveable, so try different arrangements until the correct setup is found.

    —

    All Token Locations in Dracula’s Feast

    Here are the spots of the eight tokens:

    1. Upper left side of the fireplace
    2. Under the wood next to the fireplace
    3. Under the center table (crouch to retrieve)
    4. Inside the goblet on the cabinet of the Engraved Seal puzzle
    5. On the back of a chair near the head
    6. Hidden under a groove in the rug
    7. In the balcony above the table
    8. At the top of the unlit wall candle

    —

    How to Solve the Darkest Puzzle in Dracula’s Feast

    This is a more complex version of the kingdom resources game. You need to organize each kingdom to have a king, queen, and princess, with specific resources.

    Arrange the panels as follows:

    – Top-left corner: a panel covering two red tiles and one green tile
    – Beneath it: a panel covering one red and one purple tile
    – Bottom center: a four-tile long panel
    – Far right: a three-tile vertical panel covering red and green tiles
    – Top left of previous panel: a six-tile panel combining multiple resources

    This organization ensures each kingdom has the necessary figures, completing the puzzle.

  • How to Set the Perfect Price in Supermarket Simulator by Completing and Solving

    How to Set the Perfect Price in Supermarket Simulator by Completing and Solving

    In Supermarket Simulator, a relaxing game about running your own convenience store, you manage the daily tasks such as placing orders, filling shelves, and, most crucially, setting prices for the products you sell. Proper pricing is key to keeping your business running smoothly.

    If setting prices feels overwhelming, don’t worry. The game uses real-life economic principles to help you find the right strategy. This guide will show you how to price your items effectively without losing customers or hurting your profits.

    How to Set Your Prices

    Once you’ve purchased a license for a product, you need to assign prices to all items under that license. The simplest way is by ordering items and placing them on shelves. When you do this, a price tag appears on the shelf edge that you can click to edit the price.

    A small window will pop up showing the product’s average cost, a box to enter your price, options for discounts, and the current market price. To set your price, click in the box and type the amount you want to charge. Then hit “Okay,” and the price will be saved.

    If you have a growing inventory, manually setting prices for each item can become tedious. Instead, you can use the computer in your store. You’ll see an option labeled “Pricing” with a dollar sign icon. Clicking it displays a list of all products linked to your license, along with their costs, market prices, recent market changes, and options to set your prices and discounts.

    This list makes it easy to monitor fluctuating market prices—items with red indicators mean market prices recently dropped, while green signals indicate increases. You can quickly adjust your prices by typing new amounts into the boxes under “Price” for each product.

    What Is the Best Price?

    Pricing too high might drive customers away, while pricing too low can cut into your profits. Both mistakes can threaten your store’s success. Avoid taking on debt unless absolutely necessary—often, if you’re short on cash, the issue stems from your pricing or ordering too much inventory.

    To find a good balance, aim to set prices that allow you to make a solid profit while still attracting customers. Check your prices regularly, whether on the shelves or through the computer, to see how market conditions change. Adjust your prices accordingly to stay competitive and profitable.

    How to Assess Cost and Market Price

    Understanding the cost and market price for each item helps you make smarter pricing decisions. The listed cost is what you pay per unit, based on bulk purchases, not the total bulk price. When setting your selling price, always keep it above your cost to ensure some profit.

    The market price, shown on the shelf pop-up or on the computer, reflects what other stores (or in-game markets) are charging. While the game doesn’t have real competitors, it still shows you the market trend. Setting prices a few cents below the market price helps you stay competitive and attract customers—generally around $0.20 higher than market value works well.

    You can also experiment by pricing items below market to boost sales or slightly above for higher margins, as long as you’re mindful of customer satisfaction.

    When to Change Prices

    Just like in real life, market prices fluctuate. When they do, you should adjust your prices to match these changes. The game highlights which products have experienced recent price shifts—items with red indicators need lower prices, while those with green need higher prices.

    You don’t necessarily have to raise prices after a market increase, but lowering prices for products with decreased value is essential to keep customers shopping. Regularly check the “Pricing” tab on your computer to monitor these fluctuations and tweak your prices accordingly.

    As your store grows, continued pricing adjustments based on market trends, demand, and customer response will help maintain healthy profits. Experimenting with different price points is often the best way to find what works for your shop.

  • Things to Know Before Playing Waterpark Simulator: Completing & Solving Tips

    Things to Know Before Playing Waterpark Simulator: Completing & Solving Tips

    Starting out in Waterpark Simulator can feel a bit daunting. Running a busy water park means managing money, rides, staff, and guest happiness—all while keeping everything running efficiently and making a profit. Although the game is full of silly fun, it also has a lot of complex gameplay elements.

    Here are some key tips for beginners to help you start strong, avoid common mistakes, and build a water park that not only succeeds but keeps visitors coming back. From managing staff wisely to spotting troublemakers and more, here’s what you need to know to make your first splash.

    Prevent and Remove Naughty Visitors

    An annoying but funny part of the game is dealing with troublemaking guests. You can spot them by looking for the devil emoji above their heads. These visitors may sneak in without paying or leave a “present” in the pool. Always be attentive to the emoji—whether they’ve done something or not. If you see it, remove them immediately to prevent further damage or mess. Use the boxing glove at the front desk for an extra punch.

    Note: Not all troublemakers sneak in. Keep an eye on the emoji, not just whether they have a bracelet indicating they paid.

    How to Properly Use Trash Cans

    Trash cans are a simple way to keep your park clean. When you place one from the building menu, a directional arrow appears—this tells customers which way they’ll walk to use it. Use this to guide customer traffic efficiently. Also, notice the yellow area around the can, which shows its effective range. If visitors are outside this zone, they won’t go there for trash, so you might need more cans or better placement to keep litter under control.

    Unlock the Water Gun ASAP

    Getting the water gun is a fun upgrade. It allows you to spray down smelly visitors or clean certain areas faster—plus, it helps earn extra XP, especially when visitors enjoy water fights. Keep in mind, the water gun can perform cleaning tasks quicker than a mop, saving inventory slots for other tools. However, it doesn’t give you Research Points when cleaning, so weigh its benefits carefully early in the game. More pocket space unlocked through the Research Table helps keep all your tools handy.

    Always Check the Water in Your Pools

    Pools degrade over time—cracking and discoloration happen if you neglect them. If they break, they drain and get marked “out of order,” preventing guests from swimming and ruining their fun. To fix this, use the hammer to repair damaged pools, but remember to refill them afterward—guests won’t care whether the water is there or not; they’ll jump in regardless, which can lead to injuries and negative feedback.

    Note: In cases of guests getting severely injured, you’ll need to call an ambulance, which arrives automatically and costs extra.

    Use Life Preservers Wisely

    When your park is new, you’ll only have one life ring to rescue drowning visitors. Keep it with you at all times to respond quickly. As you progress and earn Research Points, you can unlock a stand with multiple life preservers—meaning you can place more rings around the park. A handy trick is to drop a few rings into the pools early in the day. Drowning visitors may bump into them and save themselves, saving you time and resources.

    Hiring Staff You Need

    While tempting to hire everyone right away, focus on using your Research Points wisely, especially early on. The first priority should be hiring a Ticket Agent—this frees you up to handle cleaning, fixing, and ejecting sneaky visitors. Handle the morning rush yourself, as staff might not admit the first 10-15 visitors quickly enough, causing frustration. After that, you can assign staff to other roles.

    Recommended hiring order:

    1. Ticket Agent
    2. Hot Dog Vendor
    3. Lemonade Vendor
    4. Cleaner
    5. Restocker
    6. Ice Cream Vendor
    7. Janitor
    8. Additional Cleaners

    The Trick for Distributing Flyers

    Handing out flyers can be frustrating—many people on the street may ignore them or already have tickets. To maximize effectiveness, print your flyers before opening and hand them out immediately as you start your day. When the park opens, quickly run out with flyers in hand; after the initial rush, patience levels are higher, and it’s easier to get flyers into potential visitors’ hands.

    Use Umbrellas as Transport

    Running in the game is fast, especially if you enable always-run in settings. But as your park grows, you won’t be able to be everywhere at once. For quick travel, use umbrellas as a form of transportation—bouncing from one to another is efficient and safe, since falling doesn’t cause damage. Consider placing umbrellas around your park in a string to create bounce pads. This makes getting from point A to B faster and allows you to respond more quickly to emergencies.

  • How to Complete Every Achievement in Waterpark Simulator

    | Achievement | Description | Advice |
    |————–|————–|———|
    | Water you are waiting for? | Open your water park for the first time. | |
    | Caution! Slippery when wet | Build your first slide. | You can do this with your first upgrade. |
    | Lifeguard-ish | Finish the tutorial. | |
    | One-Star Wonder | Reach a 1-star Park Prestige Level. | |
    | Bin There, Done That | Clean 100 trash items in your water park. | It’s easier if you don’t place bins. |
    | Pew Pew! | Use the water gun on a guest. | |
    | Mop it like it’s hot | Mop 100 puddles. | |
    | Slidekick | Hire your first staff member. | |
    | Slip Happens | Have 100 visitors slip on puddles. | Do this before hiring a cleaner for easier results. |
    | Nailed it! | Clean 500 attractions. | |
    | Visionary | Expand the water park once. | |
    | Screw it! | Repair 500 attractions. | Staff can’t do this, so do it yourself. |
    | Roll Model | Use the paint roller on an attraction. | |
    | Lifesaver Protocol | Save an injured visitor with the Injector. | Have a visitor fall from a slide onto the floor and quickly use the Injector from next to the Medkit. |
    | Double Shine | Reach a 2-star Park Prestige Level. | |
    | Making Waves | Have 20 visitors in your water park. | |
    | Hustler | Earn $10,000. | |
    | Sweep Dreams | Clean 500 trash items in your park. | |
    | Demolition Daydream | Destroy 100 buildings. | This will happen naturally as your park grows. |
    | Trash No More | Clean 1000 trash items in your park. | |
    | Mopocalypse | Mop 500 puddles in your water park. | |
    | Three-Star Standard | Reach a 3-star Park Prestige Level. | |
    | WHAAA!! | Have 1000 visitors use your slides. | |
    | High Tide | Have 50 visitors in your park. | |
    | Beyond Borders | Expand your water park three times. | |
    | Punchline Delivered | Hit a visitor with the boxing glove. | The glove is next to the ticket computer. |
    | Tycoon | Earn $100,000. | |
    | Pour Decisions | Spend $100,000 on your water park. | |
    | Almost a Legend | Reach a 4-star Park Prestige Level. | |
    | Service Worth Every Cent | Reach $1,000 in tips. | Keep upgrading and researching tips to increase your earnings. |
    | Thou shall not slip | Mop 1,000 puddles. | Upgrading to ‘Quick Dry’ reduces puddles, so skip this upgrade if aiming for this achievement. |
    | Pool of Talents | Hire five staff members. | |
    | Sniff Happens | Use the water gun on 100 smelly guests. | Removing showers can help with this. |
    | Pool-itzer awardee | Save 100 visitors from drowning. | Do it yourself; avoid hiring lifeguards if you want this. |
    | Hot Fix | Fix an attraction within five seconds of it breaking. | Stand by a breaking attraction with a hammer in hand to be ready. |
    | Pushed to the Limit | Push 100 panicked guests. | Avoid hiring lifeguards, as it makes this harder. |
    | Liquid Assets | Spend $250,000 on your park. | |
    | Mist Opportunity | Unlock and use the spray can. | |
    | Human Canvas | Use the spray can on a visitor. | |
    | The Bigger They Are… | Fall from a 15-meter height. | |
    | Crowned in Stars | Reach a 5-star Park Prestige Level. | |
    | Deep Wallet | Spend $500,000 on your park. | |
    | Breaking Boundaries | Expand the park to the maximum. | |
    | Don’t Look Down | Build a 5-star diving board. | |
    | Nothing Left to Learn | Unlock all research options. | |
    | Mogul | Earn $1,000,000. | |
    | Squeeze the Day | Sell 500 lemonades. | |
    | Meeting Expectations | Sell 500 hot dogs. | |
    | No Trespassing | Kick out 200 guests without a bracelet. | |
    | Doo-Doo Duty | Clean 50 poops from the pool. | |
    | Cold Hard Cash | Sell 500 ice creams. | |
    | Do You Have a Minute? | Hand out 500 flyers. | |
    | Full House | Have 100 guests in your water park. | |
    | Zookeeper | Clean 100 poops from the pool. | |
    | Pool-ution Solution | Clean 500 poops from the pool. | Removing toilets helps complete this in 2-4 days. |

  • Beginner’s Guide: Completing Tips for Solving Parcel Simulator

    Beginner’s Guide: Completing Tips for Solving Parcel Simulator

    Parcel Simulator Overview

    Parcel Simulator immerses you in the fast-paced world of package inspection and logistics, where timing is crucial and errors can be costly. Your tasks involve sorting packages, verifying labels, scanning serial numbers, and juggling deadlines, all while aiming to grow your warehouse and boost profits. For newcomers, the initial experience can be quite daunting.

    Below, you’ll find effective strategies to enhance your efficiency and increase your earnings. Whether you’re fine-tuning your workspace or just getting acclimated, these beginner tips will help you optimize every package processed.

    Collect Trash Bags for Extra Cash

    Similar to collecting waste in Schedule 1, gathering trash bags is an effortless way to earn money in Parcel Simulator. Keep an eye out for full black trash bags located outside near the loading area. Just grab a bag and toss it into the green dumpster for quick cash rewards.

    In the early stages, view these stray trash bags as easy opportunities for extra income. Funds can be tight initially, so every bit counts towards tablet upgrades or shipping licenses. Also, since trash bags respawn daily, it’s beneficial to step outside before your shift to gather any new ones.

    Purchase the Industrial Scale and Weight Class License Early

    Once you get the hang of the game, access your tablet by pressing T, and acquire the Industrial Scale. This tool accurately weighs parcels, helping you avoid automatic rejections. Following that, improve your earnings potential by obtaining the Weight Class License.

    Without this license, even parcels that are properly weighed will yield lower payouts.

    Set up the scale next to your inspection table for a more organized workspace. Weigh each parcel, match it to its class (A–E), and stamp or pile accordingly. This setup allows for more efficient processing of batches of eight parcels, leading to higher profits.

    Submit Parcels in Batches of Eight

    Grouping your submissions into batches of eight can significantly enhance your efficiency, and it’s simpler than it sounds. As parcels arrive, don’t rush to label and submit them right away. Instead, set aside boxes until you have a full batch of eight, be they approved or denied, and then submit them all at once to unlock the batch bonus.

    To submit in batches:

    1. As each parcel arrives, place it on the inspection table and tag it correctly.
    2. Set it aside in a “batch pile” until you reach eight.
    3. Once you have a full batch, put them in the submission chute and press the submit button to process them all at once.
    4. Watch your credits accumulate much faster compared to single submissions.

    Upgrade to Warehouse Tier Two Quickly

    Like in other simulation games, upgrading to Warehouse Tier Two in Parcel Simulator unlocks Conveyor Deliveries. This feature allows you to install conveyors to automatically unload parcels from trucks, saving you time after every delivery.

    Once installed, purchase the weight scanner, serial number scanner, and sticker scanner from the in-game shop. These scanners automate the processes of weighing, validating serial numbers, and confirming approvals.

    Complete Contract Objectives for Bonus Cash

    Contracts are special orders that become available once you upgrade your warehouse. You can check them at any time by accessing your tablet with T, navigating to the Contracts tab, and reviewing your active tasks. Often, these tasks involve delivering specific types of parcels, like sending out a specific number of rail parcels.

    You don’t need to examine these packages closely. Just pick them, ensure they meet the criteria (rail, air, country), and drop them in the designated area. Be sure to refresh your contracts regularly on your tablet, as new orders come in periodically, helping you stay on track with valuable goals.

    Parcel weights are classified from A to E: A is 0–5 kg, B is 0–10 kg, C is 0–15 kg, D is 0–20 kg, and E is 0–30 kg. If a parcel exceeds its class, it fails inspection. Always weigh before approval to avoid penalties.

    Optimize Your Workspace

    Optimizing your workspace saves time and boosts efficiency. Start by positioning your inspection table close to the delivery gate to minimize walking distances. Place your industrial scale within easy reach on one side of the table, allowing you to weigh parcels quickly after checking labels.

    As you progress, utilize pallets to organize batches according to contract requirements or destination countries. This small adjustment ensures you don’t accidentally submit a mixed batch.

    Be Aware of Pre-Inspected Parcels

    Once you access the weight, serial number, and sticker scanners, packages will start arriving that are already stamped and weighed. These parcels are ready for submission without additional inspection from you. When you spot a green sticker that matches your daily cargo type, you can quickly toss it into your batch pile.

    Later on, these parcels will automatically pass through the automated scanners, ensuring a steady revenue stream for you.

    Continue Working After 5 PM

    In Parcel Simulator, delivery trucks stop arriving after 5 PM, but your work doesn’t have to come to a halt. After unloading everything during the day, take the opportunity to conduct inspections and complete contracts. To begin inspecting, press E while pointing at any parcel on your desk or conveyor.

    Regularly check your Tablet by pressing T. This feature will help you manage cargo types, track country flags, access the shop and licenses, review daily tasks, and monitor billing.

    With no new packages arriving, it’s the perfect time to consider flagged parcels or complex boxes without time pressure. Use this downtime to catch up on contract goals, rectify any missed details, and clear your queue before the morning rush begins.

  • Guide to Raising Pigs in Ranch Simulator

    Guide to Raising Pigs in Ranch Simulator

    In *Ranch Simulator*, you have the opportunity to raise various animals for profit, and each one has specific needs. Ignoring these requirements can lead to serious problems, including losing your animals. Among all the livestock, pigs stand out as a fantastic investment due to their rapid breeding capabilities, especially if you’re just starting out.

    Pigs allow you to produce meat and transform it into profitable products, making them a great choice for building your ranch’s success early in the game. This guide covers everything you need to start raising pigs effectively.

    Where to Purchase Pigs


    You can buy pigs at the General Store for 300 dollars each. Both male and female pigs are available, and if you wish to breed them, make sure to acquire at least one of each gender. To transport your new pigs to the ranch, you can utilize the UTV provided at the start of the game, which can carry two pigs at a time.

    How to Care for Pigs

    The pigs are inside the orange fenced area, circling the food trough and water container in Ranch Simulator

    After acquiring your pigs, it’s time to provide them with a home. If you’re still early in the game, you can temporarily house them in the garage or the nearby wooden structure to save on materials. Otherwise, consider building a proper barn or creating a simple enclosure with wooden fences.

    Next, ensure your pigs have access to food and water by constructing a food trough and a water bowl. Each of these requires 16 wooden planks to build.

    Be cautious about where you place the food and water containers within the fenced area. If positioned near the edges, pigs may climb on them and escape. It’s best to keep these containers in the center of the pen.

    Understanding Breeding

    When you have a male and a female pig together, the female will quickly become pregnant. You can identify female pigs by the teats on their underside. Once she’s pregnant, you’ll notice a pacifier icon next to her health bar when you approach.

    After about three to five days, the female will give birth, typically to three or four piglets. While the mother initially feeds them, the piglets will be able to eat solid food shortly after.

    It’s vital to manage the population; otherwise, pigs can overcrowd their pen, escape, or cause performance issues. To prevent this, it’s recommended to separate males and females once you have enough pigs to control breeding.

    If you want more piglets, introduce a female to the males for breeding, then return her to the females afterwards. You can segregate the piglets by gender once they reach maturity.

    Pig Maturation Stages

    Pigs will increase in size over time, with noticeable growth differences compared to newly purchased ones. Selling pigs is generally not advisable since you’ll only receive about half of their original cost. Instead, it’s more profitable to slaughter them and convert the meat into products.

    The amount of pork you obtain depends on the pigs’ size. Newly bought pigs yield seven pieces of pork, while fully grown pigs can provide as much as 26 pieces. They achieve maximum size approximately eight days after birth.

    Pork Processing and Pricing

    The player is looking at dead pigs next to the porks on the ground in Ranch Simulator

    Raw pork is much more lucrative than selling live pigs, but you can earn even more by turning it into processed meat products. Below is a table detailing the various pork products and their corresponding prices:

    Product Prices (dollars)
    Raw With Egg With Milk With Egg and Milk
    Pork 30 – – –
    Meatball 25 35 37 47
    Salami Meatball 40 50 52 62
    Sausage 40 50 52 62
    Boiled Sausage 45 55 57 67
    Salami Sausage 60 70 72 82
    The player is standing next to the equipment used for processing meat in Ranch Simulator

    To create minced meat from pork, you need a meat grinder and a pan. For sausages, a sausage stuffer is required. To maximize your profits, consider building a preserving bin, which allows you to convert sausages into salami sausages that sell for the highest prices.

    To get the best return on pork sales, wait for a favorable price multiplier at Best Burger. Selling your processed meats there can yield significantly higher profits compared to other locations.

  • Mastering Furniture Movement in Supermarket Simulator

    Supermarket Simulator is an engaging and relaxing game where you take on the task of creating and managing your own grocery store. As you work toward success, you’ll encounter various challenges, one of which involves the interior design of your store. While it may seem straightforward at first, those who appreciate a well-organized space will want to master how to arrange and rotate furniture effectively.

    The game doesn’t really explain how to interact with interior items, which can be tricky, especially for newcomers. But don’t worry! We’re here to guide you through the process of moving your furniture.

    How to Rotate and Place Furniture

    Moving and rotating furniture in Supermarket Simulator isn’t too complicated, but there are some restrictions that might limit your actions. Let’s go over the essentials of how to interact with and move furniture.

    First, walk up to the item you wish to move or rotate. Hover your cursor over the furniture and click the left mouse button to enter editing mode. If done correctly, the item will turn translucent and green and start following your cursor. Now you can select the spot where you’d like to place it. When you’ve found the perfect location, click the left mouse button again to place the item and exit editing mode.

    To rotate the item, left-click to enter edit mode, then press the Q key to turn it left or the E key to turn it right. After making your adjustments, left-click once more to finalize the item’s position and exit editing mode.

    Now, let’s discuss the limitations you may encounter while trying to move furniture:

    • Only one item in the store: If you have just one shelf, you won’t be able to move it. Instead of entering edit mode when you click on it, you’ll see a notification saying “Can’t move the last Rack.” The only way to fix this is to purchase another item of furniture.
    • The shelf is occupied: If the shelf you want to move contains items for sale, it will also be immovable. To resolve this, simply wait until customers have bought all the products from that shelf.
  • Tips for Organizing Items in Fast Food Simulator

    Tips for Organizing Items in Fast Food Simulator

    Fast Food Simulator gives you the chance to run your own restaurant, where you’ll whip up fast food dishes and ensure your customers are happy and satisfied. As the game progresses, you’ll need to manage an increasing variety of ingredients and menu items, which makes your role a bit more challenging.

    If you want to keep your customers happy and reduce their wait time, it’s important to stock up on supplies from the Market app. However, the challenge lies in storing everything properly, as any items left in the wrong place will vanish by the next day, leading to unnecessary losses.

    How To Store Items


    The game features three categories of items. Some, like packaging supplies and vegetables, won’t be lost no matter where you place them. However, other items must be kept in cold storage. Certain opened items must also be refrigerated to prevent spoilage.

    Properly storing items is crucial for your bottom line. It’s wise to stock up before opening your restaurant each day so you can quickly access everything based on what your customers want.

    You can place orders through the Market app during business hours, but this is not advised. Waiting for delivery can be time-consuming, possibly leading to unhappy customers.

    As you advance in the game, you’ll need to accumulate a substantial inventory. Fortunately, the kitchen offers plenty of room for efficient storage. However, remember that prepared foods for customers cannot be stored, and any leftovers will be automatically discarded the next day.

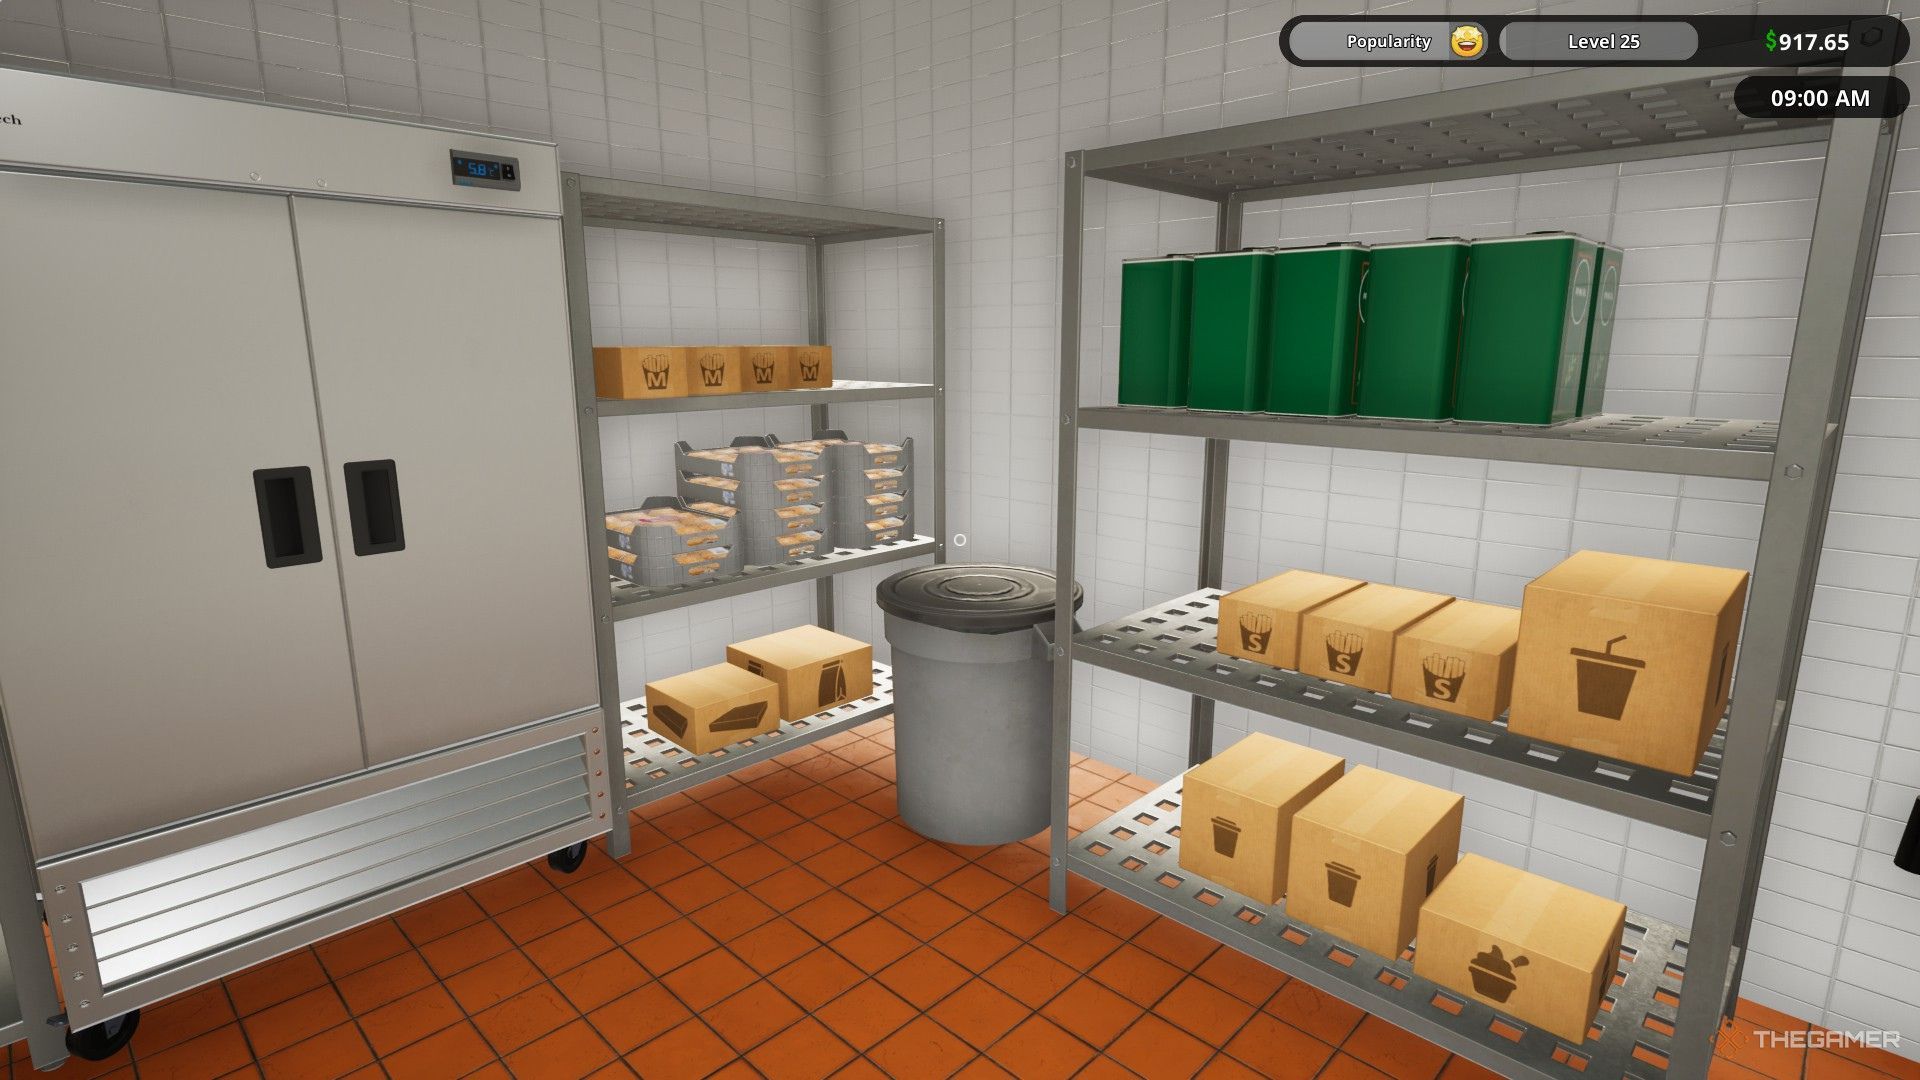
    Items That Can Be Stored On Shelves And Cabinets


    The image shows the shelves inside the kitchen stocked up with items in Fast Food Simulator.

    Your kitchen features many shelves and cabinets, providing ample space for all kinds of items. There’s a shelf beyond the cold storage for overflow items as well.

    Below is a list of items that can be stored anywhere in the kitchen, although it’s best to put them on shelves or in cabinets:

    • Tomatoes
    • Onions
    • Lettuce
    • Pickles
    • Burger Buns
    • Soda Cups
    • Coffee Cups
    • Ice Cream Cups
    • French Fry Cups
    • Coffee
    • Burger Wrapping Paper
    • Frying Oil
    • Paper Bags
    • Nugget Boxes

    Ketchup, mayonnaise, and mustard containers can also be placed anywhere but must be refrigerated after opening.

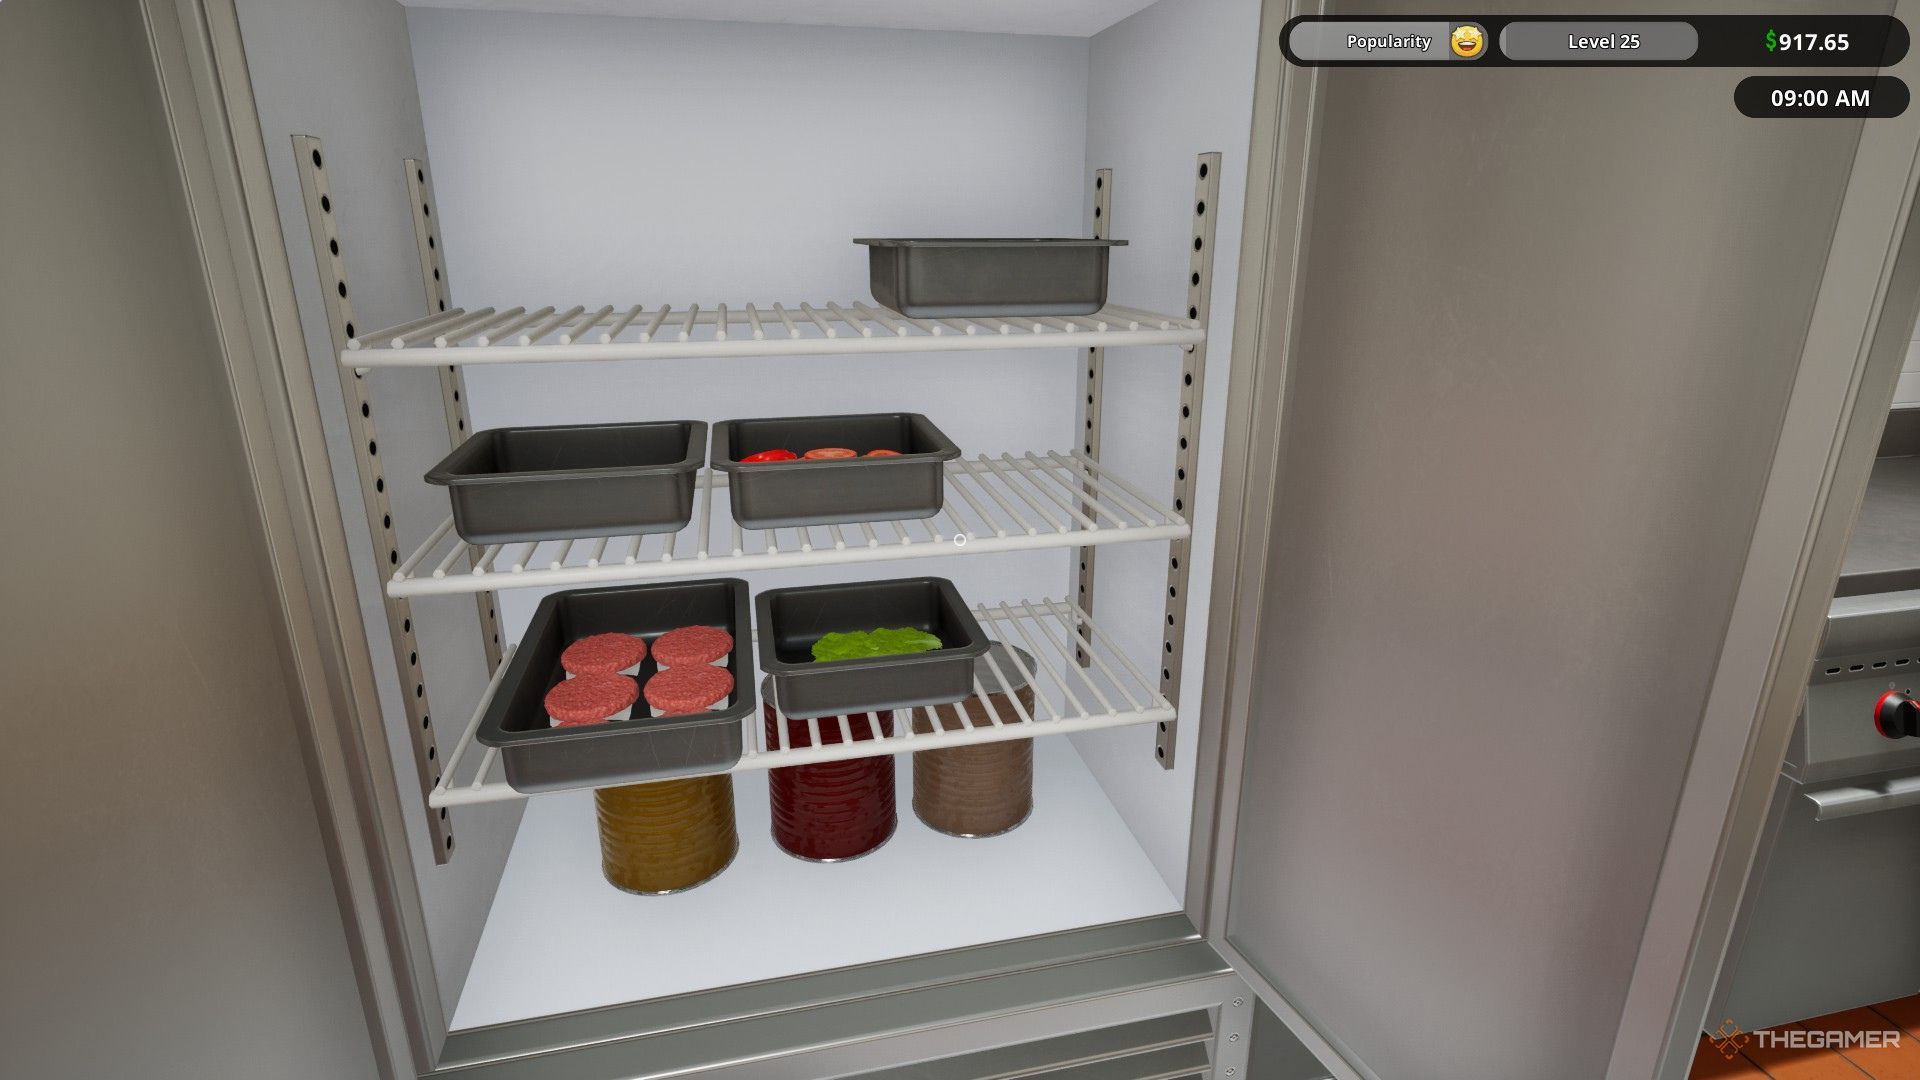
    Items That Can Be Stored In Cold Storage


    The image shows several ingredient containers, beef patty container, and several sauce cans inside a fridge in Fast Food Simulator.

    There’s a large cold storage area at the back of the restaurant to keep items from spoiling. You can also make use of two refrigerators in the kitchen for this purpose.

    • Frozen Beef Patties
    • Frozen Chicken Patties
    • Frozen French Fries
    • Milk
    • Beef Patty Containers
    • Cheddar Cheese
    • Frozen Chicken Nuggets
    • Ingredient Containers
    • Opened Ketchup Can
    • Opened Mayonnaise Can
    • Opened Mustard Can

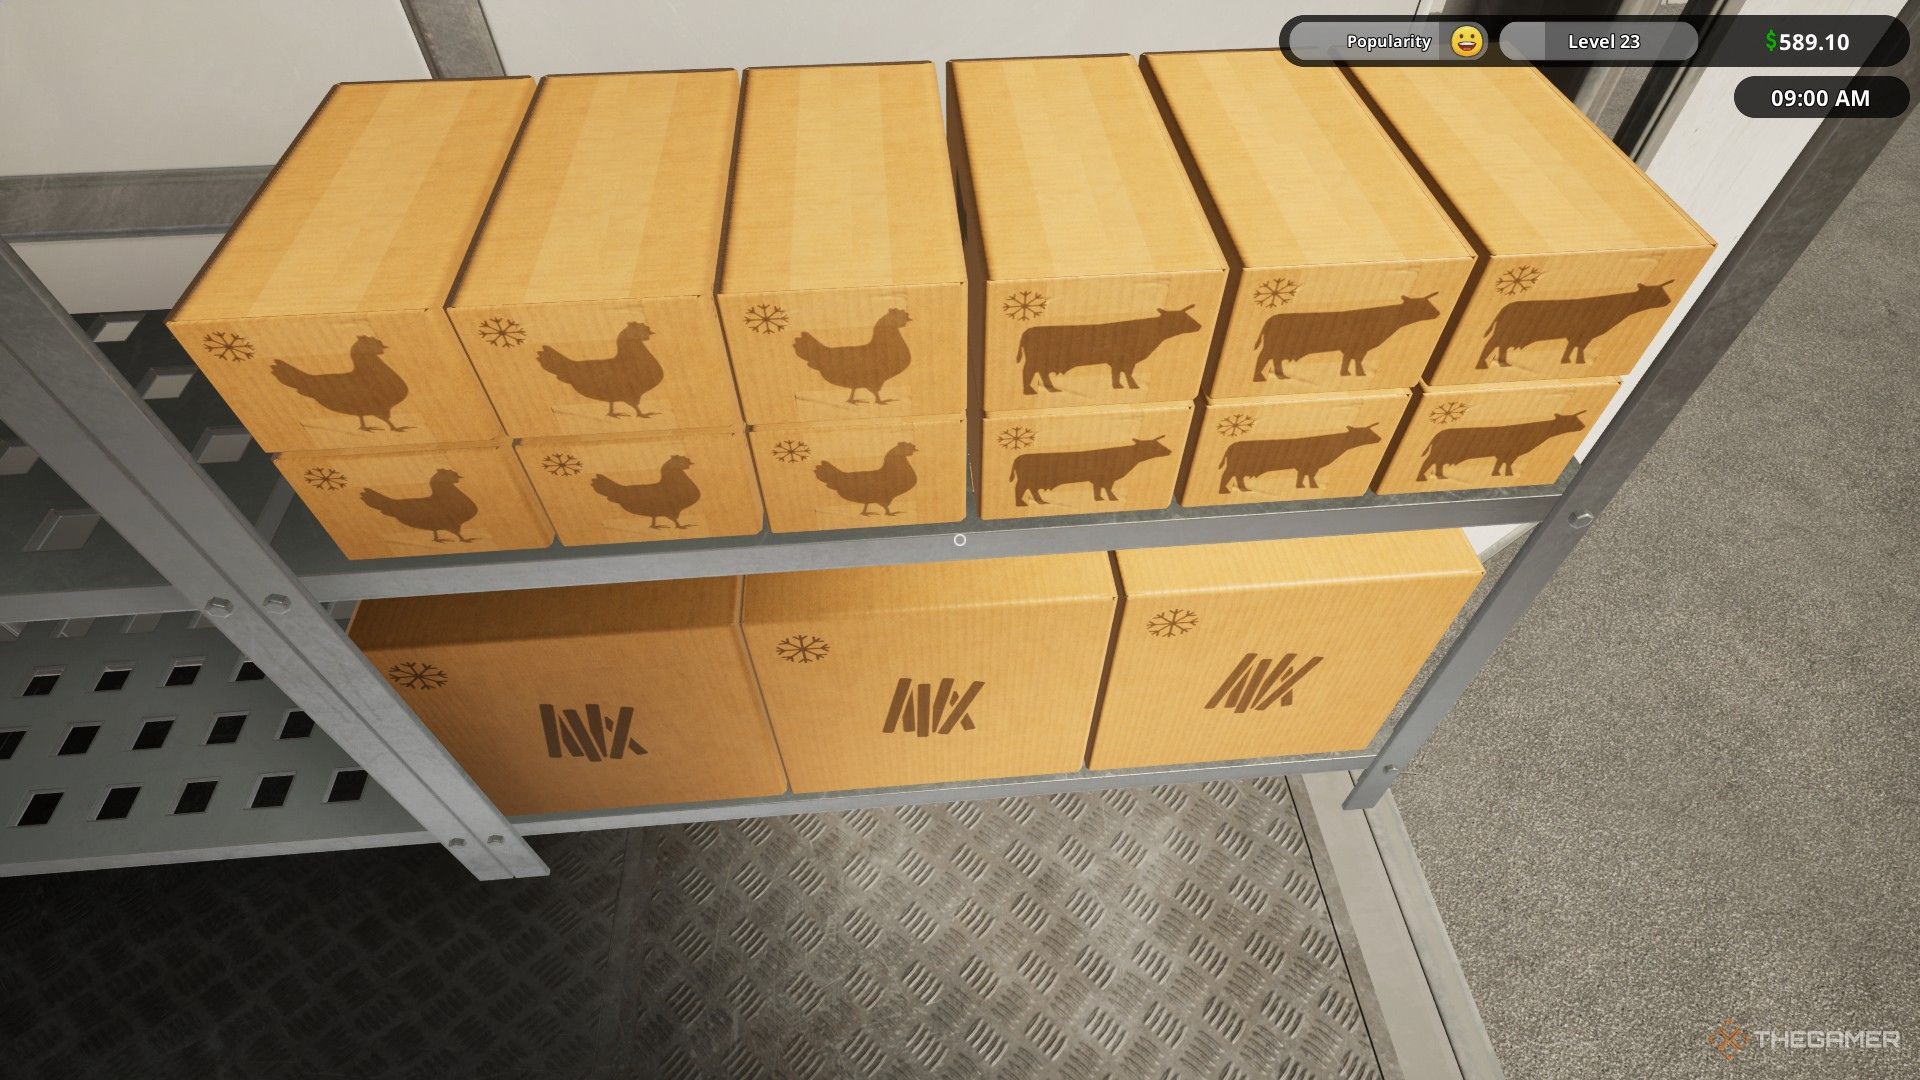
    The image shows several packages with a snowflake icon in Fast Food Simulator.

    You can easily identify items that belong in cold storage thanks to the snowflake icon on their packaging. All ingredients and patty containers must be refrigerated to avoid spoilage. Leaving items outside the fridge will result in expired ingredients disappearing.

  • Mastering Drive-Thru Service in Fast Food Simulator

    Mastering Drive-Thru Service in Fast Food Simulator

    Fast Food Simulator invites you and your friends to run a fast food eatery together. There’s plenty to keep you busy in the kitchen, and as orders grow in complexity, the excitement really ramps up. You’ll need to stay focused and agile to make your restaurant thrive.

    Once you reach level 15, you’ll gain access to the Drive-Thru, allowing you to start taking customer orders from their vehicles. Initially, handling these drive-thru orders can be tricky, as the game doesn’t provide much guidance.

    How to Handle Drive-Thru Orders

    Completing drive-thru orders requires a different strategy compared to regular orders since there’s no server to assist, and you can’t simply pass a tray to customers. Fortunately, upon unlocking the Drive-Thru, you’ll also gain access to various items, including paper bags.

    You’ll need to purchase these paper bags from the Market app using the computer in your kitchen and wait for delivery. Once the delivery truck arrives, take the bags out of their packaging and position them near the Drive-Thru window.

    After organizing the paper bags, start a new day and anticipate incoming orders. First, accept the Drive-Thru orders using the system by the window. Once accepted, the customer’s vehicle will arrive to pick up their order.

    Prepare the items, and when you’re ready, grab a paper bag from the stack and place it on the counter. Fill it with the necessary food items for the order. Once everything is packed, you can hand the bag directly to the customer.

    You don’t have to individually package each item. Simply place all items listed on the receipt into one paper bag, and hand that bag over to complete the order.

    Additional Tip

    The drive-thru receipt isn’t particularly useful, so you don’t need to include it with the food items. You can either leave the receipts on the counter where they’ll disappear by the next day or toss them in the trash bin located behind the drive-thru counter.

  • Essential Tips for Mastering Fast Food Simulator as a Beginner

    Essential Tips for Mastering Fast Food Simulator as a Beginner

    Fast Food Simulator places you in the role of a fast-food restaurant manager, requiring you to handle everything from taking orders to cooking and serving food. As you progress through the game, you can unlock new ingredients and hire staff to make your tasks easier.

    The game can quickly become hectic if you don’t make the right choices, so it’s crucial to have a strategy before jumping in. Here are some beginner tips that will help you get started and make your restaurant experience more enjoyable.

    You Have All the Time You Need to Prepare

    Before you open for business, time is on your side. The clock remains at 9 AM, allowing you to get ready without any rush. Take this opportunity to order ingredients, organize them, and complete any time-consuming tasks that would be tough to manage once customers arrive.

    A smart strategy is to cook a good number of beef patties in advance, as they take a while to prepare and require constant attention to avoid burning or undercooking. Having enough patties ready before opening will help you fulfill orders in seconds.

    Tip: If you finish the day with extra cooked patties, it’s better to toss them rather than risk losing a customer by serving late.

    Don’t Hesitate to Order More Than You Need

    Before opening, feel free to order as much food as your budget allows. Ensure you have not only what you need for the day, but also anything unlocked in the market.

    Any excess ingredients can be stored on shelves. Perishable items like vegetables and patties can be kept in the fridge or cold storage. Remember, once you unlock an ingredient, order it right away; you’ll start receiving requests for it the very next day, whether you have it or not.

    Tip: If a last-minute order comes in for something you don’t have, you can still buy it through the Market app, but it’s always better to prep ahead of time to save crucial seconds during the rush.

    Hire Staff as Soon as Possible

    You can hire a server and a busser for a nominal cost. The server picks up dishes and brings them to customers, while the busser handles payments and keeps tables clean. For just around $60 for both workers for the day, their assistance becomes vital as your restaurant grows and orders become more complex. This allows you to concentrate on cooking without the distraction of serving tables.

    Note: Don’t forget to place the receipt and food on a tray before marking the dish as complete; your server will automatically serve it to the correct table.

    Keep an Eye on the Screens

    There are screens positioned around the cooking stations, and it’s essential to check them regularly. As you advance and the orders get more intricate, it’s easy to overlook ingredients.

    By frequently glancing at the screens, you’ll remember what each order entails and which table it belongs to. This habit is especially helpful when you’re managing multiple orders at once.

    Prepare a Few Simple Orders Before the Day Starts

    As you get used to the game, it’s wise to have a couple of simple orders ready before opening for the day. You’ll begin noticing common requests from customers, and having those on hand will lessen your workload.

    At higher difficulty levels, managing customer orders can be quite a challenge, so having basic items ready will allow you to focus on fulfilling other requests, ensuring satisfied customers.

    Tip: Prepped orders don’t have to be just burgers; preparing drinks in advance can also help you keep up with demand.

    Don’t Overextend Yourself

    In the kitchen, take your time and avoid rushing. For instance, when cooking beef patties, limit yourself to six at a time to prevent burning. Cooking more than the cooking tray can hold will lead to overcooked patties.

    If you’re busy with several orders, don’t hesitate to cancel new requests. Cancelling isn’t as impactful as serving the wrong item and will help you maintain focus.

    Clean the Kitchen Before Closing

    Before you wrap up for the day, it’s vital to clean the kitchen. Make sure all ingredients and uncooked patties are placed in the fridge. Likewise, any trays your busser has collected should be organized under the counter.

    These simple steps help prevent food waste, saving you money. Leaving items out overnight means losing them by morning, and that includes condiments like ketchup and mayo, which should also be refrigerated after use.

    Don’t Dwell on Mistakes

    In the fast-paced environment of the game, it’s easy to feel overwhelmed, especially with increased difficulty. Stay calm and don’t let a single wrong order derail your progress. Customers might still accept slightly imperfect patties, so focus on the next order instead.

    You can refer to the receipt on trays to confirm details before marking an order complete. Additionally, a label system can help you keep track of which burger belongs to which order. Make it a habit to double-check to avoid confusion.

    By following these tips, you can efficiently manage your fast-food restaurant and keep your customers happy!

  • Quick Ways to Earn Cash in Farming Simulator 25

    Quick Ways to Earn Cash in Farming Simulator 25

    At its heart, Farming Simulator 25 revolves around earning money. Even if your main motivation for playing FS25 is a love for farming, you can’t ignore the fact that running a successful operation requires significant funds for costly machinery, land, and various resources. Sometimes, you just need to boost your income.

    The following techniques and strategies can help you generate more cash than you’ll need. Some are straightforward and quick, providing that extra boost to your finances, while others may demand more time and effort but come with higher profit potential. These methods cater to all types of players, from wealthy farmers to those deep in debt.

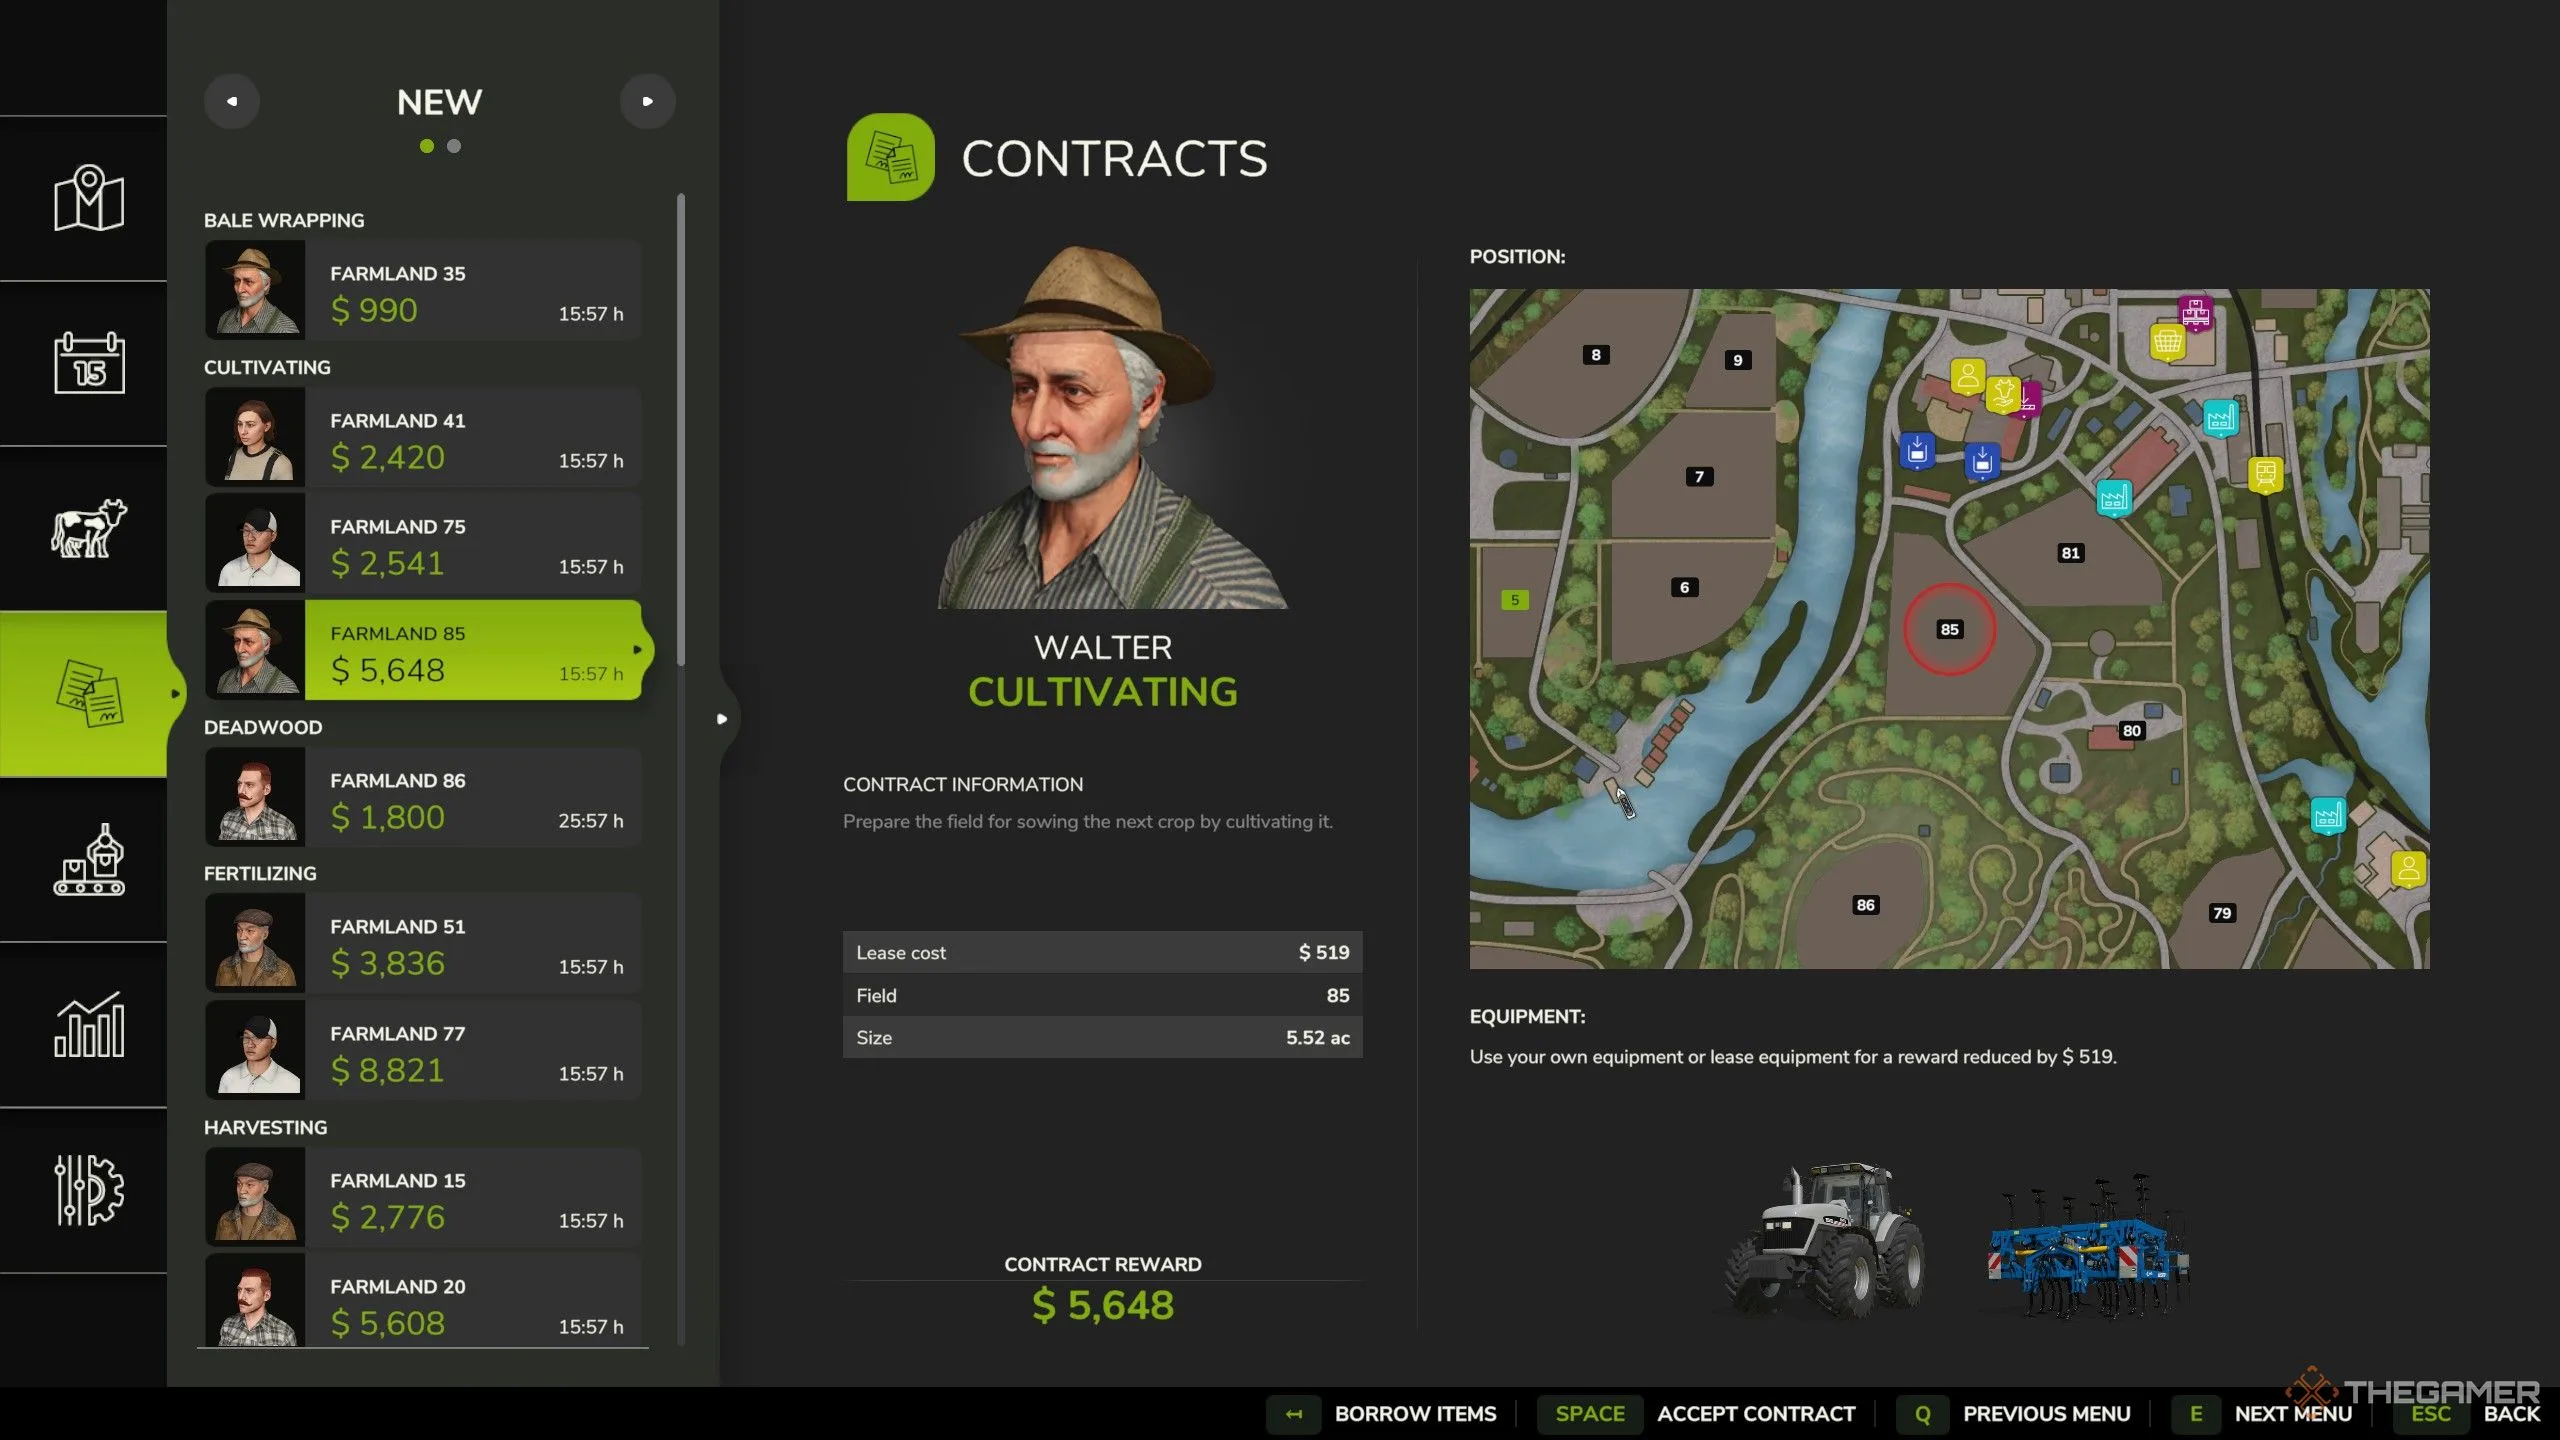
    Complete Contracts

    One of the simplest ways to earn some cash is by taking on the game’s built-in contracts. These contracts provide short-term tasks that you can complete on chosen fields, covering every aspect of farming, from weeding to harvesting. You may also encounter various other jobs, like removing rocks, cutting trees, or transporting logs. The payment for these tasks varies based on their complexity and the size of the land involved.

    Claiming simple tasks on larger fields is a smart strategy for making quick money, as jobs like cultivating, plowing, or weeding can be completed easily. The best part? You don’t even have to do the work yourself. By renting equipment for a small fee and hiring an AI worker to manage the task, you can focus on your own farm and collect the payment once the task is finished!

    Purchase Power Generators

    Investing in power generators is one of the most effective ways to create a steady stream of passive income. If you have the capital to invest, the more generators you buy, the more money you’ll make every month. The returns come in pretty quickly too, with every generator typically paying for itself within a year.

    The Large Solar Collector is an excellent investment. It’s more affordable compared to other generators, occupies less space than turbines, and offers a favorable profit-to-investment ratio.

    Do keep in mind that the monthly income estimates are based on ideal weather conditions; cloudy or rainy weather could diminish your overall profit.

    Convert Trees to Wood Chips

    Forestry can be a lucrative venture if you know how to tap into it. Instead of selling logs directly or turning them into production goods, consider using a wood chipper to process them. Selling wood chips can be very profitable with minimal equipment requirements.

    To maximize your earnings, all you need is a chainsaw, a wood chipper, a tractor with at least 150 horsepower, and a trailer. If you want to be environmentally friendly, consider getting a stump grinder and a tree planter to replace trees you cut down.

    Here’s a simplified process to create wood chips:

    1. Take your tractor, trailer, and wood chipper to your chosen logging area.
    2. Use the chainsaw to cut down a tree close to the ground.
    3. Trim excess branches with the chainsaw if desired.
    4. Cut the tree into logs weighing under 200 kg (the maximum you can lift by hand).
    5. Feed the logs into the wood chipper.
    6. Transport the resulting wood chips to your local biomass plant for sale.

    Pine trees are an excellent choice for this activity due to their straight structure and less dense wood. The best time to sell wood chips is in January since tree growth isn’t affected by the seasons, allowing you to harvest and sell without losing out on profit.

    Convert Grass to Silage

    Many experienced players agree that silage is incredibly profitable. This fermented grass product requires a multi-step process but can be produced in large quantities throughout much of the year, yielding substantial profits.

    If you already engage in raising animals, you probably have the necessary equipment on hand. Making silage demands several tools, depending on the method you choose—be it baling or using silage bunkers.

    Here’s what you will generally need:

    • Mowers (for the front and back of a tractor)
    • A windrower
    • A baler and a bale wrapper (if using the baling method)
    • A forage wagon and a silage leveler (for bunker method)

    Starting with a field of grass, the process involves mowing, windrowing, and choosing between baling or using a bunker for storage.

    For baling:

    1. Gather the cut grass with a baler.
    2. Wrap the bales.
    3. Wait about two months.
    4. Collect and sell the bales.

    For using silage bunkers:

    1. Use a forage wagon to collect the grass.
    2. If you don’t have a bunker, purchase one.
    3. Fill the bunker, compact the grass, and cover it.
    4. Wait two months, then uncover and sell.

    Silage is consistently priced throughout the year, meaning you can sell it whenever you want. Producing it can become a regular activity given the quick growth cycle of grass, making your farming operation more profitable over time.

  • Top Strategies for Earning Cash in TCG Card Shop Simulator

    Top Strategies for Earning Cash in TCG Card Shop Simulator

    Guide to Success in TCG Card Shop Simulator

    In TCG Card Shop Simulator, you embark on an exciting journey to build and manage your own card shop. However, turning your aspirations into reality in just one day is out of reach. You’ll have to focus on purchasing products, drawing in new customers, and expanding your inventory to transition your empty store into a profitable business. Although the tasks may seem daunting, the primary goal remains clear: increase your revenue.

    With various strategies and products available to boost your earnings, identifying the most profitable ones is critical. Which items yield the highest returns? This guide will delve into the best money-making tactics you’ll want to embrace as you navigate this thrilling simulation game.

    Focus on Affordable and Bulk Products

    Understanding customer behavior is key; they tend to buy more when they see a variety of items available. Therefore, it’s wise to concentrate on stocking affordable options like basic booster packs and card sleeves in the early stages of the game. Keeping your shelves well-stocked with these products creates a reliable way to generate income.

    These low-cost items also require minimal display space, allowing you to sell them in larger quantities. During the early game, avoid heavy investments in expensive items that take up too much room, like board games. Instead, hold off on purchasing these until you have the licenses for bulk items.

    When placing orders, remember to buy multiple items at once to cut down on shipping fees, and opt for larger bundles (64 units) to maximize savings.

    Don’t Overlook Selling Individual Cards

    Selling single cards can significantly boost your shop’s earnings. Aim to have at least three or four display tables dedicated to these cards. Before closing for the night, open booster packs and display the cards as singles. High-value cards can provide a considerable boost, especially early on.

    Bear in mind not to price single cards too steeply. A profit margin of 10-20% is generally well-received by customers. For common or lower-value cards, consider pricing them at market value or adding a small markup.

    During business hours, consistently monitor your display tables to ensure they remain stocked. Regularly refresh these tables, even if that means opening more booster packs or adding cards purchased from customers.

    Leverage Deals from Customers Selling Cards

    You’ll notice customers approaching your register with a little red exclamation mark, signaling they want to sell cards. Engage with them to see their offers and the prices they’re requesting.

    Your goal in these exchanges is to purchase cards below market value. If a card is priced at $50, for example, propose an offer of $35. You can then resell for a margin of 10-20% over the market price. Just be careful not to lowball; if your offer is too low, customers might refuse to sell.

    Sometimes, these negotiations allow for back-and-forth offers, so be prepared to adjust your bids gradually.

    Manage Your Game Tables Wisely

    At the onset, game tables won’t yield sizeable profits, but tracking player attendance is essential. More players mean you can host larger tournaments, which translates to extra income later on.

    Although game tables take up space, don’t overcrowd your shop with them early on. Three to four tables are typically adequate. As your business expands, feel free to add more.

    Furthermore, if customers are still at the tables near closing time, don’t rush to skip ahead to the next day. Allow games to finish; these individuals might still make purchases, possibly boosting your profits.

    Broaden Your Product Selection

    To attract diverse customers, enhancing your product variety is critical. Some customers may enter your shop searching for specific items, like a niche board game. Before expanding your inventory, ensure you have sufficient shelving; trying to cram too many products into a small space isn’t effective.

    When your financial standing is solid, consider investing in double-sided shelves to maximize your space while offering a wider product assortment. Eventually, you might replace standard shelves with these optimized options.

    If funds allow, look into obtaining licenses for new products. This investment will further diversify your offerings and draw in a larger customer base.

    Effectively Control Growth and Staffing

    As you consider expanding your shop, always keep an eye on your profits—growing too quickly can lead to increased rent and make it difficult to stay financially stable. Ensure consistent income before upgrading your space.

    The same principle applies to hiring employees. Initially, workers may not be essential, given the associated costs. Low-wage employees tend to work slowly, which may hinder service during busy times.

    Save hiring for when your shop is larger and you can handle a greater volume of customers. This approach will help maintain profitability while ensuring consistent growth.

    In the later stages of the game, you’ll need staff to help streamline operations, especially cashiers. Prioritize hiring individuals with high work speeds to boost efficiency. You can also improve cashier efficiency by setting rounded prices, as this speeds up the checkout process.

    Capitalize on Morning and Night Rushes

    When starting a new day, your first task should always be to open your shop as quickly as possible. Procrastinating can lead you to miss out on early morning customers. Save any orders or organizational tasks for the evening when things decompress.

    Similarly, if players are still at the tables at night, be patient before closing; wait for them to finish their games, as they might make purchases afterward. New customers may also arrive while they finish up.

    By following these tips, you’ll be well on your way to building a thriving card shop in TCG Card Shop Simulator. Happy selling!

  • Beginner’s Guide: Essential Tips for TCG Card Shop Simulator

    Beginner’s Guide: Essential Tips for TCG Card Shop Simulator

    TCG Card Shop Simulator enables players to dive into the exciting world of owning their own card shop. Your main objective is to expand your store and boost profits by selling items like booster packs, single cards, board games, and accessories. There are various methods to earn money within the game as well.

    For example, setting up tables in your store can attract card game lovers who will pay for the experience. Additionally, customers might come to you with cards they want to sell, which opens up opportunities for you to flip them for profit. If you’re looking to get started, here are some helpful tips for beginners!

    Make the Most of Your Mornings and Evenings

    Once you flip your sign to say ‘Open,’ the game timer will start. It’s crucial to manage this time wisely. Make sure to open your store promptly to catch the morning rush. In the evening, when the timer halts and it’s time to wrap up for the day, don’t close immediately.

    Remaining customers might still make purchases or new ones could walk in. After dealing with customers, you can use the rest of the time to restock products, arrange your displays, or place orders for more stock. This preparation will set you up for success the following day.

    Pay Attention to Customer Feedback and Reviews

    Throughout the day, various customers walk through your doors, many of whom will leave reviews and ratings. To keep your customers happy, it’s essential to pay attention to their feedback. If you frequently receive comments about overpriced products, consider adjusting your prices to stay competitive.

    Aim to maintain a profit margin of around 10 to 20 percent. Setting fair prices will attract more customers, and as you level up your shop, you’ll see even more foot traffic.

    Occasionally, customers might complain about bad odors in your shop. Buying air fresheners can help keep your store smelling pleasant and customers satisfied.

    Set Up Your Air Freshener System

    Some customers may not be very concerned about cleanliness, leading to unpleasant odors that can put others off. You can often identify these customers by the green fumes around them; they could harm your store’s reputation.

    To combat this, consider investing in two Auto Scent Machines close to your entrance. These machines activate when customers who might have odors enter, helping to eliminate any unpleasant smells.

    Unfortunately, simply having the machines isn’t enough. Be sure to stock up on Cleansers from the Accessories section to keep them working effectively.

    Single Cards Could Be Your Best Source of Income

    While there are numerous ways to make money in the game, single cards can yield high profits. Keep your card display tables fully stocked. Rare cards typically bring in the most cash, while even common cards can still turn a profit if priced correctly. Avoid overpricing; aim to sell cards at market value or slightly above it, around 10 percent.

    In the early game, rare cards can provide a substantial financial boost, helping lay the groundwork for a stable economy.

    Collecting Cards Might Not Be a Good Idea

    You might occasionally encounter customers wanting to trade cards with you. However, these offers don’t come often, and the cards they propose might not be worth much. Depending on trades isn’t sustainable if you aim to have a diverse collection.

    The best strategy is to focus on selling cards through your display tables rather than building up your personal collection.

    Keep Your Store Organized and Avoid Clutter

    Whenever you buy items, they come in boxes. If you don’t put everything on shelves, you’ll end up with clutter. Fully stocking your shelves is vital. To maximize space, if there are just a few items left on a shelf, either transfer them to another shelf or unpack them to make room for new products.

    Instead of individually placing items from returning boxes to shelves, carry the box and directly stock from it for efficiency.

    If you have to leave boxes on the floor, stack them neatly and group similar items together to minimize clutter.

    Carefully Evaluate Employee Hiring

    Managing a growing store becomes increasingly challenging, and hiring help may become necessary. However, it’s important to make this decision carefully. Initially, you can handle most tasks on your own.

    When you hire a worker, you’ll incur an initial processing fee as well as daily salaries. Always aim to hire the best staff available, even if they come at a higher cost, as they can improve your store’s efficiency.

    If you decide to hire a cashier, consider straightforward pricing. For example, use whole numbers rather than odd figures like $2.95, as this can streamline transactions and enhance customer satisfaction.

  • The Ultimate Guide to Pigs in Farming Simulator 25

    The Ultimate Guide to Pigs in Farming Simulator 25

    Quick Links

    Farming Simulator 25 offers players more than just the chance to grow crops. It includes a variety of livestock that players can manage. Just like in real farming, the livestock can provide various resources—from meat to supplementary products and passive benefits.

    Pigs are one type of animal you can farm in the game. They strike a balance in terms of management: not as easy as bees but not overly complicated either. The investment of time and effort in caring for pigs can yield significant returns, both financially and in useful byproducts.

    Construction for Keeping Pigs

    There are several structures you can build for housing pigs. Most of these structures operate similarly and serve as upgrades, which is reflected in their pricing.

    Building Price Description
    Pig Pasture 20,000 Holds 36 pigs. This is the most basic structure for keeping pigs, requiring manual water filling and offering no slurry collection.
    Pigsty 67,000 Holds 50 pigs. The first pig building that automatically provides water and allows slurry collection.
    Shed With Pig Pasture 44,000 Holds 25 pigs. The smallest option but includes automatic watering and allows for slurry collection, an upgrade from the Pig Pasture.
    Pigsty 2 109,000 Holds 109 pigs. A larger version of the original pigsty with an increased capacity.
    Pigsty 3 164,000 Holds 275 pigs. The most expensive pigsty with the highest capacity, maintaining the same functions as its predecessors.

    How to Feed Your Pigs

    Feeding pigs is straightforward as they are not picky eaters. You can sustain them using two primary methods.

    Feeding Your Pigs with Crops

    Pigs can consume a variety of crops you cultivate, including:

    • Corn
    • Wheat
    • Barley
    • Canola
    • Sunflowers
    • Soybeans
    • Potatoes
    • Sorghum
    • Sugar Beets

    These crops can serve as a steady food source. However, if you aim to sell crops for profit or use them in other supply chains, this approach could lead to conflicts with your profit goals.

    A smart way to manage feeding is to keep dedicated fields close to your pig enclosures. This will help you avoid mixing up crop purposes or forgetting to feed pigs before selling a crop.

    Rotating Crops

    If you’ve activated seasonal growth, be aware that during winter months, the necessary crops for feeding pigs will not grow. During this period, you have the option to either purchase pig feed in the store or store enough food in a silo throughout the year.

    It’s also crucial to pay attention to your pig’s nutritional needs. A consistent diet of just one type of feed, like sunflowers, won’t promote optimal growth. Rotating between staple foods, grains, root vegetables, and proteins will keep your pigs healthy and productive.

    Feeding Your Pigs with Pig Feed

    You can conveniently purchase pig feed from the Packs > Animals section in the store. It costs €1,000, making it an affordable option for easy pig care. However, using purchased feed may decrease your overall profits since you’re not utilizing homegrown crops.

    Storing Your Pig Food and Straw

    Loading food for your pigs is largely similar across different types of enclosures. For each building, an area marked with a food symbol indicates where to unload the pig food. Simply drive your transport vehicle to this symbol, drop off the food, and it will automatically load into the pig’s storage.

    Straw is handled similarly but does not need to be loaded in the Pig Pasture. For other structures that require straw, deliver the straw in the same manner as the food.

    How to Collect Slurry

    Collecting slurry is straightforward but requires the right equipment. You’ll either need a slurry tanker for transporting large amounts or a slurry spreader for smaller quantities. Pricing starts at €31,500 for a spreader and €37,500 for a tanker, both available in the Yield Improvements section of the store. A tractor is necessary for towing either of these vehicles.

    How to Buy Pigs

    You have two options for purchasing pigs, with one being more convenient than the other.

    You can buy pigs that are either zero months old or three months old, with older pigs priced higher.

    Buying Pigs at Your Pigstys

    Purchasing pigs directly at your pigsty ensures they load instantly into their new home, blending convenience with a slight increase in per-pig cost, eliminating the need for an animal transport vehicle.

    Buying Pigs from an Animal Dealer

    Alternatively, you can acquire pigs from an animal dealer in town. They offer various animals and allow you to bypass the delivery charges associated with transporting pigs to your operation.

    The Life of a Pig

    In the game, there are three cosmetic varieties of pigs:

    • German Landrace
    • Bentheim Black Pied
    • Berkshire

    Young Pigs

    Pigs aged zero to six months cannot reproduce and will spend their time eating, sleeping, and playing. Once they reach six months, they start reproducing, providing you with additional pigs without needing to purchase new ones.

    Adult Pigs

    Adult pigs can be sold for profit. However, consider that selling pigs without transporting them will yield lower profits. Furthermore, maintaining a healthy pig population is essential for sustained reproduction and future profitability.