الوسم: shrine

  • Completing All Druidic Shrines in Tainted Grail: The Fall of Avalon

    Completing All Druidic Shrines in Tainted Grail: The Fall of Avalon

    In Tainted Grail: The Fall of Avalon, you’ll discover intriguing Druidic Shrines scattered across various regions. These ancient altars, left by the land’s guardians, provide more than just backstory; they offer lasting benefits that can significantly improve your character’s defense and attack capabilities. To activate a shrine, you’ll need to make an offering, but the perks you receive are definitely worth it.

    Let’s delve into how these Druidic Shrines function, the offerings you’ll need, and the specific buffs and armor sets available in each area. Whether you’re looking for a boost in power or unique armor, seeking out these shrines is a smart move on your journey.

    What Are Druidic Shrines?

    Druidic Shrines are distinct landmarks found across every zone in Tainted Grail: The Fall of Avalon. Each region contains seven shrines, each requiring a single Animal Part as an offering. Though the offering type is consistent across all shrines, the bonuses stack permanently. Each time you activate a Druidic Shrine, you gain a 5% increase in incoming healing and a 3% boost to critical damage.

    Tip: Don’t overlook shrines in high-risk areas. You can often make your offering and slip away without engaging in fights.

    In addition to these buffs, you’ll be rewarded with a specific piece of armor related to your current region. In the Horns of the South, for example, you’ll gradually collect the Waning Moon set. In Cuanacht, you’ll gather the Horned Warden armor, and in Forlorn Swords, the powerful Archdruid armor. The rewards are given in a fixed order, no matter the sequence in which you visit the shrines.

    Druidic Shrines in Horns of the South

    Here’s where you can find all the Druidic Shrines in the Horns of the South:

    • Nestled in a rocky chasm along the road north of the Abandoned Stronghold.
    • On the beach directly west of the Mansion By The Beach.
    • West of the Sunken Village, at the entrance to a narrow pathway between cliffs on the beach.
    • South of the Horns of the South, along the beach against a cliff.
    • At the top of a raised rocky path northeast of Blood Lake.
    • East of the Ruined Broch, north of the path along the stone walls.
    • Directly north of Archspire, on the other side of some stone slabs.

    Druidic Shrines in Cuanacht

    Here’s where to locate all the Druidic Shrines in Cuanacht:

    • Directly west of High Cliff Gate.
    • East of the Derelict Amphitheater, across the river in a grassy clearing.
    • South of the Last Tree, just across the bridge.
    • Following the river’s edge south after crossing the eastern bridge from Wyrd Tower.
    • Right next to the second Wyrd Tower by the massive vertebrae, at the end of the northern path.
    • Northeast of The Swamps, beside the Forgotten Gate.
    • South of The Swamps, across a wooden bridge.

    Druidic Shrines in Forlorn Swords

    Here are the locations of all the Druidic Shrines in Forlorn Swords:

    • Where the grass meets the snow, northeast of the Stagfather Shrine near a fork in the road.
    • From Volker Village, along the southern road on the right side.
    • Next to an icy cliff near the Lake of The Primordial Beast, west of the Warrior Grave.
    • At the end of a winding road that twists southwest from the Theud Village fast travel point.
    • Southeast of Gunnvaldr Stronghold, nestled between tall rocky terrain and a sheer cliff.
    • At the entrance to the southern mountain pass of Forlorn Swords Main Gate, leading to Cuanacht.
    • Southwest of Frozen Lake, across both roads and close to a cliff.

    These locations will help you efficiently find Druidic Shrines and reap their benefits as you explore the vast world of Tainted Grail: The Fall of Avalon.

  • Completing All Stagfather Shrine Locations in Tainted Grail: Avalon

    Completing All Stagfather Shrine Locations in Tainted Grail: Avalon

    Tainted Grail: The Fall of Avalon offers an expansive world filled with diverse shrines. Some shrines provide temporary boosts, while others grant permanent advantages or serve as challenges to assess your skills. Among these, the Stagfather Shrines stand out in their appeal.

    In each area, there are three of these shrines, which challenge players to hunt spectral Wyrddeer within a time limit. Finishing these challenges earns you unique crafting materials and special recipes. Since these are one-time events, you’ll need to act quickly—Wyrddeer can escape if not defeated promptly. It’s wise to use your King’s Power and slowing spells to manage the pursuit, and don’t forget to rely on robust ranged or melee attacks to take them down quickly.

    Rewards for Completing a Stagfather Shrine Trial

    Upon completing a Stagfather Shrine trial, you will gain valuable materials essential for high-level crafting and alchemy. The rewards vary, depending on whether it’s your first attempt or a rerepeat. First-time completions are especially rewarding, providing unique recipes in addition to rare items.

    Rewards include:

    • The Stag’s Defiance (Recipe – First Time)
    • The Stag’s Woe (Recipe – First Time)
    • Wyrddeer Stew (Recipe – First Time)
    • Wyrddeer Pelt
    • Wyrd Antler Fragments
    • Wyrd Bones
    • Wyrd Venison
    • Ethereal Cobwebs

    Horns of the South Stagfather Shrines

    For the first shrine, begin at the Deserted Settlement. Move east into the sparse forest, just north of the road, and slightly veer south. You’ll soon spot the Stagfather Shrine.

    To reach the second shrine from the Ruined Broch, head northwest, passing large rocky formations. The shrine will be directly ahead. If you reach the ruined King’s Road and twisted trees, you’ve gone too far.

    Starting at the Abandoned Village for the last shrine, travel north along the road until you find a bridge over a river. Cross the bridge, then immediately turn left onto the adjacent path. Follow the road west between two large stone masses, and you’ll eventually discover another Stagfather Shrine at the end.

    To unlock the Prey of the Wyrdness achievement, rest at a bonfire near the second shrine and awaken during the nightly Wyrdness to trigger an ambush event.

    Cuanacht Stagfather Shrines

    For the first shrine, begin at The Swamp fast travel point. This one is simple to locate—head a short distance east through some twisted trees, and you’ll find the Stagfather Shrine.

    From the Wyrd Tower for the second shrine, travel directly southwest along the road, shifting more eastward when the path splits. Watch out for redcaps, bandits, and bears in the area. You’ll soon see the Stagfather Shrine to your left, nestled in a field full of pink flowers.

    The third shrine is east of the Plains. Start there and follow the road leading east, through grassy terrain and cliffs on both sides, passing massive standing stones crowned with giant antlers. Once the rocky path transitions to open land, move south to find the Stagfather Shrine.

    Be cautious around the Plains shrine; even high-level players may find the bears and buggane in the area quite dangerous.

    Forlorn Swords Stagfather Shrines

    Begin at the Zone Gate 2 fast travel point, heading south past the Forlorn Swords Northern Gate, following the main path. Eventually, you’ll notice a rocky outcropping to your left. Continue south around the outcrop until you spot an upward slope. Follow that path to find the Stagfather Shrine.

    For the next shrine, start at the Frozen Lake fast travel point. Head north, crossing a small bridge, and you’ll reach a crossroads. The Stagfather Shrine will be visible northeast across the road.

    The final shrine requires you to head east from Ulfr Village. Follow the road and take the wooden lift down to the bottom of the cliff. Stick close to the cliff wall heading north until you encounter the Stagfather Shrine along your route.

  • Unlocking and Solving Makurukis Shrine in Zelda: Tears of the Kingdom

    Unlocking and Solving Makurukis Shrine in Zelda: Tears of the Kingdom

    Among the 152 shrines featured in Zelda: Tears of the Kingdom, several early-game shrines act as tutorials for the game’s mechanics. One such shrine is the Makurukis Shrine, which instructs players on how to utilize bows effectively against both stationary and moving adversaries.

    Although this shrine does not present any puzzles or challenging tasks, it does reward you with a Light of Blessing, which you can use to enhance your health or stamina. This makes Makurukis Shrine particularly appealing for completionists.

    Location of Makurukis Shrine

    You’ll find Makurukis Shrine in the western part of Hyrule Ridge. It’s situated southwest of Lindor’s Brow Skyview Tower, right next to the Tabantha Bridge Stable. This shrine also provides a fast travel option to the stable.

    The shrine is located south of Mount Rhoam, with coordinates of (-2851, 0624, 0233). Approach its sigil to unlock the shrine and prepare for a combat challenge.

    Walkthrough for Makurukis Shrine

    Instead of puzzles, Makurukis Shrine features a combat challenge called Archery. Your goal is clear: hit the enemies in the head with arrows.

    Before you enter the main area, grab a bow and arrows from the left side. You’ll receive a brief tutorial on bow usage: hold down ZR to draw the bow, aim with the left analog stick, and release the ZR button to shoot your arrow.

    Consider using motion controls to enhance your aiming when targeting enemy heads.

    Your first task is to shoot the head of a stationary soldier construct. It’s pretty straightforward: aim at the glowing eyes and fire an arrow. Afterward, two additional soldier constructs will appear.

    One of these constructs is mobile, making it a bit trickier to aim for its head. Successfully hit the heads of both constructs to complete your objective.

    Upon completing this task, a small door will open, granting access to the altar room. Inside, you can open a treasure chest to obtain a Strong Construct Bow in Zelda: Tears of the Kingdom. To finalize your visit, interact with the sigil on Ruru’s altar to receive a Light of Blessing, marking your completion of Makurukis Shrine in Zelda: TotK.

  • Locating and Solving the Ishodag Shrine in Zelda: Tears of the Kingdom

    Locating and Solving the Ishodag Shrine in Zelda: Tears of the Kingdom

    The Ishodag Shrine in Zelda: Tears of the Kingdom focuses on the use of wind currents and Zonai fan devices. As an early-game shrine, it acts as an introduction for beginners to familiarize themselves with the Ultrahand and Ascend abilities.

    This guide will assist you in locating the shrine and completing it efficiently.

    Where to Find Ishodag Shrine

    You can find the Ishodag Shrine in the northeastern part of Hyrule Field, situated directly northwest of Lookout Landing and north of Mount Gustaf. Its location is close to the Hebra region border, with coordinates at (-0880, 0421, 0049).

    This shrine is accessible fairly early in the game.

    Ishodag Shrine Guide

    The challenge in the Ishodag Shrine is called The Windy Device. As the name suggests, the solution revolves around using the Zonai Fan device to reach your objective.

    Use the Ultrahand ability to grab a fan device and place it on the floor near the platform. Activate the device, then jump and deploy your Paraglider to land on the platform above.

    Next, grab another Zonai fan and attach it to the side of the plank so that it faces outward. Now, take the plank and place it on the water with the fan facing you.

    Step onto the plank and activate the fan. The fan boat will propel you across the pond. Once you reach the next platform, collect another Zonai fan and turn right to spot a broken bridge.

    Attach the fan to the edge of the bridge and activate it to reposition the bridge. Use the Ascend ability to ascend the bridge and open the treasure chest to claim an Opal.

    Once you’ve retrieved the Opal, return to the bridge and detach the fan. Network both fans from the surrounding area to the lift’s base, ensuring they both point downwards for proper lift-off.

    Step onto the lift and activate the fans. This will elevate you to the top of the Ishodag Shrine in Zelda: Tears of the Kingdom. Interact with the sigil near Rauru’s Altar to complete the puzzle and earn a Light of Blessing as your reward.

  • Completing the Glyph Parchment Shrine in Core Keeper’s Sunken Sea

    Completing the Glyph Parchment Shrine in Core Keeper’s Sunken Sea

    As you venture through the vast biomes that extend from the Core in Core Keeper, you’ll stumble upon various ancient ruins, some exposed due to looting or the passage of time, while others remain securely sealed. While many of these ruins hold outdated technology or minor treasures, some are much more significant.

    Among them, one ruin floats on a solitary island in the Sunken Sea. If you pass by, you’ll notice a chest concealed behind an unusual locked door. Digging won’t get you through, so to access the treasure inside, you’ll need to harness ancient technology to craft the Admin Key.

    How to Prepare and Locate a Forlorn Metropolis

    The Admin Key is a special item used to unlock the Sunken Shrine in the Sunken Sea. To create it, you’ll need three unique crafting materials along with the purchasable Empty Crystal recipe:

    • Shutdown Protocol
    • Anomaly Report
    • Overwrite Transport

    To reach the Sunken Sea, you must defeat the first three bosses – Glurch, Ghorm, and Malugaz. Place their dropped trophies in their respective totems at the Core to remove the Great Wall, and locate the biome beyond its border.

    These three materials can only be found in exclusive areas of the Forlorn Metropolis sub-biomes, situated in the Sunken Sea and often appearing amidst the open water, unless they intersect with land or other mid-game biomes.

    Before you set out, ensure you have at least reinforced Octarine Armor, some powerful weapons, bridges, and enough food and potions. The sub-biome is extensive, and you’ll encounter multiple enemies in a single room who can hit hard with long-range magical attacks, even if you’re prepared.

    Having a Boat is essential for traversing the waters easily without the hassle of building numerous bridges. You can craft the basic model at a Boat Workbench using 80 Planks, 50 Scarlet Bars, and 20 Mechanical Gears.

    If you’ve already explored the Desert of Beginnings and started creating Galaxite Bars, the Galaxite Chakram is an excellent weapon for the Forlorn Metropolis because it frequently bounces off room walls.

    Player character navigating a boat in the Sunken Sea in Core Keeper.

    Once prepared, begin boating across the expanse of the Sunken Sea, concentrating on the widest water areas and searching for large structures in the water.

    Forlorn Metropolis sub-biomes will appear as square-shaped connections of rooms and hallways, unlike the land formations, with their building blocks displayed in light and dark blue-green colors on your map.

    A helpful strategy to locate a Forlorn Metropolis is to first boat around and identify at least one edge of the Sunken Sea. This will help you establish some boundaries, increasing your chances of discovering one.

    Each Forlorn Metropolis will always feature two to four open entrances for docking, which may occasionally harbor enemies and items like the Vending Machine that sells various food dishes.

    Inside, you will face Caveling Scholars and Core Sentries, both capable of launching magic attacks and the sentries utilizing an area-of-effect stomp.

    How to Locate the Broken Cores

    Within these areas, you can find various unique items, such as Crystal Lamps and Ancient Chests containing Sunken Sea loot like Octarine Ore. However, the main goal is to discover the special Broken Core Room scenes.

    The Shutdown Protocol, Anomaly Report, and Overwrite Transport can only be obtained by interacting with the Broken Cores found in these specific Forlorn Metropolis sub-biomes that are typically larger than usual.

    • Shutdown Protocol: Approximately 550 tiles from the Core.
    • Anomaly Report: Approximately 650 tiles from the Core.
    • Overwrite Transport: Approximately 750 tiles from the Core.

    Finding at least one of the sub-biomes containing a part of the Admin Key will assist in determining the locations of the other two, as they are usually in proximity to each other.

    These rooms are among the largest within the sub-biome and are generally situated in the center, displaying a unique appearance on the map.

    A large view of a Forlorn Metropolis structure surrounded by land and water in Core Keeper.

    They will always feature two to three lines intersecting with a gray square, which represents the Broken Core, but will lack the blue or green centers that mark the City Park and City Plaza scenes.

    Upon discovering the Broken Core Rooms, approach the Broken Core and interact with it. A mini-inventory will appear, revealing one of the three crafting materials.

    Be sure to inspect the Ancient Chest found in each of the three Broken Core Rooms, as they contain unique crafting materials necessary for making the Phantom Spark bow.

    How to Craft the Admin Key

    Player crafting the Admin Key in their base, showing progress.

    After collecting the three essential items from the Forgotten Metropolises, the final component you’ll need is the Empty Crystal.

    This recipe can be purchased from the Cloaked Merchant for 3,000 Ancient Coins after you’ve activated the Core by placing all three trophies from the early-game bosses into their corresponding statues.

    After defeating Ghorm the Devourer, the Cloaked Merchant and their furniture item will become available. As with other NPCs, you can house them in your base by placing their Mysterious Idol in an appropriate room.

    Next, add the Empty Crystal to your hot bar and ensure you have the Shutdown Protocol, Anomaly Report, and Overwrite Transport in your inventory simultaneously, as it won’t work otherwise.

    Activate the Empty Crystal to trigger a progress bar on your screen. Once filled, the three items will merge with the Empty Crystal to create the Admin Key, allowing you to unlock the Sunken Shrine.

    How to Find and Open the Glyph Parchment Shrine

    Map view showing the player by the Glyph Parchment Shrine in Core Keeper.

    The Glyph Parchment Shrine can be found in the open waters of the Sunken Sea, located 500 tiles from the Core.

    It appears as a small, lightbulb-shaped island featuring a ruins room similar to the Musical Note Rooms but with a visible Titan Chest inside and a large, ornate door that has a diamond-shaped hole.

    If you’ve discovered the Forlorn Metropolis containing the Shutdown Protocol, there’s a good chance the Sunken Shrine is nearby, so you can easily boat there from the Forlorn Metropolis.

    Once you find the shrine, approach the door and interact with it. This will open a mini-inventory where you can place the Admin Key, unlocking the door.

    Inside, you’ll find several breakable items from the Forlorn Metropolis, unique furniture, and a Titan Chest hidden behind a Throne, which contains valuable loot: 25 Gold Bars, 15 Ancient Gemstones, and the unique Glyph Parchment recipe needed to craft the Phantom Spark bow.

  • Unlocking the Forest Shrine on Luma Island: A Step-by-Step Guide

    Unlocking the Forest Shrine on Luma Island: A Step-by-Step Guide

    Luma Island is filled with various ruins from different civilizations that once inhabited it. You’ll discover small structures that might have served as homes, massive temples packed with both traps and treasures, and even enigmatic locked shrines.

    It appears every region boasts at least one shrine. If you’ve interacted with the Talking Stones and picked up on the island’s lore, you’ll likely realize that these shrines are magically sealed. To unlock their treasures, you’ll have to traverse the more dangerous parts of the Forest and gather additional Offering Crystals.

    All Forest Offering Crystal Locations


    Much like the Tepid Offering Crystals you come across on your farm or in town, the Forest area has its own variant: the Forest Offering Crystal.

    This time, there are only nine to discover, reduced from the previous total of 11. Most of these crystals require you to access the eastern part of the Forest.

    You can reach this section by navigating through a small cave located at the northwestern edge of the Forest. This cave will lead you to the eastern side.

    You can create a permanent bridge between the two areas by kicking down the tree log located at the top of the hill connected to the cave’s eastern exit.

    Forest Offering Crystal

    How to Find It

    Crystal 1

    On the western side of the Forest, follow the path along the river until you reach the cave entrance at the northwestern end. Walk under the rock arch nearby, and you’ll find the Crystal in a small alcove, behind some bushes.

    Crystal 2

    On the western side of the Forest, head to the sizeable lake in the southern part and follow the shore to the slope with the Mushroom Man’s store. Halfway down, take the path that curves back around the cliff. The Crystal is at the path’s end, beneath a stone bridge.

    Crystal 3

    On the eastern side of the Forest, go down the hill next to the tree log bridge but stop before reaching the small ruins. Start clearing the trees just before reaching it and follow the cliff edge around to a small hill near a Leech Plant. The Crystal is located on top of a rock formation at the end of the path.

    Crystal 4

    On the eastern side of the Forest, head down the hill next to the tree log bridge, and cut down the trees near the small ruins. Keep clearing the area and head towards the small mountainous corner with rocks and a broken ladder. You can repair the ladder using five Reeds and three Forest Wood; climb up to find the Crystal on the cliff.

    Crystal 5

    On the eastern side of the Forest, head down the hill next to the tree log bridge, and start clearing the trees near the small ruins. Move southeast until you reach a campsite you can restore, then continue past that and the nearby ruins. The Crystal is around the corner, close to the cliff.

    Crystal 6

    Go to the eastern side of the Forest, follow the path through the quicksand area, and then northeast towards the lake in the upper corner. Move to the lower left corner of the lake and follow the path along the cliff to find the Crystal.

    Crystal 7

    Travel to the eastern side of the Forest, past the quicksand area, and navigate around the northeastern mountain. Pass by the unlit torch in the cave and go towards the mossy well. Clear the trees to the left, climb up the hill towards the mountain, and the Crystal will be on a cliff nearby.

    Crystal 8

    On the eastern side of the Forest, head down to the beach on the northeastern edge. Move south along the shore and stop at the cave entrance halfway down. Repair the ladder at the entrance using 5 Reeds and 3 Forest Logs, then climb up to find the Crystal on the cliff.

    Crystal 9

    Go to the eastern side of the Forest, head to the northeastern corner, and pass the trio of Toxic Mushrooms. Follow the path down to the southeastern ruins. Look for a large cluster of trees between two pillars and a Toxic Mushroom, and cut them down. The Crystal is hidden in the center.

    Where to Use the Forest Offering Crystals


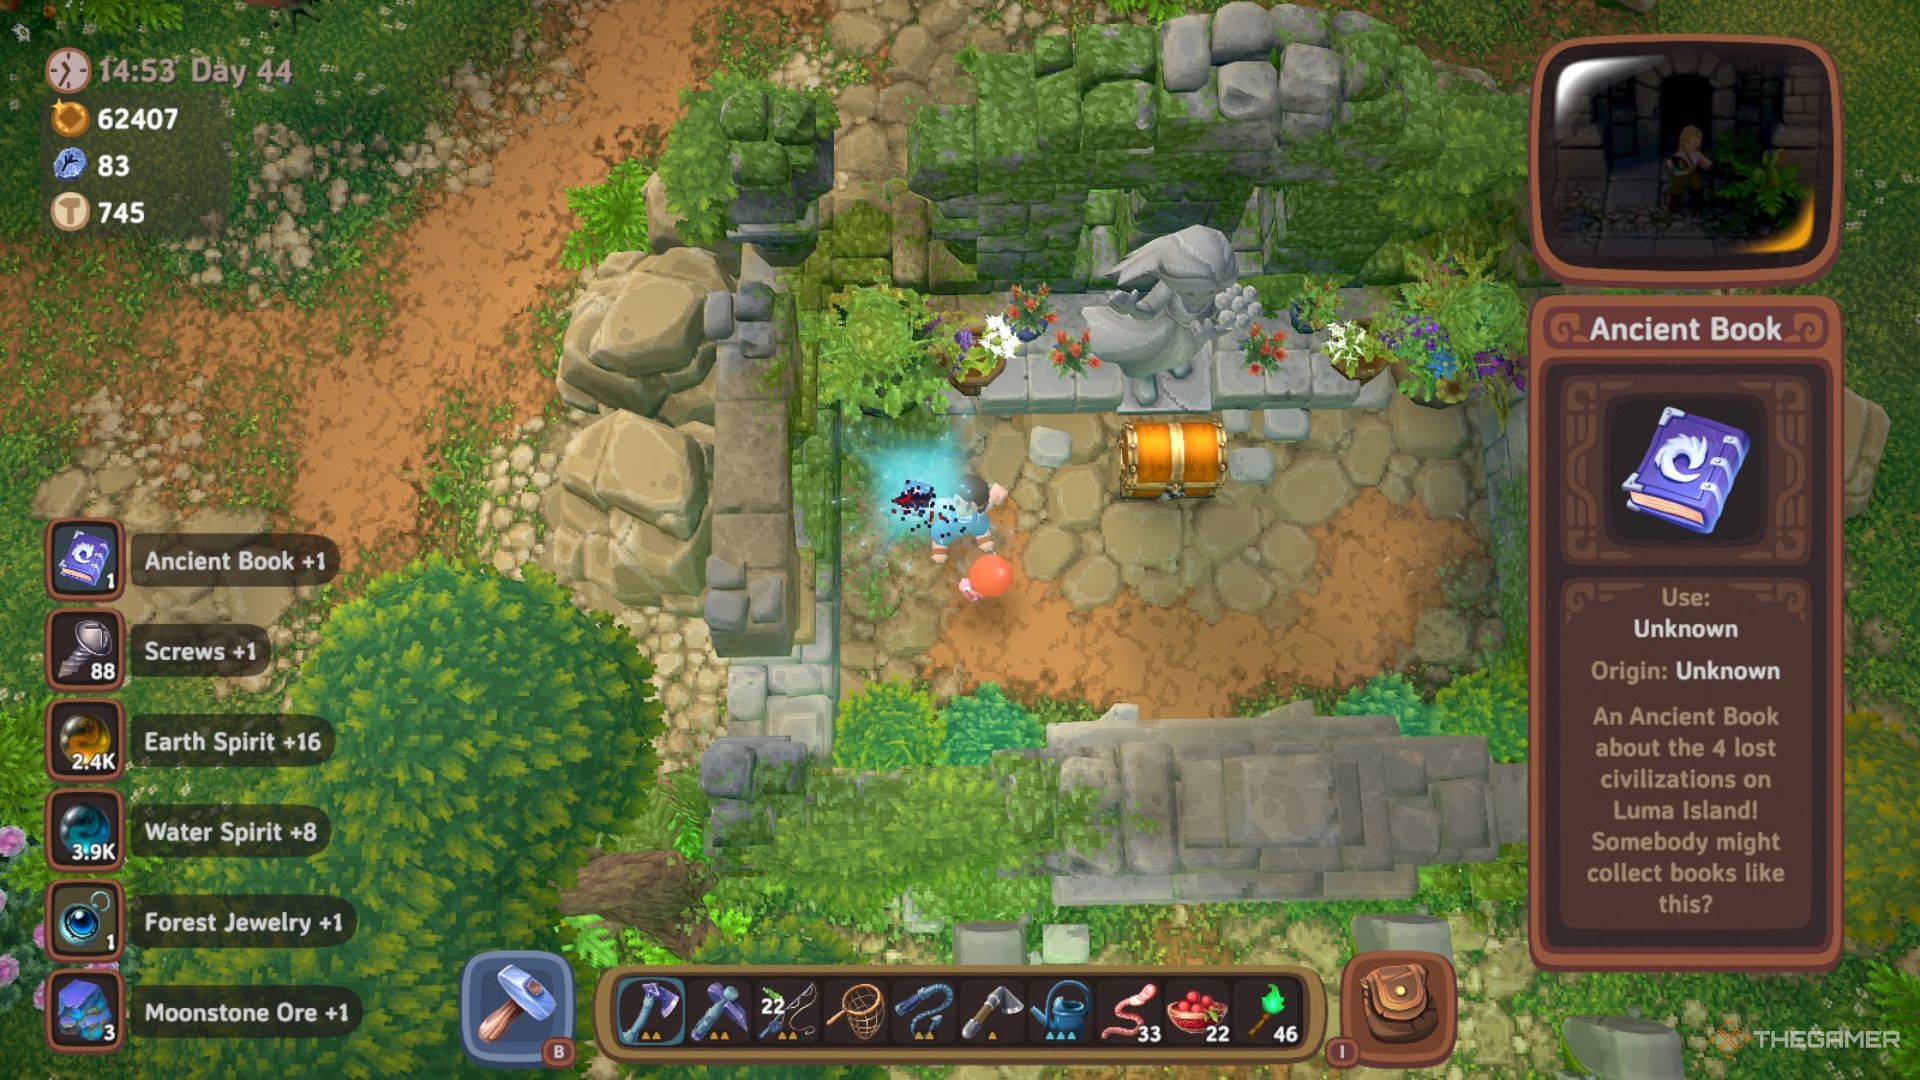
    Player character holding up an Ancient Book that they found in the Forest Shrine in Luma Island.

    Once you’ve gathered at least eight Forest Offering Crystals, make your way to the eastern section of the forest. Follow the path until you come across the area with quicksand.

    After maneuvering through the quicksand using the rocks and floating platforms, continue eastward, and you’ll find the Forest Shrine at the fork in the path that diverges to the northeast and southeast.

    Place a Forest Offering Crystal into each unoccupied Forest Offering Pedestal. Once all eight pedestals are filled, the Forest Shrine door will unlock. Inside, you’ll receive one Purple Chest that always contains one Forest Jewelry, an Ancient Book, and an Orange Chest filled with a Luma Egg and additional Forest loot.