In Forza Horizon 6, your vehicle can feel like a rocket or a shopping cart depending on a few basic settings many players overlook. This is where tuning comes into play, giving you control over your car’s personality. You can modify everything from grip and braking to how the car handles when taking a corner too aggressively.
It may sound complicated, but mainly it involves small tweaks that can have a big impact on your driving experience. This guide explains each tuning option in simple words so you can understand what’s happening under the hood without needing a mechanic. Once you grasp what each setting does, finding the perfect setup becomes easier, more enjoyable, and less of a guess.
### How To Tune Your Car
To tune your car in Forza Horizon 6, go to the main menu, select the Cars tab, pick the vehicle you want to adjust, and then choose “Tune Car.” This will open the full tuning menu where you can change performance aspects like handling, gears, suspension, and more.
#### Tuning Options Explained
| Type of Tuning | What It Does | Tips |
|———————-|——————————————————————————-|———————————————————————————————————————————-|
| Tire Pressure | Alters how much grip your tires have. | If your car doesn’t turn well, lower the front tire pressure to improve grip. If it slides too much, lower the rear tire pressure. Higher pressure makes the car feel faster but reduces grip in corners. |
| Gearing | Controls how quickly your car accelerates and your top speed. | If your car hits top speed too fast and stops accelerating, make the gears longer. If it feels slow off the line, make the gears shorter. |
| Alignment | Helps tires sit better during turns. | Adding a little negative camber improves grip when turning. Slight toe-out makes steering faster. Small adjustments are best. |
| Anti-Roll Bars | Manages how much your car leans in turns. | To help turn better, soften the front anti-roll bar or stiffen the rear one. To prevent sliding, do the opposite. |
| Springs | Adjusts stiffness and ride height. | Stiffer springs reduce bounce and instability; softer springs increase comfort but can make handling sloppy. Lowering can make the car faster but may risk scraping the ground. |
| Damping | Controls suspension response to bumps and turns. | Increase damping if car bounces excessively; lower if it feels overly stiff. Adjust gradually for control. |
| Aero | Adds downforce at high speeds. | Increase rear downforce if sliding in corners; decrease for higher top speed on straight roads. More downforce equals better grip but slower speed. |
| Brakes | Sets braking strength and modulates how the car slows down. | If wheels lock up during braking, lower brake pressure. If slowing down too slowly, increase it. Fine-tune brake balance for stability. |
| Differential | Manages power distribution to the wheels. | To prevent pushing wide during acceleration, lower the acceleration differential. To stabilize when slowing down, raise the deceleration setting. |
Getting familiar with each of these tuning options helps you craft a ride that feels just right, whether you’re racing on tight corners or cruising straightaways.
Google Home is one of the top smart home platforms currently available. Beyond voice control, it can synchronize with thousands of compatible devices, making it easy to automate various tasks around your home. Setting up a Google Home device, like the Nest Hub or Nest Hub Max, is straightforward—you just unbox it and place it on your countertop. However, to maximize its capabilities, spending a few extra minutes customizing and fine-tuning its settings can make a big difference.
Getting Started: Plug in Your Device
Begin by connecting your Google Home device to a power outlet. Keep your smartphone nearby—this will be helpful for pairing the devices. Choose a central, accessible spot for your device to ensure it hears your commands clearly. Positioning it in a prominent location allows you to take full advantage of its voice-recognition features without restrictions.
Download the Google Home App
The Google Home app is available for both iPhone and Android devices through the App Store and Google Play, respectively. When installing, grant location permissions when prompted—this helps your device provide accurate weather updates, locate nearby services, and more. Make sure your phone is connected to your home Wi-Fi network so the app can communicate seamlessly with your device.
Sign In and Set Up Your Device
You’ll need a Google account to use a Google Home device. If you already have a Gmail account, simply sign in. If not, visit gmail.com on your computer or smartphone to create a new Google account. Once logged in, open the Google Home app. It should detect your new device automatically, or you can manually initiate setup by tapping the ‘+’ icon and selecting ‘Set Up Device.’ Confirm the pairing by verifying that the code displayed on your device and your phone match. Assign the device to a room, and you’re ready to go.
You may also be asked to enter your address during setup—this is important for local weather reports, traffic updates, and navigation. Properly setting your location helps your device provide accurate, relevant information.
Personalize Your Device and Connect Accounts
Next, Google Home will prompt you to establish connections with various services:
Voice Match: This feature allows your device to recognize your voice and distinguish between household members. It’s ideal for personalizing your responses, but it involves sharing additional data, which some users might prefer to skip.
Music Services: Link your favorite streaming platforms such as Spotify, Pandora, or Apple Music to enable voice-controlled playback.
Video Services: If your device has a display, you can connect popular video platforms like YouTube, Netflix, Hulu, HBO Max, or others, for a richer multimedia experience.
Google Meet: Some devices support making or receiving video calls through Google Meet—consider enabling this feature if you want to use your device for video conversations.
Google Photos: Connect your Google Photos account for slideshows and visual displays of your favorite images, turning your device into a digital photo frame.
Once setup is complete, the app may offer a tutorial—it’s a good idea to take a moment to familiarize yourself with how your device operates. Afterward, you can explore additional customization options to tailor your experience.
Adjust Preferences and Personal Details
To further personalize your device, tap the menu in the app and go to ‘Account Preferences.’ Here, you can adjust various settings, such as language preferences or news sources. You can choose which news outlets your device reads from, customizing your daily briefing to include NPR, CNN, Fox News, or other preferred sources. You can also change what the device calls you by updating your nickname or even teaching it how to pronounce your name correctly.
Enable Shopping and Smart Home Integration
Your Google Home device can also facilitate shopping. Set up voice purchasing features by accessing the device settings and enabling ‘Recognition & Sharing’ options, then linking your payment methods. This allows quick, hands-free purchases with voice authentication for security.
In addition, integrate your smart home devices—over 30,000 products from various brands are compatible. Through the app, add devices to your ‘Home Control’ section, ensuring they’re all on the same Wi-Fi network to enable control via voice commands. During setup, you can specify device types (e.g., smart light, fan, appliance), which helps Google better recognize commands and provides more accurate control. Once connected, you can script routines, such as dimming the lights or adjusting the thermostat, to be triggered by a single voice command.
Troubleshooting Common Setup Issues
If you encounter issues during setup—like the device not appearing or the app freezing—don’t get discouraged. Often, restarting your device and app can solve these hiccups. Unplug your Google device, wait at least ten seconds, then plug it back in. Close the Google Home app completely or swipe it away from your recent apps list, and try reinitiating the setup process.
Ensuring your Wi-Fi connection is stable and restarting your router can also help. If problems persist, consult online forums such as the Google Nest Community, where many users share helpful troubleshooting tips based on their own experiences.
With patience and persistence, you’ll have your Google Home device fully configured and ready to enhance your smart home experience.
Traditional bulbs are becoming a thing of the past. Smart lights have taken over, offering a simple and budget-friendly way to dive into smart home technology. While the specifics can differ based on the brand, the fundamental steps for setting them up are quite similar across most types.
Even if you’re not particularly tech-savvy, rest assured that installing these lights is straightforward. In fact, smart lights are often suggested as an ideal starter option for anyone new to smart home tech.
How to Install Smart Lights
The installation process for smart lights is generally consistent, whether you’re working with a smart bulb, light panels, or a light strip. The app’s on-screen prompts will assist you with any specific requirements based on the brand you choose.
Step 1: Download the respective app and create an account.
Note: It’s advisable to use a single account for all your smart devices. Many brands allow you to sign in with your Gmail account.
Step 2: Open the app and look for the “Add device” or “Set up new light” option. The wording may vary by app. For this step, we’ll use the AuraScape Smart Hexagon Panels from AIDot as an example.
1. Screenshot
Step 3: Select the device you’re setting up. Depending on your app, you might be able to scan a QR code, search for nearby devices, or select from a list. If your lights don’t appear, ensure they are in pairing mode.
1. Screenshot
Step 4: Once you’ve selected your lights, move on to connecting them to your home Wi-Fi network.
1. Screenshot
Step 5: (For smart light panels only) Indicate how many panels you have set up.
Step 6: Specify where the controller fits into your lighting arrangement.
1. Screenshot
Step 7: Finally, some devices may prompt you to connect with a smart home assistant like Amazon Alexa or Google Assistant. However, this step can also be completed later.
Smart lights offer incredible convenience, allowing you to say things like, “Alexa, turn off the bedroom lights,” all from the comfort of your bed. You can program schedules—like having your office lights turn on automatically at 7 AM—or set them to respond to motion.
In addition, smart light panels and strips add to your room’s atmosphere. They can change colors, sync with your music, and much more. Over the past five years, smart lighting technology has advanced significantly!
The Apple Intelligence Health Coach is a groundbreaking feature that leverages advanced technology to promote healthier living. Whether you’re looking to improve your fitness routine, monitor your health metrics, or receive personalized coaching, this tool offers an array of functionalities. This guide will take you through the setup process and highlight how to best utilize the Health Coach for your wellness journey.
Setting Up Your Apple Intelligence Health Coach
Prerequisites
Before diving into the setup process, ensure you have the following:
Compatible Apple Device: iPhone, iPad, or Apple Watch running the latest iOS or watchOS.
Latest Software Update: Always ensure your device is running the most recent version of its operating system.
Apple Health App: Pre-installed on Apple devices, this app is essential for the Health Coach’s operation.
Step-by-Step Setup
Open the Apple Health App:
Locate the Apple Health app icon on your device and tap it to open.
Create or Update Your Health Profile:
Tap on your profile picture or initials at the top right.
Fill in or update your medical information, including height, weight, and health conditions.
Enable Notifications:
Go to Settings > Notifications > Health. Turn on notifications to receive prompts and advice from the Health Coach.
Link Third-party Apps (optional):
Visit the "Health Data" tab to link third-party fitness and health applications, enhancing data collection for your Health Coach.
Start the Health Coach Feature:
Navigate to the "Browse" tab and select “Health Coach” (if available).
Follow the on-screen prompts to integrate your preferences for fitness, nutrition, sleep, and wellness.
Utilizing Your Apple Intelligence Health Coach
Personalizing Your Experience
To get the most out of your Health Coach, you can tailor the recommendations according to your unique lifestyle and goals.
Set Goals:
Establish fitness, dietary, and sleep-related goals within the app.
Daily Check-ins:
Engage with your Health Coach daily for motivational reminders and suggestions.
Health Metrics Monitoring:
Regularly check your heart rate, step count, and other vital statistics. Consider having medical checkups to ensure your data aligns with health standards.
Leveraging Recommendations
The Health Coach offers insights based on the data it collects. Here’s how to leverage its recommendations:
Fitness Suggestions:
Utilize personalized workout plans based on your progress and preferences.
Nutrition Advice:
Receive tailored meal plans and recipes adjusted to your dietary needs.
Sleep Improvements:
Get techniques and tips for improving sleep quality and establishing a routine.
Interactive Features
Goal Tracking:
Monitor your progress visually to keep you motivated.
Social Sharing:
Share achievements with friends or family to foster a supportive environment.
Virtual Coaching Sessions:
Engage in periodic virtual consultations if you link to a healthcare provider for comprehensive health management.
Integration with Other Apple Devices
If you own multiple Apple devices, make sure to integrate them for a more comprehensive experience.
Apple Watch:
Use your watch to capture real-time data, receive coaching prompts, and track workouts.
iPad:
Utilize the larger screen for detailed insights and meal prep guidance.
Troubleshooting Common Issues
In the course of using your Health Coach, you may encounter some issues. Here’s how to handle them:
Data Sync Problems:
Ensure Bluetooth is enabled and your devices are connected.
Check if your Health app is up to date.
Inaccurate Metrics:
Double-check your profile for any incorrect entries.
Notifications Not Appearing:
Revisit the notification settings and ensure they are correctly configured.
By setting up and utilizing the Apple Intelligence Health Coach correctly, you can transform your approach to health and wellness, paving the way toward a healthier lifestyle.
Wave farewell to some of the challenges associated with smart homes. A variety of new user-friendly features are being introduced to Matter, making it simpler than ever to set up your smart home and navigate the more frustrating aspects of adding new devices. These enhancements are part of the 1.4.1 specification, which was announced today by the Connectivity Standards Alliance.
One of the standout new features is the Multi-Device Setup QR Code. Previously, users had to scan each smart bulb or device individually for setup, which can be quite tedious and often requires the device to be powered on for the scan. Given that QR codes are typically located at the bottom of devices, this process could be challenging.
With the new update, users can scan just one QR code to configure multiple devices at once—provided that manufacturers enable this functionality in their products.
Another enticing addition is the capability to set up devices via an NFC connection. Although this isn’t a brand-new concept—companies like Apple HomeKit and LIFX have implemented it—it has not been widely adopted across the industry. By integrating it into the Matter protocol, this feature can reach a broader array of devices.
The final notable improvement is the Enhanced Setup Flow (ESF). When using the Google Home app to set up a new device, users often face interruptions to accept the manufacturer’s terms and conditions in a separate app. With the ESF, you can now agree to those terms without leaving the Google Home app, streamlining the process.
The 1.4.1 update is the first minor release under Matter, and while the changes may be incremental, they effectively tackle some of the primary concerns users have expressed about the protocol. Any enhancements that simplify the management of a smart home are certainly beneficial.
In Schedule 1, you have the opportunity to acquire several properties and set up your equipment to begin creating products for the customers of Hyland City. Initially, your choices will be limited because of budget constraints, but the Bungalow serves as your first property, providing ample space for building a functional production facility.
The Bungalow is situated in Westville, an ideal location thanks to its proximity to a gas mart, where you can easily access resources for your mixing needs. Additionally, you’re not far from your customers in Northtown and Downtown.
What Is the Optimal Bungalow Setup?
Here’s a list of the hardware and equipment you’ll need to optimize production in your Bungalow, ensuring you have nearly everything necessary until you earn enough to upgrade to a larger property.
Optimal Bungalow Setup
Name
Number of Units
Where to Buy
Bed
3
Hardware Store, Warehouse
Lab Oven
3
Warehouse
Mixing Station Mk2
4
Warehouse
Packaging Station Mk2
1
Hardware Store
Chemistry Station
3
Warehouse
Large Storage Shelf
3
Hardware Store
Cauldron
1
Warehouse
Brick Press
1
Warehouse
Drying Rack
2
Warehouse
Suspension Rack
6
Warehouse
Full Spectrum Grow Light
6
Warehouse
Air Pot
6
Warehouse
Pot Sprinkler
6
Warehouse
Room One
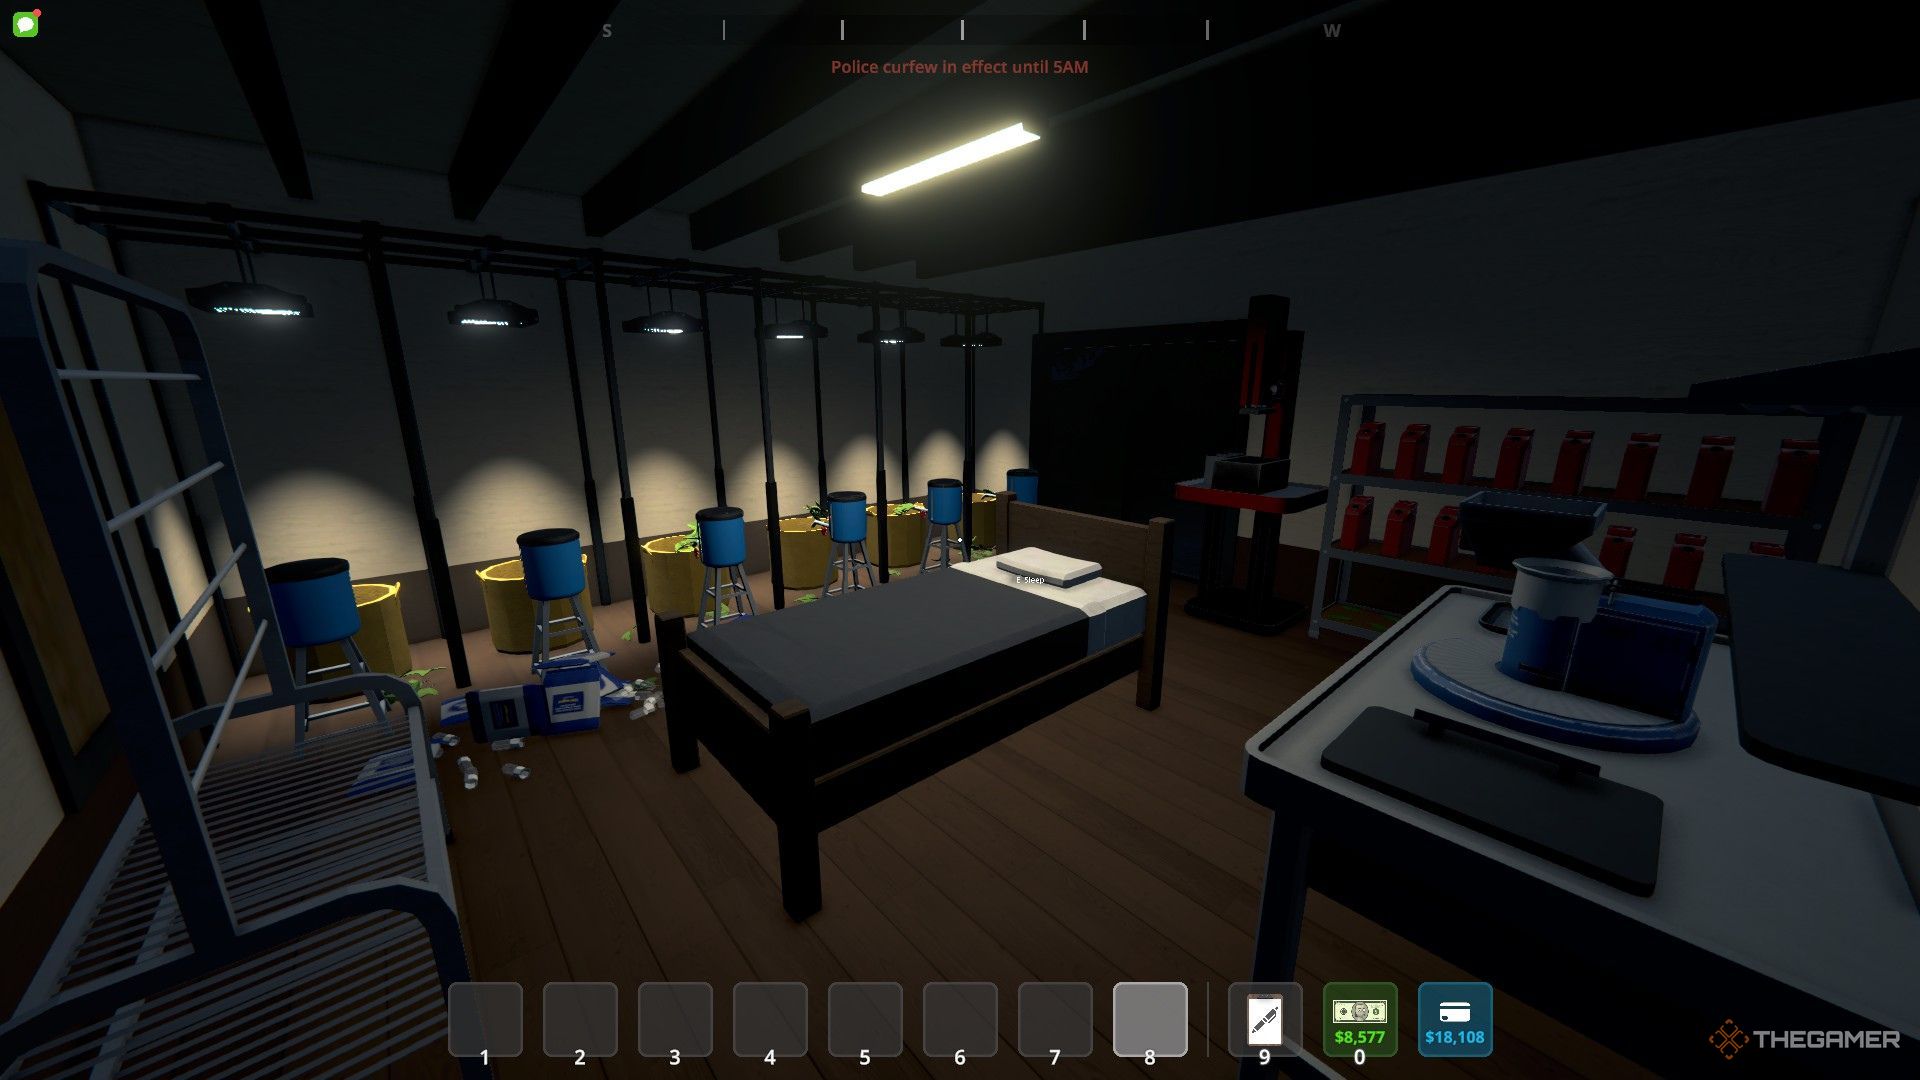
The first room of the Bungalow offers a lot of space. Your first task is to install the air pots and plant-growing equipment. Arrange the six pots along the south wall. You should install suspension racks above them to hang the grow lights and position the pot sprinkler in front of the pots.
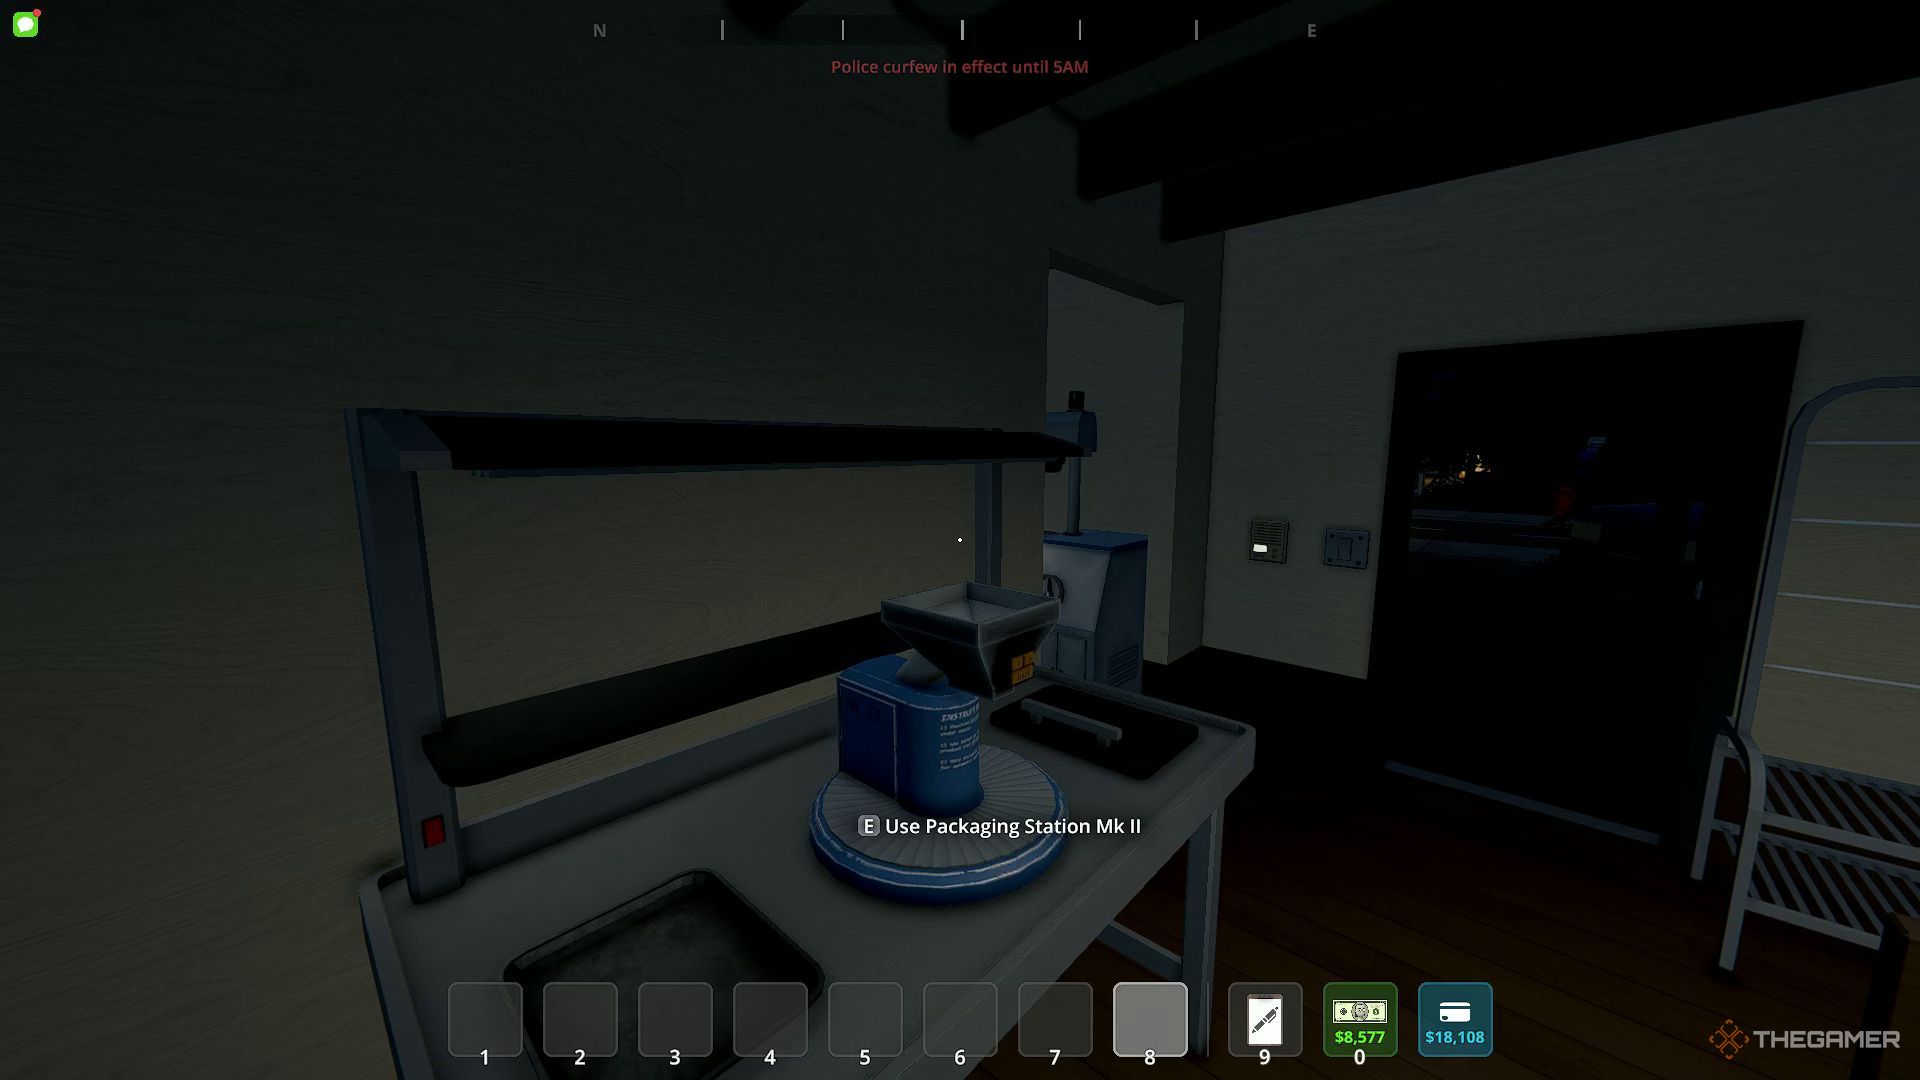
Fortunately, there’s still ample room for additional items. You can position a drying rack between the door and the pot sprinkler. Place the packaging station on the north wall. You might also want to set the shelf in the front-right corner near the kitchen entrance. Even after placing the packaging station, there will be enough central space for a bed. Plus, there’s just enough room left to fit the brick press between the sliding door and the storage shelf.
Kitchen
Position a storage shelf on the wall next to the counter and the entrance to the kitchen. It should be placed adjacent to the shelf from room one. This kitchen is large enough to accommodate four mixing stations. One mixing station can go on the north wall, next to the counter.
You can install two mixing stations on the east wall, one on either side of the door leading to room two. The last mixing station can be placed on the southern wall. After arranging these, set a bed by the sink. You won’t really need the sink, thanks to the pot sprinklers.
If you need more storage, you can substitute one of the mixing stations with an extra shelf.
Place a drying rack next to the bed, and there will still be enough central space for a cauldron.
Room Two
Room two serves as your cooking area where you or your chemist will handle all the food preparation. Here, you need to set up three chemistry stations on one wall and three lab ovens on the opposite wall, or you can switch their positions.
In the center of the east wall, you can add a shelf. You can also place a bed in the middle of the room for your staff if needed. This arrangement allows enough space for movement around the bed to access any of the stations.
Automation
You’ll require two chemists to manage all your cooking tasks. Assign one chemist to the three lab ovens and the other to the three chemistry stations. Managing the pots will be easier due to the pot sprinklers, but you may hire a botanist if necessary.
A botanist can oversee up to eight pots or drying racks, which aligns perfectly with the six pots and two drying racks found in your Bungalow. Alternatively, you can choose to hire a handler instead, or even both, provided you clear out some equipment to accommodate an extra bed. Once your team is set up, you’ll be fully prepared, and your Bungalow will function as an efficient production house until you upgrade to a bigger property.
Setting up an HP printer can sometimes be a straightforward process, but issues may arise that can complicate things. Below are some common problems and effective solutions to help you troubleshoot your HP printer setup.
Initial Installation Issues
Common Setup Problems
When setting up your HP printer, you might encounter several initial issues. Here are some common problems and how to address them:
Printer Not Detected: Your computer may not recognize the printer.
Wi-Fi Connection Issues: Difficulty connecting the printer to your home or office network.
Driver Installation Failures: Problems during the installation of printer drivers.
Steps to Resolve Setup Issues
Check the Power Supply:
Ensure the printer is plugged into a working electrical outlet.
Confirm that the power button is turned on.
Establish Connections:
For USB connections, ensure the cable is securely connected to both the printer and the computer.
For wireless setups, make sure the printer is connected to the same Wi-Fi network as your computer.
Install the Latest Drivers:
Visit the official HP website to download the latest printer drivers specific to your model.
Follow the prompts for installation to ensure proper functionality.
Connectivity Challenges
Troubleshooting Wireless Setup
Wireless connectivity is crucial for many modern printers, but it may not always function as expected. Follow these steps to troubleshoot wireless setup:
Network Issues:
Make sure your Wi-Fi network is operational and other devices can connect.
Verify that the printer is within range of the router.
Printer Network Settings:
Access the printer’s control panel to check or change network settings.
If needed, initiate a network configuration page to see current settings.
Steps to Fix Wireless Connectivity
Reboot Devices:
Turn off your printer and router, then turn them back on after a minute.
Reconnect your printer to the network following the manufacturer’s instructions.
Connect Using WPS (Wi-Fi Protected Setup):
If your router supports WPS, press the WPS button on the router.
Simultaneously, initiate the WPS connection from your printer.
Manually Configure Network Settings:
Use the printer’s control panel to manually enter the Wi-Fi network SSID and password.
Confirm connection by printing a network configuration page.
Software and Driver Issues
Diagnosing Driver Problems
Drivers are essential for establishing communication between your device and the printer. If you’re facing issues related to drivers, consider these points:
Outdated Drivers: Ensure you have the most updated drivers installed.
Incompatible Software: Confirm that your operating system is compatible with the printer model.
How to Address Driver Issues
Update Printer Drivers:
Navigate to the HP Support website and search for the latest drivers for your printer model.
Download and install any available updates.
Reinstall Drivers:
Uninstall the existing printer driver from your computer.
Restart your computer before reinstalling the new driver.
Use HP Smart App:
Download the HP Smart App from the HP website or your device’s app store.
The app provides step-by-step guidance for setup and troubleshooting.
Error Messages and Issues During Print Jobs
Common Printer Error Messages
Error messages can be frustrating, especially during important print jobs. Some typical error messages include:
“Cartridge Error”: Indicates problems with the ink or toner cartridges.
“Paper Jam”: A message suggesting that paper is stuck in the printer.
“Printer Offline”: The printer may not be connected to your computer or network.
Troubleshooting Error Messages
Resolving Cartridge Errors:
Check if ink or toner cartridges are properly installed.
Replace any old or empty cartridges.
Dealing with Paper Jams:
Carefully remove any jammed paper, following the path it would take through the printer.
Inspect the printer for any small pieces of torn paper that may remain.
Fixing Offline Issues:
Ensure the printer is turned on and connected to the network.
Go to the print settings on your computer and set the printer as the default.
By following these guidelines, you can effectively troubleshoot and resolve common setup issues with your HP printer, ensuring you spend less time fixing problems and more time enjoying the benefits of your device.
In today’s fast-paced business landscape, integrating Artificial Intelligence (AI) into customer service operations has become a necessity rather than a luxury. Organizations are realizing that AI can enhance customer experience, streamline operations, and significantly reduce costs. This article delves into the essential aspects of setting up an AI-powered customer service system.
Understanding AI in Customer Service
AI refers to computer systems capable of performing tasks that typically require human intelligence. In customer service, this encompasses various applications that enhance interaction quality and efficiency, such as chatbots, virtual assistants, and predictive analytics.
Key Components of AI Customer Service
Chatbots: These automated programs can engage with customers through chat interfaces, providing instant responses to inquiries.
Natural Language Processing (NLP): This allows machines to understand and interpret human language, enabling more meaningful interactions.
Predictive Analytics: This involves using historical data to foresee customer behavior and preferences, tailoring services to meet needs proactively.
Steps to Set Up an AI-Powered Customer Service System
Integrating AI into customer service involves several critical steps, ensuring that the system aligns with business goals and enhances customer satisfaction.
Step 1: Identify Goals and Objectives
Before implementing AI technology, outline clear goals:
Improve response times
Increase customer satisfaction
Reduce operational costs
Provide 24/7 support
Step 2: Choose the Right Technology
Selecting appropriate AI tools is crucial. Consider the following:
Chatbot Platforms: Explore platforms like Drift, Intercom, or Zendesk that offer user-friendly interfaces.
CRM Integration: Ensure your AI tool can integrate seamlessly with existing Customer Relationship Management (CRM) systems.
Scalability: Look for solutions that can grow with your business needs.
Step 3: Design the Customer Journey
Map out the customer journey to identify key interaction points where AI can intervene:
Pre-Purchase: Provide assistance through product recommendations and FAQs.
Purchase: Facilitate the checkout process with chatbots guiding customers.
Post-Purchase Support: Answer queries on order status, returns, and troubleshooting.
Step 4: Training AI Systems
AI technologies learn from data, necessitating a training phase:
Data Collection: Gather historical customer interactions for the AI to analyze.
Training Models: Use machine learning algorithms to improve the accuracy of responses.
Testing: Conduct trials using real customer scenarios to refine performance.
Best Practices for Implementation
To maximize the effectiveness of an AI customer service setup, follow these best practices:
Human Touch: Always provide an option for customers to connect with human agents when needed.
Feedback Loop: Regularly collect customer feedback to enhance AI performance and identify areas for improvement.
Monitor Performance Metrics: Track response times, customer satisfaction scores, and resolution rates to measure success.
Tracking Key Performance Indicators (KPIs)
In evaluating the success of an AI-powered customer service system, focus on these KPIs:
First Response Time: Measure how quickly customers receive a response.
Resolution Rate: Track the percentage of issues resolved during the first interaction.
Customer Satisfaction (CSAT): Use surveys to gauge customer satisfaction levels after interactions.
Challenges and Solutions
While implementing AI in customer service can yield significant benefits, certain challenges may arise. Here’s how to tackle them:
Challenge 1: Resistance to Change
Solution: Educate employees about the benefits of AI and involve them in the transition process. Provide training on utilizing the new tools effectively.
Challenge 2: Data Privacy Concerns
Solution: Ensure compliance with data protection regulations like GDPR. Be transparent with customers about data usage and security measures.
Challenge 3: Initial Investment Costs
Solution: Consider phased implementation to spread out costs over time and invest in a solution with a clear ROI.
AI-powered customer service setups can revolutionize how businesses interact with their clients. By following the outlined steps and adhering to best practices, organizations can create responsive, efficient, and customer-centric support systems. Embracing AI not only meets the demands of today’s consumers but also paves the way for innovative service delivery in the future.
In combat scenarios in Honkai: Star Rail, you can assemble a team of up to four characters while facing as many as five enemies simultaneously. To succeed in various endgame modes, it’s essential to establish a strong synergy among your team members.
Typically, your team should have a primary damage dealer, such as Mydei, a five-star Imaginary Destruction character, accompanied by support characters that enhance his abilities. The overall output of damage from Mydei is significantly influenced by the support characters you choose.
Top Mydei Team
The most effective team setup for Mydei includes:
Character
Role in Team
Mydei
Main Damage Dealer
Sunday
Support/Turn Advancement
Tribbie
Support/Sub-Damage Dealer
Luocha
Healer
To maximize Mydei’s potential, you’ll need to pair him with three limited five-star characters. Once you accumulate 100 Charge on Mydei, he enters a Vendetta state, allowing him to automatically attack his target whenever he takes a turn.
During the Vendetta state, Mydei remains in this powerful stance until he suffers three fatal hits. Notably, he does not expend any Skill Points while executing automatic attacks, and if you gain enough Charge, he can unleash a more powerful attack that inflicts additional damage.
Note: You can alter the primary target of his buffed attack using your Ultimate, allowing it to be directed at the opponent targeted by your Ultimate.
Mydei is a Skill-Point-neutral character, which means he can work well with Sunday, who can help him take additional turns for extra attacks. However, to optimize their synergy, you’ll need to adjust Mydei’s Speed so that he acts just before Sunday, enabling double attacks.
Additionally, Tribbie provides Mydei with All-Type Resistance Penetration and boosts Damage output while also dealing significant damage herself. Her damage scales with her HP, which gets augmented based on the overall team HP during her Ultimate, making her an ideal match for Mydei, who typically has over 8,000 HP.
Tip: Mydei already possesses a 56% Crit Rate through his base kit and the optimal relic set, while Sunday adds another 20%, resulting in a 76% Crit Rate during fights. This makes it much easier to achieve high Crit Damage with relics.
Luocha is another essential support for Mydei as he can restore HP to all allies whenever they attack an enemy within his area of effect, which has nearly constant uptime. This ability helps Mydei offset the HP drain from his attacks while enhancing his Charge generation.
Free-to-Play (F2P) Mydei Team
For those playing on a free-to-play basis, a viable team setup for Mydei includes:
Character
Role in Team
Mydei
Main Damage Dealer
Remembrance Trailblazer
Support/Turn Advancement
Bronya
Support/Turn Advancement
Gallagher
Healer
Fortunately, Mydei is one of the few characters who maintains solid performance even on a F2P team. This is largely due to the incredibly powerful kit that Remembrance Trailblazer brings, which can not only occasionally accelerate Mydei’s turns but also deliver extra True Damage based on his output.
If you have been playing Honkai: Star Rail for some time, especially as a F2P player, you may have Bronya, a Standard character. She synergizes well with Mydei, frequently advancing his turns and providing Crit Damage bonuses.
Tip: If Bronya isn’t in your roster, consider using Pela for an area-of-effect Defense reduction.
Gallagher plays a critical role in keeping Mydei alive in this setup by healing allies who attack enemies marked with his Besotted debuff. He also has the capability to lower the enemy’s Attack, decreasing the likelihood that Mydei will experience a fatal blow in many situations.
However, if you’re confident in your ability to protect Mydei, you might want to choose Lynx as a healer since she can boost his HP. While Lynx increases the chance of Mydei being attacked, he usually taunts enemies, which can make this less of a concern.
Asus AiMesh technology allows you to expand your Wi-Fi network seamlessly using multiple Asus routers. By creating a mesh network, you can eliminate dead zones and ensure consistent signal strength throughout your home. Adding an AiMesh node is a straightforward process, whether you’re adding a new router to an existing setup or starting from scratch. This guide will walk you through the steps to add an Asus AiMesh node efficiently.
Prerequisites for Adding an AiMesh Node
Before you begin the process of adding an AiMesh node, ensure you have the following:
Compatible Asus Routers: Check that the router you want to add as a node is AiMesh-compatible.
Firmware Updates: Both the main router and the new node should have the latest firmware installed for optimal performance.
Stable Internet Connection: A reliable connection is necessary to proceed with the setup.
Setting Up Your Main AiMesh Router
To start, set up your primary Asus router if you haven’t done so already. Follow these steps:
Power Up the Router:
Connect your main router to a power source and turn it on.
Connect to the Internet:
Use an Ethernet cable to connect to your modem, or set up a wireless connection.
Access the Router Settings:
Open a web browser on your computer or mobile device.
Enter the router’s IP address in the address bar (usually 192.168.1.1 or router.asus.com).
Log in using the admin credentials.
Configure Basic Settings:
Set up your Wi-Fi SSID, password, and any other essential configurations.
Adding an AiMesh Node
Now that your main router is ready, it’s time to add your AiMesh node following these simple steps:
Step 1: Prepare the AiMesh Node
Unbox and Connect:
Remove the AiMesh node from its packaging and connect it to power.
Position the Node:
Place it within a reasonable distance from the main router for optimal connectivity.
Step 2: Enable AiMesh on the Main Router
Go to AiMesh Settings:
In the router settings page, navigate to the “AiMesh” tab.
Initiate the AiMesh Setup:
Click on “Add AiMesh Node.”
Your router will start searching for available AiMesh nodes.
Step 3: Sync the AiMesh Node
Press the Reset Button:
On the new AiMesh node, locate the reset button. Press and hold it for about 5 to 10 seconds until the power LED starts flashing.
Connect to the Main Router:
The main router will detect the new node and begin the connection process.
Wait for the pairing process to complete, which usually takes a few minutes.
Step 4: Finalize the Setup
Check Connection:
Once connected, the AiMesh node’s LED light should indicate a successful connection. A solid light typically means it’s connected properly.
Configure Settings:
You can adjust settings specific to the AiMesh node through the router interface. Options include:
Changing the node’s Wi-Fi name and password
Configuring guest network settings
Prioritizing devices connected to the node
Troubleshooting Tips
If you encounter issues while adding your AiMesh node, consider these troubleshooting suggestions:
Distance: Ensure the AiMesh node is within the range of the main router. If it’s too far, the connection may fail.
Firmware: Verify that both the main router and the AiMesh node have the latest firmware installed.
Factory Reset: If the node isn’t connecting, perform a factory reset on the AiMesh node and try the setup again.
Network Refresh: Restart both the main router and the AiMesh node to refresh the network.
Benefits of Using Asus AiMesh
Using Asus AiMesh technology brings several advantages, such as:
Extensive Coverage: Eliminate Wi-Fi dead zones by extending your network coverage.
Seamless Roaming: Experience uninterrupted connectivity as you move through your home.
Easy Management: Manage all routers and nodes from a single interface, streamlining your network control.
By following these steps, you can easily add an Asus AiMesh node to enhance your Wi-Fi experience. Enjoy consistent and reliable internet connectivity throughout your living space!
Honkai: Star Rail frequently introduces powerful characters, but even the strongest members can fall short if they aren’t paired effectively. Forming a successful team hinges on the right combination of up to four characters, ensuring their strengths complement one another to secure victory in battles.
One noteworthy addition is Sunday, a five-star Imaginary unit introduced in the Version 2.7 update, known for being part of the Harmony path. Despite his strengths, he faces limitations with team options, apart from a handful of clear pairings.
Teaming Up with Jing Yuan
One of the most discussed aspects of the community post-Sunday’s introduction is how Jing Yuan is set to make a comeback in the game’s meta. Sunday introduces the unique ability to advance the turn of a summon, which is exactly what Jing Yuan needs. His previous drawback was the lengthy wait between Lightning Lord attacks.
With Sunday on your team, clearing high-level content becomes much easier, particularly in Pure Fiction and Memory of Chaos, thanks to the consistent damage output. While Robin typically doesn’t synergize with Jing Yuan, the frequent Lightning Lord attacks facilitated by Sunday make her a viable option, although energy regeneration can still be an issue.
Tip: When assembling this team, ensure Sunday has just slightly lower speed than Jing Yuan, allowing the latter to take two turns in succession.
You can also swap out Robin for Jade to provide buffs to Jing Yuan, significantly increasing damage and allowing for extra turns, particularly beneficial in Pure Fiction. Finally, Aventurine rounds out the team, generating additional follow-up attacks, aiding Robin’s energy recovery, and keeping everyone alive.
A DPS with Lingsha
Contrary to expectations, an Abundance character like Sunday can serve as a central DPS. When included in a Break-focused team with ample Break effects, Lingsha offers substantial damage output. Even when not in a specialized team, she consistently inflicts damage across all enemies using her Skills, Ultimate, and follow-up attacks. If tailored for critical hits, her capabilities can shine, although accessing the right supporting characters might be challenging.
Note: Since Sunday enhances both Crit Rate and Crit Damage, forming a competitive team is definitely achievable, even without a perfect supporting Light Cone.
Argenti, Sunday’s Alternative Team
While the Lingsha team has its quirky elements, another viable option exists for endgame content. Argenti, much like other Erudition characters, came with an impressive kit but had limitations due to support dependencies and the energy requirements for his Ultimates. Thankfully, with Sunday’s release, Argenti gains indispensable energy assistance as well as repeated turns, significantly enhancing his gameplay.
Advisory: Similar to the Jing Yuan configuration, it’s ideal for Sunday to have a slightly lower speed than Argenti to maximize the team’s effectiveness.
Conclusion
The synergy between characters in Honkai: Star Rail can make a significant difference in performance. Selecting the right combination and understanding each character’s strengths is key to overcoming the toughest challenges in the game.
Creating a home theater can transform your media experience, allowing you to enjoy movies, games, and shows just as you would in a commercial cinema—right in your living room. However, building your perfect home theater requires some planning and specific equipment. Below are the fundamental components needed to set up an impressive home theater.
Choosing the Right Space
Before diving into equipment, selecting an appropriate space is essential. Here’s what to consider:
Size of the Room: Ensure the room is large enough for a screen, seating, and acoustic treatment.
Lighting: Look for a space that can be darkened effectively. Consider blackout curtains or shades to reduce ambient light.
Layout: Think about the arrangement of furniture and equipment. A rectangular room is often better than a square one for sound distribution.
Essential Components of Home Theater
After determining the space, it’s time to invest in the main elements of your home theater setup.
A/V Receiver
The A/V receiver is the central hub for your home theater system.
Functionality: It processes audio and video signals, allowing you to switch between devices.
Channels: Choose a receiver with enough channels to support your surround sound system (typically 5.1 or 7.1).
Display Screen
The right display will significantly affect your viewing experience.
Projector vs. TV:
Projector:
Ideal for larger images.
Best for dedicated theater rooms.
Requires a dark room for optimal performance.
Television:
Convenient for multi-purpose rooms.
Better for bright environments.
High-definition options like 4K or OLED are recommended.
Audio System
Great audio can elevate your movie-watching experience.
Speakers: Consider the following configurations:
Soundbar: Compact and easy to set up; suitable for smaller rooms.
Surround Sound System: Typically includes:
Front Speakers
Center Channel Speaker
Subwoofer
Rear Speakers
Cables and Connectivity
Proper cables ensure that your equipment communicates efficiently.
HDMI Cables: Essential for video and audio signals.
Speaker Wires: Needed for connecting speakers to the receiver.
Power Cords: Check for sufficient outlets and power strips.
Comfortable Seating
Comfortable seating can make or break your home theater experience.
Recliners: Offers comfort and support for long viewing sessions.
Theater-Style Seats: Designed for true cinema enjoyment; might include cup holders.
General Seating: Sofas and sectionals can be suitable for casual settings.
Lighting Design
Lighting plays a pivotal role in creating the right mood for watching films.
Dimmer Switches: Allows for adjustable lighting levels.
Smart Lighting: Can be controlled via apps for customized atmosphere.
Accent Lighting: Use LED strips or spotlights to enhance the space without causing glare on the screen.
Additional Enhancements
Consider these extras to improve your home theater experience:
Streaming Device: A device like Roku, Apple TV, or Amazon Fire Stick caters to various streaming services.
Universal Remote Control: Simplifies the operation of multiple devices.
Acoustic Treatments: Sound panels and carpets can help dampen sound reflections and improve overall audio quality.
Setting Up a Home Network
A strong home network is vital for streaming and device connectivity.
Wi-Fi Router: Ensure it offers enough bandwidth for streaming high-definition content.
Ethernet Cables: For more stable connections, especially for devices often used for streaming.
Calibration
Once the setup is complete, consider calibrating your system:
Speaker Placement: Adjust positioning for optimal sound balance.
Video Calibration: Fine-tune settings for color accuracy, brightness, and contrast.
Room Acoustics: Make adjustments based on how sound interacts with your space.
By carefully considering each of these components, you can create a home theater that not only matches your aesthetic preferences but also delivers high-quality audio-visual experiences. Enjoy setting up your space and preparing for countless movie nights!
Building a gaming PC can be an exciting venture for both amateur and seasoned gamers alike. The costs associated with a gaming setup can vary significantly based on individual preferences, performance requirements, and budget constraints. Let’s break down the essential components and typical costs associated with a gaming PC setup.
The Base Components of a Gaming PC
When considering the total cost of a gaming PC, it’s crucial to factor in the main components that contribute to its overall performance. Below are the essential parts:
1. Central Processing Unit (CPU)
Entry-Level: $100 – $300
Mid-Range: $300 – $600
High-End: $600 – $1,000+
2. Graphics Processing Unit (GPU)
Entry-Level: $150 – $300
Mid-Range: $300 – $600
High-End: $600 – $2,000+
3. Motherboard
Basic Models: $70 – $150
Feature-Rich Options: $150 – $300
4. Memory (RAM)
8GB: $30 – $80
16GB: $80 – $150
32GB: $150 – $300
5. Storage Solutions
HDD (Hard Disk Drive): $40 – $100
SSD (Solid State Drive): $50 – $250
6. Power Supply (PSU)
Basic Models: $50 – $100
Higher Wattage/Certified Models: $100 – $200
7. Computer Case
Budget Cases: $30 – $80
Mid-Range Cases: $80 – $150
Additional Costs to Consider
Apart from the core components of a gaming PC, there are other crucial items that contribute to the overall gaming experience:
1. Monitor
1080p Displays: $150 – $300
1440p Displays: $300 – $600
4K Displays: $600 – $1,200+
2. Keyboard and Mouse
Basic Sets: $20 – $50
Mechanical Keyboards and High-Precision Mice: $50 – $200+
3. Audio Equipment
Headsets: $20 – $200
Speakers: $50 – $300
4. Gaming Chair
Budget-Friendly Options: $50 – $150
Premium Models: $150 – $500+
5. Software
Operating System (Windows): $100 – $200
Game Titles: $30 – $60 each, depending on sale seasons
Estimated Total Cost
To give a clearer picture, here’s an average breakdown of what to expect based on different setups.
Budget Setup
CPU: $200
GPU: $200
Motherboard: $100
RAM: $60
Storage: $70
PSU: $60
Case: $50
Total: $840
Mid-Range Setup
CPU: $400
GPU: $400
Motherboard: $200
RAM: $120
Storage: $150
PSU: $120
Case: $100
Total: $1,590
High-End Setup
CPU: $800
GPU: $1,200
Motherboard: $300
RAM: $250
Storage: $400
PSU: $150
Case: $150
Total: $3,250
Factors Influencing the Cost
Several key factors can influence the overall cost of a gaming PC setup:
Brand Preference: Some brands charge a premium for their reputation and features.
Part Availability: Prices may fluctuate based on market demand and availability.
Customization Needs: Custom-built PCs typically cost more but offer personalized performance.
Investing in a gaming PC can vary dramatically based on your needs, ensuring that you can find a configuration that suits your gaming lifestyle and budget preferences. Understanding what components you need and their associated costs can help you build a rig that delivers excellent performance without breaking the bank.
Setting up a home wireless printer can often feel like a daunting task, especially for those who are not tech-savvy. However, certain models stand out for their simplicity and user-friendly features. In this article, we will explore the easiest wireless printers to set up, making your printing experience hassle-free.
Factors to Consider When Choosing a Wireless Printer
When selecting a wireless printer, it’s essential to consider several factors that contribute to a smooth setup process. Here are some key elements to keep in mind:
Wireless Connectivity: Look for printers that support Wi-Fi Direct or have a simple connection process via WPS.
Mobile Printing Capabilities: Ensure that the printer is compatible with various mobile printing apps like Apple AirPrint and Google Cloud Print.
User-Friendly Interface: A printer with an intuitive touchscreen or easy-to-navigate buttons will simplify the setup.
Ease of Setup: Some printers come with guided setup features to assist you throughout the installation.
Top Picks for Easiest Home Wireless Printers to Set Up
HP Envy 6055e
The HP Envy 6055e is a versatile all-in-one printer tailored for home use. This model is particularly known for its straightforward installation process.
Features:
Easy Wireless Setup: Connect via the HP Smart app, making the process seamless on both iOS and Android devices.
Mobile Compatibility: Supports AirPrint and various other mobile printing platforms.
All-in-One Functions: Offers printing, scanning, and copying features.
Brother MFC-J995DW
The Brother MFC-J995DW is another excellent option for those looking for an easy setup process, combining functionality with user-friendly features.
Features:
Inkvestment Tank Technology: Comes with high-yield ink cartridges that last longer, reducing your need for frequent replacements.
WPS Setup: Quick and easy wireless connection via Wi-Fi Protected Setup.
Touchscreen Display: Intuitive control panel simplifies print tasks.
Canon PIXMA TR8620
Perfect for families and home offices, the Canon PIXMA TR8620 excels in convenience and ease of use.
Features:
Automatic Document Feeder: Makes multi-page copying and scanning simple.
Simple Setup: The Canon PRINT app provides straightforward wireless configuration, both for iOS and Android.
Versatile Paper Handling: Equipped to handle different paper sizes and types, enhancing functionality.
Step-by-Step Setup Guide for Wireless Printers
While each printer comes with its unique setup instructions, the basic steps are typically similar. Here’s a generic process to help you get started:
1. Unbox the Printer
Carefully remove the printer from its packaging and ensure all components are included.
2. Connect to Power
Plug the printer into a power source and press the power button.
3. Load Paper
Load printer paper into the designated tray according to the manufacturer’s guidelines.
4. Install Ink Cartridges
Follow the instructions to install the ink cartridges securely.
5. Connect to Wi-Fi
Using the Printer Display:
Navigate to the wireless setup option on the printer’s screen.
Select your Wi-Fi network and enter the password when prompted.
Using WPS:
Press the WPS button on your router.
Select the WPS option on the printer, allowing it to connect automatically.
6. Download Software
Install the necessary software on your computer or mobile device. This can usually be done by downloading it from the manufacturer’s website or using the provided installation CD.
7. Test the Printer
Print a test page to ensure everything is functioning correctly. Adjust settings as needed.
Tips for a Smooth Setup
Keep Your Router Close: Ensure the printer is within range of your Wi-Fi router for a stronger signal.
Update Firmware: Check for any firmware updates for your printer right after setup to ensure optimal performance.
Consult the Manual: If you encounter any issues, refer to the user manual for troubleshooting steps.
By considering the recommended models and following the setup guide, you can find a wireless printer that’s not only easy to install but also efficient for your home printing needs. Happy printing!
A Virtual Private Network (VPN) provides privacy by hiding your online activities and making your IP address untraceable. The most effective VPNs not only secure your internet connection but also grant access to streaming services worldwide, allowing you to experience international content as if you were a local.
Difficulty
Moderate
Duration
20 minutes
What You Need
A Windows PC or Mac
An internet connection
If you’re intrigued by the concept of a VPN but are uncertain about how to start, this guide will show you the ropes. A straightforward setup can mask your browsing behavior while keeping your IP address private. For a more comprehensive approach, you might consider a system-level installation that secures everything without requiring you to run a VPN app or extension. This guide covers both Windows and macOS options.
Sign Up and Install Your VPN Service
Regardless of whether you choose a well-known option like NordVPN or our current favorite, Surfshark, the simplest way to begin is through the VPN app. Most leading VPN services provide software for Windows, macOS, and Linux, along with mobile applications for Android and iOS.
Step 1: Download the relevant application from your VPN provider’s website or the appropriate app store and proceed with the installation. You will need to register for the service to obtain an account and log in to utilize the VPN.
Step 2: Most VPNs include a quick connect feature, so if you’re not picky about the server you use, just click that. Within moments, you should connect to the fastest available server.
Should you wish to appear as if you’re located in a specific country or wish to access services like Netflix via your VPN, you’ll need to select a particular server. Your chosen VPN will provide a list of available regions and might highlight those optimal for streaming. Use the interface provided by the VPN to select the server that meets your needs. Then, click the Connect or Quick Connect button, and wait for the confirmation that you’ve established a connection.
The Proton VPN app makes basic operation simple, though researching some features was necessary. Digital Trends
Step 3: If you prefer to manually choose a server, or at least connect to one each time your device starts, you can finish for today and start browsing securely with your new VPN. For a more automated experience, see if your VPN service provides options to connect automatically and launch upon startup. This is common among most services.
Head to the settings menu and locate the relevant options. Enable options for the VPN to launch with your operating system and connect on its own. The next time you turn on your device, it should automatically link to the fastest server.
Surfshark features a sleek design complemented by extra functionalities in the sidebar. Digital Trends
Alternative: Configure Your VPN Manually in Windows 11
If you prefer complete control over your VPN connection and are using Windows 11, you can use the built-in VPN configuration tool. Although this method requires more steps, it grants you greater control over your connection settings. Familiarity with Windows 11 will be beneficial, so consider doing some additional reading beforehand.
Before diving into the detailed steps, it’s wise to familiarize yourself with VPN protocols:
Understanding VPN Protocols
Older protocols like Point-to-Point Tunneling Protocol (PPTP) may be simpler to set up, but they carry risks due to vulnerabilities that expose them to potential attacks. It’s best to steer clear of PPTP.
Newer options, like Layer Two Tunneling Protocol (L2TP), utilize robust 256-bit encryption deemed secure for confidential communications. However, L2TP can also be susceptible if set up with shared keys, so pay attention to authentication methods.
OpenVPN is another popular choice, known for its security and versatility. It can run on multiple ports, making it hard to block, and supports both UDP and TCP. Its complexity, however, can make setup challenging, often requiring third-party tools.
For this guide, we’ll opt for the Internet Key Exchange Version 2 (IKEv2) protocol. IKEv2 combines robust security with speedy connections and is supported by both Windows and mobile macOS systems. It’s easy to install and reconnects swiftly if your VPN connection drops, making it an excellent choice for those who frequently switch between networks.
Setting Up a VPN in Windows 11
Step 1: Open the VPN configuration tool by typing VPN in the Windows search bar, then select VPN Settings. Alternatively, access it via the Settings menu under Network & Internet and select VPN from the options.
Step 2: Click on Add VPN to proceed.
Digital Trends
Step 3: A dialog box will appear. In the VPN Provider dropdown, select Windows (built-in).
Fill in the Connection Name field with a name of your choice. For instance, if using NordVPN and connecting to a U.S. server numbered 2093, you might label it NordVPN USA 2093. A descriptive name will help you identify it later if you decide to add more connections.
Each VPN provider will have a directory of available servers. Refer to your provider’s documentation for specific server addresses — for example, NordVPN’s U.S. server at us2093.nordvpn.com. Enter this in the Server Name or Address field.
Opt for a nearby server for optimal speed and reliability. Conversely, if you’re trying to bypass geo-restrictions, pick a server from another country.
In the VPN Type field, select the protocol you’ve chosen to connect. Based on the previous information, choose IKEv2.
For the Type of Sign-in Info, select User Name and Password. VPN services commonly use this method, but check with your provider for specific login instructions. Most allow username and password logins.
Once done, click Save.
Digital Trends
Step 4: Your new VPN connection should now be visible in the list. For most connection types, you’re ready to connect — skip ahead to Step 19. However, if you chose IKEv2, you’ll need to download a certificate and adjust some additional settings first.
Your VPN provider will guide you in downloading the certificate. Once obtained, open it. A security alert will pop up; select Open.
Digital Trends
Step 5: In the certificate’s General tab, click Install Certificate at the bottom.
Step 6: The certificate wizard will prompt you to choose where to install the certificate. Be sure to select the bubble labeled Local Machine. Click Next, then confirm by checking Yes in the following security dialog.
Digital Trends
Step 7: Select Place All Certificates in the Following Store, then click Browse.
Digital Trends
Step 8: A pop-up will present a list of locations. Choose Trusted Root Certification Authorities and click OK.
Digital Trends
Step 9: Press Next, then Finish. Click OK and confirm with another OK to finalize the certificate installation.
Digital Trends
Step 10: Search for Control Panel in the Windows search bar and launch it.
Step 11: Select Network and Internet.
Digital Trends
Step 12: Choose Network and Sharing Center.
Digital Trends
Step 13: In the left column, select Change adapter settings.
Digital Trends
Step 14: Your VPN connection (e.g., NordVPN USA 2093) should appear here. Right-click it and select Properties. Then, click on the Security tab.
Digital Trends
Step 15: Under the Type of VPN, confirm it’s set to IKEv2. Ensure Require Encryption (Disconnect If Server Declines) is selected for Data Encryption. For Authentication, select Use Extensible Authentication Protocol (EAP) and choose Microsoft: Secured password EAP-MSCHAPv2. Click OK to finalize.
Digital Trends
Step 16: You are now set to connect. Click on the Wi-Fi icon on the right side of the Windows taskbar. Your VPN connection should be visible at the top; click it and select Connect. If your username and password aren’t saved, you will need to enter them to authenticate. After connecting, enjoy a more secure internet experience.
One important aspect to remember with the built-in VPN connection tool in Windows 11 is that you’re configuring a specific server for your device. If you wish to manage multiple server connections, periodically repeat these steps. This way, if your current server becomes busy, you can switch to another for potentially improved speeds. Some services offer country-specific servers for bypassing geographic restrictions while providing several local servers for secure browsing.
Setting Up a VPN on a Mac
Establishing a VPN on macOS can be accomplished similarly to Windows. Have your username, password, server address, and certificates on hand if using IKEv2 for authentication.
Step 1: Download your VPN certificate per Step 8 from the Windows section and refer to your VPN provider for the specific URL to obtain the certificate. Once downloaded, it will be stored in your Downloads folder on your Mac. Click it to open.
Step 2: macOS will prompt you to Add Certificates. Click Add at the bottom right to include the certificate in your login keychain.
Step 3: In the Keychain Access window, log in through the Keychains menu on the left. Your VPN certificate (using NordVPN in this instance) should be visible. Right-click on it and select Get Info.
Step 4: Change the dropdown next to When Using This Certificate to Always Trust. You’ll need to enter your password to save the changes.
Step 5: Open System Settings by searching for it in Spotlight. In the System Settings, navigate to the VPN section.
Digital Trends
Step 6: Click Add VPN Configuration and select IKEv2 from the dropdown menu. A new window will open for you to fill in your connection details.
Digital Trends
Step 7: Name the VPN connection anything you prefer. However, using a name that includes your VPN provider, server number, and location can help you quickly identify the connection later. For this example, we named ours NordVPN USA 2093 to signify it connects to the NordVPN server 2093 based in the U.S.
Enter the Server Address and Remote ID from your provider’s guide, referring to their server list. In this case, type us2093.nordvpn.com into both fields, leaving the Local ID blank.
Next, set up your authentication by accessing Authentication Settings. Input your user credentials for the connection and click Create.
Digital Trends
Step 8: Your new VPN connection will now appear in the VPN section of System Settings. Toggle the switch to connect and start using the VPN. Your online activities will now be secured through this connection, ensuring your privacy is maintained.
Digital Trends
If you haven’t yet selected a VPN service, there are crucial factors to consider. While free VPNs are available, investing in a subscription often ensures faster speeds, more features, and superior service. Our guide can assist you in identifying the best VPN options for various needs, be it for academic use, streaming preferences, or household devices.
Subscriptions are typically more economical when you commit to longer terms. To ensure you’re not overpaying, review our list of the latest VPN deals.
Launched in 2022, Matter has been making waves in the smart device industry by providing a simplified approach to connecting smart gadgets. Since its initial rollout, the Connectivity Standards Alliance has been actively delivering updates to this interoperability standard, enhancing compatibility across a wider array of devices while resolving various issues. The latest iteration, Matter 1.4, focuses on improving energy management features and streamlining the process of establishing a robust smart home network.
For those utilizing Matter and aiming to reduce energy expenditures, the energy tracking capabilities introduced in version 1.3 are now available for a greater variety of devices with the release of Matter 1.4. This update enables energy monitoring and management for several types of devices, including:
Solar Solutions: Items that utilize solar energy, including inverters, individual and grid-connected panel arrays, as well as hybrid systems.
Battery Solutions: Devices such as wall-mounted batteries, energy storage units, and Battery Energy Storage Systems (BESS).
Heat Pumps
Water Heating Appliances
In addition to the newly supported devices, Matter 1.4 enhances features for Electric Vehicle Supply Equipment (EVSE). Users can now schedule charging times for their vehicles, allowing for cost-effective charging based on local utility rates. Moreover, smart thermostats will now support predefined settings and scheduling, including a dedicated vacation mode.
Related
The widely used Eve Light Switch is now Matter-compliant and eliminates the need for a hub.
Ikea is adding Matter support for its Dirigera smart home hub.
The new Ring Battery Doorbell simplifies installation and offers an improved viewing angle.
Matter 1.4’s focus isn’t solely on energy optimization; it also lays the groundwork for future enhancements in network capabilities. Home networking devices such as routers, modems, and access points can now incorporate better support for Matter-compatible gadgets. This means that users should experience an easier process when integrating new devices into their Thread networks without the hassle of starting from scratch. More updates on this development are expected soon.
A range of smaller features has also been integrated into Matter 1.4. To explore all the new capabilities, visit the official Matter website.