الوسم: Resonance

  • Choosing Your Perfect Class in Blue Protocol: Star Resonance Solving

    Choosing Your Perfect Class in Blue Protocol: Star Resonance Solving

    When you begin playing Blue Protocol: Star Resonance, you’ll need to create a character and choose a class. Each class offers different skills and specializations that help you succeed in battles. Some classes focus on attacking, while others are better at healing or defending, so you can find a style that suits you best. Each class has two ways to specialize further, allowing you to customize your combat approach. It may take some practice to master each class, but all of them have their own unique look and feel.

    There are several classes to select from, each with its role in a team. For example, some are better suited for direct fighting, while others excel in supporting teammates through healing or buffing. Here is a breakdown of each class, including its main position, level of difficulty, and available specializations:

    | Class Name | Role | Difficulty | Specializations | Attributes |
    |————–|——–|————–|——————|————|
    | Stormblade | Attack (Melee, DPS) | Advanced | Iaido Slash, Moonstrike | Agility, Crit, Mastery / Haste, Luck |
    | Frost Mage | Attack (Caster, DPS) | Intermediate | Icicle, Frostbeam | Intellect, Crit, Luck / Haste, Mastery |
    | Wind Knight | Attack (Melee, DPS) | Master | Vanguard, Skyward | Strength, Haste, Mastery / Strength, Crit, Luck |
    | Verdant Oracle | Support (Healing, Caster) | Beginner | Smite, Lifebind | Intellect, Luck, Mastery / Intellect, Haste, Mastery |
    | Heavy Guardian | Tank (Melee, Guard) | Easy | Earthfort, Block | Strength, Mastery, Versatility / Strength, Mastery, Luck |
    | Marksman | Ranged Attack (DPS) | Beginner | Wildpack, Falconry | Agility, Haste, Mastery / Agility, Haste, Crit |
    | Shield Knight | Tank (Melee, Guard) | Beginner | Recovery, Shield | Strength, Crit, Mastery / Strength, Haste, Mastery |
    | Beat Performer | Support (Melee, DPS Healer) | Intermediate | Dissonance, Concerto | Intellect, Haste, Luck / Intellect, Crit, Haste |

    To switch to a new class, you’ll need to unlock it at the main office in Asterleeds. From your profile menu, choose the class you want, which will start a quest to meet Milia at the Pioneer Bureau. She’ll ask you to exchange a Hero’s Radiance, a resource that usually costs 680 Bound Rose Orbs. Luckily, your first Hero’s Radiance is free. When you get it, you’ll be given a simple quest to defeat nearby monsters with your current class. After completing it, you can switch to your new class by visiting your profile menu and trying it out in the Asteria Plains, where you can battle monsters and bandits.

  • How to Play a Heavy Guardian in Blue Protocol: Star Resonance Solving

    How to Play a Heavy Guardian in Blue Protocol: Star Resonance Solving

    Playing as a tank in an MMO often means stepping into the shoes of a strong defender who can soak up damage and control the fight. In Blue Protocol: Star Resonance, the Heavy Guardian class is perfect for that role, regardless of which specialization you pick at level 20.

    Designed to maximize your Rage and withstand as much damage as possible, the Heavy Guardian is the easiest tank class to learn among the game’s options. It relies on increasing your strength, building up Rage, and using your skills to keep enemies at bay and protect your team.

    Class Overview

    If you enjoy controlling close-range battles and being the primary damage absorber, the Heavy Guardian is a solid choice. It’s built to be both offensive and defensive, with abilities that let you hit multiple enemies or focus on a single target. Your main attribute is Strength, which powers most of your skills and buffs.

    Visual: Fighting Caprahorns as a Heavy Guardian in Blue Protocol.

    Playing as a Heavy Guardian

    Do you like to lead the charge, taking hits and positioning yourself to control the battlefield? If so, this class is for you! You’ll focus on building Rage to activate powerful skills and keep enemies busy. Both specializations use the same core skill, Sandshroud, which coats you in sand that damages nearby foes and helps generate Rage and Sand Crystals—keep Sandshroud active during fights for best results.


    Earthfort Specialization

    Overview: Uses shields and damage mitigation. Your main attack is Shield Bash, and you excel at protecting your allies by absorbing incoming damage and staying resilient.

    Main Skills:

    • Star Shatter: Charges forward with force, stunning enemies and gaining Rage and Sand Crystals upon hit. Best for quick Rage buildup.
    • Sandshroud: Creates a sand burst around you, damaging enemies and generating continuous Rage and Sand Crystals.
    • Stoneform: Taunts enemies and counters lethal attacks, increasing armor and reducing damage.
    • Rage Burst: Uses Rage and Sand Crystals to unleash a roar, damaging foes and creating a damage-absorbing shield that stacks up to your max HP.

    Weapon: Shield-based weapons fit this spec, emphasizing protection and control.

    Visual: Heavy Guardian Earthfort Specialization overview.


    Block Specialization

    Overview: Focuses on steady damage reduction and counterattacks, especially against physical attacks. Your special skill is Countercrush, which enhances your blocking ability.

    Main Skills:

    • Granite Fury: Consumes Sand Crystals to deal damage and reduce incoming damage temporarily.
    • Sandshroud: As above, for damage and Rage generation.
    • Brave Bastion: Creates a barrier that counters lethal attacks and taunts enemies, extending its duration with Sand Crystals.
    • Sandgrip: Pulls enemies toward you using Rage, interrupting their actions and slowing their movement.

    Weapon: Likely geared towards melee, with gear optimized for Luck to improve damage mitigation.

    Visual: Heavy Guardian Block Specialization overview.


    Talent Tips

    Rage plays a vital role in both specs. Building up Rage early helps unleash powerful skills and boosts survivability.

    • Rage Awakening: Chance to become Enraged upon consuming Rage, increasing your durability and armor.
    • Weak Point Strike: Basic attacks have a chance to trigger extra damage and generate Sand Crystals.
    • Power Conversion: Boosts your armor and Strength, making you tougher and more offensive.
    • Suppression Skills: Reduce damage taken or increase damage dealt when your HP is higher than the enemy’s, especially useful with the large health pool of the Heavy Guardian.

    Other talents help yank enemies close, increase healing, or extend your Enraged state, further enhancing your tanking prowess.


    Gear Recommendations

    Since Strength is at the heart of the Heavy Guardian, gear should focus on maximizing it.

    • Earthfort: Prioritize increasing Versatility to handle all types of damage effectively.
    • Block: Focus on Luck to improve blocking and mitigate physical damage more reliably.

    Balancing your gear to boost your primary stats ensures you stay resilient and effective throughout battle scenarios.

  • Unlock Your Desired Outfits in Infinity Nikki’s Resonance System

    Unlock Your Desired Outfits in Infinity Nikki’s Resonance System

    In Infinity Nikki, one of the key elements of gameplay is collecting clothes and putting together stylish outfits. There are several ways to obtain new clothing, including the Resonance feature, where you can try your luck to snag some of the game’s finest outfits. The Resonance events offer a broad selection of outfits and pieces, each with varying levels of rarity.

    Typically, you’ll find yourself getting three-star pieces more often than not, but the game includes mechanisms that ensure you’ll receive four or five-star pieces after a certain number of attempts. By gathering Diamonds, which can be converted into crystals, you can complete various collections in the Compendium.

    How Does Resonance Work?


    Drawing outfits through Resonance is a fast way to acquire rare pieces. Each draw requires 120 diamonds to get a crystal, so a 10x draw necessitates 1,200 diamonds for ten crystals.

    You can purchase Stellarite with real money, which can then be exchanged for Diamonds.

    After a series of three-star draws, you are assured a four-star piece on your tenth draw. If you’re not hitting any stunning five-star pieces, keep trying; you’re guaranteed to receive one by your 20th draw.

    You won’t receive duplicate pieces until you’ve completed that particular outfit.

    The odds favor drawing three-star pieces, which boast a base probability of 82.44 percent. Expect to draw a five-star outfit after more attempts, given its low base probability of just 1.5 percent. Your chances of obtaining four-star pieces are slightly better at a base probability of 3.29 percent.

    You can acquire more Diamonds by using Surging Ebbs and Tranquility droplets. Surging Ebbs are awarded after collecting duplicate four or five-star pieces, while Tranquility droplets appear with every three-star duplicate piece.

    Permanent Resonance


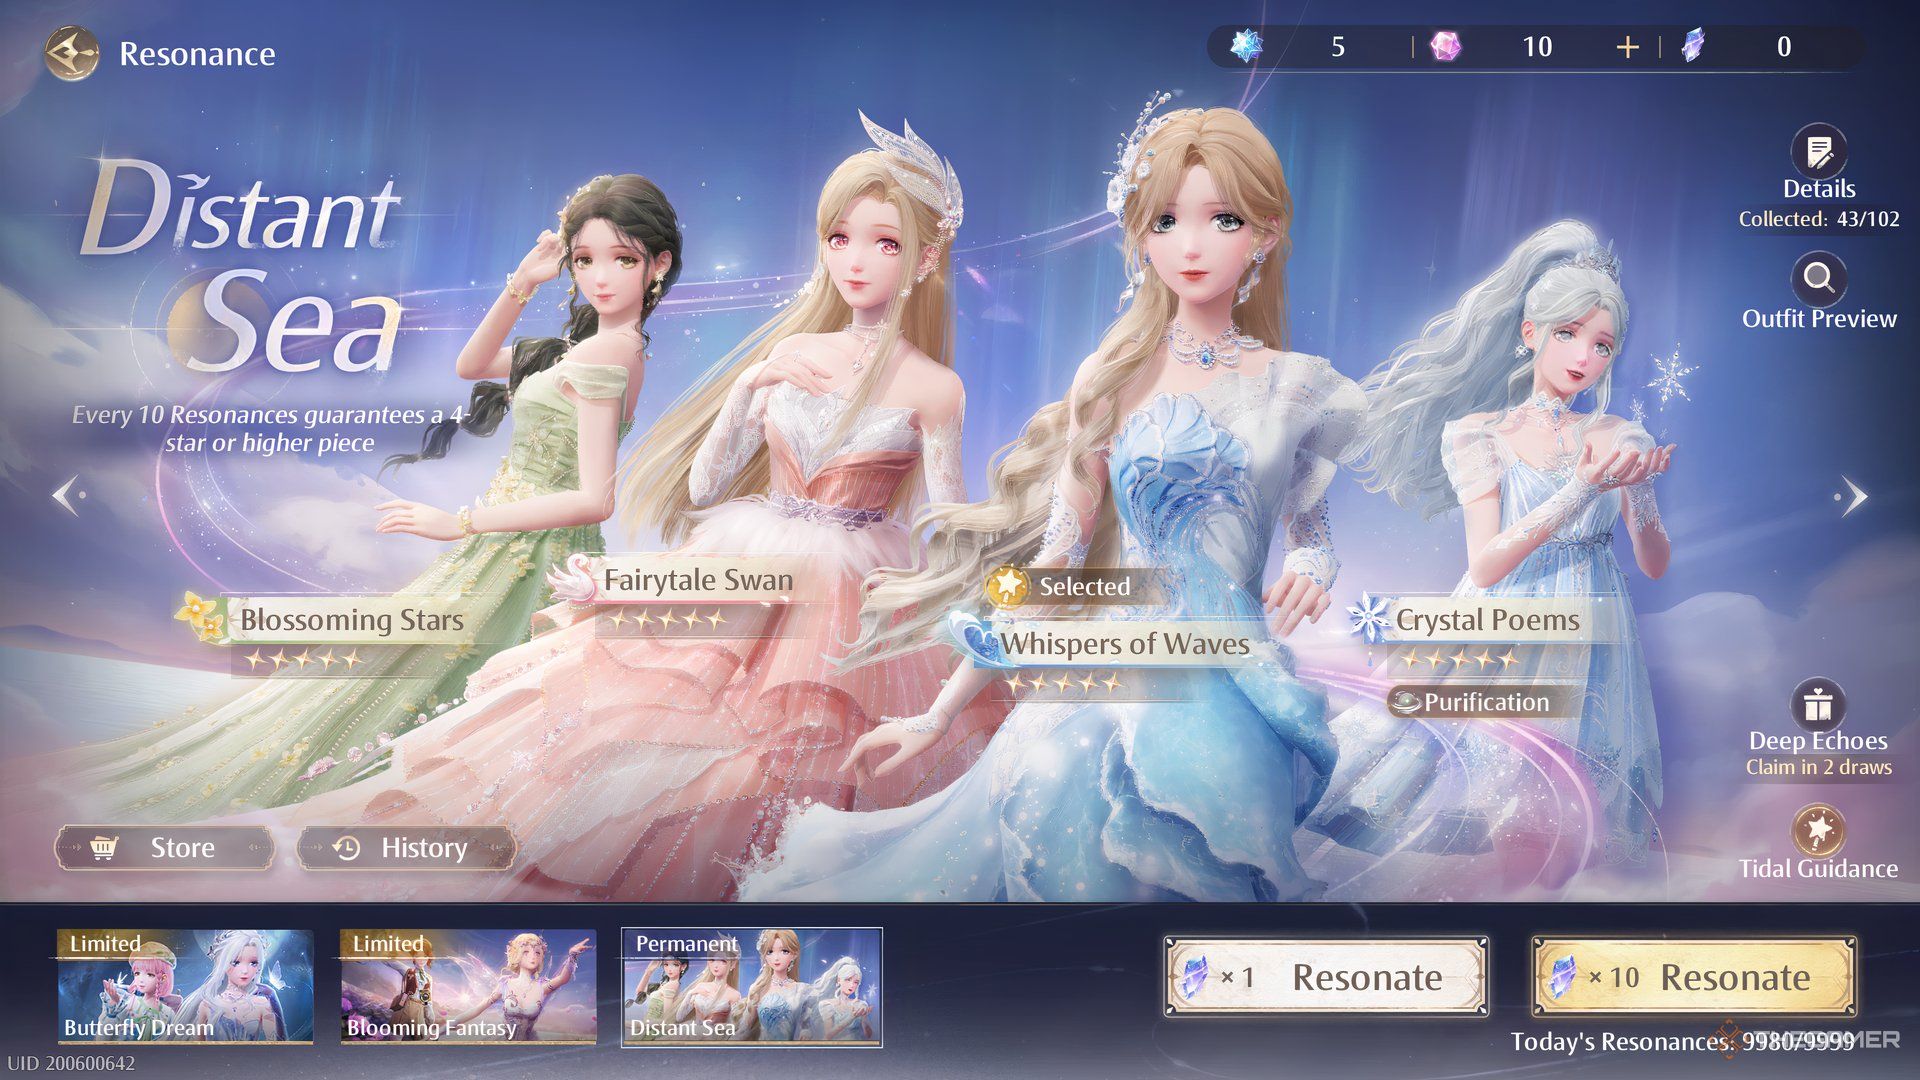
    Permanent Resonance banner is shown in Infinity Nikki.

    Currently, the Permanent Resonance banner features four five-star outfits that you can draw from at any time. To obtain the outfit you desire most, you can utilize Tidal Guidance to select pieces from a specific outfit. This Tidal Guidance effect will last until you complete the outfit.

    To participate, you need Resonite Crystals, which can be purchased using Diamonds. The outfits eligible for Tidal Guidance include:

    • Fairytale Swan
    • Crystal Poems
    • Whispers of Waves
    • Blossoming Stars

    If you’ve amassed the pieces you wanted, you can cancel Tidal Guidance and select a different outfit. However, keep in mind that you have limited Tidal Guidance attempts, so change it only if you don’t plan to obtain another piece from your current selection.

    The permanent Resonance Banner also includes a selection of three-star and four-star pieces, which you can view by clicking the details button on the banner.

    Limited Time Resonance


    The Butterfly Dream limited time resonance event is shown in Infinity Nikki.

    The Limited Time Resonance banners are open for a limited duration, so it’s wise to save up Diamonds to purchase Revelation Crystals. This way, you can snag your preferred outfits when they appear. Unlike Tidal Guidance, you can use Ocean’s Blessing once to target a specific piece from any outfit. Remember, once you’ve chosen your item, you cannot change your selection, but you’ll get it more quickly, guaranteed on your fifth five-star draw.

    Ocean’s Blessing will conclude when a Resonance event ends, and if the outfit comes back later, you’ll need to select again.