Tag: recipes

  • All Popcorn Serving Cart Recipes and How to Complete Them in Heartopia

    All Popcorn Serving Cart Recipes and How to Complete Them in Heartopia

    Popcorn is a big deal in Heartopia, and the Popcorn Serving Cart shows just how serious they are. It starts as a cute little reward, but it can quickly turn into your own personal snack empire, complete with buckets and ingredients you might have forgotten you needed. You’ll find yourself hunting for mushrooms, brown sugar, and mysterious veggies like you’re on a gourmet scavenger hunt.

    The cart connects your progress in events with gathering resources, making just one more recipe feel almost addictive. Before long, you could be running a full cinema concession stand. So, let’s get popping.

    How to Get the Popcorn Serving Cart
    You can unlock the Popcorn Serving Cart through the Dreamlight Cinematics Rewards tab. It’s the first reward available, so you can claim it early while working through the event.

    Once you have it, you’ll need to craft it with these materials:

    • 15 Quality Timber
    • 6 Branches
    • 1 Light & Shadow Material Pack

    The Light & Shadow Material Pack is earned by completing tasks related to the Dreamlight Cinematics event.

    All Popcorn Serving Cart Food Recipes
    These are the food items you can cook with the cart and their recipes.

    Item Ingredients
    Savory Popcorn Bucket Corn, any Mushroom, 2 Butter
    Caramel Popcorn Bucket Corn, 2 Springday Brown Sugar, Butter
    Salsa Wavy Potato Chips 2 Potatoes, Salsa
    Savory Duo Bucket Savory Popcorn Bucket, Salsa Wavy Potato Chips
    Sweet Duo Bucket Caramel Popcorn Bucket, Salsa Wavy Potato Chips
    Romaine Lettuce Taco 2 Romaine Lettuce, Salsa, Eggs
    Wild Vegetable Celtuce 2 Wild Veggies (Event-specific), Romaine Lettuce Taco
    Springday Fruit Black Tea Tea Leaves, any Fruit, Springday Brown Sugar
    Colorful Movie Combo Springday Fruit Black Tea, Sweet Duo Bucket, Wild Vegetable Celtuce
    Supreme Movie Combo Springday Fruit Black Tea, Savory Duo Bucket, 2 Wild Vegetable Celtuces

    How to Get Limited-Time Popcorn Cart Ingredients
    Some ingredients are seasonal or limited, and here’s where to find them:

    Item Source
    Springday Brown Sugar Purchased from Massimo’s store
    Salsa Purchased from Massimo’s store
    Eggs Purchased from Massimo’s store
    Butter Purchased from Massimo’s store
    Fruit Foraged from trees or bushes, or planted
    Wild Veggies (Tall Mustard, Fiddlehead, Burdock, Mustard Green) Found in Onsen Mountain Ruins, Forest Deer Tower, Flower Field Whale Mountain, Fishing Village Lighthouse
    Corn Bought as seeds from Blanc’s store
    Potatoes Bought as seeds from Blanc’s store
    Romaine Lettuce Bought as seeds from Blanc’s store
  • Where to Find All Alchemy Recipes in Crimson Desert While Completing and Solving

    Where to Find All Alchemy Recipes in Crimson Desert While Completing and Solving

    Alchemy in Crimson Desert allows you to create powerful items using various ingredients and recipes. Most recipes are discovered while exploring or completing quests. As you advance through the game, some recipes become available through the main story, but others you’ll need to find on your own.

    Along with a complete list of all alchemy recipes and where to find them, I’ve included tips on how to craft these recipes at a Cauldron. I know it took me a while to locate one myself.

    Before diving into the recipes, here’s how to find a Cauldron. I spent quite some time searching before I found one in Shadow’s Whisper Cave, north of Hernand City, just west of Three Saints’ Falls. Once marked on your map, it’s easy to return there for repeated crafting. Later, I also discovered a Cauldron in Hernand itself.

    Here’s the location of each alchemy recipe in Crimson Desert, along with how to find and craft them:

    Haiden’s Lesser Elixir
    Located in a house in Hernand that doesn’t require a key to enter. This Elixir is made in a Cauldron and needs:

    • Two low-grade container materials (like rosemary or green sulphur butterfly)
    • One lesser alchemy support material (such as iron ore or stone)
    • One empty bottle
      When used, it grants four seconds of no Spirit consumption.

    Palmar Pill
    Found in Shadow’s Whisper Cave, north of Hernand, accessible through a narrow crack in the cliff face. Crafted at a Cauldron with:

    • Fifteen medicinal herbs (such as rosemary or cotton)
    • Two units of water
      This pill mainly acts as a revival, letting you get back on your feet and restoring a small amount of health.

    Platinum
    The recipe is in Scholastone. Enter through the large central door, pass the reputation vendor on your left, then go upstairs and around to find it on a shelf. Crafted at a Witch with:

    • One gold bar
    • Four brimstone
    • Three mercury
    • Two holy water
      Platinum is a rare ore, pricey, but useful for advanced alchemy.

    Astrid’s Lesser Elixir
    Available for purchase at the Back Alley shop in Pailune after completing part of the main story. To craft it at a Cauldron, you need:

    • Two low-grade stamina alchemy materials
    • One lesser alchemy support material
    • One empty bottle
      This Elixir grants four seconds of stamina ignore when consumed.

    Meliara’s Lesser Elixir
    Found in Mudridge Cabin, north of Porrorin Woods in Hernand. Accessing the room with the recipe involves solving a sliding puzzle amidst thick swamp smoke. It’s located on some books in a corner of the room. To craft it, you need:

    • Two lesser health alchemy materials
    • One lesser alchemy support material
    • One empty bottle
      When used, it boosts health by 75 and attack speed by 1 for five minutes.
  • Where to Find All Crafting Recipes in Resident Evil Requiem Completing and Solving

    Where to Find All Crafting Recipes in Resident Evil Requiem Completing and Solving

    Crafting is a key part of many survival horror games, and in Resident Evil Requiem, it continues the tradition of allowing players to make their own ammunition and useful items. You’ll need these supplies to stay alive, as both Grace and Leon rely heavily on crafted equipment to avoid deadly situations.

    To craft items, you first need to find resources like Scrap and Herbs, along with recipes that unlock additional crafting options for each character. We’ll go over where to find all crafting recipes, the items you can make, and the materials needed in Resident Evil Requiem.

    How Crafting Works

    You can start crafting as soon as you pick up materials such as Scrap and Herbs. Open your Inventory, switch to the Crafting menu, and select the items you want to make based on your available resources. This mechanic is especially important when the ammo you find doesn’t last long.

    Note: Resources stored in the Item Box don’t count for crafting. Also, you need free inventory space to create items.

    In addition to resources, Grace uses a Blood Collector to gather blood. Many recipes require Infected Blood, which can be obtained by exploring the Care Center and examining buckets of blood or by defeating enemies, as some blood drops are random.

    Initially, the number of craftable items is limited, but you can unlock more recipes by discovering them during your gameplay. There are two types:

    • Blood Sample recipes, which require you to find the sample and take it to the Blood Analyzer in the Blood Lab, where a mini-game activates to analyze it.
    • Regular recipes, which are automatically added to your list when found.

    Where to Find Grace’s Crafting Recipes

    You can find various recipes around the game in different locations:

    • Blood Specimen (Denatured): Located in the Blood Lab, on a desk next to the Blood Analyzer.
    • Blood Specimen (Reversible): Found in the Blood Lab’s Storage Room, accessible with the Level 1 (“blue”) ID Wristband.
    • Blood Specimen (Converged): In the Waiting Room of the Care Center, behind a locked door guarded by an infected cleaning staff. You’ll need the Level 1 Wristband to access this area.
    • Molotov Cocktail Recipe: Located in the Bunkroom in the Care Center Basement, inside a suitcase on a table near bodies. You must activate a nearby power device to open the room.
    • Bottle of Acid: Found in the Monitor Control Room at the ARK facility, next to a safe.
    • Blood Specimen (Polymerized): Available in the same spot as the Denatured blood sample but only if you start a new game in Insanity mode.

    Every Crafting Recipe with Grace

    Grace can learn more recipes as you progress. Key recipes include:

    • Mixed Herb (G+G+G): Made by combining a Green Herb and a Mixed Herb (G+G).
    • Scrap: Basic resource used to craft many items.
    • Makeshift Knife: Crafted from Scrap, useful for melee.
    • Handgun Ammo (x8): Made from Scrap and Infected Blood.
    • Hemolytic Injector: Crafted using Scrap and a large amount of Infected Blood.
    • Steroids: Made with an empty injector and a large amount of Infected Blood.
    • Med Injector: Combining green herbs or mixed herbs with Infected Blood.
    • 12.7x55mm Ammo (x2): Requires Rare Metal and Infected Blood.
    • Molotov Cocktail: Made with an empty bottle and Infected Blood.
    • Bottle of Acid: Crafted with an empty bottle and Infected Blood.
    • Handgun Ammo (x30): Using Scrap and Infected Blood.
    • R.I.P. Knife: Crafted from Scrap and Infected Blood.

    Every Crafting Recipe with Leon

    Leon also learns related recipes through exploration:

    • Mixed Herb (G+G): Starting recipe.
    • Mixed Herb (G+G+G): Combining Green Herb and a mixed herb (G+G).
    • Handgun Ammo (x10): Created with Scrap and Small Gunpowder.
    • Shotgun Shells (x3): Made from Scrap and Large Gunpowder.
    • Rifle Ammo (x5): Requires Scrap and Large Gunpowder.
    • Machine Gun Ammo (x40): Made with Scrap and Small Gunpowder.
    • Hand Grenade: Crafted from Scrap and Small Gunpowder.
    • Stacked Hand Grenade: Special grenade, details vary.

    Note: Leon automatically learns new crafting recipes as you find objects like Powder and the first type of each weapon, so you don’t need to find all recipes manually.

    All these items help you survive longer and deal with threats more efficiently in the game’s dangerous environment.

  • All Combo Recipes and How to Unlock Them in Monster Hunter Stories 3

    Lifesoot
    Restores a small amount of HP to all allies. Available at Melynx Emporium for 300 Silver Trade Points.

    Potion
    Restores HP for one ally. This item is immediately available.

    Mega Potion
    Greatly restores HP for one ally. Can be purchased at Melynx Emporium for 1,500 Silver Trade Points.

    Lifepowder
    Restores HP for all allies. Requires items such as 2 Godbugs and 2 Wyvern Barbs to craft. You can obtain it by completing Gaul’s Chapter One Side Story, “Gaul’s Unexpected Side.”

    Dust of Life
    Fully restores HP and Stamina for all allies. Crafted with 2 Lifepowder and 2 Gloamgrass Buds. Available after completing Gaul’s Chapter Three Side Story, “Rent Negotiations.”

    Max Potion
    Fully restores HP for one ally. Made with 2 Godbugs, 2 Honey, and 2 Mandragoras. Obtain it after finishing Gaul’s Chapter Three Side Story, “Rent Negotiations.”

    Ancient Potion
    Fully restores HP and Stamina for one ally. Crafted from 2 Immunizers and 1 Kelbi Horn. Available post Gaul’s Chapter Three Side Story, “Rent Negotiations.”

    Immunizer
    Grants Regenerate to one ally. Found at Melynx Emporium for 500 Silver Trade Points.

    Nulberry Elixir
    Cures any abnormal status for one ally. Requires 2 Nulberries and 2 Cactus Flowers. Available at Melynx Emporium for 1,000 Silver Trade Points.

    Antidote
    Cures Poison, Noxious Poison, or Severe Poison in one ally. Made with 2 Antidote Herbs and 2 Blue Mushrooms. Costs 200 Silver Trade Points at Melynx Emporium.

    Burn Ointment
    Cures Burn status in one ally. Also costs 200 Silver Trade Points at Melynx Emporium.

    Paracare
    Cures Paralysis for one ally. Requires 2 Anesfreesia and 2 Sap Plants. Available for 200 Silver Trade Points at Melynx Emporium.

    Intuitizer
    Removes Darkness from one ally. Made with 2 Manyberry and 2 Blue Mushrooms. Costs 200 Silver Trade Points at Melynx Emporium.

    Energy Drink
    Cures Sleep status in one ally for 200 Silver Trade Points at Melynx Emporium.

    Soap Scud
    Cures Blastblight in one ally. Requires 2 Soapgrass and 2 Spider Webs. Costs 200 Silver Trade Points at Melynx Emporium.

    Zest Pill
    Removes Skillseal from one ally. Made with 2 Girthy Garlic and 2 Nitroshrooms. Available for 200 Silver Trade Points at Melynx Emporium.

    Spirited Soda
    Cures Exhaust in one ally. Complete the quest “The Great Windmill Heist” to obtain.

    Big Barrel Bomb
    Deals damage to one enemy and can be changed to inflict Burn. Crafted with 1 Big Barrel, 2 Fire Herbs, and 1 Nitroshroom. Unlocks after completing Kora’s Chapter One Side Story, “A Rocky Past.”

    Mega Barrel Bomb
    More powerful than a Big Barrel Bomb, deals damage and inflicts Burn, made with 1 Big Barrel and 2 Scatterfish. Obtain after finishing Kora’s Chapter Three Side Story, “Cave Kids.”

    Pitfall Trap
    Triggers on enemy attack; traps enemies so they cannot act. Crafted from 1 Trap Tool, 2 Spider Webs, and 1 Ivy. Available after completing Ogden’s Chapter Three Side Story, “The Sender’s Identity.”

    Shock Trap
    Triggers on attack; inflicts Paralysis. Made with 1 Trap Tool and 2 Thunderbugs. Obtain after Ogden’s Chapter One Side Story, “Letter From An Unknown Sender.”

    Tranq Trap
    Triggers on attack; puts enemies to Sleep. Crafted from 1 Trap Tool and 2 Sleepfish. Unlocks after Ogden’s Chapter One Side Story, “Letter From An Unknown Sender.”

    Poison Knife
    Deals damage and may inflict Poison. Made with 1 Throwing Knife and 2 Toadstools. Costs 800 Silver Trade Points at Melynx Emporium.

    Paralysis Knife
    Deals damage and has a chance to cause Paralysis. Requires 1 Throwing Knife and 2 Anesfreesia. Costs 800 Silver Trade Points.

    Sleep Knife
    Deals damage and may cause Sleep. Crafted with 1 Throwing Knife and 2 Sleepyfish. Costs 800 Silver Trade Points.

    Sonic Bomb
    Releases a shock wave to Stun an enemy. Crafted from 1 Screamer Sac and 2 Fire Herbs. Obtained after Kora’s Chapter One Side Story, “A Rocky Past.”

    Flash Bomb
    Releases a bright flash to potentially Darkness. Made with 2 Flashbugs, 2 Sap Plants, and 2 Stones. Also obtained after “A Rocky Past.”

    Paintball
    Increases monster retreat rate, especially effective on low HP monsters. Earned after completing “A Step Towards Conservation.”

    Dash Juice
    Restores Stamina and boosts Stamina Regen. Made with 2 Immunizers and 2 Dash Extracts. Can be bought at Melynx Emporium for 1,500 Silver Trade Points.

    Demondrug
    Boosts attack power. Crafted from 2 Mandragoras and 2 Might Seeds. Available at Melynx Emporium for 1,500 Silver Trade Points.

    Mega Demondrug
    Enhances attack even more than a Demondrug. Made with 1 Demondrug and 1 Nourishing Extract. Costs 1,500 Silver Trade Points.

    Armorskin
    Increases defense. Crafted from 2 Mandragoras and 2 Adamant Seeds. Available after “Seeds! More Seeds!”

    Mega Armorskin
    Provides greater defense boost than Armorskin. Made from 1 Armorskin and 1 Nourishing Extract. Available after completing “Seeds! More Seeds!”

    Vigor Powder
    Restores Stamina for all allies. Crafted from 2 Godbugs, 1 Dash Extract, and 1 Kelbi Horn. Unlocks after the quest “Locating the REAL Legend.”

    Grape Juice
    Made from Azurian Grapes and Gloamgrass Buds. Restores HP and enhances stats. Earned after completing Thea’s Chapter Three Side Story, “The Tarkuan Trotter.”

  • How to Unlock Crafting Recipes in Heartopia by Completing and Solving

    How to Unlock Crafting Recipes in Heartopia by Completing and Solving

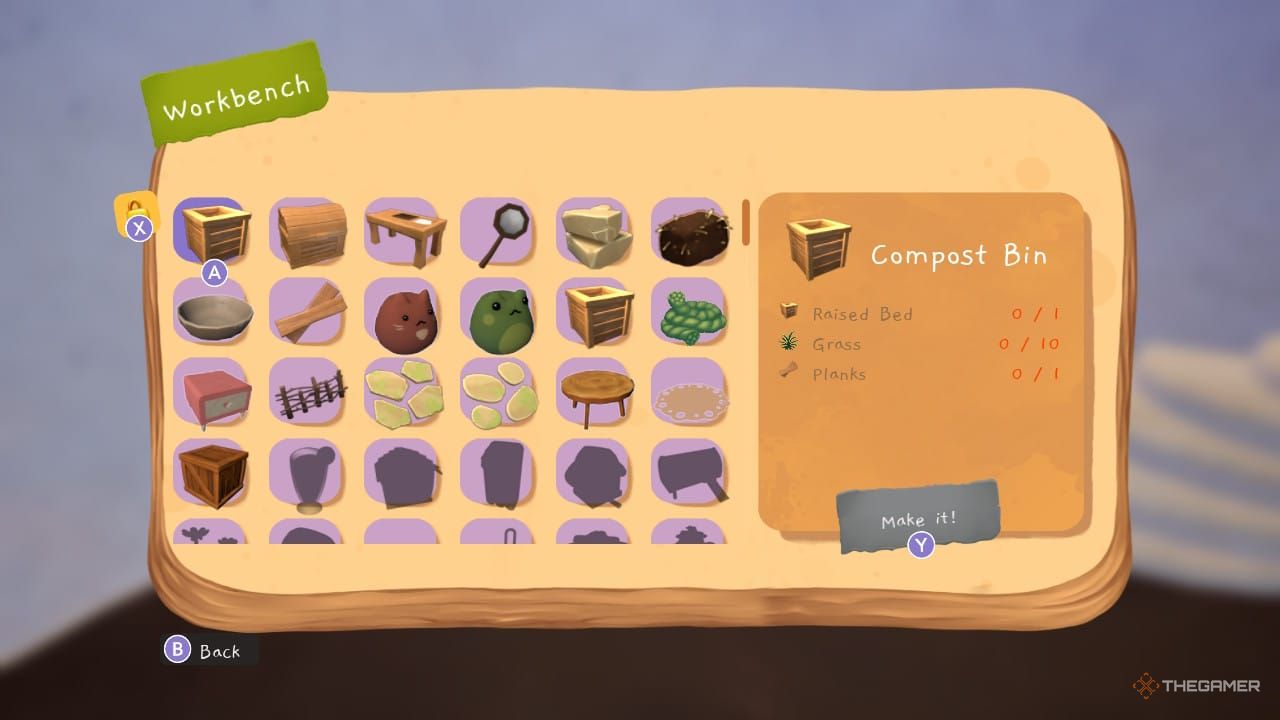
    In Heartopia, besides purchasing furniture, another popular way to add decor to your home is through crafting. Luckily, crafting is one of the first activities available. The workbench, which you need for crafting, unlocks at D.G. Member Level 1.

    To start crafting, you only need to complete the initial quests that guide you into joining the D.G. The game will walk you through making your first item, a repair kit. After that, you’ll be on your own, needing to gather resources and find recipes to craft other items.

    ### Where to Get Resources for Crafting

    For crafting materials, you’ll mainly need different types of wood, rocks, and Flawless Flourite. These resources are quite easy to find, but you’ll need a fair amount if you want to make multiple pieces of furniture. After some time mining stones and chopping trees, you’ll be ready to craft basic items.

    However, keep in mind that you can’t craft anything by just combining random items. Similar to cooking, you need specific recipes for each item. Without the recipe, you won’t be able to make that particular item.

    ### Where to Find Furniture Recipes

    There are several ways to obtain crafting recipes in Heartopia. Buying furniture from stores doesn’t usually come with the recipe to make it yourself. Usually, when you purchase or receive pre-made furniture, it’s a single item, with no way to replicate or modify it later. Also, without recipes, you can’t dye furniture to match your home’s style or produce duplicates.

    To get recipes, you can:

    – Purchase them as Blueprints from Bob’s Furniture Store, not as finished furniture.
    – Earn them as rewards from Requests or Gossip Quests.
    – Obtain them during Limited-Time Events.
    – Discover them in bubbles floating around Heartopia.
    – Receive them by completing collections, raising your D.G. Member rank, or pursuing Dreams.
    – Buy them from vendors like Ka Ching and Massimo.

    Most activities in Heartopia have a chance to reward you with recipes. While this may make planning challenging, it encourages ongoing collection and growth over time.

    ### How to Craft

    Once you’re part of the D.G. and have your crafting table with some recipes, the process is simple. Interact with the crafting table to see options for crafting, dyeing, and sewing (if available).

    Focusing on crafting and dyeing, when you select to craft, you’ll see a list of your known recipes. Recipes marked with a wrench indicate you have all necessary ingredients in your inventory. If you lack resources for a recipe, you can tap on the item to see exactly what you’re missing. You can also check all your recipes from the watch’s Recipes tab if you’re not near the crafting station.

    When you craft furniture, you’ll have an option to dye it later — either in build mode or at the crafting bench if the item is still in your inventory. To dye furniture, wait until the related quest is available and purchase dye from Ka Ching.

    ### Most Important Crafting Recipes

    While many recipes exist, some you’ll frequently craft include:

    | Item | Recipe | Use |
    |———————|—————————————–|————————————————————————————-|
    | Repair Kit | 5x Branches | Restores 3% durability to your active tool for 17 seconds. |
    | Crafty Repair Kit | 1x Roaming Oak Timber, 3x Ore | Restores 5% durability for 20 seconds. |
    | Bait | 3x Apples | Attracts fish to where it’s thrown. |
    | Fertilizer | 4x Weeds, 3x Timber | Boosts chances of growing better-quality crops. |
    | Workbench | 7x Timber, 2x Quality Timber, 2x Ore | A reusable furniture piece for crafting other items in different areas. |

    Many recipes are more commonly used than others, so memorizing key ones helps keep your supplies stocked. Favorite recipes by tapping the star icon on the item, which saves them to a separate tab for quick access.

  • Complete All Wishvale Crafting Recipes in Octopath Traveler 0

    Complete All Wishvale Crafting Recipes in Octopath Traveler 0

    The reconstruction of Wishvale in Octopath Traveler 0 may not seem important at first, but as you progress, it opens up opportunities for players to create a diverse and lively settlement inspired by different regions of Orsterra. You can gather various “blueprints” through different methods, which allow you to upgrade houses and facilities, turning simple buildings into impressive displays of regional culture.

    You’re not the only one creating. Each city offers shop lists, so once you establish Wishvale’s shop, it can become your main shopping destination. We’ve found nearly all of these listings by now.

    Additional Smithy Recipes
    These recipes expand the number of weapons, armor, and accessories you can craft in Wishvale. They don’t always match the specific towns they originate from, but some decorations do seem to be unique to their locations.

    Location Source NPC
    Emberglow Terrorized Scarlet Wing
    Berecain Chief’s Residence Guard (around Chapter 3, in “Bestower of Fame” arc)
    Clearbrook Entrance Guard
    Cragspear Castle Guard
    Flamesgrace Proud Knight Ardante
    Atlasdam Know-It-All Milo
    Rippletide Harris
    Shepherds Rock Former Merchant
    Sunshade Soldier from the West
    Theatropolis Merchant who caters to theatregoers
    Valore Veteran Hunter
    Victors Hollow Young Man About Town
    Donescu Amiable Merchant

    Adding these recipes increases the list of craftable items at Ludo’s shop in Wishvale. Most are obtained by performing Path Actions on townsfolk, with the shop’s inventory reflecting what you find in the settlement’s stores.

    Equipment Archives
    This category introduces new weapons, armor, and accessories at Ludo’s shop. These are mainly obtained by performing Path Actions on NPCs, often by interacting with specific town residents.

    Location Source NPC
    Atlasdam Good-For-Nothing Guard (inside palace)
    Berecain Zealous Knight Ardante (after “Bestower of Fame” arc)
    Clearbrook Gertas
    Cragspear Aristocrat (inside tavern)
    Donescu Resolute Noblewoman
    Emberglow Man distrustful of laboratory (East District screen)
    Flamesgrace Well-connected merchant (inside church, after “Bestower of Fame”)
    Hell Ambitious merchant (Valore)
    Rippletide Olneo the Merchant (inside tavern)
    Shepherds Rock Iron-loving merchant
    Sufraltajah Spice Mixer (inside inn)
    Sunshade Unsociable recruiter
    Theatropolis Vigilant merchant
    Tytos Cathedral Head of the Artisan’s Guild (in Emberglow, not available until Chapter 2)
    Victors Hollow Old timer
    Donescu Amiable Merchant

    Some NPCs require certain story progressions or Chapter completions to be interacted with, but these contacts unlock various useful equipment recipes.

    Trade Goods
    Trade goods are region-specific items added to Ludo’s stock, which refresh regularly. You can pay 2,000 leaves to instantly refresh the list, which provides a random selection from all available trade goods and other stocks like the “Backdoor Dealer” ability.

    Location Source NPC
    Atlasdam Palace Purveyor
    Berecain Berecain Village Chief (after Chapter 1 “Bestower of Fame”)
    Clearbrook Angler
    Cragspear Victors Hollow Merchant
    Donescu Donescu Syndicate Member
    Emberglow Woman Stern to Strangers (East District)
    Flamesgrace Mayor
    Grandport Veteran Captain
    Rippletide Exhausted Broker
    Shepherds Rock Merchant-like Man
    Sunshade Troubled Merchant
    Victors Hollow Traveling Gourmand

    Access to some traders may depend on progress in the story, but they provide regional items that enhance variety.

    Recipe Books
    These recipes add dishes for the Wishvale tavern’s menu, mainly discovered via Path Actions in towns. They include food and drinks that can be cooked and served.

    Location Source NPC
    Atlasdam Capable Culinarian
    Berecain “Collection Point” (downstairs house after “Bestower of Fame”)
    Clearbrook Magg the Cook (in tavern)
    Donescu Roberta of Rapture (in tavern)
    Emberglow Girl waiting for her mom
    Flamesgrace Woman new to town
    Rippletide Tony’s mother
    Shepherds Rock Chatty housewife
    Sufraltajah Spice Mixer (inside inn)
    Sunshade Woman traveling with her husband
    Theatropolis Old man hoping to see a cheerful play
    Victors Hollow Eccentric cook

    Most recipes are obtained from settlement NPCs, and they allow you to cook new dishes for your tavern menu.

    House and Facility Blueprints
    These blueprints let you redesign houses and facilities like the tavern, shop, salon, church, and training center. However, you cannot alter the museum or arena. Collecting blueprints from different regions of Orsterra allows for a culturally diverse and personalized Wishvale.

    Location Source NPC
    Berecain Establishment Man repairing the church (post-“Bestower of Fame” arc)
    Berecain House Harmony scholar
    Cliftlands Blueprint Disagreeable merchant in Cragspear (slums)
    Cliftlands House Unknown; possibly from Wishvale, needs confirmation
    Coastlands Establishment Old tavern regular
    Coastlands House Elderly woman from a distant land (Rippletide)
    Flatlands Establishment Old woman reminiscing in Atlasdam
    Flatlands House Guard at Theatropolis entrance
    Frostlands Establishment Gossipy woman in Emberglow
    Frostlands House Gossipy woman in Emberglow
    Highlands Establishment Nimble carpenter in Shepherds Rock
    Highlands House Industrious gardener in Shepherds Rock
    Riverlands Establishment Old Guard in Donescu (after “Bestower of Power”)
    Riverlands House Granddaughter in Clearbrook
    Sunlands Establishment Art dealer’s assistant in Sunshade
    Sunlands House Husband studying culture in Sunshade

    By gathering these blueprints, you can customize your facilities, making Wishvale a truly multicolored town reflective of many regions’ styles.

  • All Cooking Recipes in Where Winds Meet: Completing and Solving

    All Cooking Recipes in Where Winds Meet: Completing and Solving

    Cooking in Where Winds Meet is more than just a survival mechanic; it encourages you to explore and interact with the detailed world around you. Whether you’re gathering ingredients, discovering recipes, or facing various encounters, each part of the game helps you sharpen your skills, giving you a better chance to stay in the fight longer.

    Cooking allows you to make dishes that restore health and provide temporary buffs that can significantly impact battles. Below, you’ll find all the essential information about recipes and how to master cooking in the game.

    How to Cook

    To cook in Where Winds Meet, you first need to learn the recipes. While some recipes are known initially, others need to be unlocked by meeting specific conditions, listed in the table below. Once you’ve unlocked a recipe, you’ll need ingredients, which can range from animal meat to fungi, typically easy to find in the game world. If you’re missing anything, you can visit locations marked on your map to forage, fish, or hunt for the needed items.

    When you have all the ingredients, approach a fire with a pot or spit over it. Interact to open the cooking menu, where you can prepare dishes or get help with ingredient gathering. Some recipes are simple and heal small amounts, while others can provide powerful buffs like increased attack strength.

    Recovery Dish Recipes

    There are two types of recovery meals: ones that restore health gradually, and others that give you specific buffs. Currently, there are 13 different Recovery Dishes in the game.

    Meal Cooking Level Ingredients Effect Stamina Cost How to Unlock
    Veggie Mix 1 2 Herbs, 2 Mushrooms Restores 4,500 HP over 3 seconds 2 Available immediately.
    Divine Stuffed Fish 1 1 River Fish, 2 Herbs, 1 Wild Fruits Restores 4,500 HP over 3 seconds 2 Fish by fishing with Chu Shuiyang in Verdant Wilds.
    Hotpot 1 2 Herbs, 2 Meat Scraps Restores 4,500 HP over 3 seconds 2 Complete the “Culinary: The Flavor of Sunset Glow” exploration quest.
    Savory Roast 20 2 Herbs, 3 Prime Meat Cut Restores 9,000 HP over 3 seconds 3 Complete the “The Flavor of Sunset Glow” exploration quest.
    Egg-Steamed Clams 20 2 Eggs, 2 Meat Scraps, 1 Mushrooms Restores 9,000 HP over 3 seconds 3 Complete the “The Flavor of Sunset Glow” exploration quest.
    Fish-Stuffed Lotus Pods 20 1 River Perch, 2 Mushrooms, 2 Wild Fruits Restores 9,000 HP over 3 seconds 3 Fish with Chu Shuiyang in Verdant Wilds.
    Sliced Fish Fillet 20 2 Snakehead, 3 Herbs Restores 9,000 HP over 3 seconds 3 Fish with Chu Shuiyang in Verdant Wilds.
    Steamed Pork 41 3 Herbs, 1 Prime Meat Cut Restores 22,500 HP over 3 seconds 4 Obtain from the Meow Meow Temple Shop in Kaifeng.
    Wine Mushrooms 41 3 Mushrooms, 3 Meat Scraps Restores 22,500 HP over 3 seconds 4 Obtain from Meow Meow Temple Shop in Kaifeng.
    Mushroom-Steamed Fish 41 2 Luokou Croaker, 3 Mushrooms Restores 22,500 HP over 3 seconds 4 Fish with Chu Shuiyang in Verdant Wilds.
    Steamed Egg Custard 61 3 Wild Fruits, 2 Eggs Restores 39,000 HP over 3 seconds 5 Unlock “The Thirteenth Chambers” after progressing through the game.
    Mock Clam Fish 61 2 Mandarinfish, 2 Wild Fruits Restores 39,000 HP over 3 seconds 5 Fish with Chu Shuiyang in Verdant Wilds.
    Braised Fish Head 61 2 Bighead Carp, 3 Herbs Restores 39,000 HP over 3 seconds 5 Fish with Chu Shuiyang in Verdant Wilds.

    Note: All cooking costs stamina. Keep this in mind when cooking in bulk.

    Buff Food Recipes

    Though fewer in number, buff foods are just as valuable. Only six buff recipes are currently available, and they provide temporary boosts that do not stack—meaning only one buff can be active at a time.

    Meal Cooking Level Ingredients Effect Stamina Cost How to Unlock
    Crisp Carp Noodles 20 1 Golden Carp, 2 Beauty’s Garment, 2 Mushrooms +1,100 Max HP for 30 min (refresh duration), does not stack during Trials or Martial Mastery 8 Fish with Chu Shuiyang.
    Rotisserie Venison 20 2 Bai Zhu, 1 Deer Meat, 2 Eggs +10-20 Physical Attack for 30 min (refresh duration) 8 Unlock “The Thirteenth Chambers.”
    Crispy Pheasant 41 2 Vicious Frog Meat, 2 Mushrooms, 1 Vicious Flower +20-40 Physical Attack for 30 min (refresh duration) 8 Complete Encounter – Culinary Successor.
    Venison Soup 41 2 Wild Ginseng, 1 Venison, 3 Herbs +2,300 Max HP for 30 min (refresh duration) 8 Unlock “The Thirteenth Chambers.”
    Double Shreds 61 2 Great Bustard Meat, 1 Wei’s Purple Peony, 1 River Fish +50-100 Physical Attack for 30 min (refresh duration) 8 Fish with Chu Shuiyang.
    Pufferfish Soup 61 2 Jade Tower Peony, 1 Pufferfish, 2 Wild Fruits +5,600 Max HP for 30 min (refresh duration) 8 Fish with Chu Shuiyang.

    Important: These buff effects only activate individually and do not accumulate.

    Both types of recipes require stamina to prepare, so plan your cooking sessions accordingly.

  • Complete All Cooking Recipes in Vein: The Ultimate Guide to Solving

    Complete All Cooking Recipes in Vein: The Ultimate Guide to Solving

    Cooking in Vein is essential for survival, providing a dependable way to heal and offering comfort in a dangerous, post-apocalyptic world. Gathering supplies and scavenging for resources is necessary, and there are plenty of ingredients scattered around to help you start your cooking journey.

    Whether you farm for your meals or work with what you already have, there are many recipes to explore, and new ones are just waiting to be discovered. To learn everything the game has to offer, check out our comprehensive cooking guide.

    Cooking Basics

    In the game, there are four main cooking tools: pot, dish, pan, and kettle. Each can be used on a stove, fireplace, or campfire, but different recipes require specific tools.

    Note that despite the various types and sizes, all pots and pans serve the same function; some have larger capacities than others. Finding these tools can be random since they don’t always spawn in the same locations. Focus your search around residential houses or closed businesses, especially areas resembling kitchens. Items such as pots and pans often appear in cardboard boxes scattered throughout these locations. If you want to start with basic recipes, choose the chef occupation during character creation. This grants you three tools, a +25 boost in cooking skills, and access to a magazine with additional recipes once you reach certain skill levels.

    For faster skill advancement, consider specializing in cooking when creating your character, especially if you’re pursuing the chef career for quick mastery.

    How to Cook

    Once equipped with tools and ingredients, cooking in Vein is straightforward. Remember to transfer your ingredients from your inventory into the stove, campfire, or fireplace—nothing will cook if the ingredients aren’t inside the appliance.

    You’ll need your ingredients, any necessary liquids, and the appropriate cooking tool. Recipe details will specify requirements. If any required ingredient appears in red, it’s missing, and you cannot cook that dish yet. Each item cooks at a different speed, and some foods burn quickly if you’re not attentive. The progress bar turns green when your food nears completion.

    Cooking beyond 100% will burn your meal, possibly causing negative effects like stomachaches. Properly cooked food with skill buffs will grant those bonuses, but only if cooked correctly. Once finished, remove the meal from the stove to apply its benefits.

    Turning off the stove doesn’t stop cooking immediately; the dish will continue to cook as it cools, risking burning. Always move your food off the heat source once it’s done.

    Cooking Magazines and Recipes

    Throughout the world, you’ll find cooking magazines that expand your recipe collection. While they spawn randomly, concentrating your search around kitchens or similar areas increases your chances of finding them. Your cooking level determines which recipes you can learn—higher levels unlock more complex dishes.

    A quick way to boost your cooking skill is to fill a container with water from a sink and boil it on the stove. This passive method helps level up your skill without risking burnt food.

    Cooking meals is a better way to keep your character healthy than eating junk scattered around the map. Proper meals prevent sluggishness and drowsiness, helping your survival prospects.

    Recipes and Crafting

    The game offers a wide array of recipes, each requiring specific ingredients, liquids, and tools. Some key examples include:

    • Bagel: Flour, sugar, yeast, water (using a sauce pot), restores 12% hunger.
    • Baguette: Flour, salt, yeast, water (oven dish), restores 24% hunger.
    • Brownie: Fancy chocolate with nuts, flour, sugar, oven dish, restores 3% hunger.
    • Beef Stew: Beef, carrot, potato, broth, cast iron pan, restores 45% hunger and provides a Vitality buff.
    • Cheese Pizza: Cheese, flour, tomato, cooking oil, cast iron pan, restores 180% hunger.
    • Chocolate Cake: Egg tray, fancy chocolate, flour, oven dish, restores 30% hunger.
    • Vegetable Stir Fry: Cabbage, carrot, cooking oil, cast iron pan, restores 38% hunger.

    Some recipes provide skill buffs such as Strength, Vitality, Agility, or specific buffs to help you face the world better.

    Brewing Recipes

    Brewing in Vein follows the same process as cooking but allows the use of a kettle, which requires liquids like water. To brew, approach a sink with an empty container and select the fill option to add water. Once filled, you can craft items like:

    • Broth: Vegetables or meats, water, any tool.
    • Hot Chocolate: Hot chocolate box, milk, any tool.
    • Maple Syrup: Raw syrup sap, no liquids needed.
    • Tea: Tea bag box, water, any tool.

    Always be cautious when cooking; smell can attract zombies, whether they’re hostile or not. Ensure your surroundings are safe before preparing your meals.

  • All Crafting Recipes in Misery: Completing and Solving Guides

    All Crafting Recipes in Misery: Completing and Solving Guides

    Misery is a survival game where crafting plays a crucial role. When you start, you’ll have a basic Crafting Bench in your bunker. This bench allows you to create many items, such as structures, survival tools, and devices to upgrade your bunker.

    This initial crafting station is just the beginning. Using the Crafting Bench, you’ll unlock recipes to craft other objects, each with their own ingredients and functions. Expanding your crafting options enables deeper exploration and progress in the game. To assist players, all crafting recipes in Misery are compiled here for quick reference.

    ### All Crafting Recipes

    There are numerous devices and machines you can craft. Below are categories with detailed tables listing each item, required materials, and their functions.

    #### Crafting Bench Recipes

    | Object | Materials Needed | Use/Notes |
    |————————–|—————————————————–|————————————————————–|
    | Crafting Bench | — | Your initial station; no materials needed. Creating a second is optional but unnecessary early on. |
    | Advanced Crafting Bench | Iron Bar x20, Scrap x20, Wood x20, Electronics x20 | Upgrades your crafting ability; lets you use electricity and build more complex objects. |
    | Sewing Machine | Wood x10, Scrap x10, Iron Bar x2 | Repairs items and creates clothing. |
    | Chemical Table | Iron Bar x20, Wood x30, Glass x15, Electronics x10 | Crafts seeds and items for farming. |
    | Sledgehammer | Scrap x10, Iron Bar x2, Wood x3 | Breaks concrete walls for bunker expansion. |
    | “Busel” Detector | Iron Bar x3, Electronics x5 | Searches for Artifacts and rare items. |
    | Lamp | — | Provides lighting. |
    | Gasoline Generator | Scrap x20, Electronics x10, Insulating Tape x1 | Powers your bunker. |
    | Cupboard | — | Storage space for items. |
    | Cable | — | Transfers energy between devices. |
    | Concrete Wall | Cement x2, Bottle of Water x1 | Builds bunker walls. |
    | Concrete Floor | Cement x2, Bottle of Water x1 | Constructs floors within your bunker. |
    | Concrete Door Frame | Cement x2, Bottle of Water x1 | Adds door frames (not essential early). |
    | Concrete Window Wall | Cement x2, Bottle of Water x1 | Creates windows in walls. |
    | Wooden U Stairs | — | Adds staircases. |
    | Wooden L Stairs | — | Alternative staircase design. |
    | Metal Door | — | Used in conjunction with concrete door frames. |
    | Wooden Window | — | Adds window openings. |
    | Small Crop | — | Grow small plants. |
    | Wooden Wind Turbine | Plastic x10, Scrap x10, Iron Bar x1, Insulating Tape x1 | Generates power outdoors. |
    | Dwarf Generator | Dwarf x1, Wood x20, Iron Bar x3, Insulating Tape x2 | Generates power humorously; needs vodka. |
    | Car Battery | Plastic x20, Scrap x15, Electronics x3 | Stores power. |
    | Combiner | — | Merges two power sources. |
    | Splitter | — | Allows powering multiple devices. |
    | Switcher | — | Controls power flow. |
    | Metal Railing | — | Requires support for installation. |
    | Gun Cleaning Kit | Deer Skin x1, Insulating Tape x1, Scrap x1 | Crafts weapons. |
    | Sewing Kit | — | Repairs and creates clothing. |
    | Wooden L Stairs | — | Adds additional stairs. |

    #### Advanced Crafting Bench Recipes

    Using your initial Crafting Bench, you can craft an upgraded version that unlocks advanced items as well as improved versions of basic ones.

    | Object | Materials Needed | Use/Notes |
    |————————-|—————————————————————————|———————————————————|
    | Ammo Crafting Station | Iron Bar x30, Scrap x30, Plastic x20, Electronics x15 | Creates ammunition. |
    | Large Crop | — | Grow more crops simultaneously. |
    | Metal Wind Turbine | Scrap x10, Iron Bar x10, Electronics x10, Plastic x5 | Produces more power than the wooden turbine. |
    | Accumulator | Scrap x20, Iron Bar x15, Plastic x20, Electronics x25 | Stores large amounts of energy, capacity of 10,000 units. |
    | Solar Panel | Plastic x20, Iron Bar x20, Scrap x30, Electronics x20 | Generates 5 units of power outdoors. |
    | Gas Stove | Scrap x10, Iron Bar x5, Electronics x10, Gasoline x1 | Allows cooking food in your bunker. |
    | Safe | — | Provides secure storage space. |
    | Exoskeleton | Iron Bar x30, Scrap x30, Electronics x30, Sewing Kit x3, Military Uniform x1 | Max armor and radiation protection. |

    #### Sewing Machine Recipes

    To craft a Sewing Machine, do so at the basic Crafting Bench. Recipes include various protective suits and masks:

    | Object | Materials Needed | Use/Notes |
    |————————–|————————————————|——————————————————–|
    | Bandit Hazmat Suit | Torn Bandit Hazmat x1, Sewing Kit x1 | Radiation protection and item storage. |
    | Hazmat Suit | Torn Hazmat Suit x1, Sewing Kit x1 | Basic radiation protection, no storage. |
    | Spetsnaz Uniform | Torn Spetsnaz Uniform x1, Sewing Kit x1 | High armor and item space. |
    | Military Uniform | Torn Military Uniform x1, Sewing Kit x1 | Similar to Spetsnaz but with poorer heat resistance. |
    | Gas Mask | Broken Gas Mask x1, Sewing Kit x1 | Protects against radiation. |
    | Plague Mask | Broken Plague Mask x1, Sewing Kit x1 | Less protection than Gas Mask. |
    | PKM-2 Gas Mask | Broken PKM-2 Gas Mask x1, Sewing Kit x1 | Better radiation resistance. |
    | Military Gas Mask | Broken Military Gas Mask x1, Sewing Kit x1 | Best head protection from radiation. |

    #### Chemical Table Recipes

    Crafting these requires the Chemical Table, which is built at the basic Crafting Bench. Recipes include:

    | Object | Materials Needed | Use/Notes |
    |——————–|————————————————–|—————————————————–|
    | Cement | Ash x2, Bottle of Water x1 | Building structures. |
    | Gunpowder | — | Craft ammunition and explosives. |
    | Flour | — | Make bread. |
    | Sugar | Wheat x1, Alenka Chocolate x1 | For cooking recipes. |
    | Tomato Seeds | — | Grow tomatoes. |
    | Carrot Seeds | — | Grow carrots. |
    | Cucumber Seeds | — | Grow cucumbers. |
    | Jar of Tomatoes | — | Store and use for cooking. |
    | Jar of Pickles | — | Preserves cucumbers. |
    | Vodka | Bottle of Water x1, Sugar x1, Glass x1 | Restores stats but hurts others. |
    | Medkit | Bandage x1, Plastic x1, Ash x1, Sewing Kit x1 | Temporarily heals. |
    | Car Medkit | Medkit x2, Bandage x1, Ash x1, Sewing Kit | Fully restores health; high material cost. |
    | Anti-Rad | — | Protects against radiation when not wearing suits. |
    | Bottle of Clean Water | Radioactive Bottle of Water x1 | Essential in a wasteland environment. |

    These recipes form the core of your crafting experience in Misery, allowing you to build, defend, heal, and explore more effectively in the game’s post-apocalyptic world.

  • Completing Smoothie Recipes and Their Solving Effects in The Sims 4

    Completing Smoothie Recipes and Their Solving Effects in The Sims 4

    There are ten different types of smoothies that your Sim can prepare using the blender in the “Adventure Awaits” expansion for The Sims 4. These smoothies offer various benefits, from boosting mood to serving as meal replacements, so gather the right ingredients and start blending.

    How to Make Smoothies

    While many mods add new electronic devices, the “Adventure Awaits” pack introduces a blender called the Smoothietron: A Blender Experience, which you can find in the Build/Buy mode under the Kitchen Appliances menu. You can prepare smoothies in two ways:

    • Use ingredients from your household fridge, such as fruits, vegetables, animal products, and jams—especially handy if you have the Cottage Living expansion and a garden.
    • Purchase smoothies directly from the blender, spending Simoleons if you don’t have the needed ingredients on hand.

    When your Sims drink their smoothies, they will experience various effects depending on the recipe they chose or ordered from the Smoothietron.

    All Smoothies and Their Effects in The Sims 4: Adventure Awaits

    Smoothie Name Ingredients Cost (§) Effect
    Energizing Apple Spinach Smoothie 10 Gives an energized moodlet.
    Eagle Eye Carrot Smoothie 1 Carrot, 1 other vegetable 10 Provides a focused moodlet that speeds up archery and handiness skills.
    The Purg Sequence 10 Immediately lowers the Bladder need, then grants the Steel Bladder moodlet to slow bladder decrease for hours.
    Vitamin Focus Smoothie 1 Fruit, 1 Vegetable 10 Boosts positive moodlet effects and makes skill gaining slightly easier.
    Berry Banana Blitz Smoothie 10 No specific effects listed.
    Athletic Boost Protein Smoothie 10 Enhances fitness skill gains and workout effectiveness.
    Slim Chocolate Shake 15 Slightly reduces the Sim’s size, acting as a workout substitute.
    Meal Replacement Peanut Butter Smoothie 1 Milk or Egg, 1 Fruit, 1 Vegetable 20 Satisfies the Hunger need equal to a quick fridge meal.
    Rainbow Calamity 1 Milk or Egg, 1 Fruit, 1 Vegetable 20 Grants the Rainbow Bliss moodlet, boosting positive mood effects overall.
    X-TREME Muscle! Protein Smoothie 25 Elevates energetic moodlets, leading to better workouts with less fatigue.

    Stock your fridge with fruits, vegetables, and other ingredients to make these smoothies or buy them ready-made for quick benefits in your gameplay.

  • Complete All Cooking Recipes for Story of Seasons: Grand Bazaar

    Apple Jam
    Weight: 935G
    Buy it and enjoy it at Mini Madeleine’s for 1,304G.
    Bazaar Rank 4

    Apple Juice
    Price: 221G
    Buy it and enjoy it at Mini Madeleine’s for 309G.
    Bazaar Rank 4

    Autumn Juice
    Includes: Blueberry Juice, Grape Juice, Apple Juice
    Total Cost: 1,313G
    Eat at Mini Madeleine’s for 1,414G.
    Bazaar Rank 5

    Autumn Blend Tea
    Cost: 1,888G
    Make it by blending autumn tea leaves at the yellow windmill.
    Bazaar Rank 4

    Babaocai
    Ingredients: Mushroom, Nappa Cabbage, Green Bell Pepper, Carrot, Shimeji or Shiitake Mushroom
    Price: 1,509G
    Unlocks the Hydrator Title, no specific location.

    Baguettes
    Price: 662G
    Eat at Mini Madeleine’s for 926G.
    Bazaar Rank 4

    Banana Tea
    Cost: 832G
    Enjoy at Mini Madeleine’s for 1,164G.
    Bazaar Rank 4

    Black Tea
    Price: 401G
    Enjoy at Madeleine’s Cafe for 561G.
    Bazaar Rank 2

    Blueberry Jam
    Cost: 863G
    Enjoy at Mini Madeleine’s for 1,208G.
    Bazaar Rank 5

    Blueberry Juice
    Price: 163G
    Enjoy at Mini Madeleine’s for 228G.
    Bazaar Rank 4

    Blueberry Tea
    Cost: 601G
    Enjoy at Mini Madeleine’s for 841G.
    Bazaar Rank 4

    Boiled Egg
    Default; No cost or location.
    Unloked by default.
    Bazaar Rank 1

    Boullabaisse
    Ingredients: Oil, Fish, Tomato, Nut/Herb/Olive or Grape Oil
    Price: 853G
    Eat at Mini Madeleine’s for 1,169G.
    Bazaar Rank 4

    Bread
    Price: 195G
    Enjoy at Madeleine’s Cafe for 273G.
    Bazaar Rank 1

    Buttered Roll
    Cost: 1,056G
    Enjoy at Madeleine’s Cafe for 1,478G.
    Bazaar Rank 3

    Chamomile Tea
    Price: 344G
    Enjoy at Madeleine’s Cafe for 481G.
    Bazaar Rank 1

    Cheese Bun
    Ingredients: Cheese (or Herb Cheese), Buffalo Milk, Wheat Flour
    Cost: 1,320G
    Enjoy at Mini Madeleine’s for 1,848G.
    Bazaar Rank 5

    Cherry Juice
    Price: 182G
    Enjoy at Mini Madeleine’s for 254G.
    Bazaar Rank 4

    Cherry Tea
    Cost: 647G
    Enjoy at Mini Madeleine’s for 905G.
    Bazaar Rank 4

    Churros
    Ingredients: Oil, Egg, Wheat Flour, Sugar
    Price: 1,332G
    Unlocks the Scene Stealer Title.
    N/A

    Cooked Rice
    Price: 91G
    Enjoy at Madeleine’s Cafe for 127G.
    Bazaar Rank 1

    Cookies
    Price: 328G
    Enjoy at Madeleine’s Cafe for 459G.
    Bazaar Rank 1

    Corn Soup
    Ingredients: Butter, Buffalo Milk, Corn, Onion
    Price: 1,815G
    Enjoy at Mini Madeleine’s for 2,541G.
    Bazaar Rank 5

    Egg Drop Soup
    Default; No cost or location.
    Unlocked by default.
    Bazaar Rank 1

    Egg Over Rice
    Default; No cost or location.
    Unlocked by default.
    Bazaar Rank 1

    Egg Tart
    Price: 601G
    Unlocks the Milker Title.
    Bazaar Rank 4

    Fish and Chips
    Ingredients: Nut/Herb/Olive or Grape Oil, Oil, Potato, Rice or Wheat Flour
    Price: 1,584G
    Enjoy at Mini Madeleine’s for 2,217G.
    Bazaar Rank 5

    French Fries
    Ingredients: Nut/Herb/Olive or Grape Oil, Oil, Potato
    Price: 355G
    Enjoy at Mini Madeleine’s for 497G.
    Bazaar Rank 4

    Fried Egg
    Price: 396G
    Enjoy at Madeleine’s Cafe for 554G.
    Bazaar Rank 2

    Fried Onigiri
    Price: 735G
    Enjoy at Mini Madeleine’s for 1,029G.
    Bazaar Rank 4

    Fruit Dumplings
    Ingredients: 2 Fruits, Refined Rice Flour
    Price: 1,089G
    Enjoy at Mini Madeleine’s for 1,524G.
    Bazaar Rank 4

    Fruit Sandwich
    Price: 647G
    Eat at Mini Madeleine’s for 905G.
    Bazaar Rank 4

    Galette
    Ingredients: Nut/Herb/Olive or Grape Oil, Oil, Potato, Buckwheat Flour
    Price: 1,122G
    Enjoy at Mini Madeleine’s for 1,570G.
    Bazaar Rank 5

    Gazpacho Soup
    Cost: 490G
    Enjoy at Madeleine’s Cafe for 686G.
    Bazaar Rank 2

    Grape Jam
    Cost: 1,007G
    Enjoy at Mini Madeleine’s for 1,409G.
    Bazaar Rank 4

    Grilled Fish
    Default; No cost or location.
    Unlocked by default.
    Bazaar Rank 1

    Happy Forest Mix
    Price: 130G
    Buy at the Happy Shoppe and gain 3,000 Happy Energy.
    Bazaar Rank 1

    Happy Mushroom Fry
    Ingredients: Shimeji or Shiitake Mushroom, Salt
    Price: 662G
    Buy at Happy Shoppe for 3,000 Happy Energy.
    Bazaar Rank 3

    Hash Browns
    Ingredients: Nut/Herb/Olive or Grape Oil, Oil, Potato, Wheat Flour
    Price: 632G
    Enjoy at Mini Madeleine’s for 884G.
    Bazaar Rank 4

    Herb Bread
    Price: 1,182G
    Enjoy at Mini Madeleine’s for 1,654G.
    Bazaar Rank 5

    Herb Cookies
    Price: 415G
    Enjoy at Mini Madeleine’s for 581G.
    Bazaar Rank 4

    Herb Pasta
    Price: 616G
    Located in the bookshelf at Derek and Jules’ house.
    N/A

    Herb Salad
    Default; No cost.
    Unlocked by default.
    Bazaar Rank 1

    Herb Sandwich
    Cost: Complete Mina’s request.
    N/A

    Herb Soup
    Default; No cost.
    Unlocked by default.
    Bazaar Rank 1

    Honey Cake
    Cost: 755G
    Unlocks by progressing through the story.
    Bazaar Rank 1

    Honey Juice
    Price: 325G
    Enjoy at Madeleine’s Cafe for 455G.
    Bazaar Rank 1

    Hot Coffee
    Price: 380G
    Enjoy at Madeleine’s Cafe for 532G.
    Bazaar Rank 2

    Ice Cream
    Price: 832G
    Located in the bookshelf in June’s house.
    Bazaar Rank 1

    Jam Tea
    Price: 1,850G
    Enjoy at Madeleine’s Cafe for 2,590G.
    Bazaar Rank 5

    Jam-Filled Bun
    Ingredients: Wheat Flour, Jam (Strawberry, Grape, or Apple)
    Price: 1,339G
    Eat at Madeleine’s Cafe for 1,874G.
    Bazaar Rank 3

    Lemon Tea
    Cost: 632G
    Enjoy at Mini Madeleine’s for 884G.
    Bazaar Rank 4

    Marinated Peppers
    Ingredients: Red Bell Pepper, Nut/Herb/Olive or Grape Oil, Oil, Vinegar
    Price: 598G
    Enjoy at Mini Madeleine’s for 837G.
    Bazaar Rank 4

    Mashed Potatoes
    Price: 677G
    Enjoy at Madeleine’s Cafe for 947G.
    Bazaar Rank 2

    Melon Tea
    Price: 1,901G
    Enjoy at Mini Madeleine’s for 2,661G.
    Bazaar Rank 5

    Meuniere Fish
    Ingredients: Nut/Herb/Olive or Grape Oil, Oil, Wheat Flour, Fish
    Price: 1,073G
    Enjoy at Mini Madeleine’s for 1,502G.
    Bazaar Rank 5

    Milk Hot Pot
    Ingredients: Spinach, Napa Cabbage, Carrot, Milk
    Price: 2,640G
    Enjoy at Mini Madeleine’s for 3,696G.
    Bazaar Rank 5

    Milk Rice Porridge
    Cost: 801G
    Enjoy at Mini Madeleine’s for 1,121G.
    Bazaar Rank 4

    Mint Tea
    Price: 344G
    Complete Freya’s request.
    N/A

    Mushroom Pasta
    Ingredients: Shimeji or Shiitake Mushroom, Butter, Pasta
    Price: 1,449G
    Enjoy at Madeleine’s Cafe for 2,028G.
    Bazaar Rank 3

    Mushroom Rice
    Price: 874G
    Complete Madeleine’s request.
    N/A

    Olive Tea
    Price: 586G
    Enjoy at Mini Madeleine’s for 820G.
    Bazaar Rank 4

    Omelet
    Price: 721G
    Enjoy at Madeleine’s Cafe for 1,009G.
    Bazaar Rank 2

    Omelet Rice
    Default; no specific location.
    Unlocked by default.

    Onigiri
    Price: 370G
    Enjoy at Madeleine’s Cafe for 518G.
    Bazaar Rank 1

    Onion Salad
    Price: 325G
    Enjoy at Madeleine’s Cafe for 455G.
    Bazaar Rank 1

    Onion Soup
    Price: 1,024G
    Enjoy at Mini Madeleine’s for 1,433G.
    Bazaar Rank 5

    Oolong Tea
    Cost: 401G
    Complete Derek’s request.
    N/A

    Orange Juice
    Price: 180G
    Enjoy at Mini Madeleine’s for 252G.
    Bazaar Rank 4

    Orange Tea
    Cost: 642G
    Enjoy at Mini Madeleine’s for 898G.
    Bazaar Rank 4

    Paella
    Price: 1,151G
    Enjoy at Mini Madeleine’s for 1,611G.
    Bazaar Rank 5

    Pancakes
    Ingredients: Egg, Milk, Wheat Flour, Honey
    Price: 1,152G
    Enjoy at Madeleine’s Cafe for 1,612G.
    Bazaar Rank 3

    Pasta
    Price: 328G
    Enjoy at Madeleine’s Cafe for 459G.
    Bazaar Rank 1

    Pineapple Juice
    Price: 429G
    Enjoy at Mini Madeleine’s for 600G.
    Bazaar Rank 4

    Pineapple Tea
    Cost: 1,320G
    Enjoy at Mini Madeleine’s for 1,848G.
    Bazaar Rank 5

    Poached Egg
    Price: 301G
    Enjoy at Madeleine’s Cafe for 421G.
    Bazaar Rank 2

    Poke
    Price: 1,197G
    Enjoy at Mini Madeleine’s for 1,675G.
    Bazaar Rank 5

    Popcorn
    Price: 508G
    Unlocks the Neighborly Title.
    N/A

    Potato Pancakes
    Price: 429G
    Enjoy at Madeleine’s Cafe for 600G.
    Bazaar Rank 2

    Pudding
    Price: 328G
    Unlocks the Generous Forager Title.
    N/A

    Rainbow Curry
    Ingredients: Curry Powder, Spinach, Red Bell Pepper
    Price: 1,304G
    Enjoy at Mini Madeleine’s for 1,825G.
    Bazaar Rank 5

    Rice Gratin
    Price: 1,188G
    Enjoy at Mini Madeleine’s for 1,663G.
    Bazaar Rank 5

    Rice Porridge
    Price: 544G
    Enjoy at Madeleine’s Cafe for 761G.
    Bazaar Rank 2

    Risotto
    Price: 1,552G
    Enjoy at Madeleine’s Cafe for the same price.
    Bazaar Rank 3

    Sandwich
    Price: 375G
    Enjoy at Madeleine’s Cafe for 525G.
    Bazaar Rank 1

    Sashimi
    Default; No cost or location.
    Unlocked by default.

    Sauteed Cauliflower
    Price: 602G
    Enjoy at Mini Madeleine’s for 842G.
    Bazaar Rank 4

    Sauteed Turnips
    Price: 882G
    Enjoy at Madeleine’s Cafe for 1,234G.
    Bazaar Rank 2

    Scones
    Price: 1,155G
    Enjoy at Madeleine’s Cafe for 1,617G.
    Bazaar Rank 3

    Soy Milk
    Price: 85G
    Enjoy at Madeleine’s Cafe for 119G.
    Bazaar Rank 1

    Soy Milk Pudding
    Price: 501G
    Enjoy at Mini Madeleine’s for 842G.
    Bazaar Rank 4

    Spaghetti Soup
    Price: 1,566G
    Enjoy at Madeleine’s Cafe for 2,192G.
    Bazaar Rank 3

    Steamed Bun
    Ingredients: Napa Cabbage, Green Onion, Shiitake Mushroom, Wheat Flower
    Price: 1,377G
    Enjoy at Mini Madeleine’s for 1,927G.
    Bazaar Rank 5

    Steamed Cake
    Ingredients: Milk, Egg, Pumpkin, Wheat Flour
    Price: 1,422G
    Enjoy at Mini Madeleine’s for 1,990G.
    Bazaar Rank 5

    Steamed Muffin
    Ingredients: Sweet Potato, Egg, Wheat Flour
    Price: 609G
    Available at Clara’s Diner.
    Bazaar Rank 5

    Strawberry Jam
    Price: 855G
    Enjoy at Mini Madeleine’s for 1,197G.
    Bazaar Rank 4

    Strawberry Juice
    Price: 156G
    Enjoy at Madeleine’s Cafe for 218G.
    Bazaar Rank 1

    Strawberry Mochi
    Price: 618G
    Unlocks the Big Hops Title, no specific location.

    Strawberry Pie
    Ingredients: Egg, Strawberry, Wheat, Butter
    Price: 1,368G
    Enjoy at Madeleine’s Cafe for 1,915G.
    Bazaar Rank 3

    Strawberry Tea
    Cost: 586G
    Enjoy at Madeleine’s Cafe for 820G.
    Bazaar Rank 4

    Toast
    Price: 234G
    Located in the bookshelf at June’s house.
    Bazaar Rank 1

    Toasted Mochi
    Price: 390G
    Enjoy at Mini Madeleine’s for 546G.
    Bazaar Rank 4

    Tofu
    Price: 205G
    Enjoy at Mini Madeleine’s for 287G.
    Bazaar Rank 4

    Tofu Steak
    Price: 809G
    Enjoy at Mini Madeleine’s for 1,132G.
    Bazaar Rank 4

    Tomato Juice
    Price: 55G
    Enjoy at Madeleine’s Cafe for 77G.
    Bazaar Rank 1

    Tomato Salad
    Default; No cost.
    Unlocked by default.

    Turnip Salad
    Default; No cost.
    Unlocked by default.

    Walnut Cookies
    Price: 524G
    Enjoy at Madeleine’s Cafe for 733G.
    Bazaar Rank 2

    Walnut Juice
    Default; No cost.
    Unlocked by default.

    Warm Milk
    Price: 195G
    Enjoy at Madeleine’s Cafe for 273G.
    Bazaar Rank 1

    Watermelon Tea
    Price: 2,148G
    Enjoy at Mini Madeleine’s for 3,007G.
    Bazaar Rank 5

    White Bread
    Price: 182G
    Enjoy at Nadine’s Bistro.
    Bazaar Rank 5

  • All Secret Windmill Recipes Solved with Purple Wonderstone in SoS: Grand Bazaar

    All Secret Windmill Recipes Solved with Purple Wonderstone in SoS: Grand Bazaar

    During the early stages of Story of Seasons: Grand Bazaar, you’ll frequently meet different windmills as Isaac assigns you various tasks to unlock each one. Every windmill produces unique recipes, which will become your primary way to earn money once you have the right ingredients.

    Although you’ll unlock all three windmills fairly early in the game, you can expand the variety of recipes they process by obtaining the Purple Wonderstone. Luckily, earning this item isn’t too difficult once you’ve advanced enough in the game.

    How to Get the Purple Wonderstone

    To acquire the Purple Wonderstone, you first need to upgrade your bazaar four times and reach the fifth rank. Once you hit this level, Felipe, Miguel’s brother, who stands behind him in the general store, will give you a new stall request.

    Felipe asks you to generate 200,000 sales in a single day at your bazaar to get his stall. After completing this challenge, his stall will be added to the bottom left corner of your existing stall. You can then browse his shop on bazaar days, where each Wonderstone, including the purple one, costs about 140,000 gold.

    All New Windmill Recipes with Purple Wonderstone

    Once you have the Purple Wonderstone, you can insert it into the mechanism to the left of where you assign processing tasks in any windmill. Each windmill will then unlock new recipes. Here are the recipes for each windmill:

    Red Windmill

    Item Recipe Ingredients Sale Price Processing Time
    Summer Sun Stone 5 Pink Diamonds, 10 Diamonds, 3 Legendary Treasures Chests, 3 Ancient Fish Fossils, 3 Starry Sand Bottles Not sellable 10 days
    Sprinkler 5 Gold, 10 Silver, 20 Copper, 30 Iron 10,000 1 day
    Pickled Veggie Mix Pickled Turnip, Potato, Onion, Radish 4,104 2 days, 12 hours
    Blended Perfume Citrus, Herbal, Floral, Tea Perfumes 6,434 6 hours

    Note: Processing times can vary depending on wind conditions, increasing or decreasing based on the day.

    Blue Windmill

    Item Recipe Ingredients Sale Price Processing Time
    Autumn Sun Stone 5 Pink Diamonds, 10 Diamonds, 10 Golden Crops, 10 Milk+, 10 Eggs+ Not sellable 10 days
    Bronze Medal 300 1 hour
    Silver Medal 500 2 hours
    Gold Medal 1,500 3 hours
    Guardian Bait Fish Bait Stock, 4 Weeds, 1 Fish Bones 1,000 1 day

    Yellow Windmill

    Item Recipe Ingredients Sale Price Processing Time
    Winter Sun Stone 5 Pink Diamonds, 10 Diamonds, 30 Rubies, 30 Emeralds, 30 Amethysts Not sellable 10 days
    Travel Stone Wind Jewel, Feather Jewel, Sky Jewel Not sellable 10 days
    Ultimate Hoe Orichalcum Hoe, 3 Mithril, Adamantite, 9 Orichalcum, 20 Ultimate Stone Not sellable 5 days
    Ultimate Watering Can Orichalcum Watering Can, 3 Mithril, Adamantite, 15 Orichalcum Not sellable 5 days
    Ultimate Sickle Orichalcum Sickle, 3 Mithril, Adamantite, 12 Orichalcum, 15 Ultimate Stone Not sellable 5 days
    Ultimate Fishing Rod Orichalcum Fishing Rod, 3 Mithril, Adamantite, 6 Orichalcum, 40 Ultimate Lumber Not sellable 5 days
    Ultimate Hatchet Orichalcum Hatchet, 3 Mithril, Adamantite, 15 Orichalcum, 20 Ultimate Lumber Not sellable 5 days

    Other recipes include jewelry and tea tins, where the sale prices depend on the quality of ingredients used. For example:

    • Pink Brooch: 55,776 gold (takes 5 days to craft)
    • Sparkly Bracelet: 30,240 gold (4 days, 12 hours)
    • Spring Blend Tea Tin: 1,116 gold (16 hours)
    • Summer Blend Tea Tin: 1,116 gold (16 hours)
    • Autumn Blend Tea Tin: 1,259 gold (16 hours)
    • Golden Blend Tea Tin: 9,965 gold (3 days, 8 hours)

    Note: Sale prices can vary based on ingredient quality.

  • How To Complete All Brainpower Recipes in Grounded 2

    How To Complete All Brainpower Recipes in Grounded 2

    As you progress in Grounded 2, your ability to craft items that boost your gameplay unlocks as your intelligence increases. When you explore and find new resources—like plants, bugs, and food—you analyze them at the Resource Analyzer. Doing so reveals useful recipes you can craft to help during your adventures in the park.

    Your Brainpower level controls which additional items you can craft at the Workbench. Each level up to level nine offers new recipes to unlock, providing more tools, weapons, and armor. Knowing your current Brainpower level helps you see what you can craft and what resources are needed for each recipe in Grounded 2.

    ### How To Increase Brainpower

    As you explore Grounded 2, you’ll encounter new resources. These include various plants, insects, and edible items. Collecting and harvesting these resources is vital not only for crafting but also for increasing your Brainpower.

    Your Brainpower reflects your knowledge. Every time you learn something new—such as analyzing a resource or defeating a new bug—you gain more knowledge. This progress unlocks new recipes, allowing you to craft better gear that enhances your chances of survival in the park.

    The only way to boost your Brainpower is by analyzing new resources you come across during gameplay. Ranger Stations are equipped with a Resource Analyzer, where you can scan each new resource to gain Brainpower points.

    > Tip: Every time you encounter a new bug or harvest an unfamiliar resource, take it to the nearest Ranger Station for analysis.

    ### All Brainpower Unlocks And Recipes

    As your Brainpower increases, new recipes become available on the unlock screen. Here are some examples of recipes you can unlock at different levels, along with the resources needed:

    | Brainpower Level | Recipe Name | Resources Needed |
    |——————-|————————-|—————————————————————|
    | 1 | Clover Hood | 4 x Clover Leaf, 1 x Crude Rope |
    | 1 | Warhammerlet | 3 x Pebblet, 3 x Sprig, 3 x Sap |
    | 1 | Arrow | 5 x Thistle Needle, 2 x Mite Fuzz |
    | 1 | Clover Poncho | 6 x Clover Leaf, 3 x Crude Rope |
    | 1 | Clover Shin Guards | 2 x Sprig, 3 x Clover Leaf, 2 x Crude Rope |
    | 2 | Larvalance | 4 x Red Ant Part, 2 x Larva Spike, 2 x Crude Rope |
    | 2 | Weevil Shield | 2 x Grub Hide, 2 x Raw Weevil Meat, 1 x Crude Rope |
    | 2 | Canteen | 3 x Grub Hide, 2 x Crude Rope |
    | 2 | Water Container | 3 x Acorn Shell, 1 x Clover Leaf, 2 x Crude Rope |
    | 3 | Red Ant Knee Guards | 6 x Red Ant Parts, 4 x Mite Fuzz, 2 x Crude Rope |
    | 3 | Green Machine | 1 x Clover Leaf, 1 x Slime Mold Stalk, 1 x Grass Seed |
    | 3 | Smoothie Station | 4 x Sprig, 1 x Acorn Top, 5 x Grub Sludge |
    | 3 | Red Ant Arm Guards | 5 x Red Ant Part, 2 x Acid Gland, 2 x Mite Fuzz |
    | 3 | Red Ant Helmet | 3 x Red Ant Part, 1 x Red Ant Head, 5 x Mite Fuzz |
    | 3 | Crimson Saber | 3 x Red Ant Part, 2 x Red Ant Mandibles, 2 x Grub Hide |
    | 4 | Crimson Buckler | 4 x Red Ant Part, 2 x Grub Hide, 4 x Mite Fang |
    | 4 | Red Ant Club | 3 x Sap, 4 x Red Ant Part, 3 x Red Ant Mandibles, 2 x Crude Rope |
    | 4 | Ant Head Totem | 1 x Sprig, 1 x Red Ant Head, 1 x Crude Rope |
    | 4 | Gas Mask | 4 x Gnat Fuzz, 1 x Stinkbug Part, 1 x Weevil Nose, 2 x Crude Rope |
    | 5 | Jerky Rack | 5 x Bombardier Part, 6 x Crude Rope |
    | 5 | Weaver Leggings | 4 x Orb Weaver Chunk, 2 x Spine Nub, 3 x Silk Rope |
    | 5 | Weaver Spaulders | 5 x Orb Weaver Chunk, 2 x Spine Nub, 4 x Silk Rope |
    | 5 | Weaver Daggers | 4 x Orb Weaver Chunk, 2 x Orb Weaver Fang, 2 x Silk Rope |
    | 5 | Flashfurter | 1 x O.R.C. Receiver, 1 x Blue Butterfly Chunk, 1 x Unstable Goo, 1 x Silk Rope |
    | 5 | Weaver Hood | 3 x Orb Weaver Chunk, 2 x Orb Weaver Fang, 2 x Spine Nub |
    | 6 | O.R.C. Receiver | Looted from O.R.C. bugs |
    | 6 | Ladyguard | 3 x Sap, 4 x Ladybug Part, 2 x Crude Rope |
    | 6 | Ladybug Faceplate | 2 x Ladybug Part, 1 x Ladybug Head, 3 x Blueberry Leather |
    | 6 | Ladybug Chestplate | 2 x Flower Petal, 4 x Ladybug Part, 4 x Blueberry Leather |
    | 6 | Ladybug Shin Guards | 4 x Flower Petal, 5 x Ladybug Part, 4 x Blueberry Leather |
    | 6 | Feather Arrow | 1 x Crow Feather Piece, 3 x Silk Rope |
    | 7 | Bee Shoulder Pads | 5 x Bee Fuzz, 4 x Blueberry Leather, 3 x Silk Rope |
    | 7 | Stinger Spear | 1 x Bee Stinger, 5 x Bee Fuzz, 3 x Silk Rope |
    | 7 | Bee Shin Guards | 4 x Bee Fuzz, 4 x Blueberry Leather, 4 x Silk Rope |
    | 7 | Bee Face Mask | 1 x Bee Stinger, 4 x Bee Fuzz, 2 x Blueberry Leather |
    | 7 | Disrupter Arrow | 1 x O.R.C. Receiver, 5 x Feather Arrow |
    | 8 | Glacial Sting | 2 x Pine Needle, 1 x Northern Scorpion Stinger, 4 x Mint Shard |
    | 8 | Butterfly Circlet | 4 x Blue Butterfly Scales, 4 x Blue Butterfly Chunk, 5 x Mint Shard |
    | 8 | Butterfly Robes | 4 x Blue Butterfly Scales, 2 x Blue Butterfly Wing, 5 x Blueberry Leather |
    | 8 | Butterfly Boots | 5 x Blue Butterfly Chunk, 4 x Blueberry Leather, 3 x Silk Rope |
    | 9 | Landing Pad | 6 x Milkweed Tuft, 6 x Blueberry Leather, 3 x Crude Rope |
    | 9 | Volatile Capacitor | 3 x O.R.C. Receiver, 4 x Unstable Goo, 3 x Bug Rubber, 1 x Praying Mantis Head |
    | 9 | Snail Shell Casque | 2 x Lingonberry Leather, 3 x Garden Snail Fragment, 2 x Garden Snail Eyestalk |
    | 9 | Snail Shell Plastron | 5 x Acid Gland, 4 x Lingonberry Leather, 5 x Garden Snail Fragment |
    | 9 | Snail Shell Greaves | 3 x Lingonberry Leather, 4 x Garden Snail Fragment, 2 x Silk Rope

    Your progression relies on analyzing new finds frequently, especially bugs and resources you haven’t encountered before. Always bring these to a Ranger Station for analysis to maximize your Brainpower and unlock new crafting options.

  • Completing the Top Potion Recipes in Oblivion Remastered

    Completing the Top Potion Recipes in Oblivion Remastered

    Alchemy plays a crucial role in Oblivion Remastered. While it’s possible to overlook this feature, doing so could lead you to spend a large amount of gold on potions from shops. Alternatively, you could save your money but find yourself burdened by negative effects and missing chances to defeat enemies quickly.

    We’ve curated a list of our favorite potions. The earlier choices highlight how easy they are to create, but our top pick is astonishingly simple. Each potion is selected based on how often we’ve found their recipes to be invaluable.

    9
    Feather + Fortify Speed

    Are you tempted to take everything you come across? If you find yourself overloaded, it can be frustrating to decide whether to leave behind treasures or to return later to collect them.

    Feather reduces your Encumbrance while it lasts, making it easier to carry your loot. Coupled with Fortify Speed, you’ll move faster, giving you time to deposit your treasures safely before needing to drink another potion.

    • Smoked Baliwog Log
    • Lady’s Mantle, Venison, Flax Seeds, Sacred Lotus Seeds, or Somnalius Frond

    8
    Resist Disease

    This straightforward potion significantly reduces your chances of contracting diseases in Oblivion Remastered.

    There are about 34 diseases in the game, which presents many opportunities for harmful effects that can only be cured in limited ways. It’s wise to avoid getting sick!

    • Bergamot Seeds, Garlic, or Vampire Dust
    • Any two from Clannfear Claws, Foxglove Nectar, Sweetroll, or Tinder Polypore Cap

    7
    Water Walking

    While there are various means to achieve water walking, drinking a potion guarantees this ability even if your character lacks the magical proficiency to cast the spell.

    Water Walking allows you to cross waterways without worrying about potential aquatic threats. Though some enemies will still be a risk overhead, you’ll greatly reduce your exposure to danger.

    Crossing lava with this ability is also beneficial. You might still take damage, but you can avoid much of the trouble associated with it.

    • Tiger Lily Nectar, Fungus Stalk, or Swamp Tentacle
    • Grapes, Stinkhorn Cap, or Scales; either Fungus Stalk or Swamp Tentacle can replace one ingredient if not previously used.

    6
    Fortify Strength + Fortify Health

    If you enjoy using melee weapons, then Fortify Strength greatly enhances your damage output, allowing you to take down enemies quicker. Meanwhile, Fortify Health gives you resilience against incoming damage.

    This combination is effective and straightforward to craft.

    • Void Essence, Arrow Root, or Fungus Stalk
    • Garlic, Ogre’s Tooth, or Lady’s Smock Leaves
    • Mutton, Swamp Tentacle, Somnalius Frond, or one of the above
    • An additional mix of the above

    5
    Fortify Intelligence + Fortify Magicka + Restore Magicka

    This potent mix is perfect for spellcasters. Fortify Intelligence increases your overall Magicka pool, allowing access to more powerful spells. Fortify Magicka serves a similar purpose, making their combination especially beneficial.

    Restore Magicka keeps your levels topped off, enabling you to keep casting spells without interruption.

    • Blister Pod Cap + Carrot + Clouded Funnel Cap + Void Salts

    4
    Invisibility + Night Eye

    This combination is ideal for stealth-oriented players. Invisibility conceals you from enemies, although some sounds might still betray your presence. It’s an excellent choice for sneaky builds, but even those who prefer fighting can benefit from it.

    Night Eye enhances your vision in dark environments. Unlike a torch, which would reveal your location, Night Eye ensures you stay hidden while still being able to see. Together, these effects can have great results.

    • Aloe Vera Leaves
    • Lady’s Mantle Leaves
    • Motherwort Sprig
    • Viper’s Bugloss Leaves

    3
    Cure Disease

    At some point, you will contract diseases. With around 34 infections in the game, avoiding them isn’t always possible. Even when you’re prepared, there’s still a chance of getting sick.

    Managing vampirism is particularly tricky, with limited means to cure it. Keeping Cure Disease potions on hand is essential in Oblivion Remastered.

    Even if you’re not an alchemy enthusiast, you might want to purchase some of these potions from vendors.

    • Mandrake Root, Clannfear Claws, or Withering Tongue
    • Any two from Withering Moon, Red Kelp Gas Bladder, or either Clannfear Claws or Mandrake Root if not already used

    2
    Reflect Damage + Reflect Spell

    Reflect Damage sends melee attacks back at your attackers. While only a portion of that damage is reflected, it accumulates over time.

    Reflect Spell operates similarly for magical attacks. By combining both, you prepare yourself for various enemy types.

    • Withering Moon
    • Flour
    • Scamp Skin
    • Watcher’s Eye

    Both Withering Moon and Watcher’s Eye are exclusive to the Shivering Isles. However, obtaining this expansion is easy in Oblivion Remastered, making crafting this potion feasible without much issue.

    1
    Fortify Health + Restore Health

    There are many ways to create Fortify Health + Restore Health, making it easy to discover even with basic alchemy skills and common materials. This potion is a favorite because it’s so accessible.

    When facing the dangerous parts of Cyrodiil, especially in Oblivion Planes, nothing beats a potion that regenerates health and boosts your health pool.

  • Unlock Every Crafting Recipe in Lego Fortnite Odyssey!

    Unlock Every Crafting Recipe in Lego Fortnite Odyssey!

    In Lego Fortnite Odyssey, reaching milestones is essential to earn rewards and unlock new recipes. If you’re looking to upgrade your surroundings, you probably want to know how to create aesthetically pleasing homes for your villagers.

    The game offers more than just basic shacks; you can unlock over ten house designs. This guide will explain how to unlock these various houses to enhance your creativity and decoration options.

    Updated January 16, 2025 by Connie Watson: Since its release, Lego Fortnite Odyssey has introduced several updates, adding new pre-built designs achievable through Village Upgrades or Lego Passes. This guide has been revised to assist you in unlocking each one!

    Complete Guide to In-Game House Crafting Recipes and Their Unlocking Methods

    Lego Fortnite features five categories of pre-built homes, each with its own themed building options. You start with the Starter Shacks category upon entering the game, allowing you to shelter a bed and crafting bench before moving on to develop a Village Hub.

    A Village Hub establishes your area as an official gathering spot for NPCs, enabling you to create a town and recruit characters.

    As you unlock more categories, you will find options like the self-explanatory Log Cabin, the modern-style Pleasant Park houses, the grand Majestic Manor, and the traditional Shogun Palace, among others.

    Pre-Build Category

    Recipes

    Starter Shacks

    • Log Lookout
    • Simple Shack
    • Double Shack
    • Roomy Shack
    • Porch Shack

    Fishin’ Docks

    • Simple Dock
    • Dock House
    • Double Dock House
    • Deluxe Dock House

    Log Cabin

    • Log Shed
    • Palisade Gate
    • Log Cabin
    • Log Watch Tower
    • Log Home
    • Jumbo Lodge
    • Lonely Lodge

    Pleasant Park

    • Bungalow
    • Pleasant Pavilion
    • Detached Garage
    • Roomy Home
    • Spacious Home

    Majestic Manors

    • Humble Manor
    • Manor Gates
    • Manor Stables
    • Tower Manor
    • Noble Manor
    • Grand Manor

    Shogun Palace

    • Starter Palace
    • Palace Pavilion
    • Palace Gates
    • Tiered Palace
    • Palace Tower
    • Grand Palace

    Imperial Survival

    • Imperial Outpost
    • Galactic Lodge
    • Imperial Castle

    Rebel Survival

    • Rebel Castle
    • Rebel Lookout
    • Rebel Workshop
    • Rebel Farm
    • Rebel Command Center
    • Rebel Stables

    Salty Seaport

    • Tudor House
    • Tudor Workshop
    • Tudor Tavern
    • Tudor Mansion

    How to Unlock

    To access these various house crafting categories, you need to establish a village across different biomes. The specific biome where your Village Hub is situated will influence the rewards when upgrading that hub, linking each hub to a unique category.

    Upgrading your Village Hub provides multiple benefits, including the number of NPCs you can house or the crafting recipes you can unlock. For instance, recipes for Log Cabin houses are available only by upgrading a Village Hub located in the Grasslands.

    To enhance a Village Hub, you must create a town and integrate new elements like additional housing and decorations. To unlock all pre-built crafting recipes, you’ll need a Level Ten Village Hub in nearly every biome.

    Buildings

    Village Hub Biome

    Starter Shacks

    Anywhere

    Fishin’ Docks

    Shore or Grasslands

    Log Cabin

    Grasslands

    Pleasant Park

    Grasslands

    Majestic Manor

    Dry Valley

    Shogun Palace

    Frostlands

    Imperial Survival

    Rebel Village

    Rebel Survival

    Rebel Village

    Salty Seaport

    Lost Isles

    Comprehensive List of Lego Pass Building Crafting Recipes

    Arcade Tent from the Chill and Thrill Lego Pass in Lego Fortnite Odyssey.

    The Lego Pass serves as Lego Fortnite Odyssey’s equivalent of a Battle Pass. While a Lego Pass is active, you can earn rewards using the Battle Stars you gain by leveling up during its duration.

    Typically, each Lego Pass includes one or two exclusive house builds that you can unlock simply by playing the game and leveling up while the pass is active.

    Be cautious! If you take too long and let the Lego Pass expire, you will miss out on those builds.

    Building Sets

    Buildings

    Lego Pass

    Wastelander’s Rampart Set

    Chapter 5: Season 3 Battle Pass

    Mos Eisley

    • Mos Eisley Marketplace
    • Mos Eisley Homestead
    • Mos Eisley Garage
    • Mos Eisley Emporium
    • Mos Eisley Tower
    • Mos Eisley Large Garage
    • Mos Eisley Cantina
    • Dusty Durr Burger

    Rebel Adventure

    Nana

    • Nana Plaza
    • Nana Hall
    • Nana Manor
    • Nana Hut
    • Nana Gate

    Tropical Treasures

    Tomato Temple

    • Tomato Temple
    • The Hothouse
    • Zesty Ziggurat
    • Uncle Pete’s Pizza Pavilion

    Tropical Treasures

    Haunted

    • The Creaker on Bleeker Street
    • The Ruin of Rue Royale
    • The Eyesore of Eerie Avenue
    • The Dump on Old Durr Drive

    Brick or Treat

    Fortnite Forever Festival

    • Juice Tent
    • Arcade Tent
    • Lounge Tent
    • Main Stage

    Chill & Thrill

    Raven’s Roost

    • Raven’s Abode
    • Raven’s Workshop
    • Raven’s Apothecary
    • Raven’s Mausoleum

    Chill & Thrill

  • Complete Guide to Cooking Recipes in Sengoku Dynasty

    Complete Guide to Cooking Recipes in Sengoku Dynasty

    Sengoku Dynasty is a survival and crafting game that takes place during Japan’s feudal period. Your primary goal is to establish your legacy in the Nata Valley through unique projects, village building, accepting refugees, and fighting off hostile forces threatening the area.

    As you work on your empire, it’s essential to keep yourself and your villagers well-nourished throughout the year. In the early stages, you can get by with raw ingredients, but as your community grows, you’ll need to enhance meal production by preparing nutritious dishes for everyone.

    Cooking in Sengoku Dynasty

    You can cook using any basic campfire or sunken hearth that you set up in your homes. Prepared meals significantly boost your hunger meter compared to raw components and improve your villagers’ food supply. Even simple items like cooked meat can vastly enhance your meal production.

    As your village expands, the need for food will also rise. Eventually, basic dishes will no longer be sufficient, requiring you to transition to using a cooking pot and build a kitchen for creating more complex meals.

    A kitchen establishes a dedicated cooking area where you can assign a villager to handle meal preparation. This setup allows for continuous dish production without requiring your constant attention, increasing your overall food output.

    In the later stages of the game, you can also construct a tavern. This facility unlocks the ability to prepare even more sophisticated meals, and you can assign a villager to the large cooking pot in the tavern to automate the cooking process.

    If you build a cooking station with a pot, you can also produce various beverages.

    Cooking Recipes for Campfires and Sunken Hearths

    You can easily create simple meals using any campfire or sunken hearth in your homes. These cooking stations let you prepare cooked versions of basic ingredients you encounter in the game.

    Simple Cooking Recipes

    Name Ingredients How to Gather Ingredients
    Cooked Gobo Gobo plants are widely found throughout the game, except in winter. You can also grow them from seeds in any field.
    Cooked Egg Eggs can be found mainly in the mountains by searching bird nests.
    Cooked Fish Purchase raw fish from vendors or catch it at your fishing post.
    Cooked Meat Obtain meat by hunting and skinning animals.
    Simple Vegetable Meal 5x Any Vegetables; 3x Any Herbs Grow or buy vegetables and herbs from various vendors.
    Simple Bean Meal 5x Any Vegetables; 3x Any Beans Grow or purchase vegetables and various bean seeds.

    Intermediate Cooking Recipes

    Once you have a cooking pot, you can add variety to your meal production. These intermediate recipes can be crafted using slightly different ingredients.

    Cooking Pot Recipes

    Name Ingredients
    Oil
    Cooked Rice
    Simple Vegetable Meal 4x Vegetables; 1x Edible Mushrooms
    Solid Vegetable Meal 10x Soybeans; 2x Koji Mold
    Solid Vegetable Meal 1x Water; 6x Any Cereal; 3x Any Berries
    Solid Vegetable Meal 1x Water; 6x Any Beans; 3x Any Herbs
    Simple Fish Meal 1x Raw Fish; 1x Any Edible Mushroom
    Solid Fish Meal 2x Raw Fish; 1x Any Cereal; 3x Any Herbs
    Solid Meat Meal 1x Meat; 1x Edible Mushroom
    Solid Meat Meal 1x Meat; 1x Egg; 6x Any Beans

    Advanced Cooking Recipes in a Tavern

    When you reach Dynasty Level 11, you can construct a tavern, providing access to advanced cooking options. At the tavern’s large cooking pot, you can prepare gourmet dishes and assign a worker to manage food production.

    Advanced Cooking Recipes

    Name Ingredients
    Excellent Vegetable Meal 7x Any Cereal; 8x Taro; 1x Oil; 1x Water
    Excellent Vegetable Meal 12x Rice; 2x Shitake Mushroom; 5x Leek; 1x Oil
    Excellent Vegetable Meal 7x Wheat; 8x Any Vegetable; 3x Wasabi; 1x Oil
    Excellent Fish Meal 1x Raw Fish; 5x Cereal; 10x Any Beans
    Excellent Fish Meal 2x Raw Fish; 7x Rice; 2x Any Herbs
    Narezushi 1x Raw Fish; 1x Cooked Rice; 1x Koji Mold
    Excellent Meat Meal 2x Meat; 4x Any Cereal; 4x Any Beans

    Advanced recipes tend to require specific ingredients, unlike intermediate recipes, which can allow for more flexibility. Regardless of the specific ingredients used, a dish will provide the same benefits if it falls into the same category of excellence.

  • Unlocking Recipes in Garden Witch Life: A How-To Guide

    In Garden Witch Life, recipes are essential for advancing in the game. The ability to access various recipes is crucial, as they not only unlock distinctive decorations for your farm but also enable you to craft other recipes.

    Player and May in a cutscene in Garden Witch Life.

    Garden Witch Life: 7 Beginner Tips

    Discover important tips for starting your journey in Garden Witch Life!

    Crafting is integral to gameplay, and there are multiple methods to unlock new recipes. Some recipes can only be accessed through specific actions, so we’ll explore how to unlock more recipes in Garden Witch Life and how to make progress.

    What Are Recipes Used For?

    The crafting workbench menu with the compost bin selected in Garden Witch Life.

    Recipes serve various functions in the game. You can unlock recipes for cooking, and food made with the cauldron or cutting board can restore health or stamina. Some food recipes are also required for creating furniture and unlocking recipes for tools and other useful machines.

    Once you unlock a recipe, you can view it at the workbench. The treehouse workbench displays all available recipes, marking the ones you’ve unlocked and dimming the rest.

    How To Unlock Recipes

    A player unlocking multiple strawberry recipes at once in Garden Witch Life.

    You can unlock recipes by completing various tasks within the game. Some recipes become available as you progress, complete quests, or simply explore the game. You can also unlock recipes by repeatedly performing tasks. For instance, harvesting the same plant multiple times can reveal recipes linked to that plant.

    Keep an eye out for hidden chests around the world, as they might contain exciting loot, including new recipes for food or furniture. You can find a detailed location list of every chest in the Forest in our
    Garden Witch Life: Forest Guide.

    Another effective way to unlock recipes is to complete quests for NPCs. Engaging with NPCs allows you to build relationships, and giving them gifts can grant you recipe unlocks or other benefits.

    Progression Recipes

    Type

    How To Unlock

    Pudding

    Food

    During cooking with May in the prologue.

    Diced Potato

    Food

    Collected from your mailbox at the start of the game.

    Mashed Potato

    Food

    Collected from your mailbox at the start of the game.

    Potato Slices

    Food

    Collected from your mailbox at the start of the game.

    Potato Soup

    Food

    Retrieved from your mailbox at the start of the game.

    Nettle Soup

    Food

    Craft Potato Soup for the first time.

    Straw

    Crafting Component

    Harvest Sickle Grass for the first time.

    Rope

    Crafting Component

    Harvest Sickle Grass for the first time.

    Wooden Chest

    Furniture

    Gather Wood for the first time.

    Wooden Stool

    Furniture

    Gather Wood for the first time.

    Wooden Crate

    Furniture

    Gather Wood for the first time.

    Cob Brick

    Furniture

    Gather Clay for the first time.

    Plate

    Furniture

    Gather Clay for the first time.

    Clay Pot

    Furniture

    Gather Clay for the first time.