الوسم: RE

  • Completing Strategies for Fast Ranking in Ghoul Re

    Completing Strategies for Fast Ranking in Ghoul Re

    In Roblox’s Ghoul Re, advancing through ranks is a crucial part of your journey, whether you’re playing as a Ghoul or a CCG member. Your rank directly influences your power and the weapons or skills you can access.

    Moving up in ranks takes dedication, but it’s definitely worth the effort, especially for Humans. Higher ranks grant access to superior CCG equipment. To level up quickly, focus on completing specific tasks related to combat, missions, and events. This guide will help you streamline your progress and reach the top faster.

    How to Level Up

    Your first step in tracking your progress is to speak with the designated NPC.

    • If you’re a Ghoul, go to the Anteiku Cafe and chat with Hanazuki.
    • CCG agents should visit the CCG Headquarters and talk to Saiyo Natsuki.

    Upon interacting with them, you will see a menu that displays your current rank and the goals you need to accomplish to advance. Here’s a breakdown of the activities related to ranking up and how they function:

    Activity

    Description

    Grips

    Take down foes and press B to execute a Grip. The more grips you perform, the quicker you’ll rank up. This works on both NPCs and enemies.

    Event Participation

    Press P to open the event tracker. Joining active events around the map gives you chances to earn progress points.

    Surviving PD

    Engage in Permadeath Events that occur every 10 minutes. These events and others like Birdcage or Turf Wars yield valuable PD points.

    EXP

    Utilize your faction’s Mission Board to take on tasks. CCG’s board is located at Headquarters, while Ghouls can find theirs outside Anteiku.

    Event EXP

    Defeat NPCs and excel in Events to acquire Event XP. The better you perform, the more XP you’ll earn.

    The quickest way to rank up is by combining these tasks whenever you can. For example, complete missions during events or participate in Permadeath battles while focusing on grips. Juggling multiple tasks helps save time and boosts your ranking fast.

    All Ranks


    Both Ghouls and CCG members have distinct rank systems that are entirely separate. You start at the lowest level and progress upwards, unlocking new content and reputation along the way. Below is a complete list of ranks in Ghoul Re for both factions, arranged from lowest to highest:

    CCG Ranks

    Ghoul Ranks

    Rank 3 Investigator

    C

    Rank 2 Investigator

    B

    Rank 1 Investigator

    B+

    Second Class Investigator

    A

    Semi-Associate First Class

    A+

    Associate First Class

    S

    First Class Investigator

    S+

    Associate Special Investigator

    SS

    Special Class Investigator

    SS+

    SSS

    Every rank brings you a step closer to mastering your role. Keep working through your goals for promotions, and you’ll reach the top before you know it.

  • Completing a Character Reset in Roblox: Ghoul RE Guide

    Completing a Character Reset in Roblox: Ghoul RE Guide

    At some point in Roblox’s Ghoul Re, you might feel dissatisfied with your current clan or simply crave a clean slate. Whether you’re aiming for improved stats or a new gameplay approach, resetting your character is the solution. While you can use Robux for a re-roll, there are several free methods to achieve this as well.

    This guide outlines various ways to reset your character in Ghoul Re, detailing how each option operates and the benefits they offer. With the right knowledge, wiping your character will be a straightforward process, and you’ll reach your goals in no time.

    How to Reset a Character

    Not everyone understands the importance of resetting a character, but sometimes, a fresh start can be the key to improving, exploring new strategies, or correcting earlier mistakes. Below, we’ll explain all the techniques to reset your character in Ghoul Re.

    Resetting Your Character Through the Shop

    The player character at the in-game store in Ghoul Re.

    The most dependable method to reset your character is through the Ghoul Point Exchange, which is an in-game shop where you can spend points or Robux for various re-roll options. Here’s how to wipe your character step by step:

    • Open the Shop by clicking the shopping cart icon at the top-left corner of the screen.
    • Select the Ghoul Point Exchange option from the menu.
    • This will open the Ghoul Point Exchange menu. The first option is “Wipe Character,” which costs 30 Ghoul Points.
    • If you have enough points, click this option to reset your character.

    If you’re a newcomer, you start off with 500 Ghoul Points, allowing for up to 16 free resets right away. This is a substantial amount to experiment and optimize your character. If you’ve exhausted these points, consider joining a Point-Capture event, which can earn you hundreds of Ghoul Points. Additionally, completing quests, defeating enemies, and participating in events can also yield points, though less effectively.

    Alternatively, you can reset your character in the Shop using Robux. In the Developer Products section, you’ll find the Wipe Character option for 399 Robux.

    Using the Perma Death Event

    The player character showing the Permadeath event tab in Ghoul Re.

    Another cost-free way to reset your character is by taking advantage of the Perma Death event. To use this, find a server where the event is active by switching between servers. Once you find one, allow your character to be killed by another player, an NPC, or a boss. If the event is happening, your character will reset automatically upon dying.

    This method is completely free, requiring no Ghoul Points or Robux. It’s perfect for those low on points wanting to reset.

    However, be aware that locating an active Perma Death event may involve some server-hopping.

    Creating a New Character

    The player character showing the Character select tab in Ghoul Re.

    When you start playing Ghoul Re, you’re provided with two character slots by default. This allows you to try out different builds, clans, and play styles without needing to reset. If you’re not satisfied with both characters, you can buy additional slots for 399 Robux each.

    This approach is particularly useful early in the game when you haven’t invested too much time in a character yet. You can explore new setups without needing to reset your main character and conserve your Ghoul Points.

  • Completing Character Control in Roblox: Ghoul Re Solving Guide

    Completing Character Control in Roblox: Ghoul Re Solving Guide

    Ghoul Re is a thrilling, rogue-like game on Roblox, taking place in a gritty world inspired by Tokyo Ghoul. Your goal is to survive the perilous environment, choosing to embody either a Ghoul or a CCG Investigator, each boasting distinctive skills and weapons. The game features exciting combat scenarios, tactical challenges, and engaging role-playing aspects, making it crucial for players to master the controls.

    Getting a firm grip on the controls of Ghoul Re will greatly improve your gaming experience. Whether you are battling foes, consuming NPCs to gain power, or tactically navigating missions, familiarity with each keybind is essential. This comprehensive control guide will outline all the necessary commands, ensuring you’re equipped to take charge.

    Ghoul Re Controls

    Mastering the controls in Ghoul Re enables you to respond quickly during battles, effectively wield your Kagune or Quinque, and handle interactions fluidly.

    The controls are categorized into overworld actions and combat actions, both vital for successful gameplay. Becoming familiar with these controls will allow you to deliver precise attacks, evade enemy strikes promptly, and utilize interactive elements in the game world.

    Unfortunately, you cannot modify the controls in the game settings to tailor them to your liking. Thus, learning all the keybindings quickly is essential if you want to excel in battle, fully leveraging your abilities.

    Overworld Controls

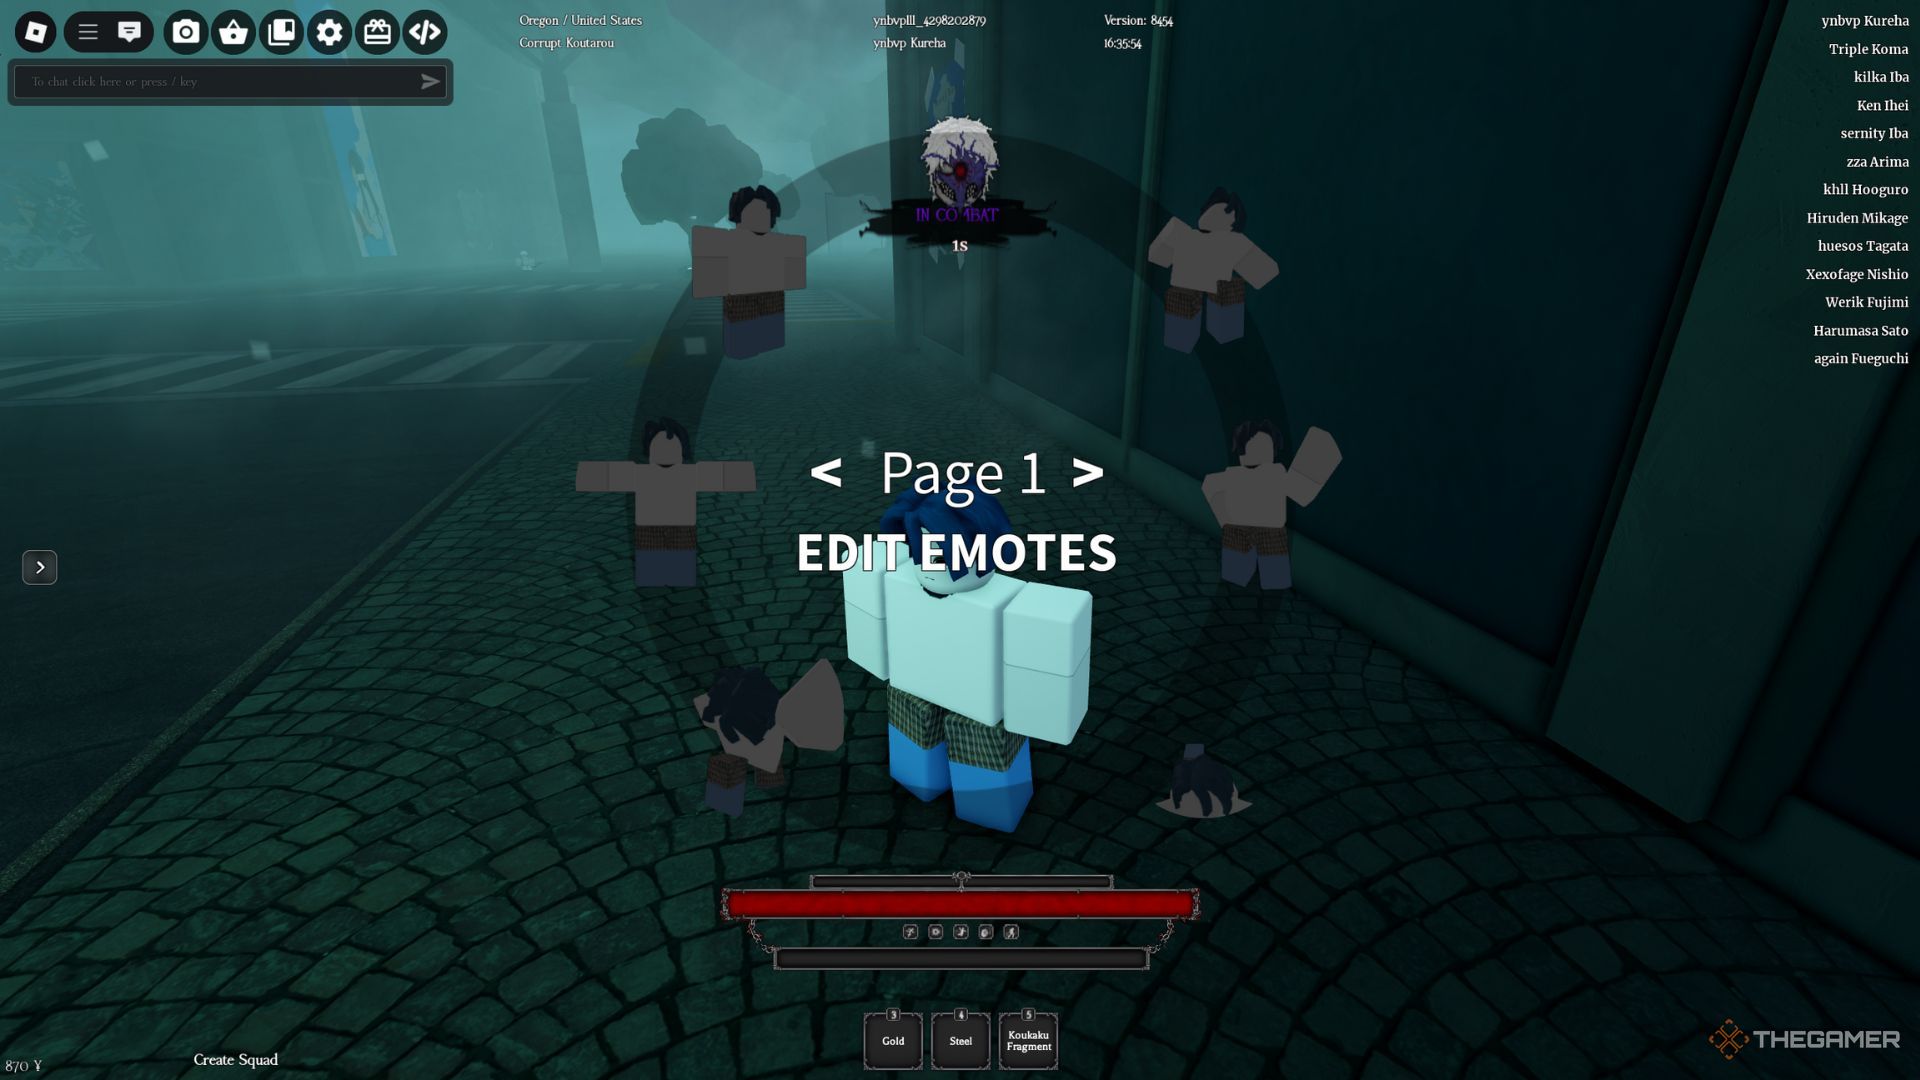
    The player character is using an Emote Wheel on the street in Ghoul Re.

    Hotkeys

    Action

    Notes

    W

    Move Forward

    W + W

    Run

    A

    Move Left

    C

    Move Backward

    D

    Move Right

    Space

    Jump

    M

    Open Menu

    Access quests and player information.

    V

    Carry

    Use on a downed player.

    E

    Interact

    Face an object to interact with it

    E

    Equip/Unequip Weapon

    Q

    Dash

    M2 (While Dashing)

    Cancel Dash

    Ctrl + B / Ctrl + M2

    Devour

    P

    Highlight Location Points

    Available for Ghouls only.

    Left Alt

    Shift-Lock

    L

    Equip Mask

    For Ghouls only.

    >

    Location Icons

    T

    Emote Wheel

    Combat Controls

    The player character is using a dash on the street near a tree in Ghoul Re.

    Hotkeys

    Action

    Left Click

    Attack

    M1 + Ctrl

    Uppercut

    M2

    Feint

    Ctrl + E

    Activate Kagune

    Ctrl/Tab + 1-2

    Switch Kagune Stance

    Space + M2

    Air Critical Attack

    R

    Critical Attack

    Z/X/C

    Activate Kagune/Quinque Skills

  • Mastering the Insidious Sucker RE: Slitterhead’s 2nd Loop Guide

    The RE (2nd Loop) missions in Slitterhead offer players a chance to revisit earlier missions in alternate realities, where you can alter outcomes, unravel secrets, and claim rewards like new outfits, masks, and memory fragments.

    In the case of Insidious Sucker RE (2nd Loop), your goal is to track down the White Suit Slitterhead to discover their intentions, taking you through a mission filled with unexpected turns and surprises. These missions are considered the heart of the game and often provide the most engaging experiences!

    Beginning Insidious Sucker RE (2nd Loop) in Slitterhead


    Selecting Alex and Edo for the Insidious Sucker RE (2nd Loop) mission in Slitterhead.

    Alex is the main Rarity for the Insidious Sucker RE (2nd Loop) mission in Slitterhead, meaning he can’t be replaced by another character. However, you can pick any Companion Rarity you want to join you.

    We strongly recommend choosing Edo because he’s one of the most effective Rarities in the game, delivering massive damage with his Burning Edge Skill. Other Rarities like Julee, Anita, and Tri can also perform well, but it’s advisable to avoid Blake and Doni due to their range-focused abilities.

    Entering the Main Street

    When you enter the mission, you’ll start in the back alleys and need to find your way to the main street. Begin by following the navigation marker through the alleyways until a small group of lesser Slitterheads ambushes you.

    If you have chosen Edo as your Companion Rarity, activate Burning Edge and wield your Blood Weapon to take them out quickly. If not, the Blood Well and Bloody Blast combination will still work, though it might take a bit longer. After clearing them, continue towards the marker leading you into the main street.

    Defeating Slitterheads

    After you leave the back alley, you’ll approach the overpass, where you’ll be confronted by additional Slitterheads. This time, they will be standard Slitterheads, but luckily, Alex’s Blood Well and Bloody Blast combo will be particularly effective here.

    Activate Burning Edge and start attacking them to eliminate them quickly. After defeating the Slitterheads, head towards the main street for a brief cutscene.

    Defeat the Slitterhead Swarm Within the Time Limit

    The White Suit Slitterhead will challenge Alex to defeat a swarm of Slitterheads in under five minutes, which can prove to be quite strenuous. Thankfully, both Alex and Edo are powerful Rarities, making this task more manageable.

    Initially, you will face a few lesser Slitterheads along with one normal enemy, allowing you to utilize your Blood Well and Bloody Blast combo to dispatch them quickly. However, as the challenge escalates, Mantis Slitterheads will begin to appear alongside waves of lesser Slitterheads.

    When the tougher Slitterheads arrive, switching to Edo is a smart move. Activate his Burning Edge and use Angel Step repeatedly to inflict substantial damage. You can also swap back to Alex occasionally to unleash his Blood Well and Bloody Blast combo.

    Taking down enough enemies will reveal a health bar at the top of your screen, indicating your progress in defeating the incoming Slitterhead Swarm. Alternating between your Rarities and leveraging their strongest Skills will streamline this process. Just be sure to heal with Alex after using his combo since it consumes a lot of health!

    Pursuing the White Suit Slitterhead

    A brief cutscene will play after you complete the challenge, showing Alex inspecting a nearby corpse, which reveals it’s not Lisa. Afterwards, return to the main street to trigger yet another cutscene, propelling you into a chase after the White Suit Slitterhead.

    The chase will take some time as the Slitterhead will summon a group of lesser Slitterheads to impede your progress. Fortunately, you are not obliged to engage them and can continue pursuing him. Inflicting a few hits on him will make him flee onto a rooftop.

    Utilize Blood Jump to climb the nearby neon signs until you reach the rooftop the White Suit Slitterhead has dashed to. At this point, use Possession to jump to your other Rarity on the roof, then navigate over to the two civilians on that rooftop to trigger another cutscene.

    Defeating The Slitterheads

    Following the cutscene, you will need to take down two normal Slitterheads, which shouldn’t be too difficult. Start the encounter by using Alex’s Blood Well and Bloody Blast combo to deal significant damage to both Slitterheads right away.

    Afterward, switch to Edo, activate his Burning Edge, and utilize Angel Step on one of the Slitterheads to wipe it out, leaving just one remaining. From here, you can either stick with Edo and keep using Angel Step or switch back to Alex to perform his combo once more to finish it off.

    Landing the final blow will lead to another cutscene featuring the White Suit Slitterhead, setting the stage for the ultimate battle of the mission against the Greater Blue-Ringed Octopus Slitterhead!

    Conquering the Greater Blue-Ringed Octopus Slitterhead

    Ah, it’s you again, Greater Blue-Ringed Octopus Slitterhead. If you’re curious, the fight is almost identical to your previous encounter. You can parry and guard most of its attacks, allowing you to close the distance and unleash Edo’s Burning Edge and Angel Step Skills for tremendous damage.

    Switching to Alex afterward to execute his Blood Well and Bloody Blast combo will also provide ample damage chances, enabling you to stagger it quickly for further Skills and attacks. With Edo on your side, you can effectively keep up the pressure and deal heavy damage without difficulty.

    However, there is one attack from the Greater Blue-Ringed Octopus Slitterhead that you must be cautious of: its unguardable grab and slash that inflicts significant damage. This attack is signaled by a flashing red light, indicating it’s time to move away swiftly. Other than that, feel free to unleash your offensive strategies with little concern!

    Insidious Sucker RE (2nd Loop) Rewards


    The reward for completing Insidious Sucker RE (2nd Loop) for the first time in Slitterhead.

    Defeating the Greater Blue-Ringed Octopus Slitterhead once again and successfully completing the Insidious Sucker RE (2nd Loop) mission for the first time earns you a hefty 24 Skill Tokens. You can use them on any of the eight Rarities available in the game, but remember, they are shared, so once you use them, they’re gone.

    Lastly, it’s important to note that be sure to check all new ‘Talk’ options to unlock additional missions and progress toward the end of the game. You don’t have much left to complete. If you haven’t collected all eight Rarities yet, take the time to do so; they’re worth the effort!

  • Guide to Finishing Missing Girl RE (2nd Loop) in Slitterhead

    Keiichiro Toyama brings fans another captivating horror experience with his new game, Slitterhead. Known for his work on the Gravity Rush series, Toyama offers players a blend of the unusual and the imaginative that distinguishes his creations from others in the genre. While you might encounter some quirks in the game, there are also plenty of thrilling and chilling moments to keep you engaged.

    One feature of Slitterhead that becomes more prominent as you progress is the RE (2nd Loop) missions. In these missions, you revisit former levels armed with fresh insights. This allows you to better navigate challenges posed by the Slitterheads that previously bested you or others.

    Getting Started with Missing Girl RE (2nd Loop) in Slitterhead

    Choosing the Rarities for the Missing Girl 2nd Loop Mission in Slitterhead.

    Now that you have access to Alex, you can select him as your Primary or Companion Rarity for certain missions. This gives you the option to switch to him during combat or exploration. If you enjoyed his gameplay in a previous mission, consider choosing him as your starting Rarity.

    If it wasn’t clear earlier, the RE (2nd Loop) version of Missing Girl is largely similar to the first, but you now know exactly where to find Anita. This knowledge allows you to rush to the spot where she met her fate, trying to save her this time around.

    Tracking Anita’s Path

    Knowing where to find Anita saves you from the Crane tasks from the initial mission, letting you follow her trail right away. As soon as you start, chase after her path until you reach the dead end, just like before, and use possession to navigate past the carts and boxes that are in your way.

    From here, keep following her trail to the vacant lot where she was previously killed by the Slitterhead. Luckily, she’s alive this time, and after a brief cutscene, you can possess her, adding her as your second Rarity in the game.

    Similar to Alex, Anita will also have a tutorial, prompting you to learn how to utilize her skills effectively. You can use Devil’s Scent to summon nearby civilians, and then apply Mind Hack to direct them against the Slitterhead, causing substantial damage. Anita also possesses Poison Needles, which inflict poison damage gradually over time.

    Taking Down the Blacktip Mantidfly Slitterhead

    Once you’ve completed Anita’s tutorial, your next objective is to defeat the Blacktip Mantidfly Slitterhead again, this time alongside Anita. While there won’t be any civilians at the start, you can use her Devil’s Scent skill to bring them into the fray, providing you options if the battle turns tough.

    The civilians can also use Anita’s Poison Needles, allowing you to weaken the Slitterhead by dealing poison damage over time. After wearing it down, the Slitterhead will flee the area.

    Pursue the Blacktip Mantidfly Slitterhead

    Start chasing the Blacktip Mantidfly Slitterhead until it halts in a small market area located in the back alleys and confronts you again. As before, use Devil’s Scent to call upon a group of civilians to strike at the Slitterhead.

    Once you reduce its health to just below half, the Slitterhead will escape again, this time scaling the sides of a building and positioning itself on a rooftop.

    Keep Chasing the Blacktip Mantidfly Slitterhead

    With the Slitterhead perched on the rooftop, you need to find a way to reach it. Use Blood Jump to ascend to the signs above you. Then, perform another Blood Jump to land on a yellow neon sign directly across from the building where the Slitterhead is located.

    While on the neon sign, look across to see a civilian on the rooftop. Possess this civilian to gain access to the roof and prepare to battle the Blacktip Mantidfly Slitterhead.

    Finish Off the Blacktip Mantidfly Slitterhead

    Although neither Anita nor Julee will be present at the beginning of the fight, this won’t hinder your strategy from previous encounters. You can quickly take down the Blacktip Mantidfly Slitterhead before your Rarities even arrive.

    Use your Poison Needles to inflict poison on the Slitterhead, then follow up with attacks using your Blood Weapons. Remember to switch to another civilian when your health runs low. Parrying attacks will extend your time in the fight, letting you activate Blood Time to unleash significant damage.

    The Blacktip Mantidfly Slitterhead’s behavior remains the same, so repeat your successful strategies to defeat it once and for all!

    Rewards for Completing the Missing Girl RE (2nd Loop)

    Rewards obtained after completing the Missing Girl RE (2nd Loop) in Slitterhead for the first time.

    Upon completing the Missing Girl RE (2nd Loop) for the first time, you gain access to Anita as a Rarity, along with 18 Skill Tokens, which is a substantial reward. Keep in mind that these tokens are shared across all your Rarities, so choose wisely when deciding how to allocate them.

    As always, make sure to listen to all ‘Talk’ conversations after finishing this mission, as they will unlock additional missions and provide hints for future Rarities!