الوسم: Perk

  • Top Perk Builds for Eleven in Dead by Daylight: Completing and Solving

    Top Perk Builds for Eleven in Dead by Daylight: Completing and Solving

    Eleven has joined the roster in the second Stranger Things chapter of Dead By Daylight, alongside Dustin Henderson and Vecna, known as The First. Each new character brings three unique perks that players can unlock and upgrade through the Bloodweb. Once leveled up, these perks become available to all Survivors.

    Eleven’s perks draw inspiration from her psychic abilities and her personality from the show. They are designed to support team play and enhance stealth strategies. Here’s a breakdown of her perks and some suggested builds for using them effectively:

    Eleven’s Perks:

    • Extrasensory Perception: Lets you see the auras of nearby objects and players after crouching for four seconds. It highlights totems and chests within 44 meters for 11 seconds. During this time, you also gain Oblivious and Elusive effects, but the perk goes on cooldown afterward.
    • We See You: Allows you to reveal the Killer’s aura to your teammates when they perform break actions like kicking a generator or breaking a pallet or door.
    • Teamwork: Soft-Spoken: Reduces generator noise for other Survivors working with you and increases repair speed when working together.

    All three perks work well together but are especially powerful when combined with specific perk builds. Extrasensory Perception supports stealthy gameplay and item detection; We See You is effective in coordination with aura-reading perks; and Soft-Spoken amplifies repair speeds for team-based strategies.

    When upgraded to Prestige 3, Eleven’s perks can be shared with all Survivors, increasing their versatility.

    Build Example: Extrasensory Perception Focus
    This setup emphasizes stealth and aura reading by combining Extrasensory Perception with Urban Invasion, which allows crouch walking with a 100% Haste boost—great for sneaky play. Adding Alert enhances functionalities by revealing Killer auras when they break or kick generators, while Sprint Burst provides an escape option if you find yourself in danger.

    Key perks and their functions:

    • Extrasensory Perception: When crouching for 4 seconds, reveal auras within 44 meters for 11 seconds, gaining Oblivious and Elusive effects.
    • Urban Invasion: Allows crouch walking at full Haste.
    • Alert: Shows Killer’s aura for 5 seconds after they break a generator, pallet, or door.
    • Sprint Burst: After starting to run, gain a 50% speed boost for 3 seconds, followed by exhaustion for 40 seconds.

    Teamwork: Soft-Spoken Build
    This build focuses on maximizing generator repair speed through perk synergy, creating a fast-paced gen-rushing strategy that can intimidate Killer players. Combining Prove Thyself increases repair speed when working with others, while perks like De Ja Vu and Teamwork: Full Circuit expand control over generators and improve skill check effectiveness. Using a toolbox with Brand New Part and Spring Clamp adds a temporary repair speed surge, charges automatically repaired, and reduces noise, making repair even faster and quieter.

    Because Soft-Spoken only activates when paired with another Survivor on the same generator, pairing it with Better Together can highlight the generator you’re working on, which helps solo players coordinate with teammates.

    Perks:

    • Teamwork: Soft-Spoken: Noise reduction on generators when others are working with you and a small repair speed boost.
    • Prove Thyself: Boosts repair speed when coworkers are present.
    • De Ja Vu: Shows the three closest generators, increasing repair speed by 6% on each.
    • Teamwork: Full Circuit: Enlarges good Skill Check zones with more Survivors, boosting repair speed.

    We See You Build
    Utilizes We See You in conjunction with aura-reading perks like Object of Obsession, Eyes of Belmont, and Kindred to gather information about the Killer’s position. This build excels against Killers with aura-reading perks of their own, enabling quick information gathering and strategic play.

    Perk highlights:

    • We See You: Gains a token each time the Killer sees your aura; on four tokens, reveals the Killer’s aura to the entire team temporarily.
    • Bound By Obsession: When your aura is seen by the Killer, you also see their aura and gain bonus speeds when healing or repairing.
    • Eyes of Belmont: Reveals the Killer’s aura for three seconds after completing generators, increasing the visibility duration with each reveal.
    • Kindred: Shows all survivor auras and the Killer’s aura near hooks when hooked; also reveals other survivor auras when you’re on the hook.

    These builds exemplify how Eleven’s perks can be adapted for stealth, fast generator completion, or strategic information gathering, depending on player preference and team coordination.

  • Top Perk Builds for Vee Boonyasak in Dead By Daylight: Completing & Solving

    Top Perk Builds for Vee Boonyasak in Dead By Daylight: Completing & Solving

    A new survivor has joined the world of Dead By Daylight, bringing three fresh perks to help other survivors. Vee Boonyasak, a skilled drummer full of energy, is eager to leave her mark. Although her story has a tragic end, her adventurous spirit lives on through her perks, which showcase her determination and resilience.

    Vee’s perks are designed to help you recover faster from exhaustion, increase your chances of making skill checks for faster generator progress, and speed up healing when necessary. Here are some effective build strategies to maximize her abilities.


    Vee Boonyasak’s Unique Perks

    Vee arrives with three unique teachable perks: Ghost Notes, One-Two-Three-Four!, and Road Life. Both One-Two-Three-Four! and Road Life rely on skill checks, boosting your chances of successful checks during repairs and healing. While Road Life depends heavily on landing great skill checks, One-Two-Three-Four! serves as a helpful support perk, especially when paired with other skill check perks.

    Ghost Notes is a chase-oriented perk. It doubles the speed at which scratch marks fade and lowers exhaustion duration, making it ideal for survivors who enjoy losing killers quickly. Combining Ghost Notes with exhaustion perks is highly recommended to maximize its potential.

    Warning: While running, you won’t recover from exhaustion. Use walking, repairing, healing, or cleansing totems during this period until exhaustion depletes.

    Perk Description Guide
    Ghost Notes Your scratch marks fade 50% faster when exhausted and you recover 10% faster from exhaustion. Fading scratch marks quickly helps you escape, especially when paired with exhaustion perks.
    One-Two-Three-Four! Perform drums for 15 seconds with ongoing skill checks; after succeeding, your chance of skill checks increases by 20% for 90 seconds. Use during generator repairs or healing to get more skill checks naturally.
    Road Life When injured but not broken, gain a Token after each great skill check; with 6 Tokens, heal at 100% speed until healing stops. Situational, as it needs six great skill checks to activate but excels in prolonged healing scenarios.

    Best Build Combos and Strategies

    Vee offers one strong perk with two situational ones. Ghost Notes is likely to be a staple in many builds, especially for players who chase or loop around killers. One-Two-Three-Four! is valuable for boosting generator progress by ensuring multiple skill checks. Road Life is more niche, as it hinges on landing six great skill checks but can be effective in extended healing.

    Ghost Notes Perk Combos

    Pair Ghost Notes with perks like Sprint Burst for quick escapes at the start of chases. Reducing scratch mark visibility with Lightweight and improving recovery speeds with Vigil enhances ghosting and tactically losing the killer.

    Perk Effect How to Use
    Lightweight Scratch marks last 5 seconds less, and their pattern is irregular. Makes avoiding detection easier during chases.
    Sprint Burst Grants a 50% haste for 3 seconds when starting to run, causing exhaustion afterward. Combine with Ghost Notes to maximize evasive actions.
    Vigil Reduces the effects of exhaustion and other status effects by two-thirds within 16 meters. Helps recover from status effects faster, especially with Ghost Notes.

    Tip: Use exhaustion perks like Balanced Landing or Lithe with Ghost Notes for more effective chases.

    One-Two-Three-Four! Perk Combos

    While seemingly unimpressive on its own, One-Two-Three-Four! shines when paired with perks that trigger on skill checks, such as Bardic Inspiration, Autodidact, or Do No Harm. These perks enhance your ability to consistently generate skill checks, accelerating generator repairs or healing.

    Perk Effect Usage
    Bardic Inspiration During its active 15-second window, roll a D20 to boost skill check progress. Amplifies skill check success chances.
    Hyperfocus Grants a token on each great skill check, increasing skill check chances and progression. Use to maximize skill check gains.
    Stake Out Earns tokens when in the killer’s terror radius; these convert into great skill checks. Use in stealthy playstyles to maximize skill checks passively.

    Road Life Perk Combos

    Pair Road Life with One-Two-Three-Four! to increase the likelihood of landing skill checks, but consider supplementing with Iron Will to stay quiet while injured. Both perks revolve around skill check mastery, so combining them amplifies your opportunities for activations.

    Perk Effect Notes
    Hyperfocus Each great skill check grants a token, increasing skill check speed and progression. Build to consistently trigger skill check bonuses.
    Stake Out Ties into Hyperfocus by turning in-radius skill checks into great ones. Enhance passive skill check gains for sustained performance.
    Iron Will Reduces grunts of pain for stealthier injured play. Maintain silence during activations and escapes.

    Additional tip: Activate Road Life multiple times per game if you can land enough great skill checks; it’s a rewarding but resource-heavy perk.


    This setup makes Vee a versatile survivor who excels at skill checks during generator repairs and healing, with tools to evade killers effectively during chases. Combining her perks thoughtfully can create tailored strategies suited for fast-paced, unpredictable matches.

  • Top Perk Builds for Michonne Grimes in Dead by Daylight: Completing and Solving

    Top Perk Builds for Michonne Grimes in Dead by Daylight: Completing and Solving

    Dead by Daylight players have been eagerly awaiting the addition of Rick and Michonne Grimes ever since Behavior Interactive dropped subtle hints in the 2025 roadmap. These characters are straight from The Walking Dead: The Ones Who Live and are now part of the large list of playable Survivors. Each has three unique perks that influence gameplay.

    Once you level up Michonne’s Bloodweb to at least Prestige Three with Bloodpoints, you can use her perks on any Survivor. These perks can significantly change strategies and improve chances in matches.

    Michonne Grimes’s Unique Perks

    Michonne arrives with three fresh perks inspired by her character in The Walking Dead. Her perks allow her to get one more shot at surviving, stand up to the Killer, and help teammates escape.

    Here’s a look at her perks:

    Perk Description Guide
    Conviction Sometimes, a final push makes all the difference between dying and surviving. After healing yourself or another Survivor, Conviction activates. While in the Dying State, you can recover instantly after reaching 25% progress. You then remain broken and will re-enter Dying after 20/25/30 seconds.
    Last Stand When things get tough, your fighting spirit shines. Activates after being in the Killer’s terror radius without being chased for 90-120 seconds. Complete a rushed vault to stun the Killer for three seconds when they are within 2.5 meters. This perk only works once per game.
    Teamwork: Throw Down Empowering allies is key to turning the tide. From the start, blind the Killer or stun them at a pallet to grant all injured Survivors within 24 meters Endurance. This encourages close teamwork.

    Note: Michonne’s perks require being close to the Killer, so they might not be ideal for newer Survivors nervous about chases.

    Best Build and Perk Combinations for Michonne

    To maximize her strengths, use perks centered around survival, escape, and supporting teammates. The three perks work well together and can also help you earn the Adept Michonne achievement.

    It’s advisable to level her Bloodweb extensively to unlock general perks like Hope, Kindred, or Resilience. You can also unlock perks from other Survivors by reaching Prestige Three or buying them in the Shrine of Secrets.

    Suggested Perk Combos for Conviction:

    • Jonah’s Boon: Exponential — Creates a safe spot for self-recovery, allowing you to get out of the Dying State without aid. Pair with Small Game to locate Totems quickly and Mikaela’s Boon: Shadow Step to hide your scratch marks while healing.
    • Cheryl’s Soul Guard — Grants eight seconds of Endurance after self-healing from Conviction, especially useful in end-game scenarios. Since Conviction can be used multiple times, this combo keeps you alive longer.

    Last Stand and Perk Combinations

    Last Stand can be fun but requires you to hide within the Killer’s Terror Radius for about 90 seconds. Use these perks to make hiding and escaping easier:

    Perk Description Guide
    Nea’s Urban Evasion Allows quick crouch-walking to hide effectively. Useful for staying hidden when Last Stand is active.
    Kate’s Windows of Opportunity & Feng’s Lithe Know all window and pallet locations, then use high-speed vaults to escape. Keeps you mobile even after Last Stand ends.
    Kate’s Dance With Me Hide your scratch marks briefly to help escape. Good if you’re familiar with map layouts.

    Teamwork: Throw Down works well here too — blinding or pallet stunning the Killer grants injured teammates Endurance. Combining it with other perks like Last Stand or blinding perks like Jill’s Blast Mine can turn the tide against the Killer.

    Additional ideas include:

    • Yui’s Any Means Necessary — Allows quick recovery from dropped pallets, prolonging pallet usage.
    • Dwight’s Bond — Helps keep track of teammates’ positions based on their movements and actions, supporting coordinated efforts.
  • Unlocking the Hunter’s Instinct Perk in BO6: A How-To Guide

    Unlocking the Hunter’s Instinct Perk in BO6: A How-To Guide

    Season 2: Reloaded of Call of Duty: Black Ops 6 introduced a new perk called Hunter’s Instinct to the Multiplayer mode. This T2 perk is specifically designed for the Enforcer combat specialty, and it reveals the location of an opponent when you eliminate them, encouraging a more aggressive style of play in both core and hardcore modes.

    If you’re looking for a powerful perk for player-versus-player action, Hunter’s Instinct stands out as the top option in the Enforcer category. To maximize your play experience, it’s recommended to unlock this perk quickly as it fits well with various builds. This guide will walk you through the steps to unlock Hunter’s Instinct and provide an overview of its functionality.

    How To Unlock Hunter’s Instinct


    To unlock Hunter’s Instinct, you need to complete Armory challenges. These can be tackled in Multiplayer, Zombies, or Warzone modes. Currently, all Armory unlocks require you to accumulate 100,000 XP from any playlist. This experience points (XP) will add to your overall progress while also counting towards your selected Armory unlock.

    You can speed up the process by completing daily challenges, account challenges, and using XP tokens.

    How To Access The Armory

    To access the Armory, go to the Barracks tab in either the Multiplayer or Warzone menu. From there, navigate to Challenges and select Armory. This will show you the list of available Armory unlocks in Black Ops 6. Choose Hunter’s Instinct as your target item, and the XP you earn will contribute to unlocking it.

    What Does Hunter’s Instinct Do?

    Hunter’s Instinct serves as a T2 perk in Multiplayer for the Enforcer class. When you eliminate an opponent, your minimap will highlight a nearby enemy’s location with a red cone for three seconds. This works similarly to the radar in Destiny, providing a general direction of the threat without revealing their exact position. Keep in mind that those marked are not shown as red dots on the minimap.

    This perk has a cooldown period of five seconds after each activation.

    Testing indicates that there are no significant countermeasures to Hunter’s Instinct. Perks like Ghost and Ninja, as well as the Recon Specialty, do not appear to mitigate its effects. To enhance its use, consider combining Hunter’s Instinct with Forward Intel through a Perk Greed Wildcard. This will give you a broader view on your minimap, allowing for a more accurate assessment of enemy movements.

    Since Hunter’s Instinct is categorized as an Enforcer perk (red perk), it’s wise to focus on the Enforcer combat specialty while utilizing it. This combination will grant increased movement speed and health regeneration after a kill, making it ideal for a run-and-gun playstyle. Pairing this with the new Slipstream perk can create a highly offensive loadout suited for a variety of Multiplayer matches.

  • All Artifact Perks in Destiny 2: Heresy Unveiled

    All Artifact Perks in Destiny 2: Heresy Unveiled

    Quick Links


    Episode: Heresy introduces a new Artifact to the Destiny 2 universe, packed with a variety of powerful perks that are poised to influence gameplay for the foreseeable future. This season brings back several popular perks, such as Horde Shuttle, a revamped version of Volatile Light, and even Particle Deconstruction from the Season of the Splicer.

    If you’re eager to maximize your builds or dive into buildcrafting, this season’s Artifact is essential. To get started, complete the initial Heresy story mission, acquire the Tablet of Ruin, and begin earning XP to unlock these potent perks.

    Overview of the Artifact’s Functionality in Episode: Heresy

    While we have yet to conduct comprehensive testing on all 25 Artifact perks, this section will provide a brief overview based on in-game descriptions. Once we complete our testing, we will update this guide with specific perk values and notable combinations.


    How the Artifact Works

    The Tablet of Ruin consists of 25 unlockable perks. You gain perk points for the Artifact through XP, which can be earned from any activity, not just content related to Heresy. The Artifact is acquired during the Heresy onboarding quest, ensuring you won’t miss it.

    Perks are organized into columns that need to be unlocked by spending points. For instance, you must select three perks from Column One before accessing any perks in Column Two. The unlocking order is as follows:

    • Column One: Unlocked by default.
    • Column Two: Requires three perks allocated.
    • Column Three: Requires five perks allocated.
    • Column Four: Requires seven perks allocated.
    • Column Five: Requires ten perks allocated.

    Keep in mind, you can have only 12 perks active at any time.

    If you wish to modify your Artifact selections, simply choose any perks in the right column to remove them. This can be done as often as you like, free of charge. You can also press the "Respec" button at the bottom-right of the Artifact UI to reset all perks.

    Note that Artifact selections are specific to each character, but they are not saved in loadout configurations. Therefore, if you wish to use different perks, you’ll have to manually adjust the Tablet of Ruin.


    Column One Perks

    1. Unstoppable Fusion: Aiming down sights with a Fusion Rifle will load an explosive shot, stunning Unstoppable Champions. When that modifier is active, Fusion Rifles are also permanently Overcharged.
    2. Overload Machine Guns: Landing consecutive hits with an LMG will stun Overload Champions. LMGs are always Overcharged when that modifier is active.
    3. Piercing Sidearms: Sidearms fire rounds that pierce shields and are effective against Barrier Champions. They are also always Overcharged.
    4. Anti-Barrier Sniper Rifle: Sniper Rifles fire rounds that can pierce shields, making them effective against Barrier Champions. Always Overcharged when that modifier is active.
    5. Unstoppable Glaive: Glaives fire an explosive payload that stuns Unstoppable Champions. They are also always Overcharged when that modifier is active.

    Column Two Perks

    1. Overclock and Load: If you are Amplified or have Bolt Charge, Arc weapons gain enhanced handling and reload speed.
    2. Deep Alchemy: Weapons with the Subjugation origin trait gain stability and reload speed for a limited time after hitting any target. These weapons are always Overcharged.
    3. Volatile Marksman: Precision hits with rapid Void weapons grant Volatile Rounds, and rapid final blows will upgrade this effect.
    4. Legend Incarnate: Weapons with the Timelost Magazine origin trait receive bonus damage, and these weapons are always Overcharged.
    5. Unraveling Orbs: Picking up an Orb of Power or a Tangle grants Unraveling Rounds for Strand weapons.

    Column Three Perks

    1. Hold the Line: When surrounded, Machine Guns and Glaives receive boosts to reload speed and stability, and their final blows will heal you.
    2. Dielectric: Defeating Arc-debuffed enemies grants Bolt Charge. If you defeat multiple Arc-debuffed combatants quickly, an Orb of Power will spawn and provide healing.
    3. King’s Vestige: Taking down a powerful Taken loads your weapon with Three Taken seekers that inflict Disruption and Exhaust, making targets deal reduced damage.
    4. Disruptor Spike: Increases the power of Exhaust and Sever effects.
    5. Photonic Flare: Defeating an Exhausted or Severed enemy with Arc damage triggers a blinding explosion.

    Column Four Perks

    1. Dreadful Finisher: Finishing powerful enemies drops Special ammo, while eliminations of Champions, Tormentors, and Subjugators yield additional ammo.
    2. Maligned Harvest: Applying Volatile quickly makes your next Void damage create a Weakening pulse.
    3. Flashover: Achieving max Bolt Charge amplifies your damage and also makes you Amplified.
    4. Horde Shuttle: Hitting targets affected by Unraveled with a weapon can occasionally create a Threadling.
    5. No Bell: Performing rapid Glaive melee final blows can generate Special ammo, and blocking damage with Glaives increases their melee effectiveness.

    Column Five Perks

    1. Particle Reconstruction: Consistent damage from Fusion and Linear Fusion Rifles debuffs the target, boosting damage taken, while reloading your weapon from reserves.
    2. Elemental Supercharger: Cheating defeat to Exhausted or Severed foes with the appropriate elemental weapon grants Super energy.
    3. Heavy Ordnance Regeneration: Sustained damage from a Machine Gun or Rocket Launcher provides damage resistance and speeds up grenade and melee regeneration temporarily.
    4. Defibrillating Blast: Stunning a Champion grants maximum Bolt Charge stacks and creates an Arc bolt that heals you while jolting affected enemies.
    5. Void Flux: Vanquishing weakened opponents with a Void weapon spreads Volatile to nearby enemies, especially effective against powerful foes who increase the explosion radius.

    This Artifact brings a range of strategic options for players to explore, enhancing the fun and depth of Destiny 2 gameplay.

  • Understanding the Death Perception Perk in BO6 Zombies

    Understanding the Death Perception Perk in BO6 Zombies

    In Season 2 of Call of Duty: Black Ops 6, the Death Perception perk makes a comeback. This Perk-A-Cola debuted in Black Ops 4 and gives players the ability to spot zombies through walls. While it doesn’t boost damage or durability, its practical benefits can be crucial for surviving tougher rounds and intense close-quarters combat in compact maps.

    If you haven’t dived into Zombies mode recently or simply need a quick refresher on how this perk functions, this guide is here to help. We’ll explore the mechanics of Death Perception, where to find it across maps, and the six different augments that enhance this revived Perk-A-Cola.

    What Does Death Perception Do?


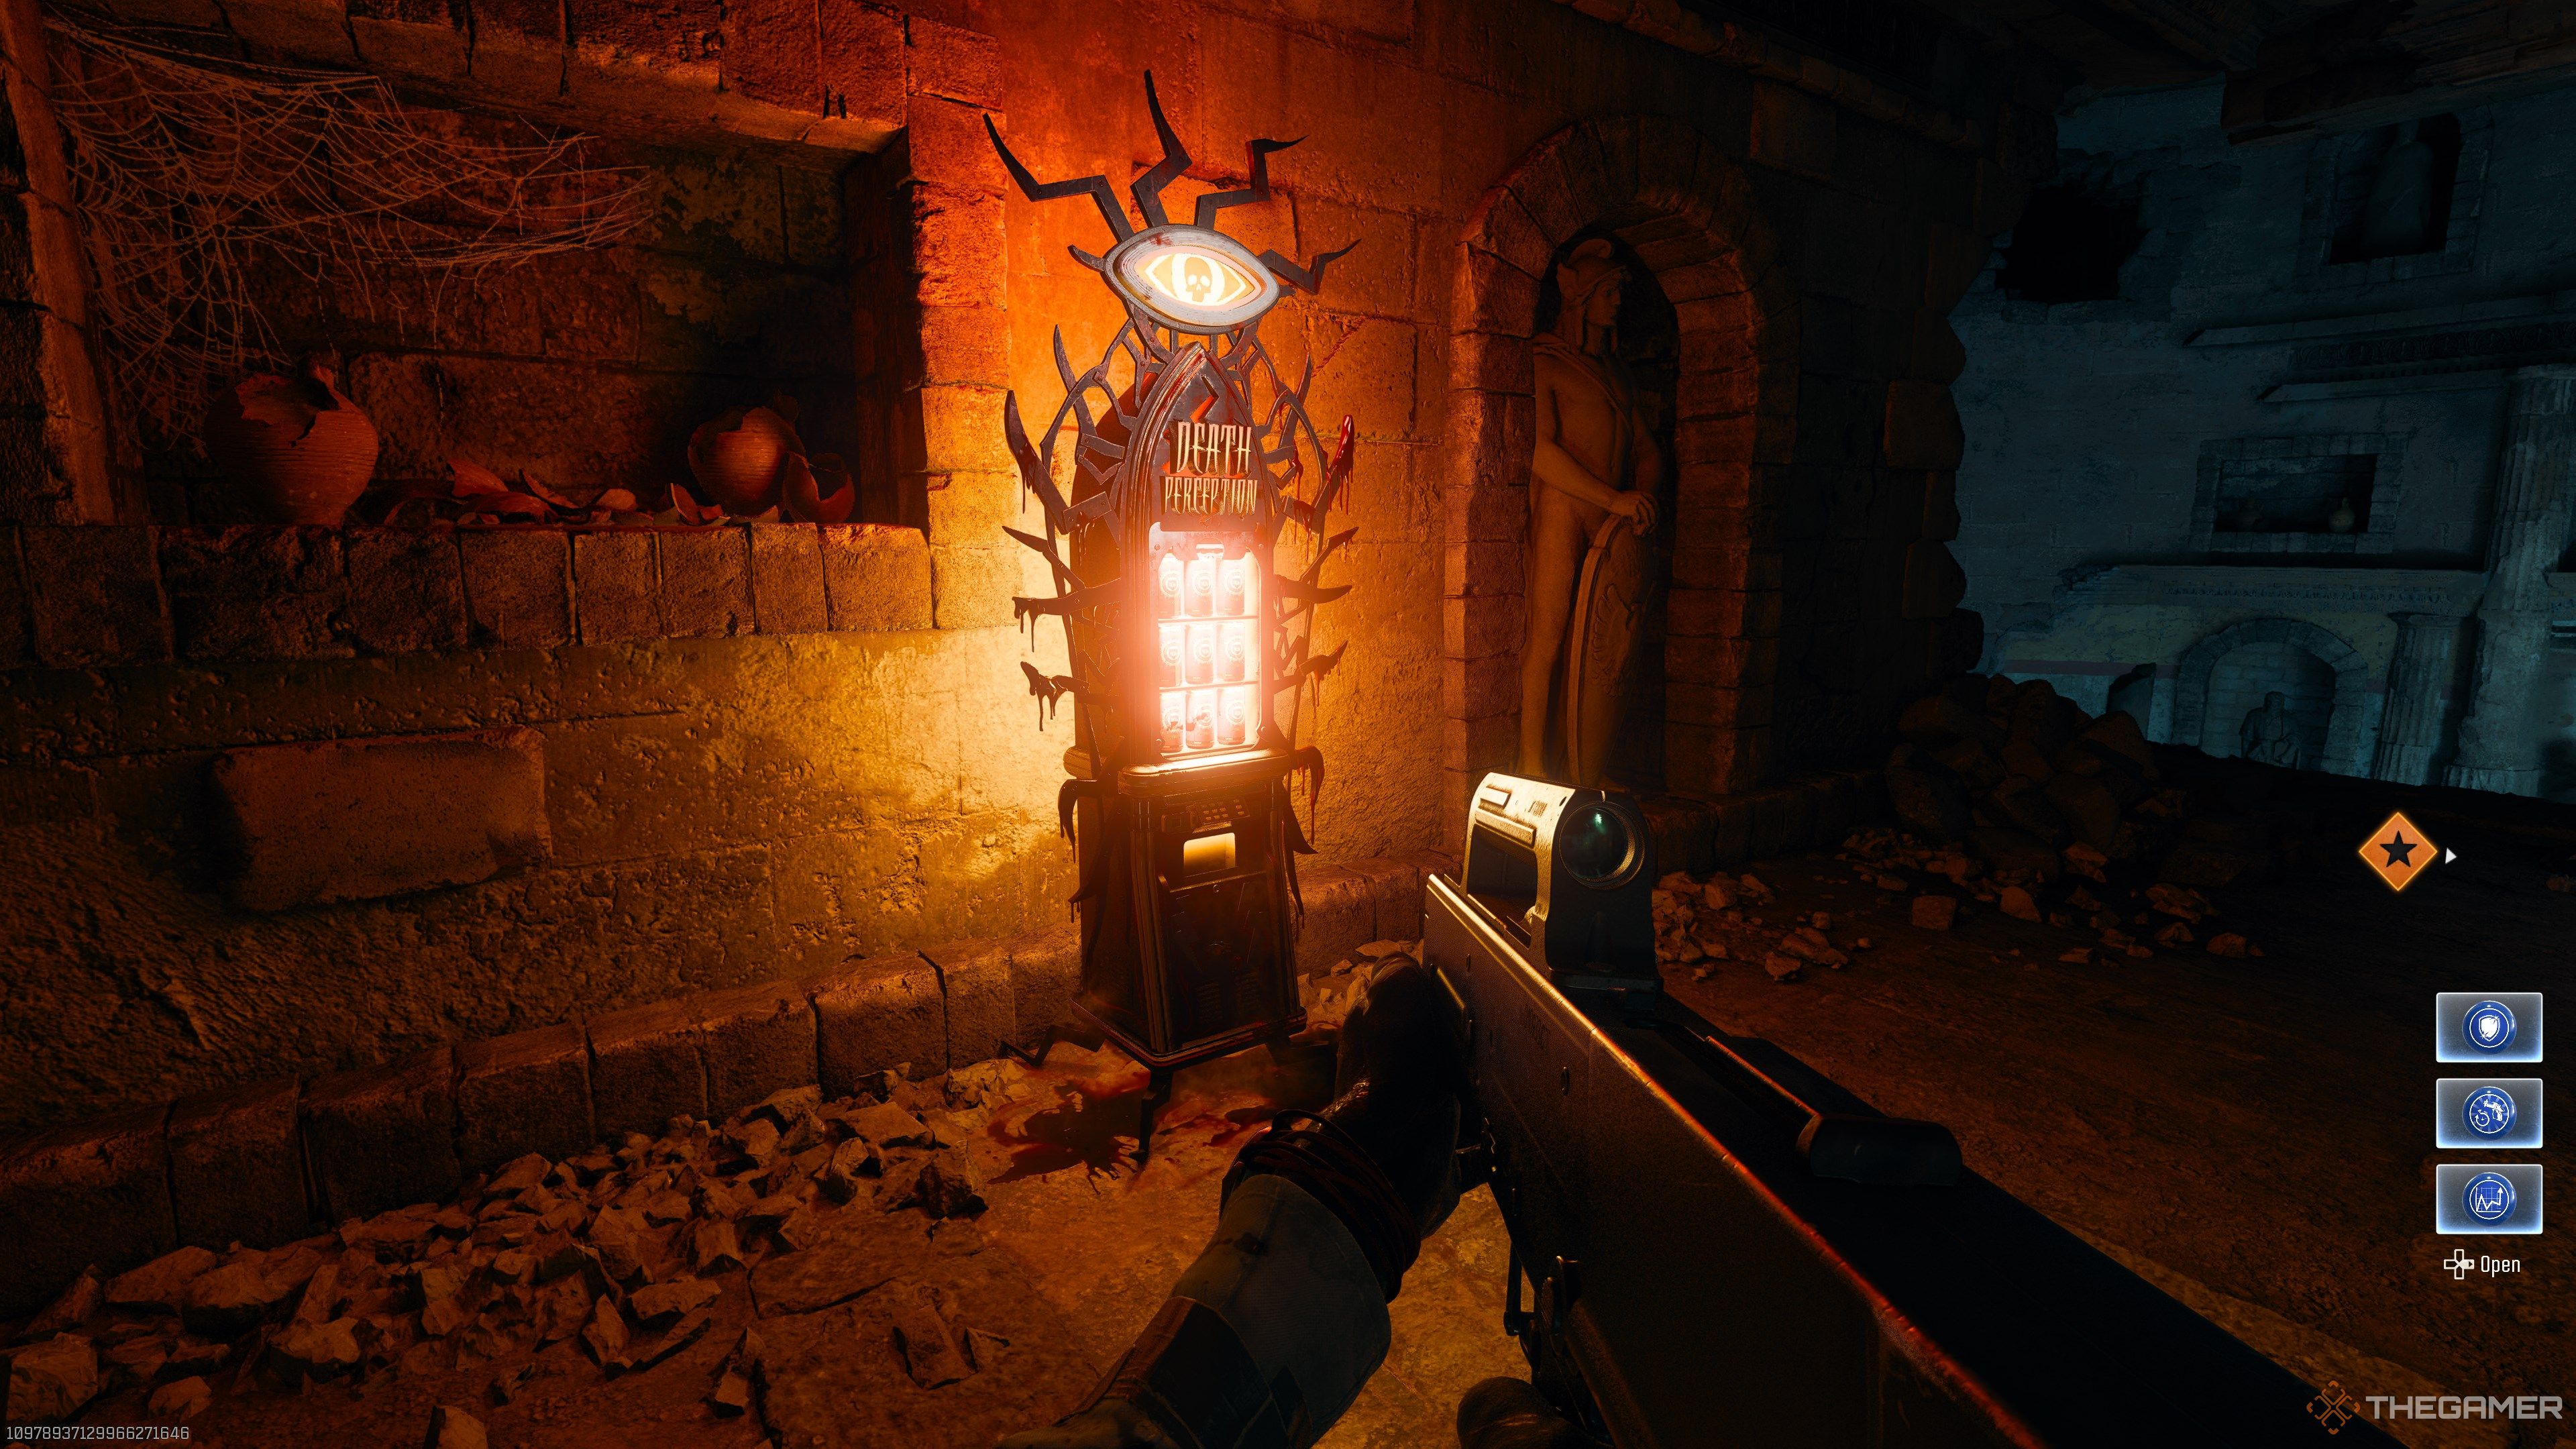
    Death Perception highlights hidden zombies with an orange glow, making it easier to identify their positions. It provides a default visual range of about 15 meters, which can be extended with specific augments. While it doesn’t enhance damage or penetration, it can yield extra benefits depending on the augment selections.

    How To Obtain Death Perception


    Black Ops 6 Death Perception Machine

    You can spot Death Perception at a Perk-A-Cola machine in “The Tomb” map and any Der Wunderfizz machine. Every map introduces a Der Wunderfizz at Round 25, so if you’re patient and save up your Essence, you can buy Death Perception on any map.

    Augments for Death Perception


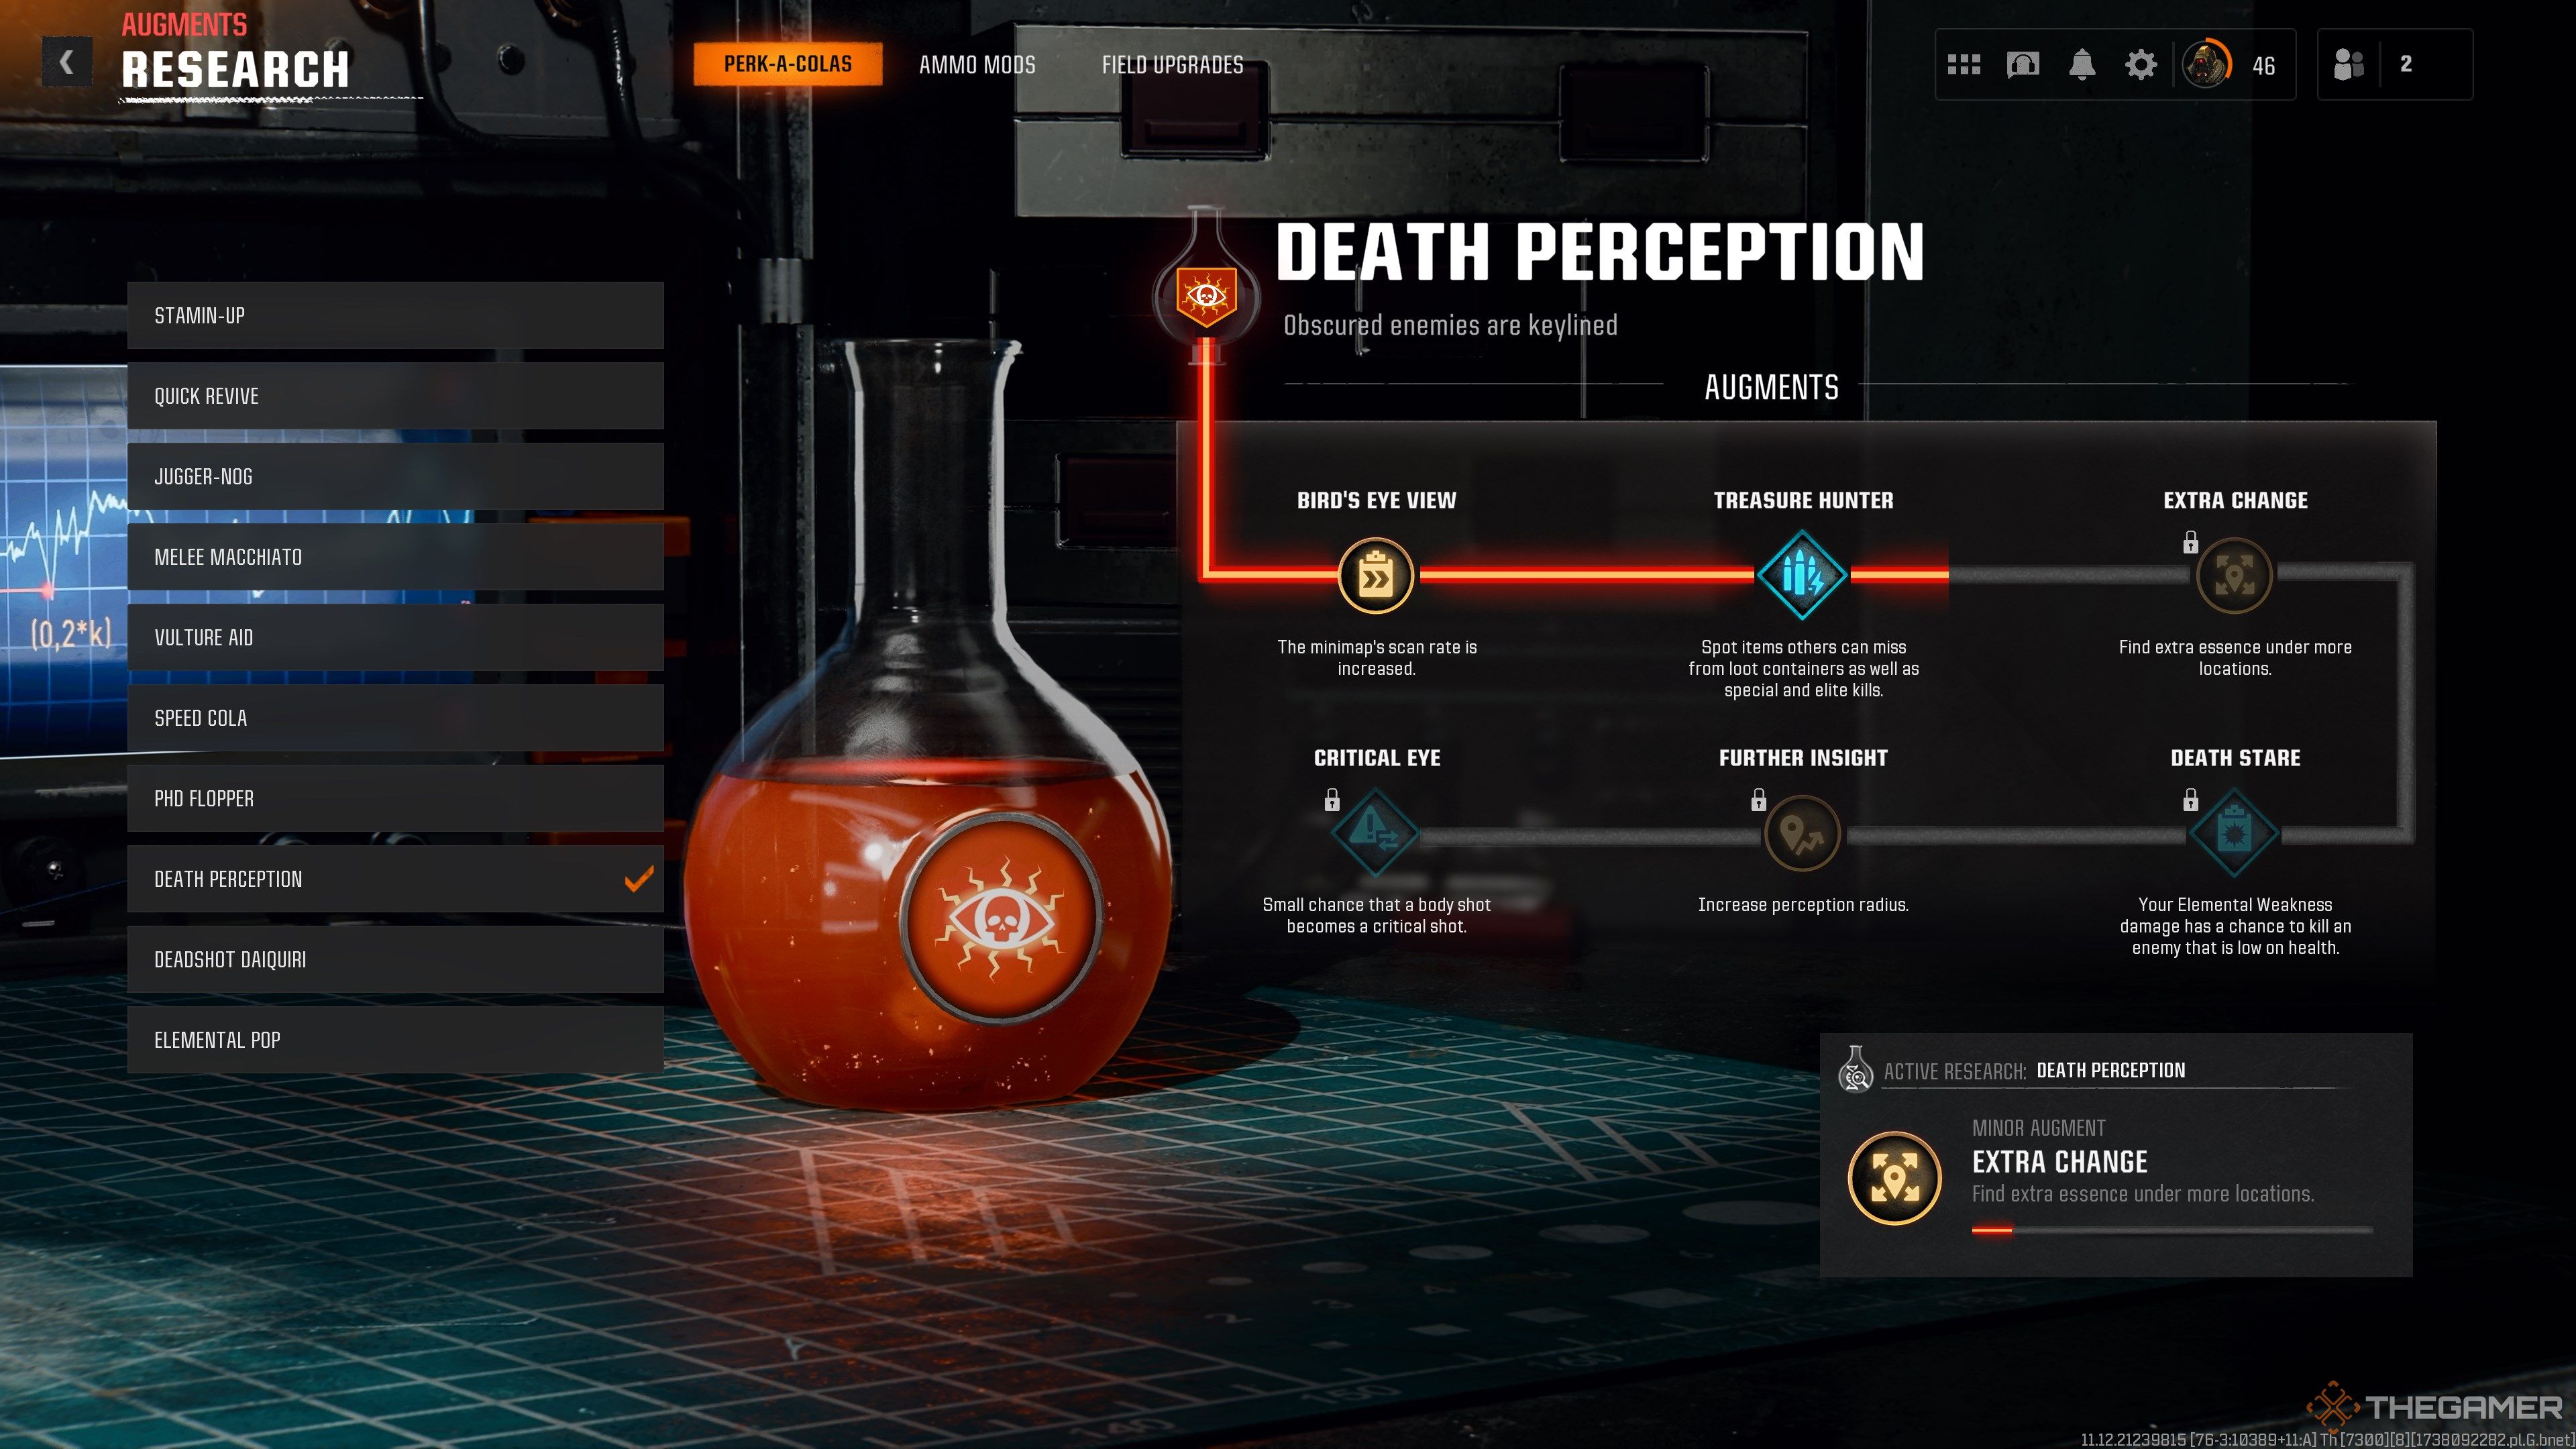
    Black Ops 6 Death Perception Augments

    Death Perception has six augments available: three major and three minor. The Critical Eye augment works well with Deadshot Daiquiri’s headshot bonus, making it particularly beneficial for rapid-fire weapons like the PPSH-41.

    Extra Change can help you gather Essence in the early rounds, while Bird’s Eye View effectively provides you with a constant UAV indicator for tracking zombies on your minimap. While Death Perception’s augments might not be as game-changing as PhD Flopper or Stamin-Up, they do offer useful quality-of-life improvements.

    Major Augments

    Treasure Hunter

    Spot items that others might overlook, including those from loot containers and special kills.

    Death Stare

    Your elemental weakness damage has a chance of finishing off low-health enemies.

    Critical Eye

    A slight chance that a regular shot becomes a critical shot.

    Minor Augments

    Bird’s Eye View

    The rate at which the minimap scans is increased.

    Extra Change

    Discover more Essence in various locations.

    Further Insight

    Expands your perception radius.

  • Top Perk Combos to Dominate in Warzone

    Top Perk Combos to Dominate in Warzone

    Whether you’re a seasoned player of Warzone or just starting out, the launch of Black Ops 6 has completely integrated new elements into the game. This includes a variety of weapons, perks, equipment, and other features that enhance the Warzone experience. As you set up your loadout, you’re bound to discover some new perks along with the ones you already know.

    When getting ready for a match, you might wonder which perks will serve you best and what combinations work well together. This guide outlines three perk combinations tailored for different playstyles to help you elevate your gameplay.

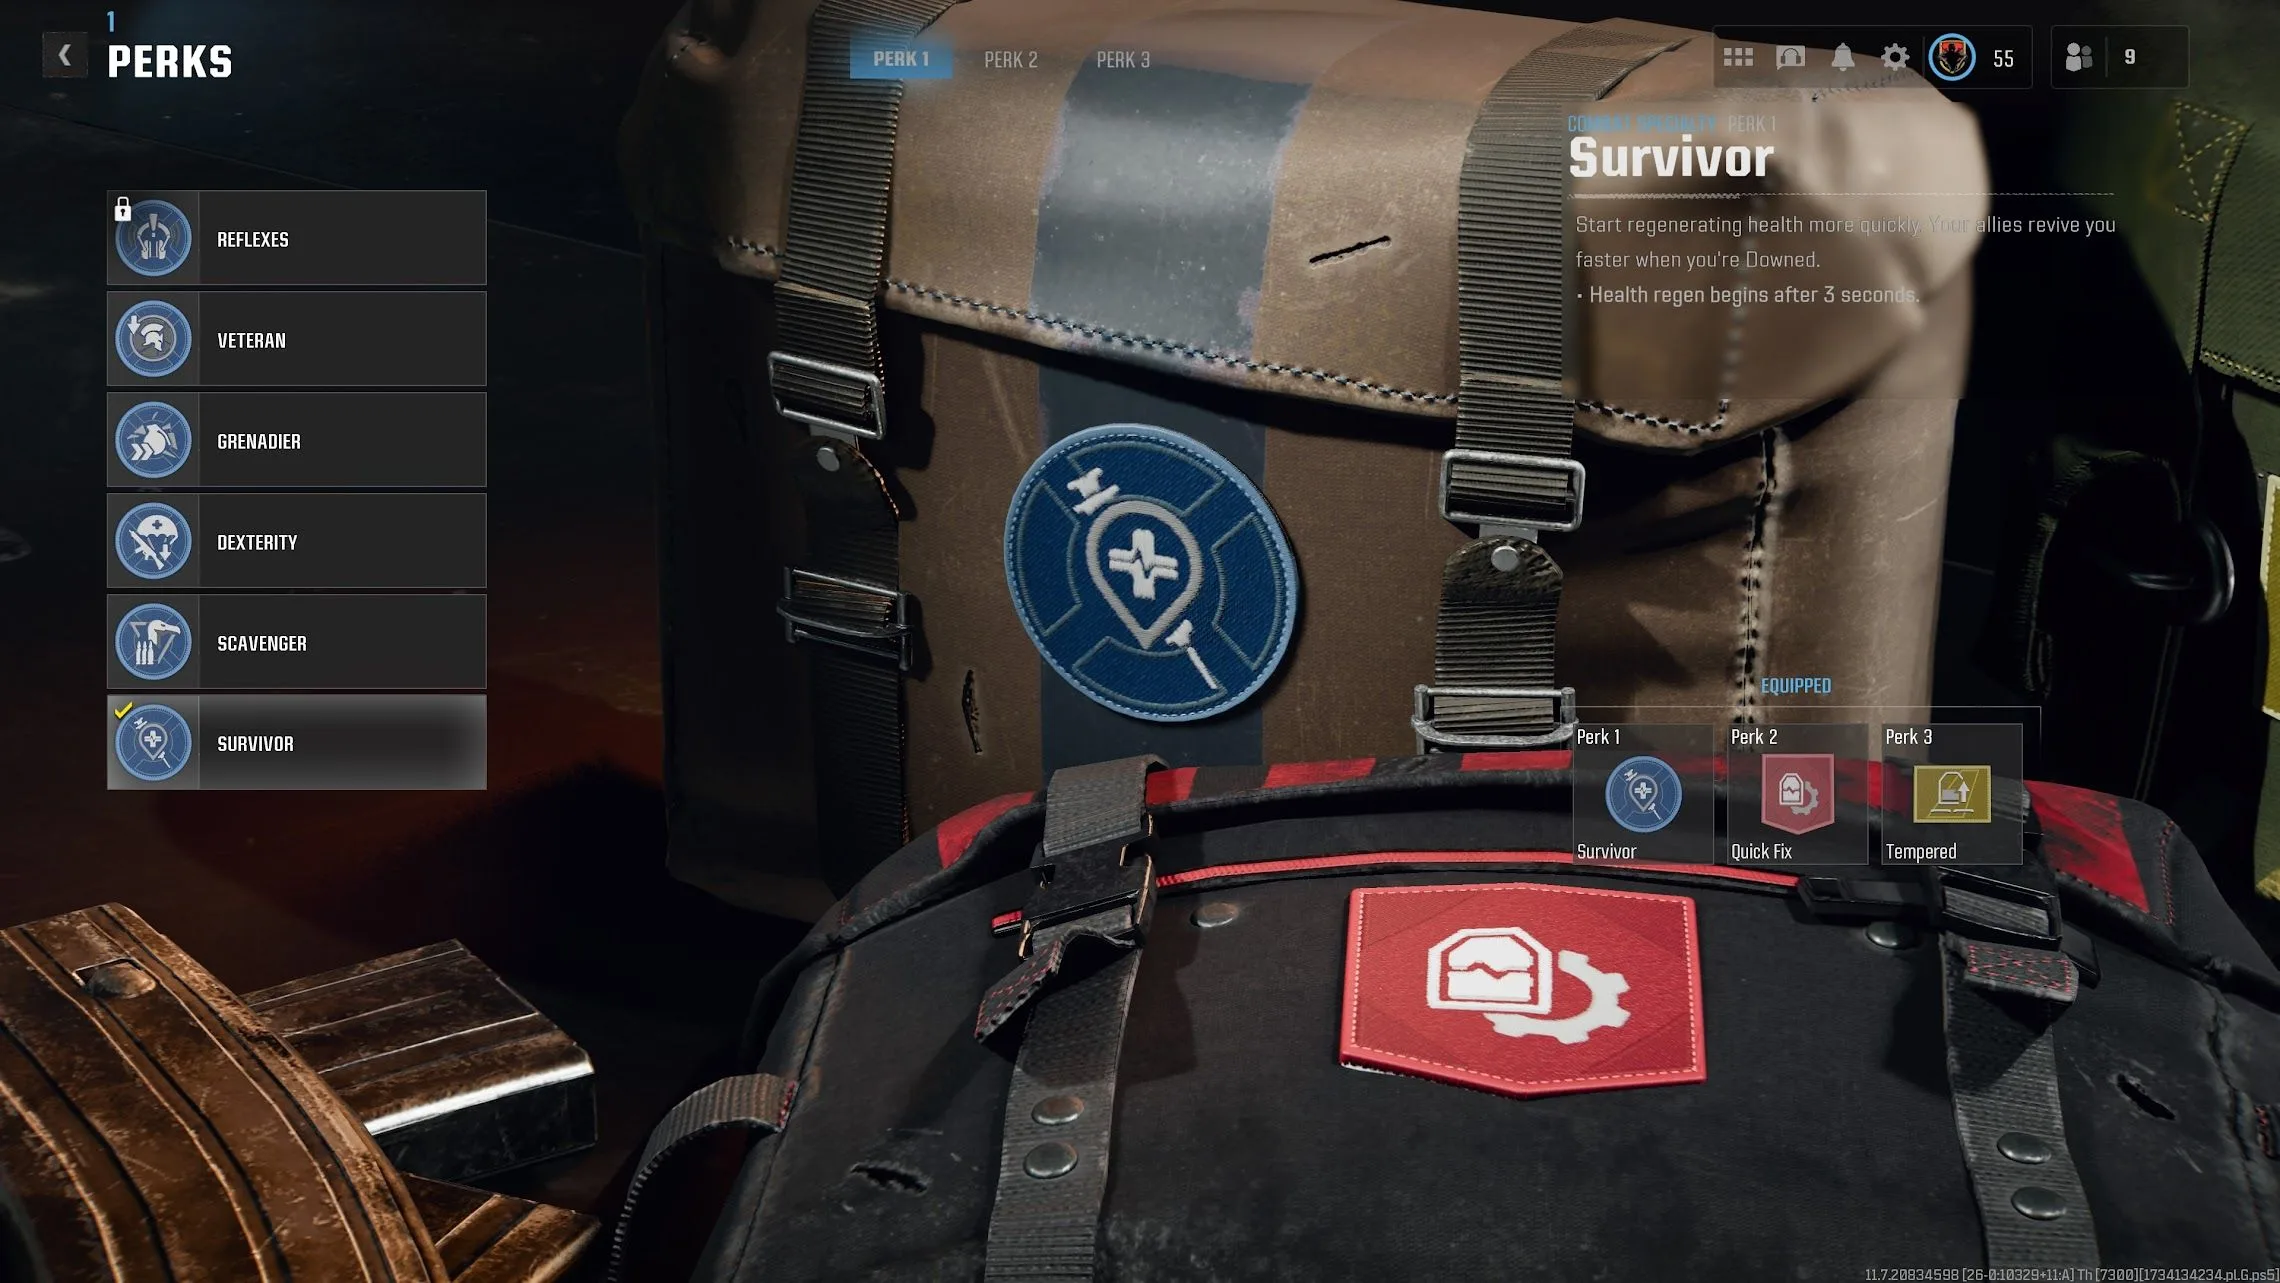
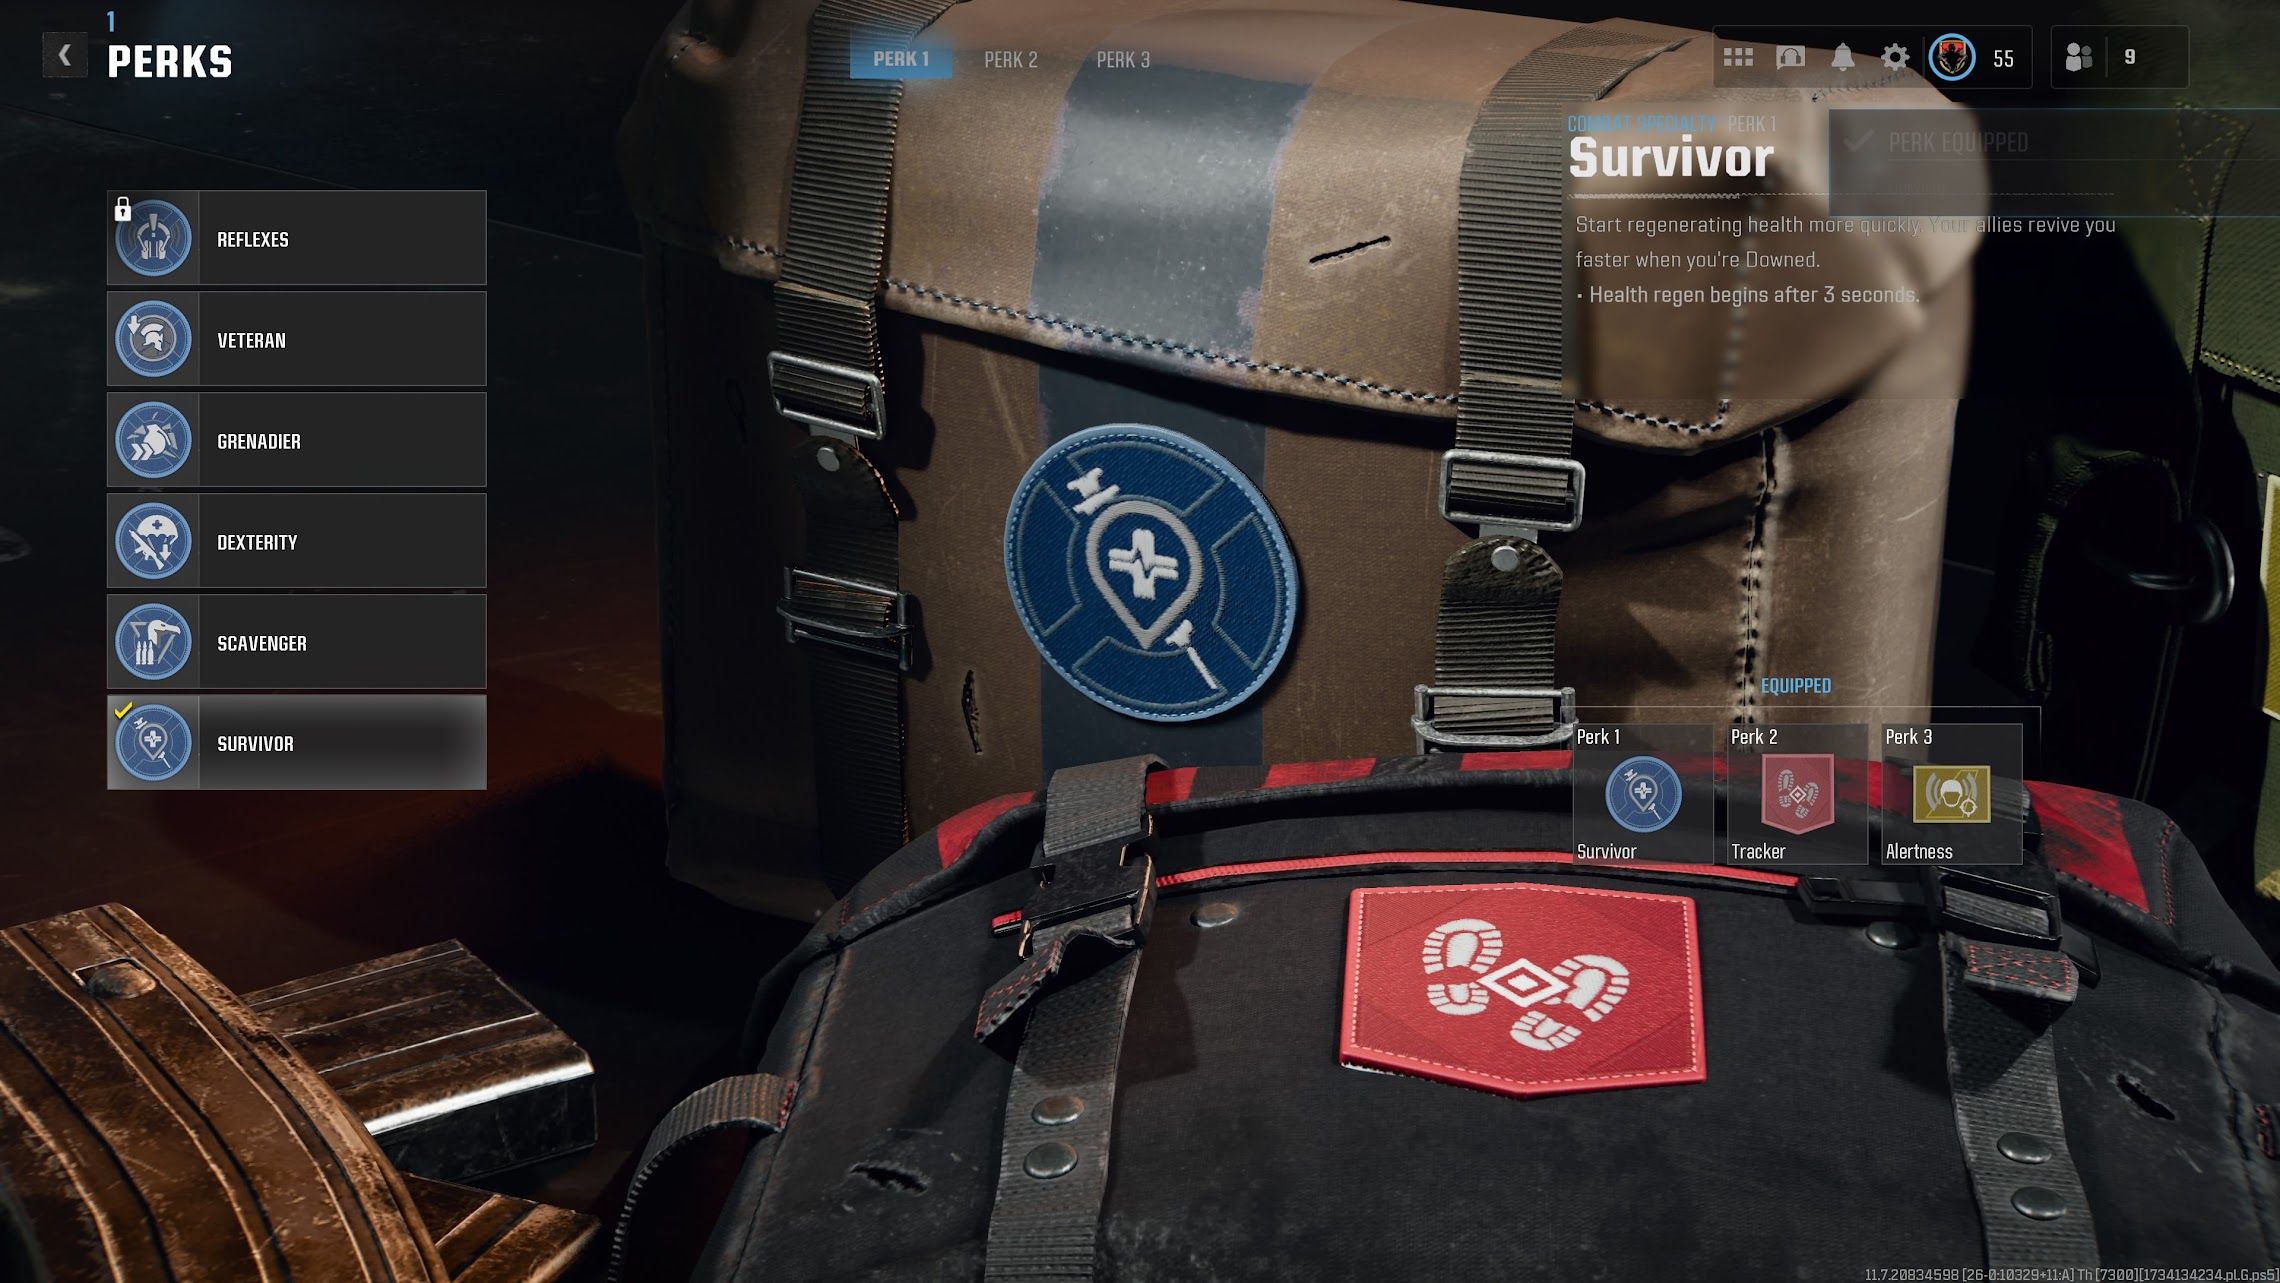
    Survivor, Quick Fix, Tempered


    The pairing of Survivor and Quick Fix is highly effective, as both are designed to help you recover health rapidly. While Survivor boosts health regeneration, Quick Fix activates health recovery with each kill.

    This combination promotes an aggressive playstyle, particularly effective with SMGs like the KSV or Jackal PDW.

    Moreover, you can reload armor plates with one hand, allowing you to fire while doing so if needed.

    Because this is an aggressive perk setup, having a way to quickly add armor plates is vital. Tempered fits this loadout perfectly.

    With only two plates necessary instead of three, coupled with your health regeneration, you can jump back into combat after engagements more quickly.

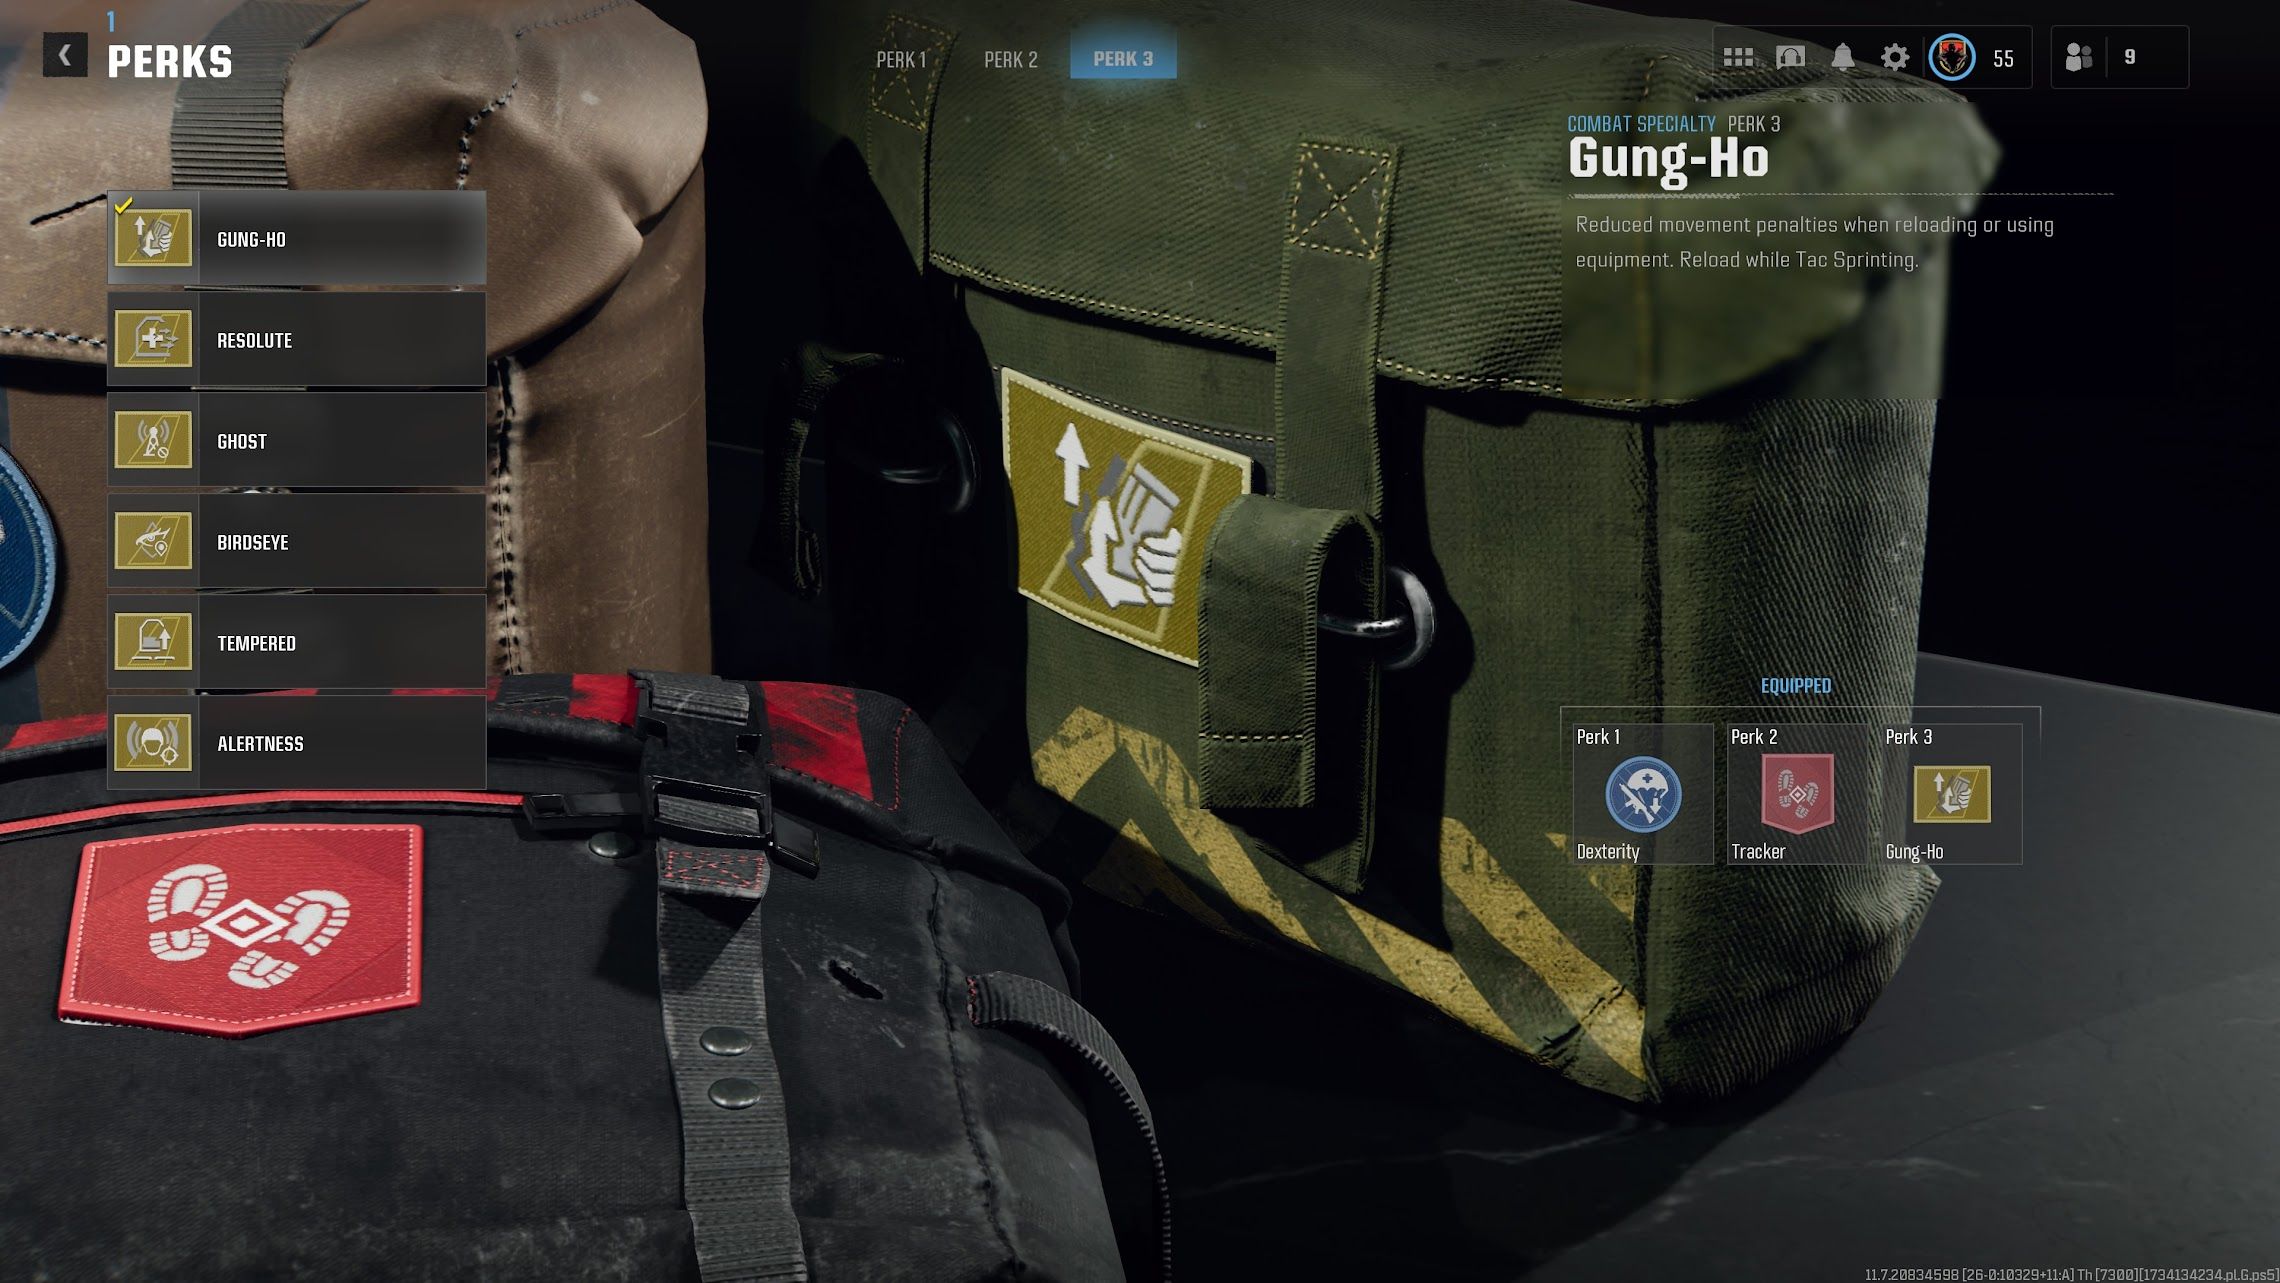
    Dexterity, Tracker, Gung-Ho


    Dexterity, Tracker, Gung-Ho perks - warzone

    This second combination leans less aggressive and is ideal for long-range engagements, requiring careful positioning before entering gunfights.

    This setup boosts your mobility with both Dexterity and Gung-Ho. Dexterity reduces fall damage and weapon sway when executing jumps, slides, or dives, easing your movement.

    With Gung-Ho, you experience no movement penalties when using equipment or reloading, enhancing your ability to maneuver during battles.

    Incorporating Tracker allows you to automatically spot enemies from afar, making it an excellent match for assault rifles like the GPR 91.

    If enemies close in on you, you can follow their footsteps to gauge their position, giving you a strategic advantage.

    Survivor, Tracker, Alertness


    Survivor, Tracker, Alertness perks - warzone

    The last combination is well-rounded and ensures you’re ready for anything that comes your way.

    As you will likely engage in numerous firefights, Survivor will help you heal quickly, allowing you to stay in the action longer.

    Tracker is effective for both close-range and long-range confrontations due to its automatic ping feature, allowing you to track enemies at any distance.

    Completing this setup with Alertness keeps you vigilant by notifying you if someone targets you or if an enemy is near, ready to strike.

    This combination keeps you alert and adaptable in various scenarios.