الوسم: Once Human

  • Completing the Sand of Clarity in Once Human’s Endless Dream

    Completing the Sand of Clarity in Once Human’s Endless Dream

    In Once Human’s Endless Dream, players are immersed in an imaginative realm filled with dangerous Dream Zones. These areas, marked by a unique blue color on the map, are home to formidable enemies, fierce storms, and ample treasures.

    Once you step into a Dream Zone, a 15-minute timer starts, giving you limited time to fight bosses and collect valuable resources. One of the key materials you’ll need is Sand of Clarity. This guide will help you find Sands of Clarity and explain how to use it to summon Dreamer bosses that offer worthwhile loot.

    How to Find Sand of Clarity

    Sand of Clarity is always in high demand in Once Human: Endless Dream. This resource is crucial for activating Nightmare Tubes, which summon bosses in the Dream Zones and are essential for progressing through the game.

    Wakeful Clocks are structures resembling grandfather clocks situated within Dream Zones. The bigger the clock, the more Sand of Clarity you can obtain from it. Some of these clocks are positioned on sand towers, requiring players to build structures or use double jump drinks to access them. Interacting with these clocks lets you collect Sand of Clarity, typically yielding around five sands per clock.

    Another method to gather Sand of Clarity is by locating Dream Zone Trace Boxes. These invisible entities can be identified by the glowing footprints they leave behind. By following these footprints and attacking the boxes, you can reveal them. Defeating a Trace Box grants you around 30 Sand of Clarity. You’ll commonly find multiple Trace Boxes near Omens, which provide great opportunities for resource collection.

    How to Use Sand of Clarity

    Sand of Clarity mainly serves to initiate battles against Dreamers within Dream Zones. Specifically, it activates Nightmare Tubes, which look like large structures adorned with static television screens. By interacting with a Nightmare Tube and depositing 50 Sands of Clarity, you can summon a Dreamer, transforming it into an enemy that you can then battle.

    Before heading into a boss fight, make sure to collect resources from clocks and Trace Boxes inside the zone.

    Eternal Dreamers, also known as Omens, emerge from towering TVs with yellow-orange screens and can be found on your map marked with a purple eye icon within a diamond.

    On the other hand, Deep Dreamers are smaller, featuring a purple screen and are represented by an icon of a blue arm coming out of a TV on the map. Lastly, Light Dreamers, which do not have a map icon, tend to appear around a Deep Dreamer’s Nightmare Tube and possess a light red or pink screen.

  • Completing the Quest for Vanadium and Beryllium in Once Human

    Completing the Quest for Vanadium and Beryllium in Once Human

    In the game Once Human, Vanadium and Beryllium Crystals are essential, particularly in the Endless Dream scenario. A consistent supply of these resources is crucial; without it, you’ll quickly stall your gear progression.

    These crystals mainly reside in Dream Zones, which are the perilous areas marked by blue overlays on the map. These zones teem with floating foes, hazardous effects, and unique challenges while also offering the best loot available. Collecting and farming these crystals is vital for crafting superior gear to tackle tougher challenges. Here’s how you can reliably obtain them.

    How to Locate Vanadium and Beryllium Crystals in Endless Dream

    Typically, you’d gather or earn Vanadium and Beryllium Crystals through caches, supply crates, or stronghold rewards. However, in Endless Dream, your options are limited, but there are still multiple ways to acquire these crystals.

    Nightmare zones include dangerous effects like Lightning Strikes and Explosions, so proceed with caution as you collect resources.

    Dreamweaver Fruit

    Player character approaching a Dreamweaver Fruit.

    Dreamweaver Fruits are floating, translucent orbs with a red core found in Dream Zones. Touching these fruits grants you a Vanadium or Beryllium Crystal. Some fruits are high up and may require you to build structures or use jumping aids to reach them.

    Do not build directly under the fruit, as this may cause it to disappear.

    Dream Zone Trace Boxes

    Revealed Dream Zone Trace Box.

    Dream Zone Trace Boxes are invisible Morphic Crates found in Dream Zones, identifiable by the white footprints they leave behind. Damaging a Trace Box reveals it, and defeating it yields two to three Vanadium or Beryllium Crystals. These boxes often spawn near Omens, offering great chances for resource gathering.

    The tier of the crystals you obtain corresponds to the difficulty level of the Dream Zone.

    Buy From Miss Memory

    Miss Memory NPC in starting and Dream Zones.

    Miss Memory is a unique vendor located in Dream Zones during the Endless Dream scenario. She offers various valuable items in exchange for Reality Fragments, which you earn by defeating Dreamer bosses and clearing Dream Zones. Among her items is a Crystal Selection Gift Box available for three Reality Fragments, which can contain Vanadium or Beryllium Crystals.

    Rewards from Public Crisis Events

    Beryllium Crystal in player inventory.

    Participating in Public Crisis Events is another effective way to collect Vanadium and Beryllium Crystals. These server-wide events happen at random times and involve a variety of objectives, such as defending areas or taking down tough enemies. Completing these events usually rewards players with valuable resources, including Controllers, Stardust Source, and sometimes Vanadium and Beryllium Crystals.

    You can craft Tier I and II gear using the standard Gear Workbench initially. For higher-level gear, you’ll need to upgrade to an Intermediate or Advanced Gear Workbench.

    How to Use Vanadium and Beryllium Crystals in Endless Dream

    Vanadium Crystal in player inventory.

    Crystals, like mid-tier ores, are essential for crafting higher-tier gear. Vanadium Crystals allow you to create reliable Tier III gear. You’ll need about 3 to 4 for each Tier III weapon, based on rarity, and a consistent 3 for each piece of armor. In the earlier stages, Beryllium Crystals will be crucial for Tier II weapons and armor, making the transition from early to mid-game in Endless Dream smoother.

  • Completing Monoliths, Teleporters, and Silos in Once Human: Endless Dream

    Completing Monoliths, Teleporters, and Silos in Once Human: Endless Dream

    In the *Endless Dream* scenario of Once Human, players venture into Dream Zones, marked in blue on the map, where dangers lurk. Once you step in, a 15-minute countdown begins. You will face demise unless you use a Reality Resetol to gain extra time.

    Clearing Dream Zones is essential for unlocking key structures like Monoliths, Teleporters, and Silos. You’ll need to defeat three types of Dreamers: Light, Deep, and Eternal. Each Dreamer poses a formidable challenge unless weakened by defeating the previous one. Understanding how these Dreamers interact is crucial for your success.

    Nightmare Specs

    Surviving long enough to battle the Dreamers presents its own set of challenges in the form of Nightmare Specs. These are environmental threats and mental debuffs that can quickly overwhelm groups. Currently, there are three Nightmare Specs:

    • Lightning Strikes: Calls down lightning that can harm both players and structures.
    • Explode: Causes enemies to detonate upon death, dealing area damage.
    • Evernight: Reduces visibility and applies a confusion effect that causes gradual health loss.

    To counter the effects of Evernight, players can interact with special light bulb plants known as Nightmare Light Sources found throughout Dream Zones. These will help reset confusion stacks. Alternatively, you can craft Nightmare Lanterns using Reality Anchors.

    Reality Resetols are consumable items obtained either by taking down Eternal Dreamers or through crafting. These resetols can extend the initial 15-minute timer in Dream Zones.

    A sinewy shrub with light known as a Nightmare Light Source

    Collect Reality Fragments from bosses for future weapon upgrades. You can also trade them at the Dream Market with “Miss Memory” for powerful enhancements like calibrations and deviations.

    Having grasped the hazards of Dream Zones, it’s time to focus on unlocking our targets of interest.

    Unlocking Silos

    Eternal Dreamer Eye above Location in Dream Zone

    Silos in *Once Human* are usually secured by Eternal Dreamers, indicated on your map by a purple eye within a diamond shape. To access the Silo, you need to dismantle the support structure that powers the boss.

    Begin by taking out the Light Dreamers, which don’t show on your map but can be found by their glowing light red screens. These Dreamers boost the power of the surrounding Deep Dreamers.

    Next, target the Deep Dreamers, marked on your map with a blue hand emerging from a TV icon. Defeating them will weaken the Eternal Dreamer.

    Although the strategy suggests clearing Light and Deep Dreamers first, feel free to rush the Eternal Dreamer with a strong, coordinated team.

    Once the Eternal Dreamer is vulnerable, engage and defeat it to unlock the Silo it guards, granting you access to the dungeon.

    Unlocking Teleporters and Monoliths

    The East Brookham Teleportation Tower under Dream Zone Lockdown

    In contrast to Silos, unlocking Teleporters and Monoliths doesn’t require you to defeat an Eternal Dreamer. Instead, focus on taking out the Deep Dreamers and their nearby Light Dreamer allies.

    Start by locating any Deep Dreamers near the Teleporter or Monolith; these are indicated by a blue hand icon on your map.

    Once you find them, scan the area for nearby Light Dreamers, identified by hovering letters above their locations. After eliminating the Light Dreamers buffing the Deep Dreamers, take them down. You’ll successfully unlock the associated Teleporters and Monoliths. Remember that Dreamers can respawn, so plan your strategy and work with your team when possible.

  • Once Human: The Path of Winter’s Embrace

    Once Human: The Path of Winter’s Embrace

    Once Human: Way of Winter has rolled out exciting new features, allowing players to explore fresh locales. With these locations, new mystical crates have also appeared. These mystical crates are packed with valuable items, such as rare weapons, armor schematics, and other treasure players will be eager to collect.

    In Way of Winter, these crates are spread across three regions: Onyx Tundra, Vena Fjord, and Ember Strand. Players can discover the mystical crates near key landmarks in each area. These crates are essential for completing landmark objectives, finding weapons and armor, defeating foes, and activating rift anchors. While some crates are relatively easy to find, others can be more elusive, making the search all the more rewarding.

    All Onyx Tundra Mystical Crate Locations

    Locate All Six Mystical Crates in Onyx Tundra

    Onyx Tundra was among the initial areas unlocked in the new Once Human scenario. This frigid, snowy landscape features iconic sites like Moose City, Obsidian Camp, Wish Land – East, and the Tundra Monolith, all of which are home to six Mystical Crates.

    The first crate is situated in Moose City. Though it’s one of the earliest crates available, tracking it down can prove challenging. My friend and I took a while to spot it, and even when we did, reaching it was a struggle. The crate is perched on top of a large, cake-shaped building. You can jump onto the lower tiers, but the second-highest tier is out of reach with a standard jump.

    To access the Mystical Crate in Moose City, you’ll need to use your motorcycle. You can summon it at several locations, but we opted to call it from below the second-highest tier. From there, mount the bike, leap onto one of the cake’s candles, and then hop up to the higher tiers until you can reach the crate.

    The next Mystical Crate can be found at the Moose City Food Factory. Inside, you’ll face blocks of ice that must be melted with your torch or a Molotov Cocktail. I recommend using the Molotov, as it’s quicker and more efficient. Eventually, you will come across a block of ice obstructing a room’s entrance. Melt it, then proceed through the space and down some stairs to find the Mystical Crate waiting for you.

    Quick Tip: The Moose City Food Factory can be frigid, so dress warmly and bring some heat supplies to fend off the cold. Items like the Chaosium lantern and Salty Roasted Spikemato work well for staying warm.

    Another Mystical Crate can be located at Obsidian Camp. This crate sits atop a base overlooking the mountains. To reach it, enter the building and climb the stairs on the right. Turn right again and ascend another flight of stairs. From there, glide through the broken window to the room across and navigate across wooden platforms and ramps until you reach the crate.

    Next, head to Wish Land – East, where you’ll find another Mystical Crate on the roof of the central orange castle. Enter the castle, take the stairs to the left, then immediately turn right for another staircase leading up. Keep ascending until you’re outside and can access the crate.

    Inside the Great River Shelter Danger Zone, the next crate is locked behind a puzzle. Go into the main building and up the stairs. You’ll find a room with a locked door and a blue square outside. Stand in the square and face the wall with disconnected yellow patterns to align them and create the letter "R." Once aligned, the door will open, granting you access to the Mystical Crate inside.

    Finally, the last Mystical Crate in Onyx Tundra is in the Tundra Danger Zone. This area is heavily guarded, so prepare your weapons and ensure your gear is in good condition. Make your way to the Tundra Monolith; the crate is on top of a container near the entrance.

    Having trouble braving the cold to claim these Mystical Crates? Don’t forget to craft a Chaosium lantern to keep warm, adjust your armor as necessary, and carry some heatium as an extra precaution.

    Location Coordinates
    Moose City 5301, 4677
    Moose City Food Factory 4184, 5024
    Obsidian Camp 5574, 3287
    Wish Land – East 2520, 5757
    Great River Shelter Danger Zone 3524, 3986
    Tundra Danger Zone 2479, 4346

    All Vena Fjord Mystical Crate Locations

    Five Mystical Crates Scattered Throughout Vena Fjord

    In Once Human, Vena Fjord contains five Mystical Crates to discover. The first is found at Fiskur Harbor, resting atop one of the highest containers. Keep climbing until you locate it.

    The second crate resides in Wish Land – West. Enter through the building featuring a giant octopus at the entrance. Navigate through, jumping over various platforms as necessary, and follow the rollercoaster track on foot. After traversing multiple tracks and reaching a gazebo with a Mr. Wish statue outside, proceed into the building across from the statue, where you’ll encounter a claw machine monster. You can confront it or navigate around — either way, head upstairs behind it, making your way to the uppermost room for the crate.

    Note: Be cautious, as shadow monsters around the area are immune to damage unless lured into light coming from the bulbs above them.

    Next, head to the Hiverail Restricted Area. The crate is positioned atop a massive rock formation in the cave’s center. Use the rift anchor to glide over to the ledge of the rock formation. Utilize the updraft ventilation systems to rise until you reach the top and the crate.

    The fourth Mystical Crate awaits in the Avalanche Danger Zone. As you head towards the Avalanche Monolith, explore small camps and buildings along the way until you discover a camp near the Avalanche Monolith gates where the crate is located.

    To find the last Mystical Crate in Vena Fjord, head to Frost Forge. Navigate through the forge until you reach an area with two portals. Take the blue portal to be teleported straight to the Mystical Crate, guarded by Igna’s Messenger.

    Location Coordinates
    Fiskur Harbor 771, 6970
    Wish Land – West 2080, 5803
    Hiverail Restricted Area 1356, 4268
    Avalanche Danger Zone -94, 4485
    Frost Forge -2427, 5044

    All Ember Strand Mystical Crate Locations

    Six Additional Mystical Crates in the Warmer Region

    In the concluding area of Once Human: Way of Winter, there are six Mystical Crates up for grabs. Since this region is recommended for players at higher levels, some crates can be particularly challenging to find. The first one is situated in the Firedust Monolith Danger Zone. Move away from the Monolith towards a nearby watchtower to locate the initial crate.

    The second Mystical Crate can be found inside the Fire God Research Center, located at the center of the excavation site. It is surrounded by lava, so glide down from higher platforms to reach it safely.

    For your third collection point, go to Fire Throat Fortress. Inside the fortress, you can decide whether to face the enemies present or sneak past them. If you opt to fight, consider upgrading your gear first. The crate is straight ahead on the right side.

    Next, head to Fire Throat within the fortress. Take the elevator down, navigate around, and descend some stairs and platforms until you reach the platform housing the Mystical Crate, watched over by an elite enemy. Defeat or evade the guard to claim your treasure.

    Then travel to Ashenton in *Once Human. Move around until you see a sign that reads, “This Way,” pointing to the right. You may need to glide from a higher location to avoid lava while you follow the direction inside a dilapidated building. Jump over the rubble, ascend six flights of stairs, turn right, and leap down into a smaller building section to access the Mystical Crate.

    Finally, navigate to Sunshroud Cave. Inside, you can choose to battle or bypass Vulture enemies. Follow the cave network until you reach an area with the rift anchor. Glide over to the anchor, but take the detour to the right where the Mystical Crate is hidden.

    Location Coordinates
    Firedust Monolith Danger Zone -3818, 2539
    Fire God Research Center -5134, 3258
    Fire Throat Fortress -5044, 4414
    Fire Throat -4719, 4713
    Ashenton -6285, 4591
    Sunshroud Cave -5875, 7294

    All Puzzle Mystical Crate Locations

    Finding Optional Puzzle Mystical Crates for Additional Loot

    Even after you’ve discovered all the regular Mystical Crates in Once Human, the adventure isn’t over. There are yet Puzzle Mystical Crates to find. These crates are scattered across the three regions, and while they don’t count towards fulfilling regional quests, they offer an enjoyable challenge filled with valuable loot, including Stardust.

    You can identify Puzzle Mystical Crates by their glowing purple shadows. To activate them, step onto these shadows. Doing so will cause another shadow to appear, and stepping on the second will reveal a third. Step on that last shadow to uncover the Puzzle Mystical Crate.

    In Onyx Tundra, expect to find Puzzle Mystical Crates in the Moose City Food Factory, Obsidian Camp, Moose City, Great River Shelter Zone, and Wish Land – East. In Vena Fjord, search for them in Fiskur Harbor, the Hiverail Restricted Area, Frost Forge, Wish Land – West, and Zone of Haze. The only Puzzle Mystical Crate located in Ember Strand can be found at the Fire God Research Center.

    The introduction of Puzzle Mystical Crates in Once Human: Way of Winter adds a fresh layer of enjoyment to the gameplay. Though optional, hunting them is a gratifying experience, particularly for the Stardust they yield. As Once Human evolves with new updates, players can look forward to an ongoing quest for more Mystical and Puzzle Crates.

  • Top Base Locations in Once Human: Way of Winter Unveiled

    Top Base Locations in Once Human: Way of Winter Unveiled

    The process of establishing a base in Once Human can be both enjoyable and occasionally challenging. Players engage in constructing foundations, arranging furniture, and unlocking recipes to enhance the base’s functionality and comfort. With the conclusion of the Manibus scenario and the onset of the Way of Winter, the game map has experienced a significant transformation.

    Players can no longer revisit the earlier regions; instead, they are required to start anew in the fresh landscapes of Onyx Tundra, Vena Fjord, and Ember Strand. As many players transition to the new Once Human scenario, it’s essential to identify the optimal locations for building bases. Although the map is smaller in comparison to its predecessor, there are still plenty of viable spots to consider, with some areas being more advantageous than others.

    Top Locations for Base Building in the Way of Winter

    Placing Bases Near Resources

    The Way of Winter map features three distinct regions. The first two—Onyx Tundra and Vena Fjord—were accessible right from the beginning, allowing players to select their preferred landing zones. Onyx Tundra is ideal for beginners, while Vena Fjord caters to more seasoned players. As the second phase rolled in, Ember Strand also became available for exploration and base construction.

    Each of these regions includes several settlements, which are popular places to build bases. However, they can get quite crowded. Fortunately, there are numerous worlds available to explore, so if a certain area feels too busy, players can simply switch to another. So, where is the best place to establish your base in each of the new regions?

    Onyx Tundra for Simple Acid Farming

    One of the top suggestions for a base in Once Human: Way of Winter is to build east of Tobacco Resort. This location is characterized by its polluted environment, providing easy access to plentiful polluted water. While pollution may cause some health loss, wearing suitable armor can make this area less hazardous compared to the harsher winter conditions found elsewhere.

    By using polluted water, players can ultimately engage in passive acid farming. Players should prioritize unlocking the Memetics early, particularly for the Water Pump. An added bonus of this location is that it tends to be less congested due to the surrounding contamination.

    However, player experiences may vary depending on the world. Another excellent option is to build east of Mousseville. I, along with two friends, chose this area for our base. While the nighttime temperatures can drop significantly from 8 PM to 8 AM, consuming Salty Roasted Spikemato—which you can unlock through the Dishes II Memetic—can help mitigate the cold.

    Considerations for Staying Warm

    Make sure to unlock helpful Memetics like the Polar Expedition and Thermal Tower to keep warm.

    I appreciate this area not only for its visual appeal but also for the level surface it provides for base construction. Additionally, it has easy access to water and is surrounded by wildlife such as deer, seals, and polar bears, all adding to its charm. It’s also conveniently situated near Mousseville, a great spot to gather essential supplies.

    Another noteworthy location is near the Ice House Camp in Once Human, which offers trading opportunities with NPCs and a wealth of surrounding resources.

    Vena Fjord: The Resource Haven

    Next up is Vena Fjord. Along with Onyx Tundra, this was one of the first places players could land and create their bases. Vena Fjord is home to locations such as Whaleborn, the Abandoned Farm, and Wish Land West.

    If you want to build here, consider positioning your base near the Broken Reefs Teleportation Tower. Its proximity to a teleportation tower can be incredibly beneficial, especially when your home teleportation is on cooldown. Moreover, this area features abundant resources, including animate wildlife, trees, and minerals.

    If you’re looking for another option, Whaleborn is a solid choice. Although players can’t construct bases directly in settlements, venturing to the west side will reveal ample building opportunities. This area offers resources like Cold Crystal Ores, sulfur, iron, and seawater, along with plentiful Spikemato plants.

    For those tired of battling hypothermia, building near Greenfield can be a great choice. This lush area has comfortable conditions and many animals to hunt or tame. It also provides easy access to various minerals and plants.

    Just like Onyx Tundra, Vena Fjord also has prime locations for acid farming. Acid is a highly sought-after resource in the game, and spots where it can be easily harvested are prized for base building. In Vena Fjord, look east of the Abandoned Farm for an area brimming with polluted water and Startrace Ores, along with plenty of nearby plants and minerals. In this location, you won’t need to worry much about hypothermia, just the usual pollution risks.

    Ember Strand: A Lava-filled Challenge

    Ember Strand is the final area to unlock in Once Human and has fewer players vying for building spots, primarily due to the abundance of lava pits that pose a danger. However, there are indeed suitable spots for base construction.

    In Ember Strand, I’d suggest traveling south to avoid the lava hazards. Building near the Oblivion settlement, whether to the east or north, can also yield good results since there’s plenty of access to Hot Rock Ore.

    Key Considerations When Building a Base

    Building a base in Once Human requires careful consideration of various factors, especially where to locate yourself. The definition of a good spot can differ for each player. Those seeking easy access to loot should consider locations near lootable areas, while those interested in minerals and wildlife might prefer spots like Greenfield. If you value solitude, be prepared to explore multiple worlds to find an ideal escape.

    As you contemplate your location, also think about long-term needs such as acid farming, which becomes increasingly important in the late-game phase.

    Remember, the initial choice of where to build your base isn’t permanent. Changing locations is generally straightforward as long as you find a clear new site. If boredom sets in or you realize you want a better access to resources, you can always relocate. Each region has its unique advantages and drawbacks, so consider what matters most to you and enjoy the creative journey of building in Once Human.

  • Once Human: Embrace the Winter Path

    Once Human: Embrace the Winter Path

    Once Human has launched a new scenario: Way of Winter, introducing fresh landscapes, content, and gameplay mechanics. Players can now explore uncharted areas and delve deeper into the Once Human narrative, all while adapting to new gameplay features like extreme cold.

    Like many survival games, Once Human now includes cold and heat mechanics that significantly impact player experience. For instance, prolonged exposure to cold can lead to hypothermia, which can drain a player’s health to zero in seconds if not managed. The pressing challenge is: how do players survive these harsh winter temperatures?

    Understanding the New Temperature Features

    Temperature States and Effects

    In Phase 1 of the Once Human: Way of Winter scenario, players can start in one of two regions: Vena Fjord or Onyx Tundra. I opted for Onyx Tundra to take a slower approach in this new environment. Regardless of where you begin, you’ll soon explore both locations.

    Regardless of your chosen location, players will contend with the universal challenge of extreme cold. The icy climate can have severe consequences, draining your energy and health. The Way of Winter features five distinct temperature states, each with unique effects.

    Temperature State Temperature Effect
    Frost Causes quick energy and body temperature loss, leading to hypothermia. It inflicts a stack of Frozen every three seconds, resulting in a 5% HP drop per second, ultimately causing instant death after four stacks.
    Cold Leads to rapid energy loss and gradual body temperature decline, resulting in hypothermia.
    Cozy Restores body temperature to normal.
    Hot Causes rapid hydration loss and rising body temperature, resulting in heatstroke.
    Blaze Intensifies hydration loss and body temperature. Heatstroke worsens, inflicting stacks of Combustion every three seconds, causing a 5% HP reduction per second and leading to instant death after four stacks.

    Your goal should be to achieve the Cozy state; however, maintaining this can be challenging. If you’re diving into Way of Winter, prepare to tackle these extreme temperatures head-on.

    Top Strategies to Stay Warm During Way of Winter

    Stay Warm to Prevent Hypothermia and Fatality

    Experiencing hypothermia in Once Human: Way of Winter can be incredibly frustrating. If you’re finding it tough to manage your warmth, don’t worry—there are several effective strategies to keep warm while exploring Vena Fjord and Onyx Tundra.

    Monitor Time

    During the night, particularly from 8 PM to 8 AM, expect the temperatures to dip, making it critical to seek shelter. Of course, if you’re equipped with enough cold-resistant gear, you may survive extended exposure.

    Even so, exercise caution: cold-resistant items merely extend your time outside—they don’t ensure safety. Always be mindful of the time and plan your expeditions wisely.

    Head Home or Build Campfires

    Your home acts as a critical refuge—while it won’t eliminate cold effects entirely, it will prevent your health from deteriorating. However, if you’re suffering from cold effects and embark on a journey the next day, you risk instant hypothermia. To mitigate this, keep a fire close or construct temperature control facilities, available in Phase 2. Ensure you have plenty of fuel to keep your fire burning.

    If you’re caught outside as night falls, building a campfire can offer the same protections as your home, defending you against hypothermia. This will also allow you to continue your journey from where you left off the next day instead of retreating home.

    Equip Yourself with Various Hides and Tools

    In Once Human: Way of Winter, hunting and skinning different animals yields unique hides for crafting cold-resistant armor. If you start in the Onyx Tundra, your best options are deer, seals, and polar bears. In Vena Fjord, look for mutated bears and flamingos. Make sure to unlock the Leatherworking Memetic to benefit from this.

    Each hide provides materials to create cold-resistant gear, enabling better survival against the wintery conditions. The animals in Onyx Tundra will get you started, but the hides from Vena Fjord will prove invaluable later.

    Keep Essential Tools Handy

    The Way of Winter introduces both old and new tools for surviving the cold. Crafting a torch provides warmth, but make sure you have it accessible for it to work. Additional tools like Thermoium and Heatium are also useful—just unlock the Polar Expedition Memetic first.

    The Chaosium Lantern is another essential item to have. It requires Chaosium to operate, so stock up on this resource. You can find Chaosium through enemy loot or create it in a furnace. The lantern can effectively both raise and lower your body temperature.

    Lastly, prepare meals that boost cold resistance. Several new crops have been added in Once Human: Way of Winter, such as Spikemato, Sunny Ginger, and Polar Peppers, all granting +5 cold resistance when consumed. Turning these crops into dishes like Salty Roasted Spikemato can significantly extend your cold resistance duration.

    Embracing these strategies will enhance your experience in Once Human: Way of Winter and lead to a higher chance of survival in the challenging cold landscapes.

  • Discovering All 7 New Deviants: Locations & Tips!

    Discovering All 7 New Deviants: Locations & Tips!

    With the release of Once Human‘s Way of Winter expansion, players can now engage with seven newly introduced deviants. This lineup includes three Combat Deviants, three Territory Deviants, and one Crafting Deviant, all of which can be captured during quests or while exploring the wilderness. Each deviant has unique abilities and effects that can enhance gameplay during the PvE scenario.

    The Way of Winter expansion offers even more than just new deviants. Players will encounter previously unseen environments and face an innovative temperature mechanic that challenges survival strategies. Staying warm now ranks closely behind mere survival, as both tasks are interlinked. The deviants you capture can assist with these challenges, providing valuable skills related to combat, crafting, and territory management.

    Locations of All Way of Winter Deviants

    Quest & Level Requirements

    The Way of Winter expansion features seven new deviants. Many of these can be obtained by completing quests assigned by Lowe, while others require clearing Securement Silos. Below is a detailed look at the quests and tasks needed to catch each new deviant, along with their locations and level requirements, based on information from Game8.

    DEVIANT

    QUEST

    LOCATION

    REQUIRED LEVEL

    Ice Pot

    Obtained during the Deviation: Ice Pot quest

    Vena Fjord

    Level 9

    Invincible Sun

    Can be obtained after clearing the Securement Silo – Delta

    Onyx Tundra

    Level 10

    Hydronaut Fish

    Obtained during the Deviation: Hydronaut Fish quest

    Vena Fjord

    Level 3

    Gazocchio

    Obtained during the Deviation: Gazocchio quest

    Vena Fjord

    Level 18

    Tar Pudding

    Obtained during the Deviation: Tar Pudding quest

    Vena Fjord

    Level 25

    Snapshot

    Obtained by clearing the Tundra Monolith

    Onyx Tundra

    Level 20

    Snowsprite

    Obtained during the Deviation: Snowsprite quest

    Onyx Tundra

    Level 9

    In addition to completing specific quests to collect all seven new deviants in Once Human, some may require prior quest completion and activities. For instance, the Deviation: Snowsprite quest can only be activated after finishing the Deviation Expert in the North side quest.

    Furthermore, some deviants are more challenging to catch than others, so it may be wise to level up beyond the required levels before venturing into dungeons and tackling tougher questlines.

    Using All Way of Winter Deviants

    Types and Uses of Deviants

    The Way of Winter expansion introduces a diverse array of new deviants in Once Human, each serving distinct purposes ranging from combat to crafting. For a detailed overview of these deviants and their gameplay mechanics, check out Xelray on YouTube. Below is a closer look at each deviant’s unique uses and abilities, as highlighted by GameRant.

    DEVIANT

    USES & EFFECTS

    Ice Pot

    Crafting Deviant that creates Sticky Ice Crystals.

    Invincible Sun

    Combat Deviant that explodes every three seconds to inflict sustained Burn Damage on foes.

    Hydronaut Fish

    Territory Deviant that can gather seawater or operate water purification facilities to obtain fish.

    Gazocchio

    Territory Deviant that specializes in protecting your base, attacking suspicious targets, and generating a tool that makes Shadow enemies vulnerable to damage.

    Tar Pudding

    Territory variant that extracts crude oil and operates refining facilities.

    Snapshot

    Combat Deviant that captures photos of enemies, which increases the damage they take from weapons.

    Snowsprite

    Combat Deviant that generates fragile ice crystals that can be shot for AoE damage.

    The addition of these deviants, along with other new features in Once Human, like puzzles, enhances gameplay. This update revitalizes the experience and provides players with plenty of fresh content to explore in the Way of Winter PvE scenario.

    Source: Game8, Marc Santos/GameRant

    Video Credit: Xelray/YouTube

  • Solo Strategies for Defeating the Forsaken Giant

    Solo Strategies for Defeating the Forsaken Giant

    Once Human is an engaging game that caters to a wide range of players. Although it’s primarily promoted as an open-world survival game, it offers numerous activities. Gamers can construct bases, cultivate crops, tame creatures, capture Pokemon-like entities known as Deviations, embark on quests, battle Deviants for loot, and even dive into dungeons and face formidable bosses.

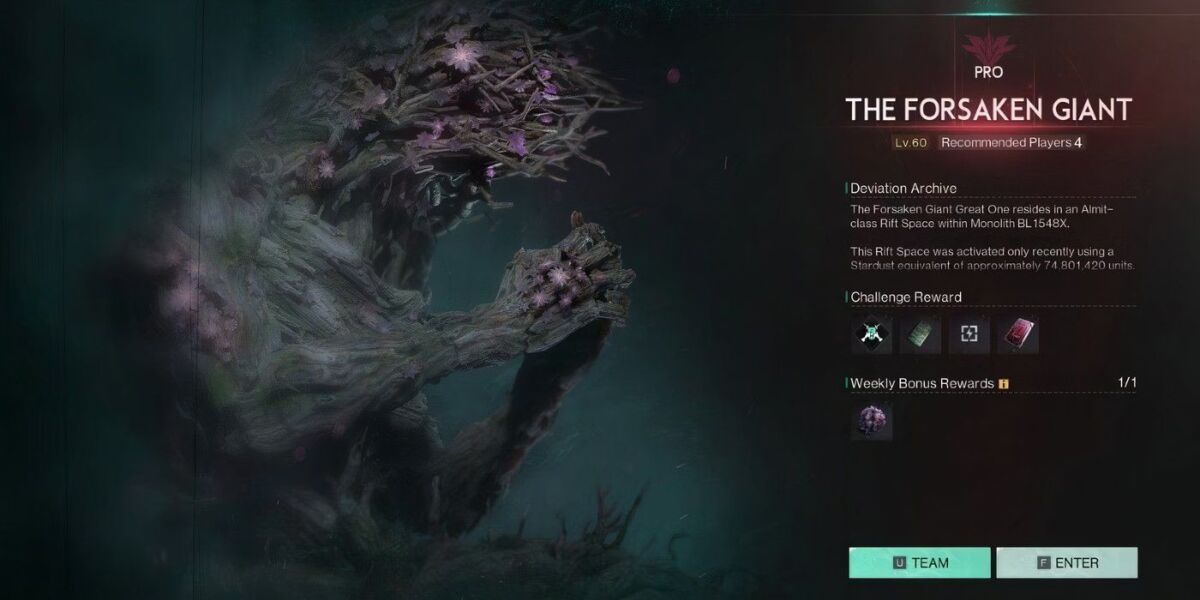
    In the post-apocalyptic universe of Once Human, players can encounter two types of dungeons: Monoliths and Silos. Monoliths present a greater challenge than Silos, particularly when tackled solo. One of the toughest Monoliths is that of The Forsaken Giant. While players can collaborate in Monoliths, facing this giant alone requires careful preparation.

    Where to Find The Forsaken Giant Monolith

    Head to Blackfell in the Red Sands

    To locate The Forsaken Giant Monolith, you need to ensure that the server is in phase four. Once you’re in phase four of the server’s timeline, make your way to Blackfell, situated in the Red Sands region.

    From Blackfell, simply head directly south until you reach an area known as Forsaken Monolith. At this location, you can either explore for loot, which involves defeating enemies, or proceed directly into the Monolith. Notable actions in this area include opening a mystical crate and activating a rift anchor.

    Tip: Don’t forget to activate the Teleportation Towers in both Blackfell and the Forsaken Monolith to make travel easier.

    Inside the tower, locate the nearby staircase and ascend until you arrive at the Rift Beacon. Interact with this beacon to initiate the dungeon. You have the option to face The Forsaken Giant in Normal, Hard, or Pro modes. Keep in mind that tougher difficulties yield better rewards; however, if it’s your first encounter, starting on Normal is advisable.

    How to Defeat The Forsaken Giant Solo

    Prepare for the Tough Battle

    The Forsaken Giant is one of the most challenging adversaries in Once Human. As players are capped at level 50, and since the Giant is a level 60 enemy, the battle will be quite rigorous. Fortunately, there are ways to enhance your chances of success.

    First, equip yourself with a solid armor set. Rather than just piecing together random items, opt for a cohesive set that works well together. My preferred sets include The Lonewolf and Falcon armors, but the Bastille or Raid sets are also strong choices. The key is to choose pieces that complement each other.

    Next, select the right weapon and ammunition. For this boss, weapons with high fire rate and accuracy are optimal. Personally, I favor an SMG for this battle, although the Blue AK or a revolver can also be effective. Use steel or tungsten ammo for added power.

    It’s also helpful to choose an effective combat Deviation to back you up during the fight. My favorites are the Enchanting Void, Lonewolf’s Whisper, and Polar Jelly. Additionally, don’t forget to bring along some consumables; if you’ve unlocked it, the Living Armor consumable can be a game-changer.

    The Start of the Battle

    Once you’re fully prepared, it’s time to engage the Giant. Activate the battle by shooting at The Forsaken Giant. This will awaken the creature, triggering a powerful fist slam aimed at you. You can easily dodge this attack by running away from the descending fist and rolling to avoid any damage.

    When the Giant slams down, it creates a shockwave that can knock you over. Jump to avoid this wave and reposition yourself to face the giant. Look for the part of its arm that glows red—this is your moment to inflict damage. Keep shooting at the glowing area until it fades.

    The Forsaken Giant will then launch a sweeping arm attack. You’ll need to dodge depending on the direction of the sweep. Position yourself by the blooming flowers on the ground to evade the attack. When its arm passes, you’ll have a brief instance to target the glowing palm again.

    Caution: Beware of falling debris that can injure you, and avoid getting too close to the edges, where you might fall into the water.

    As the Giant lifts its hand, it’s your chance to shoot at the glowing palm until the light disappears. The Giant will then shed tears, which morph into smaller enemies—this is where your Deviation is crucial for assistance.

    Some tears will transform into glowing orbs. Collect these orbs and throw them at the Giant, especially when it appears to be clutching its stomach. Successful hits will brief the Giant momentarily; seize this window to damage it again. Continue the cycle of avoiding its attacks while focusing on its weak points.

    Finishing the Battle and Defeating The Forsaken Giant

    As you inflict more damage, expect The Forsaken Giant to enter its second phase, which is similar to the first but with increased aggression and additional minions. In the final phase, the Giant will summon The Arbiter, a formidable ally you cannot ignore. Prioritize defeating The Arbiter but don’t forget to use your Deviation and weaponry against the giant too.

    Additionally, the Forsaken Giant will use a new attack that marks you with a red glow, resulting in a series of earthquakes across the platform. There are three sections where the Giant will slam; avoid these areas as they can withstand only two slams before collapsing. Warning indicators will display before each section gives way, so be vigilant.

    The last form of attack includes red beams shooting from the ground, which can deal significant damage. Simply move away from these glowing areas as soon as they light up.

    Keep targeting The Forsaken Giant’s weak points, utilizing your Deviation and any consumables you brought. Though this giant can be tough to conquer solo, being well-equipped and understanding its attack patterns will allow you to triumph and collect your rewards.

    Video Credit: LEWIS/YouTube

  • Tips for Conquering the Forsaken Giant in Once Human

    Tips for Conquering the Forsaken Giant in Once Human

    Blackfell, a once tranquil community in Once Human, is currently facing unrest due to conflicts with its leaders. To assist the townsfolk, you’ll need to embark on the quest titled ‘He Was Here’ and uncover the root of their distress. This journey will take you across the Red Sands region, ultimately leading to the Forsaken Monolith.

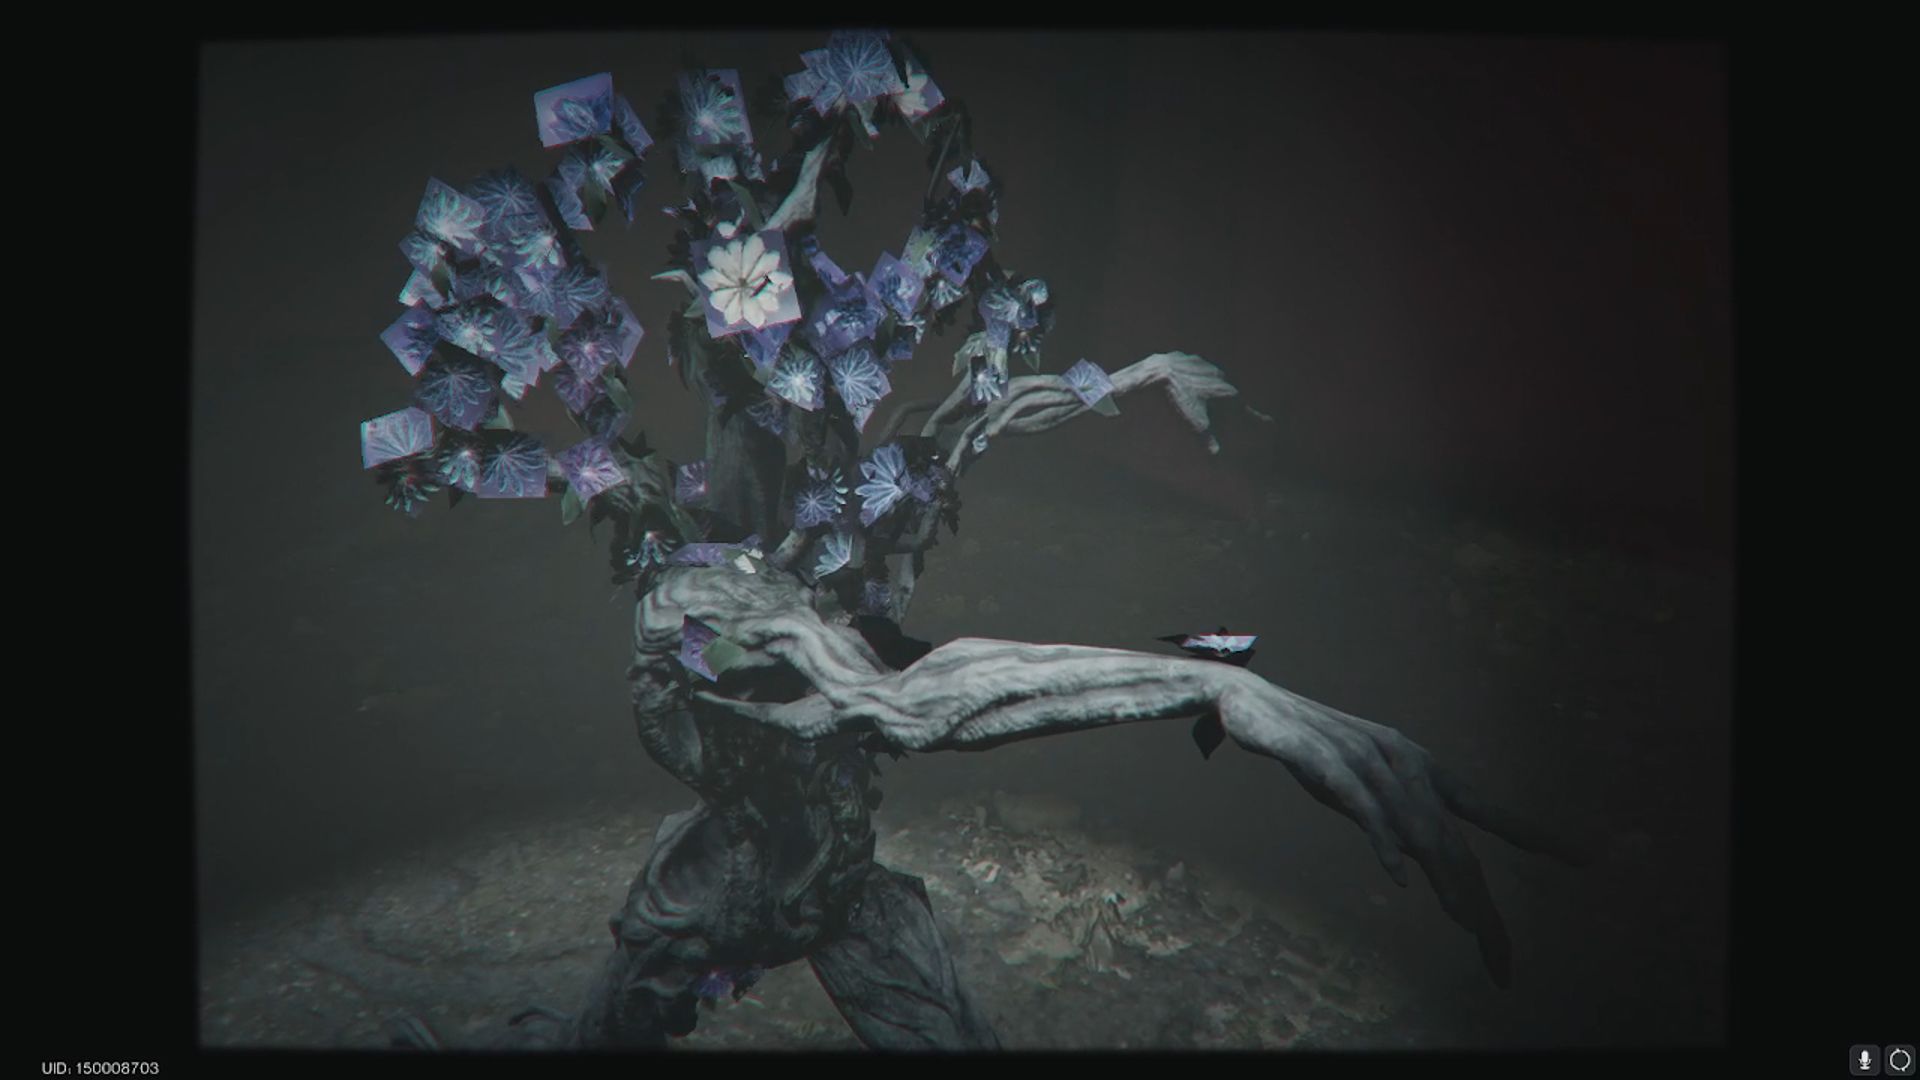
    When you arrive at the Forsaken Monolith, be ready to confront one of the largest Deviant bosses in the area: the Forsaken Giant. This battle involves multiple phases, so you’ll need to stay agile and attentive to overcome its diverse attack patterns.

    How To Prepare For The Forsaken GiantA strange Deviant dancing in Once Human.

    To gear up for your encounter with the Forsaken Giant, you’ll want to choose your loadout wisely and gather useful items.

    You’ll have only a brief moment to shoot its vulnerable spot, so it’s advisable to equip a long-range automatic weapon that will allow you to unleash a barrage of bullets quickly.

    Close-range weapons will be effective against the Deviants that will pursue you during the battle.

    Pack your inventory with healing items and Adrenaline Shots. It’s also a good idea to have some Stardust Energy Drink or Spring Legs to help you jump across various platforms.

    As for the Combat Deviant you should choose, consider picking the Lonewolf’s Whisper for dealing with mobs or the Festering Gel for swift healing and defense. Ultimately, you should take into account your personal play style when selecting your Deviant companion.

    Forsaken Giant Phase One

    The battle with the Forsaken Giant takes place in a spacious arena with a platform. You’ll need to keep moving around the platform to dodge its powerful attacks.

    Be cautious near the platform’s edge, as falling off will lead to death. The Forsaken Giant also has attacks that can knock you back. Maintain your distance from the edge when it prepares to attack.

    Like other Deviants, the Forsaken Giant has a weak point that glows red and shifts around its body during the combat. To deal the most damage, target this spot when you fire at it.

    During the initial phase of the encounter, the Forsaken Giant will launch two types of attacks:

    • A slam attack, where it brings its fist down onto the area you’re standing on.
    • A sweep attack, where it swings its arm across the battlefield.

    When it performs the slam attack, you can either run away to evade or roll at the perfect moment as its fist strikes the ground.

    Be sure to jump right after the Forsaken Giant hits the ground, as the impact will create a shock wave.

    For the sweeping attack, make a quick getaway. Once the arm reaches the opposite side, it will lift slightly from the ground, allowing you to avoid it.

    During the early phase, the Forsaken Giant will also briefly cry out, dropping Handling Giant Flower Buds that you can pick up and throw at it when it shields its weak point with its hands.

    Hitting the boss with the buds may momentarily stun it and expose its weak spot, giving you a chance for a few solid shots.

    Throughout this phase, the Forsaken Giant will summon Gnawers that will chase after you. You can either shoot them down or evade them until they eventually tire out.

    If you find them troublesome, you can assign a Deviant to target them or use a turret to take them down while you focus on the giant.

    Forsaken Giant Phase Two

    In the second phase of the fight against the Forsaken Giant, you’ll face two new attacks:

    • It will track your location with a red beam before slamming its fist down, damaging the platform beneath.
    • It will shoot toxic orbs that follow you while charging up a large mass to launch in your direction.

    The attack patterns of the Forsaken Giant will cycle through the fight, and it may return to previous phases at any time.

    When the Forsaken Giant is about to unleash an attack capable of destroying the battlefield, you’ll receive an alert at the top of your screen. It will vanish from view as a large beam begins to home in on you.

    Upon reappearing, the Forsaken Giant will swiftly slam its fist down, shattering the ground below.

    Each section of the platform can withstand three hits before crumbling. It’s essential to choose a safe spot to stand so that the stage sustains minimal damage.

    If the Forsaken Giant repeatedly performs the fist slam, try to have it damage the left or right platforms first. Aim to preserve the center platform to avoid creating a gap in the middle of the battlefield.

    When it starts to charge for the black mass attack, continue moving. The black orbs it launches will track you and will deal damage upon contact.

    To evade the large black mass, run to a different platform than the one it’s targeting; it moves slowly enough that you should be able to anticipate where it will land and escape in time.

    During this phase, the Forsaken Giant will also summon more Deviants to the battlefield. The specific types of Deviants will depend on the difficulty level of your fight.

    Forsaken Giant Phase Three

    In the third phase, the Forsaken Giant will begin to writh in agony. During this time, red beams will erupt from the ground, causing damage to anything within a small radius.

    Move across the platforms to avoid the beams until the giant settles down.

    Having enough mobility space is crucial during this phase, so try to prevent the Forsaken Giant from demolishing the center platform. Otherwise, you’ll have to navigate around a small ledge along the edges of the field.

    While dodging its various attacks, make sure to keep dealing damage to its weak spots. If it becomes too challenging, consider forming a team of four to help distract the enemies during the fight.

    Upon defeating the Forsaken Giant, a Nutcracker Deviant may spawn, allowing you to secure it. You’ll also gain access to a Controller for unlocking the rewards dropped by the giant.

  • Finding Blueberries in Once Human: A Complete Guide

    Finding Blueberries in Once Human: A Complete Guide

    In Once Human, you’ll come across various fruit-bearing plants and vegetables scattered throughout the area. These provide a straightforward way to find food, allowing you to begin farming right on your land. The fruits and vegetables you collect can also be utilized in a variety of recipes, helping you create wholesome meals.

    When you need to quench your thirst, you have more options beyond just boiled water. Refreshing juices and teas can hydrate you and even boost your nutritional stats. For example, you can whip up some Blueberry Juice using the blueberries you discover during your adventures.

    Where to Find Blueberries

    You can gather blueberries from wild bushes. Look for bushes that are adorned with blue fruit. They can be found scattered throughout the landscape.

    If you’re hunting for a prime spot to collect blueberries, head to the teleporter located at the coordinates 5269, -5501, which is situated in the northwest corner of Broken Delta.

    Upon using the teleporter, you’ll arrive in a picturesque area filled with stunning purple Wind Chime trees. Make your way through the forest, and you’ll encounter blueberry bushes interspersed within, as well as along the path near the teleporter.

    You can freely gather blueberries from these bushes, and they will respawn after a few seconds.

    How to Make Blueberry Juice

    To create Blueberry Juice, you’ll first need to use a cooking station. Head over to your Stove or Kitchen Set and find the Blueberry Juice recipe.

    You need only one blueberry to make this juice. Decide how many you want to produce, then press ‘F’ or click on ‘CRAFT’ to start the cooking process.

    After a few seconds, your Blueberry Juice will be ready to enjoy.

    Please note that Blueberry Juice can spoil over time, so it’s best to consume it as soon as possible.

    With these easy tips, you’ll be on your way to enjoying homemade blueberry juice while thriving in the world of Once Human!