الوسم: Oblivion

  • Completing Oblivion Remastered: Studio Virtuos Solving Employee Cuts

    The Elder Scrolls 4: Oblivion Remastered Updates

    The Elder Scrolls 4: Oblivion Remastered is likely to be a top contender for Game of the Year. The team at Virtuos has done a fantastic job updating the game while keeping its classic charm. Even dedicated Skyrim fans are starting to wonder if Oblivion might actually be the better game.

    Sadly, the studio is facing layoffs. Gauthier ‘Gautoz’ Andres from the French outlet Origami (as reported by PC Gamer) claims that Virtuos plans to cut around 300 jobs, which is about 7% of its workforce. A thread on Bluesky also mentioned that employees were required to take training in generative AI.

    Layoffs at the Oblivion Remastered Studio

    “Mass layoffs are happening at Virtuos, the studio behind Oblivion Remastered and the new Metal Gear Solid [Delta],” says Andres’s post (translated). “300 jobs (7% of the workforce) are at risk at this outsourcing studio across Asia, the USA, and Europe, including three locations in France.

    “Reports suggest that these layoffs will focus mostly on China (about 200 people) but will also affect other departments, including the French studios that contributed to the success of Oblivion Remastered. The main reason for the layoffs given to teams weeks ago was ‘competitiveness.’

    Virtuos is said to have gone all out to ensure high quality for Oblivion Remastered, but the contracts were structured without royalties, meaning no bonuses were given based on the game’s success. This led to pressure on developers for a game that may never turn a profit.

    “In February, when Oblivion’s development ended, the company announced a freeze on raises and a cut in bonuses across the board,” the thread added. “Management was questioned about the potential for layoffs after these changes but tried to reassure the team.” This situation has reportedly led to a strike at Virtuos Lyon.

    The report also highlighted that the studio is increasing its use of generative AI. “In one year, we’ve moved from a few presentations to basic but mandatory training for employees,” said one source. Everyone Andres spoke with expressed distrust towards management.

  • Completing Oblivion’s Quirks: Bethesda’s Lore Expert on Solving Mysteries

    Completing Oblivion’s Quirks: Bethesda’s Lore Expert on Solving Mysteries

    Cyrodiil was quite different before Oblivion was released in 2006. The Pocket Guide to the Empire described it as an “endless jungle.” In the East, socialites wore “garish costumes, bizarre tapestries, tattoos, branding, and elaborate ceremonies,” while the Colovians in the West preferred “immaculate uniforms.”

    The heart of the Empire was said to have many cults, including those worshipping the Ancestor-Moth, Heroes, Tiber Septim, and Emperor Zero. Villagers sent their dead down rivers on paper boats, and homes featured Akavari designs. Dragons reportedly flew over the Imperial City while the Emperor looked down from the towers on the walls.

    Thousands of workers cultivated rice fields after flooding and cleaned up the jungle during dry seasons.

    However, when Oblivion launched after 12 years, we saw a different Cyrodiil. It was filled with wide plains and mountains, influenced by Roman culture and fantasy elements. The “endless jungle” was gone, and the only cult of significance was the villainous Mythic Dawn.

    Many were surprised by the sharp contrast between the Cyrodiil from earlier games and the one they experienced in Oblivion, including lore master Kurt Kuhlmann. In an interview on YouTube, he mentioned returning “during the end of pre-production” after world-building was finished. He and designer Michael Kirkbridge originally envisioned “a much weirder place than what you see in Oblivion.”

    The Lord Of The Rings Completely Changed Oblivion Lore

    Kuhlmann, who joined Bethesda alongside Michael Kirkbride in 1996, remembered how he drew inspiration from “Dune vibes and the Dark Crystal vibes” while working on Morrowind, one of the most unique fantasy RPGs ever. He and Kirkbride also wrote the Pocket Guide during Redguard’s development, which was distributed as a physical booklet with the game.

    Though he left the series in 1998 during Morrowind’s pre-production, he contributed several in-game books in 2001, earning a “special thanks” credit. Kuhlmann and Kirkbride laid the groundwork for much of The Elder Scrolls’ lore, but when Kuhlmann returned in 2003 for Oblivion, things had changed. He attributes this shift to the popularity of The Lord of the Rings and the fact that Todd Howard preferred simpler stories.

    Kuhlmann has no hard feelings towards Howard or the changes. He stated, “If you’re in charge of spending all this money and want your studio to last and pay salaries, you have to create a successful commercial product.” He acknowledged that while Skyrim wasn’t “all that weird,” it did have “more dark corners than Oblivion.”

    Still, many fans can’t help but miss the Cyrodiil that could have been.

  • Completing Oblivion Remastered Patch 1.2: Solving Difficulty Issues

    Completing Oblivion Remastered Patch 1.2: Solving Difficulty Issues

    The Elder Scrolls 4: Oblivion Remastered Patch Update

    The Elder Scrolls 4: Oblivion Remastered is set to receive its second major patch soon, with update 1.2 now available in the Steam Beta. Bethesda aims to address several major issues, including difficulty balancing, which many fans have criticized.

    A significant concern is the sharp increase in difficulty between the Adept and Expert levels. Adept is deemed too easy, while Expert is frustratingly hard for many players. In Expert mode, you deal less damage and take more, making enemies feel like they can withstand anything while you feel weak.

    To fix this, the upcoming patch will introduce a ‘Journeyman’ difficulty level, which will serve as a better middle ground between Adept and Expert. Additional difficulty settings will also allow players to adjust damage levels to suit their preferences.

    Once the update is live, you can adjust either Player Combat Damage or Enemy Combat Damage to find the right balance. For instance, if enemies feel too tough on Expert or Master levels, you can increase your own damage to make things fairer.

    Currently, this update is only accessible through the Steam Beta, and the timeline for a wider release or updates for other platforms is still unclear. It’s likely that the game will remain in its current state for a while after Patch 1.2 is released.

  • Oblivion Remastered: What’s Luck’s Role in Completing the Game?

    Oblivion Remastered: What Does Luck Actually Do?

    In “Oblivion Remastered,” the Luck stat plays a unique role that often gets overlooked. Unlike other RPG stats, which directly affect your skills and abilities, Luck influences various random events and occurrences in the game.

    The Luck attribute mainly impacts how often you find better loot, how successfully you hit an enemy, and how likely you are to accomplish certain tasks. A higher Luck level can lead to more favorable outcomes in combat and exploration, meaning it can make your adventures a little smoother.

    Notably, Luck doesn’t alter your skills or your effectiveness in battle itself; rather, it subtly enhances your experience by increasing your chances of positive results. For example, when you pick locks or search for hidden items, luckier characters might find traps less frequently or discover more valuable treasures.

    While it might not seem crucial at first, investing in Luck can lead to a series of fortunate events that enhance gameplay. Balancing it with other core attributes can create a more rewarding experience, allowing you to enjoy the game’s vast world without as many setbacks.

    In essence, Luck is about embracing the unpredictability of your journey in “Oblivion Remastered” and enjoying whatever surprises come your way.

  • Completing Magic Skills Quickly in Oblivion Remastered

    Completing Magic Skills Quickly in Oblivion Remastered

    You may have come across some unique ways to boost your skills in Oblivion Remastered. If you’re ready to invest some time, these techniques can quickly enhance your magic abilities across all schools of magic. This grinding method yields substantial results for your preparation efforts.

    If you’re focusing on just one or two schools of magic, like Illusion and Conjuration, you’ll find this approach to be even more efficient. Just make sure to gather enough gold to purchase the recommended spells if you don’t already have them.

    Getting Ready to Level Up Your Magic Skills

    To effectively level up your magic skills quickly, you’ll need to focus on two primary areas:

    1. Prepare for Spell Absorption effects.
    2. Have at least two spells from each school of magic:

      1. It’s best to have one Novice spell and one Expert-level spell.

    Interestingly, you can start preparing for fast magic skill leveling right from the beginning of the game, during the birthsign selection with the emperor. The ideal birthsign for quickly leveling up all magic skills is The Atronach.

    The Atronach provides several benefits:

    • Grants an extra 150 magicka.
    • Offers a permanent 50 percent Spell Absorption.
    • Magicka will not regenerate on its own.

    While the Stunted Magicka effect prevents your magicka from naturally replenishing, the Spell Absorption effect makes this trade-off worthwhile.

    Spell Absorption is the key to efficiently grinding your magic skills up to level 100. You can also increase your Spell Absorption by:

    • Casting the Spell Absorption spell.
    • Equipping armor with Spell Absorption.

    Aiming for at least 75 percent Spell Absorption will help you consistently avoid damage and refill your magicka when spells are cast at you.

    With 50 percent Spell Absorption from The Atronach, adding just two pieces of armor, each providing at least 15 percent, will give you more than enough absorption.

    Once you’re set with your Spell Absorption effects, visit the Mages Guild vendors across Cyrodiil to acquire at least one spell from each school of magic to begin your leveling process. Then, buy a second spell for when your mastery reaches Journeyman or Expert level.

    In Oblivion Remastered, higher-cost spells will increase your Magic Skills leveling speed. Thus, using more expensive spells will speed up your progress as you approach level 100.

    How to Quickly Achieve Level 100 in Magic Skills

    After getting your Spell Absorption effects and acquiring spells from each magic school, head to the Arcane University and locate the Training Rooms.

    Within these Training Rooms, you’ll find several target walls downstairs and a few more upstairs.

    You can use any of the areas; you’ll be spending a lot of time grinding in one of them.

    From about 10:00 am to 5:00 pm, mages will continually cast spells on these training targets, which works to your advantage.

    Your goal is to equip your Spell Absorption gear and position yourself between a mage and their target, allowing them to hit you with spells.

    When the mages cast spells at you, your magicka will refill thanks to Spell Absorption, letting you cast your own spells continuously with minimal downtime.

    Experiment with standing in front of multiple mages. Aim to position yourself near a mage who casts powerful spells, as these will refill your magicka more effectively with every hit.

    Monitor how much magicka you regain from each mage’s spells to find the best ones.

    Switch to your stronger, high-cost spells from each school once you’re able to cast them, since using higher-cost spells earns more experience with each cast.

    Top Alteration Spells for Leveling Up

    • First Spell: Electric Shell
    • Second Spell: Lightning Wall

    These Alteration skills are relatively affordable and will help you reach Master level quickly. They’re particularly advantageous when absorbing shock-based spells from mages in the Practice Rooms.

    The downstairs area often features a strong male mage who uses lightning spells.

    Top Conjuration Spells for Leveling Up

    • First Spell: Bound Helmet
    • Second Spell: Summon Clannfear

    You can use any of the Bound spells for your early levels. The best way to boost your Conjuration quickly is to choose a variety of Bound spells for different items.

    Using Bound Dagger, Bound Helmet, etc., in sequence allows you to keep gaining levels while you wait for your conjured items to vanish.

    Alternatively, you can use Dispel to remove your bound items quickly, creating a nice loop with Mysticism magic.

    Top Destruction Spells for Leveling Up

    • First Spell: Weak Fireball
    • Second Spell: Drain Skill: Alteration

    Destruction skills are best leveled up in a different location, such as one of the surrounding forts in Cyrodiil.

    A great way to rapidly improve your Destruction skill is to find a Lich and wear as much Spell Absorption gear as possible.

    You can increase your game difficulty to ensure the spells they cast are more powerful, but since you absorb their spells, you won’t take any damage. This will help fill your magicka more quickly.

    Use spells like Weak Fireball or Drain Alteration to repeatedly attack the Lich without killing it, allowing you to level your Destruction skills efficiently.

    You can also use Restoration spells to heal the Lich, allowing you to keep absorbing magicka while you attack without fear of being defeated.

    Top Illusion Spells for Leveling Up

    • First Spell: Void Gazer
    • Second Spell: Shadow

    Void Gazer is a great spell to kick things off, but once you unlock Shadow, your progress toward level 100 will really accelerate.

    Shadow is also one of the top Illusion spells for staying hidden, useful once you hit max level.

    Top Mysticism Spells for Leveling Up

    • First Spell: Major Dispel
    • Second Spell: Superior Spell Absorption

    Mysticism pairs well with Conjuration, allowing you to level these skills together by following this order:

    1. Cast several ‘Bound’ spells to increase your Conjuration level.
    2. Cast Major Dispel to reset your conjured items and raise your Mysticism.
    3. Repeat the cycle.

    This loop helps you escalate both Mysticism and Conjuration efficiently. After you gain access to Superior Spell Absorption, you’ll find your magicka replenishing consistently, should you not have it already.

    Top Restoration Spells for Leveling Up

    • First Spell: Salve
    • Second Spell: Heal Superior Wounds

    You can level up Restoration alongside any skill, but it’s particularly effective to do so while dealing with the Lich to improve your Destruction skill.

    Whatever method you choose, integrating Restoration spells into your routine is beneficial, or you can focus on spamming it after leveling up your other skills.

  • Completing the Art of Dodging in Oblivion Remastered

    In Oblivion Remastered, there are plenty of ways to create your perfect character, including some survival techniques you might not know about. While using Alteration magic can protect you from various types of damage, there’s an even better method to completely avoid any harm.

    If you’re up for a little adventure and don’t mind repeatedly pressing the jump button as you explore Cyrodiil, you can unlock an alternative survival technique. With consistent practice in Acrobatics, you’ll likely gain access to the dodging perk without any trouble.

    How to Unlock Dodging

    The dodge feature isn’t available right from the beginning of Oblivion Remastered. You need to reach level 25 in Acrobatics to qualify as an Apprentice in this skill.

    Once you hit level 25 and achieve the Apprentice rank, a notification will pop up, confirming that you can now use the dodge mechanic to evade damage during battles.

    The fastest way to reach level 25 in Acrobatics is by continuously jumping in a designated area, as each jump boosts your Acrobatics skill.

    This process speeds up significantly if you find a location with a low ceiling. When you jump, you’ll hit your head and bounce back down, allowing you to jump again quickly.

    If you want to boost your Acrobatics progression even more, falling and experiencing fall damage will slightly increase your Acrobatics skill alongside jumping.

    Therefore, the most effective Acrobatics training loop involves jumping to a ledge, falling from there to take some damage, and then repeating the cycle.

    How to Dodge

    After unlocking the dodge ability at level 25 in Acrobatics, use the following button combinations, based on your controller:

    Console

    Buttons

    PC

    Right Click + E

    PlayStation

    L2 + Triangle

    Xbox

    LT + Y

    Dodging can be done in all directions, allowing you to add a directional movement while dodging, regardless of where your character is facing.

    You can dodge both during and outside of combat:

    • In combat:

      • To avoid enemy melee attacks, spells, and other offensive actions.
      • To reposition while your opponent is attacking.
    • Out of combat:

      • To dash instead of running.
      • To maneuver up steep inclines when encountering difficult terrain.

    No matter how you choose to utilize dodging, it’s clear that this ability is quite powerful, considering the effort needed to unlock it.

    However, keep in mind that while dodging can enhance your Acrobatics, completely avoiding damage will hinder the leveling of your Heavy Armor and Light Armor skills. These skills can only increase when you take damage while wearing the respective armor type. So, as your dodging skills improve, you might find that your armor skills progress more slowly.

  • What Rewards Await You from Completing The Shivering Isles in Oblivion?

    There’s more to Oblivion Remastered than just aiding Martin Septim and halting Mehrunes Dagon, as you’ve discovered in your adventure through the Shivering Isles DLC. While assisting Sheogorath with a variety of tasks and becoming the ruler of either Mania or Dementia was entertaining, nothing could prepare you for your battle against Jyggalag.

    Now that you’ve triumphed over the Daedric Prince of Order and saved the Shivering Isles from the looming Greymarch, it’s time to wrap up a few final details. Plus, there are several rewards, including valuable loot, that you won’t want to overlook.

    How to Begin the Prince of Madness

    After defeating Jyggalag and finishing The End of Order, you’ll seamlessly transition into the last quest of the Shivering Isles DLC: the Prince of Madness.

    To kick off the quest, pay attention to Jyggalag’s speech after you land the final blow.

    During this moment, you’ll gain insights into the endless cycle of the Greymarch, where Sheogorath transforms into Jyggalag.

    How to Wrap Up the Shivering Isles DLC

    Having defeated Jyggalag, your next step is to embrace the throne of Madness. Begin by returning to New Sheoth Palace to claim your title.

    Once inside the palace, talk to Haskill near the empty throne. Select ‘Duties’ and ‘Benefits’ to learn more about your rewards.

    After your conversation with Haskill, you’ll be crowned Sheogorath, the Prince of Madness.

    What Rewards Will You Get & What Changes Occur After Completing the Shivering Isles DLC?

    While prior quests may not have offered much loot, finishing the Shivering Isles DLC and becoming the Daedric Prince of Madness does come with its advantages.

    As a reward for your efforts to thwart the Greymarch, you’ll receive the following items:

    • The Staff of Sheogorath – Found in your inventory.
    • The Sword of Jyggalag – Collect from behind the throne on the stone mantle against the wall.
    • Sheogorath’s Regalia – Locate it on the throne.
    • Manipulate Weather Greater Power – Obtained from Haskill. Only usable in the Shivering Isles.
    • Sheogorath’s Protection Lesser Power – Also given by Haskill. Limited to the Shivering Isles.

    Along with these fantastic rewards, changes will occur throughout the Shivering Isles to reflect your new status as the Daedric Prince of Madness. Here are the additional benefits you’ll receive upon completing the Shivering Isles:

    1. Your subjects will refer to you as the Madgod.
    2. Dark Seducers and Golden Saints can join you as companions.
    3. A court healer in the Palace can help refresh your attributes, health, and magicka.
    4. You can request a dancer for entertainment in your throne room.
    5. All Obelisks of Order will be eliminated, and Knights will no longer appear.
    6. Haskill will occasionally show up, asking you to help protect a settlement, offering you gold rewards based on your level.
    7. The door to the Cyrodiil fast travel point will be reopened, allowing for quick travel from anywhere in the Shivering Isles, and The Fringe will return to its normal state.

    Now, you can enjoy a host of unique rewards and perks as the ruler of the Shivering Isles.

  • Completing the Search for Garridan’s Tears in Oblivion Remastered

    Completing the Search for Garridan’s Tears in Oblivion Remastered

    In Oblivion Remastered, there are plenty of side quests to dive into, including one called Tears of the Savior. This quest will have you tracking down the remnants of a legendary figure from local folklore. To get started, you’ll need to chase down some whispers and chat with a Khajiit named S’drassa for more details about this unique journey.

    If you’re feeling adventurous and itching to explore ancient sites that time seems to have forgotten, this quest is perfect for you. You’ll learn about Garridan, a hero who didn’t succeed in his mission, and it’s your job to gather his tears and finish what he couldn’t.

    How to Begin Tears of the Savior

    Your first stop should be the Leyawiin Mages Guild Hall. Look for S’drassa, who offers a special dialogue option related to Garridan’s Tears.

    After that, S’drassa will guide you to your next location: the Arcane University.

    Talk to Julienne Fanis at the Lustratorium to uncover more about Garridan’s story. She’ll suggest that you head to the Imperial City Market District and pick up a book called Knightfall from the First Edition shop.

    Where to Locate Garridan’s Tears

    Chat with Phontias and purchase the book for 25 gold to update your quest.

    Once you read Knightfall, you’ll be informed that you need Refined Frost Salts to access Frostfire Glade.

    Fortunately, Julienne Fanis sells Refined Frost Salts at her shop in the Arch-Mage’s Lobby if you need to stock up.

    To maximize your rewards, don’t forget to visit S’drassa in Leyawiin again. He’ll give you five Philters of Frostward to help protect you from the harsh frost damage you’ll face.

    If you have the Atronach birth sign or access to spells or equipment for Spell Absorption, you can alleviate some of the frost damage and sell the Philters for a good profit, with each potion valued at around 816 gold based on your Mercantile skill.

    Once you’re prepped to handle Frost damage, head northeast from the Imperial City to Frostfire Glade.

    Upon reaching Frostfire Cave, be ready to fight off some wild creatures before you encounter a secret door that opens with the Refined Frost Salts.

    Inside Frostfire Glade, you’ll meet the Frostfire Atronach Gladelord—a formidable foe that can take you down quickly if you’re not careful.

    This creature is vulnerable to fire but can reflect your spells, so tread carefully. Avoid using frost or poison magic, as it resists those types of attacks.

    After defeating the guardian, search the misty areas to find Garridan’s Tears. If you need to use potions to cope with frost damage, now is the time!

    Look for the hand icon on the ground, as the tears may have shifted after your battle. Generally, the tears are located near Garridan’s frozen figure in the center of the glade.

    Once you’ve collected all five of Garridan’s Tears, you’ll receive an update indicating you’re ready to return to S’drassa.

    What Rewards Can You Expect from Tears of the Savior?

    When you get back to Leyawiin, talk to S’drassa to collect your reward, which can be as much as 2,500 gold based on your level.

    Level Range

    Gold Reward

    1-4

    500

    5-9

    800

    10-14

    1,200

    15-19

    1,600

    20-24

    2,000

    25+

    2,500

    If you’re not particularly interested in gold or completing the quest, you can choose to keep Garridan’s Tears as decorative pieces instead.

  • Completing the Staff of Sheogorath in Oblivion Remastered

    Completing the Staff of Sheogorath in Oblivion Remastered

    If you thought the side quests in Oblivion Remastered couldn’t get any stranger, brace yourself for another unique experience with “Symbols of Office.” True to its name, this quest is all about equipping you with the royal trinkets befitting the title of Sheogorath.

    While this may not have been on your radar, your mission is to restore the Staff of Sheogorath; without it, the symbol of the Daedric Prince of Madness wouldn’t quite hold up, would it?

    Getting Started with Symbols of Office

    After you talk to Sheogorath post-completion of The Helpless Army, you’ll experience a surprising moment: Sheogorath transforms into Jyggalag, the Daedric Prince of Order.

    Following this unsettling transformation, Haskill approaches with even more shocking news: you must take on the role of Sheogorath in his absence.

    As a capable leader, you’ll need a symbol of authority, which kicks off your quest, Symbols of Office. Haskill instructs you to head to Knifepoint Hollow to reconstruct the Staff of Sheogorath and presents you with a crystal that you’ll need for later to access the library.

    Restoring the Staff of Sheogorath’s Power

    Make your way to Knifepoint Hollow, located north of the Hill of Suicides. Advance through the initial area toward the Ancient Door, which can be opened using the Knifepoint Crystal you’ve been given.

    Once you step inside, you’ll meet a man named Dyus, who has been expecting your arrival.

    Talk to Dyus, who will inform you that to restore the staff, you’ll need two specific items: The Eye of Ciirta and a Branch of the Tree of Shades found in Milchar.

    Obtaining a Branch from the Tree of Shades

    First, head to Milchar, which is just north of Overlook Road. Walk through the entrance to Milchar, Nexus, and follow the path until you reach the Grove of Reflection.

    Once inside the grove, drop down the first hole to your right (west) and turn right at the first junction. You will see the Tree of Shades in front of you.

    Before entering this room, consider removing all your armor and weapons to make the upcoming battle simpler.

    As you approach the Standing Stone, you’ll be confronted by a hostile clone of yourself, instantly engaging in combat.

    Your clone will mirror your gear and abilities, so prepare for a challenging fight if you’re well-equipped and powerful at this stage.

    After you defeat your doppelgänger, grab the sword they drop: Shadowrend. Then, activate the tree to obtain a branch.

    Acquiring the Eye of Ciirta

    Exit Milchar and make your way to the Howling Halls in the southern part of Heretics Horn.

    Enter through the Howling Halls, Narthex entrance, where you’ll encounter several apostles to defeat. You will need their Apostle Daggers shortly.

    Alternatively, you can quietly eliminate one apostle and wear their robes to sneak through unnoticed. You may also find some robes on a bench near the first apostle.

    Regardless of how you proceed, continue toward the grand doors leading to the Congregation Chambers.

    Upon entering, you will be greeted peacefully by Ra’kheran, whether you wear a robe or not.

    If you’re not in disguise, he’ll advise you to put one on before drawing attention.

    Ra’kheran proposes an intriguing offer: he and his associates will assist you in eliminating Ciirta if you provide them with some daggers. You can choose to accept his offer or eliminate everyone in the area, including Ciirta.

    If you decide to help Ra’kheran, he requires three Apostle Daggers without harming his allies.

    To do this, return to the previous area and collect the daggers from those you’ve defeated.

    With the three daggers in hand, talk to Ra’kheran again to initiate the plan.

    You can then sneakily follow Ra’kheran as he rushes off to carry out the assassination, stopping briefly to arm his accomplices.

    After this pause, continue following them into the Antechamber and witness the dialogue that leads to the three apostles eliminating Ciirta, allowing you to retrieve Ciirta’s Eye.

    Wait for your quest to update before looting her body; the eye won’t appear until prompted.

    With Ciirta’s Eye and the branch secured, head back to Dyus at Knifepoint Hollow.

    Rewards for Completing Symbols of Office

    After you talk to Dyus and provide him with the materials, he will create an incomplete Staff of Sheogorath for you.

    However, your next task is to take the staff to the palace and empower it using the Font of Madness.

    Return to the New Sheoth Palace and activate the Font of Madness located behind Sheogorath’s throne, completing your quest, Symbols of Office, and setting the stage for The Roots of Madness.

    Although there are no additional rewards, the sword Shadowrend you acquired earlier is an excellent asset.

  • Completing the Paranoid Roof Watcher Quest in Oblivion Remastered

    Completing the Paranoid Roof Watcher Quest in Oblivion Remastered

    Oblivion Remastered is packed with unusual quests waiting to be uncovered, particularly when you enter the Shivering Isles, the realm of Sheogorath. You’ll quickly see that this new area changes the dynamics, as its characters and landscape are eccentric, offering numerous secrets.

    One such secret is the Paranoid Roof Watcher quest. Although this quest isn’t officially documented in your journal, it offers a unique story intertwined within the environment. This hidden side quest exemplifies Bethesda’s knack for placing discoveries throughout the world, similar to the ghosts found on the Hill of Suicides.

    How to Begin the Paranoid Roof Watcher Quest

    Upon arriving in the Shivering Isles and reaching New Sheoth, you’ll encounter two distinct parts of the city: Bliss and Crucible.

    Head to Crucible, where your task is to climb onto the rooftops to stumble upon this unmarked quest.

    Even after reaching the right location, you won’t receive any journal updates about the quest’s progress.

    How to Access the Rooftops

    This task can be easier if you have the Boots of Springheel Jak, which enhance your Acrobatics by 50 points.

    To keep the Boots of Springheel Jak and avoid losing them during The Ultimate Heist, either use a paralyze poison on yourself (which can negate fall damage if timed correctly) or ensure that your Acrobatics level is high enough to survive a fall without the boots.

    You can also utilize Fortify Health potions to increase your HP enough to withstand fall damage.

    Even without the Boots of Springheel Jak, you can still reach the rooftops with strategic climbing. If your Acrobatics skill is close to 100 (or boosted), you should be alright.

    To maximize your jump height, consider these helpful methods:

    • For Alchemists: Use Fortify Acrobatics potions for a temporary boost in jumping ability.
    • For Mages: Create a custom Fortify Acrobatics spell, with potency determined by your Magicka pool.
    • For Armorers: Enchant additional armor pieces with Fortify Acrobatics or use Sigil Stones for this purpose.
    • For Thieves: Finally, put your exceptional jumps and Acrobatics skills to good use. Enjoy!

    After preparing your Acrobatics skills, go to the location where you may have pushed Hirrus Clutumnus to his fate during the Final Resting quest. This spot provides the highest ledge in the city.

    If you haven’t been there yet, head to the northeast corner of Crucible and pause before entering the New Sheoth Palace; this is the spot you’ll need to access.

    From there, jump onto the nearest curved rooftop, and make sure to save your game in case you fall and need to try again.

    Make your way through town toward Cutter’s Weapons, and you’ll spot something unusual on a nearby rooftop. As you approach, you’ll find a curious collection of items:

    • A stool
    • A couple of bottles of Bernice’s Roofwater Wine
    • The Sunken Urn Key
    • A note

    The note reveals the tale of a paranoid resident who spends his time on the roof, keeping watch over the town. It also hints at the location of the Sunken Urn that the key unlocks.

    Explore the additional rooftops for more scattered treasures, including a Ring of Light on the southernmost building, next to some Fur Gauntlets and bones.

    After gathering all the rooftop items, proceed to the back of Sickly Bernice’s Taphouse, where there’s a large pool of sewage on a high ledge.

    What Rewards Await from the Paranoid Roof Watcher?

    Before reaching the ledge, in the pool of sewage, you’ll find your reward: The Sunken Urn, which holds various treasures, including Gold (based on your level), wine, a Jeweled Amulet, Sweetcakes, and other assorted trinkets.

  • Completing All Diseases and Their Cures in Oblivion Remastered

    Completing All Diseases and Their Cures in Oblivion Remastered

    Getting sick is one of the most frustrating aspects of Oblivion Remastered. With a wide array of ailments to choose from, you can’t just rely on strong Restoration spells to shake them off. Get ready to gulp down potions and seek out the nearest chapel if you’re feeling under the weather.

    Beyond just curing these bothersome diseases, it’s crucial to know their origins so you can steer clear of them. If you find yourself up against a carrier of a disease, being well-prepared and cautious during the battle is key to keeping healthy.

    Understanding Diseases

    Diseases function as debuffs that lower specific attributes or skills based on the type of disease.

    Most diseases in Oblivion Remastered are contracted during fights, especially when a diseased enemy lands a melee hit on you.

    Every time a diseased enemy strikes you, there’s a chance you could contract their illness.

    You can cure any disease instantly with a Potion of Cure Disease. Alternatively, you can pray at a Shrine, Temple, or Wayshrine to cure your ailments and restore any affected attributes or skills.

    Porphyric Hemophilia, also known as Vampirism, is a special case. If you don’t cure it within three days, it can permanently affect your character. The next time you sleep after that period, you’ll contract Vampirism.

    Once fully contracted, Vampirism cannot be cured through normal means; you’ll need to embark on the Vampire Cure quest.

    Disease Effects and Sources

    If you’re looking for a detailed list of diseases, what they do, and which enemies carry them, look no further.


    Disease Name

    Effects

    Sources

    Astral Vapors

    • Damage Magicka – 15 points
    • Stunted Magicka
    • Weakness to Magic – 25 percent

    Ataxia

    • Drain Strength – five points
    • Drain Agility – five points

    Black-Heart Blight

    • Drain Strength – ten points
    • Drain Endurance – ten points

    Blood Lung

    • Drain Endurance – five points

    Bone Break Fever

    • Drain Strength – five points

    BrainRot

    • Drain Strength – five points

    Diseases Carried by Beggars

    If you’re keen on quickly finding a certain disease or are just curious about what ails the beggars, here’s a rundown of what each beggar carries.


    Disease Name

    Effect

    Beggar Name

    Ataxia

    • Drain Strength – five points
    • Drain Agility – five points

    Black-Heart Blight

    • Drain Strength – ten points
    • Drain Endurance – ten points

    While most beggars in Cyrodiil carry only one disease, be especially cautious around Rancid Ra’dirsha and Foul Fagus, as they are both afflicted with two diseases:

    • Rancid Ra’dirsha – Blood Lung & Witless Pox
    • Foul Fagus – Bone Break Fever & Shakes

    It’s usually unwise to engage in fights with or kill any beggars, particularly if you’re planning to join the Thieves Guild, since their help is vital throughout various parts of that questline.

    You’ll often need to seek information from beggars about your tasks, and they can lead you to valuable details.

    Fortunately, there are usually at least two beggars in each city, just in case something goes wrong.

  • Completing Bernice’s Illness in Oblivion Remastered: A Guide

    Upon arriving in the Shivering Isles in Oblivion Remastered, you’ll quickly notice how peculiar this realm is after chatting with its inhabitants. A brief tour through Crucible, the Dementia section of New Sheoth, vividly shows the harshness of life here, particularly for vulnerable souls like Sickly Bernice.

    Bernice, the owner of Sickly Bernice’s Taphouse, is afflicted by a mysterious illness and fears her time is running out to find a remedy. In her desperation, she turns to you for assistance, leaving you with the vital task of finding a cure to save her life before it’s too late.

    Starting a Liquid Solution

    To kick off a Liquid Solution, head to Sickly Bernice’s Taphouse in Crucible.

    This establishment is located on the southern side of Crucible, right next to Muutine’s House.

    Upon your arrival, approach the counter and talk to Sickly Bernice to learn more about her unusual ailment.

    When you ask how you can help, she will request some aquanostrum, typically found in a pool at the base of Knotty Bramble.

    Obtaining Aquanostrum for Sickly Bernice

    Make your way to Knotty Bramble, located in the southern part of the Shivering Isles, south of the Hill of Suicides and west of Xavara, east of Pinnacle Road.

    Inside Knotty Bramble, you’ll come across several Grummites that will attack you on sight. Fight your way along the linear path heading west, then turn north to proceed toward your goal.

    After encountering a Grummite past some Twisted Roots in the central area, head north and continue until you reach the entrance to Knotty Bramble’s Hatchery.

    Go down the path ahead, and you’ll find a large room featuring the pool of water mentioned by Sickly Bernice.

    Simply dive into the water near the statue, and your objective will update, confirming you’ve collected the aquanostrum you need.

    Now, exit Knotty Bramble and return to Sickly Bernice at her Taphouse.

    Rewards from a Liquid Solution

    Once you arrive, speak with Sickly Bernice, then choose the ‘Cure’ dialogue option; she’ll thank you profusely for helping save her life.

    As a reward for your brave efforts, you’ll receive the Circlet of Verdure Ring, which provides:

    • Resist Disease by 60 percent
    • Resist Poison by 60 percent
    • Fortify Health by 35 points
    • Fortify Endurance by 12 points

    This ring is an excellent asset for wandering adventurers and can significantly reduce your chances of contracting diseases, thus minimizing your reliance on Potions of Cure Disease.

  • Completing the Quest to Free Ghosts on Oblivion’s Hill of Suicides

    Completing the Quest to Free Ghosts on Oblivion’s Hill of Suicides

    The Shivering Isles DLC offers a truly unique experience in Oblivion Remastered, filled with strange quests and adventures, including several that aren’t formally marked. A prominent unmarked quest takes you to the eerie Hill of Suicides, which is situated at the heart of the Shivering Isles, straddling the boundary between Mania and Dementia.

    To get started, talk to the locals in the Shivering Isles, particularly Erver Devani who resides in Deepwallow. Devani provides crucial information about the ghosts haunting the Hill of Suicides. He shares that these spirits are stuck wandering the hill until their remains are retrieved, and that’s where your quest begins.

    How to Start the Ghosts of the Hill of Suicides Unmarked Quest

    You can kick off this side quest as soon as you enter the Shivering Isles, though be aware that it doesn’t come with a pop-up notification to guide your progress.

    Once you come across the ghosts staring solemnly into the void at the Hill of Suicides, you can examine their names, but interaction isn’t an option just yet.

    How to Help the Ghosts

    To complete the Ghosts of the Hill of Suicides side quest, you need to locate the skulls of the spirits you see on the hill and return them to their rightful owners.

    The skulls you need to find belong to the following ghosts:

    • Gadeneri Ralvel
    • Limark
    • Lorenz Bog-Trotter
    • M’Desi
    • Salonia Viria

    You can collect the skulls in any order, so feel free to retrieve them based on your convenience.

    Where to Find Gadeneri Ralvel’s Skull

    First, let’s look for Gadeneri Ralvel’s skull. It’s hidden in Knifepoint Hollow, located southeast of Split and northwest of New Sheoth.

    Clear out any Flesh Atronach blocking your way, then head through the metal door into the large room ahead. Look to the left for the door leading to the Knifepoint Hollow Chantry.

    In the Chantry, follow the straight path until you reach a locked room. You’ll find a switch in the northeast area. Use the switch to open the gate, take care of the zealot within, and then on the left side near the entrance (to the north), you’ll find another switch that opens a hidden passage.

    Inside this small room, Gadeneri Ralvel’s skull is on top of a chest. One skull down!

    Where to Find Limark’s Skull

    Next, let’s head to Limark’s Skull, which is located at Milchar, found southeast of Hale and southwest of Dreamwalk camp.

    Once inside, take out the Elytra roaming around, then continue to the southern part of the room and descend through a door to reach Milchar, Xetrem.

    Immediately turn left up the stairs while combating any more Elytra. As you turn south, you’ll see a small ledge that’s too high to jump. On the floor before that ledge, you’ll discover Limark’s skull next to the remains of a skeleton.

    Where to Find Lorenz Bog-Trotter’s Skull

    Next, let’s hunt for Lorenz Bog-Trotter’s Skull, which can be found in Knotty Bramble, situated west of Xavara and northeast of Fellmor.

    Clear out the Grummites outside and just inside the entrance, then proceed along the linear path toward the Hatchery.

    If you’ve been here before, you can take a shortcut door to the left immediately when you arrive, past the Twisted Roots.

    Once you’re in the Hatchery, keep moving forward until you drop into the water. Immediately head south to find your way into the Lost Crypt section of the Bramble.

    Continue following the path until you reach a well-lit area filled with bodies on stone slabs. Approach the preserved zealot’s body on the northern slab and press the hidden button beneath it to unveil a secret chamber where you’ll find Lorenz Bog-Trotter’s skull lying on the floor amidst some loot.

    Be ready; the zealots will suddenly reanimate when you try to leave.

    Where to Find M’Desi’s Skull

    After finishing up in Knotty Bramble, you can search for M’Desi’s Skull, which is in Rotten Den. This location is east of Inlet Camp and west of Xedilian.

    Enter the Den and follow the lower path through the root door, evading any Scalon Statue traps and defeating zealots as you go. At the fork, make a right through another root door.

    Continue along the lower path until entering Precipice. Once there, take out the two zealots and dodge another Scalon Statue trap. You can choose either the left or right tunnel.

    Defeat the next zealot, then drop down to a lower area and move across before ascending to a higher section that houses three more zealots around a large Scalon Statue that isn’t hostile.

    Follow the path behind the statue to enter the Sanctum. Immediately turn right and drop down the first hole, then turn east to continue navigating the sequence of holes.

    Defeat the Shambles blocking your way and move northeast into a room full of shambles. Head upward through the roots on the southern path, watching out for hidden spike traps.

    Once through, you’ll breach a broken wall into a large room where a zealot is worshiping a statue. At the base of that statue, M’Desi’s skull awaits atop a chest. Four skulls down, one left!

    Where to Find Salonia Viria’s Skull

    Lastly, we’re seeking Salonia Viria’s Skull, which is located in Cann. Cann is directly west of Highcross in the northern part of the Shivering Isles.

    Defeat the Heretic outside and venture into the Great Hall section.

    Make your way down the stairs, through a metal door, and take out two more Heretics before heading through another metal door to the west. Descend the steps and follow the northern path in the hall, making your first right.

    Avoid the heretic and pass through a room with dangerous statue traps to eliminate three more heretics on the opposite side of the wall.

    Here, head through the eastern door into the Amphitheater section, fighting one last Heretic before moving through a metal door down some stairs.

    Continue east, then bear right into a small room with another heretic and several shrines in the corners. You’ll find Salonia Viria’s Skull next to some candles in one corner.

    With all five skulls collected, it’s time to return to the Hill of Suicides.

    What Rewards Do You Get From the Ghosts of the Hill of Suicides?

    Upon returning to the hill, you can finally interact with the ghosts and return their remains. Doing this will cause each spirit to vanish and grant you a buff that boosts your Fatigue for 1,200 seconds, or 20 minutes.

    After returning all five skulls, you’ll receive a unique Greater Power spell called Risen Flesh, which allows you to reanimate the dead for 60 seconds.

    Additionally, even if you haven’t spoken to Erver Devani in Deepwallow (south of New Sheoth), you can still find him there and inform him that you have freed Gadeneri’s soul. You’ll be rewarded with up to 1,200 gold, depending on your level.

  • Completing the Dark Brotherhood for Unlimited Gold in Oblivion Remastered

    Completing the Dark Brotherhood for Unlimited Gold in Oblivion Remastered

    In Oblivion Remastered, each guild features its own unique questline filled with valuable rewards, and the Dark Brotherhood is no exception. After embarking on one of the most engaging storylines and becoming the Dark Brotherhood’s Listener, your adventure continues, offering more chances to earn great rewards.

    One of the advantages of being the Listener is the opportunity to undertake a straightforward weekly quest that can net you 200 gold each time. As you progress and accumulate wealth through various quests, this quest remains an excellent early-game source of unlimited gold.

    How to Start Whispers of Death

    After you complete the Honor Thy Mother quest and claim your title as the Listener of the Dark Brotherhood, you’ll be teleported back to the Cheydinhal Sanctuary to meet Arquen.

    This will trigger the repeatable Dark Brotherhood quest called Whispers of Death.

    Once you finish the quest, you can wait a week and do it all over again.

    How to Get Unlimited Gold from the Night Mother’s Quest

    Arquen will inform you that, as the Listener, your responsibility is to communicate with the Night Mother through the Lucky Old Lady statue in Bravil once a week. This will provide you with the names and locations of individuals who need assistance from the Dark Brotherhood.

    Unlike earlier quests, you can approach the Lucky Old Lady statue at any time, and she will provide you with the name and location of someone who requires help.

    Keep in mind that the locations given are not actually accessible; they are all outside of Cyrodiil in other parts of Tamriel.

    After talking to the Night Mother, you’ll have the contact’s name, and your quest will update, allowing you to return to Cheydinhal immediately.

    What Rewards Do You Get for Being the Dark Brotherhood’s Listener?

    When you speak with Arquen again, she will thank you for the details and reward you with 200 gold.

    You can revisit the Lucky Old Lady and Arquen every week to complete this quick task and earn some easy gold.

    In addition to the gold, Arquen will also enhance the Dark Brotherhood Sanctuary by inviting new members who can become your companions.

    You can find these companions in the Dark Brotherhood Training Room or Living Quarters, where you can engage with the Murderers and enlist their help.

    While they’re with you, you have the option to command them to do one of five things:

    1. Follow you closely.
    2. Follow you while staying hidden.
    3. Follow you at a quick pace.
    4. Stay where they are.
    5. Leave your service entirely.

    You can also trade with the Murderers here, as they carry various useful items and spells, especially if you haven’t acquired everything from Mraaj-Dar yet.

  • Completing the Blackwood Company in Oblivion Remastered

    Completing the Blackwood Company in Oblivion Remastered

    The Fighters Guild questline is among the longest in Oblivion Remastered, but the action really picks up in the final missions, especially with the quest titled Infiltration. Modryn Oreyn, previously your superior, has been kicked out of the guild by Vilena Donton. However, he’s not giving up on uncovering more about the enigmatic Blackwood Company.

    The Blackwood Company is proving to be a significant challenge for the Fighters Guild, persistently snatching away their contracts due to their expanding membership. After assisting Modryn in the Information Gathering quest, he’ll recruit you to go undercover within the Blackwood Company to learn more about this mysterious organization.

    How to Begin Infiltration

    Once you’ve teamed up with Modryn Oreyn and completed the Information Gathering quest, you’ll move on to the next mission: Infiltration.

    Since your informant, Ajum-Kajin, is dead, your only option is to infiltrate the Blackwood Company to discover the reasons behind their rapid rise.

    Joining the Blackwood Company

    To join, enter Leyawiin through the west gate and head directly to the Blackwood Company located in the southwestern courtyard across from the Mages Guild.

    Look for Jeetum-Ze, an Argonian who’s typically found on the second floor.

    When you approach him, express your interest in joining the Blackwood Company and engage in conversation. Afterward, he’ll guide you to the training hall downstairs where you’ll meet three other recruits who will provide details about your mission.

    As a new recruit, it’s crucial to speak with Jeetum-Ze, who advises you to take a potion called Hist Sap, which originates from the Argonians and is designed to enhance your combat skills.

    He mentions that the Blackwood Company has its own Hist tree; however, he quickly ends the conversation and instructs you to drink the Hist Sap and join your teammates.

    Once you consume the Hist Sap, which appears to have no immediate effects, you’ll start your mission.

    Be prepared to wait briefly for the teleportation.

    Upon drinking it, you’ll be instantly teleported to a location called Water’s Edge.

    Once there, you’ll notice numerous Goblins in the area, but they surprisingly don’t attack, which serves as your first hint that something is amiss with the Hist Sap.

    Your orders will be to clear out the houses, and you face a choice: either follow orders and eliminate everything within, or choose not to engage in violence. The decision is yours.

    It’s perfectly fine to explore the houses without harming anyone and still advance in the quest, making this section flexible based on your preferences.

    After you either finish your task or exit the house, you’ll find yourself teleported again, this time to Modryn Oreyn’s house in Chorrol.

    Modryn informs you that you were discovered unconscious in Leyawiin. Share your experiences regarding the Hist Sap and the tree. Oreyn then requests you to return to Water’s Edge to assess the situation of the villagers.

    This might get tricky if you eliminated all the Goblins earlier.

    Heading Back to Water’s Edge

    On your return trip to Water’s Edge, regardless of your previous choices, you’ll discover several villagers and dead sheep scattered across the village, with only one remaining villager mourning the destruction.

    Talk to Marcel Amelion, who expresses confusion and sorrow over the tragedy before asking you to leave.

    What Are the Rewards for Infiltration?

    After returning to Modryn Oreyn in Chorrol and reporting your discoveries, you’ve completed the Infiltration quest.

    While you won’t earn any gold or items for this quest, discussing the Hist with Oreyn will open up the next quest: The Hist.

  • Completing the Challenge: Solving Mankar Camoran in Oblivion

    Completing the Challenge: Solving Mankar Camoran in Oblivion

    The Elder Scrolls IV: Oblivion Remastered holds a special place as a classic, mainly due to its engaging main storyline. This adventure revolves around gathering allies to confront a significant threat, all while working to fulfill your destiny—whether that means becoming a hero or impacting the Septim dynasty.

    Your journey culminates in a dramatic confrontation with Mankar Camoran in the realm of Paradise, in a quest bearing the same name.

    How to Begin the Paradise Quest

    The Paradise Quest commences right after you finish the Great Gate quest, following the Defense of Bruma quest. Once you’ve amassed the necessary materials to open the portal, you’ll need to speak with Martin to advance the quest. If you confirm you’re ready, he will activate the portal to Paradise.

    Keep in mind that once you enter the portal to Paradise, you won’t be able to return. Prepare yourself: repair your armor, stock up on healing and magicka potions, and grab some repair hammers for your gear.

    How to Complete the Paradise Quest

    Entering Paradise in The Elder Scrolls IV Oblivion Remastered.

    Upon entering Paradise, Mankar Camoran will greet you. Follow the path, but be ready to engage in combat as numerous leveled enemies, including Daedra and elementals, are present.

    As you proceed, you may encounter Ascended Immortals who are friendly and can offer insights about the area. Keep moving, and you’ll reach a bridge leading to a door on the mountain, where a Dremora named Kathutet will converse with you.

    Confront Kathutet: Fight or Assist

    Choices involving Kathutet in The Elder Scrolls IV Oblivion Remastered.

    Kathutet will ask if you’re willing to battle him or complete a minor quest. Either choice will reward you with the Bands of the Chosen, which will assist you in entering the Forbidden Grotto.

    If you opt to fight Kathutet, he can be dispatched easily. He wields the enchanted longsword Purging Flame, which inflicts one point of fire damage for 15 seconds, alongside several leveled potions and Resist Magic items.

    Kathutet may also cast spells, holding the potential for both major and minor destruction spells, in addition to a major mysticism spell.

    Completing the Kathutet quest in The Elder Scrolls IV Oblivion Remastered.

    If you decide to assist Kathutet, he will instruct you to venture to a nearby cave to the north-northwest of your location. Inside, you’ll encounter Ascended Immortals who have imprisoned a Xivilai. Free him by interacting with the two wooden beams supporting a boulder.

    Obtaining the Bands of the Chosen in The Elder Scrolls IV Oblivion Remastered.

    If you defeat Kathutet, you can acquire the Bands of the Chosen from his body. If you assist him, enter the Flooded Grotto and navigate through the enemies to receive the Bands. You must wear these to access the Forbidden Grotto; however, you can’t remove them, and they come with a 50 percent Weakness to Fire debuff.

    Choose to Accept Aid from Eldamil

    Eldamil's options in The Elder Scrolls IV Oblivion Remastered.

    Inside the Forbidden Grotto, you’ll encounter leveled Daedra, elementals, and Dremora, as well as captured prisoners. Watch out for a non-hostile member of the Mythic Dawn named Eldamil; he will approach you.

    Eldamil will express his desire to help you escape the Forbidden Grotto. To succeed, you’ll need to remove the Bands of the Chosen, and only he can assist with that. Accept his help and follow his instructions to pretend you are a prisoner.

    Entering the cage in the Forbidden Grotto in The Elder Scrolls IV Oblivion Remastered.

    The cage will be lowered toward the lava but will stop just before reaching it. Eldamil will then ask you to proceed while he holds off the Dremora. Although he may perish in battle, he is immortal in this realm and will reappear later. Continue through the dungeon.

    Upon entering the next area of the Forbidden Grotto, you’ll find Eldamil again. Accept his offer to help remove the Bands of the Chosen. He will request to join you in battling Mankar Camoran; you can agree or decline without worry of betrayal.

    How to Defeat Mankar Camoran

    Encountering Mankar Camoran in The Elder Scrolls IV Oblivion Remastered.

    After removing the Bands of the Chosen, advance deeper into the dungeon and through the door to Paradise. As you make your way, a member of the Mythic Dawn will approach and invite you to meet their master.

    Follow them to Mankar Camoran’s chamber, where he will deliver his speech before fighting you. He will be accompanied by two Mythic Dawn members, all of whom employ magic. Mankar can summon Daedra and cast various major spells related to destruction, restoration, disintegration, and silencing.

    Mankar Camoran is a well-fortified opponent, boasting several buffs:

    • 25% Weakness to Fire, Frost, and Shock.
    • 75% Resistance to Disease.
    • 50% Resistance to Frost, Shock, and Magic.
    • 25% Reflect Damage and Spells.
    • 25% Spell Absorption and Shield.
    • Additional 10-20% Spell Absorption from his armor (based on your level).
    • Additional 7-10% Reflect Damage from his armor (also depending on your level).

    Magic users may find it challenging to engage him due to his resistances and spell absorption abilities. Focus on using fire spells, as this is the only type he is vulnerable to.

    Attacking Mankar Camoran in The Elder Scrolls IV Oblivion Remastered.

    You can defeat both of his followers to simplify the battle, but they will respawn and rejoin the fight. It’s often wiser to focus on Mankar himself, as defeating him will also take out his allies.

    Melee fighters can find this encounter easier; just be cautious of his damage reflection and relatively low shield. If you’re using the blade skill, Goldbrand can be particularly useful. It deals fire damage along with a high attack stat, making it an excellent choice for this battle.

    Looting Mankar Camoran in The Elder Scrolls IV Oblivion Remastered.

    Upon defeating Mankar Camoran, you’ll find the Amulet of Kings among his belongings. Be sure to collect it. Additionally, he carries Mankar Camoran’s Staff, which does seven points of shock damage and ten points of armor disintegration. He also wears robes that grant Reflect Damage and Spell Absorption.

    Returning the Amulet to Martin Septim in The Elder Scrolls IV Oblivion Remastered.

    Once you’ve taken down Mankar and secured the Amulet of Kings, the area will start to collapse, leading to your teleportation back to the Cloud Ruler Temple. Here, you’ll find Martin dressed in the Emperor’s attire, and you can present him with the amulet to complete his outfit for his role as the next Emperor.

  • Completing Martin’s Journey: Solving The Dragonfires Quest in Oblivion Remastered

    The epic tale of The Elder Scrolls 4: Oblivion Remastered remains a classic, and the final quest poses a real challenge, particularly for high-level players. As you near the conclusion, with both Martin and the Amulet of Kings in your possession, it seems like everything is on track—unless something unexpected happens.

    One of the concluding quests is called “Light The Dragonfires.” Here, Martin Septim must fulfill his role as Emperor and establish a barrier against Oblivion. Will he succeed, or will Mehrunes Dagon disrupt everything at the last moment? The outcome rests in your hands, hero.

    Starting the Light The Dragonfires Quest

    Talking to Martin on the last quest in The Elder Scrolls IV Oblivion.

    The quest begins automatically after completing the Paradise quest, when you hand the Amulet of Kings to Martin Septim. He will instruct you to accompany him to the Imperial City for a meeting with Chancellor Ocato. Following that, Martin will need to light the Dragonfires to close off all Oblivion gates.

    Completing the Light The Dragonfires Quest

    Councilor Ocato talking to Martin Septim in The Elder Scrolls IV Oblivion.

    Request Martin Septim to follow you, and then make your way to the Imperial City Palace, located in the city center. You can either fast travel or walk or ride there.

    Using fast travel is recommended, as followers may have issues navigating the open world.

    Upon arriving at the Imperial City, enter the White-Gold Tower and proceed to the Elder Council Chambers. There, you will meet Councilor Ocato. Martin will approach him to advance the quest. Get close enough for Ocato to address you and then have a conversation with Martin regarding the necessary formalities.

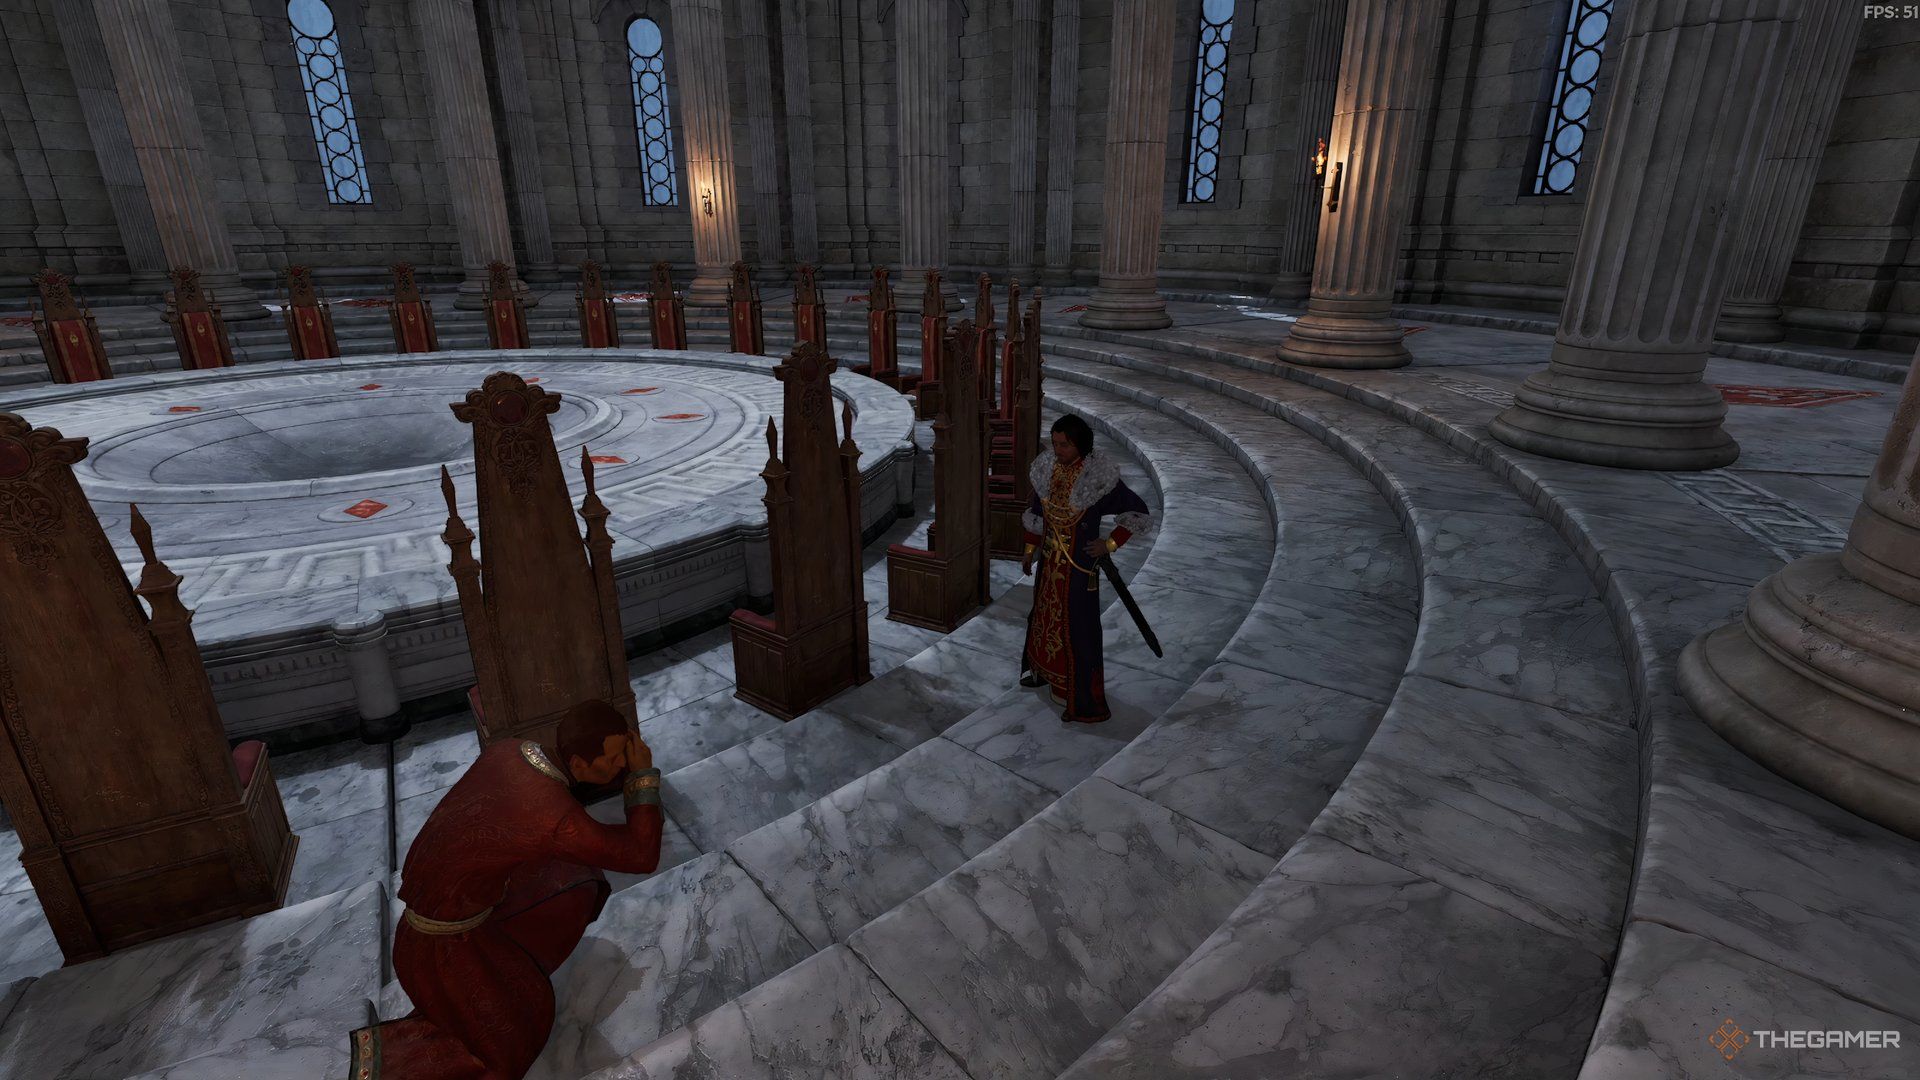
    Daedra attacking the Council Chambers in The Elder Scrolls IV Oblivion.

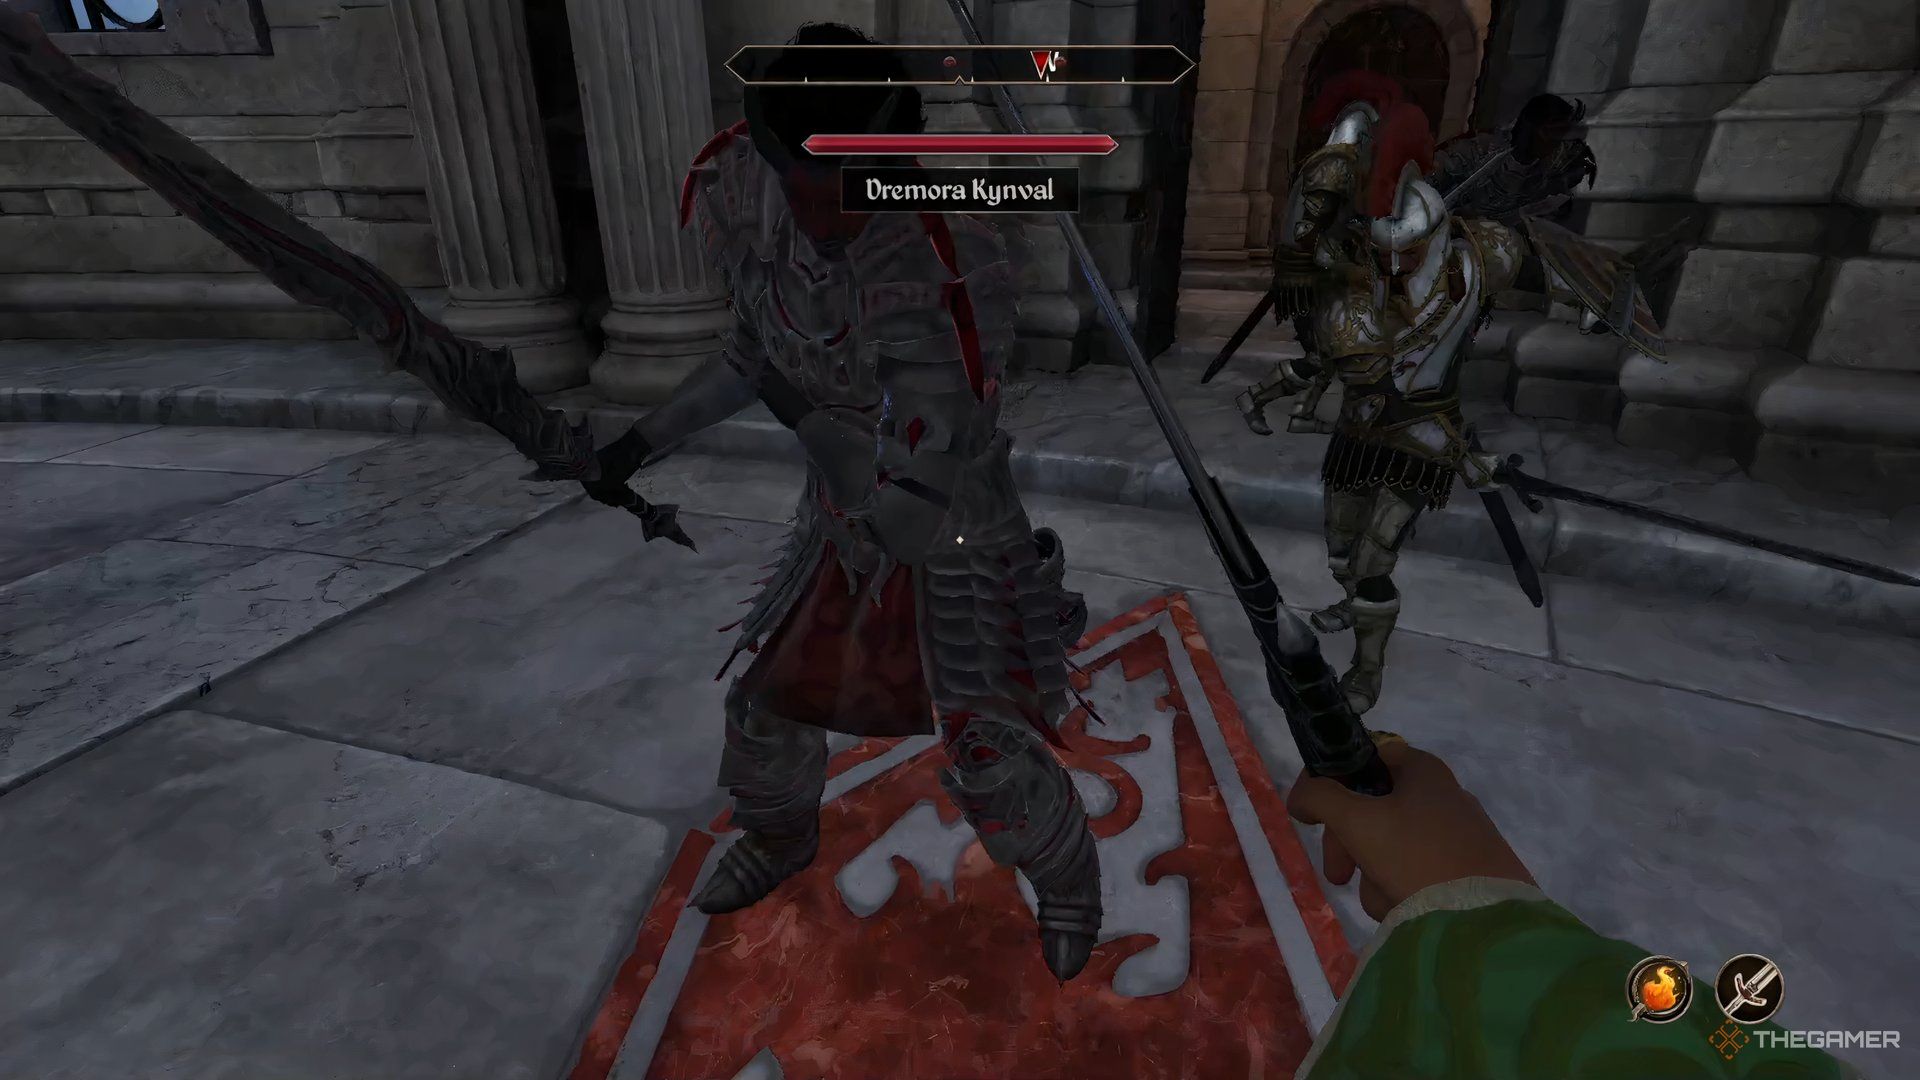
    Your conversation will be interrupted by an Imperial Watch officer rushing in to announce that the city is under attack. Oblivion Gates are opening throughout the city, leading to leveled Daedra flooding the chambers and targeting Martin. Your task is to protect him.

    Martin will instruct you to escort him to the Temple District. You’ll have to battle through the Daedra. It’s wise to concentrate on the enemies Martin is engaging, as his death results in a game over.

    Everyone present, except Councilor Ocato, is immortal, so remember that as you fight.

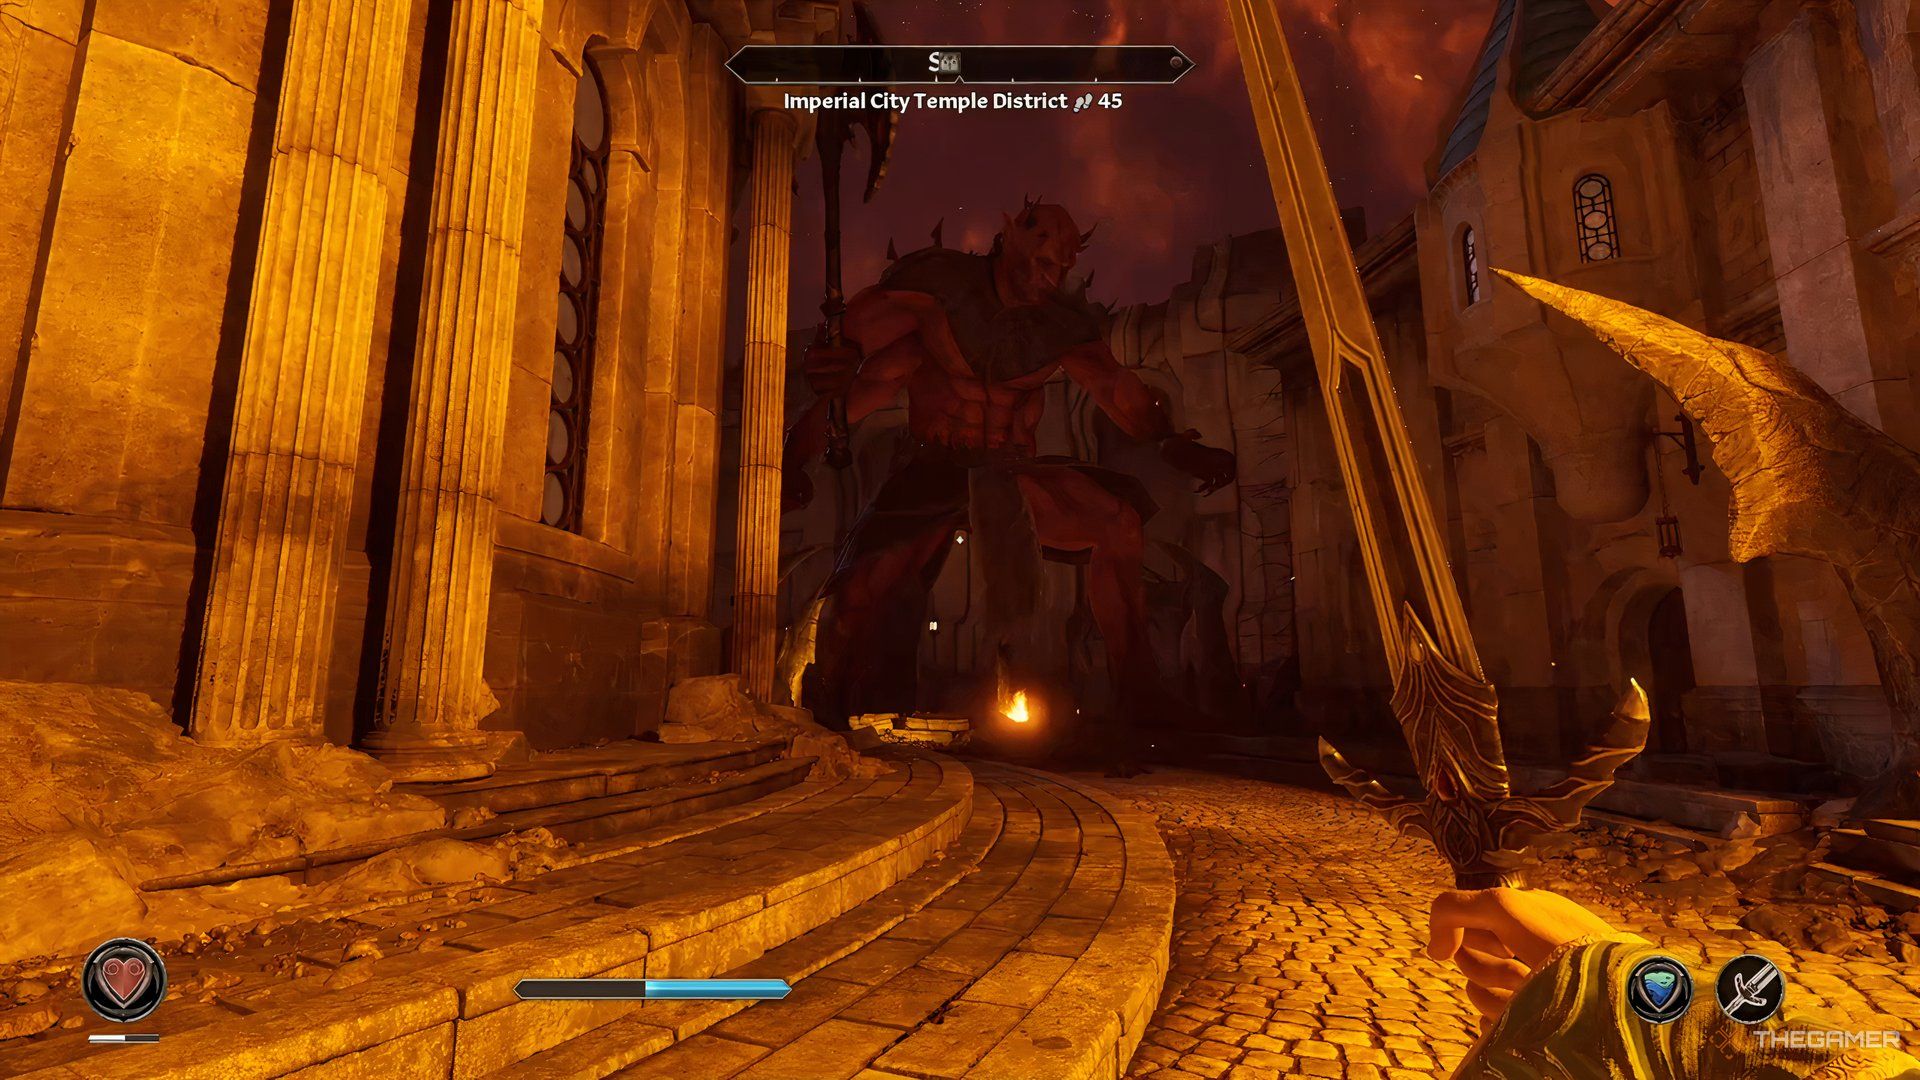
    Mehrunes Dagon in the Imperial City in The Elder Scrolls IV Oblivion.

    As you reach the Temple District, expect to see an Oblivion Gate and hordes of Daedra spilling out. Battle your way through and head towards the temple entrance, located to the south-southwest. As you approach, you will see Mehrunes Dagon has entered the city.

    Martin will share his plan and request that both of you make your way into the Temple. The entrance is situated next to Mehrunes Dagon. Since the Daedric Prince cannot be defeated, run past him and enter the temple while ensuring Martin’s safety.

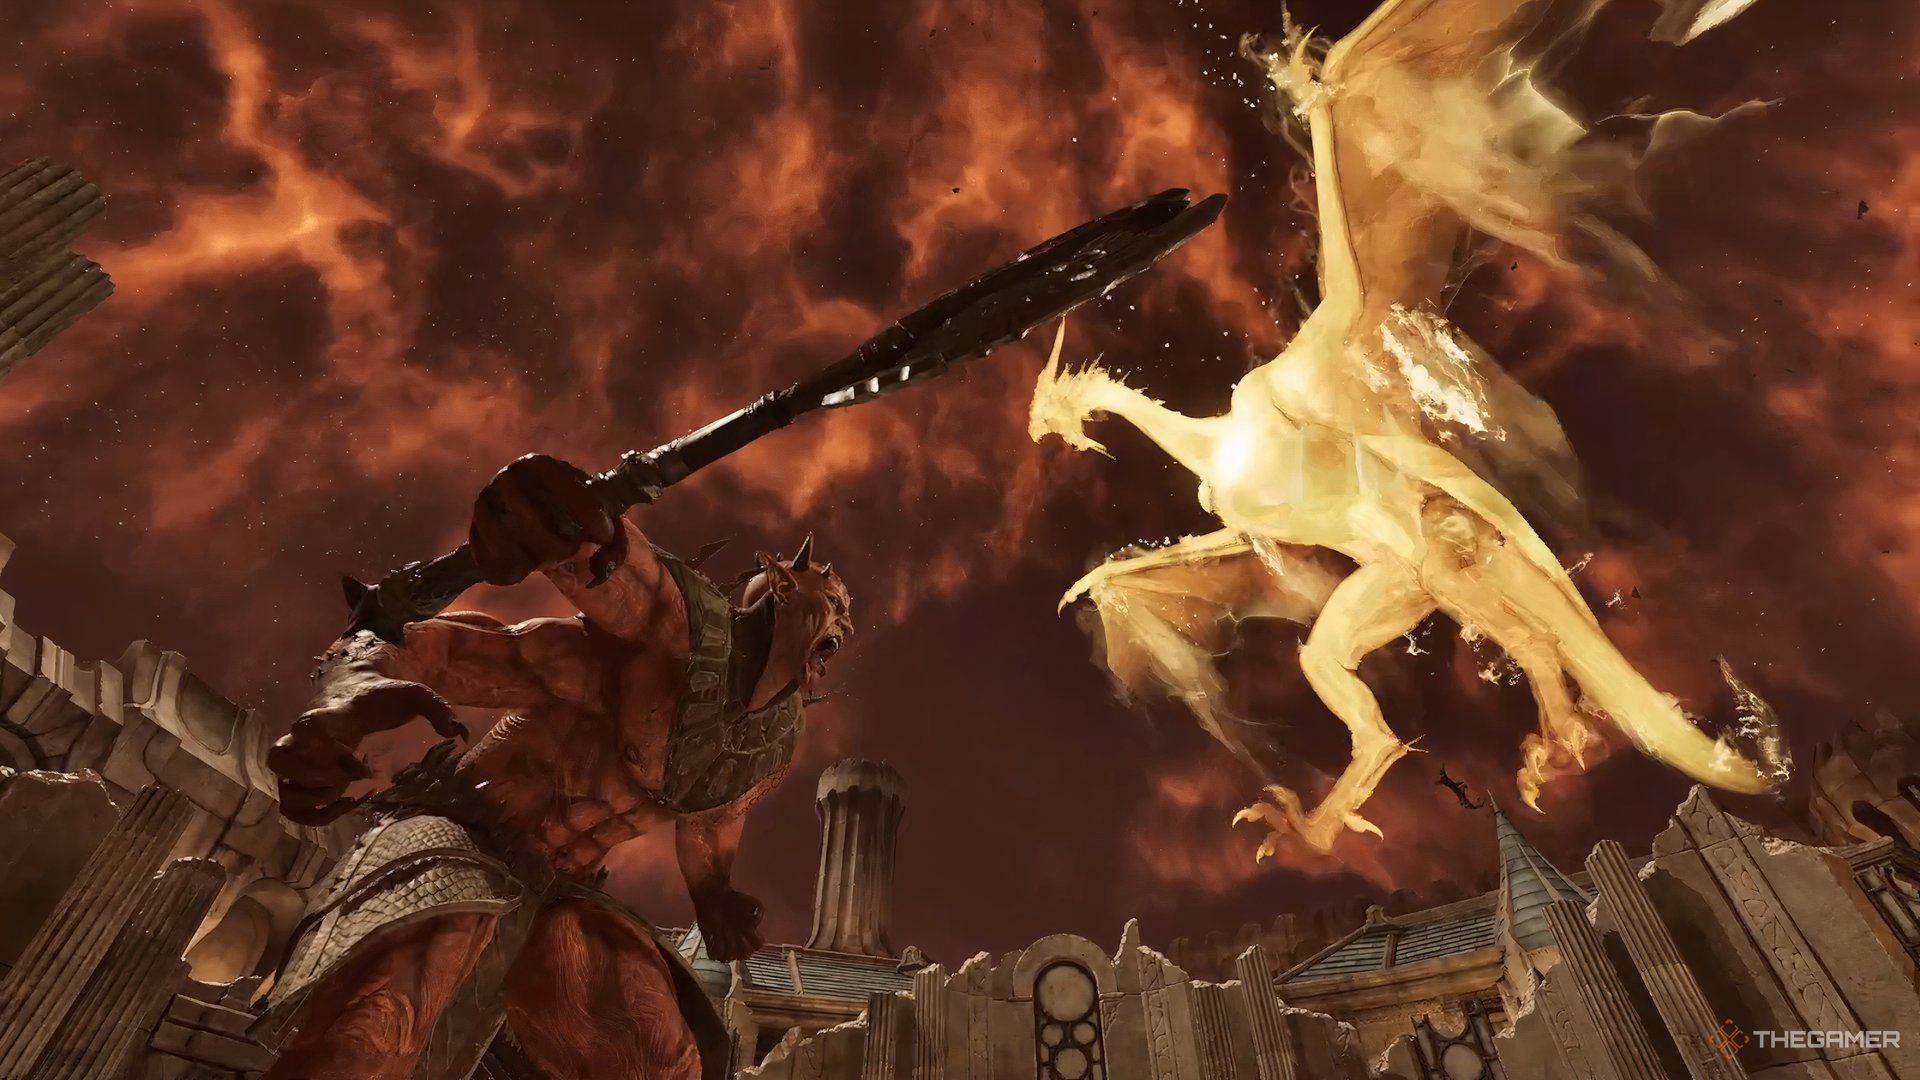
    Mehrunes Dagon fighting Martin in The Elder Scrolls IV Oblivion.

    Once inside the temple, Martin will have a final conversation with you before confronting Dagon with the Amulet. Enjoy the dramatic cutscene that concludes your quest.