الوسم: MMORPG

  • How to Complete Patch 7.5 Mounts and Minions in FFXIV

    How to Complete Patch 7.5 Mounts and Minions in FFXIV

    Patch 7.5 has been released in Final Fantasy 14, introducing new mounts and minions for players to collect and enjoy. Most of these new additions are connected to the latest patch content.

    We are still gathering details on each mount and minion, as they haven’t been fully datamined yet. We will keep updating this list as more information becomes available on how to obtain these new items.

    Here’s what we know so far:

    Every Patch 7.5 Mount and How to Get It

    • Alexandrian Axe Beak
      Can be purchased with 600 Faux Leaves from the Faux Commander in Idyllshire, earned through Faux Hollows. Alternatively, this mount is also available for purchase on the Market Board.

    • Alsvid
      Currently unknown how to obtain.

    • Inflatable Mogcraft
      Currently unknown how to obtain.

    • Rocket Punch
      Currently unknown how to obtain.

    • Wings of Legacy
      Achieved by completing the sidequest “The Wing Spirit Cometh,” which is unlocked after obtaining the Wings of Ruin, Wings of Resolve, Wings of Eternity, Wings of the Knighthood, Wings of Death, Wings of Mist, and Wings of Nihility mounts.

    • Wings of Nihility
      Rewarded after defeating The Unmaking (Extreme) Trial.

    Every Patch 7.5 Minion and How to Get It

    • Caprino
      Available as a reward from The Clyteum Dungeon. It can also be purchased on the Market Board.

    • Junior Jinbei
      Can be fished up along the Thavnairian Ocean Fishing Route on the Ruby Route. It is also available on the Market Board.

    • Little Blue Viking
      Earned as a Level 15 reward from PvP Series 11.

    • Little Red Viking
      Currently unknown how to obtain.

    • Senor Otter
      Currently unknown how to obtain.

    • Musical Paca
      Currently unknown how to obtain.

    • Sweetkit
      Currently unknown how to obtain.

    • Wind-up Prishe
      Likely a reward from the “Echoes Of Vana’diel – Windurst: The Third Walk Alliance Raid” activity.

    We are working to gather more details on the remaining mounts and minions, and will update this information as soon as possible.

  • Building a Base in Hytale: Complete Guide to Completing and Solving

    Building a Base in Hytale: Complete Guide to Completing and Solving

    Part of playing a survival game like Hytale is in Exploration mode, which focuses on exploring the world. To survive overnight while monsters are out, you need a safe place to hide, a spot to store your extra items temporarily, and somewhere to keep your crafting tables safe.

    Building a base in Hytale takes some planning. While there’s no one right way to do it, there are a few tips to keep in mind when deciding where and when to settle.

    These tips are for creating a base in Exploration mode, assuming you’ll be unlocking materials and recipes as you go. If you’re in Creative mode with everything unlocked from the start, you have endless options and can build anything you imagine.

    ## Use What You Can At First
    When starting a new world in Exploration mode, you only have your character’s clothes. Luckily, you can find easy-to-access resources around the overworld like sticks and loose stones that don’t require tools to gather.

    Use these raw materials to make Crude Tools as soon as possible. A Crude Hatchet and Crude Pickaxe will make gathering wood and stone much faster. They can be crafted from your inventory menu’s Pocket Crafting option. Once you have better tools, gathering stronger materials for building becomes easier.

    Your first base doesn’t need to be pretty. It just needs to keep monsters out and give you a safe place to store things. If night is coming and you’re not ready to fight, quickly throw together a simple structure from any available raw materials. An ugly but functional shelter is better than risking the night with no protection.

    ## Gather and Build With Available Resources
    Before you craft a Furniture Workbench to make beds, you’ll need to wait out the night. Waiting in an impromptu shelter made of dirt and wood is safer than dying and losing everything when monsters attack after dark.

    If you’re near a cave entrance, block the lower part to keep monsters underground, seal off the main entrance, but leave a small opening to watch the sunrise safely. In a forest, chop down thick-trunked trees, carve out sections, and use that wood to build a simple wall or shelter. It might not be pretty, but it’ll keep you safe until morning.

    ## Map Using Basic Resources, Then Improve
    If your base location is ideal, but resources are limited, don’t worry. You’ll gather plenty of materials during your adventures—stone, wood, ores—so focus on establishing a sturdy structure first. You can always decorate or upgrade later.

    It’s better to build a simple but solid shelter now and improve it later rather than delaying your first night or risking monsters and weather. Remember, demolishing sections with your pickaxe lets you recover materials and change your layout as you go.

    ## Build Using What’s Already There
    If you come across abandoned structures, ruins, or villages, these can be turned into your home base. Exploring the world thoroughly can reveal great spots with useful loot and potential to expand or modify existing buildings.

    If you stumble upon an empty house, place your bed inside to set that as your spawn point. Even if your house isn’t finished yet, sleeping in the bed sets your respawn location. When night falls, sleep in your bed to skip the dangerous hours, so you can get a fresh start in the morning.

    ## Find Ways To Add Visual Interest
    Once you have a builder’s workbench and resources, make your base visually appealing rather than just functional. Rotate blocks to break up patterns, use colored wood or wool for accents, or blend materials in different areas to create unique looks. Inside, you can mix wood and stone materials to give your space character and style.

    Adding decorative items like lights, pottery, seasonal decor, colored wool, or painted walls can make your base feel more like home, even if it’s still a work in progress.

    ## Pick a Good Location for Your Main Base
    Choosing a strategic spot to settle allows for easier resource collection and safer exploration. Being near an underground mine entrance gives quick access to valuable minerals, while choosing a location close to natural food sources ensures you stay fed during long adventures.

    Explore different areas before settling down—consider proximity to biomes, caves, and natural spawn points for animals. Make sure the location suits your preferred play style and has enough space for expansion if needed.

    ## Take Over Existing Structures
    If building from the ground up doesn’t appeal to you, look for pre-made structures like houses, ruins, or villages. These can be moved into or used as bases, saving you time. Many of these structures are generated naturally and can serve as a starting point.

    If you find an empty house early on, place your bed inside to gain ownership and set your respawn point there. Using existing structures helps you avoid early construction work and can give you a head start in establishing your home.

    ## Find Ways To Make Your Base Visually Interesting
    Even after building your initial shelter, you can add personal touches. Rotate block orientations to create different patterns. Use contrasting materials or colors for accents. Inside, mix textures and styles to make each space stand out.

    Decorate with lights, plants, furniture, and other ornaments to give your base personality. Experiment with different designs and materials to create a space that looks good and feels like home.

    ## Leave Space Outside for Farming
    Food is essential for survival, especially if you’re engaging in combat, exploring caves, or fighting other players. Plan for farming outside your main base by leaving space for crop plots, animal pens, or both.

    Plant berry bushes, till soil for crops, and set up fences to keep out wild animals and monsters. Access to fresh food helps keep your character healthy and well-fed on long journeys.

    ## Expand or Move When Needed
    Once your initial base is established, you might find it’s not big enough, especially if friends join or you discover new resources. Building additional rooms or expanding your current base is straightforward—just add new sections if space allows.

    If you want to switch to a different biome or find a better spot, you can pack up what’s important and rebuild elsewhere. Sleeping in a bed in your new location resets your spawn point, making moving a smooth process.

  • All Status Effects & How to Cause Them in Titan Quest 2: Completing Guide

    All Status Effects & How to Cause Them in Titan Quest 2: Completing Guide

    Inflicting status ailments in Titan Quest 2 is common whether you’re using a magic-based character or facing them against you in battle. In the early access version of the game, there are ten different ailments you might encounter.

    Knowing when and how to apply these ailments can significantly impact your combat effectiveness. Whether you’re dealing lightning, getting poisoned, or facing other effects, understanding each ailment’s properties and remedies is essential.

    Status Ailments Cause Passive Damage

    As you become accustomed to active combat in Titan Quest 2—probably even before leaving the tutorial—you’ll notice the importance of paying attention to your weapons’ substats and the moves you learn with your Masteries.

    There are ten unique status ailments available at this stage. Seven of these cause active damage, like Burn or Bleed, which gradually drain health, while three offer passive benefits, supporting your character in different ways. All classes can inflict some ailments during combat, with melee characters needing to attack up close and magical users often able to afflict enemies from a distance.

    Additionally, stronger armor can provide resistance against ailments, since enemies have the ability to inflict them on you as well.

    Defensive Gear Against Status Ailments

    A necklace granting elemental resistances

    It’s wise to equip armor with good defense stats against various ailments because enemies are diverse in their attacks across different areas of Titan Quest 2.

    Building Skills to Enhance Ailment Effects

    Simply attacking isn’t enough—status effects depend on a percentage chance to succeed with each attack. You can improve your chances and damage by building your passive skills and customizing your character’s stats.

    Weapons have a chance to inflict ailments based on their damage type or modifiers—like staffs with added Ice Damage. Your armor also plays a role by increasing your resistance to these effects. Comparing your gear carefully will help you choose the best options.

    Leveling up your passive Mastery skills further increases your odds of successfully inflicting ailments relevant to your class. For instance, Earth Mastery characters can boost their spells that deal elemental damage, adding another layer to your strategy.

    Increasing Ailment Chances and Effectiveness

    Passive skill increasing stagger chance

    Invest in passive skills that increase the likelihood and damage of status ailments. This helps especially on higher difficulty levels where enemies are tougher.

    List of Every Status Ailment

    Status Ailment Effect How to Inflict
    Damage-Dealing Ailments
    Bleed Causes a wound that slowly drains health over time. Pierce damage in melee combat.
    Burn Sets enemies on fire, causing health loss over time. Fire damage from Earth mastery.
    Chilled Freezes enemies, dealing damage and reducing their movement speed. Ice damage from Storm mastery.
    Holy Enemies take continuous Spirit damage. Magical support moves.
    Plague Poisons enemies, leeching their health gradually. Poison damage from attacks and weapons.
    Shock Stuns enemies, preventing attacks. Lightning attacks from Storm mastery.
    Shadow Steals health over time from enemies. Magical support moves.
    Non-Damaging Ailments
    Disrupted Stops enemies from performing actions. Attack enemies during their attack animations.
    Staggered Slows attack and movement speeds. Melee strike damage.
    Weakened Reduces the damage enemies deal. Inflicting heavy damage to them.

    Focusing on leveling and skill points will boost your ability to successfully inflict these effects, adding extra damage and control during battles. This is especially useful when facing tougher enemies or playing on higher difficulty settings.

  • Completing the Oakfather’s Retribution Set in The Elder Scrolls Online

    Completing the Oakfather’s Retribution Set in The Elder Scrolls Online

    The Elder Scrolls Online offers a variety of powerful PvP gear sets capable of transforming your battle performance. Many of these sets are connected to Cyrodiil, the game’s expansive open-world PvP area where three alliances vie for territory, rewards, and renown. Whether you’re a seasoned player or just starting out in large-scale combat, knowing where to acquire top-notch gear is essential for maintaining competitiveness.

    One particular set that has been making waves in PvP is Oakfather’s Retribution. Designed for players who want to leverage enemy buffs to amplify their damage, this set encourages an aggressive playstyle suitable for DPS roles in PvP. Here’s everything you need to know about its features and how to acquire it.

    What Is Oakfather’s Retribution?

    Oakfather’s Retribution is a light armor DPS set that players can earn by engaging in PvP activities in Cyrodiil. This massive battlefield allows players to capture keeps, defend fortifications, and complete missions for their alliances. You’ll face off against real opponents on a grand scale while earning Alliance Points (AP) and unique rewards.

    This set encompasses light armor, jewelry, and various weapon types, providing a range of options for your character build. The bonuses enhance Weapon and Spell Damage, while the five-piece bonus significantly increases your Offensive Penetration and damage output based on the number of Major and Minor Buffs your enemies have activated.

    Oakfather’s Retribution Set Bonuses (CP 160, Gold Quality)

    • (2 items): Adds 129 Weapon and Spell Damage.
    • (3 items): Adds 129 Weapon and Spell Damage.
    • (4 items): Adds 129 Weapon and Spell Damage.
    • (5 items): Gain 449 Offensive Penetration against enemies for each Major Buff they have active, and gain 20 Weapon and Spell Damage for each Minor Buff they have active.

    The greater the number of buffs your enemies have stacked, the more damage you deal. This makes it an effective counter against modern PvP builds that often feature both defensive and offensive buffs.

    Oakfather’s Retribution isn’t craftable and it won’t drop from standard monsters. However, it is part of the base game, meaning you don’t need any DLC to obtain it.

    How To Access Cyrodiil

    To begin your journey, you’ll need to enter Cyrodiil (or join a Battleground) with a character that is level 10 or above. Here’s how:

    1. Open the Alliance War menu (press L on PC).
    2. Click on Campaigns in the top-right corner.
    3. Select a campaign and press E to queue.
    4. When the queue pops, hover over the notification and press E again to travel.

    If you prefer Battlegrounds, ensure your character is at least level 10. Press P (the default key) to open the Group & Activity Finder, select Battlegrounds, choose a game mode, or opt for a random match, then click Join Queue to enter matchmaking.

    If you aren’t satisfied with the traits on your armor set, you can change them using Transmute Crystals.

    How To Acquire Oakfather’s Retribution Pieces

    Once you’re in Cyrodiil, the most straightforward way to obtain this set is by purchasing gear boxes with your Alliance Points (AP), which is the main currency for PvP. You accumulate Alliance Points by participating in various PvP activities, such as defeating enemy players, capturing or defending keeps, seizing Elder Scrolls, and completing PvP quests in Cyrodiil or Battlegrounds.

    You can obtain pieces of the Oakfather’s Retribution set in several ways:

    Golden Vendor (Adhazabi Aba-daro)

    Location

    Available on weekends at the base of each alliance in Cyrodiil.

    Availability

    Offers specific set pieces on a rotating basis, available for purchase with AP.

    Note

    Oakfather’s Retribution items have appeared previously, so keep an eye on the vendor’s weekly offerings.

    Cropsford Quests

    Location

    Cropsford, situated in the center of Cyrodiil.

    How to earn

    Speak to the Cropsford Quartermaster to complete daily and repeatable quests.

    Rewards

    Completing quests can yield set pieces, including those from the Oakfather’s Retribution set.

    Mission Boards

    Location

    Found at each alliance’s main gate in Cyrodiil (Eastern Elsweyr Gate for Aldmeri Dominion, Southern High Rock Gate for Daggerfall Covenant, and others).

    How to earn

    Finish a board mission, which may include Battle, Bounty, Conquest, Scouting, Warfront, and Elder missions, to earn occasional gear containers and Alliance Points.

    Contents

    These containers can have random sets or individual gear pieces from Cyrodiil, including Oakfather’s Retribution items.

    Elite Gear Vendors

    Location

    Located at each alliance’s main gate in Cyrodiil (Eastern Elsweyr Gate for Aldmeri Dominion, Southern High Rock Gate for Daggerfall Covenant, and Northern Morrowind Gate for Ebonheart Pact).

    How to earn

    You can spend 20,000 AP to buy Elite Gear boxes from these vendors.

    Contents

    These boxes may contain random set pieces, including those from Oakfather’s Retribution.

    Delves And Dolmens In Cyrodiil

    Location

    Delves are permanent public dungeons scattered throughout Cyrodiil, while Dolmens appear at specific times and places. The region features 18 Delves and 10 Dolmens.

    What Drops

    Defeating delve bosses can drop waist and feet armor pieces from overland PvP sets, while completing Dolmens can reward you with jewelry pieces, including those from Oakfather’s Retribution.

    Drop Mechanics

    Each delve boss has a chance to drop specific armor slots, while closing a Dolmen triggers a chest that may contain jewelry items.

    Both delve and Dolmen drops in Cyrodiil are random, meaning they do not prioritize uncollected set pieces. You could receive duplicates or items you already have.

  • MMORPG Adds New Player Class After 28 Years Since Release

    MMORPG Adds New Player Class After 28 Years Since Release

    After nearly three decades with just four character classes, the MMORPG Tibia is introducing a fifth option: the Monk class. If Tibia sounds unfamiliar to you, don’t worry. Launched in 1997 as a student project by a group in Germany, the game has expanded slowly over the years, and it wasn’t until two years ago that sound effects were integrated (though the main theme is quite catchy).

    Even the game’s website resembles the nostalgic design of the Runescape gaming era, yet it possesses a unique charm in the artwork. In a post on their blog, the developers discussed the journey to this major addition. “Initially, we thought introducing a new vocation to Tibia after so long would be too challenging and risky. However, the more we deliberated, the more it seemed not only feasible but also a natural evolution for the game. After all, why else would most bosses allow five characters to enter if not for five distinct vocations?”

    The developers aimed to create a class that would function both as a secondary healer and a damage dealer, ultimately deciding that the Monk—a melee combatant with a spiritual dimension—was the ideal fit.

    Get your weekly breakdown of the tech behind PC gaming


    Check your inbox!

    While there is no official release date for the Monk class yet, players can begin playtesting it starting February 25. The developers plan to share more details in the weeks ahead, and they hope that this new class will reignite players’ excitement and sense of exploration.

    Tibia is a free-to-play MMORPG that evokes a blend of Stardew Valley and World of Warcraft, in a charming way. Alongside classic MMO elements, it features modern conveniences such as the ability to rent and decorate homes or even marry. For those who are new to this genre, the isometric view may take some getting used to. However, for fans of retro-style gaming, it’s definitely worth exploring.

  • Your Ultimate Guide to the Paladin Role in FFXIV

    Your Ultimate Guide to the Paladin Role in FFXIV

    Final Fantasy 14 features a variety of engaging jobs, each with a designated role in different gameplay modes. A prime example is the Paladin, renowned as one of the game’s top-tier Tanks. Paladins excel at close-range combat, combining melee attacks with spellcasting, all while providing crucial protection for their teammates.

    With their distinctive sword and shield, Paladins possess a unique skill set, allowing them to excel in both offensive and defensive scenarios. If you’re searching for a job that can anchor your team, defend allies, and inflict respectable damage on foes, the Paladin is an excellent choice.

    The Rise of the Shield Hero

    Like other jobs in Final Fantasy 14, the Paladin role requires players to level a prerequisite class to Level 30. In this case, you must unlock the Gladiator class before transitioning to Paladin.

    The Gladiator is one of the starting jobs, so you can select it during character creation or learn it as early as Level 1.

    If Gladiator wasn’t your initial class choice, you can acquire it by visiting Ul’dah – Steps of Thal and talking to Lulutsu at the Gladiator’s Guild (coordinates: X:9.2, Y:11.7). Accept and complete the quest “Way of the Gladiator” to become a Gladiator!

    Path to Becoming a Paladin

    Once you’ve reached Level 30 with your Gladiator, you can become a Paladin. To start this process, head back to Ul’dah – Steps of Thal and consult with Lulutsu again at the Gladiator’s Guild (coordinates: X:9, Y:11).

    Complete the quest “Paladin’s Pledge” to receive the Soul of the Paladin, officially granting you the Paladin class! After this, you’ll need to level up to Level 100 to maximize your potential with this job.

    If you’re looking to enhance your leveling experience in Final Fantasy 14, check out our comprehensive guide, which explains the leveling system in detail! Additionally, for an extensive overview on unlocking Paladin and other jobs, visit our detailed guides!

    Paladin Rotations

    The Paladin’s unique sword and shield setup grants access to special traits and abilities, making the job a solid blend of offense and defense.

    One major advantage of the Paladin is that positional attacks are not a concern, as they typically face the target head-on. Below, we will cover the basic rotations for the Paladin without including Off-GCD Actions, which we will discuss later!

    The basic rotations for the Paladin underwent changes in Patch 6.3, enabling them to execute two AoE Rotations instead of just one and condensing their Single-Target Rotation to one.

    Paladins can now choose to restore MP or HP with their AoE Rotations, proving useful in large mob pulls or specific boss fights.

    Fundamental Single-Target Rotation

    • Fast Blade > Riot Blade > Royal Authority

    Using Royal Authority affords you three stacks of Sword Oath and delivers substantial damage to your target. Sword Oath then allows you to use several Actions, including Off-GCD Actions detailed in the next section of this guide.

    Essential AoE Rotation

    • Total Eclipse > Prominence
    • Confiteor > Blade of Faith > Blade of Truth > Blade of Valor

    The Total Eclipse Rotation replenishes your MP while causing area damage, enabling the casting of more Actions. Meanwhile, the Confiteor Rotation inflicts considerable damage across multiple targets while also restoring some HP, allowing you to endure fights more effectively.

    Paladin Off-GCD Actions

    Now that we’ve covered the basic rotation, it’s time to examine the core Off-GCD Actions that define the Paladin and enhance its gameplay effectiveness. Below is a rundown of the key Off-GCDs for both offensive and defensive strategies.

    The Paladin Job experienced the most updates among all the jobs in Patch 6.3 and again in 6.4. While the following tables focus solely on the Off-GCD Actions, many changes will also reflect in the Openers section later in the guide.

    Offensive Off-GCD Actions


    Action Recast Time Information
    Fight or Flight 60s Increases damage dealt by 25% for 20 seconds, enabling up to eleven GCD attacks during this period. Grants Goring Blade for 30 seconds.

    Defensive Off-GCD Actions


    Action Recast Time Oath Gauge Cost Information
    Reprisal 60s 0 Reduces damage taken by 10% for 15 seconds.

    Optimal Paladin Opener in FFXIV Dawntrail

    Armed with the information provided in previous sections, you should have a good understanding of your basic rotation and how Off-GCDs can significantly enhance your combos.

    As you approach openers, focus on maximizing your job’s potential while preparing for the remainder of the fight. For the Paladin, we present your primary opener and how to transition afterward.

    Off-GCD Actions are highlighted in bold and placed in parentheses, making them easy to identify.

    Basic Opener

    • (Pre-Pull) Holy Spirit
      • Cast Holy Spirit about two seconds before the countdown ends.
    • Fast Blade > Riot Blade (Grade 1 Gemdraught of Strength) > Royal Authority (Fight or Flight + Imperator) > Confiteor (Circle of Scorn + Expiacion) > Blade of Faith (Intervene) > Blade of Truth > Blade of Valor (Blade of Honor) > Goring Blade > Atonement > Supplication > Sepulchre > Holy Spirit

    Burst Window Example

    • Royal Authority > Atonement > Fast Blade > Riot Blade > Supplication (Fight or Flight + Imperator) > Confiteor (Circle of Scorn + Expiacion) > Blade of Faith (Intervene) > Blade of Truth (Intervene) > Blade of Valor (Blade of Honor) > Goring Blade > Sepulchre > Holy Spirit > Royal Authority

    Top Gear for Paladin in FFXIV Dawntrail

    The final piece to creating a robust Paladin build is selecting the right equipment and Materia. This can become particularly tricky for new players, whether they are new to the game or the job itself.

    If you haven’t reached Level 100 yet, the following table is still helpful for figuring out which stats and Materia types to focus on when enhancing your Paladin’s gear.


    Equipment Materia Stats How to Obtain
    Weapon Dark Horse Champion’s Sword
    • Heaven’s Eye Materia XII
    • Heavens’ Eye Materia XII
    • DMG +146
    • STR +449
    • VIT +476
    • CRT +281
    • DET +197
    Can drop during AAC Light-heavyweight M4 (Savage) or purchased from Hhihwi in Solution Nine (X:8.7, Y:13.7) for 8 AAC Illustrated: LHW Edition IV.

    While the above information outlines the “Best In Slot” gear for Paladins, there are still ways to enhance your damage and defense. The most straightforward method is by eating a meal before engaging in dungeons, raids, or trials.

    The best food buff for Paladins is Roast Chicken. Additionally, a strategy mentioned in the “Openers” section is using the Grade 1 Gemdraught of Strength. Incorporating this item into your opener will significantly boost your capabilities in most encounters.

  • How to Teleport in Temtem

    How to Teleport in Temtem

    TemTem is an expansive game, but the teleportation feature significantly enhances your mobility. Once you arrive at Cipanku Island, you’ll need to complete a side quest to acquire the matter-transfer drone, enabling you to teleport. This quest is quite engaging and involves players making a refrigerator disappear.

    In order to receive the teleportation item, you’ll need to accurately answer a series of questions.

    Initiate The Refrigerated Vanishings Side Quest

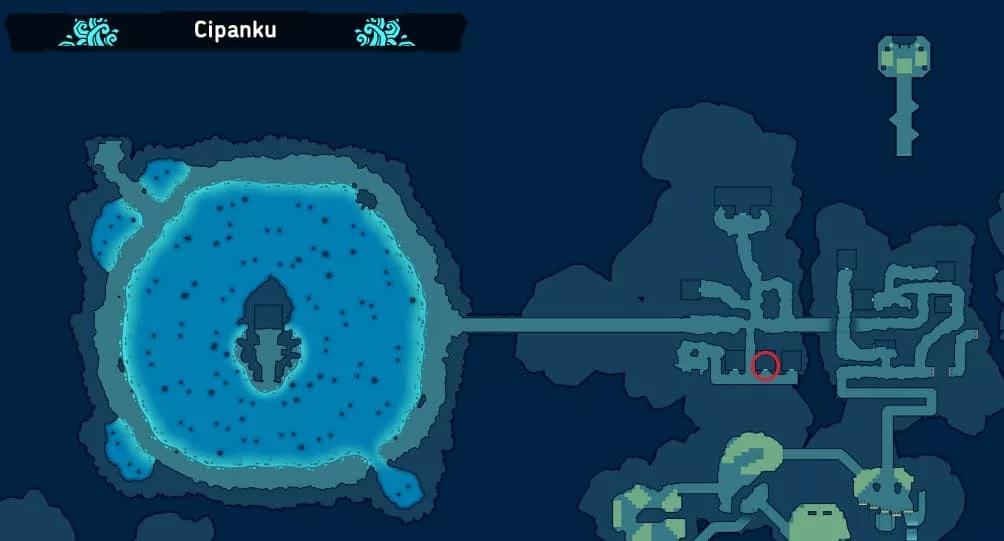
    Travel to Miyako Village on Cipanku Island and speak with Mayu. She resides in the house located on the right side of the village, which is indicated in the image below:

    To kick off the quest, ask her about the refrigerator and then venture outside to speak with various villagers in Neodo regarding the Vanished Refrigerator.

    Respond to Satoka’s Questions

    teleport temtem

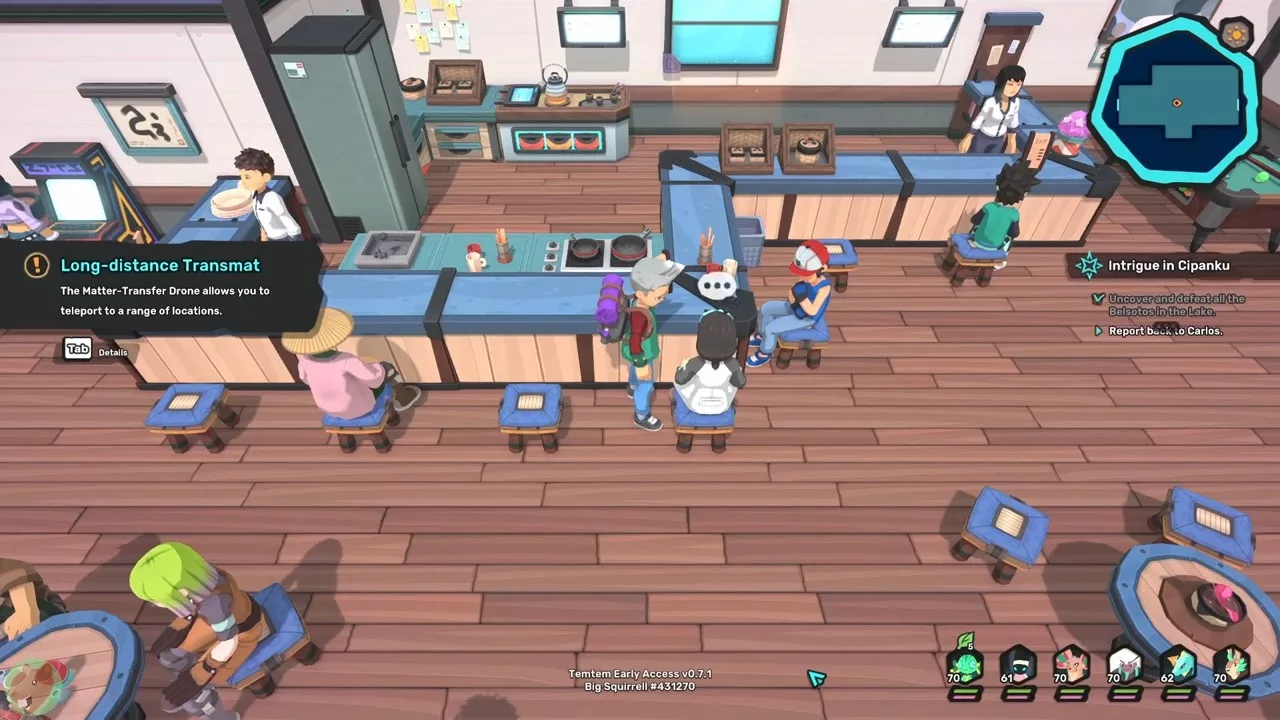
    When you arrive in Neodo, go to the first floor of the apartment and engage with a bewildered man standing next to a fridge. He’ll mention how the fridge suddenly appeared. After this chat, head to Neodo Izakaya and converse with Satoko.

    You’ll find Satoko at the bar in Izakaya. Here’s the tricky part: you must convince her that you are a seasoned traveler to acquire the matter-transfer drone.

    She will present you with six questions, and we’ll provide the correct responses for each.

    Questions Answers
    What is the tallest mountain in Omninesia? Anak Volcano
    What is the largest source of drinkable water in Tucma? The Cenote
    The Kakama Cenote
    What’s the pathway from Upinzani to Vumbi? Upinzani, Kwea Uplands, Jinogap, Vumbi.
    And the route from Arissola to Brical de Mar? Thalassian Cliffs
    How many towns are there in Deniz? Four
    Where can you find significant deposits of volcanic crystal? The Mines of Mictlan
    Aguamarina Caves
    Anak.

    If you provide the above answers to Satoko, she’ll be convinced that you are a traveler and grant you the matter-transfer drone, giving you the ability to move swiftly throughout Temtem!

    If you struggle to answer the questions accurately, don’t worry. You can retry as many times as needed.

    This drone provides a quick way to teleport to any locations you’ve previously visited, making navigation in the world of Temtem much easier.