Tag: Mission

  • Completing Firefly Missions & Solving Collectibles in Lego Batman: Legacy of the Dark Knight

    Completing Firefly Missions & Solving Collectibles in Lego Batman: Legacy of the Dark Knight

    In the upcoming Lego Batman: Legacy of the Dark Knight mission, we’re heading to the museum. It’s a shame we left that old fossil in the Batcave, huh? This time, we’re searching for models of the Space Shuttle Excalibur, and we’re right behind Firefly, which is quite literally on fire.

    There are also five WayneTech Caches to find and another Red Brick, which we’ll guide you through in this instructions. If you miss anything, you can always go back to the Batcave to replay the mission anytime from the computer.

    Every Spaceship Location

    1. In the level’s lobby, grapple to the right balcony. The first spaceship is in front of the burning mammoth display.

    2. During the Firefly fight at the end of the mission, the final spaceship is spinning on the orrery. Throw a Batarang to hit it.

    Every WayneTech Cache Location

    1. At the start of the mission, inside the museum foyer, grapple to the balcony left of the large dinosaur display. You’ll see the first WayneTech Cache in flames. Pull down the pipe with Batman’s grapple to extinguish the fire and access the cache safely.

    2. Use Batgirl’s drone to escape the foyer through the ceiling. Turn right, use the drone again to make a perch, then grapple onto the drone and jump onto the ledge by the window to reach the third cache.

    3. Later, when you arrive at the burning pirate ship, look to the right. You’ll spot the fourth cache hidden behind a crate in an archway.

    Where to Find the Red Brick – Fire Breather Modifier

    • Surrounding the sphere are various planets on the room’s walls, with Mars having a gold ring around it. The puzzle’s solution is to turn valves until all sides show the planet with the gold ring—Mars. When completed, the sphere opens, revealing the Red Brick.

    • The sphere is surrounded by planets, and the key is to rotate valves so that Mars, the planet with the gold ring, is visible from all angles. Once all sides display Mars, the sphere opens, revealing the brick.

    Additional Details

    • At the beginning, grapple to the left of the dinosaur display. Extinguish the flames to access the first WayneTech Cache.

    • Use Batgirl’s drone to reach higher areas and find caches behind structures or in hidden spaces, such as behind archways or within equipment.

    • When on the pirate ship, look for a crate in an archway to find the fourth cache.

    • The final Red Brick is hidden inside a sphere with several planets; rotating the valves correctly reveals Mars, which unlocks the brick.

    This guide should help you find all the models, caches, and the Red Brick efficiently.

  • How to Complete All Joker Mission Collectibles in Lego Batman: Legacy of the Dark Knight

    How to Complete All Joker Mission Collectibles in Lego Batman: Legacy of the Dark Knight

    Lego Batman: Legacy of the Dark Knight picks up with the eighth mission, featuring Joker’s parade. This level is smaller, covering just one street with three floats, but it still has five WayneTech Caches hidden in the nearby alleys and buildings that you’ll need to find.

    For the Batcave trophy, your goal is to find five cakes scattered across the map. You’ll see them at food stalls, on a volcano, and behind dumpsters. Since the level is tight, they can be easy to overlook. We’ll guide you on where to find each cake, the caches, and the Red Brick. Remember, if you miss anything, you can replay the mission from the Batcave computer.

    ### Every Cake Location

    1. Above a grumpy WayneTech worker, to the left of the first float, there’s a cradle. Use your grapple to climb up and find the second cake.

    2. Near the start, head directly left of the first float into the alleyway. Climb the wall and pull the lever to open the shutters at the building’s front. Inside, look to the right for a cat flap. Send a cat through it to pull another lever, which opens a door inside. Return to Batman and Catwoman, enter the room, and open the cache.

    3. Between the second and third floats, look up and to the right. You’ll see a zipwire. Grapple onto it and jump onto the window box. From there, cut a hole in the window to access the building.

    4. At the third float, cut a hole into the window on the left side of the street. Crawl inside, pull the TV halfway between the bench and shelves, summon a cat, and jump from the bench onto the TV and shelves. Inside, find a vent that leads to the cache.

    5. On the street’s end, the last cake is behind a window that Catwoman can break into. Once inside, pull the TV away from the wall, use a cat to jump onto the shelves, and find a vent leading to the final cache.

    ### Where to Find Every WayneTech Cache

    1. At the start, head left of the first float into the alley. Climb the wall and pull the lever to open the shutters. Inside, look to the right for a cat flap. Use a cat to open another lever, then return with Batman and Catwoman to open the cache.

    2. To the left of the second float, grapple up to a ledge, then jump through the window. Inside, pull the TV halfway between the bench and shelves, summon a cat, and jump onto the shelves to find a vent with a cache.

    3. After the third float, cut a hole in the window on the left. Enter, and once inside, pull the TV, use a cat to reach the shelves, and crawl through the vent to find the cache.

    4. At the fourth float, break into the building by cutting the window on the left. Inside, pull the TV, summon a cat, and jump onto the shelves. Inside the vent, you’ll find another cache.

    5. The last cache is inside an apartment to the left of the third float. Crawl through the vent, then pull a TV in the living room, use a cat to hop onto the shelves, and access the vent to retrieve the cache.

    ### Where to Find the Red Brick — Showbiz Modifier

    The Red Brick is located in a building near the end of the level. Find the window left of the last float, and break in using Catwoman. Inside, crawl through a vent to reach a cozy living room with a small cat tree. The Red Brick sits there, waiting to be collected.

  • How to Complete the Secret Side Mission in Whispering Glacier Borderlands 4

    How to Complete the Secret Side Mission in Whispering Glacier Borderlands 4

    Side missions are an important part of Borderlands 4, and you’ll find many of them throughout the main game as well as in the Whispering Glacier DLC area. This icy wasteland hides terrible creatures beneath and above the surface, so there will be plenty of people needing help.

    Sometimes, the help isn’t related to the terrifying voices and nightmares driving people crazy. For example, you might come across a young woman searching for her missing grandfather. However, you won’t find this mission listed anywhere. To reveal it, you’ll need to grab some dynamite and blow up the icy waters of the Whispering Glacier.

    ### How to Unlock the Ice Fishing Side Mission

    Ice Fishing is a hidden side quest that is part of the Ellie and the Vault of the Damned DLC, and it requires a little puzzle-solving before it becomes available. You also need to complete the first campaign mission from this DLC called On Icebound Shores Abandoned.

    First, look for fishing spots in the Crooked Teeth area. These spots are always near shallow water and usually have a chair and a bucket of dynamite with them. They can be found in a few places:

    – Three spots on the glacier near the Edge of the World fast travel point.
    – One spot along the edge of the glacier south of the Edge of the World, across from a small frozen lake.

    When you find one of these fishing spots, look out for splashing water with shiny particles in the ocean nearby. Grab the dynamite from the bucket and toss it into the splashing water. This will cause a small explosion, unearthing loot and revealing a special Echo Log.

    If your dynamite throw misses, don’t worry — it will respawn in the bucket after a few seconds, so you can try again without losing access to the mission. Use your Grapple to grab the Echo Log either midair or from the water’s edge if it falls into the ocean. When you pick it up, it will automatically play a message from someone named Grumpy.

    Repeat this process at three other sparkling water spots nearby. It might take some tries to find the right splashes, especially if they aren’t fully sparkly. Once you’ve collected all four Echo Logs, go to the Speakeasy and find the new side quest.

    ### Where to Find Ol’ Thrash

    To find Ol’ Thrash, head to the Speakeasy. Inside, go to one of the tables behind the bar where you can talk to Marina. Then, return to the Whispering Glacier via Ellie’s Garage fast travel point. Drive through the canyon to the west, then continue to the ocean at the edge of the map.

    Inside a round hut behind a chunk of ice, find and pick up the Echo Log sitting on some dead fish and blood. Listen to it, then grab the dynamite from a nearby bucket. Throw the dynamite on the cracked ice behind the hut, which is surrounded by Threshers, before it explodes.

    Ol’ Thrash will emerge from the hole after the explosion. This boss Thresher has two health bars and is similar to other bosses like Ice Maw. Watch out for his melee slams, seismic waves, and the smaller Threshers that spawn during the fight. With caution, you’ll be able to defeat him.

    After killing Ol’ Thrash, you’ll earn loot and a special item called Gumpy’s Hat. Pick up the hat, and Marina will call you, signaling the end of the quest. Completing this quest also counts towards the “Looking For Work At The Top Of The World” achievement or trophy, which requires finishing all side missions in the Whispering Glacier area. It’s a necessary step if you want to fully complete the DLC.

  • How to Complete the Amber Alert Mission in Crime Scene Cleaner Act 2

    How to Complete the Amber Alert Mission in Crime Scene Cleaner Act 2

    It’s time for Act 2 of Crime Scene Cleaner, and Kovalsky is once again entangled with the mob. This time, the trouble involves the boss’s daughter, Amber. Since her father is no longer around to watch out for her, she needs Kovalsky to clean up her mess.

    Amber Alert has a large number of bodies and a lot of mess scattered throughout the area, so prepare your mop and get ready to work. Here’s everything you need to do to score 100% on the Amber Alert mission in Crime Scene Cleaner Act 2.

    Complete Amber Alert Walkthrough

    When you first step into the area, notice a bucket point to your left. Fill your bucket with cleaning solution and detergents. The double doors ahead are locked, so go through the door on the right into the Staff Area. The Amber Alert level includes:

    • 12 bodies
    • 16 evidence items
    • 3 secret rooms
    • 4 CDs

    Staff Area

    In the Staff Area, there’s a body on the floor. Pick her up and place her in the container. Wipe up the blood, and move two chairs back into their spots. Near the steps, you’ll find a valuable ring inside a locker you can take. Up the stairs, there’s more blood to clean and trash to gather. Pick up the fire extinguisher and put it back on the wall, then pick up a cup from the table and set it aside before repositioning the table.

    While exploring the area, grab two valuable necklaces and a ring from the side, and check out the stuffed bear with a note. The next set of stairs has blood splattered on the walls and floor—clean it up and find a phone (evidence) on the ground.

    In the kitchen area, clean remaining trash and restore the shelving unit. Use the bucket point here to set up for cleaning.

    Secret 1
    Look out for tiny trash pieces like cigarette butts and bullets—these are easy to miss.

    Take the two valuable necklaces and ring from this side zone, then check behind the container with the stuffed bear for a secret door. Use the wet floor sign to reveal a hidden elevator. Press the button to descend into Dave’s Lair, where you’ll find four labeled barrels, including the one you brought down.

    Attach the barrels to the pipes along the wall in this order:

    • Elder Gnome Stout
    • Monastern Trappist
    • Iced Dwarf Pale Ale
    • Iced Dwarf Pilsner

    Inside the space with the barrels, you’ll find a secret CD among other items.

    Bar

    Many chairs are located in various parts of the bar, so you’ll need to backtrack a bit to tidy everything up. In the checkered-floor section, there’s a body with throwing stars embedded in it and nearby pillars. Behind the bar, find a cocktail shaker (evidence) along with broken glass and blood.

    Your task involves knocking down a missing chair from above the vents with a pressure washer. Chairs are scattered around different sections, so go back and forth to clean everything. In the area with the dartboard, aim to score exactly 301 points within three attempts—success reveals a ladder leading down to Dave’s hidden lair.

    Attach the beer barrels to the pipes in the specified order, and find the secret CD inside the wall behind the painting. Pick up the diamond embedded in the karaoke screen. Enter through the arcade room, which you must clear of debris and blood, and inside find valuable statues and cash.

    The safe in this room is locked; its code is 1369. Enter the code to open it and retrieve valuables inside.

    Entrance

    Afterward, head to the entrance area where you will find a poster board (evidence) and a lot of mess to clear up, including a body and cash. The toilets reveal another body and a cell phone (evidence). Return to the bar to take the stairs leading up to the Lounges.

    Lounges

    In the lounges, dispose of a body before cleaning and repositioning the furniture. There are valuables and evidence on the seating, plus another body in a restroom cubicle. Outside the cubicle, find a phone (evidence).

    Head upstairs via the stairs near the lounges to explore the private rooms, which contain valuable items and additional evidence. In the private areas, a body and cash are present among seating, with evidence including a phone and other belongings.

    Lounges Continued

    Proceed to a door marked with a snake skeleton icon—this leads to the Maintenance Room. Behind the painting, there’s a secret door—you’ll need to walk through the painting to reveal it. Inside, find the CD and three valuable cat statues; also, grab the statue’s head from behind the stairs, which leads back into the lounges.

    In the lounges, you’ll find a hidden room accessed behind a secret door, containing a Sai weapon and valuable items. Inside the boxing ring, clean up the mess, remove the body, and gather evidence including a katana and knuckle dusters. Return the chair to the main bar area.

    Back in the main lounge, find and take the evidence including throwing stars embedded in the walls, a Sai weapon on a door, and a statue head. Interact with items to locate the last CD and the diamond on the TV screen.

    Before leaving, do a final sweep to ensure all evidence, secrets, and collectibles are gathered—covering every corner, hidden room, and secret passage.

  • Mideast Conflict Drives NATO to Relocate Iraq Mission to Europe

    Mideast Conflict Drives NATO to Relocate Iraq Mission to Europe

    Nato has moved its mission in Iraq entirely to Europe due to regional conflicts, with the last non-combat staff of several hundred individuals departing Iraq on Friday. The personnel were based in an Iraqi military facility within Baghdad’s Green Zone, near the U.S. embassy, which has faced multiple attacks since the U.S.-Israeli conflict with Iran began three weeks ago.

    An official statement from Nato’s European command confirmed, “The Nato Mission Iraq has adjusted its posture, safely relocating all personnel from the Middle East to Europe.” The mission’s primary role involves supporting and training Iraqi security forces to combat terrorism, especially to prevent a resurgence of Daesh.

    Operations will now proceed from Nato’s command center in Naples, Italy. General Alexus Grynkewich, Supreme Allied Commander Europe, expressed gratitude to the Iraqi government and allies who helped facilitate the safe move. “I also want to commend the dedicated men and women of Nato Mission Iraq, who carried on their duties diligently. They are true professionals,” he added.

    Earlier on Friday, Nato announced it was modifying its Iraq mission, with a French military source confirming the relocation was temporary and driven by regional security concerns. Nato spokesperson Allison Hart emphasized that political dialogue and cooperation with Iraq, including through the Iraq mission, will remain ongoing.

    Since its inception in 2018, the mission has comprised several hundred personnel from Nato allies and partner nations such as Austria and Australia. It has been led since May 2025 by General Christophe Hintzy of France.

    A French military source explained to AFP that the decision to relocate personnel aligns with Nato’s stance on non-combat missions, noting that the current threats in the region make their continued presence less relevant. An Iraqi security official confirmed there was no disagreement with Iraqi authorities, describing the withdrawal as a temporary measure due to the escalating Middle East security situation.

  • Expansion Mission Tree Tips for Europa Universalis 5: Completing and Solving

    Expansion Mission Tree Tips for Europa Universalis 5: Completing and Solving

    If you want to quickly expand your initial territories in Europa Universalis 5 and build a global empire, you should consider focusing on the Expansion Mission Tree. These goals will help you start claiming new borders and discovering more of the world. Completing these missions involves declaring rivals, going to war, and acquiring new lands, all while boosting your country’s prestige.

    There are two main branches in the Expansion Mission Tree:

    1. Humiliate a Rival: This is a straightforward goal if your nation is already strong. It involves declaring war on a smaller rival and ending the conflict with a Humiliation Peace Treaty that damages their prestige. This mission is available anytime after your start and can be completed repeatedly every 20 years. To begin, you need to establish a rival—done through the Diplomacy menu by selecting a country and choosing the Rival option. Then, you must insult that rival within the last ten years by sending an insult from the Diplomacy menu. Doing this will give you a Casus Belli and start the mission.

    2. Regional Expansion: This involves taking land from neighboring countries by declaring war and then making peace to annex their territory. It helps to repair the region afterward, as the area will likely suffer damage during conflict. You can undertake this mission when your country is capable of declaring war and repeat it every 15 years to keep expanding.

    Completing the “Humiliate a Rival” mission involves several steps:

    • Have a Rival: Chosen via the Diplomacy menu, then insulted within ten years to be eligible.
    • Build a Spy Network: Establish a spy network of at least 30 in the rival’s territory for intelligence and potentially a Casus Belli.
    • Sow Discontent: If you have a strong spy network and multiple diplomats, you can choose to sow discontent in your rival, creating internal instability.
    • Declare War: With a Casus Belli and an army prepared, declare war on your rival.
    • Win with the Peace Treaty: Achieve a Humiliation Peace Treaty during your war, reducing their prestige significantly and boosting yours.

    Your ultimate aim is to Surpass our Foes. To do this, your rival’s military strength must fall to less than half of your country’s total force. After the initial humiliation, keep monitoring your strengths, as some nations might already qualify for this step early, especially if they started weak or with a weaker rival.

    Once the “Humiliate a Rival” goal is accomplished, additional objectives include imposing embargos, establishing spy networks, and sowing discontent, which all contribute to the overall mission progress.

    For the Regional Expansion branch, you will need to:

    • Raise a War Chest: Gather resources to fund the upcoming conflict.
    • Build Your Army: Ensure you have enough soldiers, either through general recruitment, militia, or navy.
    • Get a Casus Belli: Justify your war, either through parliamentary approval or spying.
    • Build Ships if Coastal: Have a suitable navy to support your expansion.
    • Declare War: When ready, declare war on a neighboring country, which will last at least a year before you can end it with a peace treaty.

    After winning the war and making peace:

    • Recover Prosperity: Raise the region’s prosperity above zero.
    • Fortify Borders: Upgrade defenses in the new region.
    • Integrate the Land: Over the next two years, help the region settle, ensuring satisfaction and stability.

    In summary, focusing on these expansion goals—humiliating rivals and regional conquest—can significantly boost your country’s prestige and territorial holdings, paving the way for global dominance.

  • How to Complete the Elpis Mission in Borderlands 4 by Solving Challenges

    How to Complete the Elpis Mission in Borderlands 4 by Solving Challenges

    Just when you think it’s time to head out and take down the Timekeeper in Borderlands 4, the game surprises you with a big twist. All the different storylines come together on the broken planetoid Elpis, which is reached by a makeshift rocket-powered space elevator.

    Like many of Borderlands 4’s mini-dungeons, Elpis mainly involves a series of fights. However, it also includes searches and puzzles that can trip you up, and it features a boss fight set against one of the most impressive backgrounds in the series.

    How To Get The Oxygen Masks

    When you arrive on Elpis after the Rising Action mission, you learn there’s only one oxygen mask on the space elevator — yours. You’ll need it to find more supplies so Zane and Amara can join you.

    To leave the elevator, break the lock on the door to the southwest with a melee attack. Interestingly, you can also go back to Kairos’ surface via a portal at the back of the elevator and teleport back from the launch site if you want to wait. Once the door is open, Amara and Zane will move to an air bubble to the south and wait for you to bring oxygen kits.

    • The first oxygen kit is on debris floating off the edge of the map to the west of the bubble.
    • The second kit is at the top of the hill just southeast of the bubble.

    Both are close by, and you’ll mostly encounter just some Skydrift Threshers along the way. Incendiary ammo makes quick work of these enemies—though any ammo works, incendiaries are especially effective.

    After collecting both masks, give them to Amara and Zane, then follow the path heading southeast.

    Note: Elpis’ gravity here is weaker than Kairos’, so you can jump higher and fall slower. If you’re in a rush to get down, try doing a ground slam for a quick landing.

    How To Ignite The Engine

    The next main area features a battle between Rippers and Order troops. Clear out all enemies on both sides, then listen to Amara, who will tell you to activate the ship’s engine by using the console on the northwest ledge.

    To fully ignite the engine, throw three blasting charges into the exhaust pipe. Order enemies will keep attacking, so you’ll need to balance fighting with powering the engine. The charges come from a device along the northern wall, east of the console.

    The best spot to throw the charges is from the high ground directly across the exhaust pipe. Since the pipe is quite large, a good long arc should land the charges easily. If you miss, just try again.

    Once all three charges are successfully tossed into the pipe, use the console again. The engine will break through the wall blocking your path. Finish off any remaining enemies and then proceed. Use gliding and sliding across debris to reach the next stable area.

    How To Reach The Elpis Core

    When you arrive at a container, drop into it and loot what’s inside. Then jump back out and head over the rocks in a large plain infested with Threshers. Look for a teal boost pad on the east side that launches you to floating debris and a shipwreck interior. Grapple up to the upper level past the respawn point, then make your way south along the hull.

    Be prepared for a tough fight; a lot of Rippers will be along the path here.

    At the south end of the wreck, use another boost pad to reach the abandoned Dahl mines. Clear out Rippers outside and inside, then crawl under some partially-collapsed tunnels to reach the lower chamber. Activate the elevator and follow the eastern tunnel to the power station, where you’ll use a console and listen to Claptrap’s instructions.

    How To Power The Elevator

    There are three turbines near the lava river, all reachable with a quick glide from the console. Use the Grapple Grabber to open each turbine’s casing, then grapple onto the inside part. Wait for the handle to turn around, then grapple it again to spin it to full speed. When each turbine has been spun twice in a row, it’s powered.

    After all three turbines are activated, turn the console on and go back to the elevator. You can use it to reach the surface once Rippers are cleared out.

    Tip: If the elevator gets stuck, just climb the rest of the way.

    At the top, follow the path to the observation deck and wait for the door on the left to open. Cross the plain to meet Zane and Amara again. Defeat the Rippers attacking you, then take Amara to the core and go through the tear she creates. Keep advancing until you encounter Lilith. Talk to her, then prepare for the fight against Callis again.

    How To Defeat Moon-Maddened Callis

    Callis fights similarly to her first boss fight, and her Tabnak drone is still floating above her—watch for her to deploy it when she leans into a high stance. She’ll be spawning fewer minions this time, so it might be dangerous to fight solo if she goes into a “Fight For Your Life” mode.

    Reserve your glide pack’s fuel for dodging her charge attacks. Focus on tearing through her armor using Corrosion damage. After that, she’ll go invulnerable — crawling on a laser web overhead and attacking with her scorpion tail, while Rippers swarm around.

    Keep an eye on her tail so you can avoid it, and focus on thinning out the Rippers until she resumes normal fighting.

    Warning: Watch out for laser webs on the ground—they’ll slow you down and make you vulnerable. Callis can also knock you off the platform if you’re not careful, ending the fight instantly.

    When her invulnerability ends, hit her hard with Incendiary damage or your biggest attacks. Finish her quickly before she has more chances to strike back. She hits very hard, so there’s little room for error—try to end the fight by killing the Ripper Queen as fast as possible.

    Most of her attacks target the front, so staying back and to the sides gives you more time to react and avoid damage.

    Note: She doesn’t drop much loot, but there is a generous chest near your allies that you can open before returning to Kairos and completing the mission.

  • How to Find Every Side Mission in Borderlands 4 by Completing and Solving

    How to Find Every Side Mission in Borderlands 4 by Completing and Solving

    While your main goal in Borderlands 4 is to defeat the Timekeeper and his organization, there are moments when you’d rather take a break from battling giant enemies. That’s when side missions come into play.

    The organization has caused a lot of problems for many people, and it will keep doing so until it’s gone. As a Vault Hunter, you have the strength and freedom to help those affected. Sometimes, this means urgent tasks like delivering supplies or supporting someone chasing their dream, like a missile. Other times, it’s simpler—someone just needs a little help finding talented band members.

    Additional details about side missions will be added as they are discovered.


    Every Side Mission in Borderlands 4

    There are 40 side missions you can complete throughout the game. Most of these become available after finishing certain main story missions or completing the previous quest in a series.

    All side missions give you experience points (EXP) and money, scaled to your level. Some repeatable missions also offer extra rewards like Eridium, weapons, special Vault Hunter styles, custom paintjobs for Echo-4, or vehicle skins.

    Most of these repeatable missions can be farmed to earn their specific weapons or items found during the quest. They’ll appear in the “Replay Missions” section of your menu, under the upper list.

    Note: You can restart a mission, complete part of it to farm specific loot (like a boss’s treasure), then abandon the mission. Your loot remains in your inventory even after abandoning.

    When replaying a mission, you enter a unique game state where only that mission is active, preventing other mission progress during that time. Nearly all main missions—except Guns Blazing—and most side missions can be replayed. Those only rewarding EXP, cash, or Eridium typically cannot be.


    All Fadefields Side Missions

    Mission Name Quest Giver Start Location Prerequisites Rewards Repeatable?
    Abduction Injunction Wildhorn Jenny North of the Abandoned Post Safehouse Complete Down and Outbound EXP, cash, Eridium No
    Carried Away Naver Toilet east of Zadra’s house Complete Down and Outbound EXP, cash No
    Electroshock Therapy Prof. Ambreleigh House beneath the Someday Rise Safehouse Complete Down and Outbound EXP, cash, Eridium No
    Electroshock Therapy: The Second Session Prof. Ambreleigh Road east of Horace’s Oversight Complete Electroshock Therapy EXP, cash, Eridium No
    Exit Through The Rift Shop Carlile’s Corpse Middle of the road west of Watershed Gate Complete all faction main missions in Fadefields EXP, cash, Eridium; Uncommon to Epic Ordnance; Absolute Astra Vault Hunter Style Yes
    Free For The TASKing Kilo The Launchpad Complete The Kairos Job EXP, cash, Eridium Yes
    Finway’s Cup Orts Cliff south of The Prospects Drill Site Complete Fadefields faction missions EXP, cash, Eridium No
    Gone Are My Leggies Topper Boglight Vigilance Point Complete Down and Outbound EXP, cash, rare epic sniper, Halt Citizen Vehicle paint Yes
    Hangover Helper Ole Shammer Shammy’s House Complete Down and Outbound EXP, cash, rare pistol Yes
    Meat Is Murder Bryce Harper’s Hideaway Complete Recruitment Drive EXP, cash, rare pistol Yes
    No Place Like Home Claptrap Lake southeast of The Launchpad Complete Down and Outbound EXP, cash, rare pistol Yes
    Null And Void Rush Crashsite south of The Launchpad Complete Fadefields faction missions EXP, cash, rare/epic SMG, Vault Hunter Style Yes
    Ready To Blow Store Transponder The Launchpad Complete Down and Outbound EXP, cash, rare/epic shield Yes
    Powerdrop Session Monty The Launchpad Complete Fadefields faction missions EXP, cash, Eridium Yes
    Primordial Vault: Fadefields Altar in front of the Arch of Inceptus Hill east of The Stubs Capture all Silos and find Vault Key Fragments EXP, cash, Eridium; Epic SMG; Glide Pack (Stamina boost) Yes
    Savage Salvage Echo Log on Debris West of Shut-Eye Keep Complete A Lot To Process EXP, cash, rare/epic shotgun Yes
    Scoundrel Roundup: Kilo Shim The Launchpad Complete Fadefields and start The Kairos Job EXP, cash
    Scoundrel Roundup: Glitch Shim The Launchpad Complete Fadefields and start The Kairos Job EXP, cash No
    Sum Of His Parts Claptrap Dumpster at Racketrun Complete No Place Like Home EXP, cash, Eridium Yes
    Task And Ye Shall Receive Kilo The Launchpad Complete The Kairos Job + Free For The TASKing EXP, cash, Eridium No
    TASK Master Kilo The Launchpad Complete all previous tasks EXP, cash, Eridium Yes
    The Kairos Job Shim The Launchpad Complete Fadefields faction missions EXP, cash, Eridium; Epic SMG; Weapon skin Yes
    To The Limb It Leggies Nave Point Complete Gone Are My Leggies EXP, cash No
    Working For Tips Echo Log The Howl Complete Down and Outbound EXP, cash No

    (Note: Due to space, only a selection of missions are shown. The full list follows a similar pattern.)


    All Terminals Range Side Missions

    Mission Name Quest Giver Start Location Prerequisites Rewards Repeatable?
    A Brother In Need Scholarly Jacobs Road south of Checkpoint Taupe Complete main Terminus Range missions EXP, cash, Eridium No
    A Call For Help Restless Arwa Belton’s Bore Complete Meat Is Murder + main missions EXP, cash, Eridium; rare/epic shotgun Yes
    Crack This Guy’s Back Crack MaBacky House at Sainted Cup Complete A Lot To Process + reach Terminus Range EXP, cash, Eridium No
    Father Of The Glide Claptrap Claptrap Aeronautics Complete Peak Performance EXP, cash, Eridium; rare/epic pistol Yes
    Fault Hunting Leopold Society for Amateur Seismology Complete Wrath of the Ripper EXP, cash; rare/epic assault rifle Yes

    (Similar format continues for each mission.)


    All Carcadia Burns Side Missions

    Mission Name Quest Giver Start Location Prerequisites Rewards Repeatable?
    And Welcome To The Jam Echo Log near corpse Rock formation south of Site Unseen Complete Carcadia Burns main missions EXP, cash No
    Enter The Electi: Part 1 Leader Kassandra Carcadia Complete Wrath of the Ripper + Siege EXP, cash, Eridium No
    Enter The Electi: Part 2 Leader Wilem Carcadia Complete Part 1 + Wrath of the Ripper + Siege EXP, cash, Eridium No
    Fault Hunting Leopold Society for Amateur Seismology Complete Wrath of the Ripper EXP, cash; defecting assault rifle Yes
    Her Own Funeral Carcadia (main building) Complete Carcadia Burns main missions EXP, cash, Eridium No
    PB&J Beach north of Tariffton Complete Carcadia Burns missions EXP, cash, Eridium No
    Potty Mouth Embracer’s Bluff Complete Wrath + Siege EXP, cash; rare/epic assault rifle; ECHO-IVIV Yes
    Primordial Vault: Carcadia Altar near Crumblehall Capture Silos + Key Fragments EXP, cash, Eridium; Epic shotgun; Stamina upgrade Yes
    Ripples And Rituals Broken bridge at Site Unseen Complete Carcadia Burns EXP, cash, Eridium No
    The Council Divided Levaine Carcadia Complete Parts 1 & 2 EXP, cash, Eridium; rare/epic assault rifle; Vault Hunter Style Yes
    The Power Ballad of Rodd Vomit Lila FullFolja Couch Pit Complete A Lot To Process + Carcadia Burns EXP, cash; SMG Yes
    Vend Of The Line Penelope Streams Carcadia Complete Ripper + Siege + Unpaid Tab EXP, cash; guaranteed legendary No
    Vicious New Cycle Penelope Streams Cliff south of Crumblehall All Carcadia Burns + Vend of the Line EXP, cash No

    (Note: Full list similarly detailed.)


    This summarizes the variety and mechanics of side missions across Borderlands 4, including how to unlock, repeat, and farm rewards from them.

  • SpaceX Launches New Spaceship to ISS

    SpaceX Launches New Spaceship to ISS

    SpaceX has successfully launched a newly designed Cygnus spacecraft to the International Space Station (ISS) as part of the CRS-23 mission.

    The launch took place from Space Launch Complex 40 (SLC-40) at Cape Canaveral Space Force Station in Florida on Sunday evening. The Northrop Grumman Cygnus XL spacecraft, loaded with supplies for the ISS, lifted off smoothly.

    You can see the Falcon 9 rocket’s liftoff below:

    [Video or picture of Falcon 9 launch]

    A short time after launch, the Cygnus XL spacecraft was on its way toward the station:

    [Update tweet about separation]

    Approximately eight minutes after takeoff, the first stage of the Falcon 9 rocket landed back at Landing Zone 2 (LZ-2) at Cape Canaveral.

    This marks the fourth flight for this particular booster, which previously supported missions for Ax-4, Crew-11, and a Starlink deployment. Thanks to SpaceX’s reusable rocket technology, the booster is now ready for future launches after refurbishment.

    The Cygnus XL is scheduled to berth with the ISS around 6:35 a.m. Eastern Time on Wednesday, September 17. Unlike earlier versions, this model is larger and more capable, able to carry up to 11,000 pounds (about 5,000 kg) of cargo—33% more than the previous version, which could hold approximately 8,500 pounds (around 3,855 kg).

    This new spacecraft replaces the older Enhanced variant that first launched in 2015. Its increased size and capacity will enable it to deliver more supplies and research equipment to the station, supporting a variety of scientific and operational needs.

    Ryan Tinter, vice president of Civil Space Systems at Northrop Grumman, explained the importance of this mission, stating, “It’s really critical because we can deliver significantly more science, as well as more cargo before launch, which helps reduce costs per kilogram for NASA.” He emphasized that establishing these reliable commercial transportation options is key to the future of low-Earth orbit activities and space logistics.

    Like earlier Cygnus models, this version does not dock automatically. Instead, it is captured manually by the station’s Canadarm2 robotic arm and then attached to the Unity module.

    The Cygnus XL can remain attached to the station for up to 200 days, after which it will depart and disintegrate upon re-entry into Earth’s atmosphere.

    [Insert image of the Cygnus XL spacecraft]

    Northrop Grumman’s goal with this improved design is to enhance cargo capacity and streamline resupply missions, playing a vital role in the ongoing development of commercial space activities.

  • How To Watch SpaceX Crew-11 Launch To The ISS

    How To Watch SpaceX Crew-11 Launch To The ISS

    SpaceX and NASA are finalizing preparations for the upcoming crewed mission to the International Space Station (ISS).

    On July 31, NASA astronauts Zena Cardman and Mike Fincke, Japanese astronaut Kimiya Yui, and Russian cosmonaut Oleg Platonov will launch toward the space station aboard a SpaceX Crew Dragon spacecraft, which will be deployed by a Falcon 9 rocket.

    This mission marks Cardman’s and Platonov’s first spaceflights, Yui’s second, and Fincke’s fourth journey into space.

    This will be the 11th crew rotation mission operated by SpaceX’s human space transportation system, and its 12th crewed flight—including the Demo-2 test—to the ISS, part of NASA’s Commercial Crew Program.

    The crew is expected to stay on the station for at least six months, engaging in various scientific experiments and potentially conducting spacewalks outside the orbital facility.

    A launch from Launch Complex 39A at NASA’s Kennedy Space Center in Florida is scheduled for approximately 12:09 p.m. ET on July 31. Preparatory activities and the launch itself will be broadcast live starting several hours before liftoff.

    Viewers can follow the launch on the video feed available at the top of this page, as well as on SpaceX’s official X account and NASA’s live stream platform.

    Weather conditions or technical issues could lead to a postponement, and updates will be provided through SpaceX and NASA’s social media channels.

    If you tune in early, you’ll witness the astronauts arriving at the launchpad and boarding the Crew Dragon spacecraft atop the Falcon 9 rocket.

    Multiple cameras positioned around the launch site will track the rocket’s ascent, while inside the capsule, onboard cameras will capture the astronauts preparing for launch. Live commentary will explain each step, accompanied by real-time audio communication between Mission Control and the crew inside the spacecraft.

  • Completing the Foggy Dilemma Mission: Xenoblade Chronicles X Guide

    Completing the Foggy Dilemma Mission: Xenoblade Chronicles X Guide

    Phog, a downloadable content character from the original Japanese version of Xenoblade Chronicles X, made a free appearance in the West and is now available in the Definitive Edition. While the Switch version adds plenty of new features, Phog remains true to his character—thoughtful yet a bit forgetful.

    This guide will help you navigate Phog’s recruitment mission, titled ‘Foggy Dilemma.’ You’ll find out how to begin, where to complete the necessary tasks, and learn more about your new companion. Let’s get started!

    How to Start ‘Foggy Dilemma’

    To begin the ‘Foggy Dilemma’, you must first complete Chapter 4’s main story mission, ‘The Ganglion Menace’. However, there’s a unique twist to this affair.

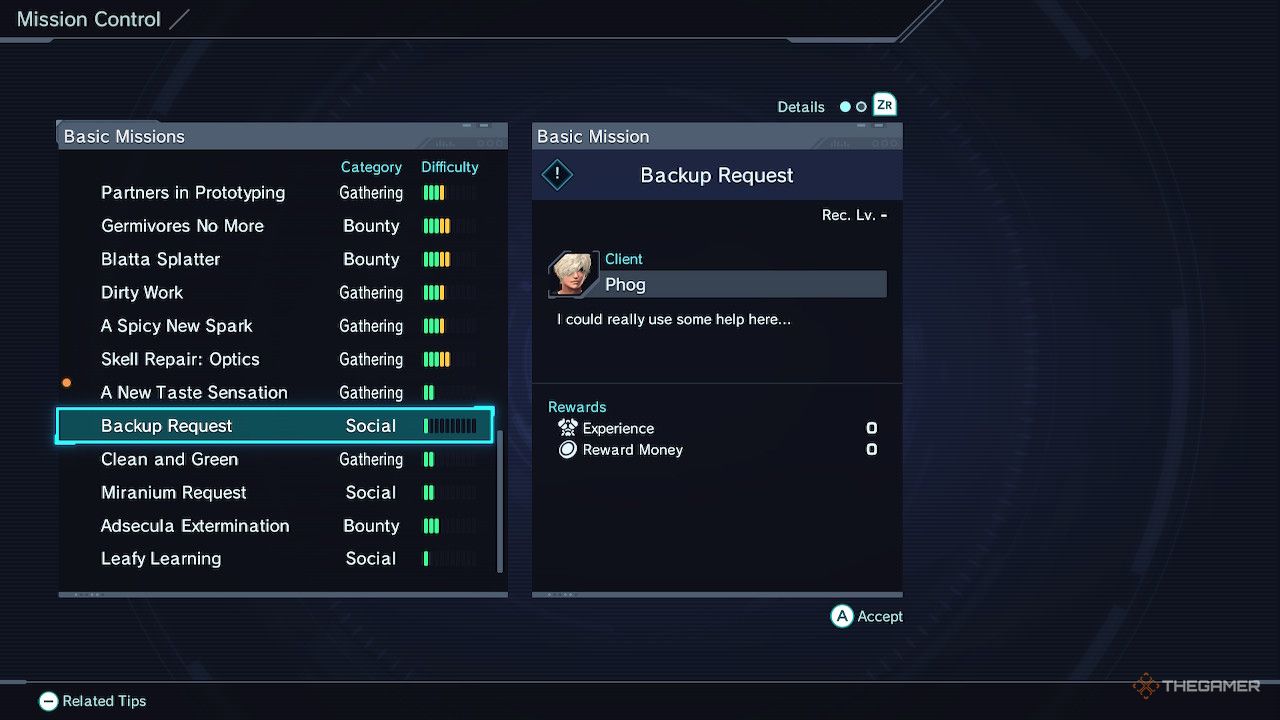
    You’ll need to start with the mission titled ‘Backup Request’. This Basic Mission can be found at Mission Control in the BLADE Concourse of New Los Angeles. Be sure to accept this brief quest as it will lead you to Phog.

    Many players have encountered issues getting ‘Backup Request’ to appear at Mission Control. First, check that you don’t have the maximum limit of 30 Basic Missions active at once, as that could block it from popping up. Make sure you’ve finished Chapter 4, and if it still doesn’t show, try completing a few other quests, return, and keep trying.

    You will find Phog near the Water Purification Plant in the Residential District. Talk to him and enjoy your dialogue choices, as they don’t affect the quest’s outcome. It’s all just for fun!

    Forget-Me-Not

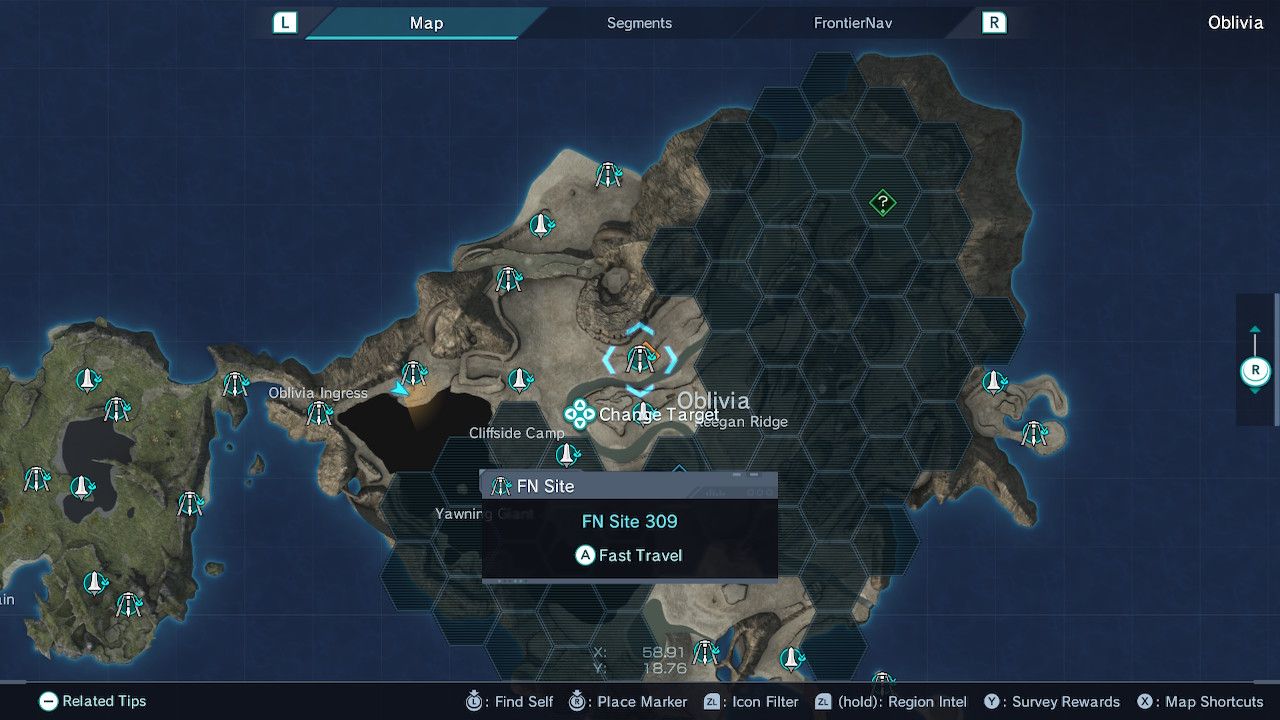
    FN Site 309 in Xenoblade Chronicles X

    Phog requires your assistance in investigating some faulty data probes located in Oblivia. Your first stop is near FN Site 309, situated in the heart of Oblivia. If you have explored this area previously, you can fast travel there.

    While ‘Foggy Dilemma’ features straightforward objectives, be aware that there are some strong creatures nearby. The level 27 beast near your initial location, Lake Falsaxam, can be quite challenging, especially if you’re under-leveled, so make sure to avoid it if you’re much lower in level.

    After the cutscene at the lake, follow the quest marker for several hundred meters. You’ll arrive at Aaroy Plain shortly. After another brief scene, return to your original location, where you’ll find that Phog has surprisingly forgotten the entire trip!

    You’ll head back to the second location afterward, but as seasoned players of Xenoblade Chronicles X advise newcomers, approach the objective during the night. You will face a battle soon, and there’s a level 65 Tyrant that tends to wander into the area during the day.

    Completing the Mission

    Prone in Oblivia in Xenoblade Chronicles X

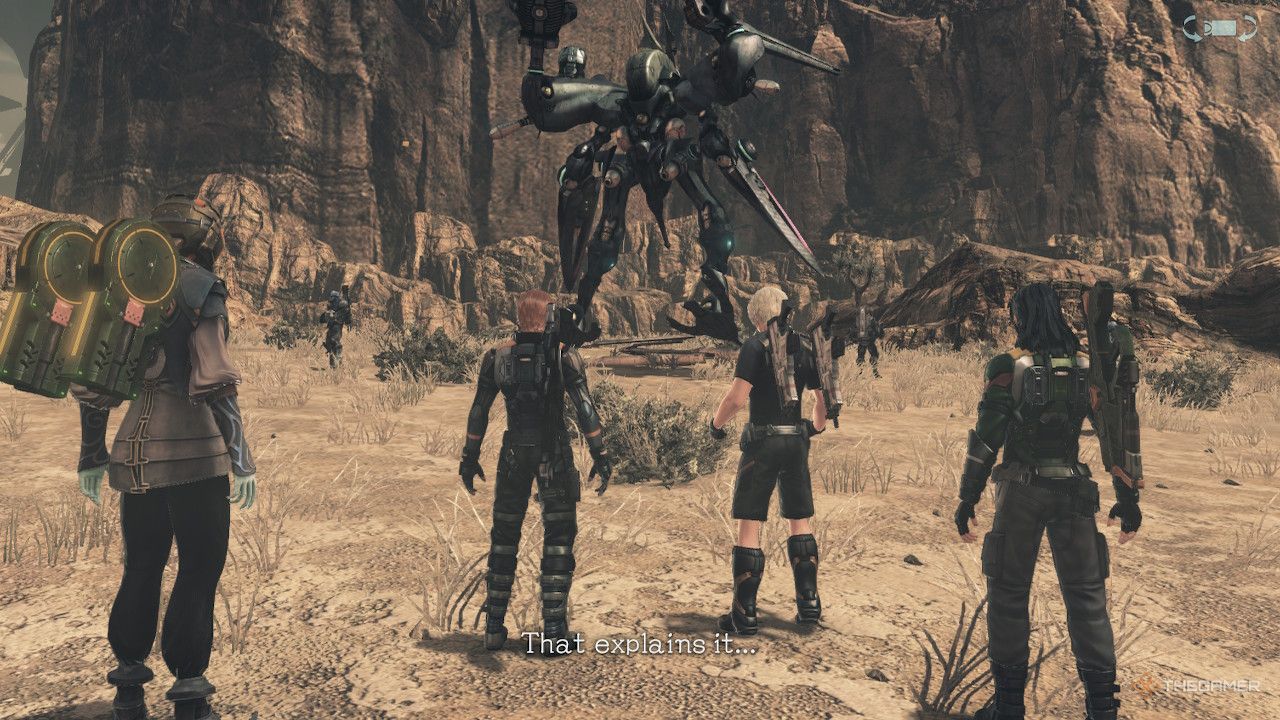
    The Prone you will face aren’t too challenging, but their mech, called a Qmoeva Divider, can be a tougher opponent.

    Despite being level 14 (and you may not be much higher), it can absorb a number of standard attacks. Use debuffs to weaken it if possible and keep an eye on your team’s health.

    Once you’ve dealt with the enemies, ‘Foggy Dilemma’ will be marked as complete, and Phog will officially join your team! Phog is classified as a Winged Viper. However, from our perspective, he’s not the strongest member to have in your party. While he can hold his own, he’s basically a more limited version of Elma, who also comes with the added benefit of being just a bit cooler.

    If you choose to bring him along, make sure to utilize his abilities like Shadow Runner, Hundred Shells, Electric Surge, and Primer Arts, while upgrading Background Noise and Master Edge for Skills. Or you might want to experiment with different approaches—Phog has worked reasonably well for us with this essential setup.

  • Completing Captis Rune Solutions – Destiny 2: Heresy Guide

    Completing Captis Rune Solutions – Destiny 2: Heresy Guide

    Quick Links

    How To Start Mission Captis

    If you’re diving into the Heresy episode of Destiny 2, be ready for some entertaining short story missions. These missions provide quick gameplay and deliver memorable story elements. This includes Mission Captis, which features a unique puzzle that may stump some players. Prepare to take out lots of Acolyte Eyes; many will be needed to complete the mission.

    Here’s a brief guide on finishing Mission Captis, detailing the challenges you’ll face, including the rune puzzles that pop up during the adventure. We will also explain how to start this mission and what it unlocks upon completion.

    Starting Mission Captis

    Mission Captis is the concluding story mission in Act 2 of Heresy. Once you log into Destiny 2 during this season and own the Heresy content, you will activate the quest chain without delay. Progress through the quest until this mission opens up, then head to the Last City map to begin. It’s a manageably short mission that can be played solo, although expect to encounter a tricky puzzle midway through.

    Complete The Binding

    Head to Eris Morn’s location on the Dreadnaught. She will instruct you to stand on a nearby Hive plate, which will kick off the binding ritual. Shortly thereafter, the Subjugator will appear, immune to all damage. Your main objective isn’t to defeat the Subjugator. Instead, focus on clearing out the adds until a wall of Acolyte Eyes appears.

    How To Solve The Symbol Puzzle

    A wall of eyes will emerge in the center of the arena, and they will regenerate if you don’t shoot the right ones. Pay attention to the floating Hive Rune near the Subjugator. Your task is to get the wall of Acolyte Eyes to match that symbol. This mechanic is similar to the one you encountered in the Witness fight in Salvation’s Edge.

    For instance, the first Hive Rune resembles a lower-case "n" shape with two ellipses on top. There will be five eyes in total at the top. Since you need three for the ellipses, shoot two of them to create the desired shape. This will recreate the symbol perfectly and summon the next puzzle wall.

    The second symbol looks like a "V," affectionately nicknamed "pizza" by players. Adjust the eyes as needed to recreate the visual that’s shown above; the goal is to create a pointed bottom.

    Lastly, you’ll need to form the circular Hive Rune. Eliminate the three eyes in the middle to complete the symbol.

    Once you’ve completed all three rune formations, defeat the remaining adds to end the mission. You will find Sloane waiting for you at Eris’ location in The Last City for a debrief on the successful operation. This marks the end of the story for Act 2, and you can continue the adventure once Act 3 opens up right after this mission.

  • NASA Shares First Photos Of Starliner Astronauts After Mission

    NASA Shares First Photos Of Starliner Astronauts After Mission

    Butch Wilmore just hours after returning to Earth.
    NASA astronaut and Starliner crewmember Butch Wilmore shortly after returning to Earth. NASA

    NASA has released the first pictures of astronauts Butch Wilmore and Suni Williams after their remarkable nine-month journey in space, which was originally planned for just eight days.

    The duo was photographed alongside fellow NASA astronaut Nick Hague and Roscosmos cosmonaut Aleksandr Gorbunov. They all were part of SpaceX’s Crew-9 mission and successfully returned to Earth from the International Space Station (ISS) on Tuesday.

    The images of Wilmore and Williams were taken after their arrival at the Johnson Space Center in Houston following a splashdown off the coast of Florida earlier that day.

    Both astronauts appeared to be in great condition, standing unaided despite the extended time spent in microgravity. Wilmore had a big smile as he greeted officials at the space center.

    NASA astronaut Suni Williams just hours after returning from orbit.
    NASA

    Williams, also standing, smiled brightly as she stepped off the aircraft. The two astronauts had reached orbit aboard Boeing’s Starliner spacecraft back in June 2024. However, the initial crewed flight faced challenges with its thrusters during the journey to the ISS. While they managed to dock successfully, engineers couldn’t confidently resolve the technical difficulties, prompting the decision to return the spacecraft empty, which left Wilmore and Williams awaiting a ride home for nine months.

    Despite the unexpected delay, both astronauts thrived during their time in space and continued to work alongside their ISS crewmates, just as they had done on previous long-term missions aboard the orbital outpost.

    Wilmore and Williams were given seats on SpaceX’s Crew-9 Crew Dragon spacecraft, which arrived at the ISS in September of last year, bringing Hague and Gorbunov for a six-month mission.

    The crew made their return early on Wednesday, splashing down off the coast of Florida, where they were welcomed back by a playful pod of dolphins shortly after landing in the ocean.

  • Stunning Eclipse View Captured by Blue Ghost Mission

    Stunning Eclipse View Captured by Blue Ghost Mission

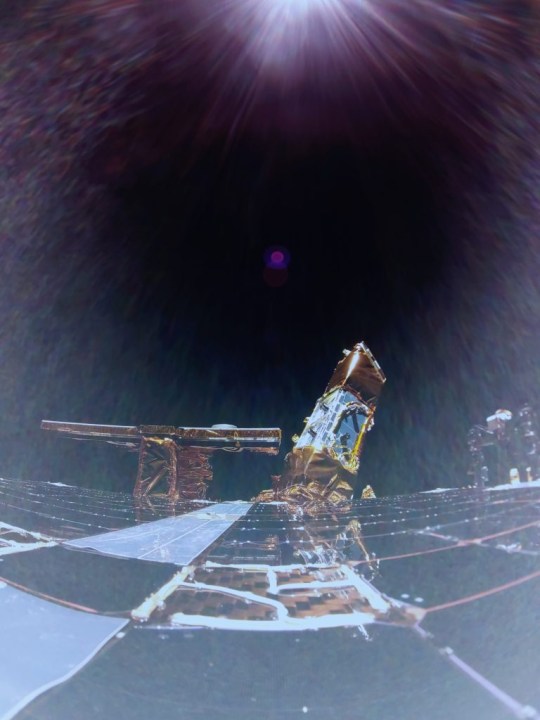
    Earlier this month, Firefly Aerospace launched its Blue Ghost mission with the goal of reaching the moon. The mission has already produced remarkable footage showing the Earth obscuring the sun from space. Currently, the Blue Ghost lander is in a low Earth orbit, fine-tuning its trajectory as it prepares for its journey to the moon over the upcoming weeks. While en route, it’s actively collecting scientific data and testing its communication systems.

    Five days into the mission, Firefly announced, “We’ve covered 220,000 miles and transmitted 1.4 GB of data!” Their message emphasized the significant accomplishments of their team, mentioning that, “There’s a long road ahead, but our #GhostRiders are making remarkable progress!”

    Initial image from space of Firefly’s Blue Ghost mission 1 lunar lander during its 45-day transit to the Moon, showcasing the X-band antenna and NASA’s LEXI payload.
    Initial image from space of Firefly’s Blue Ghost mission 1 lunar lander as it embarks on its 45-day journey to the Moon, featuring the top deck with the X-band antenna and NASA’s Lunar Environment heliospheric X-ray Imager (LEXI) payload. Firefly Aerospace

    The company also released an initial photograph of the lander in orbit, revealing some of the six NASA payloads onboard, including the X-ray instrument LEXI. This instrument will examine the Earth’s magnetosphere from lunar orbit using X-ray wavelengths.

    The mission shared an exciting update—video footage showing the Earth moving across the sun, creating an eclipse:

    Blue Ghost Mission 1 – Earth eclipse from Orbit

    Additionally, Firefly Aerospace made a significant announcement regarding a signal received from the Lunar GNSS Receiver Experiment (LuGRE), a collaboration with NASA and the Italian Space Agency. This experiment achieved a remarkable feat by connecting with a global satellite system from a distance of 205,674 miles, setting a new record. Firefly noted, “This step toward establishing a navigation solution for the Moon marks another successful milestone for our payload partners aboard Blue Ghost.”

    According to NASA, “This achievement indicates that Earth-based GNSS constellations can be utilized for navigation at nearly 90% of the distance to the Moon, marking a groundbreaking Earth-Moon signal distance record. It also highlights the potential of integrating multiple GNSS constellations, like GPS and Galileo, for navigation purposes.”

    The Blue Ghost lander will continue its orbit around the Earth for another 25 days before embarking on a four-day journey to the moon, with plans to enter lunar orbit in early March.


  • Firefly Aerospace Launches Blue Ghost Mission To The Moon

    Firefly Aerospace Launches Blue Ghost Mission To The Moon

    This morning, Firefly Aerospace successfully launched a moon lander equipped with a range of NASA science instruments and technology demonstrations. The mission, known as Blue Ghost, lifted off aboard a SpaceX Falcon 9 rocket from NASA’s Kennedy Space Center in Florida at precisely 1:11 a.m. ET on Wednesday, January 15.

    The primary goal of this mission is to achieve a soft landing on the lunar surface. If accomplished, it will mark only the second successful moon landing by a private company, following the Odyssey landing by Intuitive Machines last year. Both missions are integral to NASA’s Commercial Lunar Payload Services program, which aims to have commercial partners deliver scientific payloads to the moon in preparation for the upcoming Artemis human exploration missions.

    “This mission embodies the bold spirit of NASA’s Artemis campaign – a campaign driven by scientific exploration and discovery,” remarked NASA Deputy Administrator Pam Melroy. “Every flight we participate in is a crucial step towards establishing a sustainable human presence on the moon, Mars, and beyond. Each scientific instrument and technology demonstration takes us closer to making our vision a reality. Congratulations to the teams at NASA, Firefly, and SpaceX for this successful launch.”

    Following launch vehicle separation, Firefly’s Blue Ghost lunar lander acquired signal and completed on-orbit commissioning.
    After separating from the launch vehicle, Firefly’s Blue Ghost lunar lander established communication and completed its on-orbit commissioning.
    Firefly Aerospace

    Following the launch, the spacecraft successfully separated from its rocket at 2:17 a.m. ET and made contact with ground control. The team carried out checks to verify the spacecraft’s condition and status, confirming that all systems were operational and data transfer was functioning correctly.

    The Blue Ghost will remain in Earth orbit for approximately 25 days before embarking on its four-day journey to the moon, where it will spend 16 days orbiting the lunar surface. The mission aims to execute a landing on Sunday, March 2, in the Mare Crisium basin—a 300-mile-wide crater located on the moon’s near side—followed by conducting experiments related to lunar drilling and sample collection.

    “On behalf of Firefly, I want to extend our gratitude to SpaceX for their precise deployment into our target orbit,” stated Jason Kim, CEO of Firefly Aerospace. “The mission is now in the capable hands of the dedicated Firefly team. Having completed extensive testing and mission simulations, we are focused on executing our planned operations, achieving a successful soft landing on the lunar surface, and paving the way for humanity’s return to the moon.”

  • Amazing Images Of Mercury From The BepiColombo Mission

    Amazing Images Of Mercury From The BepiColombo Mission

    The European Space Agency’s (ESA) BepiColombo mission recently completed another flyby of Mercury, returning intriguing images of this relatively unexplored inner planet. On January 8, 2025, the spacecraft executed its sixth flyby of Mercury, using the planet’s gravitational pull to adjust its trajectory for a planned orbital insertion in 2026.

    During this flyby, the spacecraft swooped within a mere 180 miles of Mercury’s surface, providing a prime opportunity to capture detailed images. It passed over the planet’s dark side, which is oriented away from the sun, then soared above its north pole before revealing the illuminated northern hemisphere. The images were taken using three onboard monitoring cameras, labeled M-CAM 1, 2, and 3, which produce black-and-white pictures with a resolution of 1024 x 1024 pixels. Although the resolution might seem modest, the images hold significant scientific value, showcasing numerous surface characteristics of Mercury.

    Image from the BepiColombo mission during its sixth flyby of Mercury on January 8, 2025.
    This image is part of an impressive series captured by the ESA/JAXA BepiColombo mission during its sixth gravity assist maneuver at Mercury. ESA/BepiColombo/MTM

    The remaining missions will not yield any additional close-up photographs of Mercury from the monitoring cameras, as the spacecraft is set to separate into different components. Among these are the Mercury Transfer Module, which is tasked with ferrying the mission to Mercury, and two orbiters: the Mercury Planetary Orbiter and the Mercury Magnetospheric Orbiter, which will individually enter orbit around the planet. Since the monitoring cameras are part of the Mercury Transfer Module, further imaging opportunities will be lost.

    Sunlit northern hemisphere of Mercury captured by M-CAM 1 during BepiColombo's flyby on January 8, 2025.
    ESA/BepiColombo/MTM

    The images reveal a landscape dotted with craters, including some near the north pole that are so steep that their floors remain in constant shadow. These dark areas may harbor water ice, and exploring this possibility is a significant focus of the mission.

    Long-exposure photo of Mercury's dark north pole captured by M-CAM 1 during the flyby on January 8, 2025.
    This long-exposure image of Mercury’s north pole was taken by M-CAM 1 when the spacecraft was approximately 787 kilometers from the surface. ESA/BepiColombo/MTM

    Furthermore, the exact composition of Mercury remains largely a mystery, making the detailed analysis of its materials another key goal of the mission, which may provide insights into the planet’s formation and characteristics.

  • Kell’s Autumn Adventure: A Unique Mission Guide

    Kell’s Autumn Adventure: A Unique Mission Guide

    Kell’s Fall is the newest Exotic mission in Destiny 2. Players return to the Tangled Shore to hunt down Fikrul, who is guarded by some of the fiercest Scorn enemies in a deserted watchtower near the coast. If you manage to overcome these challenges and defeat Fikrul, you’ll receive a new Exotic Shotgun along with seasonal gear.

    Upon completing this mission, you will obtain Slayer’s Fang, an Exotic Shotgun featuring ricocheting shots and granting truesight on kills. This weapon is incredibly powerful if used correctly, but first, you’ll have to unlock it. Below is a detailed guide to navigating the Kell’s Fall mission, including the various encounters and difficulty levels.

    Kell’s Fall Difficulty Options

    Like most Exotic missions, Kell’s Fall offers two levels of difficulty: Normal and Expert. In Normal mode, the Power requirement is set at 1,995, with only elemental surges and enemy threats enabled. The Expert mode, however, features Champions, an Overcharge mechanic, and increases the Power requirement to 2,015 with a -15 Power delta, making enemies significantly tougher.

    The activity objectives and puzzles remain the same across both modes.

    Kell’s Fall Modifiers

    Power Cap

    1,955

    Surges

    Void and Strand

    Threat

    Void

    Expert Difficulty

    Power Cap

    2,015

    Champions

    Overload and Unstoppable

    Surges

    Void and Arc

    Threat

    Void

    Overcharge

    Shotguns & Artifact Weapons

    Shielded Enemies

    Solar and Void

    Scorched Earth

    Enemies throw grenades significantly more often.

    Battle the Trickster

    Your journey in Kell’s Fall begins at the Dreaming City’s watchtower on the Tangled Shore, a location last seen during the Forsaken campaign. When you spawn, turn right and follow the ledges to reach the watchtower. If you encounter Scorn along the path, you’re headed in the right direction.

    Once you arrive at the watchtower’s courtyard, a Trickster Baron and a group of Scorn will ambush you. You’ll need to deplete about a third of the Trickster’s health to escape. The key mechanic here is that the Trickster becomes immune after it stops moving, so make sure to unleash your Heavy ammo on it during these moments. After the Trickster retreats, proceed into the tower.

    Investigate the Fortress

    In the fortress, you’ll first notice a massive pipe organ. This instrument won’t help in completing the mission just yet, but you can find codes throughout Kell’s Fall that can unlock bonus loot. For now, head up the stairs to your left and light the brazier to progress.

    During certain encounters and puzzles, you’ll come across unlit braziers. You need to light three of these to unlock a nearby door, and there is no timer for this task.

    After lighting the brazier, you’ll enter a hallway with a large branch at one end. Look past the closest branch, and you’ll find a wall of debris that can be destroyed with your weapon. Slide through the opening to discover a peculiar mirror. Shoot it to shatter the glass and reveal your next path.

    Stepping through this mirror transports you to a mirrored version of reality, where you’ll face a few Dread and Scorn foes. Nothing overly challenging for a well-prepared Guardian. Continue through this linear path to find another mirror, break it, and return to your original dimension.

    Once back, activate two braziers nearby. One should appear close to the portal, while the other will be located up the stairs. Lighting both will open the way to the first encounter. Next, break the rubble on the right wall, slide through, and follow the path until you reach the fighting pit.

    Defeat the Mad Bomber

    Your primary goal for this encounter is to enter the mirror realm, gain Revenant Empowerment, take down two Abominations, and then defeat the Mad Bomber. Enemies will spawn around the fighting ring when the encounter begins. You can either clear them out now or start the mechanics. A mirror will begin cracking in the center of the room. Shoot it and walk inside.

    Inside the mirrored realm, you’ll find several Dread enemies, particularly Revenant Essentia, which is a variant of a Dread Weaver. Defeating them will drop three motes that grant Revenant Essence. You need ten stacks of this essence to damage immune enemies in the material realm. Once you collect ten stacks, use the mirror at the edge of the fighting ring to return.

    Revenant Essence lasts for 45 seconds, but collecting ten stacks will reset the timer.

    With Revenant Empowerment, you can now damage the previously immune Abomination foes in the chamber. There are two total, each located on opposite sides. Take your time; eliminating both will cause the Mad Bomber to spawn, along with additional enemies. Ensure that you’re prepared before taking down the second Abomination.

    The Mad Bomber behaves similarly to the variant from Forsaken, throwing explosives your way and being quite aggressive. There are no mechanics complicating the fight here. Bring out your strongest Heavy weapon and quickly cut down the boss’s health. Defeating the Mad Bomber ends this encounter.

    Find the Sanctum

    More revived barons await you as you delve deeper into the fortress. Your next destination is the sanctum, which you access via the exit door in the top-right corner of the fighting ring. Follow this path a short way until you arrive in a large, red-lit cavern. Follow the ledges and structures to your left. Climb as high as you can, and look across the chasm for an exit cave.

    Defeat the Mindbender

    Before starting this encounter, light three braziers in the material realm. You’ll find one behind the Rally Flag and two near the mirror in the next room. It’s important to bring a strong burst DPS Heavy weapon for this confrontation, as the damage phases have time limits.

    Entering the sanctum leads to a spacious area within the watchtower, where you will face the Mindbender. Just like the previous Trickster, you’ll need to deplete a third of the boss’s health for it to retreat but be aware of the two-minute timer while inside the mirror realm. It’s crucial to deal damage to the boss and escape before the timer expires.

    Luckily, the exit isn’t hard to find. Once you damage the boss sufficiently, head toward the hole on the left side of the sanctum. Upon sliding through, you’ll encounter several Thrall. Eliminate them and check the far end of the corridor for a Brazier. If one is present, light it.

    Then, backtrack halfway down the hall and make a left into a small cavern protected by a few Hive Wizards. Take them down, clear out the Acolytes, and use the mirror at the room’s end to make your escape.

    In the material realm, light two nearby braziers to unlock a door. Both braziers should appear based on your explorations. Once lit, return to the mirror, but don’t enter it just yet. Look up for a ledge behind the mirror that you can jump onto. Go inside to begin the second damage phase.

    This phase mirrors the first: damage the boss until it phases, then head through the exit door to find another mirror. You’ll return to the initial sanctum room but with another timer. Ensure that you eliminate the boss before time runs out.

    Defeat The Trickster Again

    Although not a significant encounter, this section serves as a precursor to the final battle. You’ll need to ascend a spiral staircase and take down the Trickster from earlier. This fight mirrors the start of the mission: wait for the Trickster to stop moving, then unleash your most powerful abilities and Heavy weapon. No wiping mechanics will penalize you here, so take your time. The doors at the staircase’s top will open once you defeat the boss.

    Defeat The Revenants

    Fikrul has transformed the throne room into a fortress, and it’s up to you to stop his plans. Before starting, make sure to equip a solid mid-range DPS weapon and a build focused on survivability. Grenade Launchers and Swords perform well in this fight.

    This encounter kicks off with you needing to eliminate Scorn enemies that spawn in the arena. Keep an eye on the mirror past Fikrul’s spawning area. After taking down enough foes, Fikrul will initiate a wipe mechanic. When you see him charging up his staff, jump through the mirror before the wipe kicks in.

    Inside the mirror realm, you’ll face a mix of Dread and Scorn foes, including Overload and Unstoppable Champions if you’re on Expert. Similar to the Mad Bomber fight, you’ll need to defeat Revenant Essentia in the arena to earn Revenant Empowerment. Collecting ten stacks allows you to return to the material realm to confront Fikrul directly. If you’ve completed the Act 3 quest, you’ll face Fikrul in the mirror realm instead.

    When fighting Fikrul, you need to damage the mirror to begin the damage phase. You only have a few seconds to inflict damage before you must escape; make the time count.

    The buffs you gathered earlier will allow you to damage the boss. Break the shield, then unleash everything you have to take him down. There’s no strict DPS window in the mirrored realm (except for the Fikrul scenario), so take your time, play it safe, and use your Super often, alongside your Heavy weapon. Finishing this encounter will complete Kell’s Fall and reward you with the Slayer’s Fang Exotic Shotgun.