Tag: Metaphor: ReFantazio

  • Completing All Neuras Follower Ranks in Metaphor: ReFantazio

    Completing All Neuras Follower Ranks in Metaphor: ReFantazio

    The universe of Metaphor: ReFantazio is filled with potential allies, many of whom will become loyal partners in combat. Neuras, while not a traditional party member, plays a crucial role. As the quirky pilot of your ship with a kind heart, he’s an essential companion in your quest for the throne.

    This guide outlines how to make Neuras a follower and provides tips on how to respond to his queries correctly. While you could choose to role-play rather than answer accurately, doing so will result in missing out on valuable Magla. So, if you’re aiming for perfection, keep reading!

    How to Make Neuras a Follower

    On June 14, head to the Gauntlet Runner’s Central Corridor. Talk to Neuras to begin the ‘Providing a Spark’ side quest. No need to worry about forgetting this step, as it’s automatically added to your quest log.

    Next, return to Martira and speak with the Gloomy Youth. They can be found in Thoroughfare Square, near some barrels by the exit. Doing this will mark Komero on your map, so set your course and enjoy the scene you unlock.

    Completing this quest not only unlocks Neuras as a follower, but also gives you the Gunner Archetype!

    Neuras’ Follower Ranks and Rewards

    First off, be sure to check out our detailed guide on Neuras’ Relics. You’ll need to collect all of these to advance his Bond path, so keep that guide handy as you work to befriend this charming character.

    Rank Number

    Ideal Responses

    Rank Reward

    One

    N/A

    • Neuras becomes a follower
    • Unlocks Gunner Archetype

    Two

    • Anything is fine.
    • “I’m definitely motivated.”
    • “So, you got distracted.”
    • Bombardier ability
    • Gunner Enlightenment

    Three

    • “Wish that were me.”
    • “You’re perfect for each other.”

    Four

    • “Aren’t igniters convenient?”
    • Anything is fine.
    • “This is actually a step up.”

    Five

    • Anything is fine.
    • “That’s just growth.”
    • Bombastic Bombardier ability
    • Gunner Veneration

    Six

    • “Good job holding onto it.”
    • “To the end and beyond.”

    Seven

    • Anything is fine.
    • “Anything for you, Neuras.”

    Eight

    • Anything is fine.
    • “There must be a reason.”
    • “Let’s destroy it!”
    • Gunner Archetype: Elite
    • Scion’s Essence
  • Best Strategies for Completing Heismay’s Rank Up Events in Metaphor: ReFantazio

    Best Strategies for Completing Heismay’s Rank Up Events in Metaphor: ReFantazio

    Many popular RPGs feature an endearing mascot character who accompanies the main group on their adventures. In Metaphor: ReFantazio, this character is Heismay, a former knight of the Shadowguard haunted by the grief of losing his son too soon.

    Although Heismay is a small, bat-like Eugief, his backstory is one of the most intricate and sorrowful in the game, unfolding beautifully with each rank of his follower bond. This guide will help you unlock Heismay as a follower and navigate each rank effectively.

    How to Unlock Heismay as a Follower


    Like other follower bonds in the game, Heismay’s bond is automatically unlocked on July 4th when you return to the Martira Inn. This bond enables any party member to learn the Thief Archetype, focusing on stealthy magic and rapid strikes. To advance Heismay’s bond beyond the first level, however, you need to achieve at least level two eloquence to connect with this Eugief.

    All Heismay Follower Ranks and Rewards


    The bond rank up screen that appears at the end of each bond conversation in Metaphor: ReFantazio.

    While choosing specific dialogue options during Heismay’s bond conversations isn’t mandatory, doing so will provide you with extra MAG to use later. Below is a table outlining how to unlock each rank of Heismay’s follower bond, the best dialogue choices for maximizing MAG, and the rewards associated with each bond level.

    Bond Rank

    Prerequisites

    Best Dialogue Options

    Rank Rewards

    One

    • Reach July 4th in the main story to automatically unlock Heismay’s follower bond.
      • Thief Archetype – The party can now study the Thief.

      Two

      • Unlock Heismay’s follower bond.
      • Reach level two eloquence.
      • Any option is valid.
      • Any option is valid.
      • Any option is valid.
      • Any option is valid.
      • Any option is valid.
      • Any option is valid.
      • Thief Enlightenment – Reduces the MAG cost of studying the Thief Lineage.
      • Preternatural Hearing – Shows the location of strong enemies on dungeon maps.

      Three

      • Reach follower rank two for Heismay’s follower bond.
      • “Shall we look somewhere else?”
      • “Well, he’d not be lonely.”
      • “No problem.”
      • “But it is my concern.”
      • Any option is valid.
      • “I know it’s difficult.”
      • Any option is valid.
      • Any option is valid.
      • “Let’s go already.”
      • Thief Archetype: Adept – The party can now study the Assassin.

      Four

      • Reach rank three for Heismay’s follower bond.
      • “I don’t mind.”
      • Any option is valid.
      • Any option is valid.
      • Any option is valid.
      • Any option is valid.
      • Scion’s Skill – Increases skill inheritance slots for the Thief Lineage to 2.

      Five

      • Reach rank four for Heismay’s follower bond.
      • Talk to Heismay while traveling via the Gauntlet Runner.
      • “Is that why you left?”
      • Any option is valid.
      • “There’s nobility in that.”
      • Any option is valid.
      • Any option is valid.
      • Any option is valid.
      • Thief Veneration – Significantly reduces the MAG cost of studying the Thief Lineage.
      • Battle Aura – Increases experience gained by Heismay while in reserve.

      Six

      • Reach rank five for Heismay’s follower bond.
      • “Taken it out of the village.”
      • “Just as you deduced!”
      • Any option is valid.
      • “Let’s talk to them.”
      • Scion’s Merit – Increases skill inheritance slots for the Thief Lineage to 3.
      • Battle Hypnosis – Heismay gains experience at a normal rate while in reserve.

      Seven

      • Reach rank six for Heismay’s follower bond.
      • Achieve rank four in your Imagination stat.
      • Talk to Heismay at night on the Gauntlet Runner during a trip.
      • Any option is valid.
      • Any option is valid.
      • Thief Archetype: Elite – The party can now study the Ninja.

      Eight

      • Reach rank seven for Heismay’s follower bond.
      • Speak to Heismay while traveling on the Gauntlet Runner.
      • Any option is valid.
      • “I’m sure he’d want that.” or “That day’s fast approaching.”
      • “I’m honored.”
      • “I won’t let anyone die.”
      • Scion’s Essence – Increases skill inheritance slots for the Thief Lineage to 4.
      • Assassinate – Greatly boosts Heismay’s ambush damage against stunned foes.
      • Grand Fantasy – Heismay is primed to earn a new Heroic Embodiment.

      Once you’ve achieved the highest follower bond level with Heismay, your entire party will be able to access all Thief Lineage Archetypes. Moreover, Heismay will gain the ability to elevate to the Royal Thief Archetype, the game’s fastest and most powerful Archetype.

      Unlocking the Royal Thief Archetype requires significant effort. To realize his full potential, Heismay must reach level 20 in the Ninja Archetype and level 15 in both the Dragoon and Tycoon Archetypes, along with a cost of 30,000 MAG for the upgrade. However, this investment is well worth it, given the unmatched speed and power this Archetype offers.

      Ultimately, Heismay stands out as one of the most endearing and intricate characters in Metaphor: ReFantazio, showcasing a distinctive playstyle and character design. We hope this guide enhances your appreciation for this uniquely tragic yet charming Eugief during your journey.

    • Top Strategies for Completing Hulkenberg’s Rank Up Events in ReFantazio

      Top Strategies for Completing Hulkenberg’s Rank Up Events in ReFantazio

      As you dive into Metaphor: ReFantazio, one character that stands out immediately is Hulkenberg—a fierce woman with striking red hair and a massive, imposing sword. Once a knight who served the prince, she now joins your team as a loyal companion on your adventure.

      Hulkenberg’s follower bond becomes available early in your journey, but you have plenty of time to develop it throughout the game. This guide will help you meet her expectations as a warrior and strengthen your bond with one of your most powerful allies.

      How to Unlock Hulkenberg as a Follower

      Luckily for you, earning Hulkenberg’s allegiance doesn’t involve any challenging quests. She will automatically join your party as a follower on June 10th.

      By unlocking her follower bond, you gain access to the robust Knight Archetype and future bond conversations with her.

      All Hulkenberg Follower Ranks and Rewards

      Like other follower bonds in the game, Hulkenberg’s bond features eight ranks, each accompanied by a conversation and choices that can enhance your relationship. While your follower rank will increase after each interaction, some dialogue options will give you more MAG value than others. Below is a comprehensive table detailing each rank, its requirements, and the best dialogue options.

      Rank Number Prerequisites Best Dialogue Options Rewards
      One
      • Automatically unlock on June 10th.
      • Knight Archetype – Your party can now study the Knight.
      Two
      • Unlock Hulkenberg’s follower bond.
      • Complete the Grand Cathedral Dungeon, then talk to Hulkenberg at the Hushed Honeybee Inn.
      • “Sounds like a worthy opponent.”
      • Any option works.
      • “Are you okay?”
      • Knight Enlightenment – Lowers MAG costs for studying the Knight Lineage.
      • Guard Duty – Hulkenberg can protect the protagonist from damage to their weakness.
      Three
      • Achieve follower bond rank 2 with Hulkenberg.
      • Speak to Hulkenberg while traveling on the Gauntlet Runner.
      • “I’m good at staying versatile.”
      • “Push me harder!”
      • “This isn’t like you.”
      • Knight Archetype: Adept – Now you can study the Magic Knight.
      Four
      • Achieve follower bond rank 3 with Hulkenberg.
      • Any option works.
      • Any option works.
      • “I’m used to it.”
      • Scion’s Skill – Increases skill inheritance slots for the Knight Lineage to 2.
      Five
      • Achieve follower bond rank 4 with Hulkenberg.
      • Talk to Hulkenberg while traveling to a destination on the Gauntlet Runner.
      • Any option works.
      • Any option works.
      • Any option works.
      • Any option works.
      • Any option works.
      • Knight Veneration – Greatly reduces MAG costs for studying the Knight Lineage.
      • Battle Aura – Experience gain for Hulkenberg increases while in reserve.
      Six
      • Achieve follower bond rank 5 with Hulkenberg.
      • Talk to Hulkenberg while traveling on the Gauntlet Runner.
      • “A bold mood.” or “You’d risk your life?”
      • “You’ve got this.”
      • “You show him.” or “I know you can do it.”
      • “If only to witness your victory.”
      • Scion’s Merit – Increases skill inheritance slots for the Knight Lineage to 3.
      • Battle Hypnosis – Experience gain for Hulkenberg remains normal while in reserve.
      Seven
      • Achieve follower bond rank 6 with Hulkenberg.
      • Have at least rank 4 wisdom.
      • Approach Hulkenberg while not traveling on the Gauntlet Runner.
      • Any option works.
      • Any option works.
      • Any option works.
      • Any option works.
      • Any option works.
      • “You are a model knight.”
      • Knight Archetype: Elite – The party can now study the Paladin and Dark Knight.
      Eight
      • Achieve follower bond rank 7 with Hulkenberg.
      • Talk to Hulkenberg while traveling with the Gauntlet Runner.
      • “But it’s not over yet.”
      • “I’ll forge our path forward.”
      • Any option works.
      • Scion’s Essence – Increases skill inheritance slots for the Knight Lineage to 4.
      • Special Guard Duty – High chance for Hulkenberg to defend the protagonist from an attack on their weakness.
      • Grand Fantasy – Hulkenberg is ready to gain a new Heroic Embodiment.

      By completing Hulkenberg’s follower bond, your party gains access to the most powerful Archetypes from the Knight Lineage, and Hulkenberg can transcend those Archetypes to become a Royal Knight. This is one of the top Archetypes in the game, and it truly represents her peak potential.

      To elevate Hulkenberg to Royal Knight status, you’ll need to level her up significantly in several Archetypes. Specifically, she must achieve level 20 as a Paladin, level 15 as a Dark Knight, and level 15 as an Elemental Master. Additionally, you’ll need to pay a considerable fee of 30,000 MAG to unlock it officially.

      Hulkenberg stands out as one of the best companions in Metaphor: ReFantazio, both in character and combat. We hope this guide enhances your appreciation for her role in your party.

    • Conquering the Elegy of the Soul in Metaphor Refantazio

      Conquering the Elegy of the Soul in Metaphor Refantazio

      Confronting the Elegy of the Soul in Metaphor: ReFantazio

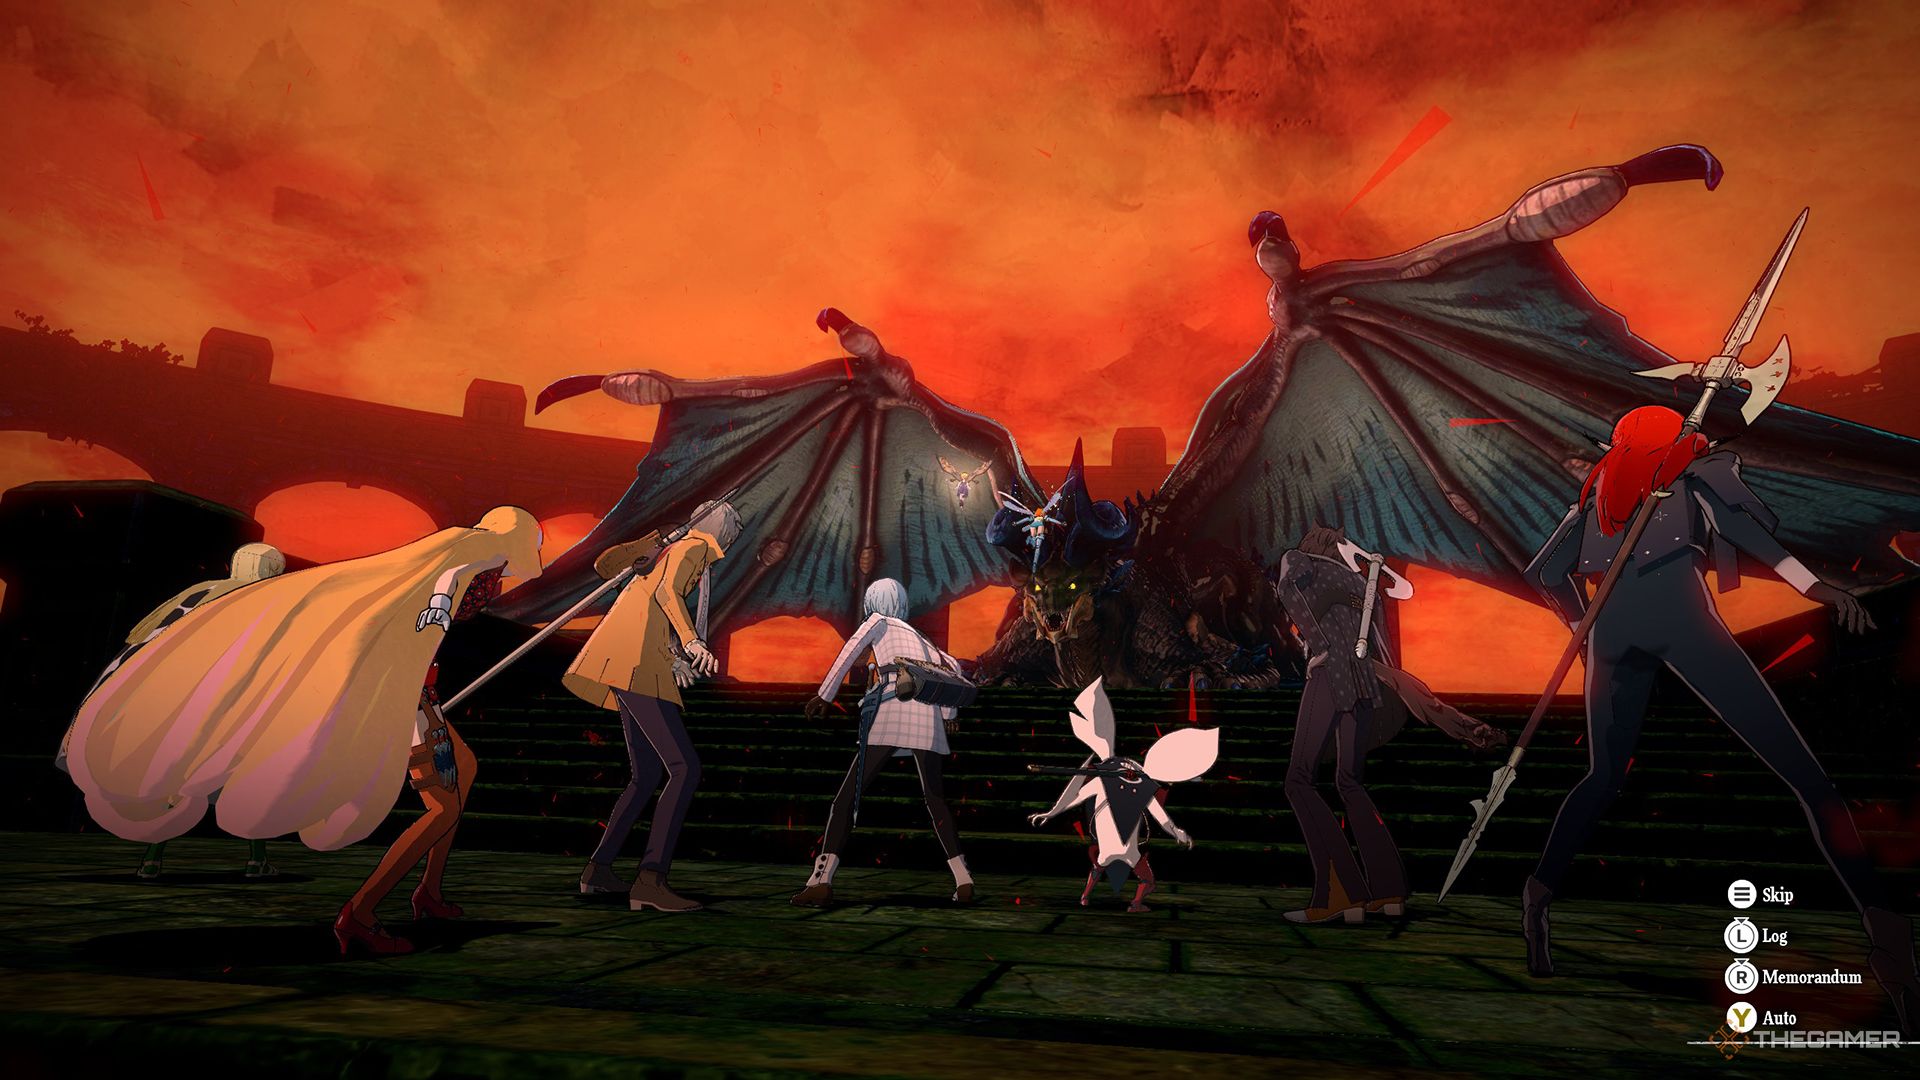
      The Elegy of the Soul serves as a formidable boss during the Trial of the Dragon questline in Metaphor: ReFantazio. This climactic battle pushes players to their limits, requiring all the skills and strategies they’ve amassed throughout their journey. Defeating this enemy isn’t a straightforward task; the boss wields a variety of archetypes, each introducing a fresh set of potent attacks and skills. Players must adapt to its evolving combat style while navigating its most lethal moves, which can sometimes feel unfairly punishing.

      Preparing for Battle

      To stand a chance against the Elegy of the Soul, ensure your gear and archetypes are top-notch. Entering this battle unprepared can lead to multiple defeats, particularly due to the boss’s devastating attack called Armageddon’s Final Sire, which has the potential to wipe out your entire party in a single blow—and it can use this twice in a row. This encounter is nearly as challenging as taking down the final boss in Metaphor: ReFantazio.

      Essential Preparations

      Make sure your party is at least level 70, aiming for higher if possible. The Elegy switches between eight different archetypes, each with distinct abilities. Having the Prince, Healer, Persona Master, and either Samurai or Knight archetypes in your lineup will be beneficial. Ensure to pick followers who complement these archetypes.

      A dedicated healer is crucial for this fight; the boss can unleash significant damage quickly. In addition to healing spells, stock up on healing items to manage your team’s health. Utilize moves that can exploit the boss’s elemental weaknesses, such as Frigid Forest Tactic, since the Elegy’s archetype-switching ability might obscure its vulnerabilities.

      Avoid equipping any gear that repels or absorbs elements, as this can trigger Armageddon’s Final Sire, resulting in an instant loss. Instead, focus on items that reduce fire damage, as many of the Elegy’s attacks are fire-based. The boss starts with five turns at the beginning of the encounter, using one to change archetypes, which leaves your team with four turns to survive its onslaught. Equip defensive equipment that prioritizes damage mitigation; this boss will not hold back.

      Strategies for Success

      Elegy of the Soul is the ultimate test in the Trial of the Dragon questline, requiring a well-assembled team. The boss transitions among various Archetypes, each presenting unique challenges. Key strategies include utilizing the Prince for consistent damage, maintaining frequent healing, and keeping the Elegy occupied with your attacks. If the battle drags on too long, you risk facing Armageddon’s Final Sire, which can result in certain defeat.

      Flexibility is key: adjust your strategies based on the archetype currently in play. Not all archetypes can be handled the same way, and utilizing tactics tailored to each one can ensure survival. For instance, Hulkenberg’s Royal Knight Archetype, equipped with Omni-Counter, can successfully negate attacks and draw aggro away from your teammates. Other archetypes that apply debuffs will also serve you well, as reducing the Elegy’s damage output is essential for your survival.

      Combat Tactics for Each Archetype

      The Elegy of the Soul can adopt eight different Archetypes, making it a daunting adversary in Metaphor: ReFantazio. Here’s how to deal with each:

      1. Seeker Archetype: Relies on boosting its stats and executing wind-based attacks. Its critical hit potential is high, but wind attacks can be countered with gear that nullifies or weakens them.

      2. Masked Dancer Archetype: Focuses on exploiting elemental weaknesses and debuffs. It lacks strong offensive moves, but you should equip passive gear to resist fire and capitalize on its frail offense.

      3. Knight Archetype: Notable for high defense and Pierce damage. Utilize Null Pierce gear or the Royal Knight’s Proclamation to counter its Pierce weaknesses. Focus on delivering heavy damage during openings.

      4. Warrior Archetype: Specializes in physical damage with powerful Slash attacks. Bolster your defenses against these to endure its onslaught, perhaps using Null Slash gear for extra support.

      5. Thief Archetype: This archetype employs a combination of physical and magical tactics. Use magical attacks to breach its defenses as it utilizes Quick-Change Arts to avoid damage.

      6. Summoner Archetype: Extremely potent, often using a myriad of elemental attacks and debuffs. Equip items that nullify fire damage and employ skills like Dekunda to purge debuffs.

      7. Berserker Archetype: Focuses on physical damage, using War Cry to lower your defenses. Evasion and strategic defensive gear will be critical in handling its aggressive playstyle.

      8. Prince Archetype: The final and most potent form of the Elegy, boasting robust stats and Armageddon’s Final Sire. Apply your strongest attacks swiftly to eliminate this form before it can unleash its deadly capabilities.

      Rewards for Triumph

      Should you succeed in defeating the Elegy of the Soul, you’ll receive two significant items: Radiant Crystal and Dragon’s Legacy. The Radiant Crystal is an accessory that enhances all combat stats by eight points and can be equipped by any character, effectively powering up your strongest ally. Dragon’s Legacy is a magnificent sword exclusive to characters with the Seeker Archetype, delivering impressive attack capabilities and inflicting Almighty damage with standard physical strikes.

      Although the Trial of the Dragon isn’t mandatory, it provides a rewarding challenge for players wanting to test their skills. The rewards granted can aid in overcoming some of the game’s most demanding battles in Metaphor: ReFantazio, making the effort worthwhile, even if it takes several tries.

      For further insights, check out the gameplay video by Zephyr.

    • Conquering the Redscale Dragon in Metaphor: ReFantazio

      Conquering the Redscale Dragon in Metaphor: ReFantazio

      Metaphor: ReFantazio features a variety of intriguing late-game challenges, primarily in the shape of dragons. While the main storyline gives you only a brief view of these majestic beasts, as you delve deeper into the game’s final stages, you’ll encounter many more, each presenting unique trials and rewards.

      At the pinnacle of difficulty is the Redscale Apocalypse Dragon, a hidden superboss that represents one of the toughest challenges in the game. This fearsome creature can be quite daunting for the unprepared, yet it rewards players with valuable treasures upon victory. Just make sure to avoid getting caught under its claws during the fight.

      Unlocking the Redscale Apocalypse Dragon Boss Fight

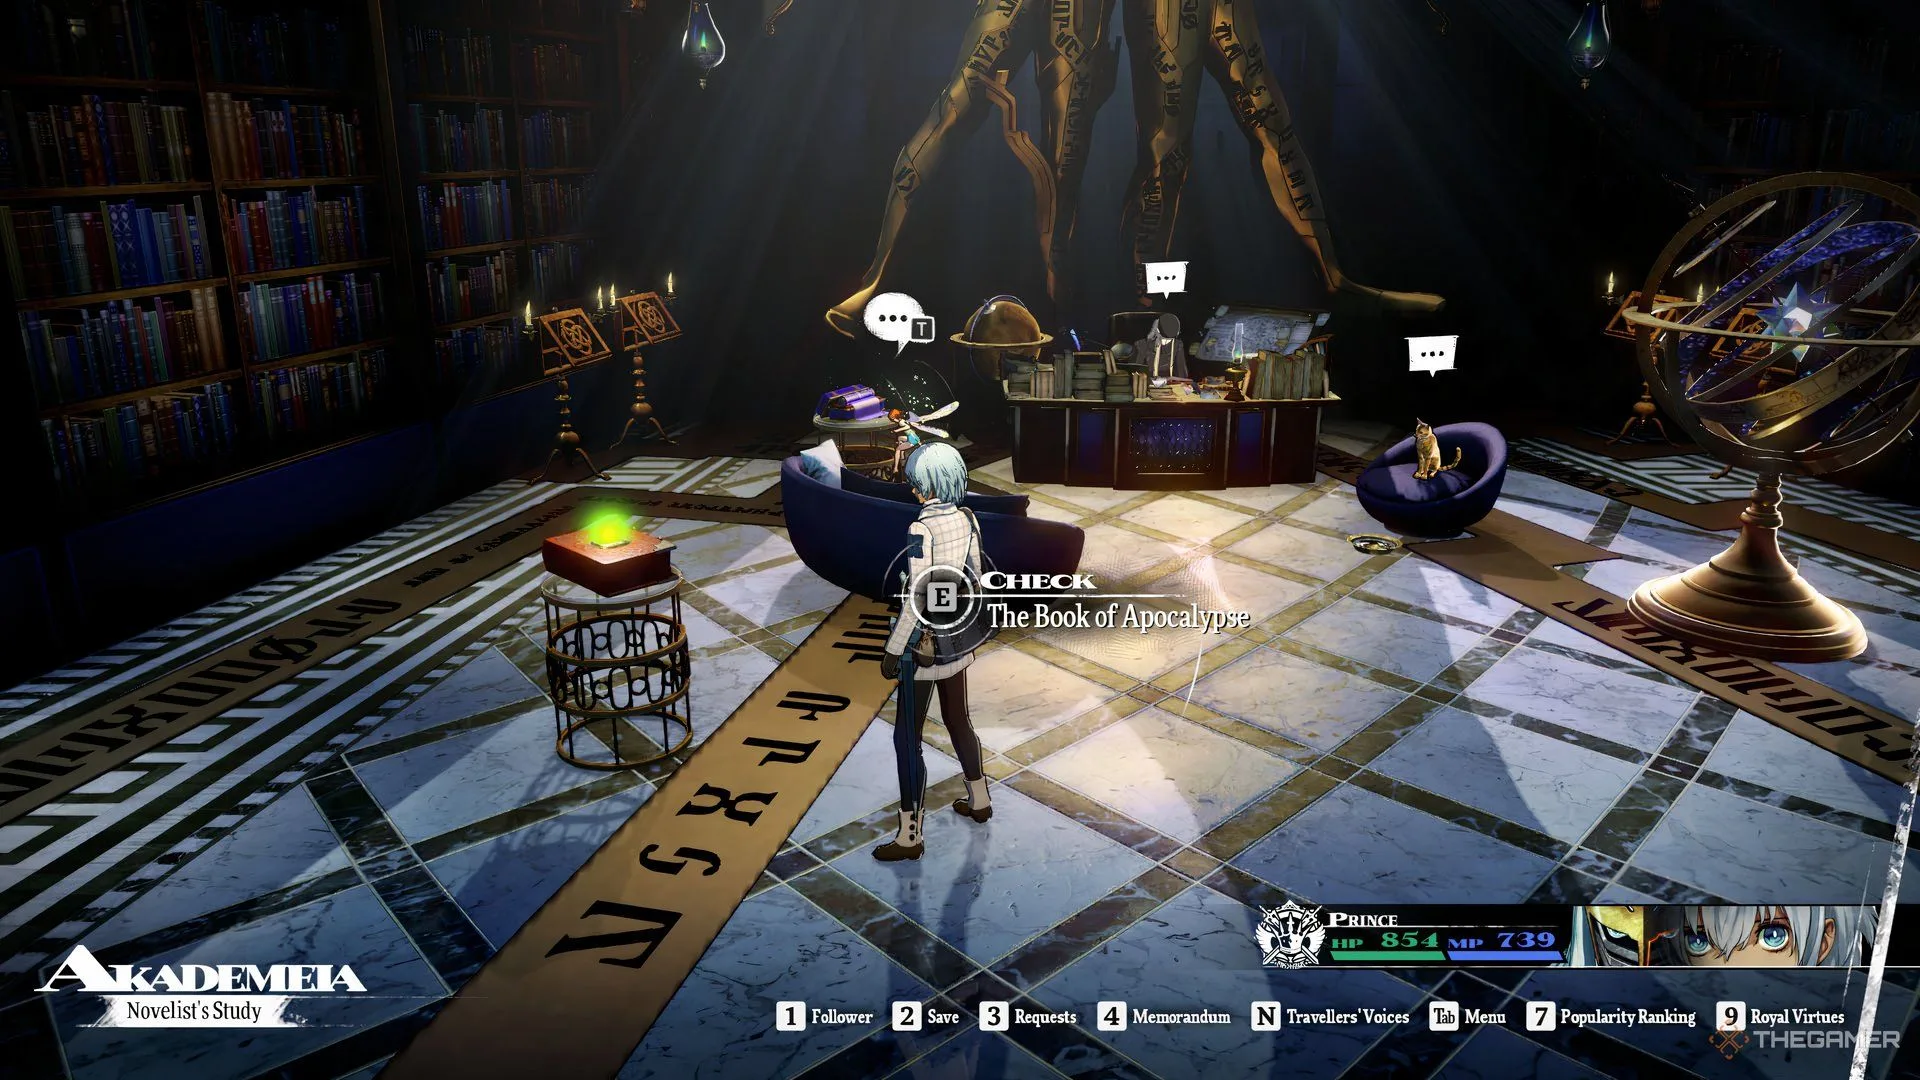
      The Redscale Dragon is exclusive to New Game Plus, meaning it’s a unique feature you can only access during a second playthrough, in addition to the new Regicide difficulty mode. If you’re seeking a serious challenge, you can initiate a fresh game on this difficulty and face the Dragon early on without much build-up. The moment you gain access to the Akademeia, look for a red unsealed book near Plato’s resting area. Interacting with this book will kick off the battle.

      Although this book can be seen during your first playthrough, More will prevent you from interacting with it for good reason.

      Details and Move Set of the Redscale Apocalypse Dragon

      This boss doesn’t have any specific weaknesses and shares some moves with other draconic foes you might have faced in the game. Here’s a breakdown of its attacks:

      Attack Effect
      Dragon’s Contempt Gains one extra Turn Icon permanently and two Half Turn Icons after each use.
      Great Dragon’s Wrath Increases Attack by 2 stages for 3 turns.
      Dekunda Removes all debuffs from itself.
      Heat Riser Increases Attack, Defense, and Hit/Evasion for 3 turns.
      Tetrakarn Reflects one Strike/Slash/Pierce attack.
      War Cry Decreases enemies’ Attack/Defense by 2 stages for 3 turns.
      Makarakarn Reflects one magical attack (non-Almighty).
      Hyper The next magical attack will inflict more than double damage.
      Exorcist’s Light Deals magical light damage to a single enemy.
      Hadean Icecrag Inflicts magical ice damage to all enemies.
      Whirlwind Tail Deals physical wind damage to all enemies.
      Crusher Tail Inflicts physical strike damage to all enemies.
      Icy Breath Inflicts magical ice damage to all enemies, with a chance to inflict frostbite.
      Boltbreath Causes magical electric damage to all enemies, with a potential shock effect.
      Toxin Breath Delivers magical dark damage to all enemies, possibly inflicting Forget.
      Puppeteer’s Claw Deals physical slash damage to one enemy, with a chance to confuse.
      Ripping Claw Inflicts physical fire damage to one enemy.
      Iceclaw Slash Deals physical ice damage to one enemy.
      Purple Toxiclaw Delivers physical slash damage with a chance to poison.
      Sturdy Darkclaw Inflicts physical dark damage to one enemy, reducing its Attack.
      Loathsome Claw Deals physical Almighty damage to one enemy.
      Bewitching Blaze Can charm all enemies.
      Distinct Black Howl Inflicts hex on all enemies.
      Ill Wind Deals 9999 Almighty damage to all enemies.

      While it seems overwhelming, keep a close watch on Dragon’s Contempt. After it uses it for the fourth time (at about 10% HP), the Dragon will use Ill Wind on its subsequent turn, ending the battle immediately. If anyone evades it, the Dragon will continue using it until you are defeated.

      Preparing for Battle

      The perfect time to confront the Dragon is on the final day, although you can challenge it whenever you are ready. Make sure to gear up by gathering essential food items and equipment throughout your playthrough.

      Here is a team setup and equipment suggestion for tackling this fight:

      Protagonist:

      • Weapon: King’s Sovereignty
      • Armor: Cardinal Dragon Armor
      • Gear: Reverent Crown
      • Accessory: Overlord’s Sash
      • Archetype: Prince (Arcane Unity, Sense of Kinship, Magic Circle, Unshaken Will)

      Hulkenberg:

      • Weapon: Save the King
      • Armor: Sunstalo Plate
      • Gear: Kaiser’s Pickelhaube
      • Accessory: Venomward Charm
      • Archetype: Royal Knight (Ironclad Bond, Item Connoisseur, Unshaken Will, Sturdy Stance)

      Junah:

      • Weapon: Heroine’s Fan
      • Armor: Cardinal Dragon Robe
      • Gear: Divine Light Gloves
      • Accessory: Trickster Mask
      • Archetype: Royal Masked Dancer (Sense of Kinship, Magic Circle, Unshaken Will, Formation of Vigor)

      Basilio:

      • Weapon: Axe of the Old God
      • Armor: Cardinal Dragon Armors
      • Gear: Rakshasa’s Hands
      • Accessory: Venomward Charm
      • Archetype: Royal Berserker (Sense of Kinship, Heat Up, Strike Boost, Unshaken Will)

      Important Tip: Avoid equipping items that repel attacks, as the Dragon will immediately counter with Ill Wind on its first move, defeating you instantly. Resistances and Blocks are viable, however.

      Strategy to Defeat the Redscale Apocalypse Dragon

      It’s advisable to be at Level 80 or above, with all Archetypes fully upgraded. Players can swap characters and items freely to adapt to various strategies. Ensure resistance to Charm and Confuse is established.

      Stock up on Ambrosia and prepare some Almighty Golden Stews for restorative help during the battle. Consider leveling all Royal Archetypes to Rank 20 and conversing with More to acquire Chronicle of the End, unlocking the Armageddon’s Final Sire Synthesis for additional damage.

      Don’t forget to bring at least one Sublime Spoonful, made from the following ingredients:

      • 1 Lord of the Lake
      • 3 Queen’s Honey Jars
      • 3 Gauntlet Shrooms

      You can obtain both the Lord of the Lake and Queen’s Honey Jar by fishing with a Rat’s Tail, while Gauntlet Shrooms can be found by checking the pantry daily on the Gauntlet Runner.

      Note: Ensure you complete item preparations before heading to the Tyrant’s Star, as cooking will not be possible once you enter.

      Winning the Fight

      Your battle plan should focus on Basilio dealing the majority of the damage, with the Protagonist as a secondary attacker and supporter, Hulkenberg acting as the shield and healer, and Junah providing additional support.

      In your first turn, follow this sequence:

      • Use Vidyartha with Junah.
      • Activate Hero’s Cry with the Protagonist for bonus turns.
      • Employ Wanton Destruction with Basilio.
      • Activate Holy Knight’s Proclamation with Hulkenberg.
      • Use Formation of Vigor with Junah.
      • Have the Protagonist use an Almighty Golden Stew.
      • Perform Charge with Basilio.
      • Execute Thunderstrike Thrust with Hulkenberg.

      If using Reverent Crown, opt for Hellfire Dance with Junah. If the Protagonist outpaces her, pass your turn.

      Basilio should continue using Wanton Destruction > Charge > Wanton Destruction to maximize damage. The boss will maintain its Strike weakness, facilitating the setup for successive attacks.

      During free turns, you can pass or use items as necessary. Junah should continue applying debuffs with Vidyartha while managing team buffs. If necessary, she can neutralize Heat Riser with Ruin’s Flameflower. Otherwise, Basilio can step in with Peerless War Cry.

      Hulkenberg’s role is vital for team durability by spamming Holy Knight’s Proclamation. She can also heal using Ambrosia effectively due to Item Connoisseur ensuring full health restoration.

      Maintain this cycle with Basilio relentlessly dealing high damage while the Protagonist assists from the sidelines. While it may get chaotic as the Dragon’s HP dwindles, keeping up buffs and debuffs should allow Hulkenberg to withstand numerous attacks and recover from AoE damage.

      Watch out for status ailments. However, with Unshaken Will, you can focus on draining the Dragon’s health. When Dragon’s Contempt appears for the third time, prepare for the finishing blow. Hit once more with Basilio and follow up with another Synthesis using the Protagonist to claim victory.

      If you want to play it safe, activate Armageddon’s Final Sire after using a Sublime Spoonful, which should deliver ample damage to secure your win.

      Rewards for Conquering the Redscale Dragon

      After defeating the Redscale Apocalypse Dragon, you will receive the Hero King’s Ring, alongside the Gaius Regalia as a reward from More. The Ring eliminates all damage types except Almighty, while the Regalia restores your HP and MP after each battle.

      The Gaius Regalia is invaluable for grinding, while the Hero King’s Ring is particularly useful for tackling the enhanced version of the game’s final boss, which could pose an even greater challenge than this formidable dragon.

    • Ultimate Guide and Walkthrough for Metaphor: ReFantazio

      Ultimate Guide and Walkthrough for Metaphor: ReFantazio

      In Metaphor: ReFantazio, players take on the role of a diverse group of disillusioned nobles, marginalized citizens, and (possibly) fallen knights, who must unite a conflicted nation to battle nightmarish creatures and the power-hungry figures behind them. This is no small task, as you’ll only have a limited number of in-game months to make it happen.

      This title is a major JRPG crafted by one of the top names in gaming, Atlus, which has loaded Metaphor: ReFantazio with engaging content alongside its compelling narrative. There’s a lot to discover on your journey to defeat Louis, and our thorough guide is designed to assist you every step of the way.

      The Basics

      Becoming an Eldan candidate for the throne is a challenging endeavor. At times, it’s a struggle just to find your place in such an unfair world.

      The Walkthrough

      While Metaphor: ReFantazio includes many shorter, stage-based segments, it also features several grand dungeons. This section is a work in progress, covering both types of experiences, with more details being added soon.

      Menu Screen in Metaphor: ReFantazio

      The Bosses

      Engage in thrilling encounters against the story-driven bosses throughout Metaphor: ReFantazio and survive to share your tales of victory.

      Homo Fulquilo in Metaphor: ReFantazio

      The Side Quests

      Dive into every aspect of the game with its extensive side quests, ensuring you experience all that Metaphor has to offer.

      Gallica in an Animated Scene

      Explainers

      Discover what makes the universe of Metaphor: ReFantazio captivating and unique.

      Main Character in Metaphor: ReFantazio

      Lists

      We’ve compiled numerous lists to help you navigate through the vast world of Metaphor, guiding you in your journey and choices.

      Louis Looking Up in Metaphor: ReFantazio

    • Echoes of the Past: The ReFantazio Legacy Adventure

      Echoes of the Past: The ReFantazio Legacy Adventure

      Preparing for Your Confrontation with Louis in Metaphor: ReFantazio

      As you gear up for your ultimate challenge against Louis, you have thirty days for preparation. One of the essential tasks to tackle before the final showdown is the Trial of the Dragon quests, which can significantly aid you when the time comes.

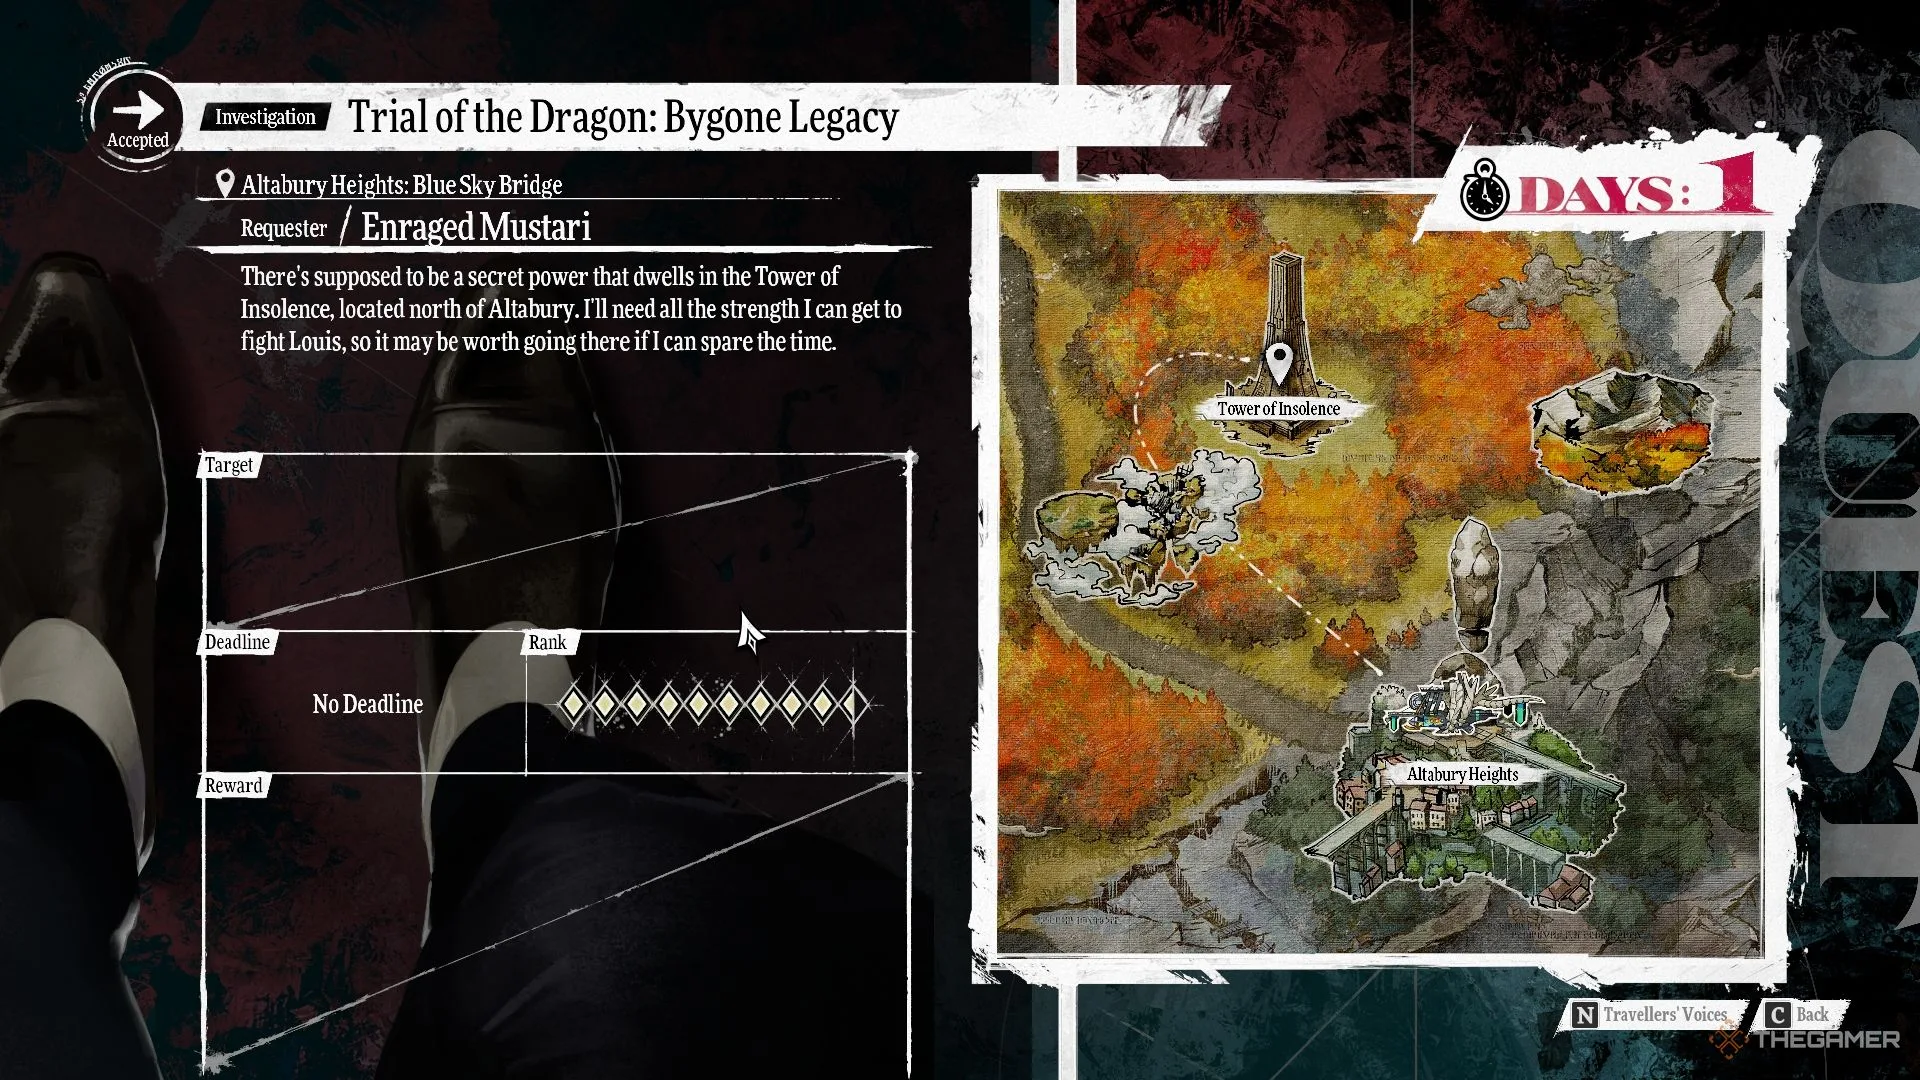
      One such quest, Bygone Legacy, involves a return to the Tower of Insolence to battle a dragon boss known as the Devourer of Stars. This fight is quite challenging, and the name itself is enough to send shivers down your spine. However, with a solid strategy and a bit of patience, you can conquer this powerful adversary.

      Starting the Bygone Legacy Trial

      To initiate the Bygone Legacy, go to the Upper Blue Sky Bridge in Altabury Heights and talk to the Enraged Mustari, marked with a quest indicator. This NPC will disclose that there is a forbidden power within the Tower of Insolence for those who prove themselves worthy.

      If you’ve previously visited this dungeon during the Proof of Power quest, you’ll find it mostly the same. However, be prepared; it is now filled with tougher enemies, and a formidable dragon boss awaits at the top.

      Preparing for the Devourer of Stars

      While you can attempt the Trials in any sequence, it’s advisable to save Bygone Legacy for last, as the boss at the dungeon’s peak is no lightweight. Before entering, ensure that your character is at least level 65. Additionally, it’s crucial to strengthen your Follower Bonds, as some of these bonds provide beneficial passive skills in dungeons.

      Catherina, in particular, becomes a vital ally during boss fights when she reaches Rank 7, as she provides an initial damage boost of 5,000 at the start of each encounter.

      Defeating the Devourer of Stars

      Once you’ve fought your way through various foes and reached the Tower of Insolence’s summit, you will confront the level 70 Devourer of Stars. Ensure you save at Plato’s Mirage before the encounter, and make any last-minute adjustments to your team composition.

      Affinities and Weaknesses

      The Devourer of Stars is immune to and repels all forms of damage, except for Almighty damage, which will be your primary method of attack. Certain Archetype skills and Synthesis attacks can temporarily bypass this resistance, providing a one-time weakness that can assist in whittling down its health.

      Type Damage Result
      Slash Repel
      Pierce Repel
      Strike Repel
      Fire Repel
      Ice Repel
      Electric Repel
      Wind Repel
      Light Repel
      Dark Repel

      Moveset

      The Devourer of Stars also has a formidable moveset:

      Attack Description
      Great Dragon’s Wrath Buffs its attack.
      Great Dragon’s Shriek Grants extra turn icons.
      Miasma Whorl Caps party HP at 300.
      All Reset Removes buffs from your party.
      Toxin Breath Inflicts Dark damage to all party members.
      Poison Tail Deals Strike damage that can inflict Poison.
      Loathsome Claw Slash damage that critically hits targets with ailments.
      Distant Black Howl May impose Hex on the entire party.
      Dekunda Removes debuffs from itself.
      Roar Debuffs the whole party, lowering various stats.
      Purple Toxiclaw Single-target damage that can induce Poison.

      Recommended Party Setup

      To effectively take down the Devourer of Stars, consider the following party composition:

      Character Archetype Formation Strategy
      Protagonist Prince Front Focus on party healing with Medicall and curing ailments using inherited skills while also dealing some damage.
      Hulkenberg Paladin/Royal Knight Front Acts as a tank and applies buffs to enhance party damage.
      Heimsay Ninja/Royal Thief Front Use agility to dodge attacks while applying debuffs.
      Strohl Tycoon Front Emphasize dealing Almighty damage and use passive skills for extra effectiveness.

      Recommended Strategy

      Begin by deploying Heimsay’s Vidyartha skill to apply a debuff on the boss, and have Hulkenberg use Formation of Vigor to amplify your attacks. This approach will prime Strohl and the Protagonist to maximize damage output right at the start. Keep an eye out for critical hits to gain an extra turn in the initial round.

      When the boss takes its turn, it will cast Miasma Whorl, limiting your HP but wasting its turns to remove your buffs. As you continue, focus on reapplying buffs, using Dekaja to strip the boss of its advantages, and be prepared for some heavy attacks in retaliation.

      After your setup is established, the boss will launch its Great Dragon’s Shriek for an onslaught of turn icons, but thanks to your preparation, you’ll manage to weather the storm. As you persist with buff and debuff cycles, you should be poised to land the final blow and claim your victory.

      Rewards for Defeating the Devourer of Stars

      Upon defeating the Devourer of Stars, you’ll receive experience points, Mag, A-XP, and Reeve. However, the crown jewel is the Cardinal Dragon Raiment, an impressive armor that boosts both Magic and Strength by +5 while providing immunity against Fire damage. This long-awaited reward highlights your tenacity and skill in overcoming the Bygone Legacy trial.

    • ReFantazio: Your Free Time Guide to Defeating Necromancers

      ReFantazio: Your Free Time Guide to Defeating Necromancers

      Metaphor: ReFantazio introduces players to the concept of time management with the Necromancer Takedown and its associated dungeon, the Regalith Grand Cathedral. In this challenge, players must defeat the necromancer Zorba within a set time limit while also accessing various activities in Grand Trad. Initially, balancing the dungeon’s completion, the available activities, tasks, and bounties can be quite daunting. However, mastering this timing will help ensure a smoother experience in the game as it progresses.

      Much like the palaces in Persona, players must keep an eye on a calendar deadline to enter the dungeon and confront Zorba in Metaphor: ReFantazio. Activities such as shopping, listening to conversations, and meeting with characters like More do not advance the clock. However, once these tasks are completed, they will occupy your current time slot. This deadline pushes players to make thoughtful choices about how they utilize their in-game days, striking a balance between dungeon exploration and developing relationships, royal virtues, and side quests.

      Necromancer Takedown: Start Date, Deadline & Rewards

      The Necromancer Takedown challenge begins on June 12, giving players until June 21 to clear the Regalith Grand Cathedral and accomplish any associated goals. It’s crucial to understand that finishing the dungeon early does not change the deadline of June 21.

      For instance, if a player completes the dungeon by June 14, they can still explore Grand Trad with the remaining time available. Many activities unlock once the dungeon is finished, so wrapping it up early allows players to tackle limited-time quests more efficiently.

      Completing the Necromancer Takedown itself won’t yield any significant rewards upfront. Still, within the dungeon, there are numerous treasure chests and rare items to discover. Additionally, defeating enemies will steadily earn players Reeve, the primary currency in Metaphor: ReFantazio, along with MAG, which is used for interacting with the archetype system through More.

      Defeating bosses in the dungeon will also grant valuable resources and unique items that can be sold for a good profit. Outside the dungeon, completing side quests and bounties can result in Royal Virtue Points, improved bonds, helpful items, and additional resources.

      Best Activities Order During Necromancer Takedown

      To maximize efficiency, it’s advisable to complete the main dungeon early, ideally by June 14. Forming bonds with party members is an important aspect of free time gameplay, but this feature remains locked until the dungeon is cleared.

      After finishing the dungeon, the recruitment center will offer the first bounty. Additionally, Briggita, a vendor on Sumleo Street, will give you a quest that involves tackling an optional dungeon and boss, likely too challenging without having previously cleared the Cathedral.

      If your plan is to tackle Regalith Cathedral in one session, managing your Magic Points (MP) is critical. Stock up on health items instead of relying solely on healing spells, and take advantage of the Mage Archetype to regain MP by defeating overworld enemies.

      Before entering the Cathedral, use your free time to strengthen your party. One effective way to do this is by purifying any armor and weapons you’ve acquired in the Nord Mines, enhancing their stats and unlocking new abilities.

      Fortunately, both purifying gear and accepting Briggita’s quest only require level 2 Wisdom. By simply completing Young Nidia’s quest on Sumleo Street, you can earn enough Wisdom points to access these tasks. The next day, turn in the quest, purify available gear, and accept Briggita’s request.

      As a final preparation step, feel free to finish any lingering side quests, such as A Pagan’s Dilemma, stock up on MP items at the Entero Water Shop, and upgrade your equipment at the Smithy and Shield Works, all without advancing the in-game time.

      After completing the Cathedral, it’s advisable to pursue the bounty "Man’s Not-So-Best Friend" first, as it is shorter and easier to complete. Following that, ensure to work on building bonds with Strohl and Hulkenberg, and fill any spare time with repeatable virtue activities in Metaphor: ReFantazio.

    • The Ultimate Guide to Finding Top Gardening Seeds in Metaphor

      The Ultimate Guide to Finding Top Gardening Seeds in Metaphor

      In Metaphor: ReFantazio, finding enjoyable activities in your free time is important for making progress towards your goals. Engaging in these pastimes helps you move closer to significant events in the story. As you journey through the Gauntlet Runner, new activities open up, including gardening, which becomes available as Nueras makes changes to the vessel throughout the narrative.

      Your first gardening experience begins when you receive some complimentary seeds, which introduces you to the fun of planting. It’s hard to ignore this side activity, especially since it provides consumables that enhance Archetype experience points (XP). Here’s everything you need to know about how to garden and where to get your seeds to get started.

      How To Garden

      Gardening becomes an option after you’ve completed your adventures in Martira and embarked on your journey to Brilehaven. To start gardening, ensure that the Gauntlet Runner is active and moving, then head to the lounge and interact with the Plant Culture Chamber’s Igniter.

      Initially, you’ll need seeds to start your gardening journey. Your first interaction with the Igniter will provide you with a free Hero’s Fruit Seed. Gardening will take one time block, and your crops will be ready for harvest the following day. Fortunately, collecting the harvest does not consume any time, and the Gauntlet Runner doesn’t need to be operational during the collection.

      How To Get Seeds

      There are three varieties of seeds available for your gardening, each producing items, or fruits, that help increase Archetype XP. While these seeds can be purchased indefinitely, you won’t find all of them in a single location.

      The higher the quality of the seed, the greater the XP boost from its fruit. To maintain game balance, higher-quality seeds become available only in later regions, with the best seeds reserved for the endgame.

      As you move forward in the game, you’ll likely swap out lower-quality seeds for better ones, since there isn’t much reason to use weaker options once superior seeds become available. Below is a list of where to find each type of seed and their corresponding yields.

      Seed

      How To Get

      Produce

      Hero’s Fruit Seed Available for purchase from the Greengrocer Girl on Cattleracket Road in Martira for 500 Reeve. Yields two to three Hero’s Fruit consumables, granting 500 Archetype XP.
      Heroe’s Leaf of Light Seed Sold by the Elderly Seed-Seller in the Dragon Statue Plaza, Virga Island, for 2,500 Reeve. Yields two to three Hero’s Leaf of Light consumables, granting 1,000 Archetype XP.
      Hero’s Jewelled Root Seed Available from the Flower-Selling Woman on Upper Dia Franco Street, Altabury Heights, for 5,000 Reeve. Yields two to three Hero’s Jewelled Root consumables, granting 3,000 Archetype XP.
    • Defeating the Devourer of Nations in Metaphor: ReFantazio

      Defeating the Devourer of Nations in Metaphor: ReFantazio

      With your memories restored and your Royal Archetype awakened, you are about to embark on the final month of Metaphor: ReFantazio. Your mission is to stop Louis, but first, you’ll need to strengthen your character each day to get ready for this ultimate showdown.

      A variety of new quests and optional dungeons will open up, including the Trials of the Dragon. Here, we will delve into the Mad Mischief Trial of the Dragon, where you’ll return to the Forsaken Tower in Oceanus to obtain a powerful reward.

      Starting the Trial of the Dragon: Mad Mischief

      To kick off the Trial of the Dragon: Mad Mischief, talk to Gabby Mustari near the Greatest Catch in Port Brilehaven. She’ll inform you about a hidden, mysterious power within the tower, waiting for you to claim it if you can conquer its challenges.

      Once you’re prepared, head to the Forsaken Tower via the Gauntlet Runner.

      Heading Back to the Forsaken Tower

      The layout of this dungeon remains the same as the first time you ventured here during the Superior Scrimshaw Bounty earlier in the game. However, you’ll encounter new, tougher enemies this time around.

      It’s advisable to be at least level 65 before attempting this quest, but the higher your level, the better. The final boss is level 70 and can be quite a challenge.

      The new foes include the tough Sword Scourge Malmorta Undead and the Bloodcoin Imitec Mimics. The Undead are vulnerable to Strike and Light attacks, while Mimics are weak against Light. Having the Protagonist’s Prince, Savior, or any Archetype that possesses Light magic will assist you in navigating through the tower.

      Overall, the dungeon exploration in this quest is fairly standard; however, it’s the boss encounter at the top of the tower that you need to adequately prepare for.

      Defeating the Devourer of Nations

      The party facing the Devourer of Nations boss at the top of the Forsaken Tower.

      The final adversary of the Forsaken Tower and the Mad Mischief quest is the Devourer of Nations Dragon.

      Weaknesses and Resistances

      Slash

      Pierce

      Strike

      Fire

      Repel

      Ice

      Electric

      Wind

      Light

      Dark

      Attacks and Abilities

      Great Dragon’s Wrath

      Increases Attack by 3 stages.

      Great Dragon Shriek

      Grants 6 additional Turn Icons.

      Puppeteer’s Claw

      Deals Slash damage to one target with a chance to inflict Paralysis.

      Boneclaw Slash

      Deals Slash damage to one target.

      Infernal Breath

      Deals Fire damage to all party members with a chance to inflict Burning.

      Great Fireball

      Deals Fire damage to one target with a chance to inflict Burning.

      Crusher Tail

      Deals Strike damage to all party members.

      Icy Breath

      Deals Ice damage to all party members with a chance to inflict Frostbite.

      Character

      Archetype

      Position

      Strategy

      Protagonist

      Prince

      Front

      Heal and support the team.

      Heismay

      Royal Thief

      Front

      Debuff the boss’s agility and avoid attacks to remove Turn Icons.

      Strohl

      Warlord

      Front

      Provide buffs for offense and defense.

      Junah

      Royal Masked Dancer

      Front

      Deal damage and exploit vulnerabilities for more damage.

      Combat Tactics

      The Devourer of Nations is a formidable foe, capable of attacking up to nine times in succession, so plan each turn wisely. The key to your approach is Heismay, whose high agility combined with the Royal Thief’s Rank 20 passive, Noble Thief’s Soul, can help dodge attacks and eliminate enemy Turn Icons.

      Using Royal Thief’s Adamant Nightblade to debuff the boss’s agility while buffing your party with Masukukaja will significantly enhance your chances of avoiding attacks. Additionally, inheriting the Fire Dodge passive from the Merchant will assist your entire team.

      The other team members should focus on enhancing attack and defense and healing when needed. This encounter is largely about endurance, so always consider whether to heal or not cautiously.

      It may also be wise to carry some MP potions or ensure your MP-intensive members utilize the Wizard’s Shield Blessing passive to regain MP throughout the battle.

      The boss will consistently start its turn with Great Dragon’s Wrath, increasing its attack by three stages unless it already has this buff. Thus, if you attempt to remove this buff, the boss will use its first turn to reapply it.

      The most crucial ability to look out for is Great Dragon Shriek, which grants the boss six extra Turn Icons. Even with full health and maxed buffs, you should expect considerable damage when this ability is enacted. This is where Noble Thief’s Soul becomes invaluable, as dodging just once with Heismay can remove all these extra Turn Icons.

      Overall, as long as you maintain your health, deploy buffs at the right moments, and keep the boss’s abilities in check, you will eventually triumph over it.

      Rewards for Completing the Quest

      By defeating the Devourer of Nations and finishing this quest, you’ll receive experience points, Archetype experience, MAG, reeve, and the Cardinal Dragon Raiment, which grants a boost of five to Strength and Magic while nullifying Fire.

    • Unlocking the Queen’s Honey Jar in Metaphor: ReFantazio

      Unlocking the Queen’s Honey Jar in Metaphor: ReFantazio

      In Metaphor: ReFantazio, players have two main avenues to obtain the Queen’s Honey Jar. For those aiming for the prestigious Platinum trophy, achieving “King of Cuisine” necessitates mastering every recipe within the game. Since this unique ingredient is essential for crafting three extremely rare dishes, securing the Queen’s Honey Jar can be rather challenging for those who don’t know the ropes.

      Mastering speed cooking in Metaphor: ReFantazio is a great start, but it’s not enough to collect all the recipes your character can create. You will need a total of five Queen’s Honey Jars to earn the King of Cuisine Trophy/Achievement. While this task is generally tougher than tracking down Fragrant Spice, it becomes a breeze once you know where to look and what actions to take.

      Amblyrhy’s Water Jug

      The first and most straightforward method to obtain the Queen’s Honey Jar in Metaphor: ReFantazio is to speak with the Genial Water Seller NPC at Amblyrhy’s Water Jug located on the Sandy Coast in the Village of Pagans on Virga Island. This process is similar to unlocking the full inventory of the Wary Shopkeep, but instead of venturing to the Golden Deer Hearth, you’ll want to head to the island’s northwest area. Find the marked location and engage in conversation with the Genial Water Seller shown above.

      Related

      Metaphor: ReFantazio – Archetypes Tier List

      Check out this tier list for the best Archetypes available in the expansive campaign of Metaphor: ReFantazio.

      This vendor has two Queen’s Honey Jars available for 10,000 Reeve each. Once you’ve purchased both, they won’t restock, but you’ll have enough for Amber Stew and Adamantine Honey Cake. For the remaining three jars needed for the Sublime Spoonful recipe, fishing is the next step.

      How to Acquire Queen’s Honey Jar through Fishing

      Use the Right Techniques

      Fishing for Queen's Honey Jar in Metaphor: ReFantazio with Lord of the Lake as a reward

      Amazingly, you can also get the Queen’s Honey Jar through fishing in Metaphor: ReFantazio, but it requires specific steps. First, while fishing on the Gauntlet Runner with Heismay, make sure to select Tail Bait as your lure. After casting your line, Heismay will provide various actions you can take, such as “Take a break,” “Thrash and Splash,” or “Keep it Still.” Each option has the potential to yield different rewards based on your choice.

      Purchase one Queen’s Honey Jar from Amblyrhy’s Water Jug and then make sure to select the correct prompts while fishing a couple of times. Use the least expensive ingredients to cook all three recipes!

      For catching the Queen’s Honey Jar, try selecting “Thrash and splash,” “Give in to naptime,” or “Think like a fish.” Each successful catch will give you two units of the Queen’s Honey Jar and one Lord of the Lake. This approach is the most effective for cooking since you will also need the Lord of the Lake for the Sublime Spoonful recipe. Just remember to visit Amblyrhy’s Water Jug at the Sandy Coast or choose the right options while fishing in Metaphor: ReFantazio, and you’ll gather as many Queen’s Honey Jars as you require.

    • ReFantazio: A Guide to Harvesting Magla Pills Efficiently

      ReFantazio: A Guide to Harvesting Magla Pills Efficiently

      There are several methods to obtain Magla Pills in Metaphor: ReFantazio, with farming being one of the most effective options. It’s essential to use all available strategies to maximize these consumable items that restore your MP. Each Magla Pill restores 20 MP, making them invaluable for extended dungeon explorations. They allow you to utilize MP-heavy skills for more extended periods, reducing the need to rotate through multiple abilities in a single dungeon. Although they appear as random drops, there’s a reliable way to increase their drop rate.

      Unlike common healing items like Medicinal Herbs, MP-restoration items are quite rare, as the developers understand their crucial role in easing dungeon exploration. However, farming them isn’t as tough as some other challenges in the game, such as mastering the tactics required to defeat the Devourer of Stars boss. Once you get the hang of farming Magla Pills, you’ll find it significantly enhances your ability to regain MP during dungeon exploration, allowing you to make the most of your time.

      How to Efficiently Farm Magla Pills

      Target Serpetias

      In the early levels of Metaphor: ReFantazio, a reliable way to collect Magla Pills is by defeating Serpetias repeatedly in dig site #3 within the Nord Mines dungeon. While not every Serpetia you defeat will drop a Magla Pill, you can improve your chances by continuing to battle them. To maximize your farming efforts, leave and re-enter the area to respawn all enemies, similar to farming for experience points.

      For example, in the Storehouse area of Nord Mines, you’ll soon find dig site #3, populated with various enemies including Serpetias. Defeat all the snakes and collect the Magla Pills they drop. When you run out of enemies to fight, simply walk back into the Storehouse, then return to dig site #3, where all the enemies—including Serpetias—will have respawned, allowing you to defeat them once more. Repeat this cycle until you have gathered all the Magla Pills you need.

      Additional Sources for Magla Pills

      Merchants, Enemies, and Chests

      As you progress through Metaphor: ReFantazio, you’ll find other enemies, such as Papyros in the Giant Sandworm Nest dungeon. Defeating these foes can also yield Magla Pills. To boost your chances, ensure all party members rank up the Merchant Archetype to level 2 and acquire the Lucky Find skill, increasing the drop rate of items, including Magla Pills, by 20%.

      While this isn’t a farming style, you can also regularly purchase Magla Pills from select merchants across Euchronia. For instance, the merchant in Komero typically has five Magla Pills available for 250 Reeves each. However, the timing of stock replenishment can be a bit complex; it seems to happen roughly once per in-game week. Therefore, if you see Magla Pills for sale, purchase the entire stock as it’s always good to have a reserve.

      Magla Pills can also be discovered in various chests located in the explorable dungeons of Euchronia.

      Utilizing Magla Pills Effectively

      You can use Magla Pills anytime during your explorations or battles. However, to enhance your efficiency—especially after unlocking speed cooking—it’s advisable to use these outside of combat. This way, you can preserve your Turn Icons for team buffs and offensive moves. As you acquire and purchase more Magla Pills, it’s wise to stockpile them before tackling the more demanding timed dungeons in the game.

      Many large dungeons may require you to make multiple attempts to complete them due to MP depletion. Saving up around 20 Magla Pills means you can restore 100 MP for each member of your four-person party, which is crucial for making it through if you manage your skills wisely. Keep farming Magla Pills from Serpetias and buy any available from merchants in Metaphor: ReFantazio, and you’ll be well-equipped for your adventures.

    • ReFantazio: Conquering Homo Flaemo – A Strategic Boss Guide

      ReFantazio: Conquering Homo Flaemo – A Strategic Boss Guide

      Metaphor: ReFantazio – Understanding the Mini-Boss Homo Flaemo

      In the game Metaphor: ReFantazio, one of the dungeons features multiple bosses, including Homo Flaemo, a formidable mini-boss that resembles a giant human ear. To defeat this enemy, you first need to trap it. Homo Flaemo resides in one of the game’s expansive dungeons, and successfully taking it down is essential for progressing further. By targeting its sole weakness, you can mitigate the threat it poses without placing excessive strain on your team.

      Encountering Homo Flaemo

      Homo Flaemo is a mini-boss that players face while uncovering the secrets of the Drakongrace Shinjuku civilization beneath the Dragon Temple Dungeon. This area is vast, and defeating Homo Flaemo is crucial for advancing within the dungeon. With various powerful adversaries lurking around, it would be wise to evade additional encounters until you’re ready to face this particular mini-boss.

      Preparing for the Battle with Homo Flaemo

      Explore the Spawn Location

      A key part of getting ready for the fight against Homo Flaemo is scouting the area where it appears. This location, known as The Ghost Town of Dreams, operates similarly to other areas within the dungeon, such as the Steel Rendezvous. The Steel Rendezvous is also worth exploring, as you’ll find various objects that can help keep Homo Flaemo contained during the battle.

      Gather Consumables

      To bolster your party and inflict significant damage on the mini-boss, be sure to carry along consumable items. Food items created from combining cooking ingredients in Metaphor: ReFantazio can provide valuable buffs during the combat. If needed, utilize a Magla Hollow to return to your base, restock on items, and heal before entering the battle.

      Keep an Eye on Time

      Every time you return to rest from a dungeon, remember that a day passes on your calendar. This passage of time restricts your exploration capabilities throughout the game, so plan accordingly.

      Leveling Up

      While exploring the dungeon, consider battling other enemies to gain experience points and searching for treasure on various Temple floors. Homo Flaemo is around Level 45, so aim for your party members to be at least a level higher or lower to maintain a balanced challenge.

      Assembling the Best Team

      Include a Mage

      For tackling Homo Flaemo, it’s essential to have at least one Mage in your lineup. This character should specialize in Electric attacks, as Homo Flaemo is particularly vulnerable to them.

      Healing Support

      Additionally, ensure you have one team member dedicated to healing. This role is crucial for cleansing debuffs and restoring health to allies during the skirmish. While there’s no definitive formula for the perfect team composition against Homo Flaemo, a recommended lineup might include:

      • Protagonist – Wizard
      • Strohl – General
      • Hulkenberg – Magic Knight
      • Junah – Masked Dancer

      In this combination, the Wizard provides maximum damage output, while the General enhances defense and attack. The Magic Knight also supports while dealing physical damage, and the Masked Dancer can replenish resources, enabling sustained offensive tactics.

      Tactics to Trap Homo Flaemo

      When facing Homo Flaemo, you cannot simply chase it; this boss will flee if you pursue aggressively. Instead, you need to trap it within a designated area. This is achieved by activating multiple gates in The Ghost Town of Dreams.

      Activating Gates

      To activate the gates, you must first restore power to the dungeon. Upon powering up, the switches for the gates will become visible on your map. There are three gates located in The Ghost Town, but you must go back to The Steel Rendezvous to activate the switches. Avoid confrontations with other enemies in that area to maintain your focus on this task.

      Defeating Homo Flaemo

      With Homo Flaemo trapped, you can turn your attention to defeating it. Its only vulnerability lies in Electric damage. While all other damage types deal normal damage, targeting its weakness will yield greater effectiveness.

      Electric Attacks

      Utilize Electric attacks to gain additional turns for your team, maximizing your chances to apply pressure on Homo Flaemo. A strong Electric attack can create openings for your party to unleash damage, perform healing, or apply buffs.

      Final Tips

      Keep an eye on Homo Flaemo’s high-damage attacks during the fight, and be prepared to heal your allies if they come under threat. Once you successfully defeat Homo Flaemo, you’ll be rewarded with the Filleting Katana, a powerful weapon for select party members, enhancing your capabilities as you progress in Metaphor: ReFantazio.

    • ReFantazio Boss Guide: Conquering Homo Jaluzo with Ease

      ReFantazio Boss Guide: Conquering Homo Jaluzo with Ease

      After accepting a bounty related to the kidnappings, you’ll head to Martira to confront the abductor in Metaphor: ReFantazio. In this challenging encounter, you’ll face the Homo Jaluzo boss, who ties together the puzzle of the town’s missing residents. Prepare yourself—this battle is not just difficult but also highly disturbing, ranking among the most unsettling experiences in the game.

      Warning: Spoilers Ahead for the Main Story of Metaphor: ReFantazio

      Once you reach a point in the game where you discover that Heismay is not the actual kidnapper, you’ll navigate the formidable Kreigante Castle dungeon, with Heismay joining your party as a companion. As you progress through this labyrinth, you’ll catch quick glimpses of the final boss, Homo Jaluzo, lurking ahead.

      Preparing for Homo Jaluzo

      Gather Supplies & Adjust Your Archetypes

      Homo Jaluzo is, distressingly, the human offspring of Joanna and the cause of Martira’s missing people. Though it may not seem as intimidating at first glance, don’t underestimate its power. This baby possesses a high health pool and deals significant damage, capable of wiping out your entire party in just a few turns. To maximize your chance of success, ensure you’re well-prepared to exploit its weaknesses while addressing your own.

      Unfortunately, Homo Jaluzo lacks distinct weaknesses or resistances, so your main focus should be on dealing maximum damage. However, at a certain point in the fight, you’ll be instructed to target its eyes, which do have vulnerabilities. Specifically, while both eyes resist slashing damage, they are weak to piercing attacks. It’s essential to have at least one character in your party capable of delivering that type of damage.

      If possible, consider doing your shopping during Idles Day in Metaphor: ReFantazio to benefit from discounts at various shops, allowing you to stock up on supplies or invest in better weapons and armor.

      Additionally, make sure to gather enough restorative items for both HP and MP, as well as items to cure Daze. Check out weapon and armor stores, and don’t forget to visit the church to see if any of your items can be enhanced using Blessed Water found in some shops. If time allows, you might also want to complete Alonzo’s quest for the Faker Archetype, although it isn’t necessary.

      Optimal Party Setup to Conquer Homo Jaluzo

      Assemble a Balanced Team with Support and Damage Capabilities

      In Metaphor: ReFantazio, you can only have four members in your party at this stage: the protagonist, Strohl, Hulkenberg, and Heismay. With Heismay’s Thief Archetype, you’ll have plenty of options moving forward. One effective strategy for this encounter involves assembling four Merchants to launch a high-damage Gold attack, as demonstrated in Lilith’s YouTube video linked above, which can make the battle significantly easier.

      While every playthrough is unique, and different archetypes may be available at different times, there is no one-size-fits-all approach. Personally, I managed to win the fight without the Faker Archetype, as I hadn’t completed the quest related to it before tackling the dungeon. However, the Faker is frequently recommended for this battle due to its overarching advantages.

      Battle Strategy Against Homo Jaluzo

      Maintain Healing & Inflict Attack Damage

      While it may seem elementary to recommend keeping your party healed and prioritizing damage in a boss fight, it’s essential advice. Initially, you won’t have access to attack Homo Jaluzo’s eyes. Thus, your initial focus should be on damaging the main body, which has no resistances or weaknesses until the eyes are available for targeting.

      Keep an eye out for Homo Jaluzo’s Stare attack, which inflicts Daze on your party members. Your healer will be crucial in removing this condition, but it’s wise to carry items to cure Daze as well.

      It’s important to manage your team’s positioning effectively. Ensure your healer remains in the back row to mitigate damage taken while using defensive skills, since Stare does not deal damage but prevents magic and Synthesis skills from being used.

      As Homo Jaluzo gains power for larger attacks, make sure to have your party members move to the back row and guard to minimize damage taken, allowing your healer to keep everyone topped up.

      Once you’ve worn down Homo Jaluzo’s health, expect a gut-punch moment when Joanna steps in to restore the boss’s HP, forcing you to deplete its health bar again. At this point, focus on using your Synthesis Skills, emphasizing the combinations available between Strohl and Hulkenberg for maximum damage output.

      Final Thoughts

      After some perseverance and strategic decision-making, you should be able to defeat Homo Jaluzo, despite the tedious nature of this fight. Successfully overcoming this challenge will reward you with one of the most touching cutscenes in Metaphor: ReFantazio, providing a sense of closure and emotional weight.

      Source: Lilith/YouTube

    • ReFantazio: Defeating Glodell – A Comprehensive Boss Guide

      ReFantazio: Defeating Glodell – A Comprehensive Boss Guide

      The battle against Glodell in Metaphor: ReFantazio takes place at level 38 during the Infiltrate the Charadrius quest. This encounter is particularly challenging due to several restrictions that can complicate the fight. However, you will earn a significant amount of experience and in-game currency, along with valuable crafting materials to enhance your party members’ abilities.

      Taking down a boss in Metaphor: ReFantazio often requires careful planning and patience, especially when dealing with bosses that can hinder your team. In the case of Glodell, players must strategize their Archetypes before entering the battle, as only a limited number of party members are allowed.

      Best Party Combo to Defeat Glodell

      Limited Party and Archetype Choices

      In this fight, you have limited options, only bringing the protagonist and Junah along with you, which creates a 2v2 battle against Glodell and his hound, Hector. This makes selecting the right Archetypes crucial since your choices are quite restricted.

      Related

      Metaphor ReFantazio: How to Unlock Royal Embodiments

      Royal Embodiments represent the peak of a character’s Archetype in Metaphor: ReFantazio, achieved when you develop a strong bond with them.

      For this encounter, your team should consist of:

      • Protagonist – Wizard Archetype
      • Junah – Masked Dancer Archetype

      You may opt for the Mage Archetype for the protagonist instead, but it’s better to choose a class that can inflict elemental damage to counter both Glodell and Hector effectively. Junah’s selection is predetermined by the storyline, as she acquires the Masked Dancer Archetype during this segment.

      How to Defeat Glodell & Hector

      Targeting Each Enemy with the Right Damage

      be compelled to confront Glodell anyway since he has taken Junah captive. Initially, you’ll face the boss alone, but eventually, Junah will join you for assistance in defeating him.

      As the battle commences, you need to make strategic decisions about your attacks. Glodell will consistently boost Hector, who will be the primary attacker, making the fight increasingly difficult as his attacks become deadlier over time, especially without the backup of your full party. It’s advisable to focus on one enemy at a time to avoid prolonging the battle.

      Although the match concludes once Glodell is defeated, if you concentrate solely on him, Hector will strengthen and become more dangerous. Hence, it’s better to eliminate Hector first before turning to Glodell.

      Glodell is not particularly resistant to any one element, but he is vulnerable to fire damage. In contrast, Hector is susceptible to wind damage, utilizing Junah’s new Archetype effectively. After you defeat Hector, focus on dealing as much fire damage as possible to Glodell.

      To take down Hector, primarily use Junah’s Cyclo skill. The protagonist should deal substantial damage as well, with skills like Blizza or Kandera being particularly effective. Any wind damage you inflict will maximize your results against him.

      For Glodell, you can have Junah use Hellfire Dance to enhance his vulnerability to fire damage before striking with Botra. Junah also possesses Infernal Vortex, either of which will significantly aid in dispatching Glodell swiftly. For a visual demonstration of this fight, check out the YouTube channel Brandsaver.

      Upon victory, you will acquire the Magician’s White Mask as a reward, valued at 25,000 in-game currency. It can be utilized to craft various types of masks, making it an excellent asset. You can then proceed on your quest to rescue the prince from his curse and save the kingdom in Metaphor: ReFantazio.

      Video Credit: Brandsaver/YouTube

      metaphor-refantazio-tag-page-cover-art.jpg

      Release Date
      October 11, 2024

      Developer(s)
      Studio Zero

      Publisher(s)
      Atlus

      ESRB Rating
      T For Teen // Blood, Language, Mild Suggestive Themes, Use of Alcohol, Violence

    • Claiming the Deed from the Arrogant Noble in Metaphor: ReFantazio

      Claiming the Deed from the Arrogant Noble in Metaphor: ReFantazio

      Your adventures in Martira have truly paid off in Metaphor: ReFantazio. After showcasing the actual kidnapper’s head on exhibition day in the bustling port city of Brilehaven, you’ve garnered a lot of admiration. With your growing reputation, you can expect additional side quests to arrive. One of these tasks is Deeds and Diversions.

      Securing the Deed from the arrogant Ishkia noble might look like an easy task, but, as is often the case, it’s not straightforward. You will need to engage in some negotiations and dive deep into the Forsaken Tower to rectify the situation.

      How to Begin Deeds and Diversions


      On July 23rd, the day after the Exhibition of the Brave, you will be free to explore Brilehaven at your leisure, where you will find several NPCs offering quests. The Overfamiliar Man outside Nightprowler will present you with the Deeds and Diversions quest, requesting your assistance in reclaiming his Deed from an Ishkia noble.

      How to Obtain the Deed


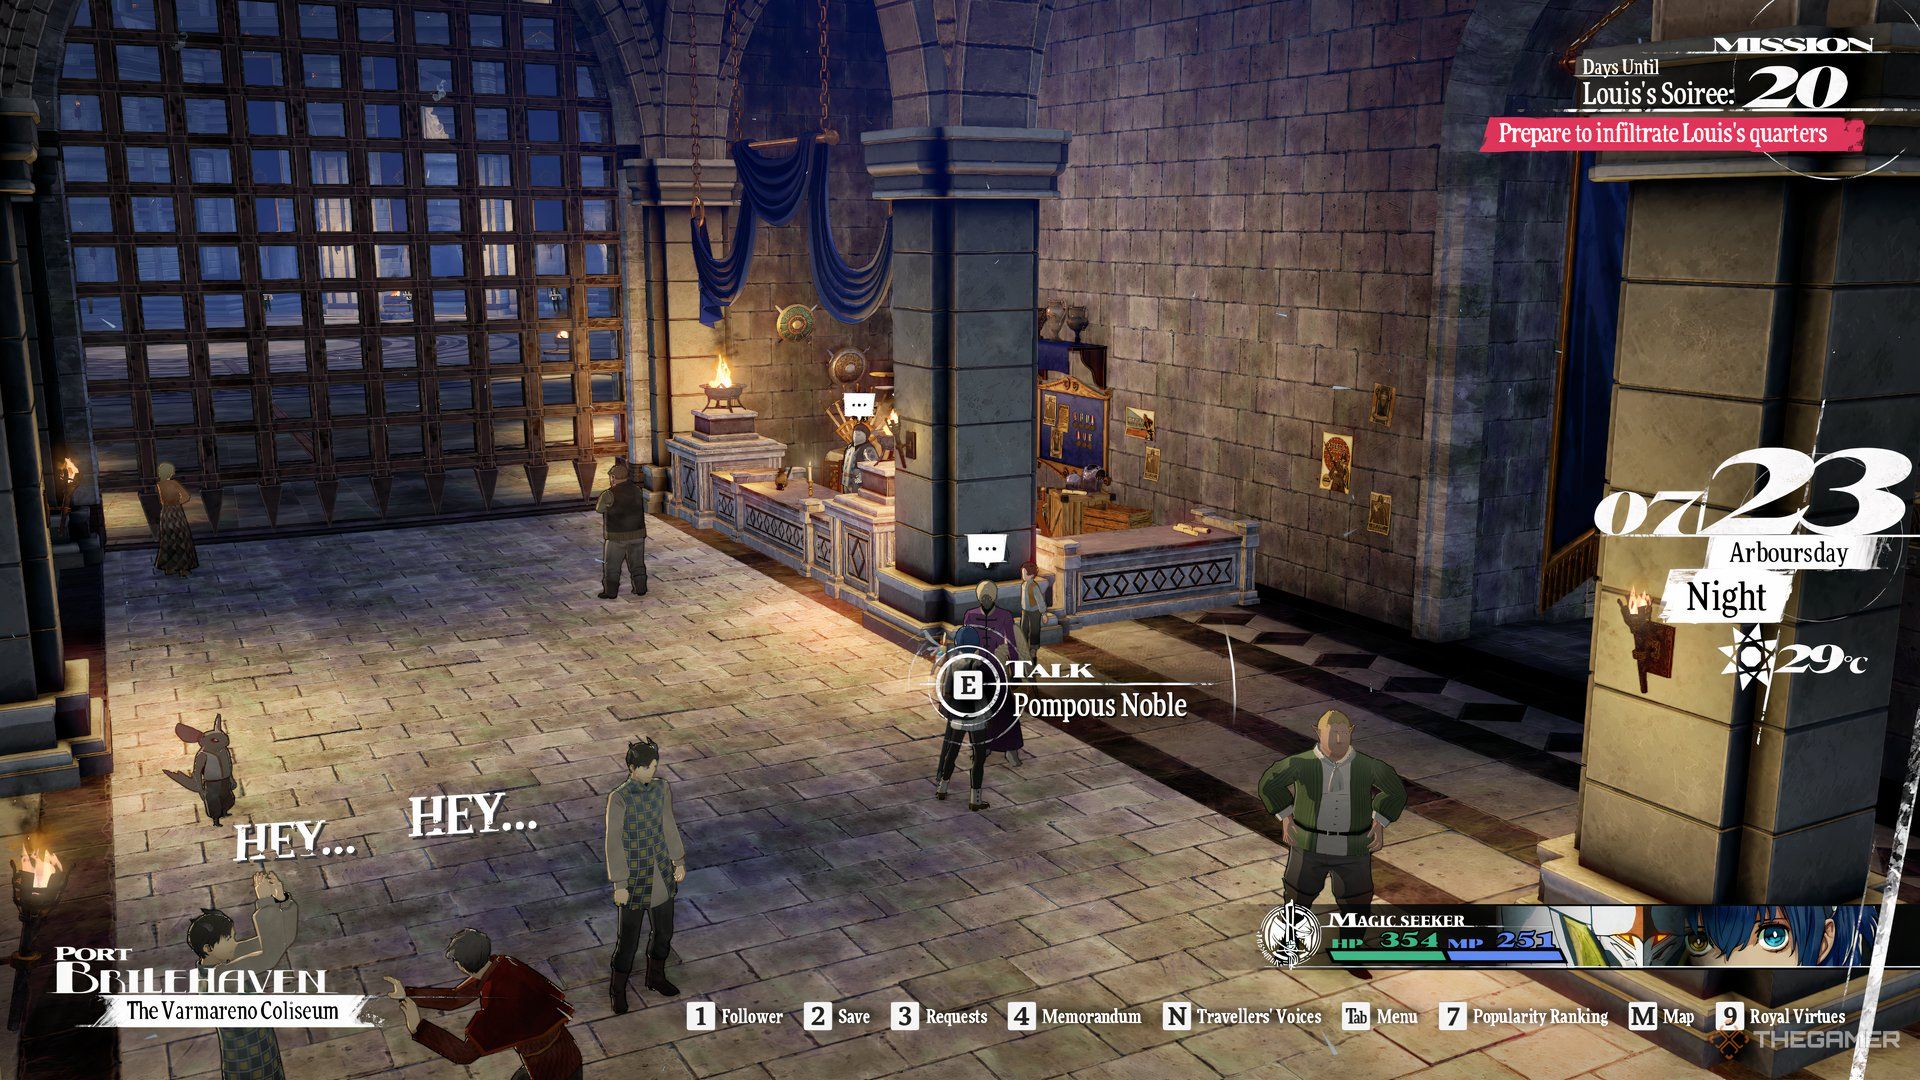
      The Metaphor: ReFantazio protagonist before a Pompous Noble in the Varmareno Coliseum.

      The noble you seek is notorious for his passion for bloodsports, as the quest-giver suggested. You’ll typically find him near the Varmareno Coliseum in Arenafront Wharf, dressed in purple.

      When you approach him, avoid being blunt about the Deed. Instead, choose your dialogue wisely to gently steer the conversation toward the Deed.


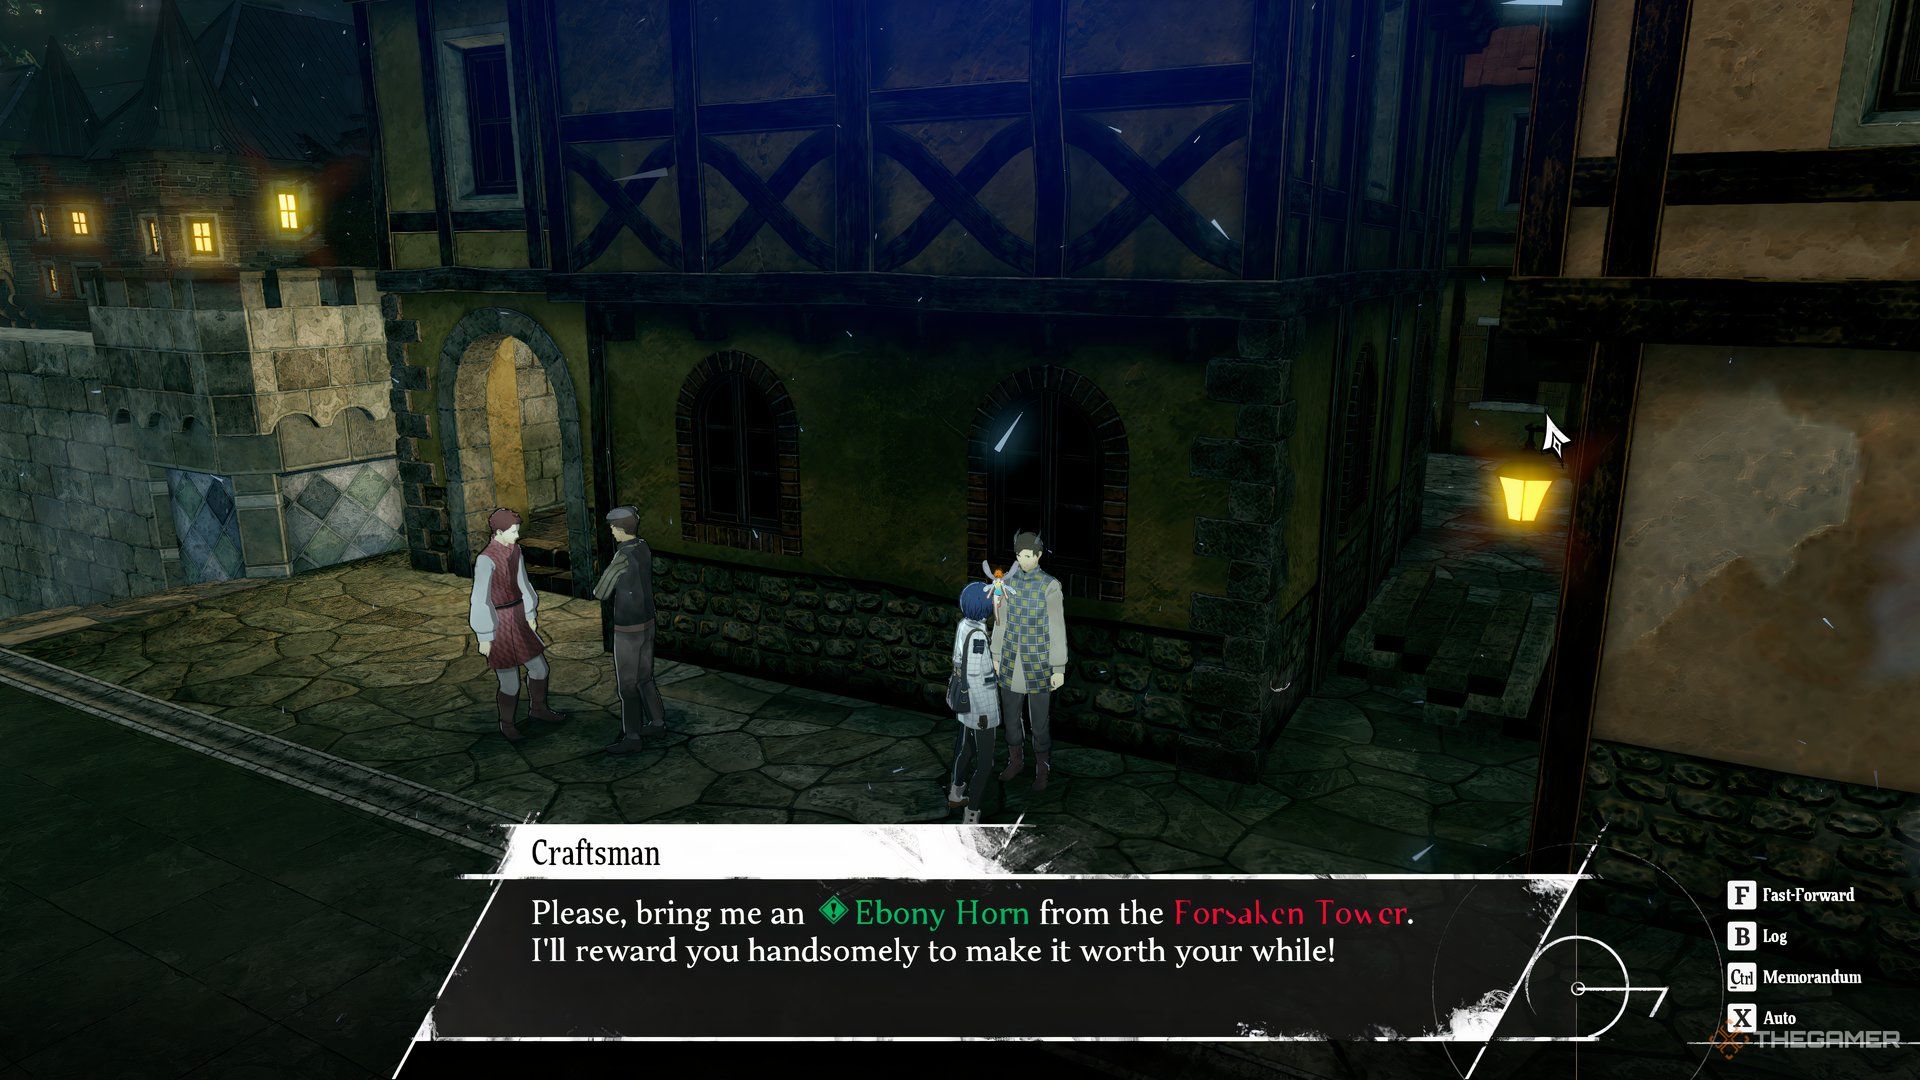
      An NPC asking the Metaphor: ReFantazio protagonist to bring him an Ebony Horn.

      Regrettably, you’ll encounter a problematic conversation unless you have already defeated the Orgas in the Forsaken Tower. This boss fight is also linked to the Superior Scrimshaw quest from the Craftsman in the Merchant Bazaar, where you’ll need to obtain an Ebony Horn by defeating the Orgas.

      Defeat Orgas in the Forsaken Tower


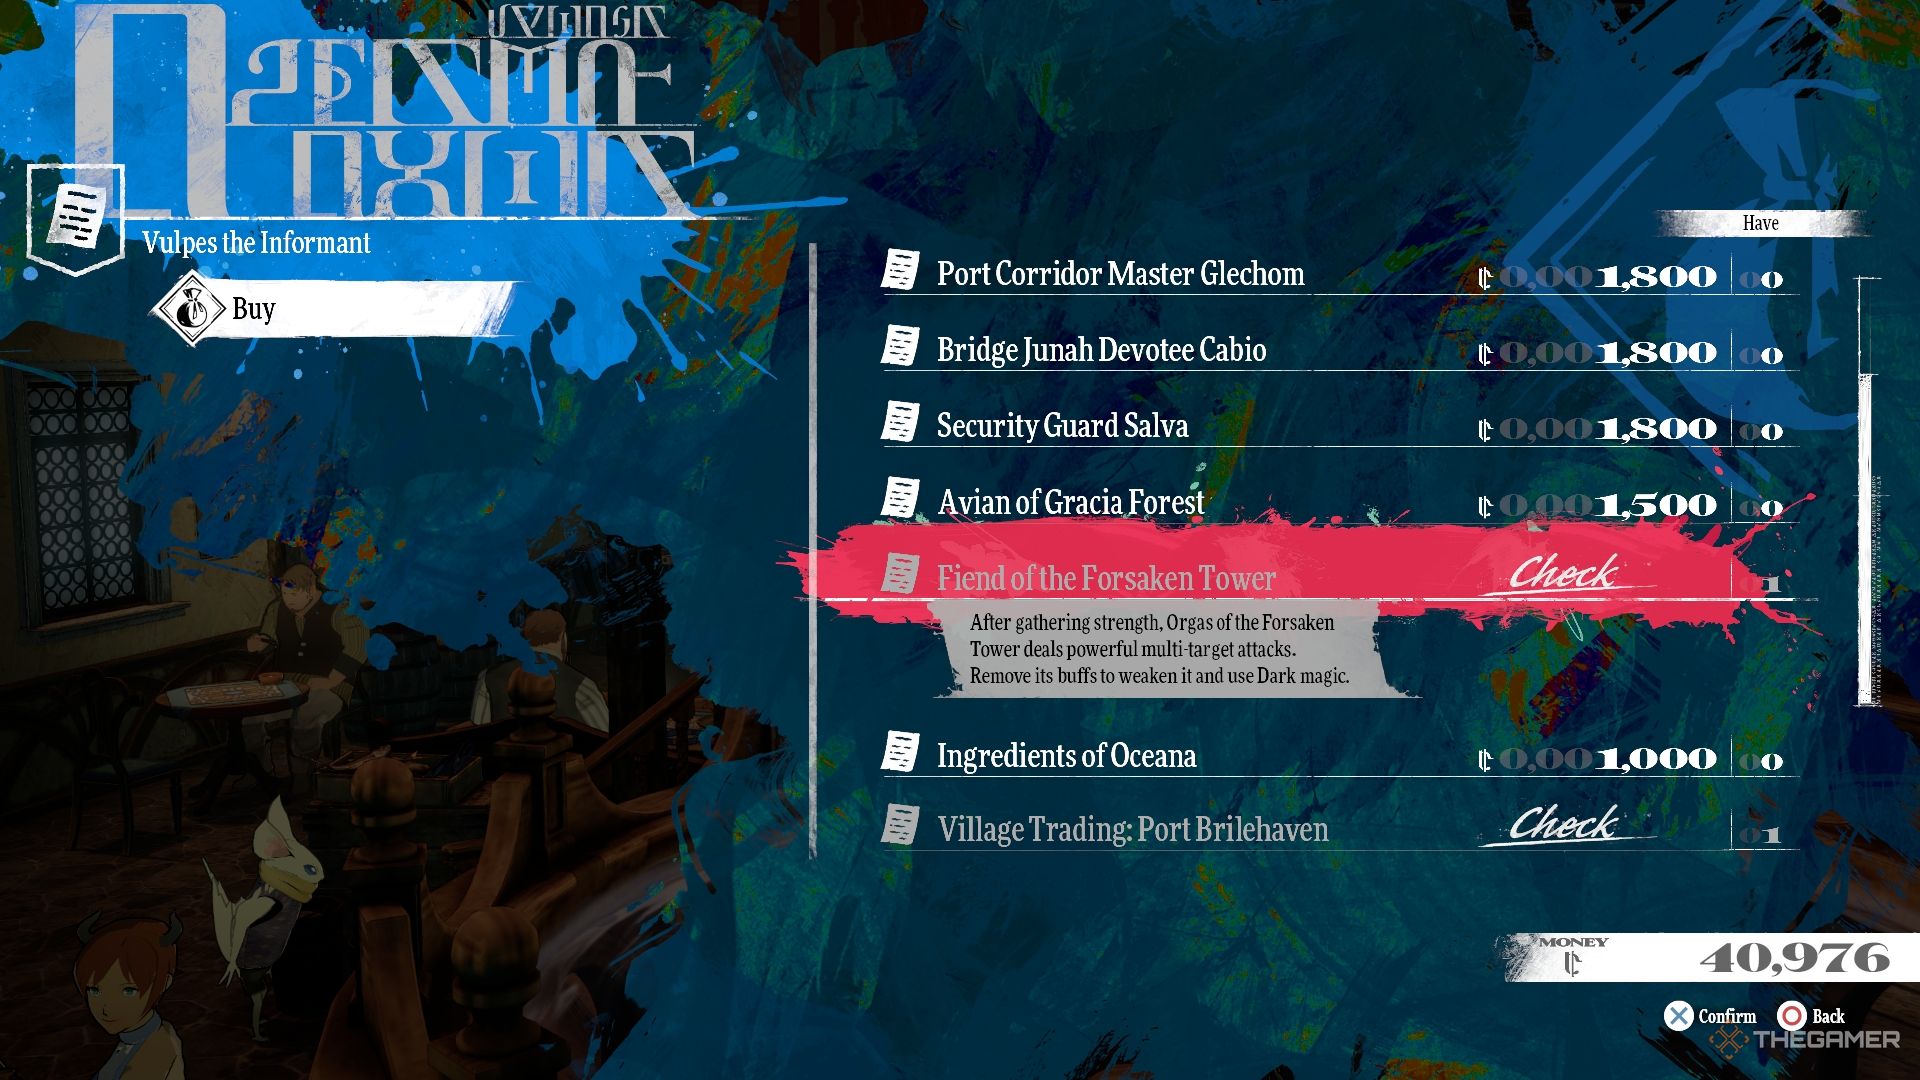
      The Metaphor: ReFantazio protagonist purchasing the Fiends of the Forsaken Tower information.

      To gain access to the Forsaken Tower, talk to the Seasoned Man in the Greatest Catch Tavern and spend 1,800 Reeve to acquire the Fiend of the Forsaken Tower information. This will grant you the ability to travel to the tower using your Gauntlet Runner – a three-day journey filled with challenges from competing Gauntlet Runners, along with a stop at Gracia Forest.

      While in Garia Forest, consider completing the Soldier’s Solace quest given by the Exhausted Woman in Angler’s Inn Square. It’s a great opportunity to accomplish more during your trip.


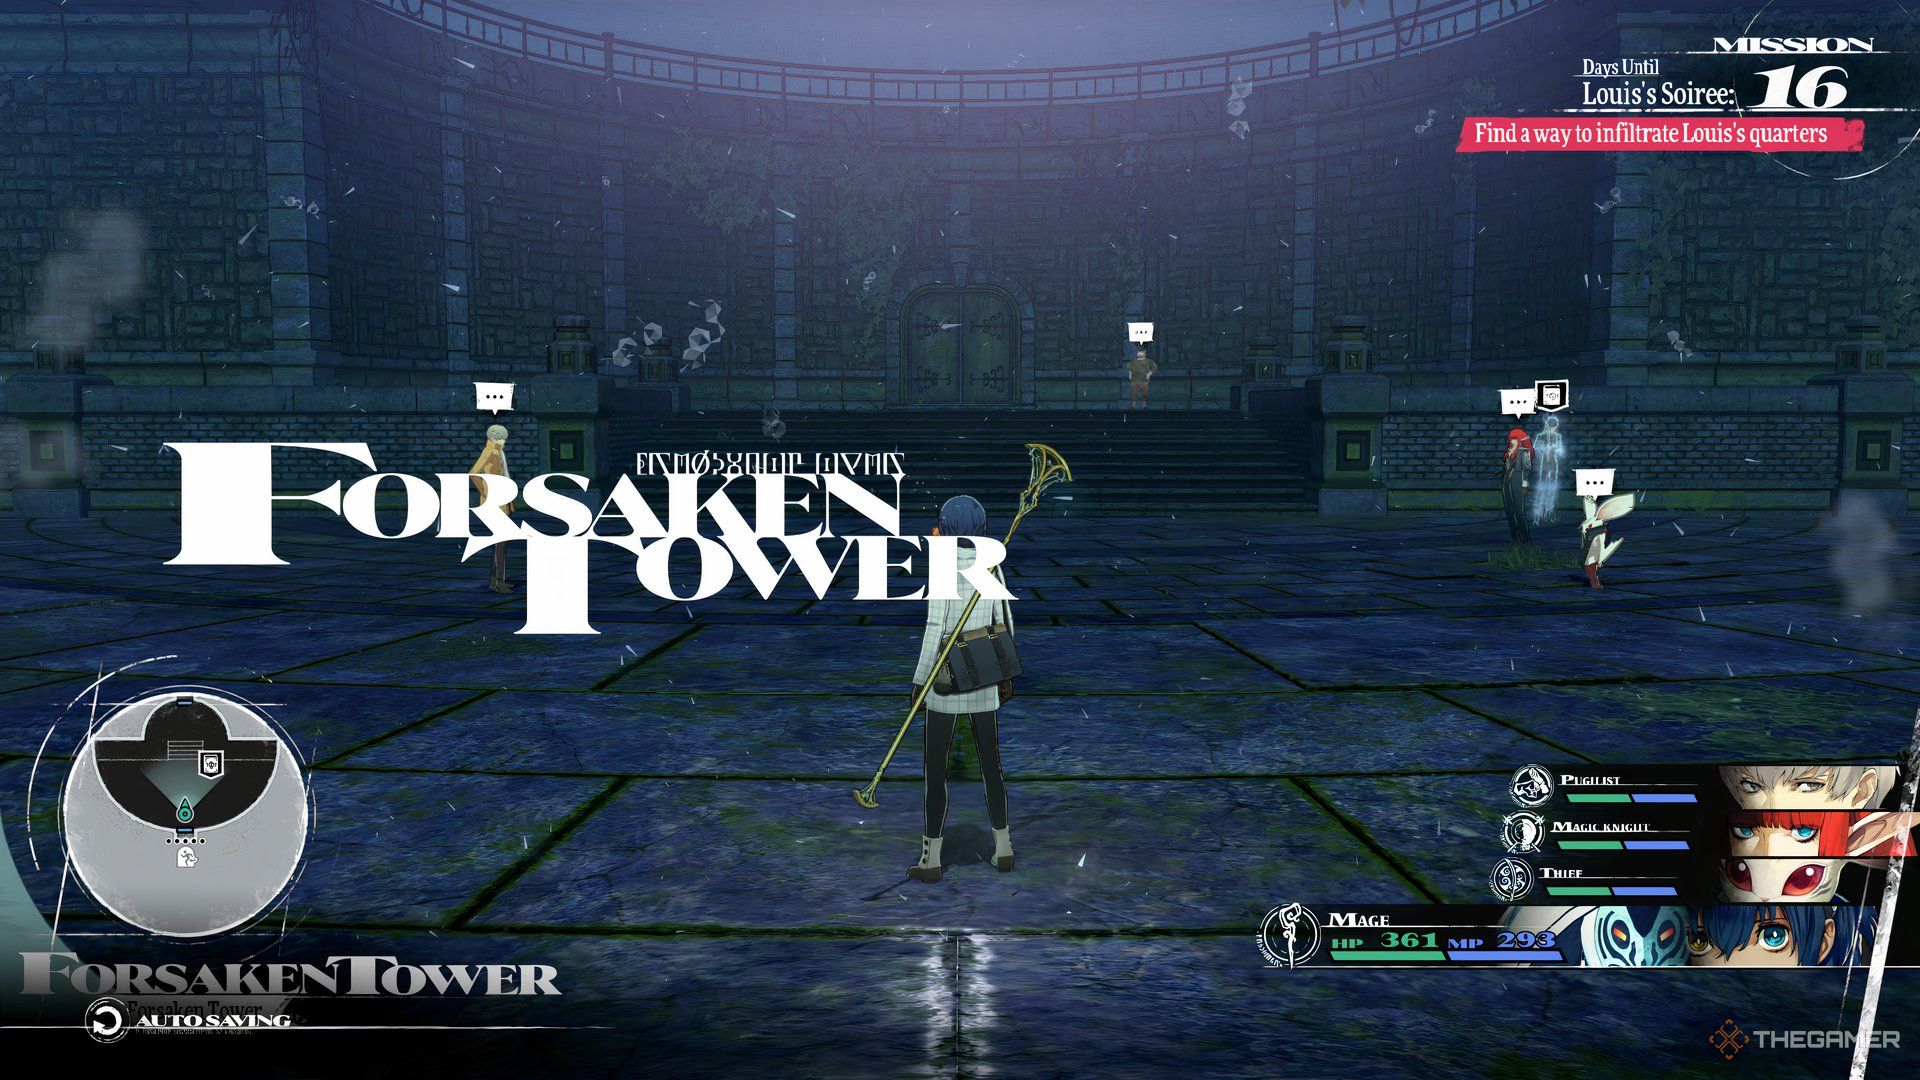
      The Metaphor: ReFantazio protagonist and their gang arriving at the Forsaken Tower.

      The Forsaken Tower has a straightforward layout, but the creatures inside are definitely challenging. Once you reach the top, you’ll confront Orgas, an incredibly tough boss. To give yourself the best shot at victory, having the Healer, Thief, and Faker archetypes is highly recommended.

      Effective Dialogues for the Pompous Noble


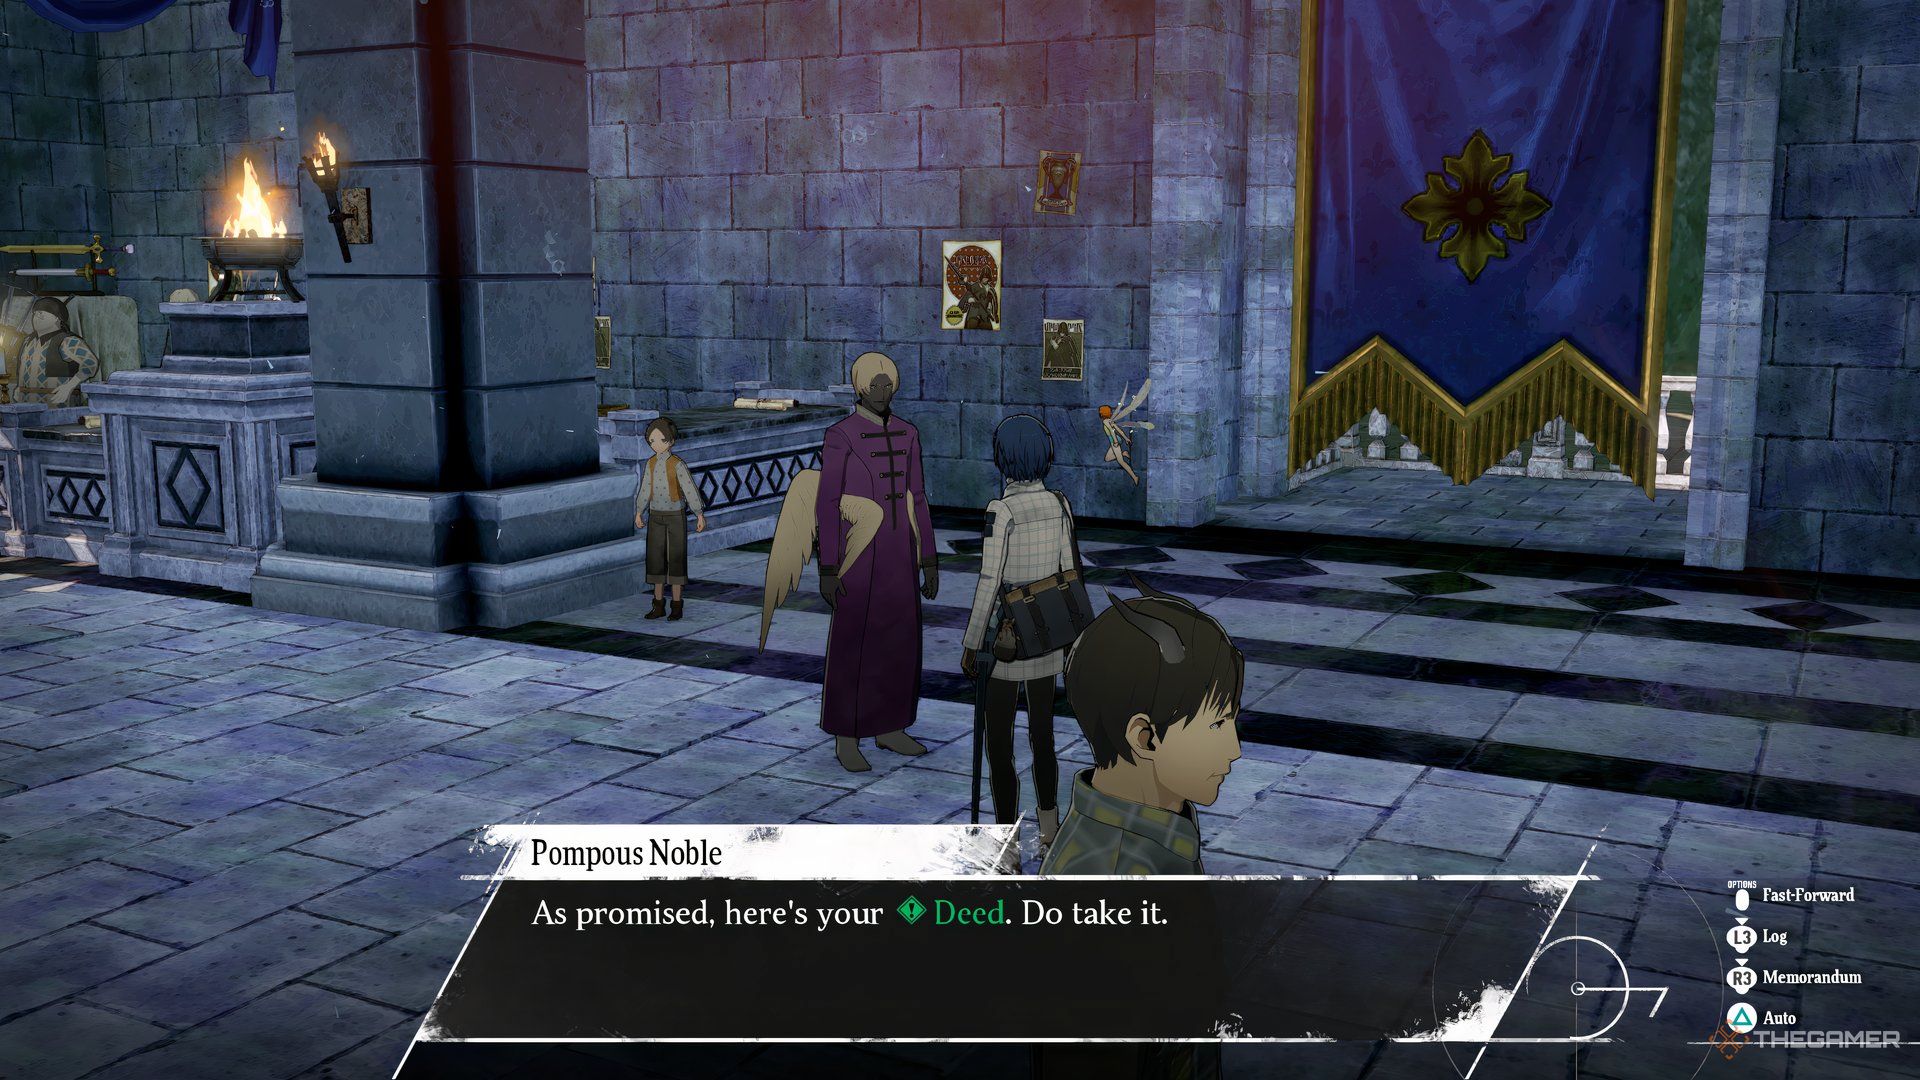
      The Metaphor: ReFantazio protagonist before The Pompous Noble who is returning the Deed.

      After conquering Orgas and securing the Ebony Horn, you can return to the port city the next day to complete the craftsman’s request. Afterward, head back to the noble and use these dialogue options to keep the conversation on track towards the Deed:

      1. You know me, I trust? (3rd Option)
      2. Such a tawdry arena. (2nd Option)
      3. Any option.
      4. You know the forsaken tower? (3rd Option)
      5. I’d like the Deed. (5th Option)

      Rewards for Deeds and Diversions


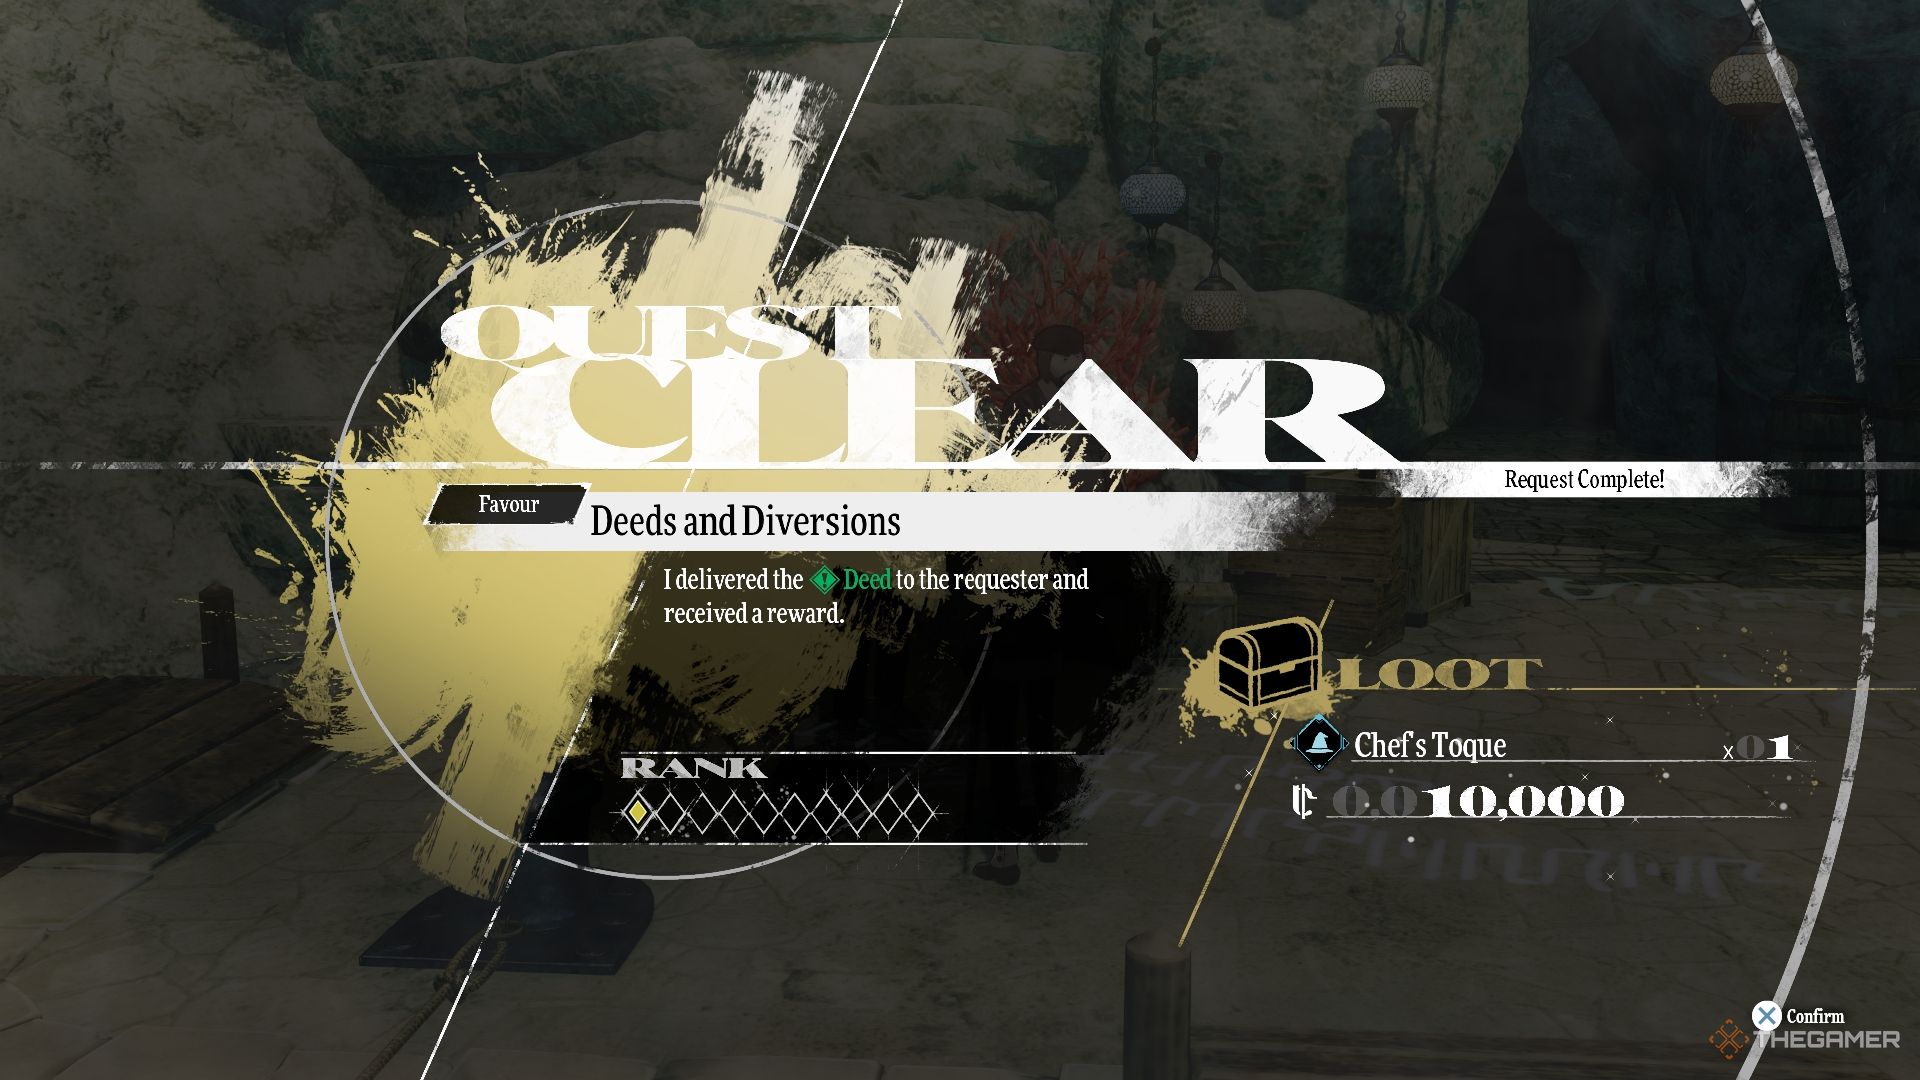
      Quest rewards for completing Deeds and Diversions in Metaphor: ReFantazio.

      After the conversation, the noble will finally hand over the Deed, allowing you to return it to the Overfamiliar Man to finish the Deeds and Diversions quest. He will reward you with a Chef’s Toque and 10,000 Reeve as promised.

    • ReFantazio: Ranking Archetypes in a Unique Tier List

      ReFantazio: Ranking Archetypes in a Unique Tier List

      To figure out which Archetypes are most effective in Metaphor: ReFantazio, creating a tier list is a great way to quickly see which ones will enhance your gameplay. There are 14 Origin Archetypes available, each with its own set of 46 subclasses, providing a wide range of skills and combat abilities. By focusing on the S and A-rank subclasses, you can make your 80-hour gaming experience much smoother.

      The standout JRPG from Studio Zero is packed with intricate mechanics that players need to master, including the unlocking of all followers. If you can also learn to rapidly accumulate EXP and MAG, you’ll be able to elevate your Archetypes quickly and access their advanced skills sooner. By prioritizing the best Origin classes, you’re almost guaranteed to win more battles along your journey.

      Ranking All 14 Archetypes

      Below is a tier list ranking all 14 Origin Archetypes in Metaphor: ReFantazio. You can unlock these Archetypes by progressing through the main storyline and completing optional objectives to forge new connections. Each Archetype is ranked from S to C based on its effectiveness in battles throughout the game.

      Tier Archetype
      S
      A – Summoner
      – Mage
      – Warrior
      – Gunner
      B – Masked Dancer
      – Commander
      – Thief
      – Faker
      C

      Understanding how to unlock every Archetype and their subtypes isn’t strictly necessary for success, but it greatly expands your strategic options. If you find yourself torn between Archetypes due to a specific skill you’re targeting while wanting to avoid certain weaknesses, consider using the Inheritance system. This allows you to duplicate skills and build a more balanced character. However, with C-tier Archetypes, you shouldn’t encounter any major difficulties in the more challenging parts of the game.

      The tier list provided for Metaphor: ReFantazio reflects a personal ranking. You’re welcome to adjust the rankings based on your own experiences.

      Which Archetypes Are the Best and Why?

      The top Archetypes in Metaphor: ReFantazio are the Seeker, Healer, and Merchant, all of which sit in the S-tier. The Seeker, despite being the first Archetype unlocked for the main character, is a versatile choice, balancing both Strength and Magic. It also possesses some of the most powerful Synthesis skills, which are increasingly valuable as you encounter formidable bosses. The Healer, another early unlock, remains indispensable as the game progresses, offering crucial squad-healing and status effect removal abilities.

      The Merchant might seem less impressive since it’s unlocked early, but its value grows immensely as your journey unfolds. With one of its key skills consuming Money instead of MP, you’ll find that you have far more resources at your disposal. This means you can traverse extensive dungeons without worrying about depleting your MP reserves. By prioritizing the Archetypes of Seeker, Healer, and Merchant, you’ll be leveraging the best advantages that Metaphor: ReFantazio has to offer.