-
A welcoming sign at the entrance to Kariyushi Arcade, installed outside and above the front door.
-
A T-shirt shop with a red tile awning, located on Ryukyu Boulevard near Goin’ My Way, next to Mujimun.
-
A casual clothing store close to Kariyushi Arcade, situated next to Mujimun on Ryukyu Boulevard.
-
A shop dedicated to Lalala Phone products, found in the Lalala Phone booth on Ryukyu Boulevard, next to Kariyushi Arcade.
-
The best place to cool off in the heat is Hibiscus Ice Cream, located on W Ryukyu Boulevard downtown, near Haisaikan Gift Shop. (The photo shows the small sign hanging above the outdoor eating area.)
-
Don’t judge a book by its cover—OkinaOne Steakhouse, located next to Hibiscus Ice Cream on W Ryukyu Boulevard, has a simple, run-down exterior.
-
A sign on the building next to the steakhouse indicates the location. It’s an unmarked building beside OkinaOne on W Ryukyu Boulevard.
-
The unmarked building facing Smile Burger across on E Ryukyu Boulevard.
-
Outside Urashima, there’s an orange-tile gazebo. It’s at the entrance between Heaven’s Golf and Poppo, along E Ryukyu Boulevard.
-
A sign for a restaurant near the coin lockers, upstairs in a building between Heaven’s Golf and Poppo on E Ryukyu Boulevard.
-
A bright yellow sign indicates a local liquor store across from Haisaikan Gift Shop on W Ryukyu Boulevard near Kariyushi Arcade.
-
A store with an outside Print Club machine is on W Ryukyu Boulevard, across from Kariyushi Arcade, in Haisaikan Gift Shop.
-
A shop selling liquor and everyday items next to the Downtown Raffle stand, beside the entrance to Kariyushi Arcade.
-
A beach-themed gift shop situated across from the Downtown Raffle stand, near Kariyushi Arcade’s entrance.
-
Hana Hana is a souvenir shop with yellow lettering, located one building down from the Downtown Raffle stand within Kariyushi Arcade.
-
A shop that sells traditional Ryukyuan instruments, next to Hana Hana inside Kariyushi Arcade.
-
Shima Bird, a small souvenir shop near the back of Kariyushi Arcade, next to Maeda Drugs, in case you missed the other shops.
-
Conch Shell offers casual island clothing, located in the corner between Kariyushi Arcade and the Public Market, just east of Waraba.
-
A simple soba restaurant sits across from the Public Market, at the southern end of the map, next to the market and the taxi stand.
-
Inside the Public Market, near the ceiling and next to the large stairway, there’s a kite depicting a shisa.
-
An adorable mascot statue outside the arcade inside the Public Market building in Downtown Ryukyu.
-
A juice shop near the Public Market, located in the far southwestern corner of the map, next to Waraba and an inaccessible area.
-
Umachii is a local izakaya with red lanterns, situated in the middle of Ryukyu Central Highway on the left side of the street.
-
A soba place near Ebisu Pawn, located in the center of Ryukyu Central Highway on the right side.
-
A billboard showing a soy sauce brand is on a tall rounded building near the entrance to Ryukyu Central Highway, visible when looking up.
-
A blue-topped phone booth located next to the stairs leading to the monorail, near the end of Ryukyu Central Highway.
-
Outside Chura Bar, there’s a turquoise sign for a corner izakaya near Hatsumachi Street.
-
Club Planet, a nightclub with a cosmic theme, located at the corner of Hatsumachi Street, across from Yamashiro Threads.
-
A Ryukyu-style ramen restaurant is in the southern part of Hatsumachi Street, across from Yamashiro Threads and next to Inari Street, near the Hatsumachi taxi stop.
-
Aqua Sky is a trendy local bar situated in the southern corner of Hatsumachi Street, next to Inari Street and close to the Hatsumachi taxi stop.
الوسم: map
-
Locating All Foto Rally Spots in Downtown Ryukyu in Yakuza Kiwami 3
-

Where To Find the Staff Room and Flushing Terminal in Arc Raiders
Arc Raiders offers numerous quests that guide players through main story progressions during raids. Each quest directs you to specific locations on designated maps. Even after completing these quests, the developers frequently add new ones, often every month.
The “Stench of Corruption” is a notable example, added with the Cold Snap update. When you accept this quest, your first task is to visit the Staff Room located in the Departure Building at Spaceport. After completing that step, you’ll need to find a Flushing Terminal inside the tunnels.
Where to Find the Staff Room
Once you accept “The Stench of Corruption,” your first objective is to reach the southwest entrance of the Departure Building at Spaceport. You can identify this building by looking for red outlines near the center of the map. Head to the smaller southwest section of the building to find the entrance.
Inside, take the hallway to your left. Soon, you’ll see a barred door on the left with a sign that says “Staff Room.” You must breach this door to enter and complete the quest objective. Sometimes, the door might already be open if someone else has looted the area before you. To make sure you’re in the right spot, look for the “Staff Room” sign on the wall.
Inside the Staff Room
After entering, go down the stairs and move straight ahead until you reach the second clothing rack on your right. Interact with this rack to complete the first part of the quest. Be sure to pick up the key that drops from here, as you’ll need it later.
Where to Find the Flushing Terminal
The next part requires you to find a Flushing Terminal inside the Spaceport tunnels. You can see these tunnels by switching the map layer. The best entrance is just above the Departure Building, where the tunnels extend outward.
Enter the tunnels through this point. Once inside, go down the ramp. To your right, you’ll see a small room with computers. Interact with these and use the key obtained earlier from the Staff Room to complete this step. Keep in mind, these steps are meant to be done in one continuous run, so you don’t need separate loadouts; you can complete the quest with a basic setup.
-

Where To Follow Red Markers in the Buried City in Arc Raiders
In Arc Raiders, very few survivors remain outside of Speranza. Every survivor you find helps increase humanity’s numbers against the machines. Protecting humanity is always the main goal, so it’s important to follow leads when new raiders are spotted.
Apollo will contact you to find a family interested in settling in Speranza. You’ll need to search the Buried City for them. The quest is tough because the guidelines aren’t marked on your map, but we’ll help you locate the target and return safely. Here’s what you should know.
Where to Find the Abandoned Highway Outpost
Go to the Buried City and aim for the broken highway on the far west side of the map, a few clicks south. The camp is set up on the remains of the highway, so use a zipline or a grappling hook to get there quickly. Once on the highway, follow it all the way to the outpost.
While the family is no longer there, you should search the backpack on the ground for clues. Inside, look for a red marker—similar to the ones Tian Wen points out in her quests. These red ribbons are your next clues.
How to Follow the Red Markers
The markers are placed on posts and cars along the highway. Follow them carefully to stay on the trail. Continue along the entire highway until you reach the final break, where it dips into the sands of the buried residences. From here, the trail gets harder to follow.
At the end of the broken highway, head north following the red markers into the heart of the buried residences. After climbing the sand mound, turn southeast to complete your journey.
How to Complete “A Warm Place to Rest”
In the ruins of the buried residences, you’ll find a shallow grave. Examine it to finish the mission and then extract quickly. The nearby Eastern Metro Station is a good escape route if it’s still open. Once back in Speranza, talk to Apollo about what you discovered.
While the family is gone, searching the grave will give you clues. After examining it, you’ll find a recovered item, and your goal is to extract swiftly. The grave area provides a nearby escape route, making it easier to return promptly.
More Survivors and Rewards
It’s unfortunate that the family didn’t survive, but more survivors are out there. As a reward for your efforts, Apollo will give you three noisemakers, five blue light sticks, a rosary, and a new cosmetic color. Even if the mission was tough, these rewards help keep you going.
-

How to Solve the Hidden Bunker Map in Arc Raiders
If you’ve spent any time in Arc Raiders, you know how valuable loot can be. From simple crafting materials to powerful weapon parts, everything can be used to improve your gear. The best place to find these materials is in a secret underground bunker located in humanity’s last known port.
The Hidden Bunker event only shows up at specific times during the day. Finding it requires careful planning and some luck. Usually, you team up with other players to loot the entire bunker, but beware—some raiders might try to betray you and take what you’ve collected.
How to Unlock the Hidden Bunker
The Hidden Bunk only appears at the Spaceport during certain hours, similar to Night Raids. However, these times are based on real-world time zones. For example, it can be found at 4:00AM UTC, 10:00AM UTC, and 7:00PM UTC. This can make it challenging for casual players, but with patience, it’s possible to join in.
Participating in this event is optional, so only enter the map if you’re planning to loot. If not, just load into the regular Spaceport map. The hidden bunker is available for about an hour each time, which means you might get two opportunities to raid it if you’re quick. Otherwise, you get just one shot per session to unlock and loot the bunker.
Once you arrive at the Spaceport, you’ll see a notification about a hidden bunker filled with gear and data. The bunker is heavily protected by Arc units, so make sure your equipment is ready for a fight.
Tip: Use a free loadout first to get familiar with the layout and feel of the mission. This way, you won’t risk losing your best gear during the raid. However, remember that support from other players might be limited during this event.
Where to Find the Hidden Bunker Antennas
There are four antennas scattered across the rooftops of the Spaceport, and they are key to opening the bunker. The exact locations are random each time but will be marked on your map. Generally, there’s one in each direction: north, south, east, and west. Use your surroundings to reach them—climb onto nearby structures or find creative routes.
You don’t need to activate every antenna yourself, as other players may have already done so. When an antenna gets activated, a notification appears for all players. To activate an antenna, go to the rooftop and interact with its console. Wait for a few seconds until it establishes a secure connection, all while fighting off Wasp and Hornet Arc units that come to investigate the noise. Once connected, interact again to complete the activation.
Warning: Rooftops can be open and exposed, so act quickly and watch your step to avoid falling.
Once all four antennas are active, a message will inform everyone that the Hidden Bunker is open. The challenge then is to race down to the bunker, which can be a short walk or a long trek across the sands, depending on your spawn point. Stay alert, navigate carefully, especially at night, and conserve your ammo for the fight ahead.
Hidden Bunker Location
The bunker is situated in the southwest part of the map, between the Fuel Processing plant and Fuel Lines. It’s just south of the Departure Building, near an elevator and concealed within a hill. The outside lights mark its position, making it easier to spot once you’re close.
When you reach it, expect resistance—Bombarier and Bastion units patrol the entrance, with Wasp and Hornets nearby. Snitches fly overhead, calling in reinforcements. Use heavy firepower and plenty of explosives to get through their armor. A strong shield and multiple ways to recharge it are important, and looting fallen Arc units can supply useful parts.
Tip: You could try sneaking in, but there’s more fun in a firefight. After the units are down, everyone can loot the remains for valuable gear. Team up to speed through the raid or sneak past enemies in the chaos to make sure you get first pick. Just be prepared for possible backlash—whether from enemy fire or flying ticks.
What to Do Inside the Bunker
Once inside, your goal is to collect data from eight different consoles on various floors. Walk up to each one and interact to start downloading. The consoles have indicator lights: red means data is ready to collect, yellow shows the download is in progress, and green indicates the data is ready to be gathered.
Tip: Stay close to each terminal to ensure the download completes successfully.
While working inside, you can break open lockers for parts and resources. Be cautious—small Arc units and ticks hide inside dark corners, so clear comms are vital to avoid surprises. After gathering all the data, head for the exit. Be aware that additional Arc reinforcements may appear as you leave; if overwhelmed, try to sneak past or head toward the elevator located about 100 meters north of the bunker for a speedy escape.
Tip: Save your ammunition for the final escape, as confronting all the Arc units outside might not be worth it.
Loot the bunker thoroughly after collecting the data—but always prioritize your safety. If you’re caught outside or overwhelmed, you risk losing all your hard-earned loot, including rare items and materials.
-

Where To Find The Best Loot on Each Map in Arc Raiders Using Completing and Solving
Knowing your way around the maps in Arc Raiders is crucial. From quick, easy runs suitable for beginners to intense zones full of danger and high rewards, each map has its own flow. Running into a new area without any plan might be fun at first, but it can leave you vulnerable to ambushes. This guide is here to help.
We’ll go over every map, how to unlock them, and where to find the best loot. Think of it as your map to getting the gear that keeps you ahead in the game.
Updated by Allyson Cochran on November 10, 2025: Map conditions have now been added to this guide.
All Maps and How to Unlock Them
Below is a list of all available maps, how to access each, and a brief description:
Map How to Unlock Map Details Dam Battlegrounds Unlocked by default Easy difficulty, perfect for quick missions and learning the basics. Practice Range Play 4 rounds Training zone to improve shooting and mechanics. No loot or extraction here. Buried City Play 6 rounds Moderate difficulty, better suited once you’ve gained experience. Spaceport Play 12 rounds Medium to high difficulty. Offers better loot but more enemy units. The Blue Gate Play 18 rounds Hard difficulty with top-tier loot; open areas make encounters riskier. Stella Montis Coming soon Details are not available yet. Where to Find the Best Loot on Each Map
Each map has specific spots where the best items can be found:
- Dam Battlegrounds: Look for high-value loot at the Hydroponic Dome Complex (top-left), Control Tower, and the Research & Administration Building near the center.
- Buried City: Top loot is at the Space Travel hub, Hospital, and Town Hall.
- Spaceport: Focus on the Departure and Arrival Buildings, Launch Towers in the top-left, and the Control Tower A6, Container Storage at the bottom-right for high-tier items.
- The Blue Gate: The best loot is near Pilgrim’s Peak (top-right) and the central Checkpoint, though these areas are more dangerous.
What Are All the Map Conditions?
Map conditions are temporary gameplay modifiers that change how you play. Here are the current conditions:
Map Condition Description Hidden Bunker A sealed bunker appears on Spaceport outskirts. Look for heavy Arc activity to find it. Activate four antennas to unlock. Raider Hatches are disabled, and exit points are limited, making PvP fights tougher. Lush Blooms Natural resources like fruits and seeds spawn more often. Great for gathering with minimal combat. Night Raid The map is at night with moonlight. Visibility is low, flashlights reveal your position, and enemies are more aggressive. Keys and better loot behind locked doors are more common, making PvP more dangerous but more rewarding. Electromagnetic Storm Lightning strikes occur across the map. Avoid hits to shields but use strikes to disable enemies. Useful for fighting tough targets or completing combat quests. Stay alert when looting. Prospecting Probes More Arc Probes and Couriers appear, perfect for quests or farming probe loot. They cluster closer together for faster runs and quick extras. Husk Graveyard Significantly increases the number of Arc husks available for looting and quests. Best for harvesting husk materials quickly. Harvester A large Harvester machine spawns, protected by a Queen. Requires teamwork to defeat. Expect big PvE battles and valuable rewards. Being familiar with these map types and conditions can help you prepare better and maximize your success in each zone.
-
Essential Map Highlights of the Atlas in Mudborne
The space outside the Carpenter’s Shop in Mudborne seems quite large, and you’re correct. However, your first journey with Dendro to the Central Junction will reveal just how expansive the pond map truly is. This is before you even consider the dream world!
If you check the map boards scattered throughout Mudborne, you’ll always have an aerial view of your current location. This can be very useful for figuring out your next moves, especially if you plan to utilize quick travel options like the Reflection Pools or Gateway Nexus.
Two Maps for Each Area
At the beginning of your adventure in Mudborne, you’ll start on the Spawning Pool map. This vast space has everything necessary to dive into the heart of the game, from restoring ecosystems to breeding vibrant frogs. As you explore and interact with characters like Hopert, you’ll get familiar with the game’s mechanics and naturally stroll by significant stone pools along your path.
These are called Reflection Pools, and they serve as your gateway between the waking and dream worlds in Mudborne. Each area of the map boasts a corresponding dream world, which largely mirrors the waking world but with important differences. Certain paths may be blocked in the dream world, while other areas could hide crucial items that help you unlock new locations in the waking realm. Furthermore, each area features its own unique obstacles and decorative elements that make them distinct.
Despite the similarities in the maps between the waking and dream worlds, navigating them requires a map! As you explore uncharted territories, watch for bulletin boards with a magnifying glass icon. These are usually positioned in central areas or near significant landmarks. Using your magnifying glass on these boards will allow you to save a map of that area to your Atlas, which helps keep track of your journey.
The maps for the waking and dream worlds are stored separately. For instance, visiting the Kindergarten doesn’t automatically unlock the Future Farms map; you must activate a Reflection Pool and enter the dream world for each map individually. Only then will you observe the environmental changes on each map.
Upon your initial exploration, you’ll notice various markings on the maps. Take note of these marked locations, as they often indicate important buildings, key item spots, helpful hints, and much more. You’ll also find that stepping stones and natural blockages, like patches of algae, are clearly marked, showing you where you can’t go.
Each area offers distinct resources based on which version of the world you are navigating. For example, the Common Green frogs found in the waking world are replaced by Dozy Dreamers in the dream world—frogs with enhanced base A.N.O.U.R.E.S. stats. Balancing resources from both realms is key to advancing your story in Mudborne.
Additionally, keep an eye out for stone archways across the maps. These archways serve as portals into the Gateway Nexus, enabling speedy travel between regions without the need for a long walk.
To aid your navigation, we’ve compiled a summary of the significant buildings and features for each map in Mudborne below.
Overview of Each Map in Mudborne
Map Key Features Characters and Story Spawning Pools - Carpenter’s Workshop
- Ancestry Research
- Emergency Reserves
- Mud Analysis
- Project Management
- Mass Breeding
- Reception
- Dumeril’s Lab
Here, you’ll learn the fundamentals of Mudborne. Characters like Hopert and the Compendium guide you as you become familiar with frog breeding, mushroom cultivation, using Reflection Pools, and more. Hopert, a carpenter, offers various tools, adorable frog-themed furniture, and plenty of storage for your items. Your first home is the Carpenter’s Workshop with a Gateway Nexus portal located on the loft roof.
Kindergarten - Maintenance Shed
- Fungal Projection
- Spore Hybridization
- Bug Farms
- Improved Farming
- Shipping Warehouse
- Keeper’s House
Located west of the Central Junction, the Kindergarten features Ribbert, a frog with a mushroom cap who helps you clear algae blooms obstructing parts of the map. In exchange for Filters and various bugs and mushroom furniture, Ribbert will assist you in repairing broken lifts that connect different islands and levels of the map. Bring frogs with high Umbrage stats to use in filters for clearing algae. The Gateway Nexus portals are located beside Ribbert’s dock and on an island north of the stagnant water pools and Bug Farms.
Residential District - Site Management
- Pumphouse
- Annura’s House
- Drayto’s House
- Engineer’s House
- Dumeril’s House
- Vacant Lot
- Archivist’s House
- Central Engineering
- Staff Canteen
- Botanist’s House
- Marina’s House
- Myola’s House
- Carpenter’s House
- Dockyard
The Residential District lies to the east of the Central Junction and may initially seem overwhelming due to its size. To navigate here, you’ll need to drain flooded rooms with the aid of Kroaka and his array of helpful tools. A key aspect of this area involves managing Saturation, adjusting the dampness of various spots to access important items. You’ll require a Humidifier and Dehumidifier from Kroaka, which you can also use back at your own home for ongoing projects with mushrooms and new frog breeds. The Gateway Nexus portals are close to Site Management and at an island in the center of the map, near Central Engineering and the Staff Canteen.
Climate Control - Forecasting
- Climate Research
- Climate Control
- Caretaker’s Rest
- Residential Shipping
- Cold Storage
- Food Storage
- Deep Storage
- ???
Upon arriving at Climate Control, the area may feel daunting, particularly as it’s mostly frozen due to a massive storm that triggered the events of Mudborne. The machinery is malfunctioning, and fixing it falls to you. You’ll meet Annura in the Caretaker’s Rest as you explore this frosty landscape. You’ll utilize Heaters and Coolers from Annura to navigate by managing the temperature to access buildings. You’ll also need to devise a path around large green pipes that block your way, making it essential to find routes across the water. Your goal is to deal with frozen control items before returning to Climate Control to repair the machinery and improve exploration opportunities. Gateway Nexus portals are located near Annura in the Caretaker’s Rest and on the northern island above Deep Storage.
Central Junction - Memory Works Access
- Collector’s House
- Record Keeping
- Hibernation Centre
- Administration
- Pondmother’s Pool
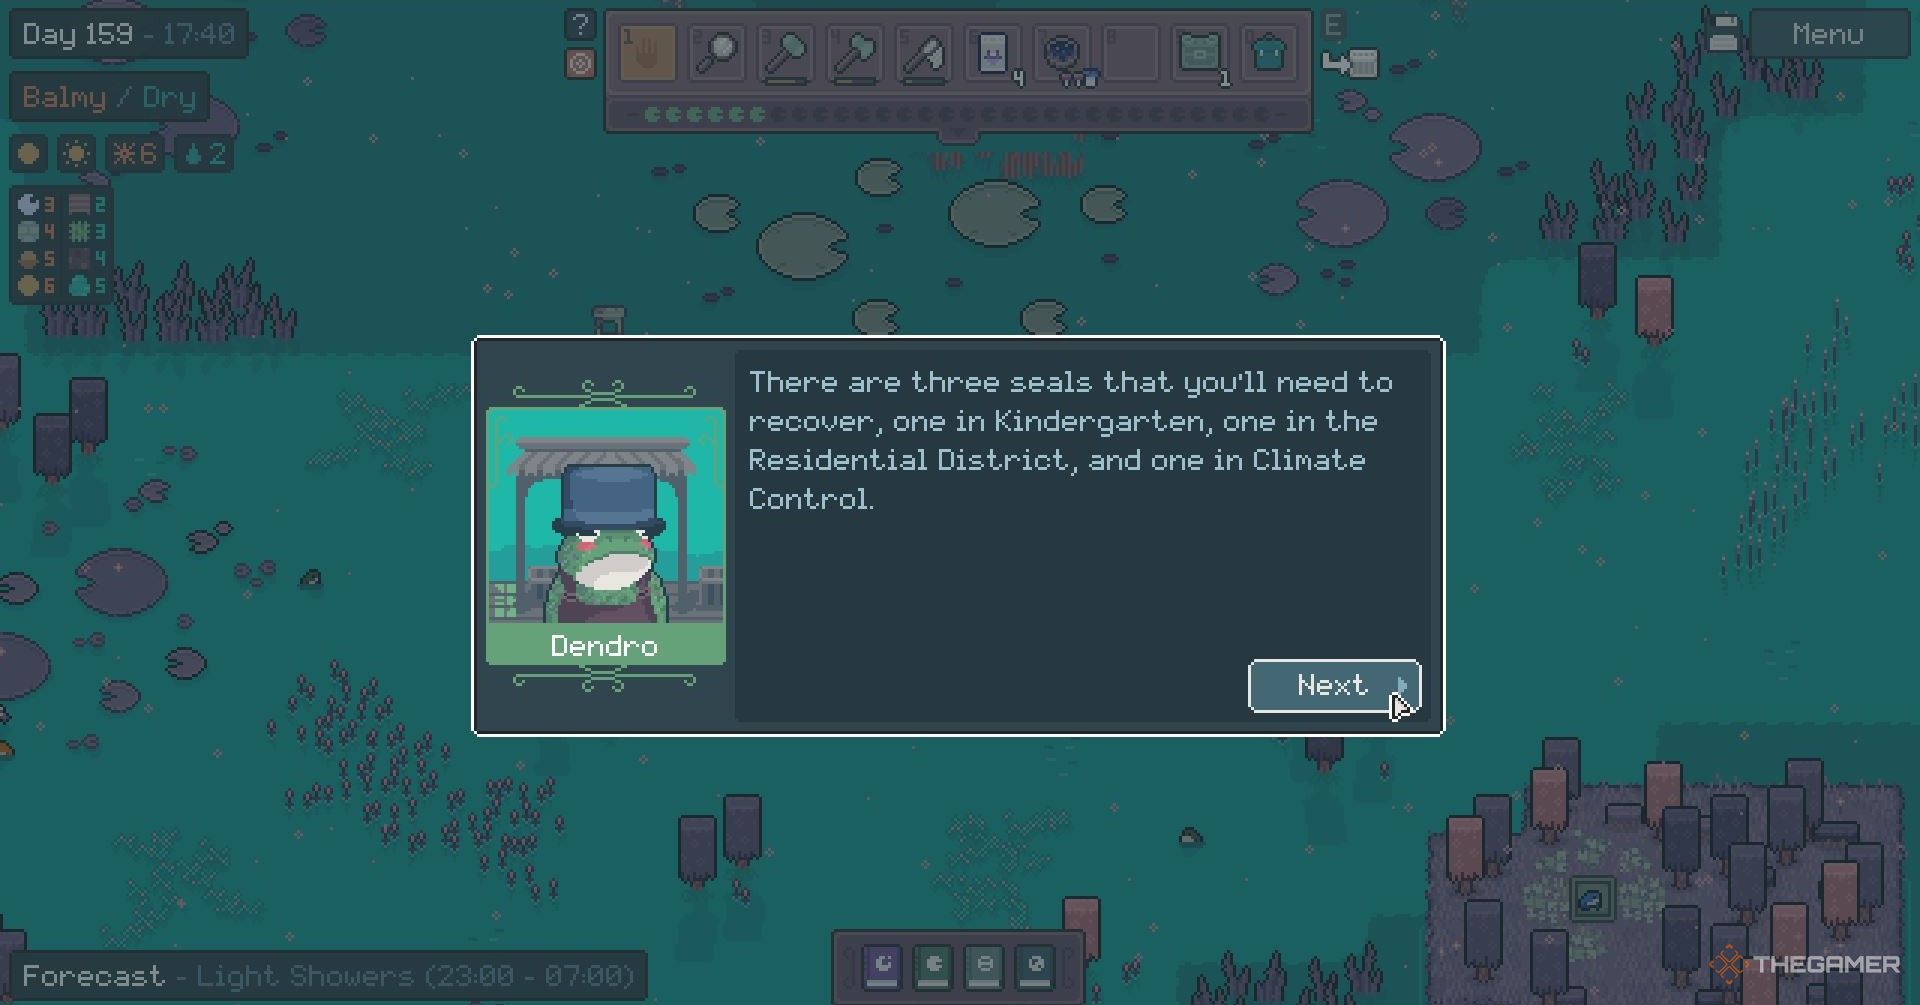
The Central Junction serves as your primary access point to explore most areas in Mudborne. After unlocking the Northern Pool and following Dendro the Historian to his new dock area south of the Pondmother’s Pool, you’ll need to thoroughly explore the Kindergarten, Residential District, and Climate Control maps to advance the story and create three seals, one in each region, allowing direct access to the Pondmother’s Pool. The only Gateway Nexus portal here is located east of Dendro’s dock, providing quick access just north of your home.
If you spot an area you want to explore later on, you can mark your map with symbols on any map page to remind yourself while you progress through the game.
-

Cracking the Practical Pockets Treasure Map in Avowed
As you navigate the world of Avowed, you’ll frequently encounter various landmarks scattered throughout the landscape. These locations have distinct names visible when you access the map, making them easily recognizable. Familiarizing yourself with these landmarks is essential, especially when working on treasure maps.
One treasure map you can find in the Emerald Stairs region is called Practical Pockets. It tells the tale of a ranger who has concealed his coat filled with pockets, with a location marked below. Here’s a straightforward guide on how to uncover this treasure.
Finding the Practical Pockets Treasure Chest
The Practical Pockets map hints at a ranger’s hideout, which is crucial for locating the treasure. The illustration on the map features a tall building on the right side, with an X indicating the location of the treasure in a small cave on the left. This tall structure represents the Rangers Headquarters, situated at the eastern edge of the Emerald Stairs.
If you’ve previously explored this area, you should have the beacon at the top left of the headquarters activated. Teleport there and head north, as indicated on your minimap. You will come across a cluster of rocks that you will need to maneuver around.
As you navigate around these rocks, you’ll notice an opening at the front that’s obscured by a few trees. Simply run directly through these trees, and you will find a small cave at the end. Inside this cave lies a large golden chest that holds the treasure you’re seeking.
If you haven’t yet unlocked this area, you’ll need to complete it during the Debt of Blood side quest.
Once you open the chest, you’ll receive Hjilde’s Handy Hide Light, a unique piece of armor. This armor not only decreases damage taken from Fire, Frost, and Shock but also increases your overall health.
-

Decoding Map Table Symbols in Aloft: What They Mean
Quick Links
When you first enter the world of Aloft, you might think the map is impressive. But wait until you discover just how extensive it really is! The game features a massive sky populated with countless islands waiting to be explored and restored.
As you navigate from one section of the map to another, you’ll uncover uncharted islands while keeping track of which ones are thriving. Utilize those lost atlases you’ve collected during your travels to enhance your sailing skills and gather valuable information.
How to Use the Map in Aloft
Refer to Your Map Table Frequently While Flying
Your first significant discovery during the Forgotten Legacy quest will be a map table. This large, circular map can be positioned at the bridge of your home island next to your helm, allowing you to track islands across this expansive world. The islands that cluster together form an archipelago, and collections of archipelagos within a segment of your map are termed sectors.
When you place the map table, you can access it anytime. It displays all the archipelagos in any sector you’ve previously visited. Your ship is represented as an island with a circle and a point on one side—this point helps you identify the position of your helm for accurate steerage. When your ship icon enters a new sector, that entire area will be revealed.
While the islands in Aloft are hand-crafted, the locations where they appear are random. Everyone can explore the same hundreds of islands, but the arrangement of these islands will differ across various world seeds.
There’s an array of vital map symbols to keep in mind—such as distinguishing which islands were uncovered via lost atlases or which ones feature frescoes. Furthermore, the map shows colors to indicate the health status of each island’s ecosystem. Some islands, which were previously considered healthy, may revert to an unhealthy status until you visit them, and stepping onto these islands will restore their health back to green.

Use Symbols to Fine-Tune Your Search on the Map
On the right side of the screen, various symbols are available to highlight islands with particular characteristics, such as those you’ve located using lost atlases or islands that include frescoes. Once a specific feature is selected, other islands become less visible, while the desired islands stand out with a bright color and a thicker black border.
You can also place beacons to mark islands of interest. Once you unlock the beacon recipe in the Sailing section of the building menu, you can position them with different symbols that correspond to the icon set found on the right of your map table. After setting a beacon, remember its symbol and select it on the map table when you wish to revisit that island—it will be easily identifiable by the beacon marker.
Every Symbol on the Map in Aloft and Their Meanings
Symbol
Meaning
Island Colors
Gray Dot
This indicates an island you haven’t explored yet. Visiting for the first time will change its color to one of the options below.
Green Dot
This signifies an island you’ve visited that has a healthy ecosystem, according to the field guide.
Yellow Dot
Pink Dot
This represents an island you’ve visited that is corrupted. You’ll need to return and address the corruption nodes (as well as fend off adversaries) to aid in the healing process.
Symbols
Checked Gate
This marks an island that contains a fresco, offering valuable sailing knowledge.
Circular Swirl
This signifies an island where you can find a lost atlas.
Always consult your map table when you’re uncertain about your next destination—there’s a vast sky filled with adventures waiting for you!

BRICS Membership Grows: 6 New Nations Join, Now 11 Total
The Expansion of BRICS: A New Era for the Global South
The BRICS group, a coalition of major emerging economies, has significantly increased its influence in the Global South. Recent developments indicate that this bloc is not only expanding in terms of membership but also enhancing its economic and political clout on the world stage. With the admission of new countries, BRICS aims to establish itself as a formidable counterweight to the historically Western-dominated G7.
New Members Joining BRICS
A Growing Coalition
The recent admission of several countries into the BRICS framework marks a major shift in global dynamics. As of January 1, 2024, the bloc welcomed Iran, Saudi Arabia, Egypt, Ethiopia, and the United Arab Emirates as formal members. This influx reflects a deliberate strategy to strengthen BRICS’ presence in regions that have traditionally been underrepresented in global governance structures.
Indonesia’s Admission
Furthermore, Indonesia was admitted as a full member on January 6, 2025. The inclusion of such a Southeast Asian nation not only enhances BRICS’ diversity but also expands its geographical reach, thereby reinforcing its voice in discussions around global trade, climate change, and sustainable development.
The Implications of Expansion
Economic and Political Clout
The growing membership signifies an increase in both economic and political clout for BRICS. With countries from different continents now part of the coalition, the bloc is positioned to exert greater influence over international economic policies and trade agreements. This is particularly crucial for nations in the Global South, which often seek alternatives to Western-dominated frameworks.
Counterweight to Western Powers
The expansion of BRICS serves as a strategic move to create a viable counterweight to Western powers, particularly the G7 countries. This development can reshape international dialogue and partnerships, enabling voices from developing nations to be better represented and considered in global decision-making processes.
Argentina’s Rejection
Concerns Over Membership
Interestingly, among the new members announced in August 2023, Argentina’s situation diverged from the trend. Despite being invited to join, Argentina, under President Javier Milei, publicly rejected the offer on December 29, 2023. In his letter, Milei articulated that joining BRICS was "not considered appropriate at this time," reflecting the complex political climate and economic considerations facing the nation.
Impact on BRICS Cohesion
Argentina’s rejection poses an interesting question regarding the cohesion and appeal of BRICS as it expands. The bloc’s ability to attract countries that may have differing political agendas and economic needs will be instrumental in determining its effectiveness and unified stance on global issues.
Vision of BRICS Leaders
A Champion for the Global South
South African President Cyril Ramaphosa emphasized the aspirations of BRICS during a press briefing, describing it as a champion for the needs and concerns of the Global South. He underscored the importance of beneficial economic growth, sustainable development, and the need for reform in multilateral systems. Such commitments are pivotal as they resonate with the core objectives of emerging economies seeking equitable representation on the international stage.
Ongoing Expansion Process
President Ramaphosa also hinted at the fact that the admission of new members is only the beginning. He stated that the leaders of the founding BRICS nations have reached a consensus on the principles, standards, criteria, and processes for future expansions, suggesting that this is just the start of a much larger movement. The clear intent is to create a robust, inclusive platform that addresses the collective challenges faced by the Global South.
The Future of BRICS
The strategic expansion of BRICS signifies an important shift in international relations, highlighting the growing importance of emerging economies. With its diverse new membership, BRICS is well-positioned to continue advocating for the interests of the Global South, shaping a more balanced and inclusive global governance framework. As the world watches closely, the outcomes of these changes will undoubtedly have lasting implications for global economics and politics.

Unlocking the Lost Jungle Island Map in Luma Island
Your hard work is paying off, and the town on Luma Island is gradually bouncing back from the earthquake. While there are still some cracked sidewalks, two key shops are open again, the streetlights are illuminating the nights, and now residents have intact benches to sit on.
Your next challenge is a tough one: fixing the Lighthouse. It’s crucial, as ships won’t be able to safely dock without its light, meaning the locals won’t be able to receive vital supplies or leave the island. Before you can get it operational, you’ll need to journey to the frozen heights of the Mountain.
How to Fix the Lighthouse
Repairing the Lighthouse is a special task that begins by speaking with Nelson near the Lighthouse after experiencing the earthquake on Day Five.
The first part of the repair requires three materials: Silk Rope, Mountain Wood Planks, and Scaffolding. While Silk Rope can be easily made, you’ll need to have advanced far enough in the game to access the Forest, acquire materials to fix the Cable Car, and reach the Mountains for Mountain Wood.
It’s essential to fully repair the General Store, as this is where you can get Scaffolding.
|
Material |
How to Obtain |
|---|---|
|
Silk Rope x15 |
Crafted from Fiber and Spider Silk at a Simple Workbench. Spider Silk is gathered by breaking Spider Webs or defeating any Spider in the caves. Fiber comes from harvesting Reeds near lakes or rivers, then refining it at a Simple Workbench. |
|
Mountain Wood Planks x30 |
Made from Mountain Wood in a Sawmill. Mountain Wood is obtained by cutting down any tree on the Mountain. |
|
Scaffolding x10 |
Purchased from the fully repaired General Store at 2,000 Gold each. |
Once you have collected all the materials, return to the Lighthouse and interact with it to complete this stage of the repair and move on to the second stage.
Materials for Stage Two of the Lighthouse Repair

For the second stage, you’ll require four materials: Mountain Stone Blocks, Moonstone Bars, Glass, and Cement. Most of these materials can also be gathered from the Mountain area.
|
Material |
How to Obtain |
|---|---|
|
Mountain Stone Block x50 |
Refine Mountain Stone at a Sawmill. You can obtain Mountain Stone by breaking boulders on the Mountain. |
|
Moonstone Bar x30 |
Smelt Moonstone Ore using an Ore Smelter. Moonstone Ore can be gathered by breaking ore nodes in the Frozen Mountain Cave. |
|
Glass x20 |
Smelt Sand in a Kiln. Sand can be collected using your pickaxe in any sandy area. |
|
Cement x15 |
Combine Calcium, Sand, and Charcoal in a Kiln. Calcium can be obtained by breaking Calcium Rocks, which can be found on the surface or in small caves on the Mountain. |
Once you have everything ready, head back to the Lighthouse and interact with it again to complete the repairs. After that, find Nelson and talk to him to finish the quest. He will reward you with 750 of each Spirit and the valuable Lost Jungle Island Map.
Nelson will also explain how to access the Jungle and where to find one essential material for it, the Boat Motor.