الوسم: make

  • Completing the Ultimate Origami Mage Wizard Subclass in DND

    Completing the Ultimate Origami Mage Wizard Subclass in DND

    Obojima: Tales From The Tall Grass offers a distinctive campaign setting for Dungeons & Dragons filled with unique species, backgrounds, and subclasses for experienced players. A standout subclass in this supplement is the Origami Mage Wizard, enabling players to infuse magic into origami art.

    If you’ve never explored this supplement or wish to introduce a fresh subclass at your gaming table, this guide is designed for you. Here’s everything you need to know to create an optimized origami mage wizard in Dungeons & Dragons.

    Overview of the Origami Mage Subclass

    The origami mage subclass allows players to blend their magical skills with creations made from origami paper, which can serve various functions in both combat and role-playing scenarios.

    Subclass Features

    Subclass Feature Character Level Details
    An Arcane Art 2 As a bonus action, you can create origami and grant it life, forming a construct with various purposes. These constructs can take on animal shapes, augment your AC, or deal extra damage.
    Origami Familiar 2 You learn the Find Familiar spell and always have it prepared. Your familiar resembles a piece of origami, with abilities to camouflage itself, blind foes, or scout.
    Binding Release 6 Use a bonus action to transport one of your origami constructs to another creature you can see within 30 feet.
    Paper Path 6 When casting a touch spell, your origami construct can deliver the spell instead of you, as long as it’s within 100 feet.
    Origami Servant 10 You learn Unseen Servant, always having it prepared and able to cast without using a spell slot. Unlike typical servants, you can have multiple origami servants with special abilities.
    Arcane Refresh 14 When an origami construct is destroyed, it returns magic granted to it, giving you ten hit points or allowing you to regain a second-level spell slot. You can also use your reaction to negate damage to a construct once per long rest.

    Note: Unlike wizards in the 2024 Player’s Handbook, you take the origami mage subclass at level two. If you plan to use this subclass outside of Obojima, discuss balance with your DM.

    Optimal Ability Scores for an Origami Mage

    For any wizard, Intelligence should be your primary focus, as it is your spellcasting ability. Following that, aim to enhance your physical capabilities when possible.

    Ability Score Details
    Intelligence This determines your spellcasting modifier and spell save DC. Make it your highest ability score.
    Constitution For maximizing hit points, ensure your second-highest score goes here.
    Wisdom Important for saving throws against spells, so prioritize it as your next highest score.
    Dexterity Affects your Armor Class and allows use of finesse weapons; allocate a decent score here.
    Charisma While useful for role-play, it’s often better assigned to other spellcasters, so keep it lower.
    Strength Not necessary for wizards, making it the lowest priority.

    Ideal Species for an Origami Mage

    When choosing a species for your origami mage, consider these three excellent options:

    1. Blue Dara: Increases Intelligence by two and another trait by one. They have access to Knowledge Talismans, which add a d6 to ability checks—great for enhancing Arcana assessments.

    2. Dragonborn: They have resistances to certain damage types, providing extra protection for your wizard during combat.

    3. Tiefling: Offers additional spellcasting options, enhancing your wizard’s versatility in magic.

    Note: Dragonborn and Tieflings are uncommon in the Obojima campaign setting. Check with your DM about how to best integrate these races into your game.

    Backgrounds for an Origami Mage

    Here are three fantastic background choices for origami mages:

    1. Apprentice Witch: This background is rich with role-play opportunities in Obojima and grants proficiency in Arcana and Survival—making Arcana particularly useful.

    2. Apprentice of AHA: Offers great role-playing potential as well and provides proficiency in History and Investigation, both Intelligence-based skills.

    3. Merchant: This background enhances your Constitution, Intelligence, and Charisma, strengthening your character’s capabilities and filling in potential gaps.

    Warning: If you want to use the Obojima backgrounds in a regular campaign setting, consult with your DM to ensure they’re compatible, as they function differently from backgrounds in other 5e materials.

    This guide should help you craft an engaging and powerful origami mage wizard for your next adventure!

  • Completing a Book in Minecraft: A Step-by-Step Guide

    Completing a Book in Minecraft: A Step-by-Step Guide

    Minecraft is all about exploration, crafting, and survival, leaving little time for reading. However, books are essential items to collect in the game. They can be transformed into various objects, such as decorative bookshelves and a handy enchanting table.

    You can stumble upon books during your adventures since they can appear in certain chests. But relying on luck isn’t always the best option. Crafting books is a much more dependable way to get them. Here’s what you need to know about making books.

    What You Need to Craft a Book

    To create a book, you need two key ingredients: paper and leather.

    How to Gather Paper

    You might find paper in chests located in villages, shipwrecks, or strongholds. Still, the most consistent way to obtain paper is by using sugar cane.

    To craft paper, place three sugar cane horizontally in the crafting grid.

    Search around water sources to find sugar cane, which is tall and bright green.

    If you cut the top parts off and leave the bottom one, it will regrow, enabling you to harvest more later. Alternatively, collect it all and plant some near your home base.

    If you decide to relocate it, make sure to plant it next to a water block.

    You will need three pieces of paper for each book. So, if you’re looking to craft a lot of books, consider starting a sugar cane farm using sugar cane and water.

    How to Obtain Leather

    Leather can sometimes be found in chests. However, to acquire it most effectively, you’ll want to defeat certain animals.

    Cows, mooshrooms, horses, and llamas are among the creatures that drop leather when defeated. You can combine four rabbit hides to create one piece of leather, but that will usually take longer. The quickest way is to hunt down animals that provide leather.

    How to Create a Book

    Once you’ve collected three pieces of paper and one piece of leather, combine them in your crafting grid. You won’t even need a crafting table for this step. Simply place the leather in the center, surrounded by the paper to craft your new book.

  • Completing All Tools and How to Create Them in Squirreled Away

    Completing All Tools and How to Create Them in Squirreled Away

    In the game Squirreled Away, you’ll immerse yourself in the tranquil life of a squirrel, spending a lot of time exploring the park. While your daily routines are generally peaceful, you’ll occasionally encounter challenges, like facing a fierce dog or a bothersome hedgehog. To thrive in this new lifestyle, you’ll need to craft the right tools.

    Let’s break down how to gather and utilize these tools effectively in Squirreled Away. The park is abundant with items and experiences waiting for you, provided you’re willing to put in the effort.

    As a squirrel, you’ll need to get creative in acquiring tools. Using the materials you gather, you will combine various items to create tools that enhance your interactions with the environment. With these tools, you’ll be able to collect resources more efficiently, navigate your surroundings with greater ease, and protect yourself from threats within the park. Moreover, these tools will be essential for building a cozy home.

    Crafting Tools

    Every time you create a new tier of a tool, it will replace the previous version, so you’ll only possess one of each tool at a time!

    Here’s a list of the tools you can make, how to craft them, and their uses:

    How to Craft an Axe

    An axe is one of the first tools you’ll create, and it’s vital for collecting sticks in the park. The larger the branch you aim to chop, the higher quality axe you’ll need. Here are the axe upgrades available:

    • Pebble Axe

      • Ingredients: 8 Twigs, 5 Pebbles, 3 Resin
    • Bone Axe

      • Ingredients: 5 Planks, 5 Bone Shards, 2 Resin
    • Scrap Axe
      • Ingredients: 5 Planks, 5 Can Scraps, 3 Bottle Caps, 3 Resin

    How to Craft a Shovel

    Shovels are handy tools that allow you to dig for treasures and clean up litter in various areas of the park. While there are only a few upgrades for the shovel, they’re effective for their purpose:

    • Pebble Shovel

      • Ingredients: 6 Twigs, 4 Pebbles, 3 Resin
    • Bone Shovel
      • Ingredients: 4 Planks, 4 Bone Shards, 3 Resin

    How to Craft a Pickaxe

    To gather rocks in the park, a pickaxe is necessary, as pebbles alone will not suffice. Though crafting a pickaxe requires a lot of materials, the payoff is significant when it comes to breaking stubborn boulders. Here are the available pickaxe upgrades:

    • Pebble Pickaxe

      • Ingredients: 5 Twigs, 5 Pebbles, 3 Resin
    • Bone Pickaxe

      • Ingredients: 5 Planks, 7 Bone Shards, 5 Resin
    • Scrap Pickaxe
      • Ingredients: 3 Planks, 3 Can Scraps, 1 Bent Nail, 3 Resin

    How to Craft a Stink Bomb

    To create a stink bomb, you’ll need five pebbles and four pieces of mushrooms gathered from the forest. When combined, these items yield a useful tool for scaring away dogs and seagulls.

    Using the stink bomb on seagulls will help you collect feathers, while throwing it at a dog will give you a crucial few seconds to escape danger. Remember, once you craft a stink bomb, you can use it endlessly!

    How to Craft a Bonker

    A bonker is ideal for removing pull tabs from soda cans and fixing valves in Fountain Springs. You’ll need the following materials:

    • 8 Planks
    • 4 Can Scraps
    • 2 Pull Tabs
    • 2 Resin

    Combining these will allow you to explore and gather materials more effectively.

    How to Craft Spring Shoes

    Spring shoes will enable your tiny squirrel feet to reach new heights without climbing. You’ll need to visit the Fountain Springs to gather the necessary materials: two bottlecaps, four strings, and two springs. Once crafted and equipped, these shoes will let you bounce around effortlessly.

    How to Craft a Fishing Rod

    Fishing is a small but enjoyable aspect of the game, though easily overlooked. To build a fishing rod, collect six sticks, two strings, and two paperclips. After crafting your rod, you can catch various fish and even find coins in fountains.

    How to Craft a Hang Glider

    A hang glider provides the thrill of soaring through the air. While it requires gathering several materials, the experience is worth it. You’ll need:

    • 8 Pull Tabs
    • 4 Feathers
    • 8 Can Scraps
    • 8 Strings

    Once assembled, you can glide effortlessly from tree to tree.

    Equipping yourself with these tools is essential for a successful squirrel adventure in the park!

  • Mastering Fluffy Dealings in Monster Hunter Wilds

    Mastering Fluffy Dealings in Monster Hunter Wilds

    Monster Hunter Wilds offers various side quests as you progress toward the High Ranks. While many of these quests involve hunting specific monsters, some will require you to collect particular items.

    One such side quest is called Make Fluffy Dealings. For this quest, you need to deliver a Vibrant Pelt+ to a cheerful Wudwud named Plumpeach, who can be found in the Scarlet Forest. Although gathering a Vibrant Pelt+ can be tricky, having some tips can make it a lot simpler.

    Starting the Make Fluffy Dealings Side Quest


    You will receive the Make Fluffy Dealings side quest from Plumpeach, the leader of the Wudwuds, after you’ve achieved High Rank status. You can find Plumpeach inside the Wudwud Hideout in the Scarlet Forest, and he will be dressed in pink Congalala fur.

    Plumpeach will request that you bring him a Vibrant Pelt+. To obtain this item, you’ll need to hunt a Congalala. Once you have collected the pelt, head back to Plumpeach to complete the quest.

    How to Obtain a Vibrant Pelt+

    The image shows the Vibrant Pelt+ details from the Field Register menu in Monster Hunter Wilds.

    First, you’ll need to locate a Congalala in the Scarlet Forest or complete an optional quest that involves hunting a High Rank Congalala. While battling the monster, focus your attacks on its head, as breaking its head guarantees a Vibrant Pelt+ drop.

    You can also acquire a Vibrant Pelt+ by inflicting damage on its other wounds, but breaking its head is the most reliable method. After you’ve successfully obtained the item, return to Plumpeach in the Wudwud Hideout in the Scarlet Forest area.

    Rewards for Completing the Make Fluffy Dealings Side Quest

    The image shows the rewards for completing the Make Fluffy Dealings Side Quest in Monster Hunter Wilds.

    Upon delivering the Vibrant Pelt+ to Plumpeach, you will successfully complete the quest and receive a Delishroom and three Truffle Du Conga as your rewards. Additionally, after finishing the side quest, Plumpeach will be able to assist you in gathering more materials.

  • Join the Fun: Creating a Ninja Party in Roblox!

    Join the Fun: Creating a Ninja Party in Roblox!

    The world of Roblox is packed with solo games, but true excitement emerges when you join forces with others. Ninja Time is a perfect example of this, as teaming up leads to greater fun, faster character upgrades, improved combat abilities, and smoother mission completions.

    Fortunately, Ninja Time’s party system is user-friendly, letting you easily team up with players without any hassle. In this guide, we’ll walk you through setting up your own team, inviting friends, and joining others if you receive an invitation.

    Creating a Party


    The party system is a fantastic way to bring friends together for joint missions, allowing you to take down foes more quickly and tackle the game effectively. Plus, working in a team lets you pick up new strategies and enhance your ninja skills by interacting with seasoned players. Here’s how to create your own team in Ninja Time:

    • Hit the M key.
    • This opens a menu filled with buttons in two columns. Click on the last button in the second column that says Extra Menu.
    • In the Extra Menu, you’ll see four buttons. Choose the second one that says Party.
    • This will bring up the Party menu, featuring an input field and an orange Invite button. Enter the Roblox username of the player you wish to invite and click the Invite button.
    • Repeat the process to send out additional invitations.

    After sending the invitation, just wait for the other player to accept. Joining forces with other players makes gameplay much easier, but keep in mind there are both pros and cons. One benefit is that team members can’t harm each other during battles, which is a real advantage.

    However, keep in mind that loot isn’t shared automatically, so each player needs to defeat enemies individually to earn rewards.

    How to Join a Party


    The player character runs over a bridge in the Hidden Leaf village in Ninja Time.

    Joining a team is just as straightforward as forming your own. If you receive an invitation, a red notification will appear on the right side of your screen. Below this, you’ll see two buttons—Accept and Decline. To join the team, simply click Accept. If the notification doesn’t show up, just ask the player to send the invite again.

    Your progress is secured while in a team, and when you leave, you can continue playing without losing any of your achievements.

  • Crafting Nectar in The Sims 1: Makin’ Magic Guide

    Crafting Nectar in The Sims 1: Makin’ Magic Guide

    If you haven’t witnessed the fun of grape stomping for winemaking, get ready to see your Sims jump into the A Pressing Feeling machine with their handpicked fruits in The Sims to whip up some “nectar,” a charming substitute for wine in the game.

    Creating nectar isn’t just about having fresh fruits; you’ll also need to enhance your Cooking skills to maximize your profits from selling your homemade beverages. There are four varieties of nectar to explore in The Sims: Makin’ Magic is where you’ll get started.

    Turn Fruits into Nectar

    Since this is a family-friendly game, you won’t come across anything directly labeled as alcohol, but nectar serves as a delightful alternative. Your Sims can make this at home using the A Pressing Feeling nectar machine found in the buy mode. For each batch of fruit nectar, simply combine two pieces of fruit with one serving of sugar; the recipes are straightforward.

    The primary fruits you’ll want are elderberries and grapes. You can purchase these in Magic Town using your spellcasting currency or grow them in your yard with a special gardening plot. Another key ingredient for crafting nectar is sugar, which you can pick up from any general goods stand. If you’re frequently visiting Magic Town for supplies, make use of the shortcut hole that came with your home; it’ll save you time and money, especially if living far from Magic Town.

    To produce nectar, simply place your items from the inventory into the A Pressing Feeling machine following the recipes in the table below. You’ll see your Sim press the nectar, and once it’s completed, you can interact with the press again to either sell your nectar—where the selling price will rise as your Cooking skill advances—or store it in the Taste of the Vine Nectar Bar.


    Additionally, there’s a unique recipe for Magic Nectar, which briefly turns any Sim who drinks it into a ghost. You won’t find this recipe in your book until you’ve made it for the first time, so make sure to use the recipe below to add it to your collection.

    Flavor

    Recipe

    Elderberry

    Grape

    Honey

    Magic

    If you’re on the hunt for a Rubber Chicken for magical purposes, offer a bottle of Elderberry Nectar to Apothecary Todd at the Wagon O’ Wares whenever you need a new one.

  • Crafting Aqua Vitalis in Kingdom Come: Deliverance 2

    Crafting Aqua Vitalis in Kingdom Come: Deliverance 2

    In Kingdom Come: Deliverance 2, alchemy is essential for survival, allowing players to create potions for healing, boosts, and various effects. By collecting ingredients and adhering to specific recipes, players can concoct powerful mixtures that enhance their adventures. The brewing process demands attention to detail, as properly timed steps can make a significant difference in the potion’s quality and effectiveness.

    As players develop their alchemy skills, they gain access to more potent potions that support them in combat, exploration, and recovery. Whether it’s healing wounds, enhancing skills, or obtaining unique advantages, mastering alchemy is a vital asset for any adventurer facing the game’s challenges.

    How to Obtain the Aqua Vitalis Recipe

    Aqua Vitalis is one of the most important potions in Kingdom Come: Deliverance 2, as it minimizes health loss and slows bleeding effects. This potion is particularly advantageous during intense battles, especially when encountering multiple foes.

    It’s advisable to consume Aqua Vitalis before engaging in combat for a strategic advantage.

    To brew the potion, your first task is to obtain the recipe. You can buy the Aqua Vitalis recipe from various vendors, including:

    • Aranka, who is located north of the Nomads’ Camp in the Trosky area.
    • Herbalist Barnaby, found just north of Trosky Castle in the Trosky region.

    After obtaining the recipe, gather the necessary ingredients, which are:

    How to Brew Aqua Vitalis

    With all the required ingredients in hand, make your way to an alchemy bench to begin brewing. Follow these precise steps:

    1. Fill the cauldron with water.
    2. Add two handfuls of dandelions into the cauldron and let it boil for one turn.
    3. Grind one handful of Marigold using a mortar and pestle.
    4. Incorporate the ground marigold into the cauldron.
    5. Let it boil for two turns.
    6. Finally, distill the mixture.
  • Creating Stall Repair Kits in Disney Dreamlight Valley

    As you forge new friendships in Disney Dreamlight Valley, you’ll notice that many characters need your assistance. Whether they’re dealing with chaos at home or searching for missing loved ones, it’s your mission to sprinkle some magic and help them find their happy endings. While it may be challenging, embracing your role as the ruler of the Valley is essential.

    Jasmine and Aladdin won’t leave Agrabah until everything is sorted out, and the dust devils along with the Windcaller are only adding to the chaos. With your help, they can restore their beloved home. Here’s how you can assist in bringing Agrabah back to life!

    Where to Find Bridge Materials

    Once you connect with Aladdin during The Ancient Revealed quest, you’ll both work together to access the South Market. But first, you need to build a bridge to traverse the gap between rooftops.

    To create that bridge, you’ll require three types of materials:

    • Pile of Planks: Found next to the trellises on the right side of the palace when facing it.
    • A Fine Rope: Hidden behind some sandstone remnants.
    • A Timber Stack: Located right beside the gap where the bridge needs to be built, on the left side.

    After collecting these items, place them at the edge of the roof near Aladdin to construct the bridge. This will allow you to cross over and follow Aladdin toward the South Market.

    How to Reach the South Market

    Once you’ve crossed the rooftop gap, turn left with Aladdin and break through more Sandstone. Retrieve the plank from the corner of the rooftops to make your way into the next section of the market.

    Be sure to grab the timber stack, fine rope, and pile of planks here, as you’ll need them!

    Continue along the rooftops to reach the Southern Market by building more bridges with the materials you find. Then, descend the ramp after using your pickaxe on the scaffolding to enter the wreckage of the marketplace, which is in disarray.

    How to Repair the Market Stalls

    Talk to Aladdin in the Southern Market. He’ll provide you with Rose Water to use on your Royal Watering Can, which will help clear away the decayed fruit in the market.

    With this new ability, you can search the remnants of the Southern Market for materials to craft Stall Repair Kits. You’ll need the following:

    Material

    Amount

    Locations

    Something Sticky

    3

    • Next to the plank you used to descend into the market.
    • Located by two piles of decaying fruit near the monkeys on the rooftops behind the Southern Market.
    • Beyond two dust devils to the left of the scaffolding, in the alley.
    • Behind a dust devil, to the right of the stairs.

    Fine Rope

    3

    • Beyond two dust devils to the left of the scaffolding, in the alley.
    • Hiding behind a dust devil, to the right of the stairs.
    • At the top of the stairs.
    • Behind two dust devils, leading into a long alleyway away from the market center.

    Timber Stack

    3

    • On the rooftops, in the corner before entering the Southern Market.
    • In the corner by the scaffolding, underneath a lamp.
    • Behind two dust devils that lead into a long alleyway away from the market center.

    Bolts of Silk

    3

    • Beyond two dust devils to the left of the scaffolding, in the alley.
    • Behind a dust devil, next to the stairs.
    • Behind two dust devils, leading into a long alleyway away from the market center.
    • At the top of the stairs.

    Once you have gathered the materials, speak to Aladdin again. He’ll guide you on how to create the Stall Repair Kits at the nearby Crafting Station. Make all three kits, and then apply them to the three stalls in the Southern Market.

    You can find these stalls next to the gate, beside the scaffolding, and against the wall between the two alleyways. Don’t forget to collect any bags that drop, as they will provide you with additional materials! Finally, return to Aladdin. Completing these tasks will conclude your quest, but there’s still plenty of work to be done before Agrabah is back to its former glory.

  • Quick Cash Strategies in Two Point Museum

    Quick Cash Strategies in Two Point Museum

    Two Point Museum Guide: Maximizing Your Revenue

    In Two Point Museum, like in any management simulation, you’ll need to juggle your expenses and income wisely. Your museum’s funding will come primarily from donations, rather than ticket sales, so managing your budget effectively is crucial. High staff costs can make it tricky to maintain a sustainable income, but with some strategic planning, you can encourage more generosity from your visitors.

    If you’re struggling to secure the necessary funds for your next project, check out these tips to boost your financial standing.

    Group Exhibits Together

    Guests donate based on their experience, so it’s essential to create an environment that maximizes both excitement and knowledge. To accomplish this, focus on fulfilling their entertainment, food, and overall needs, which will encourage them to stay longer, enjoy more exhibits, and contribute to donation bins.

    Tip: Pack as many exhibits as possible into each room while maintaining walkways and pleasing decor. A moderately sized room filled with engaging exhibits and informative displays will attract more donations than a larger space with exhibits spread too far apart.

    Guided Tours

    Creating guided tours that highlight closely grouped exhibits with a common theme can significantly enhance guest satisfaction. Visitors prefer shorter walking distances, so grouping high-quality exhibits together allows for smooth, efficient tours. Notably, donations from these tours are collected immediately, eliminating the need for a security guard to handle funds!

    Expand the Gift Shop

    A well-sized and adequately staffed gift shop can be a significant profit center. Guests are inclined to spend considerable amounts here, so ensuring that it’s easily accessible and that checkout lines move swiftly is vital.

    Tip: A larger gift shop can accommodate more customers at once. Aim for one checkout counter for every ten guests, plus an extra or two for good measure to avoid long waits.

    If sales are slow, consider lowering prices to encourage more purchases. Customers who feel they’ve bagged a good deal are likely to spend more time in the museum overall.

    Sell Old Exhibits

    As you advance in the game, you may find yourself with surplus copies of common exhibits obtained from expeditions. If you’ve maxed out the knowledge on these items, selling them for quick cash can finance further expeditions for more valuable artifacts.

    Alternatively, wait for a collector to visit. Display anything that might pique their interest, as collectors purchase at a premium—often double the regular selling price.

    Explore Sponsorship Opportunities

    Sponsorships can provide crucial financial support, but you’ll need to know where to look. Go to the Finances Menu and click on the Sponsors Tab. Here, you’ll find two sponsorship options at a time, along with the chance to declare bankruptcy if you’re in a tight spot.

    A sponsorship will require you to display a specific exhibit in exchange for a monthly bonus and extra cash for each visitor to that exhibit. However, be aware that some sponsored exhibits may have drawbacks, like creating litter or displaying advertisements that might annoy your guests. Weigh the financial benefits against these potential issues.

    Adjust Ticket Prices

    Raising or lowering ticket prices can have significant impacts on your revenue. Lower prices may encourage guests to stay longer and spend more overall, while increasing prices could provide quick financial relief if you’re facing losses. However, be sure to adjust prices back down once your situation stabilizes—unless guests still view the higher price as a fair deal!

    Consider Taking Out a Loan

    Loans are available in the Finances Menu and can provide a lump sum of cash quickly. Keep in mind, though, that repayments start right away, and higher loans usually come with higher interest rates. It’s essential to have a solid plan for using the funds wisely rather than blowing it all at once.

    Tip: Use loans strategically for significant projects like new exhibits or expanded gift shops to ensure that the potential earnings outweigh the interest costs.

    In summary, effective budgeting and strategic planning are vital for your museum’s success. By grouping exhibits, expanding sales opportunities, exploring sponsorships, adjusting ticket prices, and managing loans, you can ensure a thriving museum experience for both you and your guests.

  • Creating Your Own Faith in CK3: A Step-by-Step Guide

    Creating Your Own Faith in CK3: A Step-by-Step Guide

    Faith plays a crucial role in Crusader Kings 3. It influences many facets of life and can either support or obstruct your ambitions. It governs gender roles, marriage norms, clergy responsibilities, and even how witches are treated.

    Given this importance, it’s wise to adopt a faith that aligns with your objectives. If no suitable faith exists, you can create one. Although establishing a new faith can be costly and requires careful thought, there are strategies to simplify the process.

    Updated February 16th, 2025 by Hilton Webster: Once you create a new faith, it’s vital to ensure broader acceptance. This article has been revised to explain how existing faiths will respond to your new one and its implications for the laws you can implement in your domain.

    How To Create A Faith


    The faith creation menu in Crusader Kings 3

    Creating Your Faith

    To start making a new faith, go to the religion screen and click the “Create New Faith” button at the bottom.

    The first thing to know about creating a faith is that it requires piety, which you accumulate gradually, primarily based on your Learning skill. During this process, you’ll choose the tenets and doctrines that will define your faith.

    Your current faith serves as the foundation for your new faith, and the cost will rise depending on how different the new faith is from the existing one.

    One way to reduce costs is by temporarily switching to a similar faith, although this will also cost piety.

    After selecting your faith’s doctrines and tenets, you can name it, add a description, and spend some piety. Carefully consider your future plans when choosing these elements, as they can significantly impact your gameplay. Here are a few suggestions for making effective choices:

    • If your succession law splits territory among heirs, opting for gender equality might lead to unexpected divisions of your realm.
    • Switching Clerical Appointment to Temporal allows you to select your own Court Chaplain, providing greater control over your council and satisfying powerful vassals. For added flexibility, consider making this title revocable.
    • Adopting Polygamy or Consorts & Concubines simplifies heir production for male characters, which can be strategic for succession or expanding your dynasty.
    • While it may seem appealing to legalize all Criminal Doctrines, remember that crimes generate secrets, and secrets lead to hooks, which can be valuable for managing your realm.
    • The Mendicant Preachers tenet hastens province conversions and is ideal for newly established faiths.
    • The Pursuit of Power tenet is costly in terms of faith but excellent for expansion, offering powerful Casus Belli.
    • Likewise, the Sacred Lies tenet benefits intrigue-heavy strategies by enhancing Agent Acceptance.

    Here are some essential details to remember while creating a new faith:

    • You can only create a new faith while you are at peace.
    • You must be at least a duke to create a new faith; counts cannot.
    • Upon establishing a new faith, you and your immediate family will automatically convert, along with your realm’s capital.
    • Vassals can convert on their own, but you may also attempt to persuade them to join your new faith for a fee.

    How Culture And Faith Interact

    Generally, any culture can follow any faith. While it may seem unusual for an Islamic leader to arise in Europe, there is no technical restriction against it. However, certain aspects of faith extend beyond personal and external matters, impacting your realm directly.

    The primary way faith influences your realm is through Gender Law. Most faiths default to Male Preference in inheritance, and few cultures embody the Egalitarian Ethos needed for changes. To shift from a male-dominated system or adjust inheritance laws to favor women, you’ll need both an equal faith and an egalitarian culture.

    Conversely, some cultural ethos can facilitate faith changes. Cultures with the Spiritual Ethos naturally gain more Piety every month and enjoy a 20% discount on the Piety cost for reforming or creating a new faith.

    Creating a new faith while in Ironman mode will earn you the It’s not a Cult! achievement.

    How To Afford It


    Crusader Kings 3 Pilgrimage

    The pilgrimage event chain in Crusader Kings 3

    Establishing a faith can become prohibitively expensive if it diverges significantly from your previous one. Fortunately, there are measures you can take to enhance your piety accumulation:

    • If you can choose your heir, select one who excels at generating piety, looking for high Learning skills and traits like Zealous or Humble. If your faith allows, appoint your heir as your Court Chaplain to boost their piety before they inherit.
    • Possessing virtuous traits instead of sinful ones is beneficial. The definition of virtuous and sinful traits varies by faith; virtuous traits have a green outline on your character profile.
    • Going on a pilgrimage and obtaining the Pilgrim perk increases piety gain. Aim to undertake this every 15 years, favoring the longest pilgrimages for maximum immediate piety. Muslim characters can also perform the Hajj for similar benefits.
    • The Church and State perk from the Theologian tree of the Learning lifestyle doubles your piety gain if your current faith has Lay Clergy. If your faith is Pluralist, the Defender of the Faith perk boosts piety gains by 20%.
    • Acquiring specific provinces can enhance piety, particularly holy sites related to your faith or famous religious landmarks like Canterbury Cathedral or Notre Dame.
    • Choosing a Celibate lifestyle also yields increased piety.

    The Theologian perk tree significantly benefits characters aiming to create a new faith. It features perks that enhance piety gain and culminates in the powerful Theologian trait, which increases both piety and your character’s Learning skill.

    One of the most beneficial aspects of this perk tree is the Prophet perk, which halves the cost of faith creation.

    How Your New Faith Will Interact With Others

    Faith Hostility

    When you establish your new faith, be aware that the greater the divergence of the new Doctrines and Tenets you choose, the more Piety it will cost to implement them. This isn’t just a cost penalty; it also signals how your original faith will respond to your new faith.

    Faith Hostility reflects this relationship: The greater the deviation in Tenets and Doctrines, the more antagonistic your original faith is likely to be towards your newly created faith. This is crucial to remember, as you want to avoid provoking a Holy War when you lack the military backing to defend yourself. If your vassals remain loyal to the old faith, defending against plots and factions will also be challenging.

    Here’s a summary of the Faith Hostility levels and their implications:

    • Righteous – This faith enjoys favorable relations with others and can usurp titles from followers of other righteous faiths.
    • Astray – While this faith shares some beliefs, it varies enough to create some tension. Title usurpation is still possible, but followers of other faiths may look down upon you slightly.
    • Hostile – This faith has diverged considerably and cannot usurp titles from opposing faiths. Holy Wars can be declared against this faith.
    • Evil – This faith fundamentally opposes others, resulting in significant penalties to relations and a greater likelihood of Holy Wars. Interfaith marriages are generally rare.

    Once your faith is established, there’s no method to alter the Faith Hostility of others unless you reform your faith to align more closely with theirs.

    Fervor


    The description of religious fervor in crusader kings 3.

    This ties into Fervor, which measures how strong the faith is among its followers. A high Fervor indicates a committed group, making it tough for them to convert to other faiths and reducing the likelihood of heresies. Conversely, a low Fervor increases the chances of individuals changing beliefs and the rise of new heretical faiths.

    When you first create your faith, it will start with a high Fervor due to its novelty and limited followers. Over time, Fervor naturally declines, especially as the faith matures and increases its follower count. Several factors can also influence Fervor:

    • Specific decisions made during travels or court sessions.
    • Results of Holy Wars – Victorious outcomes lower your Fervor, while defeats tend to raise it, as the faithful struggle to reclaim their faith’s prominence.
    • Outbreaks of Heresy will significantly elevate the Fervor of the faith experiencing the growth.

    Overall, Fervor remains relatively stable unless you actively spread it or engage with other faiths.

  • Crafting Bread in Foundation: A Simple Guide

    Crafting Bread in Foundation: A Simple Guide

    In the game Foundation, providing quality food is essential for keeping your villagers happy and satisfied. The game includes several food types, such as rustic, refined, and monastic foods. You’ll need to understand what your villagers prefer and ensure there’s enough food available for everyone.

    One of the refined foods you can produce is bread, which is made from wheat. You can access wheat fairly early in the game, and while obtaining it is relatively straightforward, you’ll need to create a system for growing wheat and producing bread, which can take up a good amount of space within your territory.

    Growing Wheat

    To start growing wheat, you first need to buy the Farming option from the Progression menu. This option costs 50 gold and becomes available once you’ve reached at least level ten in Progression. Purchasing it will unlock several structures:

    • Wheat Farm
    • Windmill
    • Bakery

    Once you have the Farming option, you will need to set up a wheat farm within your territory. After the farm is built, you can assign up to three farmers to work there. Once the farm is ready, you can designate the area where your crops will grow.

    The game will inform you if the field is too big or too small based on the number of farmers you’ve assigned. After marking the area, your farmers will begin cultivating wheat.

    If space is an issue, you can also buy wheat from the Myddle Kingdom after opening its trade route. This can be a practical solution if you can’t spare the land for a wheat farm.

    Making Bread

    Once you have established your wheat farm and harvested some wheat, the next step is to build a windmill to convert wheat into flour. Each windmill can process four units of wheat into one unit of flour, which means you’ll need to maintain a steady wheat production to keep up with your bread-making demands.

    After you’ve produced flour, the next construction to tackle is the bakery. A bakery requires three units of flour and one unit of water to create five loaves of bread. You can provide water by building a well near the bakery, which should suffice for its needs.

    It’s also crucial to assign a place for the bread in your granary so bakery workers have a location to store the bread. Additionally, to ensure your villagers have access to it, you’ll need to set up market stalls where they can buy bread to meet their needs.

  • Crafting a Sickle for Efficient Harvesting in Aloft

    Crafting a Sickle for Efficient Harvesting in Aloft

    Aloft presents an exciting universe where you can soar through the air while establishing home islands and exploring fresh biomes and uncharted territories. Before diving into these adventures, though, you’ll need to get a handle on crafting and gathering resources. Once you’ve gotten the basics down, you’ll be free to explore any island and rejuvenate the land.

    The sickle is among the first essential tools you’ll want to craft. It plays a crucial role in gameplay since it allows you to gather seeds that help restore the damaged ecosystem. However, crafting one can be tricky without some guidance.

    How to Craft a Stone Sickle

    To utilize a sickle, you’ll first need to cut small plants, gather herbs, and obtain seeds. Start by constructing a workbench, which you can do anywhere with five pieces of wood. With the workbench set up, you can craft a Stone Sickle using the following materials:

    Crafting a Stone Sickle

    Materials Required

    How to Obtain

    2x Sharp Stone

    To create a Sharp Stone, combine two regular stones. This can be done without a workbench—just navigate to your inventory, select the Crafting tab, and combine the two stones. You’ll need two Sharp Stones to make a Stone Sickle.

    1x Wood

    Gathering wood is straightforward. Approach trees to collect branches, or chop them down with an axe to harvest wood.

    1x Rope

    Rope requires two pieces of Mykter Fibre, which you can obtain by defeating mushroom enemies or from large tentacled mushrooms found on corrupted islands. Like Sharp Stones, you can craft rope without a workbench.

    Once you have gathered all the necessary materials, you can craft a Stone Sickle at your workbench and then equip it. Certain items, like glasswort and wheat, can only be collected using a sickle. When you approach these plants, a sickle icon will appear, indicating that you can use your Stone Sickle to harvest them.

    The image shows the player approaching a Glasswort plant with a sickle in hand in Aloft.

    While its main purpose is to clear away small plants, the Stone Sickle can also be used for combat against mushroom enemies and to hit the weak spots of large mushrooms.

  • Creating Unique Gliders in Aloft: A Step-by-Step Guide

    In Aloft, the sky is truly limitless. As long as you can glide through those fluffy clouds, you can reach any island. Using a glider makes traveling much simpler. But it’s not just a means of transportation; it’s a way to express yourself on your adventures.

    We’re here to guide you through everything you need to know—from the hidden secrets of glider crafting to how to make the most of it. With your glider design skills, you’ll make even the most beautiful birds envious. Why settle for a basic glider when you can create something unique and personal?

    Aloft is still in early access, which means things may change. We’ll keep updating our guides to ensure you have the latest information!

    How to Craft a Glider

    Your first destination offers numerous resources and secrets to explore during the Leaving the Nest quest. Your aim is to scale the mountain by breaking rocks and exploring caves.

    At the mountain’s peak, you’ll discover a detailed fresco showing a person using a glider. This artwork holds all the info you need to make your own glider. Simply open your building menu and choose the Glider Stand from the Home tab.

    You’ll need five pieces of wood to put it together!

    Interact with the Glider Stand to craft a new glider. For your first glider, you’ll need two pieces of wood and three leaf fabrics. Here, you can also choose from various features, such as the oculus, materials, and cosmetic options.

    How to Customize Your Glider

    While at the Glider Stand, you can change the look of your glider. In the cosmetic section, you can select up to two colors and patterns and even add trailing features.

    As you explore, you’ll find more options to enhance your gear with vibrant pigments and designs!

    Experiment with different configurations to create various gliders. You can save multiple designs and tweak them anytime using the Glider Stand.

    How to Use Your Glider

    To take flight with your glider, open your inventory and equip it. Then, simply double tap the jump button. Your glider will unfurl, letting you soar effortlessly and at high speeds.

    Be cautious: if you make contact with the ground or any obstacles, the glider will automatically retract.

    You can perform dashes in the air by using your boosts. If you activate them correctly by pressing the button when the meter shows white, you’ll gain remarkable speed to reach different islands.

    By default, the glider controls are inverted. To go down, lean forward, and to ascend, pull back. This can be adjusted in the settings menu if you find it easier to switch the controls for smoother gliding.

  • How To Make Asus TUF A16 Cooler?

    The Asus TUF A16 is known for its durability and performance, but like any gaming laptop, it can get hot during extended use. Proper cooling is essential for maintaining optimal performance and prolonging the lifespan of your device. This guide will provide practical tips to enhance the cooling efficiency of your Asus TUF A16.

    Understanding the Importance of Cooling

    Why Cooling Matters

    • Performance Stability: High temperatures can throttle performance, leading to lag and reduced frame rates in gaming and intensive applications.
    • Component Longevity: Excessive heat can shorten the life of internal components, including the CPU and GPU.
    • User Comfort: A cooler laptop is more comfortable to use on your lap or desk, providing a better overall experience.

    General Maintenance Tips

    Maintaining your laptop is crucial for effective cooling. Here are some general tips to consider:

    Regular Cleaning

    • Dust Removal: Over time, dust accumulates in vents and fans, restricting airflow. Regularly clean these areas to ensure optimal cooling.

      • What you need: Compressed air canister, soft brush, microfiber cloth.

    • How to Clean:

      1. Turn off and unplug the laptop.
      2. Use the compressed air to blow dust out of vents.
      3. Wipe the surface and keyboard with a microfiber cloth.

    Optimize Airflow

    • Elevate the Laptop: Using a laptop stand can improve airflow underneath the device.
    • Use on Hard Surfaces: Soft surfaces like beds can block vents, so always use the laptop on hard surfaces.

    Hardware Upgrades

    Sometimes, improving cooling requires hardware adjustments. Here are some upgrades to consider:

    Thermal Paste Replacement

    • Why It Matters: Fresh thermal paste can significantly enhance heat dissipation.
    • Steps to Replace:

      1. Disassemble the laptop carefully.
      2. Clean the old thermal paste from the CPU and GPU.
      3. Apply a small amount of new thermal paste and reassemble.

    Additional Cooling Pads

    • Cooling Pad Benefits: A cooling pad can provide extra airflow and reduce operating temperatures by several degrees.
    • Things to Look For:

      • Multiple fans for optimal airflow.
      • Adjustable height for ergonomic comfort.

    Software Solutions

    Adjusting your laptop settings can also help in keeping it cool.

    Power Management Settings

    • Use Power-Saving Modes: Switch to energy-efficient settings to reduce CPU and GPU workload during less-intensive tasks.
    • Steps to Adjust:

      1. Go to Control Panel.
      2. Click on Power Options.
      3. Choose a power plan like “Balanced” or “Power Saver”.

    Monitor Temperatures

    • Use Software Tools: Programs like HWMonitor or MSI Afterburner can help you track internal temperatures.
    • What to do:

      • Set temperature alerts to notify when temperatures rise above a certain threshold.

    Enhance Room Environment

    Sometimes your external environment can affect laptop cooling.

    Optimal Room Conditions

    • Air Circulation: Use fans or open windows for better air circulation in your workspace.
    • Temperature Control: Maintain a moderate room temperature. Ideally, keep it below 75°F (24°C).

    Avoid Direct Sunlight

    • Location Matters: Ensure the laptop is not exposed to direct sunlight, which can raise internal temperatures significantly.

    Additional Tips for Gamers

    Gamers often push their laptops to the limit, and there are specific practices to help manage heat during prolonged sessions.

    Close Unnecessary Background Apps

    • Free Up Resources: Closing non-essential applications can minimize CPU load and help keep temperatures lower.

    Reduce In-Game Settings

    • Graphics Settings: Lowering graphic settings can significantly reduce the load on the GPU, which helps in temperature management.

    Regular Monitoring and Adjustments

    Make it a habit to regularly check your cooling system’s performance. Adjust where necessary, whether that means cleaning, upgrading, or optimizing software settings. Keeping an eye on temperatures and adjusting your usage can make a world of difference in your Asus TUF A16’s cooling performance and overall effectiveness.

  • Creating the Ultimate Psyduck Build in Pokémon Unite

    Creating the Ultimate Psyduck Build in Pokémon Unite

    Psyduck’s introduction to Pokemon Unite has certainly made an impression. This character stands out with one of the most unique abilities we’ve seen. Though classified as a Supporter, Psyduck may not be the first Pokémon that comes to mind when considering raw damage output, yet it brings a versatile role to any team.

    Nevertheless, Psyduck is far more than just a standard Supporter. With skills that can hinder opponents’ cooldowns, push enemies away, and rapidly move across the battlefield, Psyduck has a lot to offer. Get ready to craft an impressive Psyduck build capable of causing significant challenges for your opponents.

    When to Choose Psyduck


    If you’re a fan of Psyduck and want to include this cute Pokémon in your team, you’re in luck. Psyduck is versatile enough to integrate into nearly any team setup. It’s best to pair Psyduck with at least one defensive Pokémon since it doesn’t fulfill the same role as strong defenders like Umbreon or Slowbro.

    While these defenders can absorb damage and provide healing, Psyduck focuses on disrupting enemy strategies through debuffs and other hindrances, all while dealing solid damage.

    Picking Psyduck is generally a safe choice, but keep in mind that it doesn’t provide healing for teammates, which might be necessary if that’s what you expect from a Supporter.

    What’s the Best Psyduck Build?

    While Psyduck has some decent options in moves like Bubble Beam and Psychic, its preferred build using Surf and Disable is exceptional. Surf is available to several Pokémon, including Blastoise and Slowbro, but Psyduck’s unique version stands out in Pokémon Unite.

    When Psyduck uses Surf against an opponent, it reduces the enemy’s movement speed by 30%, while allies caught in the wave gain a 70% boost to their own movement speed. Psyduck itself also gains a 30% speed increase.

    The movement boosts diminish over time, while enemies experience a speed reduction for a full 2.5 seconds.

    Surf can be enhanced through Psyduck’s passive ability, Swift Swim, which activates after using mysterious power. This allows Psyduck to create two waves in its chosen direction with each Surf usage.

    Besides the impressive effects of Surf, Disable is vital to this build as it shields Psyduck from foes that unleash their abilities rapidly. It damages and stuns enemies upon activation and extends the cooldown of the last move they used by two seconds.

    It also reduces their movement speed by 30% for two seconds, making it harder for them to retaliate.

    The chaos Psyduck can create by using its abilities can significantly alter the course of battle, especially since Disable can also affect nearby enemies. If you’re looking to support your teammates while countering threats like Absol, this build is the top choice for Psyduck.

    What Items Work Best for Psyduck?


    Psyduck's best Items in Pokemon Unite.

    Psyduck’s item selection can vary based on your strategy, but for solo queue play or a focus on dealing damage, a build focused on stacking is ideal.

    These items provide Psyduck with the best chances for victories in one-on-one or even two-on-one battles:

    1. Slick Spoon
    2. Sp. Atk Specs
    3. Choice Specs

    If you’re not keen on stacking or your Specs aren’t leveled up yet, consider replacing Sp. Atk Specs with Wise Glasses. Just note that it won’t offer the same level of damage.

    You can also adjust Psyduck’s items to fulfill various roles, such as providing shields to allies with Resonant Guard, but this Pokémon truly shines when being aggressive while keeping enemies in check. A Potion can be a great addition to sustain yourself without having to return to base for healing.

    Psyduck’s great movement speed, paired with its passive and Surf, usually allows you to escape tight situations, so focus less on that when selecting your battle item.

    Now that your build is ready, you can enjoy playing as one of the top supporters in Pokémon Unite.

  • Crafting Your Own Incense Burner in Sengoku Dynasty

    Crafting Your Own Incense Burner in Sengoku Dynasty

    Sengoku Dynasty takes place in feudal Japan and includes a range of items you can craft. Some of these items can be difficult to obtain since they require specific buildings and resources to unlock their crafting recipes.

    Related

    Sengoku Dynasty: How to Make Leather

    You might not need leather right away in Sengoku Dynasty, but it will become an essential resource later on.

    The incense burner is a luxury item you can unlock much later in the game. It may not be necessary until your population reaches a certain size. However, once your population grows, learning how to craft this item can help maintain high satisfaction levels among your people.

    How to Craft an Incense Burner in Sengoku Dynasty


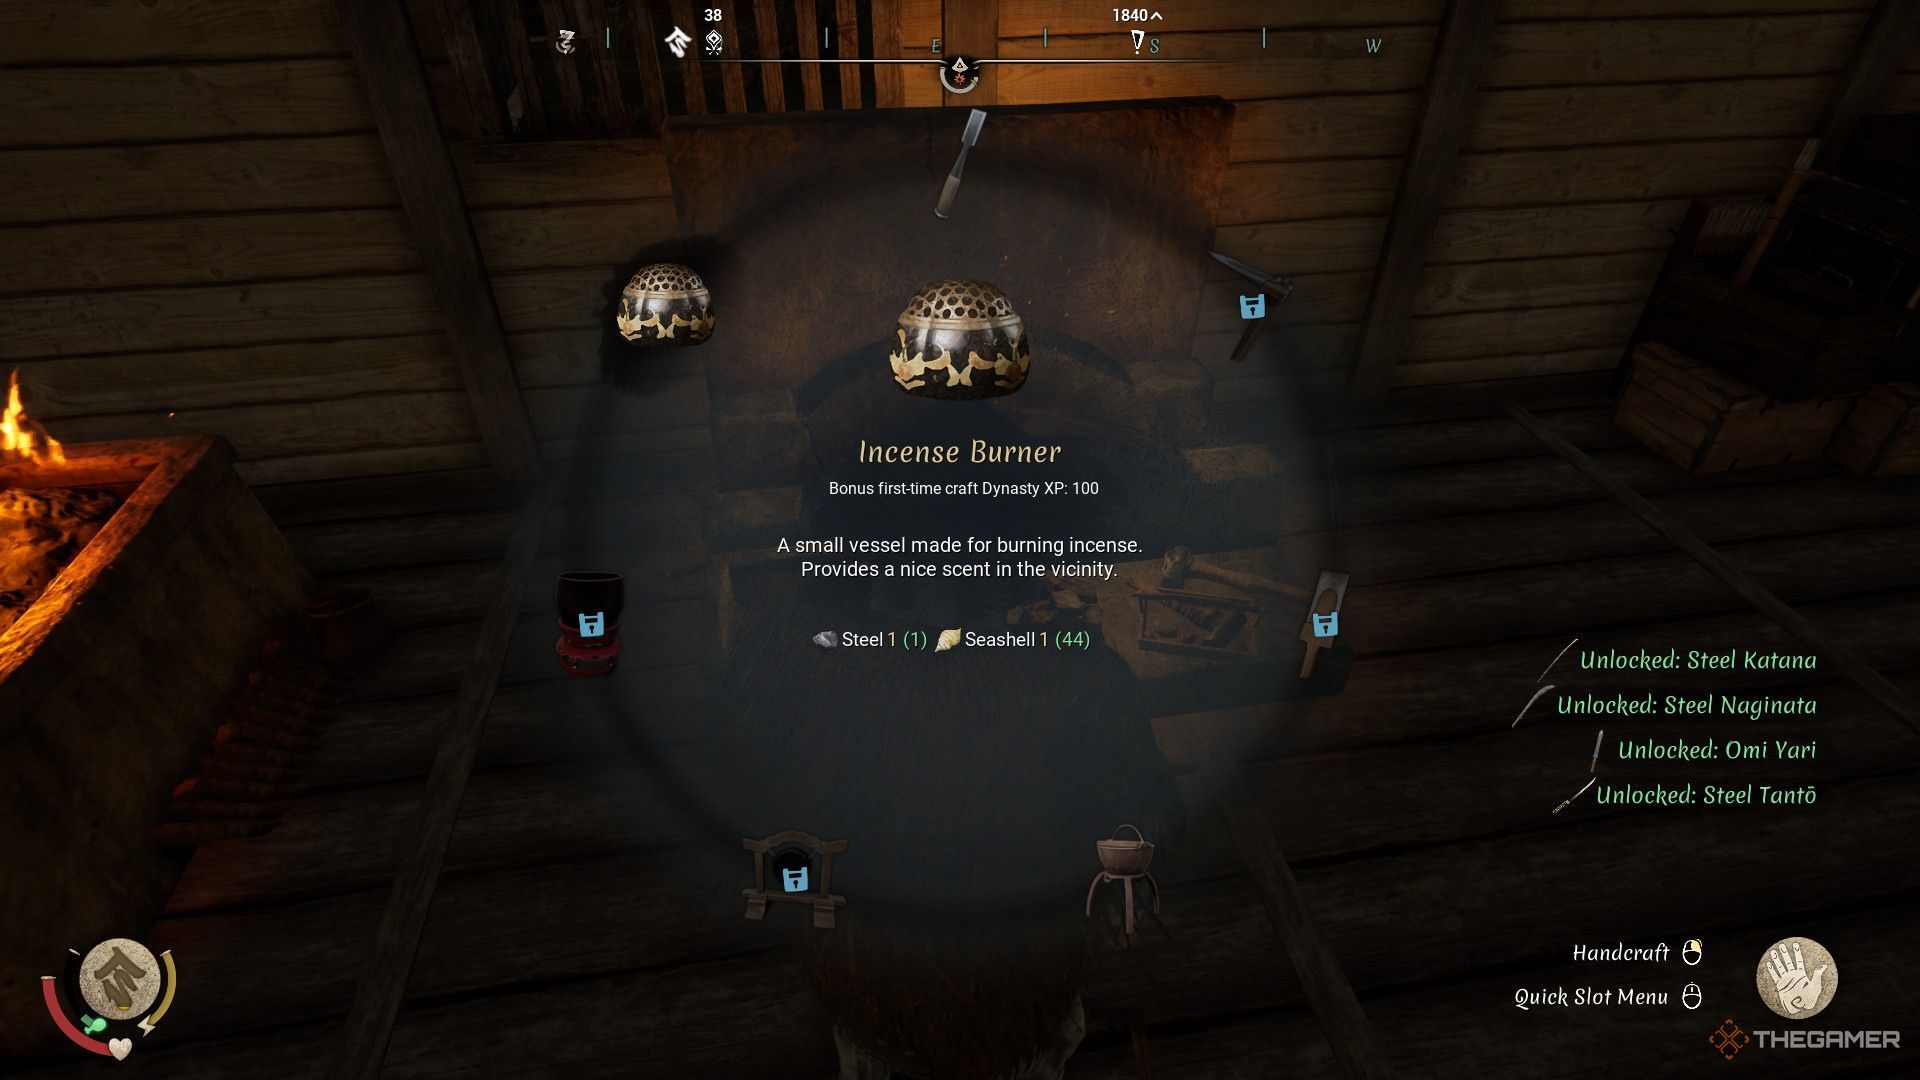
    The image shows the incense burner from the blacksmith anvil's crafting menu in Sengoku Dynasty.

    You can find the incense burner as a rare item from loot chests throughout the game or buy it from specific traders. However, if you want to make one yourself, you’ll need steel and seashells to craft it at a blacksmith’s anvil within a smithy.

    How to Create a Smithy

    To construct a smithy, you first need to unlock its crafting recipe by gathering iron ore. You can mine iron ore from caves or specific deposits using a bronze pickaxe. After establishing a smithy, you must set up a tatara furnace to turn iron ore into steel.

    Unlocking the tatara furnace’s recipe requires you to liberate the Eastern Swamps region. Once that’s done, follow these steps to build a tatara furnace:

    • Craft and equip a hammer.
    • Access the crafting menu and select furniture.
    • Choose production building furniture from the menu.
    • Select either a forge or a smithy, then choose the tatara furnace.
    • Place the furniture inside your smithy and construct it using the hammer.

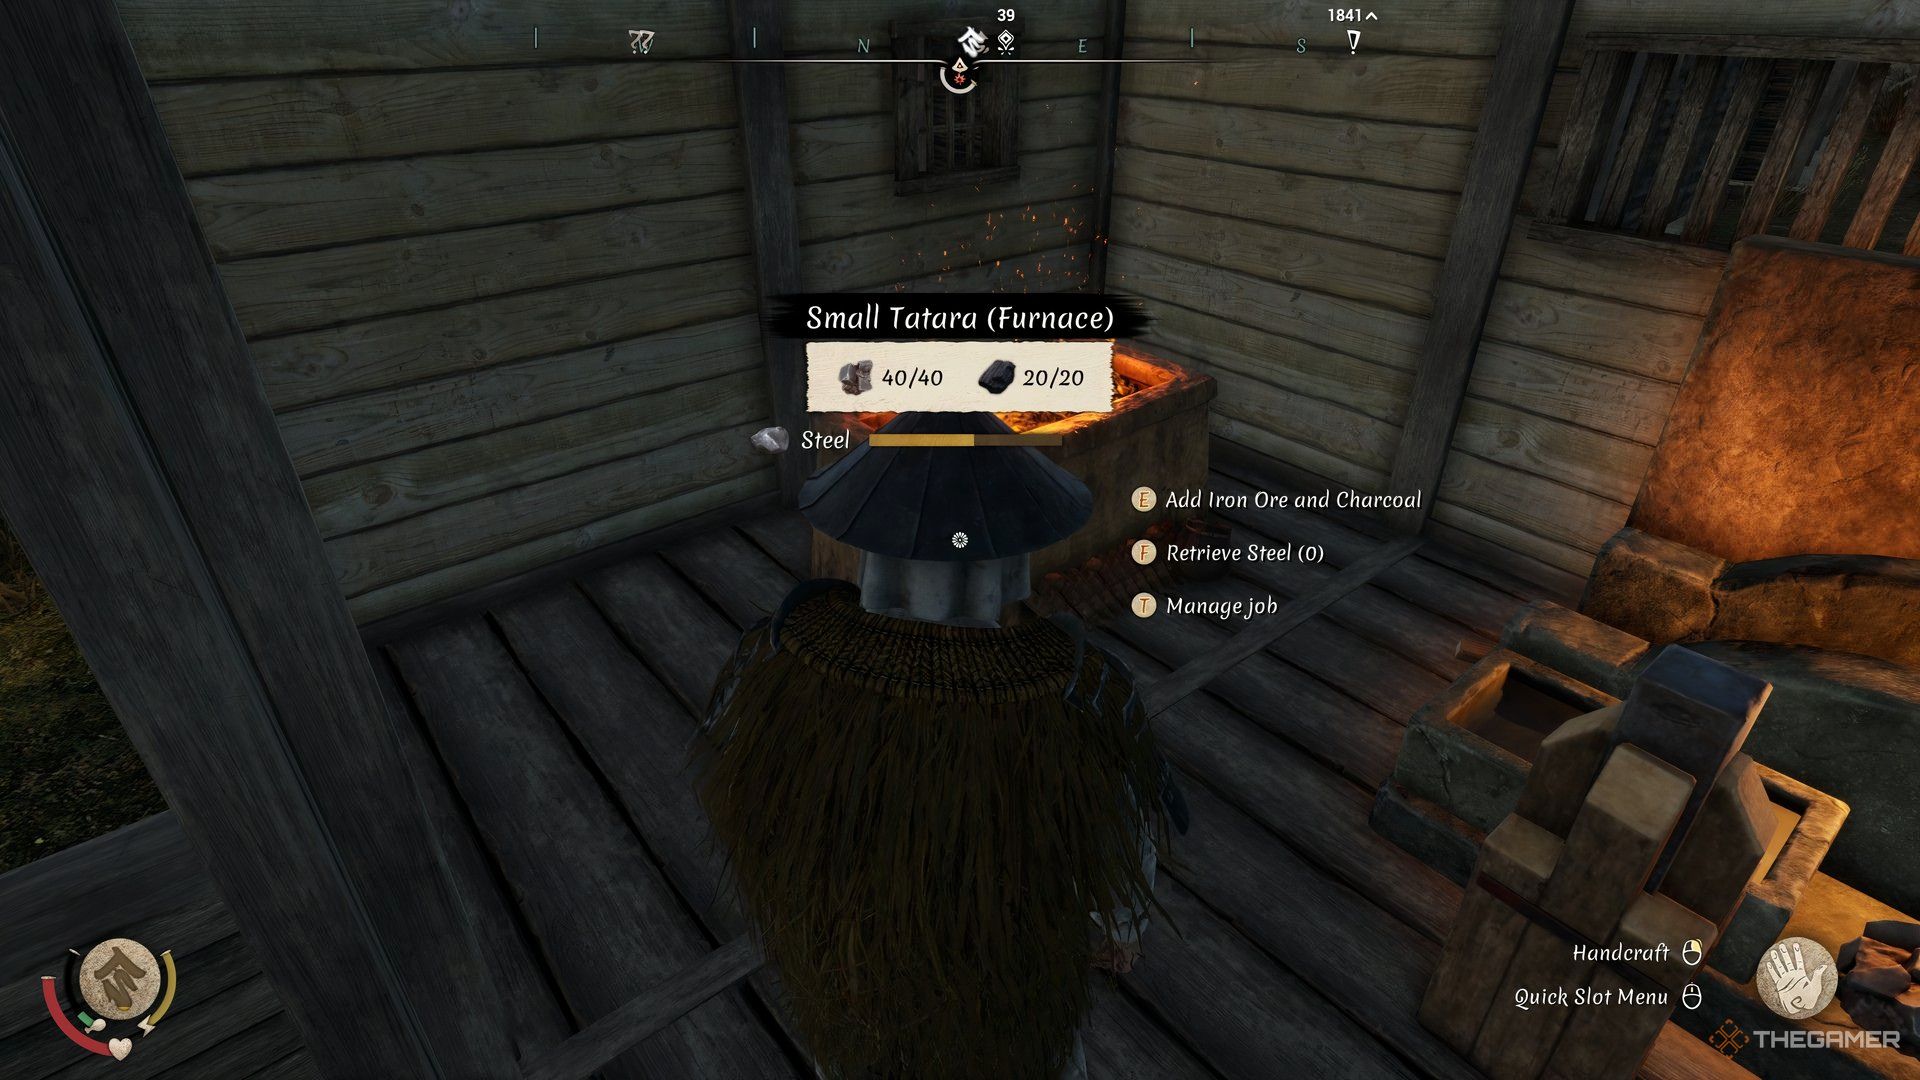
    The image shows a small tatara furnace in Sengoku Dynasty.

    After building the tatara furnace, you can add charcoal and iron ore to craft steel. Once you have the steel, go to the blacksmith’s anvil to make the incense burner by following these steps:

    • Access the crafting menu and go to the other items section.
    • Purchase the recipe for the incense burner for 450 coins.
    • Once the recipe is unlocked, you can select the incense burner and craft it.

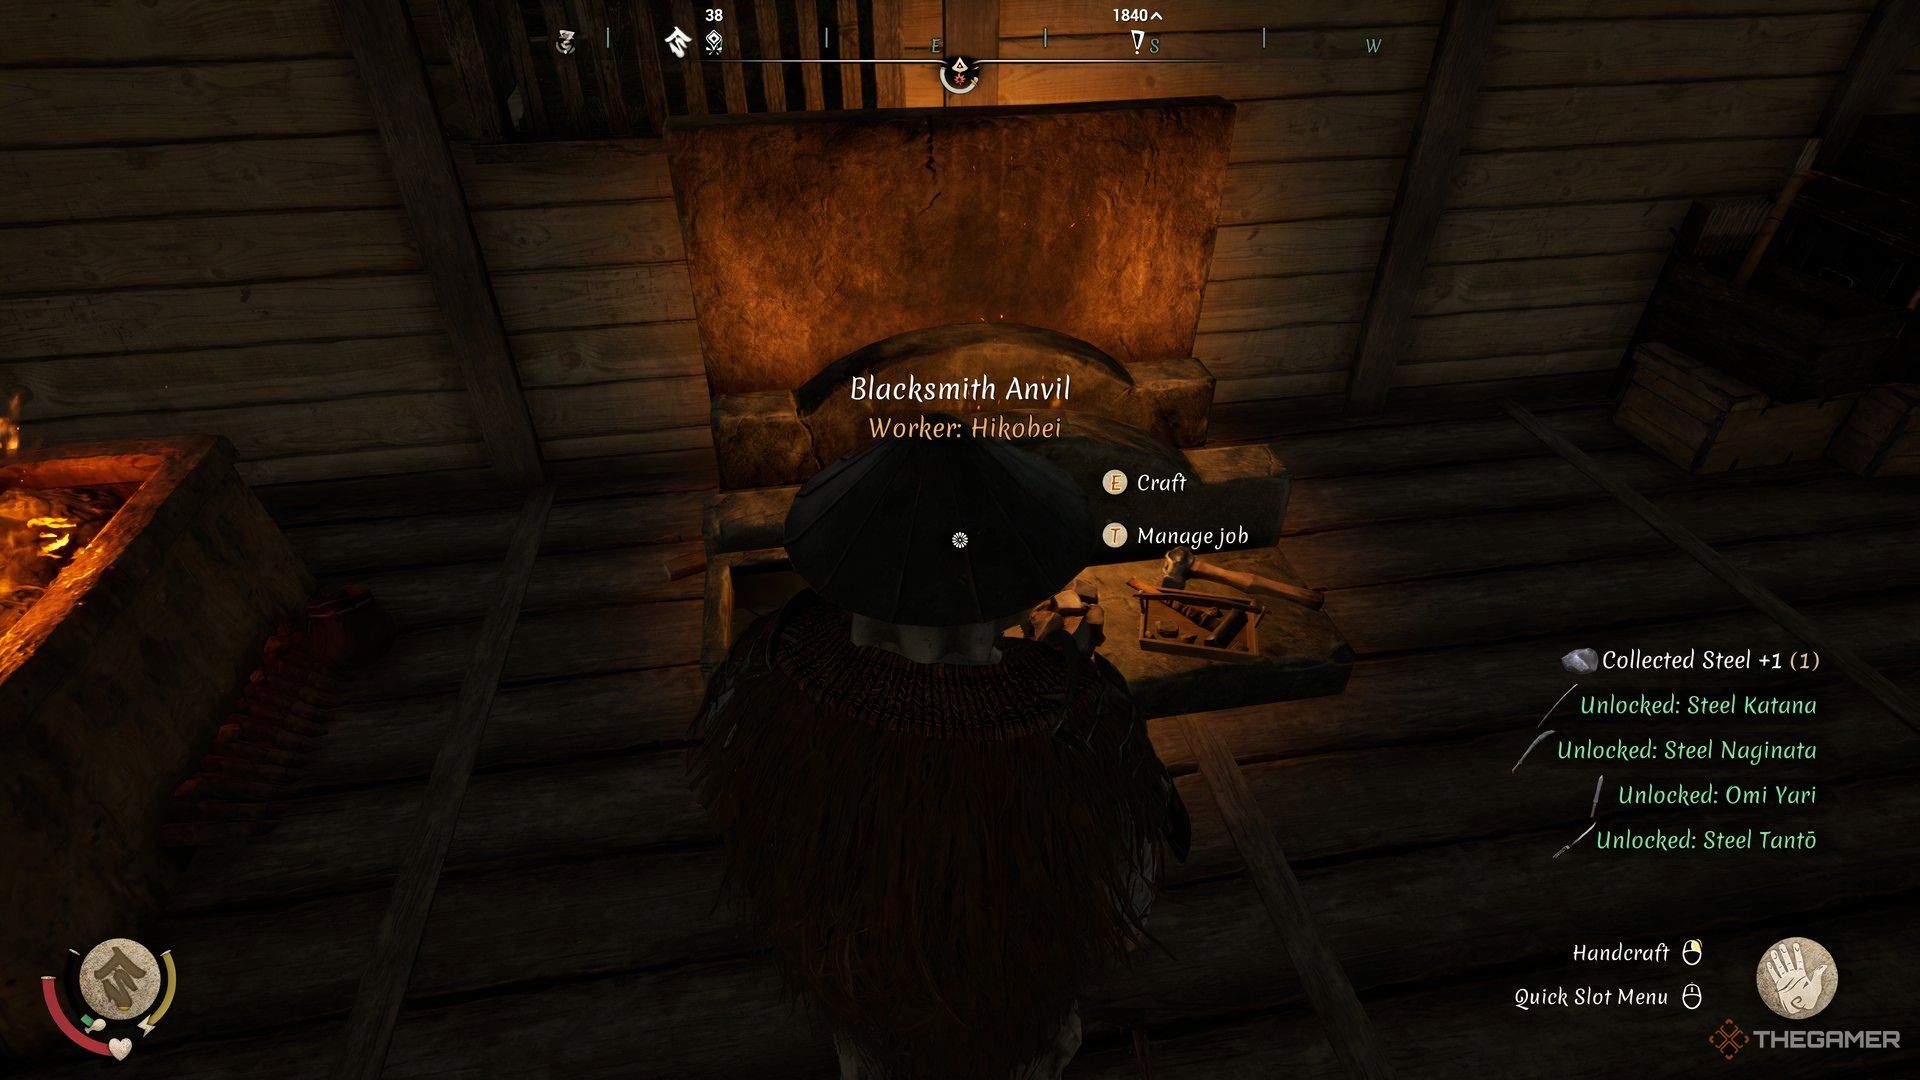
    After buying the recipe and gathering the necessary materials, you can assign a worker to the blacksmith’s anvil to create multiple incense burners every day.

    How to Use the Incense Burner in Sengoku Dynasty


    The image shows a blacksmith anvil in Sengoku Dynasty.

    The incense burner primarily serves the purpose of being stored in your dynasty’s general storage. Keeping it there will significantly boost your dynasty’s luxury production, leading to heightened satisfaction levels among your population.

    You can also sell incense burners to traders for some extra coins.

  • Strategies to Defeat Zoma in Dragon Quest III Remake

    Strategies to Defeat Zoma in Dragon Quest III Remake

    While Baramos may have felt like the ultimate challenge in the Dragon Quest 3 Remake, the real climax of your adventure comes against Zoma. This powerful foe stands in the way of peace—not just for your world, but for the entire realm of Alefgard. However, Zoma is no pushover and will put up a fight.

    Unlike Baramos, Zoma isn’t going to wait for you to make your move. He’ll first send a wave of his minions to test your strength before you can take him on. Every boss in this gauntlet presents a significant threat, but none rival Zoma’s overwhelming power. However, we’re ready to defeat him and end this saga.


    As you prepare to face Zoma, ensure your party members are between levels 40 and 43 at a minimum. Avoid having anyone below level 40—put in some time grinding if necessary, as the foes in Zoma’s Citadel provide excellent experience points.

    This was our lineup:

    • The Hero with a Paragon Personality, which enhances physical strength significantly.
    • A Monster Wrangler with the Everyman Personality, providing a balanced stat spread and approximately 80 recruited monsters to amplify Monster Pile-On’s power.
    • A Mage-turned-Sage with the Slippery Devil Personality for an extensive MP pool, allowing for high MP moves without concern.
    • A Priest-turned-Warrior with the Tough Cookie Personality, granting access to powerful buff and debuff spells along with impressive resilience.

    In this composition, the Hero and Monster Wrangler are key damage dealers, while the Warrior and Sage should focus on healing and boosting their abilities. Straying from these roles—even for a single turn against Zoma—could lead to a swift defeat.

    We found that equipping the Duplic Hat on the Sage was essential. This hat, which is located in a grove between mountains near the Castle of the Dragon Queen and can only be accessed with Ramia, ensures that every spell is cast twice consecutively, with the second casting being completely free.

    How to Beat King Hydra

    The King Hydra, known for defeating Ortega, is the first opponent in the gauntlet Zoma presents, and he’s arguably the toughest of the three. With a considerable amount of HP, he heals about 90-100 HP each turn and can strike twice. This battle is reminiscent of fighting Orochi, but with many more status effects to contend with.

    King Hydra primarily utilizes two main attacks: a physical strike and Inferno, a Fire-element breath attack. While these attacks can be managed, it’s Sweet Breath that is particularly concerning. Spells like Insulatle offer no defense against it, making it difficult to justify using powerful accessories to gain sleep protection.

    For this reason, equipping the Sunstone on your Warrior is crucial, allowing them to absorb hits and rid the party of Sleep status. As always, the Warrior should focus on support roles, such as casting Insulatle and, if possible, using Snooze on King Hydra.

    Keep your Sage focused on healing, utilizing Multiheal consistently, even when it seems unnecessary. When given the chance, the Sage should also cast Kabuff, with the Duplic Hat ensuring it’s cast twice for added protection.

    Cast Oomph on both the Hero and the Monster Wrangler, prioritizing the latter. As King Hydra’s HP decreases, he’ll create a fog preventing magic use, so it’s vital to maintain your buffs during this time.

    After defeating each boss, you can use the Teleportal at the start of the room to heal before heading back. Fortunately, you won’t have to retake on any bosses you’ve already defeated.

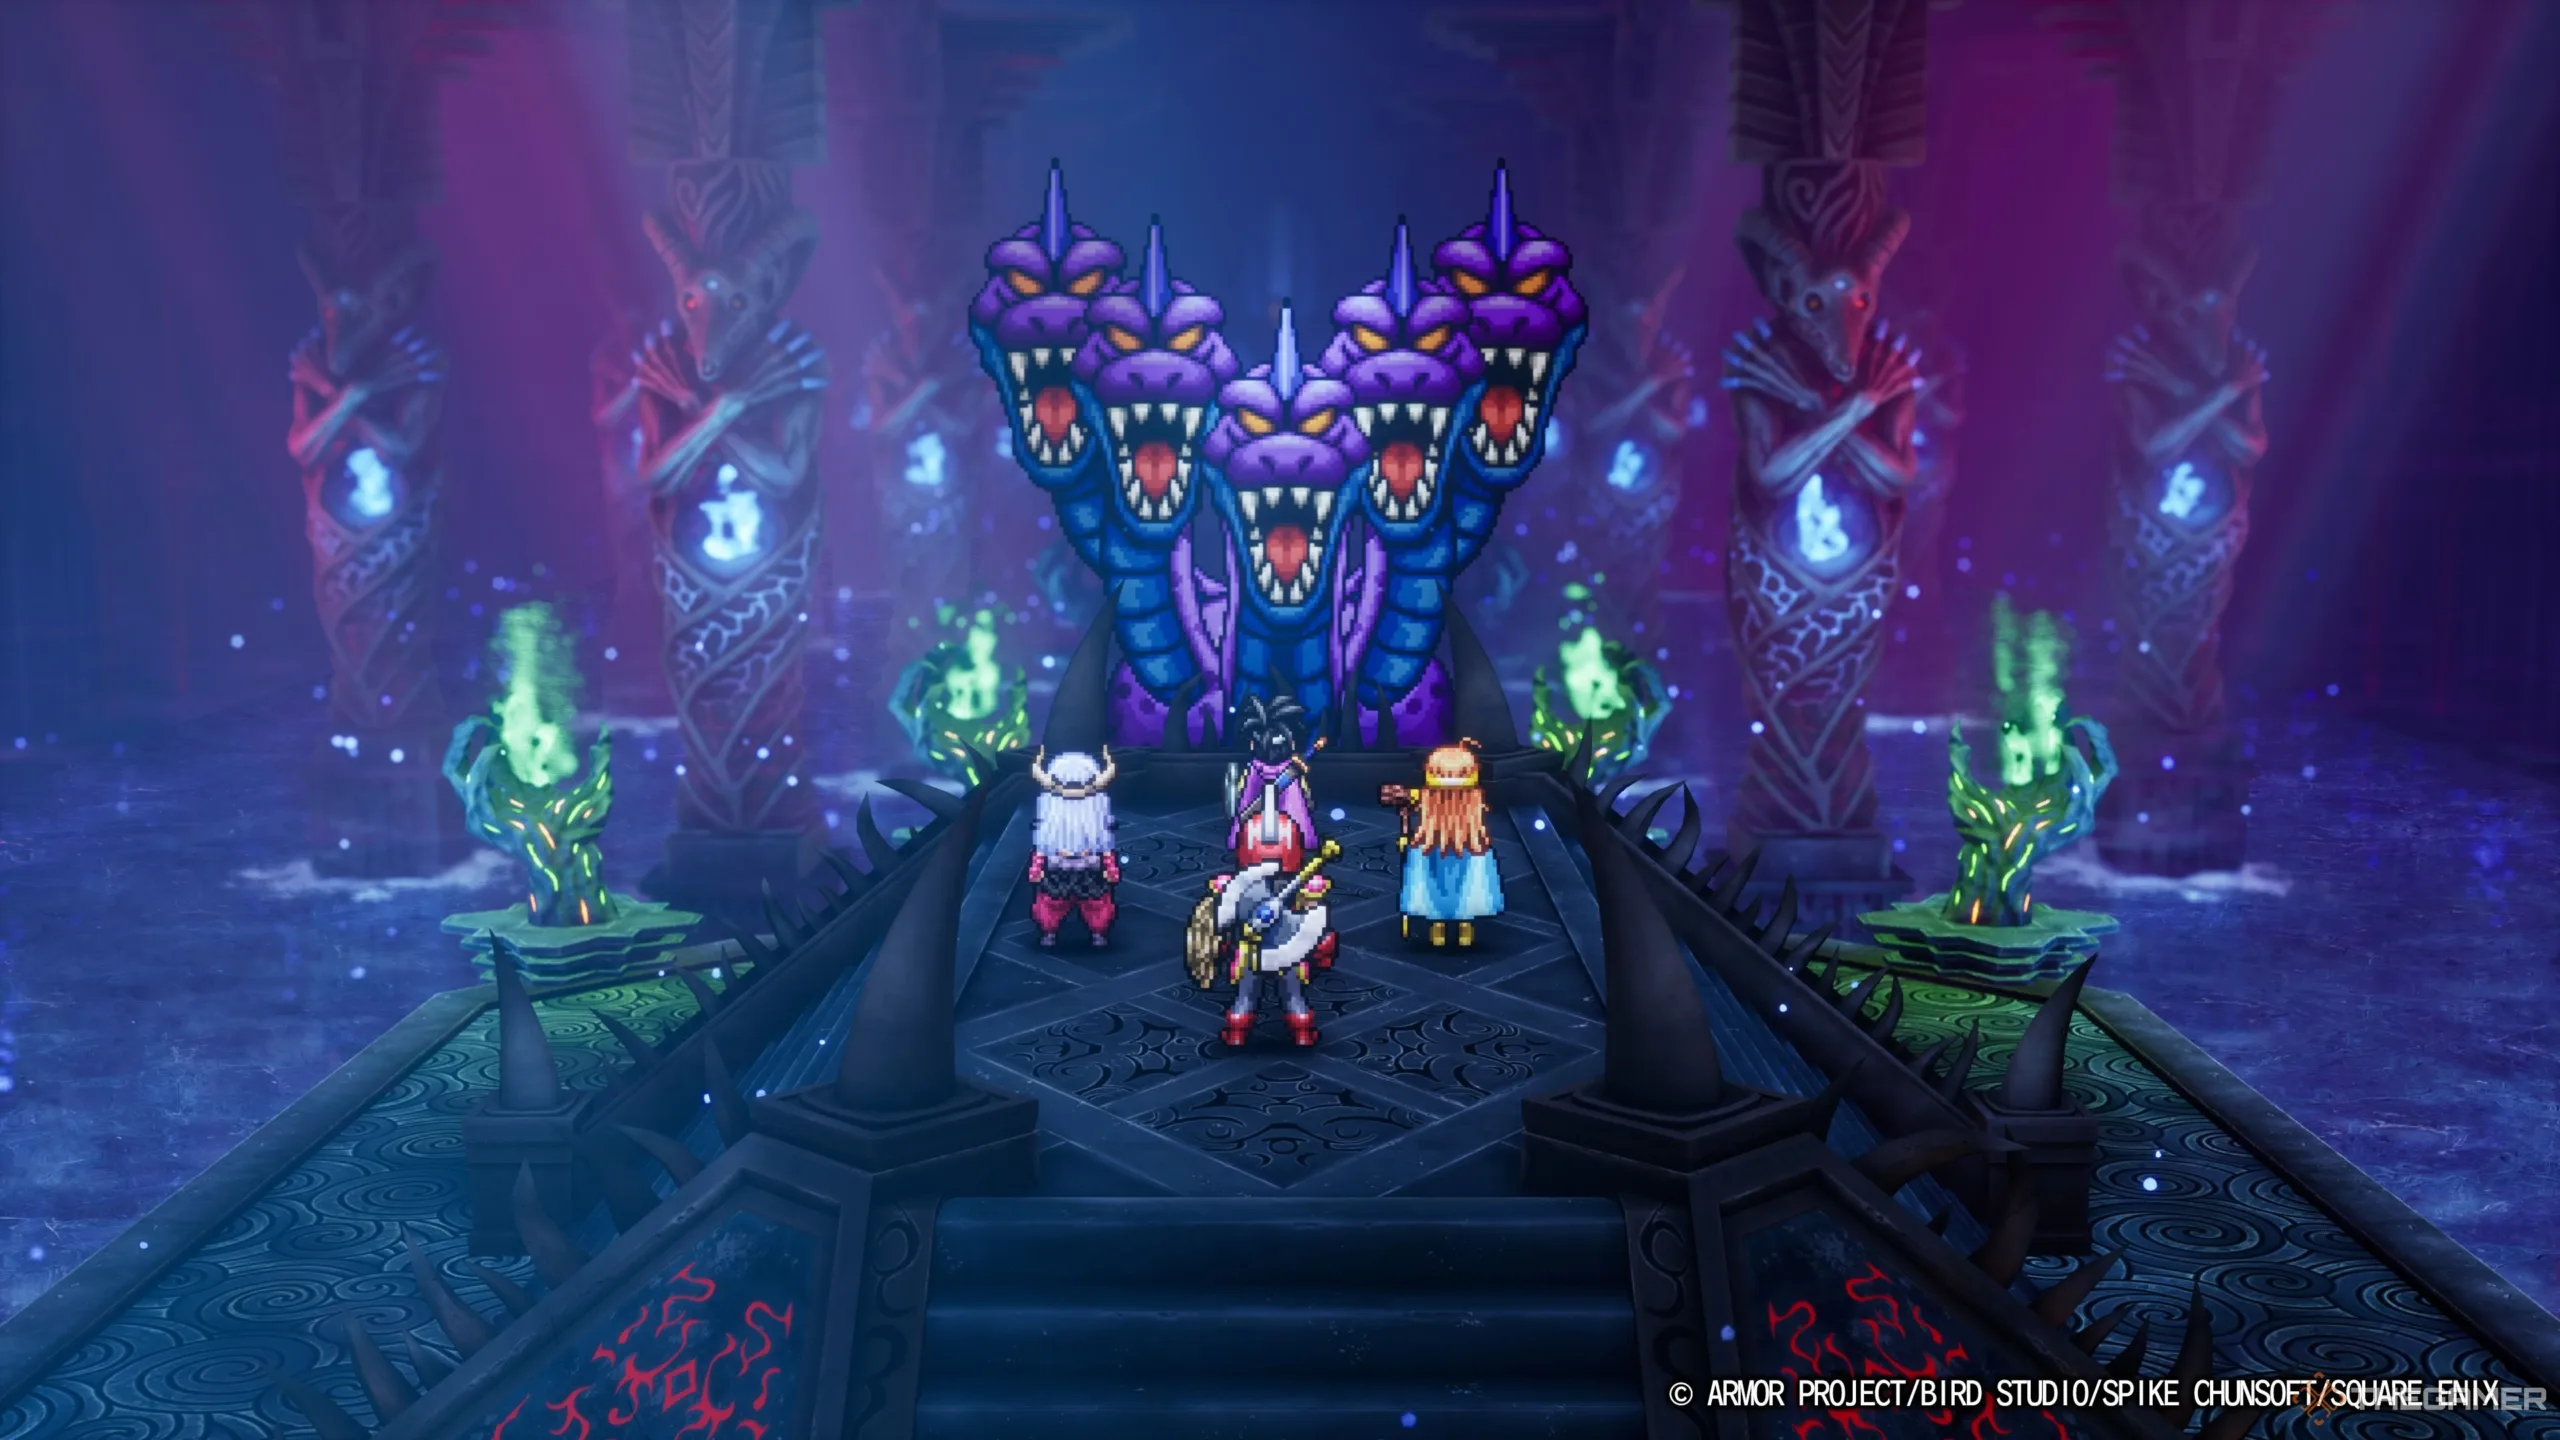
    How to Beat Soul of Baramos


    DRAGON QUEST III HD-2D Remake party confronting the Soul of Baramos in Zoma's Citadel.

    Thought you’d seen the last of Baramos? His essence lingers on beyond your previous encounter in the Tower of Rubiss, and this time he is determined to succeed. He won’t, but props to his confidence!

    This encounter is similar to your earlier battle against him, with not much additional complexity. Baramos will use the strongest versions of his moves and will often spam Inferno if you manage to cast Fizzle on him. This can work to your advantage, allowing you to focus on casting Insulatle instead of juggling multiple defensive spells.

    As before, the Warrior and Sage should focus on buffs and healing, while the Hero and Monster Wrangler take charge of the attacks. Remember that Baramos is particularly vulnerable to Lightning, so apply Oomph on the Hero and use Lightning Slash frequently. Utilize Wild Side and Monster Pile-On with the Monster Wrangler for massive damage output.

    Be aware that Baramos will cast Blasto more frequently during this fight, although it remains a low-hit probability move. He does have substantial HP, which means it may take a while to wear him down. Maintain your assault, and victory will be yours once again.

    How to Beat Bones of Baramos

    Oh, you thought Baramos was done? His soul may have been defeated, but his body is still hanging around. Now you face the Bones of Baramos, which look oddly dragon-like. Fortunately, this is the easiest of the trio of bosses you’ll encounter before Zoma.

    This battle is more about endurance than strategy. Bones of Baramos use basic attacks—primarily a standard physical strike, Attack Attacker to debuff your strength, and an All-Out Attack that delivers heavy damage while lowering their defense.

    They keep their Lightning weakness, so unleash Lightning Slash as much as possible and cast Oomph at the earliest opportunity. The same tactics apply for the Monster Wrangler, using Wild Side followed by Monster Pile-On for impressive damage.

    Play your Sage and Warrior a bit differently here. The Sage should focus on healing and casting Oomph—there’s no need to concentrate on debuffing the boss since he weakens himself naturally. Encourage your Warrior to contribute physical attacks to accelerate the onslaught.

    This fight should conclude in just a few minutes without major problems. Keep up the pressure because the boss can recover about 300 HP each turn. Keep attacking until you put him down for good.

    How to Beat Zoma

    This is it—the ultimate challenge. Zoma is hands down the toughest adversary in the game, feeling similarly daunting to the first time you faced Baramos. He is a formidable opponent. But you’ve overcome every obstacle leading up to this, and now you have the power of the Dragon Queen backing you.

    When the battle with Zoma commences, he will be surrounded by a dark blue aura, healing roughly 300 HP each turn and dealing over 100 damage with each hit. It may seem impossible to win against such odds, and it sort of is. Instead, you can use the Sphere of Light to remove his aura, making him a considerably weaker but still very challenging opponent.

    If you let several turns go by without using the Sphere of Light, you will be prompted to use it. You can choose to decline if you’re looking for a tougher fight.

    After a brief exchange with Zoma, he will lose much of his power, dealing less damage and no longer healing himself. However, he won’t hold back on using his full range of abilities, and he has plenty to spare.

    Expect Zoma to bombard you with Ice-element attacks, including Kacrackle, Freezing Blizzard, and occasionally C-C-Cold Breath. The first is a magic attack, while the latter two are breath attacks. Keep Insulatle and Magic Barrier active at all times to mitigate damage.

    As if that wasn’t enough, Zoma can attack three times per turn. He may unleash all three moves in a single round, decimating your party if you’re unprepared. Not to mention, Zoma has high agility, making him quite challenging.

    As previously, the Hero and Monster Wrangler will lead the offense, but it’s unlikely you’ll find much time to cast Oomph—focus instead on healing and buffing yourself. Use Sap only when you’re absolutely confident in your ability to survive the assault. He has no significant weaknesses, so repeatedly use Falcon Slash to maximize your damage output each turn.

    Throughout the fight, Zoma will occasionally wipe all beneficial effects from the party. While this is an annoyance, it also means he uses up an action to do so. Whenever this happens, make sure to cast Acceleratle so you can outpace Zoma’s actions. Fortunately, he doesn’t remove any negative status effects from himself.

    Restore your buffs promptly as they begin to fade. This way, you’re likely to reapply them right after Zoma removes them.

    When Zoma’s HP is running low, he will boost his magical power, potentially inflicting over 100 damage even with your defenses up. At this stage, failing to maintain those defenses could spell doom for your party. Even if your team starts this turn with high HP, have your Sage cast Multiheal in case Zoma removes your buffs and poses a significant threat.

    The fight becomes more tactical as Zoma begins to employ more status effects, using moves like Dazzle when his health is diminished. While this may reduce your accuracy, it’s far better than dealing with his increased power. Stay vigilant and take things slowly to ensure your success.

    Once you land that final blow, you’ll be transported to Talontear Tunnel, leading you towards the credits. Congratulations—you’ve liberated Alefgard from the darkness. You’ve completed Dragon Quest 3, paving the way for the stories of Dragon Quest 1 and 2.