الوسم: Like a Dragon: Pirate Yakuza in Hawaii

  • All Accurate Responses for Corporate Compliance in Like A Dragon: Pirate Yakuza

    All Accurate Responses for Corporate Compliance in Like A Dragon: Pirate Yakuza

    Understanding today’s business culture can be challenging, especially for a pirate. However, the Corpirate Compliance substory in Like A Dragon: Pirate Yakuza in Hawaii is here to guide you. It will prepare you to regain your crew’s respect and foster a successful pirate operation.

    While choices may not drastically impact the game, how you respond will influence your rewards. Your decisions could lead you to receive either a simple Chain Ring or the much-coveted Voyage Ring. Just like in real pirate life, there are no second chances. Fortunately, this guide provides all the answers you need.

    Starting the Corpirate Compliance Substory

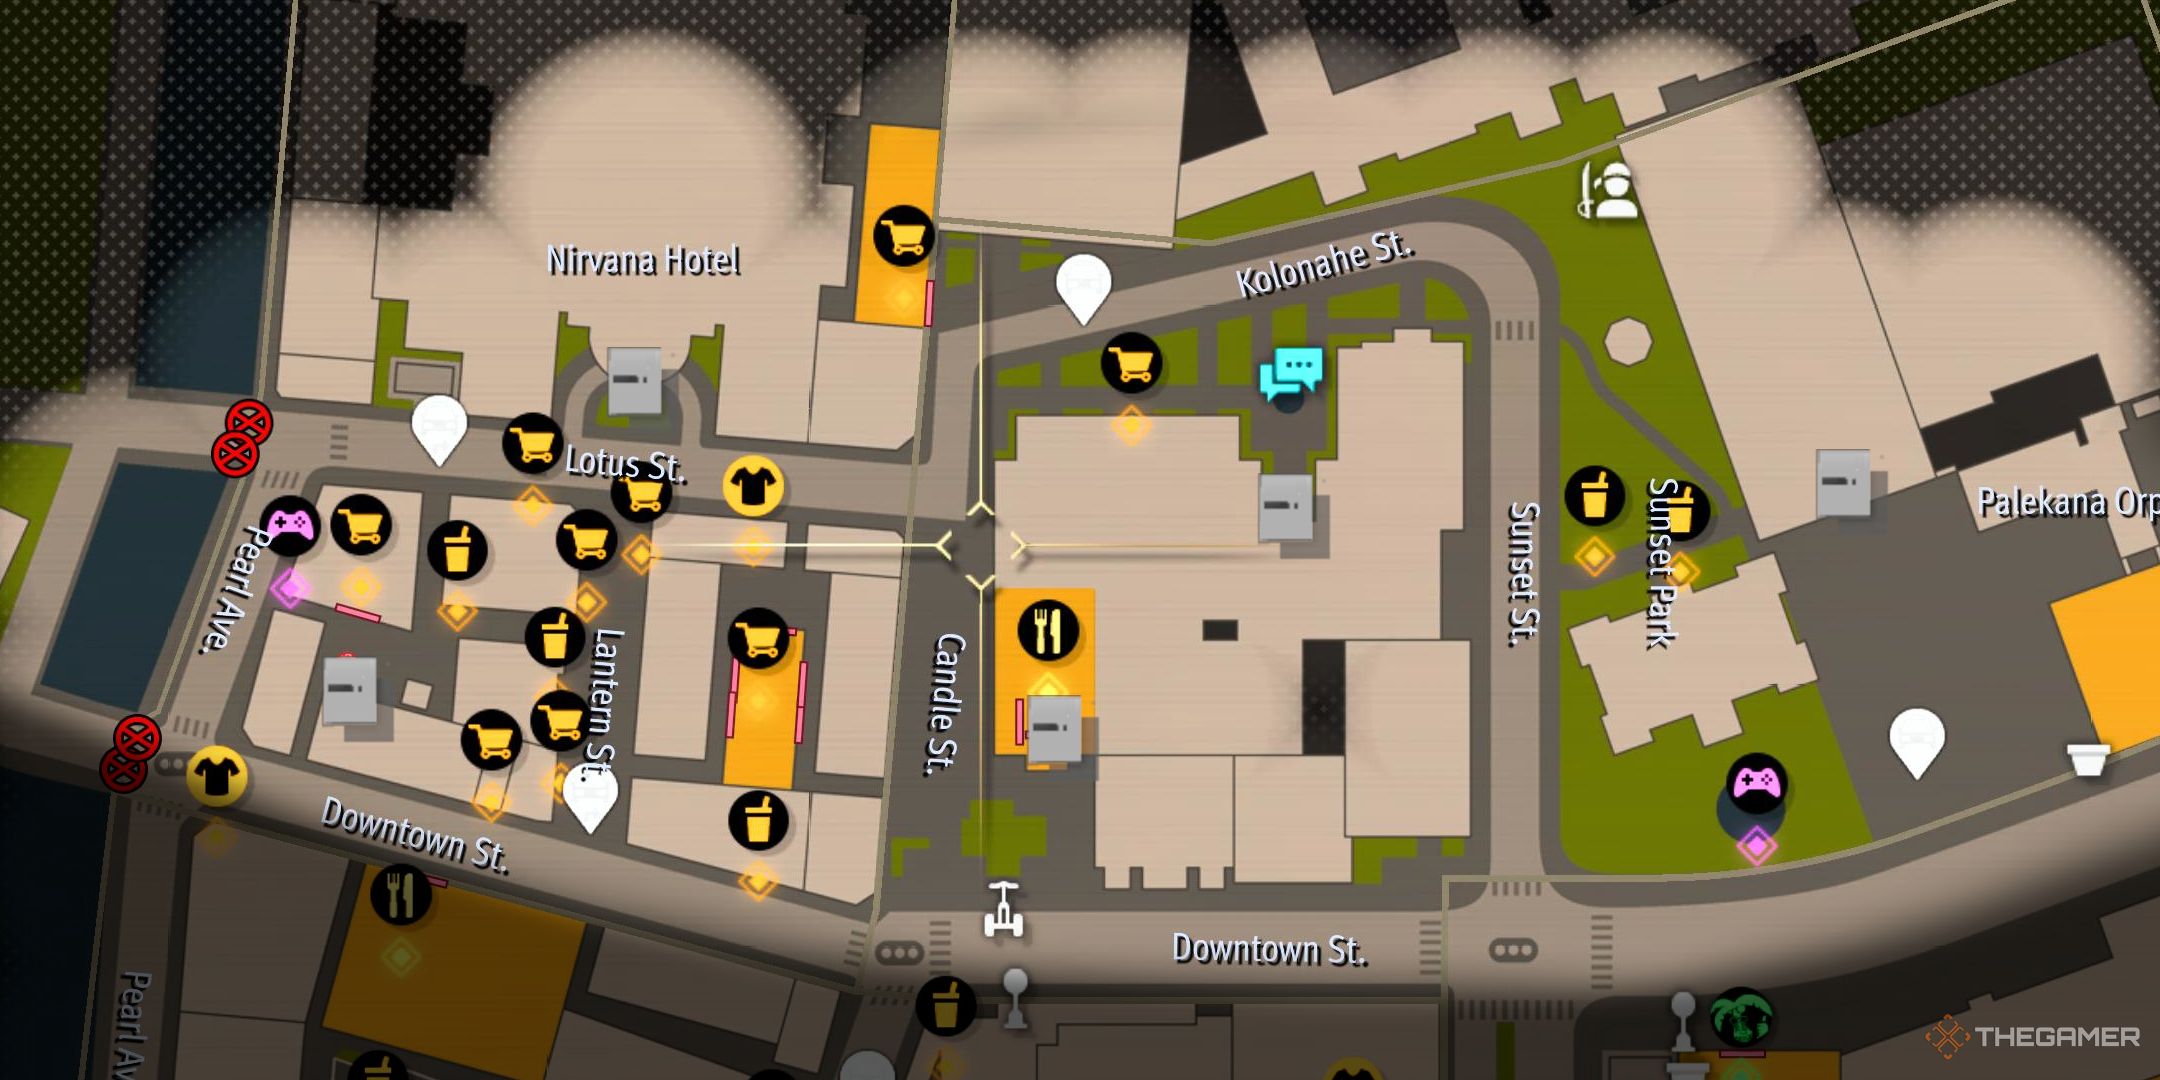
    Once you complete the Coliseum in Chapter 2, the Corpirate Compliance substory will be unlocked. Travel to the Black Hibiscus in Chinatown (via the Lantern St. Entrance taxi), where you’ll find a captain in a heated argument with his disgruntled crew.

    Enter the restaurant and speak with the pirate captain, Bryan. White will introduce himself and offer to help both of you become better leaders. You can now find both White and Bryan at the harbor, located northeast of the Dragon Kart mini-game. Talk to them when you’re ready to dive into the substory.

    Scenario One


    As White begins his presentation, you will face a scenario where a captain speaks to the crew. Your task is to identify what the captain said that was inappropriate. Your options are:

    • Saying, “Mornin’, lads!”
    • Saying, “Did you sleep well last night?”
    • Saying, “Everyone to their posts!”

    The correct choice is Saying, “Mornin’, lads!”, as this phrase excludes any pirates who are not male.

    Scenario Two


    Majima at the washroom door in the second scenario of the Corpirate Compliance substory in Like A Dragon: Pirate Yakuza in Hawaii.

    Next, Majima finds himself needing to use the restroom, but it’s currently occupied. You must determine the best course of action. Your choices include:

    • Relieve yourself outside the restroom door
    • Knock once
    • Knock twice
    • Knock repeatedly
    • Break down the door

    The best choice is to knock twice, as this is generally considered the proper way to check if a restroom is in use.

    Scenario Three


    A sword fight integral to the third scenario in the Corpirate Compliance substory in Like A Dragon: Pirate Yakuza in Hawaii.

    In the last scenario, you’ll watch a brave captain vanquish an enemy pirate and celebrate with his crew. However, there’s a mistake he made. Your options are:

    • Killing the enemy pirate
    • Saying they’ll never back down
    • Splitting the treasure evenly
    • Planning on drinks afterward

    The correct answer is Splitting the treasure evenly, as this disregards the expenses of operating a ship and the differing levels of effort each crew member contributes.

    Wrapping Up the Corpirate Compliance Substory

    After navigating all three scenarios, you’ll earn either a Chain Ring or a Voyage Ring. By following the guidance in this manual, you should walk away with the superior Voyage Ring. Your final task is to confront two disgruntled customers. Don’t worry; they won’t pose a significant threat, and Bryan will lend a hand. As a result, you’ll successfully recruit both White and Bryan into your crew.

  • Yakuza Adventures: A Pirate’s Tale in Hawaii

    Yakuza Adventures: A Pirate’s Tale in Hawaii

    Like A Dragon: Pirate Yakuza in Hawaii features a wealth of systems to discover, and one of the standout elements is the Goro Kingdom. This unique area allows you to gather items from animals you recruit during your adventures. To bring animals into the Goro Kingdom, you need to interact with specific creatures located across various regions. Once recruited, Majima can strengthen his bonds with these animals by caring for them, prompting them to yield valuable resources.

    Similar to the Golden Balls system in LAD: Pirate Yakuza, you’ll need to track down many potential recruits for the Goro Kingdom by exploring your surroundings. However, you’ll come across some Goro Kingdom animals naturally as you progress through the main storyline and complete quests. As you reach a certain point in the game, you’ll learn more about the Goro Kingdom and the advantages of expanding your animal roster.

    Locations of All Goro Kingdom Animals & How to Recruit Them

    Throughout LAD: Pirate Yakuza, there are 11 animals you can befriend for the Goro Kingdom. Recruiting animals is only possible after you unlock Goro Kingdom through the main story, so keep advancing until you encounter your first animal companion.

    Once you start recruiting animals, you can build friendships by feeding them treats over time. Feeding an animal enhances its Friendship Level from Level 1 up to Level 3. Different friendship tiers yield various rewards, but each creature provides ingredients that help you cook powerful items.

    Pro Tips for Animal Recruitment

    Searching for animals for Goro Kingdom is a great way to explore every nook and cranny of the map. While hunting for recruits, be sure to engage in Photo Rallies in LAD: Pirate Yakuza for even greater rewards.

    The following table lists the locations of each Goro Kingdom animal and the rewards they offer as your friendship grows:

    Animal Location How to Recruit Rewards
    Goro – Tiger N/A Recruited at the beginning of the game. Lvl 1 – Rabbit Meat, Lvl 2 – Pheasant Meat, Lvl 3 – Bear Meat, Max – 50x Bear Meat
    Phoenix – Chicken Stella’s Shop Join the story quest taking you to Stella’s Shop to recruit Phoenix and Onigiri here, allowing for animal recruitment. Lvl 1 – Egg, Lvl 2 – Quality Egg, Lvl 3 – Golden Egg
    Onigiri – Cat District Five Complete the "Kitten in District Five" substory, then defeat the man abusing Onigiri to recruit her. Lvl 1 – Aweoweo, Lvl 2 – Humuhumunukunukuapua’a, Lvl 3 – Oarfish
    Barkley – Dog Anaconda Shopping Center Feed Barkley some animal food after finding him at the north entrance. A nearby woman will indicate his location. Lvl 1 – Flounder, Lvl 2 – Salmon, Lvl 3 – Mahi Mahi
    Zoomies – Dog Harbor District Talk to locals for help catching Zoomies. Chase the dog in the northwest, and select the "Be gentle" dialogue option to recruit him. Lvl 1 – Flounder, Lvl 2 – Salmon, Lvl 3 – Mahi Mahi
    Coco – Chimpanzee Hulu Bridge At Aloha Bridge, find a woman asking for help with Coco in a tree. You can recruit Coco after trying to help. Lvl 1 – Coconut, Lvl 2 – Quality Mango, Lvl 3 – Superb Pineapple
    Allure – Cat Aloha Street Dress as a hostess using the outfit from Liber Tea’s silver container and approach the cat to recruit it. Lvl 1 – Aweoweo, Lvl 2 – Humuhumunukunukuapua’a, Lvl 3 – Oarfish
    The Gourmand – Dog Riverside Walk Feed this starving dog Wild Caught Sashimi, which you need to fish from the river at Riverside Walk. Lvl 1 – Flounder, Lvl 2 – Salmon, Lvl 3 – Mahi Mahi
    Turtle – Dog River Street Defeat abusers near Turtle, located west of the Crepes for Me restaurant. Lvl 1 – Flounder, Lvl 2 – Salmon, Lvl 3 – Mahi Mahi
    Sanzen – Cow Sunset Park Buy Sanzen from a local farmer in the main pavilion for $3,000. Lvl 1 – Fresh Milk, Lvl 2 – Quality Fresh Milk, Lvl 3 – Superb Fresh Milk

    Best Strategies to Increase Friendship Levels in Goro Kingdom

    Create High-Quality Food for Your Animals

    After finding animals in LAD: Pirate Yakuza, it’s essential to provide them with suitable food to quickly raise their Friendship Levels. Initially, you’ll only have access to basic food supplies from local vendors. The quality of food directly affects the rewards you receive.

    Basic Food Items

    • Regular Pet Food ($10) – Produces 2x Level Reward
    • High-End Pet Food ($150) – Produces 5x Level Reward
    • Ultimate Pet Food (Found in Briefcases) – Produces 7x Level Reward

    To swiftly fill an animal’s friendship bar, consider creating the Essence of Pet Snacks treat frequently. You can make this special food using:

    • 5x Eggs OR 5x Dairy Products
    • 5x Random Fish
    • 5x Fruits
    • 5x Bugs
    • 3x Random Meats

    Making this special food significantly boosts an animal’s friendship, allowing you to reach their top reward tier faster. Remember, cooking becomes available after progressing a bit further in the story.

    Having a kingdom filled with animals may seem daunting to manage, but the advantages they offer make it worthwhile. Those who harness all the animals in Like A Dragon: Pirate Yakuza in Hawaii will gain the capacity to craft superior items for Majima, aiding him on his journey with loyal companions at his side.

  • Dragon’s Quest: Yakuza Pirates Take on Hawaii

    Dragon’s Quest: Yakuza Pirates Take on Hawaii

    If you’re short on cash in Like A Dragon: Pirate Yakuza in Hawaii, there are several reasons you might need some quick cash. Early in the game, there’s a story segment that requires you to come up with $10,000 fairly fast to upgrade your ship and gain access to Madlantis, which features some of the best mini-games in Pirate Yakuza. Maybe you’ve been stuck in a tough battle and need to enhance your skills. Or perhaps you just blew your last coin trying to snag a rare plush toy from the UFO Catcher.

    Basically, in Pirate Yakuza, money is everything—it’s your primary resource for transactions. (Points store and the Golden Ball mini-game are notable exceptions.) Unlike conventional RPGs, there are no experience points or leveling systems to rely on, and no lines of credit to bank on—it’s just you and your wallet battling against the world. Here are some effective methods to quickly refill your pockets in Pirate Yakuza.

    How to Make Money Fast in Like A Dragon: Pirate Yakuza in Hawaii

    Take on Bounties

    The easiest way to earn thousands quickly in Pirate Yakuza is by accepting bounties, which you can find scattered throughout the game world. You unlock this feature early in the story during Chapter Two, shortly after you’re denied access to Madlantis for the first time.

    When pursuing a bounty, make sure to stock up on healing items. There’s no shame in preparing yourself, and it may help you tackle some of the more challenging bounties while at lower levels.

    To locate a bounty, check your map for the red handcuff icon. Each bounty will show the target’s name and the cash reward for defeating them. Generally, higher payouts correspond with tougher opponents, but you can also see an exact difficulty rating (using a scale of five fists) when you approach the bounty target and interact with them. At this point, you can still choose to back out if they seem too formidable. If you do decide to take them on, it’s simply a matter of defeating them in combat, and the rewards are yours immediately.

    Other Ways to Make Money

    Crazy Delivery

    If you find yourself in a bind, consider trying your hand at delivery. No joke – Majima can rake in some decent cash through the Crazy Delivery mini-game, which returns from Infinite Wealth. It resembles the classic arcade game Crazy Taxi, where you navigate a limited area of Honolulu, picking up food and delivering it to eager customers. You’ll earn bonuses based on the amount of food collected and for pulling off stunts. This mini-game is the only one that directly translates into cash.

    Finding Treasure

    Another method for earning money in Pirate Yakuza is, unsurprisingly, treasure hunting. In fact, by the time I hit Chapter Two, I managed to rack up nearly $10,000 just from a few treasure hunts. Look for islands marked with chest icons on your maps, and sail over to them. You typically need to complete a short raid, culminating in a boss battle with a few of your crew members. By the end, you’ll usually walk away with at least a few thousand dollars. Just a heads up, though: you cannot heal during treasure raids.

    Selling Items

    Lastly, consider checking your inventory for sellable items. Things like plates and watches can net you a fair amount when sold at any pawn shop around Honolulu. You can often find these items by rummaging through dumpsters or opening briefcases, so keep an eye out for shiny piles of trash as you explore.

    These are just a few of the ways to earn cash; you’ll also come across various opportunities through random encounters, vanquishing rival pirates at sea, or engaging in battles at the Pirates’ Coliseum. However, if you need to bulk up your finances swiftly, these methods in Like A Dragon: Pirate Yakuza in Hawaii are your best bet.

  • Unlocking Every Dart in LaD: Pirate Yakuza in Hawaii

    Unlocking Every Dart in LaD: Pirate Yakuza in Hawaii

    It’s no surprise that darts make a comeback in Like A Dragon: Pirate Yakuza In Hawaii. This enjoyable past-time has been a part of nearly every game in the franchise since Yakuza 3 dropped in 2010. However, this guide isn’t about how to play darts; it’s all about where to find them!

    The type of darts you use can greatly affect your performance in the game. The initial darts you receive are quite basic and can make aiming accurately a real challenge. We’re here to help you locate the darts, inform you where to buy them, and assist you in collecting every single one.

    Locating All Darts

    Most darts can be bought at various stores throughout the game, but they’re not available at mini-game shops. For the elusive Legend Darts, you’ll need to finish a Photo Rally, while the Thunder Darts can be found within a Silver Container.

    Darts

    Location

    Price

    Standard Darts

    Panthera Sports Kingdom

    $50

    Silver Darts

    $100

    Premier Darts

    Ben’s Funky Wagon

    $300

    Gold Darts

    Gorgeous Roger’s

    $1,000

    Legend Darts

    Alo-Happy (Worldwide Market)


    Complete the Waikiki Photo Rally.

    –

    Rose

    Hyper Ecstasy

    $50.00

    Pencil

    Clean-Clean Household Supplies

    $150

    Fork

    $350

    Toy Crow

    Bluebird Gallery

    $1,500

    Thunder Darts

    Crystal Aloha Resort


    This set is in a silver container.

    –

    Wind Darts

    Ben’s Funky Wagon

    $5,500

    Finding Ben’s Funky Wagon


    You can find both the Premier Darts and Wind Darts at Ben’s Funky Wagon, but this vendor isn’t always easy to spot, as he moves around and isn’t marked on your map. Look for him on the west end of Downtown Street, typically near the southern entrance to Lantern Street.

    How to Get the Legend Darts

    Majima taking a selfie with the Anaconda Arcade sign in Like A Dragon Pirate Yakuza in Hawaii.

    To get the Legend Darts, you won’t find them in any store. Instead, you must complete the Anaconda Shopping Center Photo Rally. Follow our guide to breeze through it and grab these exclusive darts.

    Locating the Thunder Darts

    The Thunder Darts are unique as they are found in a Silver Container, conveniently located near the dart mini-game. From the dartboards, head west while sticking close to the resort’s hallway. You’ll discover the Silver Container just a short distance away, positioned between the Resort’s rear doors and the dartboards.

  • Sea Dog vs. Mad Dog: Which Style to Choose in Pirate Yakuza?

    Sea Dog vs. Mad Dog: Which Style to Choose in Pirate Yakuza?

    Like A Dragon: Pirate Yakuza in Hawaii revitalizes the Yakuza fighting mechanics by introducing a dynamic and smooth approach to Majima’s legendary combat style. Renowned for his swift and deadly attacks, the Mad Dog of Shimano brings his trademark blade into action, offering players an agile yet fierce combat experience with his Mad Dog style.

    In this narrative, Majima takes on the role of a pirate captain, showcasing a more controlled and intimidating side through the Sea Dog style. This combat style emphasizes Majima’s weaponry skills, effectively utilizing cutlasses, firearms, and the Chain Hook to dispatch enemy pirates with seamless flair.

    What Is the Mad Dog Style?

    The Mad Dog style spotlights Majima’s reputation as a wild and unhinged dagger-wielding assassin who boasts remarkable speed and lethality. Key attacks include:

    Attack Name

    Attack Type

    Controls

    Mad Dog Trick: Serpent

    Uppercut

    Hold X/Square

    Mad Dog Trick: Chomp

    Charge/Dash

    Hold Y/Triangle

    Mad Dog Trick: Frenzy

    Spin Splash

    Hold B/Circle

    Alongside these main attacks, Majima can throw multiple daggers using his Demonfire Rain move by pressing B/Circle while airborne.

    The Mad Dog Trick: Savage combo features four slashes followed by a final blow or a Y/Triangle input.

    A noteworthy attack in Majima’s Mad Dog Style is called Doppelgangers, where he conjures copies of himself that replicate his movements and assist in overwhelming a shared enemy.

    During non-attack moments, Majima can swiftly dodge and maneuver away from opponents with quickstep techniques.

    While consecutive dodges aren’t unique to Mad Dog Majima, they are notably faster in this style compared to Sea Dog.

    Overall, this style enables players to chain knockouts from one enemy to the next, effectively whittling down a single foe’s health before moving on to others.

    When to Use the Mad Dog Style


    The Mad Dog style thrives when facing one foe or a small group, making it particularly effective in these situations:

    • Exploring Honolulu
    • Confronting boss battles
    • Wrapping up deck skirmishes
    • Engaging in tight spaces

    Keep these scenarios in mind, as the Mad Dog style is perfect for dodging enemies while being poised to retaliate with powerful strikes.

    What Is the Sea Dog Style?

    The Sea Dog Style embraces Majima’s untamed nature and revolves around weapon-based combat, leveraging his combat skills and pirate gear.

    The key equipment at your disposal includes:

    Attack Name

    Attack Type

    Controls

    Sea Dog Trick: Cutlass Heave-Ho

    Cutlass Boomerang

    Hold X/Square

    Sea Dog Trick: Charge ‘n’ Shoot

    Pistol Shot

    Hold Y/Triangle

    Sea Dog Trick: Chain Readiness

    Grapple Hook Combo

    Hold B/Circle

    The Sea Dog Style is effective for inflicting damage on multiple opponents, particularly with Majima’s Madness attack.

    This special attack’s effects vary based on which of the four Dark Instruments you choose:

    1. Dark God’s Violin – Calls forth sharks to assault your enemies.
    2. Dark God’s Ocarina – Summons a swarm of jellyfish to shock and harm foes.
    3. Dark God’s Guitar – Summons a massive ape to create havoc.
    4. Dark God’s Saxophone – Calls a large parrot to create a gust of wind and debuff lingering enemies.

    With the variety of choices available, the Sea Dog style provides greater flexibility compared to the Mad Dog style.

    Once you access all four Dark Instruments, you’ll be equipped to deliver damage to several adversaries simultaneously.

    Apart from the Madness attack, Majima’s cutlasses and guns are effective at medium and long ranges, respectively. However, his most adaptable move is the Chain Hook, which is the highlight of the Sea Dog style.

    Practice engaging your foes with the Chain Hook, followed by an attack as you approach, and repeat this until victory!

    When to Use the Sea Dog Style


    Majima plays the Dark God's Ocarina in Like A Dragon: Pirate Yakuza In Hawaii.

    With access to the four Dark Instruments, cutlasses, pistols, and the Chain Hook, the Sea Dog style is best suited for:

    While it can still be effective against one or two foes, Sea Dog is designed for rapidly moving between groups to unleash area-of-effect (AoE) attacks with your cutlass and firearm.

    Alongside the capabilities to handle groups, the Sea Dog’s Chain Hook can also be considered the top single-target weapon in the game, ensuring that this style offers versatility.

    You can repeatedly use the Chain Hook to grapple and Run Through (Y or Triangle) enemies in a loop that will keep them trapped and unable to counterattack.

    Which is Better: Mad Dog or Sea Dog Style?


    Majima opens the treasure chest containing the Grayson's Weapons in Like a Dragon: Pirate Yakuza in Hawaii.

    Choosing between the two styles in Like A Dragon: Pirate Yakuza in Hawaii can be tricky, as both Mad Dog and Sea Dog have their distinct advantages.

    Here’s a breakdown of the key pros and cons of each:

    Mad Dog

    Pros

    Cons

    • Rapid evasion
    • Fast attacks
    • Devastating combos
    • Doppelgangers help in fights
    • Great for isolating enemies
    • Struggles with groups
    • Best for one-on-one combat
    • No reliable spam moves
    • Low effectiveness at range

    Sea Dog

    Pros

    Cons

    • Effectively handles multiple opponents
    • Good damage at range
    • Good defensive options
    • Flexible in tight spots
    • Excellent spam combinations
    • Slower evasion
    • Difficulty against dispersed enemies
    • Not great in standard one-on-one fights

    While both styles have their unique strengths, the Chain Hook’s effectiveness against challenging bosses like Taiyo Amon often makes Majima’s Sea Dog style the superior choice.

  • Locating the Final Trash in Captain’s Return: LaD Pirate Yakuza

    Locating the Final Trash in Captain’s Return: LaD Pirate Yakuza

    The Captain’s Return Side Quest

    In the game Like A Dragon: Pirate Yakuza In Hawaii, you’ll come across the side quest known as "The Captain’s Return" in the East Waikiki area of Honolulu. Here, you’ll meet an oddly familiar figure—if you have experience with Infinite Wealth, you might recognize him. As usual, he’s in need of your assistance.

    This side quest can be easy to navigate if you understand what to do, but it can also be quite frustrating if you miss the hints. This guide will walk you through each trash location, from the obvious to the trickier spots. If you encounter any difficulties, we’re here to help you through them.

    How To Start The Captain’s Return Side Quest

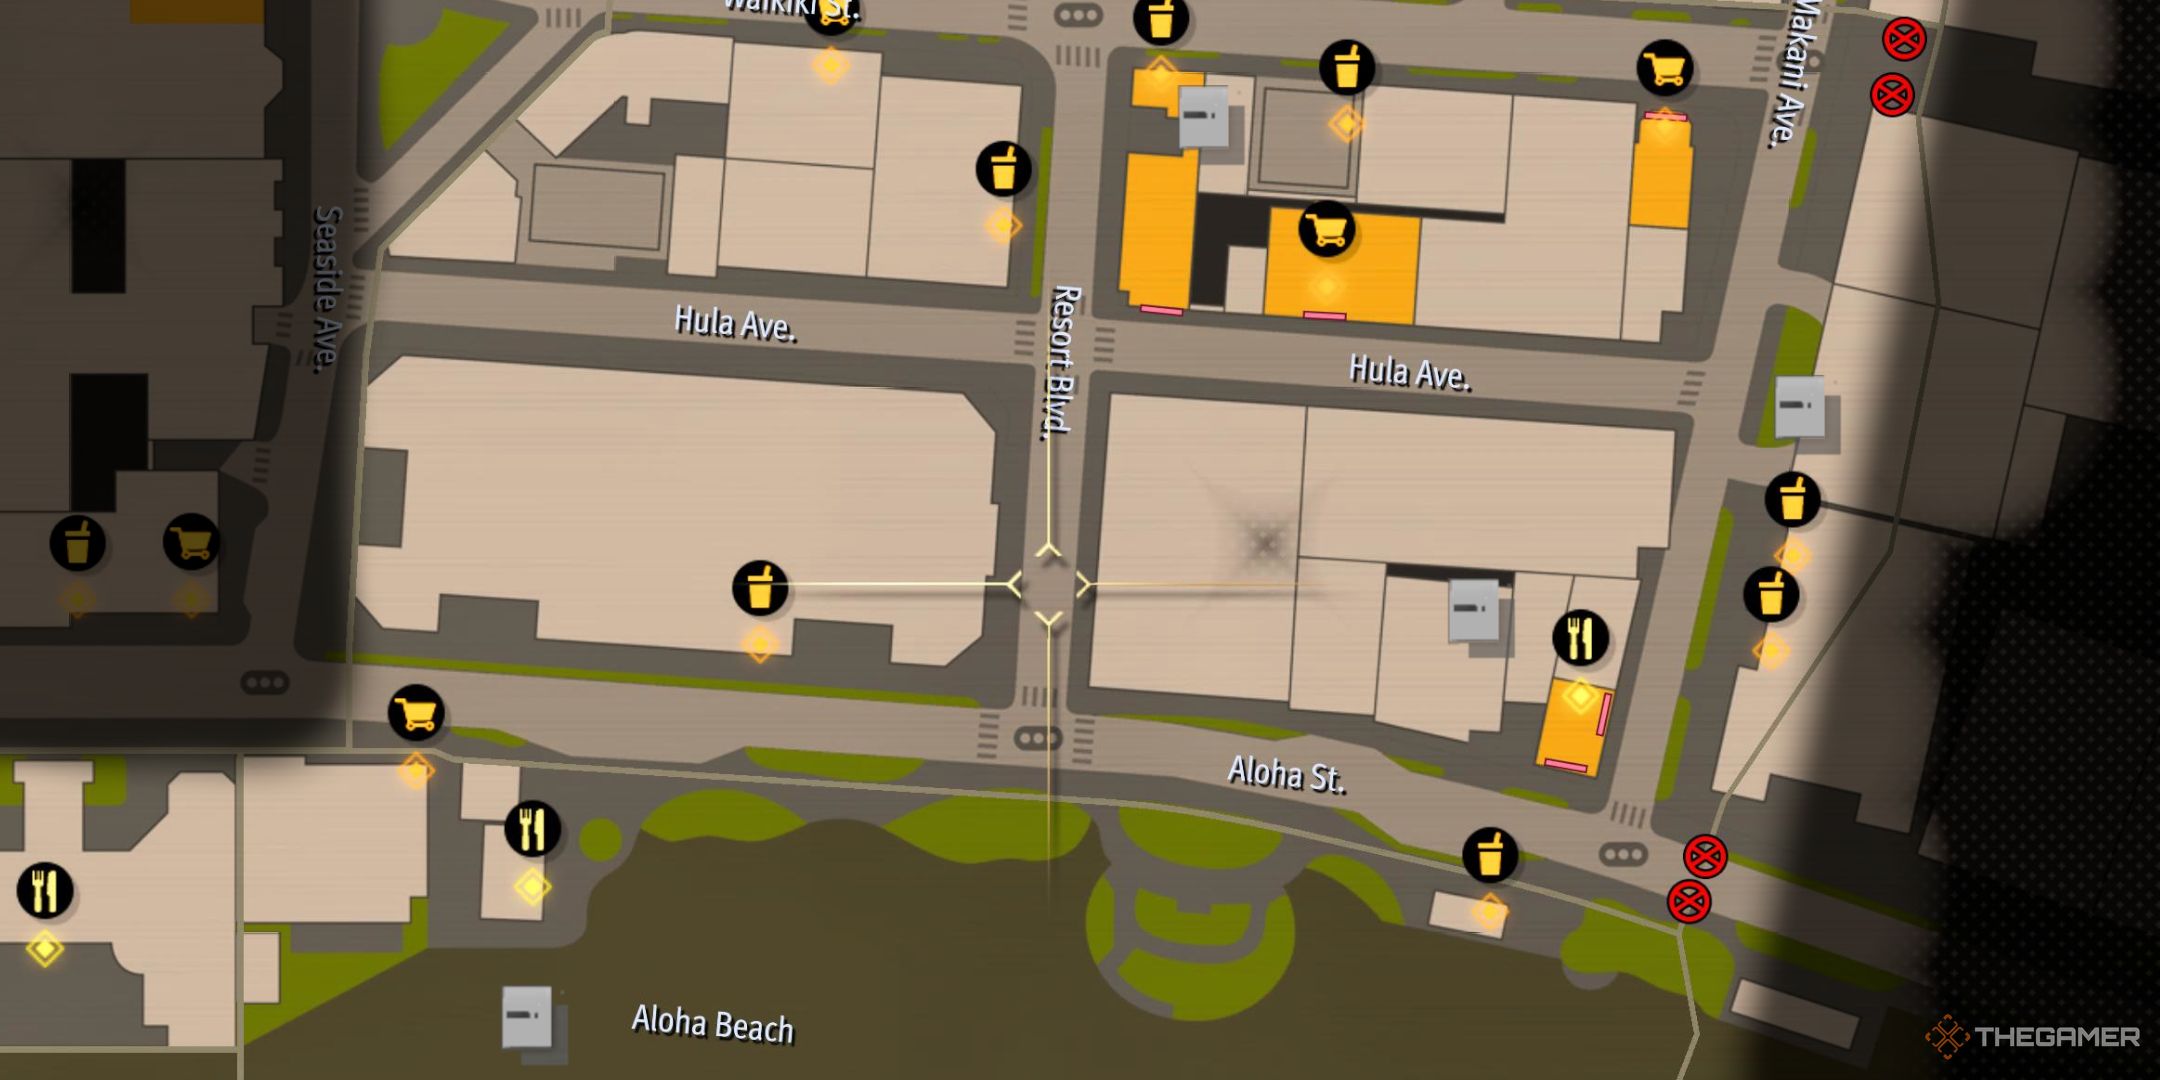
    You can access this side quest during chapter 2, but it only opens up after you’ve acquired the Chain Hook. Once you have it, head down Resort Blvd. between Hula Ave. and Waikiki St., where you’ll meet Fukuyama, also known as the "Man in Bandana," picking up litter. To initiate the quest, speak with him and select the "Begin collecting trash" option. Your task is to find five pieces of trash scattered around.

    Where To Find The Trash

    Once you start the quest, your map access will be limited primarily to Hula Ave and a small section of Resort Blvd. Unfortunately, you won’t find any trash along Resort Blvd., but you will have access to part of Seaside Ave.

    Piece Of Trash #1

    The first piece is located directly south of Fukuyama. Look for it at the southeast corner of the intersection; it should be shining and marked with an arrow.

    Piece Of Trash #2

    Next, turn right and head down Hula Ave. The second piece of trash can be found on your left, positioned at the edge of a planter.

    Piece Of Trash #3

    As you continue down the road, the third piece will be a bit further and sitting on your right, hidden behind a red car, which makes it easy to overlook.

    Piece Of Trash #4

    The fourth piece is located further down Hula Ave, on your left, directly across from the parking lot.

    Piece Of Trash #5

    The final piece, which is probably the one you’re searching for, is hinted at by Fukuyama mentioning the trash being up above. Head over to the No Surf No Life shop. Turn the corner to face the entrance, then look up to see a hook. Use your Chain Hook to reach the roof, where you’ll find the last piece of trash along with a Silver Container.

    The Battle Against the Two Litterers

    After you collect all five pieces of trash, you’ll ally with Fukuyama to confront two litterbugs. Don’t worry; they aren’t too difficult to defeat. Once you take them down, Fukuyama will join your crew and adopt the new title of Dread Pirate Hook.

  • Unlocking the Majima Helmet & Snakeskin Jacket in LaD: Yakuza Tales

    Unlocking the Majima Helmet & Snakeskin Jacket in LaD: Yakuza Tales

    While exploring all the clothing options in Like a Dragon: Pirate Yakuza in Hawaii, you may notice that there are some outfits available through the Darts game. There are four items listed, but you may be wondering how to acquire them since this mini-game doesn’t have a shop like others do.

    These rewards aren’t bought with game points; instead, they are earned as you play, and there’s more than just clothing to collect. Here’s all you need to know about the available rewards and how to get them.

    Where Can I Find the Darts Mini Game?

    The Darts Hall is located just north of West Aloha Beach, next to the Crystal Aloha Resort.

    To improve your chances, make sure to line up your shot carefully and release the dart when the indicator is in the yellow zone.

    Using higher quality darts can greatly enhance your performance, allowing you to aim more accurately.

    You can acquire new darts from various sources, including shops or rewards from other mini-games.

    All Dart Rewards

    Defeating each of your main crew members will earn you rewards listed below.


    Goro Figurehead

    Defeat Noah.

    Staminan Spark in Like a Dragon Pirate Yakuza in Hawaii.

    Staminan Spark

    Defeat Jason.

    Oarfish in Like a Dragon Pirate Yakuza in Hawaii.

    Oarfish

    Defeat Masaru.

    Fisherman Outfit in Like a Dragon Pirate Yakuza in Hawaii.

    Fisherman Outfit

    Defeat Saejima.

    Majima Construction Helmet in Like a Dragon Pirate Yakuza in Hawaii.

    Majima Construction Helmet

    Defeat Nishida.

    Snakeskin Jacket in Like a Dragon Pirate Yakuza in Hawaii.

    Snakeskin Jacket

    Defeat Minami.

    Acrylics in Like a Dragon Pirate Yakuza in Hawaii.

    Acrylics

    Defeat Misaki.

  • Complete Guide to Photo Rally Spots on Rich Island

    Complete Guide to Photo Rally Spots on Rich Island

    The Photo Rally locations in Like A Dragon: Pirate Yakuza in Hawaii are linked to a substory set in Honolulu, but they also include a brief journey to Rich Island. If this is your first encounter with this sidequest, the Photo Rally by Alo-Happy Tours challenges players to explore various sites around the map, including popular tourist spots and hidden treasures, all while taking pictures to collect stamps. Once Majima fills his stamp book for each region, he can return to Alo-Happy to claim a reward.

    Similar to a substory in Infinite Wealth, the Photo Rally offers a fresh way to experience a familiar map. Since the world of Pirate Yakuza is significantly larger than that of Infinite Wealth, it features a much more extensive list of Photo Rally locations. Fortunately, Rich Island has the fewest spots to visit, only eight, compared to Honolulu’s 75 locations. Here’s where you can find them.

    All Photo Rally Locations on Rich Island

    Center of the Island

    Your first destination on Rich Island is Central Plaza, which is the spacious area between the Esperanza bar and the shack that serves as Majima’s hideout. Here, look for a table in the southeast corner with an old air conditioning unit on it, and check under the tarp next to it.

    You’ll spot a head of an inflatable flamingo peeking out; snap a photo of it to earn your first stamp. This can be a bit hard to see during the day, so you might find it easier to search for this at night.

    Bar Sign

    This one is simple and located nearby. Approach Bar Esperanza and photograph the wooden sign with the windmill, which is situated near the northwest side of the bar, just past the barrel beside the stairs leading to the bar’s porch.

    While you’re there, try the lumpfish caviar and Aloha IPA; there’s some entertaining dialogue between Moana and Majima in this spot.

    Look Up from the Container

    Return to Central Plaza and stand at the northwest corner, facing south toward the shipping containers. Look up to find a luchador mannequin perched on top of a stack, and take a photo of it for your next stamp. This mannequin should look familiar, as it appears in one of Pirate Yakuza‘s hidden Golden Balls.

    Fishing Village Shop

    Visit Stella’s Shop, located in the northwest corner of this area.

    If you turn left from Stella’s Shop, there’s a grappling hook you can use to reach a platform. Here, you can find Gaia’s Ring and a few thousand dollars; this ring increases your random encounter rate.

    Capture an image of the crates of fish outside Stella’s shop. You might also want to grab some pet food while you’re there.

    Inside the Bar

    Next, return to Bar Esperanza but go inside this time. Take a photo of the figurehead on the column next to the bar; this is located on the right side near a collection of vintage liquor bottles and directly in front of the refrigerator.

    Fishing Village Shop, Part 2

    Now return to the Fishing Village but head to the General Store this time. Your goal is the bunches of bananas hanging from a string to the left of the merchant.

    Wall of a Fishing Village Shop

    This location can be a bit tricky to locate. It’s in the vicinity of Stella’s Shop, but instead of standing next to Stella, look for the shipping container in the southwest corner. Point your camera at the teal shack in the southeast, where you’ll find some graffiti of a bunny wearing sunglasses and smoking a cigar—that’s your next subject.

    Rock on the Coast

    Finally, the last and most challenging Photo Rally spot on Rich Island features a small rock with a heart painted on it, with minimal guidance on its location. To find it, head east to the small outcropping next to Phillips—if you’ve claimed his bounty, just head southwest of the Goro Goro Kitchen. The rock is nestled in a little alcove there.

    Congratulations! You’ve now located every Photo Rally site on Rich Island. Your reward is the Eyepatch and Glasses, which are cosmetic items for Majima. Return to Alo-Happy in Honolulu to collect your prize, and prepare to tackle Like A Dragon: Pirate Yakuza in Hawaii’s ultimate Photo Rally location—Madlantis—whenever you’re ready.

  • Top Tank Crew for Like a Dragon: Pirate Yakuza in Hawaii

    Top Tank Crew for Like a Dragon: Pirate Yakuza in Hawaii

    As you venture through Honolulu in Like A Dragon: Pirate Yakuza in Hawaii, you’ll find numerous NPCs eager to join your crew aboard the Goromaru. Some of these potential crewmates can be spotted around the streets and bars, while others may require your assistance through specific side quests before they reveal themselves.

    Finding the best crew members in Like A Dragon: Pirate Yakuza in Hawaii involves various approaches. Generally, the top crewmates are unlocked by progressing through the main storyline or meeting certain requirements, such as enhancing your Pirate Rank. One of the easiest roles to fill is the Tank position, as two of the most effective characters become accessible during the first three chapters of the game.

    Understanding Crew Tiers

    With a limited pool of recruitable characters in Like A Dragon: Pirate Yakuza in Hawaii, it becomes clear which tanks excel based on their abilities. The smaller crew roster allows us to effectively categorize them into three tiers:

    • S-Tier
    • A-Tier
    • Other Crew Members

    S-Tier crew members are distinguished by unique Squad Leader Traits, a max level of 50, strong stats, or a combination of these qualities.

    A-Tier crew members are solid picks for any formation. Although they might only reach a level cap of 30, or have just one high-tier stat, they are adept at fulfilling their roles.

    Other crew members usually have a level cap of 20 and may lack any significant traits. Ideally, they possess at least one specialty and a single A-tier stat to fit into a niche. This category is selective and doesn’t encompass all available crew members.

    In general, it’s best to use S or A-Tier crew members when building your team.

    Special Recruitment Notes

    Most crew members can be added by completing the main storyline or approaching them on the map, with two notable exceptions: Etsuko and Bronson, the Human Bronze Statue.

    You can acquire services from Etsuko and Chitose by exchanging points with Kamulop (15 points each), while Bronson becomes available following the "Man of Bronze" substory.

    S-Tier Tanks

    Here are the top Tanks in the game:

    Name Tier Explanation
    Taiga Saejima S+ A nearly perfect tank, Taiga impresses with a strong Squad Leader Trait and a top-tier First Mate Trait.
    Jason Rich S+ Also a powerhouse with S-tier stats, Jason complements Taiga with Gun Defense on his Squad Leader Trait.
    Chitose Buster Holmes S+ She excels in both Attack and Defense, making her a premium choice for Boarding Squads.
    Robo Michio Mach S+ Offers outstanding stats and excellent defense with added Shock Resistance from her Squad Leader Trait.
    Robson Caetano da Silva S A solid early-game tank with the Impenetrable Squad Leader Trait, though slightly below the other top tanks.

    Taiga Saejima and Jason Rich are essential choices for any crew.

    A-Tier Tanks

    The A-Tier Tanks are:

    Name Tier Explanation
    Etsuko A+ An excellent First Mate and versatile in different roles once unlocked, making her a top pick for any position.
    Human Bronze Statue: Bronson A A well-rounded tank with strong skills, particularly beneficial in the Boarding Squad.
    Steve A Proficient on the Cannon Squad, his impressive First Mate Trait makes him a valuable asset.

    The A-Tier selection is competitive, with each character offering unique advantages.

    All Other Tanks

    The remaining tanks include:

    Name Tier Explanation
    Theo B+ Offers solid Attack and Defense but is best suited for the Boarding Squad.
    Arman B Best utilized on the Cannon Squad, though he lacks versatility beyond that.

    While these members may not provide much adaptability, they can still adequately fill remaining positions in your crew.

  • Complete List of Photo Rally Spots in Honolulu

    Complete List of Photo Rally Spots in Honolulu

    In the game Like A Dragon: Pirate Yakuza in Hawaii, players can undertake various side quests, one of which is the Alo-Happy Photo Rally. This mission is given to Goro Majima by the staff at Alo-Happy Tours, who are looking to improve a struggling promotional campaign. The task involves capturing photographs of landmarks and unique moments throughout the game’s world, spanning popular tourist spots and distinctive locales in Honolulu, Rich Island, and Madlantis.

    This side quest starts during Chapter Two, when Majima visits Alo-Happy Tours on his way to a primary quest. As you explore the area, watch for a camera icon that appears, indicating a location where you can collect a Photo Rally stamp. You can track your progress and receive hints for the remaining photos through the Photo Rally app on Majima’s phone, accessible from the pause menu. For those who need extra guidance, here’s a list of every Photo Rally location in Pirate Yakuza‘s rendition of Honolulu.

    Locations for the Photo Rally in Little Japan

    Kametaro
    You’ll find this cheerful sculpture right next to Tony’s Lemonade Stand, a key spot in a previous Infinite Wealth substory. To locate it, head east from Tony’s and look for an apartment building with bright yellow staircases. The statue sits atop the outer wall.

    Ukulele Boy and Ukulele Girl
    This photo op is on the short Momo Street, close to the Tropical taxi stand on West Sakura Street. Next to a planter, there’s a store called Captain’s Trophies, where two ukuleles with eyes and arms are prominently displayed in the rightmost window. Snap a photo to collect this stamp.

    Lots of Charms
    As the name suggests, this spot is right next to the shrine where you can exchange fortunes for prizes with Kamulop, conveniently situated near the Shrine taxi stand. Just west of the shrine, you’ll find a small parking lot with a bulletin board on one of the surrounding walls next to a dog (assuming you’ve yet to recruit it). Photograph this board for your next stamp.

    Matsumoto Shave Ice
    This is a straightforward one; just head to Matsumoto Shave Ice in the Little Japan area and take a picture of the mural behind the counter, to the left of the menu board. It’s possible to collect this and the next three stamps in one visit since they are all clustered on the same block.

    Red Telephone Box
    You might have already spotted this one. Inside Revolve, there is a red phone booth located to the left of the entrance behind other booths.

    Wabi-Sabi Omusubi
    This one is a bit trickier but still within the same vicinity. From Revolve, travel south until you find a pagoda-style building. Capture a picture of the sign that reads "Wabi-sabi Omusubi" to complete this task.

    Mt. Fuji Planter
    One door down from the restaurant, you’ll find a residential building with a gray mailbox. Be sure to photograph the potted plant on top of it.

    Toba
    Head down the alley across from Revolve, where a gambling hall filled with classic Yakuza mini-games awaits. Inside, there’s a giant lucky cat that you won’t miss.

    Note: You might not gain access to the Gambling Hall until you’ve progressed far enough in the story for a bounty to be placed on Majima.

    Matcha Graffiti
    In that same alley, head further north to find a mural for the nearby Café Umaine featuring three samurai holding matcha containers.

    Shinobi Sushi
    Travel to Shinobi Sushi in the northeast, where a ninja clings to the wall to the left of the counter. Look up to spot a purple-clad shinobi peeking out from above—take a picture to move on.

    Ramen Store Painting
    This unmarked ramen shop is located right next to Ganryujima Armory, around the corner from Revolve. Capture an image of the sumo wrestler painting to snag another stamp.

    Samurai Window Display
    This point is conveniently located right next door, outside Ganryujima Armory. Photograph the samurai display for your next stamp.

    Place to Learn Jiu-Jitsu
    Continue along Fuji Street, bypassing most of the grassy area at the northeast border of the map. Keep an eye out for a banner that reads "Mifune Jiu-Jitsu" on the south side of the street. To the left, you’ll come across a blue flag showcasing an image of a black belt. Snap a shot of this for your rally spot.

    Wall Near Trolley Waiting Area
    As you return to Tony’s Lemonade, stay close to the stand. Behind Tony to the left is a mural featuring a blue whale.

    Karaoke Bar Sign
    This is your final Photo Rally location in Little Japan. Simply take a picture of the Revolve bar sign outside to finalize your stamp collection and return to Alo-Happy for your well-earned Daruma Figurehead for your ship.

    Locations for the Photo Rally in Waikiki

    Alo-Happy Tours
    You won’t be able to miss this one. The Alo-Happy employees will guide you to take this photo as part of the side quest tutorial. It features a cardboard cutout of their mascot standing right outside the building.

    Tropical Window Display
    Next, head over to Seaworthy Treasures on Waikiki Street. For this stamp, just snap a photo of the mannequins in the window.

    Champagne Tower
    Located between Arque Dangerous III and the abandoned cat (if you haven’t recruited it yet), there’s a jewelry store called Minatoku Tokyo. Take a picture of the champagne tower displayed in the window.

    Dolphin Statue
    This statue can be found right next to the Waikiki Oka Charger and close to the Seaside Avenue taxi stand.

    Look Up on Aloha Street
    Follow the clues to head down Aloha Street near Vincenti and Julia’s Brilliant Design. Look skyward at the Space Needle-like structure and photograph it from below; you may need to stand in the street for this shot.

    Shopping Center Entrance
    Look slightly down and to the left from the previous Photo Rally location, observing the sign that reads "Plaza." This is your next stamp.

    Streetside Window Display
    Travel to the northwest corner of the large shopping area and stand on Waikiki Street next to Crêpes for Me. Snap a picture of the stuffed dog in the window to proceed.

    No Surf No Life
    This particular photo opportunity requires you to unlock the chain hook, which gives you access to hidden treasures and bonuses—you’ll automatically unlock this during Chapter Two.

    Find the store called No Surf No Life and head upwards and towards the right of its entrance. You should see a grappling hook spot; use that and photograph the surfer on the roof for another stamp.

    East Aloha Beach
    Get on your segway and head over to Aloha Beach. You’ll need to venture onto the sand for this task. Just south of the Crazy Delivery mini-game, near a small section of beach that extends into the water, you’ll find a dolphin statue on a pole that you need to capture.

    Shop With a Lovely Wink
    You’ll head east for this one, specifically to Wink Mini Mart on Waikiki Street. Simply photograph the shop’s sign.

    Water Buffalo Painting
    Next, find the mural located next to Julie’s Gearworks, to the west of her shop and right above a vibrant red motorcycle.

    Market Village
    Now, let’s take a photo of the tree outside Alo-Happy. This is an excellent chance to collect any other Photo Rally rewards you may have earned.

    Surfboard Statue On The Sands
    Take a taxi to the Aloha Beachfront taxi stand or walk there. Your next target is the surfboard statue depicting a man on the sands.

    Street Corner Restaurant Sign
    You might have noticed this landmark early on; it’s located just west of the East Waikiki trolley stop, at Big King Pizza. Take a picture of their sign, which humorously features a pizza piece eating one of its slices.

    Famed Hotel Insignia
    Head to Crystal Aloha Resort on the western side of Aloha Beach. Capture a photo of the hotel’s sign beneath the awning to get another stamp.

    Aloha Sign
    Many more Photo Rally spots await you in the Anaconda Shopping Center. Enter via the north entrance and look straight ahead for a large "Aloha" sign.

    Anaconda Arcade
    Just behind the Aloha sign is the Anaconda Arcade where you’ll take a picture of the logo on the back wall, positioned between the UFO Catcher and Ocean Hunter machines.

    Anaconda Arcade, Part 2
    Next, check the east side of the arcade and photograph the cutout board located there.

    Snake Jar
    Now, head up to the second floor, where a big diamond-shaped plaza features a fountain at its center. Be sure to photograph the snake sculpture within that fountain.

    Colorful Mannequin
    Return to the area west of the arcade and locate a store called Archipelagoer. You’ll need to photograph its window display.

    Shopping Center South Entrance
    Leave Anaconda through the southern parking lot, finding the designated area mentioned earlier. Look up and photograph the snake on the sign.

    Shopping Center West Entrance
    Stroll around to the west side of Anaconda and find a small window display underneath an awning to photograph for your next stamp.

    Hidden Anaconda: Shrubbery
    Back to the second floor, seek out the clothing store Fiddler Brand. Look at the planter right by it and capture the small snake carving nestled in the corner.

    Hidden Anaconda: Window Display
    Also on the second floor, walk west past the ABC Store until you see a window display showcasing two shells. Snap a picture of the anaconda crafted into the crate beneath them.

    Hidden Anaconda: Restroom
    Take the escalators back down and enter the restroom in the southeast, close to the arcade. Find a small yellow snake on the floor next to the second urinal from the left.

    Sujigami PC Shop
    Make your way back to the second floor yet again. This time, you’ll want to take a picture of the Sujigami PC Shop, located in the northeastern corner next to Abaca Rondo.

    Tropical Showcase
    Take a snapshot of the window display just outside the north entrance, next to Café Trip.

    Big Heart and Message
    Photograph the sign and window display at Cutesy Doodles, a store situated in the northwestern area right next to the escalators.

    Big High Heels
    You’ll need to look between Hilo Hattie and the Anaconda taxi stand. On the north side, there’s a large window display featuring an enormous red shoe.

    Golden Cow
    Go to Boogie Woogie Steakhouse located on the west side of the first floor and take a picture of the large golden cow statue inside. If you’ve collected all the previous Anaconda Photo Rally stamps, you’ll score the Legend Darts, which are considerably more precise than the usual darts equipment in the mini-game.

    Locations for the Photo Rally in Downtown/Chinatown/District Five

    Wall Graffiti in District Five
    These three neighborhoods are grouped for the Photo Rally. Your first stop is an octopus mural, situated on a wall just south of Diamond Head.

    One Mismatched Slice
    Directly south of the mural is Buster’s Pizza. Examine the painted pizza slices on the windows and snap a picture of the one with expressive eyes and a mouth.

    Cuffed Nightspot
    Travel west from Buster’s until you reach the large neon sign of Club Guilty. Take a photo of this as your next stamp.

    Inside Ruins
    Just west of Club Guilty, there’s a small alley. Inside, turn left, and capture a picture of the boxing gloves resting on the frayed armchair.

    Streetside Café Interior
    Continue west to Café Soramame. Upon entering, you may trigger a substory. You’ll want a picture of their sizable red coffee grinder.

    Streetside Water Installation
    Head further west, located between the Orphanage taxi stand and the Anaconda Boulevard Crazy Delivery mini-game. You’ll come across a sizable marble fountain. Take a picture for your next stamp.

    Bar Interior
    Now, journey back to Diamond Head and step inside. Capture a picture of the mounted deer on the wall beside the jukebox.

    Serrated Storefront
    On Kolonahe Street, you’ll encounter a gift shop named Shark Teeth Souvenirs. You’ll need to photograph its storefront adorned with teeth.

    Chinese Weapons Dealer
    Travel to the House of Wushu in Chinatown. Snap a picture of the panda plushies displayed on the counter.

    Sign of Bliss
    At the northwestern edge of the map rests the grand Nirvana Coast Hotel. Take a photo of its impressive sign.

    Herbal Store Mascot
    Next, find the Wan Shang Tong Herbal Medicine Store in Chinatown. Your target is the store’s mascot, a quirky humanoid ginseng figure that might seem slightly unnerving.

    Orphanage Symbol
    Return to the Orphanage taxi stand and take a picture of the Palekana insignia positioned above the door, located northeast of the taxi stand.

    Streetside Water Installation
    Head back to Shark Teeth Souvenirs and photograph the nearby fountain situated southeast of the gift shop.

    Elevator Panda
    Now, we’ll go to Fantasia Mahjong (no worries, you won’t be playing). Look for a stuffed panda hanging above the door.

    Police Station Entrance
    Continue along Downtown Street until it intersects with Sunset Street. The police station is at the northwest corner; capture a picture of its sign. If this is your final Photo Rally location in the district, you’ll be awarded the Hannya sails, a distinct cosmetic to customize your ship in Pirate Yakuza, inspired by Majima’s back tattoo.

    Locations for the Photo Rally in Cultural District/Harbor Park

    Dock Graffiti
    Catch a taxi to the Pier in the southwest corner of the map. Then, head to the marked location. Photograph the graffiti on the shipping container for your first stamp in this area.

    Dolphins at Play
    Travel to Onaga Maritime Fare, nestled between the dock where the Goromaru is anchored and Anaconda Harbor Park. You’ll need to capture a photo of a statue displaying a dolphin leaping up from the water.

    Chinese Restaurant Fish Tank
    Next, visit the Black Hibiscus Chinese restaurant located on the far west side of Downtown Street. Head inside and photograph the fish tank, which sits to the left of the dining area.

    Yacht-Watching Port
    Also located near Onaga Maritime Fare, this time you need to take a picture of the deep-sea fishing sign positioned next to the docks.

    Food Truck Near Ship Landing
    This task is simple. Just snap a picture of Hip-Hop Shrimp, the food truck adjacent to the dock where you board the Goromaru.

    Raunchy Corset Display
    Continuing on with the photo adventures, head over to Hyper Ecstasy on Twilight Drive and take a picture of their eye-catching window display for your next stamp.

    Tattoo Parlor Wall
    Keep moving down Twilight Drive heading east of the taxi stand. Your target this time is the rose mural outside Volcano Tattoo Studio.

    Art Walls
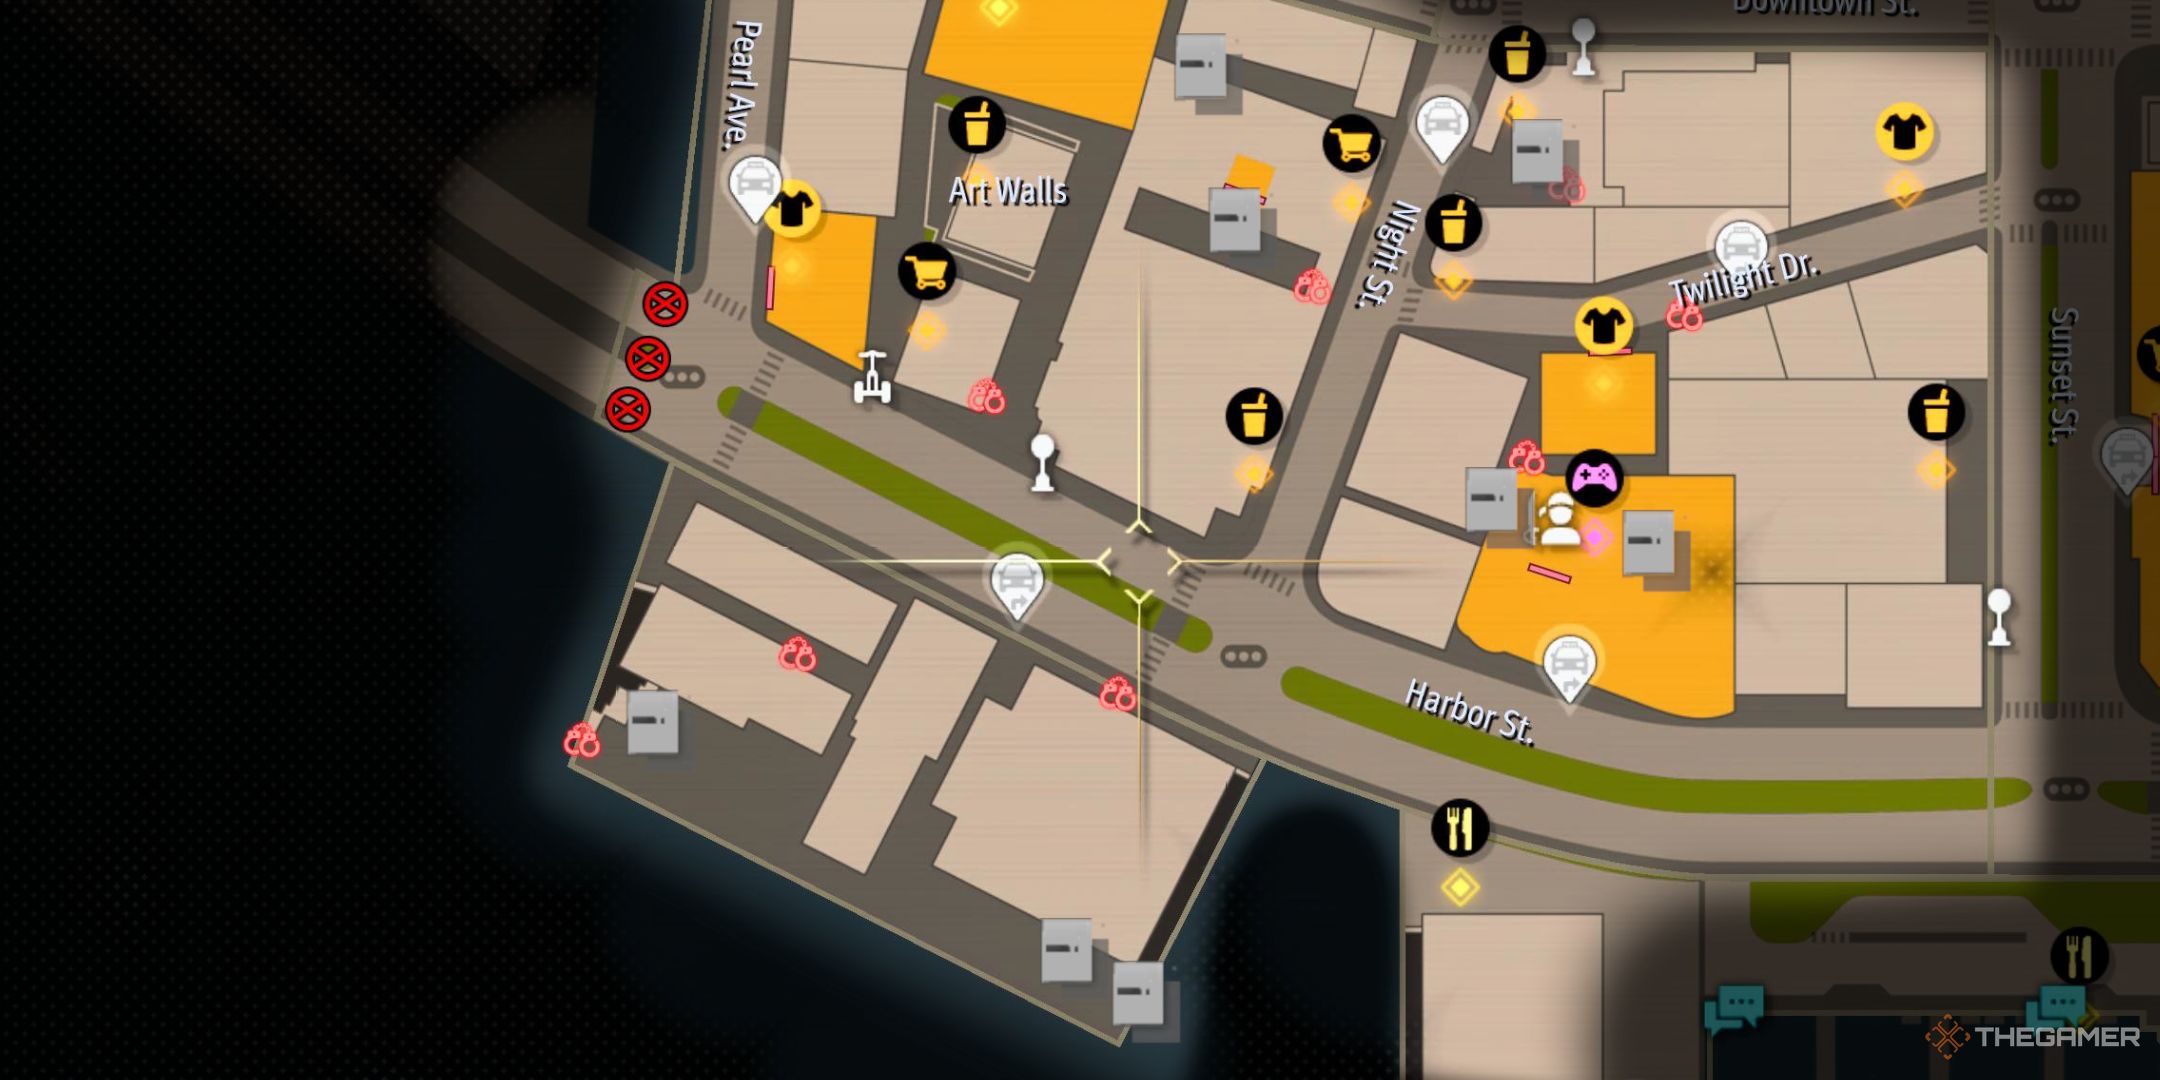
    Head towards the Art Walls, close to the southwest corner of the map behind the Black Hibiscus. There are plenty of beautiful murals, but photograph the eagle painting on the northern wall for your stamp.

    Jewelry Store Near Art Walls
    Go find Akahai Jewelers located east of the Art Walls. This task simply involves taking a photo of the storefront.

    Bar With Wall Art
    Continuing the wall art trend, find the Oka Charger in Night Square, then head east. Capture a photo of Bar Moderne, which sports graffiti on its walls.

    Monument In Front Of Entrance
    This Photo Rally location is just outside Ounabara Vocational School, which serves more as a trivia mini-game compared to its role in Infinite Wealth. You’re looking for the large spinning medal outside the main entrance.

    Currently Closed Theater
    To get this next stamp, photograph the Cabaret El Dorado, which is located on Night Street, directly across from Loco Fiesta Liquor.

    Pineapples for Sale
    Go to the Bullet Hell Armory in the furthest southwest corner of the map, where you’ll find a table stacked with pineapples. Snap a picture for another stamp.

    Art Walls Alley
    Return to the alleys behind Black Hibiscus, but now enter from the east side of the restaurant. You’re looking for the Necochan Cawaii mural to photograph.

    Light Fixture
    Finally, return to Twilight Drive and photograph the heart-shaped neon light displayed in the window of the building just next to the taxi stand. You might miss it during the day as it shines brighter at night.

    Once you’ve collected all the Photo Rally stamps for this area, you’ll unlock a rainbow-colored light for your Street Surfer. If you’ve completed all the other stamp books in Honolulu, you’re ready to move on to the next Photo Rally region in Like A Dragon: Pirate Yakuza in Hawaii.

  • All Goro Goro Kitchen Recipes in Like A Dragon: Hawaii Yakuza

    All Goro Goro Kitchen Recipes in Like A Dragon: Hawaii Yakuza

    In the adventure game Like A Dragon: Pirate Yakuza In Hawaii, you will first unlock the Goro Goro Kitchen minigame. However, this isn’t just a way to pass the time; it becomes essential for gathering recovery items and earning cash early in the game.

    As you follow Majima’s journey, your cooking skills will grow. By the time you reach the middle of the game, you’ll be preparing meals not only to boost your crew’s morale but also to level them up, strengthen your friendships with the local residents, and replenish your health and heat bars.

    Recipe Difficulty Levels

    Each dish you create will come with a difficulty rating. With every additional meal you try to prepare, the difficulty level will increase. There are five levels of difficulty: Easy, Normal, Difficult, Very Difficult, and Insanely Difficult. As the level of difficulty goes up, the margin for error becomes smaller. Nevertheless, using high-quality ingredients helps you craft dishes of maximum quality, which is how you achieve those coveted three-star ratings.

    Overview of Goro Goro Kitchen Minigames

    Every recipe involves two to three different minigames, depending on what you’re making. As you prepare more dishes, the difficulty of these minigames will rise. Regardless of how many dishes you are attempting or the difficulty level, your goal is to fill as many of the ten circles at the bottom of the screen as possible. If the circles are gray, you gain a slight quality boost; if they are green, the boost is moderate; and filling all the circles grants you a significant quality boost.

    Note: If you perform so poorly that you only manage to fill one or fewer circles, you will actually lose a small number of quality points.

    Starting the Fire

    This minigame is simple: hold the designated button down and let go when you hit the right zone. The zone includes two sections: the orange area gives you a decent result, filling part of a circle, while landing in the red area yields a great result that fills a whole circle. As the difficulty increases, the zone shrinks and the cursor moves faster.

    Preparing Ingredients

    During the ingredient preparation phase, you’ll go through a series of button combinations. Completing a string nets you two filled circles. Speed is important, but accuracy is even more crucial. If you miss an input, Majima will cut himself, causing a temporary lockout from chopping vegetables. The complexity of these input strings grows with each difficulty level.

    Skimming the Scum

    You’ll notice scum forming on top of your stew, which needs to be removed. You can either press and hold the ladle to create a vortex that pulls in the scum slowly, or you can repeatedly press and release to quickly scoop it out. However, be careful: if you push scum away from your ladle reticle, it can complicate your job. As levels become more challenging, scum will start moving in circles around the pot, suggesting a more strategic approach to clearing it.

    Selecting Your Ingredients

    When making a dish, be mindful of the required number and type of ingredients, as well as their star ratings. The quality expectation will increase as you add ingredients. If you start with a three-star base, it’s nearly impossible to end with anything lower unless you drastically mess up the minigames.

    Aim to begin with about two-and-a-half stars. You can easily bridge that half-star gap through good performance in the minigames. Early in the game, you might not have top-tier ingredients, so do your best with what you have.

    You can gather ingredients by catching bugs in the wild, utilizing planter boxes for growing vegetables, having Goro hunt for meat, or purchasing items from shops. You can fish while sailing or swim to catch fish manually. Once you acquire the Chain Hook, catching bugs will become more manageable, but until then, you’ll need to buy them.

    Tip: Building up Goro Kingdom is a reliable way to obtain consistent ingredients, as every animal you care for will provide items after each feeding.

    Complete List of Goro Goro Kingdom Recipes

    We’ve outlined all the recipes in the game, their ingredient requirements, base difficulty levels, the minigames involved, and the selling prices for each dish. Use this as a handy reference when you’re crafting meals.

    Name Base Difficulty Ingredients Cooking Method Value ($)
    Roughly Chopped Stir-Fried Veggie Bento Easy 3 Vegetables Fire Starting, Chopping $78
    Fish-Toss Hot Pot Bento Easy 2 Fish Chopping, Scum Sifting $86
    Wild Stewed Meat Bento Easy 1 Meat Fire Starting, Scum Sifting $114
    Chef’s Whimsy Bento Normal 1 Meat, 2 Fish Fire Starting, Chopping, Scum Sifting $198
    Goro Goro Luxury Party Platter Normal 2 Bugs, 2 Vegetables Fire Starting, Scum Sifting $210
    Goro Goro Special Hot Pot Meal Normal 2 Bugs, 2 Fish Chopping, Scum Sifting $230
    Goro Goro Special Steak Meal Normal 2 Meat, 3 Vegetables, 3 Eggs Fire Starting, Scum Sifting $240
    Goro Goro Supreme Pot Luck Hot Pot Difficult 2 Meat, 3 Bugs, 3 Fish, 3 Vegetables, 3 Eggs Fire Starting, Chopping, Scum Sifting $280
    Goro Goro Awakening Beer Difficult 4 Bugs, 4 Eggs Fire Starting, Chopping, Scum Sifting $150
    Pirate Party Stew Easy 3 Fish, 3 Vegetables Fire Starting, Chopping, Scum Sifting $300
    Avast! Pirate Party Hell Stew Easy 2 Meat, 3 Bugs, 3 Eggs Fire Starting, Chopping, Scum Sifting $350
    Pirate Meal For Five Difficult 3 Meat, 5 Bugs, 5 Fish, 5 Vegetables Fire Starting, Chopping, Scum Sifting $450
    Pirate Meal For Ten Difficult 5 Meat, 10 Bugs, 10 Fish, 10 Vegetables, 10 Eggs Fire Starting, Chopping, Scum Sifting $900
    Essence of Pet Snacks Difficult 3 Meat, 5 Bugs, 5 Fish, 5 Vegetables, 5 Eggs Fire Starting, Chopping, Scum Sifting $50

    This table provides a useful guide for your cooking adventures in Goro Goro Kitchen. Enjoy the culinary journey that awaits!

  • Like a Dragon: Yakuza Pirates Set Sail in Hawaii

    Like a Dragon: Yakuza Pirates Set Sail in Hawaii

    In Like A Dragon: Pirate Yakuza in Hawaii, you can indulge in your Dragon Ball dreams by gathering a collection of Golden Balls to make a wish. This substory kicks off automatically after Majima exits the Revolve Bar at the start of Chapter Three. You’ll be directed along a specific path outside the bar, leading you straight to Captain Beef. Having just joined your crew of misfit pirates, he shares his personal quest: to locate seven mythical Golden Balls scattered around Honolulu.

    According to Captain Beef, if they can find these elusive items and if Majima agrees to assist him, they’ll earn a wish from a mysterious character named Shen. Thus, the substory titled “When You Wish Upon Some Balls” begins. Shortly after, Shen sends a text to Majima containing clues about the locations of the balls. While the hints indicate general areas, each ball is concealed in a very specific spot or requires completing a different task entirely. Here’s a guide on where to find all seven Golden Balls and the rewards you’ll receive from Shen for your efforts.

    All Golden Ball Locations in Like a Dragon: Pirate Yakuza in Hawaii

    Chinese Medicine Shop

    This is one of the simplest Golden Balls to acquire in Pirate Yakuza. Head to the Wan Shang Tong Herbal Shop located in the Cultural District. The quickest way to reach it is by taking a taxi to Lotus Street, but you can also walk or ride a Segway. If you’re unsure, it’s situated at the westernmost edge of your Honolulu map. This medicine shop is outdoors; the Golden Ball can be found behind the counter on a poster featuring outlines of two human figures, conveniently positioned between one of their legs.

    You’ll primarily use your grappling hook to retrieve most of these Golden Balls, which you should have acquired through the main storyline by this point. Just aim with L2/LT and the right thumbstick, then shoot with R2/RT.

    Sushi Restaurant

    Next, make your way to Shinobi Sushi, the restaurant you might have previously visited during the substory “I Want To Be Your Nadeshiko” (or maybe just to enjoy some California rolls). It’s located near the Shrine taxi stand on Sakura Street, in the northeastern corner of Honolulu.

    By collecting two Golden Balls, you’ll unlock an achievement titled “Not Counting The Usual Ones.”

    This Golden Ball is nestled between the legs of the shinobi statue directly in front of the sushi restaurant. This seems to be a recurring theme!

    Seaside Avenue Pool

    This one is a bit trickier to locate. Head to the area shown on the map, just outside the Seaside Sanctuary Hotel. You can take a taxi to Seaside Avenue or West Hula Avenue for a shortcut. Look for the small space to the left of the hotel steps, where you’ll find a large stone wall with several openings overlooking a pool area. Near the rightmost opening is an NPC wearing jorts who comments about a mysterious, glowing ball on a nearby lounge chair. Use your grappling hook to snag it.

    Pawn Shop Masked Doll

    This Golden Ball was the first one I discovered in Pirate Yakuza (I had plenty of Bronze Plates to sell). It’s found in The Treasure Select Pawn Shop—specifically at the Hula Avenue location, conveniently near Julie’s Gearworks and the adjacent taxi stand. Upon entering, look to your right to find a mannequin adorned with a sombrero and a lucha libre mask. The Golden Ball is tucked in his shorts, just waiting to be targeted.

    Old Man Chasing Sickos

    To acquire this Golden Ball, you first need to unlock the Sicko Snap mini-game. If you haven’t yet, make your way to the Aloha Beach trolley stop (right by the Aloha Beachfront taxi stand). Wait for the trolley to arrive and get on; this will trigger a short substory where you encounter a photographer named George. He explains that he takes photos of ‘sickos’ around town in a fun, Pokémon Snap-style mini-game, then presents his findings to the police. You’ll need to play this recurring mini-game from Infinite Wealth to unlock it.

    Keep an eye out for a Golden Papillon sicko. Wait for them to pose (as shown above) to snap a picture, as you’ll garner more points that way.

    Once you unlock Sicko Snap, George will establish his shop. You can spend the Snap Points earned from completing the mini-game to obtain one special item: a Golden Ball. It’ll cost you 3,333 points to buy it, which is easily achievable after just a game or two.

    Freak On Top Of Dunghill

    Return to the Goromaru and set course for Madlantis, where we’ll uncover the last two Golden Balls. Approach the Dunghill bar in the northeast corner, then ascend the stairway at the entrance’s right side. Take a left and you’ll find yourself on top of the Dunghill roof. Face the edge and look up and to your left to spot a leather-clad man flexing quietly on a small raised ledge. You can probably guess where the Golden Ball is hidden.

    Sweaty Man Near The Coliseum

    Lastly, head to the vicinity of the Pirate Coliseum illustrated above. You’ll notice a pair of pirates squabbling, along with an NPC discussing a suspiciously shiny object in the distance. Use your grappling hook to reach the spot he’s pointing at and collect the final Golden Ball.

    Pirate Yakuza Golden Ball Rewards

    After gathering all seven Golden Balls, you’ll receive a message from Shen summoning you to the docks in Honolulu. Head over to the substory marker on your map and have a chat with Shen. He’ll take your Golden Balls and offer you a selection of wishes:

    Wish

    Reward

    I want a normal, peaceful life.

    Nothing; try again

    I want endless riches.

    $10,000

    I want eternal life.

    Nothing; try again

    I want sexy panties.

    Shen-san’s Panties; sell at a pawn shop

    Additionally, after you receive your reward, Shen will offer to join your pirate crew. Although he’s not the strongest crew member—with G ratings in Cannon Power and Ship Upkeep and E ratings in Attack and Defense—he can be developed into a decent addition for boarding parties or treasure raids.

    So, although Shen may not be the magical figure Captain Beef touted him as, he carries a significant amount of cash and has an eye for flashy underwear. The $10,000 reward is nothing to overlook, making this substory well worth your time in Like A Dragon: Pirate Yakuza in Hawaii.

  • Guide to Locating All Clothing in LaD: Pirate Yakuza Hawaii

    Aloha Shirt (Default)

    Majima’s classic outfit.

    Shirtless

    Available right away.

    T-Shirt


    Colors: White, Black, Grey, Red, Blue, Green, Pink, Yellow, Orange, Purple

    Can be bought at any Changing Room for $200.

    Striped Shirt


    Colors: Blue, Grey, Red

    Available at any Changing Room for $200.

    Sea Dog Shirt


    Colors: White, Red, Cream, Green, Black

    Can be purchased at any Changing Room for $200.

    Sweatshirt


    Colors: Grey, Blue, Black, Purple, Red

    Available for $200 at any Changing Room.

    Long-Sleeve Button-Up


    Styles: White, Snakeskin, Gold Pattern, Blue Pattern, Grey Check, Grey Stripe

    Can be bought at any Changing Room for $200.

    Garden T-Shirt

    Available at ABC (Anaconda) in the Anaconda Shopping Center for $15.99.

    Men’s Original T-Shirt

    Found at Matsumoto Shave Ice on Tsubaki and Sakura Streets for $24.00.

    Hang Loose Family Tee

    From 88 Tees on Waikiki Street for $29.99.

    Yaya Kuku Shave Ice Tee

    Available at 88 Tees on Waikiki Street for $32.99.

    Yaya Kuku Musubi Tee

    From 88 Tees on Waikiki Street for $32.99.

    Yaya Floral Silhouette Tee

    Available at 88 Tees on Waikiki Street for $29.99.

    The Hawaiian Original Classic Hibiscus Aloha Shirt

    Available at Hilo Hattie in the Anaconda Shopping Center for $39.99.

    Blue Hawaii Aloha Shirt

    Purchased at Hilo Hattie in the Anaconda Shopping Center for $49.99.

    Aloha Shirt (Unbuttoned)

    Earned from the Crazy Delivery mini-game for 1,500 points.

    Aloha Shirt (Buttoned)

    Available from the Dragon Kart mini-game for 150 points.

    Aloha Shirt (Bare)

    Earned from the Crazy Delivery mini-game for 2,000 points.

    Aloha Shirt (Peek)

    Available from Burnes & Evans on Aloha Street for $200.

    Aloha Shirt (Tucked)

    Available from Reef Riders in the Anaconda Shopping Center for $200.

    Aloha Shirt (Lei)

    Can be purchased at Honolulu Dandies in the Anaconda Shopping Center for $200.

    Collared Shirt

    Available from Yamabiko on the corner of Tsubaki Street and Fuji Street for $200.

    Short-Sleeved Hoodie

    Available at White Shore Boutique Worldwide in Market Village on Aloha Street for $200.

    Button Shirt

    Can be purchased from Honolulu Dandies in the Anaconda Shopping Center for $200.

    Basketball Jersey

    Available from Panthera Sports Kingdom near Worldwide Market Village on Aloha Street for $200.

    Keyneck Shirt

    Available from Purple Dolphins on Aloha Street for $200.

    Tank Top

    Available from No Surf No Life just off Seaside Avenue for $200.

    Sea Dog Attire (Rough)

    Available at the Casino in the northeastern part of Madlantis for 200 chips.

    Sea Dog Attire (Simple)

    Available from the Bang Bang Batting Center mini-game for 6,000 points.

    Sea Dog Attire (Slim)

    Available at Gorgeous Roger’s in the Luxury Palace Hotel on the northwestern side of the Madlantis map for $200.

    Apocalypse Clothes

    Earned from the Bang Bang Batting Center mini-game for 6,000 points.

    Sleeveless Leather Jacket

    Available at Night Marchers on Twilight Drive for $200.

    Sea Dog Frilled Shirt

    Available at Gorgeous Roger’s in the Luxury Palace Hotel on the northwestern part of the Madlantis map for $200.

    Tattered Shirt

    Available at the Gambling Hall in the alley south of Ganryujima Armory for 200 tags.

    Damaged Shirt

    Available from the Bang Bang Batting Center mini-game for 6,000 points.

    Jean Jacket

    Available at Night Marchers on Twilight Drive for $200.

    Sweater

    Found at Manu Palekaiko near Worldwide Market Village on Aloha Street for $200.

    Short-Sleeve Button-Up


    Styles: White, Snakeskin, Gold Pattern, Blue Pattern, Grey Check, Grey Stripe

    Aloha Links reward for having 5 friends.

    Tieless Suit Jacket

    Available from Vincenti on Aloha Street for $200.

    Unbuttoned Suit Jacket

    Available from Vincenti on Aloha Street for $200.

    Buttoned Suit Jacket

    Available from Vincenti on Aloha Street for $200.

    Vest

    Found at Vincenti on Aloha Street for $200.

    Three-Piece Suit

    Available from Vincenti on Aloha Street for $200.

    Rough Suit Jacket

    Available from Manu Palekaiko near Worldwide Market Village on Aloha Street for $200.

    Naval Outfit

    Available from Bullet Hell Armory on Pearl Avenue for $200.

    Work Clothes

    Can be found from the Shogi NPC behind the shrine in Honolulu for 200 points.

    School Uniform

    Available at the Fortune Exchange for 8 points.

    Palekana Garb

    Found at the Fortune Exchange for 8 points.

    Happi Coat

    Available at Ganryujima on Fuji Street Armory for $200.

    Scourge of the Night (Top)

    Earned from the Sicko Snap mini-game for 3,500 points.

    Leopard Print Sweater

    Given as a bonus when buying Crewmate: Etsuko from the Fortune Exchange for 10 points.

    Leather Jacket

    Purchased at Honolulu Dandies in the Anaconda Shopping Center for $200.

    Snakeskin Jacket

    Win against Minami in the darts mini-game near Aloha Beach.

    Cabaret Manager Suit

    Available at the Royal Casino in the Luxury Palace Hotel on the northwestern side of the Madlantis map for 200 chips.

    Cabaret Manager Suit (Unbuttoned)

    Available at the Royal Casino in the Luxury Palace Hotel on the northwestern side of the Madlantis map for 200 chips.

    Cab Driver Clothes

    Earned from the Dragon Kart mini-game for 150 points.

  • Top Healing Team for Like A Dragon: Pirate Yakuza in Hawaii

    Top Healing Team for Like A Dragon: Pirate Yakuza in Hawaii

    Choosing the right crew for your adventure on the Goromaru is one of the key decisions you’ll face in Like A Dragon: Pirate Yakuza In Hawaii. Although the selection of healers isn’t as impressive compared to other classes—like the top-tier shooters—there are still some capable healers you can recruit.

    Fortunately, you won’t need to scour every corner of Honolulu to find one of the game’s best healers; he will naturally join your team as you progress through the main story. With over ten healer options available, many may fall short of your expectations, so we’ve compiled a list of the top picks.

    Understanding the Tier Levels

    Given the limited number of crew options in Like A Dragon: Pirate Yakuza In Hawaii, we’ll categorize the available healers and their skills into a straightforward structure:

    • First Mate Trait
    • Squad Leader Trait

    Each crew member has four key stats:

    • Cannon Power
    • Ship Upkeep
    • Attack
    • Defense

    With a small roster to choose from, we only need three tiers to classify these crew members accurately:

    1. S-Tier
    2. A-Tier
    3. All Other-Tier

    S-Tier crew members are exceptional and often possess unique Squad Leader Traits, can reach a level cap of 50, and maintain a majority of S-Tier stats, or some combination of these traits.

    A-Tier crew members are solid team players, capable of performing well in many situations. Although they may top out at level 30 or exhibit mostly A-Tier stats—with possibly one S-Tier—they’re still reliable in battles.

    All Other crew members typically have a level cap of 20 and may lack additional traits. Ideally, they have at least one area of expertise, showcasing a single A-Tier stat that allows for easy placement in your strategies. This group is not comprehensive but highlights a few noteworthy members.

    Generally, it’s best to focus on using S or A-Tier crew members as you continue to enhance the Goromaru to its full potential.

    Special Requirements for Unlocking Crew Members

    Some crew members can only be unlocked through specific actions:

    • Kei: You need to become 30 buddies in Honolulu. You can do this by waving at friends or helping them in tough situations at least three times each.

    S-Tier Healers

    At the top of the list is Nishida, clearly the strongest healer in Like A Dragon: Pirate Yakuza In Hawaii.

    Name Tier Explanation
    Nishida S+ Nishida boasts S-ranks in all stats, making him an excellent choice among healers. His boosted health recovery and shock resistance greatly enhance his overall effectiveness, especially during challenging naval skirmishes.
    Kei S Although Kei may not match Nishida’s Attack and Defense, her impressive 410 Ship Upkeep at max level makes her invaluable to your Cannon Squad.

    A-Tier Healers

    • Carnal Sister Yuka: With three A-Tier stats and the powerful Sink King Kiwami First Mate Trait, Yuka is a top choice for increasing damage against enemy ships.

    • Natasha: Although her stats are mixed between A and B-Tier, her availability of Squad Leader and First Mate Traits makes her a solid backup option, especially in a leadership role.
    Name Tier Explanation
    Carnal Sister Yuka A+ Yuka stands out due to her three A-tier stats and helpful First Mate Trait, making her great for dealing damage to opponents.
    Natasha A Natasha, with mainly A and some B-tier stats, offers flexibility with her role as a Squad Leader or First Mate without significant stat drawbacks.

    All Other Healers

    Name Tier Explanation
    Oka B+ Oka comes out slightly ahead of his peers, thanks to better stats compared to Thomas or Russell, but he generally serves as a temporary option for your Cannon Squad.
    Thomas the Engineer B Thomas is less impressive than Oka, offering slightly lower stats and lacking any distinct traits.
    Russell B Russell is nearly identical to Oka but has slightly higher Ship Upkeep, making him less valuable, particularly if you have specialists like Kei or Julie.

    Sadly, many of the healer options are lackluster, limiting your choices. If you’re early in the game and struggling to build balanced Boarding Squads, some alternatives might work temporarily.

    While not top tier, Legendary Fisher Morishita and Elena could serve as additional healers. However, other characters like Yurina, Hibiki, the 14th Best Host in Kamurocho, Nickelle Kidman, and Obispo are best avoided.

  • Unlock the Silver Chest in Dragon Kart: Pirate Yakuza Hawaii

    Unlock the Silver Chest in Dragon Kart: Pirate Yakuza Hawaii

    As you explore Like A Dragon: Pirate Yakuza In Hawaii, you’ll encounter various engaging mini-games, with one of the highlights being Dragon Kart. Not only does winning the title of the fastest Dragon Kart racer in Hawaii bring fame, but it also offers exciting rewards, hidden treasures to discover, and the chance to recruit two unique crew members through the races.

    Dragon Kart makes a return from the previous two main titles, bringing a simplified and enjoyable experience in Like A Dragon: Pirate Yakuza In Hawaii. Players can compete in three main cups with a more direct and quick narrative progression. Additionally, the game introduces the fresh Elimination Duel mode, adding another layer of excitement beyond traditional racing.

    How to Play Dragon Kart

    You can find this mini-game in the southwestern corner of the map, specifically at Anaconda Harbor Park. When you first arrive, you’ll meet a young staff member named Ran, who will fill you in on Dragon Kart, the racing phenomenon sweeping Japan.

    Dragon Kart is designed to be easy to pick up, requiring only a few basic controls, so you’ll be racing in no time.

    Action Xbox PlayStation
    Accelerate RT R2
    Reverse/Brake LT L2
    Drift A X
    Use Item B Circle
    Switch Items X Square

    Before starting your race, keep these tips in mind:

    • Avoid letting your Hit Points (HP) drop to 0, as this will result in a crash and time loss.
    • Collect Dragon Rings to replenish your HP and use them for rewards after races.
    • The first race offers a straightforward yet challenging introduction that requires you to stay sharp and dodge enemy attacks to avoid crashing.

    What Game Modes Are Available in Dragon Kart?

    Dragon Kart offers several modes, although one remains locked until you complete the Resort Cup. Below are the modes along with their conditions for unlocking.

    Grand Prix
    Races Locked/Unlocked Unlock Conditions
    Resort Cup Unlocked N/A
    Urban Cup Locked Win the Resort Cup.
    Festival Cup Locked Win the Urban Cup.
    Time Attack
    Races Locked/Unlocked Unlock Conditions
    Waikiki Circuit Unlocked
    Beach and Market
    Colorful Sandy Beach
    Wabi-Sabi Street Locked Place in the top three of the Resort Cup.
    Anaconda Adventure
    Angry Waves
    Zigzag Riverside Bridge Place in the top three of the Urban Cup.
    Harbor Sunset Tour
    Ocean Festival

    The second mode, initially marked as ‘???’, unlocks after you win the Resort Cup and speak with your rival next to Ran. In this mode, Duels differ from regular races, featuring a smaller arena filled with Gatling Guns, where the goal is to drain your opponents’ HP and make them crash. The last racer left standing takes the win.


    Duel (‘???’)
    Races Locked/Unlocked Unlock Conditions
    Go-Kart Grandpa’s Elimination Duel Locked Win the Resort Cup and talk to Ran.
    Elelu’s Elimination Duel Win the Urban Cup and talk to Elelu and Yappi.
    Daisy’s Elimination Duel
    Ran’s Elimination Duel Win the Resort, Urban, and Festival Cups, along with the previous duels.
    The Michio Army Elimination Duel Defeat Ran in her Elimination Duel.

    While it may seem easy, strategy plays a major role here. You don’t want to speed into enemy fire, as a few targeted shots can take you out, so keep an eye on your mini-map to navigate around rivals and gauge your surroundings effectively.

    With some practice and learning to navigate tight corners, you’ll soon be winning duels and overcoming your competitors.

    How to Unlock New Dragon Karts


    The Dragon Kart Rising Dragon Menu in Like A Dragon: Pirate Yakuza In Hawaii.

    By engaging in Dragon Kart duels, you’ll naturally unlock several karts, providing excellent options that will enhance your performance in Dragon Kart Time Trials as you upgrade your vehicles.

    Car Unlock Condition
    Ignition Shadow Defeat Go-Kart Grandpa’s Elimination Duel
    Rapid Phantom Defeat Elelu and Yappi’s Elimination Duel
    Rumble Crasher Defeat Daisy’s Elimination Duel
    Rising Dragon Defeat Ran’s Elimination Duel
    Legend Wave Defeat The Robo Michio Army’s Elimination Duel

    How to Win at Dragon Kart and Complete the Substories

    After finishing all three tournaments and their corresponding duel matches, you’ll unlock the substory The Fastest in Hawaii, where you’ll race against Ran, known as Dragon Girl.

    Your ultimate challenge is to defeat Ran in an Elimination Duel to determine who truly is the fastest racer in Hawaii. Unlike the earlier duels, Ran’s match resembles a traditional race.

    You must avoid crashing during this duel or you will automatically lose, so steer clear of her attacks at all costs.

    Success against Ran unlocks the Rising Dragon Kart in the store. After you exit the Dragon Kart menu, enjoy a celebratory scene where Majima relishes his victory as Hawaii’s fastest racer.

    But the celebration is short-lived, as five Robo Michio show up, challenging you to another Elimination Duel to prove your strength in Hawaii. Completing the substory, ‘The Fastest in Hawaii’ leads you to the next one, ‘The Path To Speed, along with an additional Duel.

    To triumph in the Robo Michio Army Elimination Duel, use skilled driving and clever tactics to outmaneuver the robotic competition. Once they are defeated, you’ll unlock the Legend Wave Kart in the shop.

    A dramatic scene follows the victory over the rogue robots, solidifying your position as the ultimate Dragon Kart champion. After this cutscene, you’ll complete the substory ‘The Path To Speed’.

    What Rewards Do You Earn From Dragon Kart?

    Upon completing everything in the Dragon Kart mini-game, you’ll be rewarded with:

    • The White Tiger Ring (from Ran)
    • The Ring Of Blossom (found in the silver chest)
    • Ran as a crew member (after defeating her in the duel)
    • Robo Michio Mach as a crew member (after their duel)

    The time and effort spent in these races yield valuable loot and crew members, including the sharp shooter Ran and the imposing Robo Michio Mach.

  • Complete Guide to All Silver Containers in LaD: Hawaii’s Pirate Yakuza

    Complete Guide to All Silver Containers in LaD: Hawaii’s Pirate Yakuza

    As the title suggests, Like A Dragon: Pirate Yakuza In Hawaii is all about pirates, and what do pirates treasure most? That’s right—treasure! One of the prime treasures you’ll come across in Honolulu is the Silver Containers, which are packed with fantastic finds.

    These shiny boxes don’t just hold invaluable healing items and consumables that can enhance your gambling game; some of them also contain stylish cosmetic items and whole outfit sets. We’ve divided the Honolulu map into six areas and detailed where you can discover each Silver Container. Think of it as your own treasure-hunting guide!

    Little Japan Containers

    You’ll spend a lot of time in this area, which is home to Revolve. There are numerous Silver Containers packed into this relatively small spot, including a few costume sets to enhance your character’s style.

    Area

    Directions

    Container Contents

    Little Japan This container is located in the garage directly across from Yamabiko. Staminan Royale
    Look for a Silver Container in the alley east of Ganryujima Armory, connecting Fuji Street and Sakura Street. Helmet, Armor Set
    This container is behind the Gambling Hall, located in the west alley. Blackjack Amulet
    Find this container behind the ABC Store by entering the west alley. Vintage Luxury Watch
    From Revolve, head north on Tsubaki Street, where you’ll find a small set of stairs. Climb up and open the door for a Silver Container! Idol Bandanna, Cabaret Manager Makeup, Idol Set

    East Waikiki And East Aloha Beach

    Like A Dragon Pirate Yakuza in Hawaii. Silver Container Locations. East Waikiki containers.

    Upon entering Honolulu, your journey will take you through East Waikiki, an area filled with shops and eateries. Silver Containers can be found scattered throughout, offering various costume sets.

    • Anaconda Arcade

      Located on the ground floor of the Anaconda Shopping Center, this arcade features UFO machines and a selection of games:

      • SpikeOut FE
      • Fighting Vipers 2
      • The Ocean Hunter
      • Sega Racing Classic 2: Battle on the Edge
      • Sega Racing Classic 2: Power Edition
      • Virtua Fighter 3
      • Virtua Fighter 3tb
    • Crazy Delivery

      Inspired by Crazy Taxi and a dash of Uber Eats, this mini-game can be unlocked by finishing the ‘Stay Crazy’ substory located near the fountain at the intersection of Sunset Street and Anaconda Boulevard. After unlocking, you can access it from two spots:

      • Crazy Delivery (Anaconda Boulevard) – Right next to the fountain where the substory begins.
      • Crazy Delivery (Aloha Street) – Just north of the beach.

      A detailed guide on Crazy Delivery is available.

    • Darts

      You can find the Darts hall located east of the Crystal Aloha Resort, just north of the western end of Aloha Beach.


      TIP: You can discover and buy better darts in various locations throughout the game.

    • Dragon Kart

      Unlock this Mario Kart-inspired game by completing the ‘Dragon Kart in Paradise’ substory, located in the southeast area of the Honolulu map, just south of Hip Hop Shrimp.

    • Goro Goro Kitchen

      This cooking mini-game appears in several locations, but in Honolulu, you can find it in Anaconda Harbor Park, on the southern side of the western half of the map. For this game, you’ll need cooking ingredients, many of which can be gathered from the environment or bought from local shops.


      You can also access it upstairs in Revolve Bar by going out onto the terrace.

    • Open Road Shogi

      Find Open Road Shogi just off Sakura Street, right behind the Fortune Exchange Shrine. In this area, you can participate in:

      • Ranked Matches
      • Challenge Matches
      • Puzzle Shogi
    • Ounabara Vocational School

      Unlock this mini-game by completing the substory ‘The Smartest Pirate Crew!’ at the Ounabara Vocational School building on Harbor Street. A complete guide to test answers is available here.

    • Sicko Snap

      Sicko Snap, inspired by Pokémon Snap, involves taking photos of quirky characters. You can unlock it by finishing the ‘Snap Those Sickos! Again!’ substory while riding the trolley from the Aloha Beach Trolley Stop. A full guide for this mini-game is available.

    Madlantis


    A banner of Majima in Madlantis in Like a Dragon: Pirate Yakuza in Hawaii.

    Madlantis features some truly unique mini-games, with the standout being the Pirates’ Coliseum. Here’s a breakdown of where to find them.

    • Bang Bang Batting Center

      Located in the northeastern part of the Madlantis map, this optional twist on baseball includes exploding barrels. A complete guide is available.

    • Master System Console

      You can find the Master System console in the Pirate Room within the tunnel on the eastern side of Madlantis. Here, you can play any Master System games you have.

    • Pirates’ Coliseum

      The Pirates’ Coliseum is located in the southeastern part of the Madlantis map and offers a variety of modes.

    Rich Island


    A banner of Majima on Rich Island in Like a Dragon: Pirate Yakuza in Hawaii.

    While Rich Island features just a few mini-games, one stands out as exclusive: Goro Kingdom.

    Nele Island


    A banner of Majima on Nele Island in Like a Dragon: Pirate Yakuza in Hawaii.

    There’s not a lot happening on Nele Island, but you can always count on cooking to keep you entertained in the kitchen.

    Goromaru


    A banner of Majima aboard the Goromaru in Like a Dragon: Pirate Yakuza in Hawaii.

    The Goromaru has only two mini-games, both of which can also be found elsewhere. However, if you’re looking to have some fun while out at sea, here’s what you can play.

    آخر المستجدات الإخبارية

    All Rights Reserved

    Area

    Directions

    Container Contents

    East Aloha Beach This container is located in the Lifeguard tower south of the Aloha Seaside restaurant. Bare feet, Bodysuit set
    West Waikiki And South Waikiki
    Like A Dragon Pirate Yakuza in Hawaii. Silver Container Locations. West Waikiki containers.

    The area west of East Waikiki runs alongside the river and marks the farthest point you can reach when you first arrive in Honolulu. You will discover a fair number of containers in this area. However, keep in mind that you won’t be able to access the one atop the No Surf No Life store until you acquire the Chain Hook tool.

    Area

    Directions

    Container Contents

    West Waikiki This container is located right next to Treasure Select Pawn (River St.). Swiss Watch
    On the roof of No Surf No Life. You’ll need to use the Chain Hook to access it. Street Surfer Flag (Hannya)
    South Waikiki This container is situated north of the Crystal Aloha Resort. Staminan Spark
    Inside the Crystal Aloha Resort. Platinum Plate
    Northeast of the Darts location. Royal Joker Card
    This container is west of the Darts location. Thunder Dart

    Anaconda And District Five

    District Five and the Anaconda Shopping Center are located directly west of the Aloha Bridge. Initially, this area will be inaccessible, but you’ll gain entry during the main story quest when you’re directed to explore Diamond Head, which is part of District Five.

    Area

    Directions

    Container Contents

    District Five This container can be found southwest of the Diamond Head bar, next to the large steel doors. Cowboy Hat, Desperado Set
    This Container is located west of Club Guilty (marked on your map), tucked away in an alley. Blackjack Amulet
    Anaconda Located in the southwest corner of the Anaconda Shopping Center parking lot, next to Julie’s Gearworks. Swiss Watch
    This container is in the northwest corner of the first floor of the Anaconda Shopping Center, next to the escalators. Vintage Luxury Watch
    Find this container by the river, east of the Anaconda Shopping Center, south of Diamond Head. Street Surfer Flag (Majima Construction)

    Downtown And Chinatown

    Like A Dragon Pirate Yakuza in Hawaii. Silver Container Locations. Downtown And Chinatown containers.

    The Downtown and Chinatown areas are in the northwest section of Honolulu. While these locations may not have a significant impact on the main story of Pirate Yakuza, they feature numerous side missions and are where you’ll unlock Crazy Delivery and play Mahjong. You can also find several hidden Silver Containers within this region.

    Area

    Directions

    Container Contents

    Downtown Take the Orphanage Taxi to the Downtown area and travel directly north to find this container in front of a building. Grass Crown, Pyrodancer Set
    You’ll find this container south of the fountain on Kolonahe Street. It’s hidden around the corner, out of view from the street. Platinum Plate
    This container is located inside Polaris’s main entrance area. Swiss Watch
    Located at the corner of Downtown St. and Night St. on top of the awning, requiring the Chain Hook to access. Staminan Royale
    Chinatown Visit the Wan Shang Tong Herbal Medicine shop, then head up the nearby stairs to the second floor of the adjacent apartment building to find the container. Tattered Sea Dog Hat, The Tattered Sea Dog Set
    This container is positioned in front of the Nirvana Coast Hotel, the large building in the northwest corner of the map. Staminan Royale

    Cultural District And Shippers Wharf

    Like A Dragon Pirate Yakuza in Hawaii. Silver Container Locations. Cultural District And Shippers Wharf containers.

    The Cultural District and Shippers Wharf make up the southwest part of Honolulu. This area is filled with Silver Containers, many tucked away in narrow alleys or hidden in corners around the dock.

    Area

    Directions

    Container Contents

    Cultural District East of the Black Hibiscus, travel into the alley leading to Night Street to find this Silver Container. Black Jack Amulet
    Head east of Psychedelic Coffee into the alley that leads to Night St. This container is by the jewelry shop. Platinum Plate
    Find this container in the alley behind The Cabaret Eldorado, across from Loco Fiesta Liquor. Royal Joker Card
    Located beside Liber Tea in the corner of the area filled with plastic chairs. Goromi Wig, Goromi Makeup, Goromi Earrings, Goromi Set
    Inside the Ounabara Vocational School. Street Surfer Flag (Ounabara Vocational School)
    Shipper’s Wharf Southeast corner of the wharf. Toughness Infinity
    Southeast corner of the wharf. Vintage Luxury Watch
    Northwest corner of the wharf. Ninth Gates Tile
  • Discover and Play Every Mini Game in LaD: Pirate Yakuza Hawaii

    Discover and Play Every Mini Game in LaD: Pirate Yakuza Hawaii

    When you’re not busy sailing the seas of Hawaii as a fearless pirate in Like a Dragon: Pirate Yakuza in Hawaii, take some time to unwind and try out the various mini-games available. Each activity boosts your Pirate Rank, making it a fun way to gain respect, earn some cash, and unlock exclusive rewards.

    If you’re curious about the mini-games you can engage in and where to find them, you’re in the right place. The only question remaining is: which mini-game will you try first?

    Honolulu


    Below is the full list of mini-games available in Honolulu, along with their locations and any additional information you may need.