الوسم: Knew

  • Things We Wish We Knew Before Completing NTE

    Things We Wish We Knew Before Completing NTE

    Open-world gacha games are really popular right now, and Neverness To Everness is a new hit in this genre. Unlike many typical gacha games, it shows a lively city where you can drive cars and enjoy various mini-games.

    Besides the main story, it also has a management simulation mode where you can become the city’s business boss. This helps boost your reputation in Hethereau and allows you to buy better vehicles and items. It can feel a bit overwhelming at first, so here are some simple tips to help you out.

    ### Don’t Build Too Many Characters

    One common mistake new players make is trying to unlock a lot of characters right away. These games are very strict with their resources, and while it seems like you’re getting plenty in the beginning, those resources run out quickly once quests stop. It’s best to plan your resources from the start by focusing on four to six characters. Once you pick your main team, keep it to just four. Having a solid team is more important than having multiple mediocre ones.

    ### Use Your Character Pixels Wisely

    Your Character Pixels are essential for getting most of the materials in the game. You get some expansion materials like Hunter Guides, Dye, or Beetle Coins through quests, but eventually, you’ll run out. When that happens, you’ll need to spend Pixel points to get more. They’re also the only way to get items that let you upgrade your characters, arcs, or esper abilities. Pixels only regenerate every six minutes, so spend them carefully.

    > A helpful tip: Don’t use your Character Pixels on Console upgrades until higher levels unlock golden consoles.
    > In early gameplay, focus on ascension materials for your main characters first. After that, spend Pixel points on experience materials if needed. Later, most of your Pixel resources should go toward leveling up your consoles.

    ### Don’t Ignore the City Tycoon Features

    Once you start exploring Hethereau, you’ll quickly encounter the City Tycoon mode. This part of the game involves managing different activities like fishing, racing, and shopkeeping, all by upgrading your Tycoon level. Increasing your Tycoon level also unlocks powerful characters like a fully awakened S-class hero and her unique Arc. You can earn Fons weekly through this system by spending City Stamina, so it’s a key part of your game experience. Nearly half of your gameplay revolves around the City Tycoon, so it’s important to keep it in mind.

    ### Always Look Around Thoroughly

    Even if you’ve played many open-world gacha games, Neverness To Everness surprises you with its hidden interactions and items. For example, you can find Griddy lockers around the city—opening them with keys earns you free rewards. You can also spot wallets or groceries left on the streets, which can be collected or stolen from civilians. These don’t give huge rewards but add an extra fun layer to exploration. If your vehicle feels slow, you might find better ones on the streets that you can take.

    ### Mark Important Exploration Items

    While exploring Hethereau, keep an eye out for red symbols. These usually mark Oracle Stones or Gifts from “21.” Giving Oracle Stones to the witch grants cool rewards, and Gifts are chests that give items when you interact. Once you collect these, the icons disappear from your map. To keep track, mark their locations yourself, so you can find them later and get 100% exploration completion, especially when using outside resources.

    ### Don’t Waste Your Annulith

    Annulith is the rarest and most valuable currency in NTE. As you progress, you’ll encounter banners where you can spend Annulith to pull characters. There are two types: limited and standard banners. Limited banners rotate every three weeks, using Solid Dice, while standard banners stay in the game permanently, using Fabricated Dice. If you don’t have Dice, you can craft one with 160 Annulith. Since standard banners are always available, avoid spending Annulith on Fabricated Dice; most of your Annulith should be saved to make Solid Dice for limited banners.

    > A key tip: Never waste Annulith just to regenerate Character Pixels. For low-spending or free-to-play players, conserving Annulith is crucial.

    If you’ve gotten a limited character you really want, you can also use Annulith to try for the character’s signature Arc in the Arc banner.

    ### Read Character Abilities Carefully

    As you gather more characters, especially through pulls and the selector, it can be overwhelming to keep track of them all. Still, it’s very important to read each character’s abilities carefully. You might understand a character’s role generally, but knowing the details can unlock their full potential. For example, a support character might be providing buffs that you’re not using properly because you didn’t read about them.

    ### Fons Are Hard to Get

    Fons are a crucial currency for gameplay, but they are hard to find early on. Once quests run out, most of your activities either require Fons or are mini-games that give Fons as rewards. While you can earn a good amount over time, it’s smart to use them wisely. For instance, don’t buy every vehicle as soon as you can afford it; save Fons for better options later.

    —

    This version aims to be clear and straightforward, avoiding technical or AI-specific phrases, and maintaining all key details and advice from the original.

  • Things We Wish We Knew Before Completing Tides of Tomorrow

    Things We Wish We Knew Before Completing Tides of Tomorrow

    Tides Of Tomorrow may seem like just another decision-based game in a crowded market, but it has a unique feature: your choices can be influenced by decisions made by players who visited the same story segment before you. In this game, decisions from others can also affect your experience.

    The game features a post-apocalyptic world, mainly revolving around three factions. As you explore different areas, you’ll learn more about plastemia, a condition affecting the world, while making choices that determine the ending. Here’s how to have a better experience:

    ### Your Choices Are Important

    As you progress through the story, remember that your decisions can have significant consequences. Some choices directly impact the game later, and even minor decisions can lead to big changes. For example, when choosing which areas to visit first, the order can unlock special dialogues and cutscenes, or even cause you to skip some story parts entirely.

    ### Choose Your Tidewalker Partner Carefully

    The gameplay is divided into separate instances: each time you visit an island, you experience a new story segment. Before starting each, you select a Tidewalker to follow, and their decisions will influence how you’re treated in that part. If your Tidewalker behaves poorly to locals, they might treat you with suspicion or block access to specific areas. It’s best to pick a Tidewalker who leaves plenty of ozen and scrap in their area’s special chest, as this is valuable for your journey.

    ### Use Your Ozen Wisely

    Ozen is the most critical resource in the world of plastemia. Since there’s no cure for its effects, you need ozen to manage symptoms. After each story segment, you’ll typically need to use at least two ozen bottles. While early on, it’s easy to gather enough, it becomes scarcer and more expensive later, so use it strategically. Avoid giving it away unless necessary, and keep a stockpile for yourself.

    ### Keep an Eye on Your Surroundings

    The gameplay, while decision-driven, is fairly linear. You visit islands, experience their stories, and then leave. However, each island has hidden spots where you can find scrap, ozen, and Mereid Eggs—keys to building resources. Gathering scrap and ozen from these locations is vital, especially since running out can abruptly end your run. Always look for these secret areas and items to extend your journey.

    ### The Game Is Highly Replayable

    Because the game’s ending depends on your choices, you can replay it multiple times to unlock various endings. Unlike some games, you can’t save mid-run and come back; each new attempt requires starting from scratch. Fortunately, the many branching decisions and different outcomes make replaying enjoyable, letting you explore all possible endings without boredom.

    ### Focus on Your Traits

    Your choices can influence your traits, which might seem like simple stats early on, but become increasingly important later. During the story, many options require specific trait levels, such as unlocking a secret message by maxing out your cooperative trait. Building and maintaining these traits can unlock additional lore and secrets.

    ### Don’t Ignore Ocean Events

    Throughout your journey, you’ll encounter ocean events before visiting new islands. These special missions don’t cost health and usually reward you with ozen or scrap. Be sure to check for these events before starting a new mission, as once passed, you can’t revisit them later. Participating in these missions can provide valuable resources to help you survive longer.

    ### Upgrade Your Ship When You Can

    Your ship can be upgraded for 100 scrap at the steering wheel, increasing its health. Upgrades aren’t mandatory but are helpful, especially later when facing multiple enemies firing tracking bullets. Having at least two or three upgrades can make it easier to avoid damage and survive tougher fights during the later parts of the game.

    By paying attention to your choices, managing your resources carefully, and exploring hidden areas, you can improve your chances of reaching different endings and fully experiencing everything Tides Of Tomorrow has to offer.

  • Things We Wish We Knew Before Completing Alchemy Factory

    Things We Wish We Knew Before Completing Alchemy Factory

    Managing and automating processes have always been central to gaming, and Alchemy Factory combines both perfectly. When you start the game, you begin with just a few basic recipes and a tutorial on crafting, but it doesn’t provide detailed guidance. As an alchemist and crafter, you’ll need to figure out most tasks on your own, which can feel overwhelming—especially when trying to automate everything in the later stages of the game. Luckily, some simple tips can help reduce that stress.

    Sell Items That Are Not Needed
    Early on, you’ll open your shop with a small stock of items. The game features many materials, but you can only sell certain items. You can identify these sellable goods in the recipe book’s goods section. Hovering your mouse over items in your inventory also shows their selling prices—these are your key indicators of what you can sell. Keep in mind, you can’t sell items immediately after making them, as they’re often needed for early quests. It’s best to stockpile enough of a certain item before selling, so you can use them later for crafting or furniture. Once you’ve met these conditions, selling surplus items can generate income that’s vital for your progress—it’s generally better than taking loans.

    You Must Multitask
    One major mistake in this game is focusing on just one task at a time. This game can become quite overwhelming because you need to pay attention to manual tasks that require your input every few seconds, like planting crops or crafting items such as rope or healing potions. You have to check on these frequently to replant or harvest at the right time. This constant attention becomes less of an issue at higher levels, as you’ll unlock automation for farming and other processes, allowing you to manage multiple tasks without constant supervision.

    Rotate Your Conveyor Belt
    In the early game, you’ll likely find managing conveyor belts tricky. Although both straight and sloped belts are available, adjusting their direction isn’t always straightforward. The easiest way to rotate a conveyor belt is by holding the left mouse button while creating it and dragging it to your desired path. To make multiple curves, you can stop dragging after each turn and start again. Holding down the mouse button also helps to place multiple items quickly and adjust their height, which is especially useful for items like the Conveyor Lifter.

    Don’t Fear Closing Your Shop
    As you level up, new research options unlock, including new buildings and crafting recipes. During the early game, these new options aren’t too complicated, but after level three, they can become overwhelming. To avoid mistakes with new machinery and recipes, it’s a good idea to close your shop temporarily or stock up on items that won’t run out quickly. This allows you to focus on learning the new mechanics without pressure, reducing errors and making it easier to manage multiple tasks at once.

    Manage Your Builds from the Start
    The game emphasizes automation, and as your workshop grows, keeping track of where to add logs, stone, or other materials becomes more difficult. To prevent late-game chaos, it’s best to plan and manage your building layouts early on. This will help you automate more processes from the beginning, saving time and effort later.

    Stay Focused on Quests
    You can spot your mailbox outside the shop, just below the open/close sign, which notifies you about new quests. These quests come in several types:

    • Main quests (permanent, leveling up your character and unlocking new recipes and upgrades),
    • Carpenter quests (permanent, unlocking new recipes at certain times),
    • Sample quests (permanent),
    • Urgent quests (one day, offering high rewards but requiring quick completion),
    • Random quests (lasting a few days, providing small amounts of money),
    • Bulk orders (taking several days and offering high rewards but demanding many different items).

    Completing quests is your primary way to earn cash. Keeping an eye on these can significantly support your progress.

    Manage Your Money Wisely
    Money management is crucial. Your current funds appear at the top right of the screen, and coins also exist physically in your inventory. You can store extra coins in chests—these won’t show on your HUD—allowing you to save for larger purchases like seeds, ore, wood, or stone. It’s smart to keep at least 2,000–3,000 coins available at all times to cover typical expenses.

    Sell a Wide Range of Items
    After reaching level three and higher, your shop can stock many different items. Some, like wooden gears, sell cheaply but take up little space. Others, such as the Mortar, are expensive but require more shelf space. Providing a variety of items in your store increases customer satisfaction and boosts your reputation, leading to more visitors. Balancing low- and high-priced items is key to building a good reputation while managing your stock efficiently.

  • Things We Wish We Knew Before Completing Our Way Into Kirby Air Riders

    Things We Wish We Knew Before Completing Our Way Into Kirby Air Riders

    Although Kirby Air Riders may appear to be just another Nintendo mascot racing game, it actually stands out as one of the most unique titles in its genre, thanks to features like its two-button controls and quirky machines.

    At first glance, Air Riders seems easy enough for anyone to pick up, but its gameplay mechanics are quite complex and detailed. We’re here to help, so let’s go over some beginner tips.

    You Don’t Need To (And Shouldn’t) Push The Stick Forward To Move

    The main thing to get used to in Kirby Air Riders is its two-button setup. One button is for your character’s special move, and the other is mainly for boosting and inhaling enemies.

    Steering is simple—just push the left stick left or right. Interestingly, you don’t push the stick forward to go faster; doing so actually slows you down. It’s different from most racing games and takes some time to get used to, so focus on just steering left and right.

    Boost Charging Is The Most Important Mechanic In Air Riders

    Once you’re comfortable moving around, the most crucial skill to learn is how to boost. Hold down the B button to stop your machine and charge up for a boost that propels you forward.

    Think of it like a drift—you only want to boost when approaching a corner to maintain your speed and avoid losing momentum. Using boosting at the right moment is key, and the effectiveness depends on which machine you’re using. For example, the Swerve Star comes to a full stop when you boost, while the Slick Star needs constant boosting to stay still and aim accurately. Start with easier machines to master boosting techniques.

    Drafting Can Be The Difference Between Winning And Losing

    In many racing games, following closely behind other racers (drafting) gives you a speed boost. In Kirby Air Riders, this is called Star Sliding—it involves following the trail of stars left by others.

    Following these star trails gives you a significant speed boost, almost as powerful as charging a boost yourself. Make sure to take advantage of star sliding whenever you can to gain an edge.

    You Can Make Quick Attacks Much Less Annoying

    Quick attacks are performed by wiggling the left stick, which then hits nearby opponents or enemies to boost your speed.

    While useful, this mechanic can be frustrating since it’s tied to the left stick. You can’t reassign it to a button, but you can adjust the sensitivity of the left stick in the settings. Turning the Quick Spin sensitivity to a higher level makes accidental quick attacks less likely.

    Copy Abilities Can Be Dismissed

    A feature many players might overlook is that you can get rid of copy abilities if you find them more hindering than helpful. To do this, simply press the Y button repeatedly to remove the current ability, giving you a fresh start to inhale something else.

    Character Stats Are More Important Than You Think

    Each character in Kirby Air Riders has unique starting stats, visible during character selection. These stats influence how they perform with different Machines.

    For example, Starman has excellent gliding capabilities, while King Dedede is heavier and has more health. Keep these differences in mind, especially during City Trial mode, where matching the right character with the best Machine can make a big difference.

    Road Trip Is The Best Game Mode To Start With

    While City Trial is fun and offers lots of unlockables, starting with Road Trip is recommended for newcomers. It serves as a story mode and allows you to try out all three other modes within it, helping you understand the game’s mechanics better. It also shows character stats and Machine preferences clearly, making it a great way to learn.

    Don’t Worry About Gummies

    As you play, you’ll collect Gummies shaped like various Machines. These are purely collectible items and serve no hidden purpose—they’re just for fun and to see what’s available. No need to worry about missing secret shops or mechanics.

    By keeping these tips in mind, you’ll be better equipped to enjoy Kirby Air Riders and master its unique gameplay.

  • Things We Wish We Knew Before Completing Our Door to Strangers in No, I’m Not Human

    Things We Wish We Knew Before Completing Our Door to Strangers in No, I’m Not Human

    Surviving in “No, I’m Not a Human” is all about figuring out if the people knocking at your door are real humans or dangerous visitors trying to kill everyone during the night. You need to be able to tell them apart to stay alive.

    This game is full of secrets, many endings, and small details. To help you get through your first few playthroughs more easily, here are some useful tips based on our experience.

    Check the TV More Than Once a Day
    Each morning, you get a broadcast warning about new symptoms. But it’s helpful to click the TV in your bedroom more than once during the day—up to two extra times. Doing this unlocks new info, like fresh items at ForRest or new phone numbers to call.
    Additionally, you can listen to the hallway radio once a day once you find the right station. This can reveal more details and contacts.

    Use ForRest as Often as Possible
    On your first full day, when you see the ad for ForRest’s delivery service, call and order two cans of EnerJeka. Each can restores some stamina. Keep ordering these every possible day, since they offer helpful advantages. Remember, you can only order one item per night, and deliveries arrive that night. After that, you need to wait a couple of days before ordering again.
    Prioritize items like EnerJeka or Cat Food, which give you useful benefits.

    Let the Cat Lady Inside, Even Though She Looks Not Human
    The woman with the long neck and a cat isn’t human, but always let her in. She might kill a guest on her first visit, and you’ll need to shoot her in the morning, but it’s worth it. She’s the only way to get the cat into your house, which opens additional endings and enables you to use Cat Food. When used, Cat Food prevents anyone from dying overnight—even if a visitor is present.

    Skip Using Cat Food on Nights 6 and 13
    While using Cat Food is generally helpful, don’t waste it on nights 6 and 13. No new visitors arrive then, so verifying your guests during the day should suffice. Save your food for nights when new visitors might come.

    Stay With People on Certain Nights
    The Pale Man Visitor appears on nights 3, 5, 9, and 11. He asks if you are alone. If you are, that’s an immediate game over—so make sure to have someone in your home those nights, even if it’s risky.
    Beware, FEMA also shows up on nights 4, 5, 8, and 10, removing one or two people each time. Plan who you invite carefully.

    Use FEMA Notices for Unsure Characters
    When you suspect someone isn’t human, give them a FEMA Notice. It guarantees FEMA will take them away on their next visit. This helps protect alliances you want to keep or removes characters you’re unsure about, especially if your stamina is low and you want to avoid testing each guest.

    Not All Visitors Kill or Show Typical Symptoms
    Not every Visitor kills on their first night, and some may look completely normal—like having regular eyes or no hair. For example, the Cat Lady doesn’t always kill, and characters like the Immortal Man, Seductive Woman, or Dreamer Guy might be non-hostile. Keep in mind, only one death can happen per night, even with multiple Visitors.

    Humans Can Fake Symptoms; Use Context and Backstories
    Symptoms such as red eyes or skin irritation aren’t guaranteed signs of Visitors. For example, the woman with glasses has red eyes because she cried, and her skin might be burned from trying to save children. The grave digger’s dirty nails are just part of his job. Pay attention to what you know about each character—they often give clues about their true nature.

    Check and Change Your Own Symptoms Regularly
    You can verify your own health in the bathroom mirror. You might see that your teeth are white or that you have fungus under your arms. Symptoms like fungal armpits or red eyes can come and go, so keep an eye on your condition. Also, during the later nights—like the eighth, tenth, and twelfth—you’ll meet the Vigilante, who asks for proof you aren’t a Visitor. Failing to show proof results in death, so use your symptoms or other guarantees (like clean hands or white teeth) as evidence.
    Remember, symptoms are temporary and will revert after a few days.

    You’re Not As Limited in Saving as You Might Think
    There’s a jar of Kombucha in the hallway you can use to save your game. If used, you need to order another jar before saving again, which is limited by how often you can order. Alternatively, you can use the game’s menu option to “Save and quit” without using a jar. This lets you pause and return later without consuming resources, making planning your moves easier.

    Always Have People in Your Home on Certain Nights
    On nights 3, 5, 9, and 11, it’s crucial to have someone else with you. The Pale Man visitor appears and asks if you’re alone. If you’re single, it’s game over. Bringing guests can be risky but necessary to avoid bad endings.
    However, be aware that FEMA removes people during nights 4, 5, 8, and 10, so choose your houseguests wisely.

    Use FEMA Notices to Manage Suspicious Characters
    Giving a FEMA Notice to a guest ensures FEMA will take care of them on their next visit. Use this on characters you’re unsure about to keep your house safe or to remove potential threats. Notices can sometimes be given in exchange for bribes or when FEMA visits.

    Visitors Don’t Always Kill or Show Typical Symptoms
    Some Visitors, like the Cat Lady, don’t always kill on their first night. The symptoms they show can be normal, such as healthy eyes or no visible signs. There are also a few non-hostile visitors that are still dangerous but less likely to kill immediately, like the Immortal Man or Dreamer Guy. Only one death can happen each night, regardless of how many Visitors are present.

    Humans Can Faint False Symptoms, So Identify Them Carefully
    Symptoms can be faked by humans. For instance, the woman with glasses has red eyes from crying and skin burns from helping children—not necessarily indicating she’s a Visitor. Use logic based on character backstories and appearance to make accurate judgments.

    Check Your Own Symptoms Regularly
    Look at yourself in the mirror to see if anything unusual is happening—like fungal armpits or discolored teeth. Symptoms such as fungus or red eyes are temporary and can reappear after a few days. Keeping your own health in check is vital to prove to visitors and to stay alive.

    You Can Fight the Save Limit with a Friendly Trick
    A jar of Kombucha in the hallway allows you to save your game without using resource-consuming options. To do this, just go to the menu, select “Save and quit,” and your progress will be saved without using the jar. Just remember, you’ll need to reorder another jar through ForRest each time you want to save again.

  • Essential Tips We Wish We Knew Before Completing Mage Arena

    Essential Tips We Wish We Knew Before Completing Mage Arena

    Mage Arena stands out among many PvP games because you get to speak the spells and see your character cast them. While this might be the main appeal, there are many other interesting features you might not notice unless you’re aware of them.

    During a match, the goal is to capture the enemy’s flag and defeat all their players. Once their flag is taken, they cannot respawn, and you win. A few tips can help you reach this victory quicker.

    Keep Your Base Closed
    One of the most important tips is to always keep your base door shut. When you spawn in, you’ll start in a castle with a large grassy room. You need to open the main door to go outside. If you leave it open, enemies can walk right in and steal your flag. After entering or leaving your base, you can close the door again. If enemies get in with the door closed, they’ll have to spend time opening it, giving you a chance to react if you aren’t around.

    Craft Before You Leave
    At the start of each game, inside your base, you’ll find a chest with six random materials, a tree trunk for crafting items, and a giant figure to make soups. Before heading out, craft the best items possible using these resources. Both you and your opponents spawn with a spellbook and a torch, so crafted items can give you an edge early on. You can use the recipe book beside the tree trunk to see what you can make. Once you get used to the recipes, you’ll memorize what each item does, making crafting more efficient.

    Capture Other Biomes
    The game map is divided into different biomes—like crystal, snow, swamp, and mushroom. You can capture flags in these biomes, which grants you experience points (EXP) for your spells. The map shows your current spell level; the higher the level, the more damage your spells do. Larger maps offer more tiles, but the actual tiles you get are random. To capture a biome’s flag, you need to find the specific way into its location. Capturing these flags increases your spell levels; for example, maxed-out spells like fireball become extremely powerful, but can also be deadly if you’re not careful.

    Learn Each Biome
    Understanding how each biome works can give you advantages. For example, in the lava biome, entering the central building and climbing the spiral stairs grants access to extra spells. The crystal biome has its flag hidden deep inside a cave accessible through various holes. There’s also a graveyard biome with the Mausoleum, where you can find the Excalibur sword—an incredibly powerful weapon that defeats all enemies instantly and remains in your inventory after death unless dropped by an opponent.

    Enter Enemy Bases Easily
    To infiltrate enemy bases without manually interacting with doors, you can use specific tactics. Having Bounce Mushrooms in your inventory allows you to jump onto them and be shot into the enemy base wall, entering inside. Alternatively, crafting a Levitator spell enables you to fly over walls directly into the enemy’s base. Though more challenging, this method provides free entry without dealing with mushrooms. Remember, if you get defeated, you’ll lose your Levitator and need to start over.

    Watch for NPC Enemies
    Besides battling other players, you’ll encounter various non-player enemies across biomes. For instance, in the lava biome, two sorcerers chase you in the central building, casting spells. In the swamp, giant frogs hide underwater and can suck you in with their tongues if you’re too close. The Mausoleum also features skeletons and wraiths. These foes can defeat you easily, so stay alert. Sometimes, NPC sorcerers might attack you randomly as well.

    Return to Your Base Frequently
    Your base is crucial because it’s the safest place. You can teleport back quickly by holding the “B” key, making it ideal for regrouping with teammates. When you arrive, you might find items dropped outside by goblins, useful for crafting or preparing for the next fight. Regularly returning ensures you don’t lose your flag and helps coordinate strategies with your team.

  • Completing Shadow Labyrinth: Insights for Problem Solving

    Completing Shadow Labyrinth: Insights for Problem Solving

    Shadow Labyrinth is a Metroidvania platformer where you embody a soul who can’t wield a sword with traditional hands. Instead, you use a mechanical arm to assist you. One of the standout features of the game is a twisted rendition of the classic Pac-Man, allowing you to consume your foes whole.

    The game encompasses a variety of expansive areas, and, as is typical of the genre, your progress is often restricted by specific abilities. However, you’re bound to enjoy the adventure from beginning to end, especially if you remember a few tips to enhance your gameplay.

    Explore Every Path

    When diving into a Metroidvania like Shadow Labyrinth, taking a linear approach just to follow the main storyline doesn’t do the game justice. The true enjoyment lies in navigating a vast world where not all paths are necessary for completion, yet many hide the toughest challenges.

    Along the main route, you might face some formidable enemies and a couple of minibosses. But it’s in these side paths that you’ll encounter truly unique and tough adversaries waiting to test your skills. Plus, there’s a rewarding treasure waiting at the end of those paths.

    Most yellow and red crystals, which contain vital items for HP increases and regeneration, are often tucked away in these side areas. By exploring them, you not only make the main quest easier, but you’ll also understand why Shadow Labyrinth is such an exceptional game.

    Activate Gaia Mode When Needed

    After defeating your second main boss, an older version of PUCK, you acquire a special ability that allows you to transform into a giant mech. You start the game as this powerful creature, showcasing its capabilities, but activating it requires some setup.

    A mech icon will appear in the top-left corner when it’s ready for use—this is your lifeline in critical situations. At times, you may find yourself near defeat, surrounded by enemies. In these moments, activating Gaia gives you an advantageous escape.

    Gaia can even help you take down minibosses early in the game before its activation timer runs out.

    Collect Materials Whenever Possible

    Aside from being an unstoppable mech, Gaia has a unique ability: you can devour stunned or defeated enemies. However, you only have a brief window to do this before their bodies disappear. Consuming enemies not only recharges Gaia, but it also provides essential materials.

    These materials are crucial for upgrading your abilities and purchasing various perks throughout your journey in the Labyrinth. Early in the game, be sure to consume every enemy you encounter. This foresight prevents future hunting missions for materials.

    Keep in mind that while Gaia can consume enemies directly in front of it, it can’t reach through walls. Timing is key here—it uses up a lot of your ESP, and inappropriate use can leave you vulnerable.

    Pay Attention to Your Map

    As you wander through Shadow Labyrinth, you’ll likely pass by special items hidden from view, either behind walls or otherwise concealed. Fortunately, your map can assist during these moments. Check it frequently, as certain items will be marked even if you can’t see them directly.

    Close proximity may reveal hidden paths and other items you might need. This feature also aids in locating destructible walls, guiding you in the right direction.

    Regenerating HP Is Challenging

    One of the appealing aspects of a Metroidvania is its souls-like design where you save only at specific checkpoints. In Shadow Labyrinth, there are different types of checkpoints: some have an orb, while others do not. The orb-less checkpoints allow HP regeneration but don’t refill your life tank or give you teleport options.

    If you die at these checkpoints, you’ll revert back without a way to heal, making certain areas quite perilous if you’re not careful.

    Familiarize Yourself with Your Enemies

    With HP recovery being difficult, learning your enemies’ behaviors is crucial for progression. While many smaller foes have similar patterns, larger enemies often have unique abilities.

    For instance, the bigger warriors encountered in the Sky-High Tree strike slowly but pack a punch, while smaller foes tend to swarm and utilize quick dash and jump attacks. Recognizing these patterns will help you avoid traps and counter effectively.

    Repeat Boss Fights

    On your journey, you’ll face numerous bosses. Some will have notable introductions, while others may unexpectedly block your path. The nice part is you can redo certain boss fights.

    Whenever you spot a yellow skull icon on your map, it indicates a miniboss you’ve already defeated. Reentering that area will reignite the fight, allowing you to farm materials for essential items, enhancing the game’s replay value.

    Your Dash Provides Strict Immunity

    From your initial encounter with bosses, you’ll quickly notice their formidable, agile attacks that often cover a wide area. Mastering the dash is essential for evading these threats. When you trigger a dash, you gain almost a second of immunity, allowing you to evade incoming assaults.

    Though the timing might take a little practice to master, once you get the hang of it, you’ll find dodging becomes second nature as you progress through the challenges of Shadow Labyrinth.

  • Completing Persona 5: The Phantom X—Solving Key Insights To Know

    Completing Persona 5: The Phantom X—Solving Key Insights To Know

    With the recent release of Persona 5: The Phantom X, fans of the franchise are diving right in. While many elements feel familiar, this game introduces several important changes that alter how it is played.

    But don’t worry! We’re here to guide you through all the new features, helping you connect your social accounts and summon your Personas effortlessly. While there’s a lot to learn, following this guide will make the once daunting aspects clear and manageable.

    Understanding Leveling in Persona 5: The Phantom X

    If you’re transitioning from previous Persona games, one of the main changes to note is the leveling system. The way Wonder, your main character, levels up is distinctly different from how the other characters do.

    First, unlike the rest of the cast, Wonder is the sole character who gains experience from combat in dungeons. While this method can yield some early levels, it’s not the most efficient route. For the best experience gain, focus on the following:

    • Complete your daily missions. Tasks like fusing Personas or taking on part-time jobs are essential.
    • Finish your missions. These missions often involve building social links, which enhance your gaming experience.
    • Work through Realm Of Repression missions. These are highly effective for leveling Wonder. Completing one encounter can multiply your experience significantly if you use your stamina wisely.

    This list highlights some key strategies for leveling Wonder efficiently. Be aware that many methods rely on daily resources that reset after a certain period. If you try to grind after depleting these resources, it might feel less productive.

    Wonder also features a skill tree accessible in the Thieves menu. You can unlock new abilities by earning “Schema” through obtaining and registering new Personas in the Velvet Room’s Persona Compendium.

    Leveling Your Other Party Members

    Arai celebrating after defeating her foes in Persona 5 The Phantom X.

    Training your other party members is a more straightforward process. Access this feature through the Thieves menu; once there, select a character and hit Training. You will need two sources of materials to enhance your team: Fragrance Bottles and Training Materials. The materials facilitate level increases, while fragrance bottles help in upgrading hidden abilities. It is crucial to alternate using both types of materials, as you won’t reach the next level until you’ve upgraded the corresponding hidden ability.

    You can find these materials in treasure chests during dungeons, but the most efficient way to gather them is through Realm of Repression missions, which complements leveling Wonder effectively. Just remember, the limit on your party members’ levels is tied to Wonder’s level. Even with all the necessary materials, a party member cannot level up beyond what Wonder has achieved.

    If you find yourself needing a higher-level Fragrance Bottle, you can exchange lower-tier bottles for the next level at a three-to-one ratio at the workbench.

    Prioritize the Beginner Banner

    The Newcomer Contract Banner in Persona 5 The Phantom X.

    As you play, you’ll earn many Golden Tickets and have offers available in the Contracts menu. Initially, it’s wise to focus on the “Newcomer Contracts” banner. This banner has a lower threshold for obtaining a five-star character, allowing you to choose among Ann, Morgana, and Ryuji. Plus, there’s a discount that lets you make 50 pulls for only 40 Gold Tickets.

    Note that while you are guaranteed a five-star character after reaching the maximum pulls, your selection may not be the one you want since some banners feature multiple five-star options. For example, the Phantom Magician banner ensures you’ll receive Joker after 80 pulls.

    It’s worth mentioning that there’s no soft pity feature right now in Persona 5: The Phantom X. So, unlike other gacha games, you may need to hit the hard pity ceiling for a higher chance of getting the five-star character you desire.

    Playing regularly will also teach you the game mechanics, expose you to shopping options, contracts, and more. During exploration, keep an eye out for exclamation marks in your menu, as they indicate new activities with the potential for items, experience, or other rewards.

    For instance, if you see an exclamation point near Awards, Plans, or Goals, there’s an award ready for collecting. An exclamation mark over Tutorials means a tutorial is available, which may not seem thrilling, but completing it grants you additional currency.

    While some exclamation marks, such as those in the Thieves menu, might be easy to ignore since they indicate standard actions, in the early game, it’s beneficial to check them out for potential rewards.

    Focus on Completing Daily Content

    Wonder in the Velvet Room in Persona 5 The Phantom X.

    Although Persona 5: The Phantom X can feel like an exciting new entry in the series, it remains a gacha title, meant for daily engagement rather than marathon sessions. So, even on days when you aren’t inclined to play, take ten minutes to log in and accomplish the following:

    • Log in to collect your daily Hoot-n-Loot.
    • Grab the free daily item pack available in the shop.
    • Complete four daily goals.
    • Utilize your energy in the Realm of Repression, especially when it is maxed out.
    • Make use of your action points if you’re nearing capacity.

    The theme is clear: avoid letting resources that automatically regenerate reach their maximum limits. If they do, use them right away since sitting on them does not benefit you. Resources that passively restore are crucial, and you want to ensure they are actively helping you progress.

    You can triple any activity meant to reward you, just avoid doing this with anything marked as “new,” as you won’t triple all the rewards.

    Maximizing Your Limited Meta Jewels

    Wonder facing the giant cube and receiving a reward for completing the Realm Of Repression in Persona 5 The Phantom X.

    Meta Jewels are among the most valuable currencies you’ll find in Persona 5: The Phantom X. You earn them through daily challenges, but even with a steady influx, you’ll often find yourself short. Thus, strategic use is essential for making daily progress.

    While you might be tempted to spend them on gacha pulls (150 jewels equals one pull), this may not be the best approach early in the game. If Wonder isn’t adequately leveled, your sessions could devolve into frustrating grinds. Instead, participate in Realm of Repression events to level Wonder up effectively. You can use Meta Jewels to purchase coffee, which replenishes energy, allowing you to buy five coffees a day at a cost of 60 jewels each. This strategy is highly recommended during the early game.

    However, if you’re close to the threshold for a gacha pull, investing your Meta Jewels into achieving that pull can be more beneficial. As you progress, consider saving your Meta Jewels to make bigger rolls on upcoming banners, especially if a favored character is set to feature.

    Evenly Level Your Party for Diverse Enemy Encounters

    persona5-the-phantom-x-press-image-1.jpg

    Your success in clearing challenges like Memento Trials and tackling various enemy encounters hinges largely on your party’s composition. In true Persona style, attacking elemental weaknesses is crucial. It won’t take long before you face battles that become nearly impossible without the right team setup.

    Wonder’s versatility with a range of Personas is advantageous, but having a diverse party increases your chances of success significantly. While you might have some constraints at the start, the game offers ample Golden Tickets, Platinum Tickets, and Meta Jewels to expand your roster effectively.

    Acquiring New Personas

    persona5-the-phantom-x-press-image-2.jpg

    Having a variety of Personas for Wonder is essential for overcoming tougher challenges. Aim to collect Persona Seals, which you can find while exploring dungeons, but the majority will come from the Realm of Repression.

    Your priority should be to obtain seals for each elemental category. Better yet, aim for two of each type, which will come in handy during Velvet Room Challenge Battles. Remember to level up all acquired Personas, as materials for this can also be gathered in the Realm of Repression.

    You can teach a Persona skills associated with relevant elements, but note that while this is useful for activating elemental weaknesses, when performing a Once More attack, Wonder will use a move based on their base element. This can be less effective for executing chain combos that stun multiple enemies.

  • What We Wish We Knew Before Completing Scum: Solving Tips

    What We Wish We Knew Before Completing Scum: Solving Tips

    As yet another entry in the open-world survival crafting genre, Scum offers familiar elements found in similar games while introducing a wealth of distinctive features. Upon starting the game and selecting your preferred server, you will parachute down to an expansive, uncharted landscape. Your first priority is to touch down safely on the ground.

    From that point forward, the game only becomes more challenging. You’ll begin with nothing but the clothes on your back, which you’ll need to discard shortly after. Fortunately, there are numerous items you can find to help you thrive in this vast world, provided you employ effective survival strategies.

    Manage Your Temperature Effectively

    Body temperature is vital in Scum, yet new players often overlook it. In your Metabolism tab, you’ll notice your body temperature starts at a normal level of 36.6°C. As your character feels colder or warmer, this temperature will fluctuate.

    You can easily monitor your temperature changes on the left side of the screen, where your character’s conditions are displayed. If you’re only slightly uncomfortable, it’s usually not a major issue. However, if your discomfort escalates, here’s how to stabilize your temperature:

    • If you’re feeling cold, either add more layers or start a fire. If rain is causing your chill, find shelter to stay dry. Just be cautious; fires can attract unwanted attention from other players, especially at night. It’s safer to set your fire away from roads.
    • Conversely, if you’re feeling too hot, strip off some clothing or take a swim. It’s best to remove your clothes before entering the water to keep them dry. You can stash them in your inventory or drop them temporarily.

    Prioritize the Right Items While Looting

    Scum showing phone and advanced lockpick in inventory.

    As you advance in Scum, your loot will grow from minimal to plentiful, moving from dense forests to small settlements and finally into larger towns and remains of civilization. However, your inventory space is severely limited, especially if luck isn’t on your side.

    This is why it’s crucial to prioritize what you carry. For instance, a smartphone is invaluable as it can help you complete quests and earn currency. The more you play, the more you’ll realize that some items are rarity, which affects their importance in your inventory.

    For example, always keep a toolbox, no matter how much space it consumes.

    You should also make room for Bobby Pins, Safety Pins, and Screwdrivers as they aid in lockpicking.

    Scum showing the crafting menu.

    Even if you’re already experienced with survival crafting, Scum presents a unique hurdle with its multitude of menus. Beyond inventory management, you’ll also navigate through Crafting, Health, and Metabolism tabs. Here’s a brief overview of each:

    Crafting

    This section contains all the craftable items and includes three sub-tabs. You’ll mainly focus on the first unless you’re setting up a base or cooking.

    Health

    Here, you can monitor your character’s health conditions and find treatment options.

    Metabolism

    This is arguably the game’s most crucial tab, revealing how urgently you need to relieve yourself while providing insights into your body’s nutritional status, including proteins, carbs, and vitamins. This tab also tracks your temperature and skill levels.

    Familiarizing yourself with these tabs early on will significantly boost your chances of survival.

    Utilize Focus Mode for Navigation

    Scum showing south, west, and north directions.

    Focus Mode can be activated by right-clicking in Scum. If it doesn’t activate automatically, just move around a bit before trying again. This mode enhances your aim for shooting puppets or other NPCs with your firearm or bow.

    Once you advance in Awareness and Survival skills, a special compass will appear when you enter Focus Mode, assisting you in navigating effectively without referring to the tiny red dot on the map.

    Plan Your Meals Ahead of Time

    Scum showing the food menu.

    The food and hydration systems in Scum are more intricate than many other survival titles. It’s essential to maintain proper nutrition, as each food item offers specific amounts of protein, carbs, fats, and other essential nutrients. A balanced diet is crucial.

    Keep your protein level high while keeping your energy below 50 percent to maximize your skill advancements. Make it a habit to carry some food items with you for convenient access.

    Failing to store food and scavenging for it at the last minute could result in wasting precious time or getting caught without the right items.

    A sound strategy is to gather mushrooms during your travels and hunt any animals you encounter. With some meat and edible mushrooms on hand, you can whip up nourishing recipes once you obtain vegetables.

    Scout Locations Before Diving In

    Scum looking at a cupboard you can loot.

    Scum features various server types, some of which are more peaceful due to lower player counts, while others allow for intense PvP encounters. High-population servers are common, and you’ll often face opponents looking to defeat you.

    Additionally, certain zones have high-level NPCs and mechs, making it critical to survey an area before charging in for loot. Here are the steps to follow when scouting:

    • Use Focus Mode to examine the entrances of buildings and spot any open doors. An open door generally indicates that a player has been there recently.
    • If there are no open doors, look for NPCs nearby. If the only enemies are puppets, you’re in a relatively safe area. But take extra caution if you see humans with weapons.
    • Even after scouting, move carefully and slowly in high-population servers to avoid attracting attention.

    Expand Your Inventory Whenever Possible

    Scum showing high inventory space.

    As previously mentioned, inventory space limits your exploration since you can only carry so much. While building a base with storage chests is one solution, it is a time-consuming process. Instead, consider these alternatives for increasing your inventory:

    First, focus on acquiring or crafting a better backpack. After securing your initial one, aim for the highest quality available. While exploring, you may stumble upon various backpacks, but these are rare and take time to locate.

    Hiking backpacks are the best option in Scum, and you might find them in gas stations.

    Additionally, look for clothing that provides extra inventory slots. Layering clothes can also increase your available space. For instance, wearing a sweater over a shirt and a jacket on top can significantly boost your inventory. Just remember, having more clothing will increase your character’s heat.

    Sandbox Mode is Ideal for Learning the Basics

    Scum drone mode activated.

    Throughout your time in Scum, you’ll come across numerous mechanics to learn. One effective way to accelerate this learning process is by using the sandbox mode. Accessible from the main menu, this feature allows you to experience the game solo and employ various console commands.

    You can also activate Drone Mode by pressing Ctrl + D in the main menu before entering sandbox. This mode enables you to explore areas quickly, providing an excellent opportunity to familiarize yourself with the game’s mechanics.

  • What We Wish We Knew Before Completing RuneScape: Dragonwilds

    What We Wish We Knew Before Completing RuneScape: Dragonwilds

    Runescape: Dragonwilds is a captivating survival and crafting game where you begin your journey from the very basics and gradually prepare to challenge dragons. With a wealth of activities available, the various skills and crafting components can be a bit intimidating, especially if you’re new to this genre.

    If you’re just diving into the game, these tips will help guide you toward mastering the essentials and uncovering the mysteries of Ashenfall, allowing you to grow in power and experience.

    Grinding Is Worth It

    In survival-crafting games, repetitive tasks can become a grind, and Runescape: Dragonwilds is no exception. However, the effort put into resource gathering pays off significantly over time. Initially, you will need to invest several hours in gathering materials and increasing your skill levels, but as you progress, new spells and abilities will help streamline your efforts.

    Build Storage Crates Early On

    With so many resources at your disposal, managing your inventory space can become a challenge. To address this, it’s essential to create storage crates in your home or a safe location early in the game. This allows you to store items and prepare for further exploration without feeling cluttered and overwhelmed.

    As you venture into new areas, tougher enemies may confront you, and the risk of death is real. In such instances, having items stored safely in crates ensures you won’t lose them.

    Enhance Your Woodcutting and Mining Efficiency

    Mining and woodcutting are crucial but often tedious tasks within the game. Each swing of your tools consumes stamina, so positioning your view correctly is vital. If you aim right, you can hit multiple trees or mineral nodes with a single swing, maximizing your output.

    You can also utilize spells to speed up these activities. The key is to aim carefully with these spells to affect as many targets as possible, reducing the time spent gathering.

    Use Spells Without Hesitation

    Spells do require runes, which might make some players reluctant to use them frequently. However, rune essence is unlimited, as rune nodes regenerate over time. Since most spells require minimal runes while providing significant advantages, don’t shy away from casting them liberally. You can easily gather more runes if you run low.

    Keep in mind that runes are weightless and aren’t lost upon death, allowing you to carry a large quantity without penalty.

    Don’t Stay Cooped Up at Home

    After building your initial shelter, it’s tempting to stay close to home. While it’s nice to gather resources there, it’ll prevent you from discovering all the exciting content the game has to offer. Explore fearlessly, and if you become fatigued, use a spell to create a tent or construct a small hideaway to rest and recover before continuing your adventures.

    Get a Bow Quickly for Hunting

    While a bow isn’t strictly necessary for hunting, it significantly simplifies the process. Many early-game animals can be taken down with a single, fully charged shot. You can always switch to a more blunt weapon for tougher foes. Hunting yields valuable resources like meat, which you can cook using various ingredients.

    Additionally, a bow can be a useful tool in combat. You can sneak up on enemies and score critical hits, often taking down early-game adversaries with just a couple of shots.

    Establish a Small Base Near Challenging Areas

    As you travel through the game world, you may encounter some formidable enemies. If you die facing these opponents, you’ll have to backtrack from your home. To mitigate this risk, consider setting up a small base complete with a bed near difficult zones. When you rest at this base, you can respawn there if you perish, saving you a long walk back.

    Eventually, you can also create Lodestones to fast travel between locations, further enhancing your convenience.

    Treasure Chests Replenish Over Time

    One unique element of Runescape: Dragonwilds is that chests can refill with loot after a period. If you’ve raided a treasure chest, remember its spot and check back a few days later, as it may once again be filled with treasures. Making a note on your map can help you keep track of these locations for future reference.

    Keep in mind that chests located in higher-level areas often yield better rewards, so it’s smart to revisit them after a few in-game days.

    These tips should help you get started on your journey in Runescape: Dragonwilds. Dive into the adventure, gather your resources, and prepare to conquer this expansive world!

  • What We Wish We Knew Before Diving into Wizardry Variants: Daphne

    What We Wish We Knew Before Diving into Wizardry Variants: Daphne

    Wizardry Variants Daphne is an intricate universe brimming with unexpected twists. As you navigate through a host of characters and obstacles, the game presents numerous methods for tackling challenges. You’ll have spells to learn, allies to recruit, and a wealth of mysteries to discover.

    While seasoned RPG players may recognize many familiar gameplay mechanics, newcomers will encounter fresh concepts that add to the experience. From combat techniques to managing character stats, a few helpful tips can enhance your adventure in this realm.

    Create A Neutral Character

    At the start of your journey in Wizardry Variants Daphne, you’ll face a series of questions that will define your character. Your responses—reflecting your moral compass—will culminate in a personality formed by your choices.

    Each answer may illuminate one of three colored lights, indicating the type of character you’re shaping:

    • Red signifies an evil inclination.
    • Blue represents a good disposition.
    • Yellow indicates a neutral stance.

    Opting for a neutral personality grants you more versatility when assembling your party and equipping your team. This neutral alignment allows for easy collaboration with characters that lean more towards lawfulness or chaos.

    Note: Once you make your choices, they cannot be changed, so think carefully before proceeding.

    Grind XP Through Auto Move In Dungeons

    After your initial dungeon exploration, you can repeat the journey as many times as you wish. For quicker runs, enable Auto Move with enhanced speed, allowing the game to guide your character through randomized paths.

    Keep an eye on the mini-map in the top-right corner to help with navigation. You can choose your auto-movement direction through this feature. Each playthrough will feel spontaneous and engaging, preserving the thrill of exploration.

    When you open treasure chests, you might face a timing mini-game to unlock them. Doing this successfully allows for safe treasure acquisition. If you prefer, you can also ask another party member to handle it.

    Tip: Utilize your right arm’s ability to repair or restore items. This can help revive fallen teammates or repair specific artifacts.

    Reverse Bones And Equipment

    As you delve into dungeons, you’ll discover various loot, including opportunities to restore found equipment or acquire brand new items after certain encounters. You’ll need to decide which items to assign to your team.

    You may also encounter bones that can be reversed, which allows you to gain new allies. Head to the Ruin to bring these bones back to life and welcome new companions into your party.

    Assess which bones to use based on your current team composition. A strong setup typically includes a Knight to shield a crucial character like a Priest, ensuring your party remains healthy in combat.

    Inherit Skills From Allies

    Part of leveling up your party involves leveraging skills from characters not currently in use. These inactive allies can enhance your main characters through skill inheritance.

    Visit the Training Room in the Adventurer’s Guild to choose which skills to adopt. Select the allies from whom you want to inherit skills for the active members of your team.

    Note: For example, if Eckart boasts impressive resistance and damage, you can enhance his effectiveness by selecting another character with similar stats.

    Distribute Stats Based on The Character

    When adding a new ally to your party, you’ll need to allocate points across various stats based on the character’s class and race. A typical distribution pattern might look like this:

    • Thief: DEX / SPD / STR / LUK
    • Knight: VIT / PIE
    • Fighter: STR / DEX / VIT
    • Priest: PIE / VIT
    • Mage: IQ / SPD / VIT

    Proper allocation will align with each class’s strengths, improving your combat encounters throughout the game.

    Use Inns Effectively

    After exiting a battle, always make a point to visit an Inn. This will ensure your allies can rest and progress in their levels. Interacting with other patrons at the Inn can also uncover vital information.

    You’ll need to choose the type of Inn to stay in, which varies in quality—ranging from the least to most desirable options.

    Type Conditions
    Stable Poorly managed; only suitable if you’re low on resources and in need of a brief recovery.
    Economy Room Cleaner than a Stable; your go-to option when resources are scarce.
    Private Room Much cleaner, with the added potential to earn potions during rest.
    Royal Suite Exceptionally clean, offering the best restocking of potions available.

    Tip: If you’re low on funds, consider visiting the Temple to resurrect fallen allies instead of opting for a Stable stay.

    Keep The Combat Dynamic

    Each character’s role in battle can change depending on how you deploy them. If combat isn’t set to auto, start fights by sending in your Knight or Fighter for major damage output. Keep your Priest on standby for healing efforts.

    Mixing and matching your equipment is also key. Different weapons come with unique effects based on their hidden properties, making them more or less effective in battle. For instance, utilizing elemental advantages or increasing critical damage during boss fights can turn the tide.

    By diversifying your approach, you can navigate combat encounters more safely. For example, when facing a group of goblins, different character combinations with varying weapons will facilitate a more effective attack rather than relying solely on a single ally.

    Tip: Always monitor status effects. Characters under the influence of paralysis or other effects will encounter significant setbacks in their combat effectiveness.

    Identify Allies And Items Worth Getting

    As a guiding principle, sell lower-quality, one-star items while keeping equipment that can benefit your party members. Generally, top-tier items are among the three stars or higher. Certain stats may only suit specific character classes.

    Interact with NPCs to gain new allies and gear, but be strategic about whether to continue your journey with them. Assess your team’s current needs before making a decision.

    Early in the game, you’ll meet a character selling bones named Adam. While his attitude may be rough around the edges, he can serve as a valuable companion as you set out on your quest.

  • Lessons Learned: What We Wish We’d Known About Nunholy

    Lessons Learned: What We Wish We’d Known About Nunholy

    Nunholy places you in the shoes of three formidable vampire hunters battling against dark forces. As you fight off vampires and other menaces, navigating a treacherous world demands careful planning. You will need to choose the right character and hone various skills, giving you plenty of options to explore.

    This game’s roguelike features combine different combat styles, ensuring that each game feels unique depending on the choices you make during your adventure. A few strategies can help you efficiently embark on your journey.

    Picking Your Vampire Hunter

    In Nunholy, you’ll meet three unique characters: Preiya, Marie, and Sain, each with distinct combat styles. Your choice will depend on your personal play style.

    • Preiya shines in close combat.
    • Marie is great at dealing damage from a distance.
    • Sain combines melee and ranged attacks for creative combos.

    If you’re new to this genre, Marie’s your best choice. She offers a balanced skill set that makes early battles, including the first boss fight, more manageable. Her abilities allow for substantial area damage, which is advantageous in group settings.

    When playing as Marie, focus on firing single shots rather than holding down the trigger to avoid overheating your weapon.

    Gathering and Upgrading Artifacts

    Viewing an artifact in Nunholy

    As you complete levels, you’ll find special items called artifacts that enhance your gameplay. These artifacts increase your damage output just by being in your inventory. Each artifact includes a unique bonus that can impact your game. For example, a sturdy gem might grant you +15 physical damage, while a musket allows you to shoot fire-infused rounds. Be selective when collecting artifacts.

    After acquiring an artifact, you may upgrade it during the level’s conclusion, but only if you’ve cleared all enemies first. Always ensure that you are enhancing an artifact you find useful, rather than upgrading just for the sake of it. If you mistakenly upgrade the wrong item, don’t stress too much; a new opportunity to upgrade will come along in the next round.

    If you stumble upon a musket artifact early in the game, be sure to prioritize its upgrade. It significantly boosts your chances of landing critical hits thanks to the fire damage.

    Incorporate Rhythm into Your Movement

    Viewing your abilities in Nunholy

    Fast-paced battles can be overwhelming for new players, who may believe there’s only one way to approach the combat. Thankfully, a key to mastering movement in Nunholy is understanding rhythm.

    As you attack while running or dodging, keep a rhythmic pattern in mind. For instance, you might establish a combat routine like hit-hit-dodge-hit, or if you prefer a more defensive style, dodge-dodge-hit-dodge may suit you better.

    Developing this muscle memory will aid you in grappling with more complex aspects like enemy patterns, level layouts, and character stats. Balancing your focus will often dictate the outcome of battles. Regardless of the character you select, your ability upgrades will shape how impactful your attacks are. For instance, Marie can inflict considerable area damage versus Sain, who may specialize in a particular setup. The choice is yours!

    Try Out Various Builds

    Playing as Sain in Nunholy

    The real charm of Nunholy lies in its flexibility. The more you explore different characters, the more combat and movement techniques you’ll discover. To maximize your effectiveness, center your build around your combat style and the types of enemies you confront. You might want to consider a few different styles:

    A melee tank build focuses on outputting high close-range damage while withstanding hits, which works well for Preiya. Alternatively, a glass-cannon build emphasizes ranged attacks that require precision, making Marie an ideal pick. Lastly, the classic hybrid build offers a balanced approach using both mid-range attacks and crowd control, which is best suited for Sain.

    Selecting Ultimate Abilities

    Choosing an Ultimate in Nunholy

    As you progress, you will have opportunities to upgrade abilities that expand your combat strategy. However, you will also encounter special levels with a moon icon that contain ultimate abilities. These abilities recharge over time and unleash powerful effects depending on which you choose. Selecting the right one can be challenging, especially at first.

    If you’re still mastering the game, opt for an ultimate ability like Bat Swarm. This skill summons bats that inflict blood damage upon your enemies while you maintain your regular attacks. It’s a great distraction that requires minimal management, allowing you more focus on your combat style. Additionally, be sure to purchase garlic items whenever available to enhance your defenses.

    When facing a large group of foes, summon Bat Swarm as soon as they spawn for maximum effect.

    Anticipate Enemy Behavior Based on Ranks

    Fighting a boss in Nunholy

    Major foes, including bosses, are categorized by ranks. Before entering a battle, you receive a warning stating “Threat Level:” followed by the enemy’s rank. Each rank signifies distinctive traits that influence the enemy’s movements and attacks.

    Rank Traits Best Strategy
    Knights Quick, but predictable. Work on your dodging skills.
    Barons Aggressive and deliver heavy AoE damage. Maintain distance.
    Counts Summon minions or evil forces that follow you. Concentrate on dispatching the summons first.
    Dukes Employ strong assaults with various moves. Adjust your attacks to counter the enemy’s patterns.

    Upon defeating a specific vampire, you’ll unlock a new ability (Legacy of the Martyr). Choose one that aligns with your playstyle; this will shape how challenging future bosses will be. Thankfully, you’ll have plenty of time to practice your new buffs.

    Engage with NPCs Wisely

    Talking to an ally in Nunholy

    Throughout your journey in Nunholy, you will encounter various allies who offer intriguing dialogue and essential services. These can include healing items, defensive perks, and item upgrades. The better you know them, the higher the chance of finding useful items during your run. So, make it a point to interact with them instead of just rushing through the levels.

    You can give allies Rubies each time you interact with them, which builds goodwill and offers you affinities and lasting buffs. Early in the game, it’s wise to gain support from allies who can enhance your survivability through healing and garlic items.

    Learn from Every Death

    Getting an upgrade from Calina in Nunholy

    Fortunately, dying in Nunholy isn’t as punishing as in other roguelikes. Instead of losing all your progress during a run, permanent buffs will help you carry your advancement forward. However, keep some considerations in mind as you play each round.

    First, monitor the upgrades you pursue in each run. Are you focused on investing in damage early? Or do you err on the side of caution by mainly boosting your health? Identifying this trend will help improve your gameplay since it’s easy to develop habits that aren’t advantageous over time. Also, create a save file for each vampire hunter. This allows you to switch between them and find which character, weapons, and styles suit you best.

    When discussing upgrades with Calina, scroll to the bottom to see abilities you might want to unlock in the future. This helps you set long-term goals!

  • What We Wish We’d Known Before Embracing Samurai Spirit

    What We Wish We’d Known Before Embracing Samurai Spirit

    The Spirit of the Samurai can be a harsh experience, and I’m not only referring to the terrifying things the undead can do to Chisai if they catch him. However, your knowledge can drastically improve your gameplay, making your journey smoother and more enjoyable. We’re here to help you seize control of the game and steer clear of potential traps.

    We’ll guide you through everything from building Takeshi correctly to navigating the game’s unique mechanics, along with all the combat strategies you need to defeat any foes in your way. By following this advice, you’ll empower yourself to achieve victory and take down the undead horde once and for all.

    Rebind Your Controls for Better Performance


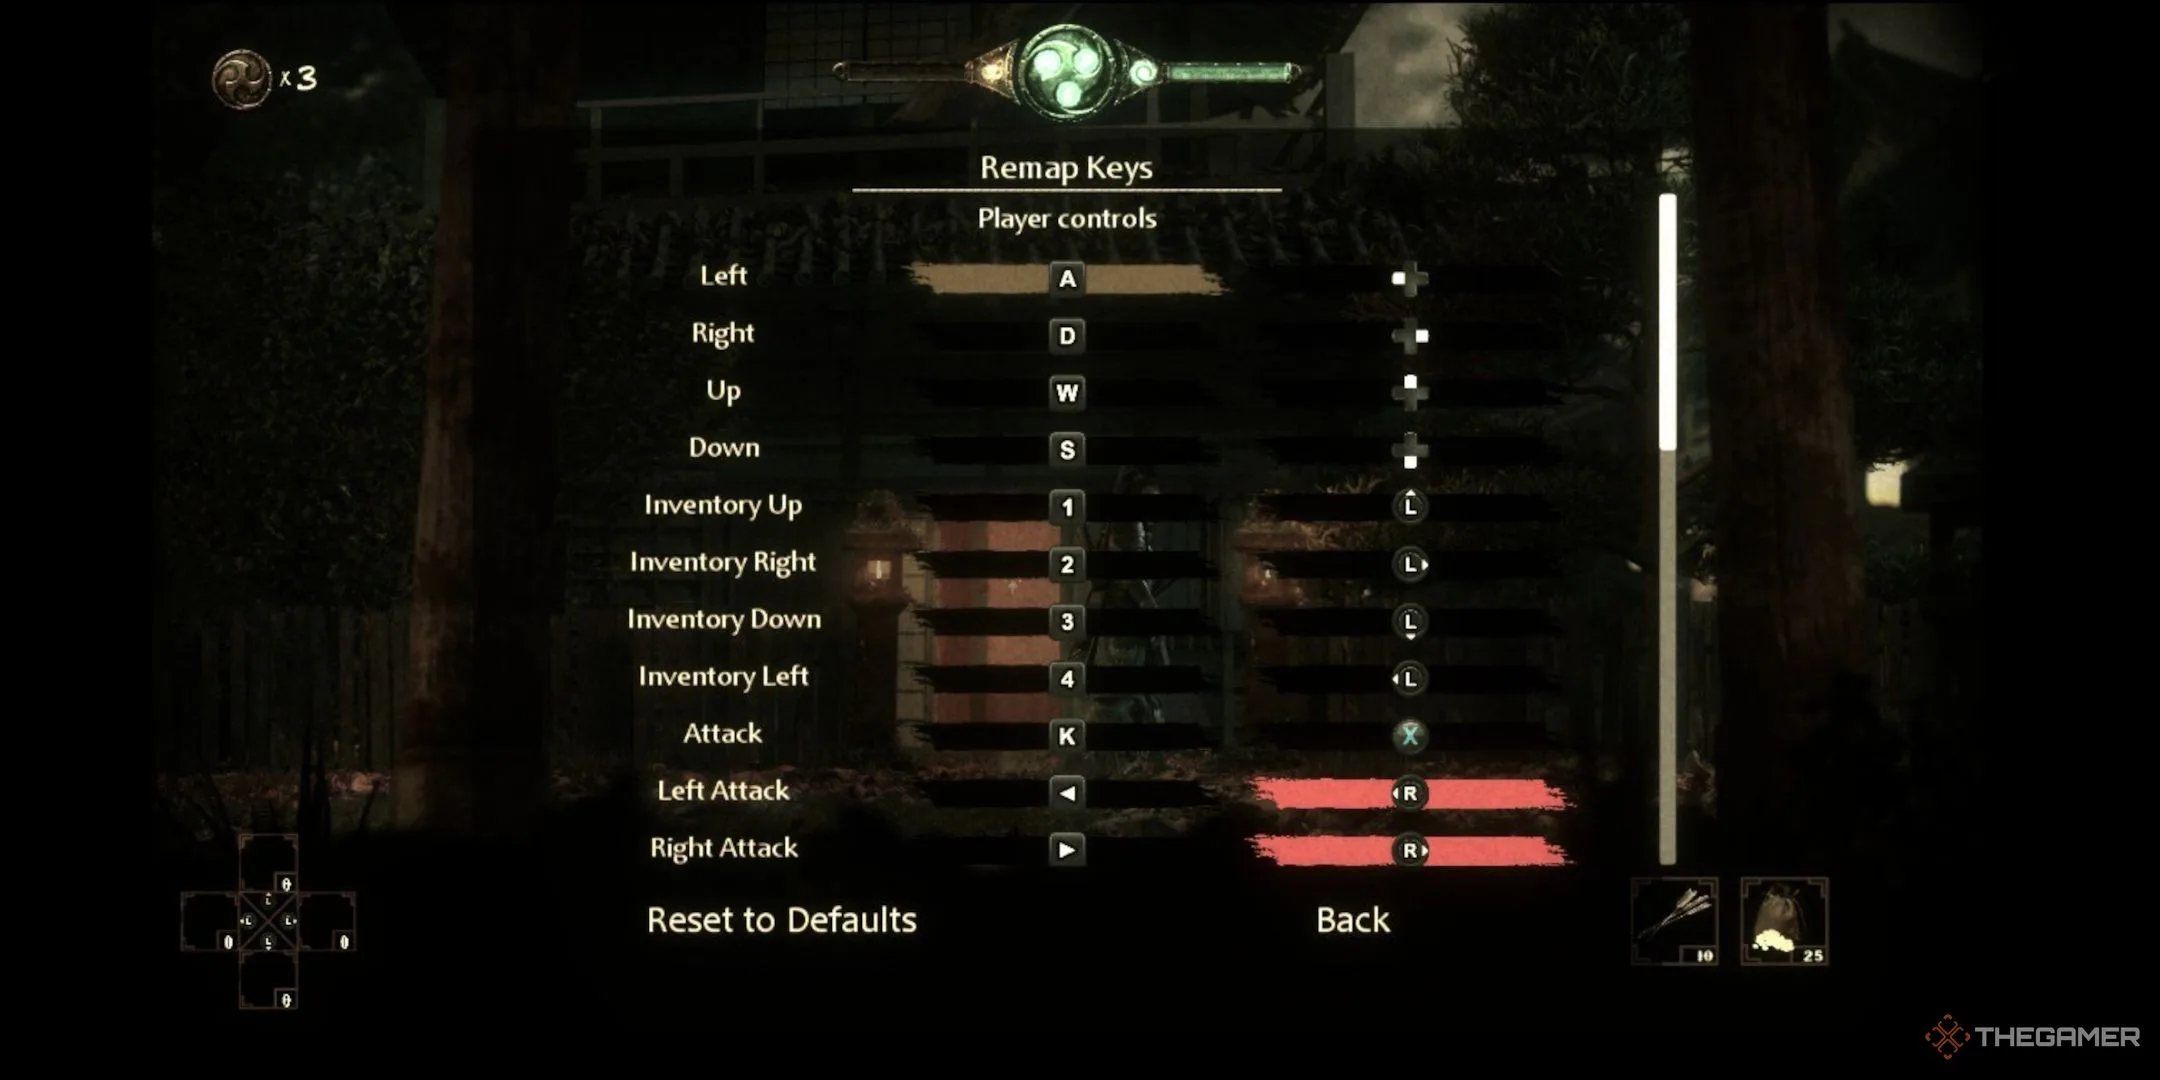
    The Spirit of the Samurai makes an unusual choice by defaulting your movement controls to the analog stick. Why is this an issue? In a game that already has some responsiveness concerns, you don’t want to aggravate it further. Analog controls can be a bit clumsy when managing a two-dimensional character. I highly recommend switching movement to the d-pad and using the left analog stick for item usage. Doing so will make your controls feel much more responsive.

    For added context, the problem with analog sticks in 2D games lies in their travel distance. When you push an analog stick, it needs to move a certain distance before registering your input. In contrast, pressing a direction on the d-pad results in immediate character movement.

    Short-Range Attacks Are Crucial


    The Spirit of the Samurai. Combat system move allocation

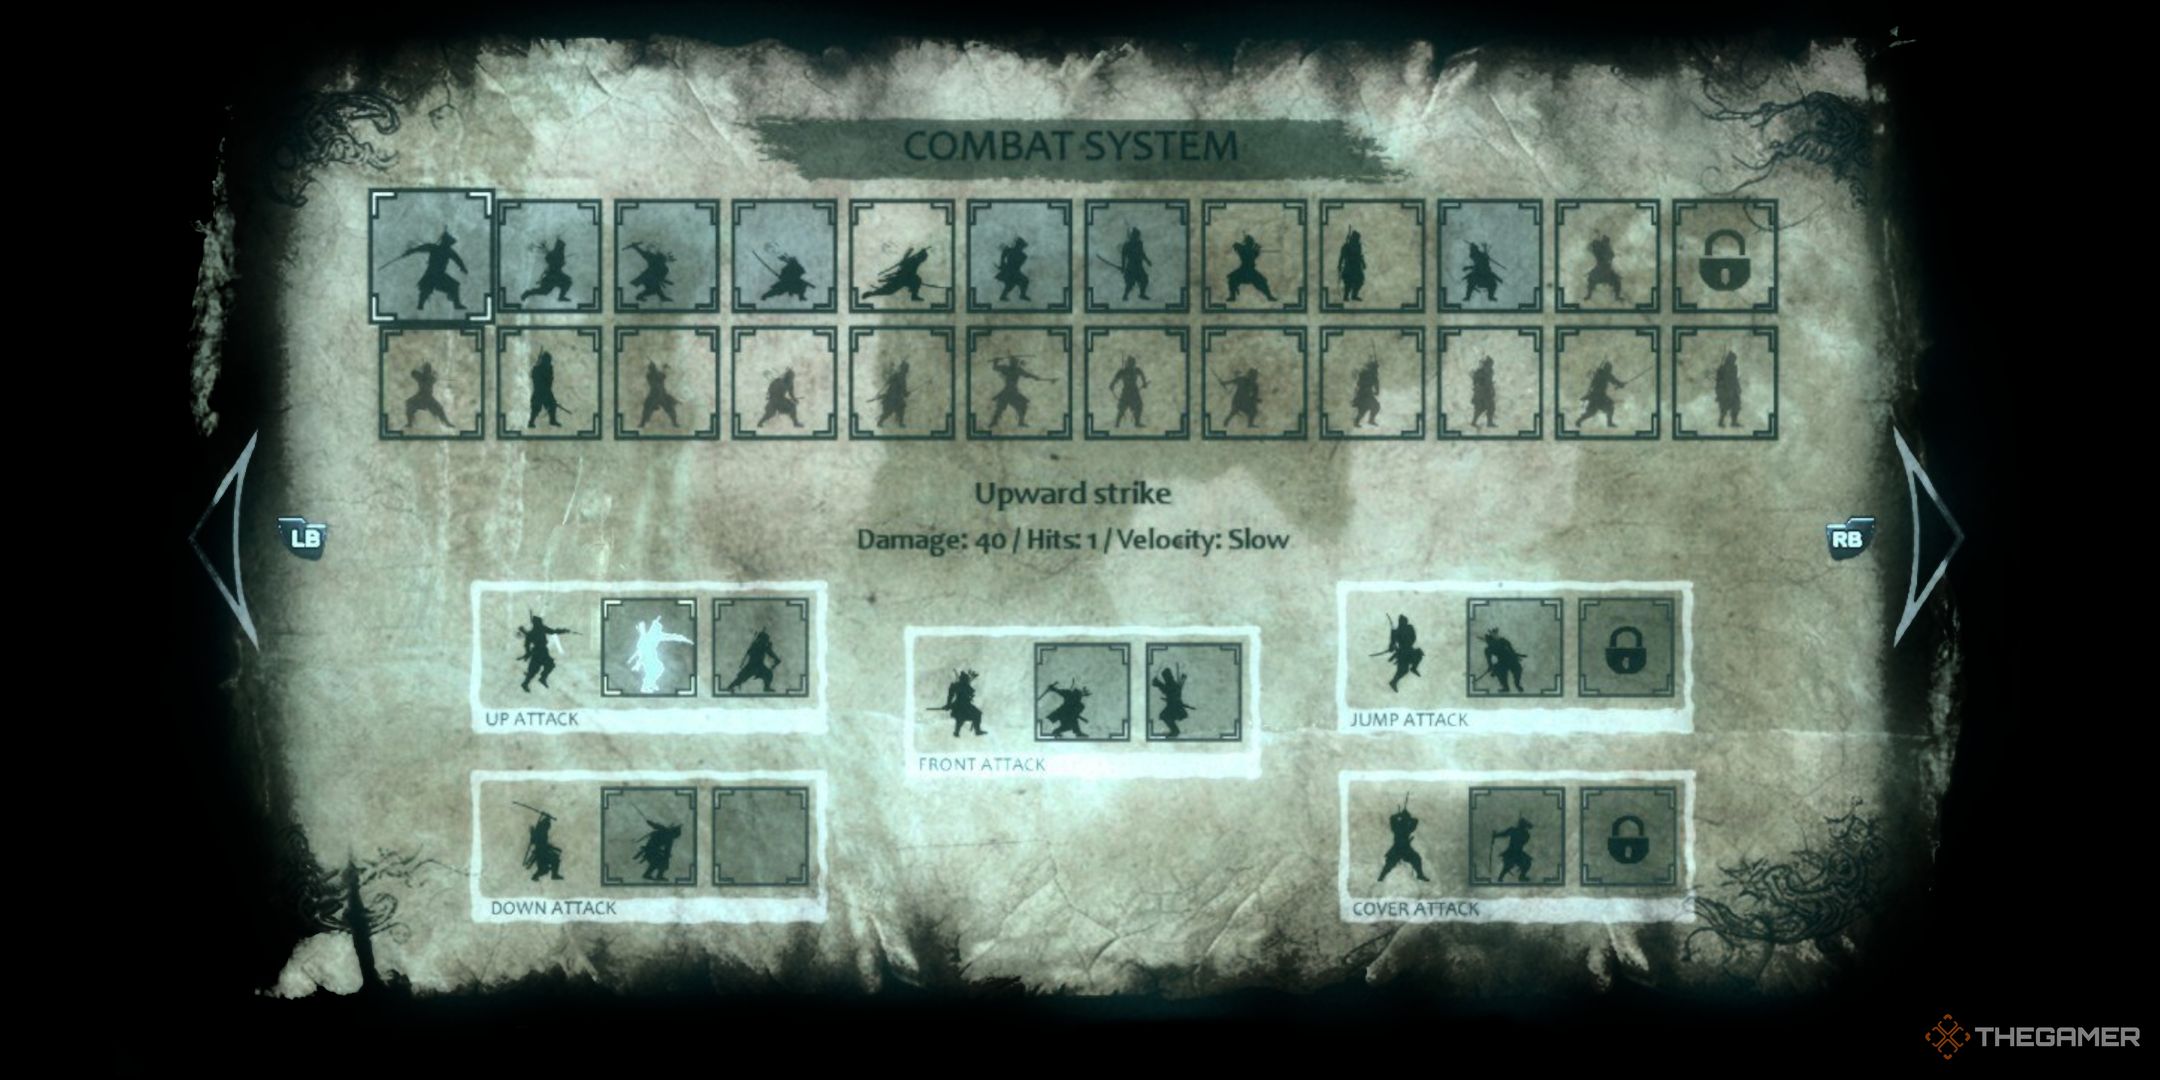
    As you’re creating your attack sequences, observe that each move possesses specific attributes like power, range, and speed. While longer-range attacks might seem like the safer choice, you should definitely assign a short-range attack to one of your alternate sequences. The reason for this is the somewhat awkward hitboxes in The Spirit of the Samurai, which may cause you to swing past an enemy when you’re right in front of them.

    This is especially true when facing shield-wielding samurai. I often found myself hitting their shield while trying to slash them from behind. One effective early short-range attack is the “Cross Stroke.” This strike targets directly in front of you, making it a great option to include in your attack sequences (I usually assign it to my combo that activates while guarding).

    How to Choose Which Stats to Level Up


    The Spirit of the Samurai. The Status Screen

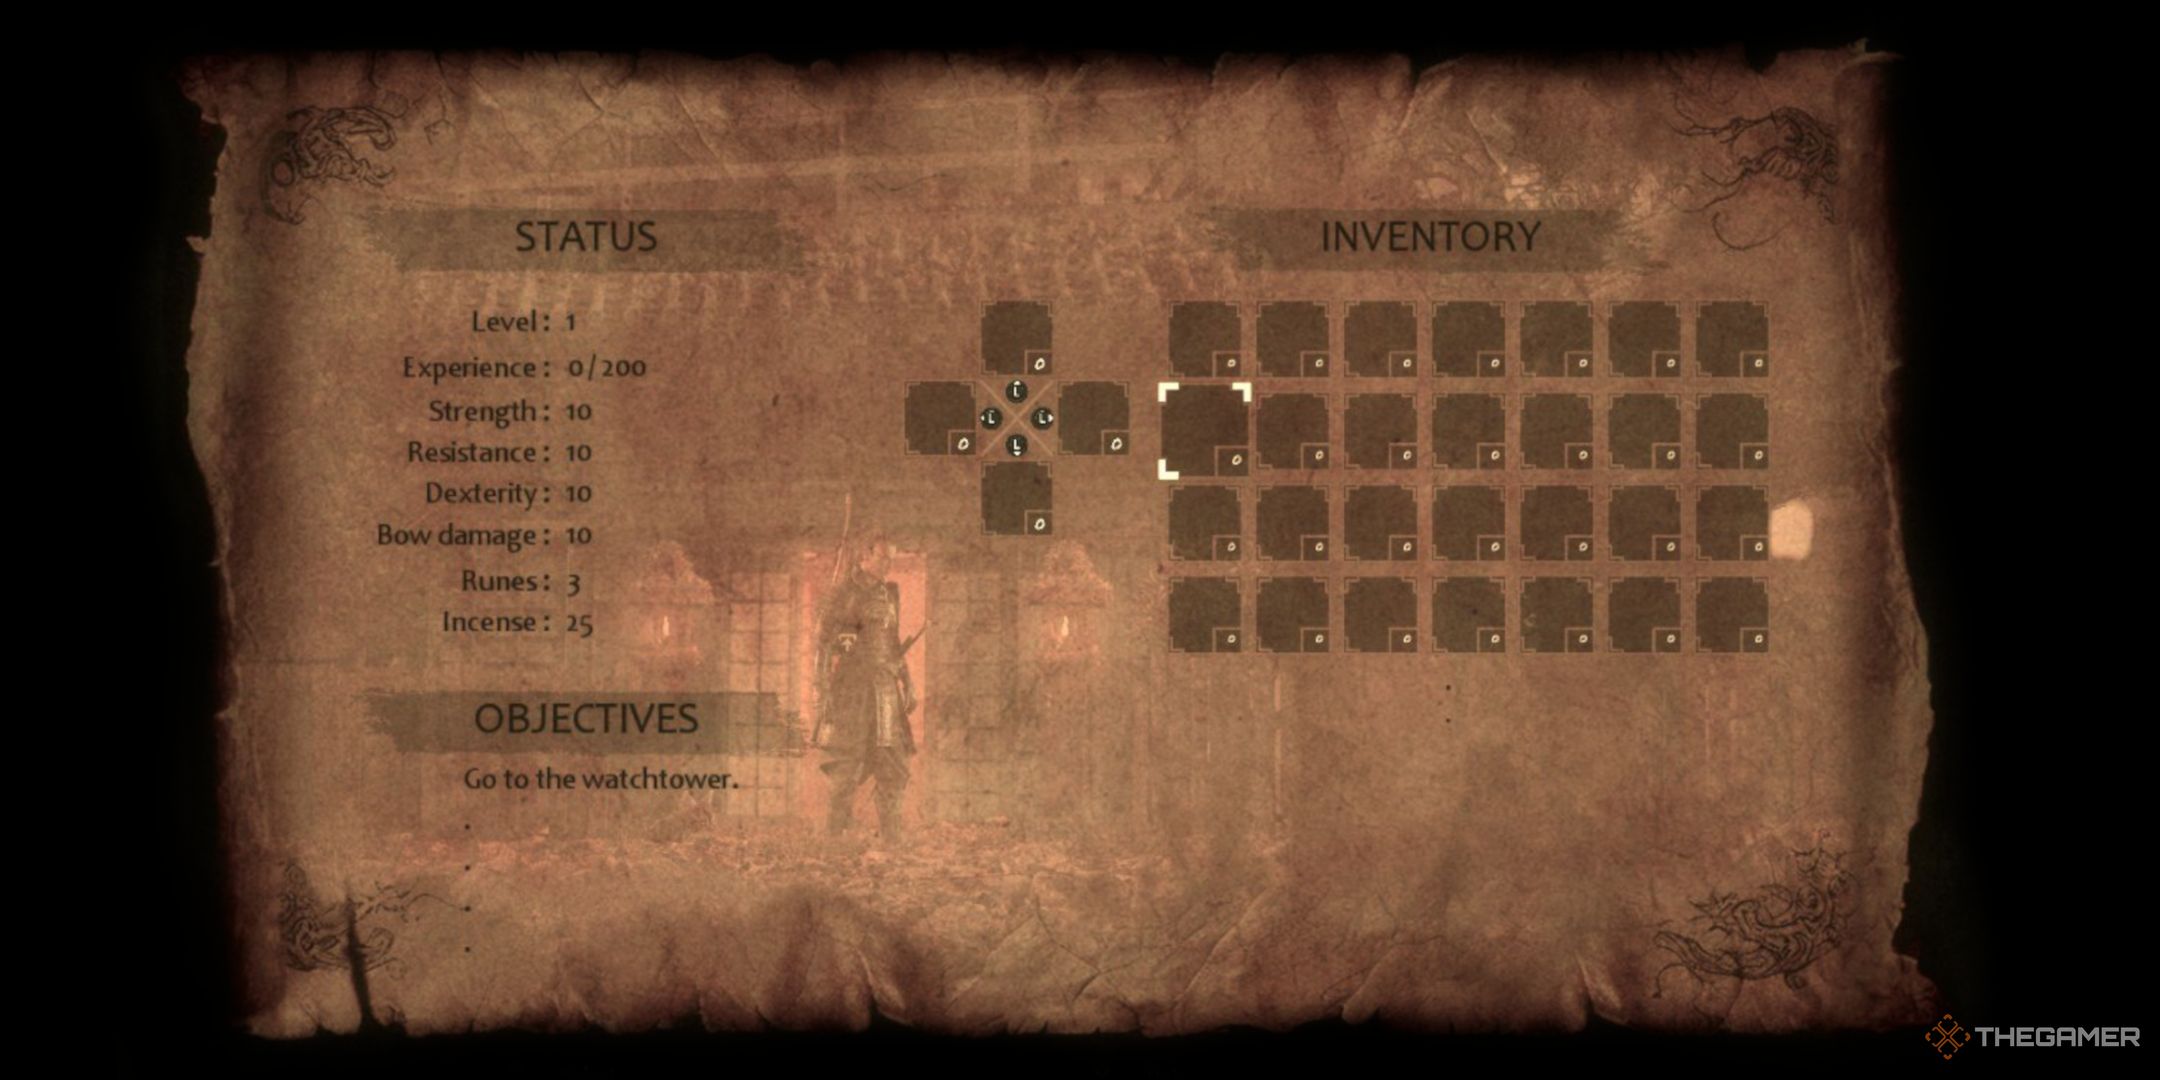
    When deciding which stats to level up, consider these key points. In the early stages, focusing on dexterity is vital since your stamina will start off very low. Once stamina is no longer a major concern, prioritize strength, as dealing damage is consistently important. It’s wise to invest at least one point into strength with every level-up.

    However, don’t overlook the other stats. Dexterity helps with positioning, while vitality allows you to absorb hits more effectively—both can be beneficial. Additionally, certain moves are tied to dexterity; you won’t be able to access these unless you’ve leveled up this stat sufficiently.

    As for bow skills, they’re a bit tricky. The bow can be one of your most powerful weapons if you invest enough points, capable of taking out enemies quickly. However, keep in mind that there will be times when using it isn’t feasible, and trying to pull it out when an enemy is lunging at you can lead to trouble. Thus, I recommend focusing on bow skills only after you’ve built up enough strength, since your sword will always be a reliable weapon.

    Tips for More Effective Parries


    The Spirit of the Samurai. Takeshi fighting an oni

    Although it’s satisfying to land a parry, I highly recommend that you don’t solely depend on this tactic. Often, rolling to evade an attack can be more effective. However, since you’ll be blocking frequently, trying for a parry while blocking can be beneficial, but don’t make it your only strategy.

    To execute a parry, aim to press the guard button a moment before your opponent’s attack lands. Avoid smashing the guard button, as this will introduce too much delay and could lead to your defeat. Instead, focus on timing and hold the button; if you’re early, you’ll still successfully block.

    Lure Enemies to You


    The Spirit of the Samurai. Takeshi with his sword drawn

    When facing multiple enemies, it’s wise to draw them in one at a time. Even when you can’t spot any additional opponents, it’s still a good idea to lure them toward you. Why? Because of how the game stages are designed, you generally activate enemies as you reach specific areas of the stage, and your regular attack can push enemies forward.

    For instance, if you’re engaging with a foe and recklessly attacking them, you might inadvertently push them further toward the right side of the stage. As you continue to pursue them, you may end up triggering more enemies to activate. Suddenly a simple one-on-one battle escalates into a chaotic struggle against five opponents. This is far from ideal. So, stay back, draw foes in one at a time, and finish the current enemy before proceeding.

    Effective Use of Your Roll


    the-spirit-of-the-samurai-tag-page-image-2.jpg

    Many players mention that The Spirit of the Samurai includes some elements reminiscent of Souls-like games, particularly regarding the roll mechanic. Indeed, you have access to a roll that grants temporary invincibility, which can be a game-changer against some of the toughest enemies. However, before you start rolling all over the battlefield, it’s important to understand the specifics of this invincibility.

    Your roll is invincible from the moment you initiate it until it concludes. Thus, if you roll as an enemy attacks, you’ll slip past them unharmed. This method is often the best way to utilize the roll, allowing you to recover as the enemy is still busy with their attack. However, bear in mind that the roll doesn’t have an immediate recovery; you’ll be vulnerable for a moment after rolling. This vulnerability means you should avoid using the roll to escape enemies. If an enemy lunges at you just as your roll concludes, there’s a good chance you’ll get hit.

    Of course, rolling away from slower enemies is feasible, but even then, sprinting might be a safer option. Essentially, never panic roll. Instead, use the roll to avoid an attack and immediately strike back while you’re behind them.

  • Must-Know Tips Before Diving into Antonblast

    Must-Know Tips Before Diving into Antonblast

    Antonblast is a lively and fast-paced platformer that captures a spirit similar to last year’s Pizza Tower. If the recent Mario games have felt a bit slow for your taste, Antonblast is the perfect remedy. Although much of the gameplay may seem familiar, it offers plenty of unique features that will keep you engaged.

    This guide will cover everything from mastering Anton and Ann’s platforming skills to providing you with essential tips to collect every item in each level. By the end of this guide, you’ll be fully prepared to soar through the game!

    Take Your Time to Explore

    As soon as Happy Hour begins, it’s a race against the clock. During this time, there will usually be at least one item you can only collect if you act fast. Knowing the layout of the level beforehand is crucial. For instance, if you’re aware of a spray can hidden behind a green brick wall, you can easily access it after destroying the bricks during the rush.

    Additionally, there are numerous secrets tucked away in the corners of each non-boss level. If you’re not thorough in exploring, you’ll likely miss out on many collectibles. Feel free to speed through the level first, and then slow down for a careful search after you’ve gotten the lay of the land.

    Tip: When the game seems to encourage speed, be cautious. If you’re sprinting, smashing enemies, and breaking boxes, you might overlook hidden treasures.

    Whenever a collectible appears on the screen—especially if it’s obscured or positioned above—you’ll need to put extra effort into exploring. Most of the time, the path leading to it is nearby, but not always.

    Recognizing Hidden Areas

    Keep an eye out for several key indicators that suggest hidden spaces:

    • Cracks: Cracked surfaces might lead to secret rooms, so be sure to hit them.
    • Bowling Pins: Seeing bowling pins typically indicates a spot where you can perform a roll. This could lead you to secret areas or be part of your Happy Hour strategy.
    • Slopes: Rolling off slopes can reveal hidden passages, so try rolling against nearby walls.
    • Graffiti: Pay attention to graffiti—it often hints at nearby secrets worth investigating.

    This list isn’t exhaustive, but it will help you discover most hidden areas and collectibles.

    Pits Are Your Friends

    If you encounter a pit, don’t hesitate to jump in! Unlike in Mario games, falling into pits in Antonblast is often beneficial. Typically, jumping into a pit will lead to bonus areas that can reward you with valuable items. Of course, if there’s fire or lava, that’s a different story, as those hazards will cause damage.

    Strategically Use Checkpoints

    Each level features platforming sections that lead to optional rewards. You can always return to the last checkpoint, so if you come upon tricky sections, take a moment to check for a nearby checkpoint before attempting them.

    Checkpoints are plentiful and make retrying challenging sections easier than restarting the entire level. However, be cautious: if you fail a platforming challenge and activate a checkpoint afterward, you’ll need to redo the entire level to complete it. For those wanting to tackle all the bonus sections, using checkpoints wisely is essential.

    Helpful Tip: When hopping from fragile box to box, you don’t need to time your jumps meticulously. Simply hold down the jump button to bounce off each box.

    Building Speed with Boost Combos

    Using the Clutch button propels you forward. You’ll see a boost gauge in the corner of the screen, which fills as you string together multiple Clutch moves. The more Clutches you combine, the faster you’ll go, and your jumps will travel farther as your boost combo increases.

    However, the challenge lies in keeping the combo alive. If your gauge fills before you execute another Clutch, the combo resets. This technique is not only useful for speedrunners but also enables you to reach certain collectibles that require high-speed jumps.

    The Power of Combining Clutch and Roll

    To gain extra height on your jump, consider pressing the roll button at the end of your jump. This technique isn’t mandatory, but it can help you reach platforms and items that would otherwise be out of reach.

    To perform this maneuver, press the Clutch button while jumping. This will initiate a spin that will give you upward momentum. At the peak of this jump, press the roll button to dive—achieving additional height. Remember, you need to be moving forward to maximize this jump effectively, especially when trying to reach elevated platforms.

    This technique may require some practice, but it’s incredibly valuable for collecting hard-to-reach items, particularly after destroying platforms.

  • What We Learned About Romancing Saga 2: The Seven’s Vengeance

    What We Learned About Romancing Saga 2: The Seven’s Vengeance

    Romancing Saga 2: Revenge of the Seven offers a distinct gaming experience within the RPG genre. The mechanics are intricate, blending depth with an air of mystery. This game revels in keeping players on their toes, often leaving much for them to explore independently. Fortunately, this guide will help clarify its complexities.

    This guide serves as a quick reference to kickstart your journey and grasp the essential components effectively. While there’s a lot to unpack, we’ll primarily set you on the right path and help you steer clear of major pitfalls—after all, this game is infamous for allowing players to make significant blunders.

    Mastering Evasion and Maneuvering

    In this game, a “deke” is a clever move where you trick an opponent into thinking you are moving in one direction before darting in the opposite way, thus avoiding their attacks. This technique is vital in Romancing Saga 2: Revenge of the Seven.

    To use a deke, run toward an enemy to draw their attention. As they chase you, create a wide circle around them while sprinting. This method is invaluable for bypassing foes blocking tight spaces. You can also leverage the environment; for instance, non-flying enemies won’t follow you up ladders or onto climbable structures, so use those to escape.

    If you’re keen on engaging in battle, there’s a twist on the deke technique for a strategic back attack. Simply run away until the enemy stops pursuing you; they will eventually return to their original spot. Once they turn, sprint behind them for a surprise attack.

    Healing and Resource Management

    Combat dynamics in this game are quite different. Healing occurs at the end of battles, meaning you don’t necessarily have to avoid taking damage. However, the Battle Points (BP) that power your skills are quite limited. Therefore, it’s often wise to absorb a few hits instead of relying heavily on BP-consuming techniques.

    Utilize United Attacks, as they don’t drain your BP yet still deal considerable damage. When learning new techniques, don’t always discard the least expensive ones at the first opportunity. In fact, higher-damage abilities may sometimes use double the BP of slightly less powerful moves. Early in the game, consider simpler healing spells, like Life Water 1, which may be sufficient for your needs without wasting precious BP.

    Time Constraints on Quests

    One crucial point to note is that certain quests will become unavailable if significant events occur, such as a time shift or the death of an emperor. Failing these quests may hinder your access to essential character classes. For instance, completing the mermaid quest requires finishing it within a single generation, or you risk losing the dancer class.

    To recognize which quests must be completed in succession, keep an eye on tasks that involve specific characters or clearing particular dungeons—these are typically secured. Quests centered around key characters, like the mermaid storyline or the search for the Grimoire, are more likely to require immediate completion.

    Permanent Character Death and Its Implications

    Every character in Romancing Saga 2 has Life Points (LP). When LP reaches zero, that character dies—permanently. Unlike some RPGs, there’s no way to resurrect characters through items or magic. This rule applies even to your main character, but any abilities learned by an emperor will carry over if they die.

    After each time shift, your character’s abilities and spells are recorded. This allows other characters to inherit skills they meet the requirements for, yet any unregistered abilities will be lost if their owner dies. You can switch low-LP characters out for others at the base, so consider this to avoid losing valuable skills.

    Interestingly, if you have a character low on LP without unregistered skills, engaging them in battle and letting them die could mitigate the risk of losing them mid-dungeon.

    Focus on Regional Liberation and Finding Mr. S

    While the main objective of Romancing Saga 2 is defeating the seven heroes, a secondary goal is liberating regions across the game world. Successfully freeing these areas yields substantial rewards.

    Another important figure is Mr. S, who is hidden in various locations—towns and dungeons alike. There are 50 instances where you can find him, and tracking him down grants useful abilities, including a reduction in crafting time and an extra ability slot for characters. These enhancements can significantly impact your progress, so prioritize finding him.

    Generally, Mr. S tends to appear near bodies of water or areas with food, making them the best places to look, although this is more a tendency than a strict rule.

    Avoid Unnecessary Combat

    In the early stages of the game, grinding or fighting every enemy can complicate your experience, particularly on classic difficulty. Every battle you enter increases the strength of monsters, and without new gear to help your team, excessive encounters can put you at a disadvantage.

    Instead of engaging every foe, focus on collecting treasures, which naturally leads you to some encounters. If you do face monsters, target stronger ones, as they will yield more Technique Points (TP).

    Don’t Flee; Be Smart About Defense

    It’s essential not to flee from battles, as doing so only increases the encounter count without giving you Technique Points. This drives the enemies’ strength upward. Instead of guarding, which uses up points that appear to have no benefit, consider using defensive techniques like parrying or countering.

    Save Frequently and Embrace Reloading

    While death isn’t catastrophically detrimental, a total party wipe can be a setback. In situations where it’s vital to maintain a certain emperor or character with unregistered skills, it’s often wiser to reload your last save rather than start anew. This is especially useful if you venture into combat underprepared or inappropriately equipped for a boss fight. Using save points before significant encounters is highly encouraged, so be sure to capitalize on them.

    In summary, mastering the art of evasion, managing resources effectively, keeping track of critical quests, and employing strategic character management are all key elements in Romancing Saga 2: Revenge of the Seven. Happy gaming!