| Unit | Undead Goal | How to Achieve |
|————–|——————————————————-|—————————————————————–|
| Miner | Defeat the first boss in the Undead Kingdom. | Kill the first boss when it appears on day 7. |
| Crossbowman | Lose in Undead scenario. | Follow the standard losing conditions. |
| Druid | Have 50 rats in your city. | Build small Burrow structures to spawn rats daily; upgrade to Soul Hunter to remove bushes and spawn more rats. |
| Treant | Have 15 bonepiles in your city. | Upgrade the Quarry to convert graves into bloats or use the Big Daddy upgrade to spawn a bloat daily; defeat bloats to generate bonepiles. |
| Flamewalker | Defeat the fourth boss in the Undead Kingdom. | Kill the second boss when it spawns on day 28. |
| Jouster | Have no graves in your city on day 21. | Upgrade the Quarry to remove all graves before day 21. |
| Frost Mage | Complete all stages of a quest. | Complete the two quests in the Undead Kingdom: kill 500 enemies with Dark damage (using Deathpriest or Lich) and summon 5,000 units during a run (with units like Deathpriest or Leech Mother). Work on this alongside the Bee achievement. |
| Angel | Have 99 faith. | Construct the small Decoration building that generates faith each tax cycle, set taxes to faith, upgrade the castle to increase tax speed, and save faith until reaching 99. |
| Mechanic | Have all types of Undead siege engines. | Build the Dark Tower and craft every siege engine in one run. |
| Griffin | Field 4 airborne units. | Use units with wings, such as Vampire, Bee, Angel, or Banshee; elemental units with flying traits also count; build an Elemental Tower for help. |
| Swordsman | Have a wall with at least 250 hitpoints. | Fully upgrade your castle, walls, and towers; buy the builder upgrade increasing wall health by 50%. |
| Bee | Field 5 summoner units. | Find units with a book icon, like Mechanic, Stormcaller, Bard, Deathpriest, Leech Mother, or hero units Cadus and Qhe’la. |
| Satyr | Have 17 potions. | Build the Cauldron; craft potions with 2 Ooze and 1 Bone (Ooze is generated automatically; bones come from killing bloats with the Soul Hunter). |
| Bard | Fully upgrade the tavern. | Collect 80 Blocks to upgrade the Tavern; build a Graveyard to dig graves for stone, focus on quarry and Haunted Workshop to turn stone into Blocks, and defeat the first mini-boss to get more stone. |
| Dryad | Have 30 thickets. | Build the Graveyard and dig for Thickets. |
| Dancer | Survive 14 days without a house. | Houses in Undead Kingdom spawn carriers, so this is easier; unlock more starting zombies or use Amaya upgrade for additional carriers. |
| Magus | Build sewage channels at least 66 tiles long. | Construct the sewage plant far from ooze deposits and connect with sewers; gather enough Blocks to build the sewers. |
| Halfling | Have 33 pumpkins in your city. | Connect sewage and ooze deposits with sewers, harvest pumpkins near them to produce more, possible to combine with Magus achievement. |
| Paladin | Have 15 carriers. | Build and upgrade houses, use Amaya upgrades to increase carriers; more carriers make it easier. |
| Monk | Have 21 graves in your city. | Build the Graveyard and dig graves. |
| Marksman | Have 25 bloats in your city. | Use the Graveyard to dig graves, then dig graves with upgraded quarry to spawn bloats; Big Daddy upgrade helps here. |
| Berserk | Be brave. | Summon and defeat all four mini-bosses on the same day. |
| Colossus | Defeat the ultimate evil. | Beat the game with at least 1250 Glory to unlock the final boss, then win. |
| Pixie | Die a peaceful death. | During a weather event that resembles cherry blossoms, retreat all units and die peacefully. |
| Overlord | Beat the game. | Defeat the final boss on a designated day. |
الوسم: Kingdom
-
How to Complete All Achievements and Units in Super Fantasy Kingdom
-

Beginner Tips for Completing and Solving in Super Fantasy Kingdom
Super Fantasy Kingdom is a blend of city-building, strategy tower defense, and roguelike gameplay, and it manages to excel at all three, even though it’s still in Early Access. The game features two main, interconnected modes happening at the same time: one where your units defend against waves of monsters, and another where your workers gather resources and help grow your kingdom.
There’s a lot of hidden complexity in Super Fantasy Kingdom, and discovering all its secrets can take dozens of hours. Luckily, the game offers meta progression that carries over your achievements to new runs, allowing you to improve gradually through experience and experimentation. If you need some helpful tips to kick off your journey, keep reading.
### Recruit Workers
Workers are your most valuable resource; they form the core of your kingdom. They gather materials and food, keeping everything running smoothly. How many workers you have largely limits what you can accomplish each day, so getting as many as possible is crucial.
At the start, you’ll have only a few workers, but it’s fairly easy to get more if you know what to do. The main way to add new workers is by building Houses. These structures cost increasing amounts of Wood — starting at four, then eight, sixteen, and finally 32 — to construct.
You can also upgrade each House with Ore, as long as your Houses are connected to Stone Roads. To build Stone Roads, you need to upgrade the Quarry and spend one Coin per road tile. The roads upgrade sequentially from the Quarry outward, so placing your Houses near the Quarry helps streamline expansion.
### Keep Your Kingdom Fed
Food is a surprisingly important resource. Each night, after defeating monsters, your units (excluding your Hero, who doesn’t need to eat) return to the Tavern. There, each unit consumes one piece of food, which also grants them experience points.
If a unit doesn’t receive food, it will go hungry and lose 25% of its attack speed the next day. This can seriously weaken your defenses, so it’s vital to ensure you always have enough food for all your units. If a unit isn’t involved in combat the following day, you might opt not to feed it, but remember, it won’t gain experience without food.
### Keep an Eye on the Map
As you progress through the early stages, building up Shards and Glory, the map will fill with new opportunities. Daily, check around the map for new roads to construct, quests to start or complete, and marked locations (red Xs) where you can gather resources.
Roads are permanent upgrades that persist across runs, so build them whenever you can. Unlocking new roads allows you to connect more parts of your kingdom, improving movement and resource flow. Building roads also sometimes reveals Outpost locations, where you can place resource-granting Outposts. Each run allows one Outpost per location, giving a resources boost at the start. More types of Outposts become available as your kingdom levels up.
You can also find the Witch, usually near an apple. Spending Shards with her grants you extra resources at the beginning of a run. Her upgrades get pricier as you progress, so focusing on short-term gains early is smarter.
Additionally, exploring the map can lead you to unlock new heroes by inspecting the map periodically. Sending them to the Throne Room allows you to recruit them using Shards between runs.
### Balance Coins and Faith
Coins and Faith are your main currencies during runs. Coins are used to buy resources, units, and upgrade facilities, while Faith is used to upgrade units, purchase upgrades, and unlock buildings.
Both are generated by taxing your kingdom. When the tax timer fills, you choose whether to produce Coins or Faith. Keep an eye on your resources and toggle between the two depending on what you need most.
Every sixth day, Gevald appears and offers a chance to buy one of three random units for 10 Coins. Make sure you have enough Coins before he arrives.
### Try New Things
Leveling up your kingdom by trying different units, heroes, and relics is one of the best ways to gain power. Each first-time use of a hero, unit, or relic grants a kingdom experience point, helping your kingdom level up.
Increasing your kingdom’s level allows you to start each run with more gold and unlock new features and upgrades. Experimenting with various heroes and units also helps you learn the game better and discover powerful synergies. While progressing through meta upgrades is essential, developing your skills and understanding deeper mechanics is equally important.
### Play Both Kingdoms
After a while, you’ll unlock the Undead Kingdom, which plays very differently from the Human Kingdom. It features a new set of resources, buildings, map layout, and a different style of gameplay. You can switch between them at any time, making the game more varied.
Sharing progress between the two kingdoms is beneficial — things like stars earned from defeating bosses are shared and help unlock essential upgrades faster. Playing both kingdoms equally can be a strategic advantage, especially as you can transfer some progress, like resources and upgrades, between them.
In the Undead Kingdom, workers only perform one task per day but are easier to generate. Managing the balance between producing new workers and spending them is key. The city layout also differs: Zombies that gather resources can pass through entrances to the Catacombs located at the Graveyard, Church, and Mausoleums. Positioning these structures around your kingdom can make resource collection more efficient.
-

Guide to Finishing the Wedding Crashers Quest in Kingdom Come 2
Kingdom Come: Deliverance 2 leads Hans and Henry on a ride full of unexpected events. Their journey is filled with surprises, and things often don’t turn out as anticipated. After completing the Loboratores quest, you’re left with just a glimmer of hope.
But more surprises await in the next quest, Wedding Crashers. Your primary goal here is to attend a wedding and speak with Von Bergow. This quest presents its own challenges and will take a while to finish. Below, you’ll find the simplest way to navigate through it.
Talk to the Lady Calling Out to Henry
First, you need to have a chat with Bara. Dress properly and approach her to discuss various topics. You’ll gather valuable information, including details about the Tomcat, which will trigger an interesting side quest.
Once you’ve spoken with her, ask for assistance. Bara will provide details on where to find a horse, where you can rest for the night, and even give you some Groschens. Don’t forget to ask about clothing, choosing the option with the Might symbol to improve your reputation with her. Additionally, she’ll hand you a lockpick.
Now that you’re equipped, you can either explore—collecting items to sell for more Groschens or taking on side quests like searching for your dog—or continue with the main quest and seek employment.
Head to the Blacksmith, Radovan
Radovan is located in Tachov, which is quite a trek on foot. He’s a skilled blacksmith who can teach you the craft, so make your way to him for a job. Mastering blacksmithing will benefit you since you’ll be able to create your own gear.
As you learn from Radovan, he will assign you an important quest, leading you into The Jaunt. This quest entails a long journey with Lord Semine to locate a cart filled with wedding supplies.
You’ll need to venture to Semine’s location and engage with the Lord. He’ll then invite you to join the mission, and after traveling further, you’ll have the chance to investigate what happened to the cart. This will lead you into a fierce battle as the story unfolds.
Once you wrap up that confrontation and complete your objectives, return to Radovan the blacksmith. He’ll assign you the next quest called The Hermit, where you must locate Ambore’s broken sword.
Find the Sword
The sword is hidden under a small tree on a hill, in a grave. If you have difficulties with this quest, consult a guide for additional assistance. Once you retrieve the sword, return to the blacksmith to inform him. To your surprise, he’ll ask you to repair the sword, so roll up your sleeves.
Once you’ve finished forging the sword, let Radovan know, and he’ll be pleased. At this point, you’ll need to prepare for the wedding. Check a guide on the best clothing choices.
Visit the Miller Kreyzl
Your next destination can be Miller Kreyzl, but it might be more advantageous to go back to the blacksmith. Building rapport with familiar faces at the wedding is beneficial. However, if your goal is to enhance your thievery and stealth skills, Kreyzl is your guy.
Upon accepting a task from him, you must complete three side quests: Materia Prima, Forbidden Fruit, and Opus Magnus. Finish these before you can attend the wedding.
Attending the Wedding
After completing those prolonged quests, the time has come to attend the wedding. Von Bergow has yet to arrive, leaving you to keep the guests entertained. Plenty of objectives await, all of which are quite enjoyable.
Mingle
Start by talking to Svatya Thrush, the bride’s brother. You’ll find yourself in a peculiar yet amusing bet with him, so get prepared to charm a lovely lady.
Then, seek out Myshka, but be aware that she might not be thrilled to see you. There’s someone bothering her, so choose the option, “Why don’t we leave Myshka alone?” This will prompt her to invite you for a private conversation.
She’ll lead you to a serene spot where you can chat. Shortly after, Myshka will invite you to dance, so accept and enjoy. After dancing, share the details with Svatya, and you’ll receive another task.
Feed the Beggars
Next, check in with Lord Semine, who needs you to assist the beggars. The cook doesn’t want to feed them, but after conversing with the guard, you’ll learn how to help out. You’ll need to grab some food from the pantry, which won’t be easy because the cook is keeping a close eye.
Myshka will come to your assistance here. Have her distract the cook while you sneak into the pantry. Once you grab the cooking scraps, deliver them to the guard, who will then give them to the beggars.
Check on the Moravians
Now, make your way to the inner courtyard where you’ll encounter the Moravians. Talk to Jurko and keep the peace. He’ll request some good wine from the cellar, which means you need to outsmart the guard. Tell him you’ll cover for him so you can sneak in and grab a jug of Moravian Schnapps. Deliver it back to Jurko, and you’re almost ready for the final stretch before the wedding.
Finding Hans
Depending on whom you came with, either Blacksmith Radovan or Chamberlain Ulrich will reach out for help. You need to find Hans for crucial information. When you reunite, he’ll share what you need to know.
If you came with Miller Kreyzl, you’ll learn that Enneleyn has returned the Chamberlain’s ring. However, joining Radovan leads to discovering the thief who has the sword. Confront that thief and reclaim the sword.
Soon enough, the wedding will commence, but unfortunately, Von Bergow seems to be missing.
The Wedding Begins, Finally
After a long day of tasks, the wedding finally kicks off. Henry is disappointed that Von Bergow isn’t present to discuss matters during his son’s wedding. After the ceremony, head to the cellar to find the bride crying. Comfort her, but this will bring you trouble.
Vyutek shows up, misunderstanding the situation and begins attacking you, prompting a brawl with Hans joining in. Defend yourself until the guards arrive. After the chaos, you’ll shift to a cutscene from Godwin’s perspective, where he’s approached for a mission by the nobles regarding Henry.
Once that scene concludes, a further one starts depicting Henry and Hans locked up in a cell. This marks the end of the Wedding Crashers quest.
-

Top Strategies for Quick Speech Boosts in Kingdom Come 2
The non-player characters (NPCs) in Kingdom Come: Deliverance 2 are more engaging than those in most role-playing games. Each character has distinct backgrounds and personalities, and they are often quick to pick up on when you’re not being truthful.
To succeed in dialogue-based skill checks, you need to maximize your Speech stat. A higher Speech stat increases your chances of deceiving suspicious guards or lying effectively to higher-ranking individuals. Fortunately, there are several effective strategies to quickly enhance your Speech stat, making challenging conversations much easier.
How to Boost Your Speech Stat
Like other vital skills in Kingdom Come: Deliverance 2, you can naturally improve your Speech stat through clear methods: gaining experience points (XP) from conversations, succeeding in skill checks, and reading books to enhance your debating abilities.
To raise your Speech stat quickly, make it a point to interact with as many people as possible. Be bold and engage in debates wherever you can. This approach will help you accumulate XP for your Speech stat and simplify those crucial skill checks in the future.
A higher Speech stat also aids significantly in negotiating prices with traders.
You can also obtain a book titled The Art of Demosthenes to further enhance your Speech stat. This can be found at the Scribe in Kuttenberg, located centrally near the market.
Skills That Enhance Speech

Unlike other stats such as Strength and Agility, there are fewer skills available to Henry that can directly increase his Speech stat. The skills you can unlock include:
Skill
Category
Level Requirement
Description
Burgher
Main Level
10
While in towns, villages, and their vicinity, you gain a +1 bonus in Strength, Agility, Vitality, and Speech.
Local Hero
Main Level
10
If you’re in an area where your reputation is good (60 or higher), you gain a +2 bonus in Strength, Agility, Vitality, and Speech.
Silver Tongue
Speech
6
This grants you a +4 Speech bonus while haggling, thereby making it easier to negotiate favorable prices.
Once you unlock all these skills, you’ll be significantly boosting your Speech stat.
-

Crafting the Ultimate Homebrew Kingdom for DND Adventures
Creating a kingdom for your Dungeons & Dragons campaign can be both exciting and overwhelming. While it might seem like a hefty task, it’s also one of the most enjoyable aspects of being a Dungeon Master (DM). Whether you’re a newcomer or a seasoned DM, figuring out where to begin can be challenging.
Many tabletop books offer a plethora of ideas for crafting continents, worlds, and towns. This guide aims to help you focus on developing your kingdom, laying out the essential steps to create captivating realms for your adventures.
Establish Basic Kingdom Facts
Starting off, it’s crucial to outline broad concepts before diving into the specifics. To effectively create your kingdom, concentrate on some key foundational elements instead of getting lost in the minutiae like characters or specific street layouts. Here’s where you should begin:
Geography
The geographical setting of your kingdom is essential. Consider where it’s located—whether it’s on a coastal region or nestled in a mountain range—as this will greatly shape its identity and influence. Here are a few questions to guide your thinking:
- Size of Your Kingdom: Understand its physical dimensions. Is it a small island, or does it span an entire continent?
- Location: Analyze its positioning relative to other regions. Does it share a continent with rival kingdoms, or is it isolated on a remote archipelago?
Weather & Terrain
The climate and environment will play a pivotal role in the kingdom’s character. As you define its geography, think about various climates that could fit the kingdom, and whether it will feature varied weather patterns.
Weather and Terrain Example Pastoral and Calm (Image of serene farmland) Wintery and Harsh (Image of a snow-covered landscape) Tropical Archipelago (Image of a lush island) Mountainous (Image of towering peaks) Scorching Desert (Image of a hot desert landscape) Dense and Urban (Image of a bustling city) History
It’s common for DMs to outline extensive backstories spanning centuries for their realms. However, you don’t need to sketch an exhaustive history to create a rich setting. Consider constructing a timeline that covers major phases and key events in your kingdom’s past.
Points in History Description Founding When was your kingdom established? Early Beginnings What were its formative years like? Golden Age What represented the peak of its prosperity? Dark Age What was the low point in its history? Current Age Describe the current state of your kingdom. You might feature significant events such as the rise of a new ruler, wars, disasters, or technological advancements within those timeframes.
Government
It’s important to define how your kingdom operates. Most often, kingdoms will be led by a monarch, but consider varying government structures like:
- Oligarchy: Rule by a small group.
- Autocracy: Governance by a single leader.
- Theocracy: Rule by religious leaders.
- Republic: Rule by elected representatives.
You should also create a few important non-player characters (NPCs) who take on leadership roles, determining their leadership styles—be it harsh, benevolent, or somewhere in between.
Crafting Settlements
Once you’ve defined your kingdom, start designing the settlements within it. Depending on the size of your kingdom, you can create several settlements for your players to explore.
Kingdom Size Number of Settlements Small (An island) 5-7+ Medium (Part of a continent) 8-12+ Large (Entire continent) 13-20+ Detailing Each Settlement
For every settlement you create, think through key components like names, population size, significant areas of interest, and any local governance structures. Develop a simple table for each settlement to keep track of these details.
Points of Interest
Enhance your kingdom by incorporating points of interest, including unique natural features or mysterious man-made structures. These could range from ancient ruins to haunted forests or magnificent castles.
Understanding the Present
With your kingdom mapped out, reflect on what it looks like today. Consider intriguing hooks that might draw adventurers into your realm, whether it’s a looming threat, a regional conflict, or the discovery of ancient secrets.
Adventure Hooks to Consider
- Low Levels: A gang of thieves threaten a local village.
- Mid Levels: A magical rivalry disrupts peace in the capital.
- High Levels: A dragon endangers the livelihoods across the lands.
By crafting a compelling backdrop and considering adventure hooks that tie into your kingdom’s story, you can firmly establish an engaging setting that will draw your players in. With these details in place, you’ll have a well-rounded, eclectic kingdom ready for exploration and adventure.
-

Duration to Finish MySims Kingdom: How Long Does It Take?
Quick Links
Are you interested in MySims Kingdom? Whether you’re racing through the main quests or taking your time to explore everything, this game allows you to play at your own speed.
Related
MySims Kingdom: All Royal Invitation Locations
Discover where to find all the Royal Invitations in MySims Kingdom.
This guide will help you estimate how much time you’ll dedicate to your royal quest—whether you’re only tackling the essentials or aiming to uncover every hidden gem in the kingdom. There’s a lot more to discover than you may realize, and it could take longer than you think. Are you ready to find out what it takes to conquer it all?
How Long Does It Take to Beat?

The time it takes to finish MySims Kingdom depends on how you play. If your focus is solely on the main storyline, you’ll likely spend around nine hours completing it. This includes tackling key quests and objectives that lead you through various parts of the kingdom and help you unlock different game features.
How Long Does It Take to 100%?

If you choose to explore every detail and complete all side quests, the time required skyrockets. Aiming for full completion will extend your playtime to about 33 hours.
This expansive journey includes tackling all tasks, collecting every scroll, figurine, flower, essence, and armor. It demands keen attention to detail and plenty of patience as you’ll be gathering resources and fulfilling additional quests beyond the main storyline.
Making friends with everyone doesn’t contribute to your 100% completion, as this is not a task you can achieve in the game.
-

Discovering Every Royale Invitation in MySims Kingdom
Quick Links
Ready to start your royal adventure in MySims Kingdom? Your first job from Buddy is to find the hidden Royal Invitations, which will introduce you to the game. These invitations are scattered around the initial area, giving you a taste of the thrill of treasure hunting as you learn the basics of gameplay. With a blend of easy-to-find spots and some that are a bit more hidden, this mission sets you up for the fun that lies ahead.
If you’re unsure where to start your search, don’t worry—this guide will lead the way. Gear up to collect every invitation like the future kingdom builder you are. Let’s jump in and gather those invitations!
How to Locate All the Royal Invitations
Your first assignment from Buddy is to track down all the hidden Royal Invitations. These invitations are spread out in the starting area, and collecting them serves as a simple introduction to the gameplay mechanics. Here’s where to find each one.
To gather them, approach the invitation and press ‘A’.
Invitation #
Location Description
Photo
1
Slightly to the left in front of the starting area. Look for it near a red mushroom.
2
Left of the castle on a small hill. There’s a wooden table nearby.
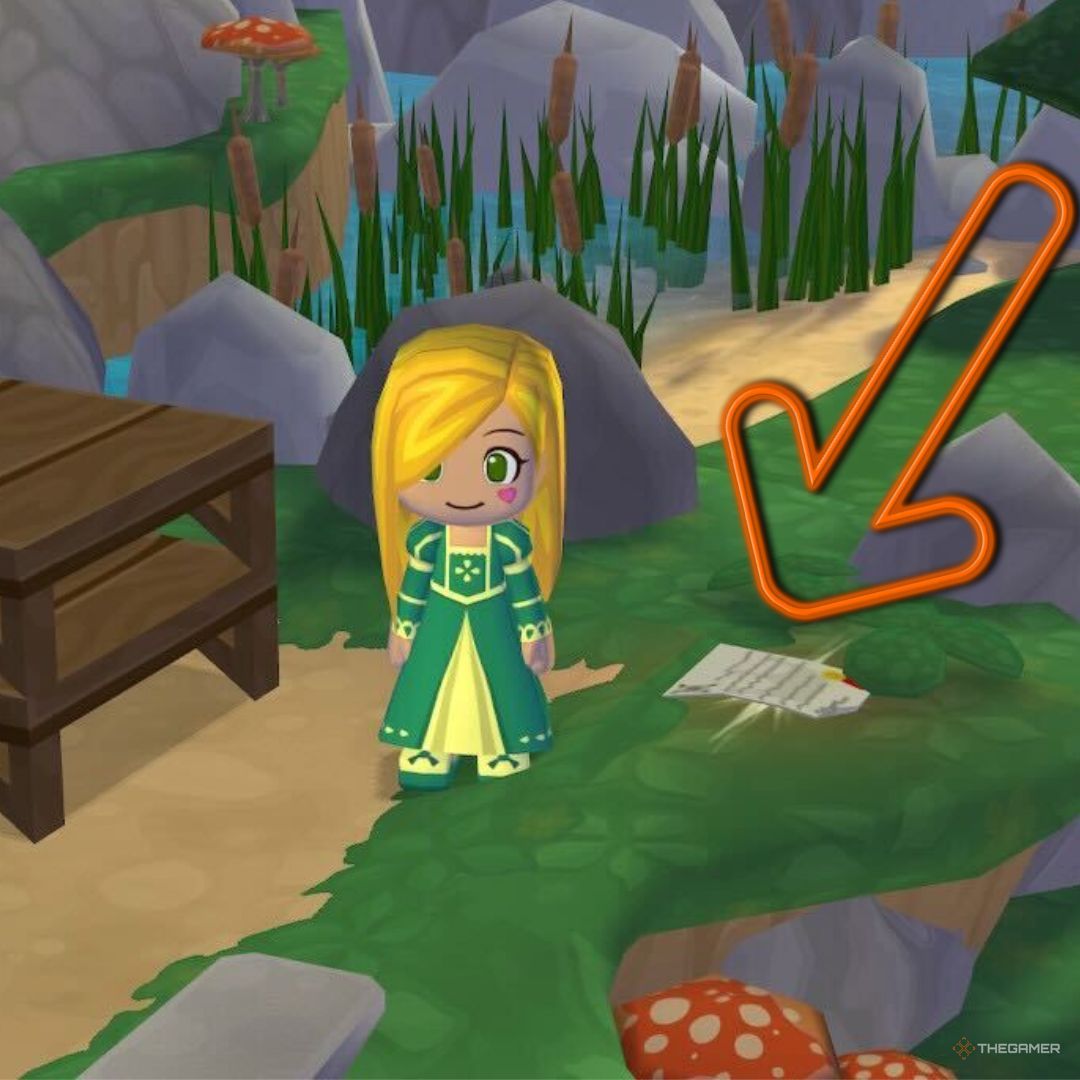
3
Towards the back wall of the castle, on the left side.
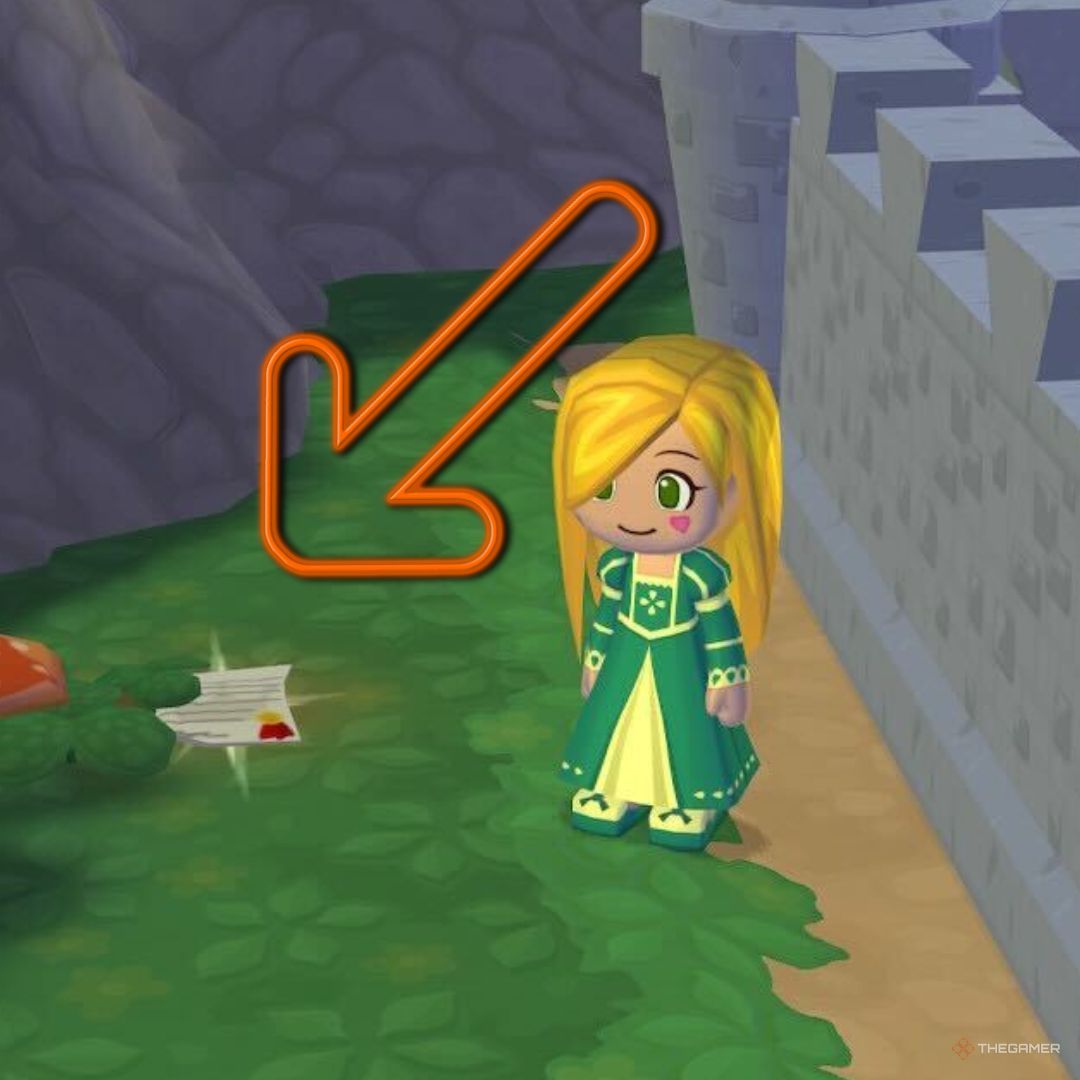
4
In the mushroom garden on the left of the castle walls. You will need to go into a fenced area to find it.
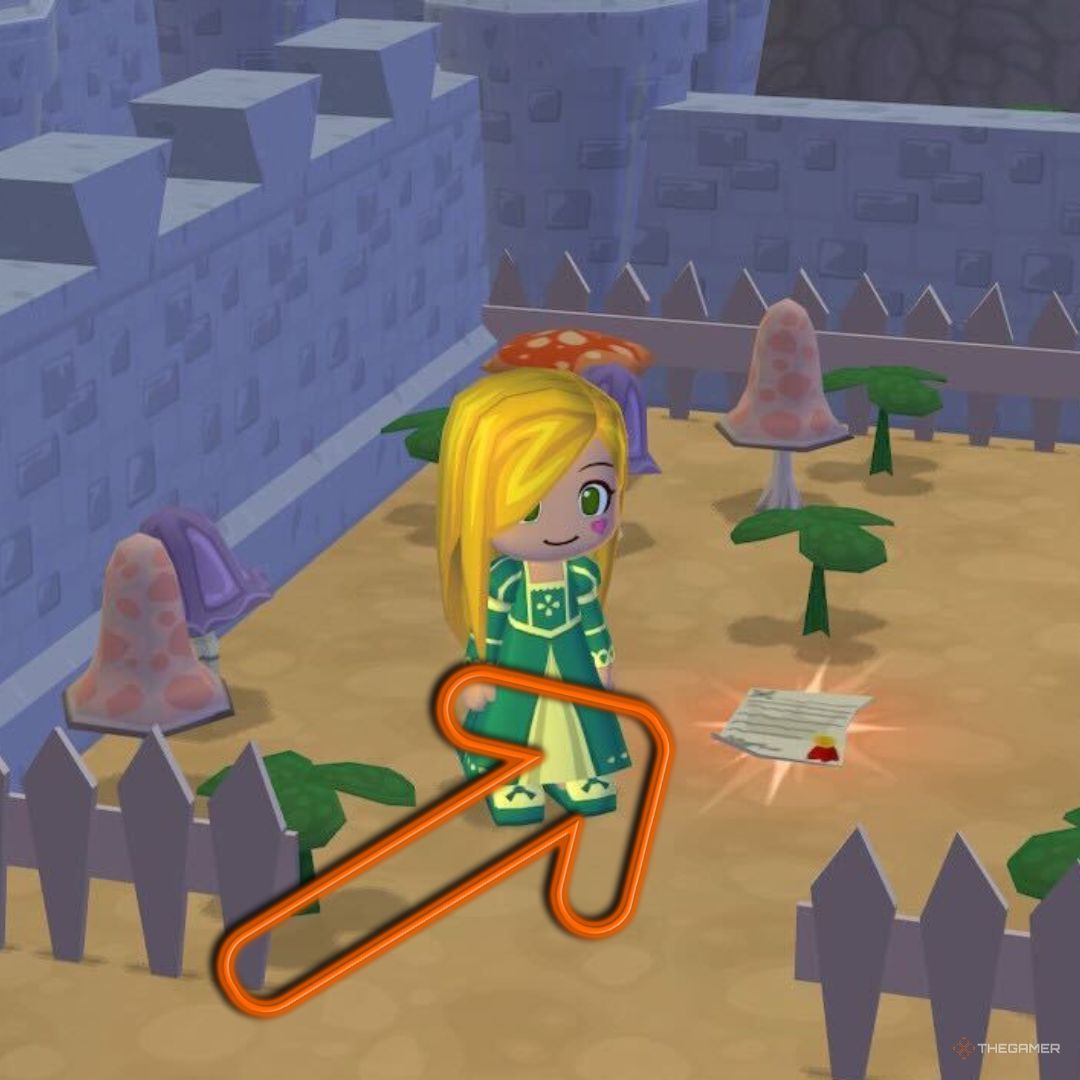
5
To the right of the pigs in the mud.
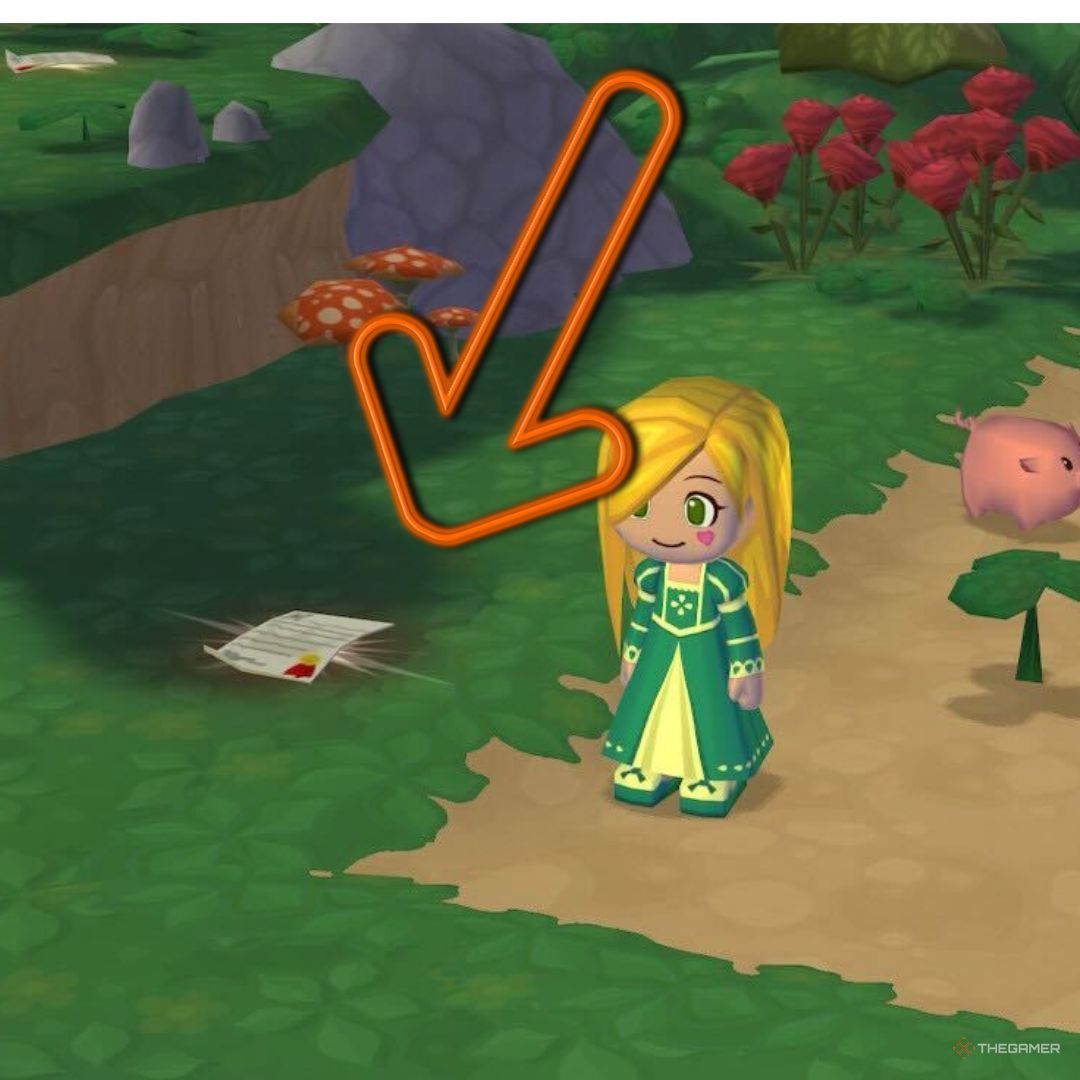
6
On the hill past the pigs; jump (press X) to reach it.
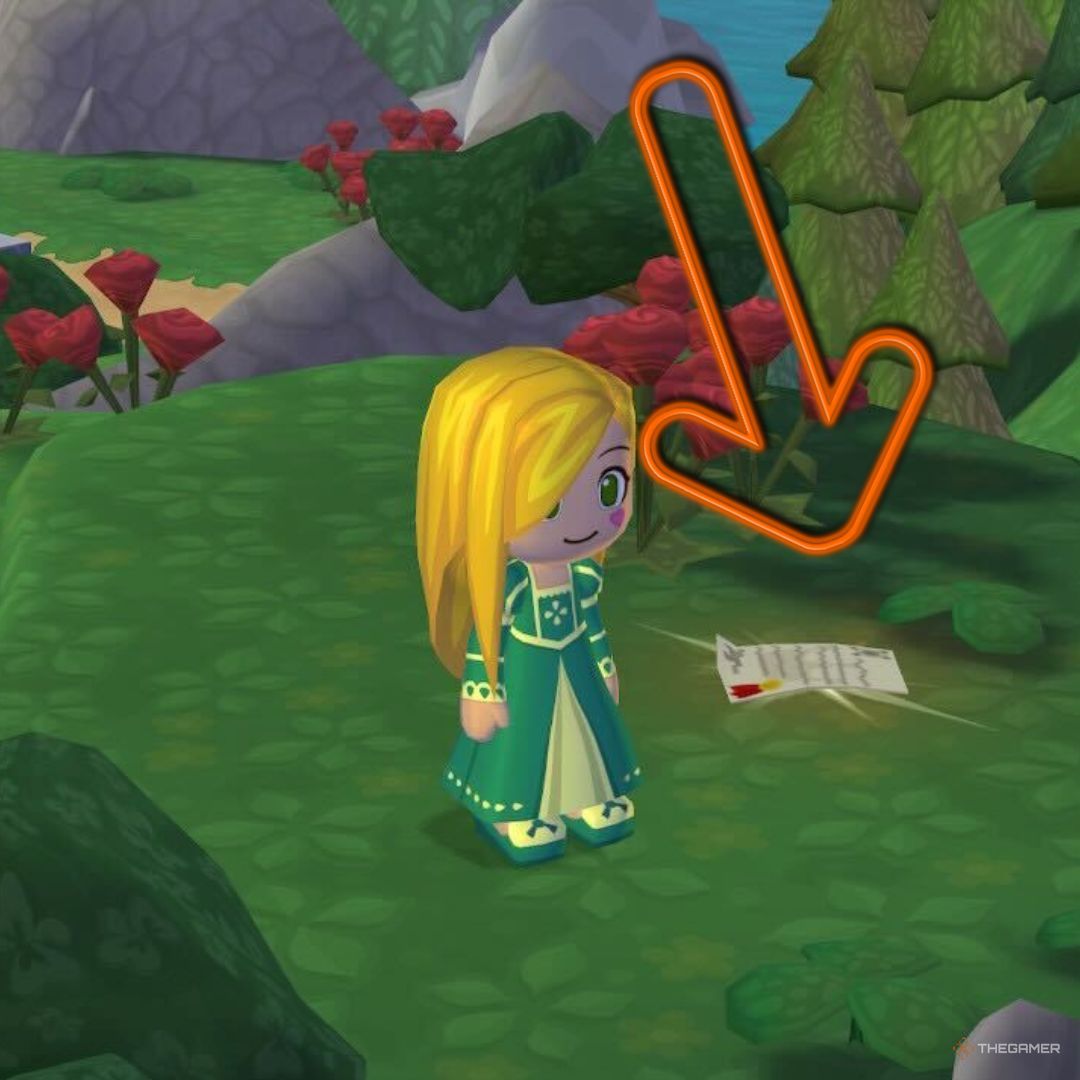
7
On the same hill as #6; it’s to the left.
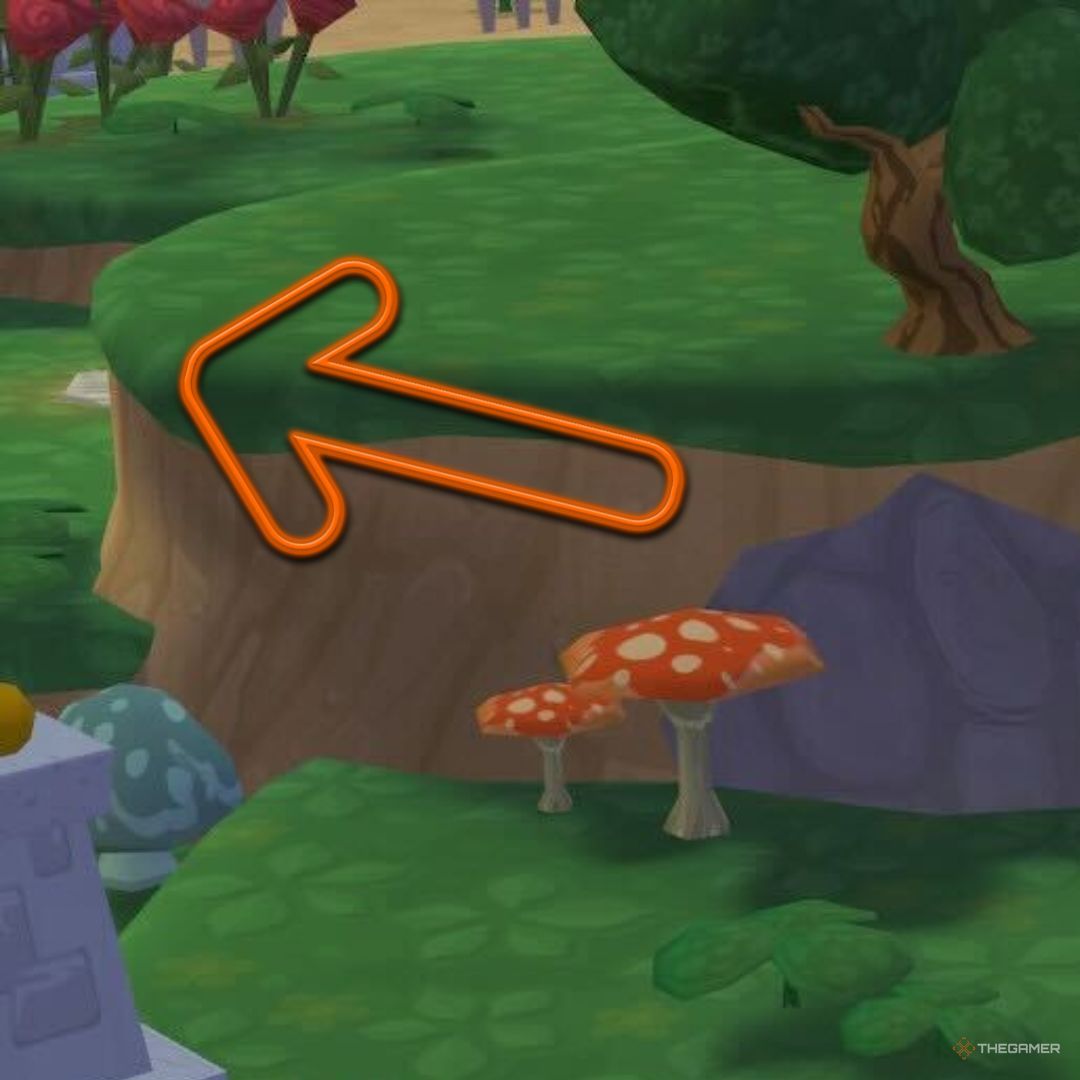
8
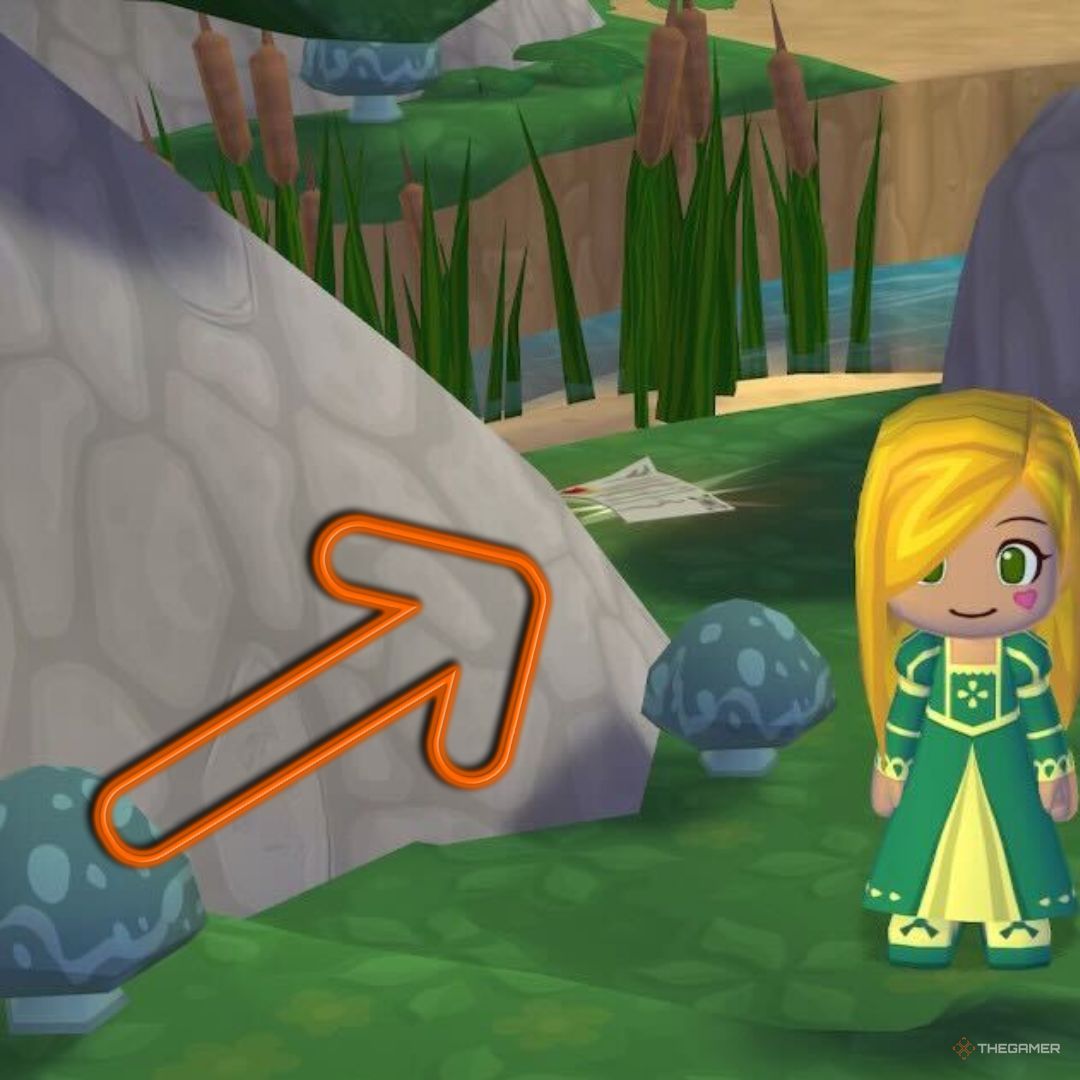
Left of the path, hidden between two rocks. You’ll find blue mushrooms and cattails nearby.