الوسم: Island Adventure

  • Mastering Keroppi: Your Guide to Friendship in Hello Kitty Island

    Building friendships with each Sanrio character is essential for unlocking new rewards in Hello Kitty Island Adventure. Players always have the option to customize their characters, and part of enhancing your bond with NPCs involves unlocking items like Avatar color palettes.

    Friendship levels can vary by character. Some friendships can reach as high as Level 25, while others cap off at Level 15. Every character on the island offers at least one Avatar palette and one side quest to complete. This guide will help you strengthen your friendship with Keroppi and detail the rewards you can earn.

    Finding Keroppi

    Keroppi location on the map in Hello Kitty Island Adventure.

    To find Keroppi, you’ll need to unlock the Spooky Swamp. First, complete the quest titled Power Up The Gate, which Chococat will assign to you. Once the Resort Gate is activated, you can access Keroppi in the Spooky Swamp. The nearest fast-travel point is the Nature Preserve, located east of Keroppi, while the Resort Gate is the next closest option.

    Gifts for Keroppi

    Selecting wood to gift to Keroppi in Hello Kitty Island Adventure.

    Keroppi enjoys receiving gifts that are related to insects, swamp-themed items, and wood. The most basic item you can craft at the game’s start is the Wood Block, which you can create once you reach Level Four in friendship with Keroppi.

    Gifts in your inventory may show one or two hearts above them; the more hearts an item has, the more it will enhance your friendship with Keroppi. One of the best ways to increase your bond is by catching critters and giving them to Keroppi. You will unlock the bug-catching net by completing the quest Open The Nature Preserve, which requires Level Two friendship.

    You will unlock the crafting recipe for Keroppi’s top-tier gift after reaching Level Ten friendship.

    Hearts

    Gifts

    One

    • Any Insect
    • Wood Block
    • Any Swamp-Related Item
      • Swamp Gift
      • Swamp Material
      • Swampy Music Box

    Two

    • Bugs from the Spooky Swamp
    • Swampy Souvenir Doll

    Three

    Rewards for Friendship

    Keroppi's friendship menu in Hello Kitty Island Adventure.

    As you progress in friendship with Keroppi, you will earn three Avatar color palettes and two crafting recipes. One of the most valuable rewards is the Stamina Apple Slice, as five of these can be combined to create a Stamina Apple, permanently boosting your stamina.

    Level

    Reward

    1

    Initial friendship

    2

    Main Quest

    3

    Keroppi Green Avatar Palette

    4

    Wood Block Crafting Plans

    5

    Stamina Apple Slice

    6

    Critter Calmer ability unlocked

    7

    Lilypad Flower Avatar Palette

    8

    Upgraded to Good Friends

    9

    Critter Friend ability unlocked

    10

    Critter Totem Crafting Plans

    11

    Critter Calmer ability upgraded

    12

    Upgraded to Close Friends

    13

    Critter Calmer ability upgrade

    14

    Sunset Avatar Palette

    15

    Upgraded to Best Friends

    Quests from Keroppi

    Keroppi's Level 2 reward quest in Hello Kitty Island Adventure.

    In order to advance in both the game and your friendship levels, it is necessary to complete quests for each character. Keroppi has only one main side quest that relates to his friendship level.

    Quest

    Description

    Story Quest: Open the Nature Preserve

    Assist Keroppi in opening the Nature Preserve.

    Daily Quests

    Quest

    Description

    Sticky Situation

    Collect five sticks found near trees.

    Awesome Blossoms

    Gather five Lotus Blossoms from lily pads in the swamp.

    Critter Companion

    Catch any critter you encounter.

    Portrait of Youth

    Snap a photo of Keroppi using your camera.

    Critter Crossing

    Catch a critter at Gemstone Mountain.

    Full Bloom

    Collect five Sakura blossoms.

    Critter Preservation

    Catch any critter again.

  • Discovering Apples in Hello Kitty Island Adventure

    Discovering Apples in Hello Kitty Island Adventure

    In the world of Hello Kitty Island Adventure, finding ingredients is essential for whipping up delicious treats. One important ingredient is apples, which pair with flour in the kitchen to create Apple Pie. This dessert can be used to complete quests or given as gifts to friends in the game to strengthen your relationships. However, apples are somewhat limited in supply.

    You can pick them directly from trees located in the Spooky Swamp. For a more reliable way to gather apples, consider playing the Bogging For Apples minigame. This fun challenge tests your quickness as you collect as many ghost apples as possible within a set time. If you have extra Game Tickets, using them here is worth it for more apples.

    How to Find Apples


    Apples are quite scarce in Hello Kitty Island Adventure, and you can only find them after you reach the Spooky Swamp. Once you’re there, head to the northern area where Kuromi roams. To the left side of that spot, you will discover the Hedge Maze.

    You must complete the Power Up The Gate quest to unlock Spooky Swamp.

    In this area, you can pick apples from the trees. However, they don’t always appear, so you might need some patience to collect enough. Fortunately, there is a minigame available that can yield a much larger supply of apples.

    How to Play Bogging For Apples Minigame

    The Bogging For Apples Minigame showcased in Hello Kitty Island Adventure.

    By the entrance of the Hedge Maze, you’ll encounter a Null who can challenge you to the Bogging For Apples minigame for one Game Ticket. The objective is to collect 20 apples in just 60 seconds. Successfully completing the challenge rewards you with five apples and various other items, including cosmetics.

    You can participate in this minigame as many times as you want, provided you have Game Tickets available.

    This minigame is relatively simple; just grab the apples as they come your way as quickly as possible. They’re laid out in an accessible pattern, so you won’t need to stray far. Collect all the apples gathered in the area and move along the path lined with them to finish the game successfully.

    How to Use Apples

    The recipe for Mama's Apple Pie shown in Hello Kitty Island Adventure.

    The apples you collect can be used in Hello Kitty’s kitchen to create various desserts. One delightful option is to make Mama’s Apple Pie, a recipe that requires you to have Dear Daniel as a guest on your island.

    You can also gift apples and apple-based dishes to characters who appreciate them, such as Hello Kitty, who has a special fondness for sweets. This will help you strengthen your connections with them.

  • Unlocking the Fishing Well in Hello Kitty Island Adventure

    Unlocking the Fishing Well in Hello Kitty Island Adventure

    Unlocking and Using the Fwishing Well in Hello Kitty Island Adventure

    In Hello Kitty Island Adventure, there are numerous features to explore, many of which become available as you advance through the storyline and develop friendships with the island’s characters. One of these features is the Fwishing Well, where you can donate fish to earn new materials.

    This guide will explain how to unlock the Fwishing Well through the quest called When You Fwish Upon a Fish, and we’ll also outline how to use the well, including what to donate and the potential rewards.

    How to Unlock When You Fwish Upon a Fish

    To start the quest When You Fwish Upon a Fish, you need to meet certain criteria. First, you must achieve level eight friendship with Hangyodon, who is the quest-giver for this task. Additionally, you’ll need to complete two other quests first, each with specific requirements:

    Quest Requirements
    Keep It Reel Level 3 friendship with Badtz-maru
    Comic Relief Level 6 friendship with Hangyodon

    Fortunately, completing these quests is fairly straightforward, so you should be able to finish them quickly. Once you’ve completed the quests and reached the necessary friendship level with Hangyodon, the quest When You Fwish Upon a Fish will become accessible.

    How to Complete When You Fwish Upon a Fish

    With the quest unlocked, it’s time to find Hangyodon. He will be located at the Fwishing Well, which is positioned just south of the central Spooky Swamp mailbox. You may have passed by this fountain several times before without realizing its importance.

    If you’re unsure of the well’s location, check your map for Hangyodon’s icon.

    After speaking with Hangyodon, he will instruct you to talk to Badtz-maru. Head over to the docks at the Seaside Resort where Badtz-maru is located. Hangyodon will accompany you, and during this conversation, you will be tasked with catching and donating five fish.

    You can catch fish from anywhere on the map. A good spot is off the docks slightly south of Badtz-maru; there’s also a fishing area located in the Spooky Swamp, just north of the central mailbox. Once you’ve gathered five fish, return to the Fwishing Well.

    Tip: It is advisable to catch six fish because Hangyodon will later ask for one to be donated. This way, you’ll have one extra fish on hand, preventing you from needing to return to the water.

    Donating Fish at the Fwishing Well

    Once you have your fish, interact with the Fwishing Well and select the five fish to donate. After confirming your donation, you will receive some Fwish Furniture. In our example, we received the Fwish Mirror.

    After donating the fish, Hangyodon will also want to take part, so make sure to give him one fish for the well. This step completes the quest!

    How to Use the Fwishing Well

    You may wonder what types of fish you can donate and what rewards you can expect. You can donate any fish in the game. As long as it is classified as a fish in your inventory, you can throw it into the well.

    Keep in mind: Donating a fish does not guarantee a reward. According to the developers, you need a cumulative score of ten points to earn a reward. Regular fish are worth one point, while rare fish are valued at two points.

    Although it’s possible that the rules aren’t entirely consistent, donating more fish at once seems to improve your chances of receiving an item. However, acquiring any piece of Fwish furniture is already quite rare. Some players report a slightly increased chance of earning smaller pieces from the Fwish furniture set, like the Fwish Plant or Fwish Nightstand.

    Note: There are 16 pieces of Fwish furniture, and the Fwishing Well is the exclusive source for acquiring these items. Below is the full list of possible items you can obtain from the well:

    Non-Furniture Rewards:

    • Dye Pouch
    • Chocolate Coin
    • Starfish
    • Stick
    • Seashell

    Fwishing Furniture:

    • Fwish Plant
    • Fwish Dining Chair
    • Fwish Lamp
    • Fwish Side Table
    • Fwish Wallpaper
    • Fwish Flooring
    • Fwish Nightstand
    • Fwish Ottoman
    • Fwish Armchair
    • Fwish Bed
    • Fwish Bookcase
    • Fwish Dining Table
    • Fwish Sofa
    • Fwish Mirror
    • Fwish Dresser

    Now you’re ready to explore the depths of the Fwishing Well and uncover all the treasures available in Hello Kitty Island Adventure! Enjoy your time in this charming game!

  • Locating the Owner of Lost Luggage in Hello Kitty Island Adventure

    Locating the Owner of Lost Luggage in Hello Kitty Island Adventure

    After making a quick escape from their plane, everyone from Hello Kitty Island Adventure landed safely on the island, thanks to their balloons. Now, as they settle in, they realize something crucial is missing: their luggage. It’s scattered all over the island, and no one knows where it is or who it belongs to.

    Cinnamaroll has been appointed as the island’s mail carrier, but he’s overwhelmed with deliveries and doesn’t have the time to search for the lost bags. That’s where you come in! With your tools, it’s your job to help Cinnamaroll locate all the misplaced luggage and return them to their rightful owners.

    How to Start Your Search for Lost Luggage

    Finding any piece of lost luggage will kick off your quest. The first one you can locate is Chococat’s, which is fairly easy to find since it doesn’t require too much progress in the story and only needs one of your primary tools.

    Once you discover the luggage, you’ll need to identify its owner and return it to one of seven characters who have lost something: Badtz-maru, Chococat, Hangyodon, Hello Kitty, Keroppi, My Melody, and Kuromi.

    Helpful Tip: If you check the menu and read the info tab for each piece of luggage, it will provide a hint about who it belongs to based on the description and the symbol for their liked items.

    You can find the Packaged Luggage at various locations throughout the four main regions of the game. They look like a blue and pink box with wings, matching Cinnamaroll’s color scheme.

    While there isn’t a big reward for collecting all the luggage like some quests, every time you drop off a piece of luggage, it boosts the character’s Friendship level significantly. So, it’s definitely worth the effort to collect and return them!

    Badtz-maru’s Lost Luggage

    To track down Badtz-maru’s Packaged Luggage, you’ll need to unlock the gate to the Spooky Swamp. Once through, head to the northern edge of the region, go past the minecart track, and use the rocks to climb up the cliff.

    Tip: You can reveal the foggy areas on the map by lighting up the Minecart Tour’s three lanterns, but it’s not necessary to find Badtz-maru’s luggage.

    Run along the cliff until you get to a flat area in the center, where you’ll find his Packaged Luggage overlooking a sandy spot with shallow water. Once you’ve got it, take it back to Badtz-maru at his Comic Stand to complete that part of your quest.

    Chococat’s Lost Luggage

    For Chococat’s luggage, you’ll need to open the large gates and make your way into the Spooky Swamp, where you’ll find the other piece of the Flippers that allow you to swim without being sent back to shore.

    Once you have the Flippers, go to the Resort area of the island and swim into the lake south of Chococat’s house. The Packaged Luggage is near the shore closest to him. After collecting it, head to Chococat’s home to return it.

    Hangyodon’s Lost Luggage

    The next piece of luggage belongs to Hangyodon, and you’ll need to reach Gemstone Mountain for it. This region is located northwest of the Spooky Swamp, and the only requirement is to have previously unlocked the Spooky Swamp.

    Note: You don’t need the Flippers for this quest, but they can help save time by allowing you to swim through the surrounding waters.

    You can find Hangyodon’s luggage at the southwestern edge of Gemstone Mountain, on a cliff beside a broken staircase where a Nul is wandering. To deliver the luggage to Hangyodon, you need to reach Friendship level six with Kuromi and complete her Deep Diving quest to obtain a Snorkel. Once you have it, head to the Comedy Club in the underwater region’s southwestern corner to return the luggage.

    Hello Kitty’s Lost Luggage

    To find Hello Kitty’s luggage, make sure you’ve unlocked the Spooky Swamp, acquired the Flippers, reached Friendship level six with Kuromi, and obtained the Snorkel.

    From there, swim or walk to the waters south of Gemstone Mountain, and find the large pier in the middle of the southern region. Dive in, and you’ll spot the Packaged Luggage near a set of three rocks to the left of a ledge with a Radiant Chest. Return it to Hello Kitty to complete another quest.

    Keroppi’s Lost Luggage

    Keroppi’s luggage can be found on Mount Hothead, the volcanic area in the northwestern part of the map.

    Be sure to have a good amount of stamina before attempting to reach this location, as climbing there requires navigating high cliffs. To access Mount Hothead, unlock the Spooky Swamp and get the Flippers from Chococat’s quest.

    Travel from the western side of the resort, cross Moonstone Island, and swim to reach the area. Begin at the fast-travel mailbox at the bottom, and carefully climb the rocks and cliffs on the volcano’s western side.

    If you want to save stamina, jump to your maximum height and cling to the wall as you climb. Once you reach the secondary level with buildings, go to the edge and hop between the rocks along the cliff to reach the top. Run along the volcano’s rim, and then jump down to where the debris is situated. Finally, hop over to the rocks to find Keroppi’s Packaged Luggage, and bring it back to him at the Resort or Nature Preserve.

    Kuromi’s Lost Luggage

    Kuromi’s luggage is back near the Comedy Club. Again, ensure you’ve unlocked the Spooky Swamp, reached Friendship level six with Kuromi, and obtained the Snorkel.

    Fast-travel to the Comedy Club in the Rainbow Reef, then swim over the fence south of that area to find Kuromi’s luggage in the sand near some coral. After retrieving it, head back to her in Spooky Swamp to hand it over.

    My Melody’s Luggage

    Finally, My Melody’s luggage is the second one you’ll find at Mount Hothead, but it’s much easier to reach than Keroppi’s.

    You can either swim from Moon Island, using the rocks and ledges to climb, or use the Mount Hothead fast-travel mailbox. From the first mailbox near the ruins, head east along the path until you locate the second ledge adorned with palm trees and plants.

    The luggage is positioned on the edge of this ledge between three yellow flowers and some Toasted Almonds. Return it to My Melody to finish the entire luggage quest.

  • Unlocking the Dessert Machine in Hello Kitty Island Adventure

    Unlocking the Dessert Machine in Hello Kitty Island Adventure

    Is there anything better than relaxing with a delicious dessert? In Hello Kitty Island Adventure, you can whip up a variety of sweet treats, including puddings, ice creams, and milkshakes. So, how do you embark on this tasty journey?

    This guide provides you with all the details you need to know about crafting desserts using the Dessert Machine in Hello Kitty Island Adventure. We’ll cover its location, every recipe available, and give a brief overview of your first trip to Gemstone Mountain.

    Where to Find the Dessert Machine

    The Dessert Machine is located inside Pompompurin’s shop on Gemstone Mountain, known as the Dessert Boat. At first, this shop is situated at the bottom of a dry lake. However, once you complete a quest titled Revive the Oasis, the boat will be floating close to a dock next to the fast-travel mailbox.

    After reaching this spot, you can easily use the Dessert Machine by mixing ingredients with a base item called Cactus Cream. You can find Cactus Cream in the area just south of the Dessert Boat, but it’s somewhat rare, so we have highlighted it on the map above.

    If you have a Nul collector, they can gather up to 12 Cactus Creams each day. This is a fantastic way to stockpile this ingredient without having to hunt for it yourself.

    How to Reach Gemstone Mountain

    After finishing the quest Power Up The Gate, you can explore the beach area of Gemstone Mountain. However, getting to a higher level isn’t a walk in the park. You have two main options: repair the zipline from the Spooky Swamp or find a climbable rocky surface.

    The easiest way to proceed is to repair the zipline by completing the quest A Zipline Adventure. For this, you’ll need to have a friendship level of four with Pochacco. Once you’ve fixed the zipline from Seaside Resort to Spooky Swamp, you can access the line leading up to the higher level of Gemstone Mountain.

    Alternatively, you can look for a rocky area that’s just climbable enough. While this isn’t the traditional method, you can pause on a small rock to let your stamina recharge. We tried this at TheGamer and, after a few attempts, successfully made it up.

    Be sure to interact with the fast-travel mailboxes located here for easy return trips.

    Upgrading the Dessert Machine

    After reaching friendship level 13 with Pompompurin, the Dessert Machine will upgrade. This enhancement allows you to combine Cactus Cream with two additional ingredients instead of just one. No quests are required for this upgrade; just make sure to give Pompompurin daily gifts.

    When you hit friendship level 15 with Pompompurin, you’ll get crafting plans to create your own Dessert Machine. This requires five Sparks, ten Mechanisms, and 100 Cactus Creams. You can place this machine in cabins.

    Every Dessert Recipe

    Here, you can find a comprehensive list of all the recipes you can create using the Dessert Machine.

    A few recipes have different preparation methods, so they are listed separately. For instance, there are three icons for Sweet Pudding, each representing a different way to create it. Keep this in mind when checking your recipe book; missing recipes could be alternate methods.

    Additionally, you can make two special event-related recipes with the Dessert Machine. Combine one Bubble and one Snowcicle to create the 50th Anniversary Shake, celebrating Hello Kitty’s milestone. The other option is the Birthday Cake Shake, part of the Happy Haven Days event, which calls for one Snowcicle and some Rainbow Sprinkles.

  • Reviving the Oasis in Hello Kitty Island Adventure: A Guide

    Reviving the Oasis in Hello Kitty Island Adventure: A Guide

    In Hello Kitty Island Adventure, there are numerous quests to undertake. As you explore different parts of the game and build friendships with various characters, you may find that the number of unfinished quests can feel overwhelming. Additionally, your quest log will show quests that you’re not yet able to start.

    One notable quest you will eventually tackle is called Revive the Oasis. This quest is relatively simple but significantly transforms Gemstone Mountain’s scenery. Moreover, it’s crucial for unlocking many subsequent tasks. Here’s how to successfully complete Revive the Oasis in Hello Kitty Island Adventure.

    How to Unlock Revive the Oasis

    Before you can start Revive the Oasis, there are several prerequisites to fulfill. You will need to complete Dessert-ed Boat and Parched, and raise your friendship level with My Melody to level 11.

    Both Dessert-ed Boat and Parched come with their own requirements, which are outlined below:

    • Requirements for Dessert-ed Boat:

      • Friendship Level 4 with Pompompurin
      • Complete Power Up The Gate (this just requires a level 1 friendship with Chococat)
    • Requirements for Parched:

      • Complete Dessert-ed Boat
      • Complete Open the Nature Preserve
      • Complete Meet the Island Beings

    Once you’ve cleared both of these main quests and reached level 11 with My Melody, you can begin Revive the Oasis.

    How to Start Revive the Oasis

    Your first task in this quest is to find Keroppi, located near the Oasis in Mount Gemstone. His position is marked by a player icon on your map, situated on a bridge at the upper end of the valley area near Pompompurin’s boat.

    When you talk to Keroppi, he will be examining a boulder that’s obstructing an entrance. After your chat, My Melody will appear and instruct you to explore the vicinity. My Melody advises you to follow the dry riverbed, but for now, simply stick with her and Keroppi as they head northwest.

    The duo will lead you to a cave entrance that you can enter. This entrance is just a short distance away; continue heading north across the bridge. If you happen to lose your way, My Melody and Keroppi will still be in the vicinity.

    How to Find the Source of Water

    Once you’re inside the cave, you’ll discover the dry riverbed along with a wooden plank path. The route to the water source is straightforward. From the first area, travel to the top right corner and exit through there. When you enter the second area, head again to the top right corner.

    Doing so will take you to a new section featuring an underwater lake where you’ll find Chococat, who will share what he’s doing.

    Your objective here is to break the boulder blocking the water flow. After speaking with My Melody and Keroppi, Chococat will give you the blueprints for crafting a pickaxe. You’ll need to leave this area and create the tool.

    How to Make the Pickaxe

    Return to a Crafting Station to create the pickaxe. You’ll need to gather ten Woodblocks and three Ingots for this. After crafting it, make your way back to Chococat, My Melody, and Keroppi.

    The trio will still be waiting in the cave, so just use the nearest fast-travel mailbox and follow the path back to them.

    How to Break Boulders and Restore Water Flow

    To break the boulders, simply approach them. Your interaction prompt will change to the pickaxe icon. Tap it several times until the boulder crumbles. You don’t actually need to equip the pickaxe to do this; just approach any boulder.

    Make it your goal to break all the boulders obstructing the water pathway. There are a total of four boulders you need to remove. Follow the dry riverbed and break any boulders that are blocking your way.

    If you lose track of where you are, don’t worry! The quest marker will guide you toward any boulders you haven’t broken yet. After clearing the boulders, return to speak with everyone just outside the cavern near Pompompurin’s boat.

    How to Complete Revive the Oasis

    After your conversation with Keroppi, Kiki and Lala will appear. They will express their gratitude for reviving the Oasis and reward you with a star fragment. However, note that these two characters remain locked for now.

    Once you’ve completed the quest, the Dessert Boat will be permanently docked at the new location. Instead of jumping into the dry lake, fast-travel to the Oasis and walk over to the boat.

    Completing Revive the Oasis is vital as it unlocks many other quests in the game. Check your quest log for updates; some quests may no longer appear grayed out. This quest is significant, especially if you want to obtain the pickaxe!

  • Mastering Swimming in Hello Kitty Island Adventure

    Mastering Swimming in Hello Kitty Island Adventure

    Hello Kitty Island Adventure offers various tools to help you navigate the island, with Flippers being one of the first essential items you’ll acquire. They enable you to take a dip in the water, allowing you to explore new areas.

    To get your Flippers, you must first find Keroppi, a friendly frog residing in Spooky Swamp. He’ll generously provide one of the necessary materials. However, locating the Straps can be a bit tricky since they’re safely tucked away in a chest. Once you’ve crafted your Flippers, you’ll be able to use water to access shortcuts and discover hidden spots.

    How to Craft Flippers


    Once you unlock Spooky Swamp, you can find Keroppi the frog there. Cross the bridge, and climb the purple hill with wooden planks. If you keep heading east, you’ll come across him.

    Ensure you have activated the Finding Flippers quest, which you can start by approaching any body of water.

    When you interact with Keroppi and reach a level one friendship, he will share the crafting plans for the Flippers with you. At the crafting table, combine one Fin and one Strap to make the Flippers.

    Keroppi will provide the Fins once you become friends, so that’s one part of the recipe covered. However, finding the Straps can be challenging since they aren’t found out in the open world nor given as quest rewards.


    The player has opened the chest which contained the straps in Hello Kitty Island Adventure.

    You can find Straps only inside a specific chest at this stage of the game. Head north into Spooky Swamp. If you walk along the wooden path above the water, you will discover the chest there.

    How to Swim


    The player is swimming near the coast in Hello Kitty Island Adventure.

    Flippers will automatically activate when you enter water. Swimming significantly enhances your exploration in Hello Kitty Island Adventure, allowing you to take shortcuts. You can quickly reach Spooky Swamp by swimming from the right side of the large gate.

    Additionally, you’ll unlock new puzzles and areas that were previously unreachable. One of these new locations is Mount Hothead, which you can access by swimming northwest.

    You won’t run out of stamina while swimming, so feel free to explore to your heart’s content.

  • Discover All Mermaid Outfit Pieces in Hello Kitty Island Adventure

    In Hello Kitty Island Adventure, there are numerous quests to tackle, ranging from straightforward fetch tasks to more involved storylines that guide you around the map. One notable quest involves finding objects in Comic Relief, which is assigned by Hangyodon.

    During your adventure in Comic Relief, you’ll be tasked with finding three parts of a Mermaid Outfit. This quest can be a bit challenging due to the area you need to cover. Fortunately, the locations of each piece are the same for every player. Here’s a guide to help you locate all parts of the Mermaid Outfit.

    For each piece, we’ve included a map and an image of the surrounding area.

    Purple Scale Mermaid Tail

    The Purple Scale Mermaid Tail can be found just to the east of the Comedy Club mailbox. When you look toward the Spooky Swamp, you’ll spot a lower wooden bridge that curves into the water, leading to a small patch of land that rises slightly. The tail sits on a small ledge in a vertical position, resembling the end of a fish’s tail.

    Teal Scale Mermaid Tiara

    The Teal Scale Mermaid Tiara is located between the Comedy Club and the larger section of the Cozy Islands. On the map, you should see three green circles, with the upper two appearing relatively close to each other.

    These circles mark underwater boulders with coral surrounding them. You can find the tiara at the bottom edge of the middle boulder, in the gap between the upper two and the lower boulder.

    Some players have reported finding the tiara before starting this quest. If that’s the case for you, keep it! Avoid using a Null unless you recall where you found it. If you already possess all the pieces, just wear them and speak to Hangyodon to avoid unnecessary searching.

    If you already have different versions of the outfit (like the Fall colors), make sure to wear the exact colors specified in this guide! Different colors may prevent Hangyodon from recognizing your progress.

    Teal Scale Mermaid Armor

    The Teal Scale Mermaid Armor is located to the southeast of the tiara’s position. Here, you will find cobblestone paths bordered by white edges. The armor rests in a large cobblestone ‘circle’. Additionally, there’s a fallen column situated on the upper side of this area.

    Once you’ve collected all three pieces, they will show up in Tuxedosam’s shop. This provides a handy way to buy the pieces if you venture to another player’s island. If they have already acquired all pieces and have one available in their shop, you can simply visit and purchase it.

  • Mastering Friendship with Retsuko in Hello Kitty Island Adventure

    Mastering Friendship with Retsuko in Hello Kitty Island Adventure

    Sanrio characters aren’t just all sweetness and light, and Retsuko is a prime example of that. Also referred to as Aggretsuko, this newer Sanrio figure has a fiery personality, which is fitting considering she resides on Mount Hothead in Hello Kitty Island Adventure.

    This guide will help you locate and make friends with Retsuko in the game. We’ll discuss her favorite gifts and the friendship rewards you can earn. Note that you can’t find her in the initial area, so don’t expect to befriend her right away when you start playing.

    Where to Find Retsuko

    Retsuko resides on Mount Hothead, but there are some prerequisites to get there. Fortunately, these aren’t overly challenging. First, you must complete the quest called Power Up the Gate. This quest is pretty early in the game and is essential for accessing locations beyond the Seaside Resort.

    After finishing that quest, you can technically reach Mount Hothead by traveling through the Spooky Swamp and over the beaches of Gemstone Mountain. It’s a lengthy trek, but there are bridges and elevated land linking these areas.

    If you complete the “Finding Flippers” quest and can swim, you can also swim across from the Seaside Resort to Mount Hothead. You’ll arrive at the lower beaches, but you can climb to higher levels if you choose.

    A mailbox is located near Retsuko’s area; once you unlock the fast-travel points and visit the mailbox at least once, you can use it to quickly teleport to her location.

    If Retsuko doesn’t appear in the central part of Mount Hothead, don’t panic. During our visit, we found her in the Hotsprings area of Mount Hothead. If you’re having trouble locating her, you can always check your map for her icon.

    Gifts to Give Retsuko

    Like the other characters in Hello Kitty Island Adventure, Retsuko enjoys receiving gifts. Any gift that has the Fire, Music, or Metal tag will earn at least a one-heart rating. There are also higher-tier gifts that yield even more friendship points, though they can be harder to come by.

    Below, you’ll find the gifts that earn two and three hearts with Retsuko:

    Hearts

    Gifts

    3 Heart

    Volcanic Guitar

    2 Heart

    Volcanic Soundtrack


    Microphone


    Sounds of Steel

    When you give Retsuko a gift, she will reward you with dough, which is mainly used for making pizza (at the nearby oven).

    Finding these gifts can be a bit tricky, but we recommend giving Retsuko Toasted Almonds, which can be found around Mount Hothead. You can also use these almonds along with some dough to create Toasty Pizza.

    Friendship Rewards

    Retsuko has a total of 20 friendship levels. By giving her gifts and completing daily tasks, you can elevate your friendship, with each level offering unique rewards.

    Below, you’ll find a breakdown of the 20 levels and the associated rewards:

    The Adrenaline ability slows your stamina drain, while the Hot Stuff ability enables you to swim in molten rock.

    Quests from Retsuko


    As you progress your friendship with Retsuko, several quests will unlock. These are one-time quests that usually involve upgrading the island or unlocking new features. Here are the two quests related to Retsuko:

    Quest

    Description

    Enraging Ruins

    Before attempting this quest, you must complete Power Up The Gate.


    This quest involves venturing through the Red Hot Ruins to retrieve Retsuko’s lost items.


    A fast-travel mailbox for Mount Hothead will unlock once you finish this quest.


    This quest can be quite long, but stay close to Retsuko and Chococat.

    Fire Up The Volcano

    You must complete Enraging Ruins before you can start this quest.


    This lengthy quest primarily takes you to Caldera of Mount Hothead, which you will then be able to explore.

    Daily Quests

    Retsuko has six daily quests that can appear each day; however, this isn’t guaranteed, so some days may feature quests from other characters instead. These tasks involve simple activities like visiting locations or crafting items.

    Quest

    Description

    Deepest Dark

    Dive to the bottom of the Hole (located slightly to the right of Moon Island).

    Fiery Flowers

    Collect 2 Magma Blooms.

    Heavy Metal

    Collect 2 Iron.

    Heavier Metal

    Craft 1 Ingot.

    Heaviest Metal

    Obtain a Volcanic Music Box.

    Ride the Waves

    Visit the Rainbow Reef.

    Completing these quests will earn you friendship points with Retsuko.

  • Mastering Pochacco: Your Guide to Friendship in Hello Kitty Island

    Mastering Pochacco: Your Guide to Friendship in Hello Kitty Island

    Hello Kitty Island Adventure features a variety of islands, each hosting beloved Sanrio characters. One character you’ll encounter is Pochacco, who has a love for fitness and active pursuits. Establishing a friendship with Pochacco is essential, as it unlocks the zipline system, enhancing your exploration.

    In this guide, we’ll explore how to find Pochacco for the first time and form a friendship with him. We’ll also discuss the benefits of increasing your friendship level and the special quests associated with Pochacco.

    Where to Find Pochacco

    Finding Pochacco is quite simple; no special tools are needed. You’ll locate him to the right of the main plaza at the Seaside Resort, just near the Resort Plaza mailbox. He usually stands outside the building, but if he’s not there, you can always check the map for his current location by looking for the Pochacco icon.

    Gifts to Give Pochacco

    Pochacco appreciates gifts, particularly those tagged with Sports, Healthy, or Veggie icons, which resemble a trophy, a heart, and two small leaves. Any gift with one of these tags counts as a one-heart gift.

    You can also give two and three-heart gifts for more friendship points. Below is a list of gifts and their corresponding heart values:

    Hearts Gifts
    3 Heart Pochacco Energy Pop
    2 Heart Veggie Crepe
    Everything Pizza

    When you give Pochacco a gift, he returns the favor with some Strawberries. A great early gift for him is Tofu, which you can obtain by gifting Hello Kitty. Interestingly, Hello Kitty accepts Strawberries, making the two characters a good match for gifting.

    Friendship Rewards

    By giving gifts to Pochacco, you can level up your friendship. He has 20 levels of friendship, each offering unique rewards. Here’s a look at what you earn as you progress:

    Level Reward
    1 Friendship (Pochacco is now your friend)
    2 Magnet
    3 Avatar Palette
    4 A Zipline Adventure quest
    5 Stamina Apple Slice
    6 Spooky Candelabra (furniture item)
    7 Avatar Palette
    8 Speed Walker Ability (level one) & Pochacco becomes your companion
    9 Spooky Dining Chair
    10 Friendship (you’re good friends now)
    11 Pochacco Energy Pop
    12 Stamina Apple Slice
    13 Speed Walker Ability (level two)
    14 Relay Ability
    15 Friendship (you’re close friends now)
    16 Everything Pizza cooking recipe
    17 Avatar Palette
    18 Speed Walker Ability (level three)
    19 Spooky Side Table (furniture item)
    20 Friendship (you are now best friends with Pochacco!)

    The Speed Walker ability allows you to walk faster, while the Relay Ability enables Pochacco to assist you in completing island challenges.

    Quests from Pochacco

    Completing quests associated with Pochacco can also help you unlock features like the zipline. Although there aren’t many quests, they are essential for enhancing your game experience. Below are the quests and their descriptions:

    Quest Description
    Pochacco Energy Pop After completing "Revive the Oasis" and "A Zipline Adventure," create a drink for Pochacco.
    A Zipline Adventure After finishing "Power Up the Gate," help Pochacco and Chococat repair the zipline. This will give you access to Gemstone Mountain.

    Daily Quests

    Pochacco also offers daily quests that you can complete every day. However, not all will be available simultaneously, as some may require you to meet specific characters or reach certain locations, like Icy Peak. Here are the potential daily quests you can undertake:

    Quest Description
    Bog Jog Visit the Spooky Swamp
    Dive Training Dive to the Sunken Ship (Rainbow Reef)
    Fast Fashion Visit Tuxedosam’s clothing shop
    Feel the Burn Climb to the Caldera (Mount Hothead)
    Maximum Energy Visit Hello Kitty Cafe
    Out and Back Touch the buoy at Seaside Resort
    Progress Pictures Take a picture with Pochacco
    Quick Stroll Visit Small Gift Big Smile (My Melody’s shop)
    Relaxation Station Visit Dessert Boat (Pompompurin’s location)
    Such Great Heights Visit Icy Peak
    Wide Open Spaces Visit Gemstone Mountain

    The reward for completing these quests is the enhancement of your friendship with Pochacco.

  • Unlocking the Camera in Hello Kitty Island Adventure: A Guide

    Unlocking the Camera in Hello Kitty Island Adventure: A Guide

    The islands featured in Hello Kitty Island Adventure are stunning, and you won’t just have to rely on your memory to enjoy them. Early in the game, you will acquire a camera that’s initially meant for snapping photos of Gudetama scattered throughout the area.

    This guide will explain how to unlock and use the camera. We’ll discuss what subjects you can photograph, as well as how to utilize Photo Ops. Overall, the camera is user-friendly and a fun way to showcase your character alongside your favorite locals.

    How to Unlock the Camera


    To unlock the camera, you’ll need to reach friendship level one with Pochacco. This is the very first friendship tier, and it’s quite easy to achieve. Just chat with Pochacco and offer him a couple of gifts to reach this level and unlock the quest titled Gudetama Snap.

    Pochacco is located to the right of the Resort Plaza, so he won’t be hard to find. To build your friendship with him, simply give him a few pieces of tofu. This is considered a one-heart gift that you can earn by giving items to Hello Kitty.

    This quest is straightforward, as it requires you to take a picture of a Gudetama figure. You won’t have to wander far to find one; once you do, the camera will be unlocked, allowing you to use it freely.

    How to Use the Camera

    To get started with the camera, first, select it from your circular toolbar. This will make the camera icon appear on the bottom right side of your screen. From there, you can click the icon to enter camera mode.

    In camera mode, you’ll see a couple of additional options. Above the camera icon, you’ll find two new buttons. The left button opens up a variety of emotes for poses, while the right icon makes your character face the camera.

    At the bottom of the screen, there are two more buttons. The leftmost one makes all characters in view face the camera, including any residents or guests present. Meanwhile, the rightmost button copies your character’s pose for the nearby NPC.

    When you click the camera icon, a picture will be taken, and you’ll then see a few choices.

    Action

    Description

    Accept

    This accepts the photo but doesn’t save it to your device.

    Save

    This saves the photo to your device (for instance, to your phone’s camera roll).

    Share

    This presents sharing options, including posting to social media or sharing via Discord.

    Retake

    This takes you back to camera mode to snap the picture again.

    You can utilize the camera to capture images of nearly anything. Some quests will ask you to take specific photos, but you can also take pictures just for fun. We enjoy posing with characters around the island and saving those memories!

    How to Use Photo Ops

    Photo Ops are specific areas around the island where you can capture moments with residents and visitors. To unlock these locations, you first need to complete the quest Picture Day, which becomes available after finishing a few other quests:

    • Meet the Island Beings
    • Gudetama Snap
    • Enraging Ruins

    After acquiring Picture Day, your task will be to take photos of My Melody and then head to the southern beach at the Seaside Resort. After completing several photo-taking activities, My Melody will instruct you to explore other Photo Op locations in Spooky Swamp, Gemstone Mountain, Mount Hothead, and Rainbow Reef.

    Luckily, you won’t have to search high and low for these spots. They will be marked on your map with a black baseball cap featuring a camera icon. Head to these indicated spots to snap your pictures.

    To invite characters for a photo, just speak with the nearby Null (the one wearing a black hat). You will then be able to choose which characters you’d like to include in your photo. Some may be busy and unable to participate, but you’re sure to find a few willing to pose with you.

  • Guide to Making Friends with Badtz-maru in Hello Kitty Island

    Guide to Making Friends with Badtz-maru in Hello Kitty Island

    Hello Kitty Island Adventure offers a delightful experience featuring a mix of beloved and lesser-known Sanrio characters. One such character is Badtz-maru, a playful little penguin whose birthday falls on April 1st—no wonder he loves to joke around!

    This guide will explain how to become friends with Badtz-maru in Hello Kitty Island Adventure, covering the quests involved and the rewards you’ll earn as your friendship grows. You can start befriending Badtz-maru right from the beginning of the game; there’s no need to unlock additional features or travel far.

    Where to Find Badtz-maru

    You’ll typically find Badtz-maru at the Seaside Resort near the docks, where he runs a comic book shop. Nearby, there’s a fast-travel mailbox that makes it easy to reach him.

    If you can’t find him right away, don’t fret! His icon on the map will always indicate where he is, so simply zoom out a bit and look for his icon to guide you.

    Gifts to Give Badtz-maru

    Want to improve your friendship with Badtz-maru? The simplest way is to offer him gifts every day, with a maximum of three per day. Any gifts that fall under the Joke, Tropical, or Pizza categories will grant you at least one heart.

    However, some gifts are particularly special and can earn you two or even three hearts. Here’s a quick rundown of the standout gifts:

    Hearts Gifts
    3 Heart Ultimate Joke Pizza
    2 Heart Pineapple Pizza

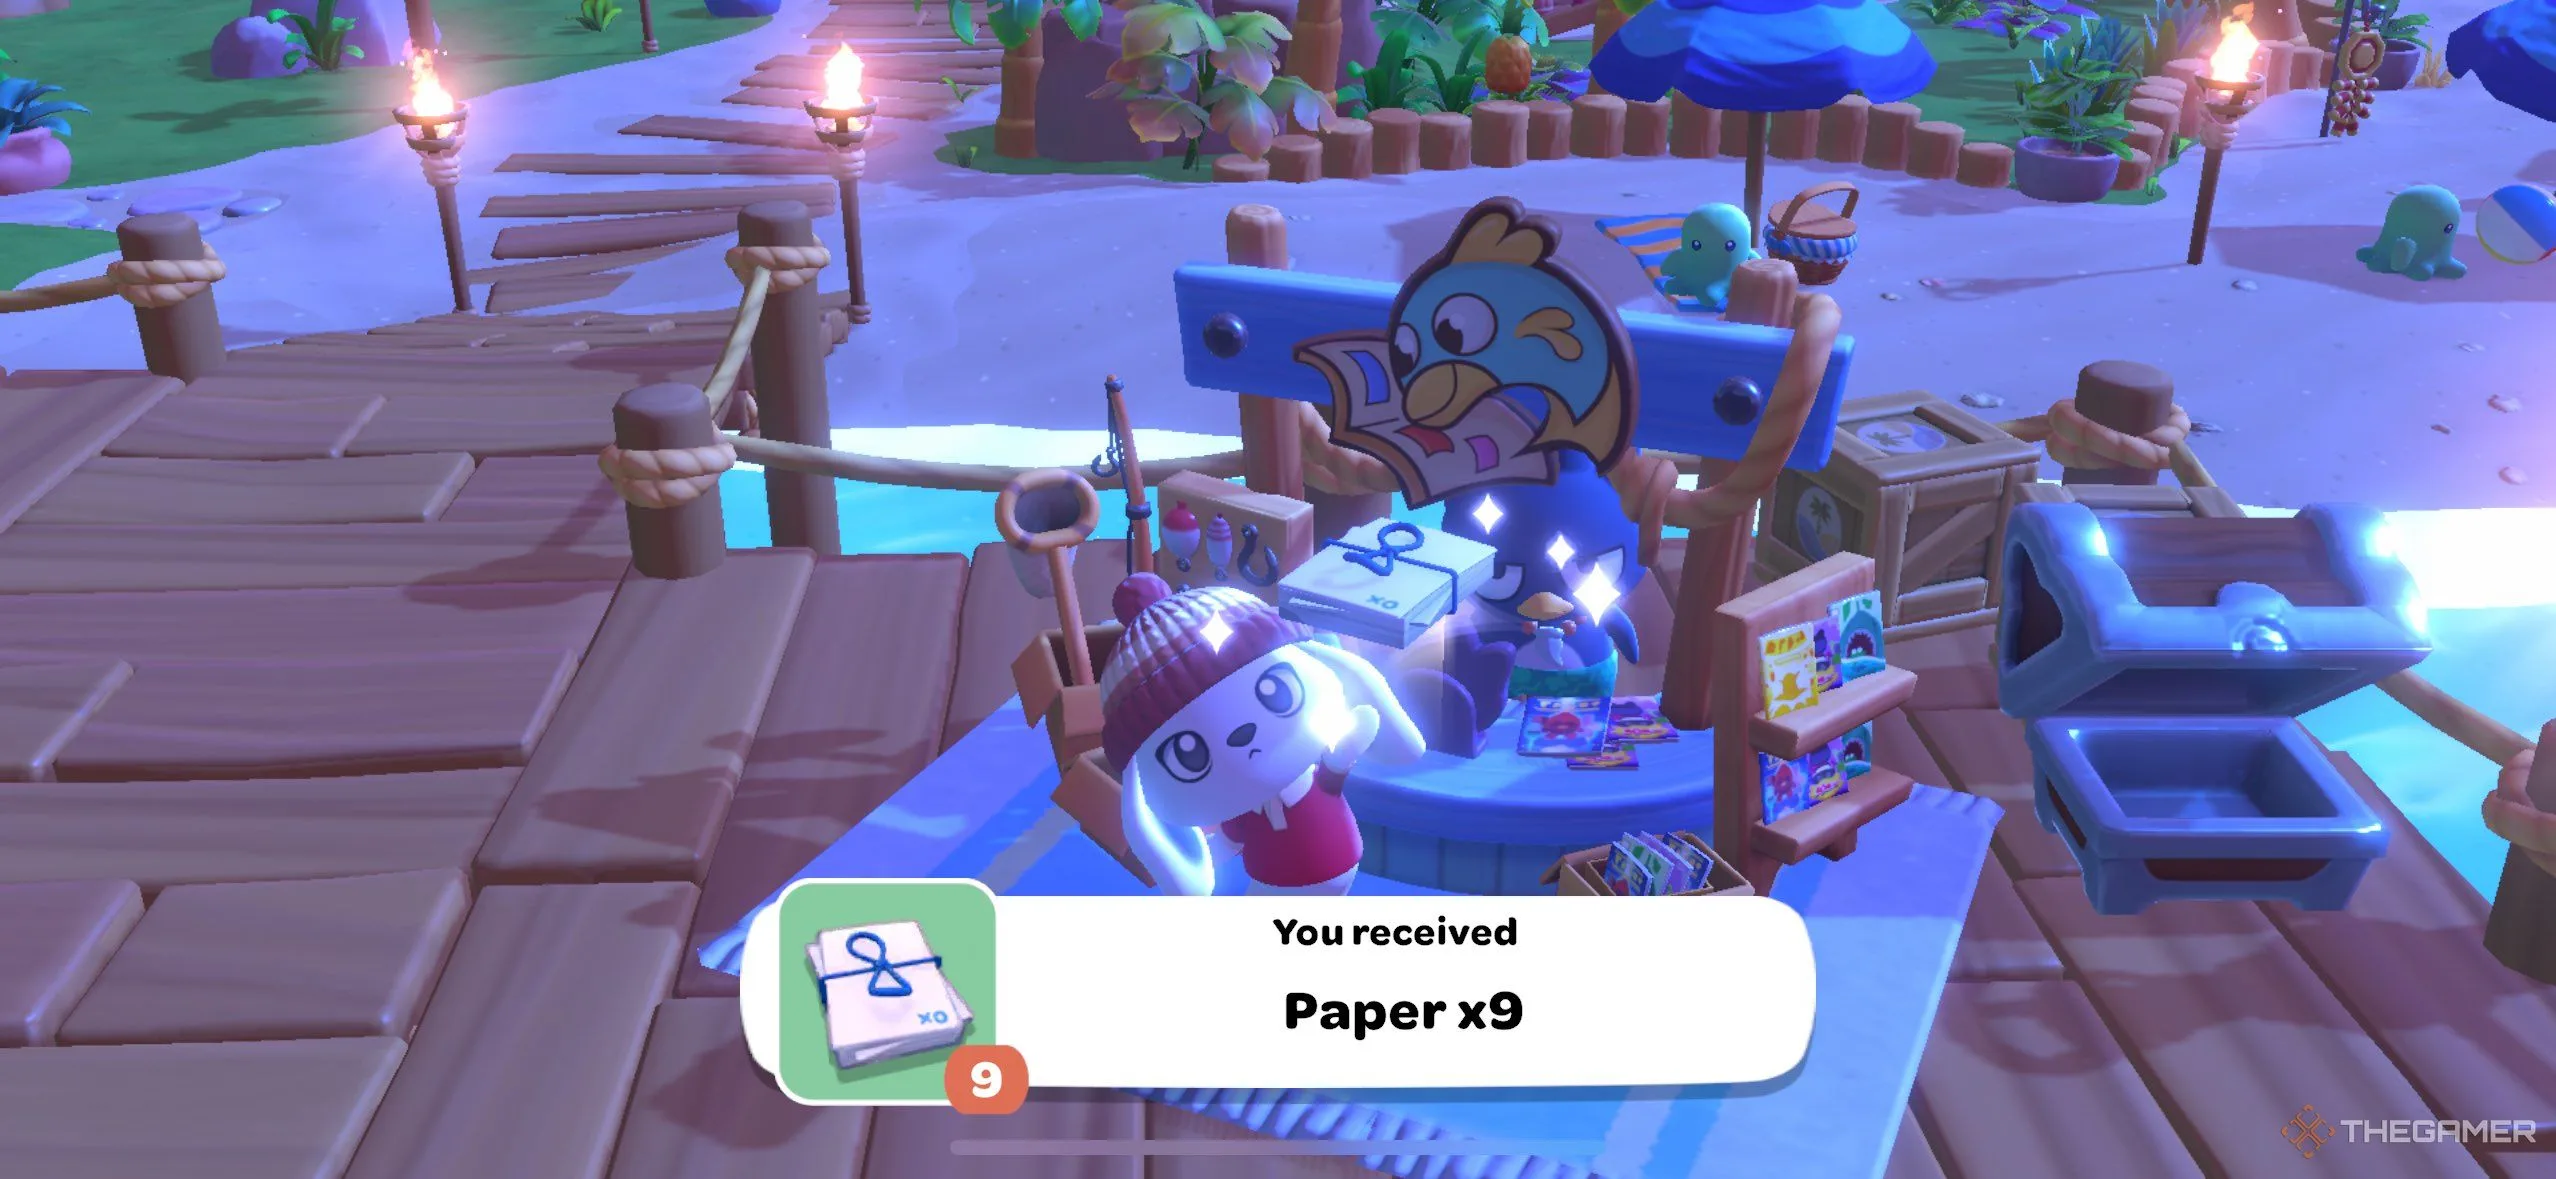
    As a bonus, when you give Badtz-maru a gift, he’ll reward you with some paper!

    Friendship Rewards

    You can develop your friendship with Badtz-maru through 20 different levels, each unlocking various rewards ranging from furniture to new quests. Below is a list of the rewards you can earn as your friendship deepens:

    Level Reward
    1 Friendship (Badtz-maru is now your friend)
    Prank Preparation quest
    2 Magnet item
    3 Keep it Reel quest
    4 Stamina Apple Slice
    5 Fish Whisperer Ability (Level 1)
    Badtz-maru can join you now
    6 Badtz-maru Avatar Palette
    7 Fish Whisperer Ability (Level 2)
    8 Pirate Chair furniture item
    9 Gamer Ability
    10 Friendship (you’re now good friends)
    11 Fish Noir quest
    12 Fish Whisperer Ability (Level 3)
    13 Pirate Standing Lamp furniture item
    14 Surprising Soda recipe
    15 Friendship (you two are close friends)
    16 Pirate Table furniture item
    17 Fish Whisperer Ability (Level 4)
    18 Pirate Bed furniture item
    19 Badtz-maru #1 comic
    20 Friendship (you are now best friends!)

    Additionally, when you reach certain friendship milestones, you’ll gain one free Ticket to use daily and enhance your chances of attracting rare fish through the Fish Whisperer ability.

    Quests from Badtz-maru

    As you build your friendship with Badtz-maru, you’ll notice that various quests become available. Completing these quests can unlock new features around the island, as well as unique cosmetics or items. Below is a list of the quests related to Badtz-maru:

    Quest Description
    Prank Preparation Collect rubber to make Water Balloons for Badtz-maru.
    Keep it Reel Tutorial quest that teaches fishing and unlocks the fishing rod.
    Fish Noir After completing Comic Relief, find clues for Badtz-maru to earn a detective outfit.

    Daily Quests

    Badtz-maru also has simpler daily quests that usually involve gathering or crafting items, visiting locations, or snapping photos. Here’s a list of potential daily quests you might encounter:

    Quest Description
    A Quick Hike Climb to Icy Peak
    Badtz-maru’s Bad Day Give Badtz-maru 3 sheets of paper
    Badtz-maru’s Best Day Ever Gift Badtz-maru an Ultimate Joke Pizza
    Badtz-maru’s Really Bad Day Give Badtz-maru a Water Balloon
    Badtz-maru’s Unbelievably Bad Day Gift "Badtz-maru Meditations on Resilience" (book)
    Cave Fishing Catch a fish in Gemstone Mountain caves
    Custom Merch Craft something
    Fishing Adventure Catch a fish at Mount Hothead (pier)
    Fishing Journal Take a picture with Badtz-maru
    Fond Memories Capture a photo with Kuromi
    Lava Fishing Catch a fish in the Mount Hothead Caldera
    Restocking the Store Give Badtz-maru something with the Book tag
    Swamp Monster Catch a fish in the Spooky Swamp
    Windy Day Collect a comic book

    Completing these quests will help solidify your friendship with Badtz-maru!

  • Unlocking All Seaside Resort Puzzles in Hello Kitty Island Adventure

    Unlocking All Seaside Resort Puzzles in Hello Kitty Island Adventure

    Hello Kitty Island Adventure is a charming game overall, but some parts can really challenge your thinking skills. A big reason for this is the puzzle rooms scattered throughout the game, starting from the very beginning.

    The first area you’ll explore is Seaside Resort, which features five puzzle rooms. Most of these can be accessed with a companion by your side, although one room requires a Star Fragment to unlock.


    Beginners Bridge Puzzle Room Guide

    The first puzzle room you’ll face is likely after chatting with Chococat, who will send you on a mission to find Power Crystals. Two of these crystals can be found in two different puzzle rooms at Seaside Resort, with the first one being located in the Beginners Bridge room. This puzzle is pretty simple.

    Approach the cube on the left side of the gate where you start, and pick it up. Move it to the right side of the gate and place it down in front of the pressure pad. This action will unlock the stairs leading to a chest, and you can climb the dark purple wall on the left to collect the crystal.

    Crystal Conundrum Puzzle Room Guide

    The second Power Crystal is hidden in the bottom left puzzle room known as Crystal Conundrum, which ramps up the difficulty. Start by picking up the cube on the pressure pad with a circle and placing it on the triangle pressure pad near the entrance.

    Next, you can jump down to the lower area, grab the cube there, and return it to the top. Set both cubes on the circular platforms, and the door to the crystal will open. After securing the crystal, you can jump down from the top area to find a chest below.

    Use the dark purple wall next to the chest to climb back up and exit the room.

    Flipflop Flight Puzzle Room Guide

    Located just above the previous room, Flipflop Flight introduces you to a new type of cube. As you enter, grab the red cube first and place it near the high ledge to the left of the door. Once you do that, a new option will appear in the bottom right to activate its special feature.

    When activated, the cube will create a wind current that allows you to glide up while ballooning. Use it to reach the cube on the top left ledge. After that, put both normal cubes on their respective pressure plates, and use the red cube near the right ledge to access the main chest.

    Button Bouncearound Puzzle Room Guide

    This is probably the toughest room in Seaside Resort, situated on the bottom left side. Upon entering, you’ll see three different types of gates. Start by picking up the cube in the main area and placing it on the circular plate to unlock another cube on the left side.

    Then, place both of your cubes on the heart pressure plates to open the middle door and retrieve the third cube. Bring this cube back to the main area and set it on the circular plate. This will open both the heart and the top right circular door.

    Go to the top right door and collect the fourth cube, which you should then place on the triangle plate.

    Finally, grab the cube from the circular plate in the main area and set it on the other triangle plate, unlocking the last door and revealing the chest.

    Platform Passoff Puzzle Room Guide

    The final room in Seaside Resort is located on a small group of islands in the top right corner. To access it, you’ll need a Star Fragment, which can be obtained by opening the reserve in the swamp. Once you have the fragment, head back to this room to get started.

    To complete this challenge, first remove the regular cube from the plate and place the green one deeper into the room on it. Take the normal cube up the stairs and leave it there, then jump back down. Now, place the green cube in the first gap at the top and activate its special ability.

    The green cube raises a pillar to the top and creates a bridge over the gap, so it’s important to position it correctly.

    The bridge made by the green cube should completely cover the gap since you can’t jump with the cube in hand. Once you’ve placed it right, use the dark purple wall to climb up and take the normal cube beyond the first gap. Repeat this process for the second gap to finally obtain the last chest in the puzzle room.

  • A Guide to Locating Every Mailbox in Hello Kitty Island Adventure

    A Guide to Locating Every Mailbox in Hello Kitty Island Adventure

    Hello Kitty Island Adventure invites you to a beautiful archipelago waiting to be discovered. At the beginning of your journey, you’ll navigate the islands by running and swimming. Fortunately, you can soon unlock a fast-travel feature to make your adventures much easier.

    This guide will reveal how to activate the fast-travel system and the locations of each accessible point. Instead of traveling at random, you’ll unlock specific mailboxes shown on your map, making it more convenient to reach various destinations. Now, let’s get started on the quest that allows you to activate these mailboxes.

    How to Unlock Mailboxes

    To unlock the mailboxes, you need to complete the Delivery Service quest. This quest becomes available once you become friends with Kuromi at level one. After this, you’ll find Kuromi waiting near a mailbox in the Spooky Swamp.

    Next, you must deliver a pumpkin to My Melody and then return with a plant for Kuromi. During your return trip, you’ll meet Cinnamoroll, who will explain the function of the mailboxes. After this, you can return to Spooky Swamp to hand over the plant.

    Once these tasks are complete, the fast-travel option is yours! Just bear in mind that you’ll need to discover each mailbox before you can teleport to it; you can’t jump to areas you haven’t explored yet.

    All Mailbox Locations

    Below is a rundown of all the mailboxes you can teleport to in Hello Kitty Island Adventure. While some locations are accessible from the start, others require further quests and friendship levels to unlock. We’ve indicated which mailboxes are available right away and which require tasks to be completed beforehand.

    From the map view, you’ll see a comprehensive list of all mailboxes available. Areas that you’ve explored but haven’t yet discovered a mailbox will appear as question marks, helping you keep track of what you might have missed.

    Seaside Resort

    • Immediately Unlockable (no quests necessary): Yes
    Mailbox Number Name on Map Location
    1 Moon Island This island resembles a crescent moon on the left side; the mailbox is on the right point of the moon
    2 Hopscotch Islands Found directly underneath Moon Island, on the left nearest to raised terrain
    3 Resort Docks Located right on the docks!
    4 Cozy Islands North of Resort Plaza, on the upper-right island
    5 Resort Plaza Right next to the Resort Plaza
    6 Resort Gate South of the gate that leads to the Spooky Swamp

    Spooky Swamp

    • Immediately Unlockable (no quests necessary): Yes
    Mailbox Number Name on Map Location
    1 Ghost Tour Ride Upper-left corner, near the start of the Ghost Tour Ride
    2 Spooky Swamp Centrally located in the plaza
    3 Nature Preserve Positioned in the southeast corner near the Nature Preserve building

    Rainbow Reef

    • Immediately Unlockable (no quests necessary): No
    Mailbox Number Name on Map Location
    1 Sunken Ship Near the tail section of the ship in the northern part of the reef
    2 Kelp Maze Just south of the dock leading down from Gemstone Mountain
    3 Comedy Club Directly outside the club housing Hangyodon

    Additionally, there is a fourth mailbox that becomes available once you complete the Straight to Your Heart quest, which is part of a longer questline.

    Mount Hothead

    • Immediately Unlockable (no quests necessary): No
    Mailbox Number Name on Map Location
    1 Caldera At the top of Mount Hothead
    2 Hot Springs Located in the upper right section, near a beach area
    3 Upper Ruins Entrance North of Mount Hothead mailbox, unlocked through Enraging Ruins quest
    4 Mount Hothead Central mailbox located near the entrance to the ruins; Retsuko often nearby

    Gemstone Mountain

    • Immediately Unlockable (no quests necessary): Yes
    Mailbox Number Name on Map Location
    1 Gemstone Corral Slightly north of the Oasis mailbox
    2 Oasis Near the boat where Pompompurin is found
    3 Gemstone Town In the town center, just below the two prominent buildings

    Icy Peak

    • Immediately Unlockable (no quests necessary): No

    Two mailboxes can be found in the Icy Peak region. The first is technically located in Gemstone Mountain and is situated in the upper right corner of the map. Completing the A Challenging Reward quest grants you access here. There’s also a waypoint at the top of Icy Peak, which can be quite the journey, but once you unlock the mailbox, travel becomes easy.

    Merry Meadows

    • Immediately Unlockable (no quests necessary): No
    Mailbox Number Name on Map Location
    1 Merry Meadows Fields Found in the lower left corner of the map
    2 Merry Meadows Plaza Positioned on the circular island at the center of the map
    3 Merry Meadows Overlook At the small lookout point southwest of the Plaza mailbox
    4 Meadows Creation Station Directly to the right of the Plaza mailbox
    5 Meadows Temple Close to the left bridge at the top of the map
    6 Meadows Gazebo Located in the far right area, unlocked by growing a beanstalk

    City Town

    • Immediately Unlockable (no quests necessary): Yes
    Mailbox Number Name on Map Location
    1 City Center North of the main dock, right at the end of the road
    2 City Critter Park At the bottom edge of the park, resembling a large green circle
    3 City Rooftop Northwest of the park mailbox, on a rooftop adjacent to the green hexagon

    Additionally, there are three mailboxes hidden in the Sewer: Main Sewer, Lower Sewer, and Upper Sewer. You can access the sewer after completing the Above and Below quest; though there isn’t an official map for the Sewer, the Hello Kitty Island Adventure community has created resources to help navigate, including a detailed layout featuring these three mailboxes.

    Now you’re ready to explore the world of Hello Kitty Island Adventure like a pro!