Tag: Hyper Light Breaker

  • Mastering Dro: Tips to Conquer the Crown of Tears in Hyper Light Breaker

    Mastering Dro: Tips to Conquer the Crown of Tears in Hyper Light Breaker

    In Hyper Light Breaker, players face thrilling challenges in the form of boss battles known as Crowns. The second opponent, Dro, called the Crown of Tears, is a challenging foe that can become quite frustrating if you’re not ready.

    This guide will equip you with everything you need to take Dro on effectively. Unlike the standard enemies in Overgrowth, Crowns require a mix of strategy and patience. From dodging his attacks to seizing the right moments to strike, here are some tips to help you defeat Dro, Crown of Tears.

    Hyper Light Breaker is in Early Access, so details in this guide may change as the full game is released.

    Preparing for Dro

    Dro is a formidable opponent that requires preparation. Before you engage in battle with him, ensure you have these crucial items in your inventory:

    Item Reason
    Upgraded Blade

    An upgraded blade boosts your attack strength, and those with status effects are advantageous against Crowns.

    Upgraded Rail

    Just like with blades, an upgraded rail enhances your attacking power, especially if it has special effects.

    Medkit

    Having at least one Medkit is essential, as the battle can quickly escalate.

    Offensive Amp

    A useful offensive Amp can help eliminate lesser foes during the conflict.

    The first version of Dro requires four Prisms to access. If gathering these Prisms has left you low on health, it’s best to retreat and return later to take him down.

    Avoiding Dro’s Attacks

    Dro executes a projectile-fire based attack in Hyper Light Breaker.

    Dro employs a variety of attacks to challenge you. Being a Crown, his attack style relies heavily on projectiles. Dro is also quick and unpredictable, so staying alert is crucial.

    Here’s a summary of Dro’s different attacks and how to evade them:

    Dro’s Attack Effect Warning Signs Evade Strategy
    Leaping Pounce

    A powerful melee attack as Dro leaps across the arena.

    Dro will glow bright orange and yellow, and a circle will form around you.

    This attack can only be dodged by parrying. Dashing away will not suffice.

    Sword Swing

    Dro swings his sword in a wide arc.

    Dro will prepare his sword for the swing.

    You can dash away or parry this attack successfully.

    Flame Rings

    Dro generates flames creating rings that expand outward.

    Dro will jump repeatedly before producing one to three fire rings that fan out.

    Jump over the flames, dash through, or use your hoverboard to evade.

    Projectile Fireballs

    Dro releases a spiral of fireballs across the arena.

    Dro screeches then raises his nose toward the sky.

    Just back away. Dashing can be tricky, but they clear out at a distance.

    Double Sword Swing

    Dro swings his sword twice in quick succession.

    Dro will lower his sword to prepare for the connect.

    You can dash away or parry, but it’s risky to try for two parries in succession.

    It’s okay if you get hit by some of these attacks, but avoid healing too quickly. Save your Medkit for when it’s really necessary.

    Defeating Dro

    A breaker attacking Dro, Crown of Tears in Hyper Light Breaker.

    Once you have a good grasp on dodging Dro’s attacks, it’s time to go on the offense. There are optimal moments to strike Dro.

    However, since Dro’s combat style is fast-paced, focus on quick hits rather than heavy hits as he moves around.

    Consider using lighter weapons like swords or claws instead of heavier types like hammers against Dro.

    Here are suggested moments to launch your attacks:

    Timing for Attacks Recommended Attacks
    After a Sword Swing

    Typically, after a sword swing, Dro pauses briefly, making it a prime opportunity for rapid Blade attacks.

    After a Double Sword Swing

    Similarly, after his double swing, Dro usually takes a moment to regroup. Take that opportunity for quick Blade strikes or use your special attack.

    During Projectile Fireball Phase

    As you strate or move back from the incoming projectiles, it’s a good time to land some hits with your Rail. Long-range attacks work best here.

    While Moving Around

    Between his move sets, Dro will at times move slowly around the arena. This is a solid chance to take some shots with your Rail.

    Remember, Dro can be a challenging boss, but if you remain calm and observe his attack patterns closely, you’ll gradually chip away at his health.

    While it’s possible, attacking Dro immediately after his Leaping Pounce isn’t advised, as he tends to follow up it quickly with a Sword Swing – watch out!

  • Unlocking Lore Secrets in Hyper Light Breaker

    Unlocking Lore Secrets in Hyper Light Breaker

    Uncovering the Lore of Hyper Light Breaker

    Despite being in early access, Hyper Light Breaker offers a substantial amount of lore for players to explore. Similar to its predecessor, Hyper Light Drifter, the game conveys its narrative without using text or direct explanations. Instead, players will need to piece together the history and events that shaped this world by collecting lore fragments while navigating the Overgrowth. These fragments shine a light on the history of the two Crowns, Exus and Dro.

    Players familiar with Drifter will recognize the stone monoliths scattered throughout Breaker, which can be interacted with to reveal important lore snippets. As you approach these structures, you can earn lore bits presented in the form of manga-style comic panels. These can be examined in the Outpost, allowing players to gradually uncover the fate of the world’s inhabitants and the identity of the Abyss King.

    Where to Find Phantom Fragments

    Classic Tablets from Drifter Return

    If you’ve played Hyper Light Drifter, you’ll notice the return of stone tablets cleverly hidden across the game. While they may not unlock secret areas as they did in Drifter, interacting with them grants you three Phantom Fragments each time. Although these fragments don’t provide immediate benefits, gathering enough will enable you to unlock lore by visiting a specific vendor.

    Tip: When playing Hyper Light Breaker in co-op mode, only one player needs to interact with a monolith for the entire group to receive the Phantom Fragments. This means you can save time by dividing your team to search for these fragments more efficiently.

    These memory monoliths are located in various spots within the Overgrowth. The maps are procedurally generated with each run, so there’s no certainty you’ll find the same places twice. Typically, they are situated near smaller structures, making it unlikely to see them out in the open. Based on experience, these monoliths usually don’t appear near gear pickups or Prism minibosses, so it might be best to explore a bit between gear collections.

    After collecting the Phantom Fragments from a monolith, you can continue your run as normal. Unlike gear items, these fragments are secure and not at risk, even if you fail the extraction. However, they remain inactive until you return to the Outpost.

    Unlocking the Stories of Exus and Dro

    Engage with Pherus Bit for Crown Insights

    Once you’ve returned to the Outpost after extracting (or meeting your demise), seek out Pherus Bit located by the entry teleporter. One of her menus allows you to spend your earned Phantom Fragments—along with 50 Bright Blood—to unlock a memory of either Exus or Dro. Keep in mind that you cannot choose which memory you get to unlock, so you might not see the complete story on your first attempt.

    You need a total of six Phantom Fragments to unlock each memory. The memories are illustrated in five-panel comics that offer glimpses into the histories of each boss. Through these panels, players can gain insights into the origins of the Hyper Light Breaker world, and understand why the Breakers play a vital role in its survival. While not all lore has been unveiled yet, it’s expected that the full release will present an intricate narrative puzzle for players to piece together, relying on both Phantom Fragments and players’ analytical skills to fully comprehend the deeper lore.

    More About Hyper Light Breaker

    Hyper Light Breaker is the sequel to Heart Machine’s acclaimed 2016 title, Hyper Light Drifter. Set in the expansive realm known as the Overgrowth, players will engage with massive monsters and explore the remnants of time-worn cities. Whether solo or with friends, you’ll gather new equipment and enhance your character while uncovering the secrets of this forgotten land.

    Game Details:

    • Franchise: Hyper Light
    • Early Access Launch: January 14, 2025
    • Developer: Heart Machine
    • Publisher: Arc Games
    • Multiplayer: Online Co-Op

    Get ready for an adventure that promises rich storytelling and thrilling gameplay!

  • Tips for Reducing Item Costs Effectively

    Tips for Reducing Item Costs Effectively

    Most of the equipment you acquire in Hyper Light Breaker is sourced from vendors in the Hub, but you can create the items they sell for a lot less. When you give gifts to these NPC vendors, you unlock additional features in their shops and lower the prices of their goods. By making various gear cheaper, you can craft a more powerful build before venturing back into the Overgrowth.

    While exploring the Overgrowth, you might come across some vendors. These characters usually offer strong items in exchange for Bright Blood, but you can never know in advance where these vendors will appear. Much like the game’s world, the location of vendors changes each time you play, making it challenging to build rapport with them.

    Understanding Vendor Affinity in Hyper Light Breaker

    Vendor Affinity is the friendship level between you and a vendor in Hyper Light Breaker. As you gather the necessary resources, you unlock different vendor characters over time in the Hub world before heading into the Overgrowth. Fortunately, the two shops that are initially unavailable only require 12 Material to unlock, which is easily collectible during your early runs.

    Material acts as a form of currency in Hyper Light Breaker, enabling you to enhance your character’s stats and unlock new abilities. You can find this Material in Stashes or by collecting four Core Shards, which will automatically convert into a Core when combined.

    Whenever you interact with a vendor, you can view their items, prices, and affinity levels. Vendor Affinity starts at 0 and resets between Cycles, which refers to the periods when the Overgrowth resets after you lose all your Rezes. Since you have a total of four Rezes, or "lives," your vendor affinity could reset much faster than you anticipate.

    Having an affinity of 0 with an NPC means their prices will be significantly higher for any items they offer. As a result, acquiring gear, weapons, or upgrades will consume a lot of Bright Blood and Material during your initial attempts. However, as you progress, you’ll unlock various methods to enhance a vendor’s shop, providing new services and lowering the costs of certain items.

    Tips to Increase Vendor Affinity (Make Items Cheaper)

    You can boost your affinity with vendors by giving Gold Rations to any vendor in the Hub. While this doesn’t apply to vendors found in the Overgrowth, any Hub vendor will be pleased to receive a Gold Ration in Hyper Light Breaker. These gifts not only help reduce item prices but also expand the services offered at their stores.

    Gold Rations are typically reserved for permanent Pherus Bit upgrades that persist across runs. You can acquire them by ranking up after successfully completing a Cycle or by exploring challenging Labs in the Overgrowth. When you have extra Rations, consider offering them to a vendor whose stock you need for your next adventure.

    It’s wise to increase affinity with vendors you frequently visit for your current character build. For instance, if you’re focusing on a melee build, prioritize increasing your relationship with the Blades vendor in the Hub.

    Here are some potential upgrades to a vendor’s store that may become available as you improve their affinity:

    • Unlock Gear Upgrading
    • All Gear 10% Cheaper
    • One Random Item 10% Off

    The benefits of enhanced vendor affinity grow as your relationship with certain NPCs deepens. If you’re playing in co-op mode in Hyper Light Breaker, you’ll likely notice these high-tier affinity bonuses more often, as it’s generally easier to gather Gold Rations in a group.

    The ability to upgrade your gear requires a higher affinity with a vendor. This means some of the best builds in the game depend on the affinity system, making it crucial for more than just making items cheaper. Although the rogue-like nature of Hyper Light Breaker will render some gear obsolete over time, it becomes much easier to find reliable equipment when you can upgrade it through vendors.

    Once items are more affordable, you can allocate the currency you gather during runs toward various upgrades. Investing in improved gear or enhanced character stats will allow you to develop far stronger builds in Hyper Light Breaker as vendor prices decrease.

  • Understanding Overgrowth Mechanics in Hyper Light Breaker

    Understanding Overgrowth Mechanics in Hyper Light Breaker

    The Overgrowth is a vast, procedurally generated wilderness within Hyper Light Breaker that players must navigate to succeed in the game. It’s filled with various enemies, bosses, and environmental hazards, but also hides valuable treasures and weapons. Mastering navigation in this environment is essential for your victory.

    At first, figuring out where to begin in the Overgrowth can be challenging, especially during your initial attempts. What should you focus on? And, what should you steer clear of? This guide will equip you with the necessary knowledge to traverse the Overgrowth like a pro and make your way to the Abyss King.

    Hyper Light Breaker is currently in Early Access, which means the information may change with the full game release.

    Preparing for the Overgrowth

  • Resolve Startup Crashes: Quick Fix Guide

    Resolve Startup Crashes: Quick Fix Guide

    Players with Early Access to Hyper Light Breaker for PC might be facing numerous crashes when trying to launch the game. Fatal errors connected to Unreal Engine can occur as gamers attempt to get past the initial loading screens after hitting the Play button. Fortunately, Heart Machine, the game’s creator, has offered a potential workaround, though it does require sacrificing some features for the game to work properly.

    This issue affecting the Early Access version of Hyper Light Breaker is expected to be addressed in an upcoming update from Heart Machine. However, for now, players are unable to start the game due to this startup crash problem. It appears that the issue relates to the game’s cloud save feature, impacting only certain PCs that have the game installed.

    What Is the Startup Crash Bug in Hyper Light Breaker?

    Fatal Error Preventing Game from Loading

    The startup crash bug appears when players attempt to open Hyper Light Breaker and receive a message stating “Fatal Error!”. This message gives the option to exit the game but does not allow players to access the main menu. The error message reoccurs every time players try to launch the game, even if they completely uninstall and reinstall it.

    The likely source of the bug seems to stem from the automatic cloud save functionality linked to Hyper Light Breaker‘s online co-op feature. While the bug isn’t directly tied to playing in co-op mode, numerous players have reported that the saved files from their online sessions disrupt the startup process in some manner.

    Currently, adjusting save files has only worked for some users trying to run Hyper Light Breaker on PC. It may help to delete the “Breaker” folder found in the game’s files after installation, but this solution is not effective for every setup.

    How to Prevent Your Game from Crashing on Startup

    Follow Developer Instructions and Play Offline

    Heart Machine has provided clear guidance for playing Hyper Light Breaker without encountering startup crashes. Firstly, it’s essential to play the game in Offline mode on Steam to avoid the cloud save issue that triggers the bug when online. To go Offline on Steam, click the Steam menu and select the “Go Offline…” option from the dropdown list.

    When playing Hyper Light Breaker in Offline mode, you will still retain all progress made during gameplay, even if you close the game and return later.

    Heart Machine’s recommended steps include the following:

    1. Update All Game Files
    2. Launch Steam in Offline Mode
    3. Start the Game You Want to Play Offline
    4. Close the Game and Return to Steam
    5. Go to the “Security” Tab in Steam Settings
    6. Ensure “Don’t Save Account Credentials on This Computer” is Not Selected
    7. Switch to Offline from the Steam Menu
    8. Launch the Game

    For more information, players can check the official post from Heart Machine, which elaborates on the issue and outlines the steps being taken to ensure a hotfix is available shortly. Running the game in Offline Mode should help you bypass the startup crash, bringing you to the game’s introductory menus.

    However, please note that this workaround means you won’t be able to play online with friends while you’re in Offline mode. If you’re still eager to team up with friends after resolving the startup issue, follow these steps:

    1. Start the Game in Offline Mode
    2. While in Offline Mode, use Alt + Tab to Switch to Windows
    3. Return to Steam
    4. Go Online through the Steam Menus
    5. Exit the Game
    6. Re-launch the Game While Online

    While this may not work for everyone, successfully bypassing the bug initially might prevent it from recurring. Heart Machine intends to officially resolve the startup crash issue in Hyper Light Breaker soon, so players can expect a smoother experience as the official launch date approaches.

    Source: Heart Machine’s X Account

  • Finding Medkits in Hyper Light Breaker: Your Ultimate Guide

    In Hyper Light Breaker, Medkits are essential. Early in your journey, healing items are hard to come by, and foes in the Overgrowth can take you down quickly. One or two hits might end your run abruptly.

    If you plan to finish your cycle and face the Abyss King, healing is a must. However, healing doesn’t come easy at the start. This guide will help you navigate everything you need to know to create Medkits.

    As of now, Hyper Light Breaker is in Early Access, so keep in mind that the details in this guide may change!

    How to Obtain Medkits

    The upgrade booth in The Cursed Outpost in Hyper Light Breaker.

    First off, to survive in the Overgrowth, you’ll need a good supply of Medkits, as they heal for +75 HP.

    While you explore, you may come across Medigems, small green plants that can restore +5 HP. These handy plants can be found throughout the Overgrowth and are crucial for crafting Medkits.

    Depending on your gear, you might also receive boons that assist in healing.

    While Medkits are the most effective healing method, you’ll first need to expand your Medkit storage capacity.

    How to Expand Your Medkit Storage

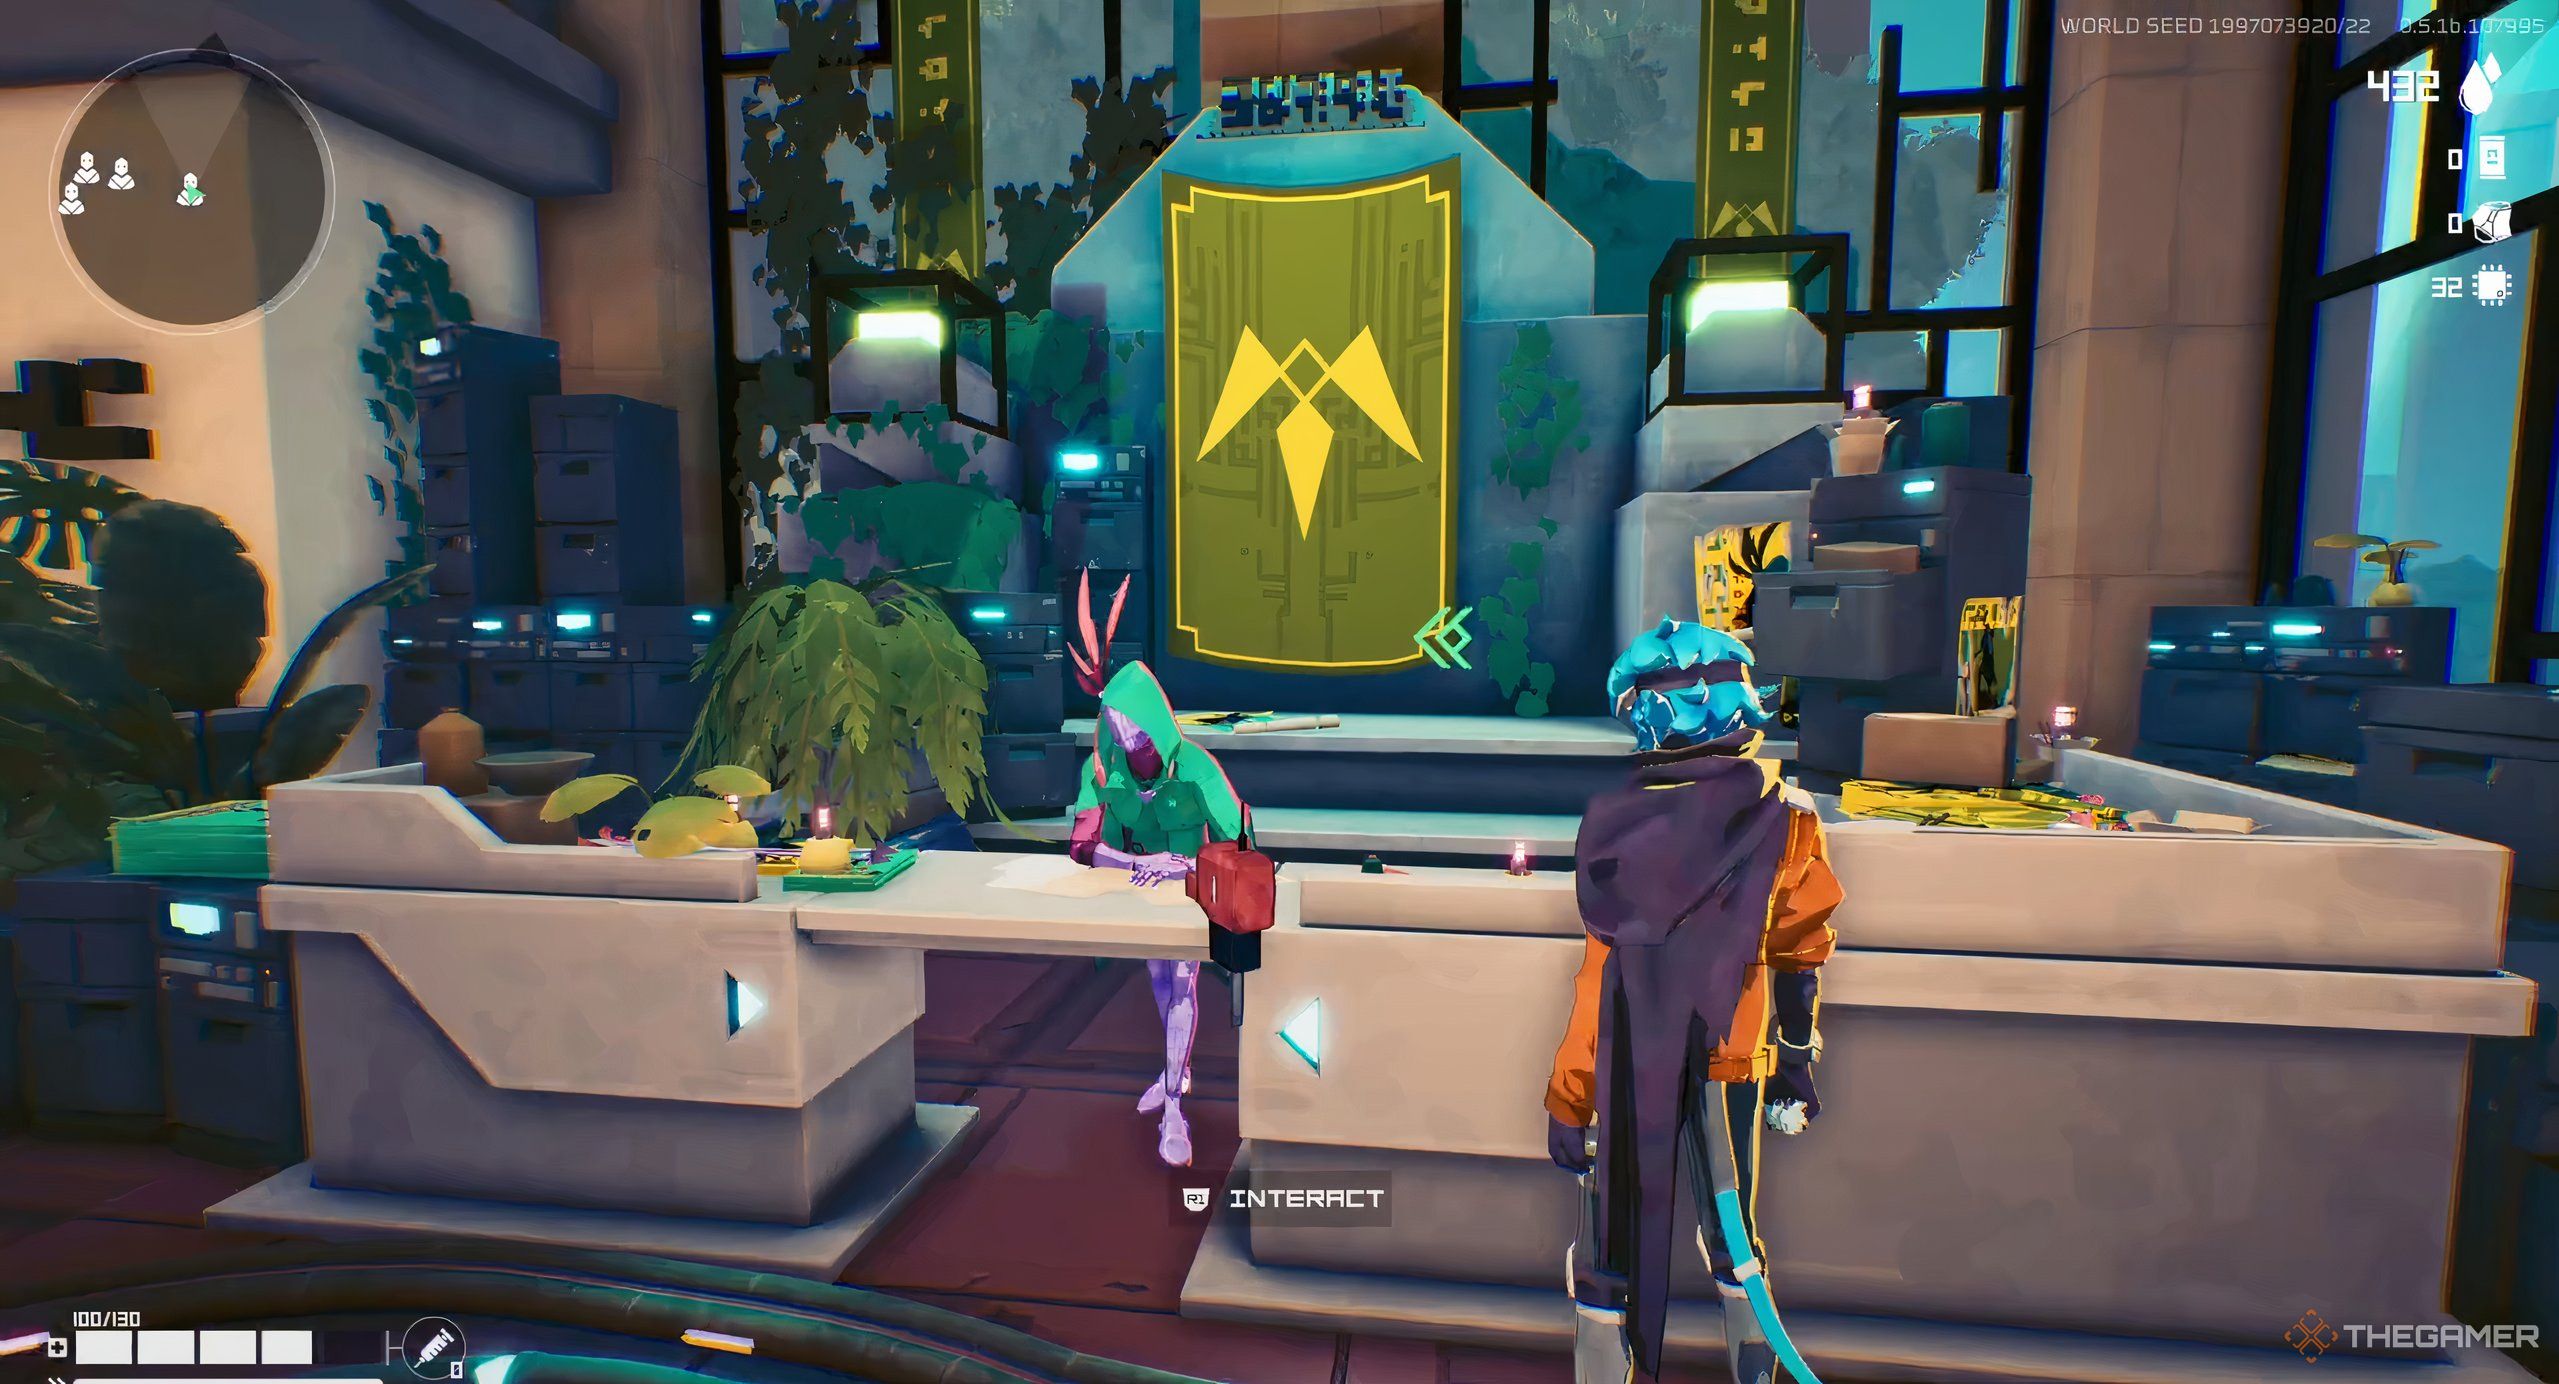
    At the beginning of your game, your Breaker has no Medkit storage available. To increase your storage, you must unlock this permanent upgrade through Pherus Bit, the mission captain at the Cursed Outpost. To expand your storage, simply trade in one Golden Ration to gain an extra slot.

    You can earn Golden Rations by completing cycles and converting excess resources into them or by exploring Drop Down Labs in the Overgrowth.

    How to Craft Medkits

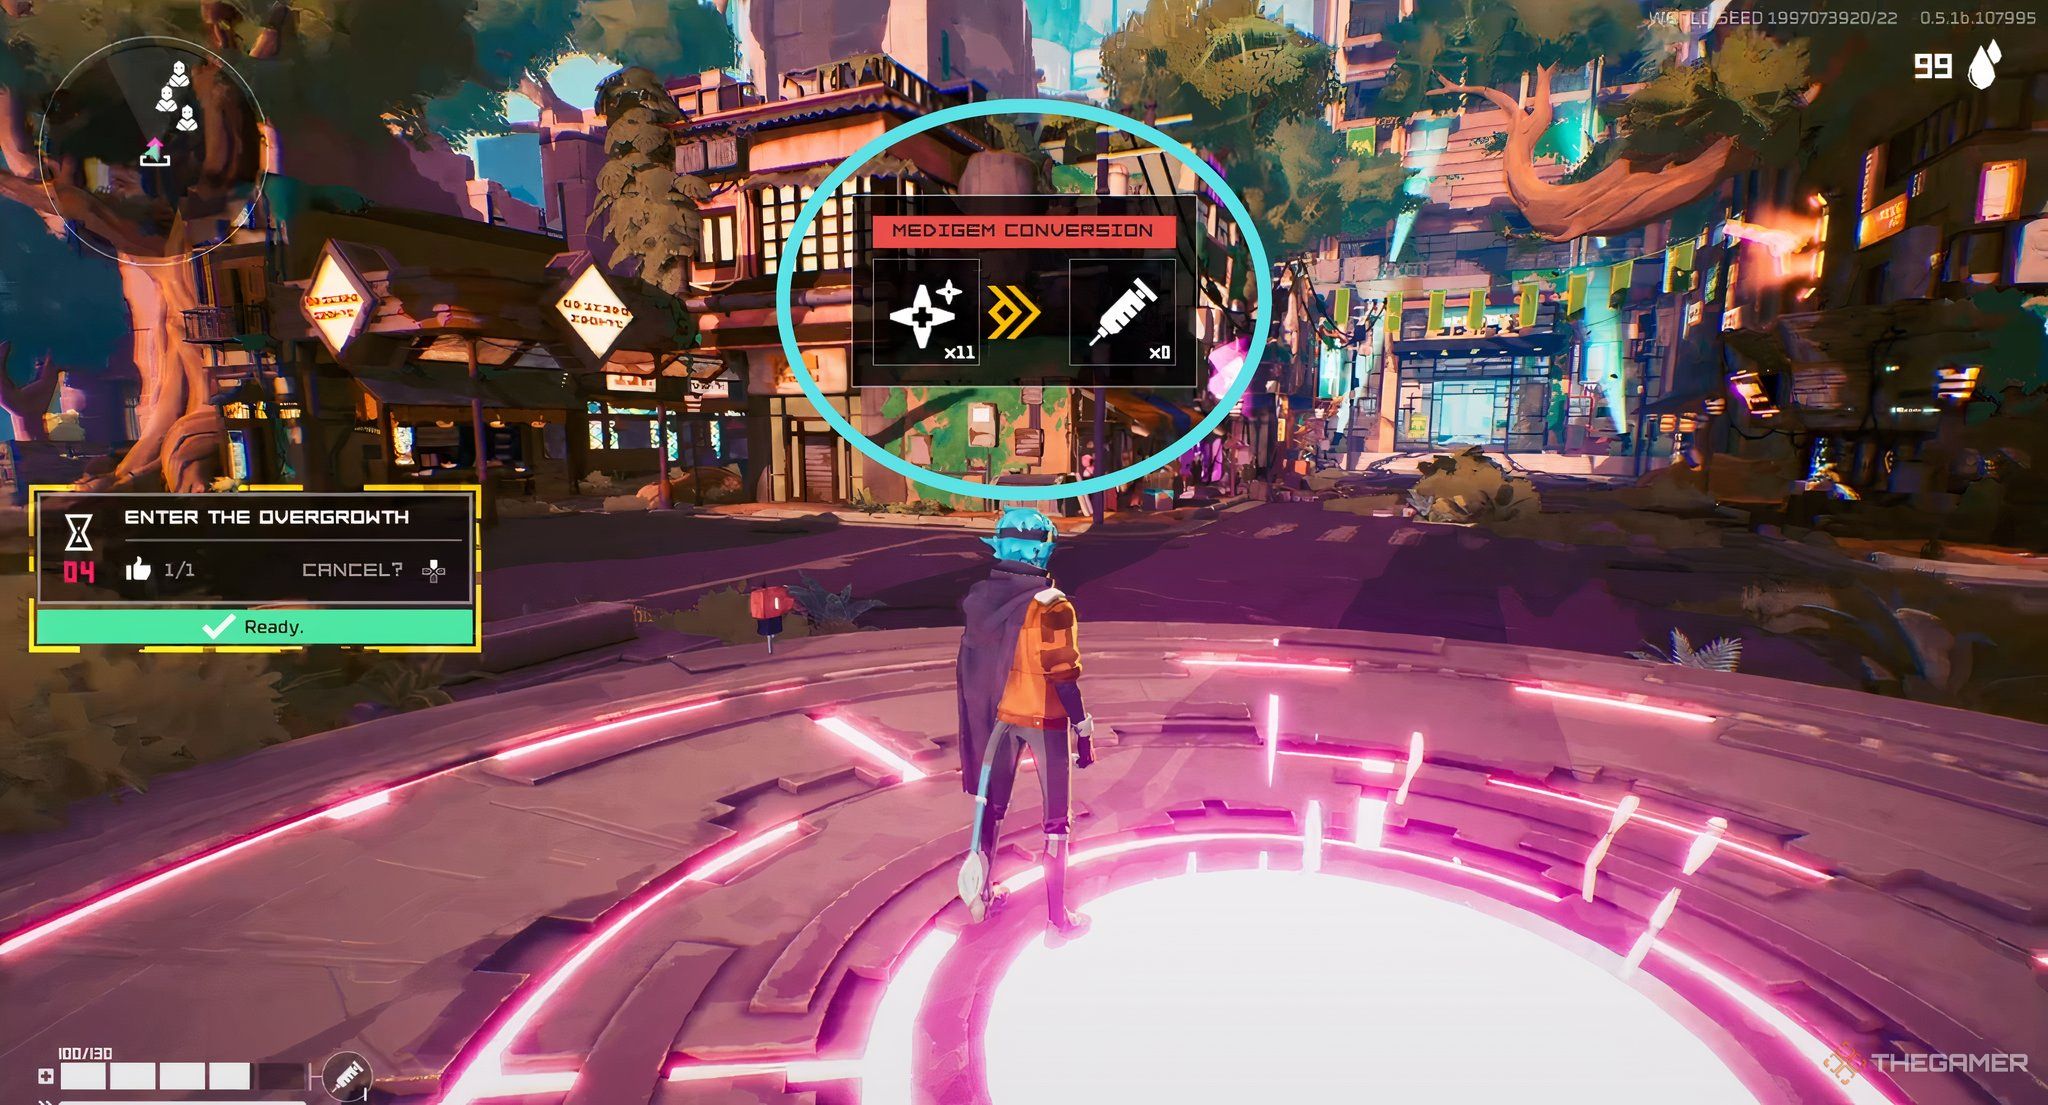
    Medigem conversion process in Hyper Light Breaker.

    Once your storage is expanded, there are several ways to earn and craft Medkits. The easiest method occurs automatically at the start of each run.

    As you gather Medigems, your Breaker will convert them into Medkits when you launch the Telipad.

    Medkit Storage

    Medigems Available

    Medkits Crafted

    1

    3

    1

    2

    6

    2

    Your Breaker will only produce enough Medkits to fill your existing storage. No extras.

    How to Earn Medkits

    Another way to get Medkits is to use Medigems at Shrines in the Overgrowth. We’ve all faced situations during runs where we desperately need healing.

    Fortunately, the Overgrowth has various shrines where you can exchange Medigems for Medkits.

    At a Shrine, each Medkit costs five Medigems, so use this option wisely and only when necessary.

    How to Purchase Medkits

    A vendor character selling items in Hyper Light Breaker.

    Lastly, you can buy Medkits in the Overgrowth. There are usually Vendors scattered across the map, but their inventory can vary.

    Sometimes, these Vendors offer Medkits for sale in exchange for Brightblood.

    Brightblood is an easy-to-find resource in Hyper Light Breaker, typically dropped by defeated enemies.

  • Enhancing Core Stats in Hyper Light Breaker: A Guide

    Enhancing Core Stats in Hyper Light Breaker: A Guide

    In Hyper Light Breaker, every character, known as a Breaker, begins their journey with a SyCom. Each SyCom has its own inherent base stats that can be enhanced as you advance in the game. The specific stats tied to a character and their SyCom play a crucial role in shaping the most effective builds and playstyles. Players have the freedom to develop their preferred SyComs in various ways by upgrading these fundamental stats. However, achieving these upgrades necessitates the right resources.

    At the game’s outset, players will have access only to Vermillion and his Gunslinger SyCom. This SyCom has the unique ability to double Vermillion’s critical hits, making any Holobytes that boost Crit Chance or Crit Damage significantly more powerful, and they can be further improved by enhancing Vermillion’s core stats. For instance, players can increase Vermillion’s critical hit chance and damage by upgrading the relevant core stats, turning him into an even more formidable damage dealer.

    Upgrading Core Stats

    Access the Right Menu and Use the Appropriate Materials

    To enhance a character’s core stats in Hyper Light Breaker, start by opening the Loadout menu by pressing “Esc” on your PC. Navigate to “Modify Loadout” and then select “Upgrade” beneath the SyCom section. This will lead you to a menu where you can choose any of the nine core stats of that character’s SyCom, each of which can be upgraded at least once.

    At higher levels of upgrades, increasing these stats will also require Abyss Stones, which can be earned by defeating Crowns.

    Depending on the SyCom, certain stats may be upgraded multiple times. For example, Goro’s Astronomer SyCom can only enhance its stamina stat one time, capping its stamina at 125. In contrast, Lapis’ Warrior SyCom can have each of its stats upgraded several times, allowing her to eventually surpass Goro in core stat capabilities.

    Related

    Understanding Core Stats in Hyper Light Breaker

    Discover the nine different stats that define characters in Hyper Light Breaker and their impact on gameplay.

    These core stats influence how well a character can fit certain playstyles, but they certainly don’t restrict you from exploring other builds. If you connect with a character but have a different strategy in mind, go ahead and experiment. As the developers state, “Each character possesses unique stats that influence how different gear operates, yet the loadout system’s flexibility allows for mix-and-match options.

    Locating Cores

    Discovering Them in the Overgrowth

    While there are several ways to find cores within the Overgrowth, the most reliable method is by collecting Prisms. Prisms are identifiable as yellow, diamond-shaped icons on your map, which are necessary for unlocking Crown doors ahead of boss engagements. Collecting prisms frequently yields at least one Core Shard, and you’ll need four shards to create a full Core.

    Core Shards are also available within underground Labs, resembling the elevator platform where you begin and requiring a key for access.

    Another method for locating Cores is to search for Stashes marked on your map. These appear as small treasure chest icons and often contain an entire core, but they are less common than prisms and can be harder to find. It’s beneficial to gather as many as you can, as Cores are essential for many of the game’s most beneficial upgrades.

    Lastly, you can purchase Core Shards from vendors scattered throughout the Overgrowth. Each shard costs 80 Bright Blood, and you can usually buy up to two from each vendor. While this isn’t the most efficient use of your Bright Blood, it’s a consistent backup for acquiring Cores when necessary.

    Once you’ve collected sufficient cores, head back to the Outpost to utilize them, allowing you to upgrade any SyCom you possess. Remember, these Cores can also facilitate .Exe upgrades using Pherus Bit (PB), which are permanent. So consider your options carefully before making upgrades.

    Related

    Solo vs. Co-Op in Hyper Light Breaker: Which Playstyle Suits You?

    Explore the co-operative multiplayer experience in Hyper Light Breaker. Is it better to play alone or as part of a team?

    Having a stockpile of Cores, whether for PB or your SyCom, is advantageous. The ability to upgrade core stats to fit your desired build keeps the gameplay dynamic and engaging, especially when trying out something new. In this phase of early access, as the game evolves, experimenting with the diverse possibilities Hyper Light Breaker offers will enhance your gaming experience.

    Source: Hyper Light Breaker/Steam

  • Boosting Your Gold Rations: Essential Tips and Tricks

    Boosting Your Gold Rations: Essential Tips and Tricks

    In the world of Hyper Light Breaker, Gold Rations stand out as one of the most crucial currencies you can obtain. Acquiring these items frequently is key, as they enable permanent enhancements for your character that persist across multiple Cycles, helping you become more powerful for future challenges. However, achieving large quantities of Gold Rations often requires some level of failure.

    It’s important not to confuse Gold Rations with Cores, another currency used for character improvements. Cores unlock various Tier paths within the Pherus Bit progression framework, but do not grant access to specific buffs in those categories. Along with Cores, you have Medigems, Abyss Stones, Bright Blood Material, and Holobytes in Hyper Light Breaker, which can lead to some confusion regarding the distinct purposes of these currencies.

    What Are Gold Rations Used For in Hyper Light Breaker?

    Acquire Permanent Upgrades and Enhance Relationships

    Gold Rations have several key functions, including:

    • Investing in Pherus Bit Upgrades
    • Unlocking New Services from Vendors
    • Cultivating Relationships with Vendor NPCs

    You will primarily use Gold Rations to purchase upgrades from the Pherus Bit trees, which you reveal using Cores and Abyss Stones. These upgrades apply to the character you’re currently playing, offering a range of benefits. For instance, one upgrade from the Pherus Bit path allows you to carry more Medkits in Hyper Light Breaker, helping you last longer in the Overgrowth.

    Even after completing a Cycle and watching the Overgrowth reset, any upgrades you have purchased through the Pherus Bit remain intact. Additionally, Gold Rations can be used to expand available services from certain vendors once you’ve repaired their shops within the Hub. Initially, some vendors might only stock basic items, but offering them a Gold Ration can enhance their inventory and unlock new items.

    Some vendors may not initially provide gear upgrades. By presenting them with a Gold Ration, you unlock this service for future use.

    Another effective strategy for using Gold Rations is gifting them to vendors to negotiate lower prices. This gesture increases your Affinity with the vendor, allowing them to offer items at reduced rates. This can help you conserve vital resources like Bright Blood within Hyper Light Breaker for other important initiatives in the Overgrowth.

    How to Farm Gold Rations

    Finish Cycles and Find Hidden Labs

    The simplest method for farming Gold Rations is to complete Cycles by navigating through all four Rezes. Rezes represent your “lives” in Hyper Light Breaker and are depleted each time you die in the Overgrowth. If you die four times, a Cycle ends, resetting the Overgrowth and erasing any temporary perks you’ve gained during your runs.

    Resetting the Overgrowth after a Cycle incurs resource costs. You might need to sell older gear to gather the necessary Material and Bright Blood to create a new world setup.

    After completing a Cycle, return to the Telepad in the Hub to reset the Overgrowth. This action also allows you to rank up based on your performance during the previous Cycle. As part of this process, you earn Gold Rations with each rank increase. The more impressive feats you accomplish, the more points you earn, facilitating your rank advancement.

    You can also find Gold Rations by exploring hidden Labs scattered throughout the Overgrowth. These Labs are marked by shiny silver and purple trapdoor platforms that you may encounter during your runs. They typically remain locked initially, and you’ll need rare items called Keys to access them. Keys are commonly found in chests dispersed throughout the Overgrowth.

    Labs house formidable enemies much tougher than those encountered on the Overgrowth’s surface, designed to provide a significant challenge. Ensure you have sufficient supplies before venturing into these areas, and consider teaming up with friends in Hyper Light Breaker‘s online co-op mode for a smoother experience.

    After defeating foes within a Lab, you can open various chests found inside. While some chests require Bright Blood to unlock, most Labs will yield at least one Gold Ration for you at no extra cost. Those who manage to gather more Gold Rations in Hyper Light Breaker will find it easier to level up their characters and enhance the services of vendors in the Hub.

  • Unlock More Characters in Hyper Light Breaker with Abyss Stones!

    Unlock More Characters in Hyper Light Breaker with Abyss Stones!

    Unlocking characters in Hyper Light Breaker can be a bit complicated, as the game doesn’t provide clear guidance on how to acquire the necessary materials for the process. This can be frustrating, especially if you’re eager to unlock more playable characters quickly. However, there is a specific method to obtain Abyss Stones, which you need to access the full range of characters.

    Currently, there are only three playable characters in Hyper Light Breaker, but additional characters will be introduced throughout the Early Access phase. There are at least six more hidden slots in the game, suggesting that more Breakers will be available to players in the future. Gathering Abyss Stones will prepare you for these upcoming additions.

    Where to Find Abyss Stones

    Collecting Materials for New Characters

    Abyss Stones are exclusively dropped from Crown Boss fights. To earn an Abyss Stone, you must defeat a Crown Boss. While it’s possible future updates may introduce new ways to obtain them, this is the only current method known. Additionally, you can only tackle these bosses by collecting prisms from the game world.

    Some prisms may give the impression that they are underground. If you find yourself near or directly over a yellow dot with no mini-boss in sight, check for nearby structures or flat surfaces. You will need a key to access it, but once you have it, you can enter the dungeon and complete it.

    The prisms are protected by smaller mini-bosses, and you need at least two to challenge the first Crown Boss. These Crown Boss battles can be quite challenging, so teaming up with others is highly recommended for the best chance of success. Otherwise, you might find yourself facing a tough fight alone.

    After you successfully defeat a Crown Boss in Hyper Light Breaker, you’ll receive various rewards, including the coveted Abyss Stone along with some solid gear. Once you’ve collected your loot, exit the area and start a new run to utilize your new equipment. You can choose a different character, but it’s best to wait until you start a new Cycle since switching characters mid-Cycle can be tricky.

    Using Abyss Stones to Unlock Characters

    Head Back to the Hub to Switch Characters

    When you return to the Hub, often referred to as the Hotel, head over to the telepad and begin a new run. When the character selection screen appears, scroll through the characters that are currently available. You’ll see an “Unlock” option next to the Abyss Stone icon. Simply select this prompt, and you will spend your Abyss Stone to unlock your chosen character.

    Here are the characters you can unlock, along with a brief overview of their abilities to help you decide whom to unlock first:

    Unlockable Characters & Abilities

    Lapis

    Lapis’ abilities evolve with gameplay; for instance, her Rail Damage increases when you collect Batteries, and her Warrior SyCom gets a boost following upgrades.

    Goro

    Goro wields Dual Blades, perfect for fast-paced gameplay. His abilities can enhance when using a Rail or he can amplify his Critical Hit chances.

    Ultimately, you will have access to a total of six characters once you unlock them all. Each character features two distinct SyCom abilities that alter their basic stats and powers, enabling you to customize your playstyle and gear combinations to create your ideal build. However, unlocking the 2nd SyCom requires Golden Rations, so there’s still more work ahead.

    Once you grasp the unlocking process, it becomes much easier. However, defeating the bosses can be challenging, and your journey has just begun. Once you clear that initial hurdle, you will start to get the hang of the game’s rhythm and acquire the gear necessary to complete runs. If you find yourself struggling, consider focusing on reaching the Extraction Point and gathering gear along the way until you feel confident enough to confront the bosses in Hyper Light Breaker.

  • Ways to Increase Your Medigems in Hyper Light Breaker

    Ways to Increase Your Medigems in Hyper Light Breaker

    In Hyper Light Breaker, Medigems and Medkits are crucial items you’ll want to collect. They serve as essential sources of healing during your quests. Medigems can be used to create Medkits, letting you gather restorative supplies before you venture back into the Overgrowth. However, there are specific rules to keep in mind regarding how Medigems interact with Medkits as you progress through the game.

    While you’re on the hunt for Bright Blood in Hyper Light Breaker, you might come across Medigems by chance. However, you won’t be able to pick up Medigems until you acquire the upgrade that allows Medkit storage, so it’s best not to focus on these items during your first few runs. Instead, use this time to familiarize yourself with the game mechanics and the special abilities of various characters.

    The Role of Medigems in Hyper Light Breaker

    Craft Medkits Before Your Next Quest

    Once you obtain the Pherus Bit upgrade, which enables you to carry Medkits, you can begin collecting Medigems throughout the Overgrowth. While Medkits provide a substantial amount of health with a single use, picking up a Medigem in the wild will only restore a small portion of your health. Quickly exploring areas can help you regain a bit of health after battling enemies.

    Medigems appear as vibrant plants scattered across various regions, resembling bright reeds that illuminate the ground. Collecting one will grant you 5 HP.

    The total of Medigems you gather during a run is tallied like other items. When you die and return to the hub world, all the Medigems you’ve collected will be automatically converted into Medkits before you choose to re-enter the Overgrowth. By amassing a large number of Medigems, you can ensure yourself multiple healing items for your next journey.

    It takes three Medigems to create a single Medkit. Therefore, you’ll need to gather numerous Medigems to build a stockpile of healing items. Players who have mastered Perfect Parry in Hyper Light Breaker may find they need fewer Medkits to survive, but generally, more healing options are beneficial. The greater the number of Medkits, the further you’re likely to progress in the Overgrowth.

    You can also use Medigems at specific locations in the Overgrowth to refill your Medkits during a run. Visit a Shrine to refill one of your Medkits—as long as you have the necessary upgrades on hand to carry more Medkits. Initially, it will cost 5 Medigems to refill a Medkit at a Shrine, but this cost increases with each refill attempt.

    How to Collect More Medigems

    Explore Areas Surrounding the Overgrowth

    Given their significance, you’ll want to be on the lookout for Medigems at all times. However, they spawn randomly throughout the Overgrowth in each run. As of now, there aren’t any upgrades known in Hyper Light Breaker that assist you in tracking down Medigems or obtaining more from other sources.

    The most effective ways to collect additional Medigems include:

    • Explore Areas Near Structures in the Overgrowth
    • Defeat Various Enemies
    • Investigate Secret Labs

    The simplest way to gather Medigems is to glide around the Overgrowth and pick up any you see. Most Medigems are typically found in grassy areas near buildings or other intriguing spots in the restructured world. Since each run generates a different Overgrowth layout, Medigems will be located in various places, so keep your eyes peeled as you explore.

    If you find yourself struggling to locate Medigems, consider purchasing Medkits from the NPC vendor known as Chemist. This character randomly appears in the Overgrowth, selling Medkits without requiring any Medigems, which allows you to conserve the ones you collect.

    Enemies have a small chance of dropping Medigems, though this is fairly rare. More challenging foes encountered in hidden Labs have an increased likelihood of dropping them, but you can only access these locations after locating a special Key during your explorations. Fortunately, the Labs you unlock may also yield Medigems within their sterile confines, giving you two chances to find this resource at one site.

    You’ll need to gather Medigems in every run to ensure your survival. As your ability to carry more Medkits improves over time, the importance of accumulating Medigems will increase, enabling you to convert them into even more healing supplies. Consistently seek out Medigems in Hyper Light Breaker from any available source to enhance your stay within the Overgrowth.

  • Defeating Dro: A Boss Fight Guide for Hyper Light Breaker

    Defeating Dro: A Boss Fight Guide for Hyper Light Breaker

    The Challenge of Dro in Hyper Light Breaker

    In Hyper Light Breaker, the Crown bosses stand out as the most formidable adversaries, capable of swiftly ending your gameplay experience. One notable Crown boss is Dro, who wields an enormous sword and is determined to eliminate anyone in their path. Even though Dro is blind, this creature is extremely lethal, capable of overwhelming you with fierce melee attacks and a barrage of projectiles. Thus, preparation is crucial when facing Dro.

    Preparing for Battle Against Crown Bosses

    Before you can take on any Crown boss in Hyper Light Breaker, you must collect special items known as Prisms. To access each Crown’s arena in the Overgrowth, you need to activate a specific number of Prism nodes. You can gather these Prisms by defeating Elite variant enemies scattered throughout the Overgrowth, which will equip you for the battles against Dro and other Crown bosses in the game.

    Who Is Dro?

    Dro is a massive, bipedal wolf-like creature wielding a powerful energy sword. Players encounter this Crown boss in a confined church setting, which restricts your movement space during the confrontation. Currently, Dro is one of three Early Access bosses, with more likely to be introduced as the game evolves.

    Challenging Dro: The Dynamic of the Fight

    When facing Dro, the number of Prisms required might change with each reset of the Overgrowth. For instance, one run might need only two Prisms to challenge Dro, while another might require four. The appearance of another Early Access Crown boss, Exus, can vary based on how the Overgrowth resets after a Cycle.

    It’s important to differentiate Dro and Exus from The Last Master, a unique Crown boss that activates and chases your character when the Death Meter reaches 50%.

    In contrast to other Crown bosses, Dro is incredibly agile and excels in close-quarters combat, making it essential to equip upgraded gear and have plenty of Medkits before stepping into Dro’s arena.

    Tips to Overcome Dro

    1. Keep Your Distance: The most effective strategy against Dro is to maintain distance whenever possible. In multiplayer mode, having allies can help you stay farther away from Dro’s attacks. If you’re playing solo, you must be agile enough to counter Dro’s swift movements.

    2. Eliminate Minions First: Throughout the battle, Dro will summon numerous minions that can quickly become overwhelming. It’s advisable to take down these minions before redirecting your focus back to Dro.

    3. Use Long-Range Weapons: Utilizing long-range weapons can be advantageous since Dro tends to engage in melee combat. This way, you can deal damage without exposing yourself to Dro’s close-range attacks.

    4. Perfect Parry Technique: Mastering the Perfect Parry can help negate damage from Dro’s swings if performed correctly. Practicing this technique on other enemies in the Overgrowth will increase your chances of success in the boss fight.

    Dro’s Attack Patterns

    Understanding Dro’s moves is key to your survival. Here’s a summary of some common attacks:

    Attack Description Counter Strategy
    Overhead Slash Dro raises their sword and strikes downward quickly. Dodge or Perfect Parry after seeing the purple flash of light.
    Double Swing Two rapid strikes in succession. Watch for indicators; anticipate a third swing as Dro’s health declines.
    Ring of Flame Dro creates a fiery ring that spreads across the ground. Jump over the ring, especially as Dro starts creating multiple ones.
    Leaping Slam Dro crouches, then leaps towards you, slamming the sword down. Prepare to dodge just before Dro lands.
    Bullet Swarm A howl summons projectiles from a central orb, creating chaos. Navigate through gaps in the projectile swarm while staying aware of Dro’s other attacks.

    Dro’s more lethal attack, Bullet Swarm, emerges when their health is halved. As the fight progresses and Dro’s health diminishes, their attacks may link together more frequently, making the battle even more intense.

    If you recognize and effectively counter Dro’s attacks while maintaining your distance, you will eventually succeed in overcoming this Crown boss. Players who triumph over Dro in Hyper Light Breaker will be rewarded with Abyss Stones, which can help unlock new characters for future gameplay.

  • Ultimate Goro Setup: SyCom, Holobytes, and Weaponry Guide

    Ultimate Goro Setup: SyCom, Holobytes, and Weaponry Guide

    Goro is the third and final Breaker available in the early access version of Hyper Light Breaker, which was launched on January 14. With intriguing SyCom stats, he offers a unique gameplay experience. His base attributes lean more towards critical hit damage and Blast rather than health points (HP), making him particularly effective when using a Rail-centric build. Therefore, the optimal setup for Goro focuses on a balance of high damage output and survivability, similar to Lapis.

    Goro wields two SyComs, Astrologer and Sniper, both of which boast impressive Critical Damage and Blast stats while having lower HP and Armor than Lapis and Vermillion. These stats can be enhanced using various rare materials found in the Overgrowth, although there is a limit to these upgrades. Overall, Goro’s base stats and the specific perks provided by each SyCom will influence the most effective build strategies.

    Best Loadout for Goro

    Create Blood Stocks and Inflict Massive Damage

    As players delve deeper into the game, they are discovering that the most effective Holobytes are those that grow stronger with gameplay. In particular, the Holobytes that scale with the amount of Bright Blood in your reserve are exceedingly powerful. There’s no cap on the advantages these Holobytes can provide, aside from your capacity to gather Blood, so taking extra time to farm Bright Blood during your runs will be beneficial. To properly set up Goro’s Crit Blood build, consider the following equipment alongside the Sniper SyCom:

    Equipment Recommended Choices
    Blade Soldier’s Light or Giant’s Needle
    Rail High-fire-rate weapons, like the DZR
    Holobytes Critical Cuffs, Chaining Shot, Spiked Cleats, Plasma Powered, Micron Edge
    AMP Personal Preference (choose something that boosts Blade/Rail Affix if possible)
    Armor Personal Preference (look for items with increased Blood Gain, Battery, or Rail DMG)

    Initially, the priority is to acquire items that enhance Blood gain and yield during your first runs. Plasma Powered works better as you gather more Blood, so focusing on building up your reserves will pay off later when facing tougher enemies. Spiked Cleats not only increase base damage but also prove to be quite useful. However, Plasma Powered and Micron Edge are the standout features of this build. Micron Edge boosts your critical hit chances by 10% and increases Critical Damage by an impressive 50%.

    If you have the Cores available, upgrading your .Exe to Tier Three will unlock Synergy. For every tier of Synergy you equip, you gain a 10% damage boost for each piece of gear with matching Affixes. For example, if you have an Affix such as Burn or Hack on both your Blade and AMP, you’d receive a 20% damage increase with one tier of Synergy, 40% for two tiers, and a significant 60% bonus with three tiers.

    With the Sniper SyCom, your chance of landing a critical hit is already elevated, meaning Micron Edge will further enhance your damage. Critical hits with Plasma Powered can inflict devastating damage, and a high-fire-rate Rail ensures you consistently achieve rapid criticals. The Critical Cuffs are a rare but crucial source of healing in Breaker, allowing you to regain health with every critical strike as long as you manage your Battery well.

    SyCom Upgrades to Prioritize

    If the healing from Critical Cuffs isn’t sufficient, you can enhance Goro’s SyCom stats using Cores within Breaker‘s progression system. Given that Goro already possesses decent stats, investing some levels into HP will help with survivability. However, if you feel secure, focus on boosting your OPS and Critical Damage for optimal performance.

    As you engage in battles, keep in mind that maintaining your Battery is essential for utilizing your Rail. Make sure to alternate between using your Blade frequently to maximize the output of your complete loadout. The key objective with Goro’s build is to maintain a Blood cache of around 2,000–3,000 Bright Blood, which is quite achievable with a few successful runs and the right Blood gain enhancements. This build is straightforward and less complex, making it perfect for navigating Hyper Light Breaker‘s many challenging encounters.

  • Mastering SyCom Abilities: Upgrade Guide for Hyper Light Breaker

    Mastering SyCom Abilities: Upgrade Guide for Hyper Light Breaker

    In Hyper Light Breaker, every character possesses two distinct SyComs, each offering unique abilities that allow you to tailor your gameplay experience. This feature is crucial, as it significantly influences how you play. Players are encouraged to utilize SyComs strategically and enhance them to permanently improve their characters.

    Currently, there are three characters available in Hyper Light Breaker, resulting in a total of six SyComs to experiment with. Each SyCom is designed to complement the playstyle of its character. At the outset, **you will only have access to Vermillion until you unlock the other two characters**. Consequently, you may find yourself experimenting with a SyCom upgrade or exploring the capabilities of the second SyCom early on, provided you know the steps to do so.

    Strategies for Maximizing and Upgrading Every SyCom

    Leveling Up Each Character to Their Full Potential

    When you first start the game, it might be unclear how to upgrade the SyComs. To do this, navigate to the character’s loadout screen and focus on the left section of the screen, where you’ll find the SyCom box displaying the initial SyCom. By clicking on “Modify Loadout” and selecting the SyCom box, you’ll notice a second, currently locked, SyCom option.

    Related

    Hyper Light Breaker: Understanding Holobytes and Their Use

    One of the essential pieces of equipment in Hyper Light Breaker is the Holobyte, and players must understand its significance.

    Just below the SyCom box on the left, you’ll find specific stats for each SyCom. Initially, it may appear that these are simply the character’s stats, but once you’ve unlocked the additional SyComs and start switching between them, you’ll notice clear differences in the stats. For example, Vermillion’s HP is significantly affected by the SyCom you choose, which impacts how much healing you’ll need during gameplay.

    To unlock the second SyCom, you will require a Golden Ration, which you can earn at the end of each Cycle based on your performance. You can unlock it on the character screen by selecting the SyCom box.

    When it comes to upgrading the SyComs, you’ll need to locate Cores in the Overgrowth. After finding them, you can hit the “Upgrade” button and cycle through choices on the left. Each SyCom has lines below indicating how many upgrades you can perform. As you scroll through, costs will be displayed. While many upgrades require just 1 Core, some might need additional materials as well.

    Select the upgrade you can afford with your materials and unlock it. There have been suggestions that SyComs would only be enhanced for a single Cycle, but based on my experience, the upgrades have persisted. Since unlocking the second SyCom costs a Golden Ration, it’s logical to assume these upgrades will remain available. Generally, the most effective upgrades typically align with the materials you possess, but increasing HP and damage is consistently reliable.

    Six Distinct Gameplay Approaches

    Fundamentally, the SyComs offer six different ways to engage with the game. Each character comes with a range of options, though some are more advantageous than others. Certain SyComs alter the functionality of your weapons, while others provide healing or damage mitigation abilities. Vermillion’s second SyCom, for instance, increases damage after executing a parry in Hyper Light Breaker. You can find all the abilities listed below.

    Character

    SyComs

    Ability

    Vermillion

    Gunslinger

    When a Rail deals a critical hit, the next shot will also be critical.

    Tank

    Parrying temporarily increases your Armor.

    Lapis

    Lightweaver

    Boosts Rail damage following a Battery pickup.

    Warrior

    Enhances Core stats during upgrades.

    Goro

    Astrologer

    Accelerates Blade skill charging while shooting.

    Sniper

    Increases the frequency of critical hits.

    Vermillion is notably balanced and versatile, making him an excellent choice for players just starting out. In contrast, Lapis can grow stronger with every upgrade or increase Rail damage, particularly appealing for those who prefer ranged combat. Goro excels with dual weapons, as one of his SyComs amplifies blade damage when alternating between the Rail and blade often. Alternatively, he can also serve as a proficient sniper. Personally, I tend to favor fast weapons with a ranged option, which makes Goro a solid pick for my playstyle.

    Once you identify your preferred character, focus on investing in that SyCom for upgrades. Gathering materials can be quite challenging, so it’s wise to prioritize upgrading your primary character. Typically, players will unlock a few upgrades for Vermillion before gaining access to the others. If you find yourself struggling, don’t hesitate to team up with friends for co-op play in Hyper Light Breaker to collect materials and improve your SyComs.

  • Ultimate Vermillion Build: SyCom, Holobytes & Weapons Guide

    Ultimate Vermillion Build: SyCom, Holobytes & Weapons Guide

    All three characters currently available in Hyper Light Breaker boast impressive Rail build capabilities, but none match the thrill of Vermillion’s critical damage potential. His SyCom called Gunslinger ensures that any shot following a critical hit will also deal critical damage, allowing him to unleash significant burst damage when equipped with the right gear. Not only does Gunslinger provide exceptional abilities, but its base stats are also quite formidable, making it a valuable choice in most gameplay sessions.

    When configuring your Breaker’s loadout, there are numerous factors to take into account. With an abundance of Rail, Blade, AMP, and Holobyte options available, how do you select the right combination? You must also consider your weapon’s durability, and if you’re not likely to survive your current run, how will your strategy adapt with diminishing Holobytes? Despite these uncertainties, there’s a specific build for Vermillion that can guide you toward achieving success.

    Optimal Loadout for Vermillion

    Prioritize Rail Uptime and Scaling with Critical Hits

    Thanks to Gunslinger, Vermillion effectively doubles his critical hits compared to other characters. To leverage this advantage, you should aim to acquire Holobytes that enhance either survivability or boost damage based on critical hits. Keep in mind that since the Holobytes and gear you collect can be unpredictable, there isn’t a single build that guarantees consistent performance; however, there are specific types of Holobytes you should strive to obtain. Here’s a breakdown of what upgrades to seek for each component of your loadout:

    Blade

    A well-rounded weapon that enables quick strikes. Look for an Affix that inflicts damage over time (DOT) to ensure you deal continual damage while using your Rail. The basic Blade, the Soldier’s Blade, has a strong ability that inflicts burning and delivers burst damage.

    Rail

    Choose a rail with a rapid fire rate to enhance your chances of landing critical hits. The Soldier’s Gun and certain line rifles fire quickly, although they deal limited damage. Aim for a balance between solid damage output and speed.

    Holobytes

    Critical Ring, along with any other Holobytes that increase Rail fire rate, critical hit chance, or Rail damage.

    AMP

    My personal favorite AMP lets you summon a gigantic, crushing cube of light. Other options to consider are AMPs that provide armor or burst damage.

    Armor

    This is a matter of personal choice; medium armor strikes a good balance between health and mobility.

    As is typical in roguelikes, the variable modifiers—specifically Holobytes—are crucial for crafting your build. The Critical Ring is vital as it heals you upon landing critical hits, and with Vermillion’s Gunslinger SyCom, this means double healing opportunities. This mechanism allows for excellent survivability, even when your health is low. Provided there are enemies to engage and your Rail is equipped with energy, you have a reliable healing method.

    Important SyCom Upgrades

    There seems to be some misunderstanding about the permanence of stat upgrades in SyCom, but if you have excess Cores, you should absolutely put them to use. For the Gunslinger build with Vermillion, boosting your critical hit rate is crucial for the build’s success. This will allow your healing Holobyte to activate more frequently, increasing your chances of survival.

    Additionally, prioritize enhancing your Blast and Battery stats, which determine the base damage of all Rail weapons and their battery life, respectively. Improving these stats will extend your Rail’s operational time, raising your odds of securing critical hits and dealing considerable damage to enemies. While faster-firing Rails may have lower base damage, boosting your Blast stat can help level the playing field.

    Although it can be tempting to upgrade some of Vermillion’s lower stats for a more versatile build, this would detract from the essence of build crafting. Roguelikes thrive on finding the optimal niche to exploit for successful runs, so boosting HP on a character designed to heal consistently isn’t the best strategy. Instead, concentrate on improving the stats that align with your chosen build, whether that’s this critical hit strategy or something entirely different.

    Tips for Playing Vermillion’s Critical Hit Build

    Combine Blade Burst Attacks with Rail Healing

    If you have one of the few Holobytes that offers healing, mix in Holobytes that enhance your critical hit potential and those that improve your Rail’s performance. The goal is to maintain Rail energy by defeating foes with your Blade, causing your critical Ring to activate from Rail hits. You can also trigger critical hits with your Blade, but note that crits in Hyper Light Breaker operate on a percentage chance—higher frequency of hits increases your crit rate.

    During your early runs, focus on gathering Bright Blood, which will allow you to invest in better upgrades sooner.

    With that in mind, aim for a high-fire-rate Rail. Look for Holobytes that boost your Rail’s fire rate, reload speed, and Battery capacity to maximize operational time. When your Rail’s Battery is depleted, switch to your Blade and try to finish off staggered enemies (press F on PC). Finishers seem to improve your chances of obtaining items such as Holobyte upgrades and Battery packs.

    As long as you can sustain your Rail’s uptime and maintain your health, this build will enable you to deal significant damage using both your Rail and Blade. The starting Blade for Vermillion is particularly effective for navigating the game due to its strong ability and relatively agile combat mechanics. There’s a wide array of Blades, Holobytes, and Rails to explore in Hyper Light Breaker, so if you discover a combination that fits your style better, don’t hesitate to experiment and see what works best for Vermillion.

  • Strategies for Healing and Finding Medikits in Hyper Light Breaker

    Strategies for Healing and Finding Medikits in Hyper Light Breaker

    Hyper Light Breaker leaves out some crucial details, particularly regarding its healing mechanics. Like many roguelites, this game encourages players to learn through exploration, which can often lead to confusion—especially since starting players initially have no Medikits. Finding out how to heal can be quite exasperating.

    New players in Hyper Light Breaker should familiarize themselves with several key elements like parrying, gathering Bright Blood, and upgrades as they progress. However, many aspects remain unclear, and healing is one of the most essential abilities players need to master for success in the game.

    Healing Methods in the Overgrowth

    Healing Items, Defeating Enemies & When to Use Them

    Before players can start collecting Medikits, there are various ways to regain health in the Overgrowth. It’s not always straightforward, so understanding what to expect is vital. Healing becomes crucial as the Overgrowth can be highly challenging, and players can quickly find themselves low on health if overwhelmed by enemies—especially if new foes appear mid-battle.

    Here are the key methods for healing:

    1. Collecting Flowers and other items found within the Overgrowth
    2. Using a Medikit when available
    3. Receiving health drops from defeated enemies
    4. Defeating a prism boss and collecting its core
    5. Using items like holobytes that grant healing abilities

    While it may seem like there are numerous ways to heal, players should be aware that most methods provide only a modest amount of health at a time. For example, Flowers consistently restore 5 HP, meaning players will need to collect many to fully replenish their health. Since the game features procedurally generated maps, searching for these Flowers is essential, but typically, there are at least three in a given area.

    Other world items, such as the white and red canisters, may sometimes restore HP, though this isn’t guaranteed. Health drops from enemies typically resemble orbs filled with green liquid and usually grant around 5 HP. To completely heal, players will often need to take down a prism boss. Depending on your character’s total HP, it may not provide a full recovery, but it will be substantial.

    Don’t forget to claim the core dropped by the prism boss. You won’t receive the health boost until you collect it, so be cautious and avoid being surrounded during the process.

    Lastly, many Holobytes and other types of gear enhance your healing capabilities based on your actions—often rewarding players for executing Perfect Parries. There’s also an armor amp that recovers health lost shortly after taking damage. Still, the most effective way to heal remains using a Medikit, albeit these can be hard to maintain in your inventory.

    How to Obtain and Refill Medikits

    Unlocking and Using Medikits

    To begin using Medikits, you must first upgrade your skill tree by using a Golden Ration to allow yourself to equip one Medikit. Initially, you start with the capacity to carry none, but you can unlock a second slot later in the skill tree. This is likely the best early upgrade in Hyper Light Breaker, as it provides a reliable way to heal.

    After unlocking this ability, there are two main methods to acquire Medikits, both requiring Medigems. Keep in mind that Medigems do not carry over between Cycles, meaning you’ll need to collect them anew each time. I had an extra Medikit at the end of a Cycle, only to find it absent at the start of the next.

    As the game is currently in Early Access, some features may change before the final release.

    Medikits can sometimes be found in locked areas unlocked with a Key in the Overgrowth. Using a Key will cost Bright Blood, so be mindful of that. At the start of a run, a prompt may appear to automatically convert Medigems into a Medikit, if possible. Once in the Overgrowth, you can approach any Shrine to exchange Medigems for Medikits, although the cost is higher in the Overgrowth compared to the beginning of the run.

    Medigems Required

    Hub

    3

    Overgrowth

    5

    Medigems are automatically obtained by interacting with Flowers, so gather as many as you can find. I also received a few from defeating enemies, though this happened infrequently, so don’t rely solely on that—there appears to be a random element involved. The enemy that dropped Medigems for me was one that shields others.

    To use a Medikit, simply follow the prompt below it—press the up arrow on the D-pad if you’re using a controller. Each Medikit typically restores 75 HP, putting it quite close to a full recovery. This method is the most effective way to keep your character healthy in Hyper Light Breaker.

  • Mastering the Art of the Perfect Parry in Hyper Light Breaker

    Mastering the Art of the Perfect Parry in Hyper Light Breaker

    Mastering the Perfect Parry in Hyper Light Breaker can be challenging, especially if you’re unsure of what to focus on. There are various strategies to navigate encounters with the game’s enemies, and understanding each approach is key to maximizing your success in each cycle. To execute a Perfect Parry, players need to have precise timing.

    Each character in Hyper Light Breaker has its own unique strengths and weaknesses. However, the core gameplay mechanics remain consistent across all characters, allowing you to enhance and level up your skills as you progress. Your Perfect Parry will improve with your upgrades, equipment, and overall character build.

    How to Execute & Upgrade the Perfect Parry

    Timing Is Crucial for Successful Parries

    Getting the timing right is crucial for executing a parry effectively. This can be quite tricky, so keep practicing until you find your rhythm. To perform a Perfect Parry, hit the “Parry” button just before an enemy strikes you. While I haven’t completely mastered this skill yet, I’ve identified a few tips that can help:

    • Avoid trying to parry when surrounded by multiple enemies; they can easily overwhelm you.
    • Concentrate on practicing against one enemy at a time.
    • Only attempt a parry when you see a clear opening, and be ready to time your counterattack.

    When you successfully perform a Perfect Parry, you’ll notice that your enemy staggers, giving you a chance to dash in and deliver a blow. Typically, a button prompt will appear on the enemy’s health bar if you’ve executed it correctly, allowing you to finish them off. Defeating an enemy in this way also rewards you with Bright Blood in Hyper Light Breaker.

    This prompt can be hard to spot if you’re not looking for it or if you’re caught in the chaos of battle. I found it to be the right bumper, but your experience may vary.

    Hitting the parry can be hard to nail down, and I often find myself preferring to dash away from trouble instead. However, pulling off a parry can yield better benefits. Upgrades from Pherus Bit can provide you with several enhancements to your Perfect Parry, but you will need Golden Rations to acquire them, as is the case with most advancement in Hyper Light Breaker.

    Additionally, you can find gear that improves your Perfect Parry capabilities, like items that restore health after executing a parry. Using Vermillion enhances your effectiveness when parrying, making it worthwhile to practice, even if it can be a bit frustrating at times. Interestingly, parrying against bosses often seems easier, possibly because they don’t spawn in swarms like regular enemies do. Master the Perfect Parry mechanic, and you’ll find greater success in Hyper Light Breaker.

  • Boost Your Bright Blood Levels: A How-To Guide

    Boost Your Bright Blood Levels: A How-To Guide

    Acquiring Bright Blood in Hyper Light Breaker is essential for advancing in the game. While there are multiple ways to gather it, not all methods are immediately obvious. Since the game is still in Early Access, more ways to earn Bright Blood may emerge as it develops further.

    The Early Access version of Hyper Light Breaker is actively being refined with ongoing updates. Players can expect additional enemies, characters, and upgrades as the game approaches its full release. In the meantime, players will need to navigate some elements on their own, including strategies for using Bright Blood effectively.

    How to Obtain Bright Blood in Hyper Light Breaker

    Discovering it in the Overgrowth & Hub

    Your character’s journey in Hyper Light Breaker largely hinges on collecting Bright Blood to make progress. There are various methods to do this, alongside many skill trees and shops to manage in the game. Currently, a few reliable ways to acquire Bright Blood have been identified.

    • Defeating enemies
    • Breaking destructible objects scattered throughout the game
    • Selling equipment you find

    Among these options, taking down enemies is the most rewarding for harvesting Bright Blood. Much like other roguelikes, defeated foes drop resources essential for your progress. The great advantage is that Bright Blood carries over even if you die, so you won’t have to fret about losing it. Additionally, you’ll earn points for accumulating it when completing a cycle, getting you closer to the Golden Ration, a feature that signifies permanent progress in the game.

    Throughout each level, you’ll come across numerous small, breakable objects scattered across the landscape. Based on my experiences, almost everything I destroyed yielded at least a few shards of Bright Blood, and some items that provided other rewards also contributed Bright Blood. While these items may not initially appear destructible, it’s wise to keep an eye out and experiment with your weapons on various materials when the opportunity arises.

    Finally, if you find yourself in the Hub, you can visit one of the vendors to sell gear you’ve accumulated. Although this strategy might seem less than ideal, selling off lower-quality items to acquire enough Bright Blood for a better weapon in your next run can be quite beneficial. The effectiveness of this method depends on how much you’ve collected and whether the Vendor has the weapon you need.

    If your gear is still in your possession, you can take it into the next run, even with a fresh cycle. This is something to remember. However, you might also choose to sell all your gear for a chance to enter the next cycle with a significantly better weapon, so think carefully about how you want to approach your options.

    Progressing in Hyper Light Breaker can be quite slow initially, but players can advance further by understanding how to wisely save and spend their resources. Bright Blood is essential in every aspect of the game, so knowing how to maximize your collection of it will be crucial to completing Hyper Light Breaker.