Tag: hunter

  • How To Quickly Increase Your Hunter Level Through Completing NTE Quests

    How To Quickly Increase Your Hunter Level Through Completing NTE Quests

    If you enjoy gacha games, you might find Neverness to Everness interesting because it has a character enhancement system that lets you improve your Espers’ potential. This system is quite detailed and requires you to level up your Appraisal Level before you can significantly power up your characters.

    By increasing your Hunter Level in NTE, you’ll unlock many features: further character upgrades, new activities around town, better gear for your Espers, and more. There are also ways to quickly boost your Hunter Level to reach new milestones faster.

    ### Hunter Levels and Appraisal Levels Explained

    As you explore the world in Neverness to Everness after choosing your main character, you’ll notice that most experience gained in the environment helps you level up your Hunter Level. This is how you measure your overall progress.

    Players familiar with gacha games know about “world levels” that go up as you gain experience and open up new challenges. In NTE, represented by shiny blue diamond icons, you earn experience points by completing various tasks around the city. Gaining this experience helps you progress and makes the game more challenging as you grow stronger.

    Every time your Hunter Level increases through experience, you earn Hunter Rewards such as Fons, level-up materials, and more.

    However, NTE adds another layer called your Appraisal Level. As your Hunter Level grows, enemies will become tougher, reflecting your improved skills. Each increase in Appraisal Level makes enemies harder to beat, but at Level 3 and above, you can choose to lower your Appraisal Level if the difficulty gets too intense too quickly.

    ### How Do Appraisal Levels Work?

    Your Appraisal Level unlocks based on your Hunter Level, following this order:

    | Hunter Level | Appraisal Level |
    |—|—|
    | 10 | 1 |
    | 20 | 2 |
    | 30 | 3 |
    | 40 | 4 |
    | 45 | 5 |
    | 50 | 6 |
    | 55 | 7 |

    You’ll need to complete specific quests at Hunter levels 20, 40, and 50 before you can raise your Hunter Level further and increase your Appraisal Level to 2, 4, and 6, respectively.

    Increasing your Appraisal Level takes some time, but it’s worth it because it unlocks rewards like:

    – Past milestone levels for your Espers
    – New features in the City Tycoon mechanic, which helps you earn Fons

    ### Boost Your Appraisal Level to Level Up Your Espers

    Your Esper levels are locked behind your Hunter and Appraisal Levels. Here is the maximum level your Espers can reach based on your Appraisal Level:

    1. Max level 20 with Appraisal Level 1
    2. Max level 30 with Appraisal Level 2
    3. Max level 40 with Appraisal Level 3
    4. Max level 50 with Appraisal Level 4
    5. Max level 60 with Appraisal Level 5
    6. Max level 70 with Appraisal Level 6

    This system prevents you from over-leveling your Espers too soon, as challenges increase with your Appraisal Level. Be sure to check your Espers’ pages whenever you increase your Appraisal Level to see new boosts or features that can improve their combat abilities.

    ### How to Raise Your Hunter Level Quickly

    To level up faster, focus on these strategies:

    – Progress through the main story because Hunter Level is closely tied to story advancement. Keep helping Eibon and the team, ensuring your Espers are strong enough to handle stronger anomalies.
    – Complete side missions marked by blue and white exclamation points on the map. These quests provide extra experience and help you level up your Hunter Level beyond the main story.
    – Finish daily and weekly tasks, known as the Circle Bounty. These give rewards like leveling materials, currencies, and experience points.
    – Complete early-game tutorial goals that guide you through mechanics as you explore. These objectives often reward significant Hunter Level experience.

    The faster you increase your Hunter Level, the sooner you can raise your Appraisal Level, unlocking new perks, rewards, and stronger Espers for your team.

  • How to Defeat Aenshin in Monster Hunter Stories 3: Twisted Reflection by Solving Challenges

    How to Defeat Aenshin in Monster Hunter Stories 3: Twisted Reflection by Solving Challenges

    After playing through the entire game and trying your best to avoid violence while calming Aenshin, it becomes clear that they are too far gone to be calmed.

    The final encounter in the story is with Aenshin, who is a very strong boss compared to most enemies encountered so far. Prepare carefully before facing Aenshin to increase your chances of victory.

    Once you defeat Aenshin, the game will reset to the point before the fight, allowing you to attempt it again if desired.

    Best Monsties to Use Against Aenshin

    Since this is a story fight and significant events lead up to it, Ratha plays a crucial role. Not just thematically but also in terms of mechanics. Aenshin can cause Petrifaction, instantly defeating any character or Monstie hit while affected. Ratha is immune to this status, making it essential for this fight.

    Aenshin is weak to all elements except Normal, making Fire attacks particularly effective. However, Aenshin’s own attacks are of the Dragon element, which Ratha is weak to, so having a backup Monstie ready is smart. If you still have a Tobi-Kadachi, it works well here. Alternatively, equip Ratha with a gene that boosts Dragon resistance, and use Skills or items that raise Defense, like Armorskin.

    Best Equipment for Facing Aenshin

    Aenshin’s attacks are all of the Dragon element, so focus on gear that offers resistance to this element. The Death Garon set, obtained from Ebony Odogaron, is highly recommended. Since the materials for level three gear are easy to gather from Serathis, it’s a good choice.

    Regarding weapons, you can choose anything because Aenshin is weak to all elements except Normal. However, Fire and Dragon weapons deal the most damage. When Aenshin enters the Blightstone Unleashed state, they become weak to Normal damage, so having a strong Normal weapon like one from Magnamalo can be advantageous.

    As a tip, bring at least one weapon of each damage type. This flexibility allows you to target all of Aenshin’s weak points effectively.

    Best Companion Against Aenshin

    Unlike other battles, you are restricted to a specific companion: Simon, who returns from the start of the game. He will fight with Ratha V as his Monstie and wield a Long Sword. You don’t control his equipment or skills but can perform a special Double Kinship Attack when using Ratha, which is very powerful and should be executed when possible.

    How to Beat Aenshin

    If you fought Aenshin earlier, you have a good idea of their mechanics. The main objective is to destroy their crystal. Avoid attacking the crystal when Aenshin’s attacks are active, as doing so will trigger a powerful counterattack. When the crystal is inactive, focus all your damage on destroying it. Multiple crystals need to be destroyed, and your allies will perform Kinship Attacks for each one destroyed.

    Aenshin’s biggest threat is Petrifaction, which can prevent your Stamina from restoring and cause you to lose a Heart if hit again. Ratha and Ratha V are immune to Petrifaction, and mounting them removes its effects. Riding Ratha also grants immunity to the status altogether.

    Another challenge is the smaller crystal enemies summoned by Aenshin, which hit hard and eat into your damage window. Attack these quickly and use multi-hit moves when their health is low to maximize damage to the main crystal.

    Aenshin shifts between different states during the fight, altering their attack patterns:

    • Blightstone Protection – Technical
    • Blightstone Unleashed – Power
    • Exposed – Power

    While their resistances change, they remain weak to Fire and Dragon throughout, so prioritize these elements in your attacks. Once the primary crystals are broken, Aenshin reveals their final core. Continue attacking, but be prepared to heal between rounds, as the boss hits hard even with good resistances. Defeating this final crystal marks the end of the fight and the game.

    After the final victory, the game does not feature a post-game.

  • How to Solve Namielle in Monster Hunter Stories 3: Twisted Reflection

    How to Solve Namielle in Monster Hunter Stories 3: Twisted Reflection

    Elder Dragons have always been the toughest opponents in Monster Hunter, offering a challenging fight with stricter rules than regular hunts. Monster Hunter Stories 3: Twisted Reflection continues that tradition.

    Namielle appears as the destructive Elder Dragon of Azuria, causing chaos at Mirror Lake while floating above it. This fight is not easy, so it’s important to be well-prepared if you want to defeat it.

    Best Monsties to Use Against Namielle

    Namielle’s biggest weakness is Fire, with some vulnerability to Dragon and Ice. However, its resistance and weakness can change temporarily during different states, with brief periods of being resistant to all elements and vulnerable to Normal attacks.

    Ratha or any Rathalos makes a good choice here because of their strong Fire attacks and only slight weakness to Thunder. Malzeno is also effective since it resists Namielle’s main elements and can exploit its Dragon weakness.

    Namielle uses attacks from both Water and Thunder regardless of its current state. Which state it’s in will determine its attack style and strength, so having a diverse team of Monsties ready is key.

    Seregios and Magnamalo are great options when Namielle is exposed or in the Water Depleted state, as they can take advantage of its massive weakness to Normal attacks.

    Best Equipment to Use Against Namielle

    It’s crucial to have high resistance to Thunder and Water types. The Lagiacrus U armor is ideal because it naturally offers strong resistance to both, though it has slightly lower Water resistance, which can be boosted with Water Defense Boost decorations. You might also consider pairing it with the Heroic Testament decoration, or other gear depending on your setup.

    For weapons, a mix of damage types works well, especially focusing on Fire damage. Using the Ashen Wrath Bow, Scorching Isshata Hammer, and Scorching Blazer Great Sword is effective. You can also swap these for Brachydios weapons to take advantage of Namielle’s weakness to Blastblight, or switch to Normal weapons like those from Magnamalo to do more damage when Namielle is exposed.

    Best Companion to Use Against Namielle

    Eleanor and Kora are the top companions for fighting Namielle. Eleanor should bring her Great Sword for Fire damage, using either her or her Monsties — Glavenus tends to be faster and more evasive. Kora’s Dios Gunlance provides passive damage, and her ability to draw aggro allows you to set up buffs more easily, though many of Namielle’s attacks will still hit the whole team.

    Gael can also be useful, providing good damage and support with the Glacial Shotel.

    How to Beat Namielle

    Namielle is a straightforward but very powerful foe. It switches mainly between two states: Water Mantle, focusing on Water attacks, and Abyssal Charge, which uses Thunder attacks.

    After some time or once the Wyvernsoul Gauge is depleted, Namielle enters the Water Depleted State, similar to the Exposed State. It remains dangerous here but mainly focuses on head-to-head attacks.

    In each state, Namielle’s attack styles differ:

    • Water Mantle: More technical moves.
    • Abyssal Charge: Faster, more aggressive attacks.
    • Water Depleted/Exposed State: Increased power, but mostly close-range combat.

    It’s vital to keep your defenses high because Namielle can also cause a status effect that stops your Stamina from recovering. Carry plenty of Nulberry Elixirs to counter this. The attack cycle is relatively simple to learn, so patience and focus on defense will serve you well.

    Defeating Namielle grants your allies the Follower’s Testament skill, or an upgraded version if they’ve already faced an Elder Dragon. Plus, eggs of Namielle will start appearing around Mirror Lake if you want to try capturing or raising your own.

    If you defeat Namielle without repelling it, you’ll also earn the Heroic Testament skill, or a better version if you’ve already defeated an Elder Dragon.

  • How to Defeat Wind Serpent Ibushi and Thunder Serpent Narwa in Monster Hunter Stories 3: Solving Twisted Reflection

    How to Defeat Wind Serpent Ibushi and Thunder Serpent Narwa in Monster Hunter Stories 3: Solving Twisted Reflection

    As you build a strong team of Monsties in Monster Hunter Stories 3: Twisted Reflection, most battles will start to become easy, allowing you to finish them quickly. However, the Calamitous Elder Dragons are an entirely different challenge.

    They are the toughest enemies in the game, and facing two at once—Ibushi and Narwa—is the most difficult battle you’ll encounter. These two Elder Dragons are the only enemies that can truly test your skills and strategy.

    The Best Monsties to Use Against Ibushi and Narwa

    Because you’re fighting two Elder Dragons simultaneously, it’s best to bring at least two powerful Monsties that you can switch between. Both of these dragons are weak to Dragon elements, making Dragon-type Monsties a good choice. Malzeno can both heal and deal damage, but it’s weak to Dragon as well, which makes Ibushi a tough opponent for it. On the other hand, Stygian Zinogre resists Dragon attacks well but is vulnerable to Narwa’s Thunder attacks.

    When targeting Ibushi’s Fire weakness, Ratha is useful, though its Dragon weakness remains a concern. Hellblade Glavenus is a good option because it handles the resistances well, though low Defense and Speed make survival tricky. For Narwa’s Ice weakness, Goss Harag is effective, particularly because of its high Defense. Velkhana, despite weaker resistances, can cause more damage due to its higher Speed, helping it dodge attacks more easily.

    Since finding a single Monstie capable of handling both monsters is hard without raising a dual-element monster, having a rotation of different Monsties is important. Skills that improve team defenses and agility, especially Dodge and Defense boosts, are vital. Also, abilities like E. Dominance can help reduce their Attack and Defense, giving you an edge.

    The Best Equipment to Use Against Ibushi and Narwa

    For gear, you’ll want armor that offers well-rounded defenses, multiple Decoration slots, and good resistances since equipment can’t be swapped during battles. Goss Harag armor is highly recommended for this, especially when fully leveled up to level three. It provides solid defenses and slots for Decorations like Dragon Def Boost (XL), Thunder Def Boost (XL), and Elemental Assault (XL) to boost elemental damage.

    Regarding weapons, equip one of each element the enemies are weak to. For example, use the Fire Ashen Wrath Bow, the Dragon Duke’s Grail Hunting Horn, and the Ice Icebrink Long Sword. This ensures you have good coverage against both Elder Dragons. Decorations like Accuracy Down Coating on your bow can help avoid attacks more often, which is very useful.

    The Best Companion to Use Against Ibushi and Narwa

    When selecting a partner, Thea and Eleanor are generally the strongest options. Kora and Gael can also be effective, but Kora’s Focal Point is less useful since much of Ibushi and Narwa’s damage hits the entire party.

    For Thea, use her Hunting Horn, which can’t deal much damage to the enemies but can buff the whole team. Make sure to bring Gnocchi, who wields Ice and Dragon attacks, making it useful against both Elder Dragons. For Eleanor, her Great Sword is particularly powerful against Ibushi. Its high damage output, combined with Fortified Spirit, effectively grants an extra Heart, increasing survivability. Also, bring her Glavenus partner for better Speed and Evasion.

    How to Beat Ibushi and Narwa

    The fight begins with Ibushi and Narwa employing a unique mechanic called the Mind Connection. During this phase, one dragon is empowered with a Mantle, acting mainly in support—removing or applying buffs and minor healing—while the other deals damage. Both can still attack, so ignore them at your peril.

    The Mind Connection also affects the Wyvernsoul Gauge: damaging one dragon reduces the gauge for both. When one is staggered, so is the other, but this also means you can’t perform Synchro Rushes during this time.

    Focus your attacks on the empowered dragon, since it will have more vulnerable spots, making it easier to drain the Wyvernsoul Gauge. Keep in mind that each dragon’s attack type changes frequently based on their current state:

    • Ibushi: Wind Mantle (Power), Mind Connection (Speed), Exposed (Power).
    • Narwa: Thunder Mantle (Technical), Mind Connection (Speed), Exposed (Technical).

    Avoid starting rounds with low HP when both dragons are about to perform non-head-to-head attacks, since they can wipe out your entire party. Use Kinship Skills strategically to cancel their most powerful moves. Prolonging the fight is safer than risking an early wipeout.

    The battle becomes most intense when both dragons’ HP drops below 50%. They then become empowered, gaining new moves and buffs, making the fight much harder. This phase also makes it easier to deplete their Wyvernsoul Gauge—the Mantles help, but it’s a punishing stretch.

    If you manage to repel Ibushi and Narwa after bringing their HP below 50%, they will both enter their empowered states again during the next battle, so plan your approach accordingly.

    As the fight progresses, learn their attack patterns and focus on keeping defenses up while chipping away at their health. Attacks that cause higher Wyvernfell build up Exposed status faster, exposing their weak spots and prompting them to perform head-to-head attacks more often.

    Once defeated, your allies earn the Follower’s Testament Skill, which can be upgraded if they’ve already fought an Elder Dragon. You also unlock an upgraded version of this skill for yourself if you manage to defeat them without repelling.

  • All Combo Recipes and How to Unlock Them in Monster Hunter Stories 3

    Lifesoot
    Restores a small amount of HP to all allies. Available at Melynx Emporium for 300 Silver Trade Points.

    Potion
    Restores HP for one ally. This item is immediately available.

    Mega Potion
    Greatly restores HP for one ally. Can be purchased at Melynx Emporium for 1,500 Silver Trade Points.

    Lifepowder
    Restores HP for all allies. Requires items such as 2 Godbugs and 2 Wyvern Barbs to craft. You can obtain it by completing Gaul’s Chapter One Side Story, “Gaul’s Unexpected Side.”

    Dust of Life
    Fully restores HP and Stamina for all allies. Crafted with 2 Lifepowder and 2 Gloamgrass Buds. Available after completing Gaul’s Chapter Three Side Story, “Rent Negotiations.”

    Max Potion
    Fully restores HP for one ally. Made with 2 Godbugs, 2 Honey, and 2 Mandragoras. Obtain it after finishing Gaul’s Chapter Three Side Story, “Rent Negotiations.”

    Ancient Potion
    Fully restores HP and Stamina for one ally. Crafted from 2 Immunizers and 1 Kelbi Horn. Available post Gaul’s Chapter Three Side Story, “Rent Negotiations.”

    Immunizer
    Grants Regenerate to one ally. Found at Melynx Emporium for 500 Silver Trade Points.

    Nulberry Elixir
    Cures any abnormal status for one ally. Requires 2 Nulberries and 2 Cactus Flowers. Available at Melynx Emporium for 1,000 Silver Trade Points.

    Antidote
    Cures Poison, Noxious Poison, or Severe Poison in one ally. Made with 2 Antidote Herbs and 2 Blue Mushrooms. Costs 200 Silver Trade Points at Melynx Emporium.

    Burn Ointment
    Cures Burn status in one ally. Also costs 200 Silver Trade Points at Melynx Emporium.

    Paracare
    Cures Paralysis for one ally. Requires 2 Anesfreesia and 2 Sap Plants. Available for 200 Silver Trade Points at Melynx Emporium.

    Intuitizer
    Removes Darkness from one ally. Made with 2 Manyberry and 2 Blue Mushrooms. Costs 200 Silver Trade Points at Melynx Emporium.

    Energy Drink
    Cures Sleep status in one ally for 200 Silver Trade Points at Melynx Emporium.

    Soap Scud
    Cures Blastblight in one ally. Requires 2 Soapgrass and 2 Spider Webs. Costs 200 Silver Trade Points at Melynx Emporium.

    Zest Pill
    Removes Skillseal from one ally. Made with 2 Girthy Garlic and 2 Nitroshrooms. Available for 200 Silver Trade Points at Melynx Emporium.

    Spirited Soda
    Cures Exhaust in one ally. Complete the quest “The Great Windmill Heist” to obtain.

    Big Barrel Bomb
    Deals damage to one enemy and can be changed to inflict Burn. Crafted with 1 Big Barrel, 2 Fire Herbs, and 1 Nitroshroom. Unlocks after completing Kora’s Chapter One Side Story, “A Rocky Past.”

    Mega Barrel Bomb
    More powerful than a Big Barrel Bomb, deals damage and inflicts Burn, made with 1 Big Barrel and 2 Scatterfish. Obtain after finishing Kora’s Chapter Three Side Story, “Cave Kids.”

    Pitfall Trap
    Triggers on enemy attack; traps enemies so they cannot act. Crafted from 1 Trap Tool, 2 Spider Webs, and 1 Ivy. Available after completing Ogden’s Chapter Three Side Story, “The Sender’s Identity.”

    Shock Trap
    Triggers on attack; inflicts Paralysis. Made with 1 Trap Tool and 2 Thunderbugs. Obtain after Ogden’s Chapter One Side Story, “Letter From An Unknown Sender.”

    Tranq Trap
    Triggers on attack; puts enemies to Sleep. Crafted from 1 Trap Tool and 2 Sleepfish. Unlocks after Ogden’s Chapter One Side Story, “Letter From An Unknown Sender.”

    Poison Knife
    Deals damage and may inflict Poison. Made with 1 Throwing Knife and 2 Toadstools. Costs 800 Silver Trade Points at Melynx Emporium.

    Paralysis Knife
    Deals damage and has a chance to cause Paralysis. Requires 1 Throwing Knife and 2 Anesfreesia. Costs 800 Silver Trade Points.

    Sleep Knife
    Deals damage and may cause Sleep. Crafted with 1 Throwing Knife and 2 Sleepyfish. Costs 800 Silver Trade Points.

    Sonic Bomb
    Releases a shock wave to Stun an enemy. Crafted from 1 Screamer Sac and 2 Fire Herbs. Obtained after Kora’s Chapter One Side Story, “A Rocky Past.”

    Flash Bomb
    Releases a bright flash to potentially Darkness. Made with 2 Flashbugs, 2 Sap Plants, and 2 Stones. Also obtained after “A Rocky Past.”

    Paintball
    Increases monster retreat rate, especially effective on low HP monsters. Earned after completing “A Step Towards Conservation.”

    Dash Juice
    Restores Stamina and boosts Stamina Regen. Made with 2 Immunizers and 2 Dash Extracts. Can be bought at Melynx Emporium for 1,500 Silver Trade Points.

    Demondrug
    Boosts attack power. Crafted from 2 Mandragoras and 2 Might Seeds. Available at Melynx Emporium for 1,500 Silver Trade Points.

    Mega Demondrug
    Enhances attack even more than a Demondrug. Made with 1 Demondrug and 1 Nourishing Extract. Costs 1,500 Silver Trade Points.

    Armorskin
    Increases defense. Crafted from 2 Mandragoras and 2 Adamant Seeds. Available after “Seeds! More Seeds!”

    Mega Armorskin
    Provides greater defense boost than Armorskin. Made from 1 Armorskin and 1 Nourishing Extract. Available after completing “Seeds! More Seeds!”

    Vigor Powder
    Restores Stamina for all allies. Crafted from 2 Godbugs, 1 Dash Extract, and 1 Kelbi Horn. Unlocks after the quest “Locating the REAL Legend.”

    Grape Juice
    Made from Azurian Grapes and Gloamgrass Buds. Restores HP and enhances stats. Earned after completing Thea’s Chapter Three Side Story, “The Tarkuan Trotter.”

  • Where to Find All Track Items in Serathis — Solving Monster Hunter Stories 3

    Where to Find All Track Items in Serathis — Solving Monster Hunter Stories 3

    Monster Hunter Stories 3 features many monsters, especially in the region of Serathis. Here, you’ll encounter some of the coldest and most dangerous monsters, including your first roaming Elder Dragon.

    The special items you need to track monsters for ecological research are scattered across three main areas in Serathis: Glacial Caps, Old Capital Road, and Sacrosanctum/Lazlion. There’s also one smaller sub-area, which has its own unique track item.

    Main Map Track Item Locations in Serathis

    You can find all the track items for every monster in Serathis on this map. Since there are quite a few, be prepared to search thoroughly.

    Tip: Track items are usually located near where the monster lives.


    Example Track Items

    Chilled Claw (Legiana Track Item)

    • Found in Glacial Caps, in the northwest corner of the western part of this area. It’s located on a rugged iceberg.


    Terra Nativitas

    This is the last region you’ll explore, and it contains only one track item.

    Terra Nativitas Map

    The map shows the party standing in front of the Aenshin egg.


    By exploring these areas carefully, you should collect nearly all the necessary track items for studying every monster in Serathis.

  • Where to Find All Track Items in Canalta Timberland for Solving in Monster Hunter Stories 3

    Where to Find All Track Items in Canalta Timberland for Solving in Monster Hunter Stories 3

    In every part of Monster Hunter Stories 3, you’ll come across many new, fierce monsters. Along with these monsters, there are numerous details to learn about each of them.

    The Canalta Timberland area offers several new tracking items to help you with your ecological studies across its three main zones. Below, we’ve listed all of these items to make it easier for you to find them.

    Canalta Timberland Main Map Track Item Locations

    Here are all the track items you can find on the main map of Canalta Timberland.

    Insert image showing the map with highlighted track locations.


    Dragonreach Mountains Track Item Locations

    In the Dragonreach Mountains section of Canalta Timberland, these are all the monster track items you can locate.

    Insert image of the team in the Dragonreach Mountains.


    Narrow Passage Track Item Locations

    Within the Narrow Passage area of Canalta Timberland, these are all the track items available for discovery.

    Insert image of the player, Ogden, and an Arzuros walking through the Narrow Passage.


    Most of the track items across Canalta Timberland should be covered with these locations. We’re working to find any missing track items and will update this list as soon as we do!

  • Completing the Windward Wilds Monster Hunter Wilds Trials in FFXIV

    Completing the Windward Wilds Monster Hunter Wilds Trials in FFXIV

    The Monster Hunter Wilds collaboration event has been added to Final Fantasy 14 with the release of Patch 7.35, and it will be a permanent addition, just like the previous Monster Hunter crossover. This update introduces the Windward Wilds trial, along with its Extreme version, and offers many rewards for players to earn.

    There are various items to collect, including mounts, minions, armor, weapons, housing items, and more. There’s likely something for everyone. To access this new content, players need to complete the quest titled “The White Wanderer.”

    The White Wanderer Side Quest Walkthrough

    Begin by speaking with the Dawn Hunt Tracker in Tuliyollal at coordinates (X:13.3, Y:13.1). Note that you need to be level 100 and have completed the main scenario quest “Dawntrail” to start this quest.

    Next, teleport to Hhusatahwi in Shaaloani and interact with the destination marker at (X:28.3, Y:30.2). After a cutscene, talk to the Stray Felyne at (X:29.8, Y:29.2) and escort him along a designated path, marked by monster tracks at (X:31.0, Y:26.2), (X:28.4, Y:25.9), and (X:29.5, Y:22.2).

    After the cutscene, interact with the Secret to climb aboard and prepare for a ride. Following another cutscene, speak with the Stray Felyne at (X:17.1, Y:6.3) and agree to set up camp. In the camp, talk again with the Felyne at (X:5.8, Y:5.9), then back at (X:5.8, Y:5.9) after a short scene. This completes the quest, unlocking access to the Windward Wilds trial.

    Prerequisites and Rewards:

    You must have an item level of 725 or higher to undertake the trial. Defeating the Guardian Arkveld grants a Veldian Weapon Coffer (IL745). Be sure to interact with the Guardian Arkveld to collect two Guardian Scales, which is easy to overlook.

    Return to the Dawn Hunt Tracker in Tuliyollal to finish the quest and receive rewards, including:

    • 5,000 gil
    • Seikret Horn (Mount)
    • Outdoor Hunter’s Grill (Furnishing)
    • Hunter’s Camp Chair (Furnishing)
    • Guardian Hunter achievement

    Unlocking The Windward Wilds (Extreme)

    After completing “The White Wanderer,” visit the Wandering Minstrel in Tuliyollal at (X:11.2, Y:14.7). Choose the option labeled “Guardian Arkveld. [The Windward Wilds (Extreme)]” to unlock the Extreme version of the trial.

    The Extreme trial offers rewards like Veldian Weapon Coffers, Guardian Scales (from the Guardian Arkveld’s body), and Guardian Arkveld Certificates.

    Exchanging Guardian Scales & Certificates

    Use Guardian Scales and Certificates at the local smithy in Tuliyollal (X:13.3, Y:13.1) to upgrade your Veldian weapons. Scales can also be exchanged for various items and permits, including mounts, minions, orchestrion rolls, and furnishings. Upgrading to an Augmented Veldian weapon requires exchanging your existing weapon along with Guardian Arkveld Certificates.

  • Essential Tips for Completing and Solving in Borderlands 4

    Essential Tips for Completing and Solving in Borderlands 4

    Unlike previous entries in the series, Borderlands 4 is an open-world game. When you arrive from the oppressive prison complex onto the shores of Clap-Trap’s paradise (which is basically hell), it can feel overwhelming at first.

    But don’t worry too much. This is still a classic Borderlands game—focused on shooting everything that moves until you’re a loot-fueled machine with a treasure chest full of shiny weapons. To help you get started and adjust to the main changes, here are some important tips.

    Don’t Explore Until You Get Your First Vehicle
    It might be tempting to start wandering around right away, but it’s better to stick with the main story until you finish the “Down and Outbound” mission. This quest rewards you with your first Faction Town and a digistruct vehicle. You can summon this vehicle anytime by pressing right on the D-pad or pressing X on a keyboard—no Catch-A-Ride stations needed on Kairos.

    Having a vehicle makes traveling much easier. It can even glide over water, so it’s worth unlocking before you start exploring on foot, which can be exhausting without it.

    Your Repkit Has More Uses Than Just Healing
    Borderlands 4 introduces the Repkit, a stim that you inject yourself with for a quick health boost. But it’s not just for healing. You can find different Repkits that come with extra perks. For example, some increase reload speed or have more charges, making them more useful beyond just healing. Keep an eye out for these upgrades—they can work well with your build and add new layers of strategy.

    Grenades Now Have a Cooldown
    Grenades are no longer unlimited. Instead, they have been replaced by “Ordnances,” which include grenades, throwing knives, and heavy weapons like the Fermionic Monsoon shown above. You don’t need to loot ammo to refill them anymore; they now have a cooldown timer after each use.

    You Can Fish for Free Guns Using Your Grappling Hook
    Borderlands 4 isn’t a relaxing game, but you can go fishing in Kairos. There are spots around the map where you’ll see splashes in the water. Using your grappling hook, you can pull in junk and weapons from these spots. It’s a handy way to find gear between fights, and you can sell what you catch at vending machines for quick cash.

    The Minimap Isn’t Enabled by Default
    The game’s compass helps keep track of objectives, but in tight spaces filled with enemies, it can be hard to see where everyone is. Luckily, there’s still a radar, but it’s off by default. To turn it on, go to the options menu, select the “Gameplay” tab, and at the bottom, toggle “Radar Display” to ‘On’. You’ll then see both the compass and a radar for better situational awareness.

    Boss Rematches Offer Better Loot
    Another new feature in Borderlands 4 is the ability to rematch bosses at Moxxi’s Big Encore machines. For a small fee, you can reset story bosses, side quest bosses, and world activity bosses to earn more XP and better loot.

    You can also queue for boss rematches from the main menu via the matchmaking options. Additionally, if you want to replay specific quests, you can do so from the “Replay” tab in the Missions menu—useful if you missed any optional objectives.

    Upgrade Your Backpack As Soon As Possible
    Many utilities—like cosmetics—are now managed through the player menu. The SDU, for example, can be accessed anytime, without visiting a vendor. From this menu, you can upgrade your weapon ammo capacity, inventory limit, bank storage, and how much of your lost loot is saved, using tokens earned through collectibles and challenges.

    Starting ammo is already quite high, so investing tokens into your backpack early is a good idea. This prevents constantly sorting through your inventory during the early part of the game.

    The Hover Pack Lets You Dodge
    Early in the game, you get a hover pack that does what it sounds like. Unbeknownst to many, you can also use it to dodge. On PC, press shift plus a direction key. On consoles, tap B or Circle while moving sideways, forward, or backward. Mastering this movement expands your traversal options and helps you avoid damage, making fights easier and survival possible longer.

    Respeccing Is Cheap and Easy, So Do It Early
    If your current build isn’t fun, you don’t have to restart the game. Respeccing is unlocked after completing the “Down and Outbound” mission and costs just enough cash to be affordable early on. Use this feature to tweak your skills and abilities until you find a playstyle that suits you. When you do, focus on finding loot that complements your chosen build.

  • Discovering the Timeless Wylk Gem in Monster Hunter Wilds

    Discovering the Timeless Wylk Gem in Monster Hunter Wilds

    Monster Hunter Wilds places a stronger focus on storytelling compared to earlier entries in the franchise, crafting a world filled with rich lore that unfolds as you play. However, this does not take away from the game’s main attraction—hunting a variety of monsters and collecting an abundance of materials.

    Many of these rare items are intricately woven into the fabric of the game world, revealing how it operates. One such item is the Time-honed Wylk Gem, which requires a keen understanding of the weather patterns to fully appreciate how this world functions. Let’s explore how to obtain and utilize this gem.

    How to Obtain the Time-honed Wylk Gem

    The Time-honed Wylk Gem can be discovered in several locations, including the Windward Plains, Oilwell Basin, and Ruins of Wyveria. You’ll find Wylky Gemstone gathering points scattered throughout these areas, but the Time-honed Wylk Gems come from a different source.

    These gems are specifically found at a Wylky Crystal Outcropping, which only appears during a Wylky Crystal Outcropping Emergence. This event can occur in both the Inclemency and Fallow regions, but you might not see it at all during the Plenty phase. Be prepared to rest at your tent in any of these areas until this event triggers.

    Note: The Origin Wylk Gem, located in the Ruins of Wyveria, has no connection to the Time-honed Wylk Gem.

    Once the emergence occurs, you can adjust your map to show only gathering points or create a waypoint directly on the map related to the event. It’s wise to equip the Geologist skill beforehand to increase your chances of collecting multiple gems from a single Wylky Crystal Outcropping.

    Uses for the Time-honed Wylk Gem

    After you’ve collected some Time-honed Wylk Gems, the next step is finding how to use them. Like many rare materials, the Time-honed Wylk Gem can only be traded. Despite its availability across three different regions, you can only utilize it in the Oilwell Basin.

    The traders in the Oilwell Basin are eager to exchange your Time-honed Wylk Gems for other rare items. These can include treasures such as Nu Udra Oilmucus+ and Azuz Tanned Leather, among others. Since the folks in Azuz rely on Wylk for their fires, it makes sense they would be interested in acquiring as many Time-honed Wylk Gems as you can provide.

  • Challenging Guardian Bone Farming Spot in Monster Hunter Wilds

    Challenging Guardian Bone Farming Spot in Monster Hunter Wilds

    The Tough Guardian Bone is a rare crafting material in Monster Hunter Wilds, and its availability can be quite limited at times. It tends to appear during specific segments of the game, making it somewhat challenging to locate.

    Among the various crafting resources in Monster Hunter Wilds, the Tough Guardian Bone holds considerable significance. It will help you unlock powerful equipment that is essential for the late stages of the game. Therefore, gathering Tough Guardian Bones is a smart move to prepare yourself for the more challenging monsters you’ll encounter as you progress.

    Where to Locate Tough Guardian Bone

    As you advance to the Ruins of Wyveria during Chapter 3 of the storyline, you will need to battle Zoh Shia and Guardian Arkveld. Both of these formidable foes have a chance to drop the Tough Guardian Bone.

    Please note that during your encounter with Zoh Shia in the main story, you will not find this monster listed in the Optional Quests at Alma’s Quest Counter. This means you cannot repeat this fight to farm for the Tough Guardian Bone.

    In contrast, you can face Guardian Arkveld at least three times throughout your journey. You will encounter it during two missions in Chapter 3—first in Repel the Guardian Arkveld and again at the midway point (3-4) during The Pale Dream of a Lone Shadow.

    For your third battle with Guardian Arkveld, you will face it again in the more difficult endgame chapter during the mission Awakening from a Dream. This encounter will be considerably tougher, so make sure you’re well-equipped before facing it.

    While Guardian Arkveld appears multiple times in Monster Hunter Wilds, it seems that Zoh Shia only makes a single appearance. You will only battle Zoh Shia once throughout the game.

    How to Farm for Tough Guardian Bone

    Fighting these formidable monsters can take time, which might slow your progress in acquiring the Tough Guardian Bone. Thankfully, there are easier methods to gather this resource, such as exploring Bonepiles and battling Guardian Seikrets.

    Bonepiles

    You can find Bonepiles scattered across the Ruins of Wyveria, and they often contain valuable resources. It’s worth seeking them out whenever possible.

    To maximize your efficiency, focus your search in Areas 4 and 5 on the second level of the ruins, as these locations have a higher rate of drops.

    Bonepiles in Areas 4 and 5 can respawn in the same locations. So, keep checking back to loot them again whenever they become available.

    You can also easily view all Bonepiles on your map. This feature helps you navigate effectively while collecting Tough Guardian Bones, as you won’t waste time searching blindly. Simply highlight a Bonepile on the map and set a waypoint to guide you.

    Guardian Seikrets

    The next option for farming Tough Guardian Bones is to hunt Guardian Seikrets. You’ll encounter these creatures during Chapter 3 of the story. They’re smaller and generally easier to defeat.

    The Optional Objective for the Guardian Seikret should be available at Alma’s Quest Counter, allowing you to hunt them without needing to defeat them for a more extensive quest.

    Guardian Seikrets often drop Tough Guardian Bones, and you can check for drops by going to the Quest information panel at Alma’s Quest Counter. If you don’t receive any bones after your initial encounter, continue battling them for a chance to obtain this important material.

    Since Guardian Seikrets are smaller monsters, you may often find groups of them during your hunts, which increases your chances of getting the Tough Guardian Bone from one or more of them.

  • Ultimate Sword and Shield Setup for Monster Hunter Wilds

    Ultimate Sword and Shield Setup for Monster Hunter Wilds

    The Sword & Shield is one of the most recognizable and classic weapon options available in Monster Hunter Wilds. It’s straightforward and user-friendly, yet remarkably effective, making it a reliable choice for players of all skill levels.

    Whether you’re just starting out or you’re a seasoned player, the Sword & Shield is your go-to ally for smoother hunts. If you’re looking to take up the Sword & Shield and want to navigate the endgame with ease, here’s a comprehensive guide to help you build your character effectively.

    As Monster Hunter Wilds is a newer game, players are continuously fine-tuning their builds to maximize damage output. Therefore, the following Sword & Shield setup may undergo changes over time.

    Overview of Sword & Shield Build


    The Sword & Shield is very straightforward to wield, but setting up your build requires utilizing both the sword and the shield effectively. You will primarily rely on the sword for dealing damage, so stacking offensive buffs such as Critical Boost and Weakness Exploit is essential.

    For the shield, Offensive Guard is crucial as it provides a damage boost when you successfully block enemy attacks. Additionally, mastering the timing for perfect guarding and executing power clashes against monsters can be a game changer. As a general rule, using Offensive Guard can greatly enhance your combat effectiveness whenever you have a shield equipped.

    It’s also worth noting that Decorations are limited in Monster Hunter Wilds, categorized by armor and weapons, which means you will need to invest considerable time in farming to collect the necessary Decorations for this build.

    For the best loot, it’s advisable to farm Tempered Arkveld and Tempered Gore Magala.

    Sword & Shield Build Guide


    Sword and Shield build overview in Monster Hunter Wilds.

    Here’s an outline of the armor and Decorations for an endgame Sword & Shield setup:

    Gear Slot

    Gear Name

    Decorations

    Weapon

    Jager-Ankh (Gore Magala Weapon)

    Guardian/Dragon Jewel (3), Critical Jewel (2), Critical Jewel (1)

    Head

    G. Ebony Helm Beta (Guardian Odogaron Gear)

    Phoenix Jewel (2)

    Chest

    Arkvulcan Mail Beta (Arkveld Gear)

    Tenderizer Jewel (3), Phoenix Jewel (2)

    Hand

    G. Ebony Bracers Alpha (Guardian Odogaron Gear)

    Waist

    Gore Coil Beta (Gore Magala Gear)

    Tenderizer Jewel (3), Phoenix Jewel (2)

    Legs

    Gore Greaves Beta (Gore Magala Gear)

    Chain Jewel (3), Sane Jewel (1) x2

    Charm

    Exploiter Charm 2

    Your weapon choice should be the Jager-Ankh, a Sword & Shield from Gore Magala, featuring slots for one Level Three, one Level Two, and one Level One Jewel. Equip it with a Guardian/Dragon Jewel level three for Offensive Guard Level Three and Dragon Attack Level One. Using Critical Jewels will enhance your Critical Boost, which significantly increases your damage output. Alternatively, consider the Artian Sword & Shield for even better damage potential if you want to optimize further.

    If you’re looking to maximize Dragon Attack, you can swap out the Guardian/Dragon Jewel for a Dragon Jewel Level Three. However, maintaining the Offensive Guard buff is crucial for maximizing your shield’s effectiveness while blocking.

    In the head slot, select the G. Ebony Helm Beta, which comes with a single Level Two Jewel slot. Insert a Phoenix Jewel Two here, which grants the Coalescence buff to boost your elemental damage and status buildup when you cleanse debuffs. Battling monsters like Arkveld will frequently expose you to blights, making this skill easy to knock into action.

    For the chest piece, the Arkvulcan Mail Beta should be chosen due to its Level Three Jewel slot and Level Two Jewel slot. Insert a Tenderizer Jewel Level Three for Weakness Exploit and another Phoenix Jewel Level Two to raise the Coalescence level. This armor component also boasts an additional Weakness Exploit Level Two.


    Fighting Arkveld with Sword and Shield in Monster Hunter Wilds.

    In the hand slot, equip the G. Ebony Bracers Alpha for their Burst Level Two and Divine Blessing Level One. While there is no Decoration slot, the protective skills provided by this gear are paramount.

    For the waist slot, use Gore Coil Beta, which has a Level Three and a Level Two Jewel slot. Insert another Tenderizer Jewel Level Three and a Phoenix Jewel Level Two to enhance Weakness Exploit and Coalescence.

    Finally, for the leg slot, choose Gore Greaves Beta, allowing for the attachment of a Chain Jewel Level Three and two Level One Sane Jewels. The Chain Jewel Level Three boosts your Burst level, while the Sane Jewel adds the Antivirus buff. Alternatively, you can replace the Chain Jewel with a Challenger Jewel Level Three to gain the Agitator buff, enhancing both your attack and Affinity when monsters are enraged.

    The Exploiter Charm grants Weakness Exploit Level Two, maximizing your Affinity when targeting weak spots on monsters. If you prefer overall attack and Affinity rather than focusing on weak spots, consider the Challenger Charm 2 for its Agitator benefits.

    Gore Magala Gear provides the Black Eclipse buff, which inflicts Frenzy on the player. Clearing this Frenzy results in a 10% Affinity boost and triggers Antivirus, adding an additional 15% Affinity boost. To remove Frenzy, simply attack aggressively during battles.

    Skill Overview for Sword & Shield Build

    The key skills for the Sword & Shield build include:

    • Critical Boost Level 3
    • Offensive Guard Level 3
    • Critical Element Level 3
    • Dragon Attack Level 1
    • Weakness Exploit Level 5
    • Burst Level 5
    • Coalescence Level 3
    • Antivirus Level 3
    • Constitution Level 2
    • Divine Blessing Level 1
    • Flinch Free Level 1

    Tips for Mastering the Sword & Shield Build


    Performing Perfect Guard against Arkveld in Monster Hunter Wilds.

    The Sword & Shield is straightforward to master, primarily focusing on two aspects: parrying monster attacks and executing perfect guards. Successfully achieving this activates Offensive Guard, which greatly enhances your attack power.

    Additionally, you should practice some basic combos with your Sword & Shield to maintain consistent damage output against foes. The beauty of this weapon lies in its minimal risk while offering high rewards.

    A common issue with the Sword & Shield is that it loses Sharpness quickly. If you struggle with that, consider using Razor Sharp instead of Critical Boost. Otherwise, make sure to regularly sharpen your weapon to maintain its effectiveness.

    You enjoy the speed of Dual Blades along with the defensive capabilities of a Greatshield, but the advantage is that your combos and attacks require less commitment, which reduces your risk of taking fatal damage. If things start to get tense, blocking can keep you alive until you find a chance to heal.

  • Complete Guide to All Event Quests in Monster Hunter Wilds

    Complete Guide to All Event Quests in Monster Hunter Wilds

    In earlier Monster Hunter titles, quests formed the foundation of gameplay. You would grab them at your base, prepare your gear, embark on your hunt, and then return home. However, Monster Hunter Wilds introduces a fresh approach, enhancing the quest system to make each hunt feel distinct and personal.

    Nevertheless, not all traditional quests have been abandoned. Event Quests make a comeback in Monster Hunter Wilds, featuring a tailored experience and exclusive rewards. Navigating these quests may be a bit overwhelming at first, so let’s explore what Event Quests have to offer.

    What Are Event Quests?

    While most hunts in Wilds stem from dynamic Field Surveys, a variety of quests still exist, focusing on straightforward hunting without any extra frills. Event Quests provide a twist, featuring distinctive rewards and specific challenges. These might guarantee certain item drops or involve monsters of particular sizes.

    The monsters featured in these quests can also be unique. For instance, in the Kut-Ku Gone Cuckoo quest, you’ll find yourself in the Scarlet Forest, where you only encounter Yian Kut-Ku in groups. This presents a unique challenge and tailored rewards, making it a refreshing break from more routine hunts.

    Are Event Quests Permanent?

    With a title like ‘Event Quests’, it may seem like they’re fleeting, and unfortunately, that’s the case. Currently, Event Quests are available for a limited time before vanishing. This deviates from earlier games like Monster Hunter Rise, where these quests were always available.

    Instead, it aligns more with the approach used in Monster Hunter World, where Event Quests are only around for a set duration. If Wilds follows in its predecessor’s footsteps, these quests will eventually return in a rotation. However, this means you’ll need to log in during specific timeframes to take on certain quests, so make sure to mark your calendar to catch the essential ones.

    Capcom maintains a live schedule for all of Wilds’ Event Quests on their official website, keeping you up-to-date.

    Every Event Quest and Its Rewards

    Each Event Quest comes with its distinct setting and rewards, but time is of the essence as you won’t have endless opportunities to attempt them. Be sure to check them out when you can, and here’s a rundown of their rewards if you happen to miss any.

    Event Quest Monster To Hunt Rewards
    Kut-Ku Gone Cuckoo Yian Kut-Ku Mimiphyta α.
    Stalking Supper Quematrice Cooking ingredients, focusing on Kunafa Cheese.
    Tongue-Tied Tempered Chatacabra Advanced Armor Spheres.
    Ballet in the Rain Tempered Lala Barina Glowing Orb – Swords.
    Sand-Scarred Soul Doshaguma Glowing Orb – Armors.
    Like a Fire Hidden by Sand Rathian Expedition Headgear α.

    This list of Event Quests will be updated as new ones are announced.

    Based on previous games, Monster Hunter Wilds is sure to roll out numerous Event Quests featuring exclusive armor and enhanced drops for rare items. It will require some strategy and timing to tackle each hunt effectively. But for now, get out there and dive into the current Event Quests!

  • Top Bow Build for Monster Hunter: Wilds Unleashed!

    Top Bow Build for Monster Hunter: Wilds Unleashed!

    The Bow is one of the ranged weapons available in Monster Hunter Wilds and stands out as one of the most powerful tools in the game. It enables hunters to dish out steady damage, which can lead to swift victories while also allowing for graceful dodges against monster attacks. Mastery requires practice, but once you get the hang of it, you’ll enjoy fluid and efficient hunts.

    That said, using the Bow can be complex, especially when it comes to setting up the right gear and playing effectively if you’re new to the weapon. If you’re interested in making the Bow your primary hunting tool, this comprehensive build guide will prepare you for the endgame.

    Overview of the Bow Build

    Stamina management is key when using the Bow in this game. You can swiftly navigate the battlefield while charging your weapon for powerful hits. Although dodging attacks can help replenish your stamina, there will be times when you can’t rely on that strategy. Thus, equipping the right Decorations is crucial to ensure your stamina rebuilds efficiently, allowing you to execute your combos successfully.

    In addition to stamina management, proficiency with the Bow requires skillful positioning, perfect dodging, and familiarity with monster behavior. Understanding the optimal times to charge your Dragon Piercer is essential to avoid disruptions during your attacks.

    Keep in mind that Decorations have limitations in this game; you can’t simply place them anywhere. Decorations for weapons and armor are distinct, so you’ll need to farm endgame Tempered monsters to gather everything you need for your Bow build.

    The primary focus of this Bow build will be on Dragon Piercer, as it offers an effective way to engage with monsters. If that playstyle becomes monotonous, feel free to swap out the Pierce Shot for a Spread Shot to refresh your gameplay.

    Guide to the Bow Build

    Bow Build overview in Monster Hunter Wilds.

    Here’s a detailed list of the endgame Bow Build you should consider:

    Gear Slot Gear Name Decorations
    Weapon Griefbringer Urstox Pierce Jewel (3), Critical Jewel (3), Trueshot Jewel (1)
    Head G. Fulgar Helm Beta (Fulgar Anjanath Gear) Counter Jewel (2)
    Chest Arkvulcan Mail Beta (Arkveld Gear) Challenger Jewel (3), Counter Jewel (2)
    Arms G. Arkveld Vambracers Beta (Guardian Arkveld Gear) Physique Jewel (1) x3
    Waist Gore Coil Beta (Gore Magala Gear) Challenger Jewel (3), Counter Jewel (2)
    Legs Gore Greaves Beta (Gore Magala Gear) Challenger Jewel (3), Sane Jewel (1) x2
    Charm Exploiter Charm 2

    The key weapon here is the Griefbringer Urstox. Although it has negative Affinity, its base damage is exceptionally high, making it ideal for Dragon Piercer builds. You’ll need Pierce Jewel Three for the Piercing Shots enhancement, Critical Jewel Three to boost your critical hits, and Trueshot Jewel One for increased special ammo effectiveness. While Artian Bows are also solid options, the Griefbringer Urstox’s damage output is hard to beat.

    In the head slot, opt for the Guardian Fulgur Helm Beta, featuring a Level Two Jewel slot. Equip a Counter Jewel Level Two to gain the Counterstrike buff, which enhances your attack when hit by a monster. Alternatively, you can consider a Destroyer Jewel Level 2 to assist with breaking monster parts.

    If you prefer less emphasis on Agitator, you might want to exchange the Challenger Jewel Level Three in the chest slot for a Counterattack Jewel Level Three. This will grant you an Adrenaline Rush buff that boosts your attack after a perfect dodge. Since dodging is crucial with the Bow, triggering this buff will be relatively straightforward.

    For the chest slot, choose Arkvulcan Mail Beta, which features both a Level Three Jewel slot and a Level Two Jewel slot. Here, you will place a Challenger Jewel Level Three for the Agitator buff and a Counter Jewel Level Two for the Counterstrike buff. The Agitator buff augments your Attack and Affinity whenever the monster is enraged, leading to increased overall damage.

    Fighting against Arkveld in Monster Hunter Wilds with bow.

    In the hand slot, equip Guardian Arkveld Vambracers Beta, which includes three Level One Jewel Slots. This piece provides Weakness Exploit Level Two. For the Jewel slots, you can go with either Physique Jewel or Brace Jewel. Physique Jewel enhances your stamina recovery, while Brace Jewel grants you Flinch Free, preventing interruptions during your attacks.

    Both Constitution and Flinch Free offer unique benefits in this build. Constitution ensures you maintain stamina, allowing for more frequent Charged Sidesteps. On the other hand, Flinch Free stops you from being disrupted by minor monster hits when you’re using the Dragon Piercer.

    For the waist slot, go for Gore Coil Beta, equipping a Challenger Jewel Level Three and a Counter Jewel Level Two here as well. This setup mirrors your chest slot, providing both the Agitator and Counterstrike buffs. Again, you can swap Counterstrike with Destroyer Jewel Level 2 for additional effectiveness in breaking parts.

    Finally, in the legs slot, use Gore Greaves Beta, attaching a Challenger Jewel Level Three and two Level One Sane Jewels. The Sane Jewels grant the Antivirus buff, improving your Affinity against Frenzy. This Frenzy debuff can be triggered by the two-piece Gore Magala gear set.

    For the Charm slot, select the Exploiter Charm Level 2, which confers Weakness Exploit Level Two, crucial for maximizing your damage output.

    Overview of Skills

    This is what your skills should look like once the build is completed:

    • Critical Boost Level 2
    • Ballistics Level 2
    • Special Ammo Boost Level 2
    • Piercing Shots Level 1
    • Weakness Exploit Level 5
    • Constitution Level 5
    • Agitator Level 5
    • Counterstrike Level 3
    • Antivirus Level 3

    Tips for Playing This Bow Build

    Dragon Piercer in Monster Hunter Wilds.

    Utilizing the Bow Build can be challenging for newcomers, as frequent perfect dodges are necessary. Aggressive monsters like Arkveld and Gore Magala demand that you consistently execute multiple perfect dodges to avoid being carted.

    It’s worth noting that Bow users—and other ranged attackers—tend to take more damage from boss attacks compared to melee users. This highlights the importance of performing perfect dodges; failing to do so can quickly lead to mission failures.

    Once you become familiar with monster patterns, your role will simplify. You can create openings to unleash your Dragon Piercer attacks on the monster. The more you do this, the more wounds will appear, enabling you to break them for additional Dragon Piercer shots.

    Eventually, you’ll knock the monster down, providing a prime opportunity to unleash your Dragon Piercer until it regains consciousness, at which point you’ll need to dodge again. If executed correctly, the monster should go down quickly, provided you don’t spend too long healing or running away.

  • Ultimate Guide to Monster Hunter Wilds’ Promotional Events

    Ultimate Guide to Monster Hunter Wilds’ Promotional Events

    Quick Links


    Monster Hunter Wilds has arrived, introducing another thrilling chapter in the series. This game offers exciting hunts and fantastic monster designs that will have players chasing down creatures for hours to complete their weapon and armor collections. Despite some performance hiccups, the gameplay is enjoyable and is set to improve over time.

    In addition to gathering materials and items while playing, you can take advantage of Promotional Events to get unique rewards. By participating, you’ll gather even more resources with minimal effort. While some events are exclusive to certain regions, there are ample ongoing opportunities to check out, making it easy to collect various materials!

    If you’re in Japan and play Monster Hunter Wilds on a PlayStation 5, you have a special opportunity to snag one of the cutest in-game items—the Felyne Pendants. Available until March 31, 2025, here’s how you can get one:

    1. Be located in Japan.
    2. Own Monster Hunter Wilds on PlayStation 5.
    3. Download the 31 Ice (Baskin Robbins) app.
    4. Order one of the following Monster Hunter Wilds Ice Cream Sets:
      • Felyne: Caramel
      • Felyne: Chocolate Mint
      • Felyne: Strawberry
    5. Collect the Promotional Code when you pick up your order.
    6. Redeem the Promotional Code on your PlayStation 5.

    Since you must pick up your order in person, you need to be in Japan to receive the Redemption Code for the Felyne Pendant. Unfortunately, if you’re not in Japan, you won’t be able to take part in this event. It’s not yet confirmed whether this promotion will extend to other regions or platforms.

    All Baskin Robbins Rewards

    Rewards How To Get End Date
    Felyne: Caramel Pendant Order a Felyne: Caramel Monster Hunter Wilds Ice Cream Set at any participating Baskin Robbins in Japan. March 31, 2025
    Felyne: Chocolate Mint Pendant Order a Felyne: Chocolate Mint Monster Hunter Wilds Ice Cream Set at any participating Baskin Robbins in Japan. March 31, 2025
    Felyne: Strawberry Pendant Order a Felyne: Strawberry Monster Hunter Wilds Ice Cream Set at any participating Baskin Robbins in Japan. March 31, 2025
    Baskin Robbins Coupons Be a 31 Club Member for Baskin Robbins and buy one of the Monster Hunter Wilds Ice Cream Sets. March 31, 2025
    Digital Wallpapers March 31, 2025
    Item Packs (In-Game) March 31, 2025

    Online play is crucial in Monster Hunter Wilds, especially with the introduction of crossplay. To maximize your experience, you’ll need a Capcom ID. By linking your Capcom ID with your gaming account, you’ll receive bonus items as a reward.

    How to Link Your Capcom ID with Your Gaming Account

    1. Log In or Sign Up for a Capcom ID by visiting the Capcom ID site and clicking the blue sign-in button.
    2. Once logged in, find the drop-down menu in the upper right and select the Account Button.
    3. Link your PlayStation Network, Xbox Network, or Steam Account to your Capcom ID.
    4. Log back into Monster Hunter Wilds to collect your rewards from the Support Desk Palico.

    If you had previously linked your Capcom ID with your account, you don’t need to do it again; just head to a Base Camp to collect your rewards!

    All Capcom ID Rewards

    Capcom ID Registration Bonus

    Discord is also holding various Promotional Events for Monster Hunter Wilds. If you’re unfamiliar with Discord’s Quest system, it can be easy to overlook these opportunities.

    How to Access Discord Quests

    To find the Quests page on Discord, navigate to the left side of the app where your servers are listed. Scroll down until you see the Discover Icon (a blue compass icon). Click it, and you’ll enter the Discover Page with different tabs on the left side. Select the Quests tab, scroll until you locate the Monster Hunter Wilds Quest, and click Accept Quest. After watching the promotional video, you’ll be asked to select your gaming platform and receive a unique code, which can be redeemed for rewards from the Support Desk Palico.

    All Discord Rewards

    Discord Promotional Event

    Lastly, Twitch is involved in promotional events as well, including the need to participate in a new Subscription Event. During this event, you need to either gift or purchase a new subscription for any streamer playing Monster Hunter Wilds to get special rewards.

    You cannot renew a prior subscription or use Twitch Prime for this promotion; it must be a new recurring subscription to a streamer. Doing so will grant you a unique code for in-game rewards.

    You can earn codes for all three platforms if you subscribe or gift a new subscription during each platform’s promotional period.

    All Twitch Rewards

    Rewards How To Get End Date
    Gift or purchase a new recurring subscription to any streamer playing Monster Hunter Wilds. PlayStation: March 6, 2025
    Gift or purchase a new recurring subscription to any streamer playing Monster Hunter Wilds. Steam: March 13, 2025
    Gift or purchase a new recurring subscription to any streamer playing Monster Hunter Wilds. Xbox: March 20, 2025

    With these events, there are plenty of opportunities to enhance your Monster Hunter Wilds experience and collect exclusive items!

  • Top Brotato Hunter Build for Ultimate Gameplay Success

    Top Brotato Hunter Build for Ultimate Gameplay Success

    The Hunter character in Brotato can be quite challenging to master, often causing frustration until you discover effective strategies. Fortunately, once you grasp the right techniques, winning becomes much easier.

    Like any spud, Hunter has multiple playstyles, but the one outlined here is the quickest and simplest. This build is effective for conquering Danger 5 in both Crash Zone and the Abyss.

    The Optimal Hunter Build

    Here are some excellent items to consider for this Hunter build:

    Bandana Projectiles pierce through one additional target; -10% Damage
    Pumpkin +15% Piercing Damage; Can’t exceed base damage; -2% Damage
    Sharp Bullet Projectiles pierce through one additional target; -20% Piercing Damage; -5% Damage; -3 Knockback
    Banner +20 Range; +10% Attack Speed; -5 Knockback
    Sunglasses +10% Critical Chance; -1 Armor
    Ricochet Your projectiles gain one bounce; -25% Damage
    Small Magazine +2 Ranged Damage; +10% Attack Speed; -6% Damage
    Cyclops Worm +12% Damage; -12 Range
    Glasses +20 Range

    The Hunter has some intriguing advantages and drawbacks. Right off the bat, he starts with +100 Range, plus +1% Damage for every 10 points of Range. This means you start with a 10% Damage boost before firing a single shot. Additionally, your Critical Chance is enhanced by 25%. However, there is a significant trade-off: he cannot harvest at all and his Max HP is reduced by 33%.

    Key stats to focus on with Hunter include:

    • Critical Chance
    • Range
    • Speed
    • Luck
    • Max HP
    • Attack Speed

    Since Hunter thrives on range, it’s best to use ranged weapons like Crossbows. While melee weapons can cover more area, they often come with longer cooldown times.


    Equipping yourself with 6 Crossbows transforms you into a powerful enemy-slaying force, as these weapons strongly benefit from Critical Chance. Critical hits allow the Crossbow to pierce through multiple foes. By leveling these weapons quickly or acquiring a Cursed version, you could pierce even more enemies.

    Be aware that while this piercing crit setup is impressive, it may not be as efficient as using explosive weapons like the Shredder or Rocket Launcher, so you might find that eliminating enemies takes longer than anticipated.

    Range is a clear priority since it boosts your Damage percentage and allows you to eliminate enemies off-screen. However, do not overly prioritize Range. For instance, if you get a +12 damage boost, it’s worth taking, as achieving 120 Range to equal that number can be challenging.

    Focus on boosting Luck and Speed early in the game. Luck increases the quality of items you find and offers more healing items. As your Luck grows, be sure to grab consumable healing items like Weird Food or Lemonade. Speed enhances your ability to dodge attacks and collect dropped resources. With 25+ Speed, you can easily evade bosses if direct confrontation seems too risky.

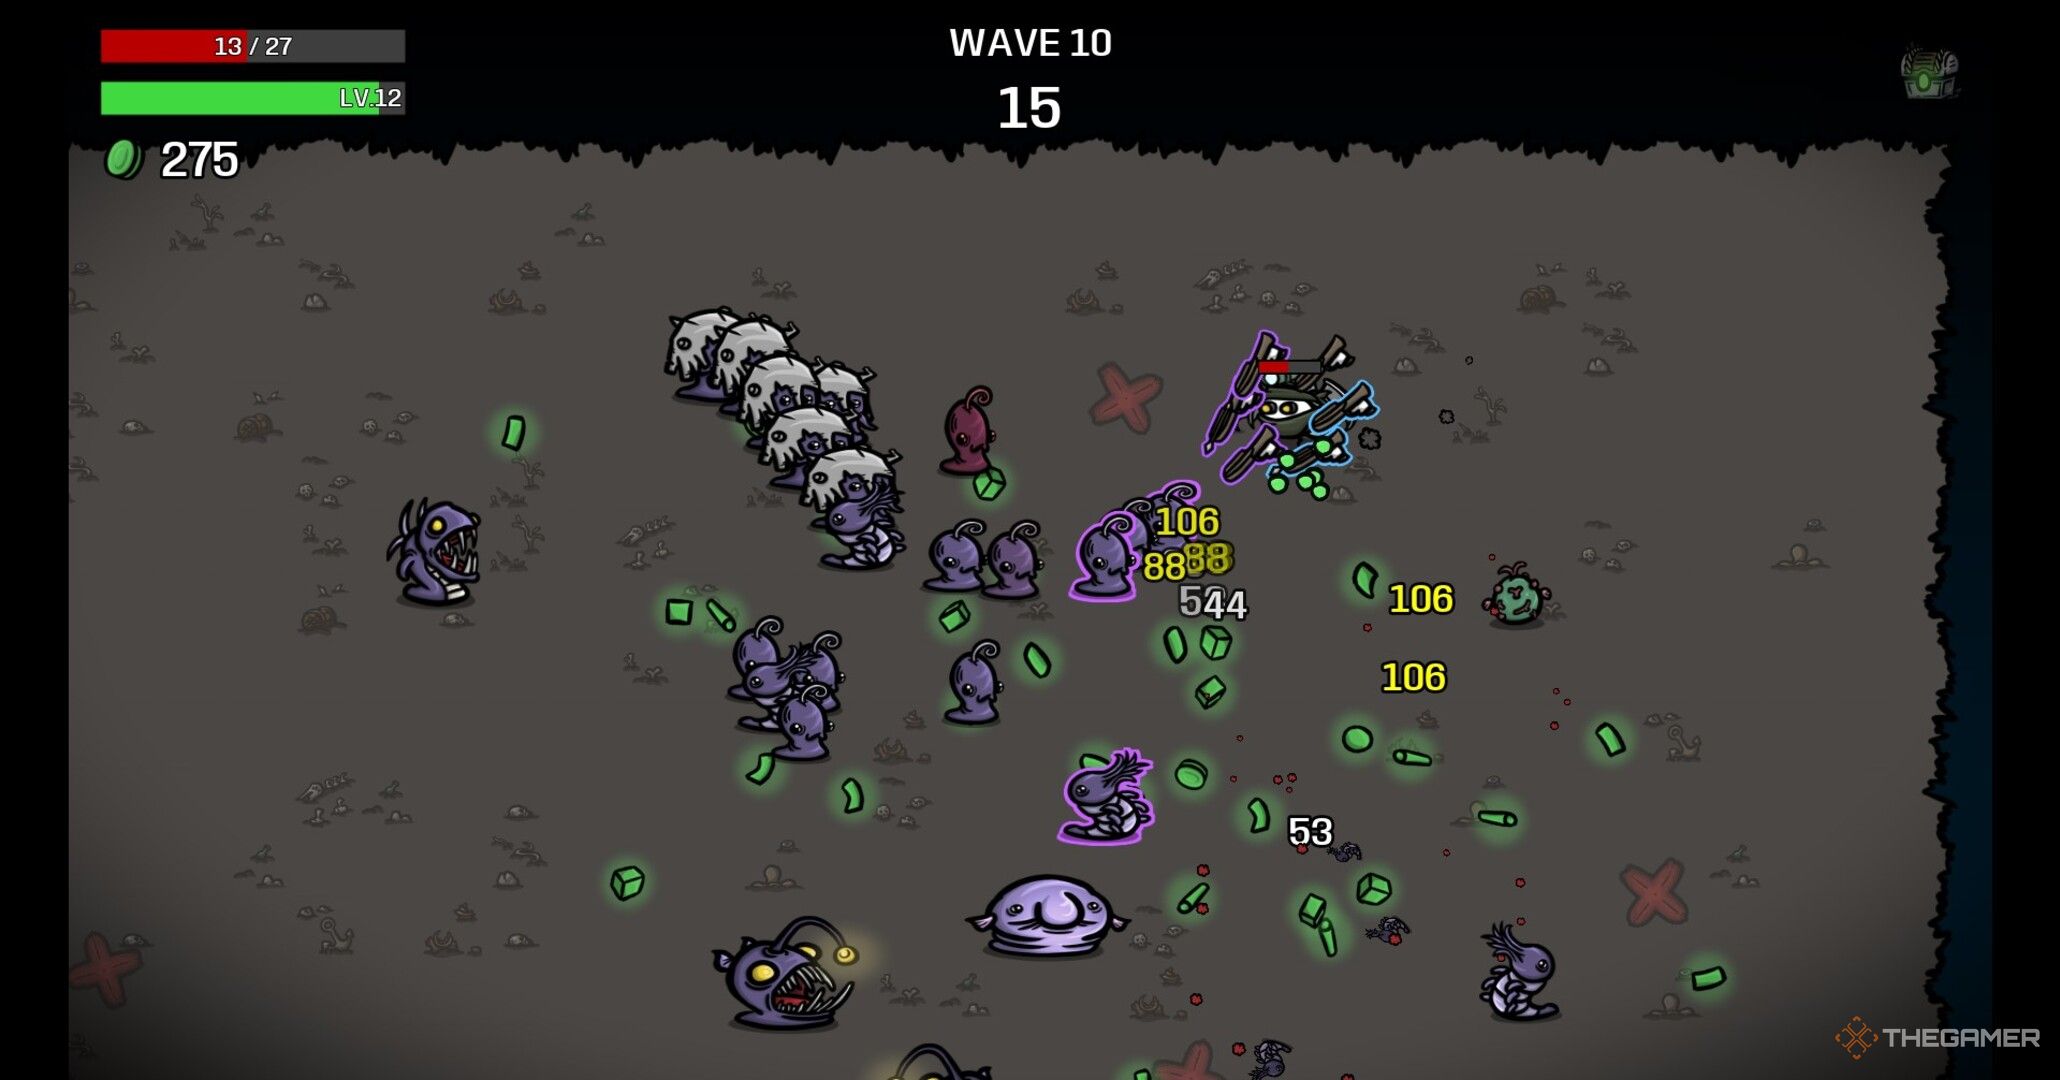
    Brotato Crossbow build Hunter fighting in the Abyss.

    While Hunter has lowered Max HP, it’s a crucial stat to invest in. Grab it whenever you can; if you come across a +3 or +4 Armor during level up, don’t hesitate to take it. This addition can significantly enhance the existing +3 Armor from having six Crossbows.

    Lastly, don’t overlook Attack Speed. Depending on RNG, you might have varying amounts, but aim for at least 50 Attack Speed. Since you won’t be using area damage weapons, quick firing is essential to handle waves of alien enemies.

    Tips for Playing as the Crossbow Hunter

    With the Crossbow build outlined here, you’ll need to be cautious while maneuvering. The Hunter’s limited Max HP will become more apparent as the game advances, particularly against Danger 5 foes (and bosses), who pack a punch. Therefore, securing Speed is vital.

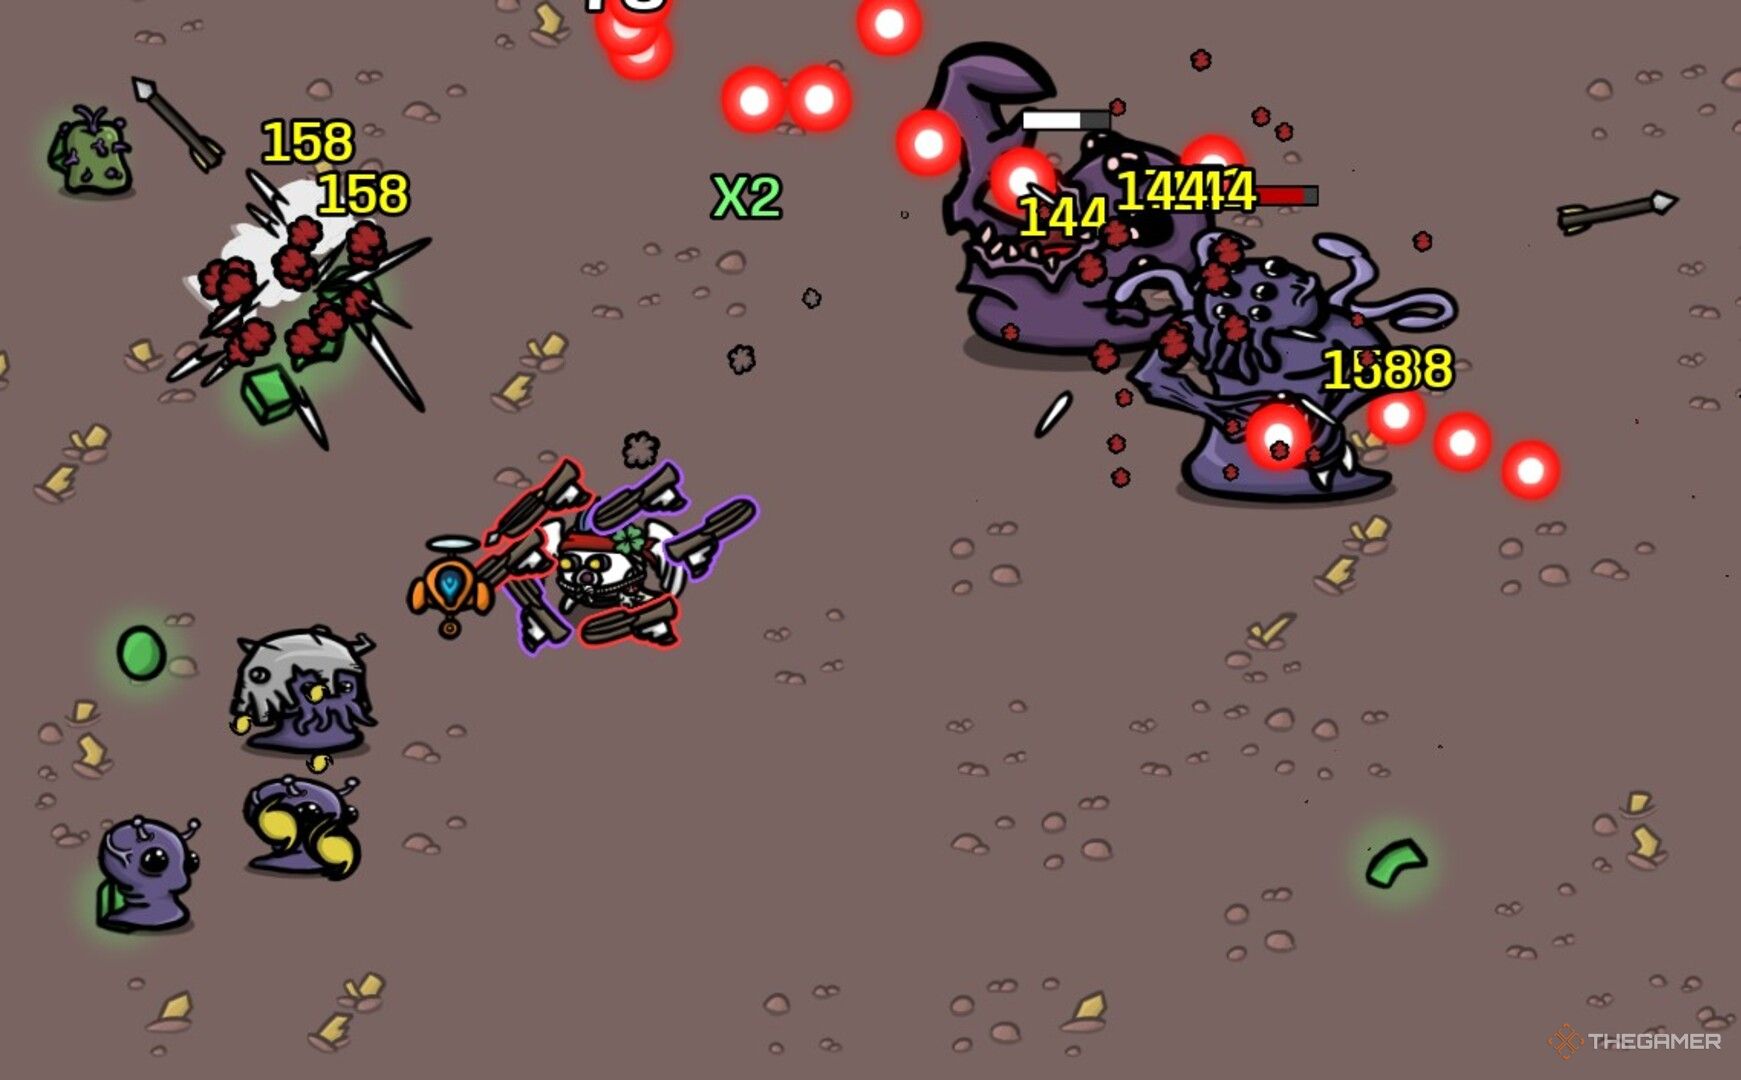
    Brotato Hunter with Crossbow build fighting 2 bosses.

    With a Speed of 20 or higher, you can effectively outpace hordes, including the speediest bosses, gaining precious moments to eliminate enemies with your formidable critical hits. If you manage to secure decent Dodge (30+), you can maneuver closer to your enemies to collect valuable resources, but avoid making this a habit, as you’re still quite vulnerable.

    When facing bosses, try to keep your distance rather than engaging directly. Instead, maintain your distance, allowing your piercing attacks to reach them and swiftly chip away at their health.