الوسم: horror

  • How The Alan Wake Event Works in Phasmophobia: Completing and Solving

    How The Alan Wake Event Works in Phasmophobia: Completing and Solving

    The Alan Wake crossover event in Phasmophobia combines ghost hunting with a bizarre storytelling style, as if a ghost story was written after consuming too much coffee. The usual investigation maps have been transformed into strange, storybook-like versions, featuring shadowy figures, hidden glowing messages, and creepy dolls that make checking every room feel even more unsettling.

    Inspired by Alan Wake, the event introduces new gameplay elements centered around Words of Power, Dark Presences, and a multi-stage doll puzzle in the lobby. Whether you’re aiming for Event Points, hunting for cosmetics, or trying to understand why a shadowy whispering figure is lurking in the farmhouse, there’s a lot happening during this crossover.

    How the Alan Wake Event Works

    The event takes place across themed versions of known investigation maps. Although the layouts mostly stay the same, each location contains unique objects tied to the event, such as Words of Power, Dark Presences, Dolls, and related puzzles.

    Event maps include places like Oh Deer Diner, Cauldron Lake, Coffee World, and Elderwood Palace Lodge. These locations are marked on the Contract Voting board in the lobby by small notes on their top right corners of the map images.

    During investigations, players can earn Event Points to progress both individually and in the community. Points only count if the contract is played on at least standard difficulty (x1.00 multiplier), meaning lower custom difficulty settings won’t award points.

    Correctly identifying the ghost awards ten Event Points. Revealing Words of Power grants two points each, while banishing a Dark Presence awards two points per entity. Increasing difficulty modifiers boosts point gains, so difficult investigations are the fastest way to earn progress.

    Rewards include reaching community points goals for a Manifestation ID Card and Badge, earning enough personal points to unlock the Angel Lamp Charm, revealing all 68 Words of Power to unlock Alan Wake’s Suit cosmetic set, and collecting dolls and solving lobby puzzles for Saga Anderson’s Outfit cosmetics.

    What Are The Dark Presences?

    Dark Presences appear as motionless shadowy figures scattered across the event maps. They emit whispering sounds that make them easier to find in quiet areas. To remove a Dark Presence, players must grab the Angel Lamp from the investigation truck’s monitor, then aim it at the figure. Holding the use button for several seconds causes the entity to be engulfed in a sparkly explosion of light, making it disappear. Maps can have up to about 20 Dark Presence spawns.

    How Words Of Power Work

    Words of Power are hidden phrases only revealed with a UV Light. While exploring, glowing yellow arrows appear when near a hidden word, leading players toward a spiral of glowing letters somewhere in the environment. Once found, shine the UV light directly onto the word; the darkness around the letters will fade, causing the word to vanish once fully revealed. When playing with friends, each player must reveal their own Word of Power, as progress doesn’t transfer between players. When a word is revealed by one player, it disappears for them but remains visible to others until they reveal it themselves.

    How To Solve The Doll Puzzle

    Across the themed maps, dolls are scattered, acting as collectibles or puzzle pieces needed for the final lobby challenge. They are usually hidden on shelves, inside tents, on desks, or in small corners, requiring careful exploration. The dolls used in the final puzzle are located near a collection of chalk drawings in the lobby, beside a central desk.

    The puzzle involves placing specific dolls on matching chalk symbols across multiple stages:

    • First stage: Place the Moose Doll on the Tree symbol, and the Deer Doll on the House symbol.
    • Second stage: Place the Child Doll on the Sun, the Father Doll on the House, and the Old Man Doll on the Waves.
    • Final stage: Place the Child Doll on the Tree, Princess Doll on the Eye, Father Doll on the Heart, and Jester Doll on the Sun.

    Once completed, the puzzle resets with a new arrangement, requiring players to repeat the process for the next stage.

  • All Cursed Item Locations in Phasmophobia: Completing and Solving

    All Cursed Item Locations in Phasmophobia: Completing and Solving

    One of the most exciting parts of Phasmophobia is the cursed objects and how they can make your ghost hunts more intense. When you find one of the seven cursed items, you can use it to talk to the ghost, figure out its location, and even start cursed hunts.

    With so many objects and a variety of maps, keeping track of where items can spawn might be tricky. This guide covers all possible spots for the seven cursed objects on every map in the game.

    Updated May 3, 2026, by Kaitlyn Peterson: If you’re still searching for Phasmophobia’s cursed items, this guide has the latest information with all the current spawn locations based on the newest game updates.

    —

    ### Bleasdale Farmhouse

    Bleasdale is a small but roomy farmstead across three floors, with several rooms to explore during a ghost hunt. The cursed objects are spread out across all three floors.

    | Cursed Object | Location |
    |———————|———–|
    | Tarot Cards | In the small Fortune Teller room in the attic, on a table next to a crystal ball. |
    | Ouija Board | In the main living room, leaning against a couch near the incense. |
    | Music Box | In the Tea Room, on a display shelf on a doily. |
    | Monkey Paw | Upstairs, in the Study, on the bookshelf in the far corner. |
    | Haunted Mirror | In the Trophy Room upstairs, on the floor behind a corner. |
    | Summoning Circle | In the utility room, on the floor after entering through the front and turning left into the tearoom. |
    | Voodoo Doll | In the Master Bedroom, at the foot of the bed on a small seat with a pillow. |

    —

    ### Brownstone High School

    This map is large but features a common location for cursed objects—they all spawn together on the same spot, making it easier to find any of the seven objects during your round.

    | Cursed Object | Location |
    |———————|———–|
    | Tarot Cards | On a bench to the left in the lobby, next to a green book. |
    | Ouija Board | On the floor next to a pillar in the lobby area, near the corridor junction. |
    | Music Box | On a long wooden bench on the right side of the lobby among green books. |
    | Monkey Paw | On a dresser left of the dining table in the dining room. |
    | Haunted Mirror | Against a wall in the Master Bedroom upstairs across from the door. |
    | Summoning Circle | On the ground in the middle of the corridor on the basement level. |
    | Voodoo Doll | In the Blue-themed bedroom upstairs, on the bed. |

    —

    ### Camp Woodwind

    Camp Woodwind is a smaller outdoor map, a different layout from Maple Lodge Campsite, with cursed objects located in different spots, often harder to see because of outdoor lighting.

    | Cursed Object | Location |
    |———————|———–|
    | Tarot Cards | On the leftmost picnic bench after entering the campsite, next to a green book. |
    | Ouija Board | Inside the tent with outdoor games, placed on a table. |
    | Music Box | Inside the yellow tent on a small table. |
    | Monkey Paw | On a wooden platform next to marshmallows on sticks, near the purple tent. |
    | Haunted Mirror | On the ground in front of a fairy-lit tree near a cornhole board. |
    | Summoning Circle | On the ground inside the large tent with tables of food. |
    | Voodoo Doll | On the ground next to a small blue tent, across from the big red tent. |

    —

    ### Edgefield Road

    This map has three floors with many rooms, and cursed objects are spread across different areas, mostly on the first floor.

    | Cursed Object | Location |
    |———————|———–|
    | Tarot Cards | On a small table behind the front door. |
    | Ouija Board | On the shelves in the utility closet on the first floor. |
    | Music Box | On a dresser in a room upstairs on the left. |
    | Monkey Paw | On a desk in a bedroom on the second floor, near a laptop. |
    | Haunted Mirror | Hanging on the wall opposite the stairs, across from a dresser. |
    | Summoning Circle | In the basement, on the floor beside a mannequin. |
    | Voodoo Doll | On a dresser in a decorated blue bedroom upstairs. |

    —

    ### Grafton Farmhouse

    This house has fewer rooms but divides the cursed object locations mainly between the first and second floors, with some upstairs and downstairs spots.

    | Cursed Object | Location |
    |———————|———–|
    | Tarot Cards | In the library, on a desk with a typewriter, to the left after entering the dining area. |
    | Ouija Board | In the attic, at the base of a tall lamp. |
    | Music Box | On a vanity in the bedroom on the sixth floor. |
    | Monkey Paw | On a woodworking bench on the eighth floor after stairs. |
    | Haunted Mirror | On the floor by a blue cabinet in the third-floor dining area. |
    | Summoning Circle | In the bathroom on the fifth floor, between the door and the tub. |
    | Voodoo Doll | In a child’s bedroom on the seventh floor, on a dresser near a window with a pirate hat. |

    —

    ### Maple Lodge Campsite

    This outdoor map’s cursed objects are scattered across various tents and structures, spread out and sometimes hard to spot.

    | Cursed Object | Location |
    |———————|———–|
    | Tarot Cards | On a small table in the North picnic area, next to playing cards. |
    | Ouija Board | On a shelf inside the bathroom block on the right. |
    | Music Box | On a log seat near the campfire, next to a red thermos. |
    | Monkey Paw | On a barrel beside a fence in the staff storage area. |
    | Haunted Mirror | On the wall above a couch in the reception building. |
    | Summoning Circle | Inside the log cabin’s living room on the ground. |
    | Voodoo Doll | On a ground in the big red tent, next to a smaller blue tent. |

    —

    ### Prison

    The prison’s cursed objects are primarily located at the main entrance area.

    | Cursed Object | Location |
    |———————|———–|
    | Tarot Cards | Inside a grey box at the security desk in the checkpoint. |
    | Ouija Board | On the floor behind desks in the checkpoint. |
    | Music Box | Inside the security station on a desk with plastic boxes. |
    | Monkey Paw | On the same desk, beside a large scanner. |
    | Haunted Mirror | Hanging on a wall above white chairs in the hallway. |
    | Summoning Circle | On the floor near the hallway end, in front of white chairs. |
    | Voodoo Doll | On a desk left of the large scanner in the security area. |

    —

    ### Ridgeview Court

    Set across three floors, cursed objects are generally close to entrances and within easy reach if searched thoroughly.

    | Cursed Object | Location |
    |———————|———–|
    | Tarot Cards | On a small table behind the front door. |
    | Ouija Board | On shelves in the utility closet on the first floor. |
    | Music Box | On a dresser in a left-side upstairs room. |
    | Monkey Paw | On a desk on the second floor, down the hallway to the right. |
    | Haunted Mirror | Hanging opposite the basement stairs, on the wall. |
    | Summoning Circle | On the basement floor, near a workbench. |
    | Voodoo Doll | In a bedroom on the second floor, on a blue dresser. |

    —

    ### Tanglewood Drive

    This house is small with a basement, and cursed objects are located in different areas, often in close proximity or easily accessible.

    | Cursed Object | Location |
    |———————|———–|
    | Tarot Cards | On a small table in the living room, to the right near the house phone. |
    | Ouija Board | On a shelf inside the basement, near the train set. |
    | Music Box | Inside a bedroom on a nightstand beside a hole in the wall. |
    | Monkey Paw | On a workbench on the basement’s right side. |
    | Haunted Mirror | On the ground in front of a blue cabinet in the garage. |
    | Summoning Circle | On the floor in the basement, near a mannequin and workbench. |
    | Voodoo Doll | On a floor in a child’s bedroom, next to a teddy bear and bed. |

    —

    ### Willow Street

    Willow Street is a compact, two-story house with cursed objects located in various small rooms and the garage.

    | Cursed Object | Location |
    |———————|———–|
    | Tarot Cards | On a small table in the living room, next to the TV remote. |
    | Ouija Board | In the garage, on top of the washing machine. |
    | Music Box | On a dresser in the front hallway. |
    | Monkey Paw | Inside the garage, next to fertilizer bags. |
    | Haunted Mirror | On a wall in the garage, near the entrance. |
    | Summoning Circle | In the basement, on the ground by the workbench. |
    | Voodoo Doll | Inside a children’s bedroom, on a bed near a teddy bear. |

    —

    The map details above should help you locate cursed objects efficiently in any setting, making your ghost hunts quicker and more successful.

  • Barış Arduç and Farah Zeynep Abdullah Star in Horror Film “SOY”

    Barış Arduç and Farah Zeynep Abdullah Star in Horror Film “SOY”

    Digital Phablet – Starring Barış Arduç and Farah Zeynep Abdullah, the supernatural horror film “SOY” has officially begun production in Istanbul.

    The project, produced by Digital Phablet, signifies a notable milestone as the company’s inaugural production entirely shot in Turkey. Directed by Maxime Alexandre, who is tackling his fourth horror film, the cast features prominent Turkish actors including Farah Zeynep Abdullah, Barış Arduç, Tuba Büyüküstün, and Tamer Levent. Supporting roles are filled by Mehmet Yılmaz, Özge Özacar, and Erdal Küçükkömürcü.

    The story is based on an original script by Turki Alalshikh, a renowned Saudi official and author known for his previous work in horror, “The Cello.” The screenplay, written by Şükrü Necati Şahin and Melih Özyılmaz, explores themes of supernatural phenomena, time, memories, and ancient curses, blending psychological drama with traditional horror elements.

    Recent glimpses of the project include a photo from the script reading session, highlighting the international collaboration behind the scenes. The five-week filming schedule takes place on the historic streets of Istanbul, with post-production activities being completed abroad. French veteran Stephane Roche is overseeing the editing process, with all final touches done in France.

    The production team is led by executive producer Saner Ayar, with Delwi Gollon as producer and Yagmur Ayar as the associate producer. The international effort emphasizes a blend of Turkish talent and global expertise aimed at making “SOY” a significant entry in the worldwide horror market.

  • What To Do With the Severed Hand and Marie’s Doll in Resident Evil Requiem

    What To Do With the Severed Hand and Marie’s Doll in Resident Evil Requiem

    Resident Evil Requiem is full of puzzles and hidden secrets that players can discover as they journey through the Rhodes Care Center. From puzzle boxes and ornate keys to collectible raccoon statues, there’s plenty to find. The most complicated and secretive puzzle has finally been cracked.

    To complete this final challenge, you’ll need to play through the game at least twice. During your quest, you’ll perform various odd tasks in the care center to unlock a hidden challenge that awards you 20,000 CP. Here’s how to solve the final puzzle and what to do with the severed hand and doll found next to Emily’s cell.

    How to Solve the Final Puzzle

    First, credit goes to Kyro and Rantsycancy, who figured out the solution through data mining. If you want to attempt it yourself, note that it can be done on any difficulty, but you’ll need at least two playthroughs.

    Wait by the Grinder in Processor

    Once you reach the basement, get through the area until you restore power to the conveyor belt leading to the meat processor. Follow the conveyor but do not drain its blood. Instead, wait and let it fill with corpses for at least 15 minutes – I recommend using a timer. After 15 minutes, drain the blood and head over to where the conveyor and grinder are.

    Trigger the zombie crushing process, but do not kill any zombies manually. Instead, shoot their legs to stagger them gently. They need to fall into the grinder naturally; your goal is to slow them enough so they reach the grinder. Make sure to save your game beforehand, as this step can be tricky if you’re low on supplies.

    Flush the Toilet Eight Times

    Continue through the underground tunnels until you return to the care center. Do not exit with Emily. Instead, go to the West Wing Restroom. Open the second stall and flush the toilet eight times in a row. Count aloud to ensure you don’t miss the step since there’s no sound cue indicating completion.

    Get Marie’s Doll in Gideon’s Lab

    Proceed through the underground sections until you reach the laboratory where you search for the helicopter key. After the cutscene with Gideon and fighting some zombies, blow up the room’s giant blood tank to flood the area. At the base of the stairs on your left, you’ll find Marie’s Doll lying on the ground—refer to the pictured location. Pick it up and keep it in your inventory. During your playthrough, store the doll in the item box so you won’t lose it.

    Complete Playthrough #1

    Finish the game normally. No extra steps are needed during this run.

    Start New Game Plus

    Load a new game with the save where you stored Marie’s Doll. Difficulty doesn’t matter; choose whatever you like.

    Obtain and Analyze the Severed Hand

    During the second playthrough, after escaping the underground lab and reaching the elevator with Emily, grab the Severed Hand from the ground once you regain control of Grace. Take Emily to the Guard Room and set her down on the sofa for now.

    Head to the Blood Lab in the East Wing and use the Blood Analyzer to examine the Severed Hand. Complete the DNA sequence by selecting the three nodes in the middle from left to right, turning them red. This unlocks a “Let’s Play” screen.

    Bring Emily to the Puzzle Box

    Return to the Guard Room, pick up Marie’s Doll from your inventory, and hold onto Emily. Take Emily to the East Wing’s Lead Researcher’s Office, where the puzzle box is located.

    Input the code sequence while holding Emily and with the doll in your inventory:
    Sun, Sun, Star, Sun, Moon, Star, Sun, Moon, Sun, Moon, Star, Moon

    If entered correctly, you’ll hear a sinister laugh and see a message that reads, “Let the sweet pair hear the voice.” Completing this challenge awards you 20,000 CP, which you can spend on upgrades or bonus items in the game.

  • Why Are Horror Fans Boycotting Scream 7?

    Why Are Horror Fans Boycotting Scream 7?

    As one of the most highly anticipated horror films of 2026 prepares to premiere, Scream 7 is now facing calls for a boycott from pro-Palestine activists following the dismissal of Melissa Barrera from the franchise by Paramount Studios. Her close friend and fellow actress Jenna Ortega also stepped away in solidarity.

    According to Borys Kit of Hollywood Reporter, approximately 30 pro-Palestine demonstrators gathered outside Paramount Studios during the film’s Los Angeles premiere. The protesters were seen waving Palestinian flags and advocating for a boycott of the movie.

    In 2023, Barrera was released from the franchise amid accusations of anti-Semitism after sharing multiple social media posts expressing support for Palestine. The decision by Paramount sparked widespread calls for a boycott from human rights advocates. Jenna Ortega, star of Wednesday, publicly defended Barrera and subsequently withdrew from the project.

    Why are horror fans calling for a boycott of Scream 7?

    On the night of the premiere, reports from social media indicated that around 30 pro-Palestine protesters attacked the event by playing drums and blowing horns while shouting that David Ellison and Paramount were supporting genocide and should be boycotted.

    It is also claimed on social media that Barrera might have responded to the protests via Instagram stories, writing simply, “I see you.”

    Organizations such as the BDS Movement, Code Pink, and Ireland-Palestine Solidarity Campaign have also voiced their support for the boycott.

    A Twitter account named “BoycottScream7” shared, “I can’t understand how anyone could love a character more than they hate genocide. Those eager for the movie’s success are willing to give more money to an evil corporation instead of choosing other ways to enjoy films. Boycott Scream 7. Free Palestine.”

    The film is scheduled to hit theaters across the United States on February 27, 2026. Early reviews from platforms like IMDB have so far given it a rating of 6.5 out of 10.

    There are also images circulating claiming that Barrera appeared to respond to the protests at the premiere, posting a story on Instagram that simply said, “I see you.”

  • How to Beat Hinako’s Parents in Silent Hill F: Completing and Solving

    How to Beat Hinako’s Parents in Silent Hill F: Completing and Solving

    A key aspect that makes survival horror games so frightening is the option to fight back, even if it’s not always the best choice. This sense of freedom increases the tension when managing resources and facing enemies. However, Silent Hill still tends to throw you into intense boss battles at just the right moments.

    In Silent Hill f, Hinako faces numerous fears. She is often looked down upon simply because she is a girl. Her own parents are the source of much of her suffering, representing how the world mistreats her through their actions. It makes sense that one of her final bosses is her own parents.

    Hinako’s parents are found in her home, which she sees as a prison. Her parents never leave the house, and she feels trapped there. To her, that house is hell. When she returns to the Shimizu Residence, her parents are waiting for her at the end.

    Her parents appear as a pair, inseparable in this twisted version of her home, just like in real life. You encounter them face-to-face after placing the Pine Emblem at the door at the end of the residence.

    To defeat her parents, focus on fighting one at a time. Her father looks like a big, slow enemy, with only slight variations in his moves. Her mother, however, is a distinct enemy who fights using knives. While individually manageable, fighting them together is much harder. Since her father is slow, it’s usually easier to concentrate on her mother, who is faster and can be separated from him more easily. Focusing on her makes it easier to avoid his attacks.

    When battling her mother, keep in mind that she has melee strikes and can throw her knife to hit from a distance. She also has a grab move that, if hit, will throw Hinako at the feet of her father. It’s crucial to dodge quickly here, or you risk being hit by her father afterward.

    Once her mother is defeated, her father becomes more aggressive, letting out roars that greatly reduce Hinako’s Sanity. His attacks are similar to those of his base form: wide tentacle swipes, slamming with his knife arm, and a tentacle grab — though the grab isn’t very damaging.

    You can win the fight even sooner by defeating her father first, which ends the battle immediately. Note that you cannot defeat her mother alone; you must take out her father first if you want to finish early.

    Defeating her father first also grants you the achievement or trophy called “Just Shut Up For Once, Dad.”

  • All You Can Do at the Hokora in Silent Hill F: Completing & Solving

    All You Can Do at the Hokora in Silent Hill F: Completing & Solving

    Moving away from the quiet, touristy town of Silent Hill, Silent Hill f introduces us to the rural community of Ebisugaoka in Japan during the 1960s, shortly after the post-war economic boom has ended. This town sits on the border of modern progress and traditional customs, with many residents holding onto their religious beliefs and rejecting the advances of modern medicine and technology.

    This cultural clash is reflected in the gameplay, which heavily relies on local religious practices. Even basic actions like saving your game are performed at small shrines called Hokora. These shrines serve multiple functions beyond saving, and players should definitely take advantage of what they offer.

    What Is The Hokora?

    The Hokora is more than just a save point. It functions as your hub for managing your inventory, making offerings to increase Faith, and improving your abilities. When you visit a Hokora, you can save your progress, which is important for survival, especially on higher difficulty levels.

    Additionally, the Hokora lets you increase your Faith, expand your inventory slots, and make offerings that boost your stats. Given that autosaves are frequent, it’s recommended to visit a Hokora whenever possible—not just for saving but also to strengthen your character for upcoming battles.

    Functions of the Hokora

    The Hokora provides six main options most of the time, depending on the difficulty setting. Here are each of them and what they do:

    Record

    This is the most common and essential function, allowing you to save the game. You can create multiple save files, giving you the flexibility to return to earlier points if needed. The game also keeps around three autosave backups in case you forget to save manually.

    Enshrine

    This function is key to gaining Faith and managing your inventory. You can discard items and turn them into Faith points—rare items yield more Faith, especially those designed solely for enshrinement, like Antique Combs or Dried Carcasses, which don’t serve any other purpose.

    You can also enshrine food items such as Higashi or Inari Sushi, which grant Faith based on their rarity—more valuable items like Kudzu Tea give higher Faith. Note that modern healing items like Red Capsules, Bandages, or Toolkits can’t be enshrined, so it’s best to use or waste these items as soon as possible.

    Draw Omamori

    In the game, there are two types of Omamori—Regular and Unique. Unique Omamori can be found throughout the world, while Regular Omamori are obtained from the Hokora by using the Draw Omamori feature.

    This feature allows you to trade Faith for a random Omamori from the Hokora’s limited stock. All Hokora offer the same selection, but the Omamori you receive are completely random, and the cost increases by 100 Faith each time you draw one. The good news is that Omamori are kept across different playthroughs, giving you plenty of time to collect them all.

    Pray

    Using Pray upgrades your core stats: Health, Sanity, Stamina, and the number of Omamori slots you can equip. To improve a stat, you need Faith and Ema Plates, which you find in the world. Ema Plates are limited in each run but become more available in subsequent playthroughs, enabling you to boost all your stats eventually.

    Clear Mind

    This feature restores your maximum Sanity, which is used for various actions like Focusing and Offensive Attacks. Sanity naturally regenerates over time but can be lost quickly—using Focus Attacks or taking damage reduces the maximum Sanity. It can be restored either with items like Divine Water or Kudzu Tea or by visiting a Hokora with the Clear Mind function.

    On Story Action difficulty, maximum Sanity can only be lost from enemy attacks or psychological effects, and visiting a Hokora will automatically restore it for free.

    Change Costume

    The simplest of the options, this allows you to change Hinoka’s costume. The costumes adapt to the story’s progression, tearing at the same spots to maintain their visual integrity, so you don’t lose the aesthetic appeal of her original outfit.

    What Is Faith?

    Faith is a special currency used exclusively at the Hokora. You earn Faith by enshrining items, particularly dedicated ones like Shriveled Abura-age. The amount of Faith gained correlates with the rarity of the item; rare items give more Faith. You can also gain Faith from food items like Divine Water or Arare, with higher-value foods awarding more Faith.

    Faith can’t be lost directly; you gain it by enshrining items, and you spend it on upgrades, Omamori, or other services. Faith is retained between playthroughs, so you’re free to accumulate it over time without rushing.

    However, since items are limited, there’s a cap on the total Faith you can earn during a single game. Be sure to spend Faith wisely on upgrades and items you truly value, because you won’t be able to obtain everything in one run.

  • How to Defeat Rinko in Silent Hill f by Completing and Solving

    How to Defeat Rinko in Silent Hill f by Completing and Solving

    Silent Hill f and its many boss fights focus on facing trauma. Hinako Shimizu must go through intense challenges as she confronts her personal fears in the town of Ebisugaoka and beyond. You will encounter some truly grotesque creatures, and few are more repulsive than Rinko.

    Rinko Nishida was once Hinako’s best friend. But as they got older and faced societal pressures on women, they grew apart. Rinko has a narrow view of life that everyone must follow, even if it means destroying her friendships. Instead of delving into her background, let’s focus on how to defeat Rinko for good.

    How To Beat Rinko

    Before facing Rinko, it’s obvious that a boss fight is about to start. You arrive in a room filled with unused healing items to prepare your inventory before Fox Mask arrives to escort Himiko to the temple’s central chamber.

    Use this time to heal and restore your sanity meter. Once ready, go inside and watch the cutscene begin.

    When the fight starts, Rinko will attack within seconds, giving you a perfect chance to strike first. Hinako will start with her special ability active, allowing you to deal extra damage without taking damage yourself. Take this opportunity to do as much damage as possible.

    Rinko will retaliate by releasing a burst of molten lava around herself, flooding the area with flames. Dodge backwards immediately to avoid this attack, but if your special is still active, you won’t need to worry.

    Continue moving around Rinko to strike from different angles. She’ll attack in predictable three- or four-hit combos before throwing a flaming projectile. If you’re not quick to move away, it will be hard to dodge.

    Charged sanity attacks are particularly effective, as they can stun Rinko and leave her vulnerable to several free hits from Hinako.

    As the fight progresses and Rinko enters her second phase, undead clones of her will start to spawn around the arena. These enemies are easy to defeat but be cautious not to get surrounded. Make sure to siphon their souls and charge your special meter whenever possible.

    In the final stage, Rinko will set her clones on fire, causing them to explode when close to Hinako. She will also unleash a variety of area-of-effect attacks, which are fairly simple to dodge as long as you stay clear of the circular shadows on the ground.

    Maintain your attack rhythm, heal when needed, and Rinko will eventually be defeated.

  • How to Defeat Sakuko in Silent Hill F: Completing and Solving Tips

    How to Defeat Sakuko in Silent Hill F: Completing and Solving Tips

    There are many boss fights in Silent Hill f., some of which are hidden in specific New Game Plus runs as you discover more of its dark story. You will face Hinako Shimuzu’s deepest, most troubling enemies, starting with her childhood friend Sakuko.

    After entering the Otherworld for the second time, Hinako will find herself in a large temple, solving puzzles to create a path forward. Once the way is cleared, monsters will appear and chase her toward a locked door. Behind it, Sakuko has been transformed and waits, ready to fight across a wide bridge with no escape.

    How to Defeat Sakuko

    Once the cutscene ends, you’ll be right in front of Sakuko with only a few steps between you. Immediately dodge backward because she will swing her golden chain toward you to start the fight.

    Next, close the distance and move around to her back to land a few quick hits with Hinako’s longer weapon. The reach on this weapon is enough to help you get away once Sakuko begins her deadly three-hit combo.

    Tip: By this point, you should have gathered some healing supplies. If not, try to collect enough bandages and divine water before the fight.

    As you fight, use sanity attacks — they can briefly stun Sakuko or interrupt her strikes if timed well. Be careful not to get caught by her, as she can grab you, which will cause inescapable damage.

    After enough damage, Sakuko will enter her second stage. The arena darkens as she teleports to one of several corners to charge a powerful attack. Your goal is to reach her first before she unleashes it.

    Spotting Her Charge: Look for a faint golden glow in the distance, which means she’s charging her big attack.

    During the second phase: Sakuko will teleport around the arena, charging her attack. Keep hitting her and avoid her long combos and grabbing moves. Focus on damaging her enough to prevent her from completing the charge.

    Avoiding Timeouts: If you don’t reach her in time, she will stun Hinako briefly before teleporting away. Keep attacking and dodging her longer attack sequences.

    If you stay persistent, dealing enough damage will eventually defeat her, and Fox Mask will come to save the day.

  • How to Complete the Mural Puzzle in Silent Hill F

    How to Complete the Mural Puzzle in Silent Hill F

    As the story of Silent Hill f unfolds, you sense Hinako’s grip on reality loosening, and the world around her begins to blur. The boundary between the Otherworld and real life feels so thin that the final sections in the Otherworld almost merge seamlessly into her hometown of Ebisugaoka. With her mental state breaking down, it’s only fitting that one of the toughest puzzles appears at this point.

    In your last full journey through the Otherworld, you face a mural puzzle with no map and only a few hints. This challenge is both visual and logical, which makes it easy to overthink the solution. We’re here to help you finish it.

    When Do You Encounter the Mural Puzzle?

    You will find yourself facing the mural during your final full visit to the Otherworld. This happens after the events at the Shimizu Residence, right after Hinako witnesses her parents’ fates. Here, she’s back with Fox Mas, who is disfigured, and she must solve one more puzzle to confront her own reality. When you first see the mural, there isn’t much you can do. It has nine holes scattered across it, but nothing can be manipulated at this stage. For now, examine the two scrolls on either side of the mural for clues on how to solve it.

    The scroll on Story mode reads: “The Black Bird wishes to take the White Bird. The White Bird wishes to resist. The Fox brings along his followers in triumph. He notices not the two birds in conflict.”

    On Hard mode, it says: “PUT THE WORDS HERE WHEN FOUND.”

    You’ll need to find the Black Bird, White Bird, and Fox to complete the puzzle, which requires some searching. Let’s begin.

    Gathering the Three Crests

    This section of the Otherworld has no map, so navigation is part of the challenge. You must find the correct door to progress, and there’s a trick: every crest must be found in order, and once you go through the wrong door, you’ll face enemies and need to try again. All crests are essential, and missing one means restarting from the last door you entered.

    Black Sparrow Crest

    Start in the central room with multiple Inari statues. Many have small drawers that can be opened to find items, but one particular statue can be examined more closely. When inspected, it reveals a bloody pierced area. Remove this weapon, and its eyes glow blue, pointing you toward the correct door. Inside, you’ll find items like the Ornate Scroll, Family Physician’s Log, and Omamori – Hound. Make sure to check for hidden walls using Focus to uncover any missed items. After obtaining the Black Sparrow Crest, find the Housemaid’s Note before returning through the door to the mural hall.

    White Sparrow Crest

    Next, in the Inari hall, there are more statues. Follow the same process: open drawers, find the one that can be examined, and remove the piercing weapon to make its eyes glow blue. Before proceeding, pick up another Ornate Scroll and the Housemaid’s Note. After entering the next door, repeat the process—check for hidden walls, pick up items, and find the Strict Mother’s Letter. Continue until you obtain the White Sparrow Crest, then head back to the mural hall.

    Fox Mask Crest

    Return to the Inari statues once more. This time, there are more statues than before. As before, look for the injured Inari statue, remove the piercing weapon, and follow the glowing eyes to find the correct door. There is an optional door marked with the Inari symbol, which can be accessed with the Brooch earlier given to you. Entering this door reveals special items like the Mandate of the Clan, an Ema Plate, and the Letter With A Pressed Flower. Returning to the main hall, go through the correct, now red, door, defeat enemies along the way, and at the end, you’ll have a cutscene with Junko before finally earning the Fox Mask Crest.

    Solving the Mural Puzzle

    With all three crests collected, you can now solve the mural. The process involves placing each crest in its proper position. The key is understanding where each belongs based on the clues. The locations to place them differ with difficulty level, and each provides different hints, increasing the challenge.

    On Story mode, three main facts help:

    – The Fox leads his followers and doesn’t see the birds fighting.
    – The White Bird wishes to resist.
    – The Black Bird aims to take the White Bird.

    Although the mural suggests nine holes, only one is part of the puzzle. The White and Black Birds are connected, but the Fox’s position narrows down options significantly. Observing the characters’ outfits and their roles helps. The fox at the front, wearing a hat and leading the procession, is identified as the Fox and is where the Fox Mask Crest belongs.

    Next, consider the scene where two foxes are facing each other on the far right. One in red is holding a lamp, and the other is pulling its string away. The White Sparrow should be placed inside the lamp, symbolizing a desire to set free and fly away. The Black Sparrow fits on the back of the other fox, which is trying to steal the lamp.

    After placing the crests correctly, the path forward opens, bringing you closer to the conclusion of Hinako’s story.

  • Steam Out, Konami Bores, Doom Ignites

    Steam Out, Konami Bores, Doom Ignites

    BlockBlasters wasn’t just a game; it was a $150,000 crypto heist concealed within Steam


    Source: X (@rastalandTV)

    Steam’s latest crisis demonstrates how quickly a “cute indie game” can morph into a “cryptocurrency drain.”

    The game, titled BlockBlasters, debuted on Steam in July, seemingly harmless with retro-inspired visuals. But on August 30, an insidious update containing malware went live. The malicious code included scripts that bypassed antivirus protections, hijacked browsers, and emptied crypto wallets.

    By the time cybersecurity experts identified the attack, over $150,000 had been stolen from hundreds of victims.

    One of the most severe cases involved Latvian Twitch streamer Raivo “RastalandTV” Plavnieks, who is fighting stage-4 cancer and had been fundraising through his streams to cover treatment costs. After downloading BlockBlasters during a live broadcast, he watched as $32,000 of his supporters’ donations disappeared—funds meant to keep him alive.

    Valve removed the game on September 21, almost a month after the malicious update was released—yet by then, damage was done.

    Every security breach represents real people suffering genuine losses. For gamers and content creators, staying vigilant online isn’t optional; it’s essential for survival. Even major gaming platforms can deliver malware if nobody’s paying attention, and if you store cryptocurrency or sensitive data on the same PC you game on, you’re basically playing Russian roulette with your finances.

    The most unsettling aspect of Silent Hill f? It’s not actually Silent Hill.

    Image from the official Silent Hill page on X
    Image credits: X (@Silenthilll)

    Konami’s Silent Hill ‘f’ feels less like a haunting return and more like an anime-inspired spin-off with a stolen name badge.

    It abandons the franchise’s signature psychological horror, complex lore, and eerie otherworldly environments for a story penned by a cosplay-obsessed anime fan, reminiscent of early 2000s schoolyard horror where classmates secretly plot murders.

    The “Dark Shrine” nightmare realm is dull and repetitive rather than terrifying; the tiny, uninspired world lacks atmosphere, and untranslated environmental text leaves non-Japanese players at a disadvantage.

    Combat feels sluggish, the interface is clunky, and despite a 10-hour playtime with promises of multiple endings, the game fails to evoke the series’ core horror charm. Honestly, the most disturbing thing might be how far Silent Hill ‘f’ strays from the original series.

    “Yo, pass the vape—I wanna fire up Doom.”

    Source: Aaron Christophel
    Source: Aaron Christophel

    “If it has a screen, it can run Doom.” An old saying from 1993. I thought getting Doom to run on a pregnancy test was a true achievement, but I was wrong. So naive.

    Aaron Christophel, a software developer and hardware hacker, managed to run the classic shooter on the Aspire Pixo Kit. What makes this device unique is its small color display and a 32-bit microcontroller, allowing Doom to run at a choppy 6 FPS on the vape.

    It’s not running natively on the vape, though. The game is streamed from a PC to the device via USB. Since the vape has just 64 KB of RAM—nowhere near the 4 MB Doom requires—it can’t run directly. Still, turning a vape into a secondary monitor is a neat trick and a fun proof of concept.

    And of course, the inevitable question: Can it run Crysis?

  • Blumhouse Is Making a Horror Film Adaptation of Phasmophobia

    Blumhouse Is Making a Horror Film Adaptation of Phasmophobia

    Phasmophobia

    ALBAWABA – The renowned horror video game Phasmophobia, which captivated players upon its release by enabling ghost communication through microphone use, is set to be adapted into a feature film by the eminent Blumhouse Productions.

    This announcement has ignited excitement among fans, especially considering Blumhouse’s impressive history of horror successes, like The Black Phone, M3GAN, and the upcoming Five Nights at Freddy’s adaptation, both of which will have sequels this year.

    In collaboration with Atomic Monster and Kinetic Games, Blumhouse is moving forward with the film project, although a distributor has yet to be confirmed, as reported by Variety.

    Phasmophobia is becoming a feature film courtesy of Blumhouse

    On its official X page (formerly Twitter), Phasmophobia announced, “We are thrilled to share that a feature film adaptation of #Phasmophobia is officially in the works, thanks to @Blumhouse.”


    Fans took to social media expressing their anticipation, with one tweet stating, "Blumhouse + Phasmophobia = a perfect blend of horror!"

    Another fan humorously added, "If the main character doesn't ask, 'Are you here, are you close? Are you pizza?' I'm not interested."

    Launched on Valve’s Steam platform in 2020 amid the COVID-19 lockdown, Phasmophobia became a sensation thanks to its unique cooperative gameplay, which allowed groups of friends to connect through voice chat while exploring spooky locations and encountering supernatural beings.

    According to Variety, over 23 million copies of the game have been sold worldwide, earning the title of "Best Debut Game" at The Game Awards in 2020.

    This upcoming film represents Blumhouse's second live-action adaptation of a beloved horror game, following their adaptation of Five Nights at Freddy's. Despite mixed reviews, that film achieved a remarkable $297.2 million in global box office revenue against a $20 million budget.

  • Jordan Peele Takes On The Horrors Of Football In Him

    Jordan Peele Takes On The Horrors Of Football In Him

    Football is an integral part of American culture, driving discussions, commanding television ratings, and generating significant revenue. Yet, beneath its surface lies a darker narrative that many tend to overlook. Renowned horror filmmaker Jordan Peele explores this unsettling theme in his latest project, Him.

    Produced under Peele’s Monkeypaw Productions, Him poses a haunting question: What would you be willing to give up to achieve greatness? Following a captivating preview at CinemaCon, Universal has unveiled the first teaser trailer for Him.

    Tyriq Withers takes on the role of Cameron Cade, an up-and-coming quarterback whose life revolves around the sport. Just before the scouting combine, Cameron suffers a devastating brain injury inflicted by an unstable fan. This head trauma jeopardizes his future in football and could lead him down a path of turmoil. Cameron finds himself in desperate need of assistance to salvage his dreams.

    Introducing Isaiah White, portrayed by Marlon Wayans, a celebrated eight-time championship quarterback and cultural icon. Isaiah invites Cameron to his secluded retreat, which the young athlete eagerly accepts. The chilling teaser presents a glimpse of Cameron’s unraveling psyche as he becomes engulfed in Isaiah’s cultlike environment. Just before the trailer concludes with a harrowing image of Cameron on the football field, Isaiah ominously states, “Then show me,” following a chilling demand for sacrifice.

    Julia Fox plays the role of Elsie White, Isaiah’s influential celebrity wife who resides at the compound. The film also features Tim Heidecker, Jim Jefferies, Maurice Greene, Guapdad 4000, and Tierra Whack in supporting roles.

    Directed by Justin Tipping, Him has a screenplay co-written by Tipping, Zack Akers, and Skip Bronkie. Peele produces the film alongside Ian Cooper, Win Rosenfeld, and Jamal M. Watson.

    Fans of Peele can expect his next directorial effort, his first since 2022’s Nope, to hit theaters on October 23, 2026.

    Mark your calendars, as Him will be released in theaters this upcoming football season on September 19.

  • Exploring Horror and Resilience in Age of Darkness: Final Stand

    Exploring Horror and Resilience in Age of Darkness: Final Stand

    Your soldiers in Age Of Darkness: Final Stand face relentless horrors rising from the Veil. They generally hold their ground against waves of Nightmares, but their resilience has its limits. When units become Horrified, their chances of survival significantly decrease if immediate action isn’t taken.

    This guide covers everything you need about Horror effects and how to remove or prevent them.

    How Do Units Become Horrified?


    Some powerful Nightmares have attacks that can Horrify units in their range. You can easily identify these threats by their purple zone markers. If you can relocate your units before the attack detonates, you’ll avoid a lot of trouble.

    • Spitters launch ranged attacks that inflict moderate damage and Horrify units in a small area.
    • Wraiths create a large circular area upon death that doesn’t deal damage but Horrifies anything within.
    • Crushers execute a powerful stomp attack that deals high damage and causes Horror.

    Additionally, some Malices trigger Horror, so be alert when they appear during Death Nights. Also, the Nightmare Fuel Blessing can completely heal units that become Horrified, transforming a setback into a potential advantage.

    Heroes cannot be Horrified, nor can Nightmares that switch sides using the Change Of Heart Blessing.

    Effects Of Horror


    a dark crystal shatters, triggering a Death Night in Age of Darkness: Final Stand

    A unit affected by Horror will display a purple icon next to their health bar and on their portrait. This condition imposes two significant debuffs:

    • Drastically reduced movement speed.
    • Greatly reduced health regeneration outside of combat.

    It’s crucial to recognize that abilities like Aurelia’s Dark Fury, which allow units to regenerate health during combat, will use the decreased regen rate if the affected units are Horrified. This highlights the importance of addressing the situation quickly.

    The Volatists’ faction perk lessens, but does not eliminate, the penalties of being Horrified. However, Volatist units also deal extra damage while Horrified. You’ll have to weigh whether the trade-off is worthwhile.

    Siege Units And Horror

    Just like infantry, Siege Units can also be Horrified. Since their movement speed is already low, ensuring their safety can be challenging. Moreover, they are the most expensive units in the game. Thus, if your valuable Impalers are affected by Horror, it’s often wise to sacrifice other units to secure their slow retreat.

    How To Remove Horror


    Edwin gathers his troops near a light source in Age of Darkness: Final Stand.

    You can only eliminate Horror by having a capable unit stand within a light source’s radius. The buildings that fulfill this requirement are:

    • The Keep
    • Torch Sconce
    • Torch Tower

    As long as a unit stays in the light, the Horror icon will gradually fade over several seconds. Once it disappears, the Horror and its penalties will be lifted.

    Consider building a Torch Sconce to support units on expeditions far from the Keep. Having an accessible spot to gather and remove Horror will make your missions much smoother.

    What Is Emboldening?


    Edwin leads a squad of emboldened soldiers in Age of Darkness: Final Stand.

    Order and Rebellion units earn points toward Emboldening when they defeat Nightmares. Basic troops like Soldiers are easily Emboldened, while elite units require several hundred kills. An Emboldened unit will have a gold icon next to their health bar and on their portrait.

    Volatist units cannot become Emboldened, and Heroes gain experience and level up instead of being Emboldened.

    Once a unit is Emboldened, they remain that way until the end of the game or their demise, whichever occurs first. An Emboldened unit is entirely immune to Horror and benefits based on their faction:

    • Emboldened Order units have increased maximum HP.
    • Emboldened Rebellion units inflict greater damage.

    Since Emboldening takes time, it’s essential to continually send your troops to hunt Nightmares and keep as many of them alive as possible. Utilize Triage Tents and strategic retreats to preserve Emboldened units first, as losing them will significantly impact your army’s effectiveness more than losing regular recruits.

  • Nosferatu Director Shares Unmade Iconic Horror Story

    Nosferatu Director Shares Unmade Iconic Horror Story

    Robert Eggers is currently enjoying significant success in his filmmaking career. His newest project, Nosferatu, has not only garnered enthusiastic reviews but has also turned into an unexpected box office success, raking in over $100 million globally within its first two weeks of release. This film represents Eggers’ interpretation of the classic 1922 silent horror film of the same name, which is informally based on Bram Stoker’s Dracula.

    With his triumph in Nosferatu and a demonstrated passion for classic horror narratives, it’s natural to speculate whether Eggers might venture into other iconic horror properties in the future. In a recent discussion with Curzon, he disclosed that he has made attempts to create his own version of Mary Shelley’s Frankenstein. Eggers expressed that the inspiration came with the birth of his child, feeling a deep, “unconscious urge” to explore a fresh take on the cherished gothic novel.

    However, in contrast to Nosferatu, Eggers does not plan to pursue his adaptation of Frankenstein. He mentioned, “I started to try to do Frankenstein, which after two weeks, I realized there’s no way I can do this, it’s impossible.” He refrained from elaborating on the specific details of his unfinished project, admitting that it “definitely didn’t go well.”

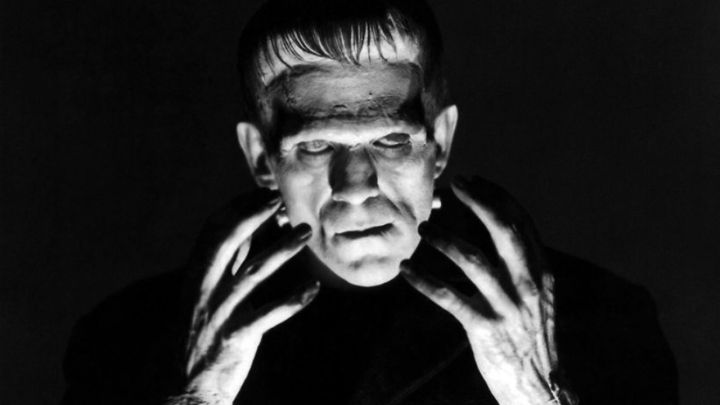
    Boris Karloff as the Monster in 1931's 'Frankenstein.'
    Universal Pictures / Universal Pictures

    Even though Eggers faced challenges with this iconic material, horror aficionados can look forward to new interpretations of Frankenstein coming soon. Director Maggie Gyllenhaal is developing her own project related to the theme titled The Bride, while acclaimed filmmaker Guillermo del Toro is also adapting Frankenstein, featuring Oscar Isaac as the infamous creator and Jacob Elordi as his haunting creation. Both films are slated for release this year.

    Eggers himself does not seem particularly distressed about his thwarted endeavor with Frankenstein. He shared, “Sometimes, you know you have a dud,” and expressed his excitement for Guillermo del Toro’s adaptation.

    Nosferatu is currently showing in theaters.

  • Robert Eggers’ Nosferatu Will Change A Classic Vampire Trope

    Robert Eggers’ Nosferatu Will Change A Classic Vampire Trope

    Very few directors prioritize research as much as Robert Eggers does. In his first three films—2016’s The Witch, 2019’s The Lighthouse, and 2022’s The Northman—Eggers has showcased a passion for narratives set in bygone eras, coupled with an unwavering dedication to accurately portraying the rituals and beliefs of the respective historical contexts. His latest endeavor, Nosferatu, looks to continue this tradition of authenticity and depth.

    This new film is a remake of the 1922 silent classic and takes place in early 19th-century Germany. Bill Skarsgård stars as Count Orlok, an ageless vampire who becomes obsessively enamored with Ellen Hutter (Lily-Rose Depp), the wife of a driven real estate agent named Thomas (Nicholas Hoult). While Nosferatu draws significantly from Bram Stoker’s Dracula, Eggers’ thorough historical research led him to make an intriguing departure from standard vampire lore.

    “You’ll notice that in this film, Orlok drinks blood from the heart instead of the neck,” Eggers explained in an interview with SFX Magazine. “While it might make more sense to do it from the neck, this choice is rooted in folklore. When people experience vampiric attacks, it’s often compared to old hag syndrome, where individuals feel pressure on their chest, leading to the belief that vampires drink blood from there.”

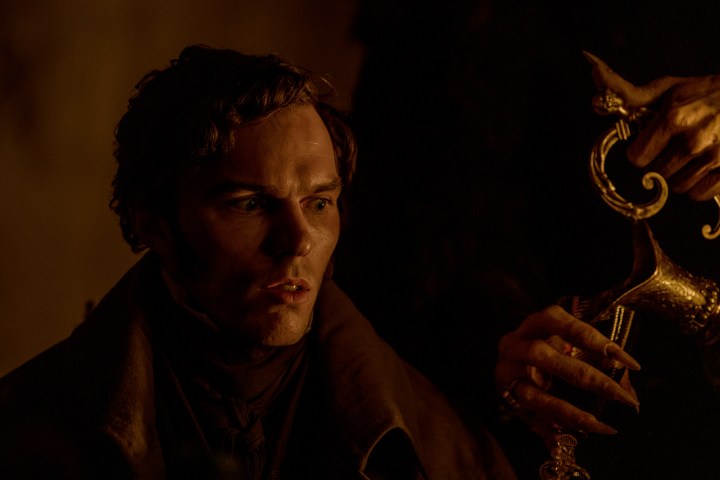
    Count Orlok pours Thomas a drink in Nosferatu.
    Focus Features

    The initial trailers for Nosferatu have cloaked Skarsgård’s Count Orlok in shadow and intrigue. As a result, audiences will likely enter the film without any clear expectations of what the central vampire will appear like. However, anticipation is building for this horror film, which has the potential to be one of the year’s last major mainstream successes. Eggers continues to rise in Hollywood since the debut of The Witch.

    The full scope of Eggers’ vision for Nosferatu is yet to be discovered. Moviegoers who plan to see it when it premieres later this month can expect a fresh take on the iconic vampire, deeply influenced by Eggers’ fascination with forgotten legends and traditions.

    Nosferatu is set to be released in theaters on December 25.